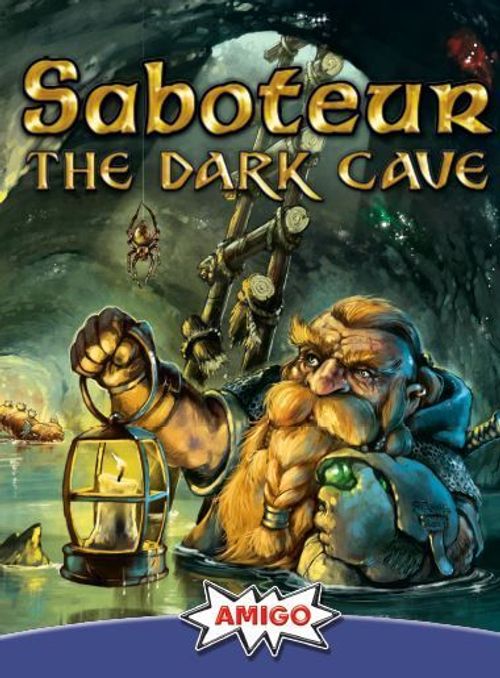
Saboteur: The Dark Cave
Saboteur: The Dark Cave Rulebook
Table of Contents
Table of Contents
Game Pieces
For 2-8 players, ages 10 and up, playing time about 45 minutes.
- 50 Path Cards (labeled I/II/III): 19 x "I", 17 x "II", 14 x "III"
- 32 Action Cards (labeled I/II/III): 10 x "I", 10 x "II", 12 x "III"
- 1 Starting Card
- 4 Goal Cards
- 10 Clan Cards
- 8 Dwarf Cards
- 5 Player Aids
- 8 Dwarves (with bases)
- 3 Creatures (with bases)
- 3 Spiderweb Tokens
- 46 Gold Nuggets
The Dwarven Clans
In Saboteur - The Dark Cave, you play as members of two rival clans: Golden Axe Clan (yellow) and the Blue Moon Dwarves (blue). Each clan has up to four dwarves active in the dark cave. However, not all of them work loyally for the clan they claim to belong to...
The dwarf clans consist of loyal dwarves from both clans, and saboteurs.
In each clan, there are one or two saboteurs claiming to work for their own clan, but actually working with the other clan! The gold these dwarves save counts towards the opposing clan's hoard in the end - and they will be rewarded by that clan accordingly.
Preparation
- Place the starting card in the middle of the table.
- Shuffle the 4 goal cards and place them in the four corners of the playing area, face down.
- For 2-5 players, this area needs to be 9 x 9 cards in area. (As printed. The rulebook states "9 x 9" for 6-8 players as well; the 6-player setup diagram shows space for 3 cards between the start and goal cards for 6-8 players, or 4 cards for 2-5 players.)
- For 6-8 players, use a 9x9 card area. (As printed.)
- Prepare the clan cards according to the number of players:
- For 2 players, use one loyal dwarf from each clan.
- For 3-4 players, use all the cards of one clan but remove one loyal dwarf.
- For 5-8 players, use all the cards but remove 1 saboteur from each clan.
- Shuffle the prepared clan cards and deal one to each player. Look at your card in secret and put it in front of you, face down. The other players can always see which clan you belong to (yellow/blue card back), but your identity (loyal/saboteur on the front of the card) stays secret until the end of the game. Put any leftover clan cards aside without looking at them. You'll need them again when the first dwarf leaves the cave.
- Each player picks one dwarf from their clan and takes the corresponding dwarf card. Put your dwarf on the starting card and place the dwarf card in front of you so everyone can see it. Then, take 3 gold each and put it on your dwarf cards.
- Sort the path and action cards by their backs into three decks, I, II, and III. Shuffle each of the three decks separately and count off 5 cards from each. Put these cards back in the box without looking at them - you won't need them for this game. Then, deal 5 cards to each player, from the following decks:
- 2-4 players: 5 x I
- 5-6 players: 4 x I and 1 x II
- 7-8 players: 3 x I and 2 x II
Playing the Game
The most trustworthy player goes first, then take turns in a clockwise direction. On your turn, you must carry out these steps in this order:
- Play 1 card or discard 1-2 cards (required)
- Move your dwarf up to 3 steps (optional)
- Draw 1 or 2 cards from the draw deck (required)
Then your turn ends, and the next player is up.
Step 1. Play Cards
At the start of your turn, you must carry out one of these actions:
- A - Play 1 path card into the network of tunnels
- B - Play 1 action card
- C - Pass and discard 1 or 2 cards
A - Play 1 path card into the network of tunnels
(See Page 8 for a detailed description of cards.)
Path cards allow you to create a network of tunnels stretching from the central starting card to the four goal cards. When you play a path card, it must connect to a path card that's already part of the network or a face-up goal card (see the section "Reaching the Goal Cards"). All path cards must face the same way: You can't play them rotated. All paths on all edges of the cards must align exactly. Each newly played card must extend an existing path.
You can extend the network in any direction you choose, even past the edges of the playing area.
Note: The card you play doesn't have to connect to the starting card or your own dwarf directly, as long as you follow the rules above when playing it.
Examples of incorrect placement of path cards:
- Not connected to cards already in the network
- Card played rotated
- Paths not aligned on all sides
- Doesn't extend an existing path
B - Play 1 Action Card
(See Page 9 for a detailed description of cards.)
Action cards help you gain secret information, obtain advantages, block pathways, swap cards, or attract certain creatures.
C - Pass and Discard 1 or 2 Cards
If you can't play a card according to action A or B, or if you choose not to, you must pass and discard 1 or 2 cards from your hand. Put the discarded cards on the discard pile, face down.
Step 2. Move Your Dwarf
After playing or discarding your cards, you may move your dwarf up to 3 steps. Each step moves your dwarf 1 space along an existing path. A step refers to moving your piece across a blue line or from one card to another.
Example: After playing a card, the yellow dwarf moves 3 steps along the path.
Remember the following rules when moving:
- If you have boots in front of you, you may move your dwarf up to 4 steps.
- For path cards from group II or group III, you need to spend 2 or 3 steps to cross them entirely.
- Each space can hold any number of dwarves.
- It takes 1 step to move from any ladder to any other ladder.
- If your dwarf crosses a bridge, you lose 1 card from your hand immediately.
- If your dwarf enters a tunnel, you lose 1 gold immediately; put 1 gold from your dwarf card back in the common pool.
- A spiderweb blocks a path - If you can't or don't want to remove it with a battle-axe, you can't use the path there.
- If your dwarf moves into a space with a creature, your movement ends immediately and the creature attacks as above (see pages 8/9). If you have a battle-axe in front of you, you can use it to drive the creature away.
Note: If you don't have any cards in your hand at the start of your turn, your dwarf can't move during your turn either. Your turn is skipped entirely.
Reaching the Goal Cards
If you're the first player to move their dwarf onto a goal card, turn over that card. Align it so that it connects to the tunnel network at the place where you entered it. Then, move your dwarf onto the first space of the goal card and end your movement there.
Example: The yellow dwarf moves onto a goal card during their turn. Before they move onto the card, it's revealed and aligned so the yellow dwarf can move there. The dwarf is then placed in the first space of the goal card and their movement ends.
Note: When you reveal a goal card, it may not line up with the existing path cards on all sides. In this case, you must place it in a way that extends the path your dwarf is entering it from.
Exiting the Cave
Only one of the four goal cards shows an exit from the cave. In order to leave the cave, your dwarf must reach the exit space. If they do, take your dwarf off the goal card immediately, put it in front of you, and reveal your clan card. You continue playing the game by playing and drawing cards.
Step 3. Draw Cards
At the end of your turn, you must draw cards. If you played a path or action card, draw 1 card from the draw deck and add it to your hand. If you passed, draw as many cards (1 or 2) as you discarded.
Note: If the draw deck runs out, don't draw any more cards.
The End of the Game and Scoring
The game ends immediately when one of the following situations occurs:
- The draw deck has run out and everybody has played all the cards in their hands.
- All the dwarves working for the same clan have left the cave through the exit. If you set aside any clan cards at the start of the game, the first player who moves their dwarf out of the cave takes them and looks at them in secret. This allows them to determine exactly how many dwarves are in play for each of the clans and they announce the end of the game ONLY when this situation occurs.
Hint: If none of the remaining dwarves are in a position where they can reach the exit, you can agree to finish the game early.
Distributing the Gold
Everyone now reveals their clan cards and shows their identities. If you haven't left the cave, return your gold to the common pool. Then, count all the gold each clan has managed to save to determine the total value of your treasures. Keep in mind that any gold the saboteurs have saved counts towards the other clan's treasure. Determine the treasures' value as follows:
Amount of gold saved x Number of dwarves working for the opposing clan
The clan with the more valuable treasure wins. If there is a tie, the winning clan is the one that the first dwarf who left the cave was working for - either a loyal dwarf of their own ranks or a saboteur from the opposing clan.
Example of the Treasures' Value in a 5-Player Game
The yellow clan has two dwarves working for it. The third yellow dwarf is a saboteur working for the blue clan. Two dwarves from each clan have managed to leave the cave. The third blue dwarf unfortunately lost their gold because they didn't make it out in time.
- Yellow Clan: 2 + 2 = 4 gold, times 3 (number of blue dwarves) = 12
- Blue Clan: 2 + 3 + 0 = 5 gold, times 2 (number of yellow dwarves) = 10
The two dwarves of the yellow clan were able to save the more valuable treasure and win the game!
The Path Cards
The path cards in groups I, II, and III differ in the number of spaces pictured on them. The more spaces there are on a card, the more steps a dwarf needs to fully cross it:
- Path cards from group I show one big space.
- Path cards from group II show more spaces: dwarves need 2 steps to cross them.
- Path cards from group III show the most spaces and dwarves need 3 steps to cross them.
Special Path Cards
Dark Hole (9 Path Cards + 1 Goal Card) Over the course of the game, creatures will climb up through these holes and threaten the dwarves (see Creatures).
Ladder (4 Path Cards + Starting Card + 1 Goal Card) All ladders are directly connected to each other; You can move your dwarf from one space with a ladder to any other space with a ladder using just 1 step.
Bridge (4) The two paths crossing on this card are not connected to each other. Your dwarf cannot move from the bridge down to the path below or vice versa. If you move your dwarf over the narrow wooden bridge, you immediately lose 1 card from your hand for the rest of the game. The player to your left draws 1 random card from your hand and puts it face down on the discard pile without looking at it.
Double Bend with Tunnel (5) The two paths on this card are connected by a tunnel. The tunnel counts as a separate space. If you move your dwarf into the tunnel, you immediately lose 1 gold. Take the gold off of your dwarf card and put it back in the common pool. Note: If you don't have any gold left, your dwarf can still enter the tunnel. In this case, you don't have to pay the gold.
Gold Vein (2 Path Cards + 1 Goal Card) When you place a gold vein in the tunnel network, immediately take 1 gold from the common pool and place it on the gold symbol on the card. If your dwarf's movement ends on the gold vein, take that gold and put it on your dwarf card. Important: If you take the gold from a gold vein, you must immediately reveal your clan card and leave your identity visible for the rest of the game.
Action Cards with Instant Effects
These action cards allow you to carry out the action shown once. Show the card you want to play to the other players and put it on the discard pile, face down (exception: "Spiderweb"). Then, carry out the corresponding action.
Secret Information (5) Choose one of these two options and carry it out. Don't show the information to the other players.
- Take a sneak peek at one of the face-down goal cards. Then put it back in its place, face down.
- Peek at another player's clan card and put it back in its place, face down.
Rockfall (3) Remove any 1 path card that does not have a dwarf or a creature on it from the network. Note: You can't use "Rockfall" on the starting card or any of the goal cards. If you remove a path card with a spiderweb on an open end of a path, remove the spiderweb, too. If you remove a path card with a gold vein and gold, return the gold to the common pool.
Swap Cards (2) Pick any other player and give them all the cards in your hand, face down. In return, you get all the cards from that player's hand, face down. The number of cards you swap doesn't have to be the same. Important: At the end of your turn, don't draw any cards from the draw deck. Instead, the other player draws 1 card (see Step 3 and the draw rules).
Spiderweb (3) Place this card in front of you, face up, and take the spiderweb tokens with the matching symbol. Set it down so the first side is showing, either...
- ...on the connecting point between 2 cards already in the network.
- ...or on the open end of a path on a card in the network.
There can be only 1 spiderweb in any one place at the same time. The spiderweb blocks this section of the path for all dwarves and creatures for 2 rounds. At the start of your next turn, flip it over to its second side. When your turn comes around again, and the spiderweb shows the second side, remove it from the network and put the corresponding action card on the discard pile.
Note: If the spiderweb is blocking the open end of a path, you may still extend the path from there.
Note: To help you keep an eye on the spiderwebs, each spiderweb action card has a marker that corresponds to it directly. The symbols around the number show you which marker matches which action card. When you remove a spiderweb from the network, put the matching action card on the discard pile.
Action Cards with Tools
These action cards equip you for the tasks at hand inside the cave. When you play one of them, place it face up in front of yourself or any other player.
Boots (3) When you have boots in front of you, you may move your dwarf 1 additional step on each of your turns. Note: Each player can have only 1 Boots card in front of them.
Battle-Axe (3) If you have a battle-axe in front of you, you can use it as follows:
- If you find yourself in a space next to a spiderweb at any point during your turn, you may discard the battle-axe to flip the web to its second side or remove it if the second side is already showing.
- If a creature moves into your space or you move into its space, you may use the battle-axe to drive away the creature before it attacks you; Discard the battle-axe and remove the creature from the network. The player with the action card matching the creature puts the card on the discard pile.
Note: To use the effect of the battle-axe, you must have it in front of you already. You can't play it from your hand and use it immediately.
Action Cards for Attracting and Moving Creatures
With these action cards, you can lure different creatures from their dark holes and move them through the tunnel network to attack other dwarves. Each creature has a different effect when it attacks (see Creatures and Their Effects).
When you play an action card with a creature, place it face up in front of you. Take the matching creature and put it on any space in the network showing a dark hole.
Note: If there aren't any dark holes in the network yet, you can't attract a creature.
Then, move the creature the number of steps shown on the action card along the existing paths of the network.
When moving a creature, please note:
- You don't have to move the creature the full number of steps. Feel free to forfeit any number of steps you don't want to use.
- You may move a creature one way and then back again.
- If a creature encounters a dwarf, it immediately stops in the dwarf's space and attacks them. If there are several dwarves in one space, they all get attacked at the same time. If one dwarf drives the creature away with a battle-axe, all the dwarves in that space are spared from the attack.
- Note: An attack occurs if a dwarf moves into a space occupied by a creature, too (see Step 2).
- Creatures can move from ladder to ladder, over bridges, and through tunnels without restrictions, but they can't move through spiderwebs.
- Creatures can't reveal face-down goal cards.
Creatures disappear from the tunnel network after one round - until they're attracted again by another action card. Remove the creature at the start of your next turn and discard the action card in front of you.
If the Creature Is Already in Play
If you play an action card for a creature that is already roaming the tunnel network, do not place it on a dark hole. Instead, move it from the space it currently occupies. If the creature starts in a space with one or more dwarves, it only attacks those dwarves if it leaves and reenters that space later.
The player who had the action card for that creature in front of them up to now discards the card. The creature now stays in play until your next turn comes around.
Creatures and Their Effects
Rat (5) Rats move up to 3 steps. If they enter a dwarf's space, that dwarf immediately loses 1 card from their hand for the rest of the game. Their left-hand neighbor draws 1 card from their hand at random and puts it face down on the discard pile without looking at it.
Lindworm (4) Lindworms move up to 4 steps. If they enter a dwarf's space, that dwarf is paralyzed for one round. Immediately lay the dwarf down in its space. On that player's next turn, stand it back up, but don't move it.
Goblin (4) Goblins move up to 5 steps. If they enter a dwarf's space, that dwarf immediately loses 1 gold. Take the gold from their dwarf card and put it back in the common pool. Note: If you don't have any gold, the goblin can't steal any from you. It still stops if it moves into your dwarf's space.
Example: The "Rat" action card is played. The active player places the action card in front of them and starts the rat on a dark hole space, moving up to 3 steps away. After 2 steps, the rat encounters a blue dwarf and attacks them. The blue dwarf loses 1 card.