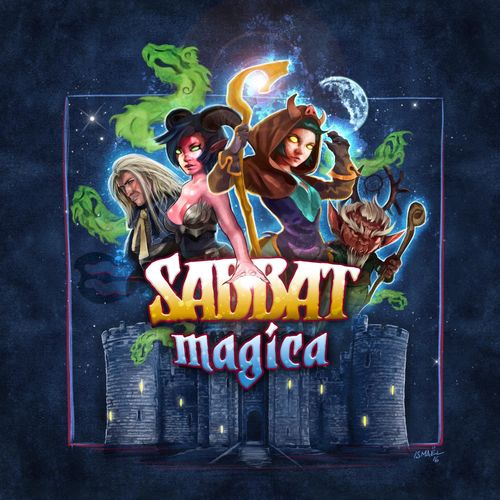
Sabbat Magica
Sabbat Magica Rulebook
Table of Contents
Table of Contents
Content of the Box
The box contains:
- 4 'magician' pieces:
- A succubus from Argosola (blue)
- A vampire from Zugriga (red)
- A sorcerer from Sanagal (yellow)
- An elf from Luserna (green)
- 28 'ghost' meeples:
- 7 slaves for the succubus (blue)
- 7 minions for the vampire (red)
- 7 spirits for the sorcerer (yellow)
- 7 will-o'-the-wisps for the elf (green)
- 4 boards:
- A 'manor' board
- A 'drawbridge' board
- A 'regions' board
- A 'graveyard' board
- 4 player boards:
- an alchemist's table (yellow)
- a magician's table (red)
- a make-up table (blue)
- a wooden dolmen (green)
- 16 'manor' tiles
- 10 'gate' tiles
- 100 'resources' (a resource, on the back it is cursed):
- 20 spiders
- 20 rat tails
- 20 gemstones
Vocabulary Used
- 'Magician' is used to represent the 4 magicians in the contest. This word is used equally to refer to the succubus, the vampire, the elf and the sorcerer.
- 'Ghost' is used to represent the magicians' servants. This word is used equally to refer to slaves, minions, will-o'-the-wisps and spirits.
- 'Resource' is used to represent the 4 magical elements of the game. This word is used equally to refer to spiders, rat tails, gemstones and masks.
- 'Regions' is used to represent the 8 regions on the 'regions' board.
- 'Gardens' is used to represent the 6 locations surrounding the 'manor' tiles in the manor house.
Note: resources are unlimited. Normally there will be enough, but if by chance you should run out, use any of the tokens to record them.
Aim of the Game
At the end of the game, the player with the most victory points (VP) is the winner.
In Sabbat Magica, each player represents a magician appointed by their people to test themselves against the others and win the contest of the best magician in Helvetia.
The magician who is able to organise their ghosts, powers and resources most effectively and spread terror in the other regions of Helvetia will be crowned the greatest magician of the day, for one year.
In Sabbat Magica, you can play as Sanagal (the sorcerers), Zugriga (the vampires), Luserna (the elves) or Argosola (the succubae).
Editor's note: the printed rulebook spells two of the peoples "Luserrna" and "Agrosola" in places; this transcription uses the spellings from the box contents and POWER cards ("Luserna", "Argosola").
Presentation of Certain Elements of the Game
The printed presentation labels the following elements.
Boards
- A 'regions' board: Victory points; Location for ghost.
- A 'drawbridge' board: Player aid; Location for ghost.
- A 'manor' board: Garden; Location for ghost; Player aid; Victory points track.
- A 'graveyard' board: not used ghost; "reminder" canteen - major; "reminder" canteen - minor.
Tiles
- A 'gate' tile.
- A 'manor' tile.
- A 'mirror' tile.
Time Card
Card title; Bonus for the game round; Number of actions; Start point; Actions line; Order of play.
POWER Card
Team; Team colour; Title.
Resources
Spider; Rat tail; Sabbat mask; Gemstone; Chimaera. Each of the first four also has a cursed version, shown in a separate column.
Player Board
Approval zone; Terror line; 2H store; 1H store; Cursed square.
Rules
Set Up
The boards are placed in the centre of the table. The 'Manor' board on one side, the 'regions' board on the other side, connected by the 'drawbridge' board. The graveyard board is positioned next to the Manor board.
Shuffle the 16 'manor' tiles and place them randomly on the Manor's parquet floor.
Shuffle the 10 'gate' tiles and place 8 of them on the 'gates' of the 'regions' board. The 2 remaining tiles are placed face-up on the side of the board.
Place the 16 'mirror' tiles face-down (3 terrors) around the room in the manor.
Take the 'time' cards. Remove the 'Full Moon' card (4 actions). Shuffle the rest of the cards, take out one card face-down, which should be placed in the box, and make a pile with the 5 remaining cards, face-down. The Full Moon card should be placed face-up next to the pile. This is the 'time' card used for the first round.
Each player chooses a people, comprising:
- A 'magician' piece;
- 7 ghosts in the same colour;
- A player board in the same colour;
- 4 tokens in the same colour;
- 3 'POWER' cards for the people in question;
- The '100' token of their people.
The magician piece is placed on the top outer-edge of the player board. The ghosts are placed on the graveyard board. The POWER cards are kept close by (variation at the end of the rules). Each player's tokens are positioned: the first on the 0 of the scoring track (manor board), the second on the 3 of the 'terror' grid (player board) and the third on the Full Moon card depending on the playing order. During the set-up, this play order is randomly defined. The last token is used to earn bonuses starting from round two (A3).
Gameplay
There are 6 rounds in the game (1 card per 'time') each representing 1 hour in real time.
Each round consists of 3 phases:
- A. Study: the magicians make their preparations!
- B. Skulduggery: the magicians act!
- C. Stewardship: the magicians decide the scores.
A. Plan
The plan phase is itself made up of 3 phases:
- A.1 Curse (except in the first round)
- A.2 Invocation
- A.3 Bonus for the round (except in the first round)
A.1 Plan - Curse
All the resources on the 'player' board are moved one hour to the right.
By beginning with the square furthest to the right, the curse resource (if there is one) is put back in the store. The player concerned immediately loses 5 VPs.
The resources in the 1H square are moved to the 'curse' square (skull) and are all transformed into one single 'curse' resource (you can choose which side of the resource you want to use, on its back it is cursed).
Example: Alice has three resources (2 rat tails and a mask) on her 1H square. During the curse phase, she discards her three resources, then adds a curse resource to the 'curse' square.
Finally, the resources on the 2H square are moved to the 1H square.
Note: all the combinations of 2 or 3 resources are described on the tiles; therefore by looking at the 2 remaining tiles, players will know which two combinations will not be used in this game.
A.2 Plan - Invocation
All the players play this phase simultaneously.
The 'time' card can be turned over depending on who has just covered the card during the previous round (Full Moon in the first round). No cards are turned over in the first round. This card defines the number of actions available for the current round (2, 3 or 4) and shows the bonuses available which will be collected in the next phase (A3).
Each player then gathers all their available ghosts together in the graveyard and on the drawbridge. They pick up some of them and hide them in their right hand, while hiding the rest in their left hand. A player can also choose not to hold any ghosts in their right hand. Once all the players have made their choice, everyone opens their right hand simultaneously, and the selected ghosts are placed on the drawbridge, while the ghosts still in the left hand return to the graveyard.
The playing order is then decided by counting the number of ghosts of each colour in the graveyard. The player with the most ghosts in the graveyard is the first to play, and so on, until the last player, who is the player with the fewest ghosts in the graveyard. In the event of a draw, the playing order does not change.
NB: Players who have a ghost in the canteen ('garden' board) can place their ghosts in the graveyard on the +2/+1 square, in order to collect a bonus when deciding the playing order. The bonus is also available if all your ghosts have been used (no ghosts in the graveyard).
Note: the Ghosts in the Graveyard are not used during the turn. The 'canteen' bonus should not be forgotten. A2 Tip: during your first game, select between 1 and 3 ghosts.
A.3 Plan - Bonus for the Game Round
By beginning with the first player, everyone receives one bonus of their choosing from the Time card. The first player chooses a bonus. This bonus becomes unavailable for the second player who in turn chooses one of the remaining bonuses, and so on, until each player has chosen one, and only one of the available bonuses. The fourth colour token is used for more clarity.
As a bonus cannot be chosen more than once, the later the player is in the playing order, the fewer the bonuses available.
B. Skulduggery
Each player can now do an action by following the playing order. Then a second action in the playing order. And so on until the number of actions from the time card have been used up.
You can move the token of each player to the current 'time' card to help complete actions.
2 actions are possible:
- B.1 Move the Magician
- B.2 Move the Ghosts
B.1 Skulduggery - Moving the Magician
In this case, the ghosts do not move.
The player must move their magician from one square either diagonally or horizontally to a 'manor' tile.
Once arrived on the new manor square, the magician whose turn it is can use the effect for the square OR take the opportunity to use a mirror (details explained later).
At the first movement of the magician, the player whose turn it is, moves the magician to the 'manor' board, putting the magician on any of the empty squares in the manor.
Note: a ghost can never move directly from the 'regions' board to the 'manor' board. There cannot be more than one magician per square.
B.2 Skulduggery - Moving the Ghosts
In this case, the magicians do not move.
Each ghost can move once (except the ghosts in the graveyard), in one of the following ways:
- from the drawbridge to one of the gardens;
- from the drawbridge to a region of Helvetia ('regions' board) in order to terrorise the population by paying the gate fee;
- from a region of Helvetia or a garden to the drawbridge (the ghost will then be available for the next action) to immediately win 1 terror point;
- from a region in Helvetia to a neighbouring region (without paying the gate fee);
- from a garden to a neighbouring garden.
If a ghost enters a region in Helvetia from the drawbridge, it must pay the gate fee by taking the resources from the player board (either square 1H or 2H) and pay the fee by placing these resources on the central square of their player board. Then the player may choose to place the ghost on a free square without fighting, or fight all the ghosts in that region.
Note: the resources used to pay the gate fee can be taken either from the 2H or 1H stores.
When a ghost enters a garden of the manor, it may choose to be on a free square without fighting, or fight all the ghosts in the garden.
If a ghost comes from a neighbouring square in the regions or the gardens, it can choose either to move to an empty square without fighting, or fight all the ghosts there.
The player whose turn it is can move all their ghosts using this action. We recommend that you lay down the ghosts that have moved to make it easier to see. Don't forget to raise them at the end of the action.
Note: a ghost can never move directly from the 'regions' board to the 'manor' board!
The Fight
When a ghost arrives in a region or a garden, it can move to an empty square without fighting.
If no place is available and it does not want to fight, the ghost is placed back in the graveyard and all the other players on the square immediately receive 2 VPs and the player whose turn it is receives 1 terror point.
If the ghost decides to fight, it must fight all the ghosts on the square. To do this, it must pay using terror points from its player board. 2 per ghost belonging to the player who comes before them in the playing order, 1 per ghost belonging to the player who comes after them in the playing order.
Example: if green wants to attack the red and blue ghosts in the canteen, it must pay 3 terror points (taken from the player board). 2 terror points for the red who played before them and 1 point for blue who will play after them.
Once the terror points have been discarded, the ghost automatically wins the fight and immediately earns 2 VPs per ghost on this square. The ghost which led the attack takes first place. Then each ghost is moved one square towards the bottom. If there are no squares available, the last ghost is placed back in the graveyard and will not be available for this round. The player who owns this ghost receives a terror point in compensation.
NB: if one of your ghosts is on the training ground, add 1 VP to the fight.
Example: so green decides to fight. They win 4 VPs because they fought the red and blue ghosts in this garden. If they had a ghost positioned on the training ground, they will earn a 5th VP.
If on leaving its position, a ghost frees a place in a region or a garden, the ghosts still in position move up one place, filling up these empty places.
Note: when you fight, you must fight all the ghosts in the garden or the region. You cannot defend yourself against a ghost attack.
Limits: you can never have more than 10 terror points. A magician can never have more than 2 ghosts (same colour) in the same region or same garden.
C. Stewardship
The stewardship phase is itself made up of 3 phases:
- C.1 Food
- C.2 Regional VPs
- C.3 Approval
C.1 Stewardship - Food
Each player must feed their ghosts with terror. To do this, you must spend one terror point per ghost not in the graveyard.
NB: if a ghost is in the canteen, you can deduct 1 or 2 terror points from what you should pay to feed your ghosts.
To help you work it out, you should (C1) pay 7 less the number of ghosts in the graveyard in terror points.
If you are unable to feed all your ghosts, then the unfed ghosts are immediately returned to the graveyard, and the player loses 1 VP per unfed ghost.
C.2 Stewardship - Region VPs
Each player now adds up the VPs for each region where they have a ghost. The position of the ghost in the region is irrelevant.
C.3 Stewardship - Approval
Each player looks at the central square on their player board (resources paid to enter by the gates). For each series of 4 different resources in this square, the player whose turn it is, discards them and takes a chimera resource.
NB: if one of your ghosts is in the alchemist's office, you can keep 1 or 2 (depending on your position in the garden) resources by putting them in your 2H store instead of discarding them during this phase of the game.
Approval (C3) is mandatory and cannot be postponed to a later round. You will put the retained resources in your 2H store at the end of the round (C3 Approval). In the next round, these resources will move to your 1H store (A1 Curse).
After the approval, a new round of the game begins. If this is the 6th round and there are no more cards in the 'time' deck, then the game ends.
5 End of the Game
The game stops immediately after the 6th round.
Players then count their VPs: 5 VPs per chimera in their possession, which are added to the current VPs.
The player with the most VPs wins the game. If there is a draw, the victory is shared.
Any terror points collected are immediately recorded on the terror line of the player's board. Similarly, each time a player earns VPs, they should be immediately recorded on the Victory track of the 'Manor' board.
6 Further Details of the Rules
Manor Tiles
Each standard tile allows you to take 2 resources of the same type which are then placed on the 2H square of the player board.
There are 4 special tiles:
- Grimoire: the player can discard a cursed resource (skull square).
- Clock: the player takes all their resources from their 1H square (player board) and places them in the 2H square.
- Terroriser: the player discards a single 1H or 2H resource from their player board. They immediately earn 4 terror points if the resource comes from their 2H store, and 2 terror points if it has come from the 1H store.
- Test tube: the player exchanges the desired quantity of one single type of 1H and/or 2H resources and receives the same quantity but of one or more chosen resource types. These resources are placed in the same square of the player board as the original resources (1H or 2H).
Example: the yellow player gives 4 'rat tails' and in return receives 2 'masks', one 'spider' and one 'gemstone'.
Mirrors
Each mirror has three states: intact, cracked, broken.
At the start of the game, all the mirrors are intact. When a magician decides to use a mirror, they begin by cracking it (or turning the mirror tile over to the cracked side). They immediately earn 3 terror points for this.
If a magician decides to work on a cracked mirror, it then breaks (discard the 'mirror' tile) and they only earn 2 terror points (instead of 3).
A magician can never work on a broken mirror.
You can only work on a mirror once per action.
A bonus is earned if at the time of doing the action, a ghost is in the corresponding bonus square. Consequently, a ghost which is removed from the Zen garden will always earn only 1 terror point (and never 2: it was no longer in the Zen garden when the action took place). The same logic applies to the other game bonuses.
Gardens
There are six gardens around the borders of the manor each giving bonuses in certain phases of the game. Each has a different effect depending on your position (first, a major bonus, or second, a minor bonus). These bonuses are optional.
- Glass factory:
- Major: each time you work on a mirror, it brings you 1 additional terror point.
- Minor: only the cracked mirrors (not intact) earn you 1 additional terror point when you break them.
- Crystal ball:
- Major: the regions which normally earn you 2 or 3 VPs will bring an additional VP during the regions VP phase (C2).
- Minor: only the regions which normally earn you 2 VPs will earn you 1 additional VP.
- Canteen:
- Major: you must feed 2 fewer ghosts during the food phase (C1). Furthermore, when deciding the playing order (A2) add +2 ghosts to your tally of ghosts in the graveyard.
- Minor: you must feed 1 less ghost during the food phase (C1). Furthermore, when deciding the playing order (A2) add +1 ghost to your tally of ghosts in the graveyard.
- Training ground:
- Major: each fight you win earns you 1 additional VP (however many ghosts you beat).
- Minor: each fight you win on the 'regions' board earns you 1 additional VP (however many ghosts you beat).
- Alchemist's office:
- Major: when you approve one or more batches of 4 different resources during the approval phase (C3), return up to 2 resources per batch to your 2H reserve instead of discarding them.
'Regions' Board
Each region of Helvetia awards VPs which are recorded during the regional VP phase (C2) of each round.
- Turgapel (centaurs): 4 VPs
- Neshata (rabbits): 3 VPs
- Gineva (diplomats): 2 VPs
- Vada (gladiators): 3 VPs
- Friburga (nuns): 2 VPs
- Valé (fools): 3 VPs
- Berena (bears): 2 VPs
- Grisa (ogres): 3 VPs
Time Cards
Other than the first one, each Time card offers bonuses which can be chosen in the playing order during the bonus phase of the round (A3).
Bonus key:
- PV: x VPs. The player adds x VPs to their current total.
- T: x terror points. The player adds x terror points to their player board.
- 1 resource: the player takes any resource they like from the general store and places it in their 2H store.
- 1 X resource: the player takes the resource indicated from the general store and places it in their 2H store.
Here are the 7 Time cards and their bonuses:
- 4 Actions
- On Full Moon: no bonus
- On the Feast of fools: 2T, 2 PV, 1 chosen resource, 1 chosen resource
- On the Mother Nature's festival: 1 spider, 1 rat's tail, 1 gemstone, 1 mask
- 3 Actions
- On the Harvest festival: 2 VPs, 2 T, 1 VP, 1 T
- On the Half Moon: 1 chosen resource, 1 VP, 2 T, 1 T
- 2 Actions
- On Carnival: 1 chosen resource, 1 chosen resource, 2 T, 2 T
- On Dark Moon: 1 chosen resource, 1 chosen resource, 2 VPs, 2 VPs
7 Variations
More than 2 Players
The rules remain unchanged, but fewer spaces are available in the regions and gardens.
- With 3 players the 3+ spaces are available.
- With 2 players the 3+ and 4+ spaces are available.
POWER Cards (Variation)
At the start of the game, each people have 3 POWER cards. A player can only use one of these cards during a game. Their choice will be revealed when the player decides to use their effect for the first time. The other cards will then be placed back in the box.
Luserna (elves)
- Luxuriance: At any time, take 2 resources of your choosing and place them in your 2H store.
- Apparition: At the end of a magician movement (B1), for each adjacent adversary, make a resource chosen by the elf appear in its 1H store.
- Secret area: At the start of a new round, a will-o'-the-wisp currently in a garden or a region cannot be moved or attacked in this round.
Sanagal (sorcerers)
- Doppelgänger: At the end of the magician movement (B1) the sorcerer reuses the effect of the manor square that he is on (mirror or manor tile).
- Teleportation: During a ghost movement (B2), a spirit may teleport from the drawbridge to any region without paying the gate fee.
- Fireball: At the end of the magician's movement (B1), the sorcerer destroys one of each adjacent adversary's ghosts on the drawbridge. These ghosts are placed back in the graveyard.
Zugriga (vampires)
- Bats: During a movement of a magician (B1), the vampire can move to any of the empty squares in the manor.
- Seduction: At the end of the magician's movement (B1), you must steal all the 2H or 1H gemstone resources of all the adjacent magicians and place them in the 2H store.
- Gift of immortality: When a vampire's minion is destroyed after a fight, it does not return to the graveyard, but reappears in any free space on the same board (regions or gardens).
Editor's note: the printed card text reads "steel" in Seduction; this transcription uses "steal".
Argosola (succubae)
- Booster: At the start of a ghost movement (B2), for this phase of movement, the slaves can advance 2 adjacent squares instead of one (adjacent regions or gardens).
- Spell: At the end of the magician's movement (B1), the succubus steals 1 terror point from each adjacent adversary.
- Frenzy: During a ghost movement (B2), the succubus immediately wins 3 terror points.