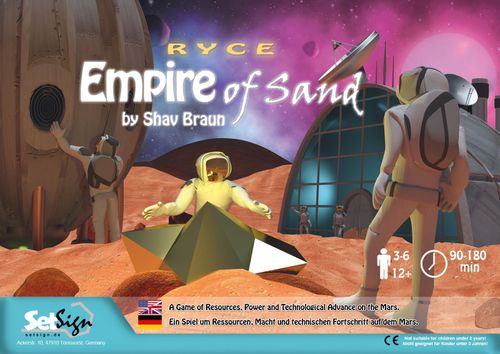
Ryce: Empire of Sand
Ryce: Empire of Sand Rulebook
Table of Contents
Table of Contents
- 1. Goal of the Game
- 2. Game Overview
- 2.1 Kinds of resources / Martian surface
- 2.2 Resource places / Extractors
- 2.2 Kinds of terrains
- 2.3 Astronauts
- 2.4 Special units
- 2.5 Sand-connection
- 2.6 Tunnel
- 2.7 Base fields
- 2.8 Recruit/place astronauts
- 2.9 Transport chains / Harvest resources
- 2.10 Majorities
- 2.11 Warehouse
- 2.12 Technologies
- 2.13 Influence on factions
- 2.14 Action fields
- 2.15 Crawler
- 2.16 Events / Index of game rounds
- 2.17 Field resource-limit
- 2.18 Hand card limit
- 3. Game Setup
- 4. Game Setup - Variants
- 5. Placing Stage
- 6. Gameplay
- 7. End of the Game
- 8. Frequently Asked Questions
- 9. Game Components
- 10. Short Rules Overview
1. Goal of the Game
1.2 Goal of the game
Each player takes the role of one of six space traveling nations of Earth and tries to achieve victory points on Mars by installing, upgrading and taking over extractors, exploring technologies and exerting influence on the factions. The player with the most victory points wins the game for himself and his nation.
2. Game Overview
The special units of the Earth and the Brotherhood can be moved across the fields, regardless of the type of terrain, even through 6b (see the example in 2.5).
2.1 Kinds of resources / Martian surface
The game board shows the bird's eye view of the Martian surface. On the hexagonal fields (hereinafter referred as "fields") there are 4 kinds of resources: RYCE (gold), metal (silver), water (blue), uranium (green).
2.2 Resource places / Extractors
RYCE and metal are put on the resource places with square icons at the beginning of the game. These resources are limited and rarely come into the match again by events. The resources water and uranium come into the match by building extractors (technical constructions, which can produce resources) and after that regularly on every event. Extractors must be built on the corresponding resource places with round icons.
2.2 Kinds of terrains
The fields contain 2 different kinds of terrain: red-orange sand terrains and red-brown mountain terrains.
2.3 Astronauts
Each player has 12 meeples in his player color, which are called astronauts.
2.4 Special units
Beside the astronauts, there are special units, which do not belong to the players at first, and will be placed later during the game:
- Earth's special unit "The Mech" (1)
- Brotherhood's special unit "The Mindcontroller" (1)
- Martians (9)
See more: Special unit movement (>6.4.2.3) and Bonus faction card (>6.5.4.5).
2.5 Sand-connection
Astronauts, Martians and resources can only be moved across sand terrains respectively sand-connections. These units are not allowed to cross red-brown mountain terrains (exception: tunnel).
Example: The white arrow (6a) shows a sand-connection between 2 fields. At the red arrow (6b) there is no sand-connection between the both fields. The astronaut and the Martian cannot be moved there directly.
2.6 Tunnel
Tunnels can be built on the corresponding icons. Tunnels create a sand-connection between 2 fields, which are separated through 1 or 2 mountain terrains.
2.7 Base fields
Around the fields white base fields are to be found. The players can place their 2 bases there at the beginning of the game. For base fields there are special rules of movement. See more: Movement (>6.4.2).
2.8 Recruit/place astronauts
Astronauts are placed from the player's stock to the adjacent fields of an own base. See more: Recruiting (>6.4.1).
2.9 Transport chains / Harvest resources
The players must use transport chains, consisting of own astronauts, to transport the resources across the fields to their base and thus to their warehouse. The astronauts do not move here. The amount of resources and the possible length of the transport chain depends on the technology value of the current player. The players also need to have the majority on the field to harvest. See more: Harvest (>6.4.3).
2.10 Majorities
Astronauts and special units have a certain majority value. The majority values of all units of one player on one field will be added up and matched with the other players and their majority values. The player with the top majority value owns the field, the resources and even the victory points of a built extractor on that field. See more: Majority system (>6.4.3.1).
2.11 Warehouse
Resources are stored on the limited places at the player's warehouse. From there, the resources can for example be invested in technology, influence, extractors, astronaut recruitment or base movement. Places of the warehouse can be extended through technology X "Warehouse Extension".
2.12 Technologies
There are 7 technologies which the players can enhance during the game (by spending resources). Technologies A-F are shown as columns, which are separated in 4 levels. The player begins (exception: 3-4 player game) from the bottom of the levels. The level of each player is shown by his tech cube, giving him a technology value, which is used for certain actions. For example, how many fields their astronauts are allowed to move.
Technology levels achieve victory points, which are indicated as red hexagons. Technology X (Warehouse Extension cards) is displayed by cards, which player can acquire and place in front of them. These cards have also victory points, that are denoted on the cards. See more: Technology (>6.4.4).
2.13 Influence on factions
There are 3 factions on Mars: the Earth, the Martians and the Brotherhood. These factions have some preferences on resources. If somebody supports the factions with resources, the factions reciprocate with influence cards, which can be used during the game for own advantage. Additionally the influence gives the player victory points. Factions also support that player, which has the most influence with Special units (>2.4). The player takes control of these units. If during the game another player gets more influence on that faction, that player gets the control of the special units. The player with the least influence on a faction is affected at his technology. Who has the most and the least influence on the factions is shown by the faction cards. See more: Influence (>6.5.4).
2.14 Action fields
There are 6 action fields with 4 different actions (Movement, Recruiting, Harvest and Technology). The player has an action token, that he places on an action field of his choice at the beginning of the game. From then on, each turn the player moves that token clockwise to one of the next 3 action fields (even more by spending resources). Thereby the player chooses his main action for his turn. Beside the main action, the player is able to do one additional action (or more, depending on the technology value F) at any time of his turn.
2.15 Crawler
The crawler field is located between the action fields "Technology" and "Movement". If a player passes the crawler field with his action token, it comes to a crawler alert, that leads time-displaced to a crawler attack (on the next turn of that player). Crawlers are placed on the game board randomly by the coordinate-dice. They can lead to loss of astronauts but also to new resources and events.
See more: Check crawler alert (>6.3) and Check crawler attack (>6.1).
2.16 Events / Index of game rounds
A normal game consists of 9 event cards. Events are triggered by a crawler attack of a metal crawler. On each event 1 Martian is placed on the game board and all extractors produce resources. See more: Trigger an event (>6.1.2).
2.17 Field resource-limit
Only a maximum of 4 resources of a kind may be located on one field.
Example: 4 RYCE, 4 metals, 4 water and 4 uranium on one field are allowed. 5 RYCE (or 5 crystals of another kind) on one field are not allowed.
2.18 Hand card limit
Each player may hold a maximum of 3 influence cards in his hand. Excess cards must be discarded at end of the turn. Displayed cards do not count towards the hand card limit.
3. Game Setup
1. Game Board. Place the game board in the middle of the table.
2. Player's components. Each player chooses a nation and respectively takes the components to his player's stock:
- 12 astronauts
- 2 bases
- 1 action token
- 1 warehouse with 1 RYCE, 2 metals, 2 water
- 3 influence discs
- 1 victory points marker
- 6 tech cubes
3. Victory points marker. The victory points marker of each player is placed on the victory point track:
- 5-6 players: 0 victory points (red arrow)
- 4 players: 1 victory point (orange arrow)
- 3 players: 2 victory points (yellow arrow)
4. Tech cubes. The 6 tech cubes of each player are placed on the technologies A-F depending on the number of players (1 tech cube for each player and each technology - the levels are numbered bottom-up).
- 5-6 players: All tech cubes of the players are placed on the 1. level of each technology (that means the level on the bottom - with the preprinted cubes).
- 4 players: For every player the tech cubes of technology B are placed on the 2. level (orange arrow). On all other technologies the tech cubes are placed on the 1. level.
- 3 players: For every player the tech cubes of technology B and technology D are placed on the 2. level (yellow arrow). On all other technologies the tech cubes are placed on the 1. level.
5. Warehouse extensions. The 12 warehouse extension cards are placed face-down on the field technology X. Shuffling is not necessary. Tech cubes are not placed on technology X.
6. Event cards and Martians. The event card "Earthquake" is omitted for the beginner's game (~first 3 matches).
Depending on the backside the remaining event cards are sorted and shuffled into 3 piles.
From each pile 3 cards are drawn. The 3 cards of stage 1 are placed face-up beside the game board. On every card a Martian is placed on the top left of the card.
The 3 cards of stage 2 are placed face-down on the 3 cards of stage 3 and form a pile, together with the 6 remaining Martians, that is used later during the game. The remaining cards are not required for this match.
Game duration. A normal match lasts 30-45 minutes for each player. To shorten the game duration for one third, draw 2 cards instead of 3 for every stage.
7. Crawler & coordinate-dice. The 4 crawler discs (in the Collector's Edition: 2 crawler discs + 2 crawler figures) and the 3 coordinate-dice are placed beside the crawler field on the game board.
8. Modular playing-field setup. Not recommended for the beginner's game - the 37 field cards are not required. The setup for future matches is explained here: Game Setup - Variants (>4.)
9. Cover chips (only 3-5 players).
- 5 players: water and uranium icons with number 6 are covered.
- 3-4 players: water and uranium icons with number 5 and 6 are covered.
On covered places it is not possible to build extractors.
10. Resources. Depending on the number of players the golden (RYCE) and silver crystals (metals) are placed on the game board. All blue and green crystals (water and uranium) and the remaining golden and silver crystals are placed beside the game board.
For all number of players: On all square resource places (without number) 3 golden or 3 silver crystals are placed corresponding to the color of the icon.
- 6 players: 3 resources each are placed on all square resource places with the numbers 4, 5 and 6.
- 5 players: 3 resources each are placed on all square resource places with the numbers 4, 5.
- 4 players: 3 resources each are placed on all square resource places with the number 4.
11. Faction cards & special units. The 6 faction cards (small cards with faction icon and without backside) and the special units are placed beside the influence area. Both orange plastic chips "mindcontroller marker" are placed on the faction card of "The Mindcontroller".
12. Influence cards. The influence cards are placed shuffled and face-down respectively to the factions.
13. Influence discs. The 3 influence discs of each player are placed on the start field (white field) of the 3 factions (Earth, Martians, Brotherhood). All influence discs of one faction are shuffled and placed on top of each other.
14. Remaining components. The water and uranium extractors and the tunnels are placed beside the game board.
4. Game Setup - Variants
For following matches with advanced players, a number of variants for the game setup is available. In all variants the event card "Earthquake" in the game setup "Event cards and Martians" (> 3.6) is not omitted.
4.1 Mars for advanced players
The RYCE: Empire of Sand-field card (A00) is placed face-up in the middle of the game board (on the preprinted RYCE: Empire of Sand-field). From the remaining 36 field cards, the 9 cards with water (1) or uranium (2) icons are picked out (A01-A09). The 3 cards with the uranium icons are shuffled and placed face-up on the preprinted fields on the board, which also shows uranium icons. The alignment of the cards is random. The 6 field cards with the water will be placed accordingly. The remaining 27 field cards are shuffled and randomly placed face-up on the remaining preprinted fields on the board. Each player receives a tunnel he may use once in the game during his turn at no cost and without using an additional action. A placed tunnel remains on the board until the end of the game.
The game setup of Cover chips (>3.9) and Resources (>3.10) does not take place for all the fields right at the beginning, but at the moment the fields are discovered.
How are cards discovered? An astronaut has to be moved across a sand-connection to an undiscovered field card (also applies to the deployment or recruitment of astronauts at adjacent fields to the base). The field card is uncovered and aligned so that the blue arrow (6) points to the side from which the astronaut entered the card. One astronaut who has discovered may not move further than to the discovered field! In this variant, there is no chance to hit a mountain terrain on discovery. If the new card contains valid RYCE or metal icons, on each icon 3 corresponding resources are placed on each icon. See more: Resources (>3.10).
4.2 Mars for experts
The RYCE: Empire of Sand-field card (A00) is placed face-up in the middle of the game board (on the preprinted RYCE: Empire of Sand-field). From the remaining 36 field cards, the 9 cards with water (1) or uranium (2) icons are picked out (A01-A09). These 9 cards are shuffled together with 9 random cards and placed face-up at the first ring (inner ring) and second ring (middle ring) on the game board (random allocation and alignment). After that, the remaining 18 cards are shuffled and placed face-up at the third ring (outer ring) of the game board (random allocation and alignment). Each player receives a tunnel he may use once in the game during his turn at no cost and without using an additional action. A placed tunnel remains on the board until the end of the game.
The black fields show the rings of the game board.
What is the procedure with undiscovered cards? Crawlers and Martians are also used on undiscovered field cards - the cards stay undiscovered. Special units of the Earth and the Brotherhood can also be moved to undiscovered field cards (that is also not a discovery). If the card is subsequently discovered by an astronaut, the special units and resources on that field stay. Influence cards that trigger actions at adjacent fields can be applied, if the card does not require a sand-connection.
4.3 Mars extreme
The RYCE: Empire of Sand-field card (A00) is placed face-up in the middle of the game board (on the preprinted RYCE: Empire of Sand-field). The remaining 36 field cards are shuffled and placed face-up on the preprinted fields (random allocation and alignment). Each player receives 2 tunnels he may use once in the game during his turn at no cost and without using an additional action. A placed tunnel remains on the board until the end of the game.
4.4 Mars for explorers (easy)
The RYCE: Empire of Sand-field card (A00) is placed face-up in the middle of the game board (on the preprinted RYCE: Empire of Sand-field). The remaining 36 field cards are shuffled and placed face-down on the preprinted fields (random allocation).
4.5 Mars for explorers (difficult)
Like "Mars for explorers (easy)", except that a newly-discovered field card is aligned so that the red arrow (instead of the blue arrow) indicates the site of entry into the card. This means there is a 30% chance to hit a mountain terrain. If the astronaut hits a mountain terrain by discovering, there is no direct sand-connection to the newly discovered field and the astronaut remains at its original field (unless a tunnel is placed directly). The card stays discovered in each case. In this variant, each player receives two tunnels when the game begins.
5. Placing Stage
5.1 Choose the starting player
Once at start of play. The starting player is either the one who has recently eaten a chocolate bar from Mars or chosen randomly.
5.2 Place bases and astronauts
First round. The starting player places one of his bases on a free base field (fields with blue flags). At adjacent fields to this base he places two of his astronauts at will. By placing the astronauts keep in mind, that there is the need of a sand-connection (no mountain terrain) between the base and the adjacent field.
After that, the other players follow clockwise. Each player places one base and two astronauts. There can be only one base on a base field and there is no distance rule between bases. Astronauts can also be used at fields where already astronauts (own or foreign) are located. Astronauts cannot be placed on the base fields.
Once all players have placed their first base, the second round starts.
Second round. The player who placed his base last in the first round begins to place his second base and two astronauts first. After him the other players follow anti-clockwise, so that the starting player is the last one, who places his second base.
Example to 5.2: The fields 1 and 2 are adjacent to the blue base. The blue player may place his astronauts, so that 1 astronaut stands on field 1 and 1 astronaut stands on field 2. The red player cannot place an astronaut on field 3, because there is no sand-connection between the red base and that field. Therefore, the red player places both astronauts on field 1. It may even be useful to place two astronauts on one field by choice.
5.3 Place action token
When all players have placed their 2 bases and 4 astronauts, the starting player begins his first turn with the placement of his action token.
He has the option to put the action token on any of the six action fields and to perform the corresponding main action. Multiple action tokens on one action field are allowed!
He may also perform 1 additional action (according to the technology value F at the beginning).
For the possibilities of the main actions and additional actions look up Perform main action (>6.4) and Perform additional action(s) (>6.5).
Once the starting player has completed the main and additional action, the other players follow in clockwise order.
If the starting player is on turn again, the placing stage is over and the starting player performs a normal turn of Gameplay (>6.).
6. Gameplay
After the Placing stage (>5.) the starting player begins with the following gameplay:
6.1 Check crawler attack
Explanation of the crawlers. Crawlers are giant creatures that move through the sandy deserts of Mars.
Whenever a player passes the crawler field with his action token, he triggers a Crawler alert (>6.3). This means, that a crawler has been spotted on Mars. The place where the crawler was sighted, is determined by the 3 coordinate-dice (>6.3.1).
Thereby a Crawler disc (>6.3.2) is placed on the determined field (note: in the Collector's Edition you use a crawler figure instead). The player who triggered the crawler alert is also marked by a crawler disc, that is placed under the action token of that player.
The player has to check if a crawler disc is below his action token. If not, this step can be skipped, otherwise perform the following:
An A-crawler disc below the own action token triggers a crawler alert on the field, where the A-crawler disc (or RYCE crawler figure) is located. Accordingly, a B-crawler disc triggers a crawler alert on the field, where the B-crawler disc (or metal crawler figure) is located.
Then the game continues as normal, until the player who triggered the crawler alert is back on turn. Before the player can make his turn, the Crawler attack (>6.1) is activated. Thus each player had one possible action to respond (to move away his astronauts) between the crawler alert and the crawler attack. Even the player who triggered the crawler alert had one possible action directly after the crawler alert.
There are 2 different crawlers: the RYCE and the metal crawler.
The RYCE crawler is represented by the A-crawler discs (or in the Collector's Edition by an A-crawler disc and a crawler figure with golden stripes). The RYCE crawler has a gain of 2 RYCE. This is noted on the crawler disc.
The metal crawler is represented by the B-crawler discs (or in the Collector's Edition by a B-crawler disc and a crawler figure with silver stripes). The metal crawler has a gain of 2 metal. This is noted on the crawler disc. In addition, the metal crawler triggers an event. This is noted on the metal crawler disc by a stage icon.
If the crawler field is passed by an action token the RYCE crawler is taken always first (if present). Only if the RYCE crawler is currently on a field card, the metal crawler is used. Therefore it is quite possible that 2 RYCE crawlers are released in series (because the crawler attack is activated before the next player triggers the crawler alert).
All players, who have 1 or more astronauts on the field with the crawler attack must remove 1 astronaut (from that field into the player's stock) or 1 resource from their warehouse (back into the general stock). Perform this in clockwise order, beginning with the player that triggers the crawler alert.
The 3. level of technology D protects against crawler attacks. A player with that technology does not need to give away a resource to save an own astronaut. But he may decide not to use the protection to sacrifice his astronaut.
6.1.1 Crawler gain
It only comes to a crawler gain, if at least one astronaut was sacrificed on the field.
A RYCE crawler (A-crawler disc) brings 2 additional RYCE, a metal crawler (B-crawler disc) 2 additional metal to the field.
Even if several astronauts were sacrificed (by different players), the gain is still only 2 resources.
Additionally always at metal crawler: The crawler attack of a metal crawler will always trigger the next event. That means the event card that is farthest to the left.
6.1.2 Trigger an event
6.1.2.1 Special event. If the event is a special event card, the event is performed like it is described on the card. The shortcuts F1-F3 refer to the three factions read from left to right.
6.1.2.2 Demand. If it is a demand card, each player may choose to meet this demand or not. Not meeting the demand has a negative effect in general. The order is determined by the least influence on the corresponding faction.
Example: The event card is a demand card of the faction Earth. The red player has the least influence on the Earth faction and starts to decide to meet a demand for 1 RYCE. After this the blue and yellow players follow.
Meeting a demand. If a player meets the demand, he advances as many fields in the influence of the corresponding faction as noted in the green area of the card. The player's influence disc is moved accordingly in a clockwise direction. By gaining influence the influence disc of that player is always placed on top (if there are other influence discs on the same influence field). The player also receives 2 influence cards, if the target field is a bright green field. The player chooses one card and returns the other influence card to the top or the bottom of the card pile. If the target field is a dark green field, he may choose one of three influence cards. On white or red fields no influence cards are drawn.
Not meeting a demand. If a player does not meet the demand, he drops as many fields in the influence of the corresponding faction as noted in the red area of the card. The player's influence disc is moved accordingly in an anti-clockwise direction. By losing influence the influence disc of that player is always placed at the bottom (if there are other influence discs on the same influence field). The player receives no cards, no matter what the color of the target field is.
6.1.2.3 Place Martians. The Martian is taken from the event card to the field where the Crawler attack (>6.1) of the metal crawler takes place.
6.1.2.4 Perform production. All extractors produce. That means, that on each field with an extractor the amount of resources that are indicated on the extractor are placed to the field. Green extractors produce uranium, blue extractors produce water. Extractors with no astronaut nearby are also producing.
Keep in mind the Field resource-limit (>2.17). If the field resource-limit is reached, no more resources can be produced.
Not enough resources for production? See more: Frequently asked questions (>8.)
6.1.2.5 New event card. The triggered event card is no longer needed and set aside. A new card is drawn from the event card pile and placed face-up right to the two other event cards. After that, a Martian from the general stock is placed on the top left corner of the new card.
6.1.3 Crawler back
Regardless whether an event has been triggered or not, the involved crawler discs (A or B - in Collector's Edition: crawler disc and crawler figure) are placed back to the crawler field.
6.1.4 If the last event card is triggered...
...each player has only one turn left. Crawler alerts are not triggered anymore. The game ends with the player right to the player, who activated the last crawler attack. See more: End of the game (>7.1).
6.2 Choose main action
The active player chooses his main action by moving his action token 1-3 action fields clockwise for free or additional fields for the cost of 1 resource each. If the action token passes the crawler field a crawler alert is triggered. Several action tokens may stand on the same action field.
Example to 6.2: The blue player moves his action token from action field "Technology" 3 steps to the action field "Harvest". He passes the crawler field and triggers a crawler alert.
6.3 Check crawler alert
If a player passes the crawler field (if crawlers are available) roll the 3 coordinate-dice and place the crawler.
6.3.1 Roll the coordinate-dice
The 3 coordinate-dice are rolled. The result of the dice is read from the bright die to the dark die. That means in this order: white, grey, black.
Example to 6.3.1: It is rolled: A, 1. ring, 1 field clockwise. The starting point is the field in the middle of the game board: "RYCE: Empire of Sand" (A00). There the letters A-F are found. The letters indicate the direction, that means you count 1 field to the direction of A to come to the first ring. There you follow the ring for 1 field clockwise. The field that has now been determined is the target coordinate. If the black die would have been a 4, the target coordinate - according to the yellow arrows - would be the field 5.
6.3.2 Place crawler
After the coordinate is determined, the corresponding crawler discs are picked. The A-crawler discs (or A-crawler disc + RYCE crawler figure) are always used first (if present). If the A-crawler discs are in use the B-crawler discs (or B-crawler disc + metal crawler figure) are picked. One crawler disc (or crawler figure) is placed on the determined coordinate. The other crawler disc is placed as a "reminder" below the own action token. After that, nothing more happens. The crawler comes to action on the next turn of that player. See more: Check crawler alert (>6.1). After the crawler is placed, the player performs his chosen main action.
6.4 Perform main action
6.4.1 Recruiting
As many new astronauts can be placed (from the player's stock) on adjacent fields to own bases as the technology value C indicates. Keep in mind the Sand-connection (>2.5).
For each two astronauts that are placed, 1 RYCE must be paid, even if only one astronaut is placed.
There cannot be used more astronauts than the "Astro(nauts) Supply" (technology value E) indicates.
Example to 6.4.1: The blue player has a technology value E of 4 and wants to recruit 3 astronauts. He has 2 bases, to which the fields are adjacent. Field 11 is not adjacent, because there is no sand-connection between the base field and field 11. He places 1 astronaut on each adjacent field. He pays 2 RYCE out of his warehouse into the general stock.
6.4.2 Movement
6.4.2.1 Astronaut movement. Each own astronaut on the game board can be moved as many fields as the technology value D indicates. Movement does not cost resources.
Astronauts can only be moved across a Sand-connection (>2.5) to other fields. Astronauts may use the fields of the base fields for movement, but cannot stop there. Therefore they need at least a technology value D of 2.
6.4.2.2 Base movement. In addition to the astronaut movement an own base may be moved to another base field. The range is determined by half of the technology value C. As many astronauts from adjacent fields (Keep in mind: Sand-connection (>2.5)) as the technology value C indicates can be loaded into the base and placed to adjacent fields of the target base field (Cost: 2 RYCE or 1 uranium). Relocated astronauts cannot move in the same turn! But astronauts may be moved before base movement, so that these astronauts are adjacent to the moving base.
Example to 6.4.2.2: The blue player performs an astronaut movement and moves his astronauts from field 2 to field 3. Thereby these astronauts are now adjacent to the base 4. Now the blue player performs a base movement and pays 2 RYCE out of his warehouse into the general stock. The technology value C of the blue player is 4. That means that he may move his base up to 2 base fields (C divided by 2) including the loading of 4 astronauts (C). He loads both astronauts of the adjacent fields into his base 4, moves it 2 fields to base field 5, and unloads both astronauts to field 6. (The white arrows show the movement of the astronauts, the yellow arrows show the movement of the base).
6.4.2.3 Special unit movement. In addition to the astronaut and/or base movement own special units may be moved. Special units are gained through the most influence on the factions. There are the Earth's special unit "The Mech", the Martian's special units and the Brotherhood's special unit "The Mindcontroller".
Martians can be moved like astronauts (as many fields as the technology value D indicates), but have to be accompanied by own astronauts.
The Earth's special unit and the Brotherhood's special unit can only be moved 1 field, regardless of the terrain (a sand-connection is not necessary).
Example to 6.4.2.3: The blue player has a technology value D of 2 and moves his astronauts 2 fields from field 6 to field 8, where a water extractor is located. Because the blue player has the most influence on the Martians he may also take the Martians from fields 6 and 7 to field 8.
The special abilities of the units may be used without using up an additional action.
Astronaut take over. The Brotherhood's special unit may take over 1 foreign astronaut within the movement action and without using up an additional action. The Brotherhood's special unit cannot move after a take over (but before). In a further movement action it is also possible to take over a second astronaut.
To take over an astronaut a mindcontroller marker (orange chip) is placed at the field of the to be taken over astronaut (if not both mindcontroller markers are in use). On top of this marker an own astronaut is placed. It should be noted that the taken over astronaut must be supplied (technology value E)! The taken over astronaut is placed on MC1 or MC2 of the "Mindcontroller faction card" depending on what mindcontroller marker was used. Mindcontroller marker cannot be used again (except the special unit receives a new owner or the mindcontrolled astronaut was sacrificed).
6.4.3 Harvest
In addition to the technology, the Field resource-limit (>2.17) must be considered. Temporal exceedance of the limit during the harvest action is allowed. Furthermore it is important to consider the majority.
To harvest resources from the game board to the warehouse the players have to build a transport chain between the field with the resources and an own base.
6.4.3.1 Majority system. Astronauts and special units do not fight against each other. The ownership of extractors, resources and fields is determined by majorities.
In order to form a transport chain, all fields must be connected with a Sand-connection (>2.5) or a tunnel. On each field of the transport chain an own astronaut must be located. In the example the blue player has a transport chain from field 3 across field 2 and field 1 to his base. How many resources can be harvested and how long a transport chain can be, is determined by the technology values of the player. Two technologies are to be considered for the harvest: Technology A (Harvest Amount) and Technology B (Harvest Range).
- Astronauts have a majority value of 1.
- Martians have a majority value of +1 (+1 because a Martian only contributes to a majority value of 1 if there is an own astronaut on the same field and only for that player that has the most influence on the faction of Martians. Otherwise the majority value is 0).
- The special unit of the Earth has a majority value of +2 (+2, because the value is only valid in combination with an own astronaut).
- The special unit of the Brotherhood has no majority value, but it can take over astronauts from other players. These astronauts have a majority value of 1 (applies even without own astronauts on the field).
Using these values, the majority value at the field can be determined. The player who has the highest value at a field, is able to harvest the resources on that field and is the owner of a possible extractor (and thus he gets the victory points) on that field.
Draw at fields with resources. If two or more players have the same majority value, each of them is able to harvest the resources of that field (The faster one has the advantage).
Draw at fields with extractors. If two or more players have the same majority value on a field with an extractor, each of them is able to harvest the resources of that field. But for the victory points (indicated by a red hexagon) of the extractor there is a tie-breaker.
The draw of a water extractor is won by that player that has the most influence on the faction "The Martians" (F2). The draw of a uranium extractor is won by that player that has the most influence on the faction "The Brotherhood" (F3).
The "most influence" on the factions is unique, because even if there is more than 1 influence disc on the same stage, the one on top is the one with the most influence.
Example to 6.4.3: In a game with 5-6 players each player starts with the technology values A of 2 and B of 2. That means, the blue player may harvest 2 resources (technology value A) across 2 fields (technology value B), thus from field 2 to his base and thereby into his warehouse. Resources can only be harvested when corresponding places in the warehouse are free. The blue player cannot harvest from the field 3 into his base, because he does not have a harvest range of 3. But it is possible to put the resources in front of his base, so he is allowed to transport the two resources from field 3 to field 1. During the game, these technologies can be upgraded so that it is possible to harvest up to 8 resources over a range of 6 fields.
Use of multiple transport chains and multiple bases. The maximum of resources that can be moved is indicated by the technology value A. The same resource crystal can only be moved as far as the technology value B indicates. Although different transport chains can be used. Both bases can serve as a destination.
Players are able to transport resources through fields where they do not have the majority. It is just not allowed to move resources from fields where another player has the majority.
6.4.4 Technology
Technology area. Above the Mars surface near of the action field "Technology" is the technology area. The technologies A-F and X are listed here. For each player these indicate, how far the level of technology has progressed in the various categories. For the technologies A-F tech cubes are used to indicate the corresponding level. For technology X players get cards, they put in front of them.
The dark blue circles indicate the corresponding technology values. This means the following at the several technologies:
- Technology A: Harvest Amount. Indicates the maximum amount of resources a player can harvest in a harvest action.
- Technology B: Harvest Range. Indicates the maximum amount of fields a player can transport resources in a harvest action - respectively how long the transport chain can be. The same resource crystal can only be moved as many fields as this technology indicates.
- Technology C: Recruitment Amount. Indicates the maximum amount of new astronauts a player can place in a recruitment action. In addition the value is relevant for the Base movement (>6.4.2.2).
- Technology D: Astro(nauts)-Range. Indicates the maximum range of fields a player can move each of his astronauts on the game board in a movement action.
- Technology E: Astro(nauts)-Supply. Indicates the maximum amount of astronauts a player can have on the game board.
- Technology F: Additional Actions. Indicates the maximum amount of additional actions a player can perform during his turn.
- Technology X are Warehouse Extension cards, which the players can buy and place in front of them.
The technology levels are counted bottom up. The lowest level is therefore the one at the bottom. Players can reach the next level by paying the cost of the technology progress during a technology action.
The white number on blue background indicates the current technology value depending on what level the tech cube is. The red hexagon indicates how many victory points the technology gives in total. That means, that the victory points of the levels below the tech cube are not added up.
In some cases a text is located at a tech level, which stands for a special ability. These special abilities are still valid even if a higher level is reached. The color of the technology shows at which main actions the technology is mainly used.
Special abilities:
- Technology C - 2. level. If a player reaches this level, he is able to upgrade extractors. This is also a precondition for the use of upgrades by using influence cards.
- Technology D - 3. level. The third level of technology D protects against crawler attacks. The player in this case must neither spend a resource nor sacrifice an astronaut - but he may sacrifice an astronaut anyway.
- Technology F - 2. level. With this special ability the player is able to upgrade 3 technologies instead of only 2 in a technology action. This also applies to the event card "Additional Technology Action for All".
Perform technology action. A maximum of two technologies can be upgraded (exception: special ability technology F - second level). The costs, that are indicated at the relevant technologies are to pay. After that, the tech cubes of the relevant technologies can be moved upward by 1 level (white field). The new levels are immediately valid. With technology X (warehouse extension cards) the declared costs are also to pay. The players get a card that is directly placed face up in front of them. The additional storage space can be used directly.
6.5 Perform additional action(s)
Additional actions are executable before, after or during the main action. In addition to the main action as many additional actions may be performed, as the technology value F of the player indicates. Each individual trade action and every individual influencing action is regarded as 1 additional action.
6.5.1 Trade
Can be applied to one of the following trading conditions per additional action:
Trading conditions with the bank:
- 1 uranium in exchange for 2 metals, or 2 metals in exchange for 1 uranium.
- 2 RYCE in exchange for 1 water, or 2 RYCE in exchange for 1 metal.
Alternatively players may trade with other players individually.
6.5.2 Construction
For the corresponding number of resources players can build a tunnel or an extractor. A construction can only take place at a field, where at least 1 own astronaut is present (also applies to influence cards). The majority of the field is not needed.
6.5.2.1 Construct tunnel. For 1 uranium or 2 RYCE a tunnel can be built. Tunnels can be built at the corresponding marks. Tunnels create a sand-connection between 2 fields, that are separated by a mountain terrain. 1 Tunnel can also be built on 2 mountain terrains, when these are abreast. To build a tunnel an own base or own astronaut must be adjacent. Building a tunnel to an adjacent field is even possible, if the tunnel mark is on the adjacent field.
6.5.2.2 Construct extractor. There are 2 kinds of extractors: water extractors and uranium extractors. These can be built at the corresponding resource places with round symbols. The cost is 1 metal and 1 astronaut (which is put back into the player's stock).
Extractors have 2 sides. If extractors are built, they are placed with the number one on top. The number also indicates how many corresponding resources the extractor can produce (green extractors produce uranium, blue extractors produce water). How many victory points the extractor gives is stated with the red hexagon. If an extractor is constructed, the extractor automatically produces the resource that is indicated on it (uranium extractors produce 1 uranium, water extractors produce 1 water).
6.5.3 Upgrade
If you have developed technology C at level 2, you may upgrade extractors. It requires an astronaut at the field, where the extractor is. The majority at the field is not required.
6.5.3.1 Upgrade water extractor. For 2 RYCE and 1 astronaut (it is put back into the player's stock), a water extractor can be upgraded. The extractor will be rotated 180 degrees and placed so that the number 2 is on top. Production takes place directly for this extractor. That means up to 2 additional water resources are placed on the field. Keep in mind: Field resource-limit (>2.17).
6.5.3.2 Upgrade uranium extractor. For 1 water, 1 RYCE and 1 astronaut (which is put back into the player's stock), an uranium extractor can be upgraded. The extractor will be rotated 180 degrees and placed so that the number 2 is on top. Production takes place directly for this extractor. That means up to 2 additional uranium resources are placed on the field. Keep in mind: Field resource-limit (>2.17).
6.5.4 Influence
There are three factions on Mars: "Earth" (short: F1), "The Martians" (F2) and "The Brotherhood" (F3). Each faction has corresponding preferences of resources.
The player, whose influence disc on the scale is located rightmost and topmost, always has the most influence on a faction. The player, whose influence disc on the scale is located leftmost and bottommost, always has the least influence on a faction.
Victory points are only scored for the influence field, where the respective influence discs are located.
6.5.4.1 Spend resources and increase influence. In order to increase the influence on a faction, players may spend the corresponding resources. As a reward, the player's influence disc in this faction is moved one field forward (clockwise). If there already is one or more other influence disc, the new disc is placed on the top of the others. If a player reaches a bright green influence field, the player draws 2 influence cards, picks one and returns the other to the top or bottom of the influence card pile. If a player reaches a dark green influence field, the player draws 3 cards, picks one, and returns the other cards to the top or bottom of the influence card pile. On white and red influence fields no influence cards are drawn. All discs which just increased their influence are always placed on top.
6.5.4.2 Request resources and reduce influence. Sometimes there are situations where a player needs a certain resource. Therefore, the factions offer certain resources. In this case the player gets the requested resource into his warehouse. The player's influence disc in this faction is moved 1 field backward (anti-clockwise). If there already is one or more influence disc, the new influence disc is placed underneath the other discs. No matter what color of the influence field, no influence cards are drawn. All discs which just reduce their influence are always placed at the bottom.
6.5.4.4 Penalty faction card. From the field with the red crown downwards, the penalty faction card is given to the player with the least influence on that faction. This card gives negative victory points and blocks the player in one technology. For example: A player with this card can have a technology with a technology level of 3, but he is then only able to use the first level of this technology, as long as he owns the penalty card (the tech cube remains at its level, and the victory points for the technology are also preserved). If the influence disc is placed at least one field above the field with the red crown again, the player can discard the penalty faction card. The card is also given to another player, as soon as that player has less influence. If several influence discs are on the same level, the disc at the bottom has less influence.
6.5.4.5 Bonus faction card. From the field with the purple crown upwards, the bonus faction card is given to the player with the most influence in that faction. This card gives victory points to the player, and the control of special unit/s. If the influence disc is placed at least one field under the field with the purple crown, the player has to discard the bonus faction card. The card is also given to another player, as soon as that player has more influence. If several influence discs are on the same level, the disc on top has more influence. If a player takes control of a special unit of the Earth or the Brotherhood for the first time, the unit is placed on the "RYCE: Empire of Sand" field (A00) in the center of the game board.
If anyone takes over the control of special unit/s, it must be checked if this change affects the majority values and the victory points must be adjusted accordingly.
If the control of the special unit of the Brotherhood is given to another player, the mindcontrolled astronauts are reset. That means, that the astronauts, who are placed on the faction cards at MC1 and/or MC2 are placed back to the field, where the corresponding mindcontroller markers are on the game board (see example: white arrows). The astronauts, who were on the markers before, go back to the player's stock (see example: red arrows). The mindcontroller markers come back to the faction card (see example: yellow arrows). The supply limit (technology value E) must be checked. Not supplied (reset) astronauts must be removed from the game board - the player who owns the astronauts, decides which astronauts are removed.
The special units are not set back to the center if the control is given to another player. They remain where they are.
6.5.5 Play influence card
Influence cards are played, as indicated on the cards. Influence cards give either one-time or permanent benefits. The influence cards with a permanent advantage will be placed in front of the players and do not count towards the hand card limit of 3 cards.
6.6 Check victory points and hand card limit (>2.18)
Check if victory points changed throughout the active player's turn - don't add all your victory points every turn - and check if he has reached the hand card limit of 3 cards. If he has more than 3 cards, he has to discard cards until he is again within the limit.
6.7 End of turn, it is the next player's (clockwise) turn
7. End of the Game
7.1 End of the game
The end of the game is nearly reached when the last event card comes to action and the last Martian is put to the game board. After that, each player has one last turn. The player to the right of the player who triggered the last crawler attack has the last turn.
7.2 Determine winner
If the game ends, the victory points for technology, influence, extractors and cards are checked again. The following options are available for victory points:
- Victory points for technologies A-F
- Victory points for warehouse extension cards
- Victory points for the 6 faction cards
- Victory points for the influence on "Earth" (F1)
- Victory points for the influence on "Martians" (F2)
- Victory points for the influence on "Brotherhood" (F3)
- Victory points for the water extractors (Tie-Breaker: influence on "Martians")
- Victory points for the uranium extractors (Tie-Breaker: influence on "Brotherhood")
The winner is the player with the most victory points. Should there be a tie, the higher number of astronauts on the game board decides which player wins. Should there still be a tie, the higher number of RYCE resources in the warehouse decides the winner. Otherwise, the players share the placement.
8. Frequently Asked Questions
Is an event triggered, if the influence card "hybrid crawler" is played on a RYCE-crawler? Yes.
Can I stay on the action field when choosing my main action? No.
What happens to non-supplied astronauts? As soon as someone notices that there are non-supplied astronauts, they must be removed. The player who owns the astronauts decides which astronauts he removes.
What happens to excess resources that exceed the field resource-limit? As soon as you notice that there are excess resources, the resources are put back into the general stock.
Can influence cards with extractor upgrades be used without the corresponding technology? No.
If I extend my additional actions, can I directly use them in the same turn? Yes.
What happens if the event card gives +2 to a faction influence, may I keep 2 influence cards? No, only one influence card can be kept.
What is to do, if there are not enough resources for the production of all extractors? The current owners of the extractors are determined and the production is performed in order of their influence. Water extractors produce in order of faction "Martians". Uranium extractors produce in order of faction "Brotherhood". That means at first the water extractor of the owner, who has the most influence on the faction "Martians" produces completely. After that, the extractors of the owner, who has the second most influence produces, and so on until no more resources are available. The remaining production is omitted.
Can extractors be taken over by other players? Yes, it does not matter who built the extractor, it only matters who has the majority at the field where the extractor is located.
When does the field resource-limit apply exactly? Can I harvest 4 RYCE through a field, where another RYCE is? Yes, the field resource-limit applies to the harvest action only for the target field. It is allowed to exceed the field resource-limit in the meantime. On a crawler gain or a production the field resource-limit must be considered.
Can tunnels be built in the placing stage? If a player has already 1 or 2 tunnels when the game starts (through game setup variants) the player can place them in the placing stage. If a player has no tunnel when the game starts, they cannot be built in this stage.
If I can use different transport chains, is it also possible (with a technology value A of 2 and a technology value B of 2) to transport 1 resource across 4 fields? No.
Can a player voluntarily take astronauts from the board? No.
Can a player choose not to perform his main action? Yes.
Can a player trade any quantity at the additional action "Trade" and can he give away any quantity of resources at the additional action "Influence"? No, it is only possible to trade once, for example to trade 1 uranium in exchange for 2 metals with 1 additional action. Also it is not possible to give away resources to more than one faction and also not several times to one faction with only 1 additional action.
The influence card "Sabotage" allows to remove displayed cards of other players. Which cards are valid for that action? Only displayed influence cards are valid (such as: special trade conditions or free warehouse extensions). Not valid are bought warehouse extension cards or faction cards.
8.1 Special units special rules
Sacrifice special units (during a crawler attack). Special units cannot be sacrificed. Mindcontrolled astronauts can be sacrificed. In this case the mindcontroller marker is returned to the faction card and is free to reuse. The 2 astronauts (from the board and from the faction card) go back to the corresponding player's stock.
Supply of mindcontrolled astronauts. If astronauts were taken over, they must no longer be supplied by the old owner, but must be supplied by the new owner.
Mindcontrolled astronauts during construction. Mindcontrolled astronauts can also be used in the construction of extractors. The mindcontroller marker is returned to the faction card and can be reused. The 2 astronauts (from the board and from the faction card) go back to the corresponding player's stocks.
9. Game Components
Component differences between Fan Edition, Collector's Edition and Premium Edition. The rulebook normally shows the components of the Fan Edition. The Collector's Edition enhances the status of the game components through 31 handmade figures. The Premium Edition enhances the status of the game components through 103 handmade figures. The printed comparison table (bases, action tokens, Martians, crawler discs, Earth special unit, Brotherhood special unit, astronauts) is pictorial and is not reproduced here.
Fan Edition component list:
- 1x Game board (594x841mm, PVC)
- 1x Rulebook (210x297mm, 20 pages)
Player's components in each color (red, blue, white, yellow, green, black):
- 1x wood-plastic-composite 25x15x10 mm as action token
- 2x wooden disc 25x8 mm / wooden building, 18x18x14 mm as bases
- 12x wooden meeples, 18x12x8 mm as astronauts
- 3x wooden discs 15x4 mm as influence discs
- 1x wooden cylinder 15x10 mm as victory points marker
- 6x wooden cube 8x8 mm as tech cubes
- 1x warehouse card (44x68 mm)
- 1x rules overview (148x210 mm)
General cards:
- 54x influence cards (18 each faction) (44x68 mm)
- 12x warehouse extension cards (44x68 mm)
- 6x faction cards (2 each faction) (44x68 mm)
- 24x event cards (8 each stage) (59x92 mm)
- 37x hexagonal field cards (edge length 40 mm)
General components:
- 3x wooden dice 10x10 mm as coordinate-dice
- 2x wooden discs 25x8 mm as RYCE-crawler discs
- 2x wooden discs 25x8 mm as metal-crawler discs
- 3x wooden green cylinders 20x27 mm as uranium extractors
- 6x wooden blue cylinders 20x27 mm as water extractors
- 1x light-blue conical cube, 24x24x24 mm as Earth special unit "The Mech"
- 9x wooden grey meeples, 21x11x8 mm as Martians special units "The Martians"
- 1x orange conical cube, 24x24x24 mm as Brotherhood special unit "The Mindcontroller"
- 18x grey sticks 5x5x25 mm as tunnels
- 3x white triangles 22 mm as cover chips
- 2x orange plastic chips 20 mm as mindcontrol marker
- 80x golden acrylic crystals (10-14 mm) as resource RYCE
- 56x silver acrylic crystals (10-14 mm) as resource metal
- 24x blue acrylic crystals (10-14 mm) as resource water
- 12x green acrylic crystals (10-14 mm) as resource uranium
The printed component list above is the rulebook's own text, with its spelling corrected only where the source is clearly a typo ("wodden" printed as "wooden", "bulding" as "building", "acryl" as "acrylic", "als" as "as").
10. Short Rules Overview
This section reproduces the printed "rules overview" sheet (the 1-page reference card) from the rulebook's final page.
Main actions
Recruiting (>6.4.1), cost: 1 RYCE for each 2 astronauts. As many new astronauts may be placed (from player's stock) on adjacent fields to own bases as the technology value C indicates. There cannot be used more astronauts than the "Astro(nauts) Supply" (technology value E) indicates.
Movement (>6.4.2). Astronauts movement, cost: none. Each own astronaut may be moved across as many fields as the technology value D indicates. Keep in mind: sand-connection.
Base movement, cost: 2 RYCE or 1 uranium. In addition to the astronauts movement 1 own base may be moved to another base field. The range is determined by half of the technology value C. In doing so, as many astronauts from the adjacent fields may be moved together with the base.
Special unit movement, cost: none. In addition to the astronaut and/or the Base movement own special units may be moved. Martians can be taken through own astronauts across as many fields as the technology value D indicates. The Earth's special unit and the Brotherhood's special unit can only be moved 1 field regardless of the terrain (sand-connection is not necessary).
Harvest (>6.4.3), gain: depends on the harvest action. As many resources can be harvested as the technology value A indicates. The maximum range a player can harvest resources - respectively how long the transport chain can be - is indicated by the technology value B. Keep in mind the majority and sand-connections!
Technology (>6.4.4), cost: depends on the technologies. A maximum of two technologies can be upgraded (exception: special ability technology F - second level). The costs are noted on the bottom right of the technologies.
Additional action(s)
Trade (>6.5.1), cost and gain: depends on the trade. For each additional action one trading condition (see short rules overview) can be used at a time.
Construct tunnel (>6.5.2.1), cost: 1 uranium or 2 RYCE. Tunnels can be built at the corresponding marks. 1 astronaut or base nearby is necessary.
Construct extractor (>6.5.2.2), cost: 1 metal and 1 astronaut. Extractors can be built (side with number 1 on top) at the corresponding resource places with round icons. 1 astronaut nearby is necessary. After construction the extractor produces directly.
Upgrade water extractor (>6.5.3.1), cost: 2 RYCE and 1 astronaut. Technology C - 2. level necessary. 1 astronaut nearby is necessary. The extractor is rotated (side with number 2 on top). After the upgrade the extractor produces directly.
Upgrade uranium extractor (>6.5.3.2), cost: 1 water, 1 RYCE and 1 astronaut. Technology C - 2. level necessary. 1 astronaut nearby is necessary. The extractor is rotated (side with number 2 on top). After the upgrade the extractor produces directly.
Increase influence (>6.5.4.1), cost: depends on the faction (2 RYCE, 2 water or 2 metals). The influence disc is moved 1 field to the right (clockwise). The disc is placed on top (if there are several discs on the target field). Depending on the color of the target field 0, 2 or 3 influence cards are drawn. 1 card is selected, the other cards are returned to the top or the bottom of the influence card pile.
Reduce influence (>6.5.4.2), gain: depends on the faction (1 metal, 1 RYCE or 1 water). The influence disc is moved 1 field to the left (anti-clockwise). The disc is placed at the bottom (if there are several discs on the target field). No cards are drawn.
Play influence card (>6.5.5), cost: none. The influence card is played, like it is noted on the influence card.
Overview of actions, technologies and victory point possibilities
Technologies
- Technology A: Harvest Amount. Indicates the maximum amount of resources a player can harvest in a harvest action.
- Technology B: Harvest Range. Indicates the maximum amount of fields a player can transport resources in a harvest action - respectively how long the transport chain can be. The same resource crystal can only be moved as many fields as this technology indicates.
- Technology C: Recruitment Amount. Indicates the maximum amount of new astronauts a player can place in a recruitment action. In addition the value is relevant for the Base movement (>6.4.2.2).
- Technology D: Astro(nauts)-Range. Indicates the maximum range of fields a player can move each of his astronauts on the game board in a movement action.
- Technology E: Astro(nauts)-Supply. Indicates the maximum amount of astronauts a player can have on the game board.
- Technology F: Additional Actions. Indicates the maximum amount of additional actions a player can perform during his turn.
- Technology X are Warehouse Extension cards, which the players can buy and place in front of them.
Special Abilities
- Technology C - 2. level. If a player reaches this level, he is able to upgrade extractors. This is also a precondition for the use of upgrades by using influence cards.
- Technology D - 3. level. The third level of technology D protects against crawler attacks. The player in this case must neither spend a resource nor sacrifice an astronaut - but he may sacrifice an astronaut anyway.
- Technology F - 2. level. With this special ability the player is able to upgrade 3 technologies instead of only 2 in a technology action. This also applies to the event card "Additional Technology Action for All".
Victory points. If the game ends, the victory points for technology, influence, extractors and cards are checked again. The following options are available for victory points:
- Victory points for technologies A-F
- Victory points for warehouse extension cards
- Victory points for the 6 faction cards
- Victory points for the influence on "Earth" (F1)
- Victory points for the influence on "Martians" (F2)
- Victory points for the influence on "Brotherhood" (F3)
- Victory points for the water extractors (Tie-Breaker: influence on "Martians")
- Victory points for the uranium extractors (Tie-Breaker: influence on "Brotherhood")