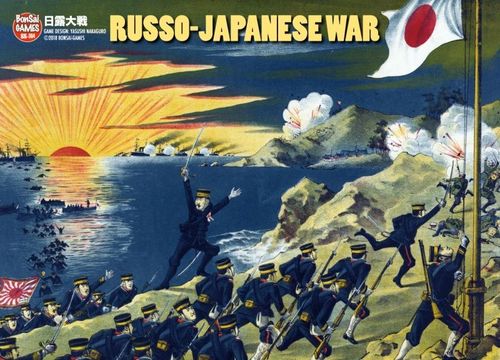
Russo-Japanese War 1904-1905
Russo-Japanese War 1904-1905 Rulebook
Table of Contents
Table of Contents
1.0 Introduction
Russo-Japanese War 1904-1905 is an introductory two-player strategy game. It recreates the period from April 1904 to March 1905 of the Russo-Japanese War. One player commands the Japanese Army and the other commands the Russian Army.
2.0 Components
This rulebook, plus an A3 map, a counter sheet, cards and a rules summary, make up the game. You will also need one or more six-sided dice.
2.1 Rules
The rules are numbered by chapter (for example 2.0), then by section (for example 2.1), and then by special case (for example 2.2.1). A reference to another rule is written as, for example, "(see 3.0)", giving the chapter or section number and, where relevant, the case number.
2.2 Map
The map shows the Liaodong Peninsula, the setting of the war. The map is covered with a grid of hexagons, called "hexes", which are used as the reference for unit position and movement. Every hex has a unique four-digit number printed in it.
2.2.1 Terrain: The map shows terrain that affects movement and combat. Consult the Terrain Effects Chart printed on the map for the kinds of terrain and their effects.
2.2.2 Setup information: Information on the units placed on the map at the start of the game is printed in certain hexes (see 3.0).
2.2.3 Charts and tables: The following charts and tables are printed on the map. Their use is explained in the relevant rules.
- Combat Results Table (see 9.0): used to resolve combat.
- Terrain Effects Chart (see 8.0 and 9.0): summarises how terrain affects movement (8.0) and combat (9.0).
- Game Turn Record Track (see 5.0): shows the number of the current turn.
- Morale Point Record Track (see 4.0): records the Morale Points of each side.
2.3 Counters
Counters are of two kinds: "units", which represent combat formations, and "markers", which show or record information during the game.
2.3.1 Example combat unit: The example shows the Japanese Imperial Guards Division (Gds), which has a combat strength of 2 and a movement allowance of 3. The counter carries the parts listed below.
- Unit designation.
- Combat strength.
- Movement allowance.
2.3.2 Combat strength: The value used when a combat is resolved (see 9.0).
2.3.3 Movement allowance: The number of hexes a unit may move in one movement opportunity (see 8.0).
2.3.4 Unit designation: The number gives the unit number and the letters are the abbreviations below. Unit designations have no meaning beyond historical interest.
- Japanese Army: Gds: Imperial Guards Division.
- Russian Army: S: Siberian Corps. PA: Port Arthur Garrison. NA: Nanshan Garrison. CR: Central Reserve Corps. ER: European Corps.
2.3.5 Nationality: A unit's background colour and stripe show its nationality. (The illustration shows Japanese and Russian examples.)
2.3.6 Unit reverse side: Except for the Russian Port Arthur Garrison, the reverse side of units is not used. See 10.4.4.
2.3.7 Naval units: The 15 naval units of the two sides are used only with the optional rules. See 11.0.
2.3.8 Markers: The following markers are used. Their use is explained in the relevant rules.
- Game Turn marker (see 5.0).
- Japanese Morale marker (see 4.0).
- Russian Morale marker (see 4.0).
- Japanese Control marker (see 3.0).
- Russian Control marker (see 3.0).
- Port Arthur Fleet Cannot Sortie marker (see 10.4.1).
- ZOC Lost marker (see 6.0).
2.4 Cards
There are 16 cards in all. The cards are shared by both players. The upper half of each card gives a Japanese Army "event" and the lower half gives a Russian Army "event". See 10.0.
3.0 Setting Up the Game
After the players decide who commands which army, place the map on the table and each player takes the units of the army he commands. Shuffle the 16 cards face down and place them as a pile, called the "deck", out of the way on the table.
Set up the game in the following order.
3.1 Russian Initial Setup
Place the two "3-2" units (combat strength 3, movement allowance 2), the one "2-0" unit and the one "1-0" unit in the hexes that carry the initial deployment symbols. Place all other Russian units in the "European Russia" box. At the start of the game the Russian player has no cards in hand.
3.2 Japanese Initial Setup
Place the three "2-3" units in the "Korean Peninsula" box. Place all other Japanese units in the "Japanese Home Islands" box. The Japanese player draws the top 3 cards of the deck as his hand. If a card drawn is the "Seiro-gan" card, return only that card to the deck, shuffle the deck and do not draw a replacement. In other words, if the Seiro-gan card is in the opening hand, the Japanese player starts the game with a hand of only 2 cards.
Transcriber's note: the printed text in section 3.2 reads "制露丸" (sic) once; this is taken to be the card "征露丸" (Seiro-gan), which is how the card is named everywhere else in the rulebook (see 10.4.6).
3.3 Placing Markers
Place the Game Turn marker on the "1" of the Game Turn Record Track. Place both sides' Morale markers on the "6" of the Morale Point Record Track. Place the four Control markers, with the Russian Control side face up, one each on the key locations (Port Arthur, Dalian, Liaoyang and Mukden).
Keep the other markers off the map until they are needed.
3.4 Hex Control
This rule defines which army "controls" a particular hex. At the start of the game, all hexes on the map are controlled by the Russian Army.
A player controls a hex on which one of his own units is placed. A player also controls a hex that was last passed through by one of his own units, even if no unit is placed there. Control changes hands every time these conditions are met, as often as they occur during the game.
During the game, the control status needs to be checked only for the four key-location hexes. Turn the Control marker to the appropriate side to show which army controls that hex.
4.0 Victory Conditions
In the Russo-Japanese War, Japan fought to the limit of its national strength. Russia, on the other hand, found it hard to continue the war because of growing war-weariness at home. In the game these factors are represented by the two sides' "Morale Points". Each player aims to win by reducing his opponent's Morale Points.
4.1 Victory at the End of a Game Turn
In each game turn's Victory Check Phase, a player whose Morale Points are at 0 is defeated and the game ends. If both players have 0 Morale Points, the game ends in a draw.
4.2 Victory at the End of the Final Game Turn
If the conditions of 4.1 have not been met by the end of Game Turn 12, the Russian player wins. However high the Japanese Morale Points are, if the Russian Morale is 1 point or more, Russia wins.
4.3 Changes to Morale Points
Both sides' Morale Points change for the following reasons.
4.3.1 Control of key locations: For each key-location hex that is controlled by the Russian Army and is taken by the Japanese Army, the Russian Morale drops by 1 point. For each key-location hex under Japanese control that is taken by the Russian Army, the Japanese Morale drops by 1 point. Taking an enemy-controlled key location does not increase your own Morale Points.
4.3.2 Unit losses: At the end of each game turn, both players count the number of their own units lost during that game turn (and only during that turn). Roll one die. If the result matches the table below, the player's Morale Points drop by 1. This check is called a "Morale Check".
| Units lost | Dice result that causes the loss |
|---|---|
| 1 | 1 |
| 2 | 1 to 3 |
| 3 or more | 1 to 5 |
Transcriber's note: the table gives the dice results as dice-face icons; the ranges above are read from those icons (one face for 1 unit, three faces for 2 units, five faces for 3 or more units).
4.3.3 Events: Playing cards can raise or lower the Morale of either side. See 10.0 and the cards for details. Note that the Morale Points of each side are capped at "6", and any increase beyond 6 is ignored.
4.4 Sudden Death Victory
A player whose unit enters the enemy's supply source hex wins immediately. (The Japanese supply source hex is hex 1015; the Russian supply source hex is hex 2417.)
5.0 Sequence of Play
The game proceeds by repeating "Game Turns". There are at most 12 Game Turns. Each Game Turn is divided into two Player Turns, and each Player Turn consists of the following steps (phases). The phases must be carried out in the order given.
I. Russian Player Turn
- a. Card Replenishment Phase
- b. Movement Phase
- c. Combat Phase
- d. Card Play Phase
II. Japanese Player Turn
- a. Card Replenishment Phase
- b. Movement Phase
- c. Combat Phase
- d. Card Play Phase
III. Victory Check Phase (see 4.1 and 4.2)
When the Victory Check Phase is over, advance the Game Turn marker to the next space and begin a new turn.
5.1 Special Rule for Game Turn 1
The Russo-Japanese War began with a Japanese surprise attack. Therefore, in Game Turn 1 only, the Russian Player Turn is skipped and play begins with the Movement Phase of the Japanese Player Turn.
6.0 Zone of Control
The Zone of Control (ZOC) is a rule that represents the spread or influence of a unit in an abstract way. A ZOC belonging to an enemy unit is called an EZOC (Enemy ZOC). EZOC affects the movement and combat of a player's units.
Every unit has a ZOC into the six hexes adjacent to it. However, if a hex is completely separated from the unit by sea, the ZOC does not extend there.
Example (see the diagram in the printed rulebook, section 6.0): Russian unit S2 exerts a ZOC into all six adjacent hexes, but unit S1 has sea on three sides, so its ZOC does not reach hexes 1302, 1203 (Dalian) and 1404.
If several friendly units exert a ZOC into the same hex, the effect is no different from that of a single unit's ZOC. The ZOCs of both armies may reach the same hex; in that case each ZOC affects the enemy units in that hex.
An EZOC in a hex is not cancelled because one of your own units is placed in that hex.
6.1 Effect of EZOC on Movement
A unit that enters an EZOC during movement must end its movement in that hex, even if it still has movement points remaining.
A unit that starts its movement in an EZOC may move, but it cannot enter another EZOC on its first move (moving from one EZOC directly into another EZOC is prohibited). After moving into a hex that is not in an EZOC, it may enter an EZOC again.
Entering an EZOC, or leaving one, does not cost extra movement points (see 8.0).
6.2 Effect on Rail Movement and Strategic Movement
A unit making rail movement (see 8.2) or strategic movement (see 10.2.4) may not enter an EZOC.
6.3 Effect of EZOC on Combat
A unit forced to retreat as a combat result (see 9.6) may not retreat into an EZOC. A unit moving during an advance after combat (see 9.7) may ignore EZOC.
6.4 Loss of ZOC
By playing an event (see 10.0), the Japanese player may temporarily cancel the ZOC of Russian units. To show which unit's ZOC has been cancelled, place a ZOC Lost marker on the Russian unit.
7.0 Stacking
Placing more than one friendly unit in the same hex is called "stacking". Friendly and enemy units may never stack together.
Boxes off the map in a player's own area have no stacking limit. A player may place as many units in them as he wishes.
7.1 Japanese Stacking Limit
A Japanese unit may stack up to two units in one hex.
7.2 Russian Stacking Limit
A Russian unit may not stack: only one Russian unit may occupy a hex.
7.3 When the Stacking Limit Applies
The stacking limit applies at all times during the game. This includes moving through friendly units: the Russian Army may not pass through a hex that already contains a friendly unit in order to move another friendly unit. Likewise, the Japanese Army may not pass through a hex that already contains two friendly units in order to move another friendly unit.
8.0 Movement
During the Movement Phase of his own Player Turn, a player may move all or some of his own units. He may also choose not to move any units.
Each unit has its own movement allowance, and it may move up to the number of hexes equal to its movement allowance. A unit need not use all of its movement allowance, but unused movement points may not be given to other units or carried over to later turns.
A unit with a movement allowance of "0" cannot move from its initial hex, including by rail movement (see 8.2) and strategic movement (see 10.2.4).
8.1 Terrain Effects on Movement
A unit may not move across a hex side that is completely covered by sea.
Even if it still has movement points remaining, a unit that enters wasteland must end its movement there. Similarly, a unit that moves across a river into an adjacent hex must end its movement there. However, a unit moving along a road or railway need not stop when it enters wasteland or crosses a river (it may move within its movement allowance).
Neither army's units may move off the map.
8.2 Rail Movement
Each side may, during one of its own Movement Phases, move one of its own units by "rail movement".
A unit may make rail movement if it is either:
- a unit on a railway that is not in an EZOC at the start of its movement; or
- a Russian unit in the Siberia box.
Regardless of its movement allowance, a unit may move along the railway as far as it likes, but it may not enter (1) an EZOC, or (2) a town controlled by the enemy.
A unit that has made rail movement may not, in the same Movement Phase, also make ordinary movement that uses movement points.
8.3 Off-Map Boxes
8.3.1 Korean Peninsula box: The Korean Peninsula box is connected by road to hex 1015. A Japanese unit in the Korean Peninsula box may enter the map through hex 1015 by ordinary movement or by strategic movement (see 10.2.4). A Japanese unit in the Japanese Home Islands box may not move during the Movement Phase (see 10.2.5).
8.3.2 Siberia box: The Siberia box is connected by railway to hex 2417. A Russian unit in the Siberia box may enter the map through hex 2417 by ordinary movement, or by rail or strategic movement. A Russian unit in the European Russia box may not move during the Movement Phase (see 10.2.5).
9.0 Combat
9.1 Basic Rules of Combat
During the Combat Phase of his own Player Turn, a player may attack an enemy unit in an EZOC with his own units. Combat is optional. A player is not obliged to attack an enemy unit that is in the ZOC of one of his units.
The player carrying out his own Combat Phase is the "attacker" and the other player is the "defender". A hex containing a defending unit that is the object of an attack is called the "target hex".
Each attacking unit may attack once during a Combat Phase, and an attacker may attack a given target hex only once. The same target hex may not be attacked more than once in the same Combat Phase.
Each unit's combat strength is its own, and it may be used in only one combat during a Combat Phase. The combat strength of an attacking unit may not be divided among several target hexes.
A unit with a movement allowance of 0 may still attack. However, it may not retreat (see 9.6) or advance after combat (see 9.7).
9.2 Combat Involving Multiple Units
When defending units are stacked, all units in the target hex must be attacked together. A player may not choose only some of the defending units to attack.
Attacking units that are stacked together need not attack the same target hex. Units may attack different target hexes, and some may choose not to attack.
Attacking units in several hexes may attack the same target hex at the same time.
9.3 Declaring Attacks
At the start of his own Combat Phase, the attacker declares, in accordance with 9.1 and 9.2, which of his units will attack which target hexes. If he intends to attack more than one target hex, he must declare every combination. Each combat between a target hex and the attacking units against it is resolved one at a time. The attacker chooses the order of resolution, but every declared attack must be resolved.
9.4 Resolving Combat
Combat is resolved one target hex at a time. Add together the combat strengths of the attacking units and of the defending units taking part. The following modifiers apply.
9.4.1 Terrain modifiers: The defending units' combat strength is modified by the terrain of the hex they occupy, as follows.
- All attacking units are across a river: +1.
- Defending units are in wasteland: +1.
- Defending units are in a town: +1.
Modifiers are cumulative. For example, an attack from hex 1810 on Kaijo (1811) gives the defender +2 (river and town). An attack on Motenrei (1713) also gives the defender +2 (wasteland and town).
9.4.2 Attack support: Only the attacker may, by discarding one card from his hand, add +1 to his combat strength. The discarded card is placed face up on the discard pile (see 10.0).
9.5 Combat Results
Subtract the modified defending strength from the modified attacking strength to obtain the "combat differential". Consult the Combat Results Table and find the column for the combat differential.
An attack may not be made if its combat differential is below -1; if such an attack was declared, it is treated as the combat result "NE". If the differential is above +5, resolve the combat on the +5 column.
The attacker rolls one die and reads the result. Combat results are shown by the following symbols.
-
DE (Defender Eliminated): Eliminate one defending unit. Any defending units that remain must retreat one hex (see 9.6).
-
DR (Defender Retreat): All defending units retreat one hex (see 9.6).
-
EX (Exchange): Eliminate one defending unit and one attacking unit. Surviving units remain as they are.
-
NE (No Effect): Neither the attacker nor the defender suffers any loss.
-
AR (Attacker Retreat): All attacking units retreat one hex (see 9.6).
-
AE (Attacker Eliminated): Eliminate one attacking unit. Surviving attacking units remain as they are.
Units eliminated in combat are placed in the Eliminated Units box.
9.6 Retreat
When a combat result requires a retreat, all friendly units that took part in the combat move one hex. The player who controls the units carries out the retreat. Units may not retreat into the following hexes.
- A hex in an EZOC.
- A hex with terrain that units may not enter or pass through.
- A hex off the map.
- A hex that would break the stacking limit.
A unit that cannot retreat is eliminated.
Only when there is no other hex to retreat to may a unit retreat into a hex that breaks the stacking limit. In that case the units already in that hex must also retreat, so that the stacking limit is respected. This is called a "chain retreat". If a chain-retreated unit can only retreat into a hex that breaks the stacking limit, a further chain retreat occurs. If a unit forced into a chain retreat cannot retreat, the unit that retreated first must be eliminated (which means no chain retreat then occurs).
If an attacker cannot retreat, or does not wish to retreat, it may voluntarily change the combat result AR to AE.
9.6.1 Units with movement allowance 0: Whether attacking or defending, a unit with a movement allowance of 0 that is forced to retreat in combat is eliminated.
9.6.2 Stacks and retreat: When stacked Japanese units retreat, they may retreat together or separately, as long as the stacking limit is not broken.
9.7 Advance After Combat
If, as a result of a DR or DE result, no defending unit remains in the target hex, the attacking units may advance into it. Among the units that took part in the attack, those within the stacking limit (two for the Japanese Army, one for the Russian Army) may advance. An advance is not movement, so it costs no movement points. An advance may also move directly from one EZOC into another EZOC.
If, as a result of an EX result, no defending unit remains in the target hex, the attacking units may not advance.
If the attacking units are eliminated or retreat as a result of an AE or AR result, the defending units may not advance.
10.0 Card Play
At the start of the game, shuffle the 16 cards face down to form the deck. Cards used during the game are placed face up beside the deck, stacked in the order in which they were used. A used card must immediately be placed on the discard pile.
When only one card remains in the deck, before that card is drawn, shuffle the discard pile together with that card to form a new deck.
When shuffling, no player may check which cards are in the discard pile. Only the top card of the discard pile may be seen.
10.1 Card Replenishment
At the start of his own Card Replenishment Phase, if a player has 2 or fewer cards in hand, he may draw cards from the deck until he has 3 cards.
Additionally, by reducing his own Morale Points by 1, a player may draw one more card. In this case his hand becomes 4 cards.
Important: The decision whether to reduce Morale Points in order to hold 4 cards must be made first, before drawing. A player may not draw up to 3 cards, check them, and then reduce Morale Points to draw an extra card.
10.2 Using Cards
A player may use a card in hand in one of the following ways.
10.2.1 Event: Apply the content printed on the card at the time stated on the card. See the cards for details. An event with no time stated may be used during the player's own Card Play Phase.
10.2.2 Attack support: When a combat is resolved, the attacker may discard one card from his hand to add 1 to his combat strength (see 9.4.2). Only one card may be used for attack support in a single combat. The defender cannot give support.
10.2.3 Forced march: During the Card Play Phase of his own Player Turn, a player may discard one card from his hand to carry out one more Movement Phase or Combat Phase. Only one card may be used for a forced march in one Player Turn. A Movement Phase or Combat Phase carried out by forced march is resolved in the same way as a normal Movement Phase or Combat Phase.
10.2.4 Strategic movement: During the Card Play Phase of his own Player Turn, a player discards one card from his hand and selects one of his own units that is not in an EZOC. The unit must be on a railway or road hex. By strategic movement, the unit may move along railway or road for any distance (it may use both railway and road). However, strategic movement may not enter an EZOC, a town controlled by the enemy, or a supply source hex controlled by the enemy.
10.2.5 Transport: During his Card Play Phase, the Russian player may discard one card from his hand to move one Russian 3-2 unit in the European Russia box to the Siberia box.
During his Card Play Phase, the Japanese player may discard one card from his hand to move one Japanese 2-3 unit in the Japanese Home Islands box to the Korean Peninsula box. Alternatively, he may place a Japanese unit from the Japanese Home Islands box on a southern Liaodong Peninsula harbour hex (a hex with a white circle bearing a red anchor symbol) that contains no Russian units, within the stacking limit. If there are no Russian units there, the transport may land at a southern Liaodong Peninsula harbour even if it is under Russian control or in an EZOC.
If the Port Arthur Fleet is unable to sortie because of 10.4.1, the Japanese player may transport to every harbour that contains no Russian units.
10.2.6 Reorganisation: During his Card Play Phase, the Russian player may discard one card from his hand to place one eliminated Russian 3-2 unit in the European Russia box. Only 3-2 units may be reorganised. The Japanese player cannot carry out this reorganisation, but by playing event "#16 Reorganisation" he may return eliminated units to the game. The Russian player, by playing event "#13 Reorganisation", may return eliminated 3-2 units to the game, and may also return an eliminated 5-2 unit.
10.3 Card Play Restrictions
Except where a limit on the number of cards is stated (such as forced march), there is no limit on the number of cards either side may use in one phase. For example, if a player has 3 cards in hand, he may transport up to three units during his own Card Play Phase. Several cards may also be used on the same unit in the same phase.
For example, during the Card Play Phase of his Japanese Player Turn, a player discards one card to transport the Imperial Guards Division (Gds) from the Japanese Home Islands box to the Korean Peninsula box. He then discards another card to carry out a forced march and selects the Movement Phase; in this Movement Phase the Imperial Guards Division moves along with the other units. He may then discard a further card to make a strategic movement with the Imperial Guards Division.
10.4 Notes on Events
10.4.1 Port Arthur: If at any time during the game Port Arthur (hex 1201) comes under Japanese control, or the Japanese player plays "#03 Mines", from then on the Russian player may no longer play the events "#01 Port Arthur Fleet Sortie" and "#06 Admiral Makarov". Events printed on a card cannot be played in that case, but the card may still be used for its other purposes by discarding it.
10.4.2 Order of card play: There is no fixed order of plays during a player's own Card Play Phase. For example, the Russian player may discard one card to transport, moving one 3-2 unit from European Russia to Siberia. He may then discard one card to carry out a forced march, and move the 3-2 unit that has just arrived in Siberia onto the map by rail movement.
10.4.3 Hand limits: The events "#01 Port Arthur Fleet Sortie" and "#05 Vladivostok Fleet Sortie" limit the Japanese player's hand. They represent Russian fleet action disrupting Japanese transport. While these events limit the Japanese hand, the Japanese player may not reduce Morale Points to increase his hand. If both "#01 Port Arthur Fleet Sortie" and "#05 Vladivostok Fleet Sortie" are used, the Japanese player's hand is limited to one card; using both has no further effect.
10.4.4 Russian Port Arthur Garrison: At the start of the game the Port Arthur Garrison (2-0) unit is placed on its 2-0 side. By playing event "#08 Kondratenko", the Russian player may turn it to its 3-0 side.
10.4.5 Events that affect combat results: The following events are played before the die is rolled, and automatically make the combat result "DR".
- Japanese Army: #09 Kodama Gentaro.
- Russian Army: #10 Kuropatkin. Note that #10 Kuropatkin causes Russian units to retreat.
The following events are played after the die is rolled, or after the combat result has been determined by the events above, and change the combat result.
- Japanese Army: #02 Hotchkiss Machine Gun.
- Russian Army: #02 Permanent Fortification; #03 Crossfire; #04 Field Fortifications; #07 Maxim Machine Gun; #08 Kondratenko; #11 Linevich.
Events that affect a combat result are played in alternation. The attacker first decides whether to use one; if he does not, the defender may use one, and the attacker may then respond with an event that affects the combat result. Any number of cards may be used during the resolution of a combat, but the events played during that combat must alternate, one at a time. For example, if the Japanese player has played "#09 Kodama Gentaro", the Russian player must accept that result before the Japanese player may play "#13 Gunshin" in the same combat. The Japanese player therefore cannot, in that way, return "#09 Kodama Gentaro" from the top of the discard pile to his hand.
10.4.6 Seiro-gan and Southern Policy: When the card "Seiro-gan" and the card "Southern Policy" (南方政策) are drawn, the player who draws it must shuffle that card together with the cards in the discard pile and the cards remaining in the deck to form a new deck. When replenishing cards from the deck, do not check each card as it is drawn: receive all the required cards first and check them afterwards. Therefore these events do not occur in the middle of a card replenishment.
Correction printed in the rulebook: if the Russian event "#16 Beriberi" (脚気) is played, the -1 dice modifier applies to the Japanese player's Morale Check, not the Russian player's.
11.0 Advanced Naval Rules
This rule is optional. Use it only when both players agree. The Russian events #1, #5 and #6, and the Japanese events #1, #3 and #4, are ignored, and are used in the way described in this rule.
11.1 Naval Units
The Japanese side has 7 naval units and the Russian side has 8. Units with a white upper half are of the Japanese First Fleet / Russian Port Arthur Fleet; units with a light-blue upper half are of the Japanese Second Fleet / Russian Vladivostok Fleet (one each).
Each unit starts with 2 steps. A unit that loses 1 step is turned to its damaged side. If it loses one more step it is sunk and removed from the game.
At the start of the game both sides place all of their naval units face up beside them.
11.2 Russian Fleet Sorties
At the start of the Russian Player Turn's Card Play Phase, the following procedure is carried out.
11.2.1 Port Arthur Fleet sortie: If the Russian player has "#1 Port Arthur Fleet Sortie" or "#6 Admiral Makarov" in hand, he may use either one of these cards to sortie the Port Arthur Fleet. Even without these cards he may declare a "Port Arthur Fleet sortie".
11.2.2 Japanese response: If the Port Arthur Fleet sorties, and the Japanese player has "#1 Port Arthur Harbour Blockade" in hand, he may use it here. The Japanese player may also, in this case, roll one die and halve the result (rounding up; the result is 1 to 3). He removes that number of steps from the Port Arthur Fleet, choosing from which units they are removed. For example, if the result is 4, the Port Arthur Fleet loses 2 steps. He may eliminate one naval unit, or damage two naval units, as he chooses.
If the Japanese player has "#3 Mines" in hand, he may use it here. He rolls one die and removes steps from the Port Arthur Fleet equal to the number rolled. The Japanese "#1" and "#3" may be used at the same time.
11.2.3 Port Arthur Fleet response: The Russian player may now call off the operation. If he calls it off, go to 11.2.6. If he continues, go to 11.2.4.
11.2.4 First Fleet sortie: The Japanese player decides whether to intercept the Port Arthur Fleet with the First Fleet. If he intercepts, a naval battle takes place between the Port Arthur Fleet and the First Fleet, resolved according to 11.3. The transport interference by the Port Arthur Fleet (11.2.5) is then resolved. If the Japanese player does not intercept with the First Fleet, go to 11.2.5.
11.2.5 Transport interference by the Port Arthur Fleet: For each unhurt naval unit of the sortied Port Arthur Fleet, the Japanese hand limit for the next Japanese Player Turn is reduced by 1 card. If there are 3 or more unhurt naval units, the hand limit is 1 card, and in addition Japanese units in the Japanese Home Islands box cannot be transported.
If the Japanese player holds more cards than his hand limit, he must discard cards at random until he is within the limit.
11.2.6 Vladivostok Fleet sortie: If the Russian player has "#5 Vladivostok Fleet Sortie" in hand, he may use it to sortie the Vladivostok Fleet.
11.2.7 Second Fleet sortie: The Vladivostok Fleet is elusive and hard to intercept. The Japanese player may therefore sortie the Second Fleet to intercept the Vladivostok Fleet only by playing "#4 Akiyama Saneyuki". He resolves the naval battle according to 11.3. The transport interference by the Vladivostok Fleet (11.2.8) is then resolved. If the Second Fleet does not intercept, or cannot intercept, go to 11.2.8.
11.2.8 Transport interference by the Vladivostok Fleet: If the sortied Vladivostok Fleet is unhurt, the Japanese hand limit for the next Japanese Player Turn becomes 2 cards. If the Port Arthur Fleet has already interfered with transport (11.2.5), the interference of the Vladivostok Fleet has no effect.
11.2.9 Return to port: Return both sides' naval units to the player's side, and resume the Russian Card Play Phase.
11.3 Resolving Naval Battles
A naval battle may take place between the First Fleet and the Port Arthur Fleet, or between the Second Fleet and the Vladivostok Fleet.
11.3.1 Line-up: Line up the naval units of both sides in a single row. Place the unhurt naval units first, then the damaged naval units behind them, in order. This forms one-to-one pairings. If one side has more naval units than the other, the surplus units are assigned to any enemy naval units. However, each enemy naval unit must be assigned two of your naval units before a third may be assigned to it.
11.3.2 Resolving gunfire: Naval units fire at the enemy naval units facing them. Roll one die for each step of the firing unit. Each result that is equal to or less than the firing unit's combat strength inflicts 1 step of damage. If damage is in excess of what is needed to sink an enemy naval unit, the excess is ignored (it may not be assigned to another enemy naval unit). Gunfire is regarded as simultaneous, and damage is applied at the same time.
11.3.3 End of the naval battle: A naval battle ends after every naval unit has fired once.
11.3.4 Akiyama Saneyuki: After the lines are drawn up, the Japanese player may play "#4 Akiyama Saneyuki". If it is used, gunfire is not resolved simultaneously: the Japanese gunfire is resolved first, and its result applied, before the Russian gunfire is resolved.
11.4 Repair of Ships
If the Port Arthur Fleet did not sortie, one damaged Port Arthur Fleet naval unit is returned to its undamaged side. The Vladivostok Fleet is not repaired even if it did not sortie. If the First Fleet did not sortie, two damaged First Fleet naval units are returned to their undamaged sides. If the Second Fleet did not sortie, one damaged Second Fleet unit may be returned to its undamaged side. If the Second Fleet has been eliminated, the Japanese player may, instead of removing an undamaged First Fleet unit, bring back a Second Fleet unit in its undamaged side.
11.5 Admiral Makarov
At the start of the game the Russian player secretly chooses which ship of the Port Arthur Fleet is the flagship that carries Admiral Makarov. If the flagship is sunk, the Russian player reveals this and reduces his own Morale Points by 1. If the flagship remains in play and undamaged naval units of 3 or more take part in transport interference that succeeds, the Russian Morale Points increase by 1. In this case the Russian player does not need to reveal which ship is the flagship.
11.6 Port Arthur
If the Japanese player controls Port Arthur, the Port Arthur Fleet is eliminated. (Because of this, the Russian Morale Points are not reduced even if the flagship is sunk.)
When there are 2 or fewer unhurt naval units in the Port Arthur Fleet, the Japanese player may transport to any harbour on the Liaodong Peninsula (see 10.2.5).
Play Example
The printed example refers to a numbered diagram (callouts ① to ⑭), which is not reproduced here. The callout numbers are given in brackets. Place names are given in the printed Japanese with hex numbers.
Game Turn 1
- Japanese Movement Phase: The game begins with the Japanese Movement Phase. One unit moves from the Korean Peninsula to hex 1114, and two units move to hex 1215 [①].
- Japanese Combat Phase: Three Japanese units attack Russian units. The combat differential is +3. The attack from hex 1215 is not across a river, so there is no river modifier. The Japanese player uses one card for attack support, raising the differential to +4. The die shows 3 and the result is "EX". The Russian unit is eliminated, and one Japanese unit (Gds) is also eliminated. Because the result is EX, no advance after combat is made [②].
- Japanese Card Play Phase: First, one card is used for transport, moving one Japanese unit from the Japanese Home Islands box to hex 1206 [③]. A second card is used for a forced march (choosing the Movement Phase), and three units on the map are moved [③④].
- Morale Check: Both sides lost one unit, so a die roll of "1" would reduce Morale Points by 1. Both sides pass the check.
Game Turn 2
- Russian Card Replenishment Phase: The Russian hand is empty, so 3 cards are drawn.
- Russian Movement Phase: The unit at 遼陽 (Liaoyang) moves to 摩天嶺 (hex 1713) [⑤].
- Russian Combat Phase: No Russian unit can attack.
- Russian Card Play Phase: Two cards are discarded to transport two 3-2 units from European Russia to Siberia [⑥]. One card is discarded for strategic movement, moving a Siberian 3-2 unit to 柝木城 [⑦].
- Japanese Card Replenishment Phase: The Japanese hand is empty, so 3 cards are drawn.
- Japanese Movement Phase: Russian units are on defensive terrain, so an attack is judged impossible. The Japanese player seeks an advantage by manoeuvre. One unit moves to hex 1714 and another to hex 1612. The unit in hex 1305 moves to 1607 [⑧].
- Japanese Card Play Phase: Two cards are discarded to transport two units to hexes 1206 and 1211 [⑨]. One further card is used for a forced march (Movement Phase): the unit in 1607 moves to 1709, the unit at 大孤山 moves to 1511, and the unit at 候兎石 moves to 1305 [⑩]. This surrounds the Russian units at 柝木城.
Game Turn 3
- Russian Card Replenishment Phase: The Russian hand is empty, so 3 cards are drawn.
- Russian Movement Phase: To rescue the surrounded friendly units, the Russian player counter-attacks. The unit at 摩天嶺 moves to hex 1712 by way of hex 1813 [⑪]. A Siberian unit is moved by rail to 遼陽.
- Russian Combat Phase: Two Russian units attack the Japanese unit in hex 1612. The combat differential is +3 and the die shows 1, giving the result "DE". The Japanese unit is eliminated and placed in the Eliminated Units box. The Russian unit at 柝木城 advances into hex 1612 [⑫].
- Russian Card Play Phase: Two cards are discarded to transport two 3-2 units from European Russia to Siberia [⑬]. A further card is used for a forced march: the unit at 遼陽 moves to 摩天嶺, and the unit at 1612 moves to 1711. A Siberian unit is moved by rail to 奉天 (Mukden) [⑭].
This completes the Russian Player Turn, and the Japanese Player Turn begins. The printed commentary at this point notes that in the previous Japanese turn the Japanese Army had succeeded in surrounding the advanced Russian units, but was then counter-attacked and lost one unit, while the Russian Army succeeded in strengthening its line. It adds that in such a situation it is advisable for the Japanese player to reduce his Morale Points in order to increase his hand and regain the initiative.