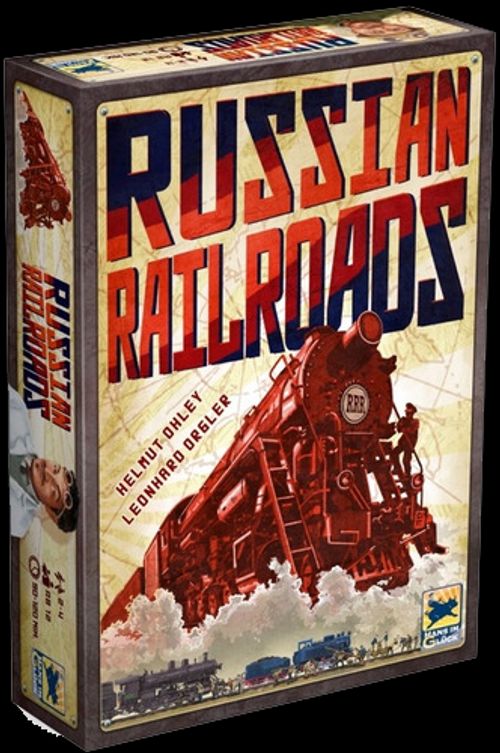
Russian Railroads
Russian Railroads Rulebook
Table of Contents
Table of Contents
- Components and Setup
- About These Rules
- Game Overview
- General: Playing a Turn
- Game Board – The Areas of the Board
- Track Extension – Develop Your Railroads and Score Points!
- Locomotives – Without a Locomotive, Even the Best Railway Is Useless.
- Factories – The Power of Industry
- Locomotives and Factories
- Industrialization – The Other Road to Scoring Points!
- The Auxiliary Actions – 1 Doubler, 2 Roubles, 2 Temporary Workers
- Engineers – Ever-changing Actions
- Turn Order – "He Who Comes Too Late Is Punished by Life."
- A Short Break – Because Reading Rules Is Hard Work.
- Player Board – The Special Spaces
- Scoring Phase – Why You Do What You Do: to Score Points!
- Game End – Will You Be the Best?
- Playing with 2 or 3 Players
- Tactical Hints
- The Tokens and the Cards
- Engineers and Factories
Components and Setup
Game Components
- 1 game board
- 35 workers (8 in each of 4 player colors, 2 turquoise, 1 black)
- 8 pawns (2 in each of 4 player colors)
- 48 tracks (12 black, 12 gray, 12 brown, 8 natural, 4 white)
- 8 Industry markers
- 4 player boards
- 37 locomotives (4 of each of the #1-8 locomotives, 5 of the #9 locomotives)
- 15 engineers
- 20 Doubler tokens
- 18 roubles (coins)
- 28 mystery tokens (4x 7 different tokens)
- 4 Revaluation markers
- 4 Kiev Medals
- 1 Last Round marker
- 4 100/200-point tokens
- 4 300/400-point tokens
- 10 End Bonus cards
- 5 mystery cards
- 4 Turn Order cards
- 4 Starting Bonus cards
- 1 detailed rulebook
- 4 Scoring Overview cards
Here and on page 4, we show you the setup for 4 players. The changes required for 2 or 3 players are described later, see Setup for 2 or 3 Players.
General Setup – for 4 Players
- Place the game board in the middle of the table. Place the 100/200 and 300/400-point tokens near space 100 of the scoring track.
- Lay the 5 mystery cards face up.
- Shuffle the 10 End Bonus cards and remove two of them from the game without looking at them. The 8 remaining cards form a face down pile.
- Place the 37 locomotives next to the board so that they are locomotive side up (the purple side will come up later). Sort them by number and place them so that they form 9 distinct piles as seen below. (One of the #9 locomotives has no purple backside and should be placed on its matching mystery card.)
- Place the 2 turquoise workers on the area of the board displaying 2 turquoise workers. Place the black worker on its matching mystery card. Give each player 7 of the workers in their player color (1 worker of each color is returned to the box).
- Form a Doubler token supply using the 20 Doubler tokens (called "doubler" for the remainder of this rulebook).
- Form a supply with the 18 roubles (coins).
- Form a track supply by sorting the 48 tracks so that they are grouped by color.
- First, sort the 15 engineers into A and B piles. (One engineer is not marked with a letter and should be placed on its matching mystery card along with a single rouble.) Shuffle the A and B piles separately. Place the top 4 engineers of the B stack on the spaces marked 6, 5, 4, 3. Place the top 3 engineers of the A stack on the spaces marked 2, 1, and the 40-space. Remove the remaining engineers from the game. Engineers placed horizontally should be light side up. Engineers placed vertically should be dark side up. (The engineers and the spaces they occupy have a distinctive form to help remind players which side should face up.)
- The Last Round marker is placed near the game board. It will be required for the last round of the game.
Proceed to the next section for instructions regarding individual player setup.
Setup – Player – for 4 Players
- Each player selects a color and places the matching player board in front of herself.
- Each player receives a #1 locomotive from the supply and places it on the appropriate space at the upper left of her player board.
- Each player receives 3 black tracks from the supply and places them on the first space of each of the three railroads pictured on her player board.
- Each player receives 5 workers in her color and places them before her. The remaining 2 workers are placed near the game board in a supply.
- Each player receives 1 rouble from the supply.
- Each player receives 1 Industry marker and places it on space 0 of the industry track.
- Each player receives 7 different mystery tokens, a second Industry marker, 1 Kiev Medal, and 1 Revaluation token. She places everything near her player board.
- Shuffle the 4 Turn Order cards and place one number-side-up in front of each player. Please note: The cards have differing backsides. It is recommended that the cards be shuffled and dealt blindly.
- Each player receives 2 pawns in her color: one to place on the 100 space of the scoring track; another to place on the space of the turn order track matching her Turn Order card.
- Lay out the Starting Bonus cards. The player 4th in turn order takes one, uses its ability and removes it from the game. (These cards are explained later, see Starting Bonus Cards.) The player 3rd in turn order does the same, followed by the player 2nd in turn order. The player 1st in turn order receives no Starting Bonus card. The remaining Starting Bonus card is returned to the box.
- Each player receives a Scoring Overview card.
Please note: When packing up after your first game, we recommend bagging each player's components separately in order to simplify setup for the following game.
About These Rules
Due to the complex nature of the game, we will begin by explaining its core concepts. After which, we will explain the game step by step. So don't panic if you feel as though something has not been explained... it's all in here and it will all make sense very soon.
After all, Russia wasn't built in a day.
Game Overview
The players embody railroad moguls who have been commissioned to build the Trans-Siberian Railway, as well as two additional railroads. In addition to track construction, the players will purchase new locomotives, promote industrialization, and hire workers and engineers. All this is done in the lofty pursuit of acquiring the most victory points – the truest measurement of a player's rail building skills.
The players take actions one after the other in order, until all players have passed. At the end of each round, players score points as a measurement of their progress.
In the four-player game, the game ends after the seventh round and the player with the most points wins.
General: Playing a Turn
Each turn a player will choose an unoccupied action space, occupy it with the required number of workers and perform that action.
You must consider the following:
- You must choose an unoccupied action space (i.e. one that is not already occupied by workers).
- You must place the correct number of workers required for the action space you wish to use.
- You must only use workers from your personal worker supply.
- You must immediately make use of the chosen action.
- You must perform the action in its entirety.
- You may perform only one action per turn.
Please note: exceptions to these rules will be noted where applicable.
Another note: We use the word "must" to ensure players clearly understand how the game is to be played. There are only positive actions. In most cases, a player will only take an action they want to perform.
Game Board – The Areas of the Board
The game board is divided into the following areas, each explained in detail in the following pages:
- Track Extension – see Track Extension
- Locomotives and Factories – see Locomotives and Factories
- Industrialization – see Industrialization
- Auxiliary Actions – see Auxiliary Actions
- Engineers – see Engineers
- Turn Order Track – see Turn Order Track
In the following pages, these areas will be explained in detail.
Track Extension – Develop Your Railroads and Score Points!
The track extension actions are among the most important in the game.
Each player's personal player board depicts 3 railroads, which can be independently extended over the course of the game.
The better each of their railroads is developed, the more points each player will score at the end of each round.
Each board shows these 3 railroads: the Trans-Siberian railroad, the St. Petersburg railroad and the Kiev railroad.
To Build Tracks, You Will Need:
- The rail extension actions
- The tracks
How Can You Extend Tracks?
First, place the required number of workers on one of the track extension action spaces. Then, advance the appropriate track(s) on your player board the number of spaces indicated on the action space.
Example:
- Blue places 2 workers on this action space. This action space depicts 3 black track advancements.
- Then he chooses to advance his black track marker 3 spaces forward on the Trans-Siberian.
You may choose to distribute track advancements between multiple railroads.
or
- Blue instead chooses to advance his black track marker 2 spaces forward on one railroad, and 1 space forward on another railroad. In total, he has moved black tracks forward by three spaces.
And so ends the action.
In order to earn more points, the players should strive to extend their railroads through the advancement of these tracks. To maximize their progress, players will also need to advance tracks of other colors (depicted here).
How Do You Get Tracks in Other Colors?
In order to advance the tracks in the other colors, you must first earn them. Your earn these tracks by advancing the black track to spaces 2, 6, 10 and 15 on the Trans-Siberian.
Once a player has advanced the black track to or beyond space 2 of the Trans-Siberian, she immediately takes 3 gray tracks from the general supply. She places these new tracks to the left of each railroad depicted on her player board. She may now begin advancing her gray tracks.
By placing the required number of workers on an action space depicting gray track advancements, you are able to advance your gray tracks. The number of icons depicted indicates the number of spaces you must advance your gray tracks.
Example:
- Blue places 1 worker on this action space. He must now advance 2 spaces with gray tracks.
- The first advancement is used to place the gray track on the first space of a railroad. The second advancement is used to advance that same track to the next space. Reminder: It is again possible to split these advancements between two railroads.
The tracks of the remaining colors can be advanced in a similar fashion using the appropriate action spaces.
When a player's black track reaches or passes space 6 of the Trans-Siberian, the player receives 3 brown tracks... space 10 grants access to 2 natural tracks... and space 15, 1 white track.
Note: Railroads offer many more advantages that will be presented later.
The Following Must Be Observed When Advancing Tracks:
- Tracks advance in a specific unchangeable order: first black, then gray, brown, natural and finally white.
- A track can only be moved onto an empty space. A track may never catch up to or go beyond the track that is in front of it. As such, the order is always respected.
- When a player must split advancements, they must be split between different railroads.
- Not all railroads use every track color. Your player board shows which colors go with which railroads.
(Example shown: 2 spaces + 1 space, split between the Trans-Siberian [all 5 colors], St. Petersburg [4 colors] and Kiev [3 colors] railroads.)
The Top and Bottom Rail Extension Actions
To use the top action, you must place a worker and 1 rouble. This action gives you two advancements of your choice (split between 1 or 2 tracks).
Example: Blue places 1 worker and 1 rouble on this space in order to perform the action. He moves his black track one space and then he moves his gray track one space.
The bottom action is the only action in the game that may be used more than once during a round. When a player places a worker there, she must then move either a black or a gray track. The action space is not considered occupied and may be used again during the same round by any player (including players who have already used it).
Example: Even though Blue already placed 1 worker on this action, it remains available to all players. On her turn, Red chooses to place a worker there and use the corresponding action.
Locomotives – Without a Locomotive, Even the Best Railway Is Useless.
To Build Locomotives, You Will Need:
- The locomotive actions
- And the locomotives from the supply
How Can You Build a Locomotive?
First, place the required number of workers on one of the locomotive action spaces. Then, take 1 locomotive from the lowest numbered pile in the supply. Finally, place this locomotive in front of one of the 3 railroads of your player board.
Example:
- Green places 1 worker on the top locomotive action.
- He takes one #2 locomotive...
- ... and places it on the St. Petersburg railroad.
There can be only 1 locomotive on these railroads: St. Petersburg and Kiev. There can be up to 2 locomotives on the Trans-Siberian. The number of a locomotive indicates the number of spaces it can reach on a railroad.
The #1 locomotive (each player begins the game with one) can only reach 1 space. This #4 locomotive can reach spaces 1 through 4 of a railroad.
The Trans-Siberian is the only railroad where there can be 2 locomotives. One of these is placed next to the board to the left of the track, while the other is placed directly on the board. You must add up the value of both locomotives on the Trans-Siberian to determine the total number of spaces that can be reached on this railroad.
A #1 and a #4 locomotive are currently on the Trans-Siberian; this means that the player can reach spaces 1 through 5 on this railroad.
Can Locomotives Be Upgraded?
Of course. To upgrade a locomotive, simply replace it with one whose number is higher.
Example: Green takes a #4 locomotive and places it on his Trans-Siberian. Since he already owns two locomotives on this railroad (a #3 and a #1), he chooses to replace the #1 with the #4.
The "old" locomotive is not lost: you can move it to one of the other two railroads.
Example: Green moves his #1 locomotive to the Kiev railroad, which did not have a locomotive.
When you move an "old" locomotive to a railroad where there is a locomotive, this can create a chain reaction.
Example: Later during the game, Green places a #4 locomotive on the St. Petersburg railroad. The #2 locomotive found at this location must be moved. Green moves the #2 locomotive to the Kiev railroad, forcing the removal of the #1 locomotive present there. This #1 locomotive can then be moved to any other railroad. However, do not forget that a locomotive can only be moved to an empty railroad or used to replace a locomotive with a lower number.
What happens to a locomotive that you cannot move elsewhere on your board?
Example: When a player is unable to place a locomotive, she flips it purple side up and places it next to the locomotive supply. That locomotive will now be used as a factory. What are factories? They will be explained in the next section.
Why Build Locomotives?
During each end of round scoring, you will only score points for the spaces that your locomotives can reach.
Furthermore, special spaces are spread amongst your railroads, and in order to benefit from their advantage, you must first reach them with a locomotive (see Railroad Special Spaces).
Factories – The Power of Industry
Factories are essential to the industrial development of your railroad network. Not only that, but each factory can be used to benefit from a unique ability.
A factory is depicted on the back of each locomotive. Locomotives with the same number all have the same factory on their back. Each factory grants its owner a special ability that she can benefit from. The ability a factory possesses is also depicted in the top left corner of a locomotive.
Front: Locomotive – Factory ability. Back: Factory.
Locomotives and Factories
How Can You Build a Factory?
To build a factory, you must use the same actions that were required to build locomotives.
First, place the required number of workers on the action space. Then, just like you did for the locomotives, take a locomotive from the lowest numbered pile in the supply. Flip this locomotive purple side up (with the factory) and place it under your board, in one of the 5 spaces reserved for factories. You must place your factories from left to right.
Example:
- Green places 1 worker on the action space.
- He takes a #2 locomotive...
- ... flips it purple side up and then places it under his board in the left-most available factory space.
If you manage to fill your 5 factory spaces, you can replace them with other factories. When you wish to replace a factory, you must first place one of your "old" factories in the general supply, to the left of the locomotive piles, factory side up (purple side). Then, you place the new factory in the recently freed space. You do not have to replace your factories from left to right.
Note: How factories are used will be covered in the "Industrialization" section on the following page.
How to Choose Your Locomotives and Factories?
- The locomotives are sorted by number and placed in piles near the game board. Each pile will contain the locomotives of a given number (from 2 to 9).
- When a player builds a locomotive or a factory, she must take it from the lowest numbered pile. At the beginning of the game, this will be pile #2. Once pile #2 runs out, players will move on to pile #3, and so forth.
Exception: If a player wishes to build a factory and there are some factories next to the locomotive piles, the player will be able to choose between one of the face up factories or one from the lowest numbered pile. (How factories can end up next to the locomotive piles was seen previously.)
What Is the Difference Between the 3 Locomotive Action Spaces?
The topmost action is similar to the track extension actions: you must place 1 worker to take 1 locomotive that you place either as a locomotive on one of your railroads or as a factory in the first available space under your board, starting from the left.
The middle action has the same effect, but it requires 2 workers. This makes it "more expensive."
The bottom action requires 3 workers. It allows you to get 1 locomotive and 1 factory. You are not allowed to take 2 locomotives or 2 factories. You decide whether to take the locomotive or the factory first. (This will only matter when you are acquiring 2 locomotives with different numbers; for example, when you are getting the last one from pile #3 and the first one from pile #4.)
Industrialization – The Other Road to Scoring Points!
Another type of action is possible: industrialization. Industrialization lets you score points during the scoring phase at the end of a round, and also gives you access to the abilities of your factories.
For the Industrialization of Your Network, You Will Need:
- The industrialization actions,
- The industry track of your board,
- And the industry marker.
How Do You Industrialize Your Railroad Network?
First, place the required number of workers on one of the industrialization action spaces. Then, advance your Industry marker the number of spaces indicated by the chosen action space.
Example:
- Yellow places 1 worker on this action space. This action allows you to advance your Industry marker by 1 space.
- She advances her Industry marker by 1 space.
Can You Jump Over a "Gap" in Your Industry Track?
You will notice that there is a gap after the first 4 spaces of your industry track. You cannot move your Industry marker into or beyond this gap.
How Can You Fill These Gaps?
For your Industry marker to progress on your industry track, you must first fill these gaps with factories. This represents another way in which your industries are improving.
Example: This player built a factory. He may now advance onto the factory, and then he moves on to the following space on the track.
Reminder: Building factories is covered above, see How Can You Build a Factory?.
Each factory features an industry space onto which your Industry marker can move. After each factory, there is another industry space that becomes available.
Important: If a player hopes to reach the last space of her industry track, she will first need the fill the 5 gaps with factories.
What Happens When a Marker Reaches a Factory?
When a marker moves onto a factory, you must then immediately use that factory's ability. If you are unable to use it at that time, the effect is cancelled.
Example: Yellow places 2 workers on this action space. This gives her 2 advancements on her industry track. With the first advancement, she moves her marker onto a factory. She immediately uses this factory's ability. Then, she proceeds with her second advancement.
The various factory abilities are explained later, see Factory Abilities.
What Is the Difference Between the 3 Industrialization Actions?
For the top action, you must place 1 worker. This action gives you 1 advancement on your industry track.
For the middle action, you must place 2 workers. This action gives you 2 advancements on your industry track.
For the bottom action, you must place 2 workers. This action gives you 1 advancement on your industry track and 1 black track advancement.
The Auxiliary Actions – 1 Doubler, 2 Roubles, 2 Temporary Workers
These 3 auxiliary actions are different from those of the groups presented so far, but they are simple to explain and easy to play.
1 Doubler
Place 1 worker on this action space to take 1 doubler from the supply. Then, you must place this doubler on an empty dashed space above the Trans-Siberian (and only there). You must fill these 8 spaces from left to right and there may only be 1 doubler per space.
A track does not have to be present for you to be able to place a doubler.
A doubler multiplies by 2 (doubles) the value of the space below it during scoring.
2 Roubles
Place 1 worker on this action space to take 2 roubles from the supply and then place them in front of you.
What Are Roubles For?
Roubles may replace workers when playing on action spaces.
You can use this action space using a rouble from your supply instead of using a worker from your supply.
You are also allowed to combine roubles and workers.
You must use 1 rouble to use either of these two actions: to use the top rail extension action, you must use 1 worker and 1 rouble (see The Top and Bottom Rail Extension Actions). Alternatively, you could use 2 roubles, but not 2 workers. To hire an engineer, you must use 1 rouble (as explained below, you may not use a worker).
Although roubles can replace workers, workers cannot replace roubles. Like action spaces occupied by one or more workers, an action space that is occupied by a rouble cannot be used again during this round.
2 Temporary Workers
Place 1 worker on this action space to take the 2 turquoise temporary workers. You must use these workers during this round, and they act as if they were your own color.
Just like roubles, you can use temporary workers by themselves (individually or together), or combine them with workers of your own color or roubles.
You may not keep the temporary workers for the next round.
Engineers – Ever-changing Actions
Engineers can help players during the game with their special skills. They can also give players a certain number of points at the end of the game.
This is the engineer area of the game board: it shows the changing actions and the hiring space.
How Can You Use and Hire Engineers?
Each round, only one engineer can be hired. The engineer that can be hired is located in the right-most space (the hiring space) of the engineer area of the game board.
To hire an engineer, you must place a rouble on the hiring action space. You then take the engineer from this space and place it, light side up, close to your player board.
Example: Red places a rouble on the hiring action space and takes the engineer from the hiring space... and puts it near her player board.
The light side of each engineer shows an action. If a player has one or more engineers next to his game board, he may use these actions just like those from the game board. A player may use his engineer actions, even if he is unable to use the action completely.
Another advantage to having "your own engineers" is that they are not "time sensitive", meaning that since the other players do not have access to them, you are able to use them exactly when you need to.
The 2 Light Side Up Engineers
Both engineers that are placed light side up on the board allow players to use their respective action. Players are unable to hire these engineers. They represent extra action spaces available to all players, just like all other action spaces on the game board (track extension, locomotive, etc.). And just like all other action spaces on the board, these actions can only be used once per round.
Example: Red places 1 worker on the left engineer and uses this action immediately.
Action: Red takes a doubler from the supply and places it on the first available space (from the left) above her Trans-Siberian. On top of that, she scores 3 points, which she indicates by advancing her pawn 3 spaces on the scoring track.
The 4 Left-most Engineers
These engineers can neither be used nor hired. However, at the end of a round, every engineer is moved one space to the right.
In other words, these engineers will become available during future rounds. Seeing them lets players plan ahead for the rounds to come.
How engineers are moved is explained later, see Preparing for the Next Round.
Turn Order – "He Who Comes Too Late Is Punished by Life."
Whatever Gorbachev meant when he uttered those words, the truth is that in this game, being first is definitely to your advantage.
What Is the Turn Order For?
In this game, players do not play in clockwise order. The turn order track is used to determine player order. The player occupying the first position plays first, followed by the player occupying the second position, and so forth. Once the last player has taken her turn, it is once again the first player's turn to play.
Example: Yellow is the first player, followed by Blue, Green, and finally Red. Then, the round continues once again with Yellow.
When a player does not wish to or cannot continue playing, she passes; this means that for the remainder of this round, she will not be able to play. Finally, to show that she is out of this round, she flips her Turn Order card and immediately scores the points shown on the back of her card.
The other players keep playing, one after the other, until every player has passed.
Note: Even if a player runs out of workers, this does not mean that she must pass right away. She can continue performing actions with roubles.
How to Get Ahead on the Turn Order Track?
You can place one of your workers under the first or second position of the turn order track. This will be your position in the turn order sequence of the following round.
Note: You may not place a worker on the action space under your current position in the turn order, nor may you occupy both turn order action spaces.
How Is the Turn Order Reorganized?
Once every player has passed, the players who placed a worker under the turn order track remove their pawn. To free the turn order spaces, the other pawns are moved to the right (towards the last spaces of the turn order track). Then, the players place their pawn on the turn order space above their worker.
Example: Green and Red remove their pawn from the turn order track. Yellow and Blue move their pawns to the right. Then, Green and Red place their pawn on the turn order space above their worker.
Special case: If the first player places a worker on the 2nd position (probably because she does not wish to move further back) and that no other player places a worker on the 1st position, the turn order will not change.
Note: As you may have noticed, it is very important to know which player places a worker on the turn order action spaces. To this effect, if a player places a worker that is not of her color or a rouble, she must immediately exchange it with a worker of her color placed on another action space.
Example: Yellow places a worker under the 2nd turn order position. No player places a worker under the 1st space. The turn order does not change.
The Workers on the Turn Order Action Spaces Can Be Used Again...
A worker on a turn order action space provides another benefit. Once the turn order has been reorganized, players who placed a worker on the turn order action spaces can each move their worker to a free action space.
The player whose worker occupies the 2nd position is first to move her worker. She takes her worker from the turn order action space and moves it to a free action space of her choice (this can be one of her engineers). She then performs the corresponding action.
Example: Red takes her worker from this space and moves it on the "1 brown track advancement" action space.
Then, the player who placed his worker on the 1st space does the same, following the same rules.
When moving your worker, you must observe the following:
- You may only move your worker to an action that requires exactly 1 worker (i.e. you may not combine it with other workers, temporary workers, or roubles).
- If there are no better options, you can always use the bottom track extension action.
A Short Break – Because Reading Rules Is Hard Work.
We have now covered the various actions that are offered on the game board, which means that we have covered the most important aspect of the game.
In the following sections, we will cover: the player board, the special spaces on it and the scoring phase.
Then, we will see the final scoring and the various tokens and cards.
Player Board – The Special Spaces
We will now see in detail your player board.
The player board is divided into the following areas: the 3 railroads (see Track Extension), 8 spaces for the doublers (see 1 Doubler), room for the engineers (see Engineers), locomotives and factories (see Locomotives), and industrialization (see Industrialization).
The Special Spaces on a Player Board
The spaces circled in red give you various advantages. To get these advantages (shown below the space or next to it), you must first fulfill certain conditions.
Example: To get this space's advantage, the black track must reach or pass this space. A locomotive is not necessary.
Example: The brown track on this railroad must at least reach this space. Furthermore, a locomotive must also reach this space. In short, you must fulfill both of these conditions to obtain this advantage.
General rule: Before acquiring the advantage that a space gives, you must always at least reach the space with a track. Sometimes, a locomotive must also reach that space. The following pages present these special spaces in two groups: those that do not require a locomotive and those that do.
Without a Locomotive
Advantage: New Tracks
On spaces 2, 6 and 10 of the Trans-Siberian, you get the tracks depicted below each space, as explained previously (see How Do You Get Tracks in Other Colors?).
Space 15 allows you to get the white track. On top of that, you can immediately advance it up to 2 spaces (+2 white track advancements). You must follow the usual rules (only on empty spaces, no passing), otherwise you lose the advancement(s) you cannot use.
Advantage: Terminus
When you reach the last space of a railroad with the black track, you immediately score 10 points. A railroad may not be extended beyond the last illustrated space.
Advantage: New Worker
If you reach space 7 of the Kiev railroad with your black track, you immediately receive one worker of your color from the general supply. You may use this worker immediately and for the rest of the game.
With a Locomotive
Advantage: New Worker
If you reach space 3 of the Trans-Siberian with your brown track and a locomotive, you immediately receive one worker of your color from the general supply. You may use this worker immediately and for the rest of the game.
Advantage: Value of This Railroad Is Doubled
If you reach space 7 of the St. Petersburg railroad with your gray track and a locomotive, the value of every scored space of this railroad is doubled during the scoring phase.
Advantage: Bonus Points
If you reach spaces 1 through 4 or space 8 of the Kiev railroad with your black track and a locomotive, you score the points depicted in the stars during future scoring phases. These points are cumulative.
For example, if your track is on space 3 and you have a #3 locomotive (at least), in each future scoring, you will score 6 bonus points (1+2+3 points).
Advantage: Mystery Token Spaces
If you reach space 13 of the Trans-Siberian, or spaces 4 or 6 of the St. Petersburg railroad with your black track and a locomotive, you choose one of your 7 mystery tokens, apply its effect and then place that token in the dashed space with a mystery-token marker. This space may not be used again to receive another mystery token.
Example: On the St. Petersburg railroad, your black track is on space 4 and you have a #5 locomotive. You choose one of your mystery tokens, apply its effect (see Mystery Tokens) and place this token in the dashed space to show that this space has been used.
Advantage: Industry Track
To receive this advantage, your Industry marker must reach this space on the industry track. (There is no track or locomotive requirement for this space.) You then proceed as described above for the mystery token spaces. This space may not be used again to receive another mystery token.
Scoring Phase – Why You Do What You Do: to Score Points!
At the end of each round, once every player has passed and the turn order has been reorganized, the scoring phase happens.
These two elements on each player's individual boards are scored:
- their 3 railroads and
- their industrialization progress.
Scoring the 3 Railroads
- In principle, only spaces reached by a locomotive are scored.
- Each track on a railroad can score points. The value of each track is determined by its color, as shown in the upper right corner of the board.
- A track scores points for the space it occupies and all empty spaces behind it. These empty spaces count as being occupied by tracks of the same color (=virtual tracks).
With this in mind, when scoring a railroad, you should visualize it as such: 2 virtual brown tracks, 1 real track, 3 virtual gray tracks, 1 real track, 1 virtual black track, 1 real track.
The scoring of the railroads will be presented in this order: Trans-Siberian, St. Petersburg and Kiev.
Step by step scoring of the Trans-Siberian:
Example: Red has a #6 and a #2 locomotive on the Trans-Siberian. Her locomotives allow her to reach space 8. Thus, Red will only score spaces 1 through 8.
Spaces 1 through 3 are occupied by brown tracks (1 real and 2 virtual). Each space with a brown track is worth 2 points. Her doubler above space 1 increases that space's value to 4 points. Her brown tracks are worth a total of 8 points.
Spaces 4 through 7 are occupied by gray tracks (1 real, and, behind it, 3 virtual). Each space with a gray track is worth 1 point, for a total of 4 points.
Space 8 is occupied by a virtual black track. It is worth 0 points. (This may not seem like a lot, but it will be worth its while in due time.)
She scores a total of 12 points for the Trans-Siberian.
Scoring the St. Petersburg railroad:
The spaces on this railroad are scored like those on the Trans-Siberian.
Important note for this railroad: when a player reaches space 7 of this railroad with his gray rail and a locomotive, the value of all scored spaces on his St. Petersburg railroad are doubled.
Example: Red does not have any tracks on the St. Petersburg railroad (except the black one) nor any locomotives. She scores 0 points.
Scoring the Kiev railroad:
The spaces on this railroad are scored like those on the other two railroads.
The special spaces of the Kiev railroad are spaces 1 through 4 and space 8. A player that reaches theses spaces with his black rail and a locomotive will also score the points noted in the stars.
Example: Red has a #2 locomotive on the Kiev railroad. Red will thus only score spaces 1 and 2. The black tracks are not worth any points, and since she has yet to build any other track colors, her tracks are worth 0 points. However, she does score points for the first two special spaces (1 point for the first one and 2 for the second one). This railroad is worth a total of 3 points.
Scoring the Industrialization – The Progress of Your Industries
In addition to your tracks, you also score the points noted on the space on the industry track currently occupied by your Industry marker. Spaces that do not show any points (for example, the factories) are worth the same amount of points as the first previous space worth points.
Example: Red's marker is on a factory. Since this factory does not show any points, she looks at the first previous space worth points; this means that she scores 5 points.
Example: For this current end of round scoring, Red scores:
- Trans-Siberian railroad: 12 points
- St. Petersburg railroad: 0 point
- Kiev railroad: 3 points
- Industrialization: 5 points
Red scores a total of 20 points, which she indicates by moving her pawn on the scoring track.
You have now seen how players score their railroads and the progress of their industrialization.
After the Scoring Phase
Once all players are done with their scoring, they must prepare the next round. To be ready for the next round:
- All players must return their workers to their personal supply.
- One player must return all placed roubles back in the general supply.
- One player must return both turquoise workers to the corresponding action space.
- One player moves the engineers. All engineers are moved 1 space to the right. If there is still an engineer on the hiring space, that engineer is returned to the box. Engineers must always be light side up on the changing action spaces, otherwise they should be dark side up. You will need to flip some engineers when you move them from one section to the next.
Note: Each space under an engineer shows a number. This is the number of rounds left to play.
- Finally, each player takes the Turn Order card corresponding to her new position in the turn order. That card is placed number-side-up in front of them.
You are now ready for the next round!
Warning! This applies only for the last round: At the beginning of the last round (round 7 with 4 players), the Last Round marker is placed over the turn order action spaces. During the last round, these actions are useless; this is why they are replaced with a new action. New action: 3 advancements on the industry track.
Game End – Will You Be the Best?
After the scoring phase at the end of round 7, a final scoring takes place, and then the game is over.
The final scoring consists of 2 parts:
- The End Bonus cards and
- the majority of engineers.
End Bonus Cards
Players reveal their End Bonus cards at this time.
Note: Usually, each player will end the game with one End Bonus card. However, it is possible, with the help of factories, to acquire more End Bonus cards. It is even possible for a player to end the game without any End Bonus cards, but we strongly advise against this.
End Bonus cards are presented later, see End Bonus Cards.
Engineer Majority
The player with the most engineers scores 40 points. The player with the second most engineers scores 20 points. In case of a tie, the tied players look at the numbers on their engineers; the player with the engineer that shows the highest number wins the tie.
Note: A player that does not have any engineers may not score these bonus points.
Example: Red has these 3 engineers. Blue has these 2 engineers. Yellow has these 2 engineers. Green does not have any engineers.
Red has the most engineers and scores 40 points. Blue and Yellow have the same number of engineers. Yellow is the one who, among the tied players, has the engineer with the highest number, allowing her to score 20 points. Blue and Green do not score any points.
The game is over after the final scoring.
The player with the most points is the winner. In case of a tie, the tied players share the victory.
Playing with 2 or 3 Players
2 Players
Setup:
- The board is two-sided, with one side reserved for 2-player games. The "blocked" actions are unavailable.
- Return 2 locomotives of each number to the box.
- There are only 6 engineers (3x A, 3x B) (as seen by the number of engineer spaces on the board).
- Players take the 8 workers in their color. The remaining 16 workers (the other player colors) are returned to the box and will not be used. Each player begins the game with 6 workers instead of 5.
- Each player begins the game with 2 roubles instead of 1.
Gameplay:
- The game lasts 6 rounds.
- A player may place on a worker on his current turn order action space.
3 Players
Setup:
- Return 1 locomotive of each number to the box.
- There are only 6 engineers (3x A, 3x B). The left-most engineer space remains empty.
- Players take the 8 workers in their color. The remaining 8 workers (the other player color) are returned to the box and will not be used. Each player begins the game with 6 workers instead of 5.
Gameplay:
- The game lasts 6 rounds.
Tactical Hints
Every Player Should Read These Before Playing Their First Game:
- Pay attention to the track extension actions. It is important not to forget to extend your more valuable tracks when possible.
- Pay attention to the locomotives you build, and make sure that they reach the special spaces (for example, a #2 locomotive on the St. Petersburg is not very useful).
- The changing action spaces (engineers) are very useful.
- Roubles are more flexible than temporary workers.
- You should aim to acquire at least 2 mystery tokens.
- Industrialization is worth a lot of points at the beginning. But fear not, extending your tracks will pay greatly by the end of the game.
The Tokens and the Cards
The Starting Bonus Cards
- Get 1 black track advancement.
- Get 1 industry advancement.
- Place 1 doubler above the Trans-Siberian.
- Take 1 extra rouble.
The 7 Mystery Tokens
- Get 4 advancements to use with the tracks of your choice. You must use them with tracks you currently have. If you acquire new tracks while using this token, you may move these tracks immediately (even with this token).
- Place 3 doublers above the Trans-Siberian.
- Get 5 industry advancements.
- Place your Revaluation token at the top-right corner of your player board. From now on, your brown, natural and white tracks are worth more points.
- Place your second Industry marker on space 0 of the Industry track. From now on, whenever you get an industry advancement, you may choose which marker to move. If you get an industry advancement of more than one space, you may split it amongst your two markers. Both markers may never occupy the same space. During the scoring phases, both markers are scored. When your 2nd marker moves onto a factory, you benefit from it a second time. You may not use the mystery-token space a second time.
- Place the Kiev Medal under space 5 of the Kiev railway. In each following scoring, if you reached space 5 with the gray track and a locomotive, you score an additional 20 points.
- Choose one of the mystery cards and apply its effect immediately. Afterward, return the card to the box, it will not be used again during this game. Then, you may look through the End Bonus card pile and take the card of your choice. Keep it face down in front of you; it will allow you to score many points at the end of the game. These cards are explained on the following page.
The 5 Face Up Mystery Cards
- Perform 4 actions: place 1 doubler, get 1 industry advancement, and get 1 black rail advancement. Then, do 1 of these 3 actions a second time.
- Take the engineer and the rouble from this card. Place the engineer near your player board, where appropriate, and place the rouble in front of your personal supply. Both are available immediately.
- Build a factory (as seen previously, see How Can You Build a Factory?). You also get 2 industry advancements to use immediately.
- Take the black worker. This gives you an extra worker for the rest of the game. Furthermore, each time you use the black worker on an action space that grants at least 1 black rail advancement, you get an extra black rail advancement.
- Take the #9 locomotive from this card and immediately place it on one of your railroads. As usual, you can replace a locomotive with this one, and any advantage acquired by placing this locomotive is applied immediately.
The End Bonus Cards
- During the final scoring, score 15 points.
- During the final scoring, score 10 points per completed railroad (max. 30 points).
- During the final scoring, score 4 points per factory in your industry track (max. 20 points).
- During the final scoring, add the numbers on your locomotives and score that many points.
- During the final scoring, score 10 points per extra worker you acquired during the game. This includes both extra workers of your color and the black worker (max. 30 points).
- During the final scoring, score the sum of the 3 spaces reached by your black tracks.
- During the final scoring, score 7 points per mystery token on your board (max. 28 points).
- During the final scoring, score 20 points if you have 4, 5, or 6 doublers above the Trans-Siberian. If you have 7 or 8 doublers, score 30 points.
- During the final scoring, this card counts as an additional engineer when determining the player with the most engineers.
- During the final scoring, score 6 points per hired engineer. (The engineer from the End Bonus card, seen above, does not count for this.)
Whenever you have the option of taking an End Bonus card, you can either look through the pile and choose the card that you want, or immediately score 10 points.
Engineers and Factories
The Engineers
- You get 2 track advancements of your choice.
- You get 1 black track advancement and 1 gray track advancement.
- You get 1 track advancement of your choice and immediately score 3 points.
- You get 1 black track advancement and immediately score 3 points.
- You get 2 industry advancements.
- You get 1 track advancement of your choice and 1 black track advancement.
- You get 1 gray track advancement and 1 brown track advancement.
- You get 1 brown track advancement and immediately score 5 points.
- You get 1 industry advancement and immediately score 3 points.
- You place 1 doubler above your Trans-Siberian and immediately score 3 points.
- You get 1 gray track advancement and immediately score 5 points.
- You choose an action space with one (and only one) worker of your color and use that action again.
- You get 1 industry advancement and 1 black track advancement.
- You get to build 1 locomotive or 1 factory.
- You get 2 black track advancements.
Note: You can use the action provided by your engineers (those near your player board), even if you are unable to perform them completely.
Note: You apply the advancements in the order you choose.
The Factories
- Immediately score the sum of your engineers (the sum of their numbers).
- Get 1 industry advancement.
- Choose one End Bonus card or immediately score 10 points.
- Build a locomotive or a factory.
- Take 1 rouble from the supply and place it in front of you.
- Choose an action space with one (and only one) worker of your color and use that action again.
- Get 2 track advancements of your choice.
- Place 2 doublers above your Trans-Siberian.
- Score the sum of your best two locomotives.
© 2013 Hans im Glück Verlags-GmbH
English version: © 2013 Z-Man Games Inc.
Designers: Helmut Ohley & Leonard Orgler
Illustration & graphic design: Martin Hoffmann & Claus Stephan
Z-Man Games, 31 rue de la Coopérative, Rigaud QC J0P 1P0, Canada
For questions, comments and requests: www.zmangames.com / [email protected]