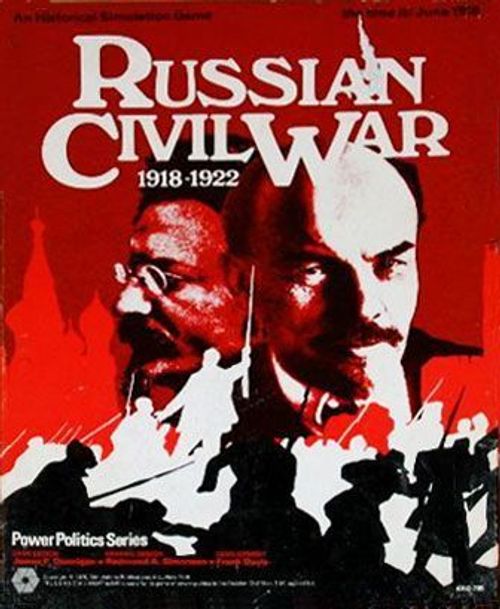
Russian Civil War 1918-1922
Russian Civil War 1918-1922 Rulebook
Table of Contents
Table of Contents
- 1.0 Introduction
- 2.0 General Course of Play
- 3.0 Game Equipment
- 4.0 Sequence of Play
- 5.0 Movement
- 6.0 Zones of Control
- 7.0 Stacking
- 8.0 Combat
- 9.0 Replacement of Combat Units
- 10.0 Assassination
- 11.0 Purge
- 12.0 Random Events
- 13.0 Imperial Units
- 14.0 Victory Conditions
- 15.0 How to Set Up and Play the Game
- 17.0 Postal Russian Civil War
- Russian Civil War Solitaire Rules
- 18.0 Terms and Definitions
- 19.0 Sequence of Play
- 20.0 Random Events Alterations
- 21.0 Movement Modifications
- 22.0 Non-Red Stacking Modifications
- 23.0 Combat Modifications
- 24.0 Leaders
- 25.0 Replacement Modifications
- 26.0 Imperial Units: Czar Execution
- 27.0 Solitaire Set-Up and Start
- 28.0 Solitaire Victory Conditions
- 29.0 Players' Notes
- Charts and Tables
1.0 Introduction
Russian Civil War is an historical simulation of the military and political conflict of 1918-1921 which abolished the Czarist regime and created the foundation of the modern Soviet Union. The basic game is designed for three to six Players, each of whom controls one or more factions among the revolutionary, counter-revolutionary, nationalist and interventionist forces which participated in the bloody, chaotic struggle to determine Russia's future.
2.0 General Course of Play
Russian Civil War is designed for three to six Players, although the optional rules included allow the game to be played by any number of Players, as well as solitaire. In the basic, multi-Player game, each Player controls a number of forces, some of which may be unfriendly to each other. In general, each Player is competing against all of the other Players throughout the game by maneuvering his forces and engaging in combat in order to enhance his ability to gain Victory Points. When the game ends, each Player's performance is evaluated by comparing the Players' Victory Points. The Player with the largest number of Victory Points is judged the winner, while the remaining Players are ranked as "runners-up."
3.0 Game Equipment
3.1 The Game Map
The 22"x34" two section mapboard depicting Russia and several neighboring states is the playing area on which the unit counters are deployed and maneuvered. The land area is divided into provinces to regularize the movement and positioning of the playing pieces and to delineate various political boundaries and terrain features as required by the game rules. To facilitate locating a given province, the provinces are grouped into Regions and each Region is distinctively coded. Other map features are explained in the appropriate rules sections.
3.2 The Playing Pieces
Differently colored sets of playing pieces (henceforth known as "units") are supplied. These units represent the military leaders and combat forces which participated in the conflict. The units are distinguished by their color, and by the numbers and symbols printed on them. Most of the units are printed on both sides. In general, the strength and type of a given unit is indicated on the front of the unit, while geographical information is indicated on the reverse side of the unit. It is strongly recommended that the Players sort the units by type and color as this greatly facilitates setting up the game.
3.21 Sample Units
Leader Unit — Identity Nr., Name, Leadership Value (e.g., Trotsky, Identity Nr. 152, Leadership Value 3).
Combat Unit — Nationality, Identity Nr., Combat Strength (e.g., BR 415, Combat Strength 2).
3.22 Summary of Unit Types
Leader Units (Red and White only) — Front: name and Leadership Value (e.g., Trotsky, 3, 152). Back: Region abbreviation (e.g., G Tver*).
Combat Units (Red, White, Blue and Green) — Front: Nationality code and Combat Strength (e.g., US 417, 2). Back: Region abbreviation (e.g., S Vlad).
Imperial Units — Front and Back: Czar.
Player Control Markers (Red, White or Blue/Green) — Front and Back: Player letter (e.g., B).
Nationalist Control Marker (Green only) — e.g., BA.
Interventionist Control Marker (Blue only) — e.g., JA.
Politburo Marker — hammer-and-sickle symbol.
Assassin Marker — pistol symbol.
Withdrawal Marker — e.g., BR Out.
3.23 Definition of Basic Terms
Combat Strength is the basic offensive and defensive power of a unit quantified in Combat Strength Points.
Leadership Value represents a given Leader's command ability in comparison with other Leaders in the game. The Combat Strength of a given Leader is equivalent to the Leadership Value of that Leader.
Purge is a game mechanic which allows a group of Players to redistribute control of the Red military and political leadership depicted in the game.
Randomizer is any wide-mouthed, opaque container in which must be distributed various units at a given time during the game. Players must supply this item themselves; a coffee cup makes a good Randomizer.
Random Events occur during the Random Events Phase and attempt to simulate the unpredictable chain of events which exerted a strong influence on the course and outcome of the Russian Civil War.
3.3 Game Charts and Tables
The game makes use of several tables to organize data into an easily retrievable form. These are the Combat Results Table, the Purge Results Table, the Random Events Table and the Victory Point Chart, all of which are printed on the map. The use of these graphic aids is explained in the appropriate rules sections.
3.4 Game Parts Inventory
A complete game should include the following parts:
- One Game Map (consisting of two 22x17 sections)
- One Set Die-Cut Counters (400 pieces)
- One Rules Folder
- Two Dice
- One Game Box with plastic tray
If any of these parts are damaged or missing, please write:
SPI Customer Service Simulations Publications, Inc. 44 East 23rd Street New York, N.Y. 10010
Questions regarding the rules (not the design) of the game will be answered if accompanied by a stamped, self-addressed envelope. Send rules questions to the above address and mark the envelope "Rules Questions: Russian Civil War." Phrase your questions so that they can be answered by a simple yes-no or one word.
4.0 Sequence of Play
4.1 The Game-Turn
Russian Civil War is played in successive turns called Game-Turns. Each Game-Turn consists of a series of Player-Turns, which is followed by a Game-Turn Interphase. The number of Player-Turns in a single Game-Turn is equal to the number of participating Players. Certain standardized functions are performed by one or more Players during the Interphase of each Game-Turn. During the Player-Turn series, the Player whose Player-Turn is in progress is called the Phasing Player. During his Player-Turn, the Phasing Player maneuvers his units and resolves combat in sequence, according to the following outline, and within the limits provided by the rules which follow. Play continues in successive Player-Turns until the Victory Conditions for ending the game are satisfied, at which time the Victory Points Schedule is consulted and a winner is determined.
4.2 Game-Turn Sequence Outline
A. PLAYER-TURN SERIES
NOTE: Each Player-Turn consists of four Phases. The actions outlined for the First Player below are repeated by each Player in the sequence determined during the Player-Turn Sequencing Segment of the preceding Interphase. Each Player is considered to be the "Phasing Player" during the four Phases which compose his Player-Turn.
FIRST PLAYER-TURN
- Random Events Phase. The Phasing Player rolls one die twice in succession and consults the Random Events Table. Subsequent action is governed by the Random Events Rules (see Section 12.0).
- Movement Phase. The Phasing Player may move all, some or none of the units he controls within the limits provided by the Movement Rules (Section 5.0).
- Combat Phase. The Phasing Player may use any of the units he controls to attack Enemy units. Combat is resolved in accordance with the Combat Rules (Section 8.0).
- Randomizer Phase. The Phasing Player picks one chit from the Auxiliary Forces Randomizer. If necessary, he should immediately deploy additional Player Control Markers to distinguish new units placed under his control (see Case 12.13).
Note: After all of the participating Players have completed a Player-Turn identical to that just described, play proceeds through a Game-Turn Interphase as outlined below.
B. GAME-TURN INTERPHASE
- Game-Turn Indication Segment. The First Player advances the Game-Turn Marker one space on the Turn Record Track to mark the passage of one Game-Turn and signal the start of another.
- Replacement Segment. The First Player (aided by the other Players) redeploys previously eliminated combat units in accordance with the Replacement Rules (see Section 9.0).
- Player-Turn Sequencing Segment. The First Player draws one marker from the Player-Turn Randomizer. The Player whose Control Marker is selected is designated the new First Player for the remainder of the current Game-Turn. The new First Player becomes the Second Player and the remaining Players are assigned a new position in the Sequence of Play by proceeding around the table in clockwise fashion.
5.0 Movement
5.1 How to Move Units
GENERAL RULE:
There are three basic types of movable units in the game: combat units, Imperial units and Leader units (henceforth referred to as "leaders"). There are no Movement Allowances printed on the unit counters. Combat units can only be moved by an accompanying Leader unit of the same color (exception: see Cases 5.6, 5.7 and 13.25). In effect, a Leader may attack and transport the otherwise immobile combat units. While Leaders have the ability to move independently, combat and Imperial units cannot. All Leaders have a Movement Allowance of five Movement Points.
PROCEDURE:
During the Movement Phase of his Player-Turn, the Phasing Player may move as many or as few of his Leaders (and any combat units they attack and transport) as he desires. Each Leader may be moved as many or as few provinces as the Player desires so long as an individual Leader's Movement Allowance is not exceeded in a single Movement Phase.
Leaders may be moved individually (in any order the Player desires), or in company with other Leaders, combat units or Imperial units. Any aggregation of units which is moved together as one stack is considered a "force." Forces must be moved one at a time. Once a force has been moved and the Player's hand withdrawn, no portion of that force may be moved again during the same Movement Phase. Unused Movement Points may neither be accumulated from Phase to Phase, nor transferred from unit to unit.
CASES:
[5.11] During the Movement Phase, only the Phasing Player's units may be moved; he may choose to move all, some or none of his units. No combat is permitted during the Movement Phase.
[5.12] Movement is calculated in terms of Movement Points. A Leader expends Movement Points from its total Movement Allowance when moving across the map, at the rate of one Movement Point for each province it enters (exception: see Case 5.5).
[5.13] A Leader may attach and/or detach any eligible combat units of the Leader's color in any province during his movement (including the province the Leader occupies at the start of his movement). Combat units moved by a Leader are considered "under the command" of that Leader; a Leader and his attached combat units are referred to as a "force." There is no additional Movement Point cost for a Leader to attach, transport or detach combat units.
[5.14] The maximum number of combat units which a Leader may attach is equal to the Leadership Value of that Leader. For example, a White Leader with a Leadership Value of "3" could attach (and transport) a maximum of three (3) White combat units (exception: see Cases 13.22 and 13.25).
5.2 Movement Inhibitions and Prohibitions
[5.21] Movement may never take place out of sequence. A Player's units may only be moved during his own Movement Phase. During all other Phases, that Player's units may not be moved.
[5.22] Red and White combat units may only be moved by a unit of the appropriate color (Red combat units are moved by Red Leaders; White combat units are moved by White Leaders. There are no Blue or Green Leaders. There are special rules which govern the movement of Blue and Green units (see Cases 5.6 and 5.7). There are also special rules which govern the movement of Imperial units (see Section 13.0).
[5.23] One Movement Point must be expended from the Movement Allowance of a unit for each province the unit enters during a Movement Phase (exception: see Case 5.5). Note: Only Red and White Leaders and Blue and Green combat units possess a Movement Allowance.
[5.24] All movement must be executed from one province to another contiguous province. Units may not skip or jump from one province to a nonadjacent province.
[5.25] Any unit which moved as part of a stack (or force) under the command of a given Leader may neither move alone nor move again under the command of a different Leader during the same Player-Turn.
[5.26] A combat unit attached to (stacked under) a given Leader may not be attached or transported by any other Leader. A Leader and its attached combat unit(s) may, however, be moved together, accompanied by other Leaders, as part of a larger force.
[5.27] A unit (or force) may freely enter or exit a province regardless of the presence of other units in the province being entered or exited. A unit (or force) may not, however, both enter and leave the same province during the same Movement Phase if the province entered is occupied by a unit of a different color than the color of the moving unit(s). A unit (or force) must immediately stop upon entering a province occupied by a different colored unit and may move no farther during that Movement Phase (exception: see Case 13.23).
[5.28] A unit (or force) may never expend more Movement Points than its total Movement Allowance in a single Game-Turn. A Player may expend all, some or none of its Movement Points in any one Game-Turn, but unused Movement Points may not be accumulated from one Game-Turn to another or transferred to another unit.
5.3 Terrain Effects on Movement
[5.31] Units are prohibited from entering Sea or Lake areas (see the Terrain Key on the map).
[5.32] White units (only) are permitted to move directly from Taurida to Kuban via the Kerch Straits.
[5.33] Units are prohibited from moving directly from Petrograd to Livonia due to the presence of Lake Pskov.
[5.34] Combat and Leader units may never be voluntarily moved off the map (exception: see Case 5.66). There are special rules governing the removal of Imperial units from the map (see Case 13.3).
[5.35] The movement of certain Blue and Green units is geographically restricted (see Cases 5.6 and 5.7).
[5.36] There are special rules governing the movement of units by Rail (see Case 5.5).
[5.37] The Cities printed on the map have no effect on game play. They are included simply as historical reference points.
5.4 Stacking Effects on Movement
[5.41] Stacking or unstacking units in the same province is considered a type of movement. There is no additional Movement Point cost involved in stacking or unstacking units; however, a Player's units may only be stacked or unstacked during his own Movement Phase. During all other Phases, that Player's units may not be voluntarily rearranged (exception: see Purge, Case 11.21).
[5.42] A force may not end a Movement Phase in violation of the Stacking Limits (see Stacking, Section 7.0).
5.5 Rail Movement
[5.51] Only Red and White units may use Rail Movement.
[5.52] A Red or White force (or Leader) which begins its Movement Phase in a province traversed by or through an unlimited number of contiguous Rail-connected provinces. Rail Movement, however, is not exempt from the restrictions of Case 5.27. Units moving by Rail must stop upon entering a province occupied by a unit of a different color.
[5.53] Rail Movement is executed during the regular Movement Phase. Rail Movement expends no Movement Points, regardless of the distance in province it permits a force to move. Rail Movement may not, however, be combined with normal overland movement during the same Movement Phase. Thus, a Red or White force may either use Rail Movement or normal overland movement, but not both during a single Movement Phase.
[5.54] The ability of a Leader to attach, transport and/or detach units is not impaired when the Leader is using Rail Movement.
[5.55] Although Rail Movement does not require the expenditure of Movement Points, combat units may only be moved by Rail by a Leader of the appropriate color.
5.6 How to Move Blue [Interventionist] Units
The Blue units represent the foreign intervention forces which participated in the Russian Civil War. A total of nine different nationalities are represented, including Germany (GE), Czechoslovakia (CZ), France (FR), Hungary (HU), Rumania (RU), Greece (GR), Japan (JA), the United States (US), and Great Britain (BR). The last seven of these nationalities are collectively referred to as the "Allies."
All Blue units are combat units; there are no Blue Leaders. Blue units are moved in accordance with the general Movement Rules as modified by the following special rules.
[5.61] There are five Blue Control Markers in the Auxiliary Forces Randomizer. One of these Markers controls each of the following Nationalities: FR (France), BR (Great Britain), US (United States), JA (Japan) and CZ (Czechoslovakia). These are gradually distributed among the Players during the Randomizer or Random Events Phase of each Player-Turn. Possession of a Blue Control Marker permits a Player to move all, some or none of the corresponding Blue combat units during the Movement Phase of his Player-Turn.
[5.62] The Blue units that lack a corresponding Control Marker, including the Hungarian (HU), Rumanian (RM) and German (GE) units, may never be moved or controlled by any Player, and thus, may never attack, although they must defend when attacked.
[5.63] Any Blue unit which may be moved possesses a Movement Allowance of three Movement Points.
[5.64] Blue units may not use Rail Movement.
[5.65] Czechoslovakian and Japanese units never enter a province outside the Siberian Region. Other movable Blue units may enter any province on the map.
[5.66] There are five Blue Withdrawal Markers at the Auxiliary Forces Randomizer. At the instant a Blue Withdrawal Marker is selected from the Randomizer, all Blue units of the corresponding nationality are permanently removed from the map. Note: If the Czechoslovakian units are removed for Victory Point purposes only from the Vladivostok province in Siberia (see Case 14.45). There is no Movement Point cost to a unit which is removed from the map for Victory Point purposes.
5.7 How to Move Green [Nationalist] Units
The Green units represent regional nationalist forces which sought independence during the Civil War. A total of seven different nationalist areas are represented, including the Baltic Provinces (BA); Byelorussia (BY); the Trans-Caucasus Region (TC); Siberia (SB); Finland (FN); and Poland (PO). NOTE: Byelorussia is designated "White Russia" on the mapboard. All Green units are combat units; there are no Green Leaders. Green units are moved in accordance with the general Movement Rules as modified by the following special rules.
[5.71] Each distinct nationalist force is represented by a Green Control Marker in the Auxiliary Forces Randomizer. Possession of a Green Control Marker permits a Player to move all, some or none of the corresponding Green combat units during the Movement Phase of his Player-Turn.
[5.72] All Green combat units have a Movement Allowance of three Movement Points.
[5.73] Green units may not use Rail Movement.
[5.74] Green units may never enter a province outside of their "home" region (exception: see Cases 5.75 and 5.76). Ukrainian units, for example, may only move within the Ukraine region.
[5.75] Finnish units may only enter the provinces: Archangel, Olonetz, Petrograd and Finland.
[5.76] Polish units may enter any province in any of the following regions: Greater Russia, White Russia, the Baltic region, or the Ukraine region. Polish units may, of course, always enter Poland. Polish units may never enter any of the following regions: the Cossack region, the Trans-Caucasus region, or the Siberia region.
6.0 Zones of Control
GENERAL RULE:
Unlike many other SPI games, the units in this game do not possess any type of "Zone of Control." A unit only influences the province it physically occupies, and to the extent of prohibiting the movement of different colored units through that province during a single Movement Phase.
7.0 Stacking
[Vertical Arrangement of Units]
DEFINITION:
Generally, the act of combining units within the same province into a single force by placing one unit on top of another is called "Stacking." Conversely, dividing a stack of combined units into its component units is accomplished by "unstacking" that force. A force composed of two or more stacked units is also referred to as a "stack."
GENERAL RULE:
During his own Movement Phase (only), the Phasing Player may reorganize his forces by stacking or unstacking any of the units he controls. Stacking or unstacking operations never expend Movement Points.
CASES:
7.1 Stacking Limitations and Prohibitions
[7.11] A single stack may contain a maximum of five combat and/or Leader units in any practicable combination. In addition, a single stack may contain one Player Control Marker and either or both Imperial units.
[7.12] Units controlled by different Players may never be stacked together.
[7.13] Different colored units may never be stacked together (exception: see Cases 7.11 and 13.25).
[7.14] Blue (or Green) units of different nationalities may never be stacked together, even if such units are controlled by a single Player.
[7.15] There is no limit to the number of stacks which may simultaneously occupy a given province.
[7.16] Units which are not controlled by any Player remain stacked as in the original deployment at the beginning of the game. Of course, such units may be disturbed to extract combat and/or epidemic losses.
7.2 Stacking Position and Unit Types
[7.21] When a combat (or Imperial) unit is attached (stacked) under a Leader, it is considered directly under that Leader. Stacked combat units directly under a given Leader are considered attached to that Leader for Movement and Combat purposes.
[7.22] The Leadership Value of a given Leader indicates the maximum number of combat units which may be attached (stacked under) that Leader (exception: see Cases 13.22 and 13.25).
[7.23] The counter mix provides six distinct sets of Player Control Markers. At the beginning of the game, one set of these Control Markers is assigned to each Player. At all times during the game, each Player uses one of his Control Markers to distinguish each unit or force (or stack) of units which he controls. This is indicated by placing a Control Marker on top of each stack. Each Control Marker possess either a Red/White or a Blue/Green color scheme. When placed on top of a force on the map, the face-up color of the Control Marker should indicate the color of the units beneath it.
7.3 Effect on Combat
[7.31] The attacker must attack all of the units in a single stack together; the Combat Strengths of all the units in a single stack are totalled, and this total Strength is attacked. Units in a single stack may not be attacked individually.
[7.32] The units in an attacking stack must participate in a single combined attack; the Combat Strengths of all of the units in an attacking stack are combined into a total Attack Strength. Units in a single stack may not attack individually nor may any unit in an attacking stack be withheld from the attack or its results.
[7.33] The units in two or more stacks may combine their Combat Strengths to attack a single defending stack as long as the restrictions of Section 8.0 are not violated.
[7.34] Separate stacks may not be combined in defense. Each stack in a given province must be attacked separately.
8.0 Combat
COMMENTARY:
The following Combat Rules introduce what is probably the most unusual aspect of Russian Civil War; the concept of a single Player controlling two or more mutually hostile forces. A given Player, for example, will probably control both Red and White units capable of attacking one another. This seemingly paradoxical combat becomes logical after a careful study of the Victory Conditions in Section 14.0. Basically, a Player gains Victory Points for each unit he eliminates in combat during the game. However, a given Player's Victory Point total is modified by the overall outcome of the game. Thus, a Player may ultimately benefit by selectively attacking his own units with other units he controls. In order to avoid initial confusion, we emphasize the tactic of attacking one's own units is entirely permissible. Of course, attacking opposing units controlled by other Players is also allowed.
GENERAL RULE:
During the Combat Phase, combat may occur between any units controlled by the Phasing Player and any opposing units which occupy the same province, at the option of, and in any sequence selected by, the Phasing Player. When resolving any combat which the Phasing Player elects to execute, the units of the Player being used as the attacker and the Phasing Player is considered the attacker. Units which are attacked by the Phasing Player must defend. These units may be defended by any Player (including the Phasing Player himself). The Player who controls the defending units is considered the defender. Note that when a Player attacks his own units with opposing units which he also controls, the Phasing Player is considered to be both the attacker and the defender.
PROCEDURE:
Total the Combat Strength Points of all attacking units involved in a specific attack (against the same defending unit or stack of defending units). Compare this total to the total Combat Strength of all the defending units which are the object of that specific attack. State the comparison as a ratio: Attacker's Strength to Defender's Strength. Round off the ratio in favor of the defender to conform to the simplified odds found on the Combat Results Table. Example: If thirteen Strength Points were attacking four, the combat odds ratio would be 3.25 to 1, rounded off (always in favor of the defender) to three to one. The attacker then rolls the die. The result indicates a line on the Combat Results Table (8.5), which is cross-indexed with the column representing the combat ratio (or odds). The intersection of line and column yields a combat result. This result should immediately be applied to the involved units, before going on to resolve any other combat. Units which are eliminated in combat are immediately removed from the map by the Owning Player and placed in the appropriate box on the Victory Point Chart (14.5).
CASES:
8.1 Definition of Opposing Forces
[Friendly and Enemy Units]
[8.11] Units are opposed to one another strictly on a color basis. Units which are opposed to each other are mutual enemies, even if controlled by a single Player. Units which are not opposed are considered Friendly to each other, even if controlled by different Players.
[8.12] Red units oppose all non-Red units.
[8.13] White units oppose Red and Green units (only).
[8.14] Green units oppose Red and White units (only).
[8.15] Blue units oppose only Red units.
8.2 Which Units May Attack
[8.21] During a Combat Phase, only units which are controlled by the Phasing Player may participate in attacks. The non-Phasing Players' units may not participate in an attack during a Combat Phase.
[8.22] Units may only attack opposing (Enemy) units. Friendly units of different colors may combine their Combat Strengths to attack a unit which is their common Enemy. For example, White and Green units may combine to attack a Red unit. No unit, however, may participate in an attack against a Friendly unit.
[8.23] Only units which occupy the same province as an opposing Enemy unit (or stack) may participate in an attack against that Enemy unit. No combat is permitted except between opposing units which occupy the same province during a Combat Phase (exception: see Case 8.3).
[8.24] Attacking is completely voluntary. The Phasing Player's units are never compelled to attack opposing units which occupy the same province.
[8.25] No unit may attack or be attacked more than once during a single Combat Phase.
[8.26] For Combat purposes, a Leader has a Combat Strength equal to its Leadership Value. A Leader with a Leadership Value of "3" possesses three Combat Strength Points for either attack or defense. Leaders are eliminated exactly like combat units.
[8.27] A unit's Combat Strength is indivisible; it may not be apportioned to more than one attack.
[8.28] Red and White combat units may only participate in attacks when attached to a Leader. Red and White combat units defend normally when not attached to a Leader.
[8.29] The Phasing Player may freely examine the counters of any force or stack on the map at any time during his Player-Turn. Examination of a given force does not obligate the Phasing Player to attack that force.
8.3 Subversive Attack
Subversive Attack is a special type of combat which represents the demoralizing effect of revolutionary propaganda which the Reds employed against various Interventionist forces. The use of Subversive Attacks is governed by the general combat rules as modified by the following Cases.
[8.31] A Subversive Attack may only be made by Red units which are in one or more provinces adjacent to a province occupied by a Blue unit. For Subversive Attack purposes, any two provinces are considered adjacent if they share a common border, which is passable by units during a Movement Phase. Red units must not employ a Subversive Attack against Blue units which occupy the same province as the attacking Red units.
[8.32] Red units in different provinces may combine their Combat Strengths for subversive attacks. Red units, however, that all Red units which participate in a Subversive Attack must occupy a province which is adjacent to the attacked Blue unit(s).
[8.33] Subversive Attacks are resolved according to the normal Combat procedure (see 8.0). Combat results, however, are interpreted differently when resolving a Subversive Attack (see below):
- "Ae" and "Ex" results have no effect on either the Red and Blue units involved.
- A "De" result eliminates all Blue defending units exactly as in normal combat.
8.4 Explanation of Combat Results
[8.41] "Ae" = Attacker Eliminated: All attacking units which participated in the combat are eliminated.
[8.42] "De" = Defender Eliminated: All defending units involved in the combat are eliminated.
[8.43] "Ex" = Exchange of Losses: The total Attack Strength involved in the combat is compared to the total Defense Strength. The units which comprise the smaller total (either all the attacking units or all the defending units) are totally eliminated. Then, at least an equal number of Combat Strength Points are eliminated from the opposing force.
[8.44] Units eliminated in combat are removed from the map by the Owning Player. When part of a force is eliminated due to an "Ex" combat result, the Owning Player may select which units to lose, but he may not rearrange or alter the composition of stacked forces after deducting the proper number of eliminated Strength Points.
[8.45] Defending units eliminated in combat are removed from the map and immediately placed on the Victory Point Chart (14.5) in the section corresponding to the attacking Player. Attacking units eliminated in combat are removed from the map and immediately placed on the Victory Point Chart in the section corresponding to the defending Player. Note that when a Player attacks his own units with opposing units which he also controls, the eliminated units are placed in his own section of the Victory Point Chart.
EXAMPLE: Player A (the Phasing Player) resolves an attack in which ten Strength Points which he controls attacks five Strength Points controlled by Player B. An "Ex" combat result occurs. All five Strength Points controlled by Player B are removed from the map and immediately placed on the Victory Point Chart in the section designated "A" (the section which corresponds to Player A). Player A then eliminates five Strength Points from his force of ten Strength Points, and places the eliminated units on the Victory Point Chart in the section designated "B."
[8.46] Attacking units eliminated in combat against a unit (or stack) which is not controlled by any Player are removed from the map and placed in the "unassigned" section of the Victory Point Chart. If an uncontrolled force is eliminated due to an "Ex" combat result, the attacking Player chooses which of the opposing units are eliminated.
[8.47] No attack may be made at less than 1:2 odds.
[8.48] An attack made at greater than 6:1 odds is resolved as though the attack were actually 6:1. In all other instances, a Player must resolve his attacks at the actual computed odds.
8.5 Combat Results Table
(See the map — reproduced in the Charts and Tables section below.)
9.0 Replacement of Combat Units
GENERAL RULE:
During the Replacement Phase of each Game-Turn, all eligible combat units which were previously eliminated by either combat or epidemics are removed from the Victory Point Chart and replaced on the map in the appropriate province and region (indicated by the province and region code printed on the unit). Replaced combat units may not be stacked with another unit when first returned to the map. In all other respects, replaced units are treated like any other combat unit. Previously eliminated combat units which have earned Victory Points for a Player are not replaced due to the restrictions of the following Cases; the remaining units stationed on the Victory Point Chart.
CASES:
9.1 Which Units May Be Replaced
[9.11] Only Red, White and Green combat units may be replaced. Leaders, Imperial units and Blue units may never be replaced.
[9.12] During the Replacement Phase of each Game-Turn, Players should examine each combat unit on the Victory Point Chart and its corresponding province. A unit may not be replaced during the Replacement Phase if its corresponding province is occupied by an opposing unit (see Case 8.1), unless the province is also occupied by at least one combat unit of the same color as the replacing unit. For example, if the Don Cossack province in the Cossack region on the map was occupied by either a Red or Green unit, the Don Cossack combat unit (identity #212) could only be replaced if: A) it was on the Victory Point Chart; and B) the Don Cossack province was occupied by White Leader or combat unit.
[9.13] Red combat units may never be replaced during a Replacement Phase if either Tver or Petrograd (both provinces in Greater Russia) is occupied by a non-Red unit, unless the Enemy-occupied province(s) is also occupied by at least one Red unit. EXAMPLE: No Red combat units could be replaced if during the Replacement Phase, a Green, White or Blue unit occupied Petrograd and there were no Red units in Petrograd.
[9.14] No Red combat units may never be replaced during the first Replacement Phase which occurs after either Lenin (identity #151) or Trotsky (identity #152) is eliminated by combat or Assassination. Note: If Lenin and Trotsky are both eliminated during the same Game-Turn, Red replacements are suspended for two full Game-Turns (i.e., no Red combat units could be replaced for two consecutive Replacement Phases).
[9.15] Combat units of a given color (either Red or White) may never be replaced after all of the Leaders of that color have been eliminated.
[9.16] No units may be replaced after the Fifth Game-Turn.
[9.17] During the Replacement Phase, all replacements are assumed to occur simultaneously. Thus, for example, a White unit being replaced in Kharkov does not prohibit a Green unit from being replaced in Kharkov during the same Replacement Phase.
[9.18] A given combat unit may never be replaced each and every Game-Turn as long as its replacement would not violate any of the restrictions of Case 9.1.
10.0 Assassination
COMMENTARY:
Assassin Markers, representing individual terrorist or assassin conspiracies, are used in the following Assassination Rules. During the game, Assassin Markers are distributed among the Players either on the First Game-Turn or during the Randomizer or Random Events Phase of each Player-Turn. Assassin Markers are never placed on the map. A Player indicates that he controls an Assassin Marker by placing it in his section of the Victory Point Chart. Assassin Markers may be freely traded among Players at any time during the game by simply repositioning the Marker on the Victory Point Chart. Such a trade is the result of a mutual agreement by the Players involved.
GENERAL RULE:
At any time during his Player-Turn, the Phasing Player may attempt to assassinate any Leader which occupies the same province as a Leader controlled by the Phasing Player. The Phasing Player must expend at least one Assassin Marker for each assassination attempt he makes.
PROCEDURE:
If the Phasing Player controls at least one Assassin Marker, he may attempt to assassinate and the assassination attempt is resolved. In order to resolve an assassination attempt, the Phasing Player rolls two dice. If only one Assassin Marker is being employed in the attempt, the dice total obtained is immediately compared to the Leadership Value of the Leader whose assassination is being attempted. If two or more Assassin Markers are utilized in the attempt, the total obtained by rolling two dice is raised by one integer for each additional Assassin Marker employed in the attempt. In either case, the Leadership Value of the "victim" Leader is then subtracted from the modified total of the dice throw. If the final result is "7" or greater, the assassination attempt is successful. If the result is less than "7," the assassination attempt fails.
EXAMPLE: The Phasing Player attempts to assassinate a Leader with a Leadership Value of "3" and he employs three Assassin Markers in the attempt. The total he obtains by rolling two dice is "7." This total is raised by two (2) because two additional Assassin Markers are being employed. Thus, the modified dice total is "9." When the Leadership Value of the intended "victim" is subtracted from the modified total, the result is "6." The assassination attempt is unsuccessful.
CASES:
10.1 Assassination Limitations and Prohibitions
[10.11] A Player may only attempt an assassination during his own Player-Turn.
[10.12] A Player must control at least one Assassin Marker to attempt an assassination. At least one Assassin Marker must be expended for each assassination attempt made (see Cases 10.22 and 10.23).
[10.13] The Leader whose assassination is attempted, must occupy a province which is also occupied by a Leader controlled by the Phasing Player. Only Leaders on the map may be assassinated. The Czar may not be assassinated (see Case 13.5).
[10.14] The color of Leader units involved in an assassination attempt has no effect. For example, the Phasing Player may attempt to assassinate a Red Leader in a province occupied by either a Red or a White Leader which he controls.
[10.15] A Player may attempt to assassinate a Leader which he himself controls (in which case he must have another Leader present in that same province).
[10.16] An unlimited number of Assassin Markers may be employed in any single assassination attempt.
[10.17] An unlimited number of assassination attempts may be made against a given Leader during a single Player-Turn. Each attempt, however, must be resolved separately according to all the restrictions of Case 10.1.
10.2 Effect of Assassination
[10.21] A Leader who is the victim of a successful assassination attempt is permanently eliminated. The Phasing Player should immediately remove the Leader from the map and place it in his section of the Victory Point Chart. A Leader who survives an unsuccessful assassination attempt remains in play on the board.
[10.22] All Assassin Markers employed in a successful assassination are immediately removed from the Victory Point Chart and transferred to the Auxiliary Forces Randomizer by the Phasing Player.
[10.23] All Assassin Markers employed in an unsuccessful assassination attempt are repositioned on the Victory Point Chart in the section belonging to the Player who controls the Leader whose assassination was attempted. These Markers are now considered under his control and he may trade them in any fashion he chooses.
11.0 Purge
COMMENTARY:
In Russian Civil War, the Purge Rules permit the Players to decisively influence the course of the game through diplomatic interaction. Basically, any Player, or group, which controls the majority of Red political power may use the Purge mechanic to threaten other Players to do his bidding and punish a disobedient Player by "purging" his Red Leaders, thus removing them from his control. Purge may also be used to "purify" a pro-White Player of his Red Leaders.
Politburo Markers, representing the major political figures who directed the Red war effort, are used in the following Purge Rules (see also Case 13.5). Politburo Markers are distributed among the Players on the First Game-Turn. Politburo Markers are never placed on the map. A Player indicates he controls a Politburo Marker by placing the Marker in his section of the Victory Point Chart. Politburo Markers may be freely traded among Players at any time by simply repositioning the Marker on the Victory Point Chart. Such a trade is the result of a mutual agreement by the Players involved.
GENERAL RULE:
At any time during the Player-Turn series of a Game-Turn, a Purge may be conducted by the members of the Central Committee of the Politburo against any Player who is not a member of the Central Committee (see Case 11.1). The Committee members may combine their strengths and use the combined strength to Purge a single Player who is not a member of the Committee. Alternatively, each Committee member may use his own strength to resolve a separate Purge against any Player who is not a member. A given Player may be Purged more than once in a Game-Turn, however, no Player may participate in more than one Purge per Game-Turn. A Player who is a member of the Committee and participates in a Purge against a Player who is "Purged."
PROCEDURE:
All other game functions are temporarily suspended when the Central Committee members declare a Purge. If the Central Committee wishes to Purge as a group, it must first collectively agree on which non-Committee Player will be Purged and how the results of the Purge will be distributed among the Committee members. If the Committee members cannot unanimously agree on how to resolve these matters, each Committee member must Purge individually. If the Committee members Purge individually, their Purges are resolved in the same order in which the Player-Turns occur during the current Game-Turn.
Once the Committee as a whole, or the individual Purging Player, declares which Player is being Purged, the Leadership Values of all Red Leaders that are controlled by the Purging Player(s) are totalled. Next, the total number of Politburo Markers controlled by the Purging Player(s) is added to the Red Leadership total. The result, known as the Purge Strength, corresponds to a vertical column on the Purge Table (Case 11.4).
The Purging Player (or a member chosen by the Committee) rolls two dice and totals their face values. This result determines a horizontal line on the Purge Table. The Purge is resolved by immediately applying the result indicated where line and column intersect on the Purge Table according to the Explanation of Purge Results detailed in Case 11.2. After the Committee's Purge(s) and any resulting Counterpurge(s) are completely resolved, the normal play routine is resumed immediately.
CASES:
11.1 Constitution of the Central Committee
[11.1] Any individual, or group of Players, who collectively control at least eight (8) Politburo Markers and who unanimously consent to each other's membership on the Committee, constitutes the Central Committee of the Politburo for Purge purposes.
[11.12] The only effective course of action by which an individual member can object to a policy adopted by the other members of the Central Committee is to withdraw his own membership. After such a withdrawal, remaining Committee members cannot fully satisfy the requirements of Case 11.11, the Central Committee is considered dissolved and may not function for Purge purposes.
[11.13] The Central Committee may be reformed according to the requirements of Case 11.11 any number of times in a single Game-Turn. No Player, however, may participate in more than one Purge in a single Game-Turn. A Player may participate in more than one Counterpurge in a single Game-Turn (see Case 11.24).
[11.14] A Player may never be Purged while he is a member of the Central Committee. A Committee member, however, may be Counterpurged.
11.2 Explanation of Purge Results
[11.21] Number result: The Purging Player(s) may immediately take control of the indicated number of Red Leadership Points controlled by the Player who was Purged. The Purging Player(s) chooses which Red Leaders it wants as long as the total Leadership Value of the chosen Leaders does not exceed the numbered result on the Purge Table. The Purging Player simply removes the Purged Player's Control Marker from the chosen Leader(s) and replaces it with one of his own Player Control Markers (see Case 7.23). Combat and/or Imperial units attached to a "Purged" Leader remain unaffected (i.e., a "Purged" Leader retains control of such units). If a portion of a stack is controlled by one Player and by another, the stack is immediately divided into two forces, and each Player places his Player Control Marker on top of the force he controls. Note: White Leaders and Red Leaders on the Victory Point Chart may never be Purged (see also Cases 11.22 and 11.23).
EXAMPLE: Player A Purges Player B and obtains a Purge result of two (2). Player A may immediately take control of either one Red Leader which possesses a Leadership Value of "2," or two Red Leaders, each of which has a Leadership Value of "1." Of course, the chosen Leader(s) must have been controlled by Player B prior to the Purge.
[11.22] Instead of taking control of a Red Leader, a Purging Player may take a Politburo Marker from a Purged Player. However, each Politburo Marker "costs" the equivalent of two (2) Red Leadership Value Points. Thus, in the example given in Case 11.21, Player A could have taken one Politburo Marker from Player B (assuming Player B possessed it) when taking control of any Red Leadership Value Points. When a Politburo Marker is "Purged" it is simply repositioned on the Victory Point Chart.
[11.23] When the Central Committee Purges as a group, it must unanimously agree beforehand how any successful "Purged" Points will be divided. Once the dice roll is executed to resolve the Purge, this agreement is considered binding upon all of the members of the Committee. The members may not alter this agreement in any manner once the Purge resolution die roll is executed. Successfully "Purged" Points must then be distributed according to the original agreement to the greatest possible extent.
EXAMPLE: Players A, B and C unanimously agree beforehand to Purge Player D and divide any successfully Purged Points as equally as possible, in alphabetical order. The Purge result indicates the number "2." This result is effected as follows: Players A and B each take control of one of Player D's Red Leaders (each of whom possesses a Leadership Value of "1"). Player C gains nothing. Note: Due to their original agreement, neither Player A or B could take control of another of Player D's Politburo Markers because a more equitable distribution was not possible.
[11.24] "C" result (Counterpurge): The Player being Purged (or Counterpurged) may immediately Counterpurge the Purging Player (or any member of the Central Committee if it is conducting a joint group Purge). The Counterpurging Player follows the regular Purge procedure, except in determining his Purge Strength he doubles the number of Politburo Markers he controls (also see Cases 11.25 and 11.26).
[11.25] Once a Counterpurge begins, a maximum of two Players may be involved; the Counter-purging Player and only one of the original Purging Players.
[11.26] A Purge may result in any number of Counterpurges, which may continue until a number result is obtained by one of the involved parties. When this occurs, the original Player is never forced to Counterpurge. If a Player declines an opportunity to Counterpurge, the original Purge is considered resolved. Note: A Player is never forced to Counterpurge, the original Purge initiated by that Player is considered resolved.
EXAMPLE: A Counterpurge result is obtained when the Central Committee (composed of Players A, B and C) Purges Player D in a joint group Purge. Player D elects to Counterpurge Player A (only). Henceforth, no Player other than Player A or D may Purge or be Purged.
[11.27] Any result gained in a Counterpurge is exempt from the intent of Case 11.23. If a Central Committee member conducts a successful Counterpurge, he is not obligated to divide the result according to the original agreement.
11.3 Special Politburo and Purge Restrictions
[11.31] Only Red Leaders on the map and Politburo Markers on the map may be "Purged." White Leaders and Red Leaders on the Victory Point Chart may never be Purged.
[11.32] If either Lenin (I.D.#151) or Trotsky (I.D.#152) is eliminated, the Player who controlled that Leader must immediately sacrifice one Politburo Marker and immediately placed in the Auxiliary Forces Randomizer. If the concerned Player has no Politburo Markers at the time, this rule should be ignored.
11.4 Purge Table
(See the map — reproduced in the Charts and Tables section below.)
12.0 Random Events
COMMENTARY:
The Russian Civil War was a chaotic struggle distinguished by (usually) brief foreign interventions, the wavering loyalties of various involved forces, and a casualty toll of more than 25 million, mostly attributable to disease, starvation and other non-battle causes. The Random Events Rules attempt to simulate the unpredictable chain of events which exerted an exceptionally strong influence on the course of the Russian Civil War.
GENERAL RULE:
During the Random Events Phase of his Player-Turn, the Phasing Player rolls one die twice in succession; the first die roll determines which horizontal line is read on the Random Events Table (12.2), while the second die roll corresponds to a vertical column on that Table. The result indicated where line and column intersect is read aloud by the Phasing Player and then immediately effected according to the Explanation of Random Events (Case 12.1).
CASES:
12.1 Explanation of Random Events Table Results
[12.11] Epidemic: An Epidemic result indicates one or more provinces as being currently disease-ridden. The Phasing Player must immediately remove the strongest combat unit in each Red, Green and White stack in each of the indicated provinces. The removed units should be placed in the "Unassigned" section of the Victory Point Chart. The combat unit removed from each stack in a diseased province should be the unit with the largest Combat Strength. If two or more units have equal Strengths (and there is no weaker unit in the stack), the topmost unit in the stack is removed. Blue combat units, Imperial units and Leaders are never affected by an Epidemic. The Epidemic cannot affect units which enter a diseased province after the Random Events Phase. Only units in a province during the Random Events Phase are affected by an Epidemic which occurs during that Phase. Note: As an aid for locating an Epidemic province during any Game-Turn, each province name is shaded the same color as the Region in which it is located.
[12.12] Subversive Attacks Doubled. During the Combat Phase of the current Player-Turn (only), the Combat Strengths of all Red units participating in Subversive Attacks are doubled (see Case 8.3).
[12.13] Draw from the Randomizer. The Phasing Player must immediately pick one chit from the Auxiliary Forces Randomizer. He then takes the action explained below, according to the type of chit which was drawn.
-
Assassin Marker: The Player simply places the Marker in his section of the Victory Point Chart. This Marker may be used as explained in Section 10.0.
-
Blue (Interventionist) or Green (Nationalist) Control Marker: The Player places the Marker in his section of the Victory Point Chart. Next, he places an appropriately colored Player Control Marker on each unit or force corresponding to the drawn Marker (see Cases 5.61, 5.71 and 7.23). Note: If a Player draws a Blue Control Marker corresponding to a force which was previously withdrawn or totally eliminated earlier in the game, the Player may immediately draw again. Conversely, if a Player draws a Green Control Marker corresponding to a force which was previously totally eliminated, he is not entitled to a substitute draw.
-
Blue (Interventionist) Withdrawal Marker: The Player immediately removes all of the corresponding Blue combat units from the map (excluding units on the Victory Point Chart). These units, along with the corresponding Withdrawal Markers should be permanently removed from play (they are not placed on the Victory Point Chart). Note: If a Player draws a Withdrawal Marker and the corresponding force was totally eliminated earlier in the game, the Player may immediately draw a different chit from the Randomizer.
12.2 Random Events Table
(See the map — reproduced in the Charts and Tables section below.)
13.0 Imperial Units
GENERAL RULE:
There are two Imperial units: the Czar and the Imperial Gold Reserve (hereafter called "the Gold"). The Czar is initially deployed under the Red combat unit in Ekaterinburg (in western Siberia). The Gold is initially deployed under the White combat unit in Omsk (directly east of Ekaterinburg). Special rules governing the movement, capture and elimination of the Imperial units are contained in the following Cases.
CASES:
13.1 How to Move the Imperial Units
[13.11] Neither the Czar nor the Gold has any intrinsic Movement Allowance. These units only be moved by being attached to and transported by a force which possesses a Movement Allowance (i.e., a Red or White force containing a Leader, or any Blue or Green units.)
[13.12] Regardless of color, any force which possesses a Movement Allowance may attach, transport and detach an Imperial unit. Such a force expends no additional Movement Points to attach, transport or detach an Imperial unit.
[13.13] The Player whose Player Control Marker is stacked above a given unit is considered "in control" of that unit. If there is no Player Control Marker above it, that Imperial unit is under no Player's control.
[13.14] During his Movement Phase, the Player may attach an Imperial unit to any eligible unit or force which he controls. A Player may only attach or detach an Imperial unit during his own Movement Phase. A Player may never detach an Imperial unit from a force which he does not control.
[13.15] If the Phasing Player controls any two of the forces which occupy the same region, he may transfer an Imperial unit between any two of the forces which occupy the same region by first detaching it from its original force and then attaching it to a second force. An Imperial unit may not be transferred in this manner if it was previously moved in the Movement Phase.
13.2 Benefits for Controlling Imperial Units
[13.21] The Leader stacked directly above an Imperial unit is considered "in control" of that Imperial unit. An Imperial unit is considered to be the same color as the unit which controls it; any combat units are stacked beneath the Imperial unit, which itself is stacked directly under the Leader.
[13.22] A White Leader which controls the Czar may attach two (2) additional White combat units for both movement and combat purposes. Thus, a White Leader with a Leadership Value of "2" could attach a total of four (4) White combat units while that Leader controlled the Czar. Note: A Player may not violate Case 7.11 to take advantage of this rule.
[13.23] A White force which controls the Czar may freely move through a province occupied solely by Blue and White units (or solely by Blue units) without being required to stop in accordance with Case 5.27.
[13.24] A non-White Leader or force derives no special benefit for controlling the Czar.
[13.25] A Red or White Leader which controls the Gold may attach two additional combat units. These combat units may be of either of two colors — the Leader's color or Green. If the Leader attaches combat units of its own color, the Owning Player may not violate either Case 5.26 or 7.11.
[13.26] If a Leader which controls the Gold attaches any Green combat units, the Owning Player is allowed to violate Case 5.26 in the following manner: Any Green combat unit, regardless of its control status, may be attached by a Leader which controls the Gold, including Green combat units controlled by any other Player. Note that units attached to a Leader which controls the Gold are considered to be of the color of that Leader for all purposes, except they may not be moved in violation of Case 5.74. Note also that when a Player gains a Nationalist Control Marker, he may not assume control of a corresponding Green combat unit if it is controlled by another Player. Finally, note that Green combat units may not be attached to a Leader in violation of Case 7.11.
[13.27] A Finnish or Polish unit may never be attached by a Red or White Leader.
[13.28] A Blue or Green force derives no special benefit for controlling the Gold.
[13.29] At the instant a Leader loses control of an Imperial unit, it also forfeits any special benefit it derived from controlling that Imperial unit.
13.3 Emigration of Imperial Units
[13.31] During his Movement Phase, the Player who controls an Imperial unit may remove it from the map for Victory Point purposes (see Case 14.46). The Player simply removes the Imperial unit from the map and places it in his section of the Victory Point Chart.
[13.32] An Imperial unit may only be removed from Victory Point purposes from a province which possesses a Port (indicated by an anchor symbol printed on the map).
[13.33] There is no Movement Point cost to remove an Imperial unit for Victory Point purposes.
[13.34] Once an Imperial unit is removed from the map, it is permanently out of play for all purposes, except Victory Conditions.
13.4 How Imperial Units Are Captured
[13.41] If all of the combat and/or Leader units stacked with an Imperial unit are eliminated in combat, any eligible unit from the opposing force may immediately attach the Imperial unit. If no combat unit or Leader is stacked with an Imperial unit, an Imperial unit is captured in this manner, the new owner should immediately replace the former owner's Player Control Marker with one of his own.
[13.42] An Imperial unit may never be stacked alone with a Player Control Marker. If no combat unit or Leader is stacked with an Imperial unit, the Player is free to attach it to an eligible unit or force which he controls.
13.5 Execution of the Czar
[13.51] The Czar may never be eliminated by combat, epidemic or assassination. The Czar may only be eliminated by execution by order of the Central Committee of the Politburo (see Case 11.1).
[13.52] To order the Czar's execution, the Central Committee must have the expressed consent of the Player(s) who collectively control at least ten Politburo Markers.
[13.53] The Central Committee may order the Czar's execution at any time the Czar is controlled (attached to) a Red Leader.
[13.54] The Player who controls the Czar at the instant the execution order is given must choose whether or not he will comply. If he wishes to comply, he simply removes the Czar counter from the map and places it in his section of the Victory Point Chart. If he does not wish to comply, he simply leave the Czar on the map under his control. (Of course, by not complying, he is risking a retributive Purge by the Central Committee.)
[13.55] If the Player who controls the Czar complies with an execution order, he is awarded Victory Points if the game ends in a Red Victory (see Case 14.0).
[13.56] Once "executed," the Czar is permanently out of the game.
[13.57] The Central Committee may issue an execution order whenever the requirements of Cases 13.52 and 13.53 are satisfied. There is no limit to the number of execution orders which the Central Committee may issue.
14.0 Victory Conditions
GENERAL RULE:
A completed game of Russian Civil War results in either a Red or White victory (see Case 14.1). If the game results in a Red victory, each Player totals the number of Red Victory Points he received according to the Victory Point Schedule (Case 14.4). The Player who possesses the greatest number of Red Victory Points is considered the winning Player and the remaining Players are ranked as "runners up" according to their respective Red Victory Point totals. If the game results in a White victory, the same procedure is followed, however, the Players are ranked according to their respective White Victory Point totals. Note that only Red Victory Points are awarded when the game ends in a Red Victory, and only White Victory Points are awarded when the game ends in a White Victory. The Victory Points pertaining to the defeated color are simply ignored.
CASES:
14.1 How the Game Is Ended
There is no limit to the number of Game-Turns which may be played in a game of Russian Civil War. However, the game must be immediately ended when any of the following conditions are met at the end of a Game-Turn.
-
The game results in a White Victory at the end of any Game-Turn when there are no Red Leaders remaining on the map, other than those on the Siberian provinces or on the Victory Point Chart.
-
The game results in a Red Victory at the end of any Game-Turn when there are no White combat units remaining on the map, other than those on the Siberian provinces or on the Victory Point Chart.
-
The game results in a Red Victory at the end of any Game-Turn if there are no White Leaders remaining on the map (excluding Leaders in Siberia or on the Victory Point Chart), and an agreement is expressed by Players who collectively control at least (10) ten Politburo Markers to end the game. If the required quorum to end the game cannot be found, the game is continued until ended by Condition #1 or #2 (above).
14.2 Player Participation
[14.21] A Player who wishes to leave the game may do so at any time. Obviously, once a Player quits the game, he is no longer eligible for Victory Points. At the end of the game, his Victory Points are simply ignored.
[14.22] If a Player quits before the completion of the game, all Red and White Leader and combat units controlled by that Player become incapable of movement or attack for the remainder of the game. In all other respects, these units are governed by the standard game rules.
[14.23] When a Player quits the game, all Politburo, Assassin and Blue or Green Control Markers belonging to that Player are immediately placed in the Auxiliary Forces Randomizer.
[14.24] When a Player leaves the game before completion, his Player-Turn is entirely deleted from the Sequence of Player for the remainder of the game.
14.3 Turn Record Track
Only the first five Game-Turns are recorded on the Turn Record Track printed on the map. The game continues beyond the fifth Game-Turn, the Game-Turn Marker is simply returned to the beginning of the Turn Record Track. Note that no combat units may ever be replaced after the Replacement Segment of the Fifth Game-Turn.
14.4 Victory Points Schedule
At the end of the game, Victory Points are awarded to each Player for the units he controls either on the map or on his section of the Victory Point Chart (as restricted by Cases 14.41 through 14.47). The Victory Point value of any eligible combat unit is equal to the unit's Combat Strength. The Victory Point value of an eligible Leader unit is equal to the Leadership Value of that Leader unit. A Player receives five (5) Victory Points for each eligible Imperial unit he controls at the end of the game. A Player receives two (2) Victory Points for each eligible Politburo Marker he controls at the end of the game. NOTE: In the event of a Red Victory, only Red Victory Points are awarded. In a White Victory, only White Victory Points are awarded.
CASES:
[14.41] Red Victory Points are awarded to each Player for each of the following units that are controlled by the Player on his section of the Victory Point Chart at the end of the game: Red Leaders; White combat units; Blue combat units; Green combat units; Politburo Markers; or the Czar (see Case 14.46).
[14.42] Red Victory Points are awarded to each Player for each of the following units he controls on the map at the end of the game: Red Leaders; Red combat units; or the Imperial Gold.
[14.43] White Victory Points are awarded to each Player for each of the following units he controls on his section of the Victory Point Chart at the end of the game: Red Leaders; Red combat units; Green combat units; Czechoslovakian (Blue) combat units; or Imperial units (see Cases 14.45 and 14.46).
[14.44] White Victory Points are awarded to each Player for each of the following units he controls on the playing area of the game map at the end of the game: White Leaders; White combat units; or Imperial units.
[14.45] When a Czechoslovakian (Blue) combat unit is voluntarily removed from the map in accordance with Case 5.66, it is placed face-down on the Victory Point Chart. Conversely, when a Czechoslovakian combat unit is eliminated, it is placed face-up on the Victory Point Chart. White Victory Points are awarded only for face-down Czech units. Red Victory Points are awarded only for face-up Czech units.
[14.46] When an Imperial unit is voluntarily removed from the map in accordance with Case 13.3, it is placed face-down on the Victory Point Chart. Conversely, if the Czar is executed in accordance with Case 13.5, it is placed face-up on the Victory Point Chart. White Victory Points are awarded only for face-down Imperial units. Red Victory Points are awarded for the Czar only if it is face-up on the Victory Point Chart.
[14.47] No Victory Points are awarded for any unit except as specifically described in Cases 14.41 through 14.46.
14.5 Victory Points Chart
(See the map.)
15.0 How to Set Up and Play the Game
GENERAL RULE:
Russian Civil War is designed for three to six Players, although the included optional rules allow the game to be played by any number of Players either "in person" or via postal play. As there is only one basic Scenario, the following Initial Set-Up and Preparation for Play Rules are always used to start the game, regardless of the number of participating Players.
CASES:
15.1 Setting Up the Game Equipment
[15.11] Place the map on a large, smooth table and arrange seating in any manner that will comfortably accommodate all of the participating Players.
[15.12] Place the game box, with the counters sorted by color and type in the compartmented tray, near one end of the map and the rules booklet at the other end.
[15.13] Provide two wide-mouthed, opaque containers (such as coffee cans). One of these will serve as the Player-Turn Randomizer throughout the game; the second container will initially serve as the Initial Forces Randomizer. After the Initial Forces are distributed among the Players, the same container will be used as the Auxiliary Forces Randomizer for the remainder of the game. All units placed in the Randomizers should be thoroughly mixed before any unit is withdrawn from the container. Players should divert their eyes when drawing from a Randomizer.
15.2 Preparation of the Randomizers
[15.21] One Player Control Marker bearing a unique alphabetical code is selected from the game box to represent each of the participating Players. These Markers are then placed in the Player-Turn Randomizer. Each Player should then take one full set of Player Control Markers (35 counters) and place it in a convenient location off the map. Each participating Player should now have one set of Player Control Markers, each bearing a unique alphabetical code. One Marker from each Player's set has been assigned to the Player-Turn Randomizer. Henceforth, for the purpose of rules clarity, a given Player will be referred to according to the alphabetical code of his Player Control Markers. NOTE: No changes are required in the game rules if there are more or less than six participating Players, however, each additional Player will require a "homemade" set of Player Control Markers.
[15.22] The Initial Forces Randomizer is prepared for play by Player A who places a total of sixty-five (65) counters in the Initial Forces Randomizer as follows: 30 Red Leaders, 20 White Leaders, 13 Politburo Markers and two Assassin Markers. (Note: All of the Red and White Leaders should be placed in the Initial Forces Randomizer.)
[15.23] After all of the units in the Initial Forces Randomizer have been distributed among the Players (see Case 15.3), Player A places the following units in the same container, hereafter called the Auxiliary Forces Randomizer: 5 Blue (Interventionist) Control Markers, 5 Blue (Interventionist) Withdrawal Markers, 7 Green (Nationalist) Control Markers, and 13 Assassin Markers. The total number of units in the Auxiliary Forces Randomizer at the start of the game should be thirty (30). Note: The units in this Randomizer are not distributed at the start of the game. These units are distributed during the Randomizer Phase of each Player-Turn and possibly during the Random Events Phase (when a "Draw from the Randomizer" result occurs).
15.3 Distribution of Initial Forces
[15.31] After the Initial Forces Randomizer is prepared, Player A proceeds to distribute the units in the Randomizer as equally as possible to each participating Player by dealing units from the Randomizer to each Player in clockwise fashion. All of the units in the Randomizer are dealt out, even if this results in an unequal numerical distribution. NOTE: Units are dealt face-up—there is no secrecy attached to the distribution of Initial Forces.
[15.32] Thirteen of the fifteen available Politburo Markers are distributed from the Initial Forces Randomizer. After all of the units in the Initial Forces Randomizer have been distributed, one additional Politburo Marker is given to the Player who received the Red Leader Lenin (I.D.#151), and one additional Politburo Marker is given to the Player who received the Red Leader Trotsky (I.D.#152). Of course, if the same Player is entitled to both Lenin and Trotsky, that rule should be ignored.
[15.33] Players are now permitted to trade any of the units they received in the Initial Forces Distribution. Any trade with the mutual agreement of both of the involved Players is allowed. Once this trading session is ended by the agreement of all of the Players, no units other than Politburo or Assassin Markers may be traded for the remainder of the game. NOTE: Generally, this trading session is used to consolidate either Red or White Strength; however, the opposite strategy of attempting to gain a "balanced hand" can be equally successful.
[15.34] At the conclusion of the trading session, each Player places all of his Politburo and Assassin Markers on his own section of the Victory Point Chart (14.5).
15.4 Initial Deployment of Combat Units
[15.41] Immediately after the trading session and deployment, all of the Red, White, Blue and Green combat units are deployed on the map. Each combat unit is coded (on its backside) to indicate the province in which the unit is initially deployed and the region in which that province is located. The province code is usually abbreviated with the first four letters contained in the actual province name. A few are abbreviated differently to distinguish them from other similarly spelled provinces (e.g., VLAD=Vladivostok, VLDM=Vladimir). When in doubt concerning which province to deploy a given unit, check the unit's region code. The codes describe the following regions: G=Greater Russia, W=White Russia, U=Ukraine, T=Trans Caucasus, S=Siberia, and C=Cossack Territories. Each of these regions is distinctly colored on the map to facilitate locating a given province at any time during the game.
[15.42] Blue (or Green) combat units of the same nationality, which are deployed in the same province, must be deployed in a single stack. For example, the three Green Polish units are deployed in a single stack in Poland at the start of the game.
[15.43] The Stacking Rules (Section 7.0) must be observed in the pre-game Initial Deployment.
15.5 Initial Deployment of Leader Units
[15.51] After all of the combat units are deployed, the two Imperial units are deployed as explained in Section 13.0. Then each Player must deploy all of his Red and White Leader units in their assigned provinces.
[15.52] Like combat units, Leader units are coded to indicate the province and region in which the Leader is initially deployed. In addition, certain Leader units bear an asterisk next to their province code. During the Initial Deployment, each Leader marked with an asterisk must be stacked with the combat unit of the Leader's color in the Leader's assigned province. For example, Trotsky (I.D.#152) must be stacked with the Red TVER combat unit (I.D.#111) during the Initial Deployment.
[15.53] Leaders controlled by different Players may never be stacked during the Initial Deployment.
[15.54] Leaders controlled by a single Player may be stacked during the Initial Deployment as long as Case 7.11 is not violated.
[15.55] The Stacking Rules (Section 7.0) are in full effect during the Initial Deployment.
15.6 Special First Game-Turn Mechanics
[15.61] After the Initial Forces distribution and deployment, the game is ready to begin. Player A should place the Game-Turn Marker in the first box on the Turn Record Track.
[15.62] The game begins with an initial Player-Turn Sequencing Segment (see Case 4.2) to determine the sequence of Player-Turns during the First Game-Turn. Player A draws one Player Control Marker from the Player-Turn Randomizer. The Player-Turn Series begins with the First Player's Random Events Phase.
17.0 Postal Russian Civil War
COMMENTARY:
An interesting alternative to an "in-person" session of Russian Civil War is playing the game by mail. Instead of playing face-to-face around one board, the Players communicate with each other and conduct their movement and combat by mail. It is not precisely the same game—on the one hand, the dictates of a manageable format for postal play somewhat constricts the normally free-wheeling sequence of play; on the other hand, the increased time and privacy increases the opportunity and potential effectiveness of negotiations.
GENERAL RULE:
Except where specifically noted, all the standard rules of Russian Civil War apply to postal version. Basically, each of the Players will write down all movement and combat and send it to one person—the "Gamesmaster," or "GM"—who will act as an adjucator and coordinator of the game. The Gamesmaster will determine the effects of movement and combat as submitted and report the results and current positions to all Players. In order to minimize the volume of back-and-forth communication required, the Sequence of Play is altered such that all movement (of all Players) occurs in One Phase and all combat in one Phase. The precise procedure is outlined below; this is followed by a description of such changes in specific rules as are necessary for postal play.
PROCEDURE:
Each Player plots the movement of his units, utilizing the initial set-up at the start of the Game-Turn as reported by the GM to make his moves. Players should specify the sequence of movement and the path of each stack, indicate where applicable such actions as picking up or dropping units along the movement route. Players should also take care to list the Leaders and units in each stack in order from top to bottom (see Case 7.21). In this First Phase, Players may also submit orders for exchanges of Politburo and Assassin Markers, for Purges and for assassinations. On or before a pre-arranged date, all orders for the First Phase must have been received by the Gamesmaster. The GM will then carry out all legal, written orders, moving each Player's stacks in the sequence listed. Any Random Events results will be effected. The Gamesmaster will then report all results, including the final dispositions of all units to each of the Players.
Each Player will then determine what, if any, attacks his units will participate in and record these. Players may also order exchanges of Politburo and Assassin Markers and Purges during the Second Phase. By a pre-arranged date, all orders for the Second Phase must have been received by the GM, who will then proceed to adjudicate all orders, as well as calculate the results of any Random Events, Randomizer and Replacement resolutions that may be called for.
RULES CHANGES BY SECTION
[Numbering corresponds to standard rules.]
[4.2] SEQUENCE OF PLAY
The following sequence of play applies to postal games:
First Negotiation Period: Based on a report from the GM of the initial positions of the units and the preceding Game-Turn, if applicable, the Players confer and plan their movement and other First Phase activity. This Period ends at a prearranged date, by which time all orders must have been submitted to the Gamesmaster.
First Phase:
- Trades: The Gamesmaster adjudicates all orders pertaining to the exchange of Politburo Markers and Assassin Markers.
- Movement: In accordance with the orders submitted by the Players, the GM adjudicates all movement and any assassinations, which are considered a part of movement.
- Purge: The GM calculates the results of any Purge that may have been called for by one or more Players.
- Random Events: The GM rolls on the Random Events Table once for every two Players in the game, rounding the number of rolls down in the event of an uneven number of Players.
Second Negotiation Period: Based on a report of the First Phase from the Gamesmaster, the Players confer on and plan combat and other Second Phase activity. As with the First Negotiation Period, this one ends at a prearranged date when all orders are due to the GM.
Second Phase:
- Trades: The Gamesmaster adjudicates all orders pertaining to the exchange of Politburo Markers and Assassin Markers.
- Combat: The GM adjudicates all combat orders submitted by the Players.
- Purge: Assuming no Purge was conducted during the First Phase of the Game-Turn, the GM resolves any Purge that may have been called for by one or more Players.
- Randomizer Phase: The GM picks a chit and determines the results for each Player.
- Replacements: The GM calculates and deploys any replacements.
- Random Events: The GM rolls once for every two Players, rounding up.
Each Player will then determine what, if any, attacks his units will participate in and record these. Players may also order exchanges of Politburo and Assassin Markers and Purges during the Second Phase. By a pre-arranged date, all orders for the Second Phase must have been received by the GM, who will then proceed to adjudicate all orders, as well as calculate the results of any Random Events, Randomizer and Replacement resolutions that may be called for.
[5.0] MOVEMENT
The GM moves each Player's stacks in the sequence listed by each Owning Player on the basis of the initial positions at the start of the Game-Turn; i.e., each Player's orders will be adjudicated as if that Player were the first to move. It is suggested that the GM begin adjudications by noting which colors of units begin the Game-Turn in each province.
Example: At the beginning of a Game-Turn, Player A has a Red stack in PETR and Player B has two White stacks, one in TVER and one in RYAZ. Player A orders his Red force to move along the route PETR-NOVG-TVER-RYAZ. Player B orders his stack in RYAZ to move TVER-NOVG-PETR, and his stack in TVER to move to RYAZ. The Gamesmaster chooses as a matter of convenience to adjudicate Player A's movement first. The Red stack is moved from PETR through NOVG to TVER, where it must stop because in the initial positions (before any movement), Player B had a White stack in TVER. Therefore, the order to move through TVER to RYAZ is not legal. The Gamesmaster next adjudicates Player B's movement orders. The White stack in TVER is moved to RYAZ as ordered. The stack in RYAZ is also moved in accordance with its orders, from RYAZ through TVER-NOVG to PETR. It does not have to stop in TVER, since at the beginning of the Turn (before any movement), only a White stack occupied that province. By the same token, it could not have moved out of PETR if so ordered, since Player A's Red stack started the Game-Turn in that province.
In the event two or more different Leaders are ordered to pick up the same uncontrolled combat or Imperial unit, the Leader with the lower identity code is successful, unless different colors of Leaders are involved in the conflict (in the case of an Imperial unit). In that case, the Leader with the highest Leadership Value is successful. In the case of a tie, the Gamesmaster determines in a random fashion which is successful.
[8.0] COMBAT
The GM adjudicates all combat, first resolving all Subversive Attacks and then determining the results of normal combat. If more than one Subversive Attack is ordered against the same Blue unit(s), the attack employing the most Strength Points is resolved first, with any losses effective immediately. Normal attacks are adjudicated province by province. In each province, the attacks ordered by each Player with the higher number of total Strength Points (of all colors) are resolved first. Any losses are subtracted immediately. If other Players' units remain in that province, the orders of the Player with the next highest total of Strength Points are resolved second, and so on. Any attacks, Subversive or normal, ordered against units eliminated by attacks with greater precedence have no effect.
[10.0] ASSASSINATION
Players may attempt assassinations during the First Phase by targeting one or more Assassin Markers against each Leader they wish to exterminate. If the movement route of any targeted Leader includes a province which is the final disposition for any Leader controlled by a Player who is attempting to assassinate the targeted Leader, the assassination attempt is resolved by the GM. If not, then no attempt takes place, and no Assassin Markers are expended or change hands.
Example: Player A wishes to use his three Assassin Markers against Player B. He decides to only go after B's stronger Leaders, and thus specifies in his orders, "use all AM's to assassinate Trotsky and/or Tukachevsky." Player A has two Leaders, one in PETR and one in TVER. He orders the former to move PETR-PSKO-SMOL-OREL-KURS and the latter to remain in TVER. Trotsky, in RYAZ, is ordered by Player B to move RYAZ-TULA-KALU-SMOL-PSKO-PETR. Since none of these is "the final disposition" for any Leader controlled by Player A, no assassination is attempted. Tukachevsky, in PETR, is ordered by Player B to move PETR-NOVG-TVER-RYAZ. Since one of Player B's Leaders ended its movement in TVER, the GM will adjudicate an assassination attempt against Tukachevsky.
[11.0] PURGE
For a multi-Player Purge to occur, each participant must submit to the GM with the rest of that Phase's orders compatible orders detailing a) the number of Politburo Markers assigned by that Player to the Purge; b) the participants in the Purge; c) the object of the Purge; d) the method of dividing the spoils. Any Politburo Marker assigned by its owner to more than one prospective Purge that Phase may be used for no Purge that Phase.
A Player may submit hypothetical or conditional orders covering Counterpurge activities to be used in the event of an unsuccessful Purge directed against him. If no such orders are submitted, no Counterpurge is conducted.
The judgment of the Gamesmaster in all cases concerning interpretation of Purge orders is final.
[12.0] RANDOM EVENTS TABLE
"Subversive Attacks Doubled" always refers to the subsequent Second Phase, which may not necessarily be the same Game-Turn.
"Draw from the Randomizer" indicates that the GM determines in a random fashion the recipient of the draw.
[13.26] Attaching Green Units with Gold
This can be ordered by the Player in control of the Gold at three points during the Game-Turn. Uncontrolled ("neutral") Green combat units can be picked up as part of the movement portion of the First Phase; a Leader in control of the Gold always has precedence over any other Leader detailed to pick up the same uncontrolled Green unit. Green units controlled by other Players may be "stolen" during either trade portion of the Game-Turn, so long as they are in the same province as the Leader controlling the Gold.
[13.5] EXECUTION OF THE CZAR
This is handled in the same manner as Purges, except that the execution may be ordered during both the First and Second Phases of the Game-Turn (i.e., up to twice per Game-Turn). The Player with the Czar may submit hypothetical or conditional orders concerning his response to any Politburo action in this regard; if such an order is on file, the GM can adjudicate the Politburo's execution order immediately. If not, the order is reported along with the rest of the Phase's results and it is incumbent upon the Player controlling the Czar to submit an order to comply with the execution order, if it is his intention to accede to the will of the Politburo.
[15.0] INITIAL SET-UP
Two special "pre-game" Reports are necessary as organizational prerequisites to the play of Russian Civil War by mail. After determining the actual identity of the Players in the game, the Gamesmaster will distribute the counters in the Initial Forces Randomizer (as outlined in Case 15.31). The results of this distribution will provide the material for the first Report. A period of time for bartering and initial negotiations will follow, at the end of which the Players will be required to submit orders for any "pre-season" trades they have arranged (see Case 15.33); the results of these will be the substance of the second special Report. The sequence outline under the modified Sequence of Play above will then be followed until the game ends.
Russian Civil War Solitaire Rules
[Sections 18.0 through 28.0]
These rules are designed to enable a single Player to engage in a game of Russian Civil War. Some of the rules in the solitaire system heavily modify those of the standard multi-Player game.
18.0 Terms and Definitions
Red Units refer to Red Leaders and Red combat units.
Non-Red Units refer to White Leaders, Green (Nationalist) combat units (including Polish and Finnish combat units), White and Blue combat units.
Red Player refers to the fact that although there is only one Player, he is referred to in the rules as the Red Player whenever he carries out any operation with the Red units.
Non-Red Player refers to the fact that although there is only one Player, he is referred to in the rules as the non-Red Player whenever he carries out any operation with the non-Red units.
Controllable Units are those units which may or must be moved and which may or must take part in combat. For the Red Player, controllable units refer to Red Leaders and any Red combat units which are attached to those Red Leaders. For the non-Red Player, controllable units refer to White Leaders and any White combat units which are attached to those White Leaders, as well as Blue and/or Green combat units whose Control Marker has been drawn from the Auxiliary Randomizer and is possessed by the non-Red Player.
19.0 Sequence of Play
CASES:
19.1 The Game-Turn
Russian Civil War Solitaire is played in sequenced Turns called Game-Turns. Each Game-Turn is composed of twelve Phases, which occur in a rigid sequence. All game operations must be undertaken in a proper sequence. Any game operation performed out of sequence is a violation of the rules and invalidates the game. All Game-Turns are identical and follow one another until the game is ended.
19.2 Sequence of Play
The following Sequence of Play is substituted for Case 4.2.
A. NON-RED PLAYER-TURN
- Random Events Phase: The Player rolls one die twice in succession and consults the Random Events Table. Subsequent action is governed by the Random Events Rules, see Section 20.0.
- Movement Phase: The Player must move non-Red units within the limits of the Movement Rules, see Section 21.0.
- Stacking Phase: The Player must stack or restack all non-Red units according to the Stacking Rules, see Section 22.0.
- Combat Phase: The Player must use non-Red units to attack Red or Green units. Combat is resolved in accordance with the Combat Rules, see Section 23.0.
- Randomizer Phase: The Player picks one chit from the Auxiliary Forces Randomizer. If necessary, he should immediately deploy Player Control Markers to distinguish new non-Red units which are controllable from those non-Red units which are not controllable. It is immaterial to the play of the game which Player Control Markers are used to make this distinction, see Case 20.12.
B. RED PLAYER-TURN
- Random Events Phase: The Player rolls one die twice in succession and consults the Random Events Table. Subsequent action is governed by the Random Events Rules, see Section 20.0.
- Red Leader Determination Phase: The Player removes all Red Leaders, except Lenin (I.D.#151) and Trotsky (I.D.#152). He rolls the die once to determine how many Red Leaders in addition to Lenin and Trotsky may be used during the Red Player-Turn, and the Red Player-Turn, see Section 24.0.
- Movement Phase: The Player may move all, some or none of the Red units with the limits of the Movement Rules, see Section 21.0.
- Combat Phase: The Player may use Red units in accordance with the Combat Rules, see Section 23.0.
- Randomizer Phase: The Player picks one chit from the Auxiliary Forces Randomizer, see Case 20.12.
C. REPLACEMENT PHASE
The Player redeploys previously eliminated Red, Polish and/or Finnish combat units according to the Replacement Rules, see Section 25.0.
D. GAME-TURN INDICATION PHASE
The Player advances the Game-Turn Marker one space on the Turn Record Track to mark the passage of one Game-Turn and the start of another Game-Turn.
20.0 Random Events Alterations
The rules governing the Random Events, under the heading of Section 12.0, are used in the solitaire version. The two modifications for solitaire play are explained below.
CASES:
20.1 Alterations
[20.11] Remove all Assassin Markers from the Auxiliary Forces Randomizer and place them in the game box. The rules governing Assassination, Section 10.0, and the Assassin Markers are not used in the Russian Civil War Solitaire system.
[20.12] Whenever a Blue or Green Marker is drawn from the Auxiliary Forces Randomizer (either as the outcome of a die result on the Random Events Table or due to the Sequence of Play), the possession of that Marker and the units represented by that Marker always goes to the non-Red Player.
21.0 Movement Modifications
GENERAL RULE:
The rules governing the movement of Red combat and Red Leader units are not modified in any way from the rules in Section 5.0; however, there are additional rules governing the movement of non-Red combat units and non-Red Leader units.
CASES:
21.1 Basic Procedure
[21.11] During the non-Red Movement Phase, the non-Red Player must move all non-Red units that he controls (exception: see Case 21.25). In moving his units, the non-Red Player is governed by three constraints—a priority sequence, a die roll, and a path of the fewest number of Railline-connected provinces between a force and Tver or Petrograd. These three constraints are explained below.
[21.11] The non-Red Player must move his units in a strict priority sequence: First, all White units are moved, then all Green units are moved, lastly, all Blue units are moved. There is no priority sequence for the movement of units within a color.
[21.12] Any aggregation of units, which are in one stack, is considered a "force." Forces must be moved one at a time. To move a force, the Player must first specify which force that he intends to move; second, roll the die; and third, move that force the indicated number of the die roll.
[21.13] At the beginning of the game, the non-Red Player must determine for each non-Red force its target province. To determine its target province, count the fewest number of provinces, which are connected and traversed by a Railline, from the non-Red force to either Petrograd or Tver; that province, Tver or Petrograd, which has the fewest number of intervening Railline provinces, becomes the target province of that force. Once the target province for a force has been chosen, that force must move along the very same path of provinces (connected and traversed by Raillines) which determined that force's target province.
21.2 Non-Red Movement Restrictions
[21.21] To determine the target province for a non-Red force, which does not start on a province traversed by a Railline, count the fewest number of provinces to a province which has a Railline, that leads to either Petrograd or Tver, and then obey the Basic Procedure.
[21.22] In the event that two or more paths have the fewest number of provinces (connected and traversed by Raillines), determine at random by the roll of a die along which path that force must move to get to its target province.
[21.23] Once a non-Red force moves into either Tver or Petrograd, it immediately stops moving, regardless of whether or not it has consumed its Movement Allowance (as determined by the die roll).
[21.24] A target province must be chosen for all non-Red forces at the beginning of the Game. Once the target province has been chosen, it may not be changed. The non-Red force must move to its target province.
[21.25] Even though some Green and Blue forces may not move out of their region, they are assigned their target province. Though they may not move out of their region, they must move to the furthest extent possible within their region so that they are as close as possible to their target province. At this point, the non-Red Player need not bother moving Green and Blue units any further, because they may not move any longer.
[21.26] The concept of a specific Movement Allowance, see Section 5.0, General Rule, is not used in the solitaire system. Instead, as explained in the Procedure, a die roll determines the Movement Allowance for each non-Red force.
22.0 Non-Red Stacking Modifications
GENERAL RULE:
The rules governing Stacking, Section 7.0, are in effect in Russian Civil War Solitaire. There are additional rules which control the stacking of non-Red units. These additional rules do not apply to Red units.
PROCEDURE:
The basic idea of the Stacking Phase is to rearrange the non-Red units so as to create the fewest, but strongest possible stacks of each color within the limits of the Stacking Rules given in Section 7.0, in each province.
CASES:
22.1 White Stacking Procedure
Specifically for White units, the Stacking procedure is as follows: In a province in which there are White Leaders and White combat units, place as many White combat units with the greatest Combat Strength as possible under the White Leader with the lowest Identity Code. On this stack, place on top another White Leader (if any remain) with the lowest Identity Code, and place as many White combat units with the greatest Combat Strength as possible under this White Leader. Repeat this procedure until a stack of White units obeys Case 7.11 and contains the greatest possible Combat Strength for that particular province. This procedure should now be repeated with any remaining White units to create another stack with the second greatest Combat Strength, and so forth, until all of the White units in that province are properly stacked. Of course, if there are only White Leaders and no White combat units in a particular province, then the White Leaders must stack to the greatest and strongest possible extent, while obeying Case 7.11.
22.2 Blue and Green Stacking
The above procedure also applies for Green and Blue combat units, obey Case 7.14.
22.3 Restacking Prohibition
Once non-Red units are arranged in a stack, the units in that stack may not be rearranged or restacked until the Stacking Phase of the next Game-Turn (exception: see Cases 8.44, 8.29 and 12.11).
23.0 Combat Modifications
GENERAL RULE:
The rules governing the combat of Red Leader and combat units are not modified in any way from the rules given in Section 8.0; however, there are additional rules limiting the combat of non-Red Leader and combat units. In general, whenever possible and within the following limitations, the non-Red forces must attack during the non-Red Combat Phase (exception: see Case 23.15).
CASES:
23.1 Non-Red Combat
[23.11] If there are any Red forces within the same province as any controllable non-Red forces, then all White, Green and Blue controllable forces must attack a Red force. In this case, all controllable non-Red forces must attack the Red force which has the smallest total number of Combat Strength Points. In the event that two or more Red Forces have both equal and the smallest total amount of Combat Strength Points, randomly determine by a die roll which Red Force is to be attacked (exception: see Case 23.14).
[23.12] If there are no Red units, but there are Green forces within the same province as any controllable non-Red forces, then all controllable White forces (never Blue or Green units, see Case 8.1) must attack a Green Force. In this case, all controllable White forces must attack the Green force which has the smallest total amount of Combat Strength Points. In the event that two or more Green forces have both equal and the smallest total amount of Combat Strength Points, randomly determine by a die roll which Green force is to be attacked (exception: see Case 23.14).
[23.13] Green units may not be attacked by White forces if there are any Red units in the same provinces as those Green units.
[23.14] Controllable non-Red forces may not attack a force if the odds for that attack are less than 1:1. The lowest odds at which a non-Red force may attack is 1:1.
[23.15] If condition 23.11 or 23.12 does not occur, or if condition 23.14 does occur, then there is no combat for the non-Red Player in that province.
[23.16] Whenever non-Red units must be eliminated due to an Exchange result, the priority in which non-Red units are to be eliminated to fulfill that Exchange result (see Case 8.43) is as follows: any and all Blue combat units are eliminated first; followed by any and all Green combat units second; followed by any and all White combat units third; and then any or all White Leaders last.
[23.17] Non-Red forces, which are not controllable, must not attack and must not be attacked.
[23.18] Any non-Red force may be attacked by any controllable Red force.
24.0 Leaders
GENERAL RULE:
In general, the use and function of Red Leaders in the solitaire game has not changed from the multi-Player scenario; however, the use and function of non-Red Leader and combat units in the solitaire game has been modified from the historical scenario. Refer to the appropriate section on Movement (21.0), Stacking (22.0), or Combat (23.0) to note the changes. There is one addition for the solitaire game which governs the number of Red Leaders that the Red Player may use during a Game-Turn. This addition is the Red Leader Determination Phase.
PROCEDURE:
At the start of every Red Leader Determination Phase in every Game-Turn, the Red Player must remove all Red Leaders other than Lenin (I.D.#151) and Trotsky (I.D.#152). Don't remove or move at all Trotsky and Lenin during this Phase. The Red Player rolls the die once. The die roll is the number of Leaders in addition to Lenin and Trotsky that the Red Leader may use during his Player-Turn (but there may never be more than six, six total; see Case 24.12). The Red Player may then pick any selection of Red Leaders and deploy them on the map. Once deployed on the map, Red Leaders function in movement and in combat identically to Lenin or Trotsky.
CASES:
24.1 Red Leader Determination
[24.11] During the Red Leader Determination Phase, the Red Leaders must be deployed (placed on top of) either a Red combat unit, or by themselves in provinces. The Red Leader may not be deployed on a non-Red unit.
[24.12] The maximum number of Red Leaders (including Lenin and Trotsky) that a Red Player may have during a Game-Turn is six.
Example 1: Lenin is eliminated, but Trotsky is still on the map. During the Red Leader Determination Phase if the Red Player rolls a die and gets a six, he may only choose five additional Red Leaders for a total maximum of six Red Leaders.
Example 2: Lenin and Trotsky are on the map and the Red Player rolls a die and gets a one during the Red Leader Determination Phase. The Red Player may only choose one additional Red Leader; in this example, the Red Player has a total of three Red Leaders.
[24.13] The Red Player may pick any Red Leader during the Red Leader Determination Phase. In effect, a Red Leader may be picked and returned to and from the map continually throughout the game; however, once a Red Leader is eliminated due to combat, that Red Leader is permanently out of play and may never be picked again for the Red Leader Determination Phase.
[24.14] If Lenin or Trotsky is eliminated in either Red Combat Phases of a Game-Turn, then there is no Red Replacement for that Game-Turn (only), see Case 9.14, and there is no Red Leader Determination, see Case 24.16.
[24.15] If Lenin and Trotsky are eliminated in either or both Combat Phases of the same Game-Turn, then there is no Red Replacement for both that Game-Turn and the next Game-Turn, and there is no Red Leader Determination, see Case 24.17.
[24.16] In the case of 24.14, there is no Red Leader Determination for one Phase.
Example 1: If Lenin or Trotsky is eliminated during a non-Red Combat Phase, then there is no Red Leader Determination for that same Game-Turn.
Example 2: If Lenin or Trotsky is eliminated during a Red Combat Phase, then there is no Red Leader Determination Phase for the following Game-Turn.
Player's Note: Even though the Red Player does not have the benefit of a Red Leader Determination Phase because Lenin or Trotsky has been eliminated, it does not at all impair, alter or modify the function and use of the sole surviving Leader (Lenin or Trotsky) during the Red Player-Turn. The Player simply does not get any additional Red Leaders.
[24.17] In the case of 24.15, there is no Red Leader Determination for two Phases. Obey Case 24.16 and simply ignore the immediately following Red Leader Determination Phase.
25.0 Replacement Modifications
GENERAL RULE:
The rules for Replacement of combat units, Section 9.0, are used in the Solitaire Replacement Phase, see Case 19.2. Nevertheless, there are several major modifications for the solitaire version, as explained below.
CASES:
25.1 Combat Replacement
[25.11] No White, Green or Blue combat units are ever replaced during the solitaire game (exception: see Case 25.12).
[25.12] Only Polish and Finnish combat units are replaced during the game, see Section 9.0 for replacement procedures.
[25.13] Red combat units are replaced during the game, see Section 9.0 for replacement procedures.
[25.14] Though no Leaders are ever replaced during the game, the Red Leaders do have a special determination/deployment phase which permits them to reappear on the map during the game, see Section 24.0. The above is not considered as replacement, and hence is not covered by any of the replacement rules.
26.0 Imperial Units: Czar Execution
GENERAL RULE:
The rules governing the Imperial units, Section 13.0, are used in Russian Civil War Solitaire; however, the rule governing the Execution of the Czar, Case 13.5, is deleted. Instead, use the following procedure:
PROCEDURE:
Whenever a Red Leader is stacked with the Czar, the Czar is automatically executed. Immediately remove the Czar from the map and place it in the game box. The Czar does not affect the Victory Conditions for either side, Red or non-Red, for the solitaire game. The Czar does retain its ability to permit a White Leader to attach two extra White or Green combat units, as well as its benefit in moving, see Case 13.2.
27.0 Solitaire Set-Up and Start
GENERAL RULE:
The Set-Up of Red, White, Green and Blue combat units is identical to the standard set-up. There are two modifications of the deployment of the Leaders and Auxiliary Forces Randomizer.
CASES:
27.1 Leader Deployment
[27.11] Deploy all White Leaders in identical fashion to the multi-Player game (exception: see Case 27.12).
[27.12] Deploy the following White Leaders (Identity Code) on top of the combat units in the following province/region.
| Leader | Province/Region |
|---|---|
| Chatilov (266) | Saratov/Cossack |
| Ulagi (267) | Uralsk/Cossack |
| Romanovsky (268) | Tiflis/Trans Caucasus |
| Lukomsky (269) | Kirghiz/Cossack |
| Kappel (270) | Samara/Cossack |
[27.13] For the Red Leaders, deploy only Lenin (151) on the Red combat unit in Petrograd/Greater Russia and Trotsky (152) on the Red combat unit in Tver/Greater Russia. No other Red Leader is deployed at the start of the solitaire game, see Section 24.0.
27.2 Auxiliary Forces Randomizer
The same mix of Markers as in the multi-Player game is placed in the Auxiliary Forces Randomizer for Russian Civil War Solitaire. The only exception is that the Player should remove all Purge and Assassin Markers from the Auxiliary Forces Randomizer. They are not used in the solitaire game.
27.3 How to Start
[27.31] The non-Red Player is the First Player in the Sequence of Play in every Game-Turn, see Case 19.2.
[27.32] The solitaire game starts with Game-Turn One and finishes at the end of the Seventh Game-Turn.
28.0 Solitaire Victory Conditions
In Russian Civil War Solitaire, the Player endeavors to win as the Red Player. Though during the course of the game, the Player acts on behalf of the non-Red Player, the non-Red Player represents a system of rules, which restricts the operations of the non-Red forces to defeat the Red Player.
There are three levels of victory for the Red Player. In increasing order of magnitude, they are Marginal, Substantive and Decisive. For the non-Red Player, there is only one level of victory, Decisive. Any other result is considered a Draw. In successive games, the Player should always try to improve on his previous performance.
CASES:
28.1 How to Determine Victory
[28.11] The object of the Red Player is to eliminate all non-Red units from each province within the following regions: Greater Russia, White Russia, Ukraine and Cossack.
[28.12] If the Red Player achieves his objective on:
| Game-Turn: | his Victory is: |
|---|---|
| 5 | Decisive |
| 6 | Substantive |
| 7 | Marginal |
[28.13] The objective of the non-Red Player is to have a non-Red force move into either Petrograd and/or Tver. If there exists at least one non-Red unit in either Petrograd and/or Tver on the end of a Game-Turn, then the non-Red Player achieves a decisive Victory.
[28.14] Once either Player achieves a Victory, the game immediately stops.
[28.15] If either Player has not achieved a Victory by the end of Game-Turn Seven, the game is considered to end in a Draw.
29.0 Players' Notes
There are basically two courses of action that Russian Civil War may follow during the course of play. On the one hand, there is the so-called "mixed format" and its counterpart is the "Red/White format." Each has its own style of play.
The "mixed format" refers to the situation in which Players have a heterogeneous "hand" of Red, White, Green and Blue forces. In this situation, a skillful Player can dupe the gullible into thinking that he is gaming on behalf of the Red Party, yet in action he eliminates Red Leaders. He may even eliminate his own Red Leaders to rack up Victory Points. If successful, the Player may evade being Purged.
In the "mixed format," Purges become common. Even the strongest Player must be wary lest the weaker Players start to pool their Purge Strength. For the weaker Players who do form a Central Committee, one popular idea is to use a Purge as a threat. When the Central Committee is formed, they should order the strong Player to assassinate his own Leaders! If the Player doesn't have an Assassin Marker, the Central Committee should provide him with one; remember that Assassin Markers may be traded at any time. If the Player refuses to comply, the Central Committee should Purge him.
The "Red/White format" refers to the condition in which a Player commits himself to one color. In this situation, one or two Players have all the White forces and everyone else has Red forces. Cooperation of the highest order is necessary for survival. The side that consolidates its strength with a sound plan of action will win. The White Players should try to provoke Purges and dissension among the ranks of the Red Players. A simple ploy is to point out the fact that it will invariably be one Red Player who remains detached from combat while he directs other Red Player comrades to fight the Whites. Should an internal revolt occur in the Red Players' ranks, the White Players will be assured of victory.
For those Players who like to remain noncommittal, their best bet is to eliminate Blue combat units. Blue combat units are not replaced if eliminated and they are worth Victory Points.
Leaders are extremely vulnerable. Like Blue combat units, they are not replaced if eliminated and are worth Victory Points. But the most important point is that once a color, Red or White, loses all its Leaders, that side is impotent. The isolated combat units are easy prey to the vengeful enemy forces.
Charts and Tables
The following charts are printed on the game map.
[8.5] Combat Results Table
Combat Ratio (Attacker's Strength:Defender's Strength)
| Die Roll | 1:2 | 1:1 | 2:1 | 3:1 | 4:1 | 5:1 | 6:1 |
|---|---|---|---|---|---|---|---|
| 1 | Ex | De | De | De | De | De | De |
| 2 | Ex | Ex | De | De | De | De | De |
| 3 | Ex | Ex | Ex | De | De | De | De |
| 4 | Ae | Ex | Ex | Ex | De | De | De |
| 5 | Ae | Ae | Ex | Ex | Ex | De | De |
| 6 | Ae | Ae | Ae | Ex | Ex | Ex | De |
Ae = Attacker Eliminated. De = Defender Eliminated. Ex = Exchange of Losses.
[11.4] Purge Results Table
Purge Strength (Number of Leadership Value and Politburo Points)
| Die Roll | 1-10 | 11-20 | 21-30 | 31-40 | 41-50 | 51-60 | 61+ |
|---|---|---|---|---|---|---|---|
| 2 | 1 | 2 | 2 | 2 | 3 | 3 | 3 |
| 3 | 1 | 1 | 2 | 2 | 2 | 3 | 3 |
| 4 | 1 | 1 | 1 | 2 | 2 | 2 | 3 |
| 5 | 1 | 1 | 1 | 1 | 2 | 2 | 2 |
| 6 | 1 | 1 | 1 | 1 | 1 | 2 | 2 |
| 7 | C | 1 | 1 | 1 | 1 | 1 | 2 |
| 8 | C | C | 1 | 1 | 1 | 1 | 1 |
| 9 | C | C | C | 1 | 1 | 1 | 1 |
| 10 | C | C | C | C | 1 | 1 | 1 |
| 11 | C | C | C | C | C | 1 | 1 |
| 12 | C | C | C | C | C | C | 1 |
Note: No Player may conduct a Purge with a Purge Strength of less than one. Accumulated Purge Strength greater than sixty-one Points are resolved on the sixty-one column. Politburo Markers are doubled in value for Counterpurges.
[12.2] Random Events Table
The Phasing Player rolls one die twice; the first die roll selects the row (below); the second die roll selects the column.
| First Die | Second Die 1 | Second Die 2 | Second Die 3 | Second Die 4 | Second Die 5 | Second Die 6 |
|---|---|---|---|---|---|---|
| 1 | Epidemic: Tula, Saratov, Ekaterinburg, Taurida | Epidemic: Petrograd, Irkutsk, Malinovka, Olonetz | Epidemic: Smolensk, Orel, Kharkov, Omsk | Epidemic: Vyatka, Kiev, Poltava, Kaluga | Epidemic: Bessarabia, Terek District, Kars Territory, Chita | Epidemic: Kherson, Vilna, Estonia, Livonia |
| 2 | Epidemic: Astrakhan, Orenburg, Simbirsk, Krasnoyarsk | Epidemic: Nizhniy Novgorod, Kursk, Erivan, Daghestan | Epidemic: Don Cossacks, Samara, Spasskoye, Volhynia | Epidemic: Stavropol, Kirghiz, Novonikolaevsk, Barnaul | Epidemic: Courland, Kovno, Podolia, Chernigov | Epidemic: Tsitsikar, Kostroma, Ryazan, Tiflis |
| 3 | Epidemic: Urals, Novgorod, Vologda, Vitebsk | Epidemic: Yelizavetpol, Chelyabinsk, Yekaterinoslav, Pskov | Epidemic: Tver, Yaroslavl, Uralsk, Kutais | Epidemic: Minsk, Perm, Penza, Kazan | Epidemic: Kuban, Vladivostok, Manchuria, Vladimir | Epidemic: Mohilev, Grodno, Mogocha, Harbin |
| 4 | Epidemic: Voronezh, Baku, Ufa, Archangel | Epidemic: Finland | Epidemic: Poland | Draw from the Randomizer | Draw from the Randomizer | Draw from the Randomizer |
| 5 | Draw from the Randomizer | Draw from the Randomizer | Draw from the Randomizer | Draw from the Randomizer | Draw from the Randomizer | Draw from the Randomizer |
| 6 | Subversive Attacks Doubled | Subversive Attacks Doubled | Subversive Attacks Doubled | Subversive Attacks Doubled | Subversive Attacks Doubled | Subversive Attacks Doubled |