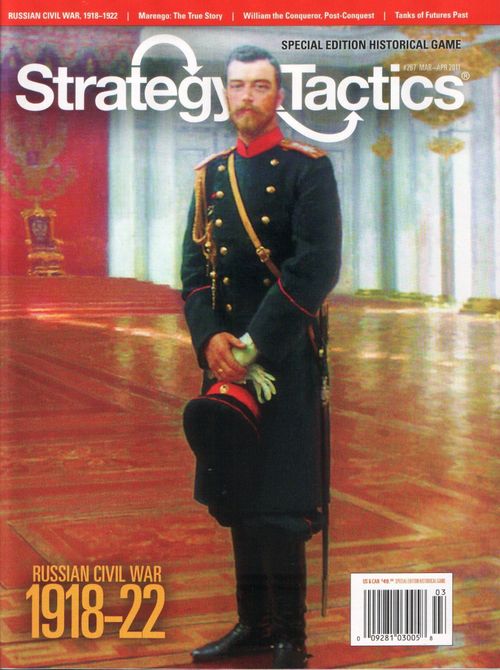
Russian Civil War 1918-1922 (Second Edition)
Russian Civil War 1918-1922 (Second Edition) Rulebook
Table of Contents
Table of Contents
- 1.0 INTRODUCTION
- 2.0 GENERAL COURSE OF PLAY
- 3.0 GAME EQUIPMENT
- 4.0 SEQUENCE OF PLAY
- 5.0 MOVEMENT
- 5.1 HOW TO MOVE UNITS
- 5.17 Blocking Movement
- 5.2 HOW TO MOVE RED & WHITE UNITS
- 5.22 Leader Attachment of Red & White Combat Units
- 5.24 Attachment and Detachment
- 5.3 TERRAIN EFFECTS ON MOVEMENT
- 5.4 STACKING EFFECTS ON MOVEMENT
- 5.5 RAIL MOVEMENT
- 5.6 HOW TO MOVE BLUE INTERVENTIONIST UNITS
- 5.65 Restrictions
- 5.66 Czech Withdrawal
- 6.0 PLAYER NEGOTIATIONS
- 7.0 STACKING
- 8.0 COMBAT
- 9.0 REPLACEMENTS & REINFORCEMENTS
- 10.0 ASSASSINATION
- 11.0 PURGE
- 12.0 RANDOM EVENTS & THE AUXILIARY FORCES RANDOMIZER
- 13.0 IMPERIAL UNITS
- 14.0 SPECIAL UNITS
- 15.0 VICTORY CONDITIONS
- 15.1 HOW THE GAME IS ENDED
- 15.2 PLAYER PARTICIPATION
- 15.3 TURN RECORD TRACK
- 15.4 VICTORY POINTS SCHEDULE
- 15.41 Red Victory Points (VP Display)
- 15.42 Red Victory Points (On Map)
- 15.43 White Victory Points (VP Display)
- 15.44 White Victory Points (On Map)
- 15.45 Czech Withdrawal
- 15.46 Imperial Units
- 15.47 Special Units
- 16.0 HOW TO SET UP & PLAY THE GAME
- 16.1 SETTING UP THE GAME EQUIPMENT
- 16.2 PREPARATION OF THE RANDOMIZERS
- 16.21 Player Turn Randomizer
- 16.3 DISTRIBUTION OF INITIAL FORCES
- 16.4 AUXILIARY FORCES RANDOMIZER CREATION
- 16.5 INITIAL DEPLOYMENT OF COMBAT UNITS
- 16.6 INITIAL DEPLOYMENT OF LEADER UNITS
- 16.7 SPECIAL FIRST GAME TURN MECHANICS
- 16.8 SPECIAL SHORT SCENARIOS
- 17.0 OPTIONAL RULES
- 17.1 CENTRAL POWERS EXPEDITIONARY FORCES
- 17.3 BLUE FORCE EXTREMES
- 17.31 Free Korps Fanaticism
- 17.32 The Czech Legion
- 17.4 NAVAL OPERATIONS
- 17.41 Naval Movement
- 17.42 Restrictions
- 17.43 Naval Evacuation
- 17.46 Naval Bombardment
- 17.5 MAJOR ALLIED MILITARY INTERVENTION
- 17.51 Set Up
- 17.52 Triggering Allied Military Intervention
- 18.0 SOLITAIRE GAME TERMS AND DEFINITIONS
- 19.0 SOLITAIRE GAME SEQUENCE OF PLAY
- 20.0 SOLITAIRE GAME RANDOM EVENTS ALTERATIONS
- 21.0 SOLITAIRE GAME MOVEMENT MODIFICATIONS
- 22.0 SOLITAIRE GAME NON-RED STACKING MODIFICATIONS
- 23.0 SOLITAIRE GAME COMBAT MODIFICATIONS
- 24.0 LEADERS
- 25.0 Replacement Modifications
- 26.0 IMPERIAL UNITS: CZAR EXECUTION
- 27.0 SOLITAIRE SET-UP AND START
- 28.0 SOLITAIRE VICTORY CONDITIONS
- Game Analysis
- 29.0 PLAYERS’ NOTES
- 30.0 SIMULATION DESIGN NOTES
- 31.0 HISTORICAL NOTES
- 32.0 SUMMARY OF RULES
- 5.0 MOVEMENT
- 6.0 PLAYER NEGOTIATIONS
- 8.0 COMBAT
- 8.1 DEFINITION OF OPPOSING FORCES
- 8.13 White units oppose Red and Green units (only)
- 8.14 Green units oppose Red and White units (only)
- 8.2 WHICH UNITS MAY ATTACK
- 8.3 SUBVERSIVE ATTACK
- 8.4 EXPLANATION OF COMBAT RESULTS
- 9.1 WHICH UNITS MAY BE REPLACED
- 9.2 Replacement of Special Units
- 9.3 Reinforcements
- 10.1 ASSASSINATION LIMITATIONS AND PROHIBITIONS
- 10.2 EFFECT OF ASSASSINATION
1.0 INTRODUCTION
Russian Civil War is a historical simulation of the military and political conflict of 1918-1921 that abolished the Czarist regime and created the foundation of the modern Soviet Union. The basic game is designed for 3-6 players, each of whom controls one or more factions among the revolutionary, counter-revolutionary, nationalist, and interventionist forces that participated in the bloody chaotic struggle to determine Russia’s future.
The Decision Games edition of Russian Civil War is based on the original rules set, counters and map from the original 1976 SPI version. The following have been added in this edition: Map: expanded to cover Russian Central Asia and Mongolia. Forces: additional units have been added to account for specialized formations and additional intervention and nationalist forces. Randomizer markers: additional markers represent various special events of the Russian Civil War. Rules: several rules have been clarified, and some minor modifications have been made to the Randomizer. Several Optional Rules have been added. In addition, the rules have been color coded for ease of reference as follows: Blue: Play Examples Red: Critical Rules (These are also summarized in Section 32.0.)
2.0 GENERAL COURSE OF PLAY
2.1 Russian Civil War is designed for three to six players, although the optional rules included allow the game to be played by any number of players, as well as solitaire. In the basic, multi-player game, each player controls a number of forces, some of which may be unfriendly to each other. In general, each player is competing against all of the other players throughout the game by maneuvering his forces and engaging in combat in order to enhance his ability to gain victory points. When the game ends, each Player’s performance is evaluated by comparing the players’ victory points. The player with the largest number of victory points is judged the winner, while the remaining players are ranked as “runners-up.” Initial set up is explained in rule 16.0. Players should consult rule 30.0 Summary of Rules to get a general idea of play.
2.2 Rule Cases
Each rules section is identified by a case number that indicates the general rules section and the order within that section. Thus, 2.2 indicated the second rule of rule
2.3 General Course of Play
Often, one rule will refer to another rule by citing its rule case.
3.0 GAME EQUIPMENT
3.1 The Game Map
The 34x44” two section map board depicting Russia and several neighboring states is the playing area on which the unit counters are deployed and maneuvered. The land area is divided into provinces to regularize the movement and positioning of the playing pieces and to delineate various political boundaries and terrain features as required by the game rules. To facilitate locating a given province, the provinces are grouped into regions and each region is distinctively coded. Other map features are explained in the appropriate rules sections.
3.2 The Playing Pieces
Differently colored sets of playing pieces (henceforth known as “units”) are supplied. These units represent the military leaders and combat forces that participated in the conflict. The units are distinguished by their color, and by the numbers and symbols printed on them. Most of the units are printed on both sides. In general, the strength and type of a given unit is indicated on the front of the unit, while geographical information is indicated on the reverse side of the unit. It is strongly recommended that the players sort the units by type and color, as this greatly facilitates setting up the game.
3.21 Sample Units
Leader Unit
Combat Unit Identity #
Nationality Combat Strengths
3.22 Summary of Unit Types
LEADER UNITS (Red and White only)
- Front | Back COMBAT UNITS (Red, White, Blue, and Green, Black)
- Front | Back IMPERIAL UNITS
- Front | Back SPECIAL COMBAT UNITS Armored Train
- Front | Back Shock Army
- Front | Back Reverse of Unit Generally, the reverse side of the unit has its set-up instructions. These include: Codes to describe regions: A = Central Asia, C = Cossack Territories, G = Greater Russia, M = Mongolia, S = Siberia, T = Trans Caucasus, U = Ukraine, W = White Russia (Byelorussia) Following the region code is an abbreviation of the province. An asterisk indicates that a leader starts the game stacked with combat units in the same Province. (Reinf) indicates that the unit is not set up initially on the map but is possibly received later as a reinforcement. (Rand) indicates that the unit or marker is initially placed in the Auxiliary Forces Randomizer. (Optional) indicates that the unit or marker is used only if the players agree to the optional rules for its inclusion in the game.
GAME MARKERS PLAYER CONTROL MARKERS (Red/White or Blue/Green)
- Front | Back These are used to indicate which player controls units on the map.
AUXILIARY RANDOMIZER FORCES CHITS Examples in corresponding rules section. Nationalist Control Marker Interventionist Control Marker Interventionist Withdrawal Marker Politburo Marker Assassin Marker Special Auxiliary Forces Chits Air Raid Anarchists Strike Armistice Assassination of the Czar Comintern Cordon Sanitaire Felix D. General Strike Ice March Military Commissariat Supreme Ruler 26 Commissars Territorial Demands Terror “Option” Randomizer Markers
Unit Nationalities BA: Baltic States BR: British Empire BY: Byelorussia (White Russia) CA: Central Asian. CH: Chinese. CP: Central Powers (Germans and Austro-Hungarians) CZ: Czech Legion FK: Free Korps FN: Finland FR: French INT: Optional Allied Intervention Force. JP: Japanese MO: Mongolian PO: Poland RM: Romanian SB: Siberia TC: Trans-Caucasus TU: Turks. UK: Ukraine US: United States
Unit Identifications KA: Konarmiya. KR: Kronstadt. LR: Latvian Rifles NM: Nester Makhno UR: Uprising. VO: Volunteer Army
3.23 Definition of Basic Terms
Auxiliary Forces: are chits (and some units) that may come into play as a result of players drawing them from the Auxiliary Forces Randomizer. Control of a Province: A player controls a province if both of the following are true: (1) The only units in the province are controlled by that player. No other player may have any units in it, nor may there be any non-controlled units; and second, none of the player’s units are mutually opposing. See 12.1 and 12.4 for where control of provinces applies. Control of a unit: means that a particular unit or chit is in the player’s possession, and that player may utilize it for various game functions. A player may control units of different factions. A player indicates control of units by placing a Control marker with his letter code (A, B, etc.) on the unit or stack of units. A player indicates control of certain auxiliary forces chits (such as Assassins) by placing them on his player display on the map. Combat Strength: is the basic offensive and defensive power of a unit quantified in combat strength points. Critical City: is one of the major political or economic centers of the former Russian Empire. Factions: are the five major groupings of forces: Red (Bolshevik), White (anti-Bolshevik Russians), Green (Nationalists), Blue (Interventionists) and Black (Anarchists and Independents). Force: is a group of one or more units performing some action together. Leadership Value: represents a given leader’s command ability in comparison with other leaders in the game. The combat strength of a given leader is equivalent to the leadership value of that leader. Marker: is a general term for a counter used for informational or non-combat game functions. The term “chit” is sometimes used in place of “marker”. Movement Point: is a quantification of a unit’s ability to move across the map. Effectively, a unit expends one movement point to enter one province (but also see railroad and naval movement for special cases). Nationality: is the subdivisions of Green and Blue units. This is indicated by the code on the unit. Each nationality of Green and Blue units represents a distinct force. Opposing: forces is a term for units antagonistic to each other. Red units are hostile to White, Green, Blue and Black units. White units are hostile to Red, Green, and Black units. Green units are hostile to Red, White, and Black units. Blue units are hostile to Red and Black units. Black units are hostile to Red, White, Green and Blue units. A player may control units that are hostile to each other. Friendly units are units that are not hostile to each other. Note that units controlled by different players may be friendly to each other. For example, if Player A and Play B both control Red units, those units are friendly to each other. Phase: is a term for a specific segment of a game turn. Note this is quite different from the usual procedure for wargames. Phasing player: is the player whose game turn is currently in progress. A non-phasing player would be any player whose game turn is not in progress. Province: is one of the sub-areas that compose regions. Finland, Mongolia and Poland are regions consisting of one province each. Purge: is a game mechanic that allows a player or a group of players to redistribute control of the Red military and political leadership depicted in the game. Randomizer: is any wide-mouthed, opaque container in which are placed various units that must be distributed in random fashion at some time during the game. Player must supply this item themselves. A coffee cup makes a good randomizer. Players will need two of these: a Player-Turn Randomizer in which each player places one Control marker in order to determine the order of player turns; and an Auxiliary Forces Randomizer, in which the auxiliary forces chits are placed. Random Events: occur during the Random Events Phase and attempt to simulate the unpredictable chain of events that exerted a strong influence on the course and outcome of the Russian Civil War. Note: Do not confuse the Randomizer Phase with the Random Events Phase. These occur at separate points in the sequence of play (see 4.2) and involve different play mechanics. Regions: are major geographic divisions on the map. Each region consists of one or more provinces, all colored the same. Stack: is more than one unit piled on top of each other. Generally, a player may stack only units of the same color, though there are exceptions for Imperial Units and Special Combat Units. Unit: is a general term for a counter that has a combat strength or leadership value. Special Combat Units: refer to units received via the Auxiliary Forces Randomizer.
3.3 GAME CHARTS AND TABLES
The game makes use of several tables to organize data into an easily retrievable form. These are the Combat Results Table, the Purge Results Table, the Random Events Table, and the Victory Points Display, all of which are printed on the map. The use of these graphic aids is explained in the appropriate rules sections.
3.4 GAME PARTS INVENTORY
A complete game should include the following parts: One Game Map (consisting of two 22x34 sections) Two sheets of Die-Cut Counters (456 pieces) One Rules booklet
4.0 SEQUENCE OF PLAY
4.1 THE GAME TURN
Russian Civil War is played in successive turns called game turns. Each game turn consists of a series of player turns, which is followed by a Game Turn Inter-phase of several segments. The number of player turns in a single game turn is equal to the number of participating players. Certain standardized functions are performed by one or more players during their Inter-phase of each game turn. During the player turn series, the player whose player turn is in progress is called the “phasing player.” During his player turn, the phasing player maneuvers his units and resolves combat in sequence, according to the following outline, and within the limits provided by the rules that follow. Play continues in successive game turns until the victory conditions for ending the game are satisfied, at which time the Victory Points Schedule is consulted and a winner is determined.
4.2 GAME TURN SEQUENCE OUTLINE
Note: Each player turn consists of four phases. The actions outlined for the first player below are repeated by each player in the sequence determined during the Player Turn. Sequencing Segment of the preceding Inter-phase. Each player is considered to be the “phasing player” during the four phases that compose his player turn.
FIRST PLAYER TURN
-
- | Random Events Phase. The phasing player rolls one die twice in succession and consults the Random Events Table. Subsequent action is governed by the random events rules (see section 12.0)
-
- | Movement Phase. The phasing player may move all, some or none of the units he controls within the limits provided by the movement rules (Section 5.0)
-
- | Combat Phase. The phasing player may use any of the units he controls to attack enemy units. Combat is resolved in accordance with the combat rules (see Section 8.0)
-
- | Randomizer Phase. The phasing player picks one chit from the Auxiliary Forces Randomizer. If the player controls provinces with critical cities, he draws additional chits. (see 12.11 and 12.5).
SECOND AND SUCCEEDING PLAYER TURNS Each succeeding player takes their turn in order, repeating steps 1 through 4 as per above. Play proceeds through a Game Turn Inter-phase as outlined below.
GAME TURN INTER-PHASE
-
- | Game Turn Indication Segment. The first player advances the Game Turn marker one space on the Turn Record Track to mark the passage of one Game Turn and signal the start of another.
-
- | Replacement Segment. The players redeploy previously eliminated combat units in accordance with the replacement rules (see section 9.0).
-
- | Player Turn Sequencing Segment. The first player draws one marker from the Player Turn Randomizer. The player whose Control marker is selected is designated the new first player for the ensuing game turn. The player to the left (clockwise) of the new first player becomes the second player, and the remaining players are assigned a new position in the sequence of play by proceeding around the table clockwise.
4.3 Assassinations & Purges
Players may conduct assassinations at any time in their player turn (see 10.11). Players may also conduct purges under certain circumstances at any point during any player’s turn (see 11.1). One assassination or purge must be completed prior to the next one being initiated.
5.0 MOVEMENT
There are three basic types of moveable units in the game: leaders, combat units, and Imperial units. There are no movement allowances printed on the counters. All leaders have a movement allowance of five movement points. Red and White combat units may only be moved by an accompanying leader of the same color. In effect, a leader may attach and transport the otherwise immobile Red and White combat units. Green and Blue units may be moved only if a player has their Control marker. Green and Blue units have a movement allowance of three movement points. Black units never move. Also see 5.6, 5.7 and 13.25. Imperial units may not move by themselves; they may be “carried along” by certain other units.
During the movement phase of his player turn, the phasing player may move as many or as few of his Red and White leaders (and any combat units they attach and transport) as he desires. Each leader may be moved as many or as few provinces as the player desires to as long as an individual leader’s movement allowance is not exceeded in a single movement phase. Additionally, the player may move any controlled Green and Blue units without needing leaders.
Units may be moved individually (in any order the player desires), or in company with other leaders, combat units or Imperial units with which they are stacked (in accordance with the stacking rules). Any aggregation of units that is moved together as one stack is considered a “force.” Forces must be moved one at a time. Once a force has been moved and the player’s hand withdrawn, no portion of that force may be moved again during the same movement phase. Unused movement points may neither be accumulated from phase to phase, nor transferred from unit to unit.
5.1 HOW TO MOVE UNITS
5.11 During the movement phase, only the phasing player may move units; he may choose to move all, some, or none of his units. No combat is permitted during the movement phase. 5.12 Movement is calculated in terms of movement points. A unit expends movement points from its total movement allowance when moving across the map at the rate of one movement point for each province it enters (exception: see 5.5). 5.13 Movement may never take place out of sequence. A player’s units may only be moved during his own movement phase. 5.14 One movement point must be expended from the movement allowance of a unit for each province the unit enters during a movement phase (exception: see 5.5). Note: Only Red and White leaders and Blue and Green combat units possess a movement allowance. 5.15 All movement must be executed from one province to another contiguous province borders. Units may not skip or jump from one province to any nonadjacent province. For example, a unit could move directly from Finland to Petrograd. 5.16 A unit may never expend more movement points than its total movement allowance in a single movement phase. A unit may expend all, some, or none of its movement points in any one game turn, but unused movement points may not be accumulated from one game turn to another or transferred to another unit. Note: In certain circumstances, a given unit may move more than once per game turn (never more than once per individual movement phase). For example, in Player A’s turn, a Red or White unit might move and then be detached 5.24. Player B could then, in his movement phase, attach that unit and move it.
5.17 Blocking Movement
A force must stop upon entering a province containing a unit of an opposing color. It may move no farther that turn. See 8.1 Definition of Opposing Forces and the chart on the map for which units oppose which units. If the moving unit enters a province containing units of the same color, or of a color that does not oppose that unit, then it may continue moving. Note: This is a change from the original rules, in which units would have to stop if entering a province containing units of a different color (now the movement stops only if there are opposing units). 5.18 A force may freely enter or exit a province regardless of the presence of other units in the province being entered or exited. A force may not, however, both enter and leave a province during the same movement phase if the province entered is occupied by any opposing units (again, see 8.1). There is no additional movement point cost to enter or leave a province occupied by other units, regardless of the color orientation (friendly or opposing) of the units involved. 5.19 The restrictions of 5.17 and 5.18 apply even if a player controls both the moving and non-moving force. Example 1: Player A has a Red force in Finland, and a White force in Petrograd. He could move his Red force into Petrograd, but it would have to stop. Example 2: Player A has a Red force in Finland, and Player B has a Red force in Petrograd. Player A could move his Red force into Petrograd and it could keep on moving out of Petrograd. 5.20 Exceptions: see 13.23 Imperial Units and 14.3 Armored Trains.
5.2 HOW TO MOVE RED & WHITE UNITS
5.21 Red and White combat units may only be moved by a leader of the appropriate color. Red combat units are moved by Red leaders; White combat units are moved by White leaders. Note: There are no Blue or Green leaders. There are special rules that govern the movement of Blue and Green units (see 5.6 and 5.7). Black units may never move, nor may they ever be attached. There are also special rules that govern the movement of Imperial units (see section 13.0).
5.22 Leader Attachment of Red & White Combat Units
A Red or White leader may attach (pick up) and/or detach (drop off) any eligible combat units of the leader’s color in any province during his movement (including the province the leader occupies at the start of his movement). A player may only attach units of the same color, and units that are either controlled by the player or have no player controlling them. Units controlled by other players may not be attached. Combat units moved by a leader are considered “under the command” of that leader. A leader and his attached combat units are referred to as a “force.” There is no additional movement point cost for a leader to attach, transport, or detach combat units. Note: Red and White combat units may not move by themselves. Leaders, obviously, may. 5.23 The maximum number of combat units a leader may attach is equal to the leadership value of that leader. For example, a White leader with a leadership value of “3” could attach (and transport) a maximum of three (White) combat units (exception: see 13.22 and 13.25), nor may it be attached by another leader.
5.24 Attachment and Detachment
Red and White leaders attach combat units of the same color by placing them underneath the leader counter as part of the same stack. Additionally, a leader may also attach another leader of the same color that is either controlled by the player or not controlled by any other player. Once attached to a given leader, a combat unit may not be attached or transported by any other leader until it has been detached. (Remember, a unit that moved and was then detached may not be moved again in the same movement phase.) A leader and its attached combat units move together, accompanied by other leaders, as part of a larger force. A unit is detached during a movement phase by removing it from the leader’s stack and placing it separately in the province. Note: See rule 7.4 for emergency restacking during combat.
5.3 TERRAIN EFFECTS ON MOVEMENT
5.31 Units are prohibited from entering sea or lake areas. See the Terrain Key on the map. See the naval movement rules for special cases. 5.32 White units (only) are permitted to move directly form Taurida to Kuban (and vice versa) via the Kerch Straits. 5.33 Units are prohibited from moving directly from Petrograd to Livonia due to the presence of Lake Pskov. 5.34 Combat and leader units may never be voluntarily moved off the map (exception: see 5.66). There are special rules governing the removal of Imperial units form the map (see 13.3), the withdrawal of Blue units, and the evacuation of White units. 5.35 The movement of certain Blue and Green units is geographically restricted (see 5.6 and 5.7) 5.36 There are special rules governing the movement of units by rail (see 5.5). 5.37 The cities printed on the map (critical and other) have no effect on movement.
5.4 STACKING EFFECTS ON MOVEMENT
5.41 Stacking or unstacking units in the same province is considered a type of movement. There is no additional movement point cost involved in stacking or unstacking units; however, a player’s units may only be stacked or un-stacked during his own movement phase. During all other phases, that player’s units may not be voluntarily rearranged (exception see Purge, 11.21). 5.42 A force may not end a movement phase in violation of the stacking limits (see section 7.0).
5.5 RAIL MOVEMENT
5.51 Only Red and White units may use rail movement. (See the armored train rule for a special case, 14.3.) 5.52 A Red or White force (or leader) that begins its movement phase in a province traversed by a rail line may move into or through an unlimited number of contiguous rail-connected provinces. Units moving by rail must stop upon entering a province occupied by opposing forces. 5.53 Rail movement is executed during the regular movement phase. Rail movement expends no movement points, regardless of the distance it permits a force to move. Rail movement may not, however, be combined with normal overland movement during the same movement phase. Thus, a force may either use rail movement or normal overland movement, but not both during a single movement phase. Additionally, rail movement may not be combined with naval movement or evacuation. 5.54 The ability of a leader to attach, transport an/or detach units is not impaired when the leader is using rail movement. 5.55 Red and White combat units may only be moved by rail by a leader of the appropriate color.
5.6 HOW TO MOVE BLUE INTERVENTIONIST UNITS
The Blue units represent the foreign intervention forces that participated in the Russian Civil War. These include the Central Powers (CP), Turkey (TU), Free Korps (FK), China (CH), Czechoslovakia (CZ), France (FR), Romania (RM), Japan (JA), the United States (US), and the British Empire (BR). Additionally, there are Optional Allied Intervention (INT) units, used only when playing with the optional rules. All Blue units are combat units; there are no Blue leaders. Blue units are moved in accordance with the general Movement Rules as modified by the following special rules.Note that the Central Powers (CP) have no Control marker. They also have no OUT marker, but when the Armistice marker is picked, all CP units withdraw. Note that the Chinese (CH) and Romanian (RO) Blue units have no Control and no OUT markers. They remain on the map until eliminated. Note that the Turk units in the game have no connection to the Turkistan province. 5.61 There are seven Blue Control markers in the Auxiliary Forces Randomizer. Each of these markers controls one of the following nationalities: Turkey (TU), Free Korps (FK), Czechoslovakia (CZ), France (FR), Japan (JA), the United States (US), and the British Empire (BR). Additionally, there is an Optional Allied Intervention (INT) control marker. These markers are gradually distributed among the players during the Randomizer or Random Events Phase of each player turn. Possession of a Blue Control marker permits a player to move any and all of the corresponding Blue combat units during the movement phase of his player turn. For example, if you possess the US marker, you control the one US unit in Archangel and the two US units in Vladivostok. 5.62 The Blue units that lack a corresponding Control marker, including the Romanian (RM), Chinese (CH), and Central Powers (CP) units, may never be moved or controlled by any player. They may never attack, though they must defend when attacked. 5.63 Blue units have a movement allowance of three movement points. They may only be moved by a player possessing their Control marker. 5.64 Blue Units may not use rail movement (exception: see the Armored Train rule). They may use naval movement, if it is otherwise allowed for them.
5.65 Restrictions
- Czechoslovakian and Japanese units may only enter provinces in the Siberian region.
- Turkish units may only enter provinces in the Trans-Caucasus, Cossack and Central Asia regions.
- Central Powers, Chinese and Romanian units may never move.
- Other moveable Blue units may enter any province on the map.
5.66 Czech Withdrawal
Czech units may exit the map from the Vladivostok province in Siberia (see 14.45). This is done to gain the special victory points for Czech withdrawal (rule 15.45). Simply remove the Czech unit(s) from the map and place them on the controlling player’s Victory Point Display. There is no movement point cost to a unit that is removed from the map for victory point purposes.
5.67 Other Blue Withdrawals
There are six Blue OUT (Withdrawal) markers in the Auxiliary Forces Randomizer (BR, FK, FR, JP, TU, US). At the instant a Blue Withdrawal marker is selected from the randomizer, all Blue units of the corresponding nationality are permanently removed from the map. Additionally, if the Armistice marker is drawn, then all CP units are withdrawn. Withdrawal is not movement; simply pick up the units and remove them from the map. This is regardless of their location. Note: There is no CZ OUT marker. The only way to withdraw Czech units is via the procedure in 5.66. 5.68 If a player picks a Blue force OUT marker, then those units are considered withdrawn even if the Control marker has not yet been picked. If the Control marker is later picked, then the marker is removed from play and nothing happens—the Blue units are not controlled. 5.69 Blue units that were previously eliminated in combat are not withdrawn per se; they remain on the Victory Point Display.
5.7 HOW TO MOVE GREEN NATIONALIST UNITS
The Green units represent regional nationalist forces that sought independence during the Russian Civil War. A total of nine different nationalist areas are represented, including the Baltic Provinces (BA); Byelorussia (BY); the Ukraine (UK); the Trans-Caucasus Region (TC); Central Asia (CA); Siberia (SB); Finland (FN); Poland (PO); and Mongolia (MO). All Green units are combat units there are no Green leaders. Green units are moved in accordance with the general movement rules as modified by the following special rules. Note: Byelorussia is designated “White Russia” on the map board. Also, note that the White Russia designated on the map is the historic name of that region; it is not related to the White Russian faction. 5.71 Each distinct nationalist force is represented by a Green Control marker. Possession of a Green Control Marker permits a player to move any and all of the corresponding Green combat units during the movement phase of his player turn. Note: Unlike Blue units, there are no Green OUT markers. 5.72 All Green combat units have a movement allowance of three movement points. 5.73 Green units may not use rail movement. They may never use naval movement or evacuation. 5.74 Green units may never enter a province outside of their “home” region (exception: see 5.75 and 5.76). For example: Ukrainian units may only move within the Ukraine region. 5.75 Finnish units may only enter the following provinces: Archangel, Olonetz, Petrograd and Finland. 5.76 Polish units may enter any province in any of the following regions: White Russia, Greater Russia, the Baltic Region, and the Ukraine region. Polish units may, of course, enter Poland also.
5.8 HOW TO MOVE BLACK ANARCHIST UNITS
5.81 Black units may never move.
6.0 PLAYER NEGOTIATIONS
Players may trade markers and sometimes units at certain points in the game. Such a trade must be the result of a mutual agreement by the players involved.
6.1 Initial Set Up
During the designated point in Initial Set Up (16.33) players may trade units and markers they received in the initial forces distribution.
6.2 During Game Turns
6.21 Players may trade the following.
-
- | Politburo markers.
-
- | Assassins, Air Strike, Anarchists Strike, Assassination of the Czar, Comintern, Cordon Sanitaire, General Strike, Ice March, Military Commissariat, Supreme Leader, 26 Commissars, Territorial Demands, Terror Randomizer markers.
-
- | They may not trade other markers or units. 6.22 This may be done at any time during the game turn; however, a player may not interrupt some game process that is currently being resolved (such as a battle or Purge) to trade markers. Simply reposition the marker on the Victory Points Display. 6.3 Players may attach conditions to trade, though there is no penalty for violating them; however, once a player has agreed to trade a marker (or unit during initial set up), that trade must occur. For example, a player might agree to trade three of his assassins for an agreement from another player to not invade a certain province during the remainder of a game turn. The player gives the other player the three assassins, but the other player then decides to invade anyway. That player does not have to return the assassins.
7.0 STACKING
Generally, the act of combining units within the same province into a single force by placing one unit on top of another is called “stacking.” Conversely, dividing a stacked force into its component units is accomplished by “un-stacking” that force. A force composed of two or more stacked units is also referred to as a “stack.” During his own movement phase (only), the phasing player may reorganize his forces by stacking or un-stacking any of the units he controls. Stacking or un-stacking operations never expend movement points.
7.1 STACKING LIMITATIONS AND PROHIBITIONS
7.11 A single stack may contain a maximum of five combat and/or leader units in any practicable combination. In addition, a single stack may contain:
-
- | one player Control marker; plus
-
- | either or both Imperial units 13.0; plus
-
- | one armored train unit 14.3. There may not be more than one armored train per stack. For example, a Red stack could have a leader with a value of “3”, a leader with a value of “1” and three combat units. Even though the total leadership value is “4”, only three combat units can be stacked with the leaders since any more units would cause the stack to go over five units. Additionally, the stack could have both Imperial units and one armored train. 7.12 Units controlled by different players may never be stacked together. 7.13 Different colored units may never be stacked together (exception: see 7.11 and 13.25). Note: This is so even if those units are controlled by the same player and are not otherwise opposing. For example, a player could not have a stack that combined White and Blue units. 7.14 Blue and Green units of different nationalities may never be stacked together, even if such units are controlled by a single player. For example, British and US units could not stack together, even though they are both Blue units. Note: Regardless of the differences in nationalities, all Green units are always friendly to all other Green units, and all Blue units are friendly to all Blue units. 7.15 There is no limit to the number to stacks that may simultaneously occupy a given province. (They must all conform to the five normal maximum units per stack.) 7.16 Units that are not controlled by any player remain stacked as in the original deployment at the beginning of the game. Red and White leaders may attach those units, thereby restacking them. Such stacks may also be reduced to extract combat and/or Epidemic Event losses. 7.17 If a player detaches units, then he places them in the province, no more than one unit per stack.
7.2 Stacking Position & Unit Types
7.21 When a combat (or Imperial) unit is attached to a leader, it is stacked directly under that leader. Combat units stacked directly under a given Leader are considered attached to that leader for movement and combat purposes. 7.22 The leadership value of a given leader indicates the maximum number of combat units that may be attached (stacked under) that leader (exception: see 13.22 and 13.25). For example, Trotsky, who has a combat factor of “3,” could attach three combat units. 7.23 A leader may not attach another leader. This does not preclude more than one leader and their attached units from stacking together as long as the stacking limit is met: five units normally 7.11, plus Imperial units 13.0 and one armored train 14.32.
7.24 Control Markers
The counter mix provides six distinct sets of player Control markers (A, B, C, D, E, F). At the beginning of the game, one set of these Control markers is assigned to each player. At all times during the game, each player uses one of his Control markers to distinguish each and every force (or stack) of units he controls. That is indicated by placing a Control marker on top of each stack. Each Control marker possesses either a Red/White or a Blue/Green color scheme. When placed on top of a force on the map, the face-up color of the Control marker should indicate the color of the units beneath it.
7.3 EFFECT ON COMBAT
7.31 The attacker must attack all of the units in a single stack together; the combat strengths of all the units in a single stack are totaled, and this total strength is attacked. Units in a single stack may not be attacked individually. 7.32 The units in an attacking stack must participate in a single combined attack; the combat strength of all the units in an attacking stack are combined into a total attack strength. Units in a single stack may not attack individually nor may any unit in an attacking stack be withheld from the attack or its results. 7.33 The units in two or more stacks may combine their combat strengths to attack a single defending stack as long as the restrictions of section 8.0 are not violated. 7.34 Separate stacks may not be combined in defense. Each stack in a given province must be attacked separately.
7.4 EMERGENCY RESTACKING
If a Leader is eliminated due to combat or assassination, and this would cause a change in the capacity of the stack (as per 7.11 and 7.22), the player who controlled the eliminated leader must immediately reorganize the stack to make it conform to stacking limit. This may mean removing a control marker from stacked units, and un-stacking them. When leader is killed his stack immediately unstacks per rule 7.17.
7.5 Red and White units must have a leader stacked with them in order to remain under control. The instant that a Red or White unit is not stacked with a leader, remove any control marker. The unit may then be controlled by the first leader to attach it.
8.0 COMBAT
The following rules introduce what is probably the most unusual aspect of Russian Civil War; the concept of a single player controlling two or more mutually opposing forces. A given player, for example, may control both Red and White units capable of attacking one another at the owning player’s option. This seemingly paradoxical combat becomes logical after a careful study of the victory conditions in section 14.0. Basically, a player gains victory points for each unit he eliminates in combat during the game; however, a given player’s victory point total is modified by the overall outcome of the game. Thus, a player may ultimately benefit by selectively attacking his own units with other units he controls. In order to avoid initial confusing, we emphasize that the tactic of attacking one’s own units is entirely permissible. Of course, attacking opposing units controlled by other players is also allowed.
During the combat phase, combat may occur between any units controlled by the phasing player and any opposing units that occupy the same province. This is at the option of and in any sequence selected by the phasing player. When resolving any combat the phasing player elects to execute, the units of the phasing player are used to attack and the phasing player is considered the attacker. Units attacked by the phasing player must defend. These units may be controlled by any player, including the phasing player himself. The player who controls the defending units is considered the defender. Note that when the phasing player attacks his own units, he is both the attacker and the defender.
-
- | Total the combat strength points of all attacking units involved in an attack against the same defending unit or stack of defending units.
-
- | Compare that total to the total combat strength of all the defending units that are the object of that specific attack.
-
- | State the comparison as a ratio: attacker’s strength to defender’s strength. Round the ratio in favor of the defender to conform to the simplified odds found on the Combat Results Table. For example, if 13 strength points were attacking four, the combat odds ration would be 3.25:1, rounded off (always in favor of the defender) to 3:1.
-
- | The attacker rolls a die.
-
- | The result indicates a line on the Combat Results Table, which is cross-indexed with the column representing the combat ratio (or odds). The intersection of line and column yields a combat result.
-
- | This is immediately applied to the involved units, before going on to resolve any other combat. If there is a choice of which units might be eliminated (as in an Exchange), then the player controlling the units selects the units to be eliminated.
-
- | Units eliminated in combat are immediately removed from the map and placed in the appropriate box on the Victory Point Display. Generally, if you eliminate a unit, it ends up on your Victory Points Display.
8.1 DEFINITION OF OPPOSING FORCES
8.11 Units are opposed to one another strictly on a color basis. Units that are opposing to each other are mutual enemies, even if controlled by a single player. Units that are not opposed are considered friendly to each other, even if controlled by different players. 8.12 Red units oppose all non-Red units. 8.13 White units oppose Red, Green units and Black units. 8.14 Green units oppose Red, White units and Black units. 8.15 Blue units oppose Red and Black units. 8.16 Black units oppose all non-Black units. 8.17 The Definition of Opposing Forces Table summarizes this information.
8.2 WHICH UNITS MAY ATTACK
8.21 During a combat phase, only units controlled by the phasing player may participate in attacks. The non-phasing players’ units may never participate in an attack during a combat phase; they may defend. Attacking is voluntary; the phasing player’s units are never compelled to attack opposing units that occupy the same province. 8.22 Units may only attack opposing (enemy) units. Friendly units of different colors (if controlled by the same player) may combine their combat strengths to attack a force that is their common enemy. For example, White and Green units may combine to attack a Red unit. No unit, however, may participate in an attack against a friendly unit. 8.23 Only units that occupy the same province as an opposing enemy unit or stack may participate in an attack against that enemy unit. Generally, opposing units may engage in combat only in the same province (exception: see Subversive Attacks, 8.3).
8.24 Multiple Units
All units in a stack must attack together, and must attack the same enemy stack or unit. All units in a stack that’s being attacked must defend as a single combined force. More than one stack may be combined in a single attack against a single stack; however, each stack may combine singly, in combination with other stacks, or not all. If there is more than one enemy stack in the same province, they may also be attacked in one combined combat. However, you do not have to attack every stack in a single province, though you may do so if you want. The provisions of 8.1 must be met when conducting any combat.
For example, a player controls one White and one Blue stack in Vladivostok. There is also one Red and one Green stack there. The player could combine the White and Blue stacks into a single attack against the Red stack (but not against the Red and Green stack combined, since Blue does not oppose Green). Alternatively, the player could have the Blue force attack the Red stack, and the White force attack the Green, or just the White force attack the Red, etc. 8.25 No unit may attack or be attacked more than once during a single combat phase. 8.26 For combat purposes, a leader has a combat strength equal to its leadership value. A leader with a leadership value of “3” possesses three combat strength points for either attack or defense. Leaders may be eliminated exactly like combat units. Leaders may attack and defend by themselves. 8.27 A unit’s combat strength is indivisible; it may not be apportioned to more than one attack. 8.28 Red and White combat units may only participate in attacks when attached to a Leader. Red and White combat units defend normally when not attached to a leader. Blue and Green units may attack at any time they are controlled. Black units never attack; they defend normally. 8.29 The phasing player may freely examine the counters of any force or stack on the map at any time during his player turn. Examination of a given force does not obligate the phasing player to attack the force.
8.3 EXPLANATION OF COMBAT RESULTS
8.31 Ae = Attacker Eliminated: all attacking units that participated in the combat are eliminated. 8.32 De = Defender Eliminated: all defending units involved in the combat are eliminated. 8.33 Ex = Exchange of Losses: The total attack strength involved in the combat is compared to the total defense strength. The units that comprise the smaller total (either all the attacking units or all the defending units) are eliminated. Then, at least an equal number of combat strength points are eliminated from the opposing force. 8.34 Units eliminated in combat are removed from the map by the owning player. When part of a force is eliminated due to an Ex combat result, the owning player may select which units to lose. A player may not rearrange or alter the composition of stacked forces after deducting the proper number eliminated strength points. 8.35 Defending units eliminated in combat are removed from the map and immediately placed on the Victory Point Display in the section corresponding to the attacking player. Attacking units eliminated in combat are removed from the map and immediately placed on the Victory Points Display in the section corresponding to the defending player. Note that when a player attacks his own opposing units that he also controls, the eliminated units are placed in his own section of the Victory Points Display.
For example, Player A (the phasing player) resolves an attack in which 10 strength points he controls attack five strength points controlled by Player B. An Ex combat result occurs. All five strength points controlled by Player B are removed form the map and immediately placed on the Victory Point Display in the section designated “A” and (at least) five strength points of Player A's stack go to Player B's Victory Point Display. 8.36 Attacking units eliminated in combat against a unit (or stack) that is not controlled by any player are removed from the map and placed in the Unassigned box. If an uncontrolled force is partially eliminated due to an Ex combat result, the attacking player chooses which of the opposing units are eliminated. 8.37 No attack may be made at less than 1:2 odds. 8.38 An attack made at greater than 6:1 odds is resolved as though the odds were actually 6:1. In all other instances, a player must resolve his attacks at the actual computed odds.
8.4 SUBVERSIVE ATTACK
Subversive attack is a special type of combat that represent the demoralizing effect of revolutionary propaganda the Reds employed against various interventionist forces. The use of subversive attacks is governed by the general combat rules as modified by the following cases. 8.41 A subversive attack may only be made by Red units that are in one or more provinces adjacent to a province occupied by a Blue unit. For subversive attack purposes, any two provinces are considered adjacent if they share a common border that is passable by units during a movement phase. Red units may not employ a subversive attack against Blue units that occupy the same provinces as the attacking Red units. 8.42 Red units in different provinces may combine their combat strength for subversive attacks. Note, however, that all Red units that participate in a subversive attack must occupy a province adjacent to the province occupied by the attacked Blue unit(s). 8.43 Subversive attacks are resolved according to the normal combat procedure (see 8.0). Combat rules, however, are interpreted differently when resolving a subversive attack
-
- | Ae and Ex results have no effect on either the Red or Blue units involved.
-
- | A De result eliminates all Blue defending units exactly as in normal combat. 8.44 Terror Randomizer markers (12.5) provide a special case expanding the use of subversive attacks.
8.5 COMBAT RESULTS TABLE
- | See the map.
9.0 REPLACEMENTS & REINFORCEMENTS
When units are eliminated by either combat or epidemics, they are placed on the Victory Point Chart in the designated space. During each turn’s Replacement Phase, all eligible combat units on the Victory Points Display are replaced on the map in the appropriate province (indicated by the province and region code printed on that unit). Replaced combat units may not be stacked with any other unit when first returned to the map. In all other respects, replaced units are treated like any other combat unit. Previously eliminated combat units that may not be replaced due to the restrictions of the following Cases remain stationed on the Victory Points Display.
Units in the Unassigned are replaced at this time also.
9.1 WHICH UNITS MAY BE REPLACED
9.11 Only Red, White, and Green combat units that started the game on the map may be replaced. Leaders, Imperial units, and Blue units may never be replaced. See 9.2 for replacement of Black units, armored trains and shock armies. 9.12 During the replacement phase, players examine each combat unit on the Victory Points Display and its corresponding province (printed on the back). A unit may not be replaced during the replacement phase if its corresponding province is occupied by an opposing unit (see 8.1), unless the province is also occupied by at least one combat or leader unit of the same color as the unit being replaced.
For example, if the Don Cossack province was occupied by a Red unit, the White Don Cossack combat unit (#212) could only be replaced if (A) it was on the Victory Points Display; and (B) the Don Cossack province was occupied by at least one White leader or combat unit. If there were no units in the Don Cossack province it could also be replaced. Note that if a Blue unit were in the province and no Red, then the White unit could be replaced as Blue does not oppose White; however, the presence of a Blue unit would not be sufficient to negate the effect of the Red unit in preventing the replacement of the White unit.
9.13 Red Centers
Red combat units may never be replaced anywhere on the map during a replacement phase if either Tver or Petrograd (both in Greater Russia) is occupied by a non-Red unit, unless the occupied province(s) is also occupied by at least one Red unit.
For example, Red combat units could not be replaced anywhere if during the replacement phase a White, Green, Blue or Black unit occupied Petrograd and there were no Red units in Petrograd. Thus, control of these two provinces is vital for a player attempting to mobilize Red forces. Note that any Red unit can negate this effect, not necessarily the specific Tver or Petrograd units. Such units may be controlled by any player.
9.14 Red High Command
No Red combat units may be replaced during the first replacement phase that occurs after either Lenin (#151) or Trotsky (Identify #152) is eliminated either by combat or assassination. If Lenin and Trotsky are both eliminated during the same game turn, Red replacements are suspended for two full game turns. (That is, no Red combat units could be replaced for two consecutive replacement phases.) There is no additional effect if 9.13 is also in effect on such turns. 9.15 Red and White combat units may never be replaced after all of the leaders of that color have been eliminated. 9.16 Units are replaced normally during Game Turns 1 through 5. No units may be replaced starting with Game Turn 6. 9.17 During the replacement phase, all replacements are assumed to occur simultaneously. For example, a White unit being replaced in Kharkhov does not prohibit a Green unit from being replaced in Kharkhov during the same replacement phase. 9.18 A given combat unit may be replaced each and every game turn as long as its replacement does not violate any of the restrictions of 9.14. 9.19 When a unit is eliminated, remove any control marker on it. When it is replaced on the map, do the following.
-
- | If a Red or White unit, no player controls it until attached by a leader of the same color. Red and White units may not stack when initially replaced.
-
- | If a Green unit, it reverts to the control of the player with the Control marker, if any. Green units must stack when replaced if they are placed in a province containing a friendly unit of the same nationality.
9.2 Replacement of Special Units
9.21 On Game Turns 1 through 5, armored trains, anarchists and shock armies are immediately placed back in the randomizer when they are eliminated. If picked again, they are placed on the map as per their rules for placement (see Special Units below). 9.22 On Game Turns 6 and later, those units are instead placed on the Victory Point Display of the player who eliminated them.
9.3 REINFORCEMENTS
Historical Note: Even with World War I raging, the Allies committed several formations to intervene in the Russian Civil War; these units are represented by the Blue units starting on the map. Following the end of World War I, the Allies sent additional forces to Russia to support the Whites and otherwise look after their own interests, while a German volunteer army (the Free Korps) also marched east. These additional forces are represented in the game as Reinforcements.
Reinforcements are new units that appear after play has started. Reinforcements are distinct from Replacements. They are brought into play when the Armistice marker is picked.
9.31 Initial Placement
Reinforcement units have “(Reinf)” printed on them. They are initially placed in the Reinforcement Display on the map. While in that display, they have no impact on play. 9.32 At the instant that the Armistice marker is picked follow the procedure (below) for placing Reinforcements on the map. Reinforcement units, once placed on the map, are treated as normal Blue units. They are placed regardless if the reinforcement units are part of a player-controlled Blue force or not. If they are part of a controlled force, that player gains control of them (place Control markers). There is no movement cost to do this.
9.33 Reinforcement Placement
British: One x “3” in Kutais, one x “3” in Tiflis. Free Korps: Two x “4” in Courland. French: Two x “2” in Kherson; one x “2” in Taurida. Romanian: One x “2” in Bessarabia. 9.34 If the OUT marker is picked for a Blue force prior to their reinforcements being placed, then those reinforcements are never received. 9.35 (Optional) Allied Intervention Force This force is used only with optional rule 17.5.
10.0 ASSASSINATION
Assassin Markers represent individual assassins or terrorist conspiracies. They are used in the following rules. During the game, Assassin markers are distributed among the players either on the first game turn or during the Randomizer or Random Events Phases of any player turn. Assassin markers are never placed on the map. A player indicates that he controls an Assassin marker by placing it in his section of the Victory Points Display, Assassin markers may be freely traded among players at any time during the game by simply repositioning the marker on the Victory Points Display. Such a trade must be the result of a mutual agreement by the players involved.
At any time during his player turn, the phasing player may attempt to assassinate any leader counter that occupies the same provinces as a leader controlled by the phasing player. The phasing player must expend at least one Assassin marker for each assassination attempt he makes.
If the phasing player controls at least one Assassin marker, he may attempt an assassination any time during his player turn by simply declaring which leader he is attempting to assassinate and the number of Assassin markers he will employ in the attempt. When such a declaration is made, all other game functions are suspended until the assassination attempt is resolved. Assassination attempts are resolved on the Assassination Table. In order to resolve an assassination attempt:
-
- | The phasing player declares he is making an assassination attempt. He declares the Assassination markers he will be using in the attempt (one minimum).
-
- | The phasing player rolls two dice.
-
- | Cross-index the number of assassins used with the dice roll total.
-
- | If the number in the box is equal to the value of the leader (“1”, “2” or “3”) then the assassination attempt is successful; otherwise, the attempt fails. Example: The phasing player attempts to assassinate a leader with a leadership value of “3”. He employs three Assassin markers in the attempt. He rolls a total of “7.” Cross-indexing three assassins with a “7” gives a result of “1, "2”. The assassination attempt fails. If the dice total had been eight it would have succeeded.
10.1 ASSASSINATION LIMITATIONS & PROHIBITIONS
10.11 A player may only attempt an assassination during his own player turn. 10.12 A player must control at least one Assassin marker to attempt an assassination. At least one Assassin marker must be expended for each assassination attempt made (see 10.22 and 10.23) 10.13 The leader being targeted must occupy a province that is also co-occupied by a leader controlled by the phasing player. Only leaders on the map may be assassinated. The Czar may not be assassinated (see 13.5). 10.14 The color of the leader units involved in an assassination attempt has no effect. For example, the phasing player may attempt to assassinate a Red leader in a province occupied by either a Red or White leader he controls. 10.15 A player may attempt to assassinate a leader he himself controls, in which case he must have another leader present in that same province. 10.16 An unlimited number of Assassin markers may be employed in any single assassination attempt. 10.17 An unlimited number of assassination attempts may be made against a given leader during a single player turn. Each attempt, however, must be resolved separately according to all the restrictions of 10.1. You may not interrupt a purge to conduct an assassination.
10.2 EFFECT OF ASSASSINATION
10.21 A leader who is the victim of a successful assassination attempt is permanently eliminated. The phasing player should immediately remove the leader from the map and place it in his section of the Victory Points Display. A leader who survives an unsuccessful assassination attempt remains in play on the map. 10.22 All Assassin markers employed in an unsuccessful assassination attempt are repositioned on the Victory Points Display in the section belonging to the player who controls the leader whose assassination was attempted. These markers are now considered under his control.
10.3 Felix Dzherinisky
Felix D. is a special Assassin marker. Felix D. is worth three other assassins; otherwise, treat him as a normal assassin.
10.4 ASSASSINATION TABLE
- | See the map.
11.0 PURGE
In Russian Civil War, the purge rules permit the players to decisively influence the outcome of the game through backstabbing. Basically, any player or group of players who control the majority of Red political power may use the purge mechanic to threaten other players to do their bidding and punish a disobedient player by “purging” his Red leaders, thus removing them from his control. Purge may also be used to “purify” the Red cause by depriving a “pro-White” player of his Red leaders.
Politburo markers, representing the major political figures who directed the Red war effort, are used in the following purge rules (also see 13.5). Politburo markers are distributed among the players on the first game turn, and may be later picked from the Auxiliary Forces Randomizer. Politburo markers are never placed on the map. A player indicates he controls a Politburo marker by placing it in his section of the Victory Points Display.
At any time during the player turn sequence of a game turn, a purge may be conducted by the members of the Central committee of the Politburo against any player who is not a member of the Central Committee (see 11.1). The Committee members combine their strengths and use this combined strength to purge a single player who is not a member of the Central Committee. If the committee members cannot unanimously agree on how to resolve these matters, each member must purge individually. No player may participate in the initiation of more than one purge per game turn. A given player may otherwise be the target of a purge more than once in a game turn. A player who is a member of the Central Committee and participates in purge is called a “purging” player. A player who is subject to a purge is a “purged” player.
All other game functions are temporarily suspended when the Central Committee members declare a purge. If the Central Committee wishes to purge as a group, it must first collectively agree on which non-committee player will be purged and how the results of the purge will be distributed among the committee members. If the committee members cannot unanimously agree on how to resolve these matters, there is no purge.
Once the committee as a whole declares which player is being purged, the leadership values of all Red leaders controlled by the purging player(s) are totaled. Next, the total number of Politburo markers controlled by the purging player(s) is added to the Red leadership total. The result, known as the purge strength, corresponds to a vertical column on the Purge Table. A member chosen by the committee rolls two dice and totals their values. The result determines a horizontal line on the Purge Table. The purge is resolved by immediately applying the result indicated where line and column intersect on the Purge Table according to the Explanation of Purge Results detailed in 11.2. After the committee’s purge(s), and any resulting counterpurge(s), are resolved, the normal play routine is resumed immediately.
11.1 CONSTITUTION OF THE CENTRAL COMMITTEE
11.11 Any individual, or group of players, who collectively control at least eight Politburo markers and who unanimously consent to each other’s membership on the committee, constitutes the Central Committee of the Politburo for purge purposes. If a single player controls eight or more Politburo Markers then that player constitutes the Central Committee by himself. However, he may invite other players to join the Central Committee. 11.12 The only effective course of action by which an individual member may object to any policy adopted by the other members of the Central Committee is to withdraw his own membership. After such a withdrawal, if the remaining committee members cannot fully satisfy the requirements of 11.11, the Central Committee is considered dissolved and may not function for purge purposes. 11.13 The Central Committee may be reformed according to the requirements of 11.11 any number of times in a single game turn. No player, however, may participate in the initiation of more than one purge in a single game turn. A player may participate in more than one counterpurge in a single game turn (see 11.24). 11.14 A player may never be purged while he is a member of the Central Committee. A committee member, however, may be counterpurged.
11.2 EXPLANATION OF PURGE RESULTS
11.21 Number Result
The purging player(s) may immediately take control of the indicated number of Red leadership value points that are presently controlled by the Player who was purged. The purging player(s) chooses which Red leaders he wants as long as the total leadership value of the chosen leaders does not exceed the number result on the Purge Table. The purging player simply removes the purged player’s Control marker from the chosen leader(s) and replaces it with one of his own Control markers (see 7.23). Combat and/or Imperial units attached to a purged leader remain attached to that leader (that is, the purging player gains control of such units). If a portion of a stack is purged so that part of the stack is controlled by one player and part by another, the stack is immediately divided into two forces and each player places his player Control marker on top of the forces he controls.
For example, Player A purges Player B and obtains a purge result of two. Player A may immediately take control of either one Red leader that possesses a leadership value of “2,” or two Red leaders, each of which has a leadership value of “1.” Of course, the chosen leader(s) must have been controlled by Player B prior to the purge. 11.22 Instead of taking control of a Red leader, a purging player may take a Politburo marker from a purged player; however, each Politburo marker costs the equivalent of two Red leadership value points. For example, in the example given in 11.21, Player, A could have taken one Politburo marker from Player B instead of taking any Red leadership value points. When a Politburo marker is purged, it is simply repositioned on the Victory Points Display. 11.23 When the Central Committee purges as a group, it must unanimously agree beforehand how any successful purged points will be divided. Once the dice are rolled to resolve the purge, this agreement is considered binding upon all of the members of the committee. The members may not alter this agreement in any manner once the purge resolution die roll is executed. Successfully purged points must then be distributed according to the original agreement to the greatest possible extent.
For example, Players A, B, and C unanimously agree to purge Player D and divide any successfully purged points as equally as possible, in alphabetical order. The purge result indicates the number “2.” That result is effected as follows: Players A and B each take control of one of Player D’s Red leaders (each of which possesses a leadership value of “1”). Player C gains nothing. Note: Due to their original agreement, neither Player A nor B could take control of one of Player D’s Politburo markers because a more equitable distribution was possible. 11.24 “C” Result (Counterpurge) The player being purged may immediately counterpurge any one member of the Central Committee (or if a single player was purging, that one player). The counterpurging player follows the regular purge procedure, except in determining his purge strength he doubles the value of the number of Politburo markers he controls (also see 11.25 and 11.26). 11.25 Once a counterpurge begins, a maximum of two players may be involved; the counterpurging player and only one of the original purging players. 11.26 A purge may result in any number of counterpurges, which may continue until a number result is obtained by one of the involved parties. When this occurs, the original purge is considered resolved. Note: A player is never forced to counterpurge. If a player declines an opportunity to counterpurge, the original purge that initiated the counterpurge is resolved.
For example, a counterpurge result is obtained when the Central Committee (composed of Players A, B, and C) purges Player D in a joint group purge. Player D elects to counterpurge Player A (only). Henceforth, no player other than Player A or Player D may be involved. 11.27 Any result gained in a counterpurge is exempt form the intent of 11.23. If a Central Committee member conducts a successful counterpurge, he’s not obligated to divide the result according to the original agreement.
11.3 SPECIAL POLITBURO & PURGE RESTRICTIONS
11.31 Only Red leaders on the map and Politburo markers may be purged. White Leaders and Red leaders on the Victory Points Display may never be purged. 11.32 If either Lenin (#151) or Trotsky (#152) is eliminated by combat, the player who controlled that leader must immediately sacrifice one Politburo marker, which is immediately placed in the Auxiliary Forces Randomizer. If a player gains control of Lenin or Trotsky via purge, the player losing that leader must transfer one Politburo marker to the gaining player. In both events, if the concerned player has no Politburo markers at the time of loss or purge, this rule is ignored. 11.33 Politburo markers are Randomizer chits; however, they all start play distributed to the players. They may be returned to the randomizer if a player leaves the game 15.23 or via 11.32. Otherwise, they are not expended by being used in purges.
11.4 PURGE TABLE
- | See the map.
12.0 RANDOM EVENTS & THE AUXILIARY FORCES RANDOMIZER
The Russian Civil War was a chaotic struggle distinguished by (usually) brief foreign interventions, the wavering loyalties of various involved forces, and a casualty count of more than 25 million, mostly attributed to disease, starvation and other non-battle causes. Russian Civil War has two mechanisms for simulating all this: the Random Events Table and the Auxiliary Forces Randomizer.
During the random events phase of his player turn, the phasing player rolls one die twice in succession; the first die roll determines which horizontal line to read on the Random Events Table, while the second die roll corresponds to a vertical column on the same table. The result indicated where line and column intersect is read aloud by the phasing player and then immediately effected according to the Explanation of Random Events (12.1).
12.1 EXPLANATIONS OF RANDOM EVENTS TABLE RESULTS
12.11 Epidemic
An epidemic result indicates one or more provinces as being currently the scene of disease, starvation and just general terror. The phasing player must immediately remove the strongest combat unit in each Red, Green, White and Black stack in each of the indicated provinces. The removed units should be placed in the Unassigned box. If two or more units have equal strengths, pick one at random. If only one unit is in a stack, it is also removed. Blue combat units, all leaders, Imperial units, and armored trains are never affected by an epidemic. The epidemic does not affect units that enter the province after the random events phase. Only units in a province during a random events phase are affected by an epidemic that occurs during that phase. Note: As an aid for locating an epidemic province, each province name on the table is shaded the same color as the region in which it is located. Shock armies (14.2) are affected by epidemics; they are returned to the randomizer if so eliminated.
12.12 Draw from the Randomizer
The phasing player must immediately pick one chit from the Auxiliary Forces Randomizer.
12.13 Petrograd Crisis
Any player who controls Petrograd picks one Randomizer chit.
12.14 Moscow Crisis
Any player who controls Moscow (Tver province) picks one Randomizer chit.
12.15 European Crisis
Any player who controls Poland and/or Finland picks one Randomizer chit.
12.16 Baku Oilfields
Any player who controls Baku picks one Randomizer chit. 12.17 For 12.13, 12.14 and 12.15, control is defined in 12.42. Any player who fulfills the condition when any of the above events is rolled makes the pick, not necessarily the one rolling the dice. 12.18 See 12.5 for actions taken when drawing Randomizer chits.
12.2 RANDOM EVENTS TABLE
- | See the map.
12.3 AUXILIARY FORCES RANDOMIZER
12.31 The Auxiliary Forces Randomizer is an opaque container (such as a coffee mug). At the start of the game, Auxiliary Force chits and special units are placed in the Auxiliary Forces Randomizer. When called upon to do so, a player picks at random one (or more) marker from it. The player then controls that marker and takes the action stated for it (below). Place them in the player’s Victory Point Display. Note: If a randomizer explanation contradicts the rest of the rules, the randomizer explanation takes precedence. 12.32 Players can always examine Auxiliary Force chits under other player’s control. 12.33 Players pick from the Auxiliary Forces Randomizer under the following circumstances.
-
- | During the randomizer phase, the player must draw one chit from the randomizer. In addition, the player draws additional Randomizer chits based on critical cities rule 12.4.
-
- | During the random events phase, if the player rolls a “Draw from the Randomizer” event.
-
- | As the result of the play of certain Randomizer chits (see below for explanations).
12.4 Critical Cities & Control
12.41 There are two types of cities shown on the map: regular cities and critical cities. Regular cities are there only for historical color. Control of provinces containing critical cities gives players additional Randomizer draws. Critical cities are not separate areas; there are no special movement or combat rules for them.
12.42 Control of Provinces
A player controls a province (and hence its critical city) if both of the following are true:
-
- | The only units in the province are controlled by that player. No other player may control any units in the province, nor may there be any non-controlled units. And:
-
- | None of the player’s units are mutually opposing. Example 1: a player would control Tver province (and hence Moscow) if he had, say, White and Blue units in it; however, if he had a White and Red unit in it, he would not control it. Also, if, say, an Anarchist unit were also in Tver, then he would not control the province. Example 2: Player A has a White unit in Petrograd. Player B also has a White unit in Petrograd. Neither player controls Petrograd. Example 3: Player A has a White unit in Vladivostok. There is also a non-controlled White unit in Vladivostok. The player does not control Vladivostok. Player note: Remember, you may use units you control to attack opposing friendly and neutral units—this is sometimes useful for consolidating control of a province.
12.43 Critical Cities and the Randomizer
In addition to normal randomizer picks, a player picks additional randomizer markers depending on the number of provinces containing critical cities he controls. A player totals the number of critical cities he controls, divides it by three, rounds up any remainder, and then picks that number of additional Randomizer chits. For example, a player controls four critical cities. Four divided by three is 1.33. Round up 1.33 to 2.0 and this would result in the player picking two additional Randomizer chits. 12.44 The map has a chart summarizing the number of Randomizer markers picked per critical cities controlled during the randomizer phase. 12.45 The additional chits are drawn for control of critical cities only in the randomizer phase, and not at other points in the game where Randomizer markers may be picked.
12.5 RANDOMIZER CHIT EXPLANATIONS
- Blue (Interventionist) or Green (Nationalist) Control The player places the marker in his section of the Victory Points Display. Next, he places a Blue or Green player Control marker (respectively) on each unit or force corresponding to the nationality of the drawn marker (see 5.61, 5.71 and 7.23). Note: If a player draws a Blue Control marker corresponding to a force that was previously withdrawn, it is discarded and he must draw again.
- Blue (Interventionist) OUT (Withdrawal) Marker The player immediately removes all of the corresponding Blue combat units of that nationality from the map (excluding units on the Victory Points Display). These units, along with the corresponding Withdrawal marker are permanently out from play (they are not placed on the Victory Points Display); place them in the Blue Units Out box on the map. Note: If a player draws a Withdrawal marker and the corresponding force was totally eliminated earlier in the game (that is, by combat), the player must immediately draw a different chit from the eandomizer.
- Assassin The player simply places the marker in his section of the Victory Points Display. This marker may be used as explained in section 10.0.
- Anarchists Strike You may play this during any friendly combat phase. Designate one anarchist unit anywhere on the map. You may conduct one attack with that unit. Follow the normal rules of combat (but see 14.19). The anarchist unit may attack any White, Red, Green or Blue forces in its province. An anarchist unit may also conduct a subversive attack 8.3. After play, return Anarchists Strike to the randomizer.
- Air Raid If you pick the Air Raid marker, place it on your Victory Points Display. During any player’s replacement phase, you may declare an air raid. Choose any province adjacent to a province in which you control a friendly Blue unit. Place the Air Raid marker in it and declare an air raid. Roll a die.
- | 1-3 = | That province may not provide replacements for any Red unit that would otherwise appear there this turn. There is no additional effect if the conditions of 9.13 or 9.14 are in effect.
- | 4 = | No effect.
- | 5-6 = | The player who controls the province (if any) being raided picks one chit from the randomizer. After play, return Air Raid to the randomizer.
-
Armistice When the Armistice marker is picked, the following immediately occur:
-
Central Powers OUT: All Central Powers (CP) units are withdrawn. Remove all CP units permanently from the game; place them in the Blue Units Out box on the map. Note that this marker does not affect the Turks (TU).
-
Blue Reinforcements: Free Korps and additional British and French units are brought into play. See rule 9.3.
-
Players can possibly use optional rule 17.4 Naval Operations.
-
The Armistice marker is permanently removed from play.
-
Assassination of the Czar: Play of this chit supersedes the requirement of 13.52 to have an order from the Central Committee of the Politburo to eliminate the Czar. To play this chit, the player must control the Czar, and must have a Red leader stacked with the unit. In addition, the player must expend one Assassination marker (return it to the randomizer—there is no need to roll on the Assassination Table). Otherwise, follow the procedure in 13.54. After this chit is played, remove it permanently from the game. Note: While the Central Committee may not block this chit, it may threaten the player who played it with a purge after the Czar has been assassinated.
-
Comintern If you pick the Comintern marker, place it on your Victory Points Display. If you control the Comintern marker, you may hold it or play it. You may play it during any subversive attack you make with Red units. This doubles your attack strength for one subversive attack. Comintern may be played only with Red units; it may not be played with the Terror marker, see below. After play, return Comintern to the randomizer.
-
Cordon Sanitaire If you pick the Cordon Sanitaire marker, place it on your Victory Points Display. Play this marker during a replacement phase to replace one eliminated Green unit in a province regardless if there are opposing units in that province. This is done as per the normal replacement rule. After play, return Cordon Sanitaire to the randomizer.
13.0 IMPERIAL UNITS
There are two Imperial units: the Czar and the Imperial Gold Reserve (the latter hereafter simply called the “Gold”). The Czar is initially deployed under the Red combat unit in Ekaterinburg (in western Siberia). The Gold is initially deployed under the White combat unit in Omsk (directly east of Ekaterinburg). Special rules governing the movement, capture and elimination of the Imperial units are contained in the following cases.
13.1 HOW TO MOVE THE IMPERIAL UNITS
13.11 Neither the Czar nor the Gold has any intrinsic movement allowance. These units may only be moved by being attached to and transported by a force that possesses a movement allowance (that is, a Red or White force containing a leader or any Blue or Green units). 13.12 Regardless of color, any force a player controls that possesses a movement allowance may attach, transport, and detach an Imperial unit. Such a force expends no additional movement points to attach, transport, or detach an Imperial unit. 13.13 The player whose Control marker is stacked above a given Imperial unit is considered “in control” of that Imperial unit. If there is no control marker above an Imperial unit, that Imperial unit is under no player’s control. 13.14 During his movement phase, the phasing player may attach an Imperial unit to any eligible unit or force he controls. A player may only attach or detach an Imperial unit during his own movement phase. A player may never detach an Imperial unit from a force he does not control. 13.15 If the phasing player controls an Imperial unit, he may transfer it between any two of his forces that occupy the same region by first detaching it form its original force and then attaching it to a second force. An Imperial unit may not be transferred in this manner if it was previously moved in the movement phase.
13.2 Controlling Imperial Units
13.21 The leader stacked directly above an Imperial unit is considered “in control” of that Imperial unit An Imperial unit is considered to be the same color as the unit that controls it; any combat units are stacked beneath the Imperial unit, which itself is stacked directly under the leader. 13.22 A White leader that controls the Czar may attach two additional White combat units for both movement and combat purposes. Thus, a White leader with a leadership value of “2” could attach a total of four White combat units while that leader controlled the Czar. 13.23 A player may not violate 7.11 to take advantage of this rule. That is, a stack could not exceed the normal limit of five leaders/combat units even if it possessed the Czar. Also, the provisions of 5.22 apply: the Czar does not allow you to appropriate the White units of other players. 13.24 A non-White leader or force derives no special benefit for controlling the Czar (though they may control the Czar). 13.25 A Red or White leader that controls the Gold may attach two additional combat units. These combat units may be either of two colors: the leader’s color or Green. Note: a player may not violate either 5.22 or 7.11. 13.26 If a leader that controls the Gold attaches any Green combat units, the owning player is allowed to violate 5.23 in the following manner: any Green combat unit, regardless of its control status, may be attached by a leader that controls the Gold, including Green combat units controlled by any player (exception: see 13.27). Green combat units attached to a leader that controls the Gold are considered to be the color of that leader for all purposes except they may not be moved in violation of 5.74. Note: Possession of the Gold, in effect, allows a player to appropriate Green combat units controlled by other players. Such units may be appropriated even if they were moved previously in the same game turn. When a player gains a Nationalist Control marker, he may not assume control of a corresponding Green combat unit if it is controlled by another player who controls the Gold. 13.27 A Finnish or Polish unit may never be attached by a Red or White leader. 13.28 A Blue or Green force derives no special benefit for controlling the Gold. 13.29 At the instant a leader loses control of an Imperial unit, it also forfeits any special benefit it derived for controlling that Imperial unit.
13.3 EMIGRATION OF IMPERIAL UNITS
13.31 During his movement phase, the player who controls an Imperial unit may remove it from the map for victory point purposes (see 14.46). The player simply removes the Imperial unit from the map and places it in his section of the Victory Points Display. 13.32 An Imperial unit may only be removed for Victory Point Purposes from a province that possesses a port (indicated by an anchor symbol printed on the map). 13.33 There is no movement point cost to remove an Imperial unit for victory point purposes. 13.34 Once an Imperial unit is removed from the map, it is permanently out of play for all purposes except victory conditions.
13.4 HOW IMPERIAL UNITS ARE CAPTURED
13.41 If all of the combat and/or leader units stacked with an Imperial unit are eliminated in combat, an eligible unit from the opposing force may immediately attach the Imperial unit. When an Imperial unit is captured in this manner, the new owner should immediately replace the former owner’s Control marker with one of his own. 13.42 An Imperial unit may never be stacked alone with a Control marker. If no combat unit or leader is stacked with an Imperial unit, it is under no player’s control and the phasing player is free to attach it to an eligible unit or force he controls.
13.5 EXECUTION OF THE CZAR
13.51 The Czar (and Gold) may never be eliminated by combat, epidemic, or assassination. The Czar may only be eliminated by execution by order of the Central Committee of the Politburo (see 11.1). 13.52 To order the Czar’s execution, the Central Committee must have the expressed consent of the player(s) who collectively control at least 10 Politburo markers. 13.53 The Central Committee may order the Czar’s execution at any time the Czar is controlled (attached) by a Red leader. This may be at any point in the game turn. Note: This may be so ordered the instant that a combat, purge or assassination is declared, but must be completed before the die roll is made. 13.54 The Player who controls the Czar at the instant the execution order is given must choose whether or not he will comply. If he wishes to comply, he simply removes the Czar from the map and places it in his section of the Victory Points Display. If he does not wish to comply, he may simply leave the Czar on the map under his control. Note: Of course, by not complying that player is risking a retributive purge by the Central Committee. 13.55 If the player who controls the Czar complies with an execution order, he is awarded victory points if the game ends in a Red victory (see 14.0). 13.56 Once executed, the Czar is permanently out of the game. 13.57 The Central Committee may issue an execution order whenever the requirements of 13.52 and 13.53 are satisfied. There is no limit to the number of execution orders the Central Committee may issue.
14.0 SPECIAL UNITS
Special units include Black combat units, shock armies and armored trains.
14.1 BLACK UNITS (ANARCHISTS)
Anarchists are a fifth faction in the game, coded Black. There are five Black units: Nestor Makhno (NM, placed in Yekaterinoslav), Kronstadt (KR, placed in Petrograd as a reinforcement), and three Uprisings (UR, placed randomly).
14.11 Set Up
The Nestor Makhno unit is initially set up in Yekaterinoslav (in the Ukraine). The Kronstadt and three Uprising units are placed in the randomizer. If a player picks a Black unit, then: If Makhno (as a replacement), place it in Yekaterinoslav. If Kronstadt, place it in Petrograd. If an Uprising, then the player rolls on the Random Events Table. If a result comes up that indicates a province, the player must choose one of those provinces within the result and place the Black unit there. If any other result, then the player places the Black unit on any province of his choice in Greater Russia, White Russia, Baltic, Ukraine, Cossack, Central Asia, Siberia or Mongolia. Black units may never be placed in Finland or Poland, and if some event calls for them to be so placed, then the player places them on some other province of his choice. 14.12 Black units are always placed, regardless of opposing forces.
14.13 Replacements
See 9.2 for replacement of Black units.
14.14 Stacking
If more than one Black unit is placed in a province, they are stacked separately. Black units may not stack with other color units.
14.15 Control
Black units may never be controlled by any player.
14.16 Movement
Black units may not move once placed.
14.17 Hostility
Black units oppose all other colors.
14.18 Effects
If a Black unit is in a province, the following apply.
-
- | No Red, White or Green replacements, Red and White shock armies or armored trains may be placed in that province. Black units and Blue reinforcements are placed normally.
-
- | The presence of a Black unit in a province prevents all players from controlling that province (see 12.42).
-
- | Since Black units oppose all other forces, they affect all other colors as per 5.17. A force may move through the province if that force includes an armored train 14.3, or if using the Ice March marker 12.5.
-
- | Black units do not affect withdrawal, emigration of Imperial units, and optional naval movement and evacuation.
14.19 Combat
Players may attack Black units. All forces are hostile to Black units. Since no player normally controls anarchist units, they may not attack; however, see the Anarchists Strike Randomizer marker explanation 12.5 for an exception. The Anarchists Strike marker allows Black units to make regular attacks as well as subversive and terror attacks.
14.2 SHOCK ARMIES
14.21 Shock armies are special combat units. They are initially placed in the Randomizer. If a player picks a shock army, he gains control of it. Place it with a force of controlled units of the same color within normal stacking limits. If none exist, then return the Shock Army marker to the randomizer and a substitute marker is picked. 14.22 As long as a shock army is controlled by a player, treat it as a normal combat unit.
14.3 ARMORED TRAINS
14.31 Armored Trains are a special type of combat unit. They are initially placed in the randomizer. If a player picks an armored train, he gains control of it. Place it with any force of friendly controlled units. Armored trains have no color; they are friendly to the force with which it stacks. An armored train must always be stacked with a friendly unit. If for any reason that armored train is not so stacked, then it is returned to the randomizer.
14.32 Armored Train Stacking
Armored trains can stack with Red, White or Blue units. A player may have a maximum of one armored train in a stack. If part of a Red or White stack, they must be attached to a leader. Armored trains do not count for stacking. This means that a player could have up to six units in a stack (plus Imperial units) if one of them were an armored train. You may attach and detach an armored train among friendly forces. An armored train does not count against a Red or White leader’s capacity to stack units; however, there may never be more than one armored train in a stack. For example, a leader with a value of “1” could stack one combat unit and one armored train.
14.33 Armored Train Movement
Armored trains can only move using rail movement; they may not move otherwise. A Blue force stacked with an armored train may use rail movement, an exception to 5.51. 14.34 If a stack is making a rail move with an armored train, it may move through (into and out of) the first province with an opposing force in it. It may continue moving after exiting; however, it must stop when it enters a second province containing an opposing force. That is, an armored train allows a force to move through one (and only one) province containing hostile forces per movement phase. For example, a White stack moving via armored train from Smolensk could enter Tver if it contained a Red stack, and then enter Novgorod. If there were no opposing units in Novgorod, it could move on to Petrograd; however, if there were opposing units in Novgorod, it would have to stop there.
14.35 Armored Trains & Combat
Armored trains add their combat factors to other friendly units in their stack. It may be taken as a combat loss normally. Trains may attack and defend. 14.36 If all other units in a stack are eliminated for any reason except an Armored Train, the armored train is also eliminated.
15.0 VICTORY CONDITIONS
A completed game of Russian Civil War results in either a Red Victory or a White Victory (see 15.1). If the game results in a Red Victory, each player totals the number of Red victory points he received according to the Victory Point Schedule (14.4) The player who possesses the greatest number of Red victory points is considered the winning player, and the remaining players a ranked as “runners up” according to their respective Red victory point totals. If the game results in a White Victory, the same procedure is followed; however, the players are ranked according to their respective White victory point totals. Note that only Red victory points are awarded when the game ends in a Red Victory, and only White victory points are awarded when the game ends in a White Victory. The victory points pertaining to the defeated color are simply ignored.
15.1 HOW THE GAME IS ENDED
There is no limit to the number of game turns that may be played in a game of Russian Civil War; however, the game must be immediately ended when any of the following conditions are met at the end of a game turn.
-
- | The game results in a White Victory at the end of any game turn when there are no Red leaders remaining on the map, other than those in Siberian provinces, Mongolia or on the Victory Points Display.
-
- | The game results in a Red Victory at the end of any game turn when there are no White combat units remaining on the map, other than those in Siberian provinces, Mongolia or on the Victory Points Display.
-
- | The game results in a Red Victory at the end of any game turn if there are no White leaders remaining on the map (excluding leaders in Siberia, Mongolia or on the Victory Points Display), and an agreement to the end of the game at this point is expressed by players who collectively control 10 or more Politburo markers. Note: If the required quorum to end the game cannot be found, the game is continued until ended by condition one or two above.
15.2 PLAYER PARTICIPATION
15.21 A player who wishes to leave the game may do so at any time. Obviously, a player who quits the game is no longer eligible for victory points at the end of the game, his victory points are simply ignored. 15.22 When a player quits before the completion of the game, all Red and White leader and combat units controlled by that player become incapable of movement or attack for the remainder of the game. In all other respects, the units are governed by the standard game rules. 15.23 When a player quits the game, all Politburo, Assassin and Blue or Green control markers belonging to that player are immediately placed in the Auxiliary Forces Randomizer. 15.24 When a player leaves the game before its completion, his player turn is deleted from the sequence of play for the remainder of the game.
15.3 TURN RECORD TRACK
Only the first five game turns are recorded on the Turn Record Track printed on the map. If the game continues beyond the fifth game turn, the Game Turn marker is simply returned to the beginning of the Turn Record Track. Note that no combat units may ever be replaced after the replacement phase of the fifth game turn.
15.4 VICTORY POINTS SCHEDULE
At the end of the game, victory points are awarded to each player for the units he controls either on the map or on his section of the Victory Points Display (as restricted by 15.41 through 15.47), and for control of certain provinces (14.48, 15.49). The victory point value of any eligible combat unit is equal to the unit’s combat strength. The victory point value of an eligible leader unit is equal to the leadership value of that leader. A player receives five victory points for each eligible Imperial unit he controls at the end of the game. A player receives two victory points for each eligible Politburo marker he controls at the end of the game. Important: In the event of a Red Victory, only Red victory points are awarded. In a White Victory, only White victory points are awarded.
15.41 Red Victory Points (VP Display)
Red VPs are awarded to each player for each of the following units he controls on his section of the Victory Point Display at the end of the game: White leaders; White combat units; Blue combat units; Green combat units; Politburo markers; and the Czar (see 14.46).
15.42 Red Victory Points (On Map)
Red VPs are awarded to each player for each of the following units he controls on the map at the end of the game: Red leaders; Red combat units; and the Gold.
15.43 White Victory Points (VP Display)
White VPs are awarded to each player for each of the following units he controls on his section of the Victory Points Display at the end of the game: Red leaders; Red combat units; Green combat units; Czech (Blue) combat units withdrawn or Imperial units (see 14.45 and 14.46).
15.44 White Victory Points (On Map)
White VPs are awarded to each player for each of the following units he controls on the playing are of the game map at the end of the game: White leaders; White combat units or Imperial units. Note that White victory points are not received for Politburo markers.
15.45 Czech Withdrawal
When a Czech (Blue) combat unit is voluntarily removed from the map in accordance with 5.66, it is placed facedown on the Victory Points Display. Conversely, when a Czech combat unit is eliminated, it is placed face-up on the Victory Points Display. White victory points are awarded only for face-down Czech units. Red victory points are awarded only for face-up Czech units.
15.46 Imperial Units
When an Imperial unit is voluntarily removed form the map in accordance with 13.3, it is placed facedown on the Victory Points Display. Conversely, if the Czar is executed in accordance with 13.5, it is placed face-up on the Victory Points Display. White victory points are awarded only for face-down Imperial units. Red Victory Points are awarded only for face-up Imperial units.
15.47 Special Units
-
- | Shock armies on the Victory Point Display count as victory points, depending on their color.
-
- | Armored trains on the Victory Point Display count as victory points for any faction the player chooses.
-
- | Black units on the Victory Point Display do not count for victory points. Remember: Special units are returned to the randomizer when eliminated on Game Turns 1 through 5; they are placed on the Victory Point Display on Game Turns 6 and after.
15.48 Expanding the Revolution
A player gains Red victory points for controlling certain provinces with Red units: five for Poland; two for Finland. See 12.42 for the definition of control.
15.49 Critical Cities
A player gains one Red victory point for each critical city controlled by his Red units. A player gains three White victory points for controlling Moscow or Petrograd, and one victory point for every other critical city controlled by his White units (there may also be Blue units controlled by the same player in the province). See 12.42 for the definition of control. A player gains two Red or White victory points for controlling Baku with Red or White units, respectively. Note: No victory points are awarded for other units or control except as specifically described in 15.41 through 15.48.
15.5 VICTORY POINTS DISPLAY BOXES
Boxes are printed on the map, with each player having a corresponding box. These are convenient locations for players to place units their forces have eliminated as well as randomizer markers they control.
16.0 HOW TO SET UP & PLAY THE GAME
Russian Civil War is designed for three to six players. The included optional rules allow the game to be played by any number of players, either in person or via postal play. As there is only one basic scenario, the following rules are always used to start the game, regardless of the number of players.
16.1 SETTING UP THE GAME EQUIPMENT
16.11 Place the map on a large, smooth table and arrange seating in any manner that will comfortable accommodate all of the participating players. 16.12 Sort out the counters by color and type near one end of the map and place the rules booklet at the other end. 16.13 Provide two wide-mouthed, opaque containers (for randomizers). One of these will serve as the Player Turn Randomizer throughout the game. The second container will initially serve as the Initial Forces Randomizer. After the initial forces are distributed among the players, this same container will be used as the Auxiliary Forces Randomizer for the remainder of the game. All counters placed in a randomizer should be thoroughly mixed before any unit is withdrawn from the container. Note: Players must follow the set up instructions in the following order.
16.2 PREPARATION OF THE RANDOMIZERS
16.21 Player Turn Randomizer
One player Control marker bearing a unique alphabetical code is selected from to represent each of the participating players. Those markers are then placed in the Player Turn Randomizer. For example, in a four-player game there will be four of these markers, say A, B, C and D. 16.22 Each player then takes one full set of Control markers and places them in a convenient location off the map. Each player should now have a set of Control markers bearing a unique alphabetical code. One marker from each player’s set has been placed in the Player Turn Randomizer. Henceforth, for the purpose of rules clarity, a given player will be referred to according to the alphabetical code of his Control markers. Note: No changes are required in the game rules if there are more than six players; however, each additional player will require a homemade set of Control markers. 16.23 The Initial Forces Randomizer is prepared for play by Player A, who places counters in it as follows: all 31 Red leaders, all 21 White leaders, 13 Politburo markers, two Assassin markers (may not include Felix D.).
16.3 DISTRIBUTION OF INITIAL FORCES
16.31 After the Initial Forces Randomizer is prepared, Player A proceeds to distribute the units in the randomizer as equally as possible by dealing units to each participating player in clockwise fashion. All of the units in the randomizer are dealt out, even if this results in an unequal numerical distribution. Note: units are dealt face-up; there is no secrecy attached to the distribution of initial forces. 16.32 Politburo Marker Distribution. Thirteen of the 15 available Politburo markers are distributed from the Initial Forces Randomizer. After all of the units in the Initial Forces Randomizer have been distributed, one additional Politburo Marker is given to the player who receives the Red leader Lenin (#151) and one additional Politburo marker is given to the player who received the Red leader Trotsky (#152). If the same player received both Lenin and Trotsky, he is entitled to both of those Politburo markers. 16.33 Trading. Players are now permitted to trade any of the units and markers they received in the Initial Forces Distribution. Any trade with the mutual agreement of both of the involved players is allowed. Note: Generally this trading session is used to consolidate either Red or White strength; however, the opposite strategy of attempting to gain a balanced hand can be equally successful. 16.34 At the conclusion of the trading session, each player places all of his Politburo and Assassin markers on his own section of the Victory Points Display.
16.4 AUXILIARY FORCES RANDOMIZER CREATION
16.41 After all of the units in the Initial Forces Randomizer have been distributed among the players and any trades made, Player A places the following units in the same container, hereafter called the Auxiliary Forces Randomizer: all seven Blue (Interventionist) Control markers, all six Blue (Interventionist) Withdrawal markers, all nine Green (Nationalist) Control markers, 13 Assassin markers (including Felix D.), all three shock armies (two Red, one White), four Black units (Kronstadt, UR-1, UR-2, UR-3), all three armored trains, all special randomizer chits (see 12.5). Note: The randomizer chits marked “Optional” or “Option” are also placed if using Optional Rules. 16.42 The units in the Auxiliary Forces Randomizer are not distributed at the start of the game. These units are picked during the randomizer phase of each player turn, and possibly during the random events phase when a “Draw from the Randomizer” result occurs.
16.5 INITIAL DEPLOYMENT OF COMBAT UNITS
16.51 Place the following units on the map:
-
- | All Red, White and Green units.
-
- | All Blue units with a province code on their reverse side.
-
- | The Black NM unit. Note: Remaining Blue units may enter as reinforcements. Shock armies, armored trains and remaining Black units enter via picks from the Auxiliary Forces Randomizer. 16.52 Each combat unit is coded (on its reverse) to indicate the region and province in which the unit is initially deployed and the region in which that province is located. The codes describe the following regions: A = Central Asia, C= Cossack Territories, G= Greater Russia, M = Mongolia, S= Siberia, T=Trans Caucasus, U=Ukraine, W= White Russia (Byelorussia). Each of these regions is distinctly colored on the map to facilitate locating a given province at any time during the game. The province code is usually abbreviated with the first four letters contained in the name of the actual province. A few are abbreviated differently to distinguish them from other similarly spelled provinces (for example, VLDV=Vladivostok; VLDM=Vladimir). When in doubt concerning which province to deploy a given unit in, check the unit’s region code. 16.53 Blue and Green combat units of the same nationality, which are deployed in the same province, must be stacked in the initial deployment. For example, the three Green Polish units are deployed in a single stack in Poland at the start of the game. 16.54 The stacking rules (section 7.0) must be observed during initial deployment. 16.55 Reinforcements. Units with (Reinf) on their reverse are placed on the Reinforcement Display on the map and enter only if a randomizer event brings them into play.
16.6 INITIAL DEPLOYMENT OF LEADER UNITS
16.61 Imperial Units. The Czar is initially deployed under the Red combat unit in Ekaterinburg (Siberia). The Gold is initially deployed under the White combat unit in Omsk (Siberia). 16.62 Each player then must deploy all of his Red and White leader units in their assigned provinces. Like combat units, leader units are coded to indicate the province and region in which the leader is initially deployed. In addition, certain leader units bear an asterisk next to their province code. During initial deployment, each leader marked with an asterisk must be stacked with the combat unit of the leader’s color in the leader’s assigned province. For example, Trotsky (#152) must be stacked with the Red TVER combat unit (#111) during initial deployment. 16.63 Leaders controlled by different players may never be stacked during initial deployment. 16.64 Leaders controlled by a single player may be stacked during initial deployment as long as 7.11 is not violated. 16.65 The stacking rules (section 7.0) are in effect during initial deployment. 16.66 In order to avoid confusion, it is suggested each player use an appropriately colored Control marker to distinguish his leader units as he deploys them on the map. When several leaders are stacked, the controlling player should place one of his markers on top of the stack (see 7.23).
16.7 SPECIAL FIRST GAME TURN MECHANICS
16.71 After the initial forces distribution and deployment, the game is ready to begin. Player A should place the Game Turn Marker in the first box on the Turn Record Track. 16.72 The game begins with an initial player turn sequencing segment (see 4.2) to determine the sequence of player turns during the first game turn. Player A draws one Control marker from the Player Turn Randomizer. The player turn series begins with the first player’s random events phase.
16.8 SPECIAL SHORT SCENARIOS
Players desiring shorter games can choose one of the following options: 16.81 Historic Climax. The game ends at the completion of Game Turn 5. It was at this time historically that the Bolsheviks turned the tide against the Whites, while at the same time being repulsed in front of Warsaw by the Poles. 16.82 Quick Victory. The game ends at the completion of the game turn in which the following conditions are in effect:
-
- | One Czar is either withdrawn from the map or eliminated (see 13.3); and
-
- | One player controls both Petrograd and Tver with either Red or White units (both provinces must be controlled by the same color).
17.0 OPTIONAL RULES
Players can use the rules below at their discretion to vary the complexity of the game.
17.1 CENTRAL POWERS EXPEDITIONARY FORCES
Historical Commentary: As World War I raged, the Germans committed small expeditionary forces to fight against the Bolsheviks (in general) or otherwise in support of Germany’s interests (in particular). 17.11 When using this rule, the CP units that begin the game in Finland and Kutais may be controlled by a player. Add the Option-1 marker to the randomizer. If a player picks this marker, he then gains control of those two CP units (and only those two CP units—the remainder remain uncontrolled). These two CP units may move anywhere on the map and engage in combat normally. If the Armistice marker is drawn, then these units are withdrawn with the other CP units. 17.12 Limited Naval Movement. The player who controls the CP Control marker may move one of these two units by Naval Movement per friendly movement phase. This is done as per 17.41; however, the player may not conduct any other naval operations due to possession of the CP Control marker.
17.2 KRONSTADT. Historical Commentary: The Kronstadt sailors tended towards an extremely radical if anti-authoritarian communism. When the Bolshevik regime started showing its totalitarian colors, the Kronstadt sailors rebelled—and then were crushed on orders of Lenin and Trotsky. But ever since, the Kronstadt Rebellion is seen as something of a symbol of defiance to totalitarianism. 17.21 The Kronstadt sailors are represented in the game by the Petrograd Black unit (combat strength = “4”). When this unit is picked, check to see if any player controls eight or more Politburo markers:
-
- | If so, then all the other players pick one marker each from the Randomizer. Start with the player who picked the Kronstadt unit (if he does not control eight or more Politburo markers) and proceed clockwise. Implement any effects as soon as each marker is picked. That is, all players who do not control eight or more Politburo markers pick one Randomizer marker each. The player, if any, who does control eight or more Politburo marker does not pick a marker.
-
- | If no player controls eight or more Politburo markers, then ignore 17.21(1). 17.22 Regardless of 17.21, the Kronstadt unit is then placed in Petrograd.
17.3 BLUE FORCE EXTREMES
Historical Commentary: The Free Korps was made up of German army veterans who volunteered to fight Bolshevism after the German surrender in the Great War. They tended to be on the extreme rightwing nationalist side when it came to their politics, and were especially fanatic when it came to fighting the Bolsheviks. Needless to say, their fanaticism did not make them especially popular among the various peoples of the former Russian Empire. On the other hand, the Czechs tended to be much more “political”, going so far as to win over the local populace and set up local governments in areas they controlled. The Czech’s political skill made them just as much a danger to the Bolsheviks as did their military skill.
17.31 Free Korps Fanaticism
-
- | Free Korps (FK) units may never be the target of a subversive attack. They may be the target of a terror attack.
-
- | Free Korps units may make terror attacks against opposing units (unlike other Blue units) if other prerequisites are met. This is an exception to 15.5(16).
17.32 The Czech Legion
-
- | Czech units (CZ) may never be the targets of subversive and terror attacks.
-
- | Czech units may make subversive attacks against Red units (as per 8.3). No special marker is required for this.
-
- | Czech units may use rail movement.
17.4 NAVAL OPERATIONS
A player may use the naval movement, evacuation and bombardment rules below, if:
- he possesses a British and/or French Control chit; and: 2) the armistice is in effect.
17.41 Naval Movement
A player may move one controlled Blue or White stack per British/French control marker he controls via naval movement per turn. The stack to be moved must begin the move in the Black Sea or Baltic Sea. That is, if you control both these markers, then you may move two stacks. If you control one marker, then only one. Procedure: The unit must begin its move in a province with a port. The player then moves it to any other port within the restrictions below. This is all the movement for that unit in a turn. The presence of opposing units does not affect embarkation and/or debarkation. Units may engage in combat normally after a naval move.
17.42 Restrictions
Black Sea: move to any other Black Sea port. Baltic Sea: move to any other Baltic Sea port.
17.43 Naval Evacuation
A player may evacuate White units he controls, taking them out of the game. The purpose of this is to avoid White units being eliminated in combat and thus counting for other players’ victory points. Procedure: To conduct an evacuation, a unit must begin its movement phase in a port on the Baltic, Black or White Seas, or in Vladivostok. Simply remove the evacuated unit from play. Once evacuated, a unit never returns to the map. This counts against the one move per British or French control marker per turn. 17.44 There is no limit to the number of units you can evacuate in a turn; however, armored trains may not be evacuated. 17.45 Evacuated White units do not count as not count as Red victory points 15.41. They do not otherwise give victory points to any player. Note: Naval Evacuation is not used to implement a Blue OUT marker event, or to withdraw Czech 5.66 or Imperial 13.3 units. These units are removed when the specific conditions for their withdrawal are met. Also note that these evacuations do not require possession of British or French control markers.
17.46 Naval Bombardment
The player can declare one naval bombardment per friendly combat phase per British and French Control marker that he possesses. Naval Bombardment may be used only in the attack, not defense. It may not be used for Subversive combat (in the event the player plays Terror). 17.47 The player must control at least one Blue, White or Green unit that is in a province adjacent to the Baltic or Black Sea (these do not necessarily have to be British or French units). This has the effect of doubling the attack strength of one such unit for one attack. Use printed strength for extracting any exchange losses. This does not count against naval movement capacity.
17.5 MAJOR ALLIED MILITARY INTERVENTION
Historical Commentary: One of the big what ifs of 20th century history was the possibility of the Allies launching a major military intervention to defeat the Bolsheviks. This was extremely unlikely, given European war weariness and the general political situation, but players may use this rule to explore the possibility.
17.51 Set Up
Add the following units and markers to the Reinforcement Display: 3 x “6” Allied Blue INT units, the INT Control, and INT OUT.
17.52 Triggering Allied Military Intervention
The instant that an Armistice occurs, place the INT Control marker in the randomizer. The three Intervention combat units and the INT OUT remain in the Reinforcement Display and do not appear until the INT Control marker is picked.
17.53 Appearance
If a player picks the INT Control marker, he gains control of the Intervention units. Place these units in any regions adjacent to the Baltic or Black Sea that has a port, or Vladivostok. The units may be placed together or in separate locations. Place that player’s control markers on them. 17.54 As soon as the INT Control is picked, place the INT OUT marker in the Randomizer. If a player is picking more than one chit, then do not place the INT OUT chit in the Randomizer until all picks are complete. If the INT OUT marker is picked afterwards, then all Intervention units on the map are withdrawn.
17.55 Naval Rules
The player who controls the Intervention units may also use Naval Movement, Evacuation and Bombardment 17.4. For purposes of 17.43 and 17.49, INT Control counts as a third marker. 17.56 Intervention units otherwise behave as Blue units. Note that the INT Control maker does not give control of the other Blue units in the game.
17.57 Victory
The player who controls the Intervention units must gain a White Victory to win. If he gains a Red victory, he can not win the game. This is so even if the INT OUT marker is later picked.
17.6 SECRECY
17.61 Players can conceal the following randomizer markers: Assassins, Anarchists Strike, Assassination of the Czar, Air Strike, Cordon Sanitaire, General Strike, Ice March, Military Commissariat, Supreme Leader, 26 Commissars, Territorial Demands, Terror. Hold them off the map and reveal them only when played.
RUSSIAN CIVIL WAR SOLITAIRE GAME
Sections 18.0 through 26.0 describe the solitaire version of Russian Civil War.
18.0 SOLITAIRE GAME TERMS AND DEFINITIONS
Red Units refer to Red leaders and Red combat units. Non-Red Units refer to White leaders, Green (Nationalist) combat units (including Polish and Finnish combat units), White and Blue combat units. Red Player refer to the fact that though there is only one player, he is referred to in the rules as the Red player whenever he carries out any operations with the non-Red units. Non-Red Units refers to the fact that though there is only one player, he is referred to in the rules as the non-Red player whenever he carries out any operation with the non-Red units. Controllable Units are those that may or must be moved and that may or must take part in combat. For the Red player, controllable units refer to Red leaders and any Red combat units attached to those Red leaders. For the non-Red player, controllable units refer to White leaders and any White combat units attached to those White leaders, as well as Blue and/or Green combat units, whose Control marker has been drawn from the Auxiliary Forces Randomizer and is possessed by the non-Red player.
19.0 SOLITAIRE GAME SEQUENCE OF PLAY
19.1 The Game Turn
Russian Civil War Solitaire is played in sequenced turns called game turns. Each game turn is composed of 12 phases, which occur in a rigid sequence. All game operations must be undertaken in a proper sequence. Any game operation performed out of sequence is violation of the rules and invalidates the game. All game turns are identical and follow one another until the game is ended.
19.2 SEQUENCE OF PLAY
The following sequence of play is substituted for 4.2. A. NON-RED PLAYER TURN
-
- | Random Events Phase: The player rolls one die twice and consults the Random Events Table. Subsequent action is governed by random events rules, see section 20.0.
-
- | Movement Phase: The player must move non-Red units within the limits of the movement rules; see section 21.0.
-
- | Stacking Phase: The player must stack or restack all non-Red units according to the stacking rules; see section 22.0.
-
- | Combat Phase: The player must use non-Red units to attack Red or Green units. Combat is resolved in accordance with the combat rules; see section 23.0.
-
- | Randomizer Phase: The player picks one chit from the Auxiliary Forces Randomizer. If necessary, he should immediately deploy player Control markers to distinguish new non-Red units that are controllable from those non-Red units that are not controllable. It is immaterial to the play of the game which player Control markers are used to make this distinction; see 10.12.
B. RED PLAYER TURN
- 6. | Random Events Phase: The player rolls one die twice in succession and consults the Random Events Table. Subsequent action is governed by the random events rules; see section 20.0.
-
- | Red Leader Determination Phase: The player removes all Red leaders, except for Lenin (#151) and Trotsky (#152). He rolls the die once to determine how many Red leaders, in addition to Lenin and Trotsky, may be used during the Red Player Turn; see section 24.0.
-
- | Movement Phase: The player may move all, some, or none of the Red units within the limits of the movement rules; see section 21.0.
-
- | Combat Phase: The player may use Red units to attack non-Red units in accordance with the combat rules; see section 23.0.
-
- | Randomizer Phase: The player picks one chit from the Auxiliary Forces Randomizer; see 20.12.
C. Replacement Phase
-
- | The player redeploys previously eliminated Red, Polish and/or Finnish combat units, according to the replacement rules; see section 25.0.
D. GAME TURN INDICATION PHASE
-
- | The player advances the Game Turn marker one space on the Turn Record Track to mark the passage of one game turn and the start of another.
20.0 SOLITAIRE GAME RANDOM EVENTS ALTERATIONS
The rules governing the random events, under the heading of section 12.0, are used in the solitaire version. The two modifications for solitaire play are explained below.
20.1 ALTERATIONS
20.11 Remove the following from the game:
-
- | All Politburo markers.
-
- | Randomizer Markers: Assassins, Air Strike, Anarchists Strikes, Assassination of the Czar, Comintern, Cordon Sanitaire, Felix D, General Strike, Ice March, Military Commissariat, Supreme Leader, 26 Commissars, Territorial Demands. The rules governing these markers are not used in the Russian Civil War Solitaire system.
-
- | Remove the Latvian Rifles (Red) Shock Army. Remove two of the Armored Trains. Place the Konarmiya (red), Volunteer Army (White) and one Armored Train in the randomizer. 20.12 Whenever a Blue or Green marker is drawn from the Auxiliary Forces Randomizer (either as the outcome of a die result on the Random Events Table or due to the Sequence of Play), the possession of that marker and the units represented by that marker always goes to the non-Red player.
20.13 Special Units
-
- | If the Konarmiya or Armored Train is picked, the Red player takes possession of it. Place it normally.
-
- | If the Volunteer Army is picked, place it on the White stack that is closest to Moscow. This must be within stacking restrictions. If more than one stack applies, choose one at random.
21.0 SOLITAIRE GAME MOVEMENT MODIFICATIONS
The rules governing the movement of Red combat and Red leader units are not modified in any way from the rules in section 5.0; however, there are additional rules governing the movement of non-Red combat units and non-Red leader units.
21.1 Basic Procedure
During the Non-Red Movement Phase, the non-Red player must move all non-Red units that he controls (exception: see 21.25). In moving his units the non-Red player is governed by three constraints
-
- | A priority sequence,
-
- | a die roll,
-
- | and a path of the fewest number of rail-line-connected provinces between a forces and Tver or Petrograd. These three constrains are explained below.
21.11 The non-Red player must move his units in a strict priority sequence:
-
- | first, all White units are moved,
-
- | then all Green units are moved, and, lastly,
-
- | all Blue units are moved. There is no priority sequence for the movement of units within a color. 21.12 Any aggregation of units in one stack, is considered a “force.” Forces must be moved one at a time. To move a force, the player must first specify which force he intends to move; second, roll the die; and third, move that force the indicated number result of the die roll. 21.13 At the beginning of the game, the non-Red player must determine for each non-Red force its target province. To determine its target province, count the fewest number of provinces, which are connected and traversed by a rail-line, from the non-Red force to either Petrograd or Tver; that province, Tver or Petrograd, which has the fewest number of intervening rail-line provinces, becomes the target province of that force. Once the target province for a force has been chose, that force must move along the same path of provinces (connected and traversed by rail-lines) that determined that force’s target province.
21.2 NON-RED MOVEMENT RESTRICTIONS
21.21 To determine the target provinces for a non-Red force that does not start on a province traversed by a rail-line, count the fewest number of provinces to a province that has a rail-line, that then leads to either Tver or Petrograd, and then obey the basic procedure. 21.22 In the event that two or more paths have the fewest number of provinces (connected and traversed by rail-lines), determine randomly by the roll of a die along the path that force must move to get to its target province. 21.23 Once a non-Red force moves into either Tver or Petrograd, it immediately stops moving, regardless or whether or not it has consumed its Movement Allowance (as determined by the die roll). 21.24 A Target province must be chosen for all non-Red forces at the beginning of the game. Once the target province has been chosen, it may not be changed. The non-Red force must move to its target province. 21.25 Even though some Green and Blue forces may not move out of their region, they must be assigned their target province. Though they may not move out of their region, they must move to the furthest extent possible to their target province. At this point, the Non-Red player nee not bother moving Green and Blue units any farther, because they may not move any longer. 21.26 The concept of a specific movement allowance is not used in the solitaire system. Instead, as explained in the procedure, a die roll determines the movement allowance for each non-Red force.
22.0 SOLITAIRE GAME NON-RED STACKING MODIFICATIONS
The rules governing stacking, section 7.0, are in effect in Russian Civil War Solitaire. There are additional rules that control the stacking of non-Red units. These additional rules do not apply to Red units.
The basic idea of the stacking phase is to rearrange the non-Red units so as to create the fewest, but strongest possible stacks of each color within the limits of the stacking rules given in section 7.0 in each province.
22.1 WHITE STACKING PROCEDURE
Specifically for White units, the stacking procedure is as follows; In a province in which there are White leaders and combat units, place as many White combat units with the greatest combat strength as possible under the White leader with the lowest Identity code. On this stack, place on top another White leader (if any remain) with the lowest Identity Code, and place as many White combat units with the greatest combat strength as possible under this White leader. Repeat this procedure until a stack of White units obeys 7.11 and contains the greatest possible combat strength for that particular province. This procedure should now be repeated with any remaining White units to create another stack with the second greatest combat strength, and so forth, until all of the White units in that province are properly stacked. Of course, if there are only White leaders and no White combat units in a particular province, the White leaders must stack to the greatest and strongest possible extent, while obeying 7.11.
22.2 BLUE & GREEN STACKING
The above procedure also applies for Green and Blue combat units, obey 7.14.
22.3 RESTACKING PROHIBITION
Once non-Red units are arranged in a stack, the units in that stack may not be rearranged or restacked until the stacking phase of the next game turn (exception: see 8.44, 8.29 and 12.11).
23.0 SOLITAIRE GAME COMBAT MODIFICATIONS
The rules governing the combat of Red leader and combat units are not modified in any way from the rules given in section 8.0; however, there are additional rules limiting the combat of non-Red leader and combat units. In general, whenever possible and within the following limitations, the non-Red forces must attack during the non-Red combat phase (exception: see 23.15).
23.1 NON-RED COMBAT
23.11 If there are any Red forces within the same province as any controllable non-Red forces, then all White, Green and Blue controllable forces must attack a Red force. In this case, all controllable non-Red forces must attack the Red force that has the smallest total number of combat strength points. In the event that to or more Red forces have both equal and the smallest total amount of combat strength points, randomly determined by a die roll which Red force is to be attacked (exception: see 23.14). 23.12 If there are no Red units, but there are Green forces within the same province as any controllable non-Red forces, all controllable White forces (never Blue or Green units, see 8.1) must attack a Green force. In this case, all controllable White forces must attack the Green force that has the smallest total amount of combat strength points. In the event that to or more Green forces have both equal and the smallest total amount of combat strength points, randomly determine by a die roll which Green force is to be attacked (exception: see 23.14). 23.13 Green units may not be attacked by White forces if there are any Red units in the same provinces as those Green units. 23.14 Controllable non-Red forces may not attack a force if the odds for that attack are less than 1:1. The lowest odds at which a non-Red force may attack is 1:1. 23.15 If condition 23.11 or 23.12 does not occur, or if condition 23.14 does occur, there is no combat for the non-Red forces in that province. 23.16 Whenever non-Red units must be eliminated due to an exchange result, the priority in which non-Red units are to be eliminated to fulfill that exchange result (see 8.43) is as follows: any and all Blue combat units are eliminated first; followed by any and all White combat units Green combat units second; followed by any and all White combat units third; and then any or all White leaders last. 23.17 Non-Red forces that are not controllable must not attack. Only controllable non-Red forces must attack. 23.18 Any non-Red force may be attacked by any controllable Red force.
24.0 LEADERS
In general, the use and function of Red leaders in the solitaire game has not changed from the multi-player scenario; however, the use and function of non-Red leaders in the solitaire game has been modified from the historical scenario. Refer to the appropriate section on Movement (21.0), Stacking (22.0), or Combat (23.0) to note the changes. There is one addition for the solitaire game that governs the number of Red leaders that the Red player may use during a game turn. This addition is the Red Leader Determination Phase.
At the start of every Red Leader Determination Phase in every game turn, the Red player must remove all Red Leaders other than Lenin (#151) and Trotsky (#152). Don’t remove or move at all Trotsky and Lenin during this phase. The Red player rolls the die once. The die roll is the number of leaders in addition to Lenin and Trotsky the Red leader may use during his player turn (but there may never be more than six, total; see 24.12). The Red Player may then pick any selection of Red leaders and deploy them on the map. Once deployed on the map, Red leaders function in movement and in combat identically to Lenin or Trotsky.
24.1 RED LEADER DETERMINATION
24.11 During the Red Leader Determination Phase, the Red leaders must be deployed (placed on top of) either a Red combat unit, or by themselves in provinces. A Red leader may not be deployed on a non-Red unit. 24.12 The maximum number of Red leaders including Lenin and Trotsky) that a Red player may have during a game turn is six. Example 1: Lenin is eliminated, but Trotsky is still on the map. During the Red Leader Determination Phase, if the Red player rolls a die and gets a six, he may only choose five additional Red leaders for a total maximum of six Red leaders. Example 2: Lenin and Trotsky are on the map and the Red player rolls a die and get a one during the Red Leader Determination Phase. The Red player may only choose one additional Red leader; in this example, the Red player has a total of three Red Leaders. 24.13 The Red player may pick any Red leader during the Red Leader Determination Phase. In effect, a Red leader may be picked and returned to and from the map continually through out the game; however, once a Red leader is eliminated due to combat, that Red leader is permanently out of play and may never be picked again for the Red Leader Determination Phase. 24.14 If Lenin or Trotsky is eliminated in either combat phases of a game turn, there is no Red replacement for that game turn (only); see 9.14, and there is no Red Leader Determination Phase; see 24.16. 24.15 If Lenin and Trotsky are eliminated in either or both combat phases of the same game turn, there is no Red replacement for both that game turn and the next game turn, and there is no Red Leader Determination Phase, see 24.17. 24.16 In the case of 24.14, there is no Red Leader Determination for one phase. Example 1: If Lenin or Trotsky is eliminated during a Non-Red Combat Phase, there is no Red Leader Determination Phase for that same game turn. Example 2: If Lenin or Trotsky is eliminated during a Red Combat Phase, there is no Red Leader Determination Phase for the following game turn. Note: Even through the Red player does not have the benefit of a Red Leader Determination Phase because Lenin or Trotsky has been eliminated, it does not at all impair, alter, or modify the function and use of the sole surviving leader (Lenin or Trotsky) during the Red Player Turn. The Red player simply does not get any additional Red leaders. 24.17 In the case of 24.15, there is no Red Leader Determination Phase for two phases. Obey 24.16 and simply ignore the immediately following Red Leader Determination Phase.
25.0 Replacement Modifications
The rules for replacement of combat units, section 9.0, are used during the Solitaire Replacement Phase, see 19.2. Nevertheless, there are several major modifications for the solitaire version, as explained below.
25.1 COMBAT REPLACEMENT
25.11 No White, Green or Blue combat units are ever replaced during the solitaire game (exception: see 25.12). 25.12 Only Polish and Finnish combat units are replaced during the game, see section 9.0 for replacement procedures. 25.13 Red combat units are replaced during the game, see Section 9.0 for replacement procedures. 25.14 Though no leaders are ever replaced during the game, Red leaders do have a special determination/deployment phase that permits them to reappear on the map during the game; see section 24.0. The above is not considered as replacement, and hence is not governed by any of the replacement rules. 25.15 Eliminated special units are permanently removed from play.
26.0 IMPERIAL UNITS: CZAR EXECUTION
The rules governing the Imperial units, section 13.0 are used in Russian Civil War Solitaire; however, 13.5 is deleted. Instead, use the following procedure:
Whenever a Red leader is stacked with the Czar, the Czar is automatically executed. Immediately remove the Czar from the map and place it in the game box. The Czar does not affect the victory conditions for either side, Red or non-Red, for the solitaire game. The Czar does retain its ability to permit a white leader to attach two extra White or Green combat units, as well as its benefit in moving, see 13.2.
27.0 SOLITAIRE SET-UP AND START
The Set-Up of Red, White, Green and Blue combat units is identical to the standard set-up. There are two modifications of the Leaders and Auxiliary Forces Randomizer.
27.1 LEADER DEPLOYMENT
27.11 Deploy all White leaders in identical fashion to the multi-player game (exception: see 27.12). 27.12 Deploy the following White leaders (identity code) on top of the combat units in the following province/region
- Chatilov (#266) | Saratov/Cossack
- Ulagi (#267) | | Uralsk/Cossack
- Romanovsky (#268) | Tiflis/ Trans Caucasus
- Lukomsky (#269) | Kirghiz/Cossack
- Kappel (#270) | Samara/Cossack 27.13 For the Red leaders, deploy only Lenin (#151) on the Red combat unit in Petrograd/Greater Russia and Trotsky (#152) on the Red combat unit in Tver/Greater Russia. No other Red leader is deployed at the start of the solitaire game; see section 24.0.
27.2 AUXILIARY FORCES RANDOMIZER
27.21 The same mix of markers is placed in the Auxiliary Forces Randomizer for Russian Civil War Solitaire using the multi-player game procedure. The exception is that the player should remove all units and markers as per 20.11. 27.22 Do not use critical cities rule 12.4.
27.3 HOW TO START
27.31 The non-Red player is the first player in the sequence of play in every game turn, see 19.2. 27.32 The Solitaire game starts with Game Turn 1 and finishes at the end of the seventh game turn.
28.0 SOLITAIRE VICTORY CONDITIONS
In Russian Civil War Solitaire, you endeavor to win as the Red player; though during the course of the game, you also act on behalf of the non-Red player. The non-Red player represents a system of rules that restricts the operations of the non-Red forces to defeat the Red player. There are three levels of victory for the Red player. In increasing order of magnitude, they are: Marginal, Substantive and Decisive. For the non-Red player, there is only one level of victory: Decisive. Any other result is a draw.
28.1 HOW TO DETERMINE VICTORY
28.11 The object of the Red player is to eliminate all non-Red units from each province within the following regions: Greater Russia, White Russia, Ukraine and Cossack. 28.12 If the Red player achieves his objective on:
- | Game Turn | His Victory Is:
- | 5 | Decisive
- | 6 | Substantive
- | 7 | Marginal 28.13 The objective of the non-Red player is to have a non-Red force move into either Petrograd and/or Tver. If there exists at least one non-Red unit in either Petrograd and/or Tver on the end of a game turn, the non-Red player achieves a Decisive Victory.
Game Analysis
29.0 PLAYERS’ NOTES
There are basically two courses of action that Russian Civil War may follow during the course of play. On the one hand, there is the so-called “mixed-format”, and its counterpart is the “Red/White format.” Each has its own style of play.
The “mixed format” refers to the situation in which players have a heterogeneous “hand” of Red, White, Green and Blue forces. In this situation, a skillful player can be double-faced. He can dupe the gullible into thinking that he is gaming on behalf of the Red Party, yet in action he eliminates Red leaders. He may even eliminate his own Red leaders to rack up victory points. If successful, the player may evade being purged.
In the “mixed format,” purges become common. Even the strongest player must be wary lest the weaker players start to pool their purge strength. For the weaker players who do form a Central Committee, one popular idea is to use a purge as a threat. When the Central Committee should provide him with one, remember that Assassin markers may be traded at any time. If the player refuses to comply, then the Central Committee should purge him.
The “Red/White format” refers to the condition in which a player commits himself to one color. In this situation, one or two players have all the White forces and everyone else has Red forces. Cooperation of the highest order is necessary for survival. The side that consolidates its strength with a sound plan of action will win. The White players should try to provoke purges and dissension among the ranks of the Red players. A simple ploy is to point out the fact that invariable one Red player remains detached from combat while he directs other Red player comrades to fight the Whites. Should an internal revolution occur in the Red players’ ranks, the White players will be assured of victory.
For those players who like to remain noncommittal, their best bet is to eliminate Blue combat units. Blue combat units are not replaced if eliminated and they are worth victory points.
Leaders are vulnerable. Like Blue combat units, they are not replaced if eliminated and are worth victory points. But the most important point is that once a color, Red or White, loses all their leaders, that side is impotent. The isolated combat units are easy prey to the vengeful enemy forces.
Despite the bloody combat that may ensue during the course of the game, do not overlook the importance of grabbing the Imperial units. For example, say one of your Red forces controls the Imperial Gold Reserve. If that Red force enters a province that has Green combat units, then that Red force can pick up and transfer (that is, stack with) those Green combat units to its control. During the combat phase, should that Red force attack a White force, but suffer an exchange, the player controlling that Red force, can simply eliminate those Green combat units while preserving the strength of his Red combat units. This tactic is valid, even if those Green combat units were formerly under some other player’s control.
Another useful tactic is to move through provinces (into which a force could not normally move) by means of the Imperial units. For example, say a Red combat force in Omsk (Siberia) wanted to attack a White force in Chita (Siberia), but there existed on Siberian Green combat unit in Krasnoyarsk (Siberia). Normally, the Red force could get as far as Krasnoyarsk (Siberia) and move no farther because of the restrictions of 5.27. Hence, the White force could not be attacked. Suppose, however, that same Red force had the Imperial Gold, then it could enter Krasnoyarsk (Siberia) declare that the Green combat unit is now under the control of the Red leader (13.26) and then exit Krasnoyarsk (Siberia), continue moving to Chita (Siberia), while leaving the Siberian Green combat unit in Krasnoyarsk. Now the Red force can attack the White force in Chita. The reason the Red force does not violate 5.27 is because, for a short moment, the Green combat unit was considered “Red,” according to 13.26, and therefore the Red force could continue its movement; as it exits the province, the Red force merely leaves the Green combat unit behind. During playtesting, the above tactic was euphemistically called the “Hot Knife Through Butter.”
30.0 SIMULATION DESIGN NOTES
30.1 SPI EDITION
The following is an examination of some of the more critical aspects of the design decisions made in the game vis-à-vis their relationship to the simulation of the historical event and their intended consequences in the play of the game. These notes are headed using the decimal numbering system of the rules section being discussed.
1.0 INTRODUCTION
The Russian Civil War is the first of our Power Politics Series of games. As such, it was subject to all the experimentation necessary to work out the mechanics of what would, hopefully, be a family of games. The Russian Civil War was chosen as a topic because it was in demand and because it possesses many of the historical elements that we felt would work well in a multi-player simulation.
2.0 GENERAL COURSE OF PLAY
“Multi-Player” generally means more than two players. An important question that must be answered is how many more than two. We initially played around with four-, five- and six-player games. The five-player game seemed to work best. One of the frequent problems of multi-player games is that each player generally moves in turn, meaning games that are not simultaneous in nature require an extensive amount of time for the individual player’s pieces to be moved. All through the design of The Russian Civil War, we have attempted to eliminate, as much as possible, activities that do more to slow the game down than to contribute anything valuable to the simulation or the interest in the game.
3.0 GAME EQUIPMENT
We decided to use an area movement map primarily because the game turns, which represented five months, encompass so much time that units could move just about anywhere they waned. Thus, the true limiting factors to movement were not geographical, but political, or, at least, people-related and note terrain-related. Thus, we simply took a related map of western Russia and reproduced it with a few embellishments here and there to clear it up for the sake of the game. Siberia, however, posed another problem. The main problem was that most of Russia is Siberia. In Siberia, however, almost all of the activity took place along the Trans-Siberian Railroad, and, indeed, all that need be shown of Siberia was the area immediately adjacent to the railroad. Thus, this is all we did show- in a rather abstract manner. The railroad net on the map has been reproduced from period sources and it should be remembered that the railroads shown are the main lines. There are many other secondary lines that would do little more than clutter up the map. One further element that is implicit in the design of the map is the idea that small provinces are generally the more populous ones. This formula was not strictly adhered to by the Russians, but it was generally true. It is, relatively speaking, easier to transit a large, but thinly populate province than it is to go through a small, heavily populated one.
4.0 SEQUENCE OF PLAY
There were two interesting design problems in this section. First, there was the problem of who moves first. This can often be a decisive element in a multi-player game. We solved it by having the “Player Turn Sequencing Segment,” in which the “first” player changes in an unexpected fashion from turn to turn. This, in effect, nullified the first-move advantage to a large extent. The other problem is less obvious. Because we use a group of chits to represent control of various auxiliary forces and because these are drawn by each player during his player turn, the more players you have, the more rapidly all of these pieces are going to be put into play. Thus, the number of players will determine to a certain extent, the temp of the game. During playtesting, we experimented with various approaches to the randomizer counter mix and have, one hopes, come up with an optimal solution. There will, however, be differences, sometimes noticeable and sometimes not when the number of players is varied. One final thing we did in the sequence of play was to try to have each player go through as efficient a sequence as possible, so that the game would not drag.
5.0 MOVEMENT
One of the key elements in making the game interesting, historical and still playable was the system whereby not all combat units in the game can move by themselves. This had a two-fold effect. First, it reduced the number of units (or stacks) each player could move (or has to even worry about) each turn. The fewer units that could or would be moved, then the faster each player would get through his movement. Secondly, it put historical emphasis on the key leaders of the Russian Civil War. Unlike a more “conventional” war, the Russian Civil War did not have organized civilian infra-structures to keep things going even in the face of an inept military leadership. The military/political leadership was critical and time and again was the decisive factor. The leaders, as given in the game, represent not only single individuals, but also that small collection of cadres and hard-core combat troops that each leader usually collected about himself. The Red leader, Trotsky, was famous for this and his armored train was something of a legend in its own time as it went from area to are, carrying with it a couple of hundred key combat troops and “spare” leaders, as well as supplies of ammunition and some heavy weapons. More importantly, Trotsky carried along communications equipment and a printing press. Thus, if you can get the right leader in the right place at the right time, you will quite likely carry the day. There are basically two forms of movement: on railroads and not on railroads. The railroads were truly what was holding Russia together, economically and otherwise. For this reason, possession of an open rail-line permits one to go anywhere along it. Without the rail-line, you must slog slowly by foot. This, again, enhances realism in the game, as it was the possession of the rail-lines that gave one side or the other the ability concentrate at the critical point for decisive results. The interventionist units posed some unique problems. They were there to, among other reasons, “show the flag,” and, theoretically, to suppress the growing Red menace by their very presence. It didn’t work out that way and the Blue interventionists’ lack of mobility proved fatal to the interventionist cause. You can see that when large Blue units do get loose. They can be quite critical in the outcome of the game. Since Blue units were the product of a more conventional military machine, they are not as dependent on leadership as were the Reds, White and other participants of the Russian Civil War. Thus, one merely has control of them. Somewhat the same situation applies to the nationalist (Green) units. These units have fewer problems, since their overriding objective was to free themselves from control of any central Russian government. Two of these nationalists movements did succeed: those in Poland and Finland. Indeed, these movements had pretty much succeeded by the time the game begins. The various movement rules applying to the nationalist contingents are based upon the local political conditions at the time. The Poles, for example, had few inhibitions against attempting to expand towards the east. The Finns, on the other hand, while they might have left their own borders, had very few reasons for doing so. But the chance of their moving into St. Petersburg was always there.
7.0 STACKING
The stacking rules were developed with two purposes in mind- playability and realism. The playability aspect was covered by forcing the use of a number of smaller stacks. This rule, at the same time, enhanced realism by not allowing a huge stack, constituting a “super army,” from lumbering about the map destroying all in its way. This was impossible from a historical point of view, because supply problems during the Civil War precluded assembly of forces that large in any one place for any considerable length of time. The stacking rules also make it easier to keep track of who is who and what units belong to what Player.
8.0 COMBAT
It is in the combat rules of Russian Civil War that we bring out some of the most realistic and playable aspects of the game. As you can see from a reading of the rules, it is possible for you to attack units under your control. It is true that Red units cannot attack Red units and White units cannot attack White units, but because of the random initial distribution of forces, a player may control units that were historically on opposite sides. This recreates the element of treachery and double-dealing that was very much in evidence during the Russian Civil War. There was also the “idiocy factor,” which was a major consideration during the conflict. The ability to attack units under your control as long as the attacker and the defender are not the same color worked out very well during playtesting. It was not a constant occurrence, since player would tend to specialize in one “color” or another. Typically, in a five-player game, four players would monopolize the Red units and one player would parlay a strong White position into a monopoly on nearly all the White units. This one “white” play could often have a decisive effect on the game, because the Red leaders usually were spread quite a bit around among the various player. The Reds strove to get a hold of Greens and Blue in order to keep then out of trouble while the Whites wants to control the Greens and Blues on the off chance they could use them against the Reds. One reason why the Reds did not fear the Blues was because of the Red ability to stage “subversive” attacks on the Blue units and thus help themselves on the way to gathering victory points. Subversive Attacks are nothing more than Communist agitation among the war-weary integrationist rank and file. This is one reason why the interventionists got out of Russia so quickly. Their armies in Russia were literally falling apart due to Red subversion. The Combat Results Table actually represents more non-combat than combat losses. Some 80 percent of the combat troops who died during the Russian Civil War died due to non-combat causes. These were primarily due to disease (typhus was a big one), starvation and exposure (during the severe Russian winters). The reason that so many non-combat casualties are reflected on the CRT is that most of the non-combat casualties would be incurred as a result of the movement and exertions that happened before and after combat. The combats themselves were rather short and sharp, if only because most of the fighting was mobile in nature and the ammunition supplies were always much less abundant than they were during the First World War itself. The remainder of the non-combat losses are reflected directly on the Random Events Table.
9.0 REPLACEMENT OF COMBAT UNITS
Some units are replaced simply because they are never completely destroyed. These units are obviously, local in nature and are characteristic of militia. That is, they are an ongoing levy upon the local manpower. They also represent, to a certain extent, the political infra-structure of that area and whether or not that political infrastructure is pro-Red or pro-White (or pro-Green, for that matter). For this reason, Enemy units in a particular province will prevent certain replacements. This is also the reason why the occupation of Moscow or St. Petersburg by White units closes down Red replacements. Likewise, the death of Lenin or Trotsky also has an adverse effect upon Red replacements. These two men were, more than anyone else, responsible for the raising and maintaining of Red armies.
10.0 ASSASSINATION
Assassination was a fact of life during the Russian Civil War and, as such, had to be represented in the game. The assassins themselves were not under as much control of the individual leaders as the game might imply. However, the method we adopted enabled us to encourage a little more diplomacy and also give the players some control over the terrorism that was so much a part of the Russian Civil War. The idea behind giving the Assassin markers to the intended victim of an unsuccessful assassination attempt was done to add a little more danger to any assassination attempt.
11.0 PURGE
Purges in the Russian Civil War game are not the purges that we normally thing of in Russia. That is, the purges that took place in the late 1930s and later. The Russian Civil War purges are relatively bloodless purges, whose major objective was to obtain allies in the Communist Party at the expense of some other faction. In addition to its historical purpose, we also used this mechanic in the game to encourage diplomacy among the Red players. In doing this, we were also able to add the “Central Committee,” which was the highest political/military authority among the communists.
12.0 RANDOM EVENTS
Random events are just that. Though they are primarily concerned with the random, but massive occurrence of disease (primarily typhus), starvation was also a great killer during the Russian Civil War, since the large-scale disruption the fighting caused created a breakdown among the food production and distribution systems. The other random events were primarily things that were not expected to occur with great frequency, such a Finland entering the war, or more common occurrences, which as a withdrawal of interventionist contingents. On the Random Events Table, many of these random events speak for themselves.
13.0 IMPERIAL UNITS
At the time that the game begins, in the middle of 1918, the imperial government of Russia was gone, but not completely. The Czar was still alive and the Imperial gold reserve was sent eastward to escape possible confiscation by the Germans (or others) and was sitting, along with the Czar, in Siberia. Both the royal family and the gold had considerable political and/or practical significance to whoever held them. While neither the Reds nor the Whites entertained any serious ideas of returning the Czar to power, the Whites, in particular, could make use of the Czar as a symbol. Particularly as a bargaining chip in their dealings with the interventionists (the Czar was, after all, related to the Royal Family in Great Britain).
14.0 VICTORY CONDITIONS
For a multi-player game, we came up with some rather innovative victory conditions. First of all, the players naturally sort themselves out into teams- the Reds and the Whites. Before anyone as an individual can win the game, one of these “teams” must win. This is accomplished by the simple expedient of utterly obliterating a team. At that point, its simply a question of determining who on the winning side contributed the most to that die’s victory. This is done by keeping tack of who destroys what and, not unnaturally, the player who makes the largest contribution toward defeating the other “team” is declared the “winner” of the game. The victory points are awarded for various units, and objectives pretty much speak for themselves.
15.0 HOW TO SET-UP AND PLAY THE GAME
The units are initially deployed in the game in a random fashion in order to recreate the chaos and disorganization prevalent during the Civil War. This results in the rather unusual custom of having players possessing units of two opposing sides. Players generally sort themselves out during trading sessions, but this two-sides-under-one-player system continues to contribute a lot to the flavor of the game, as well as encouraging diplomacy among the players.
30.2 DECISION GAMES EDITION NOTES
Russian Civil War has some innovative if unusual game mechanics. Still, it was a pretty “clean” system, once you got past the concept of players controlling mutually opposing forces. I left the core game systems intact but did clarify some of the more complex procedures from the original edition. Mainly, I added some additional components and rules to the game, keeping them within the spirit of the original. Where I did add rules, I made them extensions of existing systems...for example, by using Randomizer chits to bring in many of the extraordinary events of the original conflict.
Game System. The central game system was essentially valid. It modeled the fragmentation of command among the combatants as well as the political chaos. The Whites never could get united. Thus, no matter how effective their individual armies were in the field, they could never win a strategic victory. The Allied intervention forces similarly lacked a common command, as well as any common objectives. Indeed, there was some conflict among the various Blue forces. The Americans and Japanese were at loggerheads in Siberia, while the Germans and their erstwhile Turkish ally confronted each other over control of the Caucasus. The Reds also suffered from factionalism but in the end they did manage to get united. Think of the historical Bolshevik victory as being predicated upon one player winning via the game mechanic of “purge” and thereby consolidating leaders. Therefore, dividing control of the major factions in Russian Civil War among several players makes sense and is cleaner as a simulation—and in this case, possibly more realistic—than writing endless rules to model the Russian Civil War.
Expanding the Map. The map now includes Central Asia and Mongolia. These were the scenes of some action during the Russian Civil War that also brought in various foreign intervention forces. I readjusted part of the rail network to conform to the actual grid at the time. Finally, I added critical cities; These represent cities or areas that had political or industrial importance and give players a reason to fight over provinces that might otherwise make little military sense. Another reason for adding this rule is that with more chits in the randomizer, I needed a way to get more of them into the possession of players.
Order of Battle. In some cases this was a matter of adjusting unit strengths to reflect actual capabilities. For example, I upgraded the White Yudenich leader to a “2” as he was one of the better Czarist era generals, and his army was a considerable threat to the Bolshevik military position at Petrograd. In other cases, it was creating units for the new areas on the map, such as Central Asia. Finland also saw a brief civil war, so I added in the Finn “Red Guards” and also reduced the number of Finnish Green units (in the original game, they were too strong given the historical situation). Generally, I tried to maintain the original game balance of forces between Reds and Whites with the new units. This is one reason the White army in Omsk was upgraded to a “6” (another was that it represents Kolchak’s main force). I added Intervention (Blue) forces that had an impact on events. The German Free Korps, especially, was a major power broker in northwest Russia until they wore out their welcome. Historically, Intervention forces also included some contingents from various minor European powers (Greeks, Serbs, Italians, Canadians). They ended up folded into the strength of the British and French formations since they were pretty much dependent upon the major powers for logistics and command.
Special Units. There were many forces in the Russian Civil War that did not fit into the four major factions of the game. These included everyone from radical anarchists (such as the Nestor Makhno movement in the Ukraine) to messianic warlords (like Baron Ungern-Sternberg who set up shop in Mongolia and then proceeded to run amok against all sides). These are all represented as Black units. Again, it was cleaner to consolidate them all under one rule than to write special rules for each of them. Shock Armies are the elite formations, such as they were, in the Civil War. One of the main advantages of these units is that you can place them with any friendly force, thereby possibly positioning them to make a decisive attack. As for Armored Trains—what is a wargame on the Russian Civil War without armored trains? However, there is a more practical reason for including them. One situation that developed in the original game was that it was possible for players to leave their rear areas ungarrisoned, placing all of their units up front in some distant province without regard to lines of communications. I considered adding something along the lines of a supply rule to deal with this anomaly, but that would have been violating my premise of keeping within the spirit of the original system. The solution was with the armored trains. Since they allow you to penetrate the enemy front and make a dash for key areas in the rear, players now have a reason to protect their lines of communications without having to generate extra rules. Similarly, the Anarchist units give players another reason to “watch their rear”.
Random Events Table. I adjusted this a bit to include the new provinces on the map. I also added in more events, which will cause players to draw more randomizer chits. This was needed because of the additional number of chits in the Randomizer, again, to facilitate getting them into play. This also has a secondary effect in making certain provinces a little more important and thereby giving players more reasons to fight for control of them. I dropped the Subversive Attacks Doubled event since this was accounted for by the Comintern chit.
The Randomizer. It was one of my intents from the start to minimize special rules. Thus, the randomizer chits were a way to unique situations and anomalous events by using an existing game system. The new randomizer chits bring in a lot of the color of the Russian Civil War as well as dealing with special situations, such as the end of World War I (the Armistice). Among other things, they encourage players to do some “horse trading”, especially with the General Strike chits, which can be used only if a player possesses more than one. Players can increase their randomizer chit draw by controlling critical cities. This gives a little more reason to fight for control of certain Provinces. Some quick notes on the new randomizer chits:
Air Raid: All sides used airpower in the Russian Civil War, but this marker represents a British plan to bomb Moscow, using aircraft based with White forces. At the last moment, “Permission to Bomb Moscow” was refused, but this marker allows for a player to try it—if he wants to take the chance. Anarchists Strike: This is simply a way to make the Black forces a little more dangerous to the players. Assassination of the Czar: This allows for the historical situation in which a local Bolshevik commander did indeed have the Czar and his family executed despite orders from higher ups not to do so. But it costs a little more as the player must also burn an Assassination marker to play it. Armistice: The end of World War I, explained in detail below. Comintern: The Bolsheviks established the Communist International in 1919 to spread the Revolution globally. This replaces the Subversive Attacks Doubled random event from the original game. Cordon Sanitaire, Military Commissariat, Supreme Ruler: These all represent extraordinary efforts to raise forces, or the provision of military support by outside powers. Felix D.: Felix Dzherinisky was the head of the Cheka, the Bolshevik secret police. General Strike: This is organizing wide-scale protests and some partisan warfare that paralyzes your foes temporarily. You need two markers to make this work given that it can radically alter the outcome of a game. This means you either have to be actively seizing enough critical cities to increase your randomizer draws, or do some dealing with other players. Ice March: This is based on an epic march in 1918 into Cossack territory that resulted in the latter joining the anti-Bolshevik cause. It also allows player to conduct the kind of raids that often penetrated deep into enemy territory. 26 Commissars: This is based on an incident in which 26 Bolshevik commissars from Baku were executed by firing squad. They were turned into heroic martyrs for the Red cause by propaganda. Territorial Demands: This represents the occasional situation in which Intervention forces clashed with nationalists, such as the Turks in the Caucasus and the Freikorps in the Baltic. Terror: This is terror above the normal level shown by combat in the game. Armistice. The Armistice happens at random since at the start of the game (mid-1918) the combatants would not have known when the Great War was going to end. Indeed, the last German troops to return home were from their expeditionary force that had been fighting in the Caucasus over control of (what else?) the oil fields. The Armistice then opened up the Baltic and Black Seas to the Allied navies, allowing various European powers to send more troops to intervene. In the game, the Central Powers units withdraw, to be replaced by additional British and French units. The Free Korps also march into the fray. The situation with the Turks was somewhat more complicated (in 1921 they were more or less allied with the Bolsheviks), so I showed them as a separate force. The idea behind the Armistice marker is that it uses a single game function to trigger several game events, again keeping things simple.
The Optionals. These give special characteristics to certain units. There is a temptation to overdo this sort of thing, so I kept it limited to the Kronstadt Rebels, the Free Korps and the Czech Legion, representing some very unique circumstances, all of which in one way or the other were potentially decisive. Among other things, the Kronstadt optional rule serves as a balance against a player who consolidates too many Politburo markers. Allied naval capabilities did prove useful to the Whites, so they are in there. As for the Major Allied Intervention option, this allows player to explore one of the big What Ifs of the 20th century.
Other Things. There were a lot of factors that could have been added to the game, but they would have detracted from the system and, in the long run, not have been more realistic. Still, I included the Option chits so players can experiment with their own ideas. Remember, you control the game.
— Joseph Miranda
31.0 HISTORICAL NOTES
THE GAME AS HISTORY GAME TURN 1 (June-October 1918) There is no precise date that accurately marks the outbreak of the Russian Civil War. By June 1918, however, the conflict could be geographically defined. The Bolsheviks (frequently called the “Reds”) controlled the two administrative capitals, Petrograd and Moscow, as well as most of the surrounding industrialized provinces of central Russia. This central position was menaced by a variety of foes, commonly opposed to the revolutionaries who had overthrown the Provisional Government in November 1918, and who had recently signed an armistice with Germany, thus ending Russia’s participation o the Allies’ behalf in the First World War. The anti-Bolshevik forces consisted of three distinct groups. The counter-revolutionary “White” movement constituted the chief threat against he Reds. Unlike the Reds, however, the Whites were geographically scattered. The principal White areas included the southern parts of Russia near the Black Sea, the Baltic region and Siberia. Supposedly supporting the Whites, the Allied governments of France, the United States and the United Kingdom had landed forces at Kherson in the Ukraine, Archangel in northern Russia, and Vladivostok in Siberia. The Japanese had also taken advantage of Russia’s plight by landing a large army near Vladivostok. Other foreign troops in Russia included the one-million-man German occupation forces and the 100,000 troops of the Czech Legion. This Czechoslovakian force had served under Russian control against the Germans between 1916-1918 on the eastern front. Following the Bolshevik Revolution, the Czechs were not permitted to withdraw toward their homeland. Finally, they resolved to fight their way across Siberia to Vladivostok from whence the Allies would guarantee their repatriation.
In addition to the Whites and the Foreign intervention forces, the Reds also faced resistance from an assortment of national groups seeking independence from Russia. By June 1918, Poland and Finland had both won independence form Russia. There remained Estonians, Latvians, Lithuanians, Ukrainians, Siberians and other groups who favored neither the Red nor the White cause.
During the first five months simulated in the game, two critical events occurred at opposite ends of the Russian Steppes. In early June, a small White Army commanded by Anton Ivanovich Denikin initiated a campaign against 100,000 Red troops occupying the Kuban province bordering the Black Sea. Although vastly outnumbered at the outset, Denikin gradually gained support form the surrounding Cossack provinces, including General Krasnov’s Army of the Don Cossacks. By mid-summer, the Kuban campaign had swung heavily in the Whites’ favor. Soon after capturing the provincial capital of Ekaterinodar (16 August: Denikin was joined by General Peter Nikolaevich Wrangel, a former Czarist cavalry commander, who later became the second leading figure in the White movement.
In Siberia, as in the Kuban, the Reds were initially forces onto the defense. Anxious over the general course of events and the imminent approach of Czech troops, in Ekaterinburg, on the night of July 16/17, the Imperial family was executed by Red troops, probably upon orders issued by Lenin in Moscow. A few weeks later, the last vestige of the Russian Empire, the Imperial Gold, was captured by White forces at Kazan. From there I was transported to Omsk. Eventually, it would be used to finance the campaign of the third major White leader, Admiral Alexander Kolchak.
GAME TURN 2 (November 1918-March 1919) The key event that occurred during this time period was the general armistice ending World War One. Of course, the principal result was the withdrawal of German forces from Russia. In effect, this left the Whites more vulnerable, as the Germans had formed a major deterrent to the Fledgling Red Army. On the other hand, the Allied governments were now able to intervene in Russia on a greater scale. Actually, most of the intervention forces arrived in Russia during this period. By the end of 1918, sixteen foreign armies had arrived on Russian soil. The French were primarily committed in the south in support of Denikin. The British were also aiding Denikin, but other British troops had landed in Murmansk, Vladivostok, and the Trans-Caucasus region. A small American force was operating alongside the British in the north and a larger U.S. commitment had joined the British and the Japanese on the Pacific coast. Unfortunately, the whites gained little material support from the Western Allies. In large part, this was due to the face that there was no unified direction to the White movement and no single spokesman who could authoritatively negotiate on the Whites’ behalf.
In strictly military terms, the intervention forces proved totally ineffective. Many units sent to Russia contained low-grade troops unfit for service in an active war theater. The northern intervention forces, based on Murmansk and Archangel, advanced only 200 miles to the south. There they were halted by the infamous Russian winter. The combined effect of Red surprise attacks, Red political propaganda, and frostbite quickly destroyed Allied morale. Overall, the Reds, who represented their struggle as a defense against foreign incursions, benefited from the interventions, which were ostensibly effected to help the Whites.
In the south, the Whites continued their struggle against the Bolsheviks. Although the White movement had never espoused the restoration of the old regime, it did adopt the goal of restoring Russia’s pre-1914 boundaries. This policy naturally alienated the regional nationalists and made it impossible to broaden support for the white cause.
Meanwhile, the Red Army was being expanded and improved under the direction of Leon Trotsky, the Bolshevik War Minister. In general, the Red war effort was administered by Trotsky, while Vladimir Illych Lenin administered the political affairs of the Bolshevik state. Trotsky had to fight as many battles within the Communist Party as his troops fought against the Whites. A basic ideological conflict arose concerning the employment of former Czarist officers in the Red Army. Ultimately, the Party faction dominated by Lenin and Trotsky and that favored using trained officers (supervised by political commissars) persuaded the opposition. During the course of the war, many controversial issues were resolved via bloodless, ideological “purges.” Party members who could not be persuaded along certain lines were passed over when promotions were made.
GAME TURN 3 (April-August 1919) The five-month interval simulated during this Game-Turn covered the period of greatest crisis from the Red viewpoint. During the Spring, the Reds faced simultaneous offensives by Denikin in the south and Kolchak, who had 120,000 troops west of the Urals. The Reds responded by vigorously counter-attacking the White forces in the south. In April, the French evacuated Kherson leaving Denikin’s left flank hanging in mid-air. With the southern White position rapidly deteriorating, Wrangle (recently recovered from a bout with typhoid) assumed tactical command of Denikin’s forces. Almost immediately, White morale began to rise. By early Summer, White units led by Wrangel, Kutepov, and May-Maevsky had resumed the offensive across a broad front from Kherson to Astrakhan.
Meanwhile, a different type of campaign was occurring on the Siberian front. The White movement in Siberia had focused around a ex-naval officer, Admiral Kolchak (who had optimistically adopted the title, “Supreme Ruler of all the Russias”). During the Spring, Trotsky had permitted Kolchak’s forces to advance until they were overextended. The Whites, intermittently supported by the Czechs, had pressed west from the Urals, capturing the key rail-lines running through Ufa and Perm. But suddenly, in May, Trotsky launched a major Red counter-offensive spearheaded by armies under Vatzetis and Tukhachevsky. Hindered by supply problems, the Whites quickly lost all of the territory they had gained earlier in the year. The White salient into European Russia was devoured by the Red assault. By early June, Kolchak’s forces were in full retreat. The Whites had lost their last chance for linking their forces. The ensuing Red Offensives pursued the strategy of defeating the individual White armies in detail.
GAME TURN 4 (September 1919-January 1920) Although the threat from Siberia receded after Trotsky’s victory over Kolchak, during the autumn of 1919, the Reds again faced a two-pronged White assault. The main White thrust was again mounted in southern Russia. While Wrangle continued to drive eastward (toward Kolchak), Denikin advanced due nothing along the Moscow-Rostov railway.
The second White offensive introduced a new leader, General Nikolai Yudenich, who commanded 20,000 troops organized as the North-Western Army. In October, Yudenich advanced against Petrograd from his bad in the Baltic provinces. By Mid-October, Yudenich was camped on the outskirts of the Red capital while Denikin was swiftly approaching Moscow from the south. A White victory now appeared inevitable.
Although Lenin was ready to evacuate Petrograd, Trotsky succeeded in mobilizing the civilian population to man the city’s defenses. While Yudenich procrastinated, Red reinforcements poured into Petrograd until it became apparent that a White assault was no longer feasible.
In early November, the initial Red counter-attack precipitated Yudenich’s retreat. By the end of the month, the North-Western White Army had been driven back into Estonia with heavy losses.
Shortly after Yudenich’s defeat, Denikin’s Moscow offensive collapsed, apparently as a result of the growing discord between Denikin and Wrangel. Thus, in the south, as well as the north, by November 1919, the initiative had permanently passed over to the Reds. Red attacks by Budenny, Frunze, Vorshilov and Kamenev pressed steadily south as the White military leadership splintered into numerous factions.
By early 1920, the Red-White civil war as virtually over. Kolchak was captured and executed by Red troops at Irkutsk in February 1920. A month later, Denikin’s dwindling army was evacuated from Novorossisk by French and British naval forces. The last White leader, Wrangel (who had been exiled to Turkey by Denikin in 1919), returned to wage a hopeless last stand on the Crimean Peninsula during the Russo-Polish War of 1920. This last White bastion also disintegrated in a forced evacuation in November 1920.
32.0 SUMMARY OF RULES
This section is an assemblage of key rules from the text for quick reference. In the event that there is any discrepancy, the main text is to be considered the final arbiter.
4.2 GAME TURN SEQUENCE OUTLINE
FIRST PLAYER TURN
-
- | Random Events Phase. The phasing player rolls one die twice in succession and consults the Random Events Table. Subsequent action is governed by the Random Events Rules (see section 12.0)
-
- | Movement Phase. The phasing player may move all, some or none of the units he controls within the limits provided by the Movement Rules (section 5.0)
-
- | Combat Phase. The phasing player may use any of the units he controls to attack Enemy units. Combat is resolved in accordance with the Combat Rules (see Section 8.0)
-
- | Randomizer Phase. The phasing player picks one chit from the Auxiliary Forces Randomizer. If necessary, he should immediately deploy additional player Control markers to distinguish new units placed under his control (see 12.13).
Note: After all of the participating players have completed a player turn identical to that just described, play proceeds through a game turn inter-phase as outlined below.
GAME TURN INTER-PHASE
-
- | GameTurn Indication Segment. The first player advances the Game Turn marker one space on the Turn Record Track to mark the passage of one game turn and signal the start of another.
-
- | Replacement Segment. The first player (aided by the other players) redeploys previously eliminated combat units in accordance with the Replacement Rules (see section 9.0).
-
- | Player Turn Sequencing Segment. The first player draws one marker from the Player Turn Randomizer. The player whose marker is selected is designated the new first player for the remainder of the current game turn. The player to the left of the new first player becomes the second player, and the remaining players are assigned a new position in the sequence of play by proceeding around the table clockwise.
5.0 MOVEMENT
There are three basic types of moveable units in the game: combat units, Imperial units, and leaders. There are no movement allowances printed on the unit counters. Combat units can only be moved by an accompanying leader unit of the same color (exception: see 5.6, 5.7, and 12.25). In effect, a leader may attach and transport the otherwise immobile combat units. While leaders have the ability to move independently, combat and Imperial units may not. All leaders have movement allowance of five movement points.
5.1 MOVEMENT INHIBITIONS & PROHIBITIONS
5.15 Any unit that moved as part of a stack (or force) under the command of a given leader may neither move alone nor move again under the command of a different leader during the same player turn. 5.16 A combat unit attached to (stacked under) a given leader may not be attached or transported by any other leader. A leader and its attached combat units may, however, be moved together, accompanied by other leaders, as part of a larger force. 5.17 A unit (or force) may freely enter or exit a province regardless of the presence of other units in the province being entered or exited. A unit (or force) may not, however, both enter and leave a province during the same movement phase if the province entered is occupied by a unit of a different color an the color of the moving unit(s). A unit (or force) must immediately stop upon entering a province occupied by opposing units and may move no farther during that movement phase (exception: see 13.23).
5.4 STACKING EFFECTS ON MOVEMENT
5.41 Stacking or un-stacking units in the same province is considered a type of movement. There is no additional movement point cost involved in stacking or un-stacking units; however, a player’s units may only be stacked or un-stacked during his own movement phases. During all other phases, that player’s units may no be voluntarily rearranged (exception: see 11.21).
5.5 RAIL MOVEMENT
5.51 Only Red and White units may use rail movement. 5.52 A Red or White force (or leader) that begins its movement phase in a province traversed by a rail-line may move into or through an unlimited number of contiguous Rail-connected provinces. Rail movement, however is not exempt from the restrictions of 5.27.
5.6 HOW TO MOVE BLUE INTERVENTIONIST UNITS
5.61 There are seven Blue Control markers in the Auxiliary Forces Randomizer. Each of those markers controls one of the following nationalities: Turkey (TU), Free Korps (FK), Czechoslovakia (CZ), France (FR), Japan (JA), the United States (US), and the British Empire (BR). Additionally, there is an Optional Allied Intervention (INT) control marker. Those markers are gradually distributed among the players during the Randomizer or Random Events Phases of each player turn. Possession of a Blue Control marker permits a player to move any and all of the corresponding Blue combat units during the movement phase of his player turn. For example, if you possess the (US) marker, you control the one US unit in Archangel and the two US units in Vladivostok. 5.62 The Blue units that lack a corresponding Control marker, including the Romanian (RM), Chinese (CH), and Central Powers (CP) units, may never be moved or controlled by any Player. They may never attack, although they must defend when attacked. 5.63 Any Blue unit that may be moved possesses a movement allowance of three movement points. 5.64 Blue Units may not use rail movement. 5.65 Czech and Japanese units may never enter a province outside of the Siberia region. Other moveable Blue units may enter any province on the map. Restrictions:
-
- | Czech and Japanese units may only enter provinces in the Siberia region.
-
- | Turkish units may only enter provinces in the Trans-Caucasus, Cossack and Central Asia regions.
-
- | Central Powers, Chinese and Romanian units may never move.
-
- | Other moveable Blue units may enter any province on the map.
5.7 HOW TO MOVE GREEN NATIONALIST UNITS
5.71 Each distinct nationalist force is represented by a Green Control marker. Possession of a Green Control marker permits a player to move all, some, or none of the corresponding Green combat units during the movement phase of his player turn. 5.72 All Green combat units have a movement allowance of three movement points.
5.73 Green units may not use rail movement
5.74 Green units may never enter a province outside of their “home” region (exception: see 5.75 and 5.76). 5.75 Finnish units may only enter the following provinces: Archangel, Olonetz, Petrograd, and Finland. 5.76 Polish units may enter any province in any of the following regions: Greater Russia, White Russia, the Baltic Region, or the Ukraine region. Polish units may, of course, enter Poland also. Polish units may never enter any of the following regions: The Cossack region, The Trans-Caucasus region or the Siberia region.
5.7 HOW TO MOVE BLACK ANARCHIST UNITS
5.71 Black units may never move.
6.0 PLAYER NEGOTIATIONS
6.1 During the designated point in initial set up 16.33, players may trade units and markers they received in the initial forces distribution.
6.21 During game turns, players may trade the following markers: Politburo, Anarchists Strikes, Assassins, Air Strike, Assassination of the Czar, Comintern, Cordon Sanitaire, Felix D., General Strike, Ice March, Military Commissariat, Supreme Leader, 26 Commissars, Territorial Demands, Terror markers.
7.1 STACKING LIMITATIONS & PROHIBITIONS
7.11 A single stack may contain a maximum of five combat and/or leader units in any practicable combination. In addition, a single stack may contain one player Control marker and either or both Imperial units plus one armored train. 7.13 Different colored units may never be stacked together (exception: see 7.11 and 13.25).
7.2 Stacking Position & Unit Types
7.23 The counter mix provides six distinct sets of player Control markers. At the beginning of the game, one set of these Control markers is assigned to each player. At all times during the game, each player uses one of his Control markers to distinguish each and every force (or stack) of units he controls. That’s indicated by placing a Control marker on top of each stack. Each Control marker possesses either a Red/White or a Blue/Green color scheme. When placed on top of a force on the map, the face-up color of the Control maker should indicate the color of the units beneath it.
7.3 EFFECT ON COMBAT
7.31 The attacker must attack all of the units in a single stack together; the combat strengths of all the units in a single stack are totaled, and in this total strength is attacked. Units in a single stack may not be attacked individually. 7.32 The units in an attacking stack must participate in a single combine attack; the combat strength of all the units in an attacking stack are combined into a total attack strength. Units in a single stack may not attack individually nor may any unit in an attacking stack be withheld from the attack or its results. 7.33 The units in two or more stacks may combine their combat strengths to attack a single defending stack as long as the restrictions of section 8.0 are not violated. 7.34 Separate stacks may not be combined in defense. Each stack in a given province must be attacked separately.
8.0 COMBAT
Total the combat strength points of all attacking units involved in a specific attack (against the same defending unit or stack of defending units). Compare this total to the total combat strength of all the defending units that are the object of that specific attack. State the comparison as a ration: attack strength to defense strength. Round off the ration in favor of the defender to conform to the simplified odds found on the Combat Results Table. Example: if 13 strength points were attack four, the combat odds ration would be 3.25:1, rounded off (always in favor of the defender) to 3:1. The attacker then rolls the die. The result indicates a line on the Combat Results Table, which is cross-indexed with the column representing the combat ratio (or odds). The intersection of line and column yields a combat result. This should immediately be applied to the involved units, before going on to resolve any other combat. Units eliminated in combat are immediately removed from the map by the owning player and placed in the appropriate box on the Victory Points Display.
8.1 DEFINITION OF OPPOSING FORCES
8.12 Red units oppose all non-Red units.
8.13 White units oppose Red and Green units (only)
8.14 Green units oppose Red and White units (only)
8.15 Blue units oppose only Red units.
8.2 WHICH UNITS MAY ATTACK
8.21 During a combat phase, only units controlled by the phasing player may participate in attacks. The non-phasing players’ units may never participate in an attack during a combat phase. 8.22 Units may only attack opposing (enemy) units. Friendly units of different colors may combine their combat strengths to attack a unit that is their common enemy. For example, White and Green units may combine to attack a Red unit. No unit, however, ay participated in an attack against a friendly unit. 8.23 Only units that occupy the same province as an opposing enemy unit (or stack) may participate in an attack against that enemy unit. No combat is permitted except between opposing units that occupy the same province during a combat phase (exception: see 8.3). 8.24 Attacking is completely voluntary; the phasing player’s units are never compelled to attack opposing units that occupy the same province. 8.25 No unit may attack or be attacked more than once during a single combat phase.
8.3 SUBVERSIVE ATTACK
8.31 A subversive attack may only be made by Red units that are in one or more provinces adjacent to a province occupied by a Blue unit. For subversive attack purposes, any to provinces are considered adjacent if they share a common border that is passable by units during a movement phase. Red units may not employ a subversive attack against Blue units that occupy the same provinces as the attacking Red units. 8.32 Red units in different provinces may combine their combat strength for subversive attacks. Note, however, all Red units that participate in a subversive attack must occupy a province adjacent to the province occupied by the attacked Blue unit(s). 8.33 Subversive attacks are resolved according to the normal combat procedure (see 8.0). Combat rules, however, are interpreted differently when resolving a subversive attack (see below):
-
- | Ae and Ex results have no effect on either the Red or Blue units involved.
-
- | A De result eliminates all Blue defending units exactly as in normal combat.
8.4 EXPLANATION OF COMBAT RESULTS
8.41 Ae = Attacker Eliminated. 8.42 De = Defender Eliminated. 8.43 Ex = Exchange of Losses. 8.44 Units eliminated in combat are removed from the map by the owning player. When part of a force is eliminated due to an Ex combat result the owning player may select which units to lose, but he may not rearrange or alter the composition of stacked forces after deducting the proper number eliminated strength points. 8.45 Defending units eliminated in combat are removed from the map and immediately placed on the Victory Point Display in the section corresponding to the attacking player. Attacking units eliminated in combat are removed from the map and immediately placed on the Victory Points Display in the section corresponding to the defending player. Note that when a player attacks his own opposing units that he also controls, the eliminated units are placed in his own section of the Victory Points Display.
9.1 WHICH UNITS MAY BE REPLACED
9.11 Only Red, White, and Green combat units may be replaced. Leaders, Imperial units, and Blue units may never be replaced. 9.12 During the replacement phase of each game turn, players should examine each combat unit on the Victory Points Display and its corresponding province. A unit may not be replaced during the replacement phase if its corresponding province is occupied by an opposing unit (see 8.1), unless the province is also occupied by at least one combat or leader unit of the same color as the replacing unit. For example, if the Don Cossack province in the Cossack region on the map was occupied by a Red unit, the Don Cossack combat unit (#212) could only be replaced if it was on the Victory Points Display and the Don Cossack province was occupied by at least one White leader or combat unit. 9.13 Red combat units may never be replaced during a replacement phase if either Tver or Petrograd (both provinces in Greater Russia) is occupied by a non-Red unit, unless the enemy-occupied province(s) is also occupied by at least one Red unit. Example: No Red combat units could be replaced if during the replacement phase a Green, White, or Blue unit occupied Petrograd and there were no Red units in Petrograd. 9.14 No Red combat units may be replaced during the first replacement phase that occurs after either Lenin (#151) or Trotsky (#152) is eliminated either by combat or assassination. Note: If Lenin and Trotsky are both eliminated during the same Game-Turn, Red replacements are suspended for two full game turns (that is, no Red combat units could be replaced for two consecutive replacement phases). 9.15 Combat units of a given color (either Red or White) may never be replaced after all of the leaders of that color have been eliminated. 9.16 No units may be replaced after the fifth game turn. 9.17 During the replacement phase, all replacements are assumed to occur simultaneously. Thus, for example, a White unit being replaced in Kharkhov doesn’t prohibit a Green unit from being replaced in Kharkhov during the same replacement phase. 9.18 A given combat unit may be replaced each and every game turn as long as its replacement does not violate any of the restrictions of 9.14.
9.2 Replacement of Special Units
9.21 On turns one through five, armored trains, anarchists and shock armies are immediately placed back in the randomizer when they are eliminated. If picked again, they are placed on the map as per their rules for placement
9.3 Reinforcements
Reinforcements are new units introduced onto the map after play starts. Reinforcements are initially placed in the Reinforcement Display and then moved onto the map when the Armistice marker is picked.
10.1 ASSASSINATION LIMITATIONS AND PROHIBITIONS
10.12 A player must control at least one Assassin marker to attempt an assassination. At least one Assassin marker must be expended for each assassination attempt made (see 10.22 and 10.23) 10.13 The leader whose assassination is attempted must occupy a province that is also co-occupied by a leader controlled by the phasing player. Only leaders on the map may be assassinated. The Czar may not be assassinated (see 13.5). 10.14 The color of the leader units involved in an assassination attempt has no effect. For example, the phasing player may attempt to assassinate a Red leader in a province occupied by either a Red or White leader he controls.
10.2 EFFECT OF ASSASSINATION
10.22 All Assassin aarkers employed in an unsuccessful assassination attempt are repositioned on the Victory Points Display in the section belonging to the player who controls the leader whose assassination was attempted. Those markers are now considered under his control and he may trade them or use them in any fashion he chooses.
11.1 CONSTITUTION OF THE CENTRAL COMMITTEE
11.11 Any individual, or group of players, who collectively control at least eight Politburo markers and who unanimously consent to each other’s membership on the committee, constitutes the Central Committee of the Politburo for purge purposes. 11.14 A player may never be purged while he is a member of the Central Committee. A committee member may be counterpurged.
11.2 EXPLANATION OF PURGE RESULTS
11.23 When the Central Committee purges as a group, it must unanimously agree beforehand how any successful “purged” points will be divided. Once the dice are rolled to resolve the purge, this agreement is considered binding upon all of the members of the committee. The members may not alter this agreement in any manner once the purge resolution die roll is executed. Successfully purged points must then be distributed according to the original agreement to the greatest possible extent.
12.1 EXPLANATIONS OF RANDOM EVENTS TABLE RESULTS
12.11 Epidemic
An epidemic result indicates one or more provinces as being currently disease-ridden. The phasing player must immediately remove the strongest combat unit in each Red, Green and White stack in each of the indicated provinces. The removed units should be placed in the Unassigned box. The combat unit removed from each stack in a diseased province should be the unit with the largest combat strength. If two or more units have equal strengths (and there is no weaker combat unit in the stack), the topmost combat unit is removed. Blue combat units, Imperial units, and leaders are never affected by an epidemic. The epidemic cannot affect units that enter a diseased province after the random events phase. Only units in a province during a random events phase are affected by an epidemic that occurs ding that phase. Note: As an aid for locating an epidemic province, each province name is shaded the same color as the region in which it is located.
12.12 Draw from the Randomizer
The phasing player must immediately pick one chit from the Auxiliary Forces Randomizer he then takes the action according to the type of chit that was drawn.
12.13 Petrograd Crisis
Any player who controls Petrograd picks one randomizer chit.
12.14 Moscow Crisis
Any player who controls Moscow picks one randomizer chit.
12.15 European Crisis
Any player who controls Finland or Poland picks one randomizer chit.
12.16 Baku Oilfields
Any player who controls Baku picks one randomizer chit.
12.4 Critical Cities
12.41 There are two types of cities shown on the map: regular cities and critical cities. Regular cities are there only for historical color. Control of provinces containing critical cities gives players additional randomizer draws. Critical cities are not separate areas; there are no special movement or combat rules for them.
12.42 Control of Provinces
A player controls a province (and hence its critical city) if both of the following are true:
-
- | The only units in the province are controlled by that player. No other player may control any units in it, nor may there be any non-controlled units.
-
- | None of the player’s units are mutually opposing.
13.2 Benefits for Controlling Imperial Units 13.22 A White leader that controls the Czar may attach two additional White combat units for both movement and combat purposes. Thus, a White leader with a leadership value of “2” could attach a total of four White combat units while that leader controlled the Czar. Note: A player may not violate 7.11 to take advantage of this rule. 13.23 A White force that controls the Czar may freely move throughout a province occupied solely by Blue units (or solely by Blue and White units) without being required to stop in accordance with 5.27. 13.24 A non-White leader or force derives no special benefit for controlling the Czar. 13.25 A Red or White leader that controls the Gold may attach two additional combat units. These combat units may be either of two colors: the leader’s color or Green. If the leader attaches combat units of its own color, the owning player may not violate either 5.26 or 7.11. 13.26 If a leader which controls the Gold attaches any Green combat units, the owning player is allowed to violate 5.26. 13.27 A Finnish or Polish unit may never be attached by a Red or White leader. 13.28 A Blue or Green force derives no special benefit for controlling the Gold.
13.4 How Imperial Units are Captured
13.41 If all of the combat and/or leader units stacked with an Imperial unit are eliminated in combat, and eligible unit from the opposing force may immediately attach the Imperial unit. When an Imperial unit is captured in this manner, the new owner should immediately replace the former owner’s Control marker with one of his own.
13.5 EXECUTION OF THE CZAR
13.52 To order the Czar’s execution, the Central Committee must have the expressed consent of the player(s) who collectively control at least 10 Politburo markers. 13.53 The Central Committee may order the Czar’s execution at any time the Czar is controlled (attached) by a Red leader. 13.54 The player who controls the Czar at the instant the execution order is given must choose whether or not he will comply. If he wishes to comply, he simply removes the Czar from the map and places it in his section of the Victory Points Display. If he does not wish to comply, he may simply leave the Czar on the map under his control. (Of course, by not complying he is risking a retributive purge by the Central Committee.)