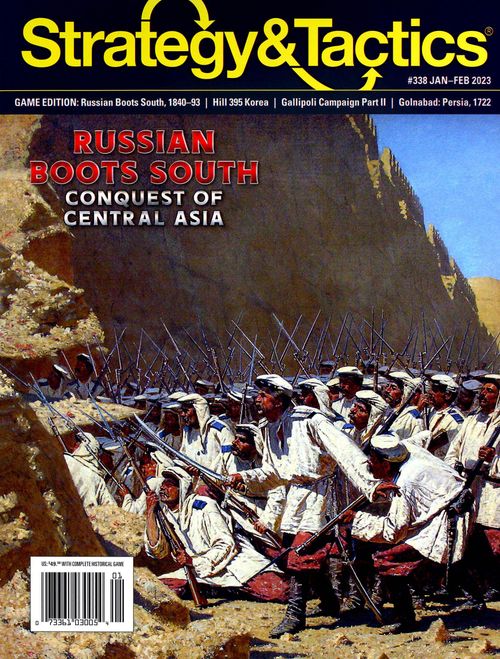
Russian Boots South: Conquest of Central Asia
Russian Boots South: Conquest of Central Asia Rulebook
Table of Contents
Table of Contents
- Counter Errata
- 1.0 Introduction
- 2.0 Components
- 3.0 Definitions
- 4.0 Set-Up
- 5.0 Victory Conditions
- 6.0 Sequence of Play
- 7.0 Theater of Operations & Alliances
- 9.0 Reinforcements & Outfitting
- 8.0 Great Game & Initiative
- 10.0 Command Markers
- 12.0 Fortunes of War & Incident Markers
- 13.0 Movement
- 14.0 Stacking
- 15.0 Zones of Control (ZOC)
- 16.0 Combat
- 17.0 Retreat
- 18.0 Pursuit
- 19.0 Supply
- 20.0 Fall Back
- 21.0 Ports & Flotillas
- 22.0 Unique Units
- 23.0 Off-Map Bases
- 24.0 Fog of War
- 25.0 Scenarios
- 26.0 Combat Results
- Optional Rules (Online Only)
- 27.0 Railroad Construction & Operations
- 28.0 Morale
- 29.0 The Great Game Goes Hot
Counter Errata
Disregard the "CA" sub-command designator on the Russian von Kaufmann counter.
1.0 Introduction
Russian Boots South is a wargame simulating the Russian conquest of Central Asia during the period between the late 1850s and early 1890s. There are two opposing players: Russian Empire and Khanates. The Russian Empire player represents the theater command of an autocratic empire. The Khanate player represents the various independent kingdoms and tribes of the region, with the possibility of intervention from forces on the periphery.
Each side's forces are divided into sub-commands. For the Russians, these are Caucasus, Orenburg, and Siberia. Khanate forces are divided up into Bokhara, Khiva, Khokand, Pamir and Turcoman. There are also Intervention forces which are controlled by the Khanates (Afghanistan, British Empire, Manchu China, and Ghazi jihadists) and sometimes by the Russians (Persia and Yakub Beg rebels).
Victory conditions are asymmetrical, with the Russians trying to conquer Central Asia and the Khanates trying to prevent this.
1.1 Game Scale
There are three scenarios, each representing a different situation. Each game turn (GT) represents a campaign lasting from one to six years, depending on the pace of operations. Each GT might not be contiguous with the prior one as often there was a space of years between campaigns.
Each hexagon on the map represents 80 to 90 kilometers (53 miles). Each Russian unit represents one or two battalion-sized groupings of companies or squadrons. Other units represent brigade or division-sized units along with corresponding logistics, as well as groupings of tribesmen or other fighters ranging between 1,000 to 5,000 persons. Generals represent key commanders, their staffs, and an elite guard.
1.2 Game System
The game system is based on the previously published S&T games: They Died with Their Boots On, Volumes 1 & 2, Julian and Sepoy Mutiny. There are changes to reflect the unique conditions of campaigning in Central Asia.
2.0 Components
A complete game of Russian Boots includes a 22×34-inch game map, rule set, and a sheet of 176 5/8-inch counters. Players must provide two six-sided dice (2d6) to resolve random game events, as well as two wide mouth, opaque containers for command and incident markers.
2.1 Game Map
A hexagonal grid has been superimposed over the map to regulate the movement and positioning of the playing pieces. The hexagons are referred to as hexes. The map is divided into the following regions:
Central Asia: The territory north of the Persia-Afghanistan-British India borders, east of the Caspian Sea, and west and north of Sinkiang (Manchu China). Central Asia includes Russian frontier regions as well as various independent kingdoms. These kingdoms have no formal borders but are instead delineated by names adjacent to each city:
- Bokhara: Bokhara (hex 1311) and Samarkand (hex 1511)
- Khiva: Khiva (hex 1009)
- Khokand: Khokand (hex 1910), Tashkent (hex 1709), and Turkistan (hex 1707)
- Pamir: Chitral (hex 2113)
- Turcoman: Merv (hex 1112) and Geok Tepe (hex 0712)
Designer's Note: The borders of the kingdoms of Central Asia were tenuous at best, thus the main geographical figure is in the fortresses and towns.
Intervention Kingdoms:
- Persia: Meshed (hex 0914)
- Afghanistan: Kabul (hex 1816), Balkh (hex 1514), and Herat (hex 1115)
- British India: Peshawar (hex 2116)
- Manchu China: Kashgar (hex 2411), Yarkand (hex 2612), and Kuldja (hex 2906)
- Yakub Beg & Gazi: These are at large forces with no corresponding regions on the map.
Russian Off-Map Bases: Russian staging areas outside of Central Asia: Caucasus, Orenburg, Siberia.
Reinforcement Codes: Reinforcement units are designated with a T followed by a number indicating the turn of availability (9.10).
2.2 Counters
There are two general types of playing pieces: combat units (military forces) and markers (informational pieces).
2.3 Combat Units
Mobile Unit: (movement factor of one or more)
Front: Sub Command Unit Type Symbols; Unit ID; Combat Factor; Movement Factor.
Back: Reverse of Units: Shows a flag and command identifier.
Static Unit: (movement factor of zero)
Generals/Leaders: Generals and leaders are special types of combat units.
2.4 Contingents & Unit Types
Russian Imperial Forces: Caucasus Sub-command; Orenburg Sub-command; Siberian Sub-command.
Khanate Forces: Turcoman; Bokhara; Khiva; Khokand; Pamir.
Intervention Forces: Afghan; Ghazis; Persian; British Empire; Manchu Chinese; Yakub Beg.
Mobile Ground Units: Infantry (regular); Expedition; Infantry (irregular); Supply Train; Cavalry (regular); Siege Train; Cavalry (irregular); Machinegun Infantry; Railroad Engineer.
Static Ground Units: Fort.
Naval Units: Flotilla.
2.5 Abbreviations
- Rifles: Elite Infantry
- Dragoon: Mounted Infantry
- RR: Railroad Engineers
- Gd: Guard
- CinC: Commander in Chief
- Cav: Cavalry
- FF: Field Force
- Gurkha: Nepalese Light Infantry
- Pundit: British Indigenous Surveyors (Expedition Unit)
- Guides: British Indigenous Cavalry
Designer's Note: The need to keep units in hexes to maintain control is due to independent raiders not otherwise shown given the scale of the game.
2.6 Command Markers
Command markers activate sub-commands on the map for operations. For the Russians, these correspond to Russian off-map bases and the special General von Kaufmann. For the Khanates and Intervention forces, these correspond to the various Kingdoms and intervention contingents.
Fortunes of War marker: This is a special command marker that initiates a check on the Fortunes of War Table.
2.7 Incident Markers
Incident markers represent various military and political actions. These are separate from the command markers.
- Crisis Incident Marker
- Tactic Incident Marker
2.8 Other Markers
- Great Game (8.0)
- Turn/Initiative (8.0)
- Railhead
- Outfitting Points (OP)
2.9 Charts & Tables
Charts and tables are printed on the map or included at the end of the rules. These include the Terrain Effects Chart (TEC), Game Turn Record Track (GTRT), Great Game Index (GGI), Subversion (SRT) and Battle (BRT) Results Tables, Command Markers Table, Fortunes of War Table, and Incident Markers Table.
2.10 Displays
Both players have tracks that allow for the display of activated command and incident markers, Reinforcements, and eliminated generals. The Russian player also has displays for the off-map base areas, along with an Outfitting Points Track and Table.
3.0 Definitions
Control of a sub-command: A sub-command is controlled when that Command marker has been played/picked.
Control of Hexes: A hex is controlled when friendly ground combat units occupy it (mobile or static). When all units are removed from a hex (including losses for combat), control is lost. Control is gained or regained by moving a unit into the hex.
Friendly/Enemy: Friendly units are units controlled by one player. Enemy units are units controlled by the other player. Important: Certain contingents can be controlled by either player, depending on Command markers (Example: Persians); they can be friendly or enemy to either player on a turn-by-turn basis.
Initiative: The player who acts first during a phase.
Operation: The activation of a sub-command and corresponding actions.
May: A player can choose to take the action.
Must: A player is required to take the action.
Phasing & Non-Phasing: The player currently conducting an Operations Phase is called the Phasing Player; the other player is the Non-Phasing Player.
Region: A geographical area on the map, delineated by borders (2.1).
Sub-command: A group of units for each of the two sides.
4.0 Set-Up
The set-up and scenarios section (25.0) provides instructions for setting up the game. Players select a scenario, then set-up in the order indicated by the instructions.
5.0 Victory Conditions
There are two ways to win the game: sudden death and victory points.
5.1 Sudden Death
The game comes to an end if any one of the following conditions are in effect at any time in the game:
- Russian Victory: Russian Empire units occupy all fortress, town, oasis and named pass hexes in Central Asia. Important: Control of these hexes in Persia, Manchu China, and Afghanistan do not count for victory purposes.
- Khanate Victory: Khanate units or Persian/Yakub Beg units occupy all fortress and town hexes in Central Asia. Important: Persian and Yakub Beg forces must be under Khanate control at the time.
- Apocalypse in the Steppes: If optional rule 29.2 is employed, the game ends if the GGI exceeds 12 and victory conditions are checked per 5.2.
5.2 Victory Points
At the end of the last turn of the scenario, each player totals their Victory Points (VP).
- The Russian Empire player receives VP for occupying the following:
- a) Each fortress in Central Asia: 2
- b) Each fortress in other regions: 1
- c) Each town and oasis in Central Asia with a Russian fort unit: 1
- d) Roll 1D6, the result is added to the Russian VP total.
- The Khanate player gains the number of VP equal to the final level of the Great Game Index (8.0).
- Each player gains 2 VP for each Crisis marker they control at the end of the game (12.3).
- If using the optional Railroad rule, the Russian player gains (or loses) VP (27.0).
Important: For the Russians, hexes must be occupied by Russian Imperial units, not Russian-controlled Intervention forces.
5.3 Victory Level
After totaling VP, the number of Khanate VP are subtracted from the Russian total (VP plus die roll), resulting in the following Victory Levels:
- Russian Imperial Victory: 30+
- Russian Continental Victory: 19–29
- Russian Marginal Victory: 10–18
- Draw: 0–9
- Khanate Decisive Victory: <0
6.0 Sequence of Play
Russian Boots South is played in Game Turns (GT), each of which is composed of interactive phases and segments. During each Operations Phase, the players alternate picking command markers from the pool which generate game actions. The sequence of play is asymmetrical owing to the differences between the centralized Russian Empire and the chaotic forces of the Khanates.
6.1 Sequence of Play
Each GT consists of the following phases. Players conduct them in the order below:
Organization Phase
- A. Initiative Segment: Determine which player will have the Initiative (8.0).
- B. Command Pool Segment: Players place Command markers in their respective Pools (10.0).
- C. Russian Outfitting Segment: The Russians recruit and deploy their reinforcements (9.0).
Operations Phases
- A. First Operations Phase
- Command Segment: The first player picks a marker from the Command Pool and as a result either consults the Fortunes of War Table or initiates an operation (11.0).
- Reinforcement Segment: If the command marker activates a Khanate or Intervention sub-command, then deploy any reinforcement for that command (skip this phase if a Russian Command marker was picked).
- Movement Segment: Move any or all units of the activated sub-command (13.0).
- Combat Segment: Conduct any attacks with units of the activated sub-command (16.0).
- Supply Segment: Check all units of the activated sub-command for supply attrition (19.0).
- B. Second Operations Phase: The second player draws a new command marker then follows the above sequence.
- C. Subsequent Operations Phases: Continue alternating between the first and second players drawing command markers until all such markers have been picked or both players declare pass sequentially (6.2).
End of Turn Phase
- A. Consolidation Segment
- Resolve any Crisis marker situations (12.3).
- Conduct any Fall Backs (20.0).
- Conduct any other actions mandated for the end of the GT.
- B. Game Turn Advance: Move the GT marker to the next box on the GTRT. If this was the last turn of the scenario, the game comes to an end.
6.2 Passing
A player may pass instead of picking a command marker. Play then goes to the other player. If both players pass sequentially, the Operations Phase ends and play proceeds to the End of Turn Phase.
7.0 Theater of Operations & Alliances
7.1 Theater of Operations
The map is divided into several regions:
- Central Asian Kingdoms: Encompasses various Russian frontier lands as well as the khanates of Bokhara, Khiva, Khokand, Pamir, and Turcoman. Kingdom names are printed adjacent to associated fortresses for unit deployment purposes (9.0).
- Example: The kingdom of Bokhara includes the fortresses of Bokhara and Samarkand.
- Intervention States: Persia, Afghanistan, British India, Manchu China.
- Others: Yakub Beg and Ghazi units are at large and have no corresponding region on the map.
7.2 Crossing Borders
All units can enter and operate in Central Asia. Elsewhere, only the following units can enter:
- Persia: Persian, Russian, Afghan and British Empire units
- Afghanistan: Afghan, Persian, Russian, and British Empire units
- British India (Northwest Frontier): British Empire units
- Manchu China: Manchu Chinese, Yakub Beg, and Russian units
Designer's Note: The Russians could invade Sinkiang and attack Manchu forces. If there are no Manchu Command markers in the pool, this means the Khanates could not maneuver Manchu forces to counter this, although Manchu units would defend normally. This reflects the chaotic situation on the frontiers. Historically, the Russians did invade Sinkiang, but the Chinese were tied up suppressing rebellions elsewhere and could not immediately respond (the crisis was resolved diplomatically). See also the Treaty of St Petersburg event on the Fortunes of War Table.
7.3 Effects of Borders
Units cannot move, retreat, or pursue across otherwise prohibited borders.
- Zones of Control (ZOC) do extend across the Persian, Afghan, and British Northwest Frontier borders. Exception: (15.1).
- Units can attack across otherwise prohibited borders as mandated by ZOC requirements but not pursue across them (18.1).
7.4 Alliances
Generally, all units of all sub-commands controlled by a player are friendly with each other. Following are special cases:
- Stacking: Russian units of different sub-commands can stack together. Units of non-Russian sub-commands may not stack together (14.0).
- Combat: Units of different sub-commands must defend together in the same combat (16.6). Units of different sub-commands cannot attack jointly due to activation limitations (16.0).
7.5 Intervention Forces and Belligerency
Command markers can give a player control of an Intervention sub-command. When such a marker is played, that Intervention force becomes a belligerent, and its units are friendly to the side which played the marker for the remainder of the turn. That player can recruit, conduct operations, etc., with them for that Operations Phase.
Important: Intervention sub-commands can also be activated via the Forced March Incident marker (12.4).
9.0 Reinforcements & Outfitting
Reinforcements are units received after initial set-up. Placing reinforcements onto the map is called Deployment. There are three ways in which reinforcements enter play:
- During the Russian Outfitting Segment (9.3).
- During the Reinforcement Segment of an Operations Phase (Khanate only).
- As a result of Fortunes of War (12.0).
Designer's Note: The procedure for Russian Imperial, Khanate and Intervention units is different, representing Russian centralized administration versus a chaotic situation with the various Central Asian powers.
- Certain contingents can be controlled by either player per the Command Markers Table.
- Once intervention reinforcements deploy onto the map, they remain in play until eliminated (9.7.2).
Example: On GT 2 the Khanates player picks the Persian marker. The Khanates deploy any Persian reinforcements onto the map then conducts any operations with them. On GT 3 the Russians player picks the Persian marker.
8.0 Great Game & Initiative
The Great Game Index (GGI) quantifies the overall international situation around the Russian conquest of Central Asia. The GGI affects victory points (5.0), initiative (8.4), outfitting (9.0), command markers (10.0), and other designated rules.
8.1 The Index
Use the GGI marker to indicate the current level. The Index can go no lower than 1 and no higher than 12. Exception: The GGI may exceed 12 if optional rule 29.2 is employed.
8.2 Changing the Index
- Raise the GGI by one each time the Russians gain control of a fortress hex.
- Lower the GGI by one each time the Russians lose control of a fortress hex.
- When a player gains control of a crisis marker (12.3) the GGI may be raised one, reduced by one, or left unchanged.
- Fortunes of War events can change the GGI (12.0).
8.3 Initiative Levels
The GGI has three levels to determine who has the Initiative:
- Low: Khanates
- Medium: Russians
- High: Russians
8.4 Effects of Initiative
The player with the Initiative:
- Becomes the first player for the GT.
- Performs special actions designated per the rules.
Important: If both players are required to perform actions in the same phase, the player with the Initiative goes first.
8.5 Duration of Initiative
The initiative remains in effect until the next Initiative Segment, regardless, if the GGI changes during the GT.
9.1 Reinforcement Displays
Units which begin the game as reinforcements are placed in the appropriate displays on the map. In some cases, all units of a sub-command will be initially deployed per the scenario instructions but can return to the map as replacements.
9.2 Deployment Instructions
Reinforcements are deployed by the player controlling that sub-command.
- Deployment hexes for Russians can contain units of other Russian sub-commands. Deployment hexes for Khanates and Intervention forces cannot contain units of other sub-commands.
- Example: Khivan reinforcements could be deployed in the Khiva fortress if it contained either no units or other Khivan units.
- Deployment hexes cannot contain enemy units but can be in enemy zones of control (EZOC).
- There is no limit to the number of units that can be deployed in a hex.
- If more than one deployment hex is available, reinforcements can be divided among them.
- If there are no available hexes for a reinforcement group, those units cannot be deployed and must remain in their Reinforcement display.
- If reinforcements are called for and there are insufficient units in the Reinforcement display, there is no further effect.
9.3 Russian Reinforcements
During the Russian Outfitting Segment, the Russians receive outfitting points (OP) and then expend them to purchase reinforcements. Use the Outfitting Points Track to record the OP. OP not expended in an Outfitting Segment may be accumulated. Accumulated OP may be no fewer than zero nor higher than 20.
9.4 Russian Outfitting Points
The Russians receive OP by rolling 1d6 and adding the result of the die roll to the following:
- Each fortress hex occupied by a Russian fort unit: 1
- GGI:
- Low: 9
- Medium: 6
- High: 3
9.5 Russian Outfitting Expenditure
OP expenditures are shown on the Russian OP Table printed on the map. The costs for types of units are the same, regardless, if those units have different combat and movement factors.
Example: A Russian 5-4 infantry would have the same OP cost as a 4-4 infantry unit.
9.6 Russian Reinforcement Deployment
The Russians deploy reinforcements per the following:
- Caucasus, Orenburg, and Siberian mobile units: In their respective off-map bases, plus any fortress hexes in Central Asia with a Russian fort unit. Caucasus sub-command units may also deploy in Russian ports on the Caspian Sea.
- Russian Generals, Expeditions, Supply Trains, and Irregular Cavalry units: Same as above, plus any town or fortress in Central Asia with a Russian fort unit.
- Fort Units: In any fortress, town, oasis or named pass hex occupied by Russian mobile units (the unit must have been in the hex at the start of the Outfitting Segment); there cannot be another fort unit in the same hex.
- Flotillas: Caucasus flotillas in Caspian Sea ports, Orenburg flotillas in Raimsk.
Designer's Note: Deployment of Russian units on fort units represents the establishment of forward administration and logistics.
9.7 Khanate & Intervention Reinforcements
Khanate and Intervention forces are deployed in the Reinforcement Segment of the Operations Phase in which their sub-command marker is picked.
9.7.1 Khanate Reinforcement Deployment
Khanate reinforcements include units from Bokhara, Khiva, Khokand, Pamir, and Turcoman in the Khanate Reinforcement display. These units are deployed:
- In any fortress with the name of the sub-command (2.1).
- In any other fortress, town or oasis which contains another unit of the same sub-command.
- In any fortress, town, or oasis within two hexes of any fortress of the named contingent.
- Units do not have to deploy in the named cities printed on their counter.
Example: The Khanates play the Turcoman marker. All Turcoman units on the Reinforcement Display may be deployed in Geok Tepe, Merv, Tenjent oasis, etc. They could also be deployed in Bokhara if there are no units of other sub-commands in that fortress.
9.7.2 Intervention Reinforcement Deployment
Intervention reinforcements include units from the sub-commands listed below. Reinforcements are deployed as follows:
- Persia: In Meshed and/or any map edge hexes in Persia.
- Afghanistan: In any fortress or pass in Afghanistan, and/or along any map edge hexes in Afghanistan.
- British Empire: In any hexes in British India.
- a) If there are no British Empire units on the map and a Great Britain command marker is pulled, the Khanate player deploys the British expedition unit.
- b) If the expedition unit is on the map and another Great Britain marker is picked, the Khanate player deploys all remaining British reinforcements.
- Yakub Beg: Deploy reinforcements in one fortress, town, oasis, or named pass in Central Asia or Sinkiang.
- Ghazis: Deploy reinforcements in one fortress, town, oasis, or named pass in Central Asia.
- Manchu China (Sinkiang): Manchu units with a Sinkiang fortress name must be deployed in that fortress. Manchu units designated with an (R) may deploy in any Manchu fortress or on east map edge hexes in Sinkiang.
Example: The Khanate player picks the Persian marker, meaning the Khanates may deploy all Persian reinforcements. If on the next turn the Russian player picked the Persian marker; the Russians would then deploy any Persian reinforcements.
9.8 Reinforcements Due to Fortunes of War
The Fortunes of War Table can provide additional reinforcements at no cost and are deployed as standard reinforcements (9.7).
9.9 Replacements
Eliminated units are placed in the friendly Reinforcement display and may be recruited in subsequent GTs.
Important: Named Russian generals and intervention leaders may never be replaced (22.2).
9.10 Reinforcement Codes
Several units have codes on them, indicated by T#. These units are added to their respective Reinforcement displays on the GT indicated on the counter (2.3). These units cannot be taken as reinforcements prior to the indicated GT.
10.0 Command Markers
Players pick command markers at random. Command markers generate operations and possibly fortunes of war events.
10.1 Command Pool Setup
During the Command Pool Segment of the Organization Phase, command markers are placed in the pool.
- The Russian player selects the number of Russian command markers based on the current GGI:
- Low: 2
- Medium: 3
- High: 4
- The Khanate player mixes up all Khanate and Intervention Command markers and then picks (at random) the number of markers based on the current GGI:
- Low: 3
- Medium: 4
- High: 5
Designer's Note: The Khanates pick more command markers as these include Intervention markers which can potentially be controlled by the Russians.
Important: Only one Great Britain command marker may be included in the Khanate mix prior to conditions being met for the activation of Russian General von Kaufmann (22.3).
- The player holding the initiative must place the fortunes of war marker in the pool.
- All other command markers are placed to one side and not used during the GT. Unused markers may not be inspected by the opposing player (24.0).
11.0 Activating Commands
Sub-commands are activated by picking markers during the Operations Phase.
11.1 Procedure
The phasing player picks a command marker.
- If the marker picked is for a friendly sub-command, the player may then execute an operation (6.1).
- If a player picks a marker for an enemy sub-command, give that marker to the other player who then conducts an operation.
- The Command Marker Table summarizes which player controls which contingent.
- A given unit may be activated more than once per turn via separate markers (10.1).
Examples: (a) The Russians pick the Orenburg command marker. The Russians may then move units of the Orenburg sub-command, conduct attacks with those units, and check them for Supply Attrition. (b) The Russians pick the Turcomans marker and must give it to the Khanates who activate that sub-command. (c) The Khanates pick the Persian marker and activate the Persian sub-command.
11.2 Higher Commands
The Russian player always controls Russian sub-commands.
- The Khanate player always controls the Khanate sub-commands as well as the Afghan, British, Ghazi, and Manchu sub-commands.
- Either player can control the Persian and Yakub Beg sub-commands per the Command Markers Table.
11.3 Command Marker Disposition
Command markers are placed on the appropriate player display after being picked. Return it to the pool in the ensuing Command Pool Segment (6.0).
12.0 Fortunes of War & Incident Markers
Fortunes of war and incident markers represent random and, in some cases, historical events which impact game play.
12.1 Fortunes of War Table
If the fortunes of war marker is drawn from the Command Pool, the drawing player rolls 2d6, then consults the Fortunes of War Table. The event corresponding to the result is then implemented. Important: Event explanations on the Fortunes of War Table may supersede other rules.
Example: The Russians roll a die total of 7, so event 7 (Bolshoya Igra) is activated.
12.2 Incident Marker Pool and Procedure
Place all incident markers in the Incident Marker Pool during Set-up (4.0).
Important: The Incident Marker Pool is separate from the Command Marker Pool.
- After implementing any event for the Fortunes of War Table, each player must then pick the number of incident markers indicated by the right-hand column in the table. If there are insufficient markers in the pool, no further action is taken.
There are two general types of incident markers: crisis and tactics (2.7).
12.3 Crisis Markers
A crisis marker must be played when picked. Place the marker in the map hex designated by the counter.
- During the Consolidation Segment of the GT of placement, if a player has a mobile unit in the designated hex from any friendly sub-command that was activated in the GT, they take possession of the marker and place it face up in the player's Incident Marker Display. If no activated units for either side occupy the hex, the marker is returned to the Incident Marker Pool.
- Possession of crisis markers may affect the GGI (8.2). Crisis markers also provides VP (5.2).
Designer's Note: This will potentially give each player the chance to fight for control of the marker's placement hex.
12.4 Tactics Markers
When picked, the player places these markers in the friendly display. The player may examine the marker, but not the opposing player. After being played, these markers are returned to the Incident Marker Pool. The Incident Marker Table indicates how the markers are played.
Important: A forced march marker may be played after all command markers have been played.
12.5 Back into the Pool
Some events will direct players to return Incident markers. Pick from the available markers and place them back in the pool without playing.
Example: Event 2 (Sandstorms) on the Fortunes of War Table.
13.0 Movement
During the friendly Movement Segment, as many units of an activated sub-command may be moved as desired.
13.1 Movement Procedure
Units are moved by tracing a path of contiguous hexes through the hex grid. To enter a given hex, a unit must expend the number of movement points (MP) designated by the TEC for the type of terrain in the hex. A unit may continue to move until it has expended all its MP. Activated units may be moved in any direction or combination of directions to the limits of their movement factors.
13.2 Movement Restrictions
An activated unit may expend all, some, or none of its MP during the Movement Segment of its sub-command.
- Once a unit has been moved, it may not be moved again during that segment.
- Unused MP may not be accumulated, nor may they be transferred from one unit to another.
- Certain terrain costs are different for different units.
13.3 Static Units
Units with a printed MP of zero (0) never move unless removed by elimination or withdrawal.
13.4 Multiple Moves
A given unit can be activated and thus move more than once per GT via separate Command markers (11.1).
13.5 Multiple Terrain
If there is more than one type of terrain in a hex, use the highest single movement cost from among all the terrains involved.
13.6 Hexsides
There are no additional movement costs to cross hexsides. Borders are hexside features but units pay no extra MP cost to cross them.
13.7 Minimum Movement
Mobile units can generally move at least one hex per Movement Segment of their activation. They may not enter enemy occupied or otherwise prohibited hexes.
13.8 Rivers
Rivers are in-hex terrain features, not hexsides, and have no effect on movement/combat owing to game scale.
13.9 Trails & Passes
A unit that moves directly along hexsides connected by trails and/or passes expends the number of MP as detailed in the TEC and below, regardless of other terrain in the hex.
- Trails: A unit that moves directly along hexsides connected by trails expends one half (0.5) MP per hex entered. Important: Potential railroad hexes cannot be used as trails (27.0).
- Passes: A unit which enters a pass hex (trail + mountain) from a connected trail or pass expends one MP.
13.10 Flotilla Movement
For flotilla movement on rivers, lakes and sea hexes, the flotilla movement rate is always used regardless of any other terrain present in those hexes (21.3).
13.11 Railroad Movement
Railroad movement is only employed when using optional railroad rules (27.0).
14.0 Stacking
Having more than one unit in the same hex at the same time is called Stacking.
14.1 Stacking Restrictions
A player may stack an unlimited number of friendly units in a hex, within the restrictions below.
- All Russian units can stack together regardless of sub-command. If units of different sub-commands are stacked together, they still activate per their own command markers.
14.2 Passage of Lines
Russian units can always move through other Russian units, regardless of sub-command.
- Khanate and Intervention units can move through units of other Khanate or Intervention sub-commands, but not end their move in the same hex.
Examples: (a) Bokhara units could retreat through a hex containing Khivan units but not end the retreat in their hex. (b) The Russians control the Persian command marker. Russian units could move through Persian units and vice versa for the remainder of the turn. On ensuing turns they could not unless the Russians picked the Persian marker again.
14.3 Stack Movement
Units may be moved individually or as stacks. The movement rate of a stack is that of the slowest unit within it. A stack may drop off units as it moves; however, those units may then not move any farther that segment. A moving unit or stack may not pick up units as it moves. If a moving unit or stack ends its move stacked with a unit that didn't move with it, they do form a stack for combat.
14.4 Stacking Order
In general, players are free to arrange stacked units of an activated sub-command in any order they choose. If a hex contains a marker, that marker must always be the top unit in the stack. Important: Markers do not affect stacking.
15.0 Zones of Control (ZOC)
The six hexes immediately surrounding a unit's hex constitute that unit's Zone of Control (ZOC). Hexes into which a unit exerts a ZOC are called controlled hexes.
15.1 ZOC Effects
Mobile and static units always exert a ZOC, regardless of the phase, segment, or command activation.
- ZOC do not extend across all-sea or lake hexsides, nor into or out of fortress hexes.
- Forts units do not negate ZOC.
- There is no additional effect if more than one unit exerts a ZOC into the same hex at the same time.
- ZOC do not affect movement.
- During each activated sub-command's Combat Segment, the player must initiate attacks with all activated units that are in an EZOC.
- See railroad supply (27.4).
- Units of different Khanate and Intervention sub-commands cannot stack together.
Example: Units of the Orenburg and Siberian sub-commands are stacked together. The Russians pick the Orenburg marker and thus can activate the Orenburg units in the stack. If they are adjacent to an enemy unit, only the Orenburg units could attack.
Designer's Note: This represents the generally chaotic conditions of operating in the vast steppes and deserts of Central Asia, given the effects of limited intelligence, extreme weather and raiders operating beneath the scale of the game. Armies would often run into each other and fight battles without being prepared, while aggressive subordinates precipitated battles at all sorts of odds.
Example: If the Russians gain control of the Yakub Beg contingent, Yakub Beg units may move but may not stack with Russian or Khivan units.
16.0 Combat
Players conduct combat to destroy enemy forces and take objectives.
Important: All units other than forts may attack to include supply units and siege trains, allowing them to retreat or pursue after combat.
16.1 Combat Prerequisites
Attacking is mandatory for all units of an activated sub-command in EZOC at the start of that sub-command's Combat Segment. The phasing player is termed the attacker and the non-phasing player is the defender.
16.2 Combat Sequence
For each individual combat, follow the sequence below.
- Attack Declaration: The phasing player declares which friendly units of the activated sub-command will be attacking which defending enemy units. For each combat, the attacker determines which Combat Results Table (CRT) will be used (16.7).
- Combat Strength Determination: Total the combat strength of all involved attacking units, then total the defense strength of all involved defending units. Divide the attacker's strength by the defender's strength and multiply that result by 100 to get a percentage (16.8).
- Shift Determination: Determine shifts for generals, terrain, incident markers, and other factors (16.9).
- Final Percentage Determination: Consult the appropriate CRT under the corresponding percentage column heading. Apply all applicable shifts to the initial percentage column.
- Combat Resolution: The attacker rolls a die and cross indexes its result with the final percentage column. Implement the combat results (retreats, pursuits, eliminations) immediately.
16.3 Which Units Attack
Only the units of an activated sub-command may attack during a given Combat Segment. Units of other friendly non-activated sub-commands may not attack at this time, even if stacked with activated units.
- Activated units must attack all enemy units in their ZOC regardless of the status of the enemy units.
- Intervention units that are controlled by the Russians via possession of their command marker are treated as Russian forces.
Example: If a Russian force is adjacent to a Persian force, and the Russians control the Persian command marker, no combat would be required. If on the next GT the Khanates gain control of the Persians, the Russians would then have to attack them. Also, if neither player controlled the Persians, the Russians would still have to attack them.
16.4 Which Units Do Not Attack
- Fort Units: Fort units never attack but units inside forts must attack if in an EZOC. Units adjacent to forts must attack them and any units inside the fort. Important: The combat factor of a fort is never applied to an attack by units inside.
- Fortresses: Units in a fortress are not required to attack but may do so. If they do attack, they must attack all enemy units adjacent to them. Units adjacent to fortresses may attack them but are not required to do so. They must attack all adjacent enemy units that are not in fortresses.
- Expeditions: Expedition units are not required to attack but may do so. If they do attack, they must attack all enemy units adjacent to them.
16.5 Attack Declarations
The attacker must declare which activated units will attack which enemy units at the beginning of each Combat Segment to ensure all enemy units in a friendly ZOC will be attacked. After selecting all attacking units, the player selects the order that attacks will be resolved.
- All ZOC-exerting enemy units adjacent to friendly activated units must be attacked.
- A defended hex may be attacked from as many as six adjacent hexes, with all attacking units combined into one single attack.
- A unit may only attack once per Combat Segment.
- A defending unit may not be attacked more than once per Combat Segment. Exception: (17.3)
16.6 Multi-Unit & Multi-Hex Attacks
If an attacking unit is in multiple EZOC, it must attack all those enemy units that are not engaged by other attacking units.
- Units in the same stack in multiple EZOC may conduct separate attacks if all defending units are attacked.
- Units in two or more hexes may combine their combat strengths and attack a single hex if all attacking units are adjacent to all defending units.
- Attacks may involve any number of attacking or defending units.
- A single unit's attack and defense strengths are unitary and may not be divided among different combats.
- Units defending in the same hex must be attacked as a single combined total.
16.7 Choice of CRT
There are two different Combat Results Tables (CRT): Battle and Subversion. The Battle CRT (BRT) represents the outcome of one large combat or many small actions. The Subversion CRT (SRT) represents a wide range of diplomatic and intelligence means in support of actions against enemy strongholds.
- The attacker may always select the BRT.
- The attacker may choose the SRT if: a) The attacking force contains a general and/or expedition unit; and, b) The defending force is in a fortress hex; and, c) The defense contains no Russian, British, Ghazi units, generals, or expeditions of any sub-command.
Important: If the defender in a particular combat has units in both fortress and non-fortress hexes then the Subversion CRT cannot be employed.
16.8 Combat Percentage
Combat percentage is determined by dividing the attacker's strength by the defender's strength and then multiplying that result by 100. Reference the corresponding column on the CRT when rolling the die.
Example: The attacker has 20 combat factors and the defender 13, divide 20 by 13 and get 1.53. Then you multiple 1.53 by 100 to convert it to a percentage, which yields 153. That combat would be resolved on the 150-199% column of whichever CRT is chosen.
16.9 CRT Percentage Column Shifts
Certain game functions will shift combat odds. These include generals participating in the attack or defense; terrain; forts; siege trains against fortresses, towns, and forts; converging attacks; and play of certain Incident markers.
- A CRT percentage right column shift means the column is increased by the number of columns indicated in favor of the attacker.
- A left column shift means the column is decreased by the number of columns indicated in favor of the defender.
- If both the attacker and defender have shifts, use the cumulative difference.
- If the starting percentage is less than 49% or greater than 600%, use the 49% and 600% columns as the base line for shifts.
16.9.1 Shifts for Generals
Each player can designate one General or Leader per battle to provide a one right column shift for attackers, and one to the left for defenders.
Example: The attacker has one combat factor and the defender 10, which would normally give ≤49% odds. The attacker has three right column shifts, and the defender one to the left, giving result of two shifts to the right. The final percentage column is therefore 100–159% because the starting column (≤49%) shifted two to the right is the 100–159% column.
16.9.2 Shifts for Terrain
Defending units benefit from the terrain in the hex they occupy as listed in the TEC.
- Benefits for terrain are not cumulative (Exception: 16.9.3).
- If a defender has more than one defensive terrain shift available, the most advantageous is used.
- When a single attack is made against defenders in multiple hexes, the most advantageous shift is used.
- Units attack into mountain hexes normally, even if they could not otherwise enter mountain hexes, and mountain defensive shifts are applied.
16.9.3 Shifts for Fort Units
A fort unit provides one left column shift in addition to any other terrain shift received. This includes situations where fort units are defending by themselves, and fort units in fortress hexes.
16.9.4 Siege Trains
A siege train provides one right column shift for an attack against a fortress or town hex, or if the defending hex contains a fort unit. No more than one shift may be applied regardless of the number of attacking siege train units.
- The defender is affected normally by retreat results that are otherwise negated by defense in a fortress or fort.
- Defending siege train units do not provide bonuses for the defense.
16.9.5 Converging Attacks
A converging attack occurs if attacking units are attacking defending units from two opposite hexes, or there are attacking units in or adjacent to all six hexes surrounding the defender's hex. A converging attack shifts combat odds one column to the right. Only units taking part in the attack are considered for a converging attack, not other adjacent units that may be engaged against other enemy units. Important: Defending in fortresses or towns does not negate the converging attack bonus.
16.9.6 Shifts for Incident Markers
Each player can play one incident marker per individual combat. The attacker can play one of the following:
- An Abject Lesson versus an enemy occupied fortress: one right column shift on the BRT; or,
- An Agent versus an enemy occupied fortress: one right column shift on the SRT.
The defender can play one of the following:
- An Abject Lesson when defending in a fortress: one left column shift on the BRT; or,
- An Agent when defending in a fortress: one left column shift on the SRT.
16.9.7 Ambush
An Ambush (AM) result on the SRT results in the original defender selecting one hex occupied by attacking units and launching a counterattack against it. This combat is resolved on the BRT with the following special cases:
- Ambushing (counterattacking) units receive one right column shift.
- Apply CRT shifts for generals (if applicable), but no other shifts are applied.
- Ambushing (counterattacking) units may conduct pursuit (18.0).
16.9.8 Combat Results Explanation
The results for both CRTs are explained in (26.0).
17.0 Retreat
When a combat result requires a retreat, the player controlling the affected units must immediately move them the indicated number of hexes away from their combat position. Important: Retreat is not regular movement; no MP are expended.
17.1 Retreat Types
There are two types of Retreat:
- Withdrawal: All Russian and British Empire units retreat one hex.
- Rout: All Khanate and non-British Empire Intervention forces rout. The owning player rolls 1d6 and retreats each unit or stack that number of hexes. Important: All units in a stack retreat or rout together. For routs, one die roll is made per hex containing the units routing.
17.2 Retreat Guidelines
Mobile units must retreat within the below guidelines:
- Conduct withdrawals before any routs. All units in a stack must retreat together.
- Units can never retreat into hexes containing enemy units or into otherwise prohibited terrain. If no retreat path is available, units are eliminated in the last hex into which they were able to retreat. Important: Units may retreat through EZOC.
- Units can retreat through friendly stacks (14.2). If retreating units would create an overstack, they may retreat one additional hex to meet the requirement.
- Units can retreat into mountain hexes only via contiguous passes. Leaders, expeditions, and irregular infantry/cavalry units can retreat into mountains regardless of passes.
- A retreating unit must end its retreat the indicated number of hexes away from its combat position. If a unit cannot retreat the full number of hexes due to enemy units, prohibited terrain, etc., it is eliminated in the last hex into which it was able to retreat. Exception: If the retreat is conducted entirely along contiguous trails and/or passes, the final hex does not have to follow the above requirement if the total number of hexes is equal to the DR.
- A unit may never retreat into a hex that would cause it to be eliminated or overstacked if another retreat path is available.
- Russian units can retreat into an Off-Map Base of their own sub-command. Other units that retreat off-map are removed and placed in their respective Reinforcement Displays.
17.3 Into the Frying Pan
Defending units may end their retreat in an EZOC. Those enemy units could then attack the retreated units if they had not previously engaged in combat during that segment. If a unit retreats into a hex containing a friendly unit defending against a separate attack, it joins in the defense. Attacking units which retreat cannot attack again if ending adjacent to defending units.
17.4 Fortresses and Forts
Retreat results are negated for units in fortress hexes and forts. If begin their rout outside of a fortress hex or a fort, the rout ceases no matter how far the actual length of their rout.
- If an attacking force contains a siege train, retreat results are not negated. The retreat must be conducted, and any forts (not fortresses) would be eliminated.
18.0 Pursuit
Pursuit is a combat result which allows attacking units to advance through a vacated defending hex.
18.1 Pursuit Guidelines and Restrictions
- All mobile units can pursue one hex. This must be into the hex formerly occupied by the defender.
- All leaders, expeditions, and cavalry (any type) can pursue two hexes. The first hex must be the hex formerly occupied by the defender, and the second can be in any direction.
- Static units may never participate in a pursuit.
- Pursuit does not expend MP.
- Pursuit may not be conducted into prohibited terrain. Units that can normally enter mountains (leaders, expeditions, irregular infantry/cavalry) may pursue into mountains regardless of passes.
- Pursuing units ignore EZOC. If pursuing units end their move in another EZOC they may not attack again.
- Stacking restrictions apply to the completion of a pursuit (14.0).
19.0 Supply
During the Supply Segment, players determine the supply status of all units of an activated sub-command. Units not in supply are subject to attrition.
19.1 In Supply
The following units are always in supply and do not count for attrition checks:
- Generals/Leaders
- Supply Trains
- Expeditions
- Units in Fortresses
19.1.1 Russian Units
The following Russian units are always in supply:
- Units in a port hex on the Caspian Sea
- Flotillas and units in a hex containing a flotilla not in a port
- Fort units and units in a fort
- Units in an Off-Map Base Area
19.2 Supply Expenditure
A force is In Supply if the player expends a supply train unit in the hex during the Supply Segment. A supply train can supply all friendly units in the hex regardless of sub-command. Return the supply train to the Reinforcement Display at the end of the Operations Phase in which it is used.
19.3 Attrition Check
The TEC shows the number of units to which a hex can provide supply. All units in excess are subject to attrition. If a hex contains more than one type of terrain, use the most advantageous type. Important: As many units as a hex can support per the TEC are always in supply.
Example: A stack in a desert plus river hex would check under the river line on the TEC.
19.4 Supply Attrition Procedure
Roll 1d6 for each hex. The result is the number of unsupplied units which the player selects and eliminates. Units which are always in supply do not count against the hex limit and are never eliminated by attrition.
Example: A player has four units in a desert hex which can supply one unit. The player rolls a 2 and eliminates two units from the three which are unsupplied.
20.0 Fall Back
During the Consolidation Segment of the End of Turn Phase players must, in order of Initiative, move overextended units.
20.1 Fall Back Prerequisites
Units are considered overextended if, at the beginning of the Consolidation Segment, they are not located in one of the following hexes: Fortress, Town, Oasis, and Named Pass Hexes, or a hex containing a fort unit.
Important: Expedition units are never considered overextended. Units in a hex with an expedition unit are overextended if not located in any of the above hexes.
20.2 Fall Back Procedure
Fall Back occurs in the order of Initiative. Players pick up all overextended units and place them in any of the following:
a) Fortress, town, oasis, or named pass hexes occupied by units of the same sub-command. Important: When playing the Anglo-Afghan War result on the Fortunes of War Table, all British Empire and Afghan units may simply be returned to the appropriate hexes in British India and Afghanistan, respectively, which do not need to be occupied by other units of their sub-command.
b) Off-Map Base Areas of the same sub-command.
c) Flotillas must be placed in ports. The port must be in the same body of water and/or river.
-
Example: A flotilla cannot fall back from the Aral Sea to the Caspian Sea.
-
Stacking restrictions need to be met for different sub-commands (14.0).
Important: Units can fall back in any direction. No MP expenditure is involved in a Fall Back.
20.3 Disbanding
If none of the above locations are available, then place the units in the friendly Reinforcement Display.
Example: A Manchu unit is in a desert hex. The Khanate player picks up the unit and places it in Khokand if the latter were occupied by another Manchu unit. The unit could not fall back to Kashgar if it were occupied by Ghazi units.
21.0 Ports & Flotillas
Ports and flotillas assist the Russians with movement, combat, and supply.
21.1 Port Effects
The Russian player can deploy flotilla reinforcements in ports.
- Ports provide supply to an unlimited number of Russian units in the hex.
- Only Russian units can use ports. Khanate and Intervention forces treat ports as town hexes.
21.2 Flotilla Units
Russian flotillas are treated as ground units, but can move only on sea, lake, and river hexes.
- Flotillas exert a ZOC (15.1); however, they are not affected by EZOC.
- Flotilla reinforcements are deployed in Russian-controlled ports (9.6).
21.3 Movement
Flotillas may move only into or along river, lake/sea and/or coastal hexes.
- Flotillas may move into and through hexes containing enemy ground units. Flotillas may not, however, end their move on a hex that contains enemy units.
- Fortresses occupied by enemy or non-activated forces block flotilla movement into that hex.
- Flotillas can move an unlimited number of water hexes.
21.4 Combat
Flotillas engage in combat normally with the following special cases.
- Flotillas can retreat and pursue only along contiguous river or lake/sea hexes. Flotillas are subject to the same retreat restrictions as Russian ground units (17.2).
- Flotillas in all-sea hexes cannot attack nor be attacked by enemy units.
- Flotillas can attack units on adjacent coastal or river hexes.
21.5 Transport
A flotilla may transport three mobile ground units belonging to its sub-command.
- All units start the Movement Segment in the same hex.
- The units move together using the flotilla's movement allowance. The flotilla and transported units may move through hexes containing enemy units but may not end the move in such a hex (21.3).
- Transported units may be debarked at any time during a move.
- A flotilla can conduct only one transport per Movement Segment.
Important: Generals count against the three-unit limit.
21.6 Disembarkation
Ground units which disembark in a port, fortress, or fort may move normally during that Movement Segment. Units which disembark in any other coastal or river hex must cease movement.
22.0 Unique Units
22.1 Generals and Leaders
Generals and Leaders function as mobile combat units.
22.2 Effects
Generals and Leaders provide CRT column shifts in both attack and defense (16.9.1).
- Generals and leaders count for stacking purposes (14.1).
- Named generals and leaders (Perovsky, Yakub Beg, etc.) are permanently eliminated should such a result be called for on either CRT. Leaders with titles (Amir and CinC FF) may return as reinforcements during the next GT (9.7).
22.3 von Kaufmann
The Russian General von Kaufmann can be recruited on the first Outfitting Segment in which the Russians control four or more fortresses. When this occurs, add von Kaufmann to the Russian Reinforcement Display and place the von Kaufmann command markers in the pool.
22.3.1 Procedures
Activation: When the von Kaufmann command marker is picked:
- Activate von Kaufmann; and,
- Select one Russian sub-command and activate it; and,
- Remove all von Kaufmann command markers from the Command Pool.
Important: Von Kaufmann remains activated for the remainder of the game, unless eliminated or withdrawn, regardless of the number of fortresses under Russian control.
- If von Kaufmann is removed from play via event 10 (Fortunes of War Table), all the von Kaufmann command markers are returned to the Command Pool (12.0).
Friendlies: Von Kaufmann is friendly to all Russian sub-commands, regardless of activation.
Important: Von Kaufmann has a reinforcement code of Tx, indicating the flexibility involved with its deployment.
22.4 Expeditions
Expedition units function as combat units with the following special cases:
- Combat: Expeditions are not required to attack adjacent enemy units. If they initiate an attack, then the usual provisions of attacking all enemy units in their ZOC apply. They otherwise exert ZOC and can be attacked normally. Expeditions can employ either CRT.
- Subversion: Expeditions can conduct subversion attacks by themselves or in conjunction with other units (16.7).
- Supply: Expeditions are always in supply (19.1).
22.5 Siege Trains
- Combat: In addition to their combat factor, siege trains provide one right column shift on the BRT when attacking fortress and fort units. Siege trains provide no defensive CRT shifts.
- Loss of Guns: If a siege train retreats (attacking or defending) it is eliminated instead. If in a situation where the retreat is negated, it is not eliminated (17.4).
Important: Machinegun infantry units are not siege trains.
22.6 Supply Trains
Supply trains function like combat units but can be expended to avoid supply attrition (19.2).
- If a supply train receives a retreat result, whether attacking or defending, it is eliminated. If pursuing forces advance into the hex, roll one die: 1–3: No Effect. 4–6: Place a friendly supply train of the same sub-command as the pursuing force in the hex (if available).
- If a supply train is in a situation where retreat is negated, it is not eliminated, and the above DR does not occur (17.4).
22.7 Fort Units
Fort units represent Russian fortified positions, settlers, and militia.
- Command: Fort units have no specific command. They may be occupied by Russian Imperial units but not by Russian-controlled Intervention units.
- Deployment: Fort units can be deployed in hexes containing Russian units (9.6). Russian reinforcements may deploy on fort units (9.6).
- Movement: Forts are static units. Once deployed, they cannot move.
- Stacking: Fort units do not count for stacking, but only one fort unit is allowed per hex.
- Combat: Fort units have a combat factor used only for defense, as indicated by the brackets around the factor on the unit counter. EZOC do extend into hexes containing fort units. Units in forts may attack normally. Additionally, fort units provide one left column shift on the CRT that applies even if the fort unit is not occupied by friendly units (16.9.3).
- Retreats: Russian units defending in or attacking out of a fort unit ignore retreat results (17.4).
- Supply: Fort units are always in supply and may provide supply to an unlimited number of Russian units in the hex (19.1.1).
- Dismantling Forts: At the start of any Russian Outfitting Segment, the Russians can remove any fort units on the map and return them to the Reinforcement Display. They can be rebuilt in that or later segments. The Russians do not recoup OP for dismantling a fort.
22.8 Mountain Warfare
The following units can enter mountain hexes (regardless of passes): Leaders, irregular cavalry/infantry, expedition units, and British Gurkha infantry.
- An attack into a mountain hex by these units, or a stack containing at least one of these units, receives a one right column shift on the BRT.
23.0 Off-Map Bases
The Russian Empire has three Off-Map Bases: Caucasus (off the west map edge); Orenburg (off the northwest map edge); and Siberia (off the northeast map edge).
23.1 Off-Map Bases in General
- Supply: All units in an Off-Map Base are automatically in-supply (19.1.1).
- ZOC: ZOC do not extend into or out of Off-Map Bases.
- Combat: Units cannot attack into or out of Off-Map Bases.
- Exclusivity: Only Russian units can enter Russian Off-Map Bases. The Russians always control their Off-Map Bases; no garrisons are required.
23.2 Off-Map Movement
- Entrance: Russian units can move from an Off-Map Base onto the map via the map edge by paying the movement cost for the hex of entrance. Important: Units of a sub-command can only enter the Off-Map Base corresponding to their contingent, although von Kaufmann may enter any Off-Map Base. Units cannot move from one Off-Map Base to another.
- Exit: Russian units can move from the map, via the map edge, into the appropriate Off-Map Base by paying one additional MP. The unit must then cease movement for that phase.
- Caucasus Army Port: The Caucasus area contains a port which functions in the same manner as a port on the map (21.1). Both flotillas and land units may be placed in the Caucasus Off-Map Base.
- Caspian Sea Deployment: The Russians can deploy Caucasus sub-command reinforcements on ports on the Caspian Sea.
24.0 Fog of War
Players may examine the contents of their opponent's stacks only under the following circumstances:
- Players may examine all enemy units in the ZOC of friendly units at the start of each Combat Segment and before any combat.
- By playing a Skullduggery Incident marker (12.4).
- Players may not examine the contents of the Command or Incident Marker Pool, or the other player's markers.
24.1 Concealed Units
Players can deploy their units face down. They can examine their own units but not those of the enemy unless the above conditions apply.
25.0 Scenarios
25.1 Scenario I: The March of Conquest
This starts with General Perovsky's campaigns on the Syr Darya and other frontier regions. It concludes with the Russian conquest of the khanates of Central Asia and the Panjdeh Crisis.
- Game Length: The game starts on GT 1 (1854) and ends on GT 6 (1885).
- GGI: 1 (Low).
- Important: Deploy units in the fortresses that match the unit's name.
Khanates (set-up first) Initial Forces:
-
Turcoman
- Geok Tepe Fortress: 2× irregular cavalry, 1× infantry
- Merv Fortress: 2× irregular cavalry, 1× infantry
-
Khiva
- Khiva Fortress: 2× cavalry, 2× infantry
-
Bokhara
- Bokhara Fortress: 2× irregular cavalry, 1× infantry
- Samarkand Fortress: 1× irregular cavalry, 1× infantry
-
Khokand
- Khokand Fortress: 2× irregular cavalry, 1× infantry
- Tashkent Fortress: 1× irregular cavalry, 1× infantry
- Turkistan Fortress: 1× irregular cavalry, 1× infantry
-
Pamir
- Chitral Fortress: 1× irregular cavalry, 1× infantry
-
Reinforcements: All remaining Khanate units.
Intervention Forces (Initial Forces):
-
Persians (Russian player deploys)
- Meshed Fortress: 1× irregular cavalry, 2× infantry
-
Manchu (Khanate player deploys)
- Kashgar Fortress: 1× infantry, 1× irregular cavalry
- Yarkand Fortress: 1× infantry, 1× irregular cavalry
- Kuldja Fortress: 1× infantry, 1× irregular cavalry
-
Afghanistan (Khanate player deploys)
- Kabul Fortress: 1× infantry, 1× irregular cavalry
- Herat Fortress: 1× infantry, 1× irregular cavalry
- Balkh Fortress: 1× infantry
-
British Empire: None
-
Ghazis: None
-
Yakub Beg: None
-
Reinforcements: a) All remaining Intervention units. b) Persian Cossack unit and Afghan Gd unit cannot be deployed until GT 5 or later.
-
Command Markers: Place all Intervention markers in the Intervention Display.
Russian Empire (set up second) Initial Forces:
-
Caucasus Army
- Alexandrovsk Town: 1× fort, 1× infantry, 1× flotilla
-
Orenburg Army
- Orenburg Off-Map Base: Perovsky, 1× infantry, 1× irregular cavalry, 1× siege train, 1× supply train
- Gueriev Town: 1× fort, 1× infantry
- Raimsk Town: 1× fort, 1× infantry, 1× irregular cavalry, 1× flotilla
- Perovsk Town: 1× fort, 1× infantry
-
Siberian Army
- Siberia Off-Map Base: 2× infantry, 2× irregular cavalry, 1× siege train
- Sergiopolsk Town: 1× fort
- Korpal Town: 1× fort, 1× infantry
-
Reinforcements: a) All remaining Russian units. b) Skobeleff cannot be recruited until GT 3 or later, and Russian machinegun units cannot be recruited until GT 4 or later.
-
Command Markers: Place all Orenburg, Siberian, and Caucasus command markers in the Russian Display.
25.2 Scenario II: The Grand Campaign
This is the same as Scenario I but goes through to the Russian seizure of the Pamir and the establishment of the Durand Line which established the border between Afghanistan and the Northwest Frontier Province in British India.
- Game Length: The scenario starts on GT 1 (1854) and ends on GT 8 (1893).
- Special Rules: Use Scenario I Deployment and Special Rules.
25.3 Scenario III: Khiva and Beyond
This starts with von Kaufmann's campaign against Khiva. In Sinkiang, Yakub Beg and his rebels have seized several fortresses while the Russians have moved into Kuldja to protect their interests. The scenario concludes with the Russians reaching the Pamir.
- Game Length: The game starts on GT 4 (1873) and ends on GT 8 (1893).
- GGI: 6 (Medium).
- Important: Deploy units in the fortresses that match the unit's name.
Khanates (set up first) (Initial Forces):
- Turcoman
- Geok Tepe Fortress: 2× irregular cavalry, 1× infantry
- Merv Fortress: 2× irregular cavalry, 1× infantry
- Khiva
- Khiva Fortress: 2× cavalry, 2× infantry
- Bokhara: None
- Khokand
- Khokand Fortress: 2× irregular cavalry, 1× infantry
- Fergana Valley Oasis: 1× Tashkent irregular cavalry
- Pamir
- Chitral Fortress: 1× irregular cavalry, 1× infantry
Important: Bokhara, Samarkand, Tashkent, and Turkistan fortresses begin the scenario under Russian control.
Scenario Special Rules:
-
Russians have the Initiative on GT 1 (regardless of the GGI).
-
Scenario begins with the First Operations Phase. The Russians may activate one sub-command without drawing a command marker.
-
Persia begins under Russian control.
-
Reinforcements: All remaining Khanate units.
-
Command Markers: Place all Bokhara, Khiva, Khokand, Turcoman and Pamir markers in the Khanates Display.
Intervention Forces (Initial Forces):
-
Persians (Russian player deploys)
- Meshed Fortress: 1× irregular cavalry, 2× infantry
-
Afghanistan (Khanate player deploys)
- Kabul Fortress: 1× infantry, 1× irregular cavalry
- Herat Fortress: 1× infantry, 1× irregular cavalry
- Balkh Fortress: 1× infantry
-
British Empire
- Peshawar: 1× expedition
-
Manchu: None
-
Ghazis: None
-
Yakub Beg
- Kashgar Fortress: Yakub Beg general, 1× irregular cavalry
- Yarkand Fortress: 2× irregular cavalry
-
Reinforcements: a) All remaining Intervention units. b) Persian Cossack unit and Afghan Gd unit cannot be deployed until GT 5 or later.
Russian Empire (set up second) Initial Forces:
-
Caucasus Army
- Alexandrovsk Town: 1× fort
- Krasnovodsk Town: 1× fort
- In any combination in the above locations: Skobeleff, 5× infantry, 3× irregular cavalry, 1× siege train, 1× flotilla
-
Orenburg Army
- Gueriev Town: 1× fort
- Raimsk Town: 1× fort, 2× flotilla
- Perovsk Town: 1× fort
- Irikibai Town: 1× fort
- Bokhara Fortress: 1× fort
- Samarkand Fortress: 1× fort
- In any combination in the above locations: 4× infantry, 3× irregular cavalry, 1× siege train
-
Siberian Army
- Sergiopolsk Town: 1× fort
- Korpal Town: 1× fort
- Fort Vernoy Town: 1× fort
- Turkistan Fortress: 1× fort
- Tashkent Fortress: 1× fort
- Kuldja Fortress: None
- In any combination in the above locations (including Kuldja): von Kaufmann, 5× infantry, 3× irregular cavalry, 2× siege train
26.0 Combat Results
Combat results are listed below for each table. When unit eliminations are called for, the owning player may choose the units to eliminate.
Note: the printed page places a stray line, "2) Attacking units may Pursue.", at the head of the column that carries the Incident Markers Table, with no result label beside it. It is left unattributed here.
26.1 BRT Results
- AC (Attacker Catastrophe): Eliminate all attacking units.
- AR (Attacker Retreats): Retreat all attacking units.
- BB (Bloodbath):
- All units of the side with fewer combat factors are eliminated. The other side must eliminate units that constitute at least an equal number of combat factors. If both sides have the same strength, then all units are eliminated.
- If all defending units are cleared from a hex, any surviving attacking units may pursue.
- DR (Defender Retreats):
- Retreat all defending units.
- Attacker may pursue.
- DC (Defender Catastrophe):
- Eliminate all defending units.
- Attacker may pursue.
26.2 SRT Results
- AM (Ambush): Defender immediately launches a counterattack (16.9.7).
- DD (Desertions):
- Roll one die and eliminate that number of defending units.
- If all defending units are eliminated, attacking units may pursue.
- SR (Surrender):
- Eliminate all defending units.
Incident Markers Table
| Incident Markers | Effects |
|---|---|
| Crisis (Ak Baital Pass, Panjdeh Oasis, Muzart Pass) | Place the marker in the designated hex (12.3). |
| Abject Lesson | Play when an attack is being made against a fortress using the BRT. If the attacker plays: shift one column to the right. If the defender plays: shift one column to the left. |
| Agent | Play when an attack is being made against a fortress using the SRT: If the attacker plays: shift one column to the right; If the defender plays: shift one column to the left. |
| Forced March | Instead of picking a command marker. Designate one friendly sub-command and activate it. |
| Skullduggery | Play either: (1) during any friendly activation to examine the contents of all stacks belonging to one enemy sub-command; or, (2) after enemy play of an Abject Lesson, Agent or Forced March marker; that marker is returned to the Incident pool without having any effect. |
Command Markers Table
| Command Markers | Effect |
|---|---|
| RUSSIAN | |
| Caucasus, Orenburg, Siberia | Russians activate the designated sub-command. |
| Von Kaufmann | Russians activate von Kaufmann, then select and activate one Russian sub-command. |
| KHANATES | |
| Bokhara, Khiva, Khokand, Pamir, Turcoman | Khanates activate the designated sub-command. |
| INTERVENTION FORCES | |
| Afghanistan | Khanates activate the Afghanistan sub-command. |
| British | Khanates activate the British Empire sub-command. First time a British marker is picked in a turn, deploy the British expedition unit. If the expedition unit is on the map, then deploy all other British units as reinforcements. |
| Ghazi | Khanates activate the Ghazi sub-command. |
Fortunes of War Table
Consult when a Fortunes of War marker is picked. Roll 2d6.
| Total 2D6 | Event | Explanation | Incident Marker Picks |
|---|---|---|---|
| 2 | Sandstorms | Operations Phases immediately cease. Each player picks one of their Incident markers and returns it to the pool. Skip to the End of Turn Phase. If this is the final GT, ignore this event. | Russian: 0; Khanates: 0 |
| 3 | Anglo-Russian Accord | Khanates pick up all British units in Central Asia and Russians pick up all Russian units in Persia and Afghanistan. The players then place these units per Fall Back. Also, eliminate any Russian forts in Persia and Afghanistan. | Russian: 0; Khanates: 0 |
| 4 | Ottoman Support | Khanates pick one Khanate command marker from the display and place it in the Command Pool. | Russian: 1; Khanates: 2 |
| 5 | Anglo-Afghan War | Khanates pick up all British and Afghan units from the map, which are then placed per Fall Back. | Russian: 1; Khanates: 0 |
| 6 | Uprising | Khanates pick three Irregular units from one Khanate and/or Intervention sub-command (excluding British Empire) in the Reinforcement display; deploy per the Reinforcement rule. |
Optional Rules (Online Only)
27.0 Railroad Construction & Operations
The Russians can build the Trans-Caspian Railroad connecting Krasnovodsk to Khokand fortress.
27.1 General
Railroad construction may be performed during the Movement Segment of any Operations Phase in which the Caucasus sub-command is activated.
- Construction may not begin until GT 5 (late 1870s). However, the Russians may opt to begin construction on GT 4 if event 8 is rolled on the Fortunes of War Table during GT 4.
27.2 Building the Railroad
To begin building the railroad, the railroad engineer unit must begin the Movement Segment in Krasnovodsk (hex 0309).
Important: The railroad engineer unit is activated with the Caucasus sub-command and is recruited in the same manner, and at the same OP cost, as Russian infantry.
- To extend the railroad, move the railroad engineer unit up to its MF, expending MP per the TEC, along contiguous railroad hexes. For each such hex, expend one OP and move the railhead marker to the hex where the last OP was expended.
- Once built, a railroad hex cannot be destroyed.
- The railhead marker has no other effect on play.
- The railroad engineer unit can also move normally without building RR hexes.
27.3 Railroad Movement
To use railroad movement, a Russian mobile ground unit must start or move onto a railroad hex. One MP is expended, and the unit may move along contiguous railroad hexes until reaching the railhead marker. If the unit has MP remaining, it may continue to move normally.
- EZOC: A unit may begin rail movement in an EZOC but must cease railroad movement when entering an EZOC.
Important: Only Imperial Russian units may use railroad movement.
27.4 Railroad Supply
Units on a railroad are automatically in supply if they can trace a line of railroad hexes back to a Russian-controlled port or fortress hex. All hexes must be clear of both enemy units and EZOC. Friendly units do not negate EZOC for this purpose.
27.5 Railroad and Victory Points
At the conclusion of GT 8, modify Russian VP as follows (5.2):
- No Railroad Built: −2 VP
- Railroad Built to Geok Tepe (hex 0712): −1 VP
- Railroad Built to Merv (hex 1112): 0
- Railroad Built to Bokhara (hex 1311): +2 VP
- Railroad Built to Samarkand (hex 1511): +4 VP
- Railroad Built to Khokand (hex 1910): +6 VP
28.0 Morale
Historically, winning big battles did much to shift overall morale in Central Asia.
28.1 Incident Markers
- a) If the attacker plays an abject lesson marker and pursues into a fortress, raise the GGI by one.
- b) If the attacker plays an agent marker and pursues into a fortress, lower the GGI by one.
Important: These effects are in addition to GGI shifts for gaining control of a fortress (8.2).
29.0 The Great Game Goes Hot
Historically, Russian, and British forces, while content to engage each other in diplomacy and via proxies, were reluctant to resort to open conflict.
29.1 Open War
The first time a Russian unit attacks a British Empire unit or vice versa, raise the GGI by one. Open War is applied on each such GT but is applied only once per GT, regardless of the number of such attacks or who initiates them. Important: This applies only to Russian and British Empire sub-commands, not to other sub-commands controlled by the players.
29.2 Apocalypse on the Steppes
If the GGI is pushed above the maximum level (12), the game comes to an immediate end and victory conditions are checked (5.2).