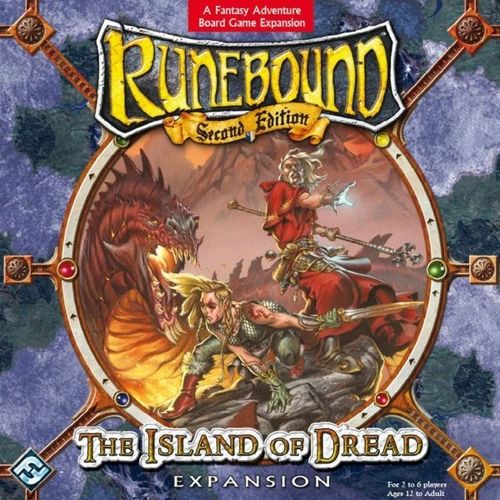
Runebound: The Island of Dread
Runebound: The Island of Dread Rulebook
Table of Contents
Table of Contents
Object of the Game
The object of Runebound is determined by the adventure you are playing.
In The Island of Dread, the object of the game is to defeat Assif Shib-Sa. The first player to do this wins the game. Defeating Assif Shib-Sa is discussed in detail later in these rules.
Editor's note: the text above says defeating Assif Shib-Sa is discussed in detail later, but this printed edition contains no separate section for it. The only defeat-related rules printed are in "The Island of Dread" and "Legendary Item Key" sections below; nothing has been added.
Components
- 77 Adventure Cards (23 green, 19 yellow, 20 blue, 7 red, 8 silver)
- 11 Market Cards (1 Ally, 10 Items)
- 14 Captain Cards
- 8 Hero Cards
- 8 Hero Figures
- 8 Legendary Item Counters
- 12 Map Counters
- 12 Adventure Counters
- 1 Sea Deck Tile
- 1 Island of Dread Tile
- 8 Event Tiles
- 1 Game Board Overlay
- 1 Rulebook
Before you play your first game, carefully punch the cardboard pieces out of their frames so that they do not tear.
You use many of the components from your main Runebound game when playing The Island of Dread adventure. The following components are new to the game.
Adventure and Market Cards
The Island of Dread features a deck of silver adventure cards and a deck of sea adventure cards. In addition, the expansion includes new green, yellow, and red adventure decks. These decks replace the adventure decks from your main Runebound board game. In addition, you can simply shuffle the new market cards into your market deck and use them for all of your Runebound games.
Captain Cards
A Captain card represents not just the Captain, but also his ship and crew. Captains have many of the same features as Allies but are not considered Allies.
Hero Cards and Figures
The Island of Dread expansion presents eight new Heroes and their corresponding plastic hero figures. You can use these heroes instead of, or in addition to, the 12 heroes from the main Runebound game.
Legendary Item Counters
For all rules purposes, Legendary Item counters are considered Items with no cost. Legendary Items may be received as rewards for defeating Challenges or acquired while voyaging (see "Voyaging, Step 5: Experience," page 5). When you discard a Legendary Item to use its special effect, place the counter back into the pool face up. The abilities of each Legendary Item are described on the back of this rulebook (page 6).
Printed-page note: the page reference above reads "page 6", but the printed Legendary Item Key is on printed page 5 of this rulebook (the sixth PDF page is the front cover image). The key is transcribed in full under "Legendary Item Key" at the end.
Map Counters
This expansion includes 12 map counters (six blue and six green), which Heroes may collect by defeating sea adventure Challenges. One green and one blue map counter equal a set. Players discard map sets while voyaging to discover the location of the Island of Dread and to claim Legendary Items (see "Voyaging, Step 5: Experience," page 5). When you receive a map counter, shuffle the face-down pool of map counters and draw one randomly. If there are none available in the pool, you may choose to take any map counter (of a color of your choice) from another player. When you spend a map counter, place it back into the pool face down.
Adventure Counters
There are more adventure jewels on The Island of Dread board overlay than there are on the main Runebound game board. Use the adventure counters from the main game along with these extra counters to set up The Island of Dread board, as described in the basic rules. Your Hero will also face adventures while voyaging (see "Voyaging, Step 3: Adventure" page 5). Since these adventures are not marked by adventure counters on the game board, you must use the extra adventure counters in the expansion to record experience gained from sea adventures.
Sea Deck Tile
Place the deck of sea adventure cards on this tile.
Island of Dread Tile
Place the silver adventure cards on the Island of Dread tile. When you voyage to the Island of Dread, remove your Hero figure from the game board and place it on this tile to indicate that you have reached the island (see "The Island of Dread," page 5).
Event Tiles
The event tiles have a hexagon shape for easy placement on the game board. Each tile is double-sided and most feature a colored border. The event tiles include six plains (red), five sea lanes (yellow), four sea areas (blue), and one ruins. The sea lanes event tiles are numbered for easy placement on their corresponding spaces on the game board.
Game Board Overlay
The game board for The Island of Dread features many new types of spaces.
Event Spaces and Tiles
When the corresponding Event card is resolved, place the event tiles such that the number on each tile matches the number on a space on the game board.
Event Space
The yellow, red, and blue event spaces function as their normal terrain types until an event tile is placed over them. The sea lanes event spaces are numbered, and the numbers match those on the corresponding event tiles.
Anchor Space
Anchor spaces represent the adventures that voyaging Heroes must face during their journeys from one island to another (see "Voyaging, Step 3: Adventure," page 5).
Sea Lanes
Sea lanes are lines that connect a town to one or more other towns across the sea. When heroes are voyaging, they travel along sea lanes to the next space that is either an anchor or town space.
Sea
The blue area of the game board represents the Cerridor Sea. Unlike the terrain spaces on the board (which represent the mainland islands), the sea area of the board is not marked by hexagonal spaces. A hero may never move or be moved into the sea unless he is voyaging, and only then by following the sea lanes.
Standard Runebound Components
In addition to the new components listed above, you should use all of the components from your main Runebound game, with the following exception: You do not use any of the adventure cards from the main Runebound game. These cards are replaced by the new adventure cards found in your copy of The Island of Dread.
Game Setup
Before you begin playing The Island of Dread, follow the steps below to set up the game. For additional information on these steps, see the Runebound rulebook.
- Unfold the Runebound game board and place it centrally on a large table. Place The Island of Dread game board overlay over the map area of the Runebound board, as shown in the diagram to the right.
- Place an adventure counter face up on each space of the board marked with an adventure jewel. Make sure that the color of the adventure counter matches the color of the adventure jewel. That is, place a green counter on each green adventure jewel, a yellow counter on each yellow adventure jewel, etc.
- Place all six undefeated challenge counters in their corresponding position on the undefeated challenge track. (That is, counter one in position one, etc.)
- Shuffle the Ally and Item cards from your main Runebound game and The Island of Dread expansion into a single market deck. Place the market deck where indicated on the board. Draw six market cards and place them in the Tarianor market stack; draw two market cards for each of the other towns' market stacks.
- Shuffle the captain deck and place one Captain in each town's market stack.
- Separate the adventure cards by color into five adventure decks (green, yellow, red, silver, and sea). Shuffle each deck and place it where indicated on the board. Remember, the silver deck goes on the Island of Dread tile and the sea deck goes on the sea deck tile. Note: There are no blue adventure cards for the Island of Dread adventure; the blue adventure deck is replaced by the sea adventure deck.
- Give each player three gold and place the remaining gold counters into a central bank. Any gold you earn as a reward comes from the bank. Any gold you spend for healing, purchases in a town, etc., goes into the bank. You can "make change" from the bank at any time.
- Place all wound, exhaustion, experience, and leftover adventure counters in a central pile where all the players can reach them.
- Place the map counters face down and randomize them. You may prefer to place them in a cup or bowl instead. This forms a pool of map counters.
- Place the eight Legendary Item counters face up in the common play area.
- Each player randomly chooses a Hero card to represent the Hero he will play in the game. Alternatively, players may agree amongst themselves which Heroes they will play.
Unused Hero cards and figures are put back in the box.
Figure caption (Game Setup): Follow the rules for game setup, adding the new components from The Island of Dread expansion to the play area.
Figure labels (Game Setup): Sea Deck; Island of Dread Deck; Event Tiles; Map Counters; Legendary Item Counters.
New Rules
The Island of Dread expansion uses all of the rules from the main Runebound board game, except where noted specifically in this rulebook. In addition to the standard Runebound rules, the following expanded rules address the new features and situations presented in The Island of Dread.
Hiring a Captain
At any time during your Market Step, in addition to the normal Market Step actions in a town, you may also hire a Captain. To hire a Captain, first draw a card from the captain deck and place it face up on the market stack of the town you are visiting. You may then select one of the Captains in the town, pay the cost of the card to the bank, and take the Captain card. You may decide not to hire any of the Captains.
You may only have one Captain at any given time. If you already have a Captain and hire another, choose one of your Captains and discard the other. If a Captain is discarded, remove all counters from the Captain card and place it face down on the bottom of the captain deck.
If you move out of a town without voyaging, you must place all Captains back onto the town's market stack. Finally, if there is more than one Captain in a town's market stack at the end of any player's turn, that player must choose one Captain to remain in the market stack and discard the rest.
You may also hire a Captain "on loan." Hire the Captain without paying the card's gold cost, but place a gold counter on the card as a reminder that he is on loan. During your voyage, any and all rewards (gold, adventure or market cards, experience, etc.) you earn are immediately discarded.
Example: Steelhorns is in Orris and takes his Market Step in the town. After performing all of his other actions for the step, Steelhorns decides to hire a Captain. He draws a card from the captain deck and adds it to Orris's market stack. He then chooses the Captain card that was already in the market stack, but he does not have enough gold to pay its cost. Steelhorns decides to hire the Captain on loan and puts the Captain card in his play area (placing a gold counter on the card to indicate that it is on loan). On his next turn, Steelhorns will be able to voyage from Orris. If he leaves the town without voyaging, he will have to return the card to Orris's market stack. Because he hired the Captain on loan, Steelhorns will receive no rewards from any of the adventures he faces during the voyage.
Voyaging
If you begin your Movement Step in a town and you have hired a Captain, you may voyage. Voyaging is similar to taking a normal turn with the following changes outlined below.
Important: Voyaging (and the results of some adventure cards) is the only way for Heroes to cross the Cerridor Sea. Heroes cannot use market cards to move across the Sea.
Example: Steelhorns begins his Movement Step in Evenpor Grove on Torue Albes. He has the Wings of Regiroth Armor Item and the Teleport Rune Item. He could use the Wings of Regiroth Item to move any 4 spaces on Torue Albes, or could activate the Teleport Rune to attempt to move to any space on Torue Albes, but could not use either Item to travel across the Cerridor Sea to, for instance, Garnet Island.
The Voyaging Turn Sequence
When a Hero is voyaging, the player follows a slightly different turn sequence from the one used in a standard turn. Unless otherwise stated, you may perform all of the standard actions for each step, in addition to those specific to voyaging Heroes listed here. For example, during your Refresh Step, you may always refresh the cards you activated the previous turn.
Step 1: Refresh
Refresh your cards as normal.
Step 2: Movement
When voyaging, you do not roll movement dice. Instead, voyaging Heroes must move to the next space along their sea lane that is either an anchor or town space (see example diagram on page 5). If you end your movement on an anchor space, proceed to the Adventure Step below. If you end your movement in a town space, you complete your voyage: Place your Captain card on the town's market stack and proceed to the Market Step using the standard rules.
Example: Steelhorns begins his Movement Step in Orris and hired a Captain the previous turn. During his Movement Step, Steelhorns moves his figure to the next anchor space on one of Orris's sea lanes. Having completed his Movement Step, Steelhorns moves on to the voyaging Adventure Step.
Note that a voyaging Hero may follow any available sea lane from a town or anchor space. A voyaging Hero could even move from a town space to the first anchor space on a sea lane, and then during his next turn move immediately back to the town space from which he embarked.
Example: Steelhorns left Orris on the previous turn and began voyaging. He begins the Movement Step of this turn on the first anchor space on the sea lane connecting Orris and Dallak. During his Movement Step, Steelhorns must follow the sea lane and move to the next anchor space on the sea lane, or he may turn around and voyage back to Orris. He moves his Hero figure to the anchor space and proceeds to the Adventure Step. On his next turn, Steelhorns will be able to follow any of the sea lanes leading from the anchor space: He could follow the sea lane to Gafford, follow the sea lane that leads north through the Weeping Reach, follow the sea lane that leads to Dallak, or even turn around and follow the sea lane that leads back to Orris.
Figure caption (Voyaging): Steelhorns begins a new voyage. He must leave Orris following one of the sea lanes leading from the town. The player moves his Hero figure to the next anchor space along the sea lane. Once there, he enters a voyaging Adventure Step by drawing and resolving a card from the sea adventure deck. He defeats the Challenge that he draws, skips his Market Step, and proceeds to his Experience Step. During that step his Captain takes 1 exhaustion and Steelhorns may spend experience points and map counters, if he wishes.
Figure caption (Voyaging): Steelhorns continues his voyage on the following turn by moving along the sea lane to the next anchor space. After reaching the anchor space, Steelhorns proceeds to the voyaging Adventure Step, then his Experience Step, repeating the process from last turn.
Step 3: Adventure
Draw the top card of the sea adventure deck. If a voyaging Hero draws a Challenge card, the following exceptions apply during combat:
- If you successfully escape, your Hero figure remains on the anchor space and your turn ends immediately (see "Escaping," below).
- Your Captain may make one attack per combat round, as if he were one of your Allies (remember, though, that Captains are not Allies).
- Your Captain is not affected by any special effect or card ability that affects Allies.
- If your Captain is killed or your Hero is knocked out, you become Shipwrecked (see below).
- If you attempt a Challenge and escape or are shipwrecked, discard the Challenge card instead of placing it on the undefeated challenge track.
Step 4: Market
If you end your movement on an anchor space, you must skip this step.
Step 5: Experience
If your Hero is on an anchor space at the beginning of your Experience Step, your Captain takes 1 exhaustion. If your Captain has exhaustion equal to his Stamina, your Captain takes 1 wound instead.
In addition to spending experience points during this step, you may also spend map counters to discover the Island of Dread or to find Legendary Items. To do the latter, discard one or more sets of map counters (a set is two map counters of different colors). For each set of map counters discarded, you may take one Legendary Item counter of your choice from the Legendary Item pool. You may not find Legendary Items if none are available in the pool. For information on spending map counters to discover the Island of Dread, see "The Island of Dread," below.
Shipwrecked
If your voyaging Hero is knocked out or your Captain is killed, your Hero is shipwrecked. Your shipwrecked Hero follows all of the standard rules for being knocked out, with the following exception: The player to your left places your Hero figure on an adjacent non-sea terrain space (plains, forest, swamp, road, hills, mountains, river, or town). If there are two or more adjacent terrain spaces, the player to your left may choose which space your Hero is placed on.
Escaping
In The Island of Dread expansion, unlike the standard Runebound rules, Heroes remain in the same space after escaping from a Challenge. They do not move back to an adjacent space in the direction from which they were traveling. If an escape test succeeds, the Hero remains in the same space and the player's turn immediately ends.
Interacting with Other Heroes
Voyaging Heroes may not attack or negotiate with other Heroes.
The Island of Dread
To discover the Island of Dread you must:
- Begin your turn on an anchor space
- Declare your intention to travel to the Island of Dread and discard a map set (two map counters of different colors)
- Place your Hero on the Island of Dread tile and discard your Captain card
Once you have placed your Hero on the Island of Dread tile, your turn continues. You must draw silver adventure cards, resolving them one at a time, until you either defeat Assif Shib-Sa or your Hero is knocked out. Each time you draw a new adventure card, you immediately receive a Refresh Step. If you are knocked out while on the Island of Dread, the player to your left places your Hero figure on any town space of his choice. You keep any silver adventure cards you have received as a result of defeating Challenges, but you must then shuffle any discarded silver cards (including the one you were resolving when your Hero was knocked out) back into the silver adventure deck.
Combat on the Island of Dread works as detailed in the standard rules, with the following exception: Heroes in combat on the Island of Dread must always skip the escape phase. In other words, Heroes can never escape from Challenges on the Island of Dread.
Legendary Item Key
Spear of Trelton: Discard before your Hero makes a combat roll to automatically succeed at a Ranged attack.
Sword of Antenor: Discard before your Hero makes a combat roll to automatically succeed at a Melee attack.
Talisman of Korsec-Amin: Discard before your Hero makes a combat roll to automatically succeed at a Magic attack.
Helmet of Trelton: Discard at the beginning of any combat round. For the rest of this combat round, your enemy inflicts exhaustion instead of wounds.
Shield of Antenor: If your Hero defends, discard after your combat roll to automatically succeed.
Emerald of Korsec-Amin: Before moving, discard to replenish adventure counters on all of the board spaces with a sunburst icon.
Jewel of Trelton: After you draw a Challenge card, discard to skip "Before Combat" and start the first round of combat in any phase you choose (ranged, melee, or magic).
Book of Korsec-Amin: Discard during "Before Combat" to reduce Assif Shib-Sa's Life value to 7 for the entire combat. He cannot inflict any damage on the first round of combat.