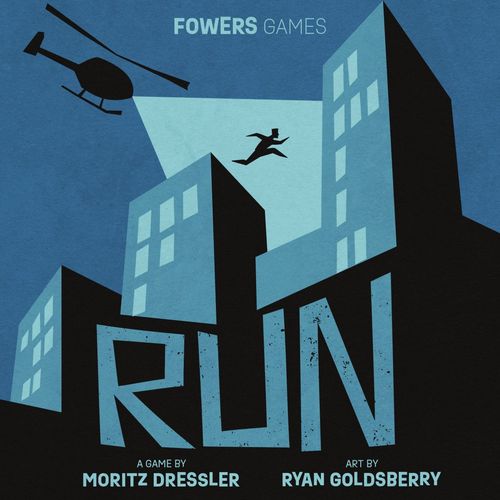
RUN
RUN Rulebook
Table of Contents
Table of Contents
The Rank System
RUN ships with a built-in difficulty ladder. New players start at rank 1; winning enough games at a rank promotes a player to the next one. Rank is tracked per player, separately for each role, on the rank board. Lower ranks simplify the game (useful for onboarding), higher ranks add complications. Rank 3 is the baseline the main rulebook is written against, so the core rules below describe rank 3 play; wherever a rule changes at rank 1, that's called out separately, and ranks 2, 4 and 5 are covered in their own section. New groups are encouraged to start at rank 1 rather than jumping straight to rank 3.
Components
- 2 privacy screens
- 8 double-sided map cards
- 1 dry-erase evidence board
- 1 rank board
- 10 dry-erase rank cards
- 1 Dispatch helicopter miniature
- 5 Dispatch action tiles
- 11 Dispatch backup cards
- 24 Dispatch tracking cubes
- 2 dry-erase pens (1 spare)
- 1 Runner miniature
- 1 Runner status tile
- 1 Runner action board
- 14 gray Runner action tokens
- 6 black Runner gadget tokens
- 20 cardboard tokens: 2 road blocks, 2 motion detectors, 8 footprints, 1 donut, 1 construction site, 2 "used" markers, 4 surveillance cars
- 1 sealed "secret research" envelope (experimental gadgets)
Maps
The box includes 4 double-sided map cards — 8 distinct maps total — printed in two identical copies each, since Runner and Dispatcher each play from their own private board.
Each map is a 6×6 grid, labeled with a map number and name. Map #1 is the simplest and best for teaching; the rulebook recommends starting new groups on side 1a. Maps #2–#4 layer on extra terrain features (water, tunnels, zip lines, and so on) and are meant to be introduced only after both players have reached rank 3.
A space's key property is whether it's a building rooftop or open ground. The Runner is never considered to be standing "inside" a building — occupying a building space means standing on its roof. Getting onto a roof normally requires a fire escape (using the action icon printed beside it) or a gadget; background scenery on non-building spaces is mostly flavor, except where advanced gadgets interact with it.
Each map also marks: stash locations and safe houses (the Runner's two objectives — safe houses carry a hidden letter, A or B, that only matters at rank 4), numbered spawn points (possible starting spots for the Runner, representing the crime scene), the helicopter's home pad (always the Dispatcher's starting position — the helicopter ignores all terrain while flying), and witness figures (which matter only for certain Dispatch backup actions).
Movement note carried on the sample map: the Runner can leave a rooftop using any action or gadget, but can only climb onto one via a fire escape, and can never reach a fire escape by sprinting.
Setup
Decide who plays Runner and who plays Dispatch.
Shared steps:
- Each player takes a screen to hide their map from the other.
- Each player takes a copy of the same map (side 1a recommended for a first game), oriented with the map number in the top-left.
- Place the evidence board where both players can reach it, facing the Dispatcher, with the pen beside it.
- Each player reads the rank card for their role at their current rank, then swaps rank cards with their opponent (so each can track what the other still has available).
Dispatch:
- Put the helicopter on the helipad building.
- Lay out the 5 action tiles, colored side up, below the map.
- Set the 24 tracking cubes within reach.
- (Rank 1 addition: place 1 surveillance car on each of 2 chosen stash spaces, matched on the Runner's map too — the Runner must announce leaving a car's space; see the Rank 1 Dispatch notes below.)
- Pull the 8 backup cards matching the current rank, shuffle them, and flip one: its circled number is the Runner's spawn point. Mark that space with a tracking cube, then return the card to the deck. The Runner places their figure on the matching spawn point on their own map.
- Reshuffle the backup deck and set it face down beside the map.
Runner:
- Place the Runner figure on the spawn point revealed during Dispatch setup.
- Slide the action board under the map, out of the Dispatcher's view, and fill every slot with a gray action token except the diagonal-wild slot. (Rank 1 addition: fill the diagonal-wild slot too.)
- Set the status tile beside the map, START side up.
- Shuffle the 4 basic gadget tokens face down, one onto each stash space. (With advanced gadgets in play, shuffle the whole advanced+basic pool and draw 4 for the stashes, returning the rest unseen.)
How to Win
The Runner wins by collecting 3 gadgets from stash spaces and then ending a turn on either safe house.
The Dispatcher wins by landing two hits on the Runner, or if the Runner ever becomes unable to act (see Exhausted, below).
Gameplay
Play alternates turns, Runner first, until someone wins. Two exceptions force the Runner to take two turns back-to-back: the very first turn of the game, and the turn right after the Runner takes their first hit.
Runner Turn
Each Runner turn, take exactly one action from the action board, or play one gadget token (none are available until stashes are collected).
Resolving an action: pull the used token off the action board and slot it into the next open evidence-board slot (fill left column top-to-bottom first, then the right). If the action was a silent move, flip the token face down before placing it — the Dispatcher only sees a "?" back, learning that some silent move happened but not which one. Every other action is placed face up, telling the Dispatcher exactly which action was used. The Runner figure itself is only for the Runner's own reference.
Available Runner actions:
- Orthogonal move (silent): step one space up/down/left/right.
- Diagonal move (silent): step one space diagonally.
- Orthogonal wild (loud): step one space up/down/left/right, Dispatcher's choice of which wild but not which direction.
- Diagonal wild (loud): step one space diagonally, same information rule as above.
- Sprint (loud): move any distance in a straight orthogonal line; the Dispatcher learns the direction but not the distance. Sprints can't use fire escapes.
General movement rules:
- Can't move off the map edge.
- Moving within the same level (ground or roof) is unrestricted to any space.
- Any action, including a sprint, can move down a level.
- Climbing up onto a roof requires starting from a space with a fire escape into that building, using the action icon shown beside the escape.
- Fire escapes can't be used with a sprint.
- A map's action icon (e.g., next to a fire escape) can also be triggered by a wild token that matches the icon's action type — this applies to every action icon in the game, including ones introduced on advanced maps.
- Two diagonally-adjacent buildings can be crossed roof-to-roof with a diagonal move (hopping the gap), and conversely their shared ground-level gap can be crossed on foot.
Gadgets: ending a turn on a stash space's gadget token flips it face down into an open slot on the action board — silently, without telling the Dispatcher. Using a gadget later works exactly like using an action: place it face up on the evidence board (revealing which gadget, not how it was used). Collecting 3 gadgets and then ending a turn on either safe house wins immediately — the gadgets don't need to be spent.
The four basic gadgets:
- Smoke Bomb: functions as an orthogonal-or-diagonal wild move, and also works on any map action icon (fire escapes, advanced terrain, etc.).
- Crowbar: from any ground-level space adjacent to a building, teleport to any other ground-level space adjacent to that same building or to any building connected to it (a "building complex" is a run of orthogonally-touching buildings).
- Hook: move up to 2 orthogonal spaces or 1 diagonal space, ignoring fire escapes, as long as the move is between ground level and a building, or between two buildings.
- Jetpack: move 1–2 spaces in a straight line, freely jumping onto or over buildings, no fire escape needed.
Advanced gadgets are covered later in the rulebook and are recommended only once both players hit rank 3.
Exhausted: if a Runner turn comes up and no action token or gadget can legally be used, the Runner is exhausted and Dispatch wins on the spot. (Rank 1 softens this: instead of losing, the Runner discards all remaining tokens and from then on may only move 1 space per turn in any direction, but must announce the exact direction taken.)
Dispatch Turn
Each Dispatch turn, do both of the following in either order — move the helicopter (optional), then take one action (mandatory) — or, instead of taking an action, choose to recharge.
Moving the helicopter: any distance, in a straight orthogonal or diagonal line, ignoring the map's terrain entirely, and without announcing the move to the Runner. Can't leave the map.
Taking an action: pick any face-up (available) action tile, flip it face down, and announce its name plus the target space(s) to the Runner, who must answer truthfully whether they're in any of them. Action wording that references "your current position" means the helicopter's map position. A used tile stays unavailable until recharged (see below); using all five automatically triggers a recharge. If the announced action misses (the Runner wasn't in any targeted space), the Dispatcher may immediately draw and resolve one backup card.
The five Dispatch actions:
- Scan Row: name your current row (1–6); the Runner must say whether they're in that row, without giving an exact space.
- Scan Column: name your current column (A–F); same rule — row/column membership only, not exact position.
- Floodlight: name your current space plus the next two spaces along your current row or column (either direction); if the Runner is in any of those three spaces, they must reveal their exact position.
- Stun Gun: name any one space in your current row or column, no range limit (including your own space); a hit there costs the Runner one wound, revealed truthfully.
- Sonic Blast: name your current space plus one orthogonally adjacent space; a hit on either costs one wound — the Runner only needs to confirm hit-or-miss, not their exact space.
As a shorthand used on the tiles and cards: "scan" effects only require a row/column confirmation, "illuminate" effects require an exact position, and "hit" effects cost the Runner a wound. The Runner is always entitled to ask which Dispatch actions are still unused.
Taking a hit: the first time the Runner is hit (by Stun Gun or Sonic Blast), they flip their status tile to its HIT side and must take two consecutive turns afterward. A second hit ends the game for the Dispatcher's win.
Backup cards: a miss lets the Dispatcher draw one backup card and immediately resolve one of the three listed actions, announcing the choice to the Runner before discarding the card. The top listed action is always usable; the middle action needs the Runner to have used at least 1 gadget, or at least 3 backup cards already in the discard pile; the bottom action needs at least 2 gadgets used, or at least 6 discarded backup cards. Running out of the backup deck means no more backup actions are available. A handful of specific backup actions get extra clarification later in the book (see Backup Action Clarifications).
Recharging: on your turn you may instead flip every used action tile back face up, doing nothing else that turn. If all five tiles end a turn face down anyway, the recharge happens automatically at no cost.
Tracking: the Dispatcher is free to record deductions however they like — moving tracking cubes onto candidate spaces, scribbling notes on the dry-erase evidence board or rank card, or both. (Rank 1 addition: the Runner must specify whether each silent move was orthogonal or diagonal, giving Dispatch more to track.)
Ranks
Winning a game lets you cross off the next open circle for that role on the rank board; your current rank is the lowest rank you haven't fully cleared. It's recommended both players sit at their own current rank rather than mismatched ranks, though experienced groups can agree to play unevenly — keeping in mind ranks 1–2 are meant as training wheels.
Runner rank modifiers:
- Rank 1: add the diagonal wild to the starting action board; exhaustion no longer ends the game outright (see the softened rule above).
- Rank 2: same exhaustion softening as rank 1, without the extra diagonal wild.
- Rank 3: the default — no changes.
- Rank 4: during setup, secretly coin-flip the construction-site token and lay it over the safe house matching the side shown, without revealing which safe house it covers to the Dispatcher. The Runner may still walk onto that space, but can't win there.
- Rank 5: add the diagonal wild back to the board, but now all 4 gadgets must be collected (not just 3) before winning at either safe house. For extra difficulty, this can be played without the diagonal wild at all.
Dispatch rank modifiers:
- Rank 1 and 2: during setup, place a surveillance car on 2 chosen stash spaces (mirrored on the Runner's map). Leaving a car's space (not just passing over it, which doesn't count) must be announced by the Runner, after which the car is removed from both maps. These two ranks are otherwise identical.
- Rank 3: the default — no changes.
- Rank 4: during setup, shuffle the rank-appropriate backup cards, draw 3, and lay them face up as your only available backup options for the game (discarded normally after use, per the usual gadget-count thresholds).
- Rank 5: during setup, draw just 1 backup card the same way, but instead of discarding it after use, mark the specific action taken with a "used" token so it can't be repeated — once all three of its listed actions are used up, no further backup actions are available.
Advanced Maps (rank 3+)
Maps #2–#4 add terrain variety; the rulebook advises against using them below rank 3.
Ladders, vines and piers all function exactly like fire escapes — a Runner needs one to climb up a level or climb out of water.
Water is a level below ground. The Runner can always step down into water freely, but climbing back out needs a ladder or pier. A sprint that starts in or crosses into water must stop at the very first water space it reaches, effectively capping sprint distance at 1 space once inside water. All four basic gadgets still work in water: Crowbar can move between water and an adjacent building; Hook can move between water and a building (but not directly between water and ground level); Jetpack can start or end in water; Smoke Bomb works normally in water.
Currents: some water spaces have a directional arrow. Ending movement on a current space forces the figure one further space in the arrow's direction (even chaining into a second current), and a current can loop a Runner back to where they started.
Terrain levels in general work like buildings — always free to step down, but climbing up needs a ladder or vine.
Tunnels (dotted line plus a sprint icon) connect the ground on either side. A sprint can enter a tunnel from its mouth or from anywhere along the same line, and can end at the exit or anywhere further along that line, following normal sprint rules. If a tunnel joins two water spaces, though, a sprint through it must start exactly at the mouth and stop exactly at the exit. Some tunnels also carry a secondary action icon in the floor's color, letting that action jump straight from entrance to exit.
Zip lines and suspension bridges: a curved line marks a zip line joining two spaces. Standing at a marked end and using the specific action icon shown there is mandatory — it isn't optional, and forces travel straight to the line's other end. Some zip lines are one-way, usable only from their marked end. Suspension bridges on map 4b behave identically to zip lines.
Other linked spaces: map 4a's tunnel-adjacent spaces count as linked; using the action shown by the arrow at a tunnel mouth teleports the Runner straight to the paired exit.
Puddles: stepping onto (or sprinting across) a puddle space leaves a footprint token there (max one per space). If the Dispatcher's helicopter ends its move on a puddle space, they may ask whether a footprint marker sits there, and the Runner must answer truthfully and remove it.
Donut Shop: the Dispatcher places a donut token on the shop space during setup. Whenever the helicopter starts or ends its move on that space, the Dispatcher may remove the token to refresh one used action tile immediately (announcing which one); if no action has been taken yet that turn, the refreshed action can be used right away. Even so, only one action tile can ever be used per Dispatch turn.
Ice (promo map 5b): any movement — from an action or a gadget — that ends on an ice space slides the Runner one further space in the same direction they were already moving. Ice counts as ground level, not water.
Map-specific rules are printed at the bottom of some maps and take priority over the general rules above; for example, a crossed-out gadget icon means that gadget is removed from the pool during setup and can't appear on that map.
Advanced Gadgets (rank 3+)
Two more gadgets are restricted to maps with water:
- Jet Ski: from the lowest terrain level, adjacent to water, move to any other lowest-level space adjacent to the same body of water.
- Scuba Gear: from any water space, move to any other space in the same connected body of water (a "body of water" is all water spaces touching each other orthogonally or visually linked, e.g. flowing under a bridge). It can't end its move directly under a bridge on map 5b.
If more than 4 gadgets are eligible for a given map, shuffle and randomly select 4 for the stash spaces at setup, returning the unused ones to the box unseen.
Experimental gadgets live in the sealed "secret research" envelope and shouldn't be opened until both players reach rank 4 — they lean on background art specific to individual maps and are meant to be used cautiously. To include them: during Runner setup, add the experimental gadget token alongside 3 other random gadgets from the pool; draw one random experimental gadget card (either side) and, if it needs map features your map doesn't have, redraw or choose a different card. The chosen card can be kept secret until actually played, at which point its token goes face up on the evidence board and the card itself is shown to the Dispatcher.
Backup Action Clarifications
- Motion Detector: the Runner marks the matching space on their own map with the token. Only "it triggered" is revealed, not which of its (up to 4) covered spaces — and it also triggers if the Runner moves away from one of those spaces, which can happen if the detector lands adjacent to the Runner's current position.
- Rangefinder: measures the fewest combined orthogonal-plus-diagonal steps needed to reach a safe house, regardless of what actions or obstacles (like buildings) stand in the way.
- Road Block: the Runner marks a matching token on their own map. A diagonal move can bypass a road block even if the block also touches a building space.