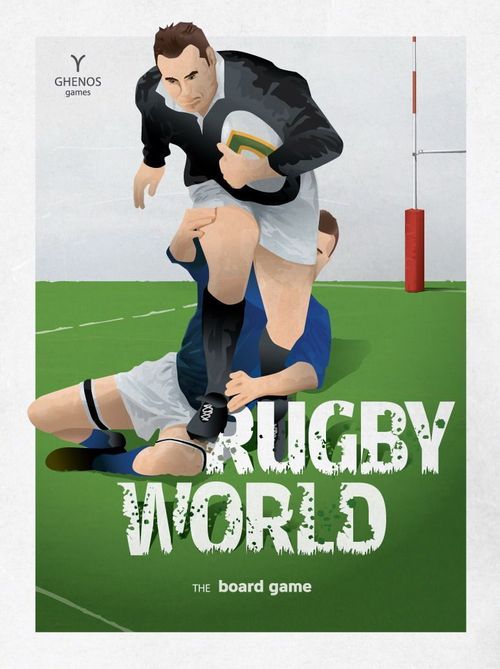
Rugby World
Rugby World Rulebook
Table of Contents
Table of Contents
Box Contents
- Game board
- 16 teams (15 players per team, each with its tokens)
- 1 oval ball token, which serves as the ball
- 64 special cards
- 1 twelve-sided die
- 1 six-sided die
- 30 transparent card stands
Brief Notes on Rugby
Rugby is a sport played by 2 teams of 15 players who face each other through physical contact, within the rules, in order to score by making a try: carrying and grounding the ball inside the opponents' try area. Advancing toward the try line, the team in possession may pass the ball by hand only backwards. With the feet, however, the ball may be passed forwards. Rugby is the only sport in which this happens. To stop the opponent's advance, prevent them from scoring, and try to recover the ball to start a possession of its own, the defence uses the Tackle. Only the ball carrier may be tackled: a tackle is a hold on the opponent with the aim of stopping them by making them lose their balance and therefore the ball. A tackled player must release the ball on the ground. Every Rugby team is divided into 2 units (the Forwards and the Backs) and into a series of positions.
Forwards
- Props (nos. 1 and 3): the strongest players in the team, responsible for the pushing in the Scrum.
- Hooker (no. 2): hooks the ball in the Scrum and throws it in at the Line-out.
- Second Row (nos. 4 and 5): always around the pitch; their height is used at the Line-out.
- Flankers (nos. 6 and 7): fast, they run everywhere to recover the ball.
- Number 8 (no. 8): at the edge of the Scrum, tries to take the ball to pass it to the Scrum-half.
Backs
- Scrum-half (no. 9): often the smallest, but quick, agile and with a long, fast pass.
- Fly-half (no. 10): the brain of the game, manages the ball in attack and the choices of play.
- Centres (nos. 12 and 13): the backbone of the back line, the link with the wings and the fullback.
- Wings (nos. 11 and 14): the fastest players in the team; wings are often alternated between large, powerful runners and agile, elusive ones.
- Fullback (no. 15): with a good kicking ability to clear the ball, protects the space behind with speed and power.
Third Half
Although Rugby is a sport of physical contact, its team values, democracy and respect for the rules show in the so-called third half: the drinks and parties offered by the home team that always follow a match.
Set-Up and Aim of the Game
Choose 2 teams from those available in the box. Up to 8 players may take part, and they divide into the 2 teams, distributing the miniatures as they prefer (one possible division is by unit and position). Each team consists of 15 miniatures, characterised by values of F = strength, S = speed, P = passing, plus an optional k = kicker.
Each miniature corresponds to a token, a placeholder of the same colour and number, which allows the movement of the miniature to be simulated without dice, signalling to the players the subsequent moves, the direction and the possible speed of the miniature. Unused tokens are placed off the pitch.
To begin the game, the pitch and the ball are decided by a draw: the higher die decides whether to start on defence (kicking the ball) or on attack (receiving it).
The aim of Rugby is to carry the ball over the opponents' try line, or to kick it through the opponents' posts with a Drop (a kick during play) or a Penalty kick (a kick awarded for an infringement).
A try is worth 5 points, followed by a conversion kick (ch. 2f) worth 2 points, for a total of 7 points. A kick between the posts (Drop or Penalty kick, ch. 2f) is worth 3 points. The team with the higher score at the end of the game wins.
Playing the Game
A match begins with the kick-off (ch. 2a).
After the kick, any miniature able to reach the ball first, by moving onto the same intersection where the ball is, becomes, together with its teammates, an attacker, gives its team the first possession, and may run (while the ball carrier moves, the ball moves with them) to score a try, or may kick or pass the ball. The team that does not have possession is on defence.
The attacking team and the defending team alternate their turns of play (first the team that made the kick-off, then the other, in a continuous alternation). During each turn up to 4 single moves may be made. Each turn must last 1 minute. After the second move, if the opponent takes too long to think about their moves, a countdown (from 10 to 1) may be started, at the end of which they are forced to close their turn with what they have done.
1) Moves
Moves may consist of:
- A run by an attacker or a defender.
- A kick by an attacker.
- A tackle by a defender.
The 4 moves in each turn must always involve different players. If there is no need, fewer than 4 moves may be made.
1A) The Pass
The pass of the ball is not considered a move. The ball is passed backwards (see fig. 1), moving it by hand from the miniature carrying the ball to an intersection of the pitch that is:
- closer to the try line than the passing miniature itself (that is, backwards)
- at a distance of up to a maximum of intersections equal to the P value of the passing miniature.
Example: if the miniature carrying the ball has P = 3, then to show the points where it may pass the ball, it is advisable to identify all the intersections behind it that can be reached by travelling across the pitch, sideways and along the main direction, for 3 intersections, as in figure 1. This creates an area of intersections inside which passes are possible. If a teammate can reach the chosen intersection in the same turn or in later turns (the ball may in fact be left on a free intersection), then the pass is completed.
If a teammate, not yet moved in that turn, is already on the chosen intersection, then not only is the pass completed, but that teammate may also be moved in that turn, advancing with the ball.
Both cases described may occur even when an opponent, instead of a teammate, is on the intersection (intercepted pass).
The turn ends immediately after the 4th move: this means that passes are allowed only before the 1st move up to after the 3rd.
Figure 1.
1B) Running Move
Vector movement
Each miniature runs on the pitch, moving across the intersections, applying a rule of vector movement, called vector movement.
The miniature chosen to run may be moved from its starting position (where it stands still) by 1 intersection only, in any direction (the 8 white circles in fig. 2a). When the movement of the miniature is finished, the corresponding token must be moved: from the position where the miniature has just stopped, the token is moved by as many intersections as the miniature has just travelled, exactly replicating its movement.
Figures 2a and 2b.
To make movements easier, it is advisable to see each displacement as the sum of a right-left displacement, sideways relative to the pitch, and a forward-backward displacement along the main axis of advance on the pitch. Making diagonal movements of miniatures, travelling first the intersections in the sideways direction and then in the direction of main advance (or vice versa), is an excellent way to remember the movement that the token must replicate (in the example, considering the try area at the top right of the sheet: 1 forward and 1 to the right).
It is important to remember that the movement of the token must start from where the miniature has just stopped, and must replicate its displacement always along the reference axes of the pitch.
Once the token is placed on the ground, the movement for that miniature ends and it may no longer be changed.
The token signals the movements allowed for that miniature in the next turn: in the next turn it may be placed, in addition to the intersection of the token itself, on all the intersections of the imaginary square having the token as its centre and 5 intersections as its side (25 small circles in total, shown in fig. 2b), that is, on all the points that are up to 2 intersections away from the token itself.
In the next turn the miniature may therefore choose to move, reaching any one of the 25 intersections indicated by its token (fig. 3). When carrying out the new movement (fig. 4), the player must remember the intersections it is composed of in the sideways direction (in the example of fig. 4, 1 to the right) and in the advance direction (3 forward).
Immediately after this action there follow:
- an identical displacement of the token, starting from where the miniature has just stopped (fig. 5)
- the identification of a new group of 25 intersections, to be chosen for the following turn (fig. 6).
For all turns of the match, therefore, the teams will move by alternating the miniature-token movements just described in the examples, being able to place the miniatures on all the intersections of the pitch, including the try area and the touchlines, but not outside. The token, instead, may be placed anywhere.
The speed at which a miniature is running equals the number of intersections of the longest segment that makes up the distance between miniature and token. The miniature of figure 5, for example, has just moved 1 intersection to the right and 3 intersections forward, and is therefore at 3rd speed.
Within the imaginary squares signalled by the token (fig. 6) there are always intersections reachable by the miniature with movements:
- that maintain the speed of the previous turn
- that reduce the speed of the previous turn by 1 or 2 units
- that increase the speed of the previous turn by 1 or 2 units.
Figures 3 to 6.
The miniature in figure 7 is at 4th speed: it therefore slows down by choosing one of the intersections that lie before the token. Choosing one after the token, instead, it accelerates. Choosing intersections level with the token, it keeps its speed constant.
Figure 7. (speeds 2A to 6A)
The maximum speed reachable by each miniature equals the S value (speed) shown in its characteristics. It is important to remember that once a miniature has reached its maximum speed, it is not possible to go to the intersections indicated by the token that correspond to higher speeds.
Fundamental rules for the runs of miniatures are:
- A miniature may never occupy the intersection of an opponent (unless making a Hard Tackle) or of a teammate.
- A miniature may not pass through, with its trajectory (the segment between the starting intersection and the arrival intersection), an intersection occupied by an opponent or a teammate (only the intersection, not the footprint of the miniature).
- It is not allowed to cross the segment, parallel to the try line, between 2 intersections occupied by 2 paired miniatures.
- Only during one's own turn is it allowed to count on the fingers on the pitch, but only for the miniature-token movement to be made in the turn and not for later turns.
- The run of a miniature ends when it leaves through the touchlines (the token, instead, may be placed outside the lines of the pitch, as it is an immaterial object).
The throw-in (ch. 2c) is taken at the point of exit, if the trajectory of the miniature has crossed the touchline exactly at an intersection (black miniature in figure 8), and at the point furthest back, if the exit trajectory of the miniature lies between two intersections on the touchline (light miniature in fig. 8).
Figure 8.
Vector movement makes possible the Tackles and above all the running game of Rugby: it is advisable to keep teammates continuously running behind the miniature in possession of the ball (within passing range), following parallel and increasingly outer trajectories, so as to create the famous handling game of Rugby and always have someone to whom to pass the ball in case of a Tackle.
Free move
In addition to vector movement, there is an important way of moving miniatures during turns: the free move. It is in fact possible to choose to move the miniatures with the hands and not with the token rule, placing them at will on the playing grid, provided the following conditions are respected:
- The free move allows miniatures to be placed on a row of intersections, parallel to the try lines, that lies behind, in the direction of advance of the pitch, by at least 2 intersections from the one where the ball is: that is, the miniature must be at least 2 intersections closer to its own try line than the ball is.
- Miniatures, after a free move, do not have a token (and if they had one before, they lose it): in the following turn they must therefore restart with a unit movement.
- No more than 3 of the 4 miniatures that may be moved in a turn may use the free move.
- After any kick, free moves are immediately frozen and may not be used until the ball is reached by any miniature (free moves may not be made while the ball belongs to nobody).
- When the ball carrier enters the opponents' 22-metre area, line included, the free moves of both teams are frozen, until the ball leaves that area again.
If vector movement with the token is the one that physically brings the tries or the Tackles, the free move is of paramount importance in Rugby World, allowing a continuous reorganisation of the line-up, a pressure on the ball carrier in favour of the defences, and a collective action protecting the ball in favour of the attacks.
1C) Kick Move
The miniature in possession of the ball, instead of running, may make its move by kicking. Miniatures in the team labelled with a "k" have the qualities of a kicker.
There are 3 types of kick that the miniature may declare, according to the range of the ball, that is, according to how many intersections, along the main direction of advance of the pitch, one wishes the ball to travel:
- Short range (5-7 intersections for "k" players, 1-7 intersections for all other players)
- Medium range (9-13 intersections for "k" players, 2-13 intersections for all other players)
- Long range (18-26 intersections for "k" players, 3-26 intersections for all other players).
The first difference between miniatures with kicking qualities and non-kickers is that the former are more precise in measuring the range; another difference is that a kicker decides the exact intersection where the ball lands, while a non-kicker, once the intersection has been declared, leaves the opponent the possibility to move the ball, parallel to the try lines, up to 5 intersections from the chosen intersection, to one side or the other (even kicking it into touch).
After declaring the intention to kick and the type of kick, the die is rolled and then the ball is placed on the pitch, or even off it, at the end of the range along the row of intersections indicated by the range itself. It is also possible to decide to let the ball fall out, for a throw-in, by placing it 1 intersection outside the touchline (see ch. 2c).
For example: if a "k" with the ball decides to kick long, he declares a long range, then rolls the die and, according to the tables below, learns the range of his kick. Let us imagine it is 22 intersections: one reasons by rows of intersections parallel to the try lines. One identifies the row 22 away from the row of intersections on which the miniature stands, and it will then be him (being a "k") who chooses, on the row identified, the intersection where the ball falls (even off the pitch).
A kick may be chosen to relieve the pressure of the opposing defence by moving the ball away. A kick into touch provides a chance to regain possession of the ball, in a more interesting zone of the pitch. A short-range kick is a solution for attacking, in case some teammates, who are running, can reach the ball just kicked.
Table: kick range (die roll)
| Kick type | Kicker (k): die 1-4 | Kicker (k): die 5-8 | Kicker (k): die 9-12 | Non-kicker: die 1-4 | Non-kicker: die 5-8 | Non-kicker: die 9-12 |
|---|---|---|---|---|---|---|
| Short range | 5 intersections | 6 intersections | 7 intersections | 1 intersection | 4 intersections | 7 intersections |
| Medium range | 9 intersections | 11 intersections | 13 intersections | 2 intersections | 7 intersections | 13 intersections |
| Long range | 18 intersections | 22 intersections | 26 intersections | 3 intersections | 13 intersections | 26 intersections |
1D) Tackle Move
Each defender may tackle only the opposing ball carrier. Tackling opponents who do not have the ball is a foul (obstruction, see 2f).
During its own turn the defence may run its miniatures, exactly as the attack does, with free moves or vector movements. With the former it puts pressure on the attack, organising the line-up to cover every gap; with the latter the miniatures may be moved to tackle the ball carrier.
The Tackle takes place by bringing from one to three defenders to position themselves on one of the 3 points in front of the ball carrier (see figure 9). When a Tackle is made, both the defender(s) and the attacker immediately lose their token because of the contact (these are placed off the pitch until they are used again).
Figure 9.
When the turn returns to attack, the tackled ball-carrying miniature must be moved: depending on how many defenders (1, 2 or 3) have tackled it, it has a series of options.
With only 1 defender in front, the tackled attacker may:
a. Break through - declare the intention to break through, and roll the die. The F (strength) values of the 2 players are compared. At equal strength, a situation of balance, the one declaring the break-through wins with a die from 1 to 6 and loses with a die from 7 to 12. But if the two do not have the same strength, the difference in F values shifts the balance of the final result, reducing the range of winning die values of the weaker by a number equal to that difference. For example, if the tackled ball carrier has strength 6 and intends to break through against the defender who tackled him, who has strength 8, the difference of -2 in strength is reflected in the final result in this way: compared with the original balance of 1-6 and 7-12, the new situation is 1-4 and 5-12. The weaker side sees its range of die numbers in its favour reduced by 2, so it can win if it rolls from 1 to 4, while it loses if it rolls from 5 to 12. And so on. This rule is called the Strength Rule.
- If the attacker wins, and therefore breaks through, it may move into the free spaces available with a unit movement, with the token moved accordingly. If it wins with a 1 or 2, then it ensures that the defender cannot move in the following turn.
- If the attacker loses, it is forced to put the ball on the ground, making it available (see option c), and if it loses with 11 or 12 the ball is taken from it by the defender (it is moved onto the defender).
Evade - declare the intention to evade the Tackle: everything just said for the break-through applies, with the difference that the players compare speeds and not strengths (Speed Rule), and that in case of victory the attacker may immediately move 2 intersections, wherever it wishes. (The source prints this option without a letter, between a and b.)
b. Pass - declare the intention to pass and move the ball from the tackled miniature to an intersection of the pitch (as explained in 1a). The maximum range of the pass is given by the P value of the miniature, but if it is tackled, it will be half of P (always rounded down).
c. Ground the ball - declare the intention to make the ball available, and place it exactly one intersection back (relative to the main axis of the pitch) from the miniature. From this moment on, the ball is available to anyone able to reach it, except for the tackling defenders and those in "offside" (see ch. 2d). If a teammate is already on the intersection behind, this teammate must declare whether it picks up the ball or leaves it on the ground under itself.
With 2 defenders tackling, the only options are b) and c).
With 3 defenders, the Tackle is such that the only possibility left is option c).
There is a Tackle called the Hard Tackle, which may allow the defender to steal the ball. The defender declares the intention to make a Hard Tackle, rolls the die and, applying the Strength Rule, checks the result (the 1-6 interval always belongs to the declarer).
If the defender declaring the Hard Tackle wins with a die of 1, 2 or 3, then it has recovered the ball, which is placed on it: it therefore occupies the original position of the ball carrier and pushes the opponent back by one intersection. If the defender wins with the remaining numbers, it occupies only the original position of the ball carrier, pushes the opponent back by one intersection and forces them to ground the ball (option c).
If the defender declaring the Hard Tackle loses with 10, 11 and 12, it has committed a foul, penalised with a Penalty kick (see ch. 2f). If the defender loses with the remaining numbers, it places itself 2 intersections away (where it wishes), losing its token.
Obstruction, as was said, is not allowed: therefore a defender may not remain on one of the 3 points in front of any attacker without the ball, unless they are players who remained in those positions from a previous Tackle.
If an attacker, in its turn, advances bringing one of its 3 intersections in front onto a stationary defender, it must warn the defence to move in the next turn: if the defence does not make the move, it commits obstruction (see ch. 2f), but it would not be penalised if the warning had not been given.
How to Play a Game of Rugby World
2A) Kick-off and Restart of Play
At the start of the 1st and 2nd halves (see 2h), one of the 2 teams (according to the draw, the 1st half is kicked off by one team and, in the 2nd half, the other team accordingly) kicks from the centre of the pitch, with one of its "k" miniatures placed there, towards the opponents' half. The kicking team lines up first, starting from an intersection behind the kicker in its own half. The opposing team must instead line up second, in the starting formation of Rugby (see fig. 10), from behind its own 10-metre line up to the end of the pitch, with distances between the miniatures at will.
The kick is made (see ch. 1c) and, as soon as the ball is placed on the final intersection, the kicking team has the right to 4 moves (the kick-off does not count as a move). The opposing team moves second with 4 moves. All moves must be vector moves until any miniature reaches the ball. From that moment on, free moves are possible for both teams.
Figure 10.
The kick-off may not kick directly into touch. At the kick-off only short and medium range may be used.
The kick-off is repeated, always from the halfway line, after every try (converted or not) or after every kick (Drop or Penalty kick) successfully scored: the team that conceded the try, the Drop or the Penalty kick must take the kick-off.
The restart kick, instead, is taken by the defence to resume play after an attacking opponent has kicked, missing, a Drop or a Penalty kick (see ch. 2f), or has sent the ball by a kick over the try line out of the pitch. The defence places a "k" miniature with the ball wherever it wishes along its own 22-metre line, and lines up the rest of the team, starting from an intersection behind this one. The opposing team must line up in the Rugby formation (see fig. 10), starting from the 24 metres (1 intersection beyond the 22 m where the restart kick takes place) towards its own try line. The restart kick may not kick directly into touch. At the restart kick all 3 types of range may be used.
2B) Offside
The ball carrier, or the ball itself, identifies an offside line that passes through the ball and is always parallel to the try lines (fig. 11). In Rugby, all attackers, to be considered "in play", must stand behind that line, and defenders, to be considered "in play", must stand in front of that line. Both must therefore be closer to their own try line than the ball is. Being in offside does not automatically entail a penalty for the miniature. They are penalised, however, with a Scrum put in by the opposing team (ch. 2d), those offside miniatures which:
- move towards the ball after a teammate behind them has kicked the ball (only miniatures that were in play at the moment of the kick may chase and collect a kick). Such offside miniatures are brought back into play (and so may move with either type of movement) only after the ball has been received by a miniature originally in play, of either team
- intercept the pass of an opponent
- position themselves above the ball that has been made available by a tackled opposing ball carrier.
Figure 11: the number 5 and the number 13 of the black team are in offside.
2C) Touch
The ball may leave the pitch (is said to be in Touch) in two ways:
- carried by a miniature that leaves the pitch
- following a kick.
After the ball has gone into Touch it must be returned to play with a throw by the number 2 miniature. The right to throw the ball belongs to the team that did not send it into Touch, unless the ball was sent into Touch directly from a Penalty kick: in that case the team that took the latter keeps the right to throw.
The throw-in is taken at the point of exit:
- of the miniature, if its trajectory has crossed exactly one intersection, or of the furthest-back point, if the exit trajectory of the miniature lies between two intersections (fig. 8)
- of the ball, that is 1 intersection outside the line, if kicked out by a miniature within its own 22 metres or on its own 22 metres. The throw-in is at the height of the position of the miniature that kicked it out, if the kick took place outside the 22 metres of that miniature (which is why, to clear the ball with a kick from outside the 22 metres, it is better to keep it on the pitch).
The throw-in is taken in the middle of 2 lines of miniatures of the 2 teams, perpendicular to the touchline (see fig. 12). The 2 lines are 2 intersections apart. 5 miniatures line up in the line, as shown in the figure, occupying the intersections between the dashed lines of the 5 m and the 15 m (see the pitch diagram).
For both teams, only the number 9 may stand within 5 intersections of the line, while the other miniatures must be more than 5 intersections away and normally organised according to a starting formation of Rugby like that of the Scrum (see ch. 2d).
The throwing team secretly chooses the miniature of its line that is to receive the throw, and indicates it by selecting on the 12-sided die the face whose number gives the position of that miniature counting from the touchline (from 1 to 5). The choice is made by covering the die with the hand.
Touch begins when the defence (the team not throwing) tries to guess this number: if it succeeds, the ball passes directly to the defending miniature, which marks in Touch the chosen one, that is, the one with the same position number. If it does not succeed, the ball is placed on the chosen attacker. The first turn of the touch always belongs to the team that took the ball, and consists of the classic 4 moves.
Figure 12.
2D) Scrum
Touch has a capital importance in the game because it allows the back line to have quality possession of the ball with the defence very far away (20 metres) or to organise a start with the forwards. It is a phase of play that often arises, because it is normally sought with kicks within one's own 22 m to push the pressure of the opponents away and restart play from a less dangerous zone of the pitch.
From Touch, restarts are organised as in the Scrum. It is advisable for whoever wins the Touch to move the number 9 in free move towards the ball, and to start making centres and wings run already from the 1st turn of Touch. In two passes from the 9 to the 10 the ball can travel important distances of the pitch. Touch is finally sought from a Penalty kick, because in that case possession remains with the team that takes it, and that team can take the opportunity to advance.
The Scrum is a phase of restart of play which consists of a push by 8 miniatures per team trying to move the opponents. In Rugby World the Scrum takes place following one of the following infringements:
- offside foul (ch. 2b): Scrum put in by the team that did not commit the offside
- obstruction foul (ch. 1d): Scrum put in by the team that did not commit the obstruction
- Previous Scrum that does not advance (4 turns, 2 of attack and 2 of defence, lost consecutively): Scrum put in by the team that had not put the ball into the previous Scrum
- Ruck or Maul that is stationary (4 turns, 2 of attack and 2 of defence, lost consecutively): Scrum put in by the team that has possession of the ball at the moment the Ruck/Maul stops.
Scrums are formed at the exact point of the infringements, placing the hooker (no. 2) on the said intersection, except within less than 3 intersections of the try area or the touchline. In that case it is formed 3 intersections from the try area or the touchline.
A Scrum ends when:
- the ball leaves the Scrum
- the number 8 has the ball and unbinds, carrying it at a run
- the ball in the Scrum touches the try line.
Figure 13.
The Scrum is formed by 8 miniatures per team, placed as in figure 13. The ball put in is automatically "hooked" (struck with the heel to be passed backwards) by the number 2 and placed in the central hole of the Scrum.
The miniatures of the 2 teams that do not take part in the Scrum organise themselves according to a Rugby formation as in figure 14, while the number 9 (in fig. 13) enjoys a particular free move and may be moved freely around the Scrum without the limitation of the 2 intersections from the ball.
Figure 14.
The attacking Scrum pack must begin to push: to do so the die is rolled and the strength rule is applied (already applied in the Break-through and in the Hard Tackle), considering the Scrum packs as a single miniature, whose strength is the sum of the strengths of the 8 miniatures. Comparing it with the strength of the opposing Scrum pack, the outcome of the push is known (see the Appendix for the strength values of the Scrum packs of the various national teams).
For example, if the Scrum pack that has the ball has F = 67 and the other has F = 69, then the first Scrum pack manages to push the second if it rolls and gets from 1 to 4. If the team declaring the push wins, then the packs move (translate forward) by one intersection towards the try line of the losing side. Each time the pack that has the ball pushes, it first decides whether to keep the ball behind itself (keeping it in the centre of the Scrum) or to leave it still on the ground, letting it roll out: in this last case, if it wins, the number 8 moves onto the ball and in the same turn could decide to unbind and start running.
If in the 1st turn in which the opponents push, the Scrum that has the ball loses, then it is the hooker who, against its will, is carried over the ball.
If the team declaring the push loses, it gains no advantage and suffers no harm: nothing happens and the packs remain in balance.
In the Scrum action, the pack that pushes counts as 1 movement.
During the defence's turn, the defence must also push its pack, and so on. In theory, if the ball is left to roll out on the ground and the attacking pack wins the push in 2 consecutive attacking turns, the ball leaves the Scrum and belongs to whoever covers it (presumably the scrum-half). But if the defending pack succeeded in pushing until it brought its own hooker onto the ball, then it would have recovered the ball.
At any moment during its own turn, the attack may decide to bring the ball out by handing it to the number 9 on an intersection adjoining the Scrum, on which the scrum-half is brought thanks to the special free move (this allows a surprise factor on where the Scrum action starts). Once the ball is out, the Scrum ends.
The Scrum also ends if, in 4 consecutive turns (2 of attack and 2 of defence), the packs lose their pushes: the Scrum does not advance, collapses, and a new Scrum with the throw-in by the opponent is awarded.
The Scrum is one of the most important static phases, because it allows an almost certain possession with all the opposing forwards engaged in a restricted zone of the pitch. Especially if in a central position, it gives the attack really excellent possibilities.
2E) The Ruck and the Maul
Following a Tackle, if in that same turn the attack manages to move 1, 2 or 3 teammates, covering only the 3 intersections immediately behind the tackled miniature, then a Ruck is formed, an unordered Scrum, and the tackled miniature must immediately release the ball without it being covered by the eventual teammate taking part in the Ruck behind the miniature. The Ruck makes it possible to protect the possession of the ball, avoiding that opponents in play may collect the ball left free (so it works well with 3-player Tackles).
The Ruck moreover, after 3 movements have been completed, allows the attack to:
- advance by moving as a single entity, following the strength rule exactly as in ordered Scrums. If, for example, 3 teammates have supported the tackled miniature with the Ruck, then the strengths of the 4 miniatures are added together and compared with that of the strengths of the tackling miniatures, rolling the die. It is probable that in these situations the difference between the strengths of the Rucks exceeds 6, which means automatic victory or defeat. Moving a Ruck counts as 1 movement, and is a compulsory movement
- move at will, by hand, as many miniatures as one wishes (excluding those taking part in the Ruck and those just moved in the turn) to reorganise the team and restart.
At the moment a Ruck forms, two offside lines are created, which, parallel to the try lines, pass through the last miniatures taking part in the Ruck.
Every other miniature that one wishes to add to the Ruck (fig. 15) must do so behind its own offside line: therefore in the following turns other miniatures, of attack and defence, may join their teammates to strengthen the Ruck, increasing the pushing capacity, but only by adding themselves on the 3 intersections behind the last teammates taking part in the Ruck, otherwise offside is whistled.
The defence, in its turn immediately following the attack's Ruck, must respond and move its Ruck, possibly first increasing the Ruck itself. The strength rule is applied again to push according to any new strengths in play, and then miniatures may be moved at will.
In the following turns, reorganisations of the line-ups at will are forbidden (only one per side, therefore).
During the push of the Ruck the attack must always decide, as in the Scrum, whether to drag the ball along, or to leave it on the ground. The miniature above the ball may decide to pick up the ball and pass it out according to its P value (it is possible, if needed, to pass the ball from miniature to miniature inside the Ruck, up to a peripheral participant of the Ruck, who will pass the ball out according to half of its own P value).
The Ruck ends in this last circumstance, or also when the ball comes out because the Ruck carries it over, or after 4 consecutive lost pushes, 2 by the attack and 2 by the defence (see Scrum): this case is penalised with a Scrum put in by whoever has possession of the ball at the end of the Ruck.
Figure 15: the 14 has been tackled by the 2 and the 4. The 8 and the 5 have formed a Ruck to support it and push. The defence replies by increasing its own Ruck with the 7. The attack replies by increasing its own Ruck with the 7 and the 2 (who steps back to cover one of the 3 intersections behind the 5, avoiding offside).
The particular case of a Ruck formed behind a teammate tackled by only 1 defender is called a Maul: in that case the ball is not on the ground because the miniature can keep it with itself to advance aided by its teammates, and therefore the ball may not slip between the miniatures, but always remains in the possession of the tackled miniature. In the Maul the ball is in "safe keeping" and cannot be taken away. For the rest, the same rules as for the Ruck apply.
2F) Penalty Kicks, Conversion Kicks and Drops
Every infringement of the Rugby World rules is punished with the formation of a Scrum or with a Penalty kick at the exact point of the infringement. The concept of advantage always applies: the team benefiting from the penalty may refuse it if continuing the action is more advantageous.
The game infringement penalised with a Penalty kick is the following:
- foul for a Hard Tackle.
The game infringements penalised with a Scrum put in by the opponents are the following:
- obstruction foul
- offside foul
- Scrum that does not advance after 4 consecutive turns.
The game infringement penalised with a Scrum put in by the attack is the following:
- Ruck or Maul that is stationary and does not advance after 4 consecutive turns.
Kick success table (the first row is for kickers "k", the second for non-kickers):
| Probability of success | Within 22 m of the posts, more than 2 intersections from the touchlines | Between 24 m and 40 m, or 2 intersections or fewer from the touchlines | Between 42 m and 50 m |
|---|---|---|---|
| "k" | 2-12 | 3-12 | 4-12 |
| "non-k" | 4-12 | 6-12 | 8-12 |
For the Penalty kick a kicker is used. The Penalty kick has 2 possibilities: to kick into touch (possession is kept) or to kick between the posts. In both cases there is no sense in lining up the miniatures, but the die is rolled.
In the case of a kick at the posts, to score the 3 points, the table below is consulted: according to the distance from the posts, there are different probabilities of success.
The same table applies to conversion kicks after a try: the teams are not lined up, since it is a die throw. If the try was scored by crossing the line more than 2 intersections from the touchlines, then the probability of conversion is that of the first row in the table, otherwise it is the second row.
The same table also applies to Drops: during an action, any miniature in the opponents' half, with an area around itself free of opponents of 7 intersections by 7 intersections (no opponent may be within three intersections or fewer of the kicker), may attempt a Drop with the probabilities expressed above.
2G) Special Cards
Each team has 4 special cards available, playable during one of its own turns to obtain a benefit at that particular moment.
Each card may be played only once in the whole game. A card may not be played if the effect of a card previously played by the opponent has not yet ended.
One of these 4 cards is collective, and concerns the whole team; the remaining 3 concern only a particular group of miniatures: a forward (from 1 to 8), a three-quarter (from 11 to 14) or a halfback or fullback (9, 10 and 15).
The collective card expresses a potential of the team and may be played during the turn regardless of the miniature being moved. The other 3 are nominal, and must be played only before moving a miniature of the group indicated in the tables below, precisely to obtain an advantage on that movement.
See the Appendix for all the meanings of the collective and nominal special cards.
Example 1: the card Haka Ka-mate allows New Zealand to cancel, for the opponent's next 5 turns, every free move of the opponent itself. It is a card of enormous offensive potential and as such must be used at the right moment.
Example 2: the card David Campese allows an Australian three-quarter to advance 12 intersections forward in that turn, ignoring its token. Thanks to this card, in that turn the movement of the indicated three-quarter may have an extraordinary acceleration or an unthinkable deviation of trajectory.
2H) Match
The match is played according to the rule of possessions: each match consists of 8 possessions.
A possession is the sequence of actions between the moment when one of the 2 teams gains the ball, following:
- a kick-off or a restart kick
- a kick received in play, or the catch of the ball from a Touch
- a Scrum awarded in favour, if it did not have possession
and the moment it loses it:
- for scoring a try or a Drop or a Penalty kick
- for a failed Drop or Penalty kick, or going out of the pitch with the ball
- for a clearing kick made in play, received by the opposing team or sent into Touch
- for an offside foul committed by one of its own miniatures
- because during the possession the opponent has made 7 Tackles, also on different miniatures. At the 7th Tackle, in fact, a Scrum put in by the opponent is whistled and the possession ends.
Once a possession ends, the match always passes to the next possession, unless the possession was interrupted by:
- a recovery of the ball by the opponent: in this case the Tackles of that possession are reset and it starts again from zero
- a clearing kick into Touch made before suffering the 3rd Tackle: in this case it is as if the possession had never begun.
The 5th possession always begins automatically with a restart kick by the team that did not take the kick-off in the 1st half: the 2nd half begins. The match ends at the end of the eighth possession.
The possessions must be indicated along one of the two rows of numbers from 1 to 8 along the edge of the pitch (the more convenient one), by means of the 6-sided die. The position of the die on the row mentioned indicates the number of the possession the match has reached. The face of the die indicates how many Tackles have been reached in that possession: the defence has the task of updating this number, since it has every interest in doing so. To indicate zero Tackles the die is left on number 1, just outside the square of that possession.
Otherwise the match may always be played on time, that is, the players decide to compete for the traditional 80 minutes of a Rugby match. At the end of the 80 minutes the team with the higher score wins.
A team that gains a possession must try to turn it into a try or a Drop within the 7th Tackle: the opponents will play to reach this 7th Tackle, because they will have cancelled a possibility for the opponent and will begin one of their own with the Scrum.
A Touch within the 3rd Tackle is a way of not letting possessions pass, postponing the moment of scoring. If the opponent makes the third Tackle, the possession can no longer be cancelled, but must be played out to the end. A ball recovered in play does not cancel the possession, but resets its Tackles.
Appendix: Special Cards and Scrum Forces Values
The names and features reported on the cards are not exhaustive. They recount part of the national teams' history, and Ghenos would like to apologise to all those who, with their vast experience, will turn their nose up at these choices. The years indicated in brackets relate to the international careers of the players mentioned.
Note on the printed headings: in the English column of the appendix the nominal cards for numbers 1 to 8 are headed "Backs (1-8)". The rulebook (ch. 2G) identifies that group as the forwards (numbers 1 to 8), so the heading means the forward cards. The printed heading and text are kept unchanged here.
Each national team has four special cards: one collective card for the whole team (the "Team" card) and three nominal cards for a single player, as listed in ch. 2G. The Scrum Forces value (F) of each team's Scrum pack is shown under its name and is used in the Scrum push (ch. 2D).
Scrum Forces Values
| Team | Scrum pack F |
|---|---|
| Argentina | 68 |
| Australia | 69 |
| Canada | 67 |
| England | 70 |
| Fiji | 68 |
| France | 70 |
| Germany | 67 |
| Ireland | 68 |
| Italy | 69 |
| Japan | 67 |
| New Zealand | 70 |
| Samoa | 69 |
| Scotland |
Argentina
Scrum pack F = 68
Bajadita Team (collective card): Scrum technique developed during the late Sixties by the legendary Don Ocampo to concentrate all the power along an imaginary arrow towards the opposing hooker. This card can only be played during a Scrum or a Ruck/Maul: it enables the Scrum/Ruck/Maul to move ahead by 7 intersections and to organize the team lineup by hand. Alternatively, it enables the ball to be automatically caught during any line-out.
Rolando Martin (Backs (1-8)): Argentinean number 8 who took part in 3 World Cup, in 1995, 1999 and 2003 (1994-2003). Any Back tackling alone forces the opposing forward to release the ball, as if there were 3 tackling defenders.
Hugo Porta (Scrum-Half, Fly-Half, Fullback (9-10-15)): The greatest player in the history of Argentinean Rugby, world class scrum-half and kicker, the only Pumas present in the Hall of Fame (1974-1989). The Fullback or the Scrum-Half or the Fly-Half carrying the ball may broaden the imaginary square given by his token from 5x5 to 7x7, or increase his P value to 20 intersections during the turn.
Gonzalo Quesada (Scrum-Half, Fly-Half, Fullback (9-10-15)): Fly-Half who set the record of points scored with the Argentinean Rugby team (1996-2004). This card can only be played during a Drop kick or a Penalty kick: it allows the player to re-roll the die if the first result is negative.
Australia
Scrum pack F = 69
Waltzing Matilda Team (collective card): Australia's most popular folk song which fans strike up, especially in reply to the New Zealand Haka. This card can only be played in defence: it permits special defending free moves to be made for 5 consecutive turns, placing the figures at a distance of 1 intersection from the ball instead of 2.
David Campese (Three-Quarters (11-14)): The most talented Rugby forward ever (1982-1992). The three-quarters in possession of the ball runs instantly at a speed of 12 (also if still). If his S is lower, during the following turn the speed reduces to this S value.
John Eales (Backs (1-8)): Monumental lock, captain of the Australian national team, world champion in 1999 (1991-01). The Back may broaden the imaginary square given by his token from 5x5 to 9x9, in order to tackle.
Mark Ella (Scrum-Half, Fly-Half, Fullback (9-10-15)): Native of Sidney, one the greatest Fly-Halves in the entire history of Rugby (1980-84). During the turn, the halves or the fullback increase their P value to 20 intersections.
Canada
Scrum pack F = 67
Quarters World Cup 1991 Team (collective card): Canada ranked among the first 8 countries in the 1991 World Cup, finishing second in the round with France, and overtaking Romania and Fiji. Canada lost 29-13 in the quarter finals against the All Blacks. This card can only be played in defence: it permits special defending free moves to be made for 1 turn, placing the figures at a distance of 1 intersection from the ball instead of 2.
Gareth Rees (Scrum-Half, Fly-Half, Fullback (9-10-15)): Fullback who collected 55 caps with Canada scoring 27 points in the game against Namibia in the 1999 World cup (1987-2000). This card can only be played during a Drop kick or a Penalty kick: it allows the player to re-roll the die if the first result is negative.
Pat Palmer (Three Quarters (11-14)): Wing who participated in 2 World Championships in 1987 e in the wonderful 1991 tournament (1983-93). The three-quarters in possession of the ball runs instantly at a speed of 7 (also if still). If his S is lower, during the following turn the speed reduces to this S value.
Chris Tynan (Scrum-Half, Fly-Half, Fullback (9-10-15)): Scrum-half who took part in the 1991 World Championship, scoring a try against the All Blacks during the quarter final (1987-99). During the turn, the halves or the fullback increase their P value to 12 intersections.
England
Scrum pack F = 70
Twickenham Team (collective card): The temple of World Rugby, built in 1907. This card can only be played in defence: it forces the opponent attacker to skip 2 turns. Therefore, defence has 12 consecutive turns at its disposal.
Rory Underwood (Three-Quarters (11-14)): Extremely fast wing, and RAF pilot (1984-91). The three-quarters in possession of the ball runs instantly at a speed of 10 (also if still). If his S is lower, during the following turn the speed reduces to this S value.
Bill Beaumont (Backs (1-8)): Second Line, leader of the English pack, generous player with a great sense of position (1975-1982). The Back may broaden the imaginary square given by his token from 5x5 to 9x9, in order to tackle.
Martin Johnson (Backs (1-8)): Leader of the English defence and 2003 World champion captain (1993-2003). In Touch, the ball is automatically caught even if it has been put in by the opponents.
Fiji
Scrum pack F = 68
Cibi Team (collective card): War dance performed by the Fiji Rugby team before every official match. This card can only be played when in possession of the ball: it blocks the opponents' defensive free moves for 2 turns.
Waisale Serevi (Scrum-Half, Fly-Half, Fullback (9-10-15)): Defined the greatest Rugby Sevens player of all times, his name appears on the Walk of Legends instituted in 1999 in the town of Rugby (1989-2003). During the turn, the halves or the fullback increase their P value to 20 intersections.
Josefa Levula (Three-Quarters (11-14)): Wing of the Fiji team in the Fifties (1956-58). The three-quarters in possession of the ball runs instantly at a speed of 7 (also if still). If his S is lower, during the following turn the speed reduces to this S value.
Nacanieli Nabaro (Backs (1-8)): Flanker, sometimes playing as centre, of the Fiji team in the Fifties (1953-57). The Back may broaden the imaginary square given by his token from 5x5 to 7x7, in order to tackle.
France
Scrum pack F = 70
Les Coqs Team (collective card): Nickname of the French National Rugby Team. This card can only be played when in possession of the ball: it forces the opponent defence to skip 2 turns. Therefore, attack has 12 consecutive turns at its disposal.
Serge Blanco (Scrum-Half, Fly-Half, Fullback (9-10-15)): One of the greatest fullbacks of all the times, called the Pelè of Rugby perhaps for the colour of his skin but, more probably, due to his extraordinary talent (1980-1992). The Fullback or the Scrum-Half or the Fly-Half carrying the ball may broaden the imaginary square given by his token from 5x5 to 9x9, or increase his P value to 20 intersections during the turn.
Philippe Sella (Three-Quarters (11-14)): Powerful centre, master of attack, and worthy representative of the French Rugby school (1982-92). The three-quarters in possession of the ball becomes immune to 1 Tackle: to stop him, his opponents must tackle him twice. During the first Tackle, the three-quarter can break the lined-up defending opponents, at the same time keeping his token.
Jean-Pierre Rives (Backs (1-8)): Third Line, courageous captain, extraordinary tackler and authentic leader (1975-84). The Back may broaden the imaginary square given by his token from 5x5 to 9x9, in order to tackle.
Germany
Scrum pack F = 67
DRV Team (collective card): Germany ranks 26th in the World this year (2007): It has not qualified for the World Cup in France, but the DRV, the German Rugby federation, is working hard to develop Rugby in Germany. This card can only be played when attacking: it blocks the opponents' defensive free moves during the following turn.
Robert Mohr (Backs (1-8)): Second Line born in 1978. The Back may broaden the imaginary square given by his token from 5x5 to 7x7, in order to tackle.
Sasha Fischer (Backs (1-8)): Second Line born in 1971. Any Back tackling alone can force the opposing forward to release the ball, as in the event of 2 tackling defenders.
Hans Botzong (Scrum-Half, Fly-Half, Fullback (9-10-15)): Captain of the 1930s challenges between Germany and France. During the turn, the halves or the fullback increase their P value to 10 intersections.
Ireland
Scrum pack F = 68
One Ireland Team (collective card): Rugby is the only international sport where the word "Ireland" truly refers to a team representing the entire island. The card can only be played when in possession of the ball: it blocks the opponents' defensive free moves for 3 turns.
Will McBride (Backs (1-8)): Second Line, one of the greatest backs of all times, the only player who can be compared to the New Zealander Meads (1962-1975). The Back tackles and automatically steals the ball.
Mike Gibson (Three-Quarters (11-14)): Centre with a strong personality; a cultured man, who was extremely fast and always able to make the best tactical choices (1964-1979). During the following turn, the three-quarters in possession of the ball runs instantly at a speed of 10 (also if still). If his S is lower, during the following turn his speed reduces to this S value.
Jackie Kyle (Scrum-Half, Fly-Half, Fullback (9-10-15)): Brilliant Fly-Half, one of the greatest in Rugby history (1947-1958). During the turn, the halves or the fullback increase their P value to 20 intersections.
Italy
Scrum pack F = 69
6 Nations invitation Team (collective card): In 1998, the IRB decided to invite the Italian Rugby team to join the 2000 5 Nations Championship, officially transforming it into the "6 Nations". This card can only be played in defence: it permits special defending free moves to be made for 3 consecutive turns, placing the figures at a distance of 1 intersection from the ball instead of 2.
Stefano Bettarello (Scrum-Half, Fly-Half, Fullback (9-10-15)): One of the greatest Italian Rugby players; the only Italian included in the Rugby Walk of Legends, and the first Italian to be called to join the Barbarians (1979-1987). During the turn, the halves or the fullback increase their P value to 16 intersections.
Diego Dominguez (Scrum-Half, Fly-Half, Fullback (9-10-15)): The Argentinean number 10, who has contributed largely to Italy's result in the 6 Nations (1989-2003). This card can only be played during a Drop kick or a Penalty kick: it allows the player to re-roll the die if the first result is negative.
Massimo Giovannelli (Backs (1-8)): Historical Italian captain coached by Coste; the only Italian included in the Hall of Fame museum; excellent Third Line (1989-2000). The Back may broaden the imaginary square given by his token from 5x5 to 7x7, in order to tackle.
Japan
Scrum pack F = 67
Ragubi-bu Team (collective card): In Japan, the amateur status of Rugby clubs (ragubi-bu) is still very strong: indeed, the championship final takes place between the winner of the university tournament and that of the industry tournament. This card can only be played when attacking: it blocks the opponents' defensive free moves for the following turn.
Tanaka Ginnosuke (Scrum-Half, Fly-Half, Fullback (9-10-15)): A professor who, during the late 1800s, introduced Rugby to Keyo University, and from there to the whole of Japan. During the turn, the halves or the fullback increase their P value to 12 intersections.
Yoshihito Yoshida (Three-Quarters (11-14)): Wing of world repute, especially known in the Rugby Sevens circuit (1989-2001). During the following turn, the three-quarters in possession of the ball runs instantly at a speed of 7 (also if still). If his S is lower, during the following turn his speed reduces to this S value.
Toshiyuki Hayashi (Backs (1-8)): Legendary Second Line of Keyo University, and of Japan generally, who took part in the 1987 and 1991 World Cups (1983-1992). The Back may broaden the imaginary square given by his token from 5x5 to 7x7, in order to tackle.
New Zealand
Scrum pack F = 70
Haka Ka-Mate Team (collective card): Legendary Maori war dance which the National team have performed before every official match since 1888. This card can only be played when in possession of the ball: it blocks the opponents' defensive free moves for 5 consecutive turns.
Brian Lochore (Backs (1-8)): Number 8 and Second Line, of great influence in New Zealand Rugby at all levels: first as player, then as captain, and finally as coach and manager (1964-1971). The Back may broaden the imaginary square given by his token from 5x5 to 9x9, in order to tackle.
Colin Meads (Backs (1-8)): Second Line, symbol of New Zealand Rugby, and one of the greatest backs ever (1957-1971). The back tackles and automatically steals the ball.
Jonah Lomu (Three-Quarters (11-14)): The face of new Rugby, whose exploits in the 95 World Cup had an impressive media effect, making this sport known throughout the world. Remarkable power and strength of character enabled him to return to the game after being seriously ill. The three-quarters in possession of the ball becomes immune for 2 Tackles: to stop him, his opponents must tackle him 3 times. During the first 2 Tackles, the three-quarter can break the lined-up defending opponents, at the same time keeping his token.
Samoa
Scrum pack F = 69
Siva Tau Team (collective card): Dance which the Samoa national Rugby team performs before each official match. This card can only be played when in possession of the ball: it blocks the opponents' defensive free moves for 2 turns.
Peter Fatialofa (Backs (1-8)): Prop; one of the best Rugby players from the Pacific area; leading player in Samoa's quarter final match in the 1991 World Cup (1988-1997). The Back tackles and steals the ball automatically.
Brian Lima (Three-Quarters (11-14)): Legendary centre, who took part in 4 Rugby World Cups (1988-1997). The three-quarters in possession of the ball becomes immune for 1 Tackle: to stop him, his opponents must tackle him twice. During the first Tackle, the three-quarter can break the lined-up defending opponents, at the same time keeping his token.
Junior Paramore (Backs (1-8)): Formidable number 8 (1991-2002). The Back may broaden the imaginary square given by his token from 5x5 to 7x7, in order to tackle.
Scotland
Scrum pack F = 68
Murrayfield Team (collective card): Historical Scottish stadium inaugurated in 1925, where the national team wearing the thistle plays all its matches. This card can only be played in defence: it permits special defending free moves to be made for 3 consecutive turns, placing the figures at a distance of 1 intersection from the ball instead of 2.
Gavin Hastings (Scrum-Half, Fly-Half, Fullback (9-10-15)): Powerful fullback with great kicking abilities (1986-1992). This card must be played during a Drop kick or a Penalty kick: it allows the player to re-roll the die if the first result is negative.
Andy Irvine (Scrum-Half, Fly-Half, Fullback (9-10-15)): For a whole decade he was one of the best fullbacks in the world (1972-1982). The Fullback or the Scrum-Half or the Fly-Half carrying the ball may broaden the imaginary square given by his token from 5x5 to 9x9.
John Jeffrey (Backs (1-8)): The best Scottish flanker of all times; a great runner, known as the "White Shark" (1984-1991). The Back may broaden the imaginary square given by his token from 5x5 to 9x9, in order to tackle.
South Africa
Scrum pack F = 70
World Cup 1995 Team (collective card): South Africa was readmitted into the World Rugby scene in 1992, one year after Nelson Mandela was freed from prison, organising and winning the 1995 World Cup. At the end of the final match, while all the stadium rejoiced, Mandela reached the (white) captain Pienaar and his team mates on the field and said: "Francois (Pienaar) I wish to thank you for what you have done for this country". Pienaar answered: "Mister President, it is I who thank you for what you have done". This card can only be played during a Scrum or a Ruck/Maul: it enables the Scrum/Ruck/Maul to move ahead by 10 intersections and to organize the team line-up by hand. Alternatively, it enables the ball to be automatically caught during any line-out.
Frik Du Preez (Backs (1-8)): Colossal, extremely powerful second or third line, who simply could not be stopped when carrying the ball (1960-1971). Any Back tackling alone forces the opposing forward to release the ball, as if there were 3 tackling defenders.
Morné Du Plessis (Backs (1-8)): Leadership, charisma and a great ability as n.8 make Morné Du Plessis one of the great players of all times (1971-1980). The Back may broaden the imaginary square given by his token from 5x5 to 9x9, in order to tackle.
Naas Botha (Scrum-Half, Fly-Half, Fullback (9-10-15)): A brilliant Rugby player, extraordinary match winner and unparalleled tactician (1980-92). During the turn, the halves or the fullback increase their P value to 20 intersections.
USA
Scrum pack F = 67
Olympic games 1924 Team (collective card): Rugby has only ever been admitted to the Olympic Games 4 times: in 1924, the USA beat France 17-3 in Paris. This card can only be played when attacking: it blocks the opponents' defensive free moves for the following turn.
Ray Nelson (Scrum-Half, Fly-Half, Fullback (9-10-15)): American Fullback who took part in 2 World Cups, in 1987 and 1991 (1983-1992). During the turn, the halves or the fullback increase their P value to 12 intersections.
Mark Williams (Three-Quarters (11-14)): American Centre who took part in 2 World Cups, in 1991 and 1999 (1987-2000). During the following turn, the three-quarters in possession of the ball instantly runs at a speed of 7 (also if still). If his S is lower, in the following turn the speed reduces to this S value.
Dan Lyle (Backs (1-8)): American Third Line who took part in 2 World Cups, in 1999 and 2003 (1994-2004). The Back may broaden the imaginary square given by his token from 5x5 to 7x7, in order to tackle.
Wales
Scrum pack F = 68
Land of my Fathers Team (collective card): Overwhelming, evocative Welsh chant, struck up at the Arms Park, now Millennium stadium. This card can only be played when in possession of the ball: it blocks the opponents' defensive free moves for 3 turns.
JPR Williams (Scrum-Half, Fly-Half, Fullback (9-10-15)): Extraordinary Welsh fullback; sublime defender and attacker, capable of remarkably penetrating breaks (1969-1981). The Fullback or the Scrum-Half or the Fly-Half carrying the ball may broaden the imaginary square given by his token from 5x5 to 9x9.
Barry John (Scrum-Half, Fly-Half, Fullback (9-10-15)): One of the legends of Welsh Rugby, known as "the king". He retired at the young age of 26 (1966-1972). This card can only be played during a Drop kick or a Penalty kick: it allows the player to re-roll the die if the first result is negative.
Gerald Davies (Three-Quarters (11-14)): Considered the best right wing of all times (1966-1978). During the following turn, the three-quarters in possession of the ball instantly runs at a speed of 10 (also if still). If his S is lower, in the following turn his speed reduces to this S value.