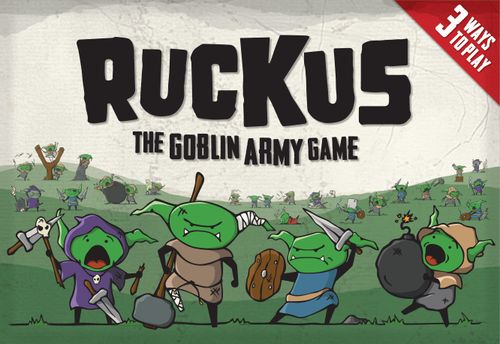
Ruckus: The Goblin Army Game
Ruckus: The Goblin Army Game Rulebook
Table of Contents
Table of Contents
- Components
- Objective
- Gameplay Summary
- Component Overview
- Unit Card Components
- Combat Keywords
- Game Preparation
- Gameplay
- Combat Round Progression
- Activation Phase
- Declaration Phase
- Resolution Phase
- Upgrade Phase
- Winning the Game
- FAQ (Cards)
- FAQ (Miscellaneous)
- Alternate Gameplay Setup
- Basic Gameplay Overview
Components
1 Rule Book; 1 1st Player Token; 4 Battle Screens; 15 VP Tokens; 20 Action Markers; 8 Kicker Cards; 12 Victory Cards; 25 Fighter unit cards; 25 Thief unit cards; 25 Cleric unit cards; 25 Necromancer unit cards.
Objective
Ruckus is a tactical war game that introduces an innovative army formation mechanic to create fast, intense combat for 2-4 players. Players will choose from one of four unique Goblin Guilds and build their army in hopes of destroying anyone that stands in their way. Each Guild provides players with a unique set of skills and tactical advantages. Players will have to make calculated decisions about which goblins to bring to the field, and which should stay behind to upgrade their forces later in battle. As battles are won and lost, players gain individual Victory cards, VP (Victory Points) or the ability to upgrade their armies. Who will be victorious, the mighty Fighters, the cunning Thieves, the powerful Clerics, or the magical Necromancers?
Gameplay Summary
After a brief setup, players strategically layout their armies, recruit new units, activate skills and then determine their battle damage for that combat round. Once damage points have been assigned and units have fallen in battle, players continue to advance their armies until only one is left standing on the battlefield. At the end of combat, a Victory card is won, units are upgraded, and players continue onto the next battle until 5 Victory cards have been won. The Guild with the most Victory Points will achieve Goblin glory!
Component Overview
Unit Cards
Each Goblin Guild is comprised of unit cards: Fighters (blue border), Thieves (grey border), Clerics (yellow border) and the Necromancers (purple border). These cards provide players with unique skills and tactical advantages in combat. Each Guild is comprised of unit cards that are specific to that army. NOTE: Card text always supersedes rulebook text.
Kicker Cards
Recognized by their red border and boot symbol (located in the bottom right corner of the card), Kicker cards may only be utilized during combat. They provide unique enhancements and opportunities for the army to which they are recruited. Once a Kicker card is drawn, it is played instantly and its effect is resolved immediately once played. Once all Kicker cards have been discarded, reshuffle the cards and place the deck face down, back into the Camp (see page 10) for continued use.
Victory Cards
Recognized by their green border and diamond symbol (located in the bottom right corner of the card), Victory cards are gained after winning a combat round. These cards provide players with rewards such as Victory Points (VP), Victory Point Tokens, and other abilities during and at the end of combat. While they help you win the game, they can also compromise the building of your army.
VP Tokens
These valuable tokens can help a player's army snatch victory from opposing forces. They feature a variety of VP (Victory Point) values and some provide an added benefit in combat.
Action Markers
These wooden cubes are used to mark damage taken, or the activation of a unit's skill in combat, or serve as a place holder for a defeated row.
1st Player Token
The 1st Player Token determines player order in various phases of the game. At the end of each combat round, the 1st Player Token will be passed to the next player in clockwise player order.
Battle Screens
Used to hide your strategies, each player sets up their army and prepares their units behind these screens before revealing their army for combat.
Camp (image on page 10)
The area on the table that houses the Victory cards, Kicker cards, VP Tokens, action markers, and other game components.
Player Area (image on page 10)
The area in front of each player that houses their cards, Victory Points, Battle Screen, and other game components.
Unit Card Components
Guild Symbols / Levels
Each of the four Goblin Guilds is represented by a symbol. This symbol can be found in the bottom right corner of each unit card.
Goblin Guild symbols with unit's level inside: Fighters, Clerics, Necromancers, Thieves.
Located in the center of each Guild symbol is the level of each unit card. There are 3 levels of unit cards: Starting units, Level 1 units, and Level 2 units.
Starting Units (S)
There are 6 Starting units featured in each Guild that all players begin to build their army around. These units have basic tricks central to each Guild.
Level 1 Units (1)
Even though Level 1 units have only basic skills and tricks, they make use of some excellent abilities during combat.
Level 2 Units (2)
Watch out, here are the heavy hitters! Level 2 units feature significantly enhanced combat statistics and abilities for use in battle.
Attack / Defense Symbols
In order to ensure victory in combat, building an army that is diverse in both offense and defense is a must. The attack and defense statistics for each unit can be found in the upper left and right corners on the cards, respectively. Consisting of 4 symbols, these statistics indicate the type of damage and defense a unit can output during combat.
Attack Symbols
Melee Attack. While it may be the most basic form of damage, it can certainly devastate any opponent. One point of damage is dealt for each melee attack symbol, but only when the unit is in the front row of the battlefield.
Ranged Attack. Ranged attacks provide an army with several great advantages on the battlefield, such as being able to attack and deal damage from any row in their formation. The unit doesn't need to be in the front row to attack, dealing one damage for each ranged attack symbol from anywhere on the battlefield.
Defense Symbols
Shield. Nothing blocks better than a shield. Units equipped with a shield can defend against one point of damage before taking any additional damage. Shields cannot block unblockable damage. Players do not use an action marker when applying damage to a shield.
Heart. Hearts are the life-line of each unit. Once a unit has taken damage equal to the number of their hearts, they are defeated and discarded from combat.
Skills / Skill Activation
Many of the unit cards feature skills that are unique to their Guild. A unit's skill is located in the skill area on the bottom of each unit card. Unit cards that are blank in this area do not have any skills to use in combat. Players can utilize 3 types of skills throughout combat: active, passive, and reactive skills.
Active Skills
Active skills require the socketing of an action marker (green cube) in the skill activation box (see previous page), which is located in the bottom left corner of a unit card. Once a player sockets an action marker they may gain the benefit of that unit's skill. Action markers are not to be removed after activating a skill. They remain socketed until their corresponding unit is discarded from combat or the final phase of combat has ended. Players may activate and use only 1 active skill per Activation Phase unless otherwise indicated. If an active skill already has an action marker socketed, it may not be activated again during the combat round.
Passive Skills
Passive skills do not require action markers to be socketed in order to use that unit's skill. Instead, passive skills automatically happen at the appropriate time in battle as indicated by the skill. Passive skills may be used multiple times during a combat round.
Reactive Skills
Both active and passive skills may feature a unique skill subtype called a reactive skill. Units with a reactive skill feature the word REACTION in the skill area, allowing the player to use this particular skill in reaction to various events in combat. Using a reactive skill is optional. Players may use multiple reactive skills in a given combat round. Players may use reactive skills that require an action marker to activate it even if they have previously socketed an action marker on another card to activate a skill earlier in the round. If a reactive skill already has an action marker socketed, it may not be activated again during the combat round.
Skill examples (as printed): Active skill: "On his next attack, deal [melee attack symbol] to the row behind the unit receiving damage." Passive skill: "Plus [melee attack symbol] to the row in front of this unit." Reactive skill: "REACTION: When this unit is discarded, opponents take 1 unblockable damage." Active skill with socketed action marker: "Deal 1 unblockable damage to each opponent's first row."
Combat Keywords
These keywords are used to describe a variety of actions that will occur in battle as well as indicate when the actions will take place during combat.
3-2-1 Rule
During army formation or when falling forward (see page 17), rows may not exceed a maximum of 3 units in the first row, 2 units in the second row, and 1 unit in the third row.
Formations shown on the page: 3-2 formation (first row 3 units, second row 2 units); 2-2-1 formation (first row 2 units, second row 2 units, third row 1 unit); 3-1-1 formation (first row 3 units, second row 1 unit, third row 1 unit).
Army
A player's army includes all of their units and any other cards or components gained during the game.
Attach
Some cards attach to other cards. Place the attached card underneath the target card with the card text visible on the bottom. Cards attached to units are discarded when the unit to which they are attached is also discarded, unless otherwise indicated.
Bury
In order to bury a card, a player must first have sidelined (see page 9) a card that permits burying underneath it as indicated on the card (e.g. Zeke, Buried Alive). Next, the player must choose the card they wish to bury from their discard pile, placing it face down under the sidelined card. The number of cards a player is allowed to bury is determined by the text on the sidelined card. If a player does not have a discard pile, they would be unable to bury a card.
Combat Round
Comprised of multiple phases, players will compete in battle to win a combat round and gain a Victory card.
Play
If a unit has a skill that states "REACTION: WHEN YOU PLAY THIS CARD" that skill is to be activated when that card is revealed to the players' opponents. This may be when the player removes their Battle Screen or when a unit comes onto the battlefield.
Recruit
If a unit's skill says to Recruit, that player draws and plays 1 additional card from their draw pile, playing it into their army if the card is a unit card. If a player draws a non-unit card, such as a Victory card, the card would be discarded unless otherwise indicated by the card text. When recruiting a unit, players must play the unit into the row featuring the recruiting card, ignoring the 3-2-1 rule. Recruit cards resolve one at a time and in the order activated. Should a row have 2 recruit cards, and the 2 drawn cards are both unit cards, they would both be played into that same row. If a recruiting card leads to another recruiting card being drawn, the new recruit card is played into that row, and then a second card would be drawn and played into the same row if it is a unit card. If a player chooses to recruit a card and draws a non-unit card, such as a Victory card, the card would be discarded.
Example: a row of 3 cards, the center card is a recruiting card. After drawing a unit card, the card is played to the same row, now making it a row of 4 cards.
Row in Front
Cards in the 1st row are "in front" of cards in the 2nd row. Cards in the 2nd row are "in front" of cards in the 3rd row. Cards in the 3rd row are not "in front" of other cards.
Sideline
Certain cards require that they be set aside in the player area for use at specific times throughout the game. This action is called sidelining a card. After a card has been sidelined, it may not be brought back into combat. However, a player may continue to use and manage a sidelined card throughout the game as indicated on the card (see Player Area Setup on following page for placement of sidelined cards).
Unblockable Damage
Certain cards deal unblockable damage. This damage is dealt and applied immediately according to any specifications on the card. Unblockable damage may be applied to any unit in a player's army, as determined by the player receiving the damage, unless otherwise indicated. Unblockable damage is not combined when being dealt or applied. Instead, units that deal unblockable damage resolve individually and separately. Unblockable damage cannot be blocked by a shield. Since this damage is dealt and applied immediately, it is not included during the Declaration Phase.
Zombie
Zombies are brought into combat by activating skills on specific units. In order to bring a Zombie onto the battlefield, the activating player will draw the top card from their discard pile and play it face down into the corresponding row. Once defeated, a Zombie card is returned to that player's discard pile. A Level 1 Zombie has the following combat statistics, one melee attack and one heart and is defeated in the same manner as a regular unit.
Game Preparation
The following Camp setup is the same for Basic Gameplay, Advanced Gameplay or Draft Gameplay (described on pages 11-12).
The Camp
Components of the Camp: VP Tokens, Upgrade deck, Victory card deck, Kicker card deck, action markers, and 1st Player Token.
- Shuffle the Victory cards. Place 5 randomly chosen Victory cards face up on the table. This will form the Victory deck. Place the remaining Victory cards out of play. Take the top card of the Victory deck and place it on the table face up, to the right of the Victory deck. This card will be the first Victory card that players will battle for. The Victory card currently on top of the deck gives players a preview of the card that they will compete for in the next combat round... adjust your strategies accordingly.
- Randomly mix the VP Tokens and place all of the VP Tokens face down to the left of the Upgrade deck (this deck will be created and added to the Camp once all players have built their armies).
- Randomly shuffle the Kicker cards. Place them face down to the right of the Victory deck. A discard pile for the Kicker cards will be placed above the Camp.
- Place all of the action markers to the right of the Kicker cards.
- Place the 1st Player Token to the right of the action markers.
The battlefield is now setup and ready for combat. See the image above for proper card and component placement.
Player Area Setup in the Draw and Formation Phase
Player area layout: Battlescreen; Army (units placed in rows); Sidelined and Buried cards; Draw pile; Tokens; Discard pile.
Gameplay
1st Player Token
A first player must be chosen prior to beginning one of the 3 gameplay setups below. To determine who receives the 1st Player Token, each player will draw one Kicker card. Each Kicker card is numbered (1-8) in the bottom right corner. The player holding the Kicker card with the highest number gains the 1st Player Token from the Camp and will be the first player when combat begins. Players should then return their Kicker cards face down, to the bottom of the Kicker deck. Next each player chooses a Goblin Guild and corresponding Battle Screen to control throughout the game.
Basic Gameplay Setup
In any introductory game of Ruckus, rather than customizing an army, newcomers can easily build their army by locating all of the cards in their Goblin Guild that have a black star on the front, bottom right corner. These recommended units will provide beginning players with a balanced army that is unique, diverse, and easily managed in combat. Such an army will allow new players to quickly learn the core concepts of the game, before moving on to tackle more advanced combat strategies. After players have finished building their armies, the remaining units from each Guild being used in this game should be combined and shuffled into one Upgrade deck. Place the Upgrade deck face down to the left of the Victory card deck (see the Camp setup for proper card placement on previous page).
Recommended unit with star.
Advanced Gameplay Setup
After choosing a Goblin Guild, each player should first locate and remove all Starting units from their Guild. These 6 units have the letter "S" in the bottom right corner of the card, indicating that they are the Starting units. These Starting units will make up the foundation of each player's army. From here, each player has 12 draft points available from which they can choose the units to build their army. Remember, units that players will be choosing are either a Level 1 or Level 2 unit. Level 1 units have a draft point value of 1 point, while Level 2 units have a draft point value of 2 points. A unit's draft point value is located in the bottom right corner of the card. Each player may determine the number of Level 1 or Level 2 units to build into their army as long as they do not exceed their 12 point limit (players do not have to use all 12 draft points). After players have finished building their armies, the remaining units from each Guild being used in this game should be combined and shuffled into one Upgrade deck. Place the Upgrade deck face down to the left of the Victory card deck (see the Camp setup for proper card placement on previous page).
Draft point values: a Starting unit worth 0 draft points (no draft point value); a Level 1 unit worth 1 draft point; a Level 2 unit worth 2 draft points.
Draft Gameplay Setup
This version of the game has not been balanced! Massively powerful combinations may occur! Proceed at your own risk!
Similar to the Advanced Gameplay Setup, each player will select a Goblin Guild and remove all of the Starting units from that Guild. Remember Starting units are marked with letter "S" in the bottom right corner of the card. These Starting units will make up the foundation of each player's army. However, prior to building their armies, players will lay out all of the remaining units from their Guilds on the table face up. From here each player will draft a unit (from any Guild on the table) into their army using the 12 point draft point value system described in the Advanced Gameplay Setup. Drafting will begin with the 1st Player and will proceed in clockwise, player order, with each player drafting 1 card at a time. After players have finished drafting their armies, the remaining units from each Guild being used in this game should be combined and shuffled into one Upgrade deck. Place the Upgrade deck face down to the left of the Victory card deck (see the Camp setup for proper card placement on page 10). The 1st player will now pass the 1st Player Token to the player on their right. That player will now be the 1st player at the start of the game.
Combat Round Progression
Combat in Ruckus is comprised of a battle for 5 Victory cards. Being able to survive each round, let alone be victorious in battle is not easily done. Below are the steps players will need to master and develop strategies for if they hope to make it out victorious. No one makes it out unscathed!
Draw and Formation Phase
A strong battle formation and secrecy are key in seizing victory on the battlefield. Players must first set up their Battle Screens as they prepare their armies. Next players shuffle their army into a draw pile and place this deck face down in their player area (see page 10 for Player Area Setup). They will then draw 5 cards from the top of this deck into their hand, establishing the start of their battle formation. A player's draw limit is 5 cards unless otherwise indicated. Only unit cards may be placed into a player's battle formation unless otherwise indicated, for instance, certain Victory cards (e.g. G-800). If at any point during the game a Victory card is drawn when drawing a card, players need to simply follow the directions as indicated below the text "WHEN YOU DRAW THIS CARD" (located on the bottom of the card).
Anytime a player no longer has cards remaining in their draw pile, they must immediately shuffle their entire discard pile to create a new draw pile, and then finish drawing the number of cards needed. Cards in the draw pile are placed face down.
Any unit cards drawn are then set up into a formation consisting of 3 combat rows. This formation must follow the 3-2-1 rule, and therefore may not exceed a maximum of 3 units in the first row, 2 units in the second row, and 1 unit in the third row. Should a player not be able or not want to arrange all 5 units from their hand into their army's formation, they may hold back cards into their hand for use during the next Formation phase. If one or more cards are held back into their hand from the previous round, the player will still draw 5 cards during the next Draw Phase, however, they must discard all cards remaining in their hand at the end of the Formation Phase. After holding cards back, a player will have more than 5 cards in their hand at the start of the next Formation Phase. Following the 3-2-1 rule, a player may never play more than 6 cards during the Formation Phase, regardless of the number of cards in hand. Below are the legal formations a player can set up following the 3-2-1 rule using the basic 5 card draw limit and playing all 5 cards into formation.
Formations shown: 3-2 formation (3 cards in the 1st row, 2 cards in the 2nd row, no cards in the 3rd row); 2-2-1 formation (2 cards in the 1st row, 2 cards in the 2nd row, 1 card in the 3rd row); 3-1-1 formation (3 cards in the 1st row, 1 card in the 2nd row, 1 card in the 3rd row).
Once all players have finished setting up their army's formation, they remove their Battle Screens to reveal their armies. The 1st Player then asks if any players are able to recruit any cards onto the battlefield. Players who are able and wish to recruit, do so simultaneously. Players must remember to recruit units into the corresponding rows.
Activation Phase
Beginning with the 1st Player, each player may activate and resolve 1 skill or place 1 add-on token (see below) on his or her turn. Once a skill has been activated, resolve its effects immediately. Players should follow all procedures for activating and resolving skills as indicated on their units' cards. Once all players have had a chance to activate a skill or place an add-on token, they prepare to declare their damage output during the Declaration Phase.
Add-On Tokens (Played as a Skill)
Some VP Tokens function as an add-on to a unit's melee and ranged damage or heart statistics. If a player has acquired one of these tokens, they may play it into battle during the Activation Phase on their turn instead of activating a skill. If a player were to have two VP Tokens, that player could only play one token into battle on their turn instead of activating a skill unless otherwise indicated by card text. These add-ons may be attached to any unit, regardless of what that unit's attack or defense statistics are.
Once a unit with an attached add-on token has been defeated, the player first removes the add-on token and then places it face up in their player area. That token cannot be used again during the game and will count as 1 VP at the end of the game.
Examples: VP token played as add-on melee damage; VP token played as add-on ranged damage; VP token played as an add-on heart.
Declaration Phase
Once each player has activated and resolved the effects of any skills for the battle, each player declares their total attack damage (this may include damage from specific skills) beginning with the 1st Player. Although they are dealt differently, all melee and ranged attack damage are combined and occur simultaneously (e.g. an army dealing 3 melee damage and 2 ranged damage, has a combined total damage output of 5). An army dealing 5 melee damage, 1 ranged damage, and 2 damage from a skill, has a combined total damage output of 8. Unblockable damage is not included in the total damage output.
Attacking
Melee Damage. Melee damage can only be dealt from the 1st row and can only hit an opposing army's 1st row.
Examples: melee damage dealt from the 1st row to the opponent's 1st row (two diagrams).
Ranged Damage. Ranged damage can be dealt from any row. Regardless of where a ranged attack is dealt from, the damage always hits an opposing army's 1st row.
Examples: ranged damage dealt from the 1st row to the opponent's 1st row; ranged damage dealt from the 2nd row to the opponent's 1st row; ranged damage dealt from the 3rd row to the opponent's 1st row.
Resolution Phase
During this phase players will begin to apply and resolve their damage taken.
Applying Damage
Once each player declares their total damage output, the player with the highest total damage output, deals that amount of damage to all other players. The player with the second highest damage output deals that amount of damage to the player who had the highest total damage output. For example, in a four player game, if the total damage outputs for each player were 8, 5, 4, 3, the player dealing 8 damage (the highest total damage) would deal that amount to each of the three other players. The player dealing 5 damage (the second highest total damage) would deal that amount to the player who dealt the highest total damage. Anything other than the highest and second highest total damage are not applied when resolving damage. In this example, the 4 and 3 damages are not applied.
Beginning with the 1st Player, damage is applied in player order to the 1st row of each player's army unless otherwise indicated. The player receiving damage determines which units in the 1st row of their army take the damage. Once a player chooses to assign damage to a unit, damage must be applied to that unit until there is either no damage left to assign or the unit has been defeated. If the amount of damage applied defeats that unit, all remaining damage is applied to units still in the 1st row. If the amount of damage applied defeats a player's entire first row, any unapplied damage remaining is not applied to any other rows in that army. The remaining, "spill over" damage is simply ignored. Remember, players may use any reactive skills available in their army to defend against damage prior to applying damage.
If two or more players deal equal damage totals for the highest total damage output, the player closest to the 1st Player token, in player order, would be deemed as dealing the highest total damage output. They would deal their total damage output to all other players. In player order, the other player who dealt damage equal to the highest, would be deemed as dealing the second highest total damage output, and would deal their damage to the player with the highest total damage output. If one player deals the highest total damage and two or more players deal equal damage totals for the second highest total damage output, the player closest to the 1st Player token, in player order, would be deemed as dealing the second highest total damage output. They would deal their damage to the player with the highest total damage output.
Defending
Shield. The key to a good offense is a good defense, and this couldn't be more true in Ruckus. Units equipped with a shield can defend against 1 point of damage before taking any additional damage. Players do not use an action marker when applying damage to a shield. Should a unit take 2 points of damage, the first point would be blocked by the shield, and the second point would be applied to that unit. A unit's shield(s) remains active and effective throughout an entire combat round until the unit is defeated. Remember, shields cannot be used to defend against unblockable damage.
Examples: 1 point of damage blocked by the shield; 2 points of damage, 1 blocked by the shield, with 1 point of damage dealt; 3 total points of damage, 1 blocked by the shield, with 2 points of damage dealt.
Heart. Each unit has a defense value of at least 1 heart. The more hearts a unit has, the more damage that is required to defeat that unit in battle. All damage applied to a unit is marked with an action marker. For each 1 point of damage dealt to a unit, place 1 action marker on a corresponding heart (e.g. if a unit is dealt 2 points of damage, cover 2 of that unit's hearts with 2 action markers). Once all of a unit's hearts are covered by action markers that unit is defeated. If a unit is damaged but not defeated, any action markers placed on that unit's hearts, remain in place and carry over into each Activation, Declaration and Resolution Phase that follow until the end of the combat round, or until that unit is defeated.
Next, all defeated units are to be discarded. Players should remove action markers from any defeated units, returning the action markers to the Camp. Any units with unresolved reactive skills (e.g. Bang, Boom, Poison Pete) are now to be resolved before falling forward. If all units in a row are defeated and discarded, place an action marker in that row to indicate the empty row.
Falling Forward
The repositioning of units is called falling forward. When falling forward, players must follow the normal row limitations of the 3-2-1 rule. When falling forward, if a player has an empty 1st or 2nd row, they must fall a unit forward from a row behind that row. Players may choose to have additional units fall forward. No unit can ever fall forward into a row that is already at its unit capacity (e.g. a unit in the 3rd row cannot fall forward if the 2nd row has 2 units in it). Similarly, a unit in the 2nd row cannot fall forward if the 1st row has 3 units in it. When a unit falls forward it may move in to any position in the row. A unit may fall forward multiple times, with each row forward being a separate movement. While players may fall multiple units forward during this phase, they may only fall one unit forward at a time. Below are examples of units falling forward.
Example 1 (in this example, the player chose to have a unit fall forward from the 2nd row to the 1st row): one card defeated in 1st row; card in 2nd row falls forward into 1st row.
Example 2 (in this example, the player chose to have a unit fall forward from the 2nd row to the 1st row, and from the 3rd row to the 2nd row): 1st row with extra card recruited; one card defeated in 1st row; card in 2nd row falls forward into 1st row; card in 3rd row falls forward into 2nd row.
Example 3 (in this example, the entire 1st row was defeated. The player must fall at least 1 unit forward to the 1st row. They chose to fall 3 units forward from the 2nd row to the 1st row): 2nd row with extra cards recruited; entire 1st row defeated; action marker to indicate defeated 1st row; 3 cards in 2nd row fall forward into 1st row.
Example 4 (in this example, the entire 1st row was defeated. The player must fall at least 1 unit forward to the 1st row. They chose to fall a unit forward from the 3rd row to the 2nd row, and then from the 2nd row to the 1st row): entire 1st row defeated; card in 3rd row falls forward into 2nd row; card in 2nd row falls forward into 1st row.
Example 5 (in this example, the entire 1st and 2nd rows were defeated. The player must fall at least 1 unit forward to the 1st row. The player falls a unit forward from the 3rd row to the 2nd row, and then the same unit falls forward from the 2nd row to the 1st row): entire 1st and 2nd row defeated; card in 3rd row falls forward into 2nd row; card in 2nd row falls forward into 1st row.
Example 6 (in this example, the entire 2nd row was defeated. The player must fall at least 1 unit forward to the 2nd row. The player falls a unit forward from the 3rd row to the 2nd row): entire 2nd row defeated; action marker to indicate defeated 2nd row; card in 3rd row falls forward into 2nd row.
Once each player has finished falling forward, players will continue to resolve any remaining skills in player order before starting the next phase of combat (e.g. Raisin, Bandit). If the resolution of any remaining skills completely defeats any row in a player's army, place an action marker in that row. The defeated row will remain empty until the next time units fall forward.
Winning a Combat Round
Players will continue to repeat the Activation, Declaration, and Resolution Phases throughout a combat round until only one player has units left on the battlefield. This player wins that combat round and gains the Victory card that was currently available to win, along with any additional benefits as indicated on the card. All Victory cards gained, unless otherwise indicated, are placed in a player's discard pile and then later shuffled into the player's draw pile. Any remaining, undefeated units are also removed from the battlefield and placed in their player's discard pile.
If at the end of any combat round, two or more players are left in a stalemate, unable to defeat one another in combat, no players win that combat round. The available Victory card would not be gained and would remain in place. The undefeated players would discard all remaining units from the battlefield. Similarly, if two or more players were to simultaneously defeat each other leaving no winner for the combat round, the available Victory card would not be gained and would remain in place. All players would next proceed to the Upgrade Phase (see below) and then start a new combat round without drawing a new Victory card.
Upgrade Phase
All hope is not lost for those who lose in battle however. Any player that does not win a Victory card during a combat round may choose to upgrade at the end of that round. In player order, players may remove 1 unit of their choice from their discard pile, placing it out of the game. They then draw a card from the top of the upgrade deck and place it on the top of their draw pile. This upgrade card (regardless of the Guild it belongs to) is now a part of their army for the game. However, if a player does not have a discard pile at the end of the combat round, they would be unable to upgrade at that time. In the event that no players win a Victory card, all players may choose to upgrade at the end of the combat round.
Lastly, the 1st Player Token is passed clockwise one player.
Winning the Game
Once the 5th Victory card has been won, players will count the total number of VP in their possession to determine the winner. At the end of the game, if players have VP Tokens that are melee and ranged damage or a heart and not VP, those tokens will be worth 1 VP each. In player order, players will reveal their total number of VP. The player with the most VP (from all sources) will be declared the winner. In the event of a tie, the player with the greatest number of Victory cards from the tied players is the winner. Should that not break the tie, randomly select 1 unused Victory card and have all tied players start a new combat round. Battle continues until the new Victory card has been won. The winner of this final Victory card would now be declared the winner.
FAQ (Cards)
Bandit. Once a revealed card has been chosen and recruited by the player that played Bandit, the remaining revealed cards are returned face up to the top of their draw piles. Once defeated, or at the start of the next Activation Phase if undefeated, the recruited card will be returned to the discard pile of the player from which it was taken.
Bullet Proof / Double Whammy. These cards are discarded immediately after the units to which they are attached are discarded.
Buried Alive / Zeke. Only cards from a player's discard pile may be buried under these cards after they have been sidelined. These cards may be sidelined and have cards buried underneath them in the same combat round.
Captain. If this unit is the only unit remaining in a player's row, the player may apply the effect of this skill to this card.
Cleaver / Cleaver's Brother. Skills for both of these units trigger and resolve only if the players controlling these units declare the highest or second highest total damage during the Declaration Phase. If their controlling players do not declare the highest or second highest total damage, then the skills for both of these units would be ignored. Should either of these units have their standard melee attacks disabled, the skills for both of these units would then be disabled (e.g. from Poison Pete, Gozer).
In addition, skills for both of these units trigger and resolve only if the player controlling these units deal damage to an opponent's army during the Resolution Phase. If for any reason an opposing player blocks or prevents all damage dealt during the Resolution Phase, such as by a shield or other card (e.g. Bullet Proof, Wallace) then the skill damage for both of these units would be ignored.
However, if an opposing player chooses to absorb and apply all damage dealt to their army with reactions from other units (e.g. Shepherd, Warden, or Saint), then the skills for both Cleaver/Cleaver's Brother would trigger and resolve. Their corresponding skill damage would be applied immediately to the row behind the unit first declared as absorbing the damage.
Cupid / Take That. When drawn from a player's draw pile, these cards are to be played next to a player's army formation, but are not part of a player's army formation. When resolving the effects from cards such as these, the effect is applied to the row as a whole, not each individual unit in that row. These cards are discarded into a player's discard pile at the end of the combat round.
Francis / Mortimer. Some cards feature the text "TO THE ROW IN FRONT OF THIS UNIT". When resolving the effects from cards such as these, the effect is applied to the row as a whole, not each individual unit in that row. For example, if Mortimer is in the 2nd row and 3 other units are in the 1st row, the 1st row as a whole would gain 1 additional point of attack damage in addition to their total damage output. Each unit does not gain 1 additional point of attack damage, but the row as a whole gains 1 additional point of attack damage.
Kicker / Victory Cards. If game conditions prevent a player from gaining the effect of a Kicker, Victory, or any other card when played, then no effect is gained at that time, and the played card would just be discarded to the appropriate discard pile. For example, if a player draws the Kicker card Bullet Proof, and they have no Level 1 units in play at that time, then there is no effect and that Kicker card is discarded.
Mugger. In order to resolve Mugger's skill, an opponent must have a VP token in their possession that is not currently in play as an add-on token (attached to a unit). Once a socketed action marker has been removed from an opponent's unit, the player controlling Mugger must select a VP token from that player in order to resolve the skill. In addition, the player controlling Mugger may choose to resolve the skill by choosing a VP token that has been previously played as an add-on token but is not currently in play.
Poison Pete. Poison Pete prevents a unit from attacking during the next Declaration Phase. However, that unit could still deal damage (e.g. unblockable damage) if it triggered from being discarded because such damage would be triggered and resolved during the Resolution Phase.
Rat & Tat. Rat & Tat do not stack. A player may only activate 2 skills on their turn during the Activation Phase regardless of how many RAT & TAT cards a player may have in play.
Shot in the Dark. When played, if a player draws a ranged attack VP Token, the token is attached to the unit that drew this Kicker card and the token is played the same as any other add-on token (see Add-On Tokens on page 13). If played as an add-on token, this token will be worth 1 VP at the end of the game.
FAQ (Miscellaneous)
Defeated Row / Falling Forward. To clarify, falling forward only occurs after all players have resolved damage in player order during the Resolution Phase of a combat round. If a row is completely defeated during a combat round before the Resolution Phase, that row would remain "empty" or defeated. A player would not fall units forward into the "empty" row until after they have resolved damage during the Resolution Phase. As a result, any damage dealt to an "empty" row (including unblockable damage) would simply be ignored and would not "spill over" to any other rows.
Ranged Damage Add-On Token (Played as a Skill). If a ranged damage add-on token is applied to a unit that normally would need to deal damage from the 1st row in order for their skill to trigger and resolve (e.g. Cleaver / Cleaver's Brother), this unit could now deal damage from the 2nd or 3rd row and could still successfully trigger and resolve their skill.
Defeated Units / Discard Pile. Once a unit is defeated in combat, the card is removed before falling forward. If a unit's skill grants a player access to another player's discard pile before falling forward, then any defeated units should resolve any skills as indicated, be discarded, and become part of their corresponding discard pile before that pile is drawn from.
Recruiting. When recruiting cards players must indicate which recruit card they are activating first. For example, if they have a recruit card in the 1st and 2nd row, they must indicate which recruit card they will activate first before proceeding. Furthermore, all recruit cards played during combat may be played only once, unless they are brought or replayed into combat (e.g. So Close, Only One, Sneaky, Scavenge, or Raisin).
Cards Recruited from Other Players. Cards recruited from other players are to be returned to the discard pile of the player from which it was taken (e.g. cards recruited from Bandit or Raisin).
Unblockable Damage. Unlike damage declared during the Declaration Phase, unblockable damage is not combined when being dealt or applied. Instead, units that deal unblockable damage resolve individually. For example, if the two cards Bang and Boom were defeated and players were to resolve the unblockable damage dealt from these cards, each would resolve individually and separately. Players would choose which damage to resolve first, Bang or Boom in this example. Once determined, the players would resolve, say, Bang's skill for 1 unblockable damage and then Boom's skill for 2 unblockable damage. The unblockable damage would not be combined to total 3 unblockable damage. Remember that the defending players would assign the damage, just like in the Resolution Phase.
Alternate Gameplay Setup
Draft Gameplay Tournament Setup (Recommended for 4 Players)
For those looking to see who is a true Guild Master.
To begin, players need to set up two 1-on-1 games of Ruckus (games will play simultaneously). All players will share the components and cards placed in one Camp, positioned in the center of the table between the two games (see image below).
The Camp for Draft Gameplay Tournament: Game #1 Upgrade deck; Game #1 Victory card deck; VP Tokens; Kicker card deck; Action markers; 1st Player Tokens; Game #2 Victory card deck; Game #2 Upgrade deck.
- Shuffle the Victory cards. Place two piles of 5 randomly chosen Victory cards face up on the table. These will form the Victory decks. Place the remaining Victory cards out of play. Take the top card of each Victory card deck and place it on the table face up, to the right of the corresponding Victory deck.
- Randomly mix the VP Tokens and place all of the VP Tokens face down in between the two Victory decks.
- Randomly shuffle the Kicker cards. Place them face down to the right of the VP Tokens. A discard pile for the Kicker cards will be placed above the Camp.
- Place all of the action markers to the right of the Kicker cards.
- Place two 1st Player Tokens to the right of the action markers. One game can use a quarter to function as another 1st Player Token as only one is included in Ruckus.
- The players of each game will Draft their armies (following the procedures described in the Draft Gameplay Setup found on page 12). Next they will create Upgrade decks and place them to the left and right of the Camp respectively, with the players of each game using only their corresponding game's Upgrade deck throughout gameplay.
After a 1st Player is determined in each game, players will continue to play through their game following normal gameplay rules and procedures. After the winner of each game has been declared, players will sort all of their cards (regaining the 25 cards for their own Guild), and reset the Camp setup for the second game. Opponents for the second game will be set up as follows: winner VS winner from the first game, loser VS loser from the first game. The winner of this game will be declared the Tournament winner.
NOTE: The same style of tournament could be played using both the Basic and Advanced Gameplay setups.
Child Friendly Gameplay
For those looking for a modified version of Ruckus that simplifies the gameplay and combat down to the basic mechanics.
After players have chosen their Guilds and created their army, whether through the Basic, Advanced, or Draft Gameplay setup, players will complete the Draw and Formation Phase as usual. Next, all players will disregard the Activation Phase, ignoring all skills on every unit in the game, including reactive skills. Instead, players will immediately move into the Declaration Phase and engage in combat as using only the attack and defense symbols present on their cards. Damage declaration is calculated following normal gameplay rules. Just like in a regular game of Ruckus, players would then complete all other phases of a combat round following normal gameplay rules. This includes the Resolution Phase, Falling Forward, and Upgrade Phase (to simplify even further, the Upgrade Phase could also be ignored). The game ends once the 5th Victory card has been won and the winner is determined by normal win conditions.
Speed Enhanced Gameplay
For those looking for a modified version of Ruckus that reduces the number of skills each player can activate and speeds up gameplay.
After players have chosen their Guilds and created their army, whether through the Basic, Advanced, or Draft Gameplay setup, players will complete the Draw and Formation Phase as usual. When entering the Activation Phase however, all players will take 1 action marker from the camp and place it in their player area. Players will now only be able to activate 1 skill per turn, and all skills will now have to be activated to be used, including those without a skill activation box (passive and various reactive skills).
For example, if a player wants a unit's reaction to trigger when that unit is discarded, such as Boom's dealing of 2 unblockable damage, the player controlling the unit must socket their 1 action marker in the unit's skill area for that skill to be activated. As a result, this would be the only skill that would be activated for that player on their turn during the Activation Phase. No skills from any of their other units in play would be allowed to activate, trigger, or resolve.
Rat & Tat would cause the only exception to this rule. If a player chose to activate Rat & Tat's skill as their 1 activated skill on their turn, they would place the action marker in the skill area on Rat & Tat. They would then take 2 additional action markers and activate the skills of 2 more units on their turn during the Activation Phase. By doing so, the player controlling Rat & Tat would therefore see 2 skills activate, trigger and resolve if the conditions for these skills were met.
Any action markers socketed on a unit's skill area would remain socketed until the corresponding unit is discarded from combat or the final phase of combat has ended. Once all players have activated 1 skill per turn (unless activating Rat & Tat), play would continue following all other previously established rules.
Advanced Gameplay Setup: Pure Guild vs. Pure Guild
For those looking to battle with a completely pure Guild.
In this setup players will create a custom upgrade deck that will only be accessible to them. Follow the same gameplay setup as in an Advanced game. However, when creating an upgrade deck, players will choose 5 remaining, un-chosen cards from their own Guild that will make up their upgrade deck. All other unused cards from all Guilds will be removed from the game. Players will then shuffle and place their upgrade decks (consisting of 5 cards each) into the Camp. Beginning the game and following all other previously established rules, players simply choose a card from their own upgrade deck anytime they are able to upgrade. Once a player has exhausted their own upgrade deck, they will no longer be able to upgrade.
Basic Gameplay Overview
Following the Selection of Gameplay and Setup of the Camp
- Players set up their Battle Screens, shuffle their army, and draw 5 cards.
- Players place their units into formation following the 3-2-1 rule.
- Players remove their Battle Screens to begin the combat round and will simultaneously recruit any units if able.
- Beginning with the 1st Player and continuing in player order, players activate and resolve skills.
- In player order, players declare damage.
- Simultaneously, players resolve damage.
- In player order, players fall forward any remaining units following the 3-2-1 rule.
- Players repeat numbers 4-7 of this overview until there is only one player's army remaining on the battlefield. This player wins the combat round. The winner gains a Victory card and resolves its effects. All players discard all remaining units from their armies on the battlefield. All losing players may upgrade if able. All players may bury cards if able (e.g. Zeke, Buried Alive).
- The 1st Player Token is passed clockwise one player.
- Play continues until the 5th Victory card has been won.
- Players count their total number of VP (from all sources). The player with the highest total number of VP is the winner. In the event of a tie, the player with the greatest number of Victory cards from the tied players would be the winner. Should that not break the tie, randomly select 1 unused Victory card and have all tied players start a new combat round. Battle continues until the new Victory card has been won. The winner of this final Victory card would now be declared the winner.