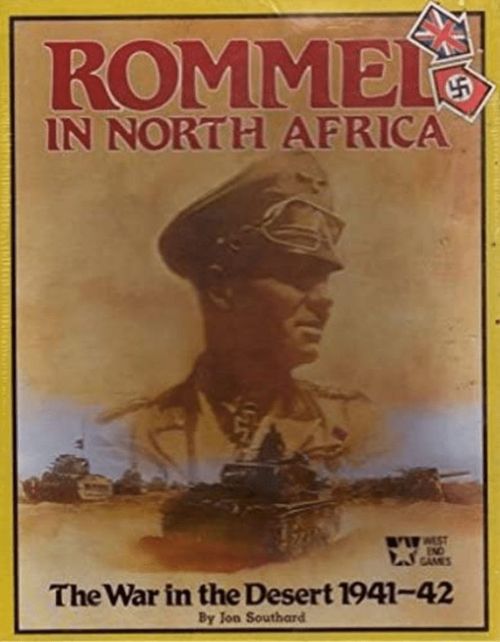
Rommel in North Africa: The War in the Desert 1941-42
Rommel in North Africa: The War in the Desert 1941-42 Rulebook
Table of Contents
Table of Contents
- 1.0 Introduction
- 2.0 Game Equipment
- 3.0 Sequence of Play: Activity Periods
- 4.0 Movement
- 5.0 Combat
- 6.0 Supply
- 7.0 Tank Replacements
- 8.0 Forts and Minefields
- 9.0 Infantry Reorganization
- 10.0 Ending the Activity Period
- 11.0 Short Scenarios
- 12.0 Campaign Game SOP: Preparation Periods
- 13.0 Reinforcements
- 14.0 Replacements
- 15.0 Receiving and Moving Supplies
- 16.0 The Rail Line
- 17.0 Moving Combat Units
- 18.0 Forts and Minefields
- 19.0 Initiating Operations
- 20.0 The Campaign Game: The War in the Desert
- 21.0 Optional Rules
- 22.0 Glossary
- 23.0 Comprehensive Examples of Play
- 24.0 Game Background
- 25.0 Bibliography
1.0 Introduction
A. Rommel In North Africa is a two-player game depicting the campaigns in North Africa during World War II. One player commands Afrika Korps and its Italian allies; the other player controls the British Eighth Army. You are given the forces and setting but your decisions determine the outcome. The game does not dictate your actions nor give a multiple-choice option; you make and execute plans using your forces; you make things happen. This freedom – this power of command - makes the game interesting.
B. Learning to play is a two-fold task: you must learn the rules well enough to move the pieces legally, then use your pieces to win. The first task is easier than the second. Both are most readily accomplished by playing through the game with a friend first, helping each other along, reminding each other of rules, and pointing out better moves.
C. Before playing for the first time, read the rules once, but do not try to memorize them. Learn enough to start moving pieces and refer back to the rules for details as you need them in play. (At the back of the rules is a glossary supplying brief definitions of terms and references to rules sections giving full explanations.)
D. In your first playing, you will misplay some rules. It is almost impossible for anyone to play even a simple game the first time without making rules errors. But you will be surprised at how quickly you pick up the mechanics. Use the Game Background (24.0) to understand what the rules represent. If you understand why a rule is there, it is easier to remember.
E. Rules 1.0-10.0 cover Activity Periods, stages of intensive warfare. Begin by reading these rules and playing the first scenario, Rommel's First Offensive, and after that, the other scenarios, Gazala and Operation Crusader. Once you are comfortable with Activity Periods, read the rules for Preparation Periods (12.0) and try the Campaign Game, The War in the Desert. The complete rules set, once you have added Preparation Periods, is moderately complex. But by the time you get there, you will be moderately experienced, even if you began as a new player.
2.0 Game Equipment
A. A complete copy of Rommel In North Africa contains:
- One 17" by 44" game map in two sections
- One 32-page rule book, including an 8-page pullout
- One set of 200 die-cut counters
- Two six-sided dice
B. If you have questions about this game, we will be happy to answer them. Please phrase questions so they can be answered yes or no, or with short answers. In addition, if any of the components are missing or damaged write to us and we'll replace them.
2.1 The Map
A. The map contains a network of boxes through which the playing pieces are moved. Later rules explain the significance of highway, airbase, ports, and railroad symbols, and the desert boxes.
B. The map, like more familiar maps, has a letter and number grid system to help locate boxes. Each player's pullout contains an index of map boxes. Note that each side has a home base box that is important for supply and victory.
C. Around the border of the map are some of the charts and tables and the tracks necessary for play. The Axis and British General Records Tracks (GRTs) hold markers to record information during play. The Campaign Turn Record Track is used only in the Campaign Game. The Eliminated Units Boxes holds pieces destroyed in play which may return later as replacements. The Victory Point Track is used to record the current game score.
2.2 The Pullout
At the center of this rule book are two player aids containing charts and tables, reinforcement information, and an outline of the Sequence of Play.
2.3 The Playing Pieces
A. Most of the cardboard playing pieces (counters) represent military units. The rest are markers used to record information. Many of the markers, such as the Victory Point, Tank and Infantry Replacement, and the Campaign Turn marker are not placed on the map itself, but on the various tracks to record information during the game.
B. British units are tan, Axis are steel gray, and Italians are green.
C. Combat units are of three basic types: tank, motor, and infantry. Other units are non-combat units: trucks, depots, and generals Rommel and O'Connor.
2.3.1 Sample Units
XX on the infantry unit is its size. Other values for motor and infantry are the same as for tank.
2.3.2 Unit Abbreviations
Abbreviations used on combat units are:
| Abbr | Meaning | Abbr | Meaning | Abbr | Meaning |
|---|---|---|---|---|---|
| B | British | Ax | Axis | Pa | Pavia |
| A | Australian | Ar | Ariete | Pi | Pistoia |
| F | Free French | Bo! | Bologna | R | Regiment |
| Gd | Guards | Br | Brescia | Ram | Ramcke |
| I |
2.3.3 Combat Strengths
A. Each combat unit has a numerical combat strength that changes during play. Each unit's maximum strength is printed on its counter.
B. A strength marker is placed beneath each unit to indicate its current strength. When the unit suffers losses, change the marker to reflect its new, reduced strength.
Example: If a unit of strength 10 suffers 2 losses, for example, replace the 10-marker with an 8-marker.
C. A unit reduced to a strength of 0 is removed from play.
D. Strength points (SPs) may not be transferred from one unit to another.
Example: Do not reduce one unit's strength by 2 and increase another unit's strength by 2 even if they are the same type of unit.
E. Either side may examine the opponent's combat units, including strength markers, at any time, but may not examine the contents of enemy depots.
2.3.4 Tank Units
A. Each tank unit is printed with a silhouette of the type of tank in that unit.
B. All German and Italian tank units are of identical type.
C. There are three types of British tanks: Cruiser, Grant, and I-Tank (infantry-tank). Thus, British tanks include the tank's name. Tank types are important in combat.
2.3.5 Motor and Infantry
All motor units are printed with the word Motor and a motorized infantry symbol. Motor and infantry are two distinct types. Motor units have characteristics in common with infantry, but are in most respects like tanks.
Design Note: Motor units are infantry, equipped with enough vehicles – halftracks or bren carriers, and possibly a few tanks – to transport the unit in a single lift. These troops were trained to fight from vehicles. Infantry units also had some transport capability but were trained to fight on foot.
2.3.6 Unit Sizes
A. Unit sizes are important for the British in determining how many units may be moved. British infantry units are brigades and divisions. A division has a combat strength of up to 10; a brigade has up to 3.
B. If a division's strength is 3 or less, the British may replace it with a brigade.
C. All British tank and motor units are brigades.
D. Symbols for unit sizes are:
| Symbol | Size |
|---|---|
| XX | Division |
| X | Brigade |
| III | Regiment |
2.3.7 The Front and Back Sides
The front and back sides of a unit are its unmoved and moved sides, respectively. A unit is flipped to its moved side after moving.
2.3.8 Other Units
Certain special units are explained later: truck and depot units (6.1), Rommel (4.4), forts and minefields (8.0, 18.0), and army artillery units (21.1).
2.3.9 Historical Designation (Unit ID)
Historical designations have no effect on play.
2.3.10 Other Markers
Markers are illustrated below and described later: Strength; Moved (4.3); Fatigue (4.3); Exhaustion (4.3); Disruption (5.3); Minefield (8.5); Rommel (4.4); O'Connor (4.4); Truck (6.1); Depot (6.1); Captured Supplies (6.3); Fort (8.0); Out of Supply (6.2.1); Half-Supplied (6.2.1); Infantry Replacements (14.0); Infantry Replacements +10 (14.0); Tank Replacements (7.0); Tank Replacements +10 (7.0); Operations Turns (3.2.6); Operations Turns +10 (3.2.6); Campaign Turn (12.2.3); Railhead (16.0); Hits (5.1.2); Engineer Points (18.1).
A. Strength markers have values from 1 to 10.
B. Hits markers have values from 1 to 6.
C. Exhaustion is the back side of Fatigue. Their value is the Fire die roll modifier (DRM) and Movement modifier.
D. British have separate tank replacements for the different tank types.
2.4 Abbreviations
These abbreviations are used throughout the rules.
| Abbr | Meaning | Abbr | Meaning |
|---|---|---|---|
| CRT | Combat Results Table | OOS | Out of Supply |
| DRM | Die Roll Modifier | RP | Replacement Point |
| EP | Engineer Point | SOP | Sequence of Play |
| GRT | General Records Track | SP | Strength Point |
| LOC | Line of Communications | SUP | Supply Point |
| MA | Movement Allowance | VARP | Variation Point |
3.0 Sequence of Play: Activity Periods
A. The play sequence for the Campaign Game of Rommel In North Africa is divided into two periods: Activity Periods and Preparation Periods. The short scenarios do not include Preparation Periods, so for ease of learning, only Activity Periods will be discussed here. Preparation Periods, and their incorporation into the sequence of play (SOP), are explained in 12.0.
B. Each Activity Period represents about one month of intensive warfare and consists of a variable number of Operations Turns. An Operations Turn (representing about three to six days) is divided into a variable number of alternating player impulses. In each player impulse, a few units on each side may move. During the course of an entire Operations Turn, all units may move; most units may move in more than one impulse per Operations Turn. Sometimes there will be only a few impulses per Operations Turn; sometimes there will be many.
C. An Activity Period continues with successive Operations Turns until both players run out of supply points (SUPs) or agree to end the Activity Period.
3.1 Detailed Activity Period SOP
The Activity Period SOP is explained below; each player's pullout contains a summary of this sequence for reference during play.
A. Operations Turn: Place eliminated tank units rebuilt by replacements on the map.
B. First Player's Impulse: The first player performs these activities:
- Remove disruption markers from friendly units not placed in immediately-preceding second-player impulse (5.3).
- Breakdown or recombine divisions (9.0).
- Second player checks supply.
- Place truck units on the map and trace supply lines for units which will move (6.1).
- Move units and expend supply as necessary (4.0); fight initial rounds of battle (4.2, 5.0).
C. Initial Battle Round
- Defender may announce intention to retreat.
- Both players fire (defender first).
- Losses take effect.
- Battle reinforcements (attacker first).
- Retreat (if announced above) is executed.
- If defenders retreated or were eliminated, attackers may continue moving if they have movement points (MPs) remaining.
D. Recover units (4.3) which did not move. If desired, expend tank replacements (7).
E. Clear minefields with units which neither moved nor recovered (8.0).
F. Resolve all battles lasting more than one round.
G. Combat Rounds: (5.1).
- Either side may announce intention to retreat (5.2).
- Both players fire (defender first).
- Losses take effect.
- Either side may attempt battle reinforcement, attacker first.
- Retreat (if announced) is executed.
- Continue conducting combat rounds until one side is eliminated or retreats.
H. Battle Ends: When all battles are resolved, attacking units, retreated defending units, and battle reinforcements incur fatigue.
I. End of Impulse: Search for enemy depots if necessary; if using optional rule 21.3, repair tanks and record tank replacements.
J. Second Player's Impulse: The second player's impulse is identical to the first player's; the players switch roles.
K. Continue alternating impulses until players pass consecutively (3.1).
L. End of Operations Turn: flip all units to their unmoved sides and remove all Moved 1 markers.
M. Continue alternating Operations Turns until the Activity Period ends.
N. The Activity Period ends if:
- Both players run out of SUPs.
- One player runs out of SUPs and the other decides to end the Activity Period.
- An Operations Turn ends with no movement or recovery of combat units having taken place.
- The players decide to end the Activity Period.
O. End of Activity Period (10.0)
- Remove unsupported units.
- Remove fatigue and disruption markers.
- Redeployment Movement Phase a. First player moves. b. Second player moves.
3.2 The Operations Turn
3.2.1 The First Player
Each Operations Turn consists of alternating player impulses. The first player in the short scenarios is given in the scenario instructions (11.0). The Axis is the first player in the first Operations Turn of the Campaign Game.
3.2.2 Combat
Combat is initiated – and initial battle rounds take place – during movement; remaining battle rounds are fought when all movement for the impulse is completed. At that time, battles are resolved in any order the attacker wishes.
3.2.3 Passing
A player passes if they do not move or recover (4.3) any combat units during a friendly impulse. A player may pass in one impulse and move again in a later impulse of the same turn.
3.2.4 Ending an Operations Turn
The Operations Turn ends when players pass consecutively in any order.
3.2.5 End of the Activity Period
The Activity Period ends when an entire Operations Turn ends with no movement or recovery of any combat unit(s) on either side.
3.2.6 Operations Turn Marker
There is no need to keep track of the number of Operations Turns played in the short scenarios unless using optional rule 21.5 (Reinforcements During Operations). If using this rule, place the Operations Turn marker on the GRT to record the number of Operations Turns played in the current Activity Period.
Design Note: The play sequence of alternating impulses gives you many options. It gives your opponent similar options, and therefore also gives you a lot to worry about. Expect to take a lot of time at first to think out your moves properly. Your first pair of impulses may take half an hour to an hour. But after one or two games, expect to complete an entire Activity Period in less than two hours.
4.0 Movement
Design Note: In the game, as in real life, mobile units react more quickly to sudden events than do infantry. If pushed to the limits of their capabilities, mobile units can move very fast and far in quite a short time. But that entails great fatigue on men and equipment. Rommel was a master of judging when and how far to push his troops. One of Rommel's greatest advantages was Afrika Korps' flexibility at maneuvering either concentrated or as separate units. He could disperse his divisions toward different objectives when necessary, and also rapidly regroup them and maneuver as a body.
4.1 Units Eligible to Move
For a unit to move, it must be within supply radius (6.2) of a friendly depot or truck unit which contains at least 1 SUP; a SUP must be expended for any unit to move (6.2).
4.1.1 Axis Restrictions
A. Axis infantry units may move in only one impulse per Operations Turn. All other combat units may move in one or more impulses per turn until they become exhausted (4.3).
B. Truck units, Rommel, and O'Connor may move in any number of impulses per turn.
C. In each friendly impulse, the Axis may move all of the following:
- Any or all German units
- Any or all Italian units in any one map box
- Any or all truck units
- Rommel
4.1.2 British Restrictions
In each friendly impulse, the British may move any or all truck units and must choose one of these options:
A. Move any three brigades, or B. Move any one division plus one brigade, or C. Move all units in one map box.
4.1.3 Moved and Unmoved Status
A. After a unit is moved, flip it to its moved side; it remains moved until the end of the Operations Turn at which point all units are flipped back to their unmoved sides. German motor and tank units have special properties (4.3).
B. Truck units, Rommel, and O'Connor never become moved; they have no moved sides.
Play Note: The reverse side of a truck is used only in the Campaign Game.
4.2 How Units Move
Units move from box to box on the map. They may move from one box to another box if the two are connected by a straight line; two such boxes are adjacent.
Example: Bir Sheferzen is adjacent to Siwa Track but not to Bir el Khamsa.
4.2.1 Movement Allowances and Costs
A. A unit's movement allowance (MA) is the maximum number of MPs it may expend each impulse. Rommel and O'Connor, however, may increase units' MAs (4.4, 21.6).
B. Entering a normal box costs 1 MP. Therefore, a unit with a MA of 3 may move three boxes.
C. Desert boxes cost 2 MPs to enter. However, a unit with a MA of 1 may enter a desert box, but may move no farther.
D. A move between two boxes connected by the highway costs ½ MP. A unit can combine highway and non-highway movement in the same impulse.
E. A unit leaving a box containing an enemy minefield pays +1 MP.
Design Note: MAs reflect the extent of motor transport units had and the speed with which command practices allowed them to operate. British infantry formations had large transport capabilities – as much as the Italian mobile formations and more than German infantry – but not enough to carry whole units in one lift. British infantry, with their accompanying tanks, tended to move at a methodical pace better suited to 1914-1918 than to the extremely mobile desert war.
4.2.2 Movement and Combat
A. Combat must occur when units enter an enemy-occupied box. Units moving into an enemy-occupied box (attacking units) must stop and attack. The first round of combat is resolved immediately after the attacker has moved all desired eligible units into the enemy-occupied box; these units may come from any number of adjacent boxes. Additional rounds (if any) are resolved after the attacker has finished all movement of other units for that impulse.
B. If the combat lasts only one round (the defenders retreat or are destroyed in the first round), attacking units may continue moving. This is an overrun.
C. If the combat last more than one round, the attacking units may not move any farther.
Example: Rommel and two panzer divisions move from Desert #4 to Retma, where there is a British brigade. They attack and destroy the brigade in one round and move to Bir el Gubi, where there is another British brigade. This brigade declares a retreat. After the retreat round (5.2), Rommel's force continues to Sidi Rezegh. Here it meets a British tank brigade, which decides to fight. Rommel's force inflicts two hits in the first round, but the battle must continue. Rommel must now stop moving; the remaining rounds must be fought after all Axis movement is finished for that impulse.
4.2.3 Entering Enemy-Occupied Boxes
A. A player may move a stack of units into an enemy-occupied box only if at least one of those units has some chance to inflict a casualty on at least one defending unit; not every unit in the stack must be able to inflict a casualty, one is sufficient.
B. When moving units into an enemy-occupied box, place them on the line between the box they entered and the box they came from. This indicates which box the attacking units came from, which is important if either side retreats (5.2).
4.2.4 Initial Rounds
A. Resolve the first round of each combat immediately after moving all desired units into the enemy-occupied box. These units may come from any number of different boxes.
B. After resolving the first round of combat, additional attacking units may enter the box only by Battle Reinforcement (5.4).
Example: A player moves a unit into an enemy-occupied box. The opponent decides not to retreat. One round is fought. At the end of that round the defender still has a unit in the box, so the combat continues after the moving player has completed all other movement and initial rounds.
4.2.5 Order of Movement
Units may be moved in any order, singly or in stacks, as long as no unit exceeds its MA.
Clarification: Stacks may be formed and broken up during movement, and movement point expenditures are calculated individually for each unit.
4.2.6 Stacking
There is no stacking limit. Any number of units may occupy the same box at the same time.
4.2.7 Rail Line
Units never use the rail line for movement. It is significant only during Preparation Periods (16.0) and for British tank replacements (7.0).
4.3 Multiple Moves, Fatigue, and Recovery
Design Note: Fatigue simulates the effects on men, machines, and organization when a unit is driven as hard as it can be. The most important effects are exhaustion and vehicle breakdown. Also, communications become confused; supplies start failing, at least to sub-units. To regain effectiveness the unit needs rest and reorganization.
All units, except Axis infantry, may move more than once per Operations Turn, with the consequence of fatigue. Each unit is in one of three conditions at all times: fresh (not fatigued), worn, or exhausted. (The last two are states of fatigue). The Fatigue Effects Summary on the map outlines effects of these fatigue levels.
4.3.1 Fatigue
A. When a unit moves and began the impulse on its moved side, it increases one fatigue level from fresh to worn, or from worn to exhausted. Place a Worn or Exhausted marker on the unit as appropriate.
B. The new level of fatigue takes effect at the end of the impulse. The unit may attack in that impulse and not suffer any ill effects, unless this combat is not the first one the unit has fought in this impulse (4.3.2).
4.3.2 Multiple Combat and Fatigue
A. In all battles after the first, a unit suffers the effects of its new level of fatigue. In other words, if a unit attempts to fight more than one battle in the same impulse (it battle reinforces or overruns the enemy and moves into another combat situation), it suffers its new level of fatigue in all subsequent battles, before the end of the impulse. This new level applies only to calculation of combat DRMs; the unit's MA is unaffected.
B. A unit's fatigue level never increases more than one level per impulse even if it fights two battles in the same round or battle reinforces after having moved (5.4).
Example 1: At the start of a new Operations Turn, a worn unit is on its unmoved side, with a Worn marker on it. The first time the unit moves in that Operations Turn, it becomes moved (flipped over) but would not yet suffer more fatigue. If it moves a second time, it becomes exhausted at the end of the impulse in which it made the move.
Example 2: A tank unit moves in the first impulse and is flipped to its moved side. In the second impulse, it moves again, but does not attack. At the end of that impulse the unit will be worn. In the third impulse, the unit moves again and engages in combat. For this battle, the unit will function as though it were worn, not exhausted, and would become exhausted only at the end of the impulse. However, if the enemy unit was destroyed or retreated in the first round of combat, allowing the unit to continue moving, and it moved into another combat situation in that same impulse, it would function as exhausted (-2 DRM) in the second battle. At the end of the impulse, the unit will be moved and exhausted.
Play Note: At the start of a new Operations Turn, a worn unit is on its unmoved side; the Worn marker remains in place. The first time the unit moves, it is flipped to its moved side but suffers no additional fatigue. When it moves a second time it becomes exhausted.
4.3.3 Special German Capabilities
A. German (not Italian) tank and motor units have a greater movement ability than all other units. They may move twice per Operations Turn before flipping to their moved sides. When the Axis moves a fresh German tank or motor unit, place a Moved 1 marker on it. The second time the unit moves in that Operations Turn, flip the unit to its moved side and remove the Moved 1 marker. The third time the unit moves, it becomes worn, and if it moves a fourth time, it becomes exhausted.
B. A unit with a Moved 1 marker has its full movement and combat abilities, the same as a unit which has not moved.
C. At the end of each Operations Turn, flip German tank and motor units faceup, and remove all Moved 1 markers.
4.3.4 Fatigue Restrictions
A. A unit which is both moved and exhausted may not move or reinforce battle.
B. A unit beginning its turn unmoved and exhausted reduces its MA by 2. It may move in only one impulse and is then flipped to its moved side.
C. A unit that starts an impulse worn reduces its MA by 1.
D. See the Fatigue Effects Chart.
4.3.5 Recovery
A. A unit may recover from fatigue in any impulse in which it does not move, provided it is on its unmoved side and not out of supply (OOS, 6.2).
B. To recover, flip the unit to its moved side and reduce its fatigue by one level. The unit is then on its moved side as though it had moved. Since a recovered unit will be on its moved side, it may recover no more than one level of fatigue per Operations Turn.
C. If the recovering unit is a German motor or tank, place a Moved 1 marker on it. Such a unit could move once in that Operations Turn without incurring fatigue. However, it may not move in the same impulse in which it recovers.
4.3.6 Recovery and Movement Restrictions
A recovering unit is counted against the number of units that may move in that impulse.
Examples: When the Axis recovers an Italian unit, it may move or recover other Italian units only in the same box, but not in any other box in the same impulse. The British might recover one brigade and move two others, or recover three brigades and move nothing, and so forth.
Example: In Operations Turn 1, the Axis moves the 21st Panzer Division in three impulses; the unit is now moved and worn. In the first impulse of Operations Turn 2, the unit is unmoved but still worn. If the Axis recovered the 21st Panzer, it would then be Moved 1 but no longer worn.
4.3.7 Fatigue and Battle Reinforcement
A unit's fatigue level increases when it reinforces a battle, or when it defends and then retreats in a battle (5.2, 5.4). Each of these operations is equivalent to a move for purposes of fatigue. Remember, however, a unit's fatigue level is never increased more than one level per impulse.
4.4 Generals Rommel and O'Connor
Design Note: Rommel led his army from the front, personally driving his men to give their utmost and giving orders to deal with fast-changing situations. This leadership style, utterly alien to most of his opponents, won many battles.
A. An Axis unit (German or Italian) remaining stacked with Rommel throughout its move increases its MA by 50% (rounded up).
Example: Rommel adds 2 MPs to a unit with MA of 3, 1 MP to a unit with MAs of 2 or 1.
B. If a unit's printed MA has been reduced by supply or fatigue, Rommel adds 50% of the reduced allowance.
C. Truck units are special in this regard: Rommel doubles a truck unit's MA from 2 to 4.
D. O'Connor gives British units the identical abilities.
Play Note: For Rommel's effect on combat see 5.1, Notes on DRMs, and the Combat Results Table (RT).
4.4.1 Restrictions
Rommel need not begin or end the impulse stacked with the unit, but must accompany it throughout its movement. Rommel may give his bonus to any number of units in the same impulse.
4.4.2 Movement Allowance
Rommel himself has a MA of 5 and may move in any number of impulses per turn. He never fatigues.
4.4.3 Death or Capture
Rommel cannot enter a British-occupied box alone. If he is alone in a box and British units enter it, or if all Axis units in his box are eliminated in combat, roll one die.
A. On a 6, Rommel has been killed or captured; remove him from play.
B. On a result of 1-5, place him with the nearest German or Italian stack. This applies even if Rommel is encircled by British units.
4.4.4 O'Connor
If O'Connor enters the game, he functions identically to Rommel (for the British). O'Connor is used only in the Campaign Game and only under optional rule 21.6.
5.0 Combat
Design Note: The combat system shows tactical facts that were critically important to each side's operational decisions. Battles in the desert were firefights in open terrain which usually favored the defense. Thus, the best way to destroy tanks was to compel them to attack. Tank and motorized units have special abilities in combat. Do not confuse British infantry with tank and motor units. British infantry may move more than once per Operations Turn (like tank units) but fights as infantry.
A. Combat always occurs (is mandatory) within an individual box occupied by opposing units. The moving player is the attacker.
B. To resolve combat, each combat unit fires at an enemy unit; the attacker rolls a die for each one to determine the effect of its fire.
C. A combat is fully resolved when one side or the other is destroyed or has retreated, leaving the box occupied by only one side's units.
D. Each combat must be fully resolved in the impulse in which it began. Refer to the SOP when reading the following rules.
E. Rounds: Combat is fought in rounds. Rounds continue until one side retreats or is destroyed. There may be any number of rounds.
F. Overruns: Combat which lasts only one round is an overrun. An overrun occurs when defending units retreat or are destroyed in the initial round. After an overrun, victorious attackers may continue moving.
5.1 Choosing Targets and Firing
Each unit may fire at any enemy combat unit in the battle except that a disrupted unit may be fired upon only if every undisrupted unit is also fired upon. (A disrupted unit would take shelter behind its comrades who were in better shape.) A player declares a unit's target when rolling the die for that unit and need not declare any fires in advance.
5.1.1 Fire Restrictions
A. Units fire individually; they may never combine fire. Exception: Army Artillery (21.1).
B. Each unit fires at one enemy unit. A unit may not split its fire against two or more targets.
C. If more losses are inflicted than are needed to eliminate the target, the excess is ignored.
D. Neither Rommel, O'Connor, nor trucks may be fired at.
5.1.2 Order of Fire
The defender fires first, but firing is considered simultaneous; losses for both sides take effect simultaneously. Do not remove losses until after both sides have fired. Use Hit markers to record losses until both sides have fired.
5.1.3 Fire Procedure
A. To fire, locate the column on the Combat Results Table (CRT) corresponding to the firing unit's strength and the target's type. Roll one die, applying all relevant DRMs. The result is the number of SPs lost by the target.
B. If a unit loses all its SPs, place it in the Eliminated Units Box when losses take effect.
C. Group-A DRMs apply to all fire.
D. Group-B DRMs apply to fire against tanks.
E. Group-C DRMs apply to fire against infantry.
F. All DRMs are cumulative.
5.1.4 Notes on DRMs
A. Battle reinforcements (5.4) do not receive defensive fire benefits; only the original occupants of the box do.
B. Disrupted units do not receive defensive fire benefits.
C. Rommel can improve the die roll of only one German unit with which he is stacked. This may be a different unit each round. He may not benefit Italians.
D. When Rommel attacks or enters a battle as a reinforcement, his DRM applies only to units he was stacked with when he entered the box. This is true of all subsequent rounds as well.
E. DRMs are always cumulative.
Design Note: The defender receives the -1 DRM because it has had time to prepare his position and because as the attacker attempts to close, the defender can fire continuously. Units which reinforce a battle do not enjoy these benefits nor do disrupted units.
Example: A Grant tank attacking a German tank always receives a +1 DRM (Grant Firing) and a -1 DRM (British tank offensive fire at German tank), net of 0, and a defending unit firing while retreating always receives a +1 DRM (defensive fire), and a -1 DRM (retreating), net of 0.
5.2 Retreats
Design Note: In the desert, mechanized formations could avoid combat against infantry whenever they were willing to give up ground. Infantry could not possibly escape motorized troops without heavy losses.
Units of either side may retreat from combat. If electing to retreat, all friendly units in the box must retreat. Infantry units that retreat become disrupted (5.3).
5.2.1 When Units Retreat
A. The defender (only) may announce retreat during the initial round. In the first step of subsequent rounds of combat either player may announce the intention to retreat. The attacker announces before the defender.
B. If the attacker can no longer inflict losses on the defender, the attacker must retreat.
5.2.2 Retreat Round
A. When either side announces the intention to retreat, the current combat round becomes the retreat round. (This simulates the combat necessary to disengage.) If the defender announces retreat during the initial combat round, the initial round is the retreat round.
B. If the retreating side has only tank or motor units, only tank and motor units on each side fight during the retreat round. The non-retreating side's infantry may neither fire nor be fired upon.
C. If a retreating stack contains only infantry units, tanks which fire at it receive a +3 DRM, in addition to the -1 DRM for retreat for a net +2 DRM. This DRM applies only against infantry; and only for tanks firing, not motor units.
D. If the retreating side has any infantry, all units on both sides fight.
E. Apply a -1 DRM to all fire die rolls during a retreat round.
F. When the attacker retreats, the defender still receives the +1 defensive fire DRM. (It will cancel the -1 DRM for a net of 0.) When the defender retreats, it loses the +1 DRM, and the net is -1.
Design Note: Infantry takes no part in a chase against tank or motor units because troops fighting on foot cannot catch retreating vehicles. But if infantry, tank, and motor troops retreat together, we assume the mechanized units will remain to cover their infantry comrades. Motor units fight with their vehicles nearby and can make a quick getaway. Infantry fight with vehicles far to the rear, and are not trained to load or unload in a combat situation.
5.2.3 Where Units Retreat
A. Units retreat to an adjacent box. A unit may never retreat to a box containing enemy combat units, even if the box also contains friendly units. If enemy units entered the battle from a particular box, then friendly units may not retreat to that box unless all those enemy units were destroyed in the battle. Minefields and vacant forts do not block retreat.
B. Defending units, including reinforcements, may retreat in any direction. All need not retreat to the same box.
C. Each attacking unit must retreat to the box it came from.
D. If a unit ordered to retreat cannot retreat, it is eliminated.
5.2.4 Retreat and Fatigue
A. A retreat is considered to be a move for purposes of moved/unmoved status and fatigue levels. Therefore, an unmoved defending unit that retreats is flipped to moved, a moved unit becomes worn and so on (4.3).
B. An attacker that retreats does not gain an additional level of fatigue for retreating; instead, its current level (the level gained from moving) takes effect at the end of the impulse, as usual.
C. An exhausted or disrupted unit may retreat even though it may not move normally.
D. Retreat movement does not require supply.
5.2.5 Supply Units and Retreat
A. If combat units retreat, any truck units in the box may retreat with them. If all a player's units in battle are eliminated, even if they are eliminated in the retreat round, any truck units in the box are removed as though expended (6.0).
B. An expended truck unit may not be used for the remainder of the impulse.
C. Depots never retreat (6.1).
5.3 Disruption
Design Note: Disruption represents the loss of command control. Units have lost contact touch with headquarters at every level of command; information and orders are not being passed as they should; officers have become casualties and are not yet replaced; and so on. A unit in this condition may neither attack nor make the usual preparations for defense. Left in peace, a unit can recover in 24 to 48 hours; but is very vulnerable during this time. Tank and motor units are accustomed to frequent advances and retreat, and do not become disrupted.
5.3.1 In General
When an infantry unit retreats, it becomes disrupted. Place a Disruption marker on it. Only infantry and army artillery units (21.1) become disrupted.
5.3.2 Disruption Effects
A. Disruption lasts through the end of the next enemy impulse. At the start of each friendly impulse, remove disruption markers from friendly units except those placed in the previous enemy impulse.
B. Disrupted units may not move, but may retreat.
C. Disrupted units do not receive the +1 defensive fire DRM.
D. A unit firing at a disrupted unit receives a +1 DRM.
5.4 Battle Reinforcement
Design Note: Tank units had the ability to react quickly to join battles developing some distance away. The British Army misused this ability, strewing units across the desert and then sending individual tank brigades to rescue one after the other. Usually the tanks arrived too little, too late; one British officer said it was "axiomatic that the armor would not arrive where it was wanted." When it did arrive, it was often smashed by the concentrated power of Rommel's divisions.
After each side removes its losses during a combat round, both sides may attempt to move additional tank units into the battle box from adjacent boxes. This is battle reinforcement. The attacker announces reinforcement attempts first.
5.4.1 Which Units May Reinforce
A. Tank units, Rommel, and O'Connor are the only units which may attempt battle reinforcement.
B. Reinforcing units must begin in a box adjacent to the battle.
C. A unit may reinforce only if it has a chance to hit at least one enemy unit in the battle.
D. A unit currently involved in a battle may not reinforce a different battle.
E. However, after a unit has resolved its own battle, it may reinforce another in the same impulse.
5.4.2 Restrictions
A. Only one battle reinforcement die roll may be attempted per unit per impulse. If a unit fails its battle reinforcement roll, it may not attempt another in the same impulse.
B. If a unit of the attacking side has attempted battle reinforcement, it may not move for the remainder of the impulse.
C. Battle reinforcements for the defending side do not receive the +1 DRM for defensive fire. In fact, battle reinforcements do not receive any offensive or defensive DRMs.
D. An unsupplied unit may not attempt battle reinforcement; however, battle reinforcement does not expend supply.
5.4.3 Procedure
A. First designate all units that will try to reinforce, then roll one die for each. The Battle Reinforcement Table shows the die roll needed for each nationality to succeed, and a list of DRMs. A unit which succeeds in its die roll must immediately enter the battle box.
B. The Axis may use the Battle Reinforcement DRM for Rommel only if Rommel accompanies the reinforcing units. His DRM for fire applies only to the units he accompanies, not to different reinforcements or the original combatants. Rommel may benefit any number of reinforcement die rolls for units he is with in the same round. Rommel alone may not reinforce battle.
5.4.4 Battle Reinforcements and Fatigue
A. Battle reinforcement is considered to be a move for purposes of unmoved/moved status and fatigue levels. When a unit makes a reinforcing move, it becomes moved; if it is already Moved 1, it incurs one level of fatigue, and so on (4.3).
B. As always, fatigue is recorded at the end of the battle; until then units remain at their current level of fatigue.
C. However, a reinforcing unit that has already been involved in a battle in this same impulse suffers the effects of its fatigue in the new battle (4.3).
D. A unit which is both exhausted and moved may not reinforce a battle.
E. A unit may move its full MA, then reinforce a battle in the same impulse. In this case, the unit incurs one increase in fatigue; a unit never incurs fatigue twice in the same impulse.
5.4.5 Reinforcing a Lost Battle
A. Battle Reinforcement may be attempted during any round (except retreat rounds) in which all defenders were destroyed, even initial rounds. Any successful defending reinforcements continue the battle, but are considered to be continuing the same battle, not starting a new battle. If the defender does this in the initial round, the attackers are prevented from moving farther.
B. Reinforcements may not enter battle at the end of a retreat round. Retreat ends battle.
Play Note: The British may attempt any number of battle reinforcements; the limits on the number of British units which may move in a single impulse do not apply to battle reinforcement.
Design Note: It is important to remember only tank units may reinforce battle. Only those units were trained to act quickly enough. British infantry may not make battle reinforcement moves for two reasons: First, an infantry brigade had an insufficient number of trucks to move the entire unit in one lift, and the trucks were stored some distance from the front. Second, British infantry was trained for a marching war. They were not trained to charge off to the rescue of someone in trouble. British tank units did so quite readily in the tradition of cavalry from which they descended.
6.0 Supply
Design Note: These rules simulate the constricting effect of lengthening supply lines, like an elastic band pulling a player's forces back towards their base. Forces needed enormous quantities of supplies – especially fuel – to exist in the desert. Very often, Rommel was able to dislocate his enemies by threatening their supply lines. But he also found that running out of supplies would stop an advance as surely as running into an anti-tank screen. The British were more careful about making sure they had plenty of supplies.
A. Units must be supplied to move or fire with full effect. Supplies, measured in SUPs, are stored in depot and truck units. SUPs must be expended (removed from play) to move units. A single SUP (or truck unit), when expended, supports any number of units for movement. But these units must begin the impulse within supply radius of and be able to trace a supply line to the depot or truck containing that point.
B. In addition to tracing supply for moving units in a friendly impulse, also check the supply status of friendly units during the opponent's impulse. Any units which are not fully supplied at that time will remain so throughout the impulse and fire at reduced strength. Place Half-Supplied or OOS markers on units in these conditions.
6.1 Supply Points, Depots, and Truck Units
A. Each side has a stock of SUPs. SUPs are stored at depots, and a strength marker is placed underneath each depot to indicate how many SUPs are held there.
B. Neither side may examine the other's depots' strength.
C. If a depot runs out of SUPs, it may remain on the map or be removed. If it remains on the map, it may receive SUPs using the rules which follow.
D. Depots are placed on the map only during Preparation Periods; they may never move during an Activity Period.
E. Each side is allotted a number of truck units. Think of truck units as mobile depots, containing 1 SUP. They move around the map and are expended (removed from play) to provide supply for movement of combat units.
F. Expended trucks may be returned (recycled) at depots each friendly impulse. Trucks have a full side (front), and an empty side (back); the empty side is used only in the Campaign Game.
6.1.1 Transferring Supplies
Truck units may transfer SUPs from one depot to another. Move the truck to a depot, increase the depot's strength marker by one, and expend the truck (remove it from the map).
Design Note: SUPs represent stores of fuel and ammunition; truck units represent the trucks carrying them to the front. Recycling a truck unit simulates giving supplies to the troops and going back for another load.
6.1.2 Recycling Trucks
A. A truck which has been expended for movement of combat units or as a result of transferring SUPs may return to play at the start of any subsequent friendly impulse of the same or later Operations Turn.
B. Place the truck unit at any depot and reduce the depot by 1 SUP. The truck may move in the same impulse it is created. A truck unit may be recycled in this manner any number of times.
6.1.3 Truck Movement Characteristics
A. Truck units never become fatigued and may move in every impulse with a MA of 2 MPs, paying the same costs as combat units.
B. Trucks may not move and be expended to supply combat units for movement in the same impulse, but they may move and transfer SUPs in the same impulse.
C. Rommel and O'Connor increase a truck unit's MA by 2 (4.4).
D. SUPs need not be expended to move trucks.
6.2 Supply Lines, Expenditure, and Effects
To be supplied, a unit must have a supply line that is no longer than the current supply radius. A supply line is a path of adjacent boxes from a depot or truck which contains at least one SUP to the unit. When tracing a supply line, count the box the unit occupies but do not count the box occupied by the truck or depot.
6.2.1 Supply Radius and Status
A. Each side has a supply radius. This is a number listed in the scenario instructions for each of the short scenarios, and on the Reinforcement Schedules for the Campaign Game.
B. A unit is supplied if the number of boxes in its supply line is equal to or less than the supply radius.
C. A unit is half-supplied if the number of boxes in its supply line is more than the supply radius but no more than twice the supply radius. Place Half-Supplied markers on such units.
D. A unit is OOS if the number of boxes in the supply line is more than twice the supply radius. Place OOS markers on such units.
E. Desert boxes count double against a supply line; highway boxes count 1, not ½.
F. There is a DRM for fire against an OOS tank or motor unit.
G. The Supply Effects Chart lists the effects of these conditions on the unit's movement and fire.
6.2.2 Supply Line Restrictions
A supply line may not pass through a box containing an enemy combat unit or minefield. Neither enemy depots, truck units, unoccupied fortifications, General Rommel (or O'Connor), nor friendly minefields block supply lines.
6.2.3 Supply For Movement
A. At the start of a friendly impulse, the owner must trace a supply line for each unit to be moved. A unit can move only if it is not OOS at the start of the impulse.
B. All supply lines are traced at the start of the impulse and SUPs expended at that time. A unit's supply condition remains in effect throughout an impulse regardless of where it moves; place the appropriate marker on units that are OOS or half-supplied.
C. Each truck unit to which some moving unit traces its supply is expended (removed from the map). One SUP is expended from each depot to which a moving unit traces its supply line. Supply must be expended even if the unit is half-supplied.
D. A SUP or truck unit provides supply for any number of units which trace supply to its box in the impulse it is expended. This supply covers all movement and combat the units conduct in that impulse.
Example: The Axis has a truck unit at Retma and a depot at Tmimi. British units occupy Bir Hacheim, Knightsbridge, Acroma, and Desert #4. The Axis wishes to move units in Bir el Gubi, Desert #5, and Gazala. It traces supply lines to Bir el Gubi and Desert #5 from Retma, and expends the truck unit there, providing supply for all units in Bir el Gubi and Desert #5. The unit in the Gazala box traces supply from Tmimi; the Axis expends a SUP from there.
6.2.4 Supply for Defense
A. Trace a supply line for each friendly unit during every enemy impulse. If a unit is half-supplied or OOS at that time, its fire becomes less effective; again, place the appropriate marker on the unit. Enemy fire becomes more effective when the target is OOS.
B. As with moving units, all supply is traced at the start of the impulse and supply status endures throughout the impulse.
C. The non-moving player never expends SUPs.
6.2.5 Lack of SUPs
If either side consumes all its SUPs on the map, all of its units are OOS.
6.2.6 Actions Not Requiring Supply
A. These actions do not require expenditure of SUPs:
- Retreat
- Unit reorganization
- Clearing mines
- Recovery
- Battle reinforcement
- Searching for and capturing depots
- Movement of truck units
B. However, a unit must be supplied or half-supplied to recover or attempt battle reinforcement.
Design Note: Each SUP represents enough fuel and munitions to support quite a bit of movement and fighting. Each of the operations listed above expends supplies, but only fractions of a point.
6.3 Truck Units and Depots in Combat
Neither truck units nor depots may be fired at in combat.
6.3.1 Losing Trucks
A. A truck is removed from play if all friendly combat units in its box are destroyed, or if enemy combat units enter its box when no friendly combat units are there. If this happens, the destroyed truck may not be used again for the remainder of the Operations Turn.
B. If friendly combat units survive a combat and retreat, any friendly truck units in the same box also retreat.
6.3.2 Voluntary Destruction of Supply
A. A player may voluntarily destroy their own depot(s) or any portion of the SUPs in it at any time during a friendly impulse, provided enemy units do not occupy the depot's box. A friendly unit does not have to be present.
B. A player may not destroy depots or SUPs during an enemy impulse.
6.3.3 Enemy-Occupied Depots
If enemy units occupy the same box as a friendly depot, the depot cannot provide supply, nor can truck units be introduced into play there.
6.3.4 Capturing Supplies
A. If enemy combat units enter a box containing a friendly depot but no friendly combat units, or if all friendly combat units in a box with a depot are eliminated in battle, the supplies at that depot may be captured or destroyed.
B. The enemy must search for the depot. A player may search only if a friendly combat unit ends its impulse in the box. The unit need not have moved during that impulse.
C. Search occurs after all other action has been completed in a player's impulse.
D. Searching for a depot does not constitute movement in any sense. Therefore, it does not affect the number of units a player may move, nor cause fatigue, and so forth.
E. A disrupted unit or one that recovered during the impulse may not search for a depot.
6.3.5 Search Procedure
The searching player rolls one die per depot in the box and consults their Search Table. A player may roll only once per depot per impulse.
Design Note: A result of no effect simulates units failing to find the depot, a common occurrence in the desert. Axis air reconnaissance was generally less effective than the British, so they generally had a harder time locating enemy supply dumps. However, the Axis spread their supplies in many small stockpiles, whereas the British accumulated enormous quantities at a few places. The British system was convenient, but it made their depots more vulnerable.
6.3.6 Search Results
A. If the search destroys the entire contents of a depot, it must be removed from play.
B. If enemy units search for a depot that happens to be empty, any result other than no effect eliminates the empty depot.
C. When the Axis player searches for British SUPs and the result is "captures one die", any SUPs not captured remain in the British Depot.
D. When the Axis captures supplies, place a Captured Supplies marker in the box and a strength marker underneath equal to the number of points captured.
E. A Captured Supplies marker functions like a depot except Axis units may not trace supply to it from a different box. Axis units in the same box may draw supply, and truck units may be introduced there, but the marker does not have the intrinsic supply radius that a depot does.
F. The Axis may voluntarily destroy captured supplies. It cannot destroy supplies at a British depot it has not yet captured.
Play Note: Attempts to capture supplies are resolved after all other actions in the impulse. If the Axis captures supplies, it may not introduce a truck unit there or destroy those supplies until its next impulse. (The Axis has a few of its own captured supplies markers, which may be used as long as they last. If they run out, the Axis may flip over a captured British depot to reveal the captured supply side. Also, if they run out, the British should consider why so many of their depots are being captured.)
7.0 Tank Replacements
Design Note: The British maintained large pools of tanks for quick replacement of combat losses. Rommel was never able to accumulate any such surplus but would have used it if he could. Players will note that infantry units may not receive replacements during Operations Turns. This is because infantry replacements are new men, requiring time and training to fit into veteran units. Tank replacements, on the other hand, are new machines taken over by experienced crews that have lost their vehicles.
Each side has a pool of tank replacement points (RPs), used to restore SPs to tank units at less than maximum strength. The short scenarios specify the number of replacements available to each side for the whole scenario. The RPs are available for the entire scenario, not for each impulse. Place the Replacement markers on the GRTs to record accumulated RPs.
7.1 Replacement Procedure
A. To receive replacements, a tank unit must be unmoved and not OOS. Flip the unit to its moved side and add SPs to it, reducing the replacement pool an equal amount.
Example: A cruiser of strength 3 could be raised to 5, and the British would lower their cruiser RPs by 2.
B. A German unit receives a Moved 1 marker instead of being flipped to its moved side.
7.2 Restrictions
A. Only tank units may receive RPs during an Activity Period.
B. A unit may never be increased to more than its printed maximum strength.
C. British units must be in an active rail line box to receive RPs. (The scenarios define which parts of the rail line are active.) The rail line must run from that box to the British home base without going through any box occupied by an Axis combat unit.
D. Axis units may receive RPs only at Axis depots. The depot must be connected to the Axis home base by a continuous path of non-desert boxes free of British combat units.
E. Units may recover at the same time they receive RPs.
F. RPs may be spent only on units of the proper tank type. Use Replacement markers on the GRT to record available RPs.
Example: Placing the Grant Replacement marker in the 5 box indicates 5 Grant RPs in the pool. Placing the +10 side up in the 5 box indicates 15 RPs are available.
7.3 Replacement Limits
A. During Activity Periods, the British may spend no more than 6 RPs per Operations Turn.
B. The Axis may spend no more than 2 RPs per Operations Turn.
Design Note: Replacement vehicles were stored in home base areas, Alexandria and the Nile delta for the British. They brought their vehicles up by railroad flatcar, but also by truck. The RP limits reflect the limited amount of rail and truck capacity.
7.4 Replacement of Eliminated Tank Units
A. At the start of each Operations Turn, units in the Eliminated Units Box may be returned to play by expending RPs. To return a unit to play, expend the RPs and place the unit, with its moved side up and a strength marker, at any box where a unit can receive RPs. A unit may be returned to play at less than full strength.
B. A unit may be voluntarily eliminated and rebuild in a later Operations Turn using RPs. When a unit is voluntarily eliminated its SPs are lost. (If using the optional tank repair rules, none of these points can be recovered through repair.)
8.0 Forts and Minefields
Design Note: Infantry was helpless in the desert unless dug in. The combat system assumes all infantry has constructed basic fortifications where it stands. Fort counters represent exceptionally strong installations.
The short scenarios give each player a number of forts to be placed on the map at the beginning of the game. In the Campaign Game, both sides must construct forts where they want them (18.0). Once placed on the map, a fort may not be moved.
8.1 Fort Capacities and Entrance
A. Each fort can hold one infantry or motor unit of strength 4 or less. Tank units may not occupy forts.
B. Units are placed underneath a fort to indicate being inside it. A player may have any number of forts per box, and different units may occupy each fort.
C. Units may enter a fort during normal movement at no extra movement cost. A unit cannot enter a fort when battle reinforcing or retreating.
Design Note: To enter a fort requires time to get properly deployed inside the fortifications, make necessary repairs to the works, and so forth.
8.2 Forts in Combat
A. Infantry and motor units firing at a unit inside a fort apply a -1 DRM to the fire die roll; tanks apply a -2 DRM. Only the unit inside the fort benefits.
B. The bonus does not apply during retreat rounds if the unit which occupied the fort is retreating, as a unit that retreats has left the fort.
8.3 Destruction
A. A fort is destroyed when the unit in it is destroyed. A fort can be left vacant but is destroyed if an enemy combat unit enters its box when no friendly combat units are there.
B. A vacant fort in no way impedes movement.
8.4 King's Cross and Fort Pilastrino
A. The setup lists for the various scenarios include forts and minefields at King's Cross and Fort Pilastrino. These represent the forts around Tobruk.
B. Units at King's Cross receive no fort or minefield benefits if the firing units moved into their box from Fort Pilastrino or Tobruk. Units at Fort Pilastrino receive no fort or minefield benefits if the firing units moved into their box from King's Cross or Tobruk. (The fortress perimeter ran along the edge of the area depicted by the Fort Pilastrino and King's Cross boxes.)
C. These rules apply to forts and minefields built by either side at King's Cross or Fort Pilastrino.
8.5 Minefield Placement and Effects
A. In the short scenarios, minefield counters are placed on the map per the setup instructions. In the Campaign Game, they may be constructed during Preparation Periods (11.8).
B. Minefields have the following effects:
- It costs +1 MP to leave an enemy minefield. A unit cannot use the highway rate (½) when leaving a minefield.
- When engaged in battle in a box containing an enemy minefield, apply a -1 DRM to all friendly fire die rolls. This applies to all fire against enemy units in the box.
- If a minefield and a fort occupy the same box, the effects are cumulative.
- Friendly minefields have no effect on friendly units.
- Supply lines cannot be traced through an enemy minefield nor to a truck or depot unit located in a mined box.
Example: If there is a British minefield in the Sidi Mufta box, an Axis unit in Sidi Mufta could trace supply to a truck unit in Trigh Enver Bei. Axis units in Knightsbridge cannot trace supply to a truck unit in Sidi Mufta nor through Sidi Mufta to a truck in Trigh Enver Bei.
8.6 Clearing Minefields
A. Any combat unit may clear a minefield. It must remain stationary in the box for one impulse. The minefield is removed from play at the end of the impulse; the effects of the minefield continue to apply until the end of the impulse.
B. Clearing a minefield does not count as movement; moved units may clear minefields. British units clearing minefields do not count against the British's allowance of units moved that impulse.
9.0 Infantry Reorganization
There are two types of reorganization: breakdown and recombination. The British may reorganize infantry divisions into brigades or vice versa. The Axis may reorganize infantry divisions into regiments and vice versa. (German 7- and 10-strength infantry units are divisions.) Tank and motor units may not be reorganized. Reorganization is the second step of a player's impulse.
9.1 Breakdown Procedure
A. To breakdown a division, replace it with a number of 3-strength units. (British 3-strength units are brigades; German 3-strength units are regiments.)
- A 10-strength division is replaced by three 3-strength units.
- A German 7-strength division is replaced by two 3-strength regiments.
B. If the division has suffered any losses, the player must distribute an equal number of losses among the brigades or regiments.
Example: If a 10 point division's current strength is 8, the player could reduce one brigade's strength to 1, thus carrying along the two losses.
C. When a moved, fatigued, or disrupted unit breaks down, all the regiments or brigades inherit those conditions.
Play Note: In general, a unit loses 1 SP when breaking down. A division of strength 10 breaks down to three components of total strength 9, and so on. This simulates the loss of effectiveness when the division's supporting assets are parceled out among separate units.
9.2 Recombination Procedure
A. A player may recombine brigades or regiments into a division. The procedure for recombination is the reverse of breakdown. Three 3-strength units combine into a 10-strength division, and two 3-strength German regiments combine to a 7-strength division. Any losses that the brigades or regiments have suffered must be accounted for in the rebuilt division.
Example: If three British brigades, for example, have suffered a total of 4 losses and combine into a division, the newly-formed division will be placed on the map with a strength of 6.
B. If any of the recombining units are moved, fatigued, or disrupted, the division inherits that condition.
C. A division need not be recombined from the same units which entered play when the division broke down.
9.3 When To Reorganize
A player may breakdown or recombine only during Step 2 of their impulse (between disruption removal and checking for supply), before any movement. Breaking down or recombining units is not movement.
9.4 Limits
When breaking down or recombining, players may use only the divisions, brigades, and regiments provided with the game. Units in the Eliminated Units Box may not be used for breakdown or recombination, including breaking down or recombining within the Eliminated Units Box.
10.0 Ending the Activity Period
The Activity Period ends if:
A. Both sides run out of SUPs.
B. One side has run out of SUPs, and the other decides to end the Activity Period;
C. An Operations Turn passes without movement or recovery of any combat unit.
D. The players agree to end the Activity Period.
10.1 Removing Unsupported Units
At the end of each Activity Period, both players (British first) remove depot and truck units which have no line of communications (LOC), and then combat units which are unsupported.
10.1.1 Line of Communications
A. An LOC is a path of connected boxes (of any length) to the unit's home base or (for either side) to Tobruk (if friendly controlled, 11.1).
B. An LOC may not pass through a box occupied by an enemy combat unit nor through any desert box.
C. Any depot or truck with no LOC is removed from play.
10.1.2 Tracing Support
A. After removing trucks and depots with no LOC, combat units that are unsupported must be removed.
B. To be supported, a unit must be within twice the supply radius of:
- A friendly depot containing a SUP, or
- A friendly truck unit, or
- The unit's home base, or
- Tobruk, if the unit is British and Tobruk is British-controlled.
10.1.3 Order of Removal
British truck, depot, and combat units are removed before any German units are removed. This may open LOCs or support for German units.
10.1.4 Removing Fatigue and Disruption Markers
After removing unsupported units, remove all Fatigue, Moved 1, and Disruption markers, and flip all units on the map faceup (to their unmoved sides).
10.1.5 Rommel and O'Connor
If Rommel or O'Connor has no LOC, they are not eliminated. Instead place the officer with the nearest friendly unit which is supported or does have an LOC.
10.2 Redeployment Movement Phase
A. The Redeployment Movement Phase is a special movement phase which occurs at the end of each Activity Period. During this phase players may move any or all of their units.
B. Each unit may move an unlimited distance through a continuous path of adjacent boxes.
C. Supply must be expended exactly as for normal movement.
D. The first player in the preceding Operations Turn moves first.
10.2.1 Restrictions
A unit may not:
A. Enter a desert box.
B. Enter an enemy-occupied box.
C. End its move more than four boxes from:
- A depot containing a SUP, or
- Its home base, or
- Tobruk (for British only), if friendly-controlled, or
- A truck unit. (See 10.2.2 for restrictions.)
10.2.2 Restrictions on Trucks
A. Each British truck may support only two brigades which end their move within four boxes of the truck. A division, for this purpose, counts as the number of brigades or regiments it would break down to at that instant.
B. Each Axis truck may support three combat units (of any size) in locations within four boxes of the truck.
C. If more units than the above restrictions allow end their moves within four boxes of a truck, and are not also within four boxes of a depot, the home base, or Tobruk (British only) the player must correct the situation to conform to those restrictions or eliminate enough units to conform.
10.2.3 Supply in Redeployment
Movement during redeployment expends supply in the same way as during normal player impulses. As long as a unit begins its move in at least half-supply, it may move any distance provided the above restrictions are met. Expending 1 SUP supplies any number of units for movement as normal.
11.0 Short Scenarios
A. Each scenario is a separate game situation with its own conditions for victory and its own starting setup. Each of the three short scenarios consists of only one Activity Period. The setup instructions list units by type and strength, for example, tank (4) is a tank unit at strength 4. If not indicated differently, units are at their printed maximum strengths.
B. The notation w/i # means within that many boxes of the box that follows.
11.1 Rommel's First Offensive
As an introduction to Rommel in North Africa, we suggest you try several plays of the following scenario. It simulates Rommel's first dash across the desert towards Tobruk. In the Campaign Game, the outcome of this first offensive is very important to the course of later operations. Therefore, you will find it worth your while to gain some experience with these opening moves. To play this scenario only rules 1-10 are required. The Axis is the first player.
11.1.1 British Setup
A. The British supply radius is 2.
B. The rail line is active between the British base and Matruh, inclusive.
Replacements: 2 x Cruiser RPs.
Reinforcements: At the start of the second Operations Turn (before any impulses occur), receive at Tobruk: Infantry brigade and Cruiser (2). If Tobruk is Axis-held at that time, these reinforcements may arrive in Bardia. If both are Axis-held, these units do not arrive.
| Location | Unit(s) |
|---|---|
| Agedabia or Desert #1* | Motor (2), Cruiser (3) |
| Benghazi, Barce, or El Abiar w/i 1 Derita | 2 x infantry brigades (2), Motor (2) |
| Msus | Depot (4) |
| Barce | Depot (1) |
| Mechili | Depot (1) |
| Tobruk, Fort Pilastrino, or King's Cross | Infantry brigade |
| Fort Pilastrino | 2 x forts |
| King's Cross | 2 x forts |
| Bardia | fort |
| Tobruk | Depot (4) |
| Matruh | Depot (2) |
| Home Base |
* Either unit may be placed in either box. Note that any unit at Desert #1 is half-supplied.
11.1.2 Axis Setup
The Axis supply radius is 3.
Reinforcements: At the start of the second Operations Turn, place one truck unit and one Italian infantry (3) at the Axis Home Base. If the base is British controlled at that time, these reinforcements are lost.
Replacements: None accumulated.
| Location | Units |
|---|---|
| Axis Home Base | Rommel, German tank (5), Italian motor (3), Italian tank (2), Italian infantry (a 3-point division), 1 x truck, depot (4) |
11.1.3 Special Rules
A. During the entire first Operations Turn, units which start at Agedabia and Desert #1 apply a -1 DRM to all fire die rolls, regardless of their location at the time they fire. (Because of surprise they were caught without proper equipment or dispositions.)
B. Units beginning at the British home base may not move until the Redeployment Movement Phase at the end of the first Activity Period. (Transport was very scarce.)
C. The British have no truck units in this scenario.
11.1.4 Victory Conditions
A. This scenario is a match of two games. Each player plays each side once, scoring match points in each game. The winner is the one scoring more combined match points during the two games.
| Match Points | Side | Condition |
|---|---|---|
| 3 | Axis | Control Tobruk at the end of the game. |
| 2 | Axis | Control Fort Pilastrino or King's Cross at the end of the game, but does not control Tobruk. |
| 1 | Axis | Invest Tobruk at the end of the game, but does not control Tobruk, Fort Pilastrino, or King's Cross. |
| 2 | British | Axis earns no points. |
B. If the players tie in match points, the player with the fewer total losses over the two games wins.
11.1.5 Control
Control means that side's units were the last to solely occupy a box. At the start of the scenario, the British control all boxes except the Axis home base.
11.1.6 Investment of Tobruk
Tobruk is invested if the British control it, but cannot count two boxes along any path starting from Tobruk without encountering an Axis unit.
Example: Tobruk would be invested if Axis units occupied the Acroma, El Adem, Sidi Rezegh, and Gambut boxes.
11.1.7 Player Notes
A. The situation in this scenario is extremely delicate. One wrong move can lose the game. The Axis must maneuver rather than fight, exploiting the miserable British supply situation. Unsupplied British units are no threat and will die at the end of the Activity Period at much less cost to the Axis than fighting them.
B. The British cannot hope to defend their positions west of Tobruk; their goal must be to defend that fortress. They must work very hard to preserve enough units to do so. They should place one unit in Agedabia, and one in Desert #1, and accept that they will be destroyed to buy time for the rest of the army. With luck, the British will have two moves to get the two infantry brigades near Benghazi back into the fortress at Tobruk.
C. If the British stack the mobile units together at Agedabia or Desert #1, the Axis should go around them and destroy their supplies. The key box is Antelat. If the British make a stand at Agedabia or Desert #1 and then fall back with their two front units to Antelat, they should be able to get the rest of their army safely into Tobruk. If not, the Axis can move through Antelat, leaving a substantial portion of the British forces stranded in the desert. The Axis should be careful not to leave their base exposed to a quick counter-thrust.
D. If the British get three or four units to Tobruk, the difficulty shifts to the Axis, as they try to invest the fortress.
11.2 Gazala
11.2.1 The Situation
The British Crusader offensive had driven Rommel back to El Agheila. Almost immediately, Rommel counterattacked and won much of what he had lost. British Eighth Army finally held at the Gazala Line and began thinking of a counteroffensive. But Rommel attacked first. The British linear deployment was disastrous for an army with inferior mobile forces. Eighth Army compounded the mistake by ordering its tank units to the front piecemeal. The tank units carried out these orders with tragic valor. In several large actions Rommel destroyed most of the British armor, although his plans were delayed by the heroic resistance of the Bir Hacheim garrison. On June 20th Afrika Korps rolled into Tobruk and began the fateful pursuit into Egypt. It was Rommel's finest hour.
11.2.2 The Three Versions
A. There are three versions of this scenario: historical, limited free, and free deployment. Victory conditions, supply availability, tank replacements, reinforcements, and the initial forces are the same for each version. Only the setup changes.
B. This scenario consists of one Activity Period.
C. The Axis is the first player.
11.2.3 Victory Conditions
At the end of the Activity Period, after players have removed units per 10.1, victory is determined by the following:
| Victory Level | Conditions |
|---|---|
| Axis Strategic | Total Axis tank strength is equal to or greater than the British, and Axis units hold Tobruk or both Bardia and Sollum; or The Axis holds the British base. |
| Axis Substantial | Total British tank strength, including saved replacements, is equal to or less than the number at the cross reference of the German's total remaining tank strength and the Axis Substantial Victory column on the Victory Chart. |
| Axis Tactical | British tank strength, including saved RPs, is less than or equal to the number at the cross reference of the remaining German tank strength and the Axis Tactical Victory column on the Victory Chart. |
| British Tactical | Hold Tobruk and have at least as many tank points, including saved RPs, as the number at the cross reference of the remaining German tank strength and the British Tactical Victory column on the Victory Chart. |
| British Substantial | Hold Tobruk and have at least as many tank points, including saved RPs, as the number at the cross reference of the remaining German tank strength and the British Substantial Victory column on the Victory Chart. |
| British Strategic | Occupy the Axis base or meet the conditions for a substantial victory and control at least two boxes with airfields.* |
* The Axis controls all airfield boxes at scenario start.
Play Note: As the chart indicates, if German tank strength is 18 or more the British cannot win a tactical victory. And, if the German tank strength is 14 or more the British cannot win a strategic victory.
Example: At the end of the game, the German tank strength is 7. (Italian points do not count.) The British tank strength is 16, including saved RPs. The Brits lost 12 infantry SPs during the scenario, for which their tank strength is modified by -6: The Axis lost 3 infantry points, for which the British strength is modified by +1. In addition, the British hold one airfield, modifying their strength by +3. The net British tank strength, then, is 14. Cross-referencing the German tank strength (7) with the British Tactical Victory column shows that the British have indeed won a tactical victory; they have the bare minimum modified tank strength required or a British tactical victory. The British have not won a substantial victory because British modified strength is not at least 18.
11.2.4 Historical Deployment
11.2.4.1 British Setup
A. One truck may be placed in any British-occupied box prior to the start of the game. The British may not use his third truck unit in this scenario.
B. British supply radius is 3.
C. Prior to play, the British secretly roll one die, consulting the table below, to determine the number of SUPs received at the beginning of the game. These may be divided among the depots as desired except no more than 4 SUPs may be placed in Tobruk. The two trucks listed in the setup are, in addition to these SUPs.
| Die Roll | SUPs | Die Roll | SUPs |
|---|---|---|---|
| 1 | 11 | 4 | 13 |
| 2 | 12 | 5 | 14 |
| 3 | 13 | 6 | 15 |
D. Tank replacements: 5 x Cruisers, 9 x Grants, 1 x I-tank.
E. The rail line is active along its entire length.
F. Initial deployments are in the table below.
| Location | Unit(s) |
|---|---|
| Gazala | infantry division, truck, minefield |
| Alem Hamza | I-tank, 2 x infantry brigades, minefield |
| Sidi Muftah | I-tank, infantry brigade, minefield |
| Bir Hacheim | Infantry brigade (in fort), motor, minefield |
| Knightsbridge | Grant, motor |
| Retma | Motor |
| El Adem | 2 x Cruisers |
| Bir el Gubi | Infantry brigade |
| In King's Cross, Tobruk, or Fort Pilastrino | 3 x infantry brigades |
| Bardia | Fort |
| Tobruk | Depot |
Design Note: Players will notice that the Tobruk perimeter is weaker in this scenario than in the Crusader scenario. The British failed to maintain the fortifications in good repair and stripped them to build the Gazala line.
11.2.4.2 Axis Setup
A. The Axis supply radius is 4.
B. SUPs: Prior to play, the Axis secretly rolls one die, consulting the table below, to determine the number of SUPs received at the beginning of the game. These may be divided among depots as desired. The two truck units listed in the setup are in addition to these SUPs.
| Die Roll | SUPs | Die Roll | SUPs |
|---|---|---|---|
| 1 | 8 | 4 | 10 |
| 2 | 9 | 5 | 11 |
| 3 | 9 | 6 | 12 |
C. The Axis receives no tank replacements.
D. Initial deployments are in the table below.
| Location | Unit(s) |
|---|---|
| Tmimi | German motor (3), army artillery (optional, 21.1), depot, minefield |
| Bir Tomrad | Italian inf (3), Italian inf (4), minefield |
| Trigh Enver Bei | 2 x Italian inf (3), Italian motor (4), Italian tank (5), Rommel, German motor (7), 2 x German tanks (10 each), 2 x trucks, minefield |
| Benghazi | Depot |
| Home Base | Depot |
11.2.5 Victory Chart
| German Tank Strength | Axis Substantial | Axis Tactical | British Tactical | British Substantial |
|---|---|---|---|---|
| ≤3 | 3 | 4 | 6 | 8 |
| 4 | 4 | 6 | 8 | 10 |
| 5 | 5 | 7 | 10 | 10 |
| 6 | 7 | 9 | 12 | 15 |
| 7 | 9 | 11 | 14 | 18 |
A. Modify the British tank total when assessing victory:
| Modification | Reason |
|---|---|
| -4 | per British depot lost to Axis capture |
| -1 | per two British infantry or motor points lost |
| +1 | per two German (not Italian) infantry or motor points lost |
| +3 | per airfield the British control |
| +10 | if Rommel is killed |
B. The historical outcome was an Axis strategic victory.
11.2.6 Limited Free Deployment
This scenario commits the British to the Gazala Line, but allows rearrangement of reserves. The Axis can select its own spot for its attack. The British set up first.
11.2.6.1 British Setup
A. Units in the Acroma, Knightsbridge, Retma, El Adem, and Bir el Gubi boxes in the historical deployment may be deployed in any of these boxes or any boxes occupied by British units in the historical deployment.
B. Supply, tank replacements, etc., are the same as for the historical deployment.
C. If the British have three infantry brigades in a box, they may reorganize them into an infantry division before beginning play (9.0).
11.2.6.2 Axis Setup
A. The Axis receives the same units in this scenario as for the historical deployment. Units may be placed in the Tmimi, Bir Temrad, or Trigh Enver Bei boxes.
B. Supply (including depots), tank replacements, etc., are the same as for the historical deployment.
11.2.7 Free Deployment
A. This scenario simply gives the British their historical mission and lets them set up however they wish. The Axis has corresponding freedom.
B. The British set up first.
11.2.7.1 British Setup
A. The British have available all units listed for historical deployment. They may be placed in the Gazala, Alem Hamza, Sidi Muftah, Bir Hacheim, or Desert #4 boxes, or any boxes east of those. The forts at Matruh, King's Cross, and Knightsbridge must be placed in those boxes, as must the minefield at Charing Cross, but the other four minefields and fort may be freely placed.
B. The depots must be placed in boxes connected by rail to the British home base.
C. Supply, tank replacements, etc., are the same as in the historical deployment.
11.2.7.2 Axis Setup
A. The Axis has available all the units listed in the historical deployment. It may setup the combat units anywhere desired in any box from which it can trace a LOC to its home base.
B. The Axis must deploy depots in boxes which are connected by highway to the Axis home base. It must deploy truck units no more than two boxes from a depot.
C. Supply, tank replacements, etc., are the same as in the historical deployment.
11.3 Operation Crusader
11.3.1 The Situation
Rommel chased the British out of Libya, but failed to take the fortress at Tobruk. While he prepared an assault, the British prepared a great offensive. Its objectives were to relieve Tobruk, reconquer Cyrenaica, and destroy Afrika Korps. (At this time Malta was under severe pressure, and the British needed Libyan airfields to support its garrison.) The British took great losses, but inflicted more on Rommel than he could afford. Rommel then dashed to the British rear, hoping to destroy supplies and cause panic. The British held steady, and exhausted Rommel's troops. In early December Rommel broke off the battle and retreated to El Agheila, Unfortunately, the British were unable to follow up their operational victory and take Rommel's base, so the campaign continued.
11.3.2 Victory Conditions
| Victory Level | Conditions |
|---|---|
| British Strategic | Occupy the Axis base at the end of the scenario. |
| British Substantial* | There are no more than 5 German SPs (not Italian) on the map (not counting the army artillery unit), or Control all four airfields at the end of the scenario. |
| British Tactical | There is an LOC from Tobruk to the British home base at scenario's end. |
| Axis Strategic | If the British cannot trace an LOC from Tobruk to the British home base; or The Axis occupies Tobruk; or The Axis occupies the British base at the end of the scenario. |
| Axis Substantial | The Axis controls all four airfields** and there are at least 6 Axis SPs (not counting the army artillery unit) still in play at the end of the scenario. |
| Axis Tactical | There are at least 6 Axis SPs (not counting the army artillery unit) still in play at the end of the scenario. |
* In either case, there must be an LOC from Tobruk to the British home base.
** The Axis controls all airfields at the start of the game.
11.3.3 Special Rules
A. This scenario consists of one Activity Period.
B. The British are the first player in this scenario.
C. If at any time the Axis occupies Tobruk, reduce the final level of British victory by one level.
Example: If the British earn a strategic victory, but the Axis units occupied Tobruk during the game, the British earn only a substantial victory.
D. If both players achieve a level of victory, the player with the higher level earns that level and the other player loses. If the players earn equal levels of victory, the game is a draw.
E. The historical outcome was a British substantial victory.
11.3.4 British Setup
A. The British have 12 SUPs which may be divided among depots as desired; however, no additional SUPs may be placed in Tobruk.
B. In addition, they have two trucks in play; the third truck unit does not appear in this scenario.
C. British supply radius is 2.
D. Tank Replacements: 7 x Cruisers, 3 x I-tanks
E. Only 4 RPs may be taken per Operations Turn.
F. The rail line is active only between the British Home Base and Piccadilly-Oxford Circus.
G. Reinforcements: The British receive three infantry brigades. Before the start of play, roll one die for each. Each unit arrives on the Operations Turn corresponding to the die roll. Upon arrival, place the unit on the map at the start of the Operations Turn at any depot with an LOC to the British home base.
Example: If a five is rolled for one of the brigades, that brigade arrives on Operations Turn 5.
| Location | Unit(s) |
|---|---|
| Anywhere in Fort Pilastrino, King's Cross, or Tobruk | Infantry division |
| Fort Pilastrino and King's Cross | 3 x forts and one minefield in each |
| Tobruk | Depot (3) |
| Buq Buq | Infantry brigade (in fort) |
| Bir Sheferzen | Infantry brigade, I-tank |
| Sofafi | Infantry brigade (in fort), infantry division |
| Siwa Track | Infantry division, 3 x Cruisers, 2 x motors |
| Piccadilly-Oxford Circus | Depot |
| In Sofafi, Piccadilly-Oxford Circus, or Siwa Track | 2 x trucks |
| Matruh | Depot |
| Home Base | Depot |
11.3.5 Axis Setup
A. Axis supply radius is 3.
B. No Axis truck units begin on the map.
C. There are no German reinforcements.
| Location | Unit(s) |
|---|---|
| Bir Hacheim | Italian motor (4) |
| Bir el Gubi | Italian tank (3) (a 5-point tank unit starting at reduced strength) |
| Acroma | Italian infantry division (4), minefield |
| El Adem | Italian division, depot (5), minefield |
| Sidi Rezegh | Italian infantry division, minefield |
| Either El Adem or Sidi Rezegh | Italian infantry division |
| Gambut | Rommel, German tank (7), German infantry division (7), army artillery, minefield |
| Fort Capuzzo | Italian infantry division (in fort), German motor (3) (in fort) |
| Bardia | Depot (1), fort |
| Gahr Saleh | German tank (7) |
| Benghazi |
12.0 Campaign Game SOP: Preparation Periods
Design Note: The desert war consisted of brief periods of furious battle separated by long periods in which nothing happened. Nothing, that is, except for the buildup of troops and supplies for the next furious battle. The rules for Activity Periods simulate the battles. To simulate the entire campaign, Rommel in North Africa has separate Preparation Periods to simulate long stretches of inactivity.
12.1 In General
A. The Campaign Game SOP incorporates the shorter scenarios' SOP and consists of Activity Periods and Preparation Periods.
B. Each Activity Period represents about one month of intensive activity.
C. Each Preparation Period represents several months of comparative quiet; it consists of a variable number of Buildup Months, just as the Activity Period consists of a variable number of Operations Turns.
D. Each Buildup Month includes a British Buildup Turn and an Axis Buildup Turn. Buildup Months continue until either side decides to begin another Activity Period.
E. During Preparation Periods (described below) each side increases the size of its forces and gets ready for the next Activity Period.
F. The SOP is:
- Activity Period a. Variable number of Operations Turns • Variable number of player Impulses b. End of Activity Period
- Preparation Period a. Variable number of Buildup Months • British Buildup Turn • Axis Buildup Turn • (Continue executing Buildup Months until either side begins operations.)
- End of Preparation Period
- Return to Activity Period
12.2 The Buildup Month
12.2.1 Victory Point Phase
The players calculate the new game score and check if either has won (20.2).
12.2.2 British Buildup Turn
12.2.2.1 Reinforcement Phase
A. Place British reinforcements arriving this turn in the British base; some reinforcements are allowed to arrive at Tobruk or Bardia (13.1.1).
B. After the first Preparation Period, the British may call for a special group of reinforcements (13.2).
C. The British receive and may spend RPs to increase the strength of units. Record surplus points on the British GRT using the Replacement markers (14.0).
D. The British make any removals the reinforcement schedule calls for.
12.2.2.2 Supply Phase
A. At any time during this phase, the British may place or remove depots (15.6).
B. The British SUPs scheduled to arrive in the first turn of the game are delayed until the first Preparation Period.
C. Beginning in September 1941, the British may advance their railhead one box (16.0). They may also move any depot along the active rail line.
D. The British receive 3 or 4 SUPs (depending on the month) at their home base, or at a depot in a port, or at any depot along the active rail line.
E. If this is the first Buildup Month of the Preparation Period, the British place all available trucks on the map at any of their depots; they remain on the map throughout the Preparation Period.
F. The British move their truck units, transporting SUPs.
12.2.2.3 Movement Phase
A. This Movement Phase is similar to the Redeployment Movement Phase at the end of each Activity Period, with some exceptions (17.0).
B. The British may move three combat units of any size.
C. If the British have an isolated garrison in Tobruk, he must check its size (17.2).
D. Truck units do not move in this phase.
12.2.2.4 Construction Phase
The British may construct forts and minefields (18.0).
12.2.3 Axis Buildup Turn
12.2.3.1 Reinforcement Phase
A. The Axis receives reinforcements and replacements and may spend replacements to increase the strength of its units.
B. The Axis may call for additional tank replacements (14.4).
12.2.3.2 Supply Phase
A. At any time during this phase the Axis may place or remove depots (15.6).
B. The Axis consults the Axis Supply Table to determine how many SUPs received this turn. Add the SUPs to depots at ports under Axis control or at the home base.
C. Any captured depots are converted to Axis depots.
D. If this is the first Buildup Month of the current Preparation Period, the Axis places all available truck units on the map at any depots; they remain on the map throughout the Preparation Period.
E. The Axis moves its truck units, transporting SUPs.
12.2.3.3 Movement Phase
This Movement Phase is similar to the Redeployment Movement Phase with some exceptions (17.0).
12.2.3.4 Construction Phase
The Axis may construct forts and minefields (18.0).
12.2.3.5 Operations Declaration Phase
12.2.3.5.1 Declaration Phase
The Axis announces whether to begin an Activity Period. If not, the British may announce their wish to do so. If either player does, proceed to the Pre-Operations Phase. If not, advance the Campaign Turn marker one month and begin another Buildup Month.
12.2.3.5.2 Pre-Operations Phase
A. Score VPs; adjust the game score to reflect this. Neither side may win the game at this time; the Activity Period must be played.
B. Each side receives SUPs due during the coming month.
C. Remove empty trucks from the map.
D. Each side adjusts its Replacement markers to reflect RPs due during the coming month.
E. The British remove units their reinforcement schedule requires for the coming month.
F. If using the optional rule Reinforcements During Operations (21.5), each side determines when reinforcements will arrive.
G. Advance the Campaign Turn marker one month. Begin an Activity Period.
13.0 Reinforcements
Design Note: Many wargamers peruse orders of appearance and argue about them. Where is that Sonderverwendung (special employment) battalion my history book says should arrive on Turn 10? In this game the goal has been to keep the reinforcement schedule as simple as possible. have tried only to maintain the right mix of forces on each side, while eliminating many complex details.
For example, the British frequently pulled divisions out of the desert and replaced them with other divisions from other fronts. In October 1941, the 9th Australian Division was removed from Tobruk and replaced by the 70th Division. We have not bothered to show such exchanges. Only if there was a net change in the number of units in the desert have we indicated a reinforcement or removal.
For another example, the British armor was reorganized early in 1942; the support groups were broken up and replaced with motor brigades. Both the support group and the motor brigades appear as 3-strength motor units in this game, so our reinforcement schedule does not note the change.
For a third example, Rommel maintained a small reserve of mobile units at army level. We show this as a single German 3-point motor unit throughout the game. That depicts the strength of the reserve accurately; it is not important that the actual composition of the reserve frequently changed. Thus, the historical designations on the counters will not be accurate at all times. However, each unit in our counter mix did spend considerable time in the desert.
Each side's Reinforcement Schedule lists the units received or removed each month. The British have two special groups of reinforcements, the composition of which varies according to the British army's strength (13.2.1).
13.1 Reinforcement Procedure
13.1.1 When Reinforcements Arrive in the Campaign Game
A. Reinforcements scheduled to arrive during a month which is an Activity Period are delayed until the next Preparation Period.
B. Reinforcements may never arrive during a month which is an Activity Period, with the following exceptions:
- During the first turn of the game (which must be an Activity Period).
- If you are using Optional Rule 21.5, Reinforcements during Activity Periods.
13.1.2 Where Reinforcements Arrive
A. All combat units arrive at a player's home base. However, if the British control Tobruk or Bardia, one British brigade may arrive at each.
B. Truck reinforcement units may be placed at any depot.
13.1.3 Arrival Strength
Units arrive at full strength unless a lower strength appears in parentheses after the unit's name.
13.1.4 Eliminated Units as Reinforcements
If there are insufficient counters for scheduled reinforcements, counters may be taken from the Eliminated Units Boxes. This is the only way eliminated units may arrive as reinforcements.
13.1.5 Exchange Cruiser for Grant
In two separate times, the British may exchange a Cruiser for a Grant. To do so, the British must have Grant SPs saved on the Replacement Track. Replace any one Cruiser with a Grant; the Cruiser is removed from play, and is no longer available. The British then expend Grant RPs to give the new unit any strength up to its maximum. The Cruiser's SPs become Cruiser RPs. The exchange can be made for a Cruiser unit in the Eliminated Units Box. The Grant then enters play at the British base. The British need not make an exchange immediately; they can wait until a later month.
Example: In April 1942 the British have accumulated 8 Grant RPs. They select a Cruiser unit with strength 5, removing it from play. The accumulated Grant RPs are reduced to 3 and the accumulated Cruiser RPs are increased by 5, and the Grant and a strength 5 marker are placed in the box where the Cruiser was. If the British had accumulated only 4 Grant RPs, the exchange could be made, but the Grant could be given a maximum of only 4 SPs.
13.2 Special British Reinforcements
A. The British have two special groups of reinforcements available. They may take one in 1941, and one in 1942, announcing the desire to take a group in any Reinforcement Phase of the appropriate year, except during the first Preparation Period of the game.
B. British special reinforcements arrive two months after they are called for.
Example: If summoned in October, they arrive in December.
13.2.1 Composition of Force
A. The exact composition of each group depends upon the British tank strength at the time they call for these reinforcements. This includes both tank points in play and tank RPs. (The lower the tank strength, the more units the British receive.)
B. The British reinforcement schedule includes a Special Reinforcement Chart indicating which units are received for each possible tank strength.
Example: At the start of the second Preparation Period in 1941 the British have two tank SPs. They call for the 1941 group and will receive one cruiser, one I-tank, and one infantry division two months later.
13.2.2 Axis Victory Points
A. When the British call for special reinforcements, the Axis receives VPs per the Special Reinforcement Chart.
B. The British may elect to receive a smaller group of special reinforcements to give the Axis fewer VPs.
Example: If the British tank strength is 4, the British could choose to receive the 8+ group instead, and the Axis would earn the VPs listed on the 8+ row.
13.2.3 Forfeiting Reinforcements
If the British do not call for the 1941 group in 1941, they forfeit it. They could call for it in November or December 1941, even though the units would not arrive until 1942.
14.0 Replacements
A. Each side receives replacements per the Reinforcement Schedules. Replacements are expended during Buildup Months using the same procedures as for tank replacements during Activity Periods (7.0).
B. Each side may expend any number of RPs per Buildup Turn, there are no limits.
C. During a Preparation Period, any unit at less than its printed maximum strength may receive RPs, regardless of where it is on the map.
14.1 Replacement Types
A. Infantry replacements may be spent for infantry or motor units.
B. Tank replacements may be spent only for tank units of the proper type.
C. The Axis may use German replacements only for German units, and Italian replacements only for Italian units.
14.2 Saving Replacements
A. Replacements may be saved from month to month. Exception: The British may not save infantry replacements; any not used are lost at the end of the month.
B. British infantry RPs scheduled to arrive during an Activity Period are delayed until the next Buildup Month.
C. Use the GRT and Replacement markers to record saved RPs.
D. In any 1941 turn, the British may not accumulate more than 10 tank RPs of all types combined. This limit rises to 15 in 1942.
Design Note: The British government would not send any more replacements if it believed the theater did not need them.
14.3 Tank Repair
If using the optional Tank Repair rule (21.3), a player may accrue the special tank RPs received for possessing the battlefield during Operations (instead of spending them immediately to repair tanks) and spend them during Buildup.
14.4 Additional Axis Replacements
A. The Axis may obtain additional German tank RPs at a cost in VPs. It may do this once in 1941 (in the second Preparation Period or later) and once in 1942 (in any Reinforcement Phase of a Buildup Turn).
B. The Axis may obtain up to 4 RPs each time, forfeiting a number of VPs equal to the number of RPs taken. The Axis announces how many RPs it will take, deducting the VPs from the current score. The Axis may not take more RPs than it has positive VPs.
C. The Axis receives the replacements in the following month.
D. The Axis may not obtain these additional replacements in the first Preparation Period of the game.
15.0 Receiving and Moving Supplies
A. During the Supply Phase, each side receives SUPs at its home base or depots.
B. SUPs may be moved using truck units, the rail line, or by sea (21.4).
C. New depots may be placed on the map and unneeded depots removed.
D. SUPs must always be stored at a depot or carried by a truck; they may not exist on the map in any other form.
E. Any number of SUPs may be accumulated at any depot; a truck may carry a maximum of 1 SUP.
15.1 Axis SUPs
A. The Axis rolls for SUPs during the Supply Phase of each Preparation Period to determine how many SUPs are received for that month. Apply a DRM per the table.
B. In addition, the Axis rolls during the Pre-Operations Phase to determine how many SUPs are received for the upcoming month of Operations Turns. The Axis does not roll for SUPs in the first turn of the game.
C. The Axis may receive up to 2 SUPs per turn at a depot in Benghazi or Tobruk. There is a total of two at the two ports, not two at each one. Additional SUPs must arrive at the Axis home base.
Design Note: The Supply Table represents the effects of British air and naval activity, the amount of Axis air and naval cover available, and other factors beyond the control of the players.
15.2 British SUPs
A. The British receive 3 or 4 SUPs each month per the Reinforcement Schedule. They may take them at their home base, or at any depot located in a box on an active rail line (16.0).
B. If the British have a depot at Tobruk or Bardia, they may take up to 1 SUP at each. (If using the optional rule for Sea Movement, a point taken at Tobruk or Bardia may be sunk, 21.4.)
15.3 Trucks in the Supply Phase
A. All trucks enter the game empty except the Axis truck that enters in the second Operations Turn of the game. It enters full.
B. Truck units carry SUPs from one depot to another. During a Buildup Month, truck units can be full (carrying a SUP) or empty (not carrying a point). Keep a truck unit on its front (full) side when it is carrying a point, and on its back (empty) side when not carrying a point. A truck unit may carry only one SUP at a time. (Note that in the Activity Period, truck units are placed on the map only when carrying a SUP.)
C. In the first Supply Phase of each Preparation Period, place all available truck units on the map, each at a depot. This occurs after placing new depots on the map (Depots in the Supply Phase, 15.6). If not loading supplies at that time, place the trucks empty side up. They remain on the map until the end of the Preparation Period. Trucks are not recycled during the Preparation Period as they are in Operations Periods.
15.4 Truck Movement
A. Each truck unit has a MA of 6 MPs per Supply Phase. Movement costs are the same as during Operations Turns.
B. The restrictions governing combat unit movement apply to trucks as well.
C. Truck units may not move by sea.
15.5 Transporting Supplies
A. To pick up a SUP from a depot, move an empty truck unit to the depot and flip it to its full side. Reduce the number of SUPs at the depot by one.
B. To drop off a point, flip the truck unit to its empty side, and increase the number of SUPs at the depot by one.
C. A truck unit may pick up and drop off SUPs any number of times during its movement, at no extra movement cost.
15.6 Depots in the Supply Phase
A. During a Preparation Period, a player may place new depots on the map and remove depots no longer needed.
B. A depot may be placed at any time during a friendly Supply Phase:
- At any friendly-controlled port, or
- At the home base, or
- In any active rail box (for the British), or
- In a box containing a truck unit. Flip the truck unit to its empty side and place a depot with 1 SUP.
15.7 Removing Depots
Remove a depot any time during a friendly Supply Phase. Any SUPs in it are lost. The number of depots a player may have is limited to the depot counters provided with the game.
Example 1: During the Activity Period, the Axis captures Benghazi. At the start of its first Supply Phase, it places a depot there. It may then receive supplies through the port.
Example 2: The Axis has established a depot at Benghazi, and has brought in 2 SUPs there. The Axis has an empty truck unit at Cyrene and moves it to Benghazi, picking up a SUP. The truck is now full. The Axis moves it to Tmimi, expending half the truck's MA. The SUP is dropped off in Tmimi, and a depot is placed there to store it. The empty truck unit then moves back to Benghazi to pick up another SUP.
16.0 The Rail Line
The British (only) may use the rail line and only to move supplies. (The Axis tried and failed.) The Railhead marker is placed on the map at the beginning of the Campaign Game (20.1).
16.1 Moving the Railhead
A. Beginning in September 1941, the British may move the railhead one box west along the rail line each Supply Phase. The rail line is active as far west as the Railhead marker.
B. The Railhead marker may be moved into a box adjacent to an Axis unit only if a British unit occupies that box.
16.2 Rail Destruction
If an Axis combat unit enters any active rail box, only that portion of the rail line between the British home base and the rail line box east of the Axis unit is active. The Railhead marker is not moved as a result of this; if the Axis unit leaves the rail line box, the line again is active as far west as the railhead.
16.3 Moving Supplies by Rail
The British may move SUPs and depot units along the active railway in any quantity each Buildup Month. Depot units containing SUPs may be moved to any box along the active rail line. (In this way the British might advance a depot westward as they extend the rail line.) This is the only case in which depot units may move.
17.0 Moving Combat Units
Design Note: Movement in Buildup Months represents administrative movement over long distances, without the pressures of battle. The British were good at this and had much more motor transport than the Axis.
This Movement Phase is identical to the Redeployment Movement Phase at the end of each Activity Period, with the following exceptions:
17.1 Unit Limitations
A. The British may move up to three combat units of any size instead of an unlimited number.
B. The Axis may move up to two.
17.2 End of Movement Limitations
A. Units must end their move within four boxes of a depot, their home base, or for British units, Tobruk if British-controlled (but see 17.2.C).
B. Being four boxes from a truck unit at the end of the move is not sufficient at this time.
C. At the end of each of friendly Buildup Month Movement Phase, the British may have no more than six brigades tracing an LOC to Tobruk and not to the British home base. A division counts as the number of brigades it would breakdown to at that instant. If in violation of this limit at the end of a friendly Buildup Movement Phase, the British must eliminate units to conform to this limit. (These limits do not apply to Redeployment Movement at the end of Activity Periods.)
Clarification: The limitations concerning Tobruk that apply at the end of the Movement Phase of Buildup Months apply regardless of the presence of depots or trucks at Tobruk.
Design Note: This rule reflects the number of men that could be supplied by sea through Tobruk. This is necessary to prevent players from placing unrealistically large garrisons in an isolated fortress. The Axis cannot have an isolated Tobruk garrison because the garrison could not have been maintained in the face of the Royal Navy and Air Force.
17.3 Reorganization
Divisions can breakdown and recombine before or after movement in the Movement Phase. The act of Reorganization itself does not constitute movement. When recombining a division and then moving it, that counts as one unit moved.
17.4 Forts and Minefields
A. A unit may enter a box containing an unoccupied enemy fort or minefield. The enemy fort or minefield is immediately removed from the map.
B. A unit may freely enter or leave a fort in its box, even if it does not actually move to another box in that month.
C. Entering or leaving a fort does not count as movement, and this action by itself does not expend supply.
18.0 Forts and Minefields
Forts and minefields are constructed during the Construction Phases of each Buildup Month; both players receive engineer points (EPs) to construct them.
18.1 Engineer Points
The Axis receives 1 EP each Buildup Month; the British receive 2 EPs.
18.2 Saving Points
EPs may be saved from month to month, and even from one Preparation Period to another. However, neither side may accumulate more than 4 EPs. Use the EPs markers on the GRT to record the number of points saved.
18.3 Construction Costs and Requirements
A. To construct a fort or minefield, expend the required number of EPs, placing the counter on the map. The fort or minefield must be placed in a box with a friendly combat unit that has not moved in the Buildup Month.
B. Construction costs in EPs are:
| Side | Fort | Minefield |
|---|---|---|
| British | 4 | 1 |
| Axis | 3 | 1 |
18.4 Minefield Limits
Both sides may construct up to two minefields per turn and no more than one minefield per box.
18.5 Occupying Newly-Constructed Forts
At the time a fort is constructed, any infantry or motor unit in the box having strength 4 or less may be placed inside the fort.
18.6 Reusing Forts and Minefields
The players are limited to the forts and minefields provided with the game. A player may construct a fort or minefield only if the counter is available. Eliminated counters may be reused any number of times. A player may voluntarily remove a fort or minefield from the map during a Construction Phase and use it elsewhere, but only in a later Construction Phase.
Play Note: The British have five forts and four minefields. The Axis has three forts and five minefields.
19.0 Initiating Operations
During the Operations Declaration Phase, either player may declare they are conducting an Activity Period.
19.1 Beginning Operations
A. The Activity Period occupies the following month.
Example: If operations are declared at the end of the June Buildup Month, the new Activity Period occupies July.
B. Before beginning the first Operations Turn, both sides receive reinforcements and supplies due them that month as follows:
- Each side receives SUPs due during the month of operations, placing them in the depots.
- All empty trucks are removed from the map.
- Each side may add to its replacement track any RPs due to arrive. RPs may not be added to units at this time. British infantry RPs are delayed until the next Preparation Period.
- The British make any removals required for the month.
- When using the optional Reinforcements During Operations rule, players determine when reinforcements will arrive (21.5).
- Each side receives VPs as at the beginning of the Buildup Month, but play continues until the end of the following Activity Period.
19.2 First Player
In the Activity Period, the player who announced the initiation of operations is the first player.
20.0 The Campaign Game: The War in the Desert
The Situation: In late 1940 and early 1941, a small British force destroyed most of the large Italian army in North Africa. It seemed the Italians might lose all of Libya. Hitler sent one of his favorite officers to Africa to try to halt the retreat. Thus, it was that in late March 1941, Erwin Rommel found himself at El Agheila in command of a few demoralized Italian divisions and 50 effective German tanks. Opposite him was a skeleton tank division screening the El Agheila front, while the rest of the British Army was ferried to disaster in Greece. Naturally, Rommel saw only one course open: attack. In violation of his government's orders, and over the protests of the Italians, he chased the British clear to the Egyptian border. But, in a heroic defensive battle, the Commonwealth forces – principally the Australian 9th Division, and later the British 70th Division – held Tobruk. Without that port, Rommel could advance no farther. There followed a long period of buildup until the British launched Operation Crusader in November.
20.1 Starting Setup
A. Place the Campaign Turn marker in the April 1941 box of the Campaign Turn Track.
B. Place the Railhead marker in the Matruh box.
C. Each side's supply radius changes during the Campaign Game, as indicated on the Reinforcement Schedules. A change becomes effective at the start of the month for which it is listed.
D. The Axis is the first player in the first Activity Period.
20.1.1 British Setup
The British deploy their units per the setup instructions for the short scenario: Rommel's First Offensive (11.1).
20.1.2 British Reinforcements
Refer to the British Reinforcement Schedule.
20.1.3 British Special Rules
A. During the first Operations Turn of the Activity Period, the units which start at Agedabia and Desert #1 apply a -1 DRM to all fire die rolls.
B. Units which begin at the British home base may not move until the end of the first Activity Period. (Transport was very scarce.)
C. The British have no truck units during the first Activity Period. Truck units arrive as reinforcements. At all times during the game the British may use only the number of truck units received as reinforcements.
D. The British control all ports and airbases in April 1941.
20.1.4 Axis Setup
The Axis deploys units per the setup instructions for the short scenario: Rommel's First Offensive (11.1).
20.1.5 Axis Reinforcements
Refer to the Axis Reinforcement Schedule.
20.2 Victory Conditions
Either side may win the Campaign Game by capturing the enemy's home base or by accumulating VPs.
20.2.1 Holding the Enemy Base
Either side wins by occupying the enemy home base (with a combat unit) at the start of any Preparation Period, after unsupported units have been removed and the Redeployment Movement Phase is completed.
20.2.2 Victory Points
A. Players earn VPs during play. In the VP and Pre-Operations Phases during Buildup Months, consult the VP Chart. Each side scores VPs for the conditions listed.
B. The game score is the current net total of Axis VPs. Subtract British VPs and add Axis VPs to determine the new net total each month. Use the VP markers and VP Track to keep a running total of the score.
20.2.3 VP Requirements
A. The Campaign Turn Track lists the number of VPs required to win the game. After determining the new score during the VP Phase, consult the track to determine whether one side has won the war in the desert. The game cannot be won by VPs before November 1941.
B. Note that there are two levels of VPs required for Axis victory: one used if the Axis controls Tobruk, and the other if it does not.
Design Note: Capturing Tobruk does not score VPs for the Axis. However, the Axis needs fewer VPs to win the game if it holds it; also, Tobruk is a valuable port where supplies can be brought in.
C. If neither side has won by the end of the November 1942 Buildup Month, calculate a new score as during a VP Phase and check the track to determine the winner.
20.2.4 Control
A. A player takes control of a box if at any time friendly units solely occupy it.
B. At the start of the Campaign Game, the British control all boxes except the Axis home base.
20.2.5 Victory Point Lines
A. There are two Axis VP Lines on the map. The Axis scores VPs if no British unit is west of Line #1.
B. The Axis also scores VPs if any Axis unit is east of Line #2. These awards are cumulative.
Example: British units in Gambut or Sidi Rezegh, or an isolated garrison in Tobruk, would all be west of Axis VP Line #1. An Axis unit in Buq Buq would be east of Line #2.
21.0 Optional Rules
These rules simulate individual aspects of the desert campaign which are interesting but not essential to the game. It is strongly recommended you use the rules for tank repair and sea movement, but not until you are comfortable with the standard rules.
21.1 Army Artillery
Design Note: Rommel maintained an army artillery, a collection of 30 to 60 medium and heavy guns. Originally intended for siege work, the artillery came to be used as a central artillery reserve. Late in the campaign, the British developed procedures which gave them a similar capability.
The Axis has one army artillery unit and the British have two. Each of these may support one other unit. An army artillery unit firing in support of another unit adds its fire strength to that of the other unit in the battle. This is an exception to the general rule that every unit fires individually.
21.1.1 Artillery Firing Alone
When not supporting another unit, army artillery fires at its target with an offensive fire strength of 1, and a defensive fire strength ½ its current strength. It uses the infantry fire row when firing alone.
21.1.2 Die Roll Modifiers
When an army artillery unit fires in support of another unit, compute DRMs for the artillery as if it were infantry. Then compute modifiers for the supported unit. The lesser of the two modifiers is used to resolve the fire.
Example: Army artillery supports an Italian motorized unit attacking infantry. The Italian unit has a DRM of -2 (for Italian motorized fire), while the artillery has a DRM of 0. Use the DRM of-2, the lesser of the DRMs.
21.1.3 Vulnerability
Army artillery cannot be fired at if any other friendly combat unit is involved in the battle. All other units – even disrupted units – must be destroyed first.
21.1.4 Movement
Army artillery may move only once per Operations Turn or Buildup Month. Rommel adds 1 to the MA of Axis army artillery.
21.1.5 Retreat
For purposes of retreat, army artillery is treated as infantry.
21.1.6 Replacements
Army artillery units may receive infantry RPs.
21.2 Halfaya Pass
Design Note: Halfaya Pass was a uniquely strong position – difficult to flank – blocking the coastal highway. Its defenders and their 88 mm guns became famous in Afrika Korps.
Any infantry unit attacking from Buq Buq to Fort Capuzzo must apply a -1 DRM to its fire die roll. Armored units must apply a -2 DRM.
21.3 Tank Repair
Design Note: Italian tank maintenance was so poor that in Rommel's initial offensive, the Ariete division lost 80% of its vehicles along the road from El Agheila to Tobruk. Occupying the battlefield to recover one's wrecks was an advantage worth fighting for: one Rommel usually enjoyed.
At the end of each impulse, German or British (not Italian) tank units occupying a box in which a battle was fought regain ⅓ (rounded down) of the SPs lost. This means that at least 3 SPs must have been lost in order to regain any.
Play Note: If a tank unit overruns a defender and continues movement, that unit forfeits the chance to repair losses from the overrun battle.
21.3.1 Multiple Type Losses
When more than one type of tank SP was lost in a battle, ⅓ of the total losses of all types is repaired. The British must make their repairs in proportion to the losses suffered by each type.
Example: A Grant and a Cruiser lost 3 SPs each and the Axis retreated. The British may repair 1 SP of each type. If the Grant lost 1 SP and the Cruiser 2 SPs, the British would repair one Cruiser SP. If each unit lost 2 SPs, they could repair one of their choice.
21.3.2 Possibilities
A. A tank unit completely eliminated in battle may be reconstituted by tank repair. At least one other friendly unit must occupy the box at the end of the impulse. Place the eliminated tank unit back in the box with its repaired points.
B. Except for the above case, a unit which regains lost SPs through tank repair must actually occupy the battle box at the end of the impulse.
C. Repair points do not have to go to the unit that actually lost them; SPs lost by one unit may be picked up by another of the same type, but this other unit must occupy the box in which those SPs were lost at the end of the impulse.
Example 1: Two British tank brigades of strength 5 are eliminated, but other units hold the field. The British could return one of the eliminated units to the box with strength 3, or both with strengths 1 and 2 respectively.
Example 2: The British have 4-point Cruiser units in Tobruk and at King's Cross at the beginning of their impulse. One Cruiser moves to Knightsbridge and loses 3 SPs overrunning Axis units. It moves on to Retma. The second British Cruiser unit moves to Knightsbridge. At the end of the British impulse the second Cruiser unit may recover the tank points the first Cruiser lost.
21.3.3 Additional Replacements Through Repair
A. In the Campaign Game, a side occupying the field of battle may recover an additional ⅓ of its tank losses (rounded to the nearest whole number) as tank replacements; add the number to that side's replacement pool. These points are in addition to normal tank repairs. The player need only occupy the battle box at the end of the impulse, not at the end of the Operations Turn or Activity Period.
B. These points may be spent during the next Preparation Period, but not in the same Activity Period. Points recovered this way should be recorded (on paper or electronically) and added to the replacement pool after the end of the current Activity Period.
21.4 Sea Movement
A. If the British control Tobruk or Bardia, they may move units and SUPs by sea. Sea movement may be accomplished only during Buildup Months.
B. They can use three ports for sea movement: Tobruk, Bardia, and the British home base. A unit may move by sea from one port to any other.
C. No more than two brigades may be moved by sea during any Buildup Month.
D. If using these rules, all British reinforcements must arrive at their home base.
21.4.1 Sea Movement and Land Movement
Units moved by sea do count against the number of British units which may be moved in a Movement Phase. A unit may move on land before or after its sea move.
21.4.2 Axis Effects on Sea Movement
A. If Axis units occupy any box within three boxes of the port from which the unit begins or ends its sea move, the unit may be eliminated during its sea move. Under these circumstances, the Axis rolls one die for each unit moving by sea, on a 6, the unit is eliminated; any other result has no effect.
B. If Axis units occupy Sidi Barrani, Piccadilly-Oxford Circus, Siwa Track, and Bir el Khamsa, a sea-moving unit is eliminated on a 5 or 6. (The Axis would have complete control of the air over Tobruk and its sea lanes.)
C. An eliminated unit does count against the limit of units which can be moved by sea.
21.4.3 Moving Supplies by Sea
A. The British may, instead of moving combat units by sea, move SUPs by sea to a depot at Tobruk or Bardia. One SUP counts as one brigade moved for this purpose.
B. If the British move a SUP to a depot at Tobruk or Bardia, the Axis should check if the SUP is eliminated the same as a combat unit.
21.5 Reinforcements During Operations Turns
Design Note: For the sake of simplicity, the standard rules for the Campaign Game provide that reinforcements due during a month of Operations Turns are delayed. To add uncertainty and realism, this rule allows reinforcements to enter during Activity Periods.
A. Reinforcements scheduled to arrive during a month in which Operations Turns are occurring do arrive. For each scheduled reinforcement (including trucks), secretly roll one die and record the result. The result determines the Operations Turn of the current Activity Period the reinforcement arrives.
Example: On a 4, a unit would enter on the fourth Operations Turn.
B. If the Activity Period ends before the reinforcement is scheduled to arrive, the unit arrives in the next Preparation Period.
21.5.1 When Reinforcements Arrive
Reinforcements arrive at the beginning of the Operations Turn. Use the Operations Turn marker to record the passage of Operations Turns.
21.5.2 Where Reinforcements Arrive
A. Reinforcing combat units arrive at that side's home base.
B. Alternately, British reinforcements may arrive at Tobruk or Bardia, and Axis reinforcements at Benghazi or Tobruk.
C. In all cases, reinforcements may arrive at a port only if it is friendly-controlled it at the start of the Operations turn. No more than two units may arrive at Tobruk in an Activity Period, and only one unit at Bardia or Benghazi.
D. If using the sea movement rules, British reinforcements must arrive at their base.
21.5.3 Trucks
Truck units arrive at any friendly depots, as usual.
21.6 Campaign Game Variations
Design Note: What if the Axis had sent Rommel another panzer division or several thousand more trucks? What if the British had not thrown away their desert army in Greece or General O'Connor had not been captured at the start of the campaign? Try these rules and find out.
21.6.1 In General
A. 21.6.2 and 21.6.3 list possible historical events which could have influenced the desert campaign. These are game variations. Before and during play of the Campaign Game, each side may choose a number of variations which apply to their side.
B. Each variation is assigned a value in variation points (VARPs). Before setup, players should agree on how many VARPs each will have available. Each player then chooses a number of variations up to that number.
21.6.1.1 Deciding the Number of Variation Points
To decide the number of VARPs allowed:
A. Agree on a number, or
B. Roll two dice to determine the number of VARPs (note that this limits the number of VARPs to 12), or
C. One player decides the number of VARPs, and the other player has the choice of sides.
21.6.1.2 When Variation Points Are Spent
VARPs may be spent at any time during the game unless specifically indicated otherwise. Obviously, variations which speed the arrival of reinforcements cannot be selected after the reinforcements have arrived.
21.6.1.3 O'Connor's Offensive
The Axis must announce prior to setup if it has chosen Different Outcomes of O'Connor's Offensive (21.6.2.3). The British must then announce if they have chosen Fewer British Troops Sent to Greece (21.6.3.1).
21.6.1.4 Reinforcement Variations
If either player chooses a variation affecting their reinforcement schedule, they need not announce it until the turn in which the change becomes effective.
21.6.1.5 Cheat the Cheat
As a check on honesty and to avoid any errors, players should record the variations as they are chosen.
21.6.2 Axis Campaign Game Variations
21.6.2.1 Increased German Effort in the Mediterranean
Any number of these may be chosen.
| VARPs | Variation |
|---|---|
| 14 | Germans commit an additional panzer division in 1941. This variation cannot be chosen until September, 1941. Roll one die; the division arrives that number of months later. |
| 10 | Germans commit an additional panzer division in 1942. This variation may be chosen only in 1942. This variation may not be selected if the additional panzer division was selected for 1941. Roll one die; the division arrives that number of months later. |
| 8 | Germans increase supply capacity. This variation may be chosen only in 1942; one truck arrives immediately. |
| 6 | Germans commit an additional infantry division. This variation may be chosen in any month after the 90th Light Division has been upgraded. The division arrives immediately. |
| 6 | Germans increase Luftwaffe and Kreigsmarine effort. Apply a +1 DRM to all supply die rolls. This cancels the British game variation requiring die rolls for replacements. |
| 6 | This may be selected in June 1941 only. The Axis forfeits 1 SUP from those received that month. In July 1941, the British must withdraw two full-strength infantry brigades or, if they cannot, remove six infantry brigade SPs. The withdrawn units return in October 1941. At that time the British roll one die, halving the result (rounded up). The result is the number of SPs which do not return in October. |
| 4 | Upgrade one infantry division to a motorized division in November 1941 instead of March 1942. |
21.6.2.2 Increased Replacements
A. For every 2 VARPs, gain one additional tank RP.
B. For 1 VARP, gain one additional infantry RP.
21.6.2.3 Different Outcomes of O'Connor's Offensive
Only one of these may be chosen.
| VARPs | Variation |
|---|---|
| 10 | Axis units may deploy in Beda Fomm, Antelat, Agedabia, Soluk, or Benghazi: British units may deploy in or adjacent to Tobruk, or within two boxes of Derna or Mechili (this includes any additional units received through British variations). The depots which deploy at Msus and Barce can deploy at Mechili or Derna. |
| 1 | Italian infantry (4) is included with the Axis starting forces. The Axis must delete one Italian infantry (4) from its reinforcements. |
| 7 | Axis may deploy in Beda Fomm, Antelat, or Agedabia: British units which deployed in Agedabia and Desert #1 deploy within two boxes of Mechili or Benghazi. |
Design Note: The German intervention in Levant variation assumes the Germans support the Vichy French in the Levant with an airlanding division against the British invasion. It also assumes the Germans have gained a base in Cyprus through General Student's "Stepping Stone" plan.
21.6.3 British Campaign Game Variations
| VARPs | Variation |
|---|---|
| 4* | British support Malta With Greater Air and Naval Forces: Axis applies a -1 DRM to all supply die rolls. When the British control two airfields, the Axis applies a -2 DRM. |
| 7* | Same as British Support Malta With Greater Air and Naval Forces, plus the Axis rolls one die per RP. On a 6, the RP is lost. The Axis variant Increased Luftwaffe and Kriegsmarine Effort cancels the replacement die roll. |
| 5 | Do not withdraw the infantry division in February 1942. |
* These variations are mutually exclusive.
21.6.3.1 Fewer British Troops Sent to Greece
Add units to starting setup, deployed within two boxes of Benghazi or Tobruk.
| VARPs | Variant |
|---|---|
| 9 | One Infantry division: This division may be broken down. |
| 4 | Add one Cruiser (5): Delete the Cruiser reinforcement in December 1941. |
21.6.3.2 O'Connor Not Captured
| VARPs | Variation |
|---|---|
| 8 | O'Connor arrives as a reinforcement in May 1941. He has the same abilities as Rommel in every circumstance, only with British units. |
21.6.3.3 British Send Reinforcements Through Mediterranean
A. For every 2 VARPs, one brigade (a division may be broken down and arrive as brigades), one truck, or 3 RPs (of any type) scheduled to arrive two months later arrives one month early.
B. For each accelerated brigade, truck, or group of RPs, the British roll one die. On a 5 or 6, the accelerated units or RPs do not arrive. If the Axis selected the Increased Luftwaffe and Kriegsmarine variation, apply a +1 DRM. The May 1941 reinforcements cannot be accelerated.
21.6.3.4 Additional Replacements
For every 2 VARPs, gain one additional tank RP.
22.0 Glossary
| Term | Meaning |
|---|---|
| Armor | One of three possible types of units, indicated by a silhouette (2.3). |
| Base | Each side has a base where reinforcements arrive. The British base is considered a port for sea movement purposes. |
| Battle Reinforcement | Tank units, Rommel, and O'Connor may intervene in an ongoing battle using the rules for Battle Reinforcement (5.4). |
| Box | Each rectangular space on the map is a box. |
| Brigade | A British infantry unit of strength 1-3 (2.3). |
| Buildup Months | Subdivisions of the Preparation Period in which players ready themselves for the next campaign (12.0). |
| Construction | The placement of minefields and forts on the map during a Buildup Month (18.0). |
| Control | A box is controlled by the last side to solely occupy it (11.0). |
| Cruiser | One of three types of British tanks (2.3). |
| Depot |
23.0 Comprehensive Examples of Play
23.1 Activity Period Example
A. The Axis is the first player and begins the first impulse by moving a stack of two German tank units, an Italian tank unit, a truck unit, and Rommel, expending 1 SUP from the depot in El Agheila to make this move. The units begin in Trigh Enver Bei and move to Desert #4, then to Retma, where there is a British brigade.
B. In one round of combat, the brigade is destroyed. This is an overrun, so the Axis may continue moving these units. The Italian unit stops in Retma because it has expended all three of its MPs. The Germans continue to Bir el Gubi, and attack another brigade. They overrun it as well, but a British tank unit reinforces from Gabr Saleh, halting German movement. The Axis then moves its German motor division and army artillery from Gazala to Acroma, attacking British units in Acroma. They resolve the initial round of battle. Because the Axis does not wish to move any other units, it now completes the battles in Acroma and Bir el Gubi. The British unit in Bir el Gubi retreats to Sidi Rezegh; the British units at Acroma retreat to Fort Pilastrino. All the German tank and motor units have Moved 1 markers placed on them; the other units moved by the Axis are flipped to their moved sides.
C. Now it is the British impulse. They have a stack of four units in Knightsbridge, and move all of them, two to Fort Pilastrino, and two to Sidi Rezegh, expending 1 SUP from the depot at Tobruk. They also place a truck unit on his depot in Tobruk, expends another SUP from the depot to fill up the truck, moving it to Sidi Rezegh. The British impulse is over.
D. The Axis begins its second impulse by moving one tank unit and the truck from Bir el Gubi to Sidi Rezegh. It fights one round against British units there. Neither side retreats. The Axis then moves its second tank unit to Gabr Saleh and on to Gambut. Neither unit is yet fatigued; both could have moved their full MA. Having moved all the desired units, the Axis resolves the battle at Sidi Rezegh forcing the British units and the truck to retreat to King's Cross. The second tank unit might have reinforced, and would still not have become worn. Resolution of battle concludes the Axis impulse, both German tank units are flipped to their moved sides.
E. The British do not want to move any units, so they pass. The Axis clears mines in Sidi Rezegh and moves a truck, but does not move or recover any combat units. It, too, has passed, and the Operations Turn is over. The players flip all units to their unmoved sides.
F. A new Operations Turn begins. The British wish to use tank RPs to restore an eliminated Cruiser to play; they place the unit in the Fort Capuzzo box (an active rail line box), flipped to its moved side.
G. The Axis passes. The game continues.
23.2 Combat Example
A. A worn German tank (10), and a German motor (7) attack a British I-Tank (5) and infantry brigade (3) in a British minefield.
B. The British fire their I-Tank at the German tank. The only applicable DRM is +1 for defensive fire. The roll is a 5, modified to a 6. This scores one hit. The infantry fires at the tank and rolls a 3, scoring no hits.
C. The Axis fires its tank at the I-Tank. The DRMs are -1 because the German unit is worn, -1 for the minefield, and -1 for fire against an I-Tank. The roll is a 5, modified to a 2, for one hit. The Axis motor unit fires at the infantry. The roll is a 2, modified to 1 because of the minefield: no hits.
D. The Axis has no units in an adjacent box, so cannot bring in reinforcements. The British has a Grant and Cruiser in an adjacent box. They announce they will reinforce with the Cruiser, but roll a 5, failing the battle reinforcement die roll, so the Cruiser does not move. The Grant cannot be brought in until next round because the British did not announce it as attempting reinforcement.
E. In the second round neither side scores any hits. The British try to reinforce with a Grant (moved), and roll a 2. The Grant is moved into the box as a battle reinforcement. The Axis has had enough, announcing the intention to retreat.
F. In the retreat round all British units fire against the tank. The I-Tank and infantry have -1 DRMs for the retreat round, and a +1 for defensive fire for a net of 0. The Grant has the retreat round DRM (-1), the +1 Grant modifier, but does not receive the +1 defensive DRM, also for a net of 0. The three fires score three more hits. The Axis scores no hits.
G. The players are using the optional tank repair rules. The British lost only one tank SP, so regain nothing from tank repair. The Axis lost 4 SPs, but left the box, so cannot repair its tanks. The Grant unit was moved when it entered battle, and now becomes worn.
24.0 Game Background
24.1 The Game System
A. I intended Rommel in North Africa, above all else, to be a relatively simple game that would invite players to concentrate on essential military problems. I wanted players to become engrossed right away in maneuvers, and devote their attention to moves instead of remembering the rules.
B. This required a design that would focus attention on essentials. I chose the point-to-point movement system to give players choices among broad alternatives, instead of hex-by-hex detail. (Should the attack go along the sea coast, through the middle of the line, or far around the desert flank?) In the same way, the players are given divisions and brigades to work with, not regiments or battalions. The choice becomes: Where will the 15th Panzer go? This is a decision more appropriate to army command than: Where will the 33rd Reconnaissance battalion go?
C. Within this structure I wanted players to feel what it was like to command these armies in the desert. The operations system is at a time scale of a few days per turn. This gives you reasonable control over the day-to-day developments of battle – a control the commanders exercised, too.
D. The turn sequence, the heart of the game, was designed to show the confusion and uncertainty of warfare in the desert. I felt a classical turn sequence would make the game too predictable.
E. The impulse system, with restrictions on how many units move per impulse, demonstrates the very different natures of the two armies. Eighth Army was cumbersome, while D.A.K. was flexible. Eighth Army fought dispersed, while Rommel was able to coordinate dispersed units in concentrated efforts. Eighth Army attacked piecemeal while Rommel attacked with everything he had.
F. It was essential that the game show basic differences between the two sides – differences beyond attack factors and MAs. To be realistic, a game must show how the two armies operated. It must show why one outfit won its battles, and the other lost.
G. The impulse system puts each player on the horns of dilemma. The Axis has great freedom in what and when it can move. But it has very few units. The British, in contrast, must choose which two or three pieces are the most important to move right now. If you find these dilemmas engrossing, if you sense the confusion and uncertainty of desert fighting, and if you can feel the vast differences between D.A.K. and Eighth Army, then your time and mine have been well spent.
24.2 The Units
A. Unit strengths are based on leadership, doctrine and training, weaponry, and manpower. Many British units had plenty of equipment but poor doctrine for using it. The most important reason for the Italians' poor performance was their leadership: the officers treated the men badly, were corrupt and incompetent, and the men knew it.
B. A single SP represents different numbers of men and equipment for the different nationalities and types of units. One German tank point represents about 10-15 vehicles, for instance, while a British point represents 20-30. An entire Italian division musters only 3 SPs, the same as a British brigade or German regiment. Therefore, combat strengths represent more than just numbers of men. You use the same line of the CRT to fire at the infantry of all three nationalities, but they are taking casualties at different rates. And while British tank-to-tank fire uses approximately the same columns as German fire, the Germans are killing a lot more tanks.
C. The CRT and combat rules also show important relationships among the various unit types. One fundamental tactical reality was that infantry could fight successfully against mechanized forces only when strongly fortified. When properly positioned, however, British infantry in particular exhibited awesome defensive might. They had an astounding defensive weapon in the 25-pounder gun, and their courage in holding ground was matchless. Among the most moving episodes of the desert war are those in which British gunners, forsaken by all supporting arms, stood to their weapons, knocking out German tanks until the panzers moved right in among them and killed the gun crews to the last man.
D. The CRT itself was calculated from analysis of actual battle outcomes. (The North African campaign is very well documented so lots of good solid data is available.) It includes as tank losses both the vehicles hit by enemy fire and those broken down on the battlefield. This is yet another reason why the British lose tanks at a higher rate than the Germans: most of their tank models broke down more frequently.
24.3 The Tanks
A. Throughout the campaign, British tanks, while not as reliable, were about as good as German – vehicle for vehicle. Yet German tank formations were far superior – unit for unit. This was due to superiority of German anti-tank guns and tactics.
B. We've all heard of the fearsome 88, which indeed could dominate a battlefield. Much more numerous, however, was the 50mm PAK (Panzerabwehrkanone, anti-tank gun). It killed tanks effectively and its low silhouette was very hard to hit. The PAK would cover the advance of the German tanks, and then, in turn, leapfrog forward under cover from the tank guns. British tanks carried only AP ammunition – no HE – and their tank units included very little artillery; they had no good weapon for knocking out the anti-tank guns.
C. If German tanks ran into a strong opponent they dropped back behind the PAK screen. All too often British tanks charged right ahead into a concealed line of PAK. Only by late 1942 did British tactics learn caution, sparring against the PAK screens. Such tactics became standard for the rest of the European war.
D. British tanks suffer an adverse DRM when attacking because they carried a weak 2-pounder (40mm) gun, and, before these light guns could do any real damage, heavier German weapons would harvest the British vehicles. All British tanks, except the Grant, were weak against infantry because they carried no HE ammunition, only armor piercing shot; the DRMs reflect this.
E. On each side, tank guns gradually grew more powerful and armor grew thicker. For the most part each side's upgunning/uparmoring kept pace with the other, so that relative strengths remained unchanged. Significant departures from this norm appear as DRMs in the game, such as the Grant tank.
F. Here is a summary of the principal tank types that appear in the game. All speeds are cross-country; road speed would be roughly double those presented here.
24.2.1 British Tanks
24.2.1.1 Cruiser Units
These units used mainly the Crusader and Stuart (furnished by the United States) types.
A. Crusader: 19 tons, one 2-pounder gun (40mm), 40-49mm maximum armor, 12 mph. The Crusader frequently broke down and was prone to burn when hit.
B. Stuart: 12.5 tons, one 37mm gun, 44mm maximum armor, 15 mph. The Stuart was classified as a light tank, but its gun was about as effective as the Crusader's and its armor almost as thick. It seldom broke down.
24.2.1.2 I-Tank
These units included primarily Matilda and Valentine tanks. In theory, the job of the infantry tank was to give close support to infantry, while Cruisers destroyed enemy armor. As a result, the Cruisers did not learn to work with infantry. The I-Tanks proved effective against enemy armor, however.
A. Matilda: 26.5 tons, one 2-pounder, 78mm armor, 6 mph. The Matilda achieved great things in 1940-41, especially against the Italians, who simply had no weapon capable of defeating it. Its slow speed eventually made it obsolete as guns grew more powerful. Overall, it was perhaps the most successful British design of the desert war.
B. Valentine: 16 tons, one 2-pounder, 65mm armor, 8 mph. Not an especially bad design, but like all British tanks, it had a 2-pounder gun that fired only AP shot.
24.2.1.3 Grant Units
British tank crews welcomed the Grant with much enthusiasm and relief. At last, they had a tank which clearly could outperform most German models. Many of the Grant SPs arriving at the end of the campaign are in fact Shermans; at this scale, the two can be treated as identical.
A. Grant: 28.5 tons, one 75mm in hull sponson, one 37mm gun in turret, 57mm armor, 10 mph.
B. Sherman: 33 tons, one 75mm gun, 50mm armor, 11 mph.
24.2.2 German Tanks
Many models served in the desert but the three listed here were the most numerous. The PzIIIG was typical of German vehicles in 1941; the III (Specials) began to arrive only in mid-1942. There were no Tiger units in the Tunisian campaign.
A. PzIIIG: 20 tons, one 50mm short-barreled gun, 30mm armor, 11 mph.
B. PzIIIJ: 22 tons, one 50mm long-barreled gun, 50mm armor, 12 mph.
C. PzIVE: 22 tons, one 75mm short-barreled gun, 60mm armor, 10 mph. Its primary mission was close infantry support.
D. M13/40: 13.5 tons, 47mm gun, 40mm armor, 8 mph. Many of these vehicles were very badly built and literally fell apart in combat.
E. The German PzIVF (with long-barreled 75mm gun) would rate the same DRMs as the Grant. But only thirty took part in the whole campaign and those only in its last battle, Second Alamein.
F. Italian tanks called Rollende Saerge (rolling coffins) by the Germans, were obsolete before the campaign started.
24.4 The Map
A. The map has been designed to show the most important characteristics – for purposes of military planning – of each region of the desert. It certainly does not depict every important position, nor every transportation route. What it does depict, though, is the region's natural fortress areas: Tobruk-Bardia, the Dema-Mechili-Tmimi triangle, El Alamein, and the weakness of the linear positions at Gazala and Matruh. Players will find the wide-open areas, such as that between Matruh and El Alamein, easily outflanked or penetrated.
B. Inland from Benghazi, the Libyan desert contains extensive mountain areas, called the Djebel el Akhbar. Much of this region was impassable to military formations. The map boxes and connections reflect this barrier. Units cannot move from Et Charraba to nearby Msus, for example, because the mountains block the way. I have chosen to make the boxes in the djebel area the same as any other for combat purposes, however. These boxes do have more rough terrain than many other boxes, but the difference is not great enough that combat is affected. Most other boxes contain some sort of prominent terrain features too (which is why they appear on the map).
C. Nearly every connecting line corresponds to at least a track. Even when moving through desert boxes, units are not wandering over trackless waste. The desert boxes cost 2 MPs because they represent larger areas, and greater distances to cover.
D. In order to make the boxes fit on the map, I've had to distort the locations considerably along the north-south axis. Bir Hacheim, for instance, is much closer to the coast than its location on this map would indicate, but it is placed correctly relative to the other boxes. It plays its historically important role of blocking a flank maneuver nevertheless.
E. Yes, it took some work to find names for all the boxes. Not every box corresponds to the exact location of the place after which it is named. I'm sure that an industrious critic could argue in several cases that box x and box y ought to be joined, according to their names. If such criticisms occur to you, kindly remember that (1) each box represents a considerable area of desert, and (2) the linkages have been designed to give correct overall effects, which they do, whereas the names are chrome, and (3) if things really are upsetting, ignore the names.
24.5 The Big Picture
A. Rommel came to Africa to save the Italian colony of Libya. Italy had begun its war by tromping across the Egyptian border as far as Sidi Barrani. Then Sir Richard O'Connor's offensive of December-February 41-42 had thrown them back, in game terms, all the way to the Axis base and destroyed most of their army. But about the time Rommel arrived in Africa, most of the British desert army was sent to Greece, and most of it was destroyed there.
B. In this situation, Rommel of course decided to defend by attacking. He chased the British back to Tobruk, far beyond the area he had been given to defend. But to sustain himself in front of Tobruk required resources far beyond those he had been given.
C. To justify his demand for more troops, more trucks, and more supplies, Rommel proposed the capture of the Suez Canal and then eastward. He might either head for the Caucasus to support the Russian front, or take the other British possessions in the Near East and threaten India.
D. These operations were probably beyond available logistic support. But they were certainly of great concern to the British, who made Africa their top priority theater and spent enormous resources to defend possessions there. Having poured so many men and so much materiel into the Mediterranean to defeat Rommel, the Allies then undertook more extensive operations there than they otherwise would have contemplated. Eventually over a million Allied soldiers served in the theatre. Rommel had a considerable indirect influence on Allied strategy.
25.0 Bibliography
Astell, John M. and Frank Chadwick. Western Desert Game. Bloomington, II.: Game Designers' Workshop, 1983.
Barnett, Carrelli. The Desert Generals. New York: Ballantine, 1983.
Liddell-Hart, Sir B.H. The North African Campaign. Dehra Dun, India: Natraj, 1978.
– (ed.) The Rommel Papers. New York: Harcourt, Brace, 1953.
Madej, Victor W. Italian Army Order of Battle 1939-1945. Allentown: Game Marketing Company, 1981.
Maughan, Barton. Tobruk and El Alamein. Canberra: Australian War Memorial, 1966.
Mitcham, Robert. Triumphant Fox. New York: Stein & Day, 1984.
Phillips, C. E. Lucas. Alamein. London: Wm. Heimemann, 1962.
Playfair, Maj. Gen. I.S.O. The Mediterranean and Middle East (Vols. II, Ill). London: HMSO, 1960.
Scoullar, J.L. The Battle for Egypt. Wellington, New Zealand: War Histories Branch, 1955.
Tuker, Sir Francis S. I. Approach to Battle. London: Cassell, 1963.
– The Pattern of War. London: Cassell, 1948.
Van Creveld, Martin. Supplying War. Cambridge: Cambridge University Press, 1977.