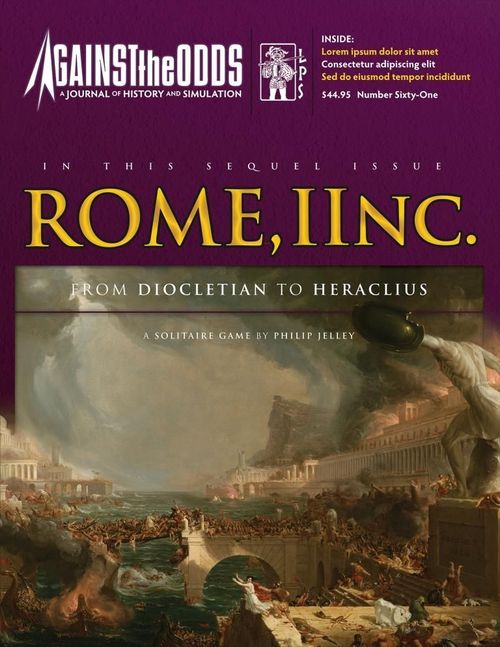
Rome, IInc.: From Diocletian to Heraclius
Rome, IInc.: From Diocletian to Heraclius Rulebook
Table of Contents
Table of Contents
Read This First
We've organized the overall structure of the rules of this LPS simulation game to follow this game's sequence of play in introducing concepts. The rules themselves are written in a format known as the Case System. This approach divides the rules into Modules (each of which deals with a major important aspect of play).
Modules are numbered sequentially as well as possessing a title. Each Module is divided into Sections (that deal with a major sub-topic inside the Module) which are also numbered sequentially. Modules and Sections are introduced by some text that briefly describes the subject covered by that particular Module or Section. Finally, the majority of each Section consists of Cases. These are the specific, detailed rules that govern play. Each Case is also numbered sequentially. The numbering follows a logical progression based upon the number of the Module of which the Cases are a part. A Case with the number 7.5.1, for example, is the first Case of the fifth Section of the seventh Module of the rules. The numbering system is designed as an organizational aid. Use it to determine where a Case is located in the rules.
3.1.4
The example above is the number of the fourth Case of the first Section of the third Module of the rules.
Learning to Play the Game
Begin by familiarizing yourself with all of the components listed for this game. Then skim through the charts and rules, reading all the titles of the Modules and Sections. Set up a game scenario or portion of a scenario (after reading the applicable Module) and play a trial game against yourself. During this trial game, try referring to the rules only when you have a question and remember the numbering system we employ makes it easy to look up rules when you do. While a trial game may take you an hour or two, it is the quickest and most pleasant way to learn (short of having an experienced friend teach you). We also don't recommend attempting to learn the rules word-for-word. Memorizing all the details is an effort that few can do. We've written these rules to be as comprehensive as possible, but they are not designed to be memorized. Taking in the rules in this way (as you play along) is the best approach to mastering this game. We're always open to suggestions on how to improve the comprehension of our rules. Write to us (see addresses below) if you have an idea on how we can communicate better with you.
If any of the supplied parts are missing or damaged, write to:
LPS, Inc. 425 Steeplechase Lane Pottstown, PA 19464 · USA Attn: Rome, IInc. Or e-mail us at: [email protected]
We hope you enjoy this game. Should you have any difficulty interpreting the rules, please write to us at the above postal address, or send an e-mail to: [email protected], phrasing your questions so that a simple sentence, word, or number can answer them. If you send a letter by mail, you must enclose a stamped, self-addressed envelope to receive a reply. We recommend e-mail as the best way to resolve a query. Although we welcome comments and suggestions about the game's interpretation of events, we cannot promise to respond to questions on theory or design intent. Additionally, check out the Against the Odds and Rome, IInc. discussion folders at consimworld.com.
1.0 Introduction
1.1 Components
Rome, IInc. contains the following:
- This Rulebook
- One Map (22" x 34")
- One Countersheet with 280 ½" square counters
- One 4-page Player Aid Chart (PAC) insert
1.2 Dice
Rome, IInc. requires one purple and two white six-sided dice to play. A 1D6 is the roll of one die, a 2D6 the roll of two dice and a 3D6 the roll of three dice. A 1D3 is the roll of one six-sided die, with 1-2 counting as a one, 3-4 as two, and 5-6 as three.
Note: Not included with this game but required for play are two white six-sided dice (2D6) and one colored six-sided die (1D6). We've used the word "purple" for that die in the rules and on the map but you can choose any other color so long as it is distinct from the white dice.
1.3 Players
The Eastern and Western Players each control their own Empire and make the die rolls and decisions affecting it, effectively playing two solitaire games side-by-side. Both Players have access to Roman Statesman in the Statesmen Box and Units in the Barracks Box and may Exchange Gold and Transfer Units to each other.
1.3.1 The Eastern Player sits on the right, controlling Roman Statesmen in Eastern Command Boxes, Units and Provinces in the Eastern Empire, and counters on the Eastern Game Track.
1.3.2 The Western Player sits on the left, controlling Roman Statesmen in Western Command Boxes, Units and Provinces in the Western Empire, and counters on the Western Game Track.
1.3.3 Playing Solitaire The same person plays the Eastern and Western Players.
2.0 Units
2.1 Overview
There are 84 Units representing the military forces of Rome; six Cavalry, six Guards, 20 Legions, 20 Pseudo Legions (with 20 Forts on their reverse), 20 Auxilia, and 12 Fleets. Units are placed in Provinces to prevent Pillage and Revolts, and fight Wars and Civil Wars. They are Promoted, Demoted, Destroyed, and Dismissed by Events, Wars, and Civil Wars.
2.1.1 Barracks Box Place Units in the Barracks Box on the map as indicated in the scenario set ups (Section 13.1) and when Dismissed as the result of Losses (Section 11.3). They are not in play but may be Built in the Unrest Phase (Section 10.6).
2.1.2 Ordinary Units use the front side of their counter and have one icon. Only Ordinary Units in the Barracks Box may be Built in the Unrest Phase (Section 10.6). They are Promoted by a War 3D6 (Section 11.2) or Civil War 3D6 (Section 11.4).
2.1.3 Veteran Units Veteran Cavalry, Guards, Legions, Auxilia, and Fleets use the reverse side of their counter with two icons and are Demoted by the Plague Event (Event Chart) and Losses (Section 11.3). They count double for Naval Strength (3.2.3), Cavalry Strength (Case 3.2.4), and on the Wars and Civil Wars Charts (PAC). They also affect the Assassination, Revolt, and Rebellions Charts (PAC).
2.1.4 Rebel Units are Units in Rebel Provinces (Case 4.2.7).
2.1.5 Loyal Units are Units in Loyal Provinces (Case 4.2.8).
2.2 Unit Types
2.2.1 Cavalry cost 30 Gold to Build and 6 Gold to Pay or Transfer to another Empire but may Transfer for free to another Command in the same Empire (Case 10.7.2). They affect the Assassin, Pillage, Wars, Civil Wars, and Rebellions Charts (PAC), and match the Cavalry Strength of Wars (3.2.4).
Note: Cavalry represent 6,000 heavily armoured cataphracts, medium cavalry, and light horse archers massed in a cavalry reserve, including bucellarii. They are very expensive, but protect Governors from Assassination, fight Wars and Civil Wars, and are needed to fight Cavalry Wars. Their mobility makes them easy to Transfer but ineffective against Revolts as they rush from one crisis to another.
2.2.2 Guards cost 25 Gold to Build and 5 Gold to Pay or Transfer to another Empire but may Transfer for free to another Command in the same Empire (Case 10.7.2). They affect the Assassination, Pillage, Revolts, Wars, Civil Wars, and Rebellions Charts (PAC) and prevent Unrest from Provinces with Legion icons if Valentinian Dynasty is in play (Case 10.1.4).
Note: Guards represent 6,000 cohortes praetoriae (Praetorian Guards), scholae palatinae (palace guards), legiones palatini (palace legions), and auxilia palatini (palace auxilia). They were no longer the makers and breakers of Emperors and are expensive, but protect Emperors from Assassination, fight Wars and Civil Wars, and are easy to Transfer.
2.2.3 Legions cost 15 Gold to Build and 3 Gold to Pay or Transfer to another Command. They affect the Pillage, Revolt, Wars, Civil Wars, and Rebellions Charts (PAC) and prevent Unrest from Provinces with Legion icons (Case 10.1.4). Legions may not be Dismissed to the Barracks Box by Losses, instead they are Destroyed and removed from the game (Section 11.3). Half the Losses on the Civil Wars Chart (PAC) between an Emperor and a Rebel Emperor and Defeats and Disasters on the Wars Chart (PAC) must Destroy Legions if possible, rounding up (Cases 5.3.4, 11.3.3). Legions may not be Promoted to Veteran if Valentinian Dynasty is in play and all Veteran Legions are Demoted if Leonid Dynasty is in play (Dynasty Chart).
Note: Legions represent 5,000 legionaries with 1,000 supporting artillery, engineers, cavalry, and skirmishers. Legions only had 1,000 to 2,000 legionaries in this period, so each Legion Unit represents several legiones comitatenses (companion legions) brigaded together. Once the mainstay of the Roman Army they were lost in a series of disasters and civil wars and never replaced by a declining empire. They are used to protect Provinces from Revolts and fight Wars and Civil Wars.
2.2.4 Pseudo Legions are on the front side of Forts and cost 15 Gold to Build and 3 Gold to Pay or Transfer to another Command. They are treated as Legions except they may not be Promoted (Case 2.1.2) and may be Demoted by being flipped to their Fort side, which reduces the Pay of their Empire by one as Forts cost less to Pay (Cases 2.2.5, 9.3.2). They may not be Demoted except by Losses (Section 11.3) and the Plague Event (Event Chart). You may build Pseudo Legions in the Barracks Box as Pseudo Legions or Forts (Case 10.6.1). Pseudo Legions may only be Destroyed after all the Legions fighting their War or Civil War have been Destroyed (Case 11.3.1).
Note: Pseudo Legions represent legions garrisoning the frontier provinces which were sometimes transferred to the field army as legiones pseudocomitatenses (imitation legions) due to manpower shortages and the destruction of veteran legions in battle.
2.2.5 Forts are on the reverse side of Pseudo Legions, cost 10 Gold to Build, and two Gold to Pay. They affect the Pillage, Revolt, and Wars Charts (PAC) and prevent Unrest from Provinces with Legion icons if Valentinian Dynasty is in play (Case 10.1.4). Forts may be Promoted by being flipped to their Pseudo Legion side, which increases the Pay of their Empire by one as Pseudo Legions cost more Gold to Pay (Cases 2.2.4, 9.3.2) and may be Promoted for 10 Gold in the Unrest Phase (Case 10.6.2). You may build Forts in the Barracks Box as Pseudo Legions or Forts (Case 10.6.1). Forts may not Transfer and are placed in the Barracks Box if forced to Transfer (Case 10.7.4).
Note: Forts represent 6,000 limitanei (border guards) on a land border, or ripenses (river guards) on a river or coastline, who slowly deteriorated into an unpaid border militia of soldier-farmers. They protect Provinces from Revolts and fight Wars but are immobile and do not fight Civil Wars.
2.2.6 Auxilia cost 5 Gold to Build and 1 Gold to Pay or Transfer to another Command. They affect the Pillage, Revolt, and Wars Charts (PAC) with Veteran Auxilia counting double except for Stacking (Case 2.3.1). Veteran Auxilia cost 10 Gold to Build and 2 Gold to Pay or Transfer to another Command as if they were two Auxilia. If Auxilia are Promoted, increase the Pay of their Empire by one as Veteran Auxilia cost more Gold to Pay (Case 9.3.2) and Auxilia may be Promoted for 5 Gold in the Unrest Phase (Case 10.6.2). Auxilia may not be Promoted if Valentinian Dynasty is in play and all Veteran Auxilia are Demoted if Leonid Dynasty is in play (Dynasty Chart).
Note: Auxilia represent 6,000 mercenary barbarians, providing cheap, expendable troops to defend Provinces and fight Wars, but not Civil Wars. Veteran Auxilia have 12,000 troops each as Diocletian vastly expanded the army, which is why they cost double to Build, Pay, and Transfer. Promotion represents the hiring of new auxiliaries and Demotion their loss due to desertion and casualties. Later, barbarians preferred to be hired by the tribe as Foederati instead as individual Auxiliaries, and Auxilia declined in numbers.
2.2.7 Fleets cost 20 Gold to Build and 4 Gold to Pay or Transfer to another Command. They affect the Revolt, Wars, Civil Wars, and Rebellions Charts (PAC), match the Naval Strength of Wars (3.2.3), and prevent Unrest from Provinces with Fleet icons (Case 10.1.5). Subtract one from the Revolt 1D6 of a Province with a Fleet for each Homeland or Barbarian Province connected by River/Straits (Section 11.1). Fleets may not be Built in or Transfer to Mountain Provinces (Cases 4.2.11, 10.6.3, 10.7.3). Fleets may be Built in Desert Provinces, but Fleets in a Desert Province may only Transfer to another Desert Province and are placed in the Barracks Box if forced to Transfer to a non-Desert Province (Cases 4.2.10, 10.7.3).
Note: These represent a fleet of 200-300 warships protecting a river or coastline. They are needed to fight Naval Wars and guard sea lanes from pirates, protect riverside and coastal Provinces from adjacent barbarians and fight Civil Wars.
2.3 Unit Stacking
2.3.1 Each Insurgent and Roman Province (Cases 4.2.5, 4.2.6) stacks a maximum of one Cavalry, one Guard, two Legions, two Ordinary or Veteran Auxilia, one Fort, and one Fleet, except that Fleets may not stack in Mountain Provinces (Case 4.2.11).
2.3.2 Immediately Transfer all Units in Homeland, Barbarian, Allied, and Foederati Provinces as if they were overstacked (Case 11.1.5).
2.3.3 If a Province is overstacked immediately Transfer the excess Units to another Province in the same Command (Case 10.7.2). If this is not possible, Transfer them to another Command in the same Empire, increasing its Unrest by one for each Unit. If that is not possible, remove Legions from the game and place other Units in the Barracks Box. Place Forts in the Barracks Box if forced to Transfer, and Fleets if they are forced to Transfer from a Desert Province to a non-Desert Province (Cases 2.2.5, 2.2.7).
2.3.4 Loyal Units may only Transfer to Rebel Provinces if overstacked and cannot Transfer elsewhere. Rebel Units may only Transfer to Provinces not controlled by their Rebel if forced to Transfer and cannot Transfer elsewhere (Case 10.7.5).
3.0 Wars and Enemy Leaders
3.1 Overview
There are eight Enemy Leader and 40 War counters representing the enemies of the Late Roman Empire. They move from Province to Province, encouraging them to Revolt until defeated by a Triumph or removed by a doubled Convert or Diplomacy Event. Some Wars have Naval Strength representing their warships, allowing them to move more easily by across Rivers/Strait and Sea connections and they cannot be defeated without a Fleet or Foederati. Other Wars have Cavalry Strength representing the cataphracts, lancers, and horse archers of steppe armies and cannot be defeated without Cavalry or Foederati. Enemy Leaders represent important barbarian kings like Attila the Hun and Gaiseric the Lame. The Persian Leader Chosroes represents both Shah Chosroes I and his grandson Chosroes II.
3.1.1 Enemy Leaders and Wars are mixed face down in the Wars Box or face up in their Homeland as indicated in the scenario set up (Section 13.1). 1D3 counters are drawn from the Wars Box in the Treasury Phase with +1 to the die roll in the 363 CE, 425 CE, and 565 CE Scenarios as they have more Wars (Section 9.6).
3.1.2 Matching Wars, Enemy Leaders, Homeland Provinces, and Foederati Province counters have matching icons (usually a shield) which affects placement and stacking (Cases 9.6.2, 9.6.3), Foederati (Cases 3.2.5, 4.2.3) and the Wars Chart (PAC). Wars also have the same name as their matching Homeland and Foederati Provinces.
3.2 Wars
3.2.1 Wars are placed in their matching Homeland or Foederati Province (Cases 4.2.1, 4.2.3) when drawn from the Wars Box and Move from Province to Province (Section 9.4), increasing Unrest (Section 10.1) and generating Revolts (Section 11.1) until removed by a Triumph (Section 11.2) or a doubled Convert or Diplomat Event (Event Chart).
3.2.2 Strength The large number on the left of a War counter is its Strength, which affects the War 3D6 (Section 11.2). The higher the number, the stronger the War.
3.2.3 Naval Strength is the number next to the Sail icon on the top left of a War counter. If the number of Roman Fleets (counting Veteran Fleets as two) and Foederati Provinces (Case 4.2.3) fighting the War are less than the War's Naval Strength, treat a Triumph as a Draw (Case 11.2.8). Wars with 2-3 Naval Strength treat Seas as River/Straits and River/Straits as Roads for Movement (Cases 4.3.4, 4.3.5) and Wars with 4-5 Naval Strength treat both Seas and River/Straits as Roads for Movement (Case 9.4.2). Example: The 6/3 Saxon War has 6 Strength and 3 Naval Strength. The 6/3 and 4/3 Saxon Wars and the Saxon Homeland all match each other.
3.2.4 Cavalry Strength is the number next to the Horse icon on the top left of a War counter. If the number of Roman Cavalry Units (counting Veteran Cavalry as two) and Foederati Provinces (Case 4.2.3) fighting the War are less than the War's Cavalry Strength, treat a Triumph as a Draw (Case 11.2.9). Wars with 2-3 Cavalry Strength add one to Pillage die rolls, or two if they have 4-5 Cavalry Strength (Section 9.5). Example: The 15/5 Hun War has 15 Strength and 5 Cavalry Strength.
3.2.5 Foederati Wars Frankish, Ostrogothic, Suevian, Vandal, and Visigothic Wars are Foederati Wars, indicated by an orange stripe. Foederati Wars treat matching Foederati Provinces as Barbarian Provinces (Cases 4.2.2, 4.2.3) on the Movement and Pillage Charts, and ignore them on the Wars Chart (PAC). If any are available, choose a random matching Foederati Province when placing Foederati Wars instead of using their Homeland Province (Case 9.6.2). Barbarian Provinces connected to a defeated Foederati War may be Annexed as matching Foederati Provinces in its Triumph unless occupied by another War (Cases 4.2.1, 10.2.4). When a Foederati War moves into (or is displaced into) a Barbarian Province immediately Annex it as a matching Foederati Province, increasing the Prestige of its Empire by one (Case 10.2.7). Foederati Provinces occupied by a matching Foederati War never Revolt (Case 11.1.1). Revolting non-matching Foederati, Allied, and Insurgent Provinces occupied by a Foederati War (or connected to its Province) become a matching Foederati Province unless occupied by another War, Player's choice if connected to several Foederati Wars (Case 11.1.3). Example: Vandal Wars are Foederati Wars with an orange stripe. They are placed in a random Vandal Foederati Province instead of the Vandal Homeland if any are in play, move through Vandal Provinces as if they were Barbarian Provinces, Annex all Barbarian Provinces they occupy as Vandal Foederati (increasing Prestige of their Empire by one for each Province), and ignore Vandal Foederati on the Wars Chart.
3.3 Enemy Leaders
3.3.1 Enemy Leaders are placed on a matching War chosen at random when they are drawn from the Wars Box (Cases 3.1.2, 9.6.3). If there is more than one matching War choose one at random. If more than one matching Enemy Leader chose one at random to join the War. Enemy Leaders stacked with Wars that are removed from play are immediately stacked with another matching War. If there is no matching War in play (or they all have Enemy Leaders) place the Enemy Leader in its matching Homeland Province (Case 4.2.1), where it increases Unrest (Case 10.1.3) and affects the Revolt Chart (PAC) until they join a new matching War. Leaders may only be killed by Mortality (Case 8.2.1). The Roman Statesmen Alaric, Gainas, Theodoric, and Zeno may become Enemy Leaders due to their Leader special ability (Case 6.3.6). Example: The Hun Leader Attila has 5 Strength and 4 Pillage and matches the three Hun Wars and three Hun Homelands.
3.3.2 Strength is the large number on the left is the Enemy Leader counter, which affects the War 3D6 (Section 11.2). Enemy Leaders do not increase the Strength of a War for reducing Unrest, increasing Prestige, and adding Gold to a Treasury in a Triumph (Wars Chart).
3.3.3 Pillage is the number next to the Fire icon on Enemy Leader counters. This affects Pillage (Section 9.5) and Revolts (Section 11.1) in the Province occupied by the Enemy Leader.
4.0 Provinces
4.1 Overview
The map has Provinces connected by Roads, Mountains, Deserts, Rivers/Straits, and Seas. They are grouped into Commands controlled by Governors who fight wars and Romanise Provinces, though ambitious Governors may Assassinate the Emperor or launch a Rebellion. The status of a Province is shown by placing a Barbarian, Foederati, Allied, or Insurgent counter on its space. Players may use substitutes for these counters, but not other game counters which have an intentional limit. When a Province is Annexed (upgraded) or Revolts (downgraded) remove their counter and replace it with the counter showing its new status. A Province with none of these is a Roman Province enjoying the benefits of Roman civilisation (roads, aqueducts, baths, sanitation, education, wine, law and order, and taxes). Homelands represent the implacable enemies of Rome, too strong to be conquered, constantly raiding the frontier, and generating Enemy Leaders and Wars to invade the empire. Barbarian Provinces are also enemies of Rome, but weak enough to be Annexed. Foederati Provinces are occupied by powerful tribes settled as foederati (treaty allies) to guard the frontier who soon carved out their own kingdoms from the crumbling empire. Allied Provinces represent a small tribe or kingdom friendly to Rome, which are weaker and more reliable than Foederati. Insurgent Provinces are newly Annexed Provinces, or those that have recently Revolted and need a strong garrison to return them to order.
4.2 Province Types
4.2.1 Homeland Provinces are represented by their icon, are not in any Command (Case 5.2.3), and affect the Movement, Pillage, Revolt, and Wars Charts (PAC). They are prioritised last for Movement along with Barbarian Provinces (Case 9.4.2) and may not be Annexed (Section 10.2). Enemy Leaders and Wars are placed in their matching Homeland Province when drawn from the Wars Box (Section 9.6). Foederati Homelands have an orange background as a reminder that Foederati Wars are only placed in them if they have no matching Foederati Province (Cases 3.2.5, 4.2.3). Hun Leaders and Wars are placed in one of their three Homelands chosen at random and the Isaurian War in Isauria (Cases 9.6.4, 9.6.5).
4.2.2 Barbarian Provinces are marked with a Barbarian counter found on the reverse of out-of-play Enemy Leader and War counters and affect the Movement, Pillage, Revolt, and Wars Charts (PAC). They are prioritised last for Movement along with Homeland Provinces (Case 9.4.2) and become Allied Provinces when Annexed (Case 10.2.5). Barbarian Provinces connected to a defeated Foederati War may be Annexed as matching Foederati Provinces in its Triumph unless occupied by another War (Cases 3.2.5, 10.2.4). Barbarian Provinces may be Annexed as Foederati Provinces matching a connected Foederati Province (not Foederati Homeland), Player's choice if several (Case 10.2.6). When a Foederati War moves into (or is displaced into) a Barbarian Province immediately Annex it as a matching Foederati Province, increasing the Prestige of its Empire by one (Cases 3.2.5, 10.2.7).
4.2.3 Foederati Provinces are marked with a Foederati counter and affect the Movement, Pillage, Revolt, Wars, and Civil Wars Charts (PAC). Foederati Wars treat matching Foederati Provinces as Barbarian Provinces on the Movement and Pillage Charts and ignore them on the Wars Chart (Case 3.2.5). Foederati Provinces reduce their Revolt 1D6 by two and by an extra one for each connected Homeland and Barbarian Province (Case 11.1.2). They become Allied Provinces when Annexed (Case 10.2.5) and Barbarian Provinces when they Revolt (Case 11.1.3). Foederati Provinces are affected by matching Homelands on the Revolt Chart, but never Revolt if occupied by a matching Foederati War (Cases 4.2.1, 11.1.1). Barbarian Provinces connected to a defeated Foederati War may be Annexed as matching Foederati Provinces in its Triumph unless occupied by another War (Cases 3.2.5, 4.2.2, 10.2.4). Revolting non-matching Foederati, Allied, and Insurgent Provinces occupied by a Foederati War (or connected to its Province) become a matching Foederati Province unless occupied by another War, Player's choice if several (Cases 10.2.7, 11.1.3). Treat each Foederati Province as either one Fleet for Naval Strength (Case 3.2.3) OR one Cavalry for Cavalry Strength (Case 3.2.4) on the Wars Chart (PAC).
4.2.4 Allied Provinces are marked with an Allied counter and affect the Movement, Pillage, Revolt, and Wars Charts (PAC). Allied Provinces reduce their Revolt 1D6 by one and by an extra one for each connected Homeland and Barbarian Province (Case 11.1.2). They become Insurgent Provinces when Annexed (Case 10.2.5) and Barbarian Provinces when they Revolt (Case 11.1.3).
4.2.5 Insurgent Provinces are marked with an Insurgent counter and become Allied Provinces when they Revolt (Case 11.1.3). They may not be Annexed, instead they become a Roman Province if their Revolt 1D6 ≤ the Military ability of their Governor or Rebel with +1 Prestige for its Empire if a Loyal Province (Cases 10.2.1, 11.1.4).
4.2.6 Roman Provinces have no Barbarian, Foederati, Allied, or Insurgent counter, become Insurgent Provinces when they Revolt (Case 11.1.3) and pay Taxes if they are Loyal (Case 9.2.1).
4.2.7 Rebel Provinces are Provinces in a Rebel Command (Case 5.3.2).
4.2.8 Loyal Provinces are Provinces not in a Rebel Command (Case 5.3.2).
4.2.9 Capital Provinces Constantinople is the capital of the Eastern Empire and Rome is the capital of the Western Empire, which affect the Assassination Chart (PAC). The Hippodrome and Papacy Events turn the Capitals into Insurgent Provinces (if not already Insurgent) with no effect on Prestige and Unrest (Event Chart). An Empire Falls if its Capital is a Barbarian, Allied, or Foederati Province at the end of any phase (Case 12.2.1).
Note: Racing Factions in the Hippodrome of Constantinople and the Papacy in Rome both resisted both the power of the emperor, requiring troops to restore order. If controlled by barbarians, allies, or foederati, they may declare for the empire.
4.2.10 Desert Provinces have a Sun icon. Fleets may be Built in Desert Provinces, but Fleets in a Desert Province may only Transfer to another Desert Province. Fleets in Desert Provinces are Dismissed if forced to Transfer to a non-Desert Province (Cases 2.2.7, 10.7.3).
Note: These Provinces are connected to the Persian Gulf by the Euphrates and Tigris Rivers, but not to the rest of the Roman Empire.
4.2.11 Mountain Provinces have a Mountain icon. Fleets may not be Built in or Transfer to Mountain Provinces (Cases 2.2.7, 10.6.3, 10.7.3).
Note: These Provinces were not connected to the rest of the empire by seas or major rivers.
4.3 Province Connections
Connections link adjacent Provinces, and affect Multiple Commands (Case 5.2.5), Movement (Section 9.4), Annexation (Section 10.2), Revolts (Section 11.1), and Fighting Wars (Section 11.2). Connections are prioritized to regulate the Movement of Wars and Enemy Leaders. They have no effect on Transferring Units (Section 10.7).
4.3.1 Roads are prioritized first for Movement.
Note: Roman roads now covered the empire.
4.3.2 Deserts are prioritized for Movement after Roads and equal with Mountain and River/Strait Connections.
4.3.3 Mountains are prioritized for Movement after Roads and equal with Desert and River/Strait Connections.
4.3.4 River/Straits are prioritized for Movement after Roads and equal with Desert and Mountains Connections. Wars with 2-5 Naval Strength treat River/Straits as Roads for Movement (Cases 3.2.3, 9.4.2).
4.3.5 Seas are ignored for Movement, except Wars with 2-3 Naval Strength treat them as River/Straits (Case 9.4.2), and Wars with 4-5 Naval Strength treat them as Roads (Case 3.2.3).
5.0 Commanders
The Late Roman Empire was ruled by Eastern and Western Emperors operating in tandem as they were usually brothers or cousins. Sometimes a Rebel Emperor would seize power and there would be a Civil War, the victor making himself Sole Emperor and appointing viceroys to rule half his empire. When the Western Empire fell in 476 CE the Eastern Emperor Zeno was recognised as Sole Emperor by the kingdoms that replaced it. Players still control their own Empire if there is a Sole Emperor, one as the Emperor and the other as his Viceroy. Governors represent a junior emperor, praetorian prefect, master of soldiers, patrician, exarch, pope, or archbishop. Their Commands are based on the 12 dioceses created by Diocletian, but they have been reduced to 10 for ease of play with Viennensis as part of Gallia and Asiana as part of Thracia. Italia, Moesia, and Oriens were later divided into two dioceses, but have been kept as one Command each. Commanders each have four abilities; Military, Administration, Popularity, and Intrigue, and Roman Statesmen also have a special ability. In this era Popularity represents their commitment to the Christian Church, pagans and heretics having the lowest Popularity and popes and bishops the highest. The Command Boxes at the bottom of the map have Generic Commander abilities for Emperors, Governors, and Rebels not important enough to have their own Roman Statesman counter. When a Roman Statesman is made a Commander place his counter in its Command Box and use his abilities instead.
5.1 Emperors
5.1.1 Eastern Emperors, Western Emperors, Sole Emperors, Generic Emperors, and Rebel Emperors are all Emperors. The Eastern Emperor controls all Loyal Provinces and Units in the Eastern Empire and the Western Emperor all Loyal Provinces and Units in the Western Empire (Case 5.2.4). Emperors may fight Wars and must fight Rebels in their Empire and Rebel Emperors in the other Empire (Sections 11.2, 11.4). A new Emperor must be appointed immediately after an Emperor dies. You may not remove an Emperor or appoint a new Emperor until the Emperor dies or becomes an Enemy Leader (Cases 6.3.6, 8.2.2). Emperors immediately die if they do not control any Foederati, Allied, Insurgent, or Roman Provinces.
5.1.2 Emperors use their Military ability on the Wars and Civil Wars Charts (PAC); Administration ability for Taxes (Section 9.2), Bread and Circuses (Case 10.5.1), and on the Assassination, Wars, and Civil Wars Charts (PAC); Popularity ability for Bread and Circuses (Case 10.5.2), Orthodoxy Events (Event Chart) and on the Assassination, Civil Wars, and Rebellions Charts (PAC); and Intrigue ability on the Assassination Chart (PAC) and for Persecution Events (Event Chart).
5.1.3 Sole Emperor If an Emperor Command Box has a Viceroy or Fall counter (Cases 5.1.4, 12.2.2) the remaining Sole Emperor is both the Eastern and Western Emperors and controls all Loyal Units and Provinces. The Sole Emperor may use the Loyal Provinces of both Empires to fight a War or Civil War, but only one Empire benefits from a Triumph, and only if its Provinces and Units were used to fight the War (Case 11.2.4). Sole Emperors do not have to fight Rebels in a Fallen Empire but must fight all Rebels in Empires that have not Fallen (Sections 11.4, 12.2). The Viceroy counter is removed if the Sole Emperor Abdicates or dies from Mortality or a Disaster, but not if he is killed by an Assassin or Rebel, who becomes the new Sole Emperor (Section 8.2).
5.1.4 Succession When an Emperor dies appoint a new Emperor to replace him in the following order of priority, ignoring the Roman Statesman Zeno if he is an Enemy Leader (Case 6.3.6). Unless they agree otherwise, the Eastern Player gets first choice of Emperor on odd turns and the Western Player on even turns.
a) Rebel Defeat If a Rebel Emperor loses a Civil War (Case 5.1.4d), replace the Rebel counters in his Emperor Command Box with the Viceroy counter and the victorious Emperor becomes the Sole Emperor (Case 5.1.3).
b) Rebel Victory If a Rebel Emperor wins a Civil War (Case 5.1.4d), remove the Rebel counters from his Emperor Command Box, place the Viceroy counter in the other Emperor Command Box, and he becomes the Sole Emperor (Case 5.1.3).
c) Assassin If an Assassin kills the Sole Emperor (Case 8.3.4), the Viceroy counter remains in its Emperor Command Box and the Assassin becomes Sole Emperor (Case 5.1.3), unless an Ineligible Statesman (Case 6.1.6).
d) Rebel Emperor If a Rebel wins a Rebel Victory or an Assassin kills an Emperor and does not become the Sole Emperor they become a Rebel Emperor (Case 5.3.4). If an Emperor dies because he controls no Loyal Provinces, a random Rebel in his Empire becomes a Rebel Emperor: place his Roman Statesman counter (if he has one), Rebel counters, and the Rebel counters of all Loyal Commands in his Empire in the Emperor Command Box, except those in the Command Boxes of other Rebels. Place all Loyal Roman Statesmen counters in his Empire's Command Boxes face up in the Statesmen Box (Section 10.3).
e) Imperial Statesmen The highest ranked Imperial Statesman with his Dynasty counter in play who is not the Eastern or Western Emperor is made Emperor (Case 6.1.5). If a Rebel remove his Rebel counters and his Commands become Loyal (Case 5.3.1).
f) Roman Statesmen The Eastern Player chooses a Roman Statesman in play to be the Eastern Emperor (except the Western Emperor), and the Western Player chooses a Roman Statesman in play to be the Western Emperor (except the Eastern Emperor). If a Rebel is chosen, remove his Rebel counters and his Commands become Loyal (Case 5.3.1).
g) Senate Use the Generic Emperor, using the Generic abilities printed in the Emperor Command Box (Section 6.2).
Example: The Western Emperor Majorian is killed by the Assassin Ricimer, so a new Western Emperor must be appointed; a) there was no Rebel Defeat; b) there was no Rebel Victory; c) Majorian was Assassinated, but was not Sole Emperor; d) Ricimer is an Ineligible Statesmen; e) Leonid Dynasty is in play but the only Imperial Statesman is the Eastern Emperor Leo I; f) the only available Roman Statesmen are Aspar, Ricimer, and Pope Leo who are all Ineligible Statesmen; and g) the Western Player appoints the Generic Western Emperor.
5.2 Governors
5.2.1 Governors control all Loyal Provinces (Case 4.2.8) and Loyal Units (Case 2.1.5) in their Command. Roman Statesman are placed in Governor Command Boxes in the Unrest Phase unless they would only control Barbarian Provinces (Cases 6.1.7, 10.3.3). Use the Generic abilities printed in the Governor Command Box if it does not have a Roman Statesman (Section 6.2).
5.2.2 Governors use their Military ability on the Revolt, Wars, and Civil Wars Charts (PAC); Administration ability for Taxes (Section 9.2) and on the Wars Chart (PAC); Popularity ability on the Assassination and Rebellions Charts (PAC); and Intrigue ability on the Assassination Chart (PAC).
5.2.3 Commands The Command Box, Command Icon, and Provinces of each Governor have the same color: Africa (brown), Britannia (maroon), Gallia (dark green), Hispania (orange), Italia (purple), Moesia (pale blue), Oriens (red), Pannonia (black), Pontica (dark blue), and Thracia (pale green). Example: The Gallia Command Box has a dark green border, and its Generic Governor has 3 Military, 2 Administration, 1 Popularity, and 2 Intrigue abilities, which would be replaced by the abilities of a Roman Statesman placed in the Gallia Command Box as its Governor.
5.2.4 Empires Oriens, Pontica, and Thracia are always in the Eastern Empire; and Africa, Britannia, Gallia, Hispania, and Italia in the Western Empire. Moesia and Pannonia each have a Command Box in the Eastern Empire and another in the Western Empire. They are in the Eastern Empire at the start of the 286 CE Scenario and join the Western Empire if Constantinian Dynasty is in play (Dynasty Chart). If Theodosian Dynasty is in play Moesia returns to the Eastern Empire while Pannonia stays in the Western Empire. Recalculate Eastern and Western Pay when their Units change Empires but there are no Transfer costs (Cases 9.3.2, 10.7.2).
Note: Moesia and Pannonia were incorporated into the Western Empire by Constans, but Moesia was returned by Gratian to help the Eastern Empire fight the Goths.
5.2.5 Multiple Commands Roman Statesmen may be the Governor of 1-3 Commands in the same Empire but not if any Roman Statesmen are face up in the Statesmen Box in the Unrest Phase as they must all be made Governor if possible (Cases 6.1.3, 10.3.3). Place the Loyal counters of his Commands in his Governor Command Box. Each of his Commands must have a Province connected to a Province in another of his Commands.
Note: This makes it easier to collect Taxes and fight Wars, but Governors of Multiple Commands are more likely to Rebel as they will have more Veteran Cavalry, Guards, Legions, and Fleets.
Example: Galerius is Governor of Moesia, Pannonia, and Thracia in the Eastern Empire, so the Galerius Roman Statesman counter and the Loyal Moesia, Pannonia, and Thracia counters are placed in the Moesia Command Box. If Constantinian Dynasty enters play Moesia and Pannonia join the Western Empire, so Galerius either becomes Governor of Moesia and Pannonia in the Western Empire or Governor of Thracia in the Eastern Empire, and the excess Loyal counters are removed.
5.2.6 If a Command has no Roman Provinces, you may reduce the number of counters in play by placing a Barbarian, Foederati, Allied, or Insurgent counter in its Command Box and treating its Provinces with no counter as having this counter (Section 4.2).
Example: Place an Ostrogothic Foederati counter in the Italia Command Box in the 497 CE Scenario set up to show that all Provinces in Italia are Ostrogothic Foederati except Corsica & Sardinia (with a Vandal Foederati counter) and Rhaetia (with a Suevian Foederati counter).
5.3 Rebels
5.3.1 When a Commander becomes a Rebel, place the Rebel counters of his Commands in his Command Box (Case 5.2.5). Rebel counters and Rebel Roman Statesmen may only be removed from a Command Box when the Rebel is made Emperor or dies (Cases 5.1.4b, 8.2.2). If a Rebel or Assassin kills an Emperor they become a Rebel Emperor (Case 5.1.4d) unless they are an Ineligible Statesman (Case 6.1.6) or the Emperor they killed was the Sole Emperor (Cases 5.1.4b, 5.1.4c).
5.3.2 A Rebel controls all the Provinces and Units of the Rebel Commands he controls, indicated by the Rebel counters in his Command Box. Use the Generic abilities printed in his Command Box if the Rebel is not a Roman Statesman (Section 6.2).
5.3.3 Rebels use their Military ability on the Revolt, Wars, and Civil Wars Charts (PAC); their Administration ability to collect Gold from a Triumph on the Wars Chart (PAC); and Popularity and Intrigue abilities on the Assassination Chart (PAC). They do not increase Prestige from a Triumph or the Romanisation of their Insurgent Provinces (Case 11.1.4) and may only use Gold collected from a Triumph to absorb Losses unless a Rebel Emperor (Cases 5.3.4, 11.2.6).
5.3.4 Rebel Emperors Rebel Emperors are Emperors who are Rebels. Place their Roman Statesman counter and all the Rebel counters of his Empire in their Emperor Command Box except those in the Command Boxes of other Rebels (Case 5.1.4d). Rebel Emperors increase Prestige and decrease Unrest for Bread and Circuses (Section 10.5), collect Gold from Triumphs, and may spend Gold from their Treasury, but do not collect Taxes and may not Exchange Gold with the other Empire (Section 9.1). Half the Losses in a Civil War between an Emperor and a Rebel Emperor must Destroy Legions if possible, rounding up (Section 11.4).
6.0 Roman Statesmen
6.1 Overview
The 67 Roman Statesmen counters show the Military, Administration, Popularity, and Intrigue abilities of historically important Romans, plus a special ability. For example, Diocletian is an excellent administrator, but an indifferent general and a pagan in an increasingly Christian world whose Persecution special ability lowers Prestige every turn despite his moderate Intrigue. Emperor Theodosius II has less impressive Military and Administration abilities, a devout Christian with low Intrigue who only became Emperor because he is an Imperial Statesman of the Theodosian Dynasty. His Prestige special ability increases the Prestige of his Empire every turn. Several Roman Statesmen have the same name, such as his grandfather Emperor Theodosius I and great-grandfather General Theodosius.
6.1.1 The reverse of Roman Statesmen counters show their scenario. Roman Statesmen are placed face up in a Command Box or mixed face down in the Statesmen Box as indicated in the scenario set up (Section 13.1).
6.1.2 Flip 1D3 random face down counters in the Statesmen Box to their face up side in the Unrest Phase. On Turn 10 flip all remaining counters in the Statesmen Box. Subtract one from the 1D3 in the 497 CE and 565 CE Scenarios as these have fewer Roman Statesmen.
6.1.3 Roman Statesmen are placed in Command Boxes in the Unrest Phase. Only one Roman Statesman may occupy each Command Box, assuming its powers but using his own abilities and special ability. All face up Roman Statesmen must be placed in a Command Box if possible, the excess being placed face up in the Statesmen Box (Case 10.3.3).
6.1.4 Remove Roman Statesmen from play when they die (Section 8.2).
6.1.5 Imperial Statesmen are Roman Statesmen with their name in purple and are ranked from Constantius I on the top left of the Dynasties Chart to Maurice on the bottom right (PAC). The highest ranked Imperial Statesman with their Dynasty counter in play is made Emperor when an Emperor dies (Case 5.1.4e). Emperors may not fight Wars if they are Imperial Statesmen and Theodosian Dynasty is in play (Case 11.2.4).
Note: Imperial Dynasties ensured an orderly succession, but the overindulged sons of emperors lacked military training and did not fight any wars after 395 CE.
6.1.6 Ineligible Statesmen are Roman Statesmen with their name in green who may never be Emperor (Case 5.1.4). If an Ineligible Rebel or Assassin would be made an Emperor (Case 5.1.4) or wins a Rebel Victory in a Civil War (Section 11.4) flip the Rebel counters in his Command Box to their Loyal side and he becomes a Governor.
Note: Barbarian generals and palace eunuchs were unacceptable and set up puppet emperors when they seized power. Clergymen could not be emperors either, and deposed emperors were sometimes forced into holy orders as a form of exile.
6.1.7 Roman Statesmen may be the Governor of 1-3 Commands in the same Empire (Case 5.2.5). They may not be Governor of a Command with only Barbarian Provinces, and if they only command Barbarian Provinces immediately place their Roman Statesman counter face up in the Statesmen Box (Cases 4.2.2, 5.2.5).
6.2 Abilities
Every Roman Statesman and Generic Commander has four abilities.
6.2.1 Military (red) affects the Revolt, Wars, Civil Wars Charts (PAC), and the Leader special ability (Case 6.3.6).
6.2.2 Administration (yellow) affects Taxes (Section 9.2), Bread and Circuses (Case 10.5.1), and the Assassination, Wars and Civil Wars Charts (PAC).
6.2.3 Popularity (green) affects Bread and Circuses (Case 10.5.2), Orthodoxy Events (Event Chart), and the Assassination, Civil Wars, and Rebellions Charts (PAC).
6.2.4 Intrigue (beige) affects Persecution Events (Event Chart), Assassination Chart (PAC), and the Leader special ability (Case 6.3.6).
Example: The Roman Statesman Pope Leo has one Military ability, three Administration ability, five Popularity ability, two Intrigue ability, and the Convert special ability. He is an Ineligible Statesman (name in green) who may not be Emperor.
6.3 Special Abilities
Each Roman Statesman has one special ability.
6.3.1 Assassin Makes an Assassination 1D6 in the Event Phase against his Emperor if a Governor, or a random Roman Statesman in either Empire (except himself) if Emperor (Section 8.3).
6.3.2 Conquest If a Triumphing Commander, he Annexes an extra Province (Case 10.2.4), or two if Emperor. If Emperor, Annex one Province in his Empire in the Unrest Phase (Case 10.2.3), both Empires if the Sole Emperor (Cases 5.1.3), and all other Triumphing Commanders in his Empire Annex an extra Province.
6.3.3 Convert Extra Convert Event in the Event Phase (Case 8.1.3).
6.3.4 Diplomat Extra Diplomat Event in the Event Phase (Case 8.1.3).
6.3.5 Event Roll an extra Event in the Event Phase (Section 8.1).
6.3.6 Leader Becomes an Enemy Leader if there is a matching War in play without an Enemy Leader with Strength equal to his Military ability and Pillage equal to his Intrigue ability (Section 3.3): Alaric as a Visigothic Leader, Gainas and Theodoric as Ostrogothic Leaders, and Zeno as an Isaurian Leader. If a Rebel, remove the Rebel counters from his Command Box and his Provinces and Units become Loyal (Case 2.1.5). If Zeno is an Emperor, remove him from his Command Box and he may not be Emperor while an Enemy Leader (Case 5.1.4). Place them face up in the Statesman Box as a Roman Statesman if they cannot stack with a War (Cases 3.3.1, 10.3.3).
Note: These Roman Generals sometimes acted like Enemy Leaders, marching their barbarian armies around the empire and sacking cities; Gainas took control of the Eastern Emperor Arcadius, Alaric the Goth sacked Rome, Theodoric the Great created an Ostrogothic Kingdom in Italia and Pannonia, and the Eastern Emperor Zeno fled Constantinople for his native Isauria when ousted from power in 475 CE.
6.3.7 Persecution Extra Persecution Event in the Event Phase if Emperor (Case 8.1.2).
6.3.8 Prestige Add one Prestige to their Empire for Bread and Circuses if an Emperor or Governor (Case 10.5.1).
6.3.9 Stalemate Treats all Disasters and Defeats as Stalemates (Wars Chart).
6.3.10 Veteran Promotes two Units to Veteran instead of one on the Wars and Civil Wars Charts (Case 2.1.3).
6.3.11 War If fighting the War named on his counter, subtract one from the War 3D6, ignore Disasters and Stalemates, treat Defeats as Draws, and Annexes an extra Province in a Triumph (Wars Chart).
Example: The Roman Statesman Maximian has the Moorish special ability. If fighting a Moorish War, subtract one from the War 3D6, ignore its Disasters and Stalemates, treat its Defeats as Draws, and Annex an extra Province in a Triumph.
7.0 Sequence of Play
7.1 Event Phase (Module 8.0)
- Remove Event counters from previous turn.
- Place one extra Persecution Event for each Emperor with this special ability.
- Place one extra Convert and Diplomat Event for each Roman Statesman with these special abilities.
- The Players determine 1D6 Events and an extra Event for each Roman Statesman with the Event special ability.
- Make Mortality 1D6 for each Enemy Leader, Generic Rebel, Generic Emperor, and Roman Statesman (in the 286 CE Scenario Emperors Abdicate on Turns 3, 5, 7, and 9 unless Constantinian Dynasty is in play).
- Make Assassination 1D6 for each Roman Statesman with the Assassin special ability.
7.2 Treasury Phase (Module 9.0)
- Make Tax 2D6 rolls.
- Pay Loyal Units.
- Move Wars.
- Draw 1D3 random counters from the Wars Box, +1 in 363 CE, 425 CE, and 565 CE Scenarios, placing and moving them as they are drawn (draw all remaining counters on Turn 10).
7.3 Unrest Phase (Module 10.0)
- +1 Unrest for each of the following in their Empire; War, Rebel, Legion icon in a Roman or Insurgent Province with no Legion (or no Guard, Legion, or Fort if Valentinian Dynasty is in play), Fleet icon in a Roman or Insurgent Province with no Fleet, Grain icon in a Barbarian, Insurgent, or Rebel Province (unless its Empire has Fallen), and for each Enemy Leader in a Homeland Province connected to the Empire.
- Flip 1D3 random counters face up in the Statesmen Box, -1 in the 497 CE and 565 CE Scenarios (flip all remaining counters face up on Turn 10).
- Annex one Province in each Empire whose Emperor has the Conquest special ability and one Province in each Empire if Justinian Dynasty is in play.
- Appoint Governors (Eastern Player first on odd turns, Western Player first on even turns).
- Increase each Empire's Prestige by the Administration ability of its Emperor.
- Decrease each Empire's Unrest by the Popularity ability of its Emperor.
- Pay for Bread and Circuses.
- Build and Transfer Units (Eastern Player first on odd turns, Western Player first on even turns).
7.4 War Phase (Module 11.0)
- Make Revolt 1D6 for each Foederati, Allied, Insurgent, and Roman Province.
- May make War 3D6 for each War.
- Make Civil War 3D6 for each Rebel.
- Make Rebellion 3D6 for each Governor who won a Triumph.
7.5 Victory Phase (Module 12.0)
- If Turn 10 the game ends, check Prestige to determine Victory.
- If not Turn 10 advance the Turn counter, and proceed to the next turn.
8.0 Event Phase
In the Event Phase Players determine random Events, check if Roman Statesmen and Enemy Leaders die, and resolve Assassination attempts by Roman Statesmen with the Assassination special ability.
8.1 Events
8.1.1 At the start of the Event Phase remove all Event counters from the Event Chart on the map.
8.1.2 Place an Event counter in the Persecution Event Box for each Emperor with this special ability (Case 6.3.7).
8.1.3 Place an Event counter in the Convert or Diplomat Event Boxes for each Roman Statesman in play with these special abilities (Cases 6.3.3, 6.3.4).
8.1.4 Make a 1D6 roll to determine the number of additional Events to be resolved at random on the Event Chart, with an extra Event for each Roman Statesmen in play with the Event special ability (Case 6.3.5).
8.1.5 To determine a random Event, roll a 1D6 using a white die for the black number, and a 1D3 using a purple die for the purple number.
8.1.6 When an Event counter is placed in an Event Box resolve the black text. If it already has an Event counter, flip to its doubled side, and resolve the purple text underneath. If already doubled re-roll the dice.
8.1.7 If all six Event counters are in play and another is required, flip a random Event counter to its doubled side and resolve its purple text.
Example: The Players put an Event counter on the Persecution Event Box as the Sole Emperor Diocletian has the Persecution special ability, with -2 Eastern Prestige, half his three Intrigue ability (rounded up) and -2 Western Prestige, half of the Western Emperor Maximian's four Intrigue ability. They make a 1D6 of 3 for three more Events. A white 1D6 of 5 and a purple 1D3 of 3 places an Event counter on the Papacy Event Box and Western Unrest is increased by a 1D6 of two. A second Papacy Event flips the Event counter to its doubled side and an Insurgent counter is placed in the Roman Province of Rome with no effect on Prestige or Unrest. A third Papacy Event requires a re-roll with a white 1D6 of 1 and purple 1D3 of 2 for Bagaudae, so in the War Phase add one to the Revolt 1D6s of Provinces in Gallia.
8.2 Mortality
8.2.1 Make one Mortality 1D6 for each Enemy Leader (Section 3.3), Generic Emperor (Case 5.1.4g), Generic Rebel (Section 5.2), and all face up Roman Statesman in play (Module 6.0); if greater than or equal to six, they die. Treat Mortality die rolls as simultaneous. Increase the Mortality 1D6 by one if there is a doubled Plague Event (Event Chart).
8.2.2 If a Roman Statesmen or Enemy Leader dies remove his counter from play. Appoint a new Emperor if the Emperor dies (Case 5.1.4) and remove the Viceroy counter if the Sole Emperor dies from Mortality or a Disaster (Case 5.1.3). If a Rebel dies remove the Rebel counters from his Command Box, and his Provinces and Units become Loyal (Case 2.1.5).
8.2.3 Abdication In the 286 CE Scenario both Emperors Abdicate (die) on Turns 3, 5, 7, and 9 unless Constantinian Dynasty is in play (Dynasty Chart).
Note: Diocletian devised the Tetrarchy, which expected Emperors to abdicate every ten years so they could be succeeded by their adopted sons in an orderly manner.
8.3 Assassination
8.3.1 Make an Assassination 1D6 in the Event Phase for a random Governor if there is an Assassin Event, for a random Emperor if there is a doubled Assassin Event, and for each Emperor, Rebel, and Governor with the Assassin special ability (Case 6.3.1). If several Assassinations occur at the same time choose their order at random.
8.3.2 An Assassin targets his Emperor if a Rebel or Governor and a random Roman Statesman if an Emperor, except himself (Module 6.0).
8.3.3 Roll a 1D6 on the Assassination Chart (PAC). If greater than or equal to 12 the Target is killed, decrease his Empire's Prestige by his Administration ability, and increase his Empire's Unrest by his Popularity ability.
8.3.4 There is no further effect if the Assassin is an Emperor (Section 5.1) or Ineligible Statesman (Case 6.1.6).
8.3.5 If an Assassin kills the Sole Emperor, the Viceroy counter remains, and the Assassin becomes the Sole Emperor (Case 5.1.4c). If the Assassin kills an Eastern or Western Emperor he becomes a Rebel Emperor, place his Roman Statesman counter and Rebel counters of Commands in his Empire not controlled by other Rebels in the Emperor Command Box and Roman Statesmen counters in the affected Command Boxes face up in the Statesmen Box (Case 5.1.4d).
Example: Governor Ricimer of Italia and Governor Petronius of Pannonia both have the Assassin special ability. Petronius is chosen at random to make the first Assassination and the Western Player makes an Assassination 1D6 of 5 targeting the Western Emperor Valentinian III, +4 Petronius' Intrigue, +3 Valentinian III's Intrigue, +1 (the difference between the 4 Popularity ability of Petronius and the 3 Popularity ability of Valentinian III), +3 three Dynasty counters in play, -2 two Veteran Guards in the Western Empire, and -1 Guard in Rome for 13 (5+11-3=13). Valentinian III is killed with -2 Western Prestige for his two Administration ability and +3 Western Unrest for his three Popularity ability. As Valentinian III was not Sole Emperor, Petronius becomes a Rebel Emperor and is placed in the Western Emperor Command Box with the Africa, Gallia, Hispania, Italia, and Pannonia Rebel counters, but not the Britannia Rebel counter which is already in the Britannia Command Box. Governor Ricimer of Italia and Governor Majorian of Gallia are placed face up in the Statesmen Box. Ricimer cannot Assassinate as he is not an Emperor, Governor, or Rebel. If he had Assassinated Valentinian III he would not become a Rebel Emperor as he is an Ineligible Statesman, and the Western Player would appoint a new Emperor.
9.0 Treasury Phase
In the Treasury Phase, Players add Gold to their Treasuries by collecting Taxes from Loyal Roman Provinces and Pay Loyal Units, one Gold being the equivalent of 72,000 gold solidi coins ($86,400,000 in 2024). Afterwards, draw new Enemy Leaders and Wars from the Wars Box and move them across the map.
9.1 Treasury
9.1.1 Gold Use the "x1" and "x10" Gold counters on each Empire's Game Track to show how much Gold is in its Treasury. Use the "-1" on the reverse of the "x1" Gold counter to record negative Gold and the "+250" on the reverse of the "x10" Gold counter to show their Treasury has 250 Gold in addition to the Gold recorded by the position of the Gold counters on the Game Track.
Example: To represent 287 Gold in the Eastern Treasury place the "x10 Gold" counter on its "+250" side in Box 3 on the Eastern Game Track and the "x1" Gold counter in Box 7 (+250 Gold +3x10 Gold, +7x1 Gold = 287 Gold).
9.1.2 Excess Gold No Treasury may ever have more than 500 Gold; the excess is immediately lost.
Note: Players may anticipate excess Gold and spend or exchange it to stop the loss but must do so before making the die roll that may add the excess Gold.
9.1.3 Bankruptcy An Empire Falls if it has negative Gold at the end of any phase (Case 12.2.1). The game ends in a Major Defeat for both Players if a Fallen Empire has negative Gold at the end of any phase (Case 12.2.3).
9.1.4 Extra Taxes If a Treasury has negative Gold its Player may increase its Unrest by one, decrease its Prestige by one and add 2D6 Gold to the Treasury. This may be done any number of times as long as the Treasury has negative Gold.
9.1.5 Exchanging Gold Players may exchange Gold between their Treasuries at any time except to give Gold from a Treasury that would leave it with negative Gold or if there is a Rebel Emperor (Case 5.3.4).
9.2 Taxes
9.2.1 The number of Gold icons in a Loyal Roman Province shows how much Gold it pays in Taxes (even if occupied by a War), to the Eastern Treasury if in the Eastern Empire and the Western Treasury if in the Western Empire (Case 5.2.4).
9.2.2 Homeland, Barbarian, Foederati, Allied, Insurgent, and Rebel Provinces pay no Taxes (Section 4.2).
9.2.3 Command Icon This shows the total Gold a Command pays in Taxes if all its Provinces are Loyal Roman Provinces.
9.2.4 Make a Tax 2D6 roll for each Governor and subtract his Administration ability and that of his Emperor, if equal to or less than zero double the Gold his Loyal Roman Provinces pay in Taxes that turn. If a Governor has multiple Commands, make one Tax 2D6 that applies to all his Commands (Case 5.2.5).
Example: If all Gallia's Provinces are Loyal Roman Provinces it would pay 25 Gold in Taxes, but Frankish Foederati Frisia, Allied Suevia, and Barbarian Germania III pay no Taxes, reducing this to 22 Gold. The Western Player makes a Tax 2D6 of 8 for Gallia, -5 for the five Administration ability of Governor Julian of Gallia and -4 for the four Administration ability of the Sole Emperor Constantius II for -1, so this is doubled to 44 Gold, which is added to the Western Treasury.
9.3 Pay
9.3.1 Pay Gold for Loyal Units in the Eastern Empire from the Eastern Treasury and Loyal Units in the Western Empire from the Western Treasury as indicated on the Treasury Chart on the map (Section 2.2). Do not Pay Rebel Units (Case 2.1.4).
9.3.2 Use the "x1" and "x10" Pay counters on each Empire's Game Track to show the total Gold needed to Pay all its Loyal Units, moving the counters as Units are Built, Destroyed, Dismissed, Rebel, become Loyal, Transfer, or when Commands move between Empires. Increase Pay by one if a Fort is Promoted to a Pseudo Legion or an Auxilia to a Veteran Auxilia as these units cost one more Gold to Pay, and decrease Pay by one if a Pseudo Legion is Demoted to a Fort or a Veteran Auxilia to Auxilia as these units cost one less Gold to Pay (Cases 2.2.4, 2.2.5, 2.2.6).
Note: It is a good idea to check that Pay is correct every few turns.
Example: When setting up the 286 CE Scenario place a "x10" Pay counter in the "6" Box and a "x1" Pay counter in the "2" Box on the Western Game Track for 62 Pay; 12 Pay for two Cavalry, 10 Pay for two Guards, 12 Pay for three Fleets, 21 Pay for seven Legions, 2 Pay for one Fort, and 5 Pay for five Auxilia. The Rebel Units in Britannia receive no Pay, but if the Rebel Carausius dies Britannia and its Units will become Loyal and increase Pay by 19; 4 Pay for one Fleet, 12 Pay for four Legions, 2 Pay for one Fort, and 1 Pay for one Auxilia. As the Pay of the Western Empire has increased to 81 move its "x10" Pay counter to the "8" Box and the "x1" Pay counter to the "1" Box on the Western Game Track.
9.4 Movement
9.4.1 Unless they agree otherwise, Players first alternate moving Wars already in their Empires, the Eastern Player first on odd turns and the Western Player first on even turns. Then Move each War as it is drawn from the Wars Box and placed in its Homeland Province (Case 9.6.2). Foederati Wars are placed in a random matching Foederati Province instead of their Homeland Province if any are available (Cases 3.2.5, 4.2.3) and make an extra Move if in a matching Foederati Province when there is a Foederati Event (Section 8.1).
9.4.2 Priority Wars move to a connected Province using the list of priorities on the Movement Chart (PAC), if several have equal priority choose one at random. Non-matching Foederati, Allied, Insurgent, and Roman Provinces have priority over Homeland, Barbarian, and matching Foederati Provinces and Roads have priority over Deserts, Mountains, and River/Straits. Wars with 2-5 Naval Strength treat River/Straits as Roads for Movement (Case 4.3.4). Ignore Seas for Movement except that Wars with 2-3 Naval Strength treat Seas as River/Straits and Wars with 4-5 Naval Strength treat Seas as Roads (Case 4.3.5).
9.4.3 Wars may not move into Provinces they have already occupied that turn unless they have no other option.
9.4.4 Each Province may only have one War and one Enemy Leader, ignoring Enemy Leaders waiting in their Homeland Province for a matching War (Case 3.3.1).
9.4.5 Immediately move a War if another War moves into its Province in addition to its own move, which may cause other Wars to move in a chain reaction. It may not move to the Province just left by the moving War. After it moves, complete the move of the War that entered its Province.
9.4.6 If a War can only move to Homeland, Barbarian, and matching Foederati Provinces it moves towards the nearest Allied, non-matching Foederati, Insurgent, or Roman Province, ignoring Sea connections unless it has 2-5 Naval Strength (Case 4.3.5).
9.5 Pillage
A War automatically moves if it starts in (or enters) a Homeland, Barbarian, or matching Foederati Province (Case 3.2.5). If it starts in (or enters) a non-matching Foederati, Allied, Insurgent, or Roman Province, make a Pillage 1D6 on the Pillage Chart (PAC); if equal to or greater than four it continues to move but stops if it enters another non-matching Foederati, Allied, Insurgent, or Roman Province, if less than four it stops. Only one Pillage 1D6 is made for each War each turn.
Example: The 7/5 Vandal War is drawn from the Wars Box and is placed in a random Vandal Foederati Province, Mauretania I on a 1D6 of 1, Baleares on 2, Numidia on 3, and Africa on 4 (re-rolling 5-6). The Western Player rolls a 3 and places it in Numidia with the Vandal Leader Gaiseric from the Vandal Homeland. As every Province connected to Numidia is a Homeland Province or Vandal Foederati it moves towards Roman Sicilia, Allied Corsica & Sardinia, or Visigothic Foederati Carthaginensis which are all two connections from Numidia. The Western Player decides to move them to Mauretania I on a 1D6 of 1-2, Baleares on 3-4, or Africa on 5-6 as the 5 Naval Strength of the Vandal War gives the Sea connection to Baleares equal Priority with the Road connections to Mauretania I and Africa. A roll of 5 moves Gaiseric and the 7/5 Vandal War to Africa. He decides they will move to Corsica & Sardinia on a 1D6 of 1-3 and Sicilia on 4-6, rolls a 4 and moves them to Sicilia. The Pillage 1D6 is 2, +5 for the Pillage ability of Gaiseric, -1 for one Auxilia in Sicilia for 6 and they move to one more Province. He decides they will move to Insurgent Neapolis by River/Straits on 1-3, and Roman Achaea by Sea on 4-6 (as the Vandal War treats these connections as Roads), and a 2 moves them to Neapolis. Neapolis already has a 9/1 Suevian War, which moves to Rome on 1-3 or Spoletium on 4-6 as these Roads take priority over the River/Straits to Epirus, a 3 moves the 9/1 Suevian War to Rome and Gaiseric and the 7/5 Vandal War remain in Neapolis as they have already made their one Pillage 1D6 allowed each turn.
9.6 Wars Box
9.6.1 After moving all Wars in play draw 1D3 new counters from the Wars Box, drawing one extra in the 363 CE, 425 CE, and 565 CE Scenarios due to their extra Wars. Draw one extra counter if the Migration Event is in play, or two counters if doubled (Event Chart). All remaining counters in the Wars Box are drawn on Turn 10.
9.6.2 Wars drawn from the Wars Box are placed in their Homeland Province (Case 4.2.1) and immediately moved (Section 9.4). Choose a random matching Foederati Province when placing Foederati Wars instead of their Homeland Province, if any are available (Cases 3.2.5, 4.2.3).
9.6.3 Enemy Leaders drawn from the Wars Box are placed on a random matching War. If they cannot stack with a matching War place them in their Homeland Province until one is available (Case 3.1.2).
9.6.4 Huns Use a 1D6 to determine in which Hun Homeland a Hun Leader or War is placed in when drawn from the Wars Box; "Hun 1-2", "Hun 3-4", or "Hun 5-6".
9.6.5 Isauria There is no Isaurian Homeland, instead the Isaurian War is placed in Isauria when drawn from the Wars Box, indicated by the Isaurian icon, which also affects the Wars Chart (PAC).
Note: The Isaurians were semi-barbarian bandits and pirates who revolted against the Eastern Empire in 404-407 CE and
[The printed note breaks off at this point in the source.]
10.0 Unrest Phase
In the Unrest Phase Players increase Unrest, then decrease it with Bread and Circuses. They Annex Provinces, draw and appoint Roman Statesmen as Governors, and Build and Transfer Units in preparation for the War Phase. Unrest represents the attitude of the Senate, Church, Army, and Racing Factions towards the Emperors. If the frontier is guarded, the seas patrolled, triumphs won, and the capitals fed and entertained all will be well. If you suffer military disasters and cannot protect the frontiers or feed the people Unrest will increase, Governors will rebel, and the empire will slowly disintegrate.
10.1 Unrest
Use the "x1" Unrest counters on each Empire's Game Track to show its Unrest, using the ">25" on their reverse if an Empire has more than twenty-five Unrest. Unrest may never be less than zero. Increase Unrest for each Empire at the start of the Unrest Phase.
10.1.1 Rebel Each Empire adds one Unrest for each Rebel in its Empire, regardless of how many Commands he controls (Section 5.3).
10.1.2 War Each Empire adds one Unrest for each War in its Empire (Section 3.2).
10.1.3 Enemy Leader Each Empire adds one Unrest for each Enemy Leader in a Homeland Province connected to the Empire (Section 3.3).
10.1.4 Legion Icon Each Empire adds one Unrest for each of its Insurgent and Roman Provinces with a Legion icon and no Legion (Cases 2.2.3, 4.2.5, 4.2.6), or if Valentinian Dynasty is in play with no Guard, Legion, or Fort (Section 2.2).
10.1.5 Fleet Icon Each Empire adds one Unrest for each of its Insurgent and Roman Provinces with a Fleet Icon and no Fleet (Cases 2.2.7, 4.2.5, 4.2.6).
10.1.6 Grain Icon Each Empire adds one Unrest for each of its Rebel, Barbarian, and Insurgent Provinces with a Grain Icon unless a Fallen Empire (Case 12.2.2).
Note: Baetica, Africa, and Sicilia shipped grain to Rome and Alexandria, Arcadia, and Thebais to Constantinople. The population of Rome collapsed from 800,000 in 400 CE to 400,000 in 500 CE when its grain supply from Africa was cut by the Vandal King Gaiseric, falling further to 100,000 in 500 CE, and 30,000 in 550 CE.
10.1.7 Revolution An Empire Falls if it has more than twenty-five Unrest at the end of any phase (Case 12.2.1). The game ends in a Major Defeat for both Players if a Fallen Empire has more than twenty-five Unrest at the end of any phase (Case 12.2.3).
10.2 Annexation
Annexation expands the empire, turning Barbarians into Allies, settling Foederati, and re-imposing direct rule. Allied and Foederati Provinces act as buffer states, but Insurgent and Roman Provinces allow Players to concentrate Units against Wars.
10.2.1 Players may Annex Barbarian, Foederati, and Allied Provinces, and even Annex the same Province several times in the same turn. Increase an Empire's Prestige by one each time one of its Provinces is Annexed (Section 12.1). Insurgent Provinces may not be Annexed, though they can be Romanised (Cases 4.2.5, 11.1.4).
10.2.2 Event Phase Annex one Western Province if there is a Convert Event, and one Eastern Province if there is a Diplomat Event (Event Chart).
10.2.3 Unrest Phase Annex one Province in each Empire whose Emperor has the Conquest special ability, both if he is the Sole Emperor (Cases 5.1.3, 6.3.2) and one Province in each Empire if Justinian Dynasty is in play (Case 6.1.5).
10.2.4 War Phase Annex a Province for each Triumph (Section 11.2), with an extra Province if the Triumphing Commander has a matching War special ability (Case 6.3.11). If the Triumphing Commander has the Conquest special ability he Annexes an extra Province, if an Emperor he Annexes two extra Provinces and all other Triumphing Commanders in his Empire Annex an extra Province (Case 6.3.2). Only Provinces occupied by the War or connected to it may be Annexed in its Triumph. Barbarian Provinces connected to a defeated Foederati War may be Annexed as matching Foederati Provinces in its Triumph unless occupied by another War (Cases 3.2.5, 4.2.2, 4.2.3).
10.2.5 An Annexed Barbarian or Foederati Province becomes Allied, and an Annexed Allied Province becomes Insurgent (Section 4.2). Replace its Barbarian, Foederati, or Allied counter with a new Foederati, Allied, or Insurgent counter to show its status.
10.2.6 Provinces may not be Annexed if occupied by a War or not connected to an Allied, Insurgent, or Roman Province (Section 4.2), except Barbarian Provinces may be Annexed as Foederati Provinces matching a connected Foederati Province (not Foederati Homeland), Player's choice if several (Cases 4.2.1, 4.2.3).
10.2.7 When a Foederati War moves into (or is displaced into) a Barbarian Province it is immediately Annexed as a matching Foederati Province (Cases 3.2.5, 4.2.1, 4.2.3) and increase the Prestige of the Province's Empire by one (Case 10.2.1).
Example: Governor Belisarius of Africa Triumphs over the 9/3 Vandal War in Numidia and Annexes three Provinces, one for the Triumph, one for his Conquest special ability, and one as the Sole Emperor Justinian also has the Conquest special ability. The Western Player Annexes the Barbarian Province of Mauretania I as an Allied Province (replacing its Barbarian counter with an Allied counter) and Annexes Vandal Foederati Numidia twice, first as an Allied Province, then as an Insurgent Province (replacing its Vandal Foederati counter with an Insurgent counter) with +3 Western Prestige for Annexing three Provinces.
10.3 Statesmen Box
10.3.1 Dynasty and Roman Statesmen counters are mixed face down in the Statesmen Box as indicated in the scenario set up (Cases 6.1.1, 10.4.1).
10.3.2 Flip 1D3 random counters in the Statesmen Box face up in the Unrest Phase, minus one in the 497 CE and 565 CE Scenarios as there are fewer Roman Statesmen. On Turn 10 flip all remaining counters in the Statesmen Box face up.
10.3.3 Place a Roman Statesman or Loyal counter in a Governor Command Box (Cases 5.2.1, 5.2.5, 6.1.3) but not if he would only control Barbarian Provinces (Case 6.1.7). Players may move Roman Statesmen and Loyal counters from one Governor Command Box to another in the same Empire or place Roman Statesmen face up in the Statesman Box, which are available to both Empires. They may not move or replace Emperors, Rebels or a Roman Statesmen stacked with a War as an Enemy Leader (Cases 5.1.1, 5.3.1, 6.3.6). All face up Roman Statesmen must be placed in a Command Box if possible, leaving the excess face up in the Statesman Box.
10.3.4 Unless they agree otherwise, Players alternate placing Roman Statesmen and Loyal counters in the Governor Command Boxes in their Empires, the Eastern Player first on odd turns and the Western Player first on even turns.
10.4 Dynasties
Dynasty counters change the rules and establish new dynasties. They also determine when Roman Statesmen will become Emperor and increase the odds of Assassination.
10.4.1 Dynasties Box Dynasty counters are placed face up in the Dynasties Box or mixed face down in the Statesmen Box as indicated in the scenario set up. When flipped over in the Statesmen Box, they are placed face up in the Dynasties Box and affect play for the rest of the game (Case 10.3.2). They have no effect on play until placed in the Dynasties Box, even if one of their Imperial Statesmen is in play.
10.4.2 Dynasties Chart This shows the effect of Dynasty counters in play, changing the rules of the game, identifying Imperial Statesmen, showing the order in which they are made Emperor (Cases 5.1.4e, 6.1.5), and moving Moesia and Pannonia between the Empires (Case 5.2.4). Increase the Assassination 1D6 by one for each Dynasty counter in the Dynasties Box (Assassination Chart).
10.5 Bread and Circuses
10.5.1 Increase each Empire's Prestige by the Administration ability of its Emperor. Roman Statesmen with the Prestige special ability add one Prestige to their Empire if an Emperor or Governor (Case 6.3.8). Players may also increase their Empire's Prestige by one for each 10 Gold paid from its Treasury, up to the Administration ability of its Emperor.
Example: +4 Eastern Prestige for the 4 Administration ability of the Eastern Emperor Constantius II and +3 Western Prestige for the 3 Administration ability of the Western Rebel Emperor Maxentius, with an extra +1 Western Prestige for his Prestige special ability. The Eastern Player pays 40 Gold from the Eastern Treasury for an extra +4 Eastern Prestige (the maximum allowed by Constantius II's 4 Administration ability).
10.5.2 Decrease each Empire's Unrest by the Popularity ability of its Emperor. Players may also decrease their Empire's Unrest by one for each 10 Gold paid from its Treasury.
Example: -3 Eastern Unrest for the three Popularity ability of the Eastern Emperor Constantius II and -1 Western Unrest for the one Popularity ability of the Western Rebel Emperor Maxentius. The Eastern Player spends 80 Gold from the Eastern Treasury for another -8 Eastern Unrest.
10.6 Building Units
10.6.1 Players may Build Units in the Barracks Box by paying their Building cost from their Treasury (see the Treasury Chart on the map) and placing them in a Loyal Roman or Insurgent Province in their Empire as an Ordinary Unit (Case 2.1.2).
10.6.2 Players may Promote Forts to Pseudo Legions for 10 Gold and Auxilia to Veteran Auxilia for 5 Gold (Cases 2.2.5, 2.2.6) but increase Pay by one for each Unit Promoted as they cost one more Gold to Pay (Case 9.3.2). Players may not Demote these Units, except through Losses or the Plague Event (Event Chart).
10.6.3 Fleets may not be built in Mountain Provinces (Cases 2.2.7, 4.2.11).
10.6.4 Unless they agree otherwise, Players alternate Building Units from the Barracks Box, the Eastern Player first on odd turns and the Western Player first on even turns.
10.7 Transferring Units
Transferring units from one Command to another was expensive as local troops were very reluctant to leave their farms and families. Cavalry and Guards were used as a strategic reserve with help from Legions and Auxilia.
10.7.1 Players may Transfer Units between Insurgent and Roman Provinces, but not to Homeland, Barbarian, Foederati, or Allied Provinces (Section 4.2). Unless they agree otherwise Players alternate Transferring Units, the Eastern Player first on odd turns and the Western Player first on even turns.
10.7.2 Players may Transfer Units for free between Provinces in the same Command, but you must pay to Transfer Legions, Auxilia, and Fleets to another Command, even if it has the same Governor (Case 5.2.5). Cavalry and Guards Transfer for free between Commands in the same Empire, but you must pay to Transfer them to another Empire, even if there is a Sole Emperor (Cases 2.2.1, 2.2.2). Units may only Transfer between Empires if both Players agree. Transfer costs are the same as the cost to Pay each Unit (see the Treasury Chart on the map), paid from the Treasury of the Empire the Unit is Transferring to. There is no Transfer cost for Units forced to Transfer by overstacking (Case 2.3.3) or when Moesia and Pannonia change Empires (Case 5.2.4).
10.7.3 Fleets in a Desert Province may only Transfer to another Desert Province. Fleets in Desert Provinces are Dismissed if forced to Transfer to a non-Desert Province (Cases 2.2.7, 4.2.10). Fleets may never Transfer to Mountain Provinces (Case 4.2.11).
10.7.4 Forts may not Transfer, place them in the Barracks Box if forced to Transfer (Cases 2.2.5, 2.3.3).
10.7.5 Loyal Units may only Transfer to Rebel Provinces if overstacked and cannot Transfer elsewhere. Rebel Units may only Transfer to Provinces not controlled by their Rebel if forced to Transfer and cannot Transfer elsewhere (Case 2.3.4).
11.0 War Phase
11.1 Revolts
Revolts downgrade Provinces and reduce Prestige. Players should only make Revolt die rolls for Provinces that are Insurgent, occupied by a War (or connected to its Province), connected to a Homeland or Barbarian Province, or affected by the Bagaudae, Heresy, and Foederati Events. Other Provinces need no Revolt die roll as they cannot Revolt. Guards, Legions, Auxilia, Forts, and Fleets help Insurgent and Roman Provinces resist Revolts. Use Foederati and Allied Provinces to secure the frontier and reduce the number of Revolt die rolls to a minimum. Players may use spare dice to show which Provinces need a Revolt die roll, so in the 286 CE Scenario place a six on Lugdunensis II, fives on Bosporus, Colchis, and Germania II, and a four on Mesopotamia as they Revolt on a die roll equal to or greater than these numbers. Also make a Revolt die roll for Insurgent Belgica as it may be Romanised even though it cannot Revolt. Other Provinces at the start of the 286 CE Scenario need no die as they cannot Revolt, though Events, Revolts, Wars, Enemy Leaders, and Transferring Units may change this.
11.1.1 At the start of the War Phase make a Revolt 1D6 on the Revolt Chart (PAC) for each Foederati, Allied, Insurgent, and Roman Province that could be affected (Section 4.2). Revolt die rolls are simultaneous and unaffected by other Revolting Provinces. Make an extra Revolt 1D6 for all Allied, Insurgent, Roman, and non-matching Foederati Provinces occupied by Foederati Wars if there is a Foederati Event (Section 8.1). Foederati Provinces are affected by matching Homelands, but never Revolt if occupied by a matching Foederati War (Cases 3.2.5, 4.2.3).
11.1.2 Allied Provinces reduce their Revolt 1D6 by one, Foederati Provinces by two, and both reduce their Revolt 1D6 by an extra one for each connected Homeland and Barbarian Province. Fleets reduce the Revolt 1D6 of their Province by one for each Homeland and Barbarian Province connected by River/Straits. Guards, Legions, and Ordinary Auxilia reduce the Revolt 1D6 of their Province by one each, and Forts and Veteran Auxilia by two each. Guards, Legions, and Fleets have the same effect on the Revolt Chart whether Ordinary or Veteran. Cavalry do not affect Revolts (Sections 2.2, 4.2).
Note: Foederati and Allied Provinces effectively reduce the modifier of each and every connected Homeland and Barbarian Province by one, as do Fleets across River/Straits. This represents them protecting the borders of their kingdom and makes them excellent buffer states. Roman Fleets guarded major rivers and straits from barbarian pirates.
11.1.3 If its Revolt 1D6 is greater than six, the Province Revolts (with -1 Prestige for its Empire). A Revolting Roman Province becomes Insurgent (with +1 Unrest for its Empire), an Insurgent Province becomes Allied, and a Foederati or Allied Province becomes Barbarian (Section 4.2). Remove its Foederati, Allied, or Insurgent counter and place the Barbarian, Foederati, Allied, or Insurgent counter showing its new status. Revolting non-matching Foederati, Allied, and Insurgent Provinces occupied by a Foederati War (or connected to its Province) instead become Foederati Provinces matching the War unless occupied by another War, Player's choice if several (Cases 3.2.5, 4.2.3).
11.1.4 Romanisation If the Revolt 1D6 of an Insurgent Province not occupied by a War is equal to or less than the Military ability of its Governor or Rebel, remove its Insurgent counter, making it a Roman Province with +1 Prestige for its Empire if a Loyal Province (Cases 4.2.5, 4.2.6, 4.2.8).
11.1.5 If a Roman or Insurgent Province Revolts into a Foederati or Allied Province its Units become overstacked and must immediately Transfer (Section 2.3).
Example: At the start of the 286 CE Scenario Lugdunensis II adds one to its Revolt 1D6 as it is Insurgent. A Revolt 1D6 of 6 replaces the Insurgent counter with an Allied counter for -1 Western Prestige. A Revolt 1D6 of 3-5 has no effect, but 1-2 will Romanise the Province as this is ≤ 3 Military ability of the Generic Governor of Gallia, removing the Insurgent counter for +1 Western Prestige. Building a Pseudo Guard, Legion, or Auxilia in Lugdunensis II will subtract one from the Revolt 1D6, making it impossible to Revolt and Romanising it on 1-3.
Example: At the start of the 286 CE Scenario Germania II will Revolt on a 1D6 of 5-6, +4 connected by River/Straits to Barbarian Frisia and Barbarian Germania III, and -2 for the Legion and Auxilia in the Province. Building a Fleet in Germania II will remove the need for a Revolt 1D6 as the Fleet provides an extra -2 modifier as two Barbarian Provinces are connected by River/Straits. The Fleet also prevents the Fleet icon in Germania II from increasing Western Unrest, but the frontier could also be secured by Building a Fort or Veteran Auxilia in the Province as they both have a -2 modifier. Alternatively, Annex Barbarian Germania III as an Allied Province, which would remove its +2 modifier.
Example: At the start of the 286 CE Scenario Allied Bosporus will Revolt on a 1D6 of 5-6, +6 connected by River/Straits to the Bulgar Homeland, Barbarian Caucasia, and Barbarian Gothia II, -1 as an Allied Province, and -3 for three connected Homeland and Barbarian Provinces. If you Annex Barbarian Gothia II as an Allied Province one +2 modifier and one -1 modifier will be removed, so Bosporus only Revolts on a 6.
11.2 Fighting Wars
11.2.1 Each War may be fought once in the War Phase by rolling a 3D6 on the Wars Chart (PAC). Wars do not have to be fought.
11.2.2 Each Commander, Province, and Unit may only fight one War each Turn.
11.2.3 Choose which Commander, Units, non-matching Foederati Provinces, and Allied Provinces will fight the War and make a War 3D6 roll on the Wars Chart (PAC).
11.2.4 Emperors may fight Wars using Loyal Provinces and Units in their Empire (Case 5.2.4). The Sole Emperor may use Loyal Provinces and Units from both Empires, but only one Empire benefits from a Triumph, and only if its Provinces and Units were used to fight the War (Case 5.1.3). Emperors may not fight Wars if they are an Imperial Statesmen and Theodosian Dynasty is in play (Dynasty Chart).
11.2.5 Governors may fight a War using the Provinces and Units in their Command (Section 5.2).
11.2.6 Rebels and Rebel Emperors may fight a War using the Provinces and Units of the Commands whose Rebel counters are in their Command Box. Rebel Triumphs do not increase Prestige, decrease Unrest, or add Gold to a Treasury except if a Rebel Emperor, but Gold won in a Triumph may be used to absorb Losses (Section 5.2).
11.2.7 Units in the same Province must fight the same War together. Provinces and Units may only fight a War in their own Province or a connected Province. They may fight a War in another Command or Empire if it is in a connected Province.
11.2.8 Naval Strength If the number of Roman Fleets (counting Veteran Fleets as two) and non-matching Foederati Provinces (Case 4.2.3) fighting the War are less than the War's Naval Strength treat a Triumph as a Draw (Case 3.2.3).
Example: The 7/1 Moorish War is in Barbarian Mauretania II, which is connected to Allied Mauretania I and Allied Baetica. No Fleet can be Transferred to the War's Province or a connected Province to match its one Naval Strength, so you cannot win a Triumph. You could Annex Baetica as an Insurgent Province and Transfer a Fleet there. If Baetica became a Foederati Province this would also match the one Naval Strength but is difficult to arrange. Alternatively, you could wait for the Moorish War to move to Mauretania I or Baetica and Transfer at Fleet to Roman Carthaginensis, which is connected to either Province, allowing you to fight the War with a chance of winning a Triumph.
11.2.9 Cavalry Strength If the number of Cavalry Units (counting Veteran Cavalry as two) and non-matching Foederati Provinces (Case 4.2.3) fighting the War are less than the War's Cavalry Strength, treat a Triumph as a Draw (Case 3.2.4).
Example: The Western Player uses Governor Aegidius of Gallia and Hispania to fight the 12/2 Visigothic War in Visigothic Foederati Aquitania II using Suevian Foederati Gallaecia, Allied Celtiberia, Roman Narbonensis (with a Veteran Guard, Pseudo Legion, and Veteran Auxilia), and Insurgent Tarraconensis (with a Veteran Legion, Auxilia, and a Fleet). Provinces and Units in Gallia and Hispania not connected to Aquitania may not fight the War even though commanded by Aegidius. The Visigothic Foederati in Aquitania II matches the Visigothic War and is ignored, but the Suevian Foederati and the Fleet in Tarraconensis match the two Naval Strength of the 12/2 Visigothic War. The War 3D6 is 12 (444), for a Disaster, which is ignored by the Visigothic War special ability of Aegidius, +12 Visigothic War's Strength, -4 Aegidius' four Military ability, -1 Aegidius' Visigothic War special ability, -2 Veteran Guard, -2 Veteran Legion, -2 Veteran Auxilia, -1 Pseudo Legion, -1 Auxilia, -2 Suevian Foederati Gallaecia, and -1 Allied Celtiberia for a total of 6 (12+12-16 = 8) and a Triumph [sic: the printed total reads 6 while the printed arithmetic gives 8; transcribed as printed]. The 12/2 Visigothic War counter is placed in Aegidius' Gallia Command Box with +6 Western Prestige and -6 Western Unrest (half the War's 12 Strength) and +24 Gold in the Western Treasury (12 Strength multiplied by Aegidius' 2 Administration ability). The Western Player takes four Losses as the purple die was 4, +1 Western Unrest for one Disgrace, -20 Gold for two Tribute, and Demotes the Veteran Auxilia to Ordinary, which reduces Western Pay by one. The Western Player Promotes the Fleet to Veteran, Annexes Suevian Gallaecia as an Allied Province, and again as an Insurgent Province thanks to Aegidius' Visigothic War special ability for +2 Western Prestige, replacing its Suevian Foederati counter with an Insurgent counter.
11.3 Losses
Losses increase Unrest, reduce Prestige and Gold, force Provinces to Revolt, demote Veterans, remove Legions from play and place other Units in the Barracks Box.
11.3.1 Purple die Take Losses equal to the purple die of a War or Civil War 3D6 as indicated in the Losses Chart (PAC). A maximum of two Losses of each type may be taken for each War and Civil War, except any number of Legions may be Destroyed. Pseudo Legions may only be Destroyed after all the Legions fighting their War or Civil War have been Destroyed (Case 2.2.4). Only Provinces occupied by a War (or connected to its Province) and the Units fighting it may be affected by its Losses. Only Units and Foederati Provinces fighting a Civil War may be affected by its Losses.
11.3.2 Disaster There is a Disaster if the War 3D6 is a triple (all three dice the same) or there is a doubled Event counter in the Persecution Event Box (Event Chart) and the two white dice of the War 3D6 are a double (both dice the same). The Commander dies and increase Unrest, decrease Prestige, and allocate Losses equal to the purple die. Half the Losses from Disasters must Destroy Legions, if possible rounded up (Case 2.2.3). Ignore if the Commander has a matching War special ability (Case 6.3.11) and treat as a Stalemate if he has the Stalemate special ability (Case 6.3.9).
Example: The Eastern Emperor Valens is fighting Fritigern and the 10/2 Visigothic War in Rhodope, but there is a doubled Persecution Event, and the Eastern Player makes a War 3D6 of 5 with the purple die and 33 with his white dice for a Disaster! Valens does not have a Visigothic War or Stalemate special ability, so is killed with +5 Eastern Unrest, -5 Eastern Prestige, and 5 Losses (equal to the purple die) which must Destroy three Legions (half the Losses, rounding up). The Eastern Player Demotes two Veteran Legions for two Losses, then Destroys them for two more Losses. As there are no more Legions fighting the War left he Destroys a Pseudo Legion as his fifth Loss and third Destroyed Legion.
11.4 Fighting Civil Wars
After fighting Wars Emperors fight Rebels by rolling a 3D6 on the Civil Wars Chart (PAC). You may fight each Rebel only once each turn. Emperors must fight a Rebel Emperor and all Rebels in their own Empire (Section 5.3). Sole Emperors may use Loyal Provinces in both Empires to fight Civil Wars, do not need to fight Rebels in a Fallen Empire, but must fight all Rebels in Empires that has not Fallen (Cases 5.1.3, 12.2.2). Rebel Emperors may fight other Rebels in their Empire. If an Emperor dies in a Civil War the new Emperor must still fight any unfought Rebels. Half the Losses in a Civil War between an Emperor and a Rebel Emperor must Destroy Legions if possible, rounding up (Cases 2.2.3, 5.3.4).
Example: The Western Emperor Constans fights Rebel Magnentius of Britannia and Gallia. The Civil War 3D6 is 13, +2 Maximus' Military, +10 five Veteran Rebel Cavalry, Fleets, and Legions, +5 five Rebel Legions and Fleets, -3 Constans' Military, -6 three Veteran Loyal Cavalry, Guards, and Legions, -7 seven Loyal Cavalry, Fleets, and Legions for 14 (13 +17 -16 = 14) for a Rebel Victory. Constans is killed with +4 Western Unrest (for his 4 Popularity ability) and -3 Western Prestige (for his three Administration). The purple die was 3, so the Western Player takes three Losses, +1 Western Unrest for one Disgrace and -20 Gold for two Tribute, then Promotes a Legion to Veteran. Add the Rebel Africa, Hispania, Italia, and Pannonia counters to Magnentius' Britannia Command Box and Governor Julian of Italia is placed face up in the Statesmen Box. Eastern Emperor Constantius II cannot fight the Rebel Emperor Magnentius this turn as he has already been fought but must fight him next turn.
11.5 Rebellions
11.5.1 If there is a doubled Mutiny Event (Event Chart) make a Rebellion 3D6 for each Governor in the Event Phase. If equal to or greater than twenty-five he becomes a Rebel and place the Rebel counters of his Commands in his Command Box (Cases 5.2.5, 5.3.1). If less than twenty-five he remains Governor.
11.5.2 If there is a doubled Usurper Event (Event Chart) make a Rebellion 3D6 for a random Emperor in the Event Phase unless there is a Sole Emperor or Rebel Emperor (Cases 5.1.3, 5.3.4). If equal to or greater than twenty-five he becomes a Rebel Emperor, place the Rebel counters of all the Commands in his Empire in his Emperor Command Box, except those in the Command Boxes of other Rebels, and place all the Loyal Roman Statesmen counters in his Empire's Command Boxes face up in the Statesmen Box (Section 10.3). If less than twenty-five he remains Emperor.
11.5.3 After all Rebels have been fought, make a Rebellion 3D6 in the War Phase for each Governor with a War counter in his Command Box from winning a Triumph (Section 11.2). If equal to or greater than twenty-five remove the War counter and place the Rebel counters of all his Commands in his Command Box (Cases 5.2.5, 5.3.1). If less than twenty-five remove the War counter and he remains Governor.
11.5.4 When an Empire Falls all its Governors become Rebels with no Rebellion 3D6, just place the Rebel counters of their Commands in their Command Boxes (Cases 5.2.5, 5.3.1, 12.2.2).
Example: Governor Aegidius of Gallia and Hispania has Triumphed over the 12/2 Visigothic War, which was placed in his Gallia Command Box. His Rebellion 3D6 is 13, +1 (the difference between his 3 Popularity ability and the 2 Popularity ability of the Generic Western Emperor), +8 Unrest, +4 four Veteran Cavalry and Guards in Gallia and Hispania for 26. Aegidius Rebels, so flip the Gallia and Hispania Loyal counters in his Command Box to their Rebel sides. If the Generic Governor of Gallia was Rebelling instead of Aegidius his 1 Popularity ability would be subtracted from the 2 Popularity ability of the Generic Emperor for +1 to the Rebellion 3D6 as the lower Popularity ability is always subtracted from the greater.
12.0 Victory Phase
12.1 Prestige
Victory is determined by the Prestige earned by each Empire by the Players. Prestige is increased by Bread and Circuses, Annexing Provinces, and Triumphing over Wars and decreased by Revolts, Disasters, Losses, Assassinations, and Events. One Empire may win a minor victory while the other loses, but you can only win a major victory if both Empires succeed. A Fallen Empire represents the decline and fall of an empire as it disintegrates into warring kingdoms under the nominal rule of an impotent or distant emperor but continue play as the other Empire may still win a minor victory. Some scenarios have bonus Prestige indicated in their set up to give the Players a chance of victory in a time of crisis.
12.1.1 Use the "x1" and "x10" Prestige counters on each Empire's Game Track to record their Prestige and the "-1" and "-10" on their reverse for negative Prestige. Prestige is affected by Assassinations (Section 8.3), Annexation (Section 10.2), Bread and Circuses (Section 10.5), and Revolts, Wars, and Civil Wars (Module 11.0).
12.1.2 In the Victory Phase of Turn 10 check Prestige to determine the level of victory or defeat of each Empire.
12.1.3 Major Victory If both Empires have more than 75 Prestige.
12.1.4 Minor Victory If your Empire has more than 75 Prestige.
12.1.5 Draw If your Empire has 50-75 Prestige.
12.1.6 Minor Defeat If your Empire has less than 50 Prestige.
12.2 Major Defeat
12.2.1 Fallen Empires An Empire Falls at the end of any phase if its Capital is a Barbarian, Foederati, or Allied Province (Case 4.2.9), it has negative Gold (Case 9.1.3), or more than twenty-five Unrest (Case 10.1.7).
12.2.2 When an Empire Falls its Emperor is killed (unless the Sole Emperor); place the "Fall" counter in its Emperor Command Box (which cannot be removed) and the remaining Emperor becomes the Sole Emperor (Case 5.1.3), even if a Rebel Emperor (Case 5.3.4). When an Empire Falls, if it has negative Gold increase it to zero, reset its Prestige and Unrest to zero, and all its Governors become Rebels (Case 11.5.4). Fallen Empires ignore Unrest from its Grain icons (Case 10.1.6) and the doubled Usurper Event (Event Chart), and Civil Wars may be fought against its Rebels but do not need to be fought (Section 11.4).
12.2.3 Both Players suffer a Major Defeat if both Empires Fall, or a Fallen Empire has less than 0 Gold or more than twenty-five Unrest at the end of any phase.
12.3 End of the Turn
On Turn 10 the game ends. If not Turn 10 advance the Turn counter and proceed to the next turn.
12.4 Optional Rules
Make the game easier or harder by using any of the following rules.
12.4.1 Events One extra or one fewer Event each turn (Section 8.1).
12.4.2 Taxes +1 or -1 modifier to each Tax 2D6 (Section 9.2).
12.4.3 Wars +1 or -1 modifier to each War 3D6 (Section 11.2).
12.4.4 Losses Dismiss three Auxilia instead of two and pay 15 Gold in Tribute instead of 10 (Losses Chart).
13.0 Scenarios
Source note: the printed Table of Contents lists Sections 14.0 to 18.0 (the 286, 363, 425, 497 and 565 CE scenario set-ups, with Eastern and Western Empire subsections). Those sections are not contained in the rulebook PDF transcribed here, which ends at Case 13.3.5, so they are not transcribed. The Addenda dated 2 April 2025 that BGG lists for this game were also not available and are not included.
13.1 Overview
The five scenarios start in 286 CE, 363 CE, 425 CE, 497 CE, and 565 CE, each lasting 10 turns. In each scenario set up the counters then proceed to the Event Phase of Turn 1. Enemy Leaders and Wars are mixed face down in the Wars Box, with the Wars being identified by their Strength/Naval Strength or Strength/Cavalry Strength (Case 3.1.1). Veteran Units are listed in bold. Roman Provinces with no Units are not listed. The Turn counter is listed for the Eastern Empire but can be placed on either Game Track.
13.2 Extended Game
You may play 2-4 scenarios in a row, but only calculate victory at the end of the last scenario being played (Case 12.1.2).
13.2.1 At the end of Turn 10 of each scenario (except Turn 10 of the last scenario being played), return the Turn marker back to the "1" Box, add the Prestige bonus for the new scenario (Section 12.1), and subtract 75 Eastern Prestige and 75 Western Prestige (which may result in negative Prestige). Gold, Pay, Unrest, Roman Statesmen, Enemy Leaders, Wars, and Units all remain where they are. Ignore the next scenario's set up except to mix the next scenario's Roman Statesmen and Dynasty counters face down in the Statesmen Box and Enemy Leader and War counters face down in the Wars Box.
13.2.2 If an Enemy Leader or War needs to be placed in the Wars Box for the new scenario but is still in play, make a note to mix it face down in the Wars Box when it is removed from play.
Example: The Persian Leader Chosroes is in both the 497 CE and 565 CE Scenarios. When the 497 CE Scenario is extended his counter needs to be placed face down in the Wars Box as listed for the 565 CE Scenario. If he is still in play, make a note to mix him face down in the Wars Box when he dies.
13.3 Extending Rome, Inc.
Players may extend the 222 CE Scenario from Rome, Inc. into the 286 CE Scenario from Rome, IInc. so that 2-9 scenarios may be played in a row, but you only calculate victory at the end of the last scenario being played (Case 12.1.2).
Note: This is done by placing counters on the Rome, IInc. map in the equivalent Provinces and Boxes on the Rome, Inc. map, so you need to have both maps on the table or note the position of the counters on the Rome, Inc. map (taking photos will be easiest).
13.3.1 At the end of Turn 10 of the 222 CE scenario, place the Turn marker in the "1" Box on the Eastern Game Track and subtract 150 Prestige (which may result in negative Prestige). Give half the Prestige and Gold to each Empire, rounding up for the Eastern Empire, and down for the Western Empire. Ignore the 286 CE Scenario set up except to mix its Roman Statesmen and Dynasty counters face down in the Statesmen Box and Enemy Leader and War counters face down in the Wars Box.
13.3.2 Provinces Place the counters from each Province on the Rome, Inc. map in the Province with the same name and location on the Rome, IInc. map, using the Provinces Chart for Provinces which have changed their name (PAC). Treat the new Provinces of Aquitania II, Arabia I, Celtiberia, Constantinople, Dardania, Gothia I, Lugdunensis II, Moesia II, Spoletium, and Valentia as Insurgent Provinces (Case 4.2.5). Enemy Leaders without a matching War are placed in their Homeland on the Rome, IInc. map and die if they now have no Homeland (Case 4.2.1).
Note: Diocletian renamed most of the provinces when he reorganised the empire.
13.3.3 Units Replace Imperial Cavalry with Cavalry, Praetorian Guards with Guards, Legions with Legions (or Pseudo Legions if there are no Legions left), Walls with Forts, Auxilia with Auxilia, Fleets with Fleets, and Veterans with Veterans. Excess Rome, Inc. Units are removed from play. The remaining Rome, IInc. Units are placed in the Barracks Box. Calculate Eastern and Western Pay (Section 9.3).
Example: Britannia Inferior has the VI Victrix Veteran Legion, XX Valera Legion, two Auxilia, and a Wall on the Rome, Inc. map, so place a Veteran Legion, Pseudo Legion, two Auxilia and a Fort in Britannia II on the Rome, IInc. map. The II Augusta Legion and Veteran Fleet in Britannia Superior become a Legion and Veteran Fleet in Britannia I. Place the Barbarian counters in Caledonia and Hibernia in Barbarian Caledonia and Hibernia and treat Valentia as an Insurgent Province.
13.3.4 Rebels Replace Rome, Inc. Rebel counters with their equivalent Rome, IInc. Rebel counters. Replace the Aegyptus and Syria Rebel counters with the Oriens Rebel counter. If different Rebels control Aegyptus and Syria give it to one at random, which will kill a Rebel left with no Rebel Provinces. Place the Thracia Rebel counter in the same Governor Command Box as the Moesia or Pontica Rebel counter, chosen at random if they are not in the same Command Box. If a Rebel controls Commands in both Empires one Emperor must fight a Civil War against him and all his Rebel Units and Provinces each turn.
Example: The Rebel Roman Statesman Carinus is in the Rome, Inc. Syria Command Box with the Rebel Pontica and Syria counters. There is no Rebel in Aegyptus, so he takes the Oriens rebel counter, but there is a Generic Rebel of Moesia. The Players decide the Thracia Rebel counter will go to Moesia on a 1D6 of 1-3 and Carinus on 4-6, roll a 4 and place Carinus in the Oriens Command Box with the Oriens, Pontica, and Thracia Rebel counters.
13.3.5 Roman Statesmen Unless they are dead, replace the Rome, Inc. Diocletian, Maximian, and Carausius Roman Statesmen counters with their equivalent Rome, IInc. counters. Keep the counters of other Rome, Inc. Roman Statesman, but they all have "1" Popularity ability (Case 6.2.3) and use their special abilities from Rome, Inc. if not listed in Rome, IInc. (Section 6.3). Make Caesar one of the Emperors, place the other Roman Statesmen face up in the Statesmen Box and appoint the other Emperor and Governors, Western Player first (Cases 5.1.4, 10.3.3).