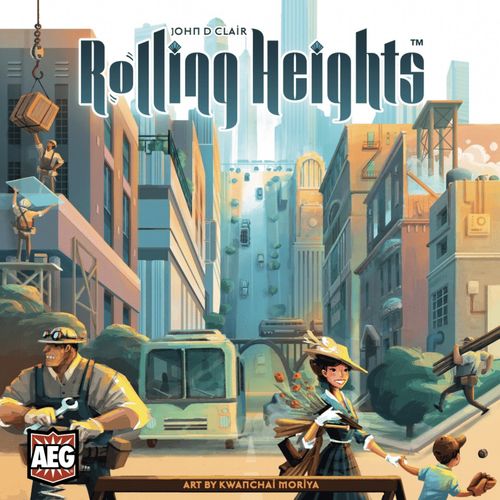
Rolling Heights
Rolling Heights Rulebook
Table of Contents
Table of Contents
Components
- 6 Double-Sided Neighborhood Boards
- 1 Score Board
- 2 Market Strips (8 pieces)
- 78 Building Plan Tiles
- 98 Meeples (16 clear, 16 navy gray, 13 blue, 11 purple, 11 yellow, 8 brown, 8 green, 8 magenta, 7 black)
- 285 Cubes (80 clear, 60 blue, 60 brown, 60 navy gray, 25 orange)
- 4 Player Tokens
- 4 Rolling Boxes
- 72 Ownership Markers (18 in each of 4 player colors)
- 1 Start Player Token
- 12 Ad Tiles & 13 Target Tiles
- 30 Wild Tokens
Overview
In Rolling Heights, you will be "rolling" meeples that represent your workforce. Meeples that land upright are energized workers who transport building materials to your various construction sites and carry out special actions, while meeples that lie on the ground are exhausted workers who need to rest. You can try to push your workers, but push too hard and your employees will revolt and go on strike!
Materials come in the form of plastic cubes that you stack to construct three-dimensional structures on the board. Completed buildings bring you prestige and additional workers to help you construct even taller buildings, including skyscrapers. These landmarks will define the cityscape for decades—even centuries—to come.
What great heights will you reach? Let's get rolling...
Set Up
- The 6 Neighborhood boards each have an A side and a B side. Depending on the number of players, flip the boards to the following sides:
- 2 players: Use all 6 A sides.
- 3 players: Use 4 randomly selected A sides and 2 randomly selected B sides.
- 4 players: Use 3 randomly selected A sides and 3 randomly selected B sides.
- Arrange the 6 Neighborhood boards randomly in a 2x3 grid as shown to form the map. (The icons on the boards do not all have to face the same direction.)
- Place the Score Board next to the map as shown.
- Place the 2 Market Strips alongside the map as shown.
- Sort the Building Plan tiles into 2 groups based on the backs of the tiles and shuffle them face-down. Stack the LEVEL 1 tiles face-down by the draw area on Market Strip Level 1 and lay out 9 tiles face-up along the indicated spaces on the strip. Do the same with the LEVEL 2 tiles and Market Strip Level 2.
- Sort the cubes into piles by color. (You may leave the miscellaneous cubes to the side—they won't be needed until near the end of the game.) We recommend making a pile of each color cube on either side of the table, so they are easier for all players to reach. Depending on the number of players, remove the following number of cubes (except misc.) and return them to the box:
- 2 players: Remove 25 cubes of each color.
- 3 players: Remove 13 cubes of each color.
- 4 players: Use all the cubes.
- Sort the meeples by color and place them near the boards to form the supply.
- Place the Wild Tokens near the boards.
- Shuffle the rectangular Ad tiles face-down and select 3 randomly. Place these tiles face-up on the indicated spaces on the score board. At the end of the game, each player will score for all 3 objectives. For your first game, we recommend using the following:
- 2 VP — Per column with one or more of your completed buildings.
- 4 VP — Per building in the largest contiguous group of your completed buildings.
- Score 4 for each neighborhood where you have the tallest completed building.
- Shuffle the Target tiles face-down and deal 2 to each player. Players should look at their Target tiles but keep them hidden from other players. At the end of the game, each player will choose 1 of the 2 Target tiles to score.
- Finally, each player chooses a player color and takes the player token and 18 ownership markers of that color. Place the player tokens on space "0" on the score track on the score board. Each player should also take a rolling box, 2 Carpenter meeples and 2 Construction Worker meeples, which they can place in their box for now.
Tile Anatomy
Each Building Plan tile shows: the Building Name; the Stacks of cubes required to complete the building (shown on the left edge, with the stack height printed next to each resource icon); the Building Type; and the VP and/or meeple(s) gained for completing the building, along with any Meeple Ability the building grants.
Example: Csilla Tower requires stacks of 4 and 6 glass, and 5 and 8 steel, to complete. Completing it gains 20 VP and a purple meeple, which grants "Gain 2" or "Gain 3" as its ability.
Starting Placement and Building Plans
Randomly determine a start player, who takes the start player token. Then, beginning with the last player and going counter-clockwise, players will select their starting Building Plan and starting location on the map.
A player may choose any of the face-up Building Plan tiles along Market Strip Level 1 and place it on any land (not water) space on the board that does NOT show a cube icon (which indicates cubes must be spent to build there).
If the space awards Victory Points (VP) for a specific type or types of buildings and the player places a matching building type there, that player immediately scores those points and moves their player token along the score track.
Example: The building type matches the bonus indicated on the map space, so this player would score 2 VP.
After placing the tile, the player should place one of the ownership markers of their color on the tile.
The players following in counter-clockwise order do the same but may NOT place their starting tile within 2 orthogonal (not diagonal) spaces of another player's tile.
Continue until all players have placed a starting tile on the map. Slide down (in the direction of the printed arrows) the remaining tiles along Market Strip Level 1 to fill in the blank spaces. Then refill the remaining blank spaces with LEVEL 1 tiles from the draw area.
Now all players are ready to begin, and the starting player should take their first turn.
Game Turn
A player's turn consists of the following 4 phases:
- PREP: Roll your meeples.
- RISK: Choose to push your luck or pass.
- MAIN: Resolve your roll. Construct buildings. Buy 1 new Building Plan.
- CLEANUP: Lose any unspent cubes. Refill market.
Once a player has completed their turn, play moves to the next player in clockwise order.
NOTE: To speed up the game, we strongly suggest that players should actually complete the Prep and Risk phases of their turns in advance, while their opponents are taking their turns, so that players can simply begin with the Main phase when their turn comes around. Generally, players can just begin their next turn's Prep and Risk phases right after finishing their current turn. This, of course, is not a requirement, and players may choose to wait until their turn officially starts to complete these phases if they feel it would be strategically beneficial.
Phase 1: Prep
- If you have 10 or fewer meeples, you will roll all of them. (At the start of the game, you have 4 meeples.)
- If you have more than 10 meeples, choose 10 of them to roll this turn and place the rest to the side of your play area. They will not be used this turn, but you may choose from them to use on future turns. The meeples you choose to roll are your "active" meeples.
Roll all of your active meeples in your rolling box. Meeples will land in one of 3 positions:
- WORKING STEADY — Sideways
- EXHAUSTED — Flat on back
- WORKING HARD — Standing
Take out any WORKING HARD or WORKING STEADY meeples from the box—keeping them in their standing or sideways position—and place them on the table in front of you.
If more than half of your active meeples are EXHAUSTED, take all the Exhausted meeples and roll them again. Repeat this process until at least half of your active meeples have come out of your rolling box and are either Working Hard or Working Steady.
Cocked or Stacked Meeples
Sometimes meeples will end up stacked on top of one another after a roll. This is fine—just count them as whatever position they are in.
Sometimes meeples will land such that they are leaning against a side of the box or another meeple and are not clearly in one of the 3 positions. In these cases, take only those meeples in question and re-roll them until they land in a clear position.
Sometimes meeples will land outside your rolling box. These meeples should be re-rolled until they land in a clear position inside your rolling box.
NOTE: Take care when re-rolling meeples that you do not alter the positions of meeples in the box that were already rolled; it may be best to temporarily remove all other meeples from your box, preserving their positions, or temporarily use another player's rolling box that is not currently being used.
Phase 2: Risk
Choose whether to stop and move on to your Main phase or push your luck and attempt to rally your workers.
If you choose to rally, take all of your EXHAUSTED meeples from your box and roll them again.
- If all the meeples landed Exhausted, you have "busted" and your workers become angry and go on strike (see below).
- If at least one meeple landed WORKING HARD or WORKING STEADY, take out from the box all the Working Hard and Working Steady meeples as normal and add them to the others in front of you on the table. If there are any Exhausted meeples remaining, you then choose again whether to stop and move on to your Main phase or continue pushing your luck and attempt to rally your workers again.
STRIKE!: When you bust, you must select half (rounded down) of your current Working Hard and Working Steady meeples and put them back in your box as Exhausted meeples. You then gain 1 Wild Token from the supply. Finally, proceed to your Main phase.
How to Resolve a Strike
Example: If you had 1 Working Hard meeple and 2 Working Steady meeples, you would have to return 1 of the meeples to your box as Exhausted. You then gain 1 Wild Token from the supply. Finally, proceed to your Main phase.
Phase 3: Main
During this phase, you may, in any order you choose:
- Activate your meeples
- Buy and place 1 new Building Plan
- Use Wild Tokens
- Make Commodity Trades
- Construct buildings
- Complete buildings
Activating Meeples
You may activate any of your WORKING HARD and WORKING STEADY meeples for their respective abilities. You may do so in any order you wish throughout your turn—before, after, and in between other actions.
As each meeple is activated, place it flat on its back to the side of your play area. That meeple cannot be activated again during this turn.
You may activate a Working Hard meeple for its lesser Working Steady ability instead, if you wish.
Most meeples provide you with cubes. When you gain a cube, simply take it from a supply pile and keep it near you. At any point during your turn, you may use the cubes you've acquired to add to your existing Building Plan tiles, buy a new Building Plan, or make Commodity Trades. You may only buy 1 new Building Plan each turn, but you may add cubes to any number of your existing Building Plans and complete any number of buildings.
NOTE: The supply of cubes of a given color will eventually run out. This will trigger the addition of the miscellaneous cubes to the general supply and MAY trigger the end of the game. See "Game End" below for more detail.
Spending Power: Magenta meeples and some purple meeples provide virtual Spending Power, which can only be used that turn and can be spent on anything a physical cube can be spent on, EXCEPT for constructing buildings.
Do NOT take cubes from the supply—simply keep track of how much Spending Power you have available to use on your turn. Remember, any Spending Power not used is lost at the end of your turn!
Any Cube: This icon means you can spend any combination of physical cubes (wood, concrete, glass, steel, or miscellaneous) and Spending Power to cover the cost. Spent physical cubes are returned to the supply.
The Meeples
PUBLIC SERVANT (GREEN) — A Working Steady green meeple lets you upgrade any 1 of your Exhausted meeples into a Working Steady meeple or upgrade any 1 Working Steady meeple into a Working Hard meeple. A Working Hard green meeple lets you upgrade 2 of your meeples or upgrade 1 Exhausted meeple directly to a Working Hard meeple.
- You may NOT use this ability to reactivate a meeple whose ability has already been activated that turn. (A meeple can never be activated more than once in the same turn.)
- You may NOT use this ability to take non-active meeples set aside at the start of the turn and make them active.
- You may NOT use this meeple's ability to upgrade other Public Servant meeples or itself.
CARPENTER (BROWN) — Gain 1 wood if Working Steady and 2 wood if Working Hard.
CONSTRUCTION WORKER (NAVY GRAY) — Gain 1 concrete if Working Steady and 2 concrete if Working Hard.
ARCHITECT (CLEAR) — Gain 1 glass if Working Steady and 2 glass if Working Hard.
RIVETER (BLUE) — Gain 1 steel if Working Steady and 2 steel if Working Hard.
POLITICIAN (YELLOW) — Gain 1 on the score track if Working Steady and 2 if Working Hard.
EXECUTIVE (MAGENTA) — A Working Steady magenta meeple provides 2 Spending Power for your turn. A Working Hard magenta meeple provides 4 Spending Power for your turn.
PUBLIC FIGURE (PURPLE) — The abilities of the purple meeples depend on your completed buildings. Many Building Plan tiles show a purple meeple ability. If that building is complete, you may use 1 of your purple meeples to use that ability. You may not use that ability multiple times in the same turn; each of your purple meeples must use a different building's ability. See "Building Clarifications" below for clarifications of the individual building abilities.
CITY PLANNER (BLACK) — The black meeple's abilities are quite distinct...
- Working Steady — Take all the Exhausted meeples in your box and re-roll them once. Resolve this like a normal roll—however, you cannot bust on this roll.
- Working Hard — Take any Building Plan tile in either market, ignoring the market's cost, and place the tile on any available space, ignoring distance costs. However, you must pay the additional placement cost, if any. This may be done in addition to your 1 Building Plan you may purchase and place per turn. See "Buying and Placing New Building Plans" below.
Buying and Placing New Building Plans
ONCE on your turn, at any time during the Main phase, you may buy and immediately place a new Building Plan. All 18 face-up Building Plan tiles in Market Strip Level 1 and Market Strip Level 2 are available for purchase.
You must be able to pay the Market cost of the Building Plan and any additional placement costs, depending on where you place the tile on the board. If you cannot pay the full costs at that moment, then you cannot buy that tile. You may not buy a tile and save it for future placement.
Market Cost: The Market cost of the Building Plan is the number of cubes printed on the space on the Market Strip next to where the tile currently lies. Pay this cost with any mixture of physical cubes (returning them to the supply) and virtual Spending Power you have for this turn.
Example: The Toy Center Co. building plan and Mayor's House building plan both cost 2 cubes to purchase.
If you purchased a Building Plan tile but it was NOT one of the 2 Building Plans farthest from the Draw Pile in its Market, place a Wild Token from the supply on each of those 2 tiles (at the end of your turn).
Example: If you did NOT purchase the building plan in one of these spaces, add 1 Wild Token to each plan at the end of your turn.
Next, place the Building Plan tile on an empty land (not water) space on the board. Immediately score any Victory Points printed on the space if matches the indicated building type.
Placement Cost(s): If the selected space on the board has a cube icon, then it is prime real estate and you must pay the cost indicated. Additionally, if the space is not orthogonally adjacent to a Building Plan tile you already own, you must add 1 cube to the cost for each space between the selected space and your closest Building Plan tile (measured orthogonally, not diagonally).
Finally, place of one your ownership markers on the Building Plan tile to indicate it is yours.
NOTE: Ownership markers are unlimited. If you run out, use some other marker to keep track.
Wild Tokens
Wild Tokens are acquired from busting or from buying a Building Plan tile with 1 or more tokens on it. During your turn, you may discard a Wild Token back to the supply to gain 1 cube of any color. You may do this any number of times during your turn.
At the end of the game, any unused Wild Tokens you still have are flipped and are worth 1 VP each.
Commodity Trades
You may make any number of Commodity Trades that you wish during your turn. There are 2 types of trades, as indicated on the score board:
- Pay 2 cubes to gain 1 wood or concrete or glass cube.
- Pay 3 cubes to gain 1 steel cube.
Constructing Buildings
Each Building Plan requires a specific set of cubes to be placed and/or stacked on the tile to complete the building. The necessary cube colors and stack heights are indicated by large icons in the center of the tile and repeated by small stack icons printed on the left side of the tile (since cubes will be placed on top of the larger icons).
At any time during the Main phase of your turn, you may add any number of cubes you've gained to your Building Plan tiles, placing them on the appropriate stacks.
- Cubes placed on Building Plan tiles can never be removed or moved to another tile!
- Spending Power CANNOT be used to add cubes to Building Plan tiles!
Stacks: These icons are a reminder for how many cubes (wood, concrete, glass, and steel) are needed per stack to complete the building. For example, "3" indicates that 3 steel are needed.
Example: To complete Viceroy House, you must place 2 single wood cubes and 1 stack of 4 wood cubes.
Example: To complete City Hall, you must place 1 single glass cube, 2 stacks of 2 glass cubes, 1 stack of 3 steel cubes, and 1 stack of 6 steel cubes.
Completing Buildings
Once your Building Plan tile has the indicated number of cubes on it, the building is complete, and no more cubes may be added to the tile.
-
You immediately score the Victory Points listed on the tile, advancing your player token on the score track.
NOTE: Some buildings score variable VP. These buildings are described in "Building Clarifications" below.
-
You also gain any meeple(s) depicted on the tile from the supply. If a single depicted meeple has 2 different colors, you choose 1 meeple of either of those 2 colors to gain. Meeples gained this way are non-active and are set to the side of your player area. They may be used on your future turns.
-
Finally, take your ownership marker from the tile and place it on top of one of the cube stacks to indicate that the building is complete.
Phase 4: Cleanup
- Return all your unused cubes to the supply.
- Any remaining Spending Power is lost.
- Gather all your active and non-active meeples for your next turn.
- Slide down (in the direction of the printed arrows) the Building Plan tiles along the Market Strip to fill in any blank spaces, and refill the top of the strip by drawing tiles from the draw area for that market. In the rare case that a draw area has run out of tiles, refill from the draw area of the other market instead.
Your turn is over and the next player in clockwise order begins their turn. We recommend you now immediately do the Prep and Risk phases of your next turn in advance, as this will significantly speed up the pace of the game.
Miscellaneous Cubes
When the supply of cubes of 1 or more colors runs out, immediately add to the supply all the miscellaneous cubes that were set aside at the beginning of the game. These can be used as substitutes for cubes of any color that has run out and can now be gained by any player.
- These cubes represent only the color of the cube the player otherwise would have gained. These cubes do NOT function as a wild color or Wild Token.
- Miscellaneous cubes can be used to construct buildings, but only if all cubes of that color have already been added to buildings. You must construct with actual cubes of the indicated color first.
- If you spend cubes in commodity trades or buying new building plan tiles, you must spend the miscellaneous cubes first.
- Miscellaneous cubes are not finite. If you run out, substitute another marker to keep track.
- It is possible that you will return cubes to the supply during your turn and then they would be available to gain, so carefully consider the order in which you choose to gain and pay cubes, as it may affect the timing of when the miscellaneous cubes come into the game and, possibly, the trigger of game end.
Game End
When all cubes of 1 or more colors have been constructed in buildings on the board, game end is triggered. (This will often, but not always, occur on the same turn the miscellaneous cubes are added to the game.)
Finish the current round until the last player in turn order (the player to the right of the start player) has completed their turn. Then complete 1 more round of turns. All players should have an equal number of turns.
Scoring
First, score the 3 Ad tiles on the score board. Each player scores for all 3 of these, advancing their player token on the score track accordingly.
Next, each player should choose 1 of their 2 Target tiles to score, revealing it to the other players and discarding the other tile.
(Clarifications for Target and Ad tiles are in "Ad Clarifications" and "Target Clarifications" below.)
Finally, players score 1 VP for each unused Wild Token they still have.
If a player passes 50, they should place an ownership marker on the 0/50 space as a reminder to add 50 to their score at the end of the game.
The player with the most VP wins! In the case of a tie, the tied player with the most meeples wins. If there is still a tie, the tied players share the victory.
Building Clarifications
Variable VP: Some building plan tiles have variable VP indicated by the star icon. The building plan will explain how to calculate the VP scored immediately when the tile is completed.
For Public Figure meeple scoring abilities, calculate VP according to the current state of the board.
MAYOR'S HOUSE — Purple meeple ability: Gain a Wild Token. Gain a meeple (Architect or Riveter). Completing: 3 VP, purple meeple.
Clarification: Gain 1 or 2 Wild Tokens. You may discard the Wild Tokens immediately for cubes.
HAUNTED HOUSE — Purple meeple ability: No effect. Sacrifice a meeple. This turn cubes may be placed on spaces of any color. Completing: 3 VP, purple meeple.
Clarification: The meeple you sacrifice can be of any color. It can be an active or non-active meeple, and it can be a meeple whose ability you already activated that turn, including the Public Figure meeple itself that you used to activate the Haunted House ability.
FAIRGROUNDS — Star ability: Gain 2 VP per house within 3 spaces.
Clarification: When counting your houses within 3 spaces, count orthogonal (not diagonal) spaces.
TUMBLE PARK — Star ability: Gain 3 VP per building adjacent to a park space. Purple meeple ability: Gain a Wild Token. Gain 1 VP per completed building of yours.
Clarification: For Public Figure meeple scoring, incomplete buildings and other players' buildings don't count.
BOTANICAL GARDENS — Star ability: Gain 3 VP per Working Hard meeple adjacent to this building. Purple meeple ability: Gain 1 VP per Working Hard Architect meeple. Gain 2 VP per Working Hard meeple.
Clarification: For Public Figure meeple abilities, score 1 or 2 for each of your Working Hard Architect meeples. Do not count Architect meeples that are Working Steady or Exhausted.
PRITZKER ZOO — Star ability: Gain 4 VP per adjacent City Hall. Purple meeple ability: Gain a Wild Token. Convert a Construction Worker meeple into an Executive meeple.
Clarification: When converting, take 1 of your Construction Worker meeples from anywhere in your play area (active or non-active, activated or not yet activated), return it to the supply, and take 1 Executive meeple from the supply. This new meeple should be placed in exactly the same state (active or non-active, activated or not yet activated) and position (Working Hard, Working Steady, or Exhausted) as the Construction Worker meeple you converted.
BIGGIE'S BALLPARK — Star ability: Gain 2 VP per house or building adjacent to this building. Purple meeple ability: Gain a Wild Token. Convert a Carpenter meeple into an Executive meeple.
Clarification: When converting, take 1 of your Carpenter meeples from anywhere in your play area (active or non-active, activated or not yet activated), return it to the supply, and take 1 Executive meeple from the supply. This new meeple should be placed in exactly the same state (active or non-active, activated or not yet activated) and position (Working Hard, Working Steady, or Exhausted) as the Carpenter meeple you converted.
GAMBREL MUSEUM — Purple meeple ability: Gain a Wild Token. Score 1 VP per orthogonal empty space (including water spaces). Completing: 20 VP, green and magenta meeples.
Clarification: Score 1 VP for each empty orthogonal (not diagonal) space next to this building. Thus, 4 VP is the most that can be scored from this building in a turn. Water spaces count as empty spaces. Edges of the map do not count as empty spaces.
Ad Clarifications
"Orthogonally adjacent" means orthogonally (not diagonally) adjacent.
- Each Residential, Park, and Commercial building that is orthogonally adjacent to your Industry building causes you to lose 1 VP. Each Industry building is scored individually, so if you have 2 Industry buildings that are orthogonally adjacent to the same Residential building, you would lose 2 VP.
- Each of your completed Industry buildings scores 2 VP for each building that is any of the 3 indicated types (Residential, Industry, Commercial).
- Each of your completed Residential buildings scores 1 VP for each building that is any of the 2 indicated types (Park, Residential), plus each water space.
- A contiguous group of Park buildings is orthogonally adjacent to each other.
- When re-scoring, add up the VP from all your Park buildings, divide in half, and round down.
- Count all of your owned building plan tiles, not just completed buildings. If there is a tie for the neighborhood with the most Industry buildings, all tied neighborhoods will lose VP for players.
- If there is a tie for the neighborhood with the most Park buildings, players can re-score 1 of their buildings in each of the tied neighborhoods.
- If players are tied in a neighborhood for the most completed buildings, they all receive 5 VP.
- If players are tied in a neighborhood for the tallest completed building, they all receive 4 VP.
Target Clarifications
"Orthogonally adjacent" means orthogonally (not diagonally) adjacent.
Targets that score VP for meeples count ALL of your meeples (active and non-active, activated and not activated).
- Each of your completed Commercial buildings scores 1 VP for each building that is any of the 3 indicated types (Residential, Commercial, Park).
- If your completed building is orthogonally adjacent to more than 1 completed building of any opponent, it still only scores 2 VP.
- If your opponent's completed building is orthogonally adjacent to more than 1 of your completed buildings, it still only scores 1 VP.
- If a completed building is orthogonally adjacent to more than 1 water space, it still only scores 1 VP.
- Each unused Wild Token also scores 1 VP at game end as normal.
Icon Reference
Building Type: Residential (house), Park (tree), Commercial (office building), Civic (bank), Industry (factory).
Meeples: Architect (clear), Carpenter (brown), Riveter (blue), Politician (yellow), Construction Worker (navy gray), Executive (magenta), Public Figure (purple), City Planner (black), Public Servant (green).
Resource Cubes: Glass, Steel, Concrete, Wood, Miscellaneous.
Building Plan Icons: Any Cube, Wild Token, Any Meeple, Spending Power, Victory Points.
Building Abilities: Working Hard, Working Steady, Variable VP.
Stack Type: Glass, Steel, Concrete, Wood (numbers indicate how many cubes of that resource are needed per stack).