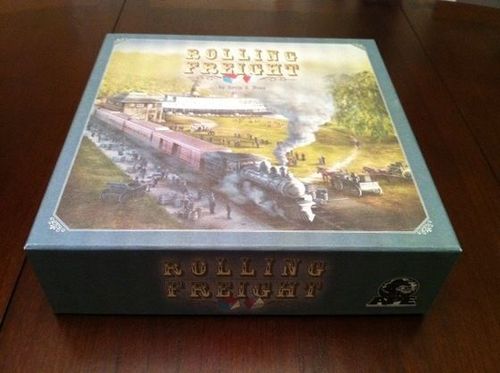
Rolling Freight
Rolling Freight Rulebook
Table of Contents
Table of Contents
Overview
Players are managers in competing rail and shipping companies, striving to establish the best shipping lines over land and sea by laying rail, carving roads and commissioning ships. They also compete to deliver the cargo that brings their company maximum profit.
Players begin the game with a resource pool containing six dice. The faces of these base resource dice contain either one or two colors. Players can purchase additional improvement dice which contain up to four colors, or symbols that provide other benefits.
During their turn players 'spend' these dice by purchasing contracts, building links, delivering cargo, improving their companies, etc. Some actions, such as purchasing contracts and building links, require particular colors on the dice, while other actions, such as purchasing improvements or delivering cargo, can be performed with dice showing any color. The generic die symbol indicates any die may be used - even an improvement die that doesn't show a color. The colored die symbol shows that a die of a specific color must be used. Dice can only be spent once per turn. Once a die is spent, set it aside until the end of your turn. Dice are rolled at the end of your turn so that you can spend other players' turns evaluating how you will spend the dice on your next turn.
Players can purchase any of the visible contracts. At least one of the dice spent to purchase the contract must be the color of the contract. When completing contract links, all dice spent must be the color of the contract.
Once links are completed, cargo can be moved across them. When delivering cargo, at least one of the links must be owned by the player making the delivery.
Equipment
- 1 two-sided game board
- 30 basic player dice (6 in each player color)
- 3 black Extra Resource improvement dice
- 2 yellow Extra Resource improvement dice
- 1 blue Extra Resource improvement die
- 1 gray Extra Resource improvement die
- 1 red Extra Resource improvement die
- 114 contract cards
- 18 improvement cards
- 3 end of phase cards
- 4 RR Xing markers and stands
- 1 cargo bag
- 65 cargo markers (23 blue, 23 gray, 12 red, 7 yellow)
- 5 player mats
- 5 locomotive pawns (1 in each player color)
- 105 construction cubes (21 in each player color)
- 170 link sticks (34 in each player color)
- 24 stockpile markers (6 in each resource color)
- 62 cargo saturation markers
- 10 "B" phase markers
- 10 "C" phase markers
End of Phase cards are placed at the end of each contract phase deck.
Link Sticks come in each of the player colors, and in 3 different lengths. They are used to mark a completed link.
'B' and 'C' cargo markers are placed on city circles to indicate cargo cannot be delivered there until later in the game. Saturation markers are placed on city circles once cargo has been delivered to a city circle.
The contract location markers are placed on the map board so that players can easily locate contracts that are available for purchase. There are 4 markers in the game - one for each spot on the contract track.
Stockpile markers can be purchased at the end of your turn with leftover dice. They may be used in future turns as additional dice of the markers' colors. There are 6 stockpile markers in each of the 4 colors.
Cargo Colors & Speed
There are four types of cargo in Rolling Freight:
- Red cargo represents tourists.
- Blue cargo is agriculture.
- Gray is industrial.
- Yellow is business travel.
The Cargo Delivery Bonus Table on the map shows that Yellow and Red cargo deliveries provide a bonus for shorter routes. Gray and Blue cargo deliveries provide a bonus for longer delivery routes.
There are far fewer Red and Yellow (fast) cargo markers in the game than Blue and Gray (slow). Watch for opportunities to make the fast deliveries before your opponents get them!
Player Setup
Take the player mat, locomotive pawn, construction cubes, link sticks and dice in the color of your choice. Place the locomotive pawns in the first (blank) space in the Switching Station section on your player mat. Place one of your construction cubes on the board near the scoring track number '1'.
Two-Player Setup and Rules
Setup for a 2-player game is the same except that the improvement deck contains only the following ten cards:
- 1x Acquisition Expert
- 1x Careful Planner
- 2x Efficient Storage
- 2x Extra Resource (black)
- 1x Extra Resource (blue)
- 1x Extra Resource (gray)
- 1x Extra Resource (yellow)
- 2x Steady Builder
Also, play only phases A and B. Skip the rules for Beginning Phase C and Ending Phase C, except that uncompleted contracts are scored, just like the end of phase C in the full game.
Game Board Setup
1. Select Game Board
Select the side of the board you wish to play, and spread it out in the center of the table. The Western U.S. map depicts the years of the California gold rush and the rapid expansion that followed it. It is meant for 2 - 4 players, and has a play time of about 2 hours. This map was specially designed for players new to Rolling Freight. Playing it will help you to focus on the game's most important elements—managing resources, planning deliveries, and maximizing the value of your routes. It is recommended that you play this map two or three times before trying the Southeastern U.S. map.
The Southeastern U.S. map is for 3 – 5 players with a playing time of 3 hours. This map depicts the years of reconstruction after the American Civil War to the early twentieth century. The Southeastern U.S. map is for experienced play. It features a network of routes that is significantly more interwoven than the Western U.S. map, and you will find a wider variety of options and strategies in game play.
2. Add Stockpile Markers to Board
Sort the red, blue, yellow and gray stockpile markers by color into their spaces on the game board.
3. Add Phase Markers
Cover every city circle labeled "B" or "C" on the board with a matching phase marker.
4. Create the Improvement Deck
Create the improvement deck according to the game board you're using:
- The Western U.S. map does not use all the improvement cards. Return the Extra Resource (red die), one Friendly and one Efficient Storage card to the box.
- Use all of the improvements if playing the Southeastern U.S. map.
- If you're playing a 2-player game, consult the special rules in the sidebar to the left.
Shuffle the improvement deck and place it on the Improvement Deck section of the game board, above the improvement boxes, face down.
5. Create the Contract Deck
Next, create the contract deck. Set aside the three End of Phase cards. Consult the table below corresponding to the game map you've chosen. Sort the contracts into sets A, B, and C and remove any cards not specified. Return the unused contracts to the game box. Shuffle sets A, B, and C separately.
Organize the contract deck, with all cards face down, as follows: place an End of Phase card on the bottom, then set the shuffled C contract cards atop the End of Phase card. Place an End of Phase card atop the C set, the B contracts atop that, an End of Phase atop set B and finally the A contracts on top.
Place the contract deck on the Contract Deck section of the game board, above the contract boxes, face down.
Contracts for Western U.S. Game Map
| Phase A | Phase B | Phase C | |
|---|---|---|---|
| Blue Contracts | 1–4 | 9 – 12 | 17 – 19 |
| Gray Contracts | 1–3 | 9 – 12 | 17 – 20 |
| Red Contracts | 1–4 | 9 – 12 | 17 – 19 |
| Yellow Contracts | 1–4 | 9 – 11 | 17 – 20 |
| Slash Contracts | 1 | 7–9 | N/A |
Contracts for Southeastern U.S. Game Map
| Phase A | Phase B | Phase C | |
|---|---|---|---|
| Blue Contracts | 1–4 | 9 – 14 | 17 – 20 |
| Gray Contracts | 1–5 | 9 – 13 | 17 – 20 |
| Red Contracts | 1–5 | 9 – 13 | 17 – 19 |
| Yellow Contracts | 1–4 | 9 – 13 | 17 – 20 |
| Slash Contracts | 1–3 | 7–9 | 13 – 14 |
6. Add Cargo to the Board
Each city has one or more city circles with an outer ring and an inner circle. Each outer ring indicates something the city wants, while inner circles indicate cargo that the city has available.
Some city circles have black inner rings. No cargo is placed in a circle with a black inner circle. Though it's not necessary for setup, it's worth mentioning that city circles with black outer rings do not accept cargo deliveries during the game.
Place cargo markers matching the city circle inner color (red cargo markers on city circles with red inner circles, etc.) until all colored city circles on the map are covered.
Then place the rest of the cargo markers in the bag. Randomly draw markers from the bag to fill the rest of the cargo circles with white inner circles.
When placing cargo markers, ignore any city circle whose inner circle is black. Also ignore any city circles covered with a "B" or "C" phase marker. Cargo markers will be placed in cities covered with "B" and "C" later in the game, so set the cargo bag aside for now; you'll need it later to set up phases "B" and "C".
Example: Richmond has a blue inner circle, so it begins the game with a blue cargo marker to indicate that it ships agricultural goods. Richmond also has a red outer ring which indicates that it accepts tourists.
Example: Winemucca has a black inner cargo circle. No cargo is placed there during the game.
Example: The city of Filmore will begin the game with a random cargo since the inner circle is white, but the outer black circle means that it will not accept cargo deliveries.
7. Reveal Starting Contracts and Improvements
Deal the top 4 rail contracts face up to fill the spaces on the track. Use RR Xing markers to mark the corresponding location of these links on the map.
Deal the top 3 improvements face up to fill the spaces on the track.
Opening Draft
Every game begins with an opening draft. Roll the dice in your resource pool before the draft begins. This roll shows the resources you will have on your first turn of the game and may influence your decisions in the opening draft.
Choose a start player. Beginning with the player to the right of the start player and proceeding counter-clockwise, each player chooses either one contract or one improvement and puts it in the appropriate spot on their play mat. (These cards are taken for free during the draft).
After each player makes a selection, slide any cards above it down to fill the gap. Then draw a new card to refill the track.
It may happen that there are duplicates on the improvement track. In this case, you may move one of the duplicates face-down to the bottom of the deck, slide the improvements down to fill the gap and draw an additional improvement to fill the gap at the top of the track before making your selection.
When players select a contract, they should also fill one of the link's squares with one of their construction cubes and then move the RR Xing marker to the map location of the new link.
If a player claims an improvement during this draft that gives the player a new die, (e.g. Extra Resource), that player should immediately roll this die and add it to his or her resource pool.
Once each player has made their first selection, continue around the table a second time. This time, each player must choose from the group not chosen the first time—players that chose an improvement the first round must select a contract this round, and vice versa.
The start player makes the last draft and immediately takes the first turn. Play proceeds clockwise.
Playing the Game
Your dice pool represents the resources that are available to carry out actions. You may perform as many or as few actions as you wish and in any order, as long as you have unspent dice remaining in your pool. Most actions may be performed multiple times.
A. Purchase a contract B. Construct a link C. Deliver cargo (limit once per turn) D. Build a switching station E. Purchase an improvement
When you have finished carrying out actions, do steps F, G and H in order.
F. Stockpile resources G. Refill the contract track and the improvement track H. Roll your dice
After your turn, play passes clockwise.
The following sections describe each of the possible actions in more detail.
A. Purchase a Contract
To purchase one of the available contracts, you must pay the number of generic dice indicated by symbols next to the contract. The symbol shows that one additional die of the same color as the contract must be spent.
Contracts that include a letter and a number in the same square are called 'slash' contracts (see example below). These contracts normally bridge water. With a slash contract, the colored dice must be paid for using a die whose face is showing two or more colors.
You'll notice that the lower contracts cost less than the newer contracts that are closer to the contract deck.
Move the purchased contract to your play mat. Find the corresponding link on the game board and fill one of its squares with one of your construction cubes. Move the RR Xing construction marker from this game board link to the empty space on the contract track.
You are limited to three contracts at a time. If you have three contracts, you must complete one of them before taking any more.
Do not refill gaps in the contract track until the end of your turn (Step G below).
Example: Nich wants to build contract Red 5A. He spends one die showing red and three more dice of any color to take the contract and put a construction cube on that route on the map.
Example: Debra wants to build the 8B slash contract. She spends one die showing a split of two or more colors and one more die of any type to take the contract and put a cube on the map.
B. Construct a Link
You may spend dice to add construction cubes to your links on your unfinished contracts. Each die spent must show a color matching the link and adds one construction cube to the corresponding link on the game board.
Dice with multiple colors on their face may be used for any one of the colors shown. Dice that show two or more colors on their face may also be used to place construction cubes on slash contracts. Only dice faces that show at least two colors may be used to complete slash contracts.
Each time you complete a contract, score it immediately. Refer to the Length of Rail Line table, and move your token along the scoring track the number of spaces indicated, based on the number of contracts you have and the length of the link you're completing. Place the completed contract card in the "Completed Contracts" space on the board. Retrieve your construction cubes and mark the completed link with a rail link stick in your color.
Example: Amy completes this contract by spending two dice that show gray. These two cubes finish the contract, so she replaces them with a link stick and scores the contract. Amy was working two contracts at the time – Gray 2A and Blue 4A. The payout for completing a length 6 contract when the player has two contracts is 6 points.
C. Deliver Cargo
Choose a cargo marker on the map and a city with a demand for that cargo. (The outer ring of the city circle shows that color). To establish a major route, you must trace a path of completed links between the source and the destination. At least one of the links must be your own. The path you select may not use any city twice and may not pass through any other cities that have demand for the cargo.
Once you've made the delivery, place the cargo marker near your player mat. Cargo marker bonuses will be paid out at the end of the phase.
The cost of establishing the route is paid in dice. Each link of your own costs one generic die. Other players' links cost two generic dice each. Switching stations you've built discount this cost. Reduce the number of dice needed for the route by your number of switching stations, to a minimum of one die. (See the section on Building Switching Stations for more details.)
Each player (including you) moves their scoring token 1 space for each of their rail links used in the route.
Fast cargo—red and yellow—represent people. These deliveries earn you (but not other players) extra rewards when you get them to their destination quickly. Slow cargo—blue and gray—earns you extra points for routes over great distances. Consult the Cargo Delivery Bonus Table on the game board to see if the delivery yields a bonus.
Finally, cover up the destination city circle with a saturation marker. This city space will no longer be considered when establishing major routes.
Important: Players may only make one cargo delivery each turn.
Example: Amy (white) is playing on the Western U.S. map. She decides to establish a major route from Fresno to Los Angeles for the agricultural surplus in Fresno. The route Amy picks is Fresno to Sacramento to Oakland to San Francisco to Santa Cruz to Santa Maria to Los Angeles. None of the interim cities show an unsatisfied need for agricultural cargo so her route is valid.
The blue circle in Los Angeles is marked with a saturation marker to show that LA has received the agricultural goods it needed.
Three of these links belong to Amy and three belong to other players. The resource cost of establishing this route is 9 dice (one die for each of Amy's links plus two dice for each link belonging to another player). Amy has built 4 switching stations and spends 5 more of her resource dice to pay the balance.
Since Amy used links they constructed, James (as green) scores 2 points and Doug (as purple) scores 1 point.
Amy scores 3 more points for her links and since agricultural cargo is slow freight and this was a 6-link route, Amy scores an additional 2 point bonus for a total of 5 points.
Amy also takes the cargo marker. This cargo will score an additional 2 points for her at the end of Phase B scoring.
D. Build Switching Stations
Switching stations make cargo deliveries more efficient. Each switching station reduces the resource cost of making a cargo delivery by one die, to a minimum cost of one die.
Switching stations cost the number of generic dice indicated on the player mat. A table showing switching station costs is also on the game board. Move the marker one space along the switching station track for each station built.
Switching stations you build provide their discount during the same turn that they are purchased.
E. Purchase Improvements
To take one of the available improvements, pay the number of generic dice indicated.
Improvements do not take effect until the very end of your turn.
Example: Amy wants Efficient Storage. She spends four dice to take the improvement and puts it on her play mat.
Example: James wants to add a yellow die to his resource pool. He spends six dice to take the improvement and puts it on his play mat. At the end of this turn, he rolls the yellow die with the rest of his resources.
You are limited to holding at most three improvements. If you purchase a fourth improvement, one of the four must be returned to the bottom of the improvement deck.
Do not fill gaps in the improvement track until the end of your turn (Step G below).
It may happen that there are duplicates on the improvement track. In this case, you may move one of the duplicates face-down to the bottom of the deck, slide the improvements down to fill the gap and draw an additional improvement to fill the gap at the top of the track.
F. Stockpile Resources
Unused dice may be turned in for stockpile markers at the end of your turn. Take one fewer stockpile marker than you have dice remaining in each color.
Example: With three blue dice remaining, take two blue stockpile markers.
Example: With four red dice and two yellow dice remaining, take three red markers and one yellow marker.
Dice that show two or more colors may be put toward markers in one of the colors shown.
Dice that show no color (possible with several of the improvement dice) may not be stored.
Stockpile markers may be spent on later turns as if they were dice of the same color or as generic dice. When spent, stockpile markers return to the supply on the board to be used again.
There are only six of each stockpile marker – if there are none left, you may not stockpile them.
G. Refill the Contract Track and the Improvement Track
If you purchased any contracts or improvements during your turn, there will be gaps on these tracks. Slide the cards that remain down to fill any gaps. Then draw new cards from each deck to refill the tracks from the top.
For each new contract, be sure to also place a construction marker on the matching link location on the map.
Special actions occur when end of phase markers are drawn from the contract deck (see Ending a Phase below).
H. Roll Your Dice
Roll your dice resource pool, including any improvement dice - even those purchased this round. These will be your resources on your next turn. Use the time until your next turn evaluating how to best use your resources.
Improvements
Acquisition Expert
Pay one fewer generic die each time you purchase a contract or improvement, or build a switching station.
This improvement does not provide any discount when delivering cargo.
Careful Planner
With one Careful Planner, set two player dice (not improvement dice) instead of rolling them at the end of your turn.
With two Careful Planners, set up to four dice, including improvements.
Efficient Storage
With Efficient Storage, you may store one resource token for each die, ignoring the usual one die penalty.
With two Efficient Storages, any of your player dice (not improvement dice) showing two colors may be used to store both.
See the rules for Stockpiling Resources for details.
Extra Resources (color)
Add the indicated die to your resource dice.
Friendly
Other players pay one fewer die for each of your links they use to deliver cargo. In addition, score one bonus point per delivery (not per link) every time another player uses your links while delivering cargo.
Steady Builder
Once per turn, add a construction cube to a link you're constructing.
Dice Symbols
In addition to colors, some of the improvement dice have symbols that aren't available on the basic player dice:
- This symbol may be spent to add one or two construction cubes to one of your links. Cubes may not be split between links.
- When this symbol is spent as part of the price of delivering cargo, score an additional two points.
- This dice may be spent as one or two generic dice.
- This symbol may be spent as part of the price of delivering cargo a second time on the same turn. Switching stations used in the first route may not be reused to discount the second route.
Bonus Cards - Natural Disasters
APE Games has made available a limited number of natural disaster cards. These cards are shuffled into the contract deck during setup - two into the 'B' phase deck and one into the 'C' phase deck. During the game, when a natural disaster card is drawn from the contract deck, pick a completed contract card at random and remove that link from the game board, along with all saturation markers at both ends of that link. Finish filling the contract track. Finally, place the destroyed contract face down on top of the contract deck.
If multiple disasters are drawn while filling the track, destroy additional completed contracts and place them face down on top of the deck, in the order they were drawn.
See apegames.com for info on getting these bonus cards for your set!
End of Phase Actions
Rolling Freight is played over a series of three phases. Certain actions occur when the End of Phase Marker appears.
Ending Phase A
The end of Phase A is signaled when the first End of Phase card is drawn from the contract deck. The player that drew the End of Phase card places it in front of him. He then draws additional contracts and completes filling the contract track.
Each player takes one more turn, including the player with the End of Phase card. Phase A is then over.
At the end of Phase A each player moves their scoring marker three spaces along the scoring track for each cargo marker they collected by delivering cargo that phase. Then return all cargo markers scored this way to the game box (not the cargo bag).
Beginning Phase B
After scoring Phase A, immediately set up for Phase B, as follows:
- Return the End of Phase card to the game box.
- All "B" phase markers covering city circles on the board are returned to the box. Draw a random cargo marker from the cargo bag and place it on each newly available B city circle.
- Move the lowest contract and the lowest improvement to the bottom of their respective decks face down. Slide the remaining cards down and draw replacement cards to fill each track.
- Play continues normally with the next player (seated to the left of the player who had the End of Phase marker).
Ending Phase B
When the second End of Phase card is drawn, give it to the active player and draw new contracts to complete the track.
Each player takes one more turn, including the player with the End of Phase card. Phase B is then over.
At the end of Phase B each player moves their scoring marker two spaces along the scoring track for each cargo marker they collected by delivering cargo that phase. Then return all cargo markers scored this way to the game box (not the cargo bag).
Beginning Phase C
- Return the End of Phase card to the game box.
- All "C" phase markers covering city circles on the board are returned to the box. Draw a random cargo marker from the cargo bag and place it on each newly available C city circles.
- Move the lowest contract and the lowest improvement to the bottom of their respective decks face down. Slide the remaining cards down. Draw replacements to fill each track.
- Play continues normally with the next player (seated to the left of the player with the End of Phase marker).
Ending Phase C
When the third End of Phase card is drawn, give it to the active player and draw new contracts to complete the track.
Every player takes one more turn, including the player with the End of Phase card.
At the end of Phase C:
- Each player moves their scoring marker one space along the scoring track for each cargo marker they collected by delivering cargo that phase.
- Each player moves their scoring marker one space for each construction cube on their uncompleted links.
Players announce their final scores. The game is now over!
Winning
The winner is the player whose marker is furthest along the scoring track. In the case of a tie, the win is awarded to the tied player with the most switching stations. If there is still a tie, the tied players share the victory.
The publisher dedicates this game to the memory of Cindy Lou. I know you're chasing rabbits full-time now! The designer dedicates this game to its many supporters. Through playtest, KickStarter, moral support or a kick in the britches, Rolling Freight could not have happened without your support.