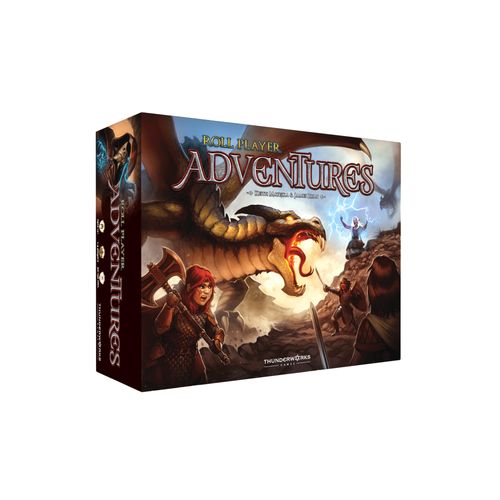
Roll Player Adventures
Roll Player Adventures Rulebook
Table of Contents
Table of Contents
Objective
Roll Player Adventures is a cooperative storytelling board game for 1–4 players, set in the world of Ulos. The players portray a party of characters who will face challenges and make decisions that affect the unfolding story, as they progress through a campaign of 11 consecutive adventures and one optional sidequest.
Important! Roll Player Adventures does NOT require the Roll Player base game or any of its expansions to play, although it is possible to import characters created in Roll Player, with or without any of its expansions.
Components
- 12 Storybooks
- 1 Tome of Encounters
- 1 Skillbook
- 6 Adventure Maps (double sided)
- 4 Character Sheets
- 25 Character Inserts
- 10 Party Journals
- 1 Dice Bag
- 36 Attribute Dice
- 15 Familiar Dice
- 1 Party Marker
- 40 XP Cubes
- 3 Favor Markers
- 3 Round Markers
- 30 Gold Coins
- 95 Stamina Cubes (65 x1s, 30 x3s)
- 14 Stamina Tokens (10 x5s, 4 x10s)
- 10 Encounter Tokens
- 8 Bonus Play Tokens
- 6 Event Tokens
- 1 Sentry Token
- 4 Player Aids
- 103 Discovery Cards
- 107 Title Cards
- 38 Modifier Cards
- 60 Rare Cards
- 15 Familiar Cards
- 61 Enemy Cards
- 36 Class Cards
- 36 Pregenerated Portrait Cards
NOTE: Players will need a pencil to record and erase different elements on various game materials as they play.
Component Diagrams
Character Sheet
- Portrait Space
- Class Ability Space
- Hand Space
- Character Name Space
- Race Space
- Class Space
- Discard Space
- Player Name Space
- Health Space
- Fatigue Box
- Attribute Score Space
- Attribute Row
- Spent Space
Enemy Card
- Enemy Illustration
- Enemy Name
- Round Track
- Round Track Icon
- Dice Slot Icon
- Reward Icon
- Counterattack Icon
- Enemy Number
Party Journal
- Active Space
- Mastery Track
- XP Space
- Saved XP Space
- Items Space
- Gold Space
- Saved Gold Space
- King's Faction Track
- Dragul Faction Track
- Campaign Track
- Play Limit Space
- Combat Dice Limit Space
- Death Track
- Titles Space
- Bonus Play Space
- Bonus Play Limit Space
- Keywords Space
- Rest Track
- Starlit Door Faction Track
Adventure Map
- Location Letter
- Map Coordinate
- Encounter Space
- Movement Path
- Location Name
Campaign Setup
Follow the steps below when starting a new campaign. Adventure setup is carried out before each new adventure within the campaign, but campaign setup only has to be done once, at the very start of the campaign.
1. Fill Dice Bag Find the 36 attribute dice and place them in the black drawstring bag. Leave the familiar dice in the game box.
2. Prepare Party Journal Take a blank party journal. Consult the chart below to find the values for the combat dice limit, play limit, and bonus play limit, based on the number of players. Record these values in the corresponding blanks on the party journal.
| Player Count | Play Limit | Bonus Play Limit | Combat Dice Limit |
|---|---|---|---|
| 1 | 4 | 1 | 3 |
| 2 | 2 | 1 | 3 |
| 3 | 1 | 2 | 3 |
| 4 | 1 | 1 | 3 |
3. Take Character Sheets Each player takes a character sheet and a blank character insert, sliding the character insert all the way into the character sheet, so that the colored bars show through the slots. Each player records their own name in the corresponding space.
4. Select Pregenerated Characters Each player selects a pregenerated character, and places the portrait card in the portrait space on their character sheet. Make sure that every player has a character with a different class color.
Important! If the players would like to import characters created in Roll Player instead of using pregenerated characters, ignore the rest of this "Campaign Setup" section and read the "Importing Characters" section.
5. Record Character Details Each player records their character's name, race, and class, as indicated by their portrait card, in the corresponding spaces on their character sheet.
6. Starting Health Each player records "16" as their character's starting health in the corresponding space on their character sheet.
7. Record Attribute Scores Each player records their character's attribute scores, as indicated by their portrait card, in the corresponding spaces on their character sheet.
8. Fill Attribute Rows Each player adds stamina cubes to the attribute rows on their character sheet. The number of stamina cubes to add to each row is equal to the character's corresponding attribute score.
9. Find Class Cards Each player finds the class card that matches the class of their character and places it face up in the class ability space on their character sheet.
10. Build Starting Hands Each player reviews the back of their portrait card to see which cards are required for their starting hand, then gathers the listed cards from the various market decks: armor, weapons, skills, traits, and scrolls. Each player places this starting hand of cards face down in the hand space on their character sheet.
11. Take Starting Gold Consult the chart below and take the amount of starting gold based on the number of players. Place a number of gold coins equal to that amount in the corresponding space on the party journal.
| 1 Player | 2 Players | 3 Players | 4 Players |
|---|---|---|---|
| 7 | 5 | 3 | 2 |
Campaign setup is now complete! If the party is now ready to start the first adventure of the campaign, continue to the "Adventure Setup" section.
Importing Characters
Instead of using the pregenerated characters, the players can choose to import characters created in Roll Player. Make sure that every player has a character with a different class color. Follow the steps below when importing characters.
1. Record Character Details Each player records their character's name, race, and class in the corresponding spaces on their character sheet. The name of the character may be chosen freely. The race and class of the new character are the same as the race and class of the imported character.
2. Record Starting Health Each player records their character's starting health in the corresponding space on their character sheet. Starting health is determined by the number of reputation stars scored when the imported character was created.
| Roll Player Reputation Stars | Roll Player Adventures Starting Health |
|---|---|
| 0 – 20 | 14 Health |
| 21 – 25 | 15 Health |
| 26 – 35 | 16 Health |
| 36 – 40 | 17 Health |
| 41+ | 18 Health |
3. Record Attribute Scores Each player records their attribute scores based on the attribute scores of the imported character. Make sure to include any racial bonuses or penalties when checking the attribute scores of the imported character.
| Roll Player Attribute Score | Roll Player Adventures Attribute Score |
|---|---|
| 0 – 13 | 0 |
| 14 – 15 | 1 |
| 16 – 17 | 2 |
| 18+ | 3 |
If the attribute scores of an imported character total less than six, that player may increase attribute scores of their choice until the total reaches six.
4. Fill Attribute Rows Each player adds stamina cubes to the attribute rows on their character sheet. The number of stamina cubes that should be placed in each row is equal to the character's corresponding attribute score.
5. Find Portrait Cards Each player finds the portrait card that matches the race of their character and places it in the portrait space on their character sheet, with the side of their choice face up. If the matching portrait card is in use by another player, choose an unused portrait card.
6. Find Class Cards Each player finds the class card that matches the class of their character and places it face up in the class ability space on their character sheet.
7. Build Starting Hands Each player notes which market cards their imported character had in Roll Player, then gathers the cards of the same name from the various market decks: armor, weapons, skills, traits, and scrolls. Each player places this starting hand of cards face down in the hand space on their character sheet.
NOTE: The market decks only have one copy of each card. If the same card is required by multiple players, one of them takes it and the others instead take a random card from the same market deck.
NOTE: If an imported character had a familiar, find the matching card from the familiar deck and add it to the player's starting hand along with the other cards. Then add the matching familiar die to the dice bag.
8. Take Starting Gold and XP Each player gathers the following resources near the party journal based on the character built in Roll Player:
- One gold for each gold that the character ended with in Roll Player.
- One XP for each XP that the character ended with in Roll Player (only with the Monsters & Minions and/or Fiends & Familiars expansions).
Divide the total amount of gold by the number of players, rounded down. Place that many gold coins on the corresponding space on the party journal.
Divide the total amount of XP by the number of players, rounded down. Place that many XP cubes on the corresponding space on the party journal.
Adventure Setup
Once campaign setup is complete, follow these steps when starting each adventure:
1. Prepare Party Journal Place the party journal in the center of the table.
2. Create Supply Place the dice bag, skillbook, enemy deck, modifier deck, gold, XP, stamina, encounter tokens, bonus play tokens, favor markers, round markers, market decks, familiar deck, and party marker near the party journal.
3. Discovery, Title, and Rare Decks Place the discovery, title, and rare decks face down near the party journal. DO NOT shuffle these decks. These cards are in numerical order. Their numbers are on their backs. DO NOT examine these cards unless a storybook instructs the players to do so.
4. Player Aids and Character Sheets Find each player's character sheet with insert and portrait card. Give each player a player aid card.
5. Storybooks Find the storybook for the current adventure according to the campaign track on the party journal and give it to any player. That player is the storyteller. Give the Tome of Encounters to the player on the storyteller's right. That player is the tome keeper. Return all other storybooks to the game box.
6. Begin the Adventure Have the storyteller open the storybook to the first page and follow the adventure-specific setup. Once complete, read the "Your Adventure Begins" text.
Key Concepts
Unlike many board games, Roll Player Adventures does not have traditional turns. The storybook drives the action and presents the players with choices. Over the course of an adventure, the players will read from storybooks, encounter challenges, and engage in combat scenarios that will lead to rolling and manipulating dice with cards. The following concepts will help you navigate the various objectives of the story.
Entries
Storybooks are divided into entries. Each entry has a unique label. The base entry for a location is labeled with the location letter but no number (e.g., A). This is the first entry that should be read when the party arrives at a location on the adventure map.
For example, in Adventure 1, the location Boorlin Prairie has the location letter "A." When the party arrives at Boorlin Prairie, the storyteller turns to entry "A" in the storybook and reads it aloud to the party.
Reading a location's base entry will often direct the party to other entries within the same section of the storybook. These other entries are labeled with the location letter and a number (e.g., A4). All entries for things to do at a location begin with that location letter.
Keywords
As the party plays through an adventure, they will gain keywords. When a storybook entry instructs the party to record a specific keyword, write it in the keywords space on the party journal. Keywords will sometimes get erased during an adventure, but all of the party's keywords are always erased between adventures.
Titles
As the party makes important decisions, they will gain titles. When a storybook entry instructs the party to reveal a specific title card, place it in the titles space on the party journal. Entries will often refer to the party's titles as the narrative takes branching paths. All of the party's titles are always saved between adventures.
Action Indicators
In the storybooks, action indicators are preceded by an exclamation point. These indicate actions that the party must resolve. Some action indicators are conditional, meaning that they must be resolved if a certain condition is true. If there are multiple action indicators in a series, resolve them in order from top to bottom.
Often, if the party has a specific keyword or title, an action indicator will instruct the party to turn to another storybook entry immediately. Because action indicators are resolved in order from top to bottom, any remaining action indicators in that entry are ignored.
For example, the party has just arrived at location C for the first time. The storyteller reviews the action indicators. The party has the keyword ALARM recorded on the party journal, and there is one XP at the location. The party collects the XP from the location, then immediately turns to entry C2.
If the party had both the keywords GOBLIN and ALARM, the party would turn to entry C5 instead. On future visits to this location, the party will immediately turn to entry C1, since now there is no XP at location C.
Choice Indicators
In the storybooks, choice indicators are preceded by a question mark. These indicate multiple options that the party must choose between as a group. If the players cannot reach consensus, then the party takes a vote with the current storyteller breaking any ties.
Some choice indicators will instruct the party to turn to another storybook entry, while others give them the chance to rest, move around on the adventure map, or take special actions.
For example, the choice indicators in this entry offer the party two choices. They must decide whether to charge in and attack or explore the area first.
If the party chooses to attack, they turn to entry F9 in the storybook and engage in combat. If they choose to explore, they turn to entry F10 in the storybook and resolve a skill check that involves DEX and WIS.
Revealed Cards
Storybook entries will sometimes instruct the party to reveal a specific card. Unless otherwise specified, what the party should do with the revealed card is determined by which deck it came from.
- Discovery Deck: If it is a map card, it is placed in the indicated position on the adventure map. If it is an item card, it is placed in the items space on the party journal.
- Rare Deck: The card is added to any one player's hand. The party can discuss amongst themselves who should receive the card.
- Title Deck: The card is placed in the titles space on the party journal.
Movement
During an adventure, the party will need to move around on the adventure map. In the storybook, the party will often find this choice indicator: "(?) (move) Move to another location." When the party chooses this option, move the party marker from the current location to another location along a connected path.
When the party arrives at a location, the current tome keeper passes the Tome of Encounters to their left to the current storyteller, who in turn passes the storybook to the player on their left. The new storyteller finds the location letter for the party's new location in the storybook and reads the corresponding base entry aloud.
When the party moves to a location they have previously explored, they do not need to stop at the location. They may keep moving through the location, only stopping at encounter tokens and locations that have XP or some other token on them.
Encounters
While moving around on the adventure map, the party will often find an encounter token when they choose a new path. When this happens, they must stop moving temporarily in order to resolve an encounter.
To resolve an encounter, flip the encounter token over to reveal a number. The tome keeper finds the entry in the Tome of Encounters that corresponds to the current adventure and encounter, then reads it aloud.
For example, during Adventure 2, the party chooses to move from one location to another on the adventure map. However, there is an encounter token along the path. They place the party marker next to the encounter token and flip the token over to reveal "4." The tome keeper opens the Tome of Encounters and finds entry ADV2-4 (Adventure 2, Encounter 4) and reads it aloud.
After the encounter has been resolved, the encounter token is returned to the game box and the party continues moving along the chosen path.
Item Use
During an adventure, the party will discover various items. Each item has a unique number. These items can be used in various locations, and in various combinations, to create unique effects. In the storybook, the party will often find this choice indicator: "(?) (item) Use an item."
To use a single item, each player must add stamina from the supply to their fatigue box equal to the stamina cost of the item. Combine the letter of the party's current location with the number of the item to get the proper storybook entry. The storyteller finds that entry in the storybook, then reads it aloud.
For example, while at location C, the party decides to use item 65, a Bluestone Fireball, which has a stamina cost of 1. Each player adds one stamina from the supply to their fatigue box. The storyteller reads storybook entry C65, describing how the Bluestone Fireball destroys a barrier that was blocking the path.
To use a combination of two items, each player must add stamina from the supply to their fatigue box equal to the stamina cost of both items. Combine the letter of the party's current location with the numbers of both items to get the proper storybook entry. The item numbers are not added together, but placed side by side, with the lower number first.
For example, item 34 is a Tinderbox, which has a stamina cost of 1. Item 31 is a Shield, which has a stamina cost of 1. At location D, the party has discovered a fire pit, but it is very windy. Each player adds two stamina from the supply to their fatigue box. The storyteller reads storybook entry D31.34, describing how the party is able to start a fire with the Tinderbox by using the Shield to block the wind.
Important! These restrictions apply to item use.
- The party may not use an item if the current storybook entry does not offer the proper choice indicator.
- The party may not use the same item, or the same combination of items, in the same location more than once.
- The party may not use an item if paying its stamina cost would cause the entire party to become exhausted.
Gold and XP
When the party gains gold or XP, take the indicated amount from the supply and place it in the designated space on the party journal.
These currencies are sometimes used during an adventure. At the end of every adventure, the party has the opportunity to spend gold and XP to advance their characters.
Resting
During an adventure, the party will need to stop and rest at times. In the storybook, the party will often find this choice indicator: "(?) (rest) Rest." When the party chooses to rest, they must have at least one XP on the party journal. Complete the following steps:
- Place a stamina cube from the supply in the leftmost open box of the rest track on the party journal. When the party places a stamina in the fourth and final box, or if all boxes have already been filled, resting has an additional cost: one player must choose a card from their hand, discard space, or spent space, and return it to the corresponding deck.
- Spend one or more XP. Return the spent XP from the party journal to the supply.
- Each player draws dice from the dice bag equal to the amount of XP spent.
- Each player rolls their dice and returns stamina from their fatigue box to the supply equal to the result, then puts the dice back in the dice bag.
- Each player fills their attribute rows up to their attribute scores with stamina from the supply. If an attribute row has excess stamina, the excess is returned to the supply.
- Each player whose class card is face down flips it face up.
- Each player returns all bonus play tokens from their fatigue box to the bonus play space on the party journal.
- Each player returns all cards from their spent space to their hand space.
Unlike most choice indicators, the rest choice indicator never directs the party to another storybook entry. After resting, the party must read the list of choice indicators in the current storybook entry again and choose another one from the list.
Faction Tracks
As the party makes important narrative decisions, their favor with different factions is affected. These changes are tracked with favor markers on the faction tracks.
When an entry instructs the party to gain or lose a specific amount of favor with a faction, move the favor marker that many spaces on the faction track. Move the favor marker to the left when favor is lost and to the right when favor is gained.
If the favor marker is at one end of the faction track when an entry instructs the party to move it further in that same direction, do not move the favor marker. Instead, the party gains one XP for each space that the favor marker is unable to move.
For example, the party's favor with the king is at "9" currently. When the party makes an important decision, they read this instruction: "(!) kingsguard +2." The favor marker moves one space from "9" to "10" on the king's faction track. It cannot move further, so the party gains one XP for the second space.
If multiple factions are tied for highest, the faction highest to the top of the party journal is considered the highest. The tied faction lowest on the party journal is considered the lowest.
The End
Near the end of each storybook, the party will come to a section called THE END. Some storybooks offer the choice to turn to THE END whenever the party is ready. Once the storybook indicates that this choice is available, the party may turn to THE END any time that they are given the choice to move to another location.
Skill Checks
The party will encounter situations that test their skills during an adventure. Skill checks are indicated in the storybook by a skill check box that indicates the skill check's name, difficulty level, and any modifiers.
During a skill check, the players must work together to cover each dice slot on the skillbook page with a matching die. If they cover all dice slots, they will pass the skill check. Otherwise, they will fail the skill check.
Each skill check has a difficulty level (I – IV). This determines which row on the skillbook page to use.
Skill Check: Setup
- Open the skillbook to find the skill check indicated by the skill check box. Find the right page, then review that page to find the right difficulty row. Place the open skillbook on the table.
- If the skill check box indicates any modifiers, find the named modifier cards in the modifier deck. Assign them to the skill check.
For example, the skill check box indicates that this skill check is "[Dangerous] Stealth II." Open the skillbook to the Stealth page, row II. Find the Dangerous modifier card and assign it to the skill check.
Skill Check: Build the Dice Pool
-
Review the skillbook page to find the dice limit for this skill check. This is the number of dice that the players will add to the dice pool.
-
The players may spend stamina, by moving it from their attribute rows to their fatigue boxes, to add a die of a specific color. Find the die in the dice bag and add it to the dice pool. The players may do this multiple times as long as they do not exceed the dice limit.
- The cost to add a die of a specific color is equal to the number of players. This cost can be split up among any number of players.
- The stamina spent to add a die of a specific color must come from the attribute row that matches the color of the die.
For example, in a three-player game, the players want to add one black die to the dice pool. They must spend three DEX stamina total. They decide that they will spend one each.
If the players collectively do not have enough stamina in the matching attribute row, they may substitute stamina from other attribute rows in place of the missing stamina at a ratio of 3:1.
For example, in a three-player game, the players want to add one black die to the dice pool, but only have two DEX stamina total. They decide to substitute two STR stamina from one player and one CHA stamina from another player in place of the missing DEX stamina.
Important! When adding dice to the dice pool, an individual player may not spend so much stamina that they become exhausted.
-
After the players are done adding dice of specific colors, add random dice from the dice bag, one at a time. Repeat until the number of dice in the dice pool is equal to the dice limit.
-
Roll the dice in the dice pool.
Skill Check: Manipulate and Place Dice
-
Each player gathers the cards from their hand space (but not from their spent space).
-
The players may play cards from their hands to alter the dice in the dice pool. They can coordinate with each other to decide who should play which cards and in what order. See "Card Icons."
- Cards are placed in the player's discard space when played. However, cards with the spent icon are placed in the spent space instead.
- Each player may play a number of cards up to the play limit recorded on the party journal.
- Some cards allow players to add more dice beyond the dice limit.
The players may spend bonus play tokens from the party journal to play more cards beyond the play limit.
- When a bonus play token is spent, any one player may play an extra card from their hand.
- After a bonus play token is spent, it is placed in the fatigue box of the player who played the extra card.
The players may also activate their class abilities. After a player activates their class ability, they flip their class card face down. Class abilities do not count against the play limit.
-
Place dice from the dice pool on matching dice slots on the skillbook page, following all restrictions. See "Dice Slot Icons."
NOTE: Players may place dice on dice slots and continue to play cards, spend bonus play tokens, and activate class abilities before placing additional dice.
Skill Check: Resolution
-
No matter the outcome of the skill check, gain rewards for covered dice slots. See "Reward Icons."
-
Return all dice to the dice bag and all modifier cards to the modifier deck.
-
Each player returns all cards from their discard space to their hand space.
-
Review the current entry in the storybook to resolve the outcome of the skill check: pass or fail.
Pass: If all dice slots on the skillbook page are covered, the party has passed the skill check. Read the pass result and turn to the indicated entry.
Fail: If any dice slots on the skillbook page are not covered, the party has failed the skill check. Read the fail result and turn to the indicated entry.
Combat
The party will encounter enemies during an adventure, which often leads to combat. Combat is indicated in the storybook by a combat box that indicates the enemy's name, number, and any modifiers.
During combat, the players must work together to cover each dice slot on the enemy card with a matching die. If they cover all dice slots by the end of combat, they will be victorious. Otherwise, they will be defeated.
Each combat can last for up to three rounds.
Combat: Setup
- Find the named enemy card in the enemy deck, using the enemy number as reference. Reveal the card and put it in play, face up.
- If the combat box indicates any modifiers, find the named modifier cards in the modifier deck. Assign them to the enemy card.
- Place a round marker on the leftmost space of the round track on the enemy card.
For example, the combat box indicates that this combat is against a "[Cornered] Goblin." Find the Goblin enemy card (22) and put it in play. Find the Cornered modifier card and assign it to the Goblin.
Combat: Build the Dice Pool
-
Review the party journal to find the party's current combat dice limit. This is the number of dice that the players will add to the dice pool.
-
The players may spend stamina, by moving it from their attribute rows to their fatigue boxes, to add a die of a specific color. Find the die in the dice bag and add it to the dice pool. The players may do this multiple times as long as they do not exceed the dice limit.
- The cost to add a die of a specific color is equal to the number of players. This cost can be split up among any number of players.
- The stamina spent to add a die of a specific color must come from the attribute row that matches the color of the die.
For example, in a three-player game, the players want to add one black die to the dice pool. They must spend three DEX stamina total. They decide that they will spend one each.
If the players collectively do not have enough stamina in the matching attribute row, they may substitute stamina from other attribute rows in place of the missing stamina at a ratio of 3:1.
For example, in a three-player game, the players want to add one black die to the dice pool, but only have two DEX stamina total. They decide to substitute two STR stamina from one player and one CHA stamina from another player in place of the missing DEX stamina.
Important! When adding dice to the dice pool, an individual player may not spend so much stamina that they become exhausted.
-
After the players are done adding dice of specific colors, add random dice from the dice bag, one at a time. Repeat until the number of dice in the dice pool is equal to the dice limit.
-
Roll the dice in the dice pool.
Combat: Manipulate and Place Dice
-
Each player gathers the cards from their hand space (but not from their spent space).
-
The players may play cards from their hands to alter the dice in the dice pool. They can coordinate with each other to decide who should play which cards and in what order. See "Card Icons."
- Cards are placed in the player's discard space when played. However, cards with the spent icon are placed in the spent space instead.
- Each player may play a number of cards up to the play limit recorded on the party journal.
- Some cards allow players to add more dice beyond the dice limit.
The players may spend bonus play tokens from the party journal to play more cards beyond the play limit.
- When a bonus play token is spent, any one player may play an extra card from their hand.
- After a bonus play token is spent, it is placed in the fatigue box of the player who played the extra card.
The players may also activate their class abilities. After a player activates their class ability, they flip their class card face down. Class abilities do not count against the play limit.
-
Place dice from the dice pool on matching dice slots on the enemy card, following all restrictions. See "Dice Slot Icons."
NOTE: Players may place dice on dice slots and continue to play cards, spend bonus play tokens, and activate class abilities before placing additional dice.
Combat: End of Round
- If all dice slots on the enemy card are covered, skip to the end of combat.
- Each player suffers counterattacks for uncovered dice slots. See "Counterattack Icons." If the entire party is exhausted, skip to the end of combat.
- Apply the effect of the next space of the round track. See "Round Track Icons." Then advance the round marker one space. If the round marker cannot be advanced or the entire party is exhausted, skip to the end of combat.
- Return the remaining dice from the dice pool back to the dice bag, then go back to the "Build the Dice Pool" step and start the next round of combat.
Combat: End of Combat
-
No matter the outcome of the combat, gain rewards for covered dice slots. See "Reward Icons."
-
Return all dice to the dice bag, the round marker to the supply, the enemy card to the enemy deck, and all modifier cards to the modifier deck.
-
Each player returns all cards from their discard space to their hand space.
-
Review the entry in the current storybook to resolve the outcome of the combat: victory or defeat.
Victory: If all dice slots on the enemy card are covered, the party is victorious. Read the victory result and turn to the indicated entry.
Defeat: If any dice slots on the enemy card are not covered -OR- if the entire party is exhausted, the party is defeated. Read the defeat result and turn to the indicated entry.
Combat: Multiple Enemies
The players can place dice on the enemies in any order. When an enemy is defeated, its round marker is removed and its assigned modifiers no longer apply, though all dice stay on the defeated enemy card until after the combat is complete. For the party to be victorious, all enemies must be defeated.
Exhaustion
When the amount of stamina in a player's fatigue box is equal to their current health, they immediately become exhausted. Any more stamina that would be added to their fatigue box is ignored until they are revived.
Exhausted players cannot play cards, use class abilities, or spend stamina during skill checks or combat. However, exhausted players can still offer input when the party has to make decisions.
There are three ways to remove stamina from the fatigue boxes of exhausted players:
- Certain choice indicators in the storybook will offer the party the option to rest, which removes some stamina from all players' fatigue boxes.
- Certain action indicators in the storybook will instruct the party to remove some stamina from one or more players' fatigue boxes.
- Certain cards and class abilities will allow the party to remove some stamina from one or more players' fatigue boxes.
When the amount of stamina in an exhausted player's fatigue box is once again less than their current health, they are revived.
If the entire party is ever exhausted at the same time, continue to follow the action indicators in the current storybook until it instructs the players to mark the next box on the death track and read the corresponding "Death" entry in the Tome of Encounters.
For example, if this is the third time that the entire party has been exhausted at the same time during this campaign, mark the "3" box on the death track and read the "Death-3" entry in the Tome of Encounters.
Sometimes a storybook will not immediately send the players to the Tome of Encounters, as there may be critical story information that needs to be relayed before sending the players to the "Death" entry.
Stamina tokens are removed from the rest track at the end of each adventure, or when the party is exhausted and sent to the death section of the Tome of Encounters.
Advancement
After each adventure, the party gets the opportunity to advance their characters by spending gold and XP before the next adventure. Complete the following steps:
1. Prepare the Market Shuffle each of the five market decks: armor, weapons, skills, traits, and scrolls. Reveal the top card of each deck and place it face up. If any of the market decks have been depleted, do not reveal cards from those decks.
2. Visit the Adventurer's Guild The players can now spend XP at the adventurer's guild to train their characters and strengthen the party in various ways. The advancements and their XP costs are listed below. The players can spend XP on the same advancement multiple times.
| Advancement | XP Cost |
|---|---|
| Increase a character's health by 1. | 1 XP if current health is < 25. 2 XP if current health is 25+. |
| Increase the party's combat dice limit by 1. | Current combat dice limit + 5 XP. |
| Increase the party's bonus play limit by 1. | Current play limit + current bonus play limit + 5 XP. |
| Increase the party's mastery level by 1. | Indicated by the mastery track. |
To increase the party's mastery level, the players must spend the amount of XP indicated by the next unmarked box of the mastery track. That box is then marked. Each player in the party then increases an attribute score of their choice by one.
Usually, no player may increase an attribute score beyond the current attribute score limit. There might be some instances when the storybook allows this.
The current attribute score limit is indicated by the tier of the mastery track that the newly marked box is in.
3. Visit the Market The players can use gold as a currency to buy and sell cards at the market. The players can buy and sell any number of cards and in any order.
Buy: Choose one of the available market cards. Return gold equal to the card's cost from the party journal to the supply. Then add the card to the buyer's hand.
Sell: Choose one market card from the seller's hand. Return that card to the matching market deck. Then gain two gold from the supply and add it to the party journal. Only market cards with a cost can be sold back to the market.
Certain cards offer discounts based on the attribute scores or race of the buyer. It is possible for the discount to reduce the card's cost to zero.
Most skill cards offer a discount based on one attribute score of the buyer. The specific attribute is indicated next to the card's cost. The amount of the discount is equal to that attribute score of the buyer.
For example, the Negotiate skill card has a cost of eight gold, minus INT attribute score. If the buyer's INT attribute score is four, the cost is only four gold instead.
Most trait cards offer a discount to buyers of one race. The amount of the discount, as well as the specific race that is eligible for the discount, is indicated next to the card's cost.
For example, the Courageous trait card has a cost of six gold. However, if the buyer is an Orc character, the cost is only four gold instead.
Additional cards are not added to the market to replace purchased cards.
After advancement, return all revealed cards in the market back to their respective decks and return all stamina cubes in each player's fatigue box to the supply.
Saving Campaign Progress
After each adventure, the party must save their progress, even if they intend to continue the campaign during the same session. Complete the following steps:
- Erase all keywords from the keywords space on the party journal.
- Return all stamina cubes on the rest track to the supply.
- Return all map cards and item cards to the discovery deck. Put them back in numerical order according to the numbers on the card backs.
- Store the party's title cards with the party journal for use in the next adventure. Do not return the party's title cards to the title deck!
- Store each player's hand of cards separately for use in the next adventure.
- Record the party's current gold and XP totals in the saved gold and saved XP spaces on the party journal.
- Return all bonus play tokens, gold, and XP from the party journal to the supply.
- Mark the box that contains the favor marker on each of the three faction tracks, to record the party's current standing with those factions.
- Mark the box on the campaign track that corresponds to the adventure that the party just completed (unless it was the sidequest adventure).
The adventures, which are linked through an ongoing narrative, must be played in consecutive order.
When the campaign resumes again, the party will play through the next adventure, as indicated by the next unmarked box on the campaign track.
The sidequest adventure exists outside of the ongoing narrative. It can be played at any point after Adventure 1, even after the campaign is complete.
Adding and Removing Players
As the party explores Ulos, they might gain or lose a member along the way. If the number of players in the party changes between adventures, the campaign can still go on! Just make the following adjustments to add or remove a player.
Adding a Player
Adjust the play limit to reflect the new player count. Refer to the chart in the "Campaign Setup" section.
Adjust the bonus play limit if necessary: If the player count has changed from two to three, increase the bonus play limit by one. If the player count has changed from three to four, decrease the bonus play limit by one.
The new player selects a pregenerated character and carries out the character setup as described in the "Campaign Setup" section, steps 3–10. It is not possible for the new player to use an imported character when they join the campaign between adventures.
For each of their required market cards that has already been taken by another player, the new player instead takes a random card from the same market deck.
For every completed adventure in the campaign, the new player gets to choose one of the following two bonuses: increase an attribute score of their choice by one -OR- increase their starting health by one.
For every two completed adventures in the campaign (rounded up), the new player gets to choose one of the five market decks and take a random card from it. They cannot choose the same market deck twice.
Removing a Player
Separate the cards from the removed player's hand into two types: cards with a cost and cards without a cost. Return all cards with a cost to the matching decks. Distribute all cards without a cost among the rest of the players in the party.
If any familiar card is returned to the familiar deck this way, remove the matching familiar die from the dice bag and return it to the game box.
Adjust the play limit to reflect the new player count. Refer to the chart in the "Campaign Setup" section.
Adjust the bonus play limit if necessary: If the player count has changed from three to two, decrease the bonus play limit by one. If the player count has changed from four to three, increase the bonus play limit by one.
For every completed adventure in the campaign, the party gains two gold and two XP.
Familiars
When a player gains a card from the familiar deck, find the matching familiar die and add it to the dice bag.
When a player returns a card to the familiar deck, remove the matching familiar die from the dice bag and return it to the game box.
Familiar dice can only be added to the dice pool when they are drawn randomly from the dice bag or when the matching familiar card is played.
Familiar dice are always considered to be two colors at the same time.
Legendary Mode
Parties who desire an additional challenge can play through the campaign in legendary mode, as long as all players in the party agree to do so.
At the start of the campaign, record the word "Legendary" in the titles space on the party journal and permanently mark off the leftmost box of the rest track using a pen or marker. This reduces the number of times the players can rest before needing to return a card to its deck.
During each adventure, pay attention to any action indicators in the storybook that begin with the phrase "If you are playing in legendary mode."
Playing in legendary mode means that encounters will be more challenging and characters will be penalized more harshly when they become exhausted.
Legendary Skill Check Failure Penalty
When the party fails a skill check:
- Add stamina equal to the skill check difficulty level from the supply to each player's fatigue box.
- For any player who would be exhausted by the failure penalty, reduce the amount of stamina added so that their fatigue box contains stamina equal to one less than their current health.
Apply this failure penalty before resolving the fail outcome from the current entry in the storybook.
Legendary Hand Limit
When playing on legendary difficulty, players' hands of cards are limited. Each player's hand limit is their base hand limit plus the attribute score matching their class color.
During campaign setup, find the base hand limit for the player count. Each player records this value as "X+" in the upper lefthand corner of the attribute score box for the attribute that matches their class color.
| Player Count | 1 | 2 | 3 | 4 |
|---|---|---|---|---|
| Base Hand Limit | 12+ | 6+ | 5+ | 4+ |
For example, if playing solo and playing a green class, record "12+" in the upper corner of your CON attribute score space. If the player's CON attribute score is 2, their hand limit is 14.
At the beginning of each adventure, each player counts their cards. Any cards in excess of their hand limit must be stored beneath their character portrait. Cards stored this way cannot be used during dice events, but are still owned by that player. Stored cards still count for narrative triggers such as "(!) If any player has the card…"
When taking a rest action, each player may reconfigure which cards are stored and which are in their hand. If the rest action would return a card to its deck, you may return stored cards.
This hand limit applies only at the start of an adventure and when resting. During an adventure, a player may acquire cards that exceed this limit.
Additional Notes
Conflicting Rules: When two rules seem to conflict, the more specific rule always takes precedence. This means that card text supersedes rulebook text, and storybook text supersedes both card text and rulebook text.
Depleted Decks: If a storybook ever instructs the players to gain a card when there are no cards left in the specified deck, gain two XP instead.
Market Cards: The armor, weapon, skill, trait, and scroll cards are market cards. The familiar, rare, discovery, and title cards are not market cards.
Partial Actions: If a player is unable to fully complete an action when instructed to, they perform as much of the action as possible and disregard the rest.
Stamina: Players can make change as needed with the different denominations of stamina cubes (x1s and x3s) and stamina tokens (x5s and x10s). Stamina tokens should only be used in fatigue boxes, not in attribute rows.
Trading: Players may not trade their cards with one another unless a storybook specifically offers the opportunity to do so.
Icon Glossary
The players will find various icons printed on different game components. Refer to the sections below to determine how to interpret these icons.
Dice Slot Icons
Dice slot icons are found in the skillbook and on enemy cards. The players must follow these restrictions when placing dice during skill checks and combat.
- The die placed here must be the indicated color and value. Example: The die must be green, and must be a value of 2.
- The die placed here must be the indicated value, but can be either of the two indicated colors. Example: The die must be a value of 3, but can be red or blue.
- The die placed here must be the indicated value, but can be any color. Example: The die must be a value of 4, but can be any color.
- The die placed here must be the indicated color, but can be any value. Example: The die must be purple, but can be any value.
Round Track Icons
Round track icons are found on the round track on enemy cards. The players apply these effects at the end of each round of combat.
- Each player adds the indicated stamina from the supply to their fatigue box. Example: Each player adds three stamina to their fatigue box.
- Return the indicated gold from the party journal to the supply. Example: The party loses two gold.
- Return the indicated XP from the party journal to the supply. Example: The party loses one XP.
- Each player returns the indicated stamina from attribute rows of their choice to the supply. Example: Each player returns two stamina from their attribute rows.
- Each player adds the indicated stamina from the supply to attribute rows of their choice. Example: Each player adds one stamina to an attribute row.
Reward Icons
Reward icons are found below dice slots on enemy cards. They are always to the right of the counterattack icons. At the end of combat, the players gain rewards for covered dice slots on the enemy card.
- Gain the indicated XP from the supply and add it to the party journal. Example: The party gains one XP from the supply.
- Gain the indicated gold from the supply and add it to the party journal. Example: The party gains two gold from the supply.
Counterattack Icons
Counterattack icons are found below dice slots on enemy cards. They are always to the left of reward icons. At the end of each round of combat, the players suffer counterattacks for empty dice slots on the enemy card.
- Each player adds the indicated stamina from the supply to their fatigue box. Example: Each player adds one stamina to their fatigue box.
Card Icons
Card icons are found on the cards that players have in their hands. The players use these effects to manipulate the dice in the dice pool.
- Flip a die to its opposite side.
- Increase or decrease a die by 1. Dice cannot be increased from 6 to 1 and cannot be decreased from 1 to 6.
- Reroll a die.
- Treat a die as another color or another value.
- Draw a die, roll it, and add it to the dice pool. This die does not count against the dice limit.
- A divider, which means "or," used to separate multiple effects on the same card.
- A die of a specific color.
- A specific familiar die.
- Any die.
- A die of a specific value.
- A random die.
- This card is placed in the spent space instead of the discard space when played.
- This card can only be played once per adventure. Set aside after played.
- This card is returned to its deck when played.
Examples
Below are some examples of how card icons appear in combination on various cards. The same logic can be applied to any combinations not shown here.
- Reroll any die.
- Flip a green or red die to its opposite side.
- Increase or decrease up to two blue dice by 1 each. One die can be increased while another die is decreased. The same die cannot be altered twice.
- Draw a green die, roll it, and add it to the dice pool. This die does not count against the dice limit.
- Draw a black-and-blue familiar die, roll it, and add it to the dice pool. This die does not count against the dice limit.
- Draw a random die, set its value to 6, and add it to the dice pool. This die does not count against the dice limit.
- Treat any die as green or purple.
- Treat a black die as another color.
- Treat a die with a value of 1 or 4 as another color.
- Reroll a blue die -OR- Increase or decrease a blue die by 1.
- Flip a red die to its opposite side -OR- Increase or decrease a red die by 1 -OR- Reroll a red die.