Rogue Scenarios
Rogue Scenarios Rulebook
Table of Contents
Table of Contents
- About the Rogue Series
- Scenario R211: Auld Lang Syne
- Scenario R212: On the Road to Andalsnes
- Scenario R213: Traverse Right . . . Fire!
- Scenario R214: The Front in Flames
- Scenario R215: Hasty Pudding
- Scenario R216: A Small Town in Germany
- Scenario R217: The Whirlwind
- Scenario R218: Operation Switchback
- Scenario R219: Scheldt Fortress South
- Scenario R220: Clearing the Breskins Pocket
- Scenario R221: Vitality I
- Scenario R222: Infatuate II
- Scenario R223: Night Drop
About the Rogue Series
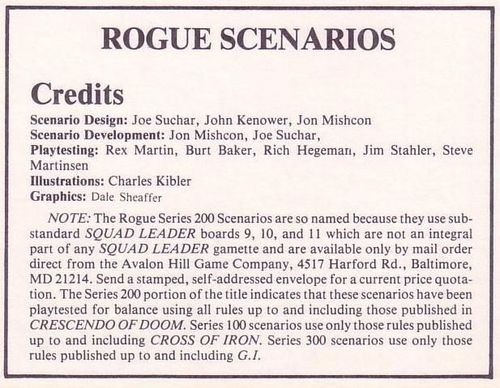
The Rogue Series 200 scenarios are so named because they use substandard SQUAD LEADER boards 9, 10, and 11, which are not an integral part of any SQUAD LEADER gamette and were available only by mail order direct from the Avalon Hill Game Company. The Series 200 portion of the title indicates that these scenarios have been playtested for balance using all rules up to and including those published in CRESCENDO OF DOOM. Series 100 scenarios use only those rules published up to and including CROSS OF IRON. Series 300 scenarios use only those rules published up to and including G.I.
Scenario R211: Auld Lang Syne
GERIMONT, FRANCE, January 1, 1945: In the Ardennes sector the U.S. 87th division was given the assignment of taking Gerimont as the VIII Corps continued its advance to the east. The opening of the assault went well as the lead companies drove the Germans from the outskirts of the town. While pausing to regroup before continuing, the Americans were hit by a strong local counterattack. The Germans hoped to disorganize the GIs thus giving the 15th PanzerGrenadier Division time for an orderly retreat.
Board Configuration
Only playable rows are (inclusive): Board 10, rows R–GG; Board 1, rows A–P.
Victory Conditions
To win the Germans must be the last to solely occupy FOUR of seven stone buildings on board 10. The Americans win by avoiding the German victory conditions.
Turn Record Chart
USA sets up first. German moves first. Turns 1 through 5, then END.
Order of Battle
Elements of the 15th Panzer Grenadier Division:
- In Bldg. 1F5: 9-1 leader (1); 4-6-7 squad (3); LMG 2-8 B12 (2)
- In Bldg. 1K5: 8-0 leader (1); 4-6-7 squad (3); LMG 2-8 B12 (2)
- In Bldg. 1I7: 9-2 leader (1); 4-6-7 squad (3); LMG 2-8 B12 (3)
- In Bldg. 1M7: 8-1 leader (1); 4-6-7 squad (3); LMG 2-8 B12 (1); MMG 4-12 B12 (1)
- In Bldg. 1M9: 8-1 leader (1); 4-6-7 squad (1); HMG 6-16 B12 (1)
Elements 345th Regiment of the 87th Division set up anywhere between rows R and FF on Board 10 inclusive:
- 8-1 leader (1); 8-0 leader (2); 6-6-6 squad (12); MMG 4-12 B12 (1)
Special Scenario Rules
R211.1 All buildings are level one on both boards.
R211.2 Any building on either board with a stairwell in any hex of that building is stone. All other buildings are wood.
R211.3 Prior to the American setup, the German player may select and record any four hexes regardless of LOS as the initial targets for his pregame artillery preparation. After setup has been completed but prior to the normal start of play, two turns will be played in which the only action is the resolution of four separate 100mm Harassing Fire (107.7) FFEs—two in each "turn". Each FFE must be placed after normal resolution of accuracy then direction and extent of error die rolls utilizing the preselected target hex as an Artillery Request counter. Such fire may not be corrected nor held for later use. Any American units broken during the pregame turns may not rout nor attempt to rally until the German Rally Phase of Turn 1.
AFTERMATH: The hastily laid German artillery barrage was only marginally effective. The GIs, although taken unaware, initially were able to stand their ground. Despite heavy casualties the Americans fell back slowly, moving in and out of buildings, generally tying up the point of the Panzer Grenadiers' attack. The impetus of the German effort broken, the surviving Panzer Grenadiers beat a hasty retreat eastwards. The following day the Allied advance ground forward into Gerimont.
Scenario R212: On the Road to Andalsnes
NORWAY, April 24, 1940: With the Allied landings at Namsos and Andalsnes the strategic and political importance of Trondheim was brought into sharp focus. Quickly implementing alternative planning, Von Falkenhorst ordered the German 196th Infantry Division to clear several key valleys and isolate Trondheim. On April 24th, lead elements of the German division advancing along the valley leading to Andalsnes, where the British 148th Infantry Brigade had landed and was moving inland, found themselves stymied by fierce resistance in the vicinity of Dombaas. With ammunition running low, and the road behind them threatened by the Norwegian 2nd Division, an urgent message was dispatched to bring up munitions and reinforcements. The 196th's HQ loaded an assortment of commandeered wagons with ammunition and sped them northward with all available troops.
Board Configuration
Boards 9 and 2. Rows 2A and 9A not in play.
Victory Conditions
To win the German must exit one leader, four squads, and four wagons off road 9B5 by game's end. The Norwegians win by avoiding the German victory conditions.
Turn Record Chart
Norwegian sets up first. German moves first. Turns 1 through 11, then END.
Order of Battle
Elements of the 196th Infantry Division enter turn 1 or later on any/or all hexes 2GG4–2GG7 inclusive:
- 9-2 leader (1); 9-1 leader (2); 8-0 leader (2)
- 4-6-7 squad (16); 2-4-7 squad (1); LMG 2-8 B12 (5); MMG 4-12 B12 (1)
- Inf 75* counter (1); wagon 7ML 1S/5PP S3 (6)
Elements of the Norwegian 2nd Division: Setup anywhere on Boards 9 and/or 2 except rows CC through GG inclusive on Board 2:
- 9-2 leader (1); 9-1 leader (2); 8-0 leader (1)
- 4-4-7 squad (7); 3-4-7 squad (7); LMG 2-7 B11+ (1); MMG 4-11 B12 (1)
- Roadblock (1); Entrench (2); dummy "?" counter (6)
Special Scenario Rules
R212.1 No boresighting.
R212.2 No shellholes.
R212.3 Wagons that spend all movement points on the road may move one additional road hex.
R212.4 Wagons must move last of all German units.
R212.5 Wagons may not carry REGULAR infantry squads.
R212.6 Building 2DD3–2EE4 does not exist.
R212.7 Crags are the four grey blobs found on certain hexes. They represent large rock formations. Crags may be routed into and through. They are not an additional level higher than the terrain they occupy. They add +1 to the IFT.
R212.8 Center dots for hexes 9E7 & 9U1 & 9FF8 are at level 1.
R212.9 All buildings are of wooden construction.
R212.10 The cost to move from 9CC7 to 9BB7 is FOUR times cost of terrain.
R212.11 Due to the tough Norwegian terrain all offroad terrain costs for wagons are doubled.
AFTERMATH: With a roadblock established and troops positioned on the hills flanking the road, the Norwegians waited confidently. The Germans, however, with a single skillful infantry assault, swept the Norwegians from their entrenchments and cleared a path through the roadblock. The munitions moved forward to the advance divisional elements. Desperate fighting continued around Andalsnes until, on the nights of 30 April and 1 May, the British troops re-embarked.
Scenario R213: Traverse Right . . . Fire!
RUSSIA, SOMEWHERE SOUTH OF BIALYSTOK, June 23, 1941: The elite German 18th Panzer Regiment, fresh from amphibious training, was among the lead elements of Army Group Center as they pressed deep into Russia on the day after 'Barbarossa'. The Soviets, still confused as to the extent of the attack, ordered armored cars of the Northwest Military District to patrol to the border and return. As they advanced, commanders on each side looked for the other in the distance. Rounding a curve, they found each other at less than 100 meters range.
Board Configuration
Board 11.
Victory Conditions
Side with the most points at game's end wins; a tie is a Russian victory. Germans get one point for every Armored Car destroyed, immobilized, or abandoned at game's end. Russians get one point for every tank destroyed, immobilized, or abandoned at game's end and two points for every Armored Car that exits the board on the assigned target road hex.
Turn Record Chart
See Special Rules. Turns 1 through 5, then END.
Order of Battle
Elements of the 18th Panzer Regiment:
- Tank 16 (-2, -3), 20L(4) -/2 (2)
- Tank 15 (-2, -3), 20L(4) -/2 (2)
- CE 9-1 leader (1)
- CE 8-1 leader (1)
Armored Cars of the Fourth Front:
- 24 (-3, -4), 37L(8) (2)
- 24 (-3, -4), 45L (2)
Special Scenario Rules
R213.1 Prior to play both sides list the order of entry of vehicles.
R213.2 German player rolls one die. On a roll of 1 or 2 his entry hex is Y1 and his target hex is I10. On a die roll of 3 or 4 his entry hex is I1 and his target hex is Y10. On a roll of 5 or 6 his entry hex is A6 and his target hex is Q10.
R213.3 Russian player rolls one die. On a roll of 1 or 2 his entry hex is Y10 and his target hex is A6. On a roll of 3 or 4 his entry hex is Q10 and his target hex is I1. On a roll of 5 or 6 his entry hex is I10 and his target hex is Y1.
R213.4 Both sides enter simultaneously moving all vehicles one hex forward along the road from the entry to the target hex on the shortest possible route. Then check for LOS between Russians and Germans. If no LOS then move forward another hex.
R213.5 All vehicles must stay on road, one of the bow hexsides facing the next road hex, with turret facing the bow, till the game starts.
R213.6 Turn One starts when there is a LOS between the Russian and German vehicles. On a die roll of 1 through 4 inclusive the German is the First Player. This die roll is subject to leader modification IF the leader can spot the opposing vehicles. Only one leader may modify roll.
R213.7 No Russian vehicle has a radio but they may all enter and move buttoned up prior to Turn One.
R213.8 Russian vehicles may not leave the board on turn one.
R213.9 Red terrain is Level One hill. All buildings are wooden.
R213.10 Prior to the start of Game Turn One all units travel on road forming a string of adjacent units. If the game starts and there are still vehicles off board they may enter on Turn One on or adjacent to entry hex.
R213.11 After Turn One starts play proceeds normally.
AFTERMATH: The Germans reacted first and met the recce units with a hail of fire. Initially the armored cars milled around trying to get back on the road and resume their patrol. However, after one Soviet vehicle was shot up and another crashed into a stone wall, the remainder fled. The Russians did leave behind one German tank burnt out by a close range frontal shot. The tactical victory was obviously German—but the slow erosion of the best of the Wehrmacht's armor crews had begun. It was the first full day of the German invasion of Russia. The panzers of the 18th Regiment reformed and moved eastward again.
Scenario R214: The Front in Flames
RUSSIA, 20 KM SOUTH OF KHARKOV, August 22, 1943: As Kharkov fell for the final time, front lines became unclear. Observation posts and defensive lines were held briefly, then abandoned as the Soviets advanced. The front began to stabilize around the Mosh river as units of the Soviet 57th Army clashed with German XI Corps troops for commanding terrain; such terrain as the church on the "Rollbahn" to Dnepropetrovsk.
Board Configuration
Playable rows D through Q inclusive.
Victory Conditions
Player to last solely occupy the 2nd floor of K4 gets four points. Each captured enemy squad or leader yields three points. Each destroyed enemy squad or leader is worth one point. The side with the most points at game's end wins. A point tie is a Russian victory.
Turn Record Chart
See scenario rules for setup. Turns 1 through 4, then END.
Order of Battle
Elements of the XI Corps:
- 9-1 leader (1); 8-1 leader (1); 4-6-7 squad (5); LMG 2-8 B12 (3)
Elements of the 57th Army:
- 8-1 leader (1); 8-0 leader (1); 4-4-7 squad (7); LMG 2-6 B10- (1)
Special Scenario Rules
R214.1 All buildings are wooden. All buildings are first level except hex K4 which is second level.
R214.2 Prior to play both sides record the order of entry of forces. One squad must follow another in a continuous string. Squads may not stack in pregame moves. Leaders and support weapons may be stacked freely.
R214.3 The order of march may not be changed till turn one starts and normal play begins.
R214.4 Two separate packs of chits 1-4 are established. Each player draws secretly from one pack. The German enter on O1 if they pick 1, on Q2 if 2, on Q7 if 3, on K10 if 4. The Russians enter on G1 if they pick 1, on D1 if 2, on D7 if 3, on I10 if 4.
R214.5 The path of the lead squad must be prewritten for 10 pregame moves. Each move is one hex.
R214.6 Both sides enter simultaneously moving all units one hex forward, then checking for LOS between Russians and Germans, then if no LOS exists, advancing all units one hex along the preplotted path.
R214.7 A column may hold position for one or more pregame moves by writing '-' on the plot.
R214.8 Turn One starts when there is a LOS between Russian and German unit(s). On a die roll of 1 through 4 inclusive the German is the first player. This die roll is subject to leader modification if the leader can see the opposing units. Only one leader may modify the die roll.
R214.9 After Game Turn One starts play proceeds normally.
R214.10 Should the enemy units be plotted to enter the same hex simultaneously, and no prior LOS has been established, they do so and are locked in close combat. Roll then for first player NOT counting any leader modifier.
R214.11 If no LOS has been established by the end of pregame turn 10, play starts with German as first player on die roll 1-4.
R214.12 No bypass movement or any other activity except movement is allowed in pregame moves.
R214.13 If Turn One starts and there are still units off board they may enter any board edge hex on or adjacent to entry hex without paying column entry costs.
AFTERMATH: The advancing infantry of both nations moved with a caution born of experience. Slowly they advanced in long files up the deserted streets. The Germans formed a firebase across the lane from the church and were about to move in when the lead Russian squad suddenly appeared. A firefight quickly developed in which neither side was able to gain an advantage. Both forces withdrew. The next day the entire area fell to Soviet armored spearheads.
Scenario R215: Hasty Pudding
FRANCE, May 27, 1940: Throughout May 27th, the Allies stubbornly held off the advancing Germans as they simultaneously prepared for a general withdrawal to a defense perimeter around Dunkirk. In an attempt to buy time, a raid was ordered behind the German lines. Elements of the British 1st Tank Brigade were ordered across a weakly held bridge to threaten assembly areas of the 7th Panzer. The Germans, still apprehensive after their scare from the British thrust at Arras days earlier, reacted strongly.
Board Configuration
Boards 11, 7 and 10, laid north to south in that order from top to bottom, with north up (printed north arrow).
Victory Conditions
The British player must control the bridge at end of game. To control the bridge it must be intact and the British player must be the last one to have unbroken infantry squad on foot in 711.
Turn Record Chart
German sets up first; British moves first. Turns 1 through 9, then END. The track carries an asterisk above Turn 4, reproduced as printed.
Order of Battle
Elements of 7th Panzer Division set up on any hex south of the river on Board 7 including half hexes:
- 8-1 leader (1); 4-6-7 squad (2); MMG 4-12 B12 (1)
Enter turn 4 south edge board 10 west of O10 inclusive:
- 9-2 leader (1); 9-1 leader (2); 8-1 leader (1); 8-3-8 squad (3); 4-6-7 squad (9); 2-4-7 squad (1); MMG 4-12 B12 (1)
- Counter printed "30" (3); LMG 2-8 B12 (5)
- 24 vehicle, 1S/7PP (3); 18 vehicle, 1S/5PP (3); 14 vehicle, 75* MS 4/2 (1)
- 16 vehicle, 20L(4) -/2 (2); 15 vehicle, 20L(4) -/2 (2); 16 vehicle, 37L(4) 4/2 (2)
- 35 vehicle, 20L(6) -/2 (1); Inf 75* counter (1)
Elements of 1st Tank Brigade set up on or north of row 5 of Board 11:
- 9-2 leader (1); 9-1 leader (1); 8-1 leader (1); 8-0 leader (1)
- 4-5-7 squad (10); 2-3-7 squad (2); HMG 6-14 B12 (1); MMG 4-11 B12 (1); LMG 2-7 B11+ (3)
- ATR 12 +1 B11+ (1); 40L gun (3); 6* gun (4)
- 26 vehicle, 1S/5PP (6); 20 ATR vehicle, 5PP (2); Inf 94* counter (2)
Special Scenario Rules
R215.1 8-3-8s are Engineer units with unlimited smoke making capacity.
R215.2 Failed Close Assaults into 711 are NOT considered occupation of that hex for victory purposes.
R215.3 The British may not deliberately try to burn their own AFVs.
R215.4 There is a two lane stone bridge from 719 to 711.
R215.5 Islands do not exist.
R215.6 The red terrain on Board 11 is Level One Hill.
R215.7 The river is deep and marsh is treated normally.
R215.8 All buildings are wooden and level one.
AFTERMATH: The small German guard troop was swept aside. While the BEF labored to set up defenses for their bridgehead, the 7th Panzer hastily assembled everything they could find for a counterattack. By using all their reserves the Germans were able to crush the British units across the river and send the rest reeling westward. The massive counterattack substantially delayed the regrouping of the 7th Panzer. By June 4th 338,000 Allied troops, including the survivors of the 1st Tank Brigade, had been lifted from the beaches of Dunkirk.
Scenario R216: A Small Town in Germany
FRIESOYTHE, GERMANY, April 8, 1945: The occupation of the Groningen bulge made it possible for the British Second Army to drive into northern Germany. The Allied advance did not go smoothly. Small "stay-behind" forces resisted bitterly. One example occurred when the Canadian 4th Armored Division, advancing to cross the River Ems, tested the savage resistance the Wehrmacht was still capable of offering. Flank elements of the Division, moving into the village of Friesoythe, encountered fierce opposition from a scratch force of students and German regulars who resolutely stood their ground in the face of the oncoming armor.
Board Configuration
Boards 10 and 11, laid north to south in that order from top to bottom, with north up (printed north arrow).
Victory Conditions
To win, the Canadians must solely occupy all of the multihex stone buildings on board 10 at the end of the game. Only complete Regular Infantry and Volkstrum squads (not crews nor halfsquads) can occupy a building. The Germans win by avoiding the Canadian victory conditions.
Turn Record Chart
German sets up first; Canadian moves first. Turns 1 through 8, then END.
Order of Battle
Mixed Regular Army troops and local students set up anywhere north of row Q (exclusive) on Board 11:
- 9-1 leader (1); 8-1 leader (1); 8-0 leader (2)
- 4-6-7 squad (4); 4-3-6 squad (5); 2-4-7 squad (5)
- LMG 2-8 B12 (4); MMG 4-12 B12 (1)
- 44a counter (4); 8 X9 counter (2); dummy "?" counter (12)
- Mtr 81 #10-30 (2)
- AT gun 76L (1); AT gun 88LL (1)
Elements of the 4th Canadian Armored Division enter on 11Y1 on Turn 1:
- 9-2 leader (1); 9-1 leader (1); 8-1 leader (1); 8-0 leader (1); CE 9-1 leader (1)
- 4-5-7 squad (12); LMG 2-7 B11+ (4); MMG 4-11 B12 (2)
- 39 vehicle (-2, -4) (2); 16 vehicle, 1S/5PP (4); 18 vehicle, 75 (2)
- 16 vehicle, 75 (3)
- 16 vehicle, 95* gun (1); 14 vehicle, 88* gun (2)
Special Scenario Rules
R216.1 All buildings with stairwells are stone, all others wood.
R216.2 All of building 10W8 is Second Level, all others are Level One.
R216.3 The Canadian Armor leader may never be in a Sexton.
R216.4 Red areas on Board 11 are Level One Hill.
R216.5 German AT guns, MTRs, and their immediate crews may choose to set up hidden if they wish.
AFTERMATH: When the Germans were inspired to fight they were still capable of inflicting grievous losses on even a veteran unit such as the 4th Armored. Unable to fully deploy, the Canadian tankers were surprised by the German ambush and their vehicles repeatedly hit. The Canadians did take the unimportant little village of Friesoythe, but suffered heavily in the process.
Scenario R217: The Whirlwind
ASCHAFFENBURG, GERMANY, April 18, 1945: As the German defenses crumbled in front of the U.S. 3rd Army, the fighting became fluid. On the night of April 17th elements of a recce troop of the American 26th Division occupied a village on the outskirts of Aschaffenburg without opposition. Based on civilian reports of the GI's presence the divisional staff of the 471st Wehrmacht Division, the only unit in the vicinity, launched a hasty counterattack.
Board Configuration
Boards 5 and 10, laid north to south in that order from top to bottom, with north up (printed north arrow).
Victory Conditions
To win the Germans must have sole control of every building hex on Board 10 rows Q–EE inclusive at game's end. The Americans win by avoiding the German victory conditions.
Turn Record Chart
US sets up first; US moves first. Turns 1 through 7, then END.
Order of Battle
471st Divisional Staff may set up anywhere on Board 5:
- 9-2 leader (1); 8-1 leader (2); 4-6-7 squad (12); LMG 2-8 B12 (4)
- Vehicle 14 (-1), 20L(24) (1)
Elements of the 26th Infantry Division set up hidden anywhere on Board 10:
- 8-1 leader (2); 7-0 leader (1); 6-6-6 squad (8)
- Counter printed "6 / [4] / X11-" (3)
Special Scenario Rules
R217.1 AFV cannot setup in woods hex even in bypass mode.
R217.2 Any infantry unit, including scouts, may establish control of an unoccupied building by moving through it.
R217.3 All buildings are wooden and Level One.
R217.4 Americans initially control all buildings.
AFTERMATH: The German HQ unit, with the aid of their remaining FlakPanzer, drove aggressively into the village. After a short, vicious firefight the Americans were dislodged. The shattering effect of the FlakPanzer as an infantry support weapon proved too much for the Americans. The next day the German 471st Division was cutoff as the U.S. 3rd Army flowed completely around and beyond it deeper into Germany.
Scenario R218: Operation Switchback
HOLLAND, October 6, 1944: Antwerp had fallen unharmed into Allied hands. All that prevented Allied use of one of Europe's largest ports were the German flak and artillery that lined the narrow waterway linking the North Sea to Antwerp; the narrow Scheldt Estuary. Axis and Allied commanders both knew the vital strategic importance of the Scheldt Estuary. Hitler assigned General Eberding as Fortress Commander of the estuary's south shore, OKW permitted flooding of much of the subsealevel terrain and gave Eberding the 64th Infantry Division, totally composed of Russian front combat veterans and heavily armed with support weapons. The Canadian First Army had twice earlier tried to cross the Leopold Canal and reach the Scheldt, and twice had been rebuffed. Today the Canadians would try again.
Board Configuration
Printed as a board diagram on the sheet (not reproduced), with boards numbered as printed. The Leopold Canal waterway runs on Boards 7 and 8; Board 3 carries the victory conditions.
Victory Conditions
To win the Canadians must be able to trace a road from the edge of the canal to the north edge of the board free of enemy units on or adjacent to the road AND be sole occupant of all five stone buildings on Board 3. The Germans win by avoiding the Canadian victory conditions.
Turn Record Chart
German sets up first; Canadian moves first. Turns 1 through 8 (8 is END), then 9 and 10. The track is printed with the note "restart on turn 11 (1)".
Order of Battle
Elements of the 1037th Grenadier Regiment of the 64th Infantry Division set up north of Leopold Canal on Boards 7, 8, 9, 10, 2, & 3:
- 10-2 leader (1); 9-1 leader (2); 8-1 leader (2); 8-0 leader (2)
- 4-6-7 squad (16); 2-4-7 squad (6); HMG 6-16 B12 (2); MMG 4-12 B12 (2); LMG 2-8 B12 (6)
- 44a counter (4); counter "7" with B12 (2); dummy "?" counter (16)
- Mtr 120 #16-75 (1)
- Mtr 81 #19-30 (1); Entrench (6); Trench (6)
"Germans start with one Module of 100 mm Art."
Elements of the 7th Brigade of the Canadian 3rd Infantry Division set up south of Leopold Canal:
- 9-2 leader (2); 9-1 leader (2); 8-1 leader (2); 8-0 leader (2); 7-0 leader (2)
- 4-5-7 squad (25); 4-5-8 squad (5); 2-3-7 squad (10)
- HMG 6-14 B12 (1); MMG 4-11 B12 (3); LMG 2-7 B11+ (5)
- Vehicle "7" with B12 (2); Mtr 4-1 / 51ss 2PP (3)
- Vehicle 20 (-4, -5), FT20 (2); vehicle 20 (-4, -5), FT20 51 (2)
- Mtr 76 #3-26 (2); Mtr 107 #9-90, S9, B11+ (2)
- 7ML 1S/2PP (10); 6ML 2S/10PP (6); Entrench (8)
"British start with two Modules of 88 mm Art."
Special Scenario Rules
R218.1 Waterway on Boards 7 & 8 is Leopold Canal. The Canal is Deep and flows West slowly.
R218.2 All marsh hexes are clear terrain. No wheatfields. Environmental conditions are wet.
R218.3 All Level 1 hexes are ground level MUD and contain other terrain as normal.
R218.4 All crags are treated as orchard, Islands in canal do exist.
R218.5 All Level 2 and higher terrain is inundated. Inundated hexes are submerged by flood waters and are treated as ground level pond. All terrain in inundated hexes is submerged beneath the water except as noted below.
R218.6 All roads are paved and above water even in inundated hexes.
R218.7 All hexes of the canal south and inclusive of 7I8, 7J7, 7K7, 7L7, 7M8, 7N8, 7O6, 7P7, 7Q8, 7R6, 7S6, 7T6, 7U7, 7V6, 7W7, 7X6, 7Y6, 7Z6, and 7AA8 (printed as "eight") are clear terrain to the south shore of canal.
R218.8 No entrenchments or trenches may be dug or placed in mud.
R218.9 Mud cannot be bypassed and does double infantry movement costs.
R218.10 Infantry units may set up concealed in TRENCHES (not entrenchments) in any terrain (including open).
R218.11 Bldgs 3N2, 3O5, 3R3, 3T4 and 3R5 are stone, all others are wood.
R218.12 All bldgs are Level 1 except HEX (not bldg) 3M2 which is level two.
R218.13 Canadians automatically get 3 fighters on Turn 1 as air support. They roll every turn for additional air support regardless of the presence of other air units BUT additional air can only be fighters and only one per turn (see 139.12).
R218.14 Canadians may erect infantry hasty pontoon bridges (133.8) by having two unbroken crews or one unbroken squad in a large raft in the canal unmoving for one full turn. The canal may be bridged no faster than 1 hex per turn. Bridges appear automatically in the owner's next rally phase. Germans may not dismantle bridges but may destroy them with KIA on IFT.
R218.15 WASPs may not ferry using 128.32
AFTERMATH: After the WASPs had flamed the far shore, the Canadian 7th Bde (Royal Winnipeg Rifles, Regina Rifle Rgt, and 1st Bn Canadian Scots) paddled across the Leopold. The crossing initially went easily. As the Canadians advanced however, they were forced to wade through waist high muddy water and crawl along elevated roadways. Much of the terrain had been submerged beneath the seawater the Germans had let in. With the aid of close support air missions, the Canadians were finally able to open a significant bridgehead. The cost, though, was so heavy the involved battalions had to be withdrawn. Someone else would have to open the waterway to Antwerp.
Scenario R219: Scheldt Fortress South
HOLLAND, October 25, 1944: Backed against the Scheldt Estuary, the weakened German 64th Infantry Division faced the entire Canadian First Army. It was the guns of the 64th which barred shipping from Antwerp. Every day that the 64th held out meant another day of short supplies for the Allies. The Canadian 7th Bde had, at substantial cost, opened a bridgehead across the Leopold Canal. Now the British 52nd Lowland Division, which had just completed more than two years of special training, was brought forward to clear the coastline. The issue was never in doubt, only the time it would take and the price the Germans would exact.
Board Configuration
Printed as a board diagram on the sheet (not reproduced). Boards 2 through 11 are in play; Boards 4 and 11 carry the setup limits below.
Victory Conditions
The British win by solely occupying all true second level hexes (including bldgs) at game end. The Germans win by avoiding the British victory conditions.
Turn Record Chart
German set up first; British move first. Turns 1 through 10, with END printed under Turn 8 and the note "restart on turn 11 (1)" at the end of the track. Symbols printed above Turns 4 and 6 are reproduced as printed; they accompany the reinforcement notes below.
Order of Battle
1038th Grenadier Regiment and 164th Artillery Regiment of the 64th Infantry Division set up on ANY board north of any hex numbered 3 on Boards 4 & 11 exclusive:
- 10-2 leader (1); 9-1 leader (3); 8-1 leader (2); 8-0 leader (2)
- 4-6-7 squad (18); 2-4-8 squad (5); 2-4-7 squad (9)
- HMG 6-16 B12 (2); MMG 4-12 B12 (3); LMG 2-8 B12 (6)
- 44a counter (6); counter "7 Δ B12" (3); dummy "?" counter (16)
- AA 20L(4) (1); AA 20L(6) V (1); Art 105 H6 (2); AT 75L (2); AA 88L V (1); AA 88LL B11+ (1)
- Mtr 81 #10-30 (2); Mtr 120 #16-75 (1)
- Vehicle 24, 1S/5PP (4); Entrench (8); Trench (1)
"Germans start with one Module of 100 mm Art."
"Turn 4: One module 200mm artillery, scarce ammo."
Walcheren reinforcements from the 70th Infantry Division, subordinated to the 64th Division, enter on Turn 6 or later on any north edge hex or hexes:
- 9-2 leader (2); 8-3-8 squad (3); 4-6-7 squad (4); LMG 2-8 B12 (3)
- Counter "30 Δ A" (1); vehicle 4 ★, 5ML 1S/3PP (7)
Elements of the 155th Brigade of British 52nd Lowland Division and elements 4th Armoured Division set up south of any hex numbered 3 on Boards 4 & 11 exclusive:
- 10-2 leader (1); 9-2 leader (1); 9-1 leader (1); 8-1 leader (2); 8-0 leader (2); 7-0 leader (2)
- 4-5-7 squad (20); 4-5-8 squad (8); 2-3-8 squad (3); 2-3-7 squad (5)
- Mortar counter "#1-8, 51 S6 2PP" (3); counter "7 Δ B12" (2); HMG 6-14 B12 (2); MMG 4-11 B12 (2); LMG 2-7 B11+ (4)
- Vehicle 9 (+2), 290* (2); vehicle 8 (+3), 75 (2); vehicle 16 (+2), 75 (2); vehicle 18 (+1), 75 (4)
"British start with one Module 88 mm Art. (plentiful ammo) and one Module 100 mm Mtr. (with S9)."
Elements 9th Brigade of the Canadian 3rd Infantry Division enter mounted on Terrapins (219.13):
- 10-3 leader (1); 9-2 leader (1); 9-1 leader (1); 4-5-8 squad (12); MMG 4-11 B12 (1); LMG 2-7 B11+ (3)
- Terrapin, vehicle 10/2 ★ (6)
Special Scenario Rules
The special rules are printed on a second sheet headed "Scenario 219".
R219.1 Scenario rules R218.2, .3, .4, .5, .6, .8, .9, .10, .11, .12 all apply to this scenario except as herein modified.
R219.2 Waterway on Boards 7 & 8 is Scheldt Estuary. ALL hexes north of south shore are water (including islands). It is deep & flow is moderate to the East.
R219.3 No entrenchments or trenches may be dug or placed on any Level 2 hexes EXCEPT for the special trench in 8X4.
R219.4 There is a special trench in 8X4, in addition to the one in the free setup, which adds its benefit to any adjacent wall, without obstructing fire.
R219.5 All terrain elevations on Board 8 represent TRUE elevations.
R219.6 The stone wall around 8X5, 8X4, and 8W5 has a special +3 modifier.
R219.7 Bldg. 8X7 doesn't exist. Bldg. 8V6 & 8W6 is stone and gives special +4 modifier. All hexes of bldg 6N4 are wooden and second level. All other buildings are wooden and Level 1 except as per R218.11 & .12.
R219.8 Both German ART must start in trenches (not entrenchments).
R219.9 German AA, AT, MTR, and their immediate crews must set up hidden. Facing determined at time exposed.
R219.10 All German ART and AA pieces must be sited so that each weapon has a clear LOS to at least one Scheldt Estuary hex.
R219.11 All vehicles moving offroad in a mud hex will BOG on a die roll of 6.
R219.12 Terrapins in water are hulldown. Even though a truck, rules 128.42, .54, .6, .71, .72, .742 apply. If the Terrapin fails its morale check it sinks.
R219.13 Terrapins enter on any hex or adjacent hexes TWO turns after British player notes turn and hexes of entry. Earliest entry is turn 3. No changes in turn or hex(es) permitted. May enter six abreast. Must all enter same turn. If hex is occupied by German unit must wait offboard till entry hex is vacant and then enter.
R219.14 German 8-3-8s are Engineer units with unlimited smoke.
AFTERMATH: The British 52nd Division was a well trained, aggressive unit. Unfortunately, the special training they had just finished was for use as mountain troops in Norway. Nonetheless, with support from the 4th Armoured Division, they cut sharply across the flat, below-sea-level terrain towards Fort Frederick-Hendrick. A surprise amphibious landing by units of the Canadian 9th Bde pulled away the last of the German reserves. Overcast weather allowed General Eberding to desperately ferry Wehrmacht engineer & infantry reinforcements across the Scheldt from Walcheren Island. Additionally, German coastal guns from Walcheren salvoed across the Scheldt in a vain attempt to slow the Allied attack. One by one, the south coast positions fell until on November 1st General Eberding surrendered.
Scenario R220: Clearing the Breskins Pocket
HOLLAND, October 6, 1944: Players should read scenarios 218 & 219 for units involved and historical background.
Board Configuration
Printed as a grid of boards on the sheet (not reproduced), with north marked by the printed north arrow.
Victory Conditions
The Allies must destroy all German AA, ART, AT guns and be sole occupant at game's end of all true second level hexes (including buildings) on the board to have a chance of winning. If neither the 7th Canadian Bde nor the 52nd British Lowland unit has dropped its morale at any time in the game and the Allied player accomplishes the above goals it is an Allied Brilliant Victory. If either of the above mentioned units drops its morale and the Allied player accomplishes his goals it is an Allied Costly Victory. If the Allies accomplish their goals but both of the units drop their morale it is a German Tactical Victory. If the German player is able to prevent the Allied player from accomplishing his goals it is a German Strategic Victory, regardless of German losses (and may, in light of Allied supply usage during the upcoming Battle of the Bulge, prolong the war by months).
Turn Record Chart
German sets up first; British moves first. Turns 1 through 10, with END printed under Turn 8 and the note "restart on turn 11 (1)" at the end of the track; the track then continues A, B and C. Game length: See Scenario Rules 220.8–220.11.
Available Forces and Artillery
German (Available Turn):
- Turn 1A: All starting forces of Scenario 218 and 219 located as mandated in those scenarios ignoring artillery modules.
- Turn 6C: Walcheren Island reinforcements enter any north edge hex or hexes as per Scenario 219.
- Artillery support: Turn 1A–17A: none. Turn 1B–17B: One Art Module of 100mm with scarce ammo. Turn 1C–17C: One Art Module of 100mm. Turn 4C–17C: One Art Module of 200mm with scarce ammo.
Allied (Available Turn):
- Turn 1A: Canadian 7th Bde. located as per Scenario 218.
- Turn 1B: British 52nd Lowland units enter any south edge hex.
- Turn 7B: Units 4th Armoured Division enter any south edge hex.
- Turn 3C: Elements Canadian 9th Bde enter on Terrapins as per Scenario 219.
- Artillery Support: Disregard modules noted in scenarios. Turn 1A–17A: Two Artillery 88mm Modules. Turn 1B–17B: One Mortar 100mm Module (with S9) + One Artillery 88mm module with plentiful ammo. Turn 1C–17C: One Mortar 100mm Module (with S9) + Two 88mm Artillery Modules.
- Air support available only turns 1A–17A as per Scenario rule 218.13.
Special Scenario Rules
R220.1 Scenario Rules 218.1 through .15 inclusive all apply to this scenario as modified below.
R220.2 Scenario Rules 219.2 through .14 inclusive all apply to this scenario as modified below.
R220.3 Scenario Rule 218.1 applies to the southern waterway on the gameboard and when there is any conflict all Scenario 218 rules are intended to apply to the southern half of the board.
R220.4 Scenario Rule 219.2 applies to the northern waterway on the gameboard and when there is any conflict all Scenario 219 rules are intended to apply to the northern half of the board.
R220.5 Unit Integrity rules ARE in effect.
R220.6 Any Bde that drops its morale TWO levels is instantly withdrawn from the game with all its support weapons. (The Germans are considered to have surrendered and the Allies to have been pulled out.) All AFVs, AT, AA, ART, MTR and their crews PLUS the detachment of the Canadian 9th Bde are exempt from ALL the morale effects of the United Integrity Rule including withdrawal. Any units locked in close combat at the time of withdrawal as well as all broken units are simply removed. If a support weapon for the unit was destroyed or permanently disabled it need not be replaced, for withdrawal, by a weapon from another unit.
R220.7 Supplemental Rule F is in effect.
R220.8 Between the three 17 turn portions of combat there are two BREAKs. During each BREAK any German unit except immobilized vehicles may move one hex due north and any Allied unit may move one hex due south, if the hex is not occupied by an enemy unit and terrain permitting. Allies move their units first. All combat activity ceases during a break. All berserk units revert to normal status. Units in Close Combat must move one hex north and south (depending on side) or be eliminated.
R220.9 During each BREAK a player MAY roll one die for each permanently or temporarily disabled weapon. For the German a die roll of 1 through 4 inclusive returns the weapon to full function while a roll of 5 or 6 destroys the weapon. For the Allies a roll of 1-5 inclusive returns the weapon to full function while a roll of 6 destroys it. A player is not forced to roll. Any destroyed weapon or vehicle cannot be recovered. All Allied AFV smoke dischargers are automatically reloaded. Immobilized vehicles are repaired.
R220.10 During a BREAK units may not gain or lose '?'
R220.11 During each BREAK ALL broken units must take a normal morale check (leader modifiers may be applied) after choosing if they wish to move one hex north or south (depending on side). Even if no leader is present the unit rallies if it passes its morale check. However, if there is no leader with the unit and it fails its morale check the unit is eliminated. If the unit fails its morale check and a leader is present the unit simply fails to rally. DM does not apply.
R220.12 Leaders from another Bde on same side are treated as per Rule 74.
R220.13 Allies may build Bailey Bridges. These are steel bridges with a maximum span of one hex. To emplace one requires a crew on both sides of the hex to be bridged for SIX full turns—unmoving, unbroken, not firing. The turns must be consecutive and unbroken by a BREAK. Treat Bailey Bridge as one lane stone with rails and girders. Only two may be erected and once erected may not be moved or replaced if destroyed. Bailey Bridges need no transport and appear automatically when two crews have fulfilled emplacement conditions and the Allied player wishes them emplaced.
Scenario R221: Vitality I
HOLLAND, October 24, 1944: The south shore of the Scheldt was nearly cleared. Unfortunately, guns on the north bank, though much less commanding, could still threaten the Allied shipping lanes to the port of Antwerp. The eastern portion of the north shore was a fingerlike strip of land known as South Beveland. The German defense of South Beveland, and Walcheren Island to the west, was entrusted to the 70th Infantry Division. Known as a "whitebread" unit, the 70th was composed of men suffering intestinal ailments. Armed in large part with captured ordnance, what it lacked in fighting spirit it made up for with a series of in-depth fortifications along South Beveland's narrow length. The Canadian First Army had tried earlier to break the German position with an armored thrust—and had been bloodily repulsed. Now, the Canadian 4th Bde, with assault engineers in the spearhead, would make the push.
Board Configuration
Boards 11 and 4, shown side by side with north up (printed north arrow).
Victory Conditions
For the Canadians to win they must have sole control of all bunkers and the German may have no functioning ordnance at the game's end. The German wins by avoiding the Canadian victory conditions.
Turn Record Chart
German sets up first; Canadian moves first. Turns 1 through 3, with END printed under Turn 3, then Turns 4 through 10, and the note "restart on turn 11 (1)" at the end of the track.
Order of Battle
Elements of the 70th Infantry Division set up anywhere west of Row K, Board 4 exclusive:
- 9-1 leader (1); 8-1 leader (1); 8-0 leader (1)
- 4-6-7 squad (7); 4-3-6 squad (3); 2-4-7 squad (5)
- LMG 2-8 B12 (3); MMG 4-12 B12 (2)
- '43b counter, [2] (1); '44a counter, [3] (3); dummy "?" counter (6)
- AT 75L (2)
- "(French)" Inf 65* B11+ (1)
- Bunker 2+3+5 (2); bunker 1+3+5 (1)
- Trench (5)
Elements of the 4th Brigade of Canadian 2nd Infantry Division set up east of Row K Board 4 inclusive:
- 10-2 leader (1); 9-2 leader (1); 8-1 leader (2); 8-0 leader (1)
- 6-3-8 squad (3); 4-5-8 squad (3); 4-5-7 squad (9)
- Counter "30 Δ X12" (2); counter "7 Δ B12" (1); counter "20 Δ -1 [2]" (1)
- LMG 2-7 B11+ (3); MMG 4-11 B12 (1)
- Vehicle 7 (+2), 75 (1); vehicle 18 (+1), 75 (1)
"British start with one Module of 100 mm Mtr. with S9."
Special Scenario Rules
R221.1 All buildings are wooden and Level One.
R221.2 Red terrain on Board 11 is all ground level mud from German flooding. Other terrain, including roads, exist normally in the mud hexes. Mud cannot be bypassed and doubles infantry movement costs. All vehicles which move offroad in a mud hex will bog on a die roll of 6. No bunkers, entrenchments, or trenches may be placed or dug in mud hexes.
R221.3 German player may not utilize Hidden Initial Placement but the Canadian player may not inspect the contents of any bunker, trench, or entrenchment until the units therein have fired.
R221.4 Weather is BOTH Gusty Winds and Rain/Heavy Overcast, roll separately for both every turn. Environmental conditions are "wet".
R221.5 There is an A27 wreck facing south in 11J9, another facing SE in hex 11F7. There is a Kangaroo wreck in 11C6 facing south and another in 11D8 facing SW.
R221.6 Canadian 6-3-8 units are Engineers with unlimited smoke making capabilities.
R221.7 Wheatfields are in effect.
R221.8 Units may not fire into a bunker against its covered arc modifier unless within the arc a bunker mounted weapon could fire out at them.
AFTERMATH: Soon after the assault began the battlefield was closed in by rain. In a series of isolated short engagements the Canadians were able to advance, but far too slowly. The situation was relieved with the landing of two battalions of the British 52nd Infantry Division behind the German fortified positions. Once isolated, and with good flying weather for the next few days, all of South Beveland was finally secured. However, the units of the German 70th Infantry Division had managed to buy another few precious days.
Scenario R222: Infatuate II
WESTKAPELLE, WALCHEREN ISLAND, HOLLAND, November 1, 1944: The last German stronghold on the Scheldt Estuary was the island of Walcheren. Linked by a narrow causeway to South Beveland, its batteries were still a threat to Allied transports. Agile minesweepers were already plying their trade in the estuary, but no freighter would dare the passage till the guns of Walcheren were silent. The only land bridge to Walcheren was 1200 meters long and 40 meters wide and "as straight as a gun barrel". In spite of the most heroic exertions of the Glascow Highlanders (of the British 52nd Infantry Division) and the 5th Canadian Bde (made up of the Black Watch of Canada, the Calgary Highlanders, and Le Regiment de Maisonneuve), the causeway could not be forced. Thus, on an overcast November 1st, the Walcheren amphibious invasion was launched.
British heavy bombers had breached the island's dyke, flooding much of the interior (along with many of the defensive batteries), but leaving a dry rim of towns and coastal guns. The town of Westkapelle, and its nearby battery W15, formed the westernmost German guardian to the Scheldt. The 4th Commando Bde, supported by specialized armored equipment of the British 79th Armored Division, and guided by the famous Westkapelle lighthouse, would sail into the face of the waiting guns in order to destroy them.
Board Configuration
Boards 7 and 8, laid north to south in that order from top to bottom, with north up (printed north arrow).
Victory Conditions
For the British to win there must be no unbroken German squads or crews and no undestroyed German ordnance at game's end. The Germans win by avoiding the British victory conditions.
Turn Record Chart
German sets up first; British moves first. Turns 1 through 10, then END.
Order of Battle
Elements of the 70th Infantry Division set up west of hex rows D and DD exclusive on Boards 7 and 8 respectively in the board center. Units may not set up on islands nor on land masses which border the north and south edges:
- 8-1 leader (1); 8-0 leader (1); 7-0 leader (1); 6 +1 leader (1)
- 1-8-8 gun, modifier -3 (1); 1-8-8 gun, modifier -2 (1); 1-8-8 gun, modifier -1 (1)
- 4-6-7 squad (3); 4-3-6 squad (3); 2-4-7 squad (6)
- LMG 2-8 B12 (2); HMG 6-16 B12 (1); '44a counter, [3] (2)
- Dummy "?" counter (8)
- AA 76L B11+ V, captured "(British)" weapon (2); AA 94L V, captured "(British)" weapon (2); Inf 94* captured "(British)" weapon (2)
- Trench (2)
Units of the 4th Special Service Brigade with AVRE of 79th Armored Division set up east of hex rows D and DD exclusive on Boards 7 and 8 respectively in the board center. Units may not setup on islands nor on land masses which border the north and south edges:
- 10-3 leader (1); 9-2 leader (1); 9-1 leader (2)
- 6-3-8 squad (11); 2-3-8 squad (2)
- LMG 2-7 B11+ (4)
- Counter "30 Δ X12" (1)
- Mtr #1-8, 51 S6 2PP (3)
- Vehicle 9 (+2), 290* (1)
Special Scenario Rules
R222.1 All German captured 76mm weapons must start & stay in trenches.
R222.2 There is a German 2-5-7 bunker facing SW in 7P1. There are German 1-5-7 bunkers facing SW in hexes 7Q1, 7O1, 7S1.
R222.3 All German captured 94mm weapons must start in bunkers and they may all fire from their bunkered positions at onboard targets.
R222.4 British 6-3-8 units are Commandos and may make no smoke but may use Demo Charges.
R222.5 All bldgs are wooden and normal height (57.1) except hex (not bldg) 8C3 which is stone and third level.
R222.6 Half orchard hexes are considered full orchard hexes.
R222.7 Units may not fire into a bunker against its covered arc modifier unless within the arc a bunker mounted weapon could fire out at it.
R222.8 The land on the southern edge of the board represents the northern edge of the Breskins pocket and is in reality far from the Westkapelle region.
R222.9 British 2-3-8s are halfsquads.
R222.10 All water is deep.
AFTERMATH: The overcast weather prevented Allied airborne spotting for artillery and markedly diminished the effectiveness of the British shore bombardment. In contrast, the German coastal batteries were very successful against the oncoming assault fleet. In all, 17 of 25 close support ships involved in Infatuate II were sunk or damaged and only 3 tanks, 2 AVRE, and one dozer could be landed. Once ashore though, the Commando units were almost immune to the seaward pointing guns. The initial British attack was repulsed by long range machine gun and sniper fire but the tough Special Service troops quickly rallied and routed the garrison. As the casemented guns were silenced, the final fight to open the Scheldt Estuary was over.
Scenario R223: Night Drop
CHERBOURG PENINSULA, FRANCE, June 6, 1944: Scattered in farms and villages along thirty miles of coast, the German 709th Infantry Division had been awaiting the invasion for a year. It had been formed eighteen months before around a core of German veterans from the Russian front with a large number of conscripts from occupied countries. On the night of June 5-6, the 82nd Airborne dropped in the midst of the 709th. The mission of the 82nd was to hold open the causeways across the flooded terrain behind the UTAH beaches thus allowing the invading units rapid exit while preventing the defenders from reinforcing the beach. Although utterly disorganized by the night drop the 82nd had begun to regroup and push aside the 709th when, as dawn broke, the 1057th PanzerGrenadier Regiment attempted to break through to the beaches.
Board Configuration
Printed as a three-board diagram on the sheet (not reproduced). Boards 3, 6, 9 and 11 are referenced in the rules.
Victory Conditions
The German wins if there exists a road with no unbroken American squads on or adjacent to it, from the east edge of Board 6 to the west edge of Board 11 at game's end. The American wins by avoiding the German victory conditions.
Turn Record Chart
German sets up first; US moves first. Turns 1 through 8, then END. A symbol is printed above Turn 3, reproduced as printed; it marks the Turn 3 arrivals below.
Order of Battle
709th Infantry Division elements set up HIDDEN (except for trucks) on any hex with no more than 12 counters on any one board. Units on half hexes count against both boards:
- 9-1 leader (1); 8-1 leader (1); 8-0 leader (2)
- 4-6-7 squad (4); 4-3-6 squad (5); 2-4-7 squad (4)
- LMG 2-8 B12 (4); MMG 4-12 B12 (2)
- Inf 75* counter (1); vehicle 24, 1S/7PP (3); AA 37L(8) (1); AA 20L(6) V (1)
- AA 20L(4) (1)
Turn 3: 1057th Grenadier Regiment elements arrive east edge:
- 9-1 leader (1); 8-1 leader (1)
- 4-6-7 squad (6); LMG 2-8 B12 (4)
- Vehicle 13 (-1, -0), 75 (1); vehicle 15, 37L(8) (1); vehicle 33 (-1, -3), 75L (1); vehicle 18 (-4, -5), 1S/5PP (6)
82nd Airborne elements paradrop:
- 9-2 leader (3); 9-1 leader (2); 8-1 leader (1)
- 8-4-7 squad (16); counter "6 / [4] / X11-" (6)
Special Scenario Rules
R223.1 On Turn 1 German Rally Phase all unexposed infantry are placed on board under question marks. Crews and guns remain hidden until exposed by fire, movement, or discovery.
R223.2 Standard NIGHT rules are in effect for first 3 turns.
R223.3 There is no penalty for this night paradrop.
R223.4 All US units enter via paradrop. Each stick must contain 7 counters of which no more than four may be squads. Sticks which pick joined half hexes must specify which board they are on before executing the placement die roll.
R223.5 All Level 1 terrain on Board 11 is flooded. Flooded hexes are treated as ground level pond. No German unit may setup in a flooded hex. The roads are elevated and exist normally. No other terrain exists in flooded terrain. Any para units which drop into a flooded hex must take an immediate MC. If it fails it is eliminated. If it passes it must use river fording rules to get out. Bazookas landing in flooded terrain are lost.
R223.6 All Level 1 & 2 hills on Board 3 are ground level with any woods or buildings existing normally.
R223.7 Chateau on Board 6 is Level 2 & wooden. Bldg 3N1 is Level 2 and stone. All other bldgs are Level 1 and wooden.
R223.8 Round fractions down when halving for conscripts.
R223.9 On Turn 1 the Germans are limited to half their normal movement and NO gun or truck movement is allowed.
R223.10 During night turns road costs 1 MP/hex for all vehicles.
R223.11 No boresighting.
AFTERMATH: American paratrooper training stressed individual aggressiveness and initiative. On the morning of June 6th this training paid full dividends. Small knots of Americans, who would not surrender, blocked every road. The advancing PanzerGrenadiers found themselves attacked from all sides. As the fight degenerated into dozens of small unit actions the causeways remained in the GIs' hands. By midnight of June 6th the entire US 4th Division was ashore and a secure beachhead was assured.