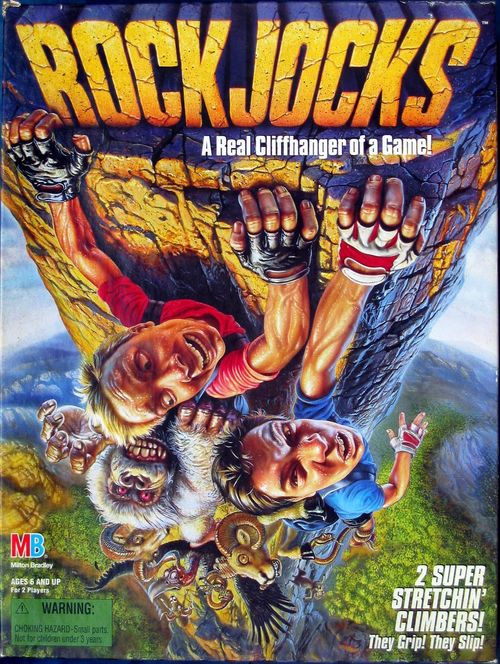
Rock Jocks
Rock Jocks Rulebook
Table of Contents
Table of Contents
Contents
3-D game unit, 6 plastic rocks, 2 climbers with stretchy arms, 4 goats, 4 snakes, 4 vultures, 1 Yeti, 22 playing tokens.
Assembly
Build the Cliff!
You will need:
- The 2 upper and lower wall pieces
- The floor piece
- The snake pit piece
- The top floor piece
- The top wall piece
- The 4 rock locks
- Punch all these pieces out from the cardboard parts sheets. As you do this, be sure to punch out all holes, slots and openings. Discard all waste cardboard.
- Fold the lower wall piece with the Yeti's cave on it along its scored line. Then attach the floor piece to it as shown in Figures 1A and 1B. (Figure 1A: insert tabs into the slots on the left side of the wall first, then swing the right side of the wall forward to fit onto the floor tabs. Figure 1B: now push the floor back until it locks in place.)
- Attach the snake pit to the wall by inserting its 2 large tabs into the wall's 2 top slots. The snake pit should be skeleton-side up. See Figure 2.
- Fold the upper wall piece along its scored line and attach it to the first wall piece as shown in Figure 3.
- Insert one each of the four rock locks into each slot of these four protruding tabs: the two on the floor and the two on the snake pit. See Figure 4.
- Fold the top floor along its scored lines and attach it to the upper wall the same way you attached the floor to the lower wall in Figures 1A and 1B. The flaps creating the rock overhang should be hanging down. See Figure 5.
- Fold the top wall along its scored line and attach it to the top floor by inserting its two tabs into the slots of the top floor's protruding tabs. See Figure 6.
The Support Bar and Planks
Before you begin this step, remove all the plastic parts from their runners. Discard the runners and set the plastic parts aside until you need them.
Insert the Support Bar as shown in Figure 7. Lift the top floor slightly, then rest the bottom of the bar against the back corner of the snake pit and insert the top of the bar in the small center hole of the top floor.
To assemble the planks, you will need:
- The 2 plastic planks
- The 4 plastic clips
First, attach two clips to the holes in the top floor as shown in Figure 8. Then snap a plank into the clips as shown. Finally, gently bend the tip of the plank and fit it into its square opening. Do the same for the other side of the top floor. (Figure 8: clip here.)
Assemble Your Climbers
For each climber, you will need:
- Climber front with matching climber back
- 2 legs
- 2 hands
- 2 cuffs
- 2 half-cuffs
- Backpack
- 1 piece of stretchy gel
First, assemble the hands to the piece of stretchy gel. Follow these five steps for each hand:
- Holding the piece of stretchy gel, slide the cuff onto it as shown in Figure 9.
- Now press the end of the gel onto the base of the climber hand as shown in Figure 10.
- With your other hand, press the half-cuff against the hand, trapping the gel inside the two pieces as you do so. See Figure 11.
- Hold the hand and the half-cuff together with one hand while you slide the cuff over them with the other hand. See Figure 12.
- Terrific! Now do the same thing with the other end of the stretchy gel and attach the other hand.
Test the hand: Take a minute to pull on each hand to make sure it stays attached with the gel trapped inside. If the hands become detached, it's easy to reassemble them.
Now it's time to assemble the arms to the rest of your climber.
- In one hand, hold the hands attached to the stretchy gel. With your other hand, pull the 2 legs against the gel (see Figure 13). The gel will get thinner as it stretches. When it gets thin enough, let it roll into the slots in the tops of the legs (see Figure 14).
- On a flat surface, lay down the back half of your climber (it's the half with the pockets in the shorts) with its inside faceup. Now lay the completed hands-gel-legs assembly inside as shown in Figure 15. Then press the front half of the climber onto the back half. If any gel oozes out, simply pull on one or both arms until the gel pops back into the climber's body!
- Now insert and twist the backpack into the climber's back as shown in Figure 16.
Assemble the other climber the same way.
Apply Labels
Put the labels on the climbers, the goats, the vultures and the Yeti. Refer to the label sheet to see which eyes are whose.
Object
Be the last climber left hanging on the cliff.
Do this by making your opponent hang more and more "critters" on his or her climber. The more critters, the heavier a climber becomes. The heavier the climber, the sooner he falls off the cliff!
Players take turns playing tokens. Some of the tokens tell you to hang different critters on the climbers. When one player's climber falls off the cliff, the other player wins that round.
Setup
- Place the completely assembled game on a flat, sturdy surface between both players.
- See Figure 17. Stand up the 4 goats in the 4 small holes on the floor of the cliff. Hang the 4 vultures on the bottom wall of the cliff. Place the 4 snakes in the snake pit. Hang the Yeti from the hole closest to the back of the snake pit.
- Make sure each of the climbers' planks has been set up. The tip of each plank should be through the square opening in the top floor of the cliff (see Figure 18). You'll need to reset this each time a climber becomes too heavy and pulls out the plank, ending the round.
- The six little rocks go on the top floor of the cliff. Place one rock on the top of each plank as shown in Figure 18.
- Each player picks a climber and hangs it from a plank on the top floor of the cliff as shown. Hang your climber very gently so you won't pull the plank out of its opening!
- Mix up the tokens and place them facedown in a pile on the cliff's floor.
- Each player takes three tokens from the pile on the bottom floor of the cliff. Look at your tokens but keep them secret from your opponent. Decide who will take the first turn.
Gameplay
On your turn, play one of your three tokens by laying it faceup between you and the other player. Then take another token from the pile to replace the token you've played. Your turn is over. Put played tokens out of the play area.
The Tokens: What They Are and How to Play Them
Either you or your opponent will follow the directions of the token you play on your turn. You may only play one token per turn (except when Trading Tokens, explained later).
Critter Tokens
There are three critter tokens: goat, vulture and snake.
When you play one of these tokens, your opponent must take the matching critter from its place on the cliff and hang it on his or her climber (see "How to Hang 'Em" on page 5).
NOTE: The Yeti is not a "critter."
On Me! Tokens
There are three "On Me!" tokens: goat, vulture and snake.
When you play one of these tokens, you must take the matching critter from its place on the cliff and hang it on your climber (see "How to Hang 'Em"). You might be forced into playing one of these tokens if you don't have any other token you can play on your turn.
Lose Grip Token
When you play this token, your opponent must remove one of the hands of his or her climber from the cliff. Now this poor climber will be hanging by only one hand!
NOTE: You cannot play this token if your opponent's climber already has one hand off the cliff!
No! Token
You may play this token right after your opponent plays any Critter Token or the Lose Grip Token.
- If your opponent played a Critter Token, now your opponent must take whichever critter you were supposed to take and hang it on his or her climber instead! Then he or she moves the Yeti once, if possible. Your turn is over.
- If your opponent played a Lose Grip Token, your opponent's climber has to lose a grip, not yours! Then he or she moves the Yeti once, if possible. Your turn is over.
More about how to move the Yeti is explained below.
EXAMPLE: Mike plays a Goat Token on his turn. You play a NO! Token on your turn. You don't hang anything on your climber, but Mike must take a goat from the cliff and hang it on his climber. Then he moves the Yeti once and takes his next turn.
NOTE: You may not play this token if your opponent plays the Yeti Token.
Give Away Token
When you play this token, you get to remove a critter that's hanging on your climber and give it to your opponent. Your opponent must then hang this critter on his or her climber. You can remove any critter as long as there is no other critter hanging from it! Then, if you can, move the Yeti once (see "How to Move the Yeti"). If the Yeti is hanging from your climber, you may play this token to remove it and give it to the other player. You can remove the Yeti as long as there is no other critter hanging from it.
Of course, if you don't have any critters hanging off your climber, you can't play this token.
Trade Token
When you play this token, you trade your two remaining tokens for your opponent's three tokens. Your opponent immediately draws a new third token from the pile to bring his or her total back to three tokens. You play another token from your new hand of three to resume play. This is the only time you can play more than one token on your turn.
Yeti Token
This is a special token that can only be played at a special time. When the Yeti is in its "ready" spot and you play this token, your opponent must take the Yeti and hang it on his or her climber (see "How to Move the Yeti").
REMEMBER: You can only play this token when the Yeti is at the "ready" spot. You cannot use this token to move the Yeti closer to the "ready" spot.
You cannot use this token to give away the Yeti if it is already hanging from your climber.
How to Hang 'Em
When it's time to hang a critter or the Yeti on your climber, here's the way to do it: Hang them, rightside-up or upside-down, on your climber. Hang 'em on his backpack! Hang 'em off his feet! Hang critters off other critters—the Yeti, too! Be creative! But be careful! See Figures 19A and 19B.
How to Move the Yeti
When the game begins, the Yeti hangs out in the back of its cave. But every time someone plays a token with "And Move Yeti 1" on it, the Yeti inches closer! The Yeti must move a total of 4 times to reach the "ready" spot (see Figure 20). Once there, the Yeti waits until someone plays the Yeti Token! When you play the Yeti Token, your opponent must hang the Yeti on his or her climber.
Rock Til You Drop!
The game is played in rounds, each round ending when one climber falls off the cliff. If your climber's still hanging on, you're the reigning Rock Jock for this round! Set up the game again for another round. But this time, the losing player has to put the rock that fell off his or her climber's plank into that climber's backpack. Every time a player loses, another rock goes into the backpack.
Three rocks and you're outta the game!
NOTE: If a climber's hand falls off the edge, leave him hanging by one hand. If any critters fall off, put them back on that climber. Then keep playing! The round ends when one climber falls completely off the cliff and hits the ground.
...And the Winner Is...
The game ends when one player's climber has gotten three rocks. The other player (who's got fewer rocks) wins the game!
What If...
What if I can't play a token on my turn?
If you can't play a token on your turn, pass. If neither you nor your opponent can play a token on your turns, both of you may turn in all your tokens and take new tokens.
What if one or more critters (or the Yeti) fall off my climber?
If any critters fall off your climber, you must re-hang them. They don't have to be put back in the same positions.
What if my climber's arms stretch so far that one or more critters (or the Yeti) touch the ground?
If any critters on your climber touch the ground, you must reposition them on your climber so they are no longer touching the ground.
What if the Yeti is at the "ready" spot and I play a token that tells me to move the Yeti?
Follow the token's directions, then leave the Yeti in the "ready" spot. The Yeti only gets to leave the "ready" spot when you play the Yeti Token.
What if I play a Critter Token and my opponent plays a No! Token? Could I play a No! Token?
You may play as many No! Tokens between the two of you as you want. Of course, if you're the last player to play one of these tokens, your opponent must follow the directions. Remember to move the Yeti once for each token played.
A Practice Game
Mike and Chris have just started their game. Mike takes the first turn.
- Mike's turn: Mike plays a snake token and takes a new token from the pile. Chris hangs a snake on his climber's left foot.
- Chris' turn: Chris plays a goat token. Then he takes a new token from the pile. Mike doesn't put a goat on his climber.
- Mike's turn: Instead, Mike plays a No! Token. Chris hangs the goat on his climber's backpack and then moves the Yeti once.
- Chris' turn: Chris plays a snake On Me! Token. Chris hangs a snake on his climber's right foot.
- Mike's turn: Mike plays a Lose Grip token. Chris doesn't take his climber's hand off the cliff.
- Chris' turn: Instead, Chris plays a No! Token. Mike has to take one of his climber's hands off the cliff. Then he moves the Yeti once.
Caring for Your Climbers
Your climbers will perform at their best if you follow these helpful hints:
- Keep your fully-assembled climbers in the resealable plastic bag when not in use.
- Keep the stretchy arms of your climbers away from porous surfaces like clothing and furniture, as the arms may stain these surfaces after prolonged contact.