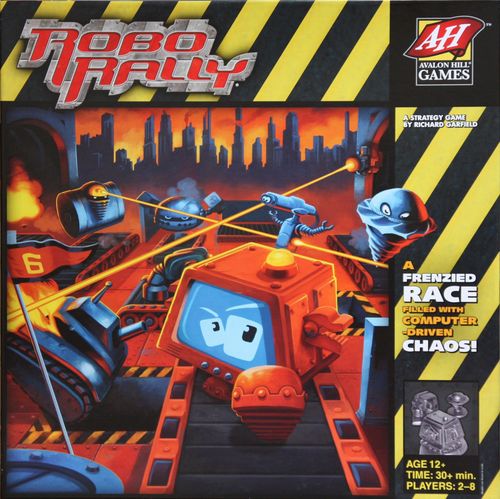
RoboRally
RoboRally Rulebook
Table of Contents
Table of Contents
Contents
- 6 Pre-Painted Robot Figures
- 6 Robot Player Mats
- 1 Double-Sided Docking Bay Gameboard
- 4 Double-Sided Factory Gameboards
- 6 Plastic Checkpoint Markers
- 120 Programming Cards (6 decks of 20 cards each)
- 40 Damage Cards
- 40 Upgrade Cards
- 8 Energy Tracking Cubes
- 6 Reboot Tokens
- 6 Archive Tokens
- 6 Checkpoint Tracking Tokens
- 1 Large Player Aid Card
- 1 Priority Token
- 1 Sticker Sheet
Setup
If this is the first time you are playing, apply the sticker labels to the plastic checkpoints. For example, Checkpoint #1 gets both a large #1 Checkpoint sticker on the side with the flagpost, while the small triangular #1 sticker is applied to the flagpost itself.
- Choose a race course to play or custom build your own! "Milk Run" is a great course for first-time players. Page 24 of this guide will tell you how to set up the Gameboards, Docking Bay, Checkpoints, and Reboot Tokens for "Milk Run".
- Each player chooses a robot and takes the matching figure, player mat, and programming deck for that robot. Shuffle your programming deck and place it face down on your player mat in the space provided.
- Shuffle the 40 damage cards and place the stack face down to one side of the Gameboard.
- Shuffle the 40 upgrade cards, and place the deck face down next to the damage card stack. Deal 3 upgrade cards to each player. After reading these cards, each player should place them face down next to their player mat. You may look at your upgrade cards at any time.
- Each player takes 1 Checkpoint Tracking Token and places it on the START space of their Checkpoint Track on their player mat.
- Each player takes 1 Energy Tracking Cube and places it on the "3" space of their Energy Track. Each player starts with 3 Energy and can store up to 10 Energy.
- Each player places their robot on one of the black and white gears on the Docking Bay board shown on the course you have chosen. Players place their robots with the arrow on their base pointing toward the adjacent board. The youngest player places their robot first, and the choice moves to the left.
- Place your robot's Archive Token under your robot in its start space. The "arrow" side should point towards the adjacent board.
- Give the Priority Token to the youngest player.
Object of the Game
Play cards to program your robot through a hazardous factory race course. Make your way to each of the Checkpoints in numerical order on the course you have chosen or designed yourself. The first player to reach the final Checkpoint is the winner!
The Basics
ROBO RALLY is played in rounds. Each round is made up of the following 3 phases: (1) The Upgrade Phase, (2) The Programming Phase, and (3) The Activation Phase.
Here's a quick summary of what a round will look like. You'll find a more detailed description of each phase and how to play a full round starting below.
- The Upgrade Phase: During this phase, you may acquire, install, and/or uninstall new upgrades. Everyone performs this phase at the same time.
- The Programming Phase: Draw cards from your programming deck, then place 1 of them into each of the register slots on your player mat (1-5) to plot the moves you want your robot to make. Everyone performs this phase at the same time.
- The Activation Phase: For each register slot in order, all players will activate their robots and carry out their programming, starting with the player who has the Priority Token and going clockwise around the table. Once all players have completed the current register, Board Elements, Robot Weapons, and End of Register effects will be activated (see page 8) before the next register is resolved. After all 5 registers are complete, the round ends.
Playing a Round
1. The Upgrade Phase
At the start of each round, you may acquire new upgrade cards for your robot by spending Energy from your Energy Track. During the game, you will have the opportunity to gain more Energy and accumulate it on your Energy Track. Upgrades change the way your robot functions, providing your robot with advantages, and you may use them at different times during the Programming and Activation Phases.
There are two basic types of upgrades: permanent and temporary. Permanent upgrade cards are yellow and temporary upgrade cards are red. A permanent upgrade's effects will (usually) last for the remainder of the game. Temporary upgrades may be used only once and are discarded after you activate them. (See page 21 for a more detailed description of the upgrades. Becoming familiar with these cards will help you to better use them.)
During this phase, you may perform any or all of the following actions in any order you choose:
- Draw a New Upgrade You may spend 1 Energy to draw 1 new upgrade card. You may only draw 1 new upgrade during each Upgrade Phase. There is no limit to the number of uninstalled upgrades you may have in your collection.
- Install 1 Upgrade You may install 1 upgrade from your collection of uninstalled upgrades. You may only install 1 upgrade during each Upgrade Phase, including the very first round of the game.
- Uninstall Upgrades Uninstall any number of upgrades and discard them to the upgrade discard pile.
To install an upgrade, look at the number in the top left corner of the card. This is the cost in Energy you must pay to install that card. Adjust your Energy Tracking Cube on your player mat's Energy Track to your new Energy total after the installation.
When you install a permanent upgrade, place it face up in the Installed Upgrades area on your player mat.
When you install a temporary upgrade, place it face up next to your player mat.
Note: Your robot can have a maximum of 3 permanent upgrades and 3 temporary upgrades at a time. If you already have 3 of one type, you may discard an upgrade of that type to make room for a new one.
Once all players are done drawing and installing upgrades, proceed to the Programming Phase. Note that a player is never required to spend their Energy to draw or install upgrades. You might want to save up for an expensive and powerful upgrade!
2. The Programming Phase
During the Programming Phase, you'll plan your robot's actions for the round. You'll do this by placing programming cards in each of the 5 registers on your player mat. Programming cards tell your robot to do things like move, rotate, or collect Energy, all in a 5-step sequence of your choosing. You'll find a complete description of the 9 types of programming cards on page 11.
Programming Your Robot
To program their robots, all players perform the following actions at the same time:
- Draw cards from your own programming deck (marked as "Draw" on your player mat) until you have 9 cards in your hand. If your deck runs out, shuffle your programming discard pile to replenish your deck, and then keep drawing until you have 9 cards.
- The 9 cards in your hand represent the moves available to you for this round. Inspect the area around your robot to see which cards will help you safely make your way to the next Checkpoint. Should you Move 3? Should you find a battery to collect Energy? Do you need to Rotate Left or Rotate Right? Be aware of Board Elements and other robots in your way, as these will affect your robot during the Activation Phase.
- After you have an idea of what you need your robot to do, choose 5 cards to play, and place 1 of them face down on each of the 5 registers on your player mat in the order you want them to resolve. During the Activation Phase, your robot will perform the action on the card you placed in Register 1 first, then the action on the card you placed in Register 2, and so on, until all 5 cards have been resolved.
Note: During the Activation Phase, players take turns activating their robots. This means that all players will activate their Register 1, based on priority. After all players have resolved their Register 1 programming and any Board Elements, Robot Weapons, and End of Register effects have been activated, players will proceed to Register 2, and so on. You'll learn more about this on the next page in Step 3, The Activation Phase.
Once the priority player has revealed their first card, no one may change their program!
- Place any non-damage programming cards still in your hand into your discard pile. Note that this means that damage cards will remain in your hand from round to round until you program them or find other means to get rid of them (like shutting down or certain upgrades).
Here's an example of what programming your robot might look like.
Shani has these programming cards in her hand this round: Move 2, Move 1, Move 1, Move 1, Power Up, Rotate Left, Rotate Right, Rotate Right, U-Turn.
She studies the board to visualize how she wants to plot out her robot's movements. She decides she wants her robot to move ahead 2, rotate right to avoid the yellow wall, move ahead 1, rotate left to redirect her robot toward the Checkpoint, and finally power up to collect 1 Energy. She hopes to draw a Move 2 next round!
- She starts here and wants to move ahead 2 spaces in the direction her robot is facing.
- Here she wants to rotate right to get around the wall in front of her.
- Then, she wants to move forward 1 space.
- Next, she wants to rotate left, so she is facing the Checkpoint.
- Lastly, she decides to use a Power Up to earn 1 Energy.
So, she places her programming cards in her registers as shown (note that programming cards are placed face down).
Each player should endeavor to place their 5 cards quickly, so everyone can get to the action. Once all players have finished programming, proceed to the Activation Phase.
3. The Activation Phase
During the Activation Phase, each of the 5 registers on your player boards are activated in order. Each register is resolved by following these 3 steps in order: (A) Programming Card Activation; (B) Board Element and Robot Weapon Activation; and (C) End of Register Activation. These 3 steps repeat for each of the 5 registers.
A. Programming Card Activation
Programming cards activate one register at a time, and players take turns based on priority. For every register, after all players have activated their programming card, Board Elements, Robot Weapons, and End of Register effects all activate before the Programming Card Activation for the next register begins. To activate your first programming cards, follow these steps:
- All players flip over the cards in Register 1 on their player mats, revealing their programming choice.
- The player with priority (that is, the player who holds the Priority Token) carries out the action on their Register 1 card. Don't worry about any effects of the space your robot stops on just yet.
- The next player with priority (that is, the player to the left of the priority player) carries out the action in their first register, and so on until all players have activated the programming in their first register.
Robots can push fellow robots, and sometimes robots will bump into each other. For more on pushing robots, see page 16.
Once all players have resolved the card in their current register, proceed to Board Element Activation and Robot Weapon Activation.
B. Board Element Activation (1-5) and Robot Weapon Activation (6)
The Board Elements of the factory floor activate whenever a robot is on that particular space. Each different Board Element type is resolved simultaneously across all boards and for all players. Since they activate in order from 1-5, one element type could move your robot onto another element, which would also activate if that element comes later in the sequence. The steps are:
Board Element Activation
- BLUE CONVEYOR BELTS move (we will use "convey" from now on) any robot standing on them 1 space in the direction of the arrow. If a robot is still on a blue conveyor belt after this first conveyance, this robot conveys a second space in the direction of the arrow. See page 12 for more on conveyor belts.
- GREEN CONVEYOR BELTS convey any robot standing on them 1 space in the direction of the arrow.
- PUSH PANELS push any robot in that space 1 space away from the wall that houses the push panel. But: A push panel only activates during the registers that match the numbers printed on that push panel (e.g., registers 2/4 or 1/3/5). See page 16 for more on pushing.
- GEARS rotate robots standing on them 90 degrees in the direction of the arrows.
- BOARD LASERS fire, hitting any robots in their line of sight. Board lasers cannot fire through walls or hit more than 1 robot: They shoot from the red and white pointer attached to a wall, and hit only the robot nearest to the source. For each laser beam shown, draw the top card from the damage deck, 1 at a time. See page 17 for more on Damage.
Robot Weapon Activation
- ROBOT WEAPONS: Each robot has a built-in "main laser" weapon that fires during this step. This main laser fires in the direction the robot is facing (in the direction of the arrow on its base). Its range has no limit; it goes until it hits the nearest target robot, a wall, or harmlessly exits the board.
Some upgrades are weapons that may be used "instead of firing your robot's main laser," in which case it doesn't deal the base 1 damage. Only 1 upgrade can replace your robot's main laser each register. These upgrades are also robot weapons and they shoot just like your robot's main laser unless the upgrade says otherwise. When the order matters for weapon effects, they fire in priority order.
Once all Robot Weapon Activations have been resolved, proceed to End of Register Activation.
C. End of Register Activation
These effects happen in this order at the end of each register:
- BATTERIES: If your robot ends a register on a battery space, you gain 1 Energy. Advance your Energy Tracking Cube 1 space up on the track on your player mat. Each robot can store a maximum of 10 Energy at a time. If you already have 10 Energy and would gain more, nothing happens.
- CHECKPOINTS: You must reach the Checkpoints in numerical order to win. If your robot ends a register on the Checkpoint that matches the number to the right of your Checkpoint Tracking Token, move it 1 space to the right on your player mat. Your token will now be on the Checkpoint number you currently occupy: When you reach Checkpoint #1, your token will move from Start to #1 on your player mat. You now need to reach Checkpoint #2 (unless the race course featured only a single Checkpoint).
Notes on Board Elements
During each of the 5 steps above, if your robot is on that particular Board Element when it activates, your robot is affected by it (but only during that step). For example, if your robot moves through a laser's path during any given register but are not on the laser during Step 5 of Board Element Activation, you will not be hit.
Continuing the Activation Phase and End of Round
Repeat steps A, B, and C for the remaining registers. Remember, after all players have activated their programming cards for a single register, Board Elements activate, robots fire their weapons, and End of Register effects happen.
When the 5th Register has been fully resolved (after End of Register effects):
- The player holding the Priority Token passes it to the player on their left.
- Place all face-up damage cards in your registers into the damage discard pile.
- Discard all face-up programming cards in your registers into your discard pile.
- Leave all face-down cards in your registers, if any.
- Return to the Upgrade Phase (unless the race has ended) and start a new round!
You now know the basics of Robo Rally racing! The race ends when a robot ends a register on the final Checkpoint. That player wins!
Card Index
Here's a more detailed look at the 20 cards found in each player's programming deck. These cards are sometimes referred to as "regular" programming cards. Damage cards are also programming cards, but they aren't among the regular ones that start the game in your programming deck.
MOVE 1 (4 copies) MOVE 2 (3 copies) MOVE 3 (1 copy) Move Cards. Move your robot that many spaces in the direction it is facing. A robot is always "facing" in the direction indicated by the arrow on the front of the robot figure.
ROTATE RIGHT (4 copies) Rotate your robot 90 degrees to the right in its current space. ROTATE LEFT (4 copies) Rotate your robot 90 degrees to the left in its current space.
U-TURN (1 copy) Rotate your robot 180 degrees so it faces in the opposite direction in its current space.
MOVE BACK (1 copy) Move Card. Move your robot 1 space backwards. It does not change its facing.
POWER UP (1 copy) Advance your Energy Tracking Cube 1 space on your Energy Track.
AGAIN (1 copy) Repeat the programming in your previous register, as if that card were in this register. If you used an upgrade or Haywire in your previous register that allowed you to place multiple programming cards, re-execute only the second card (the one that was resolved last in the sequence).
Note: An Again card in Register 1 acts like SPAM: Discard it into your discard pile and replace it with the top card from your programming deck.
More on Racing Through the Factory
As you can imagine, things can get crazy fast. The next few pages will cover some of the interactions you might find yourself in, whether you planned for them or not!
Conveyor Belts
These convey your robot in the direction of the arrows if it is on the conveyor belt during Board Element Activation. Blue conveyor belts (showing 2 arrows per space) can convey robots 2 spaces if the first conveyance is from a blue belt space to another blue belt space. There are exceptions:
Once Smash Bot has conveyed off the blue belt, it is no longer on the conveyor belt, so it does not convey a second space. Since the conveyor belt conveys it off the belt, the blue conveyor belt is no longer under it to convey it a second time.
If a conveyor belt would convey a robot onto a space that is occupied by another robot, the robot in motion will stop on the last space of the conveyor belt. It does not push the robot in its way. (A movement card in the next register certainly would though!) Additionally, if a robot on a blue conveyor belt would convey onto an occupied green conveyor belt space, the robot on the blue conveyor belt stops.
Note that all robots on conveyor belts of a particular color are conveyed at the same time. They convey in tandem in the direction of the arrows, so a robot on the same conveyor belt as your robot will convey along with your robot as you convey down the belt.
Sometimes, this simultaneous conveyance can cause 2 robots to try to enter a junction space at the same time. If this occurs, neither robot enters that space.
In this example, both robots would end their conveyance on the same conveyor belt space. In this instance, they each convey 1 space and then stop, leaving the junction space empty.
Rotating Conveyor Belts
Some conveyor belts have a curved arrow indicating a rotating section of the belt.
When a conveyor belt causes a robot to convey onto a curved conveyor space (during Board Element Activation), they will rotate 90 degrees in the direction of the curved arrow on the conveyor belt (left or right).
If a robot moves onto the curved section of a conveyor belt for any reason other than being conveyed by that belt, such as its own programming card or being pushed, it does not rotate.
Again, if your programming card moves your robot onto a curved arrow conveyor belt space, it does not rotate. If a conveyor belt conveys your robot onto a curved space of conveyor belt during Board Element Activation, your robot does rotate 90 degrees in the direction of the arrow.
If a robot conveys onto a junction space featuring a curved arrow, the robot only rotates 90 degrees if it came from the direction of the curved arrow. In this example, the robot did not come from the direction of the curved arrow. It came from the straight arrow side, so it does not rotate.
In this example, Smash Bot has resolved a Move Back in Register 3 onto a blue conveyor belt. Since there are no obstructions, it will convey twice, onto a curved conveyor belt both times it is conveyed during this Board Element's resolution.
(Smash Bot's front is highlighted in yellow in this example to make it easier to see.)
The first time it conveys around the corner, Smash Bot rotates to follow the arrow around the right-swinging curve. This conveys its backside in the direction of the curved arrow seen in panel 1 above to conform to the belt's motion.
Since a blue conveyor belt conveys it a second time, Smash Bot now conveys around a left-swinging curve, with its backside following the direction of the curved arrow.
The point is, your robot does not rotate to face the direction of the arrow. Its leading side rotates 90 degrees in the direction of the arrow, no matter which side of your robot that might be.
Combination Belts
When blue and green conveyor belts are connected, a robot can take advantage of both, as long as the blue conveyor moves them onto the green conveyor.
In this example, a robot on the far-right blue conveyor belt space is conveyed twice by the blue conveyor (Step 1 of Board Elements) and then once by the green conveyor (Step 2 of Board Elements). Moving 3 spaces for free is going to find you in the lead in no time!
Conversely, if your robot is conveyed by a green conveyor belt (in Board Elements Step 2) onto a blue conveyor belt, they don't take advantage of the blue conveyor belt, as it already resolved in Board Elements Step 1.
Push Panels
Push Panels push any robot in that space 1 space away from the wall that houses the push panel. If multiple robots are lined up, they all get pushed! They activate only during the registers that correspond to the numbers on the push panel. For example, if your movement in Register 2 brings you to a push panel labeled "2, 4" you will be pushed. If your robot ends Register 3 on the same push panel, you won't be pushed. Push panels push after conveyors convey.
Gears
Gears rotate robots resting on them during Board Element Activation 90 degrees in the direction of the arrow. Red gears rotate left, while green gears rotate right. Gears rotate after push panels push.
Board Lasers
Board lasers fire at robots during Step 5 of Board Elements. Starting at the red and white pointer attached to the wall, a board laser only hits the robot nearest to the source. A board laser cannot fire through walls or hit more than 1 robot each time it fires. For each laser beam shown, draw the top card from the damage deck. Always draw them 1 at a time. For example, if a robot is hit by a double laser (or 2 single lasers), they draw 2 damage cards, 1 after the other. See page 17 for more on Damage.
Battery
Battery spaces are places you can charge up your robot so you can draw and buy new upgrades. During End of Register effects, if your robot is on a battery space, you gain 1 Energy. Move your Energy Tracking Cube up 1 on your Energy Track. You can store a maximum of 10 Energy.
Pits and Board Edges
Pits and Board Edges are dangerous! If your robot moves into a pit or off the edge of a board into empty space, whether via your own programming card or some other effect, your robot is lost and must Reboot at the start of the next round (see Rebooting on page 19). The edge of the board is not considered a "pit" even though the effect is similar.
Note: The black borders of each board are not walls. They do not prevent robots from moving or firing through them. Two spaces on opposite sides of a black border are adjacent.
Checkpoints
Checkpoints are what you need to reach to win the game. Get to them fast, in numerical order. If you're the first to reach the last Checkpoint, you win the game!
During End of Register effects, if your robot is on the Checkpoint that is next in your sequence (as seen on your player mat), move your Checkpoint Tracking Token onto that number on your player mat.
Checkpoints do not obstruct movement or lasers. If there are walls in the space, place the Checkpoint in a manner that allows the walls to be seen. Board lasers that pass through a Checkpoint are active. All other Board Elements under a Checkpoint are not active.
For example, if your Checkpoint Tracking Token is on #2, that means you have already reached Checkpoints 1 & 2. If you find your robot on Checkpoint #3 during End of Register effects, you have reached that Checkpoint: Move your Checkpoint Tracking Token from the 2 space to the 3 space on your player mat. If there were only 3 Checkpoints in your race course and you were the first to reach #3, you win!
Walls
Walls are obstacles that robots cannot move or fire through. For example, if there is a wall 1 space in front of your robot and you resolve a Move 2, your robot moves 1 space and stops. The extra move is lost. A robot or board feature on the other side of a wall from your robot is not "adjacent" to your robot.
Walls stop robot movement and lasers, while the other Board Elements do not.
Reboot Tokens
Reboot Tokens are where robots who have fallen off the board or into a pit will reappear when they activate during Register 1 of the next round. Each board will only have 1 of these tokens. See Rebooting on page 19.
Reboot Tokens do not obstruct movement or lasers. If there are walls in the space, place the token in a manner that allows the walls to be seen. Board lasers that pass through a Reboot Token are active. All other Board Elements under a Reboot Token are not active.
Robot Interactions
Robot Lasers
A robot's main laser weapon fires at the nearest robot they are facing, as long as the laser's line of sight is not blocked by a wall. If your robot is shot by a robot laser, you must draw 1 damage card from the damage deck (see Damage on page 17). Some upgrades can be used instead of your robot's main laser. They will describe the effects of the weapon, which can include damage, programming disruption, and more.
Pushing Other Robots
When your robot moves into another robot's space, or would move into that space but fails to because of an obstruction (typically because a wall is preventing the other robot from being pushed out of its space), that is a push. No matter how far your robot pushes another robot (even 0 spaces), that is a single push event. For example, if you resolve a Move 3 and push an adjacent robot 3 spaces, that counts as one long push, not 3 separate push events.
If a robot enters a space occupied by another robot, the robot in motion will normally push the other robot in the direction the pushing robot is moving until it ends its move. Robots do not change the direction they are facing when they are pushed. Robots can be pushed almost anywhere on the board, including into a pit. They can even be pushed off the side of the board! But, robots cannot be pushed through walls. If a robot pushes another robot into a wall, both robots immediately end their movement.
When a robot pushes another robot, that might also cause other robots in a straight line of robots to also be pushed.
Some upgrades cause pushing or interact with pushing. When an upgrade uses the word "push" to describe an effect against another robot, that is a push. Pushing does not inherently cause any damage.
Important: Conveyor belt movement during Board Element Activation does not cause pushes. A robot that would convey off of a conveyor belt does not do so if a robot or wall is in the way.
Falling off the Board
If your robot moves off or is pushed off the edge of a board, your robot must Reboot (see next page). Falling into a pit and falling off the edge of a board both cause a Reboot, but falling off the board does not count as falling "into a pit" — Upgrades that protect against pits do not protect against falling off the edge of a board.
Damage
Robots get knocked around quite a bit during these hectic races, and any time they fall into a pit, are shot, or are knocked off the board, that player must take damage in the form of damage cards. Damage cards are also programming cards that will cause a bit of randomness when resolved. The damage deck contains 40 cards, and they are kept in a random stack. When you take damage, draw that many cards from the top of the damage deck, 1 at a time. Where each damage card goes depends on which type it is. There are 2 types of damage cards in the damage deck: SPAM and Haywire.
If the damage deck runs out of cards and you need to draw damage, shuffle the damage discard pile to form a new damage deck. If you cannot reshuffle because there are no cards in the damage discard pile, you take no damage during this register.
Important: Always draw damage 1 card at a time.
SPAM Damage
When you receive a SPAM damage card, place it into your discard pile on your player mat. When you shuffle your discard pile to make a new programming deck, the SPAM cards will be in it. When you draw SPAM, it will build up in your hand over time as you DO NOT discard them at the end of the Programming Phase. To get rid of SPAM cards, you must program them into your registers or Shutdown your robot (see page 19).
When you reveal a SPAM card in one of your registers during the Activation Phase, you must take the following steps:
- Immediately discard the SPAM card face up into the damage discard pile (next to the damage deck). Now it is out of your deck. This is the advantage of programming a SPAM card.
- Take the top card from your programming deck and place it face up in your current register. It will be a random card, so it might really mess up your plans! And that is the disadvantage of programming a SPAM card.
- Finally, resolve the new card that you placed in the current register slot. If that card is also SPAM, return to Step 1 above (and congrats on getting rid of 2 SPAM for the price of 1!).
Haywire Damage
When you receive a Haywire damage card, do not show it to your fellow players or discard it. Instead, place it face down under the programming card in the current register of your player mat. Your robot has received an electrical jolt that will create a wild effect during the following round. Each register can have a maximum of 1 face-down Haywire. If you draw additional Haywire cards during that same register (and you already have a face-down Haywire card under this register's programming card), place any additional Haywire cards you draw after the first one face up in the damage discard pile. You lucked out this time and take no additional damage!
Note that a new Haywire card you draw from the damage deck can be placed under a Haywire card you just resolved during a register.
At the end of the round, when you are discarding cards from your registers, discard only face-up cards! Leave each Haywire face down in the register during which it was earned.
Haywire cards might have abilities and effects that break the rules of the game. When this happens, the card takes precedence over the rulebook!
At the start of each round of play, you may have some Haywire cards already in your registers. Remember: Only 1 Haywire per register! You may look at them, but you must leave them in the registers where they were placed. Haywire cards are crazy, sometimes powerful moves and shenanigans that you might be able to take advantage of… if you play your cards right.
Example: A Haywire card is already in your Register 3 for this round. Only you know what it is. It can't be moved to another register, but its effect is pretty good for getting around a corner quickly. Can you place cards in Registers 1 and 2 to take advantage of it?
During this round, you'll place programming cards from your hand only in Registers 1, 2, 4, & 5.
If you don't have what you need in your hand to take advantage of the Haywire card, try a SPAM card in Register 2, and you might get lucky!
By the end of this round, the Haywire card you resolved will be face-up, so you'll remove it from your registers like any other programming card. Discard face-up Haywire cards in your registers to the damage discard pile.
Notes on Specific Haywire Cards
If you do not have an uninstalled permanent upgrade when this card is revealed, ignore this effect. If you do, install it at no Energy cost, even if it causes you to have more than 3 permanent upgrades. You can then take advantage of that upgrade for the rest of the current round.
The upgrade discard pile is next to the upgrade deck.
Moving to the left or right is similar to normal movement, except that the side of your robot becomes its leading edge. Your robot does not change facing to make such a move. Your robot can still push other robots when moving sideways, and a robot's sideways movement is still stopped by walls.
Shutdown
If your robot has collected a lot of SPAM, you will be drawing fewer and fewer new cards from your programming deck each round. Your robot might be in a tricky area where one wrong move could find it in a pit or, worse, a Checkpoint behind the leaders. If that is your predicament, you might want to declare a Shutdown.
After all players, including you, have completed the Programming Phase, but before players have revealed their Register 1 cards, you may declare: "I am shutting down!"
If you do:
- Your robot immediately shuts down for the round.
- Reveal all cards in your registers.
- Place all damage cards (both SPAM and Haywire) in your registers, hand, and discard pile into the damage discard pile.
- Place all regular programming cards in your registers and in your hand into your discard pile.
Your robot will not resolve any programming cards this round, but remains on the race course. As such, your robot is subject to Board Elements, being pushed, and laser fire (both robot and board lasers).
Hint: Shutting down on a conveyor belt that's headed towards your next Checkpoint is a great way to make some progress despite being powered down.
Note: Your robot cannot collect Energy from batteries nor can it reach a Checkpoint while shut down.
At the start of the next round, you continue the race as usual.
Rebooting
Robots don't die from taking too much damage; they just keep plugging along… circuit boards and wires hanging out… sparks flying. However, when your robot falls off the board or into a pit, you must Reboot your robot. To Reboot your robot, immediately take the following steps:
- Remove your robot from the board and place it onto your player mat. Your robot will return during the next round.
- Whether you resolved your card for the current register or not, your programming is canceled for the rest of the round, and you may not complete any remaining registers. Immediately discard all programming cards in your remaining registers (both face up and face down), as well as all cards in your hand (including SPAM). You must wait until the next round to program your robot. a. SPAM cards in your registers are discarded to your discard pile. b. Haywire cards in your registers are discarded to the damage discard pile.
- Draw 2 damage cards (1 at a time as usual). a. If you draw SPAM, place it into your discard pile. b. If you draw Haywire, place it face down in the current register's slot (the one in which you fell into a pit or off the board). If you draw a second Haywire card, place it face up into the damage discard pile.
All of your upgrades remain in place, even the ones you have not yet installed.
Re-entering Play
While the current round continues resolving, plot your return: When the next round starts, program your registers as usual, but without putting your robot on the board yet. You will choose the direction your robot faces when you return, so keep that in mind as you program. Other robots could also be coming back onto the board at the same time as your robot; keep that in mind as well!
When your priority comes up during Register 1, place your robot onto the Reboot Token that is on the same board where your robot fell into a pit or fell off the board. If your robot fell off the Docking Bay, they Reboot at their Archive Token there. Choose your facing (ignore the arrow on the token), then resolve your Register 1 programming card as usual.
If your reentry space is occupied by another robot when your priority comes up during Register 1, move the obstructing robot 1 space in the direction of the arrow on the Reboot Token or on your Archive Token. Then, place your robot onto the Reboot space facing in the direction of your choice. In both cases, moving an obstructing robot does not count as your robot "pushing" that robot.
Upgrade Cards
Upgrades give your robot access to special abilities, new weapons, defenses, movement bonuses, etc. There are two types of upgrade cards: permanent and temporary. Upgrade cards tell you the Energy cost and effect of the upgrade.
Upgrade cards might break the rules of the game with their special abilities. When this happens, the card takes precedence over the rulebook!
Refer to the Upgrade Phase (page 4) for how to draw and install new upgrades for your robot. If the upgrade deck runs out and you need to draw a new upgrade, shuffle the upgrade discard pile to form a new deck.
When an upgrade refers to a Move [n] "card" or a Rotate [Left/Right] "card" etc., it means a specific card from your initial programming deck. Some upgrades refer to a specific maneuver, and not to a specific "card." In that case, any source of that maneuver will trigger the effect.
Key Terms
Adjacent: An orthogonal space next to your robot (left, right, front, back) that is not through a wall.
Register Card: A card in one of your registers, be it damage or a regular programming card.
Target Robot: The robot your robot's weapon will hit. This is the nearest robot in a straight line away from your robot in the direction in which your robot fires its weapon. All weapons fire forward only unless an upgrade specifically says otherwise.
Unoccupied: A space that is not occupied by a robot. Board Elements (such as walls, batteries, etc.) do not make a space "occupied."
Example: Zoop ("Rotate to face any direction.") does not combo with Power Slide ("After resolving a Rotate Right card, you may move 1 space forward.").
Example: Laser Kata ("After performing a U-Turn…") triggers on any card that causes your robot to U-Turn, such as the Haywire card "Move 3, U-Turn." However, if a robot is "rotated to any facing" and it happens to be a U-Turn, that is not a "U-Turn maneuver."
Some weapon upgrades have the wording "instead of firing your robot's main laser." This means you may choose to use the upgrade's effects or you may choose to fire your robot's main laser. You may only use 1 weapon with such language at a time. If a damaging upgrade does not have this statement, then the upgrade works in conjunction with your robot's main laser.
Permanent Upgrades
When you install a permanent upgrade, place it face up on your player mat. You can have a maximum of 3 permanent upgrades on your player mat at a time. In the case of most permanent upgrades, the card's attributes will apply to your robot for the remainder of the game.
BRAKES (Cost: 2) Text: Move 1 cards in your registers may be treated as Move 0. The decision to brake is made after revealing a Move 1 card, but before you would activate the programming card. This does not apply to Again cards played after a Move 1, nor to Haywire cards with a Move 1 effect.
CHAOS THEORY (Cost: 2) Text: When you reveal SPAM in Register 1, 2, or 3, gain 1 Energy. The card that replaces the SPAM enters your register face up, so drawing another SPAM does not trigger this effect again.
CRAB LEGS (Cost: 5) Text: You may place a Move 1 card in the same register as a Rotate Left or Rotate Right card, and during that register your robot will move 1 space to the left or right, respectively, without rotating. The movement to the side is instead of, not in addition to, the normal Move 1 effect. If this upgrade is lost prior to resolving, it still works as described this round.
DEFLECTOR SHIELD (Cost: 2) Text: When your robot would take damage from lasers and/or other weapons, you may pay 1 Energy to take no laser/weapon damage during this register. This does not prevent damage from falling into a pit or off the edge of the board. This does not prevent effects that do not (directly!) do damage. This protects against robot and board lasers.
DOUBLE-BARREL LASER (Cost: 2) Text: Your robot's main laser deals 1 additional damage to robots. This combines with Laser Kata and Rail Gun to deal extra damage to all targets that your robot hits.
DRIFTING (Cost: 4) Text: After resolving a Rotate Left card, you may move 1 space forward.
ENERGY CONVERSION (Cost: 3) Text: After your robot takes damage from a board laser, you may move 1 space forward or backward.
FIREWALL (Cost: 1) Text: You do not draw any damage cards when Rebooting after falling into a pit.
FLASH DRIVE (Cost: 4) Text: Draw 1 additional programming card at the start of each Programming Phase.
HOVER UNIT (Cost: 1) Text: Your robot can pass over pits during your Programming Card Activation, but falls in if it ends its move on one. If your own programming card has your robot ending that move on a pit space or your robot ends up in a pit via other means, it falls in. Board edges are not pits.
LASER KATA (Cost: 1) Text: After performing a U-Turn, your robot fires its main laser in all 4 directions during this register's Robot Weapon Activation.
MEMORY CARDS (Cost: 3) Text: At the end of the Programming Phase, you may place any number of non-damage cards from your hand onto this card. At the start of the Upgrade Phase, add all cards on this card to your hand. If this upgrade is lost while cards are on it, discard those cards into your discard pile.
MINI HOWITZER (Cost: 3) Text: Instead of firing your robot's main laser, you may pay 1 Energy to fire Mini Howitzer. If you do, deal 2 damage to the target robot, then push it 1 space in the direction of fire. If you have no Energy, you cannot choose to fire this weapon. You may pay a maximum of 1 Energy to deal 2 damage. The damage is drawn 1 card at a time as usual.
MODULAR CHASSIS (Cost: 1) Text: After your robot pushes another robot during your Programming Card Activation, you may give that player this card, and take one of their installed upgrades. Both are immediately installed and active. Since the upgrade is gained after the event, any push effects of the new upgrade do not trigger this register.
POWER SLIDE (Cost: 4) Text: After resolving a Rotate Right card, you may move 1 space forward.
PRESSOR BEAM (Cost: 3) Text: Instead of firing your robot's main laser, you may fire Pressor Beam. If you do, push the target robot 1 space away from your robot. Note that any push can end up pushing more than one robot.
RAIL GUN (Cost: 2) Text: Your robot's main laser may shoot through any number of walls and/or robots. Each robot hit this way takes 1 damage.
RAMMING GEAR (Cost: 2) Text: During your Programming Card Activation, if your robot pushes (or attempts to push) an adjacent robot, that robot takes 1 damage. If an upgrade or Board Element causes a robot to be pushed, that does not trigger Ramming Gear. Even if the push fails to move the other robot, it still takes 1 damage.
REAR LASER (Cost: 2) Text: Your robot has a rear-firing laser in addition to its main laser. Both fire simultaneously. The rear-firing laser is not your robot's "main laser," so it does not deal increased damage via Double-Barrel Laser or combine with Rail Gun.
SCRAMBLER (Cost: 4) Text: Instead of firing your robot's main laser, you may fire Scrambler. If you do, replace the target's next register card with the top card from their programming deck. Cannot be used during Register 5. If the replaced card is damage, place it in the damage discard pile. If it is a regular programming card (or cards), place it into their discard pile.
SELF-DIAGNOSTICS (Cost: 2) Text: When your robot reaches a new Checkpoint, you may remove a card in your hand or discard pile from the game.
SPAM FILTER (Cost: 3) Text: After refilling your hand at the start of the Programming Phase, flip the top card of your programming deck face up.
SPIKY (Cost: 2) Text: When an adjacent robot moves into your robot's space or is pushed into your robot's space, that robot takes 1 damage. Note that a push occurs whether or not the adjacent robot actually moves your robot. Moving adjacent to the Spiky robot does not trigger Spiky.
TRACTOR BEAM (Cost: 3) Text: Instead of firing your robot's main laser, you may fire Tractor Beam. If you do, pull the target robot 1 space towards your robot. Cannot be used on adjacent robots.
Temporary Upgrades
When you install a temporary upgrade, place it face up next to your player mat on the opposite side from where you keep your uninstalled, face-down upgrade cards. You can have a maximum of 3 temporary upgrades next to your player mat at a time.
When you may use a temporary upgrade is based on what it does:
- Movement Upgrades may be used either immediately before or after your robot executes its Programming Card Activation.
- All other temporary upgrades may be used at any time.
Once used and the effect is resolved, discard the temporary upgrade to the upgrade discard pile. As such, these upgrades are good for one use only.
ABORT SWITCH (Cost: 1) Text: Replace a register card you just revealed with the top card from your programming deck. If the replaced card is damage, place it in the damage discard pile. If it is a regular programming card, place it into your discard pile.
ALL ABOARD (Cost: 1) Text: Movement Upgrade. Activate all conveyor belts, but only for your robot. Blue conveyors first, then green conveyors. The normal rules for conveyor belts still apply. This does not replace or prevent the normal conveyor belt activations.
BOINK (Cost: 1) Text: Movement Upgrade. Move to an unoccupied adjacent space without changing facing.
CALIBRATION PROTOCOL (Cost: 2) Text: Return all damage cards in your hand to the damage discard pile, then draw that many cards from your programming deck.
DISPLACING BLAST (Cost: 2) Text: Instead of firing your robot's main laser, you may fire Displacing Blast. If you do, relocate the target robot to the Reboot token on the board they occupy, without changing facing.
LUCKY BOOSTER (Cost: 1) Text: Reveal and discard cards from the damage deck until you reveal Haywire. You may replace a register card you just revealed with that card or discard it to the damage discard pile. If the replaced card is damage, place it in the damage discard pile. If it is a regular programming card, place it into your discard pile.
MAGNETIC (Cost: 1) Text: When an adjacent robot moves via a register card, you may move with them.
MEMORY SWAP (Cost: 2) Text: Draw 3 cards from your programming deck. Then choose 3 cards from your hand to put on top of your deck in any order you choose.
OVERCLOCKED (Cost: 2) Text: Movement Upgrade. Move 2.
PIERCING DRILL (Cost: 1) Text: When your robot pushes another robot during your Programming Card Activation, they take 1 damage and you may rotate them to any facing.
PRESSURE RELEASE (Cost: 2) Text: Movement Upgrade. Move Back 5 spaces, but stop if your robot would push another robot. Your robot will also stop if it hits a wall, or falls into a pit.
RE-INITIALIZE (Cost: 1) Text: Give the Priority Token to any player at the table (including yourself).
RECHARGE (Cost: 0) Text: Gain 3 Energy.
REWIRE (Cost: 1) Text: Play only during the Upgrade Phase. Add all face-down Haywire cards in your registers to your hand. You must program all these Haywires this round, but you may place them where you wish.
SWITCH (Cost: 2) Text: Movement Upgrade. Swap places with an adjacent robot, without changing facing.
ZOOP (Cost: 1) Text: Movement Upgrade. Rotate to face any direction.
Ready-to-Go Race Courses
On the following pages, you will find 13 pre-made race courses that you can set up and get right into the action. Each one is labeled with a name, difficulty, and any special rules. Pay careful attention to the orientation of each map. It matters!
Pre-Built Race Courses
Over the next several pages you find 13 race courses that are ready to go! Each entry will have the name of the race course, how long the race will likely take based on 4 players in the game, a list of which boards to use, and the number of Checkpoints. Taken all together, you should be able to find the perfect race course for your playgroup!
| Short | Medium | Long |
|---|---|---|
| 45 Minutes or less | 46-75 Minutes | 76+ Minutes |
The race courses are divided into 4 levels of difficulty: Starter, Beginner, Intermediate, and Advanced. This rating is mostly based on how hard it will be to traverse the boards to reach the Checkpoints. The length of a race doesn't factor into the difficulty. The number of boards, Checkpoints, and players factors most heavily into the time to play.
Look closely at the picture of your chosen race course when setting it up. The name of the board is found in one of the corners of the board. Some boards might be oriented in such a way that the board name is not readable without turning your head. Pay close attention to the numbers on the Checkpoints and direction of the arrow on the Reboot token in the image. It's incredibly important to match the image provided.
Suggested Starting Spaces
Most of the race courses here have Energy cubes covering some of the black and white starting spaces on the Docking Bay. Players should avoid placing their robots on these spaces at the start of the game. Once each player has placed their robot onto a starting space, remove the cubes from the board.
Starter Course
This is the perfect race course to try if no one in your playgroup has played Robo Rally before. You will learn the basics without having to worry about too many different board elements.
MILK RUN Game Length: Short Boards: In & Out, Docking Bay B Checkpoints: 1 Robots should not start in the spaces covered by Energy cubes. Don't forget to place your Archive Token under your robot at the start!
Beginner Courses
When your playgroup is ready, try a beginner course to see more board elements in action!
CASTLE TOUR Game Length: Short Boards: The Keep, Docking Bay A Checkpoints: 2
RUSH HOUR Game Length: Medium Boards: Steps, Docking Bay A Checkpoints: 4
BOX CANYON Game Length: Medium Boards: In & Out, The Keep, Docking Bay A Checkpoints: 3
Intermediate Courses
If your playgroup can fill registers quickly and everyone understands how conveyor belts work, it's time for a new set of race courses.
RIVER RUN Game Length: Medium Boards: Tempest, Docking Bay B Checkpoints: 3
THE CACTUS CUP Game Length: Long Boards: Cactus, Docking Bay B Checkpoints: 6
DANGEROUS CURVES Game Length: Medium Boards: Cactus, Misdirection, Docking Bay A Checkpoints: 3 Note that the 2nd Checkpoint covers a battery space, so it is not active during this race.
TWIST & SHOUT Game Length: Medium Boards: Sidewinder, Energize, Docking Bay B Checkpoints: 2 Yes, the Docking Bay is in between the 2 boards!
TREACHERY Game Length: Long Boards: The Keep, Cactus, Misdirection, Docking Bay A Checkpoints: 3
Advanced Courses
When your playgroup has mastered all of the board elements, get ready to test your skill with these race courses!
CRY HAVOC Game Length: Long Boards: Energize, Docking Bay A Checkpoints: 5 Yes, the 5th Checkpoint is in the Docking Bay! Special Rule: If your robot Reboots, you must draw 3 damage cards instead of the normal 2.
INTENSITY Game Length: Long Boards: Tempest, Steps, Docking Bay A Checkpoints: 4
RIDE THE LIGHTNING Game Length: Long Boards: Steps, Sidewinder, Misdirection, Docking Bay B Checkpoints: 3
FOR THE GLORY Game Length: Long Boards: In & Out, Tempest, Energize, Sidewinder, Docking Bay B Checkpoints: 4
Designing Your Own Race Courses
Once your playgroup has become experienced Robo Rally racers, you might want to broaden your horizons by creating your own race courses. The following are some suggestions that will help you create fun and fair courses that will cater to your player count and desired game length.
First-Timer Recommendation
If you have never created your own course, consider modifying a premade course with new locations for 1 or 2 of the Checkpoints and maybe even reposition (or flip) the Docking Bay.
Make Sure Robot Density is Maintained
It might feel natural to link 4 boards together to make an epic-length 3-player game. However, for games with 4 or fewer players, you're likely to not see much robot interaction with all of that extra space. Sometimes it's better to add additional Checkpoints to a 2-board course than to add a 3rd or 4th board.
Higher Player Counts Means More Playing Time and Chaos
The more robots there are to deal with, the crazier things will get. Games with 5-6 players naturally take longer than 2-3 player games. A 1-board race course might be too confining for 6 robots. It might be better to create a 2-board course and place only 2 Checkpoints if you're hoping for an hour-long game.
Where to Place Checkpoints
Checkpoints should criss-cross the boards to maximize player interaction. Avoid placing Checkpoints in a straight line from board to board to board away from the Docking Bay. You want the race leader to have to turn around to face their foes on their way to the next Checkpoint.
Checkpoints should be in areas where there are multiple entries and exits. Avoid placing them in corners where there is only one way in and one way out. Checkpoints are best placed on an open space with no walls around it, and should never be placed in a corner formed by two walls. Bottlenecks can easily occur, and players may become frustrated if 2 rounds of play are spent just with back-and-forth pushing. Checkpoints next to pits and map edges, especially Checkpoint #1, can be particularly deadly.
Where to Place Reboot Tokens
Each board, other than the Docking Bay, must have 1 and only 1 Reboot token on it.
Reboot tokens should, in general, be placed somewhat away from Checkpoints. A player who Reboots shouldn't reappear too close to the next Checkpoint. Placing them centrally will make sure that a Rebooting robot can't fall off one edge of a board and reappear on the other side of the board.
Be wary of which way the Reboot arrow points. The arrow is only used if a Reboot token is occupied when a robot tries to re-enter the board, but facing it towards a pit might be considered unfair. Also, you need to have enough space in the direction of the arrow should any unfortunate circumstances cause multiple robots to Reboot at the same token. A game with 5-6 players should have at least 2 open spaces in the direction of the arrow.
Where to Place the Docking Bay
Place the Docking Bay on the edge of a board that does not feature too many nearby obstructions or conveyor belts. If a robot gets gummed up as soon as they enter the board, they will fall behind through no fault of their own. Conversely, easy access to a conveyor belt headed towards Checkpoint #1 can propel a robot into an unfair early lead.
Use the side of the Docking Bay that seems most fair for all players.
Variant Rules
A Lighter Game
If your game includes beginners, younger players, or players who don't want to keep track of things, you can eliminate all upgrades from the game for all players. Just eliminate the Upgrade Phase, the upgrade cards, and Energy tracking. The battery spaces on the boards then also do nothing.
A Less Deadly Game
If your game includes beginners, younger players, or players who like to stay upright, all players should play without the "falling off the edge of the board" rule. Consider all map edges that don't have another board attached to have invisible walls. If your robot would move off the board, it hits a wall instead.
A Less SPAM-Y Game
If your game includes beginners, younger players, or you want to slightly reduce the randomness and time to play, players should discard all SPAM cards in their hands at the end of the Programming Phase. Discard your SPAM into your discard pile. You will continue to draw SPAM from your deck, but you'll draw your other cards more often this way.
Dynamic Archiving
Instead of placing Reboot Tokens on each board, robots "archive" when they end a register on a Checkpoint or a battery space. Place your robot's Archive Token on that space. If your robot must Reboot, they do so at their Archive Space. In larger games, you may place your robot's Archive Token on the side of the board, lined up with the space where your robot archived. This prevents a large stack of tokens on a single Checkpoint.
If your Archive space is occupied by a robot, use the rules as found under Reboot. The "arrow" side of your Archive Token acts like the arrow on a Reboot Token.
Archive Tokens are smaller than the spaces, so players should be able to see what Board Element is under it. These tokens do not change the Board Element function of that space.
Competitive Mode
For experienced players: After setting up a race course and determining the first Priority player, each player (in priority order clockwise) may place their Energy Tracking Cube on 1 of the start spaces of the Docking Bay. Start spaces with cubes cannot be chosen as any robot's starting space. This can prevent a robot from starting in a space with a clear advantage over other spaces. If using a pre-built race course from this rulebook, don't place the cubes as shown; let the players place them.
After this is done, only the black and white gear spaces without cubes may be chosen as starting spaces. Once all players have placed their robots onto the Docking Bay, players return their Energy Tracking Cubes to the "3" spaces on their Energy Tracks.
Act Fast Mode
For experienced players: If you find that some players are too slow for a racing game (fast is good), then a countdown timer might motivate them. One player should start a 2- or 3-minute timer on their cell phone (decide how fast you want your game to be) after all players have refilled their hand to 9 cards.
If a player has empty registers at the end of that time, they must shuffle the cards in their hand and randomly fill their empty registers.
Less Foreshadowing
For experienced players: At the end of each round, shuffle the cards in your deck, discard pile, and the non-damage cards in your hand together to form a new programming deck. This keeps each new hand of cards random, instead of being able to have a pretty good idea of what cards will be coming in your next hand. Recommended only for players who are good at shuffling!