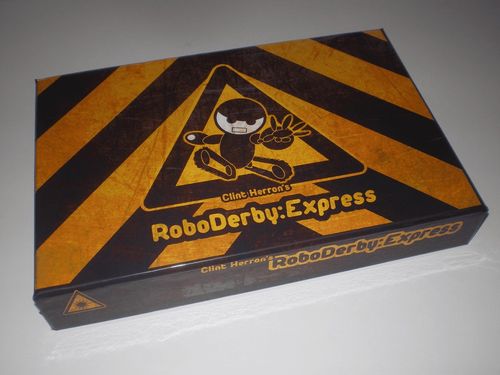
RoboDerby: Express
RoboDerby: Express Rulebook
Table of Contents
Table of Contents
Components List
- 2 six-sided robot dice (stickers glued to normal pipped D6's work well)
- 10 six-sided instruction dice in two color-matched sets of 5 (works great with two thrifted sets of Yahtzee Jr.)
- 2 player mats
- 4 game board tiles
Game Setup
Give each player a programming mat, a set of 5 instruction dice, and one robot die.
Shuffle and deal out the area mats into a 2x2 grid of tiles.
The starting tile has 8 tiles marked with an A or a B around the edge. Pick an outside edge to start from, and place the players' robot facing away from the wall on the A or B letter corresponding with each player's programming mat.
Play will continue in a lap around the game board, with the requirement of touching each game tile in order. Use the clockwise / anticlockwise direction that makes sense from the starting edge that you chose. If any back-tracking is done, then simply return to the furthest tile from the way that you came, and continue around.
The finish line will be the unused squares on the other edge of the game board (the one not used as a starting line). The A player must start at one A tile and end their turn on the other A tile, and likewise for the B player.
Optional: Provide each player with a screen to hide their programming mat during rolling / placing, to make each player operate blindly of what the other player is planning. In lieu of a full screen, a simple 3x5 index card or a free hand can suffice.
Game Progression
Each game turn consists of two phases. After each turn, a new turn commences. Play continues until all but one robot has crossed the finish line.
Phase 1: Program
To begin, each player rolls their set of five instruction dice. Roll all 5 dice to start, then place one or more of them, starting with register #1. After you place one or more, you have the option to re-roll your remaining dice. You may only re-roll after placing at least one die.
Each face on each die represents a movement instruction that you can program into your robot. You have five dice available, but only four registers into which you can insert instructions -- one will be left over and unused. You must insert instructions from left to right -- you must place register 1 before you can place register 2, and so-on. To queue an instruction for execution, place it in the green slot marked r1, r2, r3 or r4.
To program your 'bot, take one of your rolled dice and place it into one of the green "open" registers on your player mat. When programming your robot, be mindful not only of stationary obstacles, but also of where you think other players might go. Order matters as well -- if an instruction has a higher number, it will be carried out before other lower numbers.
Optionally, you may place any die as a "no operation" (NO-OP). This will cause the instruction to be skipped over, and it will not process. This can be useful to add a delay in your program (to give time for your opponent to move first), or if you simply don't have any dice that you want to place (for instance, if you need a left turn, and all you have are straights or right turns). In such a case, you can place one of your dice as a NO-OP, and re-roll the rest while you look for the desired item. If you don't find anything in that roll, you may place another NO-OP and re-roll the rest again.
Phase 2: Movement
Now comes the trickiest part -- carrying out the instructions. Movements are resolved for each register, beginning with the leftmost register, and continuing to the right. Every player must evaluate their first register before anyone can begin evaluating the second, and all must complete the second register before beginning the third, and so-on.
Every die face has a number on it. This is the "priority". Commands with a higher priority are evaluated before commands with a lower priority.
To start evaluation, every player looks at the command in their leftmost register and reads out the priority number. The player with the highest priority number carries out their instruction, and then evaluation passes to the player with the next-highest priority instruction in their register. After all players have executed their first register, continue with the second register, resolving in the order of the priority number given on each instruction in the second register. Repeat this process for the third and fourth registers.
If at any time an instruction moves a robot into a wall, the robot will stop moving at the border of the wall, and execution resumed with the next register.
If an instruction moves a robot into another robot, then the second robot is pushed along the floor (so long as there is open space to do so). This does not cause damage, even if this squeezes a robot up against a wall.
Map boundaries act as walls, and robots cannot move off the map -- nor do they take damage from bumping into the map edge.
In the rare event where there are two commands that have the same priority, and it matters which order you process them in, then have a roll-off between the affected players using their unused instruction die. The player who wins the roll-off with the highest priority will have their instruction executed first.
Phase 3: Lasers and Damage Resolution
Taking Damage
Robots fire their laser when the laser fire icon is on their executed die and once after robots have completed evaluation of all four of their registers. Lasers fire by projecting in a straight line in the direction that each robot is facing. Lasers are only blocked by walls and other robots.
If a robot is in line with this projected laser, then it receives one point of damage. To signify damage, the robot's die is rotated such that a number one less than the current value is shown (taking care to make sure that the robot is still left facing the same direction that it was originally).
A robot begins with 6 health, but as it takes damage, it will eventually begin to malfunction. When the robot's health drops to 4, its fourth register becomes "locked", meaning that whatever instruction is currently in there must remain there, and may not be gathered up and reprogrammed the next turn. If there is a left turn locked into register 4, then the fourth command executed will always be that left turn -- until the damage is healed, or your robot is destroyed. When the robot's health drops to 3, its third register also becomes "locked", and the player may now only program the first two registers. If damage continues, then eventually it is possible that all four registers would become locked.
If a register locks while there is a NO-OP command in it, then the command is immediately moved into the Locked position, and it executes the next time that register is processed (potentially the same turn).
If at any time the robot's health drops to zero or below, the robot is scrap. At the beginning of the next turn, it is removed from the game board and placed back in its starting position with full health.
Shutting Down
To repair from damage, the player may sacrifice a turn to "shut down" and heal. Shutting down for a full turn heals a robot for 2 points of damage, though the robot cannot execute commands when shut down. Beware that damage can still be incurred during shutdown from lasers or other board hazards. A shut down robot can still be pushed, and does not fire its laser at the end of the turn. In order to shut down, you must announce at the beginning of your turn before you gather up your dice to re-roll. The robot immediately regains two health when shutdown is declared. However, you must leave any and all dice in their current locations from the previous turn (in case you incur more damage during the turn and the registers become re-locked).
Optional: For a more vicious game, then do not heal a shut-down robot until after the shut-down turn is complete. If a robot is reduced to 0 damage before the end of the turn, it immediately scrapped.
Command Explanations (Movement)
Forward
The most straight forward command -- you simply move your robot one space straight forward (in the direction that it is facing).
Forward 2 / Forward 3
Even more straight forward than the previous command, this moves your robot either 2 or 3 spaces straight forward. This may make you bump your nose on a few walls, but this is a very useful command when you've got some open road ahead of you.
Turn Left / Turn Right
Rotate your robot in-place either 90 degrees to the left, or 90 degrees to the right (according to the arrow direction). Letters on the instruction, as well as on the left / right sides of the robot should assist you in keeping track of how this will make the robot spin.
Shift Left / Shift Right
Slide your robot one square to the left, or one square to the right (according to the arrows). This does not rotate your robot, it merely is a strafe that lets you continue in the direction you were going, just shifted over.
Note: This is similar to the "Crab Legs" option available in original RoboRally.
U-Turn
Spin your robot around to face the opposite direction.
Reverse
The exact opposite of the Forward command, moves your robot one space away from the direction it is facing.
Command Explanations (Hacking and Laser Fire)
While hacking is a very useful way to interfere with your opponents, don't forget that a simple shove can be an equally effective way of thwarting your opponent's carefully laid plans.
Hacking: Comment
Hacking is a useful tool that lets you interfere with your opponent's instructions.
A Comment hack (// symbol) "comments-out" the command in the corresponding register in your opponent's program. When evaluated, it causes the next command of your opponent's to be "skipped", and function as a NO-OP.
For example, if the Comment hack is placed in player A's register 3, and player B has a turn command in register 3, then B's turn command does not get evaluated. Note that all previous and all following registers will still evaluate as they normally would.
This can be an extremely useful tool in your arsenal of beating your opponent back to the finish line.
Hacking: Invert
Even more chaotic than the Comment command is the Invert (! symbol).
This command inverts your opponents' command, making it do the opposite of what it normally does.
- Forward / 2x / 3x: Moves in reverse the specified number of spaces.
- Turn: Left turns become right turns, and vice-versa. U-turns have no effect when inverted, and the robot remains pointed forward.
- Shift: Left shifts become right shifts, and vice-versa.
- Reverse: Moves forward one space.
- Comment / Invert: A hacked hack command has no effect on either party, and functions essentially as a NO-OP for both.
- NO-OP: An inverted NO-OP has no effect.
Optional: To add more chaos, make an inverted NO-OP'd instruction evaluate as if it were placed in the normal register slot, and evaluate it accordingly.
Secondary Laser Blasts
Some commands have a red laser blast symbol in the upper right corner. These are extra laser blasts that will fire when your robot executes this instruction. The laser blasts fire just like normal laser blasts, but fire after all the register is processed for all players -- not at the end of the turn.
Variants
Variant 1
Instead of racing in a lap, arrange the four board tiles in a S-shape, and place a marker (such as a penny) in the tile furthest from the starting tile. Players race to the marker, and the first player to end their turn on this marker wins the game.
Play time is a tad shorter than the original game, in our experience about 30-40 minutes, but still quite a lot of fun.
Variant 2
Print out a second copy of the game and play with 4 players instead of 2.
Variant 3
For a meaner game, don't treat the edges of the boards as walls, treat them as pits.