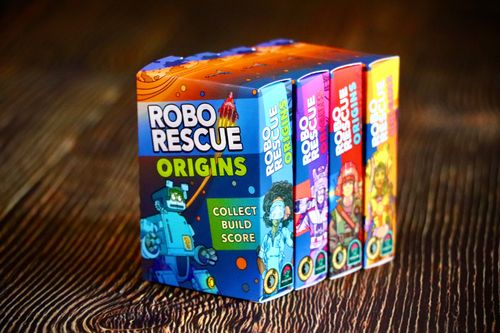
Robo Rescue: Origins
Robo Rescue: Origins Rulebook
Table of Contents
Table of Contents
1. Components
- 1 Storage Card
- 1 Workshop Card
- 52 Robot Part Cards
- 8 Engineer Cards
- 4 Workbench Cards
The Engineer and Workbench cards come in 4 colors.
2. Lab Setup
- Place the Workshop and Storage cards in front of you (Storage above Workshop), with a space to the right and left of each called an Area.
- Shuffle ALL other cards together and place them in a face down Draw Pile in your Lab.
- Reveal the top 3 cards from your deck and place them into a face up Display next to your Draw Pile.
Note: You can only play multiplayer if you have multiple decks, each including all the aforementioned components. Each player in the game will play with their own deck, and will set up their own Lab according to the following setup instructions.
3. Gameplay
Robo Rescue Origins can be played solo or multiplayer, and is played over a series of rounds - 6 rounds in Solo mode and 5 rounds in Multiplayer (with a possible 6th round to break ties). Each round consists of 4 turns. You may play turns simultaneously, or take turns in order if players want to watch one another. Each turn you will be playing 2 cards, each going into one of the Workshop or Storage Areas of your Lab (can be the same or different Areas).
Turns 1 & 2 of Each Round
Draw 2 cards from your Draw Pile, and place each in one of your Lab's Areas.
Turns 3 & 4
Draw 1 card from your Draw Pile, and then choose whether to draw a 2nd card from your Draw Pile or take 1 from your Display. Each again goes in a Lab Area.
Note: Whenever you take a card from your Display, immediately draw, reveal, and replace it with a card from your Draw Pile.
You must always play each card into 1 of your 4 Lab Areas. Place it to the right of any cards already there, leaving all card icons displayed like so.
Workshop Areas
As shown on your Workshop Card, you may place any type of Component in your Workshop Areas, including Robot Parts (Head, Body, Arm, Wheel), Workbenches, or Engineers. However, you may only place 1 of each of these Component types in each of the two Workshop Areas.
The six Component types shown on the Workshop Card are: Head, Wheel, Engineer (top row); Body, Arm, Workbench (bottom row).
Example: This card may be placed on the right side of this Workshop, where there is so far only a Body and Arm, but may not be placed on the left, where there is already a Head and Wheel Robot Part.
At the end of a round, all values of the different Components you placed in each Workshop Area will be summed to give you your base score for that Area.
Example: Let's say you add this card to the right of your Workshop, and also manage to get a Workbench card there on a later turn. At the end of the round, this area would have a base score of 13!
Storage Areas
Unlike the Workshop, you may only place Robot Parts in your 2 Storage Areas. Workbench and Engineer cards may never be placed in your Storage. They're not much good to you there, are they?
You may also only place one card of each color in your Storage Areas. Once a Storage Area has cards in it, each subsequent card played there must bear at least one Robot Part that is present on ALL previously played cards, creating a chain of one or more part types.
Example: This card may be played to the left Storage Area shown above - there are no blue cards there yet, and this one would continue the existing Body chain. It could not be played to the right, however - there is a blue card there already, and this card would not continue either of the existing Head or Wheel chains there.
Example (scoring): Five valid cards in a Storage Area score 5 points. Two cards marked invalid (crossed out) score 0 points.
Can't Place a Card?
Every card you draw must be placed into your Lab if possible, but if you are ever unable to place a card anywhere due to the placement restrictions, then you must Decommission 1 of your 4 Lab Areas.
Choose an area and flip all cards there face down, along with the one you couldn't place. A Decommissioned area cannot be scored at the end of the round, but any other cards you can't place can be discarded there (you only ever need to Decommission one area, if any).
Example: Let's say a player's Lab is as shown above, and they then draw this card. They would not be able to place it in either Storage Area (since both already have a red card) or in either Workshop Area (since both already have a Body part).
Example: They decide to Decommission their right Workshop area, since it is currently their lowest scoring area, and add the unusable card to it face down. Other unusable cards may now also be added here.
4. Round Scoring
After all players have completed 4 turns, adding a total of 8 cards to their Lab, score points for the round as follows:
- You must choose only 2 Lab Areas to score! These can be both Workshop Areas, both Storage areas, or 1 of each.
- An Area may only be scored if it has at least 2 cards in it.
Base Score
At the end of a round, the values of all Robot Part Types that appear on ALL CARDS in a Storage Area are summed to give you your base score for that Area.
Example: The Body and Wheel parts in this Area score because they appear on all 3 cards that were played there, but the Head and Arm parts do not score. 6 pts + 3 pts = 9 pts total.
Card Count Bonus
Each Storage area will also be worth additional points depending on how many cards you managed to play into that Area.
- 2 cards = 2 points
- 3 cards = 3 points
- 4 cards = 8 points!
Example: This player managed to get 4 cards into one of their Storage Areas, following the restriction that each card played there must add to an existing chain of parts (in this case just Head). Their Card Count Bonus for this is 8 pts!
Color Bonus
The cards in each Workshop Area will also be worth additional points based on whether all of them are of a matching color or not.
- Cards of different colors (1 ≠ 1) do not get the bonus.
- Cards of the same color (2 = 2) do get the bonus.
- If ALL cards in the set are the same color, score 2 more points per card.
Example: Three cards of the same color = 6 pts.
- If ANY cards do not share the same color, score 1 point per card instead.
Example: Five cards, not all the same color = 5 pts.
Completion Bonus
Finally, if you managed to get all 6 Component types into either Workshop Area, each card in that area will be worth 1 additional point.
Example: Their Workshop Area would score 4+2+1+3 = 10 pts, plus 3 pts for the Color Bonus, and 0 pts for the Completion Bonus. = 13 pts. Their total round score would then be 22 points.
Round Score
Add up all points from both your chosen Areas to get your round score.
- If playing Solo: Keep track of your round scores, as they will be totaled at game end to give you your final score.
- If playing Multiplayer: Whoever has the highest score wins the round, and sets aside any 1 card they played this round face down in a Victory Point (VP) pile.
Example: Let's say a player decides to score the following Storage and Workshop Areas. They would score 6 pts for the Body parts appearing on all cards in this Storage Area, plus a 3 pt card count bonus. = 9 pts.
Tying in Multiplayer: If 2 or more players tie for their round score, all tied players gain a Victory Point for that round, adding a card from their Lab to their VP pile.
Tracking Rounds: At the end of each round, each player discards all their played cards (aside from those kept as VP) to a face down pile. Stagger these piles to keep track of how many rounds have been played.
Example: If 3 rounds have been played, you should have 3 staggered stacks of discarded cards in front of you, like so.
Then begin a new round starting from Turn 1!
Note: The cards in your Display remain there for the following round.
5. Game End
- If playing Solo: The game ends after 6 rounds. Tally your final score, and use the Solo Ratings to see how you did!
- If playing Multiplayer: Play 5 rounds, and then whoever has the most Victory Point cards in their VP pile wins! If tied, all tied players play a 6th round to break the tie. If still tied after that, all tied players share the victory!
6. Solo Ratings
Let's see how you did! Compare your final score to the ratings below to find out just how good of an engineer you are.
- 0-100 = A start to your robot-building journey!
- 101-150 = Not bad! You've made an impressive machine!
- 151-180 = Wow, now that's a robot!
- 180+ = Legendary! A masterpiece of engineering!
If you like, keep track of your highest game scores here. (Score-tracking boxes are printed on the foldout.)
7. Advanced Mode
Looking for a tougher challenge? Great, we've got just the thing! In either Solo or Multiplayer, you can add the following rule to make things more interesting:
Once you reach Turn 3 of each round, you may no longer play cards to empty areas, and may only add them to existing sets.
Make sure you get enough areas going in the first half of each round, otherwise you may more easily end up having to Decommission one of them!