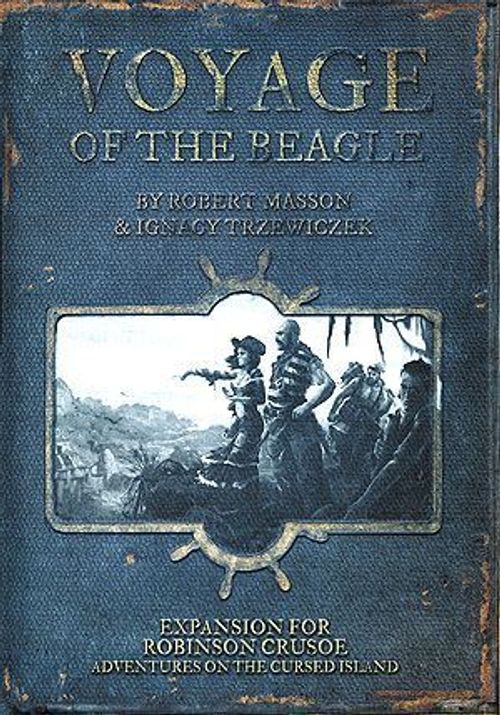
Robinson Crusoe: Adventures on the Cursed Island – Voyage of the Beagle (Vol. 1)
Robinson Crusoe: Adventures on the Cursed Island – Voyage of the Beagle (Vol. 1) Rulebook
Table of Contents
Table of Contents
Using This Expansion
Voyage of the Beagle is the first expansion printed for Robinson Crusoe: Adventure on the Cursed Island. It contains components to be used in this campaign and other 'universal' pieces that may be used in any scenario in the base game and this expansion.
In this expansion you will find:
5 new scenarios, which together make up the complete campaign:
- Scenario 1: players must help Darwin collect specimens on Discovery Island.
- Scenario 2: the Beagle returns and players must repair the damaged ship before leaving the island.
- Scenario 3: players must cross a dangerous stretch of ocean aboard the Beagle and collect nautical measurements along the way.
- Scenario 4: players explore a Tribal Island and learn the secrets of the native tribes.
- Scenario 5: a sickness strikes the ship and players must save the specimens collected in the first scenario from destruction.
Components
New components – campaign specific components
- 1 two-sided Ship board
- 1 Darwin's cabin board
- 1 campaign book
- 1 two-sided Table sheet (for scenarios 3 and 4)
- 7 Carnivorous Plant cards
- 5 Disease cards
- 6 Invention/Threat cards
- 9 Beach cards
- 3 Sailing adventures cards
- 6 Darwin specific Event cards
- 1 Darwin Character sheet (can only be used in this campaign)
- 1 Darwin pawn
- 6 Barrel tokens (full side and empty side)
- 4 Cage tokens
- 3 Islet tokens
- 1 six-sided die (d6)
- 6 Ship location tiles
- 1 Ship pawn (used in scenario 3 to represent the HMS Beagle; may be used in other scenarios as a round marker)
- 6 red Number tokens
- 16 Encounter tokens
- 3 Chest tokens
- 5 Large Tree tokens
- 3 Protection tokens
- 3 Darwin tokens
- 2 Oar tokens
- 1 Turn token
Universal components
- 14 Event cards
- 5 Crewman cards
- 1 Missionary Character card (may be used with any scenario)
- 6 Mystery tokens (2 Treasures / 2 Monsters / 2 Traps)
- 1 Basket token
- 1 Sack token
Distance on the Island
These rules also apply to the base game.
Whenever players perform an action on an Island tile/space (or effect of an action is marked on it, e.g. Building a Shelter), they can use the minimum number of pawns required for such action (e.g. 1 or 2 in case of Building, Gathering and Exploration actions), if the action is taken on a Camp tile or adjacent tile/space.
This rule is always modified by specific action rules, for example:
- Players can't gather resources which were produced in the Production phase, so they can't take a Gathering action on the Camp tile. But if players want to gather anything that is not produced in the Production phase, they can take the action even on a Camp tile, for example: gathering Fossils in scenario 1 of this campaign.
- When players want to explore the Island (by placing new Island tiles on the map), then the action is taken on an empty Island space. But if players explore Island tiles of a specific kind, for example, with Totems or a particular token, the action is taken on an Island tile and even on a Camp tile.
When players want to take the action on further tiles/spaces, they need to use 1 pawn more for each discovered tile.
Note: there must always be a continuous series of explored Island tiles from the Camp tile to the tile/space where the action is being taken.
- Players can't take the action on the marked space because there are no explored Island tiles leading to it.
- Players can take an action with 1 or 2 pawns.
- Players can take an action with 2 or 3 pawns.
Campaign Rules
All rules outlined in the base game apply, unless otherwise noted. Changes and additions to the rules may be found in this campaign book and on individual scenario cards.
The outcome of each scenario will affect the gameplay of the next scenario in the campaign. Therefore, the scenarios should be played in sequential order, with the same number of players, and Character types. If players wish to play a specific scenario in the campaign individually, or if players did not note the scores from a previous scenario, follow the instructions outlined in the 'Playing a random scenario' section of the campaign book on page 22.
If any player's Character dies during a scenario, the game is immediately lost (as in the base rules) and you should repeat the scenario. You don't have to restart the entire campaign.
Note: It would be ideal if players could complete each scenario in the campaign during the same gaming session, but we understand the complexity and time commitment involved. However, if you manage to complete the whole campaign during one gaming session, without repeating any scenario (due to failing to meet a scenario goal or a player Character's death), you may add +10 KP to your final score.
Campaign objective
The goal of the campaign is to successfully complete each of the 5 scenarios, and end the game with as much Knowledge Points (KP) as possible. As in the standard rules, all players must survive and achieve the victory conditions of each scenario.
Rules and components used in each Scenario
The Soldier may be used in a 1 or 2 player game in all scenarios of this campaign.
Darwin's cabin
Darwin's cabin board is used to keep track of different goods the players will collect during the campaign:
- Carnivorous Plants
- Fossils
- Rare Beasts
- Shoals
- Unique Resources
- Tribal secrets
- Collections
The individual fields of each track represent one unit of each type, and show the overall Knowledge Point value earned if it is in the player's possession at the end of the first scenario (except for Shoal measurements and Tribal secrets, which are collected in other scenarios to meet scenario victory conditions and are not worth any Knowledge Points).
Note: the KP values of specimens will change in scenario 5.
When players acquire a new material type they should place a black cube on the first field of the appropriate track. When a second unit of the same material is gained the marker is moved to the next field. When a material is lost players adjust the black marker backwards, losing the KP accordingly.
Example: players capture the first Rare Beast, so a black marker is placed on the first field of the Rare Beasts track, showing the value of 5 KP. Each Rare Beast is worth 5 KP, so when the next one is captured the marker is moved one field forward to the 10 KP field.
Darwin's Cabin board is used in each scenario in the campaign and the results from one scenario are kept for the next one.
Darwin character
Darwin is a new Player Character that must be used in each of the 5 scenarios of the Voyage of the Beagle campaign, and cannot be used in any of the scenarios in the base game.
Darwin takes part in the game regardless of the number of players. At the beginning of the campaign each player selects the Character they wish to play and takes all player pieces. Place the Darwin Character card and his action pawn in front of a single player or anywhere on the table. Darwin's actions can be decided by any individual player or all the players together as a group.
Darwin is considered a 'player' for all Event and Adventure resolution purposes. He may be the First Player and collect Determination tokens, resolve cards from the Adventure deck, and use one pawn in the Action phase to conduct any action currently available to the players. He is affected by weather, must be fed at Night, and receives one damage when not sheltered in the Night phase. However, he does NOT count towards the number of players when calculating Shelter, Roof, and Palisade costs. What's more, he does NOT count to the number of players, so any time there's a reference to the number of players, it does not include Darwin, i.e. a 3-player game means that there will be Darwin and 3 other players.
Darwin character card
Darwin has his own double sided Character card, with 3 Character skills and no Character specific Invention. One side (shorter life track) may be used in each scenario of the campaign, while the other side (longer life track and marked with a 'Scenario 2' icon) may only be used in scenario 2, if players have gained enough KP to unlock the +2 life bonus in scenario 1.
Darwin character skills
Believe in success
Discard 3 Determination tokens to put a black marker over a Morale decrease symbol on any Character sheet. Each time the Wound marker passes it, Morale level is not decreased. Remove the marker at the end of the scenario.
Calming down the beast
If Darwin is involved in a Hunting action (performs the action or supports it), reveal the Beast card and he may discard 2 Determination tokens to decrease the Beast strength by 1.
Note: This skill cannot be used in the scenario 3 specific Hunting action, because Beast cards are not used in this scenario.
Let me look at this
Darwin may use this skill only in the Action phase, by using his action pawn and discarding 2 Determination tokens to remove a black marker from, for example, an exhausted source or terrain type, which may be used in later rounds. This skill may be used on any Island tile adjacent to the Camp tile. If Darwin is supported by another Character he may take this action on tiles further away from Camp following the Distance on the Island rules. This action may not be taken on the Camp tile.
If Darwin uses his action pawn and the skill to fix the source/terrain type, players do not gain access to this source/terrain type until after the Action phase is complete.
Crewman
Campaign difficulty level is controlled through the use of Crewman cards. These cards represent members of the Beagle that will help you on your adventure.
At the beginning of each scenario draw 2/1/0 random Crewman cards for an easy/standard/hard game. At the end of the scenario return the Crewman card(s) to the supply, so there will always be 5 cards to draw from at the beginning of the next scenario.
| Difficulty level | Easy | Standard | Hard |
|---|---|---|---|
| Number of Crewmen | 2 | 1 | 0 |
A detailed description of the Crewman deck can be found in the Universal Components section below.
Scenario 1
Use the following components and rules from the scenario sheet in addition to the standard ones present in the base game.
- 7 Carnivorous Plant cards: Carnivorous Plant cards are used when exploring carnivorous plant habitats. After a successful Find Plants action is conducted, with the Pot Item, draw 1 Plant card and resolve the topmost Adventure effect immediately. Afterwards, the card is placed face up in the rightmost Threat action space, the same way an Event card is placed during the Event phase. Resolve the lower parts of the card as a standard Threat action and a Threat effect.
- 4 Cage tokens: Players receive 2 Cage tokens each time a Cages scenario specific Item is constructed with a Building action. Cages are used to capture Rare Beasts with a scenario specific Hunting action. There are only 4 Cage tokens, so more cannot be built unless at least 2 tokens are available. After Rare Beasts are captured the tokens are removed from the board and may be reused.
- 3 Chest tokens: Players receive 3 Collection Chest tokens after building the Collection Chests scenario specific Item. Collection Chests are placed with Chest Placement scenario specific actions and generate Unique Resource Sets in later rounds.
- 6 red Number tokens: in this scenario these tokens are used to represent Rare Beasts that may be captured with a special Hunting action.
New action examples
Note: the actions presented on the scenario sheet are not meant to replace the standard actions. These are special actions, specific only for this particular scenario. All actions from the base game are still available and resolved in the normal manner.
Capture Rare Beast
A Rare Beast is located on a tile adjacent to the Camp tile. Players wish to capture it and assign 2 pawns and an empty Cage and conduct a special Hunting action. Players fight the Rare Beast from the Beast deck (not the Hunting deck) according to the standard rules, except no food or fur is gained. Players discard the Cage token and the red Number token, indicating the Rare Beast is captured, and mark the captured Beast on the appropriate track on the Darwin's Cabin board by moving the marker accordingly.
Gather Fossils
The Camp is located on a mountain terrain type tile. As Fossils are not given to players during the Production phase, they may collect them with a Gathering action on the tile with the Camp. They decide to assign only 1 pawn, and must roll the Gathering action dice. If the action is successful, players adjust the Fossil track on the Darwin's Cabin board by moving the marker up by 1.
Find Plants
A Carnivorous Plant habitat is located on a tile adjacent to the Camp tile. Players conduct an Exploration action, with the Pot item (it's still available for other actions at the same time), and assign 2 pawns to be sure that the action is successful. When the action is resolved, players discard the green Number token and draw a Carnivorous Plant card, resolving the topmost Adventure effect, and place it on the right Threat action space, pushing all other cards in the Threat action space to the left. Afterwards, players mark the collected Plant on the appropriate track on the Darwin's Cabin board by adjusting the marker up by 1.
Chests Placement
Players decide to place the Collection Chests on 2 tiles adjacent to the Camp tile. 1 pawn is required to place up to 2 Chest tokens, so 1 pawn is assigned to each of the 2 adjacent tiles. No dice roll is required for placement, so the corresponding sources are covered with Collection Chest tokens.
Note: resources may not be gathered from sources covered by Collection Chests in the same round the chest was placed, or in any future round.
Continuing to the next scenario
The next scenario begins where the current scenario ends, so all the conditions from the end of the scenario (explored Island tiles, exhausted sources, built Items, wounds inflicted to players, etc.) should be noted before proceeding. Data may be recorded on scrap paper, a photo may be taken, or a special note sheet may be downloaded from the Portal Games website.
Scenario 2
Use the following components and rules (from both this rulebook and the scenario sheet) in addition to the standard ones present in the base game.
- 6 Ship location tiles: each Ship location tile matches one of the damaged areas of the Ship. After a Ship area is repaired, select the appropriate tile, place it over the damaged area, and place a black marker on the minimum or maximum level of repair.
- 6 Barrel tokens: players receive one Barrel token for each Barrel scenario specific Item constructed. Barrels may be filled with water using the Filling up the Barrels scenario specific action.
- 5 Large Tree tokens: these tokens represent Large Trees needed to repair the Ship and can be acquired by players with a Gathering action on certain Island tiles.
- Ship board: the Ship board has 2 different sides, one is to be used in scenario 2 and the other in scenario 3. Check the upper right corner of the board to ensure the appropriate side is being used.
There are 6 damaged areas of the Ship, which must be repaired in order to complete this scenario. Each area may be repaired to a minimum or a maximum level. Each Ship location repair area is represented by 2 scenario specific Invention cards located on the scenario sheet. Players decide minimum or maximum levels when constructing them.
Setup changes
This scenario begins where the previous scenario ends. Consider round 1 of this scenario as round 11 of the previous scenario:
-
Island status remains the same:
- All revealed Island tiles, exhausted sources, and unexplored terrain types from the previous scenario remain on the board.
- Discard all cards from the Event deck and Threat action fields remaining from the previous scenario.
- Create a new 8 card Event deck, following normal setup rules.
- Discard any food from the previous scenario, but keep all non-perishable food, wood and fur in the Available Resources Space.
- The Camp token remains on the same Island tile it was on at the end of the previous scenario.
- Characters used and their order must remain the same as the previous scenario.
-
A terrible storm hits the island and leaves a wake of destruction in its path:
- If possible: decrease Roof by 1 level.
- If possible: decrease Palisade by 1 level.
- Discard all Treasure cards and Starting Item cards, if any remain from the previous scenario.
- Remove all cardboard tokens from the board and Character cards, except for the Camp token (remove the tokens shown by icon on the printed page, Determination tokens, and Discovery tokens in the Available Resources Space, etc.).
- All Items that produced tokens that were present on the board when the storm struck were lost and must be immediately flipped to Invention side (Corral, Snare, Shortcut, etc.).
- Shuffle the remaining Item cards on the board and randomly place half of them (rounded up) back on the board with Item side up, and the rest with Invention side up. Cancel additional effects of the lost Items, if possible.
- Leave all markers (black and white markers) on Island tiles, Weapon strength, and Morale track.
- Remove and discard all Beast cards remaining in the Hunting deck from the previous scenario. Shuffle them back into the Beast deck.
Note: If enough KP was collected for Darwin to start with 2 more life, turn his Character sheet to the side marked with the 'Scenario 2' icon for this scenario only and move his Wound marker 2 spaces to the left.
New action examples
Note: the actions presented on the scenario sheet are not meant to replace the standard actions. These are special actions specific only for this particular scenario. All actions from the base game are still available and resolved in the normal manner.
Repairing the Ship
Players wish to repair the rudder. They may repair to a minimum level (1 wood required) or to a maximum level (2 wood and Rope Item required). Players have 2 wood and the Rope Item to make the maximum repair, so they assign 2 wood and 2 pawns (to be sure that the action is successful) on the corresponding Ship location. When the action is resolved players discard the resources and place a rudder Ship tile over the damaged rudder area of the Ship board. Then place a black marker over the maximum repair level (this is also important in the next scenario) and collect the salvage bonus for making the maximum repair – increase Morale level twice.
Harvesting Large Trees
Players want to gather a Large Tree from the tile adjacent to the Camp. They decide to assign only 1 pawn, so when the action is resolved the player will roll the Gathering action dice. If the action is successful, players take the Large Tree token from the Island tile and place it in the Future Resources Space.
Note: A Large Tree may not be used as a wood resource.
Searching for the Beasts
Players want to add a Beast card to the Hunting deck. A beast lair is located on the Camp tile. Players assign 1 pawn to the Exploration action and roll the Exploration action dice. When the action is successfully resolved, players draw one Beast card from the Beast deck and shuffle it into the Hunting deck, then exhaust the beast lair with a black marker.
Filling up the Barrels
The Camp is located on a river tile, so 1 Barrel was automatically filled with water in the Production phase. Players also wish to fill another Barrel as well. They cannot use the same river terrain on the Camp tile because each river can only fill 1 Barrel per round, so they decide to take a Filling up the Barrels action on the adjacent river tile as well. Because of its location to the Camp only 1 pawn is required. When resolving this action no dice roll is required. Players flip the Barrel token from the empty side to full.
Scenario 3
This scenario is much different than all others. Not only because of the amount of rules changes, but also because of the increased level of randomness involved with the damage to the ship brought on by the storm. Be aware of it and have fun.
Use the following components and rules (from both this rulebook and the scenario sheet) in addition to the standard ones present in the base game.
- Ship board: the ship board has 2 different sides. Check the upper right corner of the Ship board for the proper scenario number and ensure the correct side is being used. In this scenario, each Ship location repaired in the previous scenario has its own damage track, which is used to monitor the damage sustained by the Ship. The initial damage level of each Ship location depends on the repair level from the previous scenario. Place a marker on the I space of all Ship locations repaired to the maximum level, or II space where minimum repair level was conducted. Throughout this scenario Ship locations will take more damage and locations may be repaired, adjust the marker down or up to reflect current damage level. When a Ship location reaches level V it has taken critical damage, resolve the critical effect immediately; if it sustains any damage beyond the critical level, the Ship is lost, and the scenario ends in defeat.
- 6 Invention/Threat cards: the Invention side of each card is used to build Items as in the base game, except the card is not flipped after it is constructed. In addition, each of the 6 Inventions is linked to a specific Ship location (indicated by a number on the card). When a Ship location takes damage the linked Inventions are also damaged and flipped to the Threat side. The Threat side has a negative effect resolved in the Event phase and a Threat action that may be taken during the Action phase in order to turn the card back to the Invention side.
- 16 Encounter tokens: these tokens are placed face down on the Sea spaces during the game setup and represent different obstacles that the Ship may encounter.
- Turn token: various game effects cause the Ship to turn in random directions. The Turn token is flipped like a coin and players must rotate the Ship facing in the direction indicated by the token direction. This token is not used when players conduct Turning the Ship, scenario specific actions to change the Ship's direction.
- 6 red Number tokens: these tokens are placed face down on Sea spaces during the game setup and represent Shoals, which Darwin may measure to fulfill the goals of this scenario.
- 3 Islet tokens: these tokens are placed resource side up on Sea spaces during the game setup and represent small islands on which players may gather resources from.
- Ship pawn: the Ship pawn is used in this scenario to mark the Ship position on the Sea map.
- 5 Large Tree tokens: these tokens represent Large Trees needed to build Oars, a scenario specific Invention, and can be acquired by players with a Gathering action on Islet tiles.
Note: the tables on the Table sheet are printed on the sheet itself and are not reproduced in the campaign book text.
Introduction
The HMS Beagle has been hastily repaired and narrowly escapes Discovery Island intact. It takes to the seas and continues the survey mission, facing inclement weather and encountering powerful obstacles. Help the ship's crew travel across the troubled waters and assist Charles Darwin in his task to map the rocky shoals that line the water's edge.
Setup changes
Main board:
- Set up the board as indicated on the Map setup picture: place two face down Island tiles (starting and destination tiles) on the main board in designated spots to create a 12 hex Sea space board. Place randomly 14 face down Encounter tokens, 6 face down Shoal tokens, and 3 Islet tokens on the board. Place the Ship pawn on the starting Sea space, facing the direction indicated on the Setup picture.
- All Shelter improvements, tokens, treasures, and Invention/Items from the previous scenario were left on the island, and may not be used in the current scenario. Discard any food but keep any non-perishable food and other resources from the previous scenario.
- Replace all Inventions/Items with the 6 scenario specific Invention cards, to represent objects that may be built on the ship.
- Discard the Event deck of the previous scenario and create an Event deck with the following Event cards: 3 marked with [round icon], 3 marked with a brown "?", 3 marked with a grey "?", and 3 marked with a green "?".
- Replace the three Adventure decks with the three Sailing Adventure reference cards.
- Remove all Discovery tokens except the four special Discovery tokens, which are shuffled and placed face down near the board.
- Characters used and their order must remain the same as in the previous scenario. Remove all tokens from the Character sheets.
- Ship's doctor heals the crew: heal 6 Wounds for each player (including Darwin).
- Increase Morale level by 1 if it is below 0.
- Take the number of food equal to the number of players (including Darwin) and put it in the Available Resources space on the main board.
- Begin this scenario with Weapon strength level equal to the weapon strength at the end of the previous scenario, to represent the power of the ship's cannons (eight 18-pounder carronades and two 6-pounder long guns).
Ship board:
- Set 10 wood and 5 rope on the Hull space of the Ship board to represent the wood and rope your ship is made from. This material may be stripped from the Hull and used for other building and emergency purposes (see: Disassembling the Ship action on scenario sheet).
Note: in this scenario rope is a limited resource represented by a white marker and is not an Item like in other scenarios.
- Place a black marker on the I or II space on the damage track of each Ship location, to mark the maximum or minimum repair level built in the previous scenario.
Scenario rules and changes
Event phase – follow the rules and resolution order printed on the scenario sheet: resolve an Event card, an Encounter token, and each active Threat card.
Example: Players draw an Event card. The icon on the card is [icon], so according to the Event table players must discard 1 rope or 1 wood from the Hull space. They decide to discard 1 rope, then discard the Event card (no other text is resolved from it and it is not placed in the Threat action field). Afterwards, the Encounter token in the same Sea space as the Ship is revealed; it's a siren – Darwin cannot take any actions this round. Then players check if there are Inventions turned to the Threat side, there is one, the Rudder, so they must flip the Turn token and then rotate the Ship facing in the direction indicated on the Turn token.
Production phase – receive 1 food per round.
Morale phase – no changes to the standard rules.
Action phase – This is the only scenario in the campaign in which some of the base actions may not be used, and are instead replaced with special actions only used in this scenario. Only the Arranging Camp and Rest actions are resolved the same way as in the base game.
Combat
Main Hold threat resolution, Kraken Encounter token, special Hunting action, and certain Gathering adventures must be resolved with Combat (for details see the scenario sheet).
Example: a player wants to take a Hunting action to get food. To resolve Combat he rolls all 3 wound dice – a wound is rolled on all three dice. The players have a Weapon strength of 2, so the lead Hunter receives 1 wound. After the Combat is complete the players receive 2 food, and Weapon strength is decreased by 1.
Ship repair
Two Ship locations are damaged: Mast (damage level: 3) and Cannons (damage level: 4). A repair from level 4 requires 1 wood and an action, while a repair from level 3 only requires an action. Players decide to repair the Mast and assign 1 pawn. When the action is resolved the player rolls the Building action dice as in the normal Building action, and a success is rolled (the marker on the Mast damage track is moved to level 2), no Wound is rolled, but a "?" is rolled. In this scenario every time a "?" is rolled, players must roll the D6 die and check the effect on the special Sailing Adventure card. A 4 is rolled, so nothing happens. After the Ship location is repaired, a Reroll token is placed on it.
Gathering on Islet
The Ship pawn is in the same Sea space as an Islet. Players want to gather food and a Large Tree. They assign 1 pawn for the Large Tree and 2 pawns for the food. Gathering food is successful, so players receive 3 food. The player must roll the Gathering action dice for the Large Tree. After both actions on the Islet are complete, players draw 1 of the 4 special Discovery tokens – a reptile skeleton is found – Darwin receives 3 Determination tokens. All resources on the Islet are exhausted and it is flipped to the non-resource side.
Disassembling the Ship
Players want to collect some wood from the Ship's Hull. They assign two pawns for this action but each one takes a separate action, so each action requires players to roll the Gathering action dice. Each success generates 1 wood, both rolls are successful so 2 wood is removed from the Hull space and placed in the Future Resources space.
Encounter resolution
Players want the Ship to move in the Night phase, so they decide to get rid of the Encounter token from the Sea space where the Ship is located. They assign two pawns for the action to be sure it is successful. When the Exploration action is resolved the Encounter token is removed.
Turning the Ship
Players want to change the direction the Ship is moving in the Night phase. To do so they use 4 pawns to perform two successful turning actions without rolling any dice. Players turn the Ship two hex facings in any direction they choose – they wish to turn the Ship counter clockwise two times.
Studying the Shoals
The Ship is currently on a Sea space with a Shoal token. Darwin conducts a Shoal measurement action. The action is resolved with no dice roll, the Shoal token is flipped – the number 5 is revealed: according to the Shoal table, players get 1 food.
Weather phase – Ship damage
The Ship takes damage from the storm in the Weather phase of every round. Roll 2d6 and match numbers with corresponding Ship locations. Conduct each die roll separately. If a Ship location has a Reroll token on it, then discard the token, do not apply damage, but reroll the die. If there is no Reroll token, apply one damage to the Ship location and adjust the black marker on the damage track down one space. Each time a marker is moved to a critical level, resolve the critical level effects immediately (see the appropriate table on the Table sheet). If a Ship location is at a critical level and is damaged again, the Ship sinks and the scenario is immediately lost.
When a Ship location receives damage in the Weather phase also flip the corresponding Invention card to the Threat side, but do not resolve the effect written on the card until the following Event phase. When an Invention is on the Threat side, Items of that type are not deconstructed, but they may not be constructed. Resolve the upper part of the text on the Threat card during the Event phase of all rounds it remains face up.
Example: Round V Weather phase – players roll 2d6. First roll – it's a 1, the storm hits the Mast. Fortunately, there's a Reroll token on the Mast, so this location is not hit – players remove the token and reroll the dice. This time it's a 4, the Rudder. The marker on the damage track is moved one space down. The Invention card Oar Reparation is turned to the Threat side. Now the second roll is conducted. The outcome is a 3, the Cannons. The damage level of the Cannons drops to critical level (V) and the critical level effect is resolved according to the table, players can't take a Hunting action as long as the Cannons damage is at critical level. The Invention card Nets is turned to the Threat side and cannot be built until the threat is resolved.
Night phase
All players (including Darwin) must eat in the Night phase or take 2 wounds as usual. However, no food in this scenario rots on the Ship, and so is to be treated as non-perishable food.
Sailing and turning the Ship
After the players eat the Ship moves. The direction in which the Ship sails is determined by the Ship pawn facing. The Ship is always moved one space forward. In the picture the Ship's front points to the Sea space on the right, so the Ship is moved to the right during the Night phase.
Character skills
The following Character skills cannot be used in this scenario:
- Carpenter – A new idea
- Cook – Hooch
- Explorer – Reconnaissance, Scouting
- Soldier – Tracking, Defense plan
- Darwin – Let me look at this, Calming down the beast
- Missionary – The Blessing, Religious Parable, Prayer
Scenario 4
Use the following components and rules (from both this rulebook and the scenario sheet) in addition to the standard ones present in the base game.
- Table sheet: the Table sheet has 2 different sides, one is to be used in scenario 3 and the other in scenario 4. Check the upper edge of the board to ensure the appropriate side is being used. This sheet contains the Tribal table used in this scenario.
- d6 die: this die is used to conduct Tribal movement on the Island.
Tribal table
The Scenario sheet includes a Tribal table, which is used to track the mood of each Tribe that inhabits the island. When the mood is high the natives are friendly and share gifts and secrets with the players; when the mood is low they become angry and attack the camp.
The Tribal table is divided into five different parts:
- Tokens which represent each Tribe found on the island.
- Different goods that each Tribe desires as Enticements and Gifts.
- Outcome of the [red die] that reduces the mood of each specific Tribe.
- Mood track that indicates the current state of relations of individual Tribes towards the players.
- Note: Certain mood levels have 2 boxes instead of 1; both boxes must be passed before advancing to the next level.
- Tribal Reaction: positive and negative effects each Tribe grants to the players.
The Tribal table, by Tribe, as printed on the sheet:
| Token | Demand | Symbol (red die face that reduces this Tribe's mood) |
|---|---|---|
| 1 | Wood | [red die face] |
| 2 | [fruit icon – not named in the text layer] | [red die face] |
| 3 | [hide/pelt icon – not named in the text layer] | [red die face] |
| 4 | [skull icon – not named in the text layer] | [red die face] |
Mood track: the track runs from the most hostile mood on the left to the most friendly on the right, with the column marked "Start" where the black cubes are placed. The Tribal Reaction for each mood level is:
- Lowest mood: decrease Palisade by 1 and each player discards 1 Determination token.
- Second mood: each player discards 1 Determination token.
- Third mood: no effect.
- Fourth mood: earn 1 Culture Point (CP).
- Highest mood: reveal Tribal secret and earn 1 Culture Point (CP).
During setup cover the token of any Tribe not in play (the Tribe's number on the Tribal table) with a black cube and ignore their effects during the game. Place a black cube at the neutral mood level of the mood track of all Tribes in play before starting the game.
Player number dictates the number and type of Tribes found on the island:
| Player Number | Tribes used |
|---|---|
| 1-2 | Tribes 1 and 2 |
| 3 | Tribes 1, 2 and 3 |
| 4 | Tribes 1, 2, 3 and 4 |
Introduction
Having survived the perilous ocean voyage, the HMS Beagle spots land ahead, and sets anchor off the coast of Tribal Island. The crew prepares an away team to conduct a diplomatic mission on the island and learn the cultural secrets of the tribes that live there. Trade with the natives to earn their trust and impress them with your gifts to learn their secrets, but beware, the tribesmen have a natural distrust for strangers and are quick to anger. Explore the island, meet the tribes, and learn what secrets you can, before all the tribes turn against you and force you to leave the island at the end of the 10th round.
Setup changes
Follow all the changes listed on the scenario sheet.
Scenario rules and changes
Follow the rules of the base game with all the changes listed on the scenario sheet and below.
Event phase – after resolving an Event card in the standard way, conduct the Tribal Migration following the rules presented on the Scenario sheet.
Movement example: each revealed Tribe must move. Players roll for the first Tribe: it is a 2. According to the movement directions the Tribe token is moved in the appropriate direction.
If a Tribe moves off the edge of the board they reappear on the opposite side of the board. The different color arrows on the picture show possible movement directions and the tiles/spaces where the Tribe would reappear.
Production phase – performed as in the standard rules.
Action phase – before the Planning actions step, players have a chance to perform a Brainstorm (see scenario sheet).
Brainstorm example: in a 3-player game Soldier, Missionary, Cook, and Darwin are used. At the start of the Action phase, players decide to discard 4 Determination tokens (one player discards 2 Determination tokens and 2 other players discard 1 Determination token each). They draw two Invention cards – Furnace and Snare. Snare seems more useful, so it is placed Invention side up on the board and the Furnace card is discarded.
Action examples
Note: the actions presented on the scenario sheet are not meant to replace the standard actions. These are special actions specific only for this particular scenario. All actions from the base game are still available and resolved in the normal manner.
Capturing Tribe's Secret
Players want to capture the Tribe's secret, which has already been revealed and is located on the Camp tile. Players assign 1 pawn, so when the action is resolved the player will roll the Exploration action dice. When the action is successful, players will take the blue marker that represents the Tribe's secret and place it on the Darwin's Cabin board.
Enticement
Players want to entice a Tribe whose Demand is food. They assign one pawn and one food on a tile adjacent to the Camp. When the action is resolved the Tribe token is placed on the Island tile where the action was taken and the food is returned to the Future Resources space.
Weather phase – during the Weather phase roll the Hungry Animals die to decrease a Tribe's mood instead of affecting the players.
Example: players rolled the matching face on the red die, so Tribe 1's mood is decreased.
Night phase – all players (including Darwin) must eat in the Night phase or take 2 wounds as usual. After feeding, players move the Camp, Trade, Gift, and receive the Tribal reaction, following the rules and order described on the Scenario sheet.
Night phase example:
- There is currently only one Tribe revealed.
- Movement has located the Camp on the same Island tile as a Tribe, so players decide to trade with it. They take three random Discovery tokens and place them on three Items: Rope, Knife, Shovel. Then they reveal the Discovery tokens and decide to keep the wood Discovery token on top of the Shovel Item, adding the wood to the Available Resources Space and discarding the Shovel. Both of the other Discovery tokens are then also discarded.
- Since players traded with the Tribe they may now give the Tribe one or more gifts according to the Demand shown in the table. This Tribe's Demand is wood. Players discard two wood resources from the Available Resources area to increase the Tribe's mood by 2.
- The Tribe is in a good mood now, so players collect 1 Culture Point.
Scenario 5
Use the following components and rules (from both this rulebook and the scenario sheet) in addition to the standard ones present in the base game.
- 5 Disease cards: these cards represent various illnesses affecting the players. The cards are shuffled into the Event deck at the beginning of the game. When a Disease card is drawn from the Event deck, players must resolve it, then draw an additional card from the Event deck.
- 9 Beach cards: there are 4 pairs and 1 different Beach card used to create a 3 x 3 beach area used for a scenario specific Searching the beach action.
- Darwin tokens: the number of these tokens used in this scenario depends on the number of Culture Points earned in the previous scenario. Each token is a single use action pawn that may be used the same way as Darwin's action pawn, to conduct or support any actions in this scenario.
- d6 die: in this scenario a d6 is used to determine the weather.
Introduction
Nearly 5 years have passed from the start of the survey mission aboard the HMS Beagle. Samples have been collected, maps are drawn, and new cultures encountered; all that is left is the journey home to England. Time has taken its toll on the health of the crew and specimens aboard. A terrible sickness afflicts the Ship, sapping health and morale, and all remaining specimens collected are in grave danger of destruction. Rare Beasts are sick, Carnivorous Plants shrivel and wilt as they hunger for fresh food, leaks in the hull allow salt water to enter and ruin preserved Unique Resource Sets, and Fossils stripped away from their parent geologic material begin to dry and crumble. An uncharted island is spotted and a team is assembled to go ashore and save the crew and specimens from complete annihilation.
Setup changes
Follow setup and rules outlined in the base game:
- Place the beach Island tile and Camp token on the main board in the normal starting location, create an 8 card Event deck, make 3 Adventure decks, place 9 starting Inventions and 5 random Inventions on the board and Character specific Inventions beside Character sheets, and shuffle all Discovery tokens and place them face-down in a stack.
- Shuffle 9 Beach cards and place them face down near the board to create a 3 x 3 beach area.
- Begin with the following Items already constructed (and their effects applied): Knife, Rope, Pot.
- Starting Weapon strength is 1 (from Knife Item).
- Discard all Discovery and Determination tokens from the previous scenario.
- Do not use Wreckage cards; draw an Event card in the first round instead.
- Place as many non-perishable food as there are players (including Darwin) in the Available Resources space.
- Place as many Determination tokens as there are players (including Darwin) in the Available Resources space; they may be used by any player, at any time during the scenario.
- Convert Culture Points earned from the tribes in the previous scenario into single use Darwin tokens, used to conduct or support any action in this scenario in the same way as a Darwin action pawn:
| Culture Points | Darwin Tokens |
|---|---|
| 1-5 | 1 |
| 6-11 | 2 |
| 12+ | 3 |
Sickness strikes the crew:
- Shuffle one Disease card per player (including Darwin) into the Event deck.
- Ship's doctor heals the team to full health, but then each player receives 4 additional wounds from the sickness (ignoring the [Morale-decrease symbol]).
- Adjust starting Morale level to -1/-2/-3/(-3 & one wound per player) in a 1/2/3/4 player game.
Unique Resource damage:
Before the scenario begins, roll 1d6 for each Unique Resource Set onboard and damage one resource from each set, based on the outcome of the roll (1-2 bird, 3-4 fish, 5-6 wood). Cover the total number of resources damaged with a black marker on the Unique Resources table of the scenario sheet.
Example: Players have 4 Collection Sets, so they roll the die 4 times. The outcomes are: 1 (bird), 3 (fish), 2 (bird), 6 (wood). Players cover 2 birds, 1 fish, and 1 wood with a black marker. Currently the players have 0 complete Unique Resource Sets.
Action examples
Special Darwin actions
By taking his special actions Darwin will establish the endgame KP value of each specimen type.
Example: Players have discovered mountains and hills terrain types. Darwin takes the Restore Fossils action. The first time he takes this action players should have access to the mountain terrain type. He places his action token on the Restore Fossils action field (not the terrain type on the Island tile) on the scenario sheet and makes all Fossils collected in the first scenario worth 1 KP each. The second time Darwin takes this action players must have access to the hills terrain type. He places his action token on the Restore Fossils action field location and makes all Fossils collected in the first scenario worth 2 KP instead of 1 KP. This action may not be taken a third time.
Gathering Herbs
The Camp is located on a plains type tile. Because Herbs are not produced during the Production phase players may take a Gathering action on the tile with the Camp to collect them. They decide to assign 1 pawn to gather the Herbs, so the action is resolved by rolling the Gathering action dice. The action is successful and players receive 1 Herb (represented by a blue cube).
Searching the beach
Players assign one pawn to search the beach. This action does not require a dice roll, so when resolving the action, the player chooses two cards and turns them face up. The cards don't match, so they are turned face down, in their original location, but the player remembers their position for future actions and shares this information with other players.
Unique Resources
The Camp is located on a tile with a totem, so in the Production phase players have to decide if the resources produced are standard resources placed in the Available Resources space, or Unique Resources used to reconstruct Collection Sets. Players choose the second option and place both food and wood resources on the Reconstruct Collection action field.
Campaign end
After you finish scenario 5 count the points for the number of collected specimens (according to its KP value from scenario 5) and for acquired pairs of Beach cards.
Check your score on the last page of the campaign book.
Playing a Random Scenario
It is possible to play a random scenario without playing others in the campaign. Remember to use the components necessary for each scenario.
In scenarios 3, 4 and 5 follow the rules of the specific scenario. To estimate how many Rare Beasts, Carnivorous Plants, Fossils and Unique Resource Sets you should use in the scenario, refer to the table below.
| Specimen | Easy | Normal | Hard |
|---|---|---|---|
| Number of Rare Beasts, Carnivorous Plants | 2 of each | 3 Beasts and 4 Plants | 5 of each |
| Number of Fossils and Unique Resource Sets | 3 of each | 3 of each | 3 of each |
Note 1: In scenario 3, start with Weapon level at 3/2/1 for an easy/standard/hard game.
Note 2: In scenario 5, start with 3/2/1 Darwin tokens for an easy/standard/hard game.
If you want to play Scenario 2, it's a little more complicated, because scenario 2 is a direct continuation of scenario 1. To set up the board follow these steps and refer to the table below for the number of components to use:
- Place the Island tiles on the board starting with the beach tile and continuing with adding adjacent tiles.
- Take black markers and, using 1 marker per tile, exhaust sources on the Island tiles, starting from the beach tile.
- Take 9 starting Inventions and a number of random Inventions and shuffle them. Place a specific number of them on the board with Item side up, and the rest with Invention side up.
- Deal wounds to each player.
- Start with Shelter built on a tile in the middle row and as far as possible from the beach tile.
- Adjust the Roof and Palisade level.
- Adjust Morale level.
- Place wood and fur in the Available Resources space.
- Adjust the number of collected Rare Beasts, Carnivorous Plants, Fossils and Collection Sets.
- Adjust the Weapon level.
| Element | Easy | Normal | Hard |
|---|---|---|---|
| Island tiles | Beach tile + 5 random | Beach tile + 6 random | Beach tile + 7 random |
| Black markers to exhaust sources | 3 | 4 | 5 |
| Number of random Inventions | 3 | 2 | 1 |
| Number of Items built | 5 | 4 | 3 |
| Wounds dealt to players | None | 1 wound for each player | 2 wounds for each player |
| Overall Roof and Palisade level | 5 divided between Roof and Palisade | 3 divided between Roof and Palisade | 2 divided between Roof and Palisade |
Then, prepare the scenario specific components:
- Place a Large Tree token on each revealed Island tile with both a totem and a wood source to represent Large Trees blown down by the storm, which may be used by the players to repair certain Ship locations.
- Place the Ship board and 6 Ship tiles next to the main board.
- Take as many non-perishable food as there are players (including Darwin) and place them in the Available Resources Space.
- Draw new Crewman card(s).
- Create a new 8 card Event deck, following normal setup rules. Players do not receive a new Wreckage card or any Starting Items this scenario. In the Event phase of Round 1 draw and resolve a card from the Event deck.
Follow the rest of scenario 2 rules.
Universal Components
Missionary
The Missionary player Character can be used in any scenario in the base game as well as the Voyage of the Beagle campaign – add this card to all the others when players choose their Characters. Missionary is not recommended for a solo game.
Character skills:
The Blessing
Discard 2 Determination tokens to stop all the food from rotting in the Night phase of the current round.
One Body
Discard 1 Determination token to allow any one Character (including Missionary) to give any number of their own Determination tokens to any other Character (including Missionary) of their choice.
Religious Parable
Discard 3 Determination tokens to discard any card from the Threat action field. Do not resolve the Threat action or Threat effect of the discarded card.
Prayer
Discard 2 Determination tokens to stop any player from drawing an Adventure card when they roll "?" on an Adventure die during their action. Players must use this skill before the Adventure card is drawn.
Note: The first morale arrow for the Missionary is facing the opposite direction as all other morale arrows on other Character cards.
Crewman cards
Crewman cards are not considered players, but are special Characters that are used to reduce the difficulty of a scenario. The Boy, Horse, and Surgeon use action pawns, while the Parrot and Lookout help players in other ways. Crewmen can also be used to ease the difficulty of any scenario in the base game as well. All Crewman cards do not affect the total number of players when considering shelter, roof, or palisade costs.
There are 5 different Crewman cards available in this expansion:
Boy
- Can only be used as an additional pawn to help any action taken by another Character.
- Is affected by Weather.
- Doesn't have to eat in the Night phase.
Parrot
- First Player receives +2 Determination tokens during the Morale phase. If Morale level is negative, then the First Player first receives Determination tokens from the Parrot and then resolves the Morale level.
- Parrot is immune to all game effects.
Lookout
- Island tile stack is played face-up, instead of face down.
- Lookout is immune to all game effects.
Horse
- Can only be used as an additional pawn to support any action. Additionally, when you use the Horse, you can ignore distance rules on the Island (with the Horse you can perform an action on any Island tile as if it was a tile adjacent to the Camp).
- Although the Horse is represented by a pawn, it is neither considered a Character nor affected by any game effects.
Surgeon
- The Surgeon comes with one action pawn to be used in the Action phase. The only place the Surgeon's pawn may be placed is on his Character card. Place the token on the Gather Herbs area to collect a medicinal herb (which is different from the scenario 5 'healing herb'). In future rounds place his action token on the healing part of his card to use the herb and heal any Character 1 Wound. The Surgeon is immune to all other game effects.
Event cards
There are 20 new Event cards. Six of them affect the Darwin Character and therefore can only be used in this campaign. These cards can be easily identified by the Darwin icon printed on them.
The other 14 new Event cards can be used in any game – add these cards to the base game Event cards.
Mystery tokens
Mystery tokens: 2 Treasures / 2 Monsters / 2 Traps.
These tokens are introduced into the game by the new Event cards.
When these tokens are located on an action field (e.g. Exploration action field), the next action of that type causes players to draw and resolve a specific Mystery card of the matching type, regardless of how many pawns have been assigned to the action, and whether it was successful or not. The card is drawn after the action is completely resolved. Discard the token after resolving its effect.
When these tokens are located on an Island tile where players are planning to take an action, players must draw and resolve a specific Mystery card of the matching type, regardless of how many pawns are assigned to the action and whether it was successful or not. Draw the card after the entire action is resolved. Discard the token after resolving its effect.
Sack and Basket tokens
These tokens represent the Items from the base game and are used to help players remember which Character is using them during the Action phase.