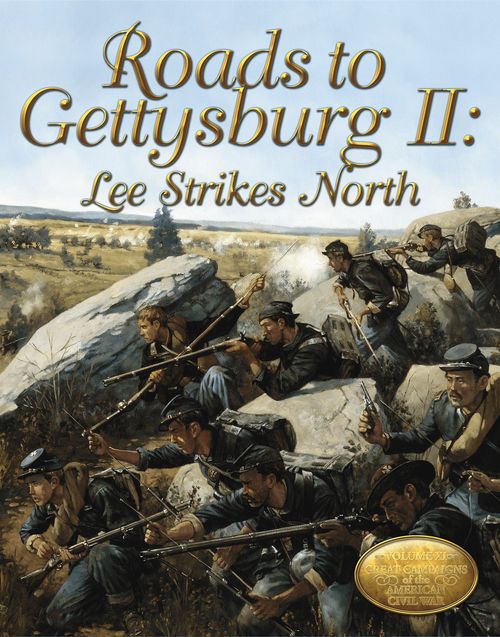
Roads to Gettysburg II: Lee Strikes North
Roads to Gettysburg II: Lee Strikes North Rulebook
Table of Contents
Table of Contents
- Introduction
- GCACW Standard Basic Game Rules
- 1.0 Introduction
- 2.0 Basic Game Concepts
- 3.0 Basic Game Sequence Of Play
- 4.0 The Action Cycle
- 5.0 Actions
- 6.0 March And Movement
- 7.0 Combat
- 8.0 Recovery
- 9.0 Entrenchments
- 10.0 Bridges, Dams, And Ferries
- 11.0 Demoralization
- 12.0 Rain
- Limited Intelligence (Optional Rule)
- Woods Hexside (Restricted ZOC) Summary of Effects
- Games of the Great Campaigns of the American Civil War Series
- Here Come The Rebels
- Roads to Gettysburg
- Rebels in the White House
Introduction
Roads To Gettysburg II: Lee Strikes North consists of three distinct games in this single game-box: Here Come The Rebels (HCR), Roads To Gettysburg (RTG), and Rebels In The White House (RWH). The extra playing counters required for the game Long Roads To Gettysburg are also included, and players can find the rulebook for this game on-line at http://www.multimanpublishing.com. Each game module is a redesign of the original game produced by Avalon Hill or Multi-Man Publishing. In each redesigned game, the original scenarios have been modified, new scenarios have been added, the maps have been modified, and the rules used are now the Standard Rules. In the games, the players control Union and Confederate military forces in turns representing one day of real time. The maps are a detailed representation of northern Virginia, Maryland, and Pennsylvania as they were in 1862-1864, drawn almost exclusively from Civil War period maps. All geographical features affecting military operations, such as roads, mountains, fords, and railroads, are portrayed. A hexagonal grid has been superimposed over the map and each hex equals about 2,000 yards (1.15 miles) from side-to-side. Military units from regiments to divisions are represented along with each side's corps and army leaders. Military units consist of a varying number of points, each of which represents about 500 infantry men or 700 cavalrymen.
The rules in each game are similar to those of the previous games in the Great Campaigns of the American Civil War (GCACW) series. Minor differences in the game system from one game to the next existed in this series prior to the 1999 publication of the Standard Series Rules Upgrade Kit in Issue No. 1 of The Skirmisher. These Standard Series Rules now form the basis for all games in the series. Roads To Gettysburg II: Lee Strikes North includes these Standard Rules in the separate rule booklet entitled: GCACW Standard Basic Game Rules Version 1.3 (reproduced above in its current, updated Version 1.5). This standard rule booklet forms a comprehensive guide to the common rules shared between all games in the series. The primary copy of Basic Game rule sections 2.0 through 12.0 appear in this separate booklet. You will also find some significant additions to the Standard Rules that need to be used just when playing scenarios of the various individual games. These new items are delineated over the first two pages of the HCR, RTG, and RWH rulebook sections respectively. For clarification, a few of the rules in those rulebooks are repeated from the Standard Rules and are noted that they are reminders. Since Here Come the Rebels, Roads to Gettysburg, and Rebels in the White House counters are included in the bundled product Roads To Gettysburg II: Lee Strikes North, the background shading on the leader and military unit artwork has been changed so it is easier to tell the counters from these various modules apart. The counters for the two Maryland campaigns (HCR and RWH) all have lighter background colors of blue or butternut. The counters for the Pennsylvania campaigns (RTG and LRTG) all have darker background colors.
Game Components. A complete game of Roads To Gettysburg II: Lee Strikes North contains the following: Two Rules Booklets, Four 22" by 32" Map sheets, Four 280-piece Counter sheets, Two Charts and Tables Cards, One Terrain Chart, Two Force Displays, Two 6-sided Dice.
GCACW Standard Basic Game Rules
Version 1.5. This booklet is shared by all games in the Great Campaigns of the American Civil War (GCACW) series and is included with Roads to Gettysburg II: Lee Strikes North. Rules added or modified for Version 1.5 update the version originally published with the game.
1.0 Introduction
The purpose of this manual is to serve as a guide to playing Basic Game scenarios for any of the games that have been published to date in the Great Campaigns of the American Civil War (GCACW) series. The games published so far in the series are listed below (in order of publication), along with the three-letter abbreviation for each game. These abbreviations are used throughout this manual.
- Stonewall Jackson's Way (SJW) [Original Publication]
- Here Come The Rebels! (HCR)
- Roads to Gettysburg (RTG)
- Stonewall in the Valley (SIV)
- Stonewall's Last Battle (SLB)
- On to Richmond! (OTR)
- Grant Takes Command (GTC)
- Battle Above the Clouds (BAC)
- All Green Alike (AGA)
- Stonewall Jackson's Way (SJW) [redesign republication]
- Atlanta Is Ours (AIO)
- Here Come the Rebels! (HCR) [redesign publication]
- Roads to Gettysburg (RTG) [redesign publication]
- Rebels in the White House (RWH) [redesign publication]
- Hood Strikes North (HSN)
- On To Richmond (OTR) [redesign publication]
- Grant Takes Command (GTC) [redesign publication]
- The Petersburg Campaign (TPC)
Two modules were also published in the Skirmisher #2 magazine: Burnside Takes Command (BTC) and Rebels in the White House (RWH). One module was published in Skirmisher #4 magazine: Lee's Last Offensive (LLO).
The first six games in the series were each published with their own rule booklet that contained minor changes in Basic Game rules from one game to the next. The Basic Game rules for the series were then standardized with the publication of the Standard Series Rules Upgrade Kit in Issue #1 of the GCACW Gamer's Guide, The Skirmisher. This kit itemized the changes required to bring each game in line with the official common set of rules. Since the Basic Game rules have been standardized, each subsequent game in the series has included a Standard Basic Game rule book (such as this manual) and a separate set of rules that are unique to that campaign. The first version of the Standard Basic Game rules appeared in Grant Takes Command. These rules have only had minor revisions in games published since then. The new designation for the standard rules that are included herein are the GCACW Standard Basic Game Rules, Version 1.5. The rules that have been added or modified for Version 1.5 are shown in blue text in the original booklet for ease of identification. Since these rule sections are the most recent version of the Standard Series Rules ("Standard Rules"), they should also be used to update the rules in Sections 2.0 to 12.0 for the first six games in the series. Please note that the special rules and setups for each scenario still must be referenced from the rule booklet that was originally published with each game.
The Upgrade Kit in The Skirmisher also contained 130 updated counters that are needed to convert the first five games in the series to the Standard Rules. Note: the various notes and leader counters for SJW, HCR, and RTG contained in Skirmisher 1 should not be used when playing the republished version of SJW, HCR, and RTG; these items are already included in the republication.
Although these Standard Rules enhance the realism and enjoyment of the series, particularly the early volumes, their use slightly increases the complexity of play. Although this manual's rules are considered "official", it is entirely understandable that some players may prefer to play the games strictly as originally written. Before starting play of any GCACW game, players must agree whether or not these Standard Rules will be employed. It is recommended that if these rules are used, they be used in their entirety, not selectively. However, rules listed as "optional" may be used selectively.
2.0 Basic Game Concepts
One person is chosen as the Union player and the other as the Confederate player. However, playing the game solitaire presents no special difficulties.
2.1 Game Components
The components differ from one game to the next in the Great Campaigns series. Consult the original rule booklet for each game to find the list of components for that title in the series.
2.2 Playing Pieces
The following types of playing pieces (or counters) are used in the game: military units, leaders and informational markers.
Military Units
Each player controls a set of military units. These are usually identified by their commanding officer, who is listed by name on the counter (e.g., "Early-B"). Some small units, however, are simply identified by regiment (e.g., "10 GA"—the 10th Georgia Infantry). Units also have designations on each side of the organizational symbol (the colored rectangle in the middle of the counter) identifying the corps and/or the division to which the unit belongs. For example, the Union "XX" designation means the unit belongs to the Twentieth Corps; the Confederate "M-W" designation means the unit belongs to Wheeler's Corps, Morgan's Division. Union infantry units also have a numerical division designation on the right side of the organizational symbol, which is used for informational purposes only.
Military units come in five different sizes: II = Squadron (Union only), III = Regiment, X = Brigade, XX = Division, X+ = Demi-Division (Confederate only).
The demi-division was not a true military organization, although several Confederate reports from early 1862 used that term. It is an aggregation of 2 to 4 brigades from the same division and is appropriate for the early period of the war, when Confederate leaders could not easily control divisions with up to 16,000 men.
Military units are divided into three types: Cavalry, Infantry, Artillery. Military units have two values printed on their counters: the Tactical value, representing the military competence of the unit's commander and troops; and the Artillery value, representing the number of artillery batteries attached to that unit. Military units have two sides: the front ("normal") side and the reverse ("exhausted") side. The exhausted side is marked by a white stripe across the top of the unit.
Leaders
There are four types of leaders in the GCACW series. A leader may never occupy a hex by itself. It must always be stacked with a friendly, subordinate military unit. The unique characteristics of each leader (and the proper way to identify their counters) are described in the sections below.
Army Leaders: Army leaders have only a single number on their counters, which is their Command value. Army leaders are used to initiate grand assaults, and in Advanced Game scenarios of some games in the series they can perform the Activate Army Leader action. They must be attached to a subordinate infantry (not cavalry or artillery) unit at all times. Army leaders are present for both players in every game except SIV and AGA.
District Leaders: District leaders are distinguished by the presence of a colored star on their counter. Like corps and division leaders, district leader counters contain two numbers: a Tactical value and a Command value. District leaders are hybrid units that are used to both activate units for movement and assault (like corps and division leaders) and initiate grand assaults (like army leaders). District leaders may not perform the Activate Army Leader action. They must be attached to a subordinate infantry (not cavalry or artillery) unit at all times. District leaders are found leading the forces in a side theater that was not large enough historically to warrant the deployment of an entire army (such as SIV or the GTC side theaters). Note: Not all games have District Leaders.
Corps and Division Leaders: Corps and division leader counters contain two numbers: a Tactical value and a Command value, but no red star. Players must check the "Size" column in the scenario setup to determine which leaders with these two numbers are corps leaders and which are division leaders. Corps and division leaders are used to both activate units for movement and to initiate assaults. Corps and division leaders must be attached to a subordinate unit belonging to the same corps or division at all times. This subordinate unit can be of any type (infantry, cavalry, or artillery), depending on the composition of the units in that corps or division. Some combination of corps and/or division leaders are present for both players in every game in the series. Some corps may even have both corps and division leaders present; in this case some units may be activated by either the corps or division leader at the player's discretion.
Informational Markers
Strength Markers: A military unit must always possess a single Strength marker. A Strength marker has a front (organized) and a reverse (disorganized) side. The organized side has a single number from 1 to 21, which is both its "Manpower value" and "Combat value." The disorganized side has two numbers: a smaller number in value (1/2 to 14), which is its Combat value; and a larger number in value (1 to 21), which is its Manpower value. Strength markers never function by themselves; they must always be assigned to a military unit. At the start of a scenario, a Strength marker of the correct Manpower value is placed underneath a unit on its organized side. Wherever a unit goes, its Strength marker accompanies it. A maximum of one Strength marker may be assigned to a unit at a time. As a unit suffers losses, its marker changes. A player may examine his opponent's Strength markers at any time. Leaders never possess Strength markers. Although Strength markers can have numbers from 1 to 21, in most games in the series, players are limited to a maximum Manpower value that is less than 21. The maximum manpower in a specific game is listed in the Advanced Game rules for that game, in the Attachment section.
Fatigue Markers: As military units move and fight, they become "fatigued." Fatigue is represented in five "Fatigue levels" from 0 to 4. Military units must always be at one of these levels. Fatigue markers are placed underneath a unit's Strength marker. As the unit's Fatigue level changes, its Fatigue marker is adjusted. A unit at Fatigue level 0 does not possess a Fatigue marker—the lack of such a marker indicates Level 0. Leaders never possess Fatigue markers.
Sample Units
The sample units depicted below are for the game HSN; similar graphics are used in most games in the GCACW series. For those games with different counter graphics, refer to the rules included with that particular game for the unit style. Each counter shows: a Name, a Size symbol, an Organization symbol, a Tactical value, and an Artillery value on military units (with front/normal and back/exhausted sides showing an Exhaustion indicator); Army leaders show a Portrait, Name, and Command Value; Corps or Division leaders show a Portrait, Name, Command Value, and Tactical Value. Strength markers show Manpower/Combat value on the organized (front) side and separate Manpower and Combat values on the disorganized (back) side. The parenthesis around the tactical value means the unit may not be the only unit in an attack (marching or assault). Note: not all games have artillery units.
2.3 The Map
Major Terrain
Each land hex on the map is classified as one of nine major terrain types: clear, rolling, rough, woods, city, swamp, provisional swamp, hill, or mountain. Each terrain type has its own Movement Point cost, listed on the Terrain Chart, which military units pay to enter the hex. Clear, rolling and hill hexes have distinctive base colors: light yellow for clear, light green for rolling, and orange for hills. Other hexes can be recognized by special symbology: a green "brush" pattern for rough; a dark green "forest" pattern for woods; a gray "grid" pattern for city; a light green "marsh" pattern for provisional swamps; a highlight to the provisional swamp for permanent swamp hexes (in OTR and GTC this highlight is given by making the swamps a darker green; in all other games the permanent swamp hexes have a silvery-blue highlight applied); a brown "elevated land" pattern for mountain, and a tan pattern for hills. A land hex is considered to be the terrain type of the predominant symbology in that hex. Only whole hexes are playable. Partial hexes are not playable for any game purpose; they are considered off-map.
Special Hex/Hexside Features
A number of terrain types appear along hexsides, such as rivers, creeks, ridges, fords, bridges, ferries, dams, and county borders. Several types of special terrain appear within a hex, such as villages, RR stations, pikes, roads, landings and redoubts, but these have no effect on a hex's major terrain classification.
Woods Hexside: A "woods hexside" is a hexside between a woods hex and any other hex (including another woods hex). The hexside itself does not have to be covered with a forest pattern to be considered a woods hexside.
2.4 Zones of Control
A military unit, regardless of its status, exerts a Zone of Control (ZOC) into each of the six adjacent hexes surrounding it. Exceptions: ZOC extend across major or minor river hexsides only at fords, dams, ferries, or bridges. Also, ZOC extend into and out of swamp and mountain hexes only across hexsides crossed by a road, pike, RR or trail. Finally, ZOC do not extend across all-water hexsides.
Restricted ZOC: If a unit exerts a ZOC across a woods hexside (see definition above), and no road, pike, RR or trail traverses that hexside, the hex into which that ZOC is exerted is referred to as a "restricted ZOC." Non-restricted ZOC are sometimes referred to as "normal" ZOC. Unless otherwise specified, restricted ZOC hexes function like normal ZOC.
2.5 Command Radius
Sometimes a leader must trace a "command radius" between itself and subordinate units or another leader. A command radius is a path of three or fewer contiguous hexes between a leader's hex (exclusive) to a unit's hex (inclusive). Terrain is irrelevant when a leader traces a command radius—the three-hex path may enter any type of hex or cross any hexside. A command radius may not enter an enemy occupied hex or an enemy ZOC, including restricted ZOCs. (It may enter an enemy ZOC hex if that hex is occupied by a friendly unit.) The hex occupied by a leader is considered within its own command radius.
2.6 Abbreviations
Art: Artillery. MP: Movement Points. Brig: Brigade. Org: Organized. Cav: Cavalry. Regt: Regiment. Cmd: Command. RR: Railroad. Disorg: Disorganized. Sub: Substitute. Div: Division. VP: Victory Points. Dmorlze: Demoralized. ZOC: Zone of Control. Inf: Infantry.
3.0 Basic Game Sequence Of Play
Each turn is performed according to a Sequence of Play:
- Random Events Phase. Two dice are rolled; the players consult the Random Events Table. (Random events are only used in a Basic Game scenario if the scenario specifically calls for it.)
- Leader Transfer Phase. Leaders may be transferred from one subordinate unit to another.
- The Action Cycle. Action Phase: A. Initiative Segment: Both players roll a die. The player with the higher roll wins. The winner must take initiative or pass (see 4.2). If both players roll the same number, special considerations apply. In BAC and AIO, either the Union or Confederate player may win initiative depending on the specific number rolled. Insubordination may also occur in BAC. Check the BAC or AIO Basic Game Rules for more details. In all other games, the Confederate Player wins initiative. B. Activation Segment: The player who has taken initiative must perform a single action with an eligible leader or unit. At the end of an Activation Segment, the players return to the Initiative Segment and a new Action Phase begins. Players continue to perform Action Phases indefinitely until both players pass in the same Action Phase (see 4.4).
- Recovery Phase. Eligible units may entrench, build bridges, repair bridges and ferries, and recover from fatigue, disorganization, exhaustion, and demoralization.
- Turn Indication Phase. The Turn marker is advanced one box on the Turn Record Track and the players begin a new turn.
Exceptions: Occasionally, an individual Basic Game scenario might draw on one or more rules sections from the Advanced Game rules for that volume. In these situations, additional phases may be added to the sequence of play after the Random Events Phase.
4.0 The Action Cycle
Every turn has a single Action Cycle of indefinite length.
4.1 The Action Phase
An Action Cycle consists of a variable number of Action Phases. Each Action Phase is composed of an Initiative Segment and an Activation Segment. As soon as a player completes an action in the Activation Segment, a new Action Phase begins. Action Phases continue indefinitely until conditions for ending the Action Cycle are fulfilled.
4.2 The Initiative Segment
During this segment, both players roll a die. The player with the highest roll wins. If both players roll the same number, special considerations may apply: in BAC and AIO and HSN, either the Union or Confederate player may win initiative depending on the specific number rolled. Insubordination may also occur in BAC. Check the Basic Game Rules for those games for more details. In all other games, the Confederate Player wins initiative. In some games, such as all OTR scenarios and the GTC Grand Campaign game, players must note the number on the winning die. In such games, this number is used to determine which units are eligible for activation with that initiative; see 5.2 for an example.
If one player has no units eligible for activation in an Initiative Segment, his opponent automatically wins, and the dice are not rolled. (Exception: In some scenarios, the turn may end early or Insubordination may occur on certain tied initiative rolls. In these scenarios, both players must roll the dice in each Initiative Segment, even if one player has no units eligible for activation. If the player who has no eligible units wins the roll, he must pass.)
The winning player must choose one of the following two options: Take Initiative (he may take the initiative, thereby obligating him to perform an action in the subsequent Activation Segment); or Pass (he may "pass," automatically yielding initiative to his opponent). A player who lost the initiative roll but who has initiative yielded to him by a "pass" must choose one of the following two options: Take Initiative (he may take the initiative, thereby obligating him to perform an action in the subsequent Activation Segment); or Pass (he may "pass," automatically ending the Action Cycle).
Passing. If the player who wins the initiative roll passes, he does nothing. His opponent must then either take the initiative or pass. If the opponent also passes, the Action Cycle ends.
4.3 Activation Segment
The player who takes initiative must perform a single action with an eligible unit or leader in the Activation Segment. The counter selected for this action is called the "active unit" or "active leader." The player controlling this unit/leader is called the "active player."
4.4 Ending The Action Cycle
As soon as a player completes an action in an Activation Segment, a new Action Phase begins. Action Phases repeat indefinitely in an Action Cycle until both players pass in the same Action Phase. Thus, an Action Cycle ends when the player who wins the initiative roll passes, and his opponent—who is given the choice of taking initiative or passing—also passes. The Action Cycle also ends when both players have no units eligible for activation; or if a player passes when his opponent has no units eligible for activation. When an Action Cycle ends, proceed to the Recovery Phase.
5.0 Actions
The player who takes initiative must perform a single action in the Activation Segment with one of his units or leaders. There are five types of actions: March, Activate Leader, Assault, Burn RR Station (not in SIV or OTR), Entrenchment (1863 or later).
5.1 March
Only a single unit (not a leader) may be chosen to perform a March action. A unit is eligible to march only if it is currently at a Fatigue Level of 3 or less—it may not march if it is at Fatigue Level 4. The unit's Strength marker may be organized or disorganized. A unit may march more than once per turn, but never more than once per Action Phase. A March is performed as follows:
- The player with initiative selects one eligible unit anywhere on the map. The unit's Movement Allowance is calculated as follows: Union Infantry or Artillery Unit—the Union player rolls one die. The result is the unit's Movement Allowance. Confederate Infantry or Artillery Unit—the Confederate Player rolls one die. The die roll is increased by 1. The modified die roll is the unit's Movement Allowance. (Exception: In OTR and AGA, the Confederate Player rolls one die (but does not increase the roll by 1). The result is the unit's Movement Allowance, although the unit's minimum Movement Allowance is 2, even if the roll is 1.) Union Cavalry Unit—the Union player rolls two dice. The sum of the dice is the unit's Movement Allowance. Confederate Cavalry Unit—the Confederate player rolls two dice. The sum of the dice is increased by 1. The modified dice roll is the unit's Movement Allowance.
- The chosen unit's Fatigue Level is increased by one. The unit gains a new Fatigue marker (or has an existing marker flipped over) to reflect the change. If this march brings a unit on its normal side to a new Fatigue Level of 3 or 4, or a unit on its exhausted side to a new Fatigue Level of 2, 3 or 4, it is an "extended march," and the player must consult the Extended March Table. Note: Before proceeding to Step 3, enemy cavalry units in the active unit's ZOC may perform a cavalry retreat (see 7.7).
- An eligible unit may enhance its Movement Allowance by making a "force march." The Movement Points (MP) gained by a force march are added to the Movement Allowance calculated in Step 1 to determine a final Movement Allowance. If no force march is performed, the unit's final Movement Allowance is the number determined in Step 1.
- Place the "Active Movement Allowance" marker on the Movement Track in the box corresponding to the unit's final Movement Allowance.
- The unit performs its march. As it expends MP, the Active Movement Allowance marker is adjusted downward. The march ends when the marker reaches 0 or the active player states that the action is over. If the marker reaches 0 due to an attack, the action does not end until the attack is resolved.
(Optional) A unit at Fatigue Level 4 may be selected in Step 1 of a March action if its Strength marker is organized. If a unit at Fatigue Level 4 marches, its Strength marker is automatically flipped to its disorganized side. (It retains its Fatigue Level 4 marker.) The player does not consult the Extended March Table. If a unit at Fatigue Level 4 marches, it may not also force march.
Extended March. If a unit on its normal side marches and its fatigue increase brings it to Fatigue Level 3 or 4, the action is an "extended march." If a unit on its exhausted side marches and its fatigue increase brings it to Fatigue Level 2, 3 or 4, the action is also an "extended march." Before proceeding to Step 3 of the march procedure, the active player rolls a die and consults the Extended March Table (see Charts & Tables handout). This roll may be modified. If the unit's Strength marker is organized, the modified roll is cross-referenced with the "Organized" column. If the unit's Strength marker is disorganized, the modified roll is cross-referenced with the "Disorganized" column corresponding to its current Manpower value. There are three possible results: NE (No effect; the extended march has no effect on the active unit); D (Disorganized; the unit's Strength marker is flipped to its disorganized side); 1/2/3 (The unit's Manpower value is reduced by 1, 2, or 3. The unit's new Strength marker is placed on its disorganized side). As long as it is not eliminated by the result, the active unit resumes its march after determining the effects of its extended march.
Example: If, in RTG, a Union unit on its exhausted side that does not belong to the Army of the Potomac performs a march, and that march brings the unit to a new Fatigue Level of 3, that march is an extended march. The Union player consults the Extended March Table, adding 3 to his die roll. (+2 because the unit does not belong to the Army of the Potomac; +1 because the march increased the exhausted unit's Fatigue Level from 2 to 3.)
Force March. A player may enhance his active unit's Movement Allowance by declaring a "Force March." A force march may only be declared in Step 3 of the March procedure. An active unit may force march only if its Strength marker is currently on its organized side. Artillery and wagon units can never force march. To conduct a force march, follow this procedure:
- Flip the unit's Strength marker to its disorganized side.
- If an infantry unit force marches, roll one die and subtract 1 from the roll. If a cavalry unit force marches, roll two dice and subtract 1 from the dice sum. The result is the number of MP added to the active unit's Movement Allowance as determined in Step 1 of the March procedure. The minimum MP bonus gained by an infantry unit's force march is 2, even if the modified roll is 0 or 1. The minimum MP bonus gained by a cavalry unit's force march is 4, even if the modified roll is 1, 2, or 3.
- If the unmodified roll in Step 2 is 6 (for infantry), the active unit's Manpower Value is reduced by two if its current Manpower Value is 6 or more; otherwise, its Manpower Value is reduced by 1. If the unmodified roll in Step 2 is from 2 to 5 (for infantry) or 8 or more (for cavalry), the active unit's Manpower Value is reduced by one. New Strength markers are placed on their disorganized sides. If the unmodified roll in Step 2 is 1 (for infantry) or 7 or less (for cavalry), the active unit's Manpower Value is unaffected.
March Example: The Union player takes initiative and declares a march with Newton's infantry division, which currently is exhausted at Fatigue Level 1 with an organized Strength marker (Manpower/Combat value of 7). The Union player rolls a die to determine Newton's Movement Allowance, obtaining a 3. Newton's Fatigue Level is increased to 2, indicating that an extended march is in effect because of his exhaustion. The Union player rolls a die, obtaining a 4, and consults the Extended March Table, cross-referencing 4 with the "Organized" column. One is added to the roll because the +1 modifier for "Other Union Units" in the "Union Army Modifiers" is the only modifier that applies. The result is "NE," so Newton is unaffected by the extended march. The Union player decides to force march Newton, which is permissible because of his organized Strength marker. He flips Newton's Strength marker to its disorganized side and rolls a die, obtaining a 1. This is reduced by 1 to 0, but the minimum MP bonus in an infantry force march is 2. Thus, Newton's final Movement Allowance is 5 (3 + 2). The Active Movement Allowance marker is placed in the "5" box on the Movement Track. Newton does not suffer Manpower value loss due to the force march because the unmodified force march die roll was 1.
5.2 Activate Leader
The "activate leader" action enables a player to perform one or more consecutive march actions with eligible military units in the same Action Phase. The following actions may not be performed in an Activate Leader action: Assault, Burn RR Station, and (in Advanced Game scenarios) RR or amphibious embarking and movement. Only one district, division, or corps leader at a time may be chosen for activation. A leader is eligible for activation only if one or more units within his command radius belonging to his command are at a Fatigue Level of 3 or less. A leader activation is performed as follows:
- The player with initiative selects an eligible leader anywhere on the map.
- The player with initiative must select one or more units belonging to the active leader's command that are situated within the leader's command radius (other than the leader itself). All of the units selected to participate in an activate leader action must be at a Fatigue Level of 3 or less. Place a Union or Confederate "Leader Activation" marker on top of each unit selected. The player is not obligated to select every eligible unit within the leader's command radius, although he may do so. He must select at least one. In all games there will be units that do not belong to any leader's command. (Example: Union cavalry units in SIV, OTR, SJW, HCR, SLB and AGA do not belong to a command since there are no Union cavalry leaders in those games). These units may not be selected to join an activate leader action. They may only perform march and entrenchment actions individually.
Exceptions: Artillery units in all games may be selected to join in an Activate Leader action of any non-cavalry leader, even though they do not belong to the active leader's command. In 1864-1865, or in 1863 if playing with the "Entrenchment" action optional rule, the player must declare whether each unit selected will march or entrench. This designation must occur in Step 2 of this procedure, prior to the calculation of the Movement Allowance. The player is free to have some units march and others entrench during a single Activate Leader action. (Optional) A unit at Fatigue Level 4 may be selected to march (not entrench) in Step 2 of an Activate Leader action if its Strength marker is organized. If a unit at Fatigue Level 4 marches, its Strength marker is automatically flipped to its disorganized side. (It retains its Fatigue Level 4 marker.) The player does not consult the Extended March Table. If a unit at Fatigue Level 4 marches, it may not also force march.
Special Rule For On To Richmond. In OTR, if the Union player is performing the Activate Leader action, he is limited in the number of units he may select by the number he rolled during the just-completed Initiative Segment of the current Action Phase: a roll of 1 to 4 lets the Union player select only 1 eligible unit; a roll of 5 lets him select 2 eligible units; a roll of 6 lets him select any number of eligible units. Note: If the Confederate player won the initiative roll in the current Action Phase but passed, the Union player may select any number of eligible units in a leader activation regardless of the number he rolled in the Initiative Segment. Also, if the Union player has taken initiative in the current Action Phase without an initiative dice roll (which is possible if the Confederate player has no units eligible for activation), the Union player may select any number of eligible units in a leader activation.
- The active leader's Movement Allowance is calculated as follows: Union Infantry Leaders—the Union player rolls one die. The result is increased by 1. The modified roll is the leader's Movement Allowance. (Exception: In SIV, OTR and AGA, the Union Player rolls one die (but does not increase the roll by 1). The result is the unit's Movement Allowance, although the unit's minimum Movement Allowance is 2, even if the roll is 1.) Union Cavalry Division Leaders—the Union player rolls two dice. The sum of the dice is increased by 1. The modified roll is the leader's Movement Allowance. Union Cavalry Corps Leaders—the Union player rolls two dice. The sum of the dice is increased by 2. The modified roll is the leader's Movement Allowance. Confederate Infantry Leaders—the Confederate player rolls one die. The result is increased by 2. (Exception: The result is increased by 1 in OTR and AGA.) The modified roll is the leader's Movement Allowance. Confederate Cavalry Division Leaders—the Confederate player rolls two dice. The sum of the dice is increased by 2. The modified roll is the leader's Movement Allowance. Confederate Cavalry Corps Leaders—the Confederate player rolls two dice. The sum of the dice is increased by 3. The modified roll is the leader's Movement Allowance.
- The leader's Movement Allowance determined in Step 3 is used by every unit selected for participation in the leader activation. Place the "Leader Movement Allowance" marker on the Movement Track in the box corresponding to this number. Do not move the marker from this box for the duration of the leader activation, as it serves to remind the players of the leader's Movement Allowance.
- The active leader may transfer to any hex occupied by a subordinate unit (including an artillery unit) selected in Step 2. This transfer is voluntary and may only take place before any units march. Place the leader in the hex to which it transfers. In the hex that the active leader occupies, the player must now designate a unit in the leader's command that the leader is "attached" to and that the leader must remain with for the entire Activate Leader Action. This unit does not have to be a unit activated in the current action (in which case that unit cannot move since it has not been activated). The only exception to this attachment is under "Leaders and Combat" in section 6.3.
- The active player chooses a single unit to perform a march or entrenchment action. The chosen unit must have been selected in Step 2 (i.e. it must have a Leader Activation marker, which is now removed). The unit must choose the same action (march or entrenchment) that was designated for the unit in Step 2. The chosen unit's Fatigue Level is immediately increased by one. The unit gains a new Fatigue marker (or has an existing marker flipped over) to reflect the change. If the unit is entrenching, it follows the procedure outlined in Section 5.5. After following the entrenchment procedure, skip Steps 7 and 8 and pick up this procedure at Step 9. If the unit is marching, it uses the active leader's Movement Allowance calculated in Step 3. If this march brings a unit on its normal side to a new Fatigue Level of 3 or 4, or a unit on its exhausted side to a new Fatigue Level of 2, 3, or 4, it is an "extended march," and the player consults the Extended March Table (see Charts & Tables handout). (Before proceeding to Step 7 but after rolling for extended march, enemy cavalry units in the marching unit's ZOC may perform a cavalry retreat; see 7.7).
Leader Activation Example (from AIO): The Union player takes initiative and declares an "Activate Leader" action with Logan. Four divisions are situated within Logan's command radius: Osterhaus (Fatigue Level 4), ML Smith (FL 0), Harrow (FL 1), and Veatch (part of XVI Corps). All four divisions are on their normal sides. Osterhaus is not eligible to participate because he is at FL4; Veatch may not participate because he is part of XVI Corps. Thus, only ML Smith and Harrow are eligible to participate and the Union player chooses them both. He places a Leader Activation marker on both units. The Union player rolls a die, obtaining a 4. Since the movement allowance is one die plus one, the Leader Movement Allowance marker is placed in the "5" box of the Movement Track, where it remains for the duration of the action. Logan, who is currently stacked with ML Smith, now transfers to Harrow's hex. The Union Player performs a march action with Harrow, whose Leader Activation marker is removed. Harrow's FL is increased to 2, so an extended march is not in effect. No force march is performed, so the Active Movement Allowance is placed in the "5" box in the Movement Track. Harrow's march ends when the Active Movement Allowance marker reaches 0. Next, the Union Player performs a march action with ML Smith. He repeats the procedure that he followed for Harrow (remove the Leader Activation marker, increase FL, place the Active Movement Allowance marker, and perform the march). The Leader Activation now ends and a new Action Phase begins.
5.3 Assault
An "assault" action enables a district, division, or corps leader to attack a single, adjacent, enemy-occupied hex with a group of subordinate units rather than attacking with each individually. Only one leader at a time may be chosen for an assault. A leader is eligible for an assault only if one or more subordinate units in the leader's hex have a Fatigue Level of 3 or less. MP are not used in an assault, and the active player does not roll a die to determine a Movement Allowance. Assaults are explained in detail in the combat section (see 7.1).
5.4 Burn RR Station
Who May Burn RR Stations. Only a single military unit (not a leader) may be chosen to perform a burn RR station action. A unit is eligible for this action if it occupies a RR station hex and is at a Fatigue Level of 3 or less; it may not be chosen if it is at Fatigue Level 4. The unit's Strength marker may be organized or disorganized, but it must have a Combat Value (not Manpower Value) of 2 or more and cannot be demoralized. Units in SIV and OTR may not burn RR stations.
Procedure. The player with initiative selects a single eligible unit anywhere on the map. The chosen unit's Fatigue Level is immediately increased by one. The units gains a new Fatigue marker (or has an existing marker flipped over) to reflect the change. An extended march never occurs as a result of a burn RR station action, even if the unit goes to a new Fatigue Level of 2, 3, or 4. If the unit's Combat Value is 2, 3, or 4, place a Damage marker in the RR station hex; if the unit's Combat Value is 5 or more, place a Destroy marker in the hex. The presence of other friendly units in the hex has no effect on the type of marker placed in the RR station hex. The action is now over and a new Action Phase begins. Damage/Destroy markers remain in place for the duration of the game. (Exception: Damage/Destroy markers may be removed in the Advanced Game in some of the volumes in the series). However, an existing Damage marker is flipped over to its Destroy side at the moment a unit with a Combat Value of 5 or more performs a burn RR station action in that hex. An existing Damage marker is unaffected if a unit with a Combat Value of 2, 3, or 4 performs a burn RR station action in that hex. A Destroy marker is unaffected if other units later perform a burn RR station action in that hex.
5.5 Entrenchment
Who May Entrench. In any 1864 or later scenario, or in a 1863 scenario if this Entrenchment Action optional rule is used by mutual consent of the players, players may add an "Entrenchment" action to the menu of actions available to active units. Entrenchment actions may be performed by units activated individually or as part of an Activate Leader action. Entrenching during the Action Cycle is always in addition to normal entrenchment rules. Eligible units may still entrench in Step 1 of the Recovery Phase.
Entrenchment Action Restrictions: The unit must meet all the following conditions to be selected for an Entrenchment action: it must be a military unit (not a leader); it must be at a Fatigue Level of 0, 1, or 2 if the year is 1863 (Fatigue Level 0, 1, 2, or 3 in 1864-1865) — units may not perform entrenchment actions if the year is 1862 or earlier; it must not be demoralized (it may be exhausted, and its Strength marker may be disorganized); it must not already possess a completed Fort marker. Note: A unit may perform more than one Entrenchment Action per turn, assuming it is eligible.
Entrenchment Action Procedure: If an entrenchment action is declared, the active player follows one of the following two procedures, depending on the year of the game.
(Optional) 1863 Procedure: 1. The active unit's Fatigue Level is increased by two. (An extended march never occurs as a result of an Entrenchment action.) 2. The player places an Entrenchment marker on the active unit (or adjusts an existing Entrenchment marker) as follows: if the active unit does not currently possess an Entrenchment marker, place a Breastwork–Build marker atop the unit; if the active unit already possesses a Breastwork–Build marker, flip the marker to its Complete side (or, if using an RTG Breastwork marker, change it from a sideways to a normal alignment); if the active unit already possesses a completed Breastwork marker, place a Fort–Build marker atop the unit; if the active unit already possesses a Fort–Build marker, flip the marker to its Complete side. 3. The Entrenchment action ends, and a new Action Phase (or the next action in an Activate Leader action) begins.
1864-1865 Procedure: 1. The active unit's Fatigue Level is increased by one. (An extended march never occurs as a result of an Entrenchment action). 2. The player places an Entrenchment marker on the active unit (or adjusts an existing Entrenchment marker) as follows: if the active unit does not currently possess an Entrenchment marker, place an Abatis marker atop the unit (Exception: If an active unit is in a redoubt hex (that it is eligible to benefit from – see 9.0), place a Breastwork-Build marker atop the unit); if the active unit already possesses an Abatis marker, flip the marker to its Breastwork-Build side; if the active unit already possesses a Breastwork-Build marker, place a Breastworks marker atop the unit; if the active unit already possesses a Breastworks marker, flip the marker to its Fort-Build-1 side; if the active unit already possesses a Fort-Build-1 marker, place a Fort-Build-2 marker atop the unit; if the active unit already possesses a Fort-Build-2 marker, flip the marker to its Fort-Complete side. 3. The Entrenchment Action ends, and a new Action Phase (or the next action in an Activate Leader action) begins.
6.0 March And Movement
6.1 Rules Of Marching
A marching unit may move and/or attack.
Movement. A unit moves from hex to adjacent hex, expending a number of Movement Points (MP) equal to the cost of the major terrain in the hex entered (see the Terrain Chart). A marching unit can expend some, all, or none of its MP (unused MP may not be saved from march to march, nor may they be transferred between units). As a unit expends MPs, the Active Movement Allowance marker is adjusted downward on the Movement Track. The unit may no longer move when the marker reaches 0.
Attack. Attacks (except for assaults) are part of the march procedure. A marching unit may attack any single adjacent hex occupied by enemy units. There are four types of attacks, each of which expends a different number of MP. (The MP cost also varies for infantry and cavalry units.) A unit may not attack if it does not possess the requisite MP. The four attacks and their MP costs are: Column of Route, 0 MP for both infantry and cavalry*; Hasty, 1 MP for infantry, 2 MP for cavalry; Normal, 2 MP for infantry, 4 MP for cavalry; Prepared, 4 MP for infantry, 8 MP for cavalry. *A column of route attack may not be declared if a unit's Movement Allowance is 0; it may only be used if the unit has a Movement Allowance of 1 or more at the moment of declaration. Note: The defender's terrain does not affect an attack's MP cost. The four types of attacks listed above are used only for units attacking in a march—they are not used in an assault.
6.2 Rules Of Movement
Roads, Pikes, Railroads. If a unit enters a hex through a hexside crossed by a road, pike, or railroad (RR), it ignores the cost of the hex's major terrain and instead pays 1 MP. Unfinished railroads are treated as roads (not railroads) for all game purposes.
Trails. If a unit enters a mountain hex through a hexside crossed by a trail, it expends 2 MP. If a unit enters a non-mountain hex through a hexside crossed by a trail, it expends 1 MP.
Mountains. A unit may never enter or exit a mountain hex unless this move is performed across a hexside crossed by a road, pike, trail, or railroad.
Ridge. If a unit enters a hex across a ridge hexside, it must expend an additional 1 MP above the normal cost for entering the hex. This applies even if the hexside is crossed by a road, pike, trail, or RR, and regardless of the direction of movement (i.e., there is a penalty both when moving up and when moving down the ridge).
Swamps. A unit may never enter or exit a swamp hex unless this move is performed across a hexside crossed by a road, pike, or RR. Provisional swamp hexes function in all respects as rough hexes except in rain turns, when they convert to normal swamp hexes (see 12.0).
Rivers. A unit may not cross a major or minor river hexside except at a bridge, dam, ferry, or ford. A unit crossing a bridge, dam, or ford pays no MP penalty. (The MP cost of the major terrain in the hex entered is negated if the bridge, dam, or ford is crossed by a road, pike, or RR—and the road, pike, or RR MP cost is used instead.)
Dams. Dams are considered indestructible bridges in all GCACW games. A unit may cross a dam over a major or minor river with no movement point penalty, even in a rain turn, just as if it were a bridge. Unlike bridges, dams may not be destroyed. In SLB, dams were not official terrain features although they were labeled on the maps. When using the GCACW Standard Rules in SLB, any ford over major or minor rivers labeled on the map as a "dam" is now considered a dam instead of a ford. The following are the only dams in SLB: Occoquan Dam (SLB S5304) and Scott's Dam Ford (SLB S3526). Note: Strider's Dam (SIV N4322) is not a dam.
Ferries. A unit may cross a ferry over a minor river in non–rain turns with no MP penalty, just as if it were a ford. However, at a major river ferry on any turn (regardless of weather), or at a minor river ferry in a rain turn or while unfordable, the unit must pay a MP penalty (simulating the use of boats to cross). The unit's Manpower value is divided by 3 (drop fractions). The result is the MP penalty to cross the ferry. This penalty is in addition to the normal MP cost to enter the hex on the far side of the ferry (typically road movement cost). In SIV and SLB ferries were not official terrain features although they were labeled on the maps. When using the GCACW Standard Rules in those two games, only Berry's Ferry (SIV M5608) is now considered a ferry. Note: All fords labeled as ferries on the Potomac River are NOT considered ferries. They remain fords in the GCACW Standard Rules.
Creeks. Creek hexsides do not affect movement. Units may cross them at no special MP cost.
Water. Units may not enter water hexes.
Enemy-Occupied Hexes. A unit may not enter a hex occupied by enemy units (but see 7.6).
Enter Enemy Zone of Control. A unit must stop its movement at the moment it enters an enemy normal ZOC hex from a hex that is not in an enemy normal ZOC. The unit must then either attack or end its march. If the unit attacks successfully (i.e., it does not receive a "D," "F," "f," or "E" combat result), it is allowed to continue its march by moving and/or attacking. (However, if after a successful attack it still occupies an enemy normal ZOC, it again must either attack or end the march.) A unit must stop upon entering an enemy normal ZOC even if that ZOC is occupied by a friendly unit. If a unit enters an enemy cavalry unit's normal ZOC and the enemy unit performs a cavalry retreat, the unit may continue its march. A unit may not refuse flanks (7.8) when entering an enemy normal ZOC; however, it may refuse flanks if it marches in place in an enemy normal ZOC. In scenarios allowing Detachment (Advanced Game scenarios and Basic Game scenarios that specifically allow Detachment), a unit may detach a substitute when entering an enemy normal ZOC.
Exit Enemy Zone of Control. An active unit may not exit an enemy normal ZOC hex unless it starts its march in an enemy normal ZOC hex and its first activity is to exit that ZOC: ZOC to non-ZOC—if it moves from an enemy normal ZOC hex directly to a hex that is not in an enemy normal ZOC, it pays normal MP costs plus 1 MP to enter that hex. Assuming the unit has MP remaining, it may continue its march. ZOC to ZOC—if it moves directly from one enemy normal ZOC hex to another, it ignores the hex's MP cost and instead pays a cost equal to the unit's entire Movement Allowance. This penalty applies even if the enemy normal ZOC hex entered is occupied by a friendly unit and even if the two enemy ZOC emanate from different enemy units not in the same hex. Since the unit then has 0 MP left, its march is over and it may not attack. (Even though a hex's normal MP cost is ignored, a unit may still not enter or exit a mountain or swamp hex—except by road, pike, RR or trail—or cross a major/minor river hexside, except by ford, bridge, dam, or ferry.) If a unit moves directly from one enemy normal ZOC hex to another and the two hexes are not connected by a road, pike, RR or trail, the unit's Strength marker is flipped to its disorganized side. (If it is already disorganized, reduce the Strength marker's Manpower value by 1.) Disorganization or loss is not applied if the unit moves from one enemy normal ZOC hex to another and the two hexes are connected by a road, pike, RR or trail. A unit may neither attack nor refuse flanks (7.8) when moving directly from one enemy normal ZOC to another enemy normal ZOC.
Restricted ZOC. "Restricted" ZOC hexes—those into which a ZOC is exerted across a woods hexside not containing a road, pike, RR or trail (see 2.4)—do not affect movement in any way.
Enter Friendly-Occupied Hex. An active infantry, artillery, or wagon train unit must pay an MP penalty to enter a hex already occupied by one or more friendly infantry and/or artillery units with a combined Combat Value of 3 or more, or a hex occupied by a wagon train. The MP penalty depends on the terrain in the hex entered:
| Combined Combat Value in hex | City/Clear/Rough/Rolling/Hill | Woods/Swamp/Mountain |
|---|---|---|
| Less than 3 | No effect | No effect |
| 3 to 11 | +1 MP | +3 MP |
| More than 11 | +2 MP | +4 MP |
| Wagon Train | +2 MP | +4 MP |
MP penalties to enter a friendly-occupied hex are not cumulative: the highest MP penalty in city, clear, rough, rolling, and hill hexes is +2; the highest MP penalty in woods, swamp, and mountain hexes is +4. Cavalry units do not pay such MP penalties and do not trigger them if a friendly infantry, artillery, or wagon train unit enters their hex. Note: The active unit's Combat value is not counted when entering the friendly-occupied hex. (Note: The combined Combat value may fall exactly between two rows of the chart above (e.g., 11.5). If so, round the value up.)
Minimum 1 Hex Movement. As long as a unit does not attack during its march, it may always move at least one hex—even if its Movement Allowance is not sufficient for it to enter an adjacent hex. Exception: A unit may still not enter or exit a mountain or swamp hex (except by road, pike, RR or trail), or cross a major or minor river hexside (except at a bridge, dam, ford, or ferry). If an enemy cavalry retreat reduces an active unit's Movement Allowance to 0 before it has moved in its march, it may still move one hex. If a unit begins a march adjacent to a ferry hexside and does not have enough MP to cross due to the ferry MP penalty, it may cross that ferry hexside anyway using all of its available MP.
Cavalry Retreat. When an active infantry unit moves into the normal ZOC of an enemy cavalry unit—before the active player declares an attack—the cavalry unit may make a cavalry retreat (see 7.7).
6.3 Leader Movement
A leader may never occupy a hex by itself; it must always be stacked with a subordinate unit. A leader is considered "attached" to a unit with which it is stacked and must move with that unit wherever it goes during a March or Activate Leader action (exception: see "Leaders and Combat," below). More than one leader may be attached to the same unit if they represent different organizational levels (e.g., a division and corps leader; or a corps and army/district leader). Once a unit with one or more attached leaders begins its movement in a March or Activate Leader action, it may not "drop off" a leader and attach it to a different unit in any hex entered during that action. A leader may neither move nor activate by itself, although it may "transfer" (see below).
Leaders and Combat. If a unit with one or more attached leaders is forced to retreat, the leaders must remain with that unit throughout the retreat. If, during its retreat, it enters a hex occupied by other units, it may not "drop off" a leader and attach it to another unit in that hex. If a unit with one or more attached leaders is eligible to advance after combat (see 7.6), the leaders accompany the unit during the advance. (Exception: If more than one unit is eligible to advance after combat, and some advance while others do not, the owning player may either keep leaders attached to their current unit, or he may reattach one or more of them to another subordinate unit in the hex immediately before the advance is undertaken.)
Leader Transfer. A leader may transfer from unit-to-unit in two ways:
Leader Transfer Phase: During the Leader Transfer Phase, the owning player may transfer some, none, or all of his leaders from one subordinate unit to another. To perform a transfer, the owning player must trace a path of contiguous hexes no more than 10 hexes in length from the leader's hex (exclusive) to the hex occupied by the unit to which the leader wishes to transfer (inclusive). This path may not enter enemy-occupied hexes, but it may enter enemy ZOC. It may transit any terrain type, including swamps, mountains, and rivers. The Union player must perform all desired transfers in the Leader Transfer Phase before the Confederate player executes any leader transfers.
Activate Leader Action: Leaders may transfer during an "activate leader" action (see 5.2). Such a transfer may only be performed once per action, and only before units march.
Army and District Leaders: Army and district leaders are subject to the following restrictions: they may transfer in the Leader Transfer Phase, but they may not attach to a cavalry/artillery unit or cavalry leader; if a District Leader is the Active Leader then he can leader transfer per section 5.2 step 5; if they are situated in the same hex as an active leader performing an Activate Leader action, they may transfer with the active leader in Step 5 of the Activate Leader procedure, although they are not obligated to do so. If an army/district leader transfers, it must transfer and attach to the same unit as the active leader. (Exception: If the active leader is a cavalry leader, an army/district leader may not transfer in Step 5 of the Activate Leader procedure.) If an army/district leader occupies a hex with more than one subordinate infantry unit, and one of those units to which the army/district leader is not currently attached leaves the hex during a March or Activate Leader action (including an advance after combat), the leader may attach to the departing unit or it may remain in the hex and stay attached to its current unit. An army/district leader is not obligated to be attached to an infantry unit to which a non-army leader is also attached. The army/district leader may be attached to an infantry unit by itself.
6.4 Stacking
An unlimited number of friendly units and leaders may occupy the same hex at a given time.
Force Markers. Since stacks of counters are unwieldy, players should use substitute counters called "Force markers" when they have more than two units per hex. Each player has his own set of Force markers and a corresponding Force Display. Each Force marker is identified by number and has a corresponding box on the display. A player may remove an unwieldy stack of counters from the map at any time and place the units, leaders, and markers comprising this stack in an empty box of the display. (Place units and markers in separate piles so they may be viewed at a glance.) Then the Force marker corresponding to this box is placed on the map in the hex formerly occupied by the stack. All units and leaders comprising a force are considered to occupy the hex in which the Force marker is situated, and they exert ZOC normally. Subject to normal marching rules, units and leaders may leave the force and be placed back on the map at any time the owning player wishes. Units may freely join a force if they end a march in the same hex as the marker. Force markers have no effect on play. Players are not obligated to use them.
6.5 Fatigue Levels
A unit's Fatigue Level is increased when it performs an action. It may also be increased due to combat. A unit at Fatigue Level 4 may not perform an action, although it may defend and retreat due to combat. Players may wish to turn units sideways when they reach Fatigue Level 4 so that they can see at a glance which units are no longer eligible for activation. (Exception: If playing with the optional rule in Sections 5.1 and 5.2, units at Fatigue Level 4 may activate if their strength marker is organized).
7.0 Combat
7.1 Attacks
Only a unit performing a march or units participating in an assault action may attack.
Targets Of Attacks. An attacking unit (or group of units in an assault) may attack any single, adjacent hex occupied by one or more enemy units. If the attacking unit is adjacent to more than one enemy-occupied hex, it may attack only one hex of the active player's choice.
Participation In Attacks. Attacks are never mandatory. In a march, only the active unit may attack. All other friendly units, even those stacked in the same hex as the active unit, never participate in the attack. A unit may attack more than once per march as long as it has the requisite MP and does not suffer a prohibitive result on the Combat Results Table. In an assault action, only subordinate units stacked in the same hex as the active leader may participate in the attack. (Exception: see "grand assault.") A maximum of one attack may take place per assault action.
Participation In Defense. All units in a hex being attacked must participate in that combat. The attacker may not single out a unit in the hex as a target, and the defender may not withhold units in the hex from combat.
Attack Restrictions. Rivers: An attack may not take place across a major or minor river hexside unless a bridge, dam, ferry, or ford connects the attacker's and defender's hexes. Mountains and Swamps: An attack may not take place against a unit in a mountain or swamp hex unless the attacker's and defender's hexes are connected by a road, pike, RR or trail. A unit in a mountain or swamp hex may not attack an enemy unit unless the two hexes are connected by a road, pike, RR or trail. Artillery: Artillery units may not be the only units in an attack (marching or assault). Woods Hexsides: A unit may only attack across a "woods hexside" (see 2.3) if it meets either of the following conditions: it starts the action in the hex from which the attack is made; or there is a road, pike, RR or trail connecting the attacker's and defender's hexes. In this case it is permissible for the active unit to have marched one or more hexes before initiating the attack across the woods hexside.
Attack Procedure (Marching Unit Only). A unit performing a march may attack as follows: 1. Select Target: The active player states the attack's target. 2. Select Attack Type: The active player states his type of attack: column of route, hasty, normal, or prepared (see 6.1). Adjust the Active Movement Allowance marker downward on the Movement Track by the attack's MP cost. 3. Determine Combat Values: The players determine their Combat values and calculate the "ratio modifier" to the attacker's die roll in Step 5. 4. Determine Die Roll Modifiers: The players determine the "tactical" and "artillery" modifiers and any other modifiers applying to the combat (see 7.4). 5. Roll Dice: The attacker and defender each roll a die, modifying their rolls as required. The defender's modified roll is subtracted from the attacker's modified roll. The players consult the Combat Chart and apply the results (see 7.5). 6. Continue Action: If the marching unit has remaining MP and the combat result does not require it to end the action, it may continue to perform its march. If the unit has no more MP or the result calls for the march to end, the action is over and a new Action Phase begins.
Attack Procedure (Assault Action Only). A corps, division or district leader may be selected for an assault only if one or more subordinate units at Fatigue Level 3 or less are stacked with that leader. A Movement Allowance is not calculated in an assault and MP are not used—thus, the active player does not specify a type of attack (column of route, hasty, normal, prepared). An assault is performed as follows: 1. Select Participants: The active player selects an eligible leader. Next he chooses one or more units in the active leader's hex belonging to the same command as that leader. Each unit selected to participate in the action must be at Fatigue Level 3 or less. (Exception: A player may select one or more artillery units occupying the same hex as the active leader to participate in an assault even though the artillery units do not belong to the leader's command. Note: an artillery unit may never be the only unit in an assault.) 2. Increase Fatigue: Each unit selected to participate in the assault in Step 1 has its Fatigue Level increased by one. Note: An "extended march" never occurs as a result of an assault action, even if the unit goes to a new Fatigue Level of 2, 3 or 4. 3. Select Target: The active player states the target of the attack, which must be a single, adjacent, enemy-occupied hex. 4. Cavalry Retreat: The enemy player may conduct a cavalry retreat with eligible units (see 7.7). 5. Roll for Command: The active player rolls a die. This roll may be modified. If he rolls a 6 (before modification), the assault automatically ends. Begin a new Action Phase—do not proceed to Step 6. If the roll is 5 or less, apply any appropriate modifier to this roll (see below), and subtract the modified number from the active leader's Command value. The result is the "Assault Number." If the Assault Number is less than 0, the assault ends. Begin a new Action Phase—do not proceed to Step 6. However, if the Assault Number is 0 or greater, the assault takes place—continue the assault procedure. The Assault Number is the maximum number of attacking units that may participate in the assault. (If the Assault Number is 0, one unit must participate.) If the Assault Number is equal to or greater than the number of units selected in Step 1, all the units selected in Step 1 (and no more) must participate in the assault. If the Assault Number is less than the number of units selected in Step 1, the active player must choose (from among the units selected in Step 1) a number of units to employ which equals the assault number. (The assault must proceed, even if the number of units actually employed is less than the number selected in Step 1.) Regardless of whether or not an assault takes place, all units selected to participate in Step 1, even if they ultimately are dropped from the assault, gain one Fatigue Level in Step 2. 6. Attempt Grand Assault: The active player may attempt a "grand assault" (see below). A successful grand assault allows additional units to participate in the attack. Even if a grand assault attempt fails, the assault must proceed to Step 7. The active player cannot back out of the action. 7. Determine Combat Values: The players determine their Combat values and calculate the "ratio modifier" to the attacker's die roll in Step 9. 8. Determine Die Roll Modifiers: The players determine the "tactical" and "artillery" modifiers and any other modifiers applying to the combat (including the automatic +1 assault modifier; see 7.4). 9. Roll Dice: The attacker and defender each roll a die, modifying their rolls as required. The defender's modified roll is subtracted from the attacker's modified roll. The players consult the Combat Chart and apply the results (see 7.5). The action is over and a new Action Phase begins.
Example (from AIO): Corps leader Palmer (XIV Corps, Command value, 5) is performing an assault. He is stacked with two XIV Corps subordinate divisions (Johnson and Baird). Both divisions are selected to participate in the assault in Step 1. The Union player rolls a die, obtaining a 5. Subtracting 5 from Palmer's Command value (5) yields 0, indicating that the assault takes place—but with only one unit. The Union player retains Johnson and drops Baird from the assault. But both divisions have their Fatigue Levels increased by one.
Assault Die Roll Modifier. The following modifier applies to the active player's assault die roll in Step 5 of the assault procedure of any game with district leaders: -2 (if the active leader is a district (not a corps or division) leader, subtract 2 from the assault die roll). Note: Advanced Game assault die roll modifiers, such as SLB's "Hooker Loses Confidence" (SLB, 16.0) and OTR's Union "Passive" Command Posture (OTR, 18.0) are in effect in all applicable scenarios.
Grand Assault. A player may attempt a "grand assault" in Step 6 of the assault procedure only if all of the following conditions are in effect: Army or District Leader—a friendly army or district leader is situated within the command radius of the active leader's hex (a district leader who successfully initiated an assault may himself attempt a grand assault); Eligible Hexes—one or more of the six hexes adjacent to the defender is eligible to join a grand assault (a hex is eligible if it is adjacent to the defender, including the hex in which the assault action was initiated, and it is occupied by one or more of the attacker's units which were not selected to participate in the active leader's assault, and at least one of those units is at Fatigue Level 3 or less); Non-Cavalry Leader—the active leader initiating the current assault must not be a cavalry leader; Combat Value—the total Combat value of the units committed to the Assault action is 3 or more (Exception: this requirement does not apply in AGA and SIV). A maximum of one grand assault may be attempted per action, although an unlimited number may be attempted per turn. A grand assault is attempted as follows:
- Roll for Command: The active player rolls a die. In the Basic Game of all GCACW games, this roll is never modified. In some Advanced Games, however, it may be modified (see below). If the modified roll is 6 or more, the grand assault does not take place. The grand assault ends—return to Step 7 of the assault procedure. If the modified roll is 5 or less, subtract the number rolled from the army (or district) leader's Command value. The result is the "Grand Assault Number." If the Grand Assault Number is 0 or less, the grand assault does not take place. Return to Step 7 of the assault procedure. If, however, the Grand Assault Number is 1 or more, the grand assault must take place. Proceed to Step 2. (Note: Advanced Game grand assault die roll modifiers, such as SLB's "Hooker Loses Confidence" (SLB, 16.0), and OTR's Union "Passive" Command Posture (OTR, 18.0) are in effect in all applicable scenarios.)
- Select Eligible Hexes: From among the six hexes adjacent to the defender, the attacker must select a number of eligible hexes (not units) equal to or less than the Grand Assault Number which he wishes to use in the grand assault. He must select at least one hex. An "eligible hex" is defined above.
- Select Participants: In each hex selected in Step 2, the active player must select one or more eligible friendly units to join the grand assault. A unit is eligible to join a grand assault if it meets all the following conditions: it has a Fatigue Level of 3 or less; it must be eligible to participate in an attack as described in the "Attack Restrictions" rules; it must not have already been selected (successfully or unsuccessfully) in Step 1 of the assault procedure. A unit's command affiliation is irrelevant in this step. Any eligible unit, regardless of its command (including all cavalry and artillery units) may join in a grand assault. Exception: Refer to the specific game module you are playing for any exceptions regarding any restrictions on units that can be selected to participate in the Grand Assault. Note: The attacker may not back out of a grand assault once the grand assault procedure goes beyond Step 1. Each hex chosen by the attacker in Step 2 must contribute at least one eligible unit to the grand assault.
- Increase Fatigue: Each unit selected in Step 3 of the grand assault procedure has its Fatigue Level increased by one. An "extended march" never occurs as a result of a grand assault, even if a unit goes to a Fatigue Level of 2, 3, or 4.
- Return to Assault Procedure: Return to Step 7 of the assault procedure. Each unit selected in Step 3 of the grand assault contributes its Combat and Artillery values to the attacker's totals in Steps 7 and 8 of the assault.
Example (from AIO): Hardee, in hex W3014, successfully initiates an assault on hex W2914. Army leader Johnston (Command value 4) is in hex W3117, within Hardee's command radius. A non-active Confederate unit is in hex W3013 and another in W2813, both at Fatigue Level 2. Thus the Confederate player may attempt a grand assault. He rolls a die, obtaining a 1. Thus, the Grand Assault Number is 3 (Johnston's Command value [4] minus die roll [1] is 3). The grand assault must take place. The Confederate player selects two eligible hexes, W3013 and W2813. The non-active unit in each hex must be chosen to join the grand assault, and each unit's Fatigue Level is increased to 3. Both units contribute their Combat and Artillery values to Hardee's assault.
7.2 Combat Values
Every military unit has a Combat value shown on its accompanying Strength marker. A unit's Combat value varies depending on whether its Strength marker is organized or disorganized. If a unit's Strength marker is organized, its Combat value is simply the number shown on the marker. If a unit's Strength marker is disorganized, its Combat value is the smaller number in value. (A unit with a disorganized Strength marker may have a Combat value of 1/2. If so, this fraction is retained in combat—it is not rounded up or down.) A unit's Fatigue Level has no effect on its Combat value. In combat, the attacker and defender combine the Combat values of all their participating units. Players cannot withhold any part of their units' Combat values. To determine the Combat value of an attacking unit in a march action, simply use that unit's Combat value alone (no other units may join the attack). To determine the final Combat value in an assault, combine the Combat values of all units participating in that assault, and add in the Combat values of those units joining in a grand assault (if any). To determine the final Combat value of defending units, combine the Combat values of all units in the defending hex.
Maximum Values. The maximum combined Combat Value of attacking and defending units is limited as shown in the table below (note that there are different limits in OTR). In a grand assault, the limit shown below applies to each hex containing attacking units, so the overall total from all hexes may exceed the number listed in the "Attacking" row below.
| Situation | OTR | Other Games |
|---|---|---|
| Attacking | 70 | 80 |
| Defending | 60 | 70 |
| At least one-half defending units entrenched | 100 | 120 |
| All defending units entrenched | 130 | 160 |
If in a grand assault, the total Combat value of attacking units is 80 or more, the attacker's Manpower value loss in that combat is increased as follows: if the attacker's Combat value is 80 to 89, his Manpower value loss number is increased by 1; if the attacker's Combat value is 90 to 99, his Manpower value loss number is increased by 2; if the attacker's Combat value is 100 or more, his Manpower value loss number is increased by 3.
7.3 Artillery Values
A unit's Artillery value is shown directly on the unit itself. A unit's Fatigue Level or Strength marker (organized or disorganized) has no effect on its Artillery value. Artillery values are used to determine the "artillery modifier" in combat (see 7.4).
7.4 Combat Die Roll Modifiers
Several factors modify combat die rolls. Modifiers are cumulative.
Ratio Modifier. The attacker's die roll must be modified by the ratio modifier. To calculate this modifier, compare the attacker's Combat value sum to the defender's Combat value sum and round this ratio down in favor of the defender to conform to one of the simplified ratios listed on the Ratio Chart. A modifier from –12 to +13 is listed next to each ratio. This is the ratio modifier.
Tactical Modifier. The attacker's die roll is modified by the tactical modifier. To calculate this modifier, the defender determines the highest Tactical value among the units and leaders in the defending hex. Meanwhile, the attacker makes the same determination among his units and leaders participating in the attack. A leader may contribute its Tactical value to an attack only if it is stacked in the same hex as a subordinate attacking unit. The defender's Tactical value is subtracted from the attacker's Tactical value. The result is the tactical modifier, which is added to (or, if a negative number, subtracted from) the attacker's die roll. Some units have a split tactical, which consists of a number before and after a slash in the tactical position on the counter. The number before the slash is the tactical modifier to use when the unit attacks; the number after the slash is the tactical modifier to use when the unit defends. In a March or Activate Leader action, a leader may contribute its Tactical value to any attack made by a subordinate active unit in the leader's hex, even if the attack is not being made by the unit to which the leader is attached. However in an assault action, the tactical value of the leader initiating the assault is always used, never the tactical value of a military unit or other leader.
Artillery Modifier. The attacker's die roll may be modified by the artillery modifier. (Note: If the defender occupies a woods, city, mountain, or swamp hex, it is not necessary to determine an artillery value differential because no artillery modifier can possibly apply in that circumstance.) The attacker adds the Artillery values of all attacking units and subtracts the combined Artillery values of all defending units from this sum. The result is the "Artillery Value Differential." On the Artillery Modifier Summary, cross-index the appropriate Differential column with the line corresponding to the terrain in the defender's hex. The result (a positive or negative number, or no effect) is the artillery modifier that is applied to the attacker's die roll. Some results call for the attacker to roll the die to determine the final artillery modifier. Note: the final artillery value in the defender's hex is rounded up due to any entrenchments (see 9.0).
Special Cases: If neither the attacker nor defender have Artillery values, no artillery modifier applies. If the defender's Artillery value is 0, a negative artillery modifier is converted to "no effect." If the total of the defenders' printed Artillery values (not counting entrenchments) in the hex is 1, a -2 modifier is converted to -1. If the total of the defenders' printed Artillery values (not counting entrenchments) in the hex is 2, a -3 modifier is converted to -2.
Artillery Modifier Summary (Artillery Value Differential = Attacker's Artillery Value minus Defender's Artillery Value):
| Defender's Terrain | –4 or less | –3 to +1 | +2 to +4 | +5 to +7 | +8 or more |
|---|---|---|---|---|---|
| Clear | -3 | -2 | NE | +1 | +2† |
| Rolling | -2 | -1 | NE | +1* | +1 |
| Rough/Hill• | -1 | -1* | NE | NE | +1* |
| Woods/City/Mtn | NE | NE | NE | NE | NE |
| Swamp§ |
* Just prior to combat, roll a die. If roll is even, indicated modifier is used; if roll is odd, no modifier is used. † Just prior to combat, roll a die. If roll is even, +2 modifier is used; if roll is odd, +1 modifier is used instead. • Also applies to provisional swamp hexes in non-rain turns. § Also applies to provisional swamp hexes in rain turns. NE: No effect.
Terrain. The defender's die roll may be modified by terrain: Bridge/Dam/Ferry/Ford—if an attack takes place across a bridge, dam, ferry, or ford hexside, the defender adds 2 to his roll. Creek—if an attack takes place across a creek (even across a road, pike, RR, or trail hexside), the defender adds 1 to his roll. (Note: If, in a grand assault, more than one hex adjacent to the defender's hex has attacking units, the above modifiers apply only if the defender's hex is separated from the active leader by a bridge, dam, ferry, or ford—or a creek hexside.) Hill—if the defender occupies a hill hex, he adds 1 to his roll. However, if the active attacking unit occupies a hill or mountain hex, or if the active attacking unit is attacking down a ridge hexside, the defender's roll is not modified. Mountain—if the defender occupies a mountain hex, he adds 2 to his roll. However, if the active attacking unit also occupies a mountain hex, or if the active attacking unit is attacking down a ridge hexside, the defender adds only 1 to his roll. Ridge—if an attack takes place across a ridge hexside, and the active attacking unit is attacking up a ridge hexside, the defender adds 2 to his roll. If the active attacking unit is attacking down a ridge hexside the defender adds 1 to his roll if the defender is in a mountain hex and 0 to his roll if the defender is in any other type of hex. (Note: A unit is attacking up a ridge hexside if the ridge between his hex and the defender's hex is within the defender's hex. If it is within the attacker's hex, the unit is attacking down.)
Ridge Combat Example: Geary's Union division occupies Dougherty (AIO W0533), and Cleburne's Confederate division occupies AIO W0532. If Cleburne attacks Geary, Geary adds 2 to his roll (Cleburne is attacking up a ridge hexside). If Geary attacks Cleburne, Cleburne adds 1 to his roll (Geary is attacking down a ridge hexside into a mountain hex).
Lee (Not in RTG). If a Confederate district, corps, or division leader successfully undertakes an assault action and the army leader Lee is currently stacked in the same hex as the active leader, the Confederate player adds 1 to his attack die roll. This bonus is in addition to the +1 modifier due to assault, and is applied regardless of whether or not a "grand assault" takes place. The Lee bonus may never be applied to defending units. The Lee bonus can not be applied in any RTG scenario. The Lee assault bonus may only be used with assaults started by leaders within one corps per turn. Once the Confederate player uses the Lee assault bonus in an assault in a turn, for the remainder of the turn the bonus may only be used with assaults initiated by leaders (corps or division level) from that corps in the current turn. The SEV district (found in Eastern Theater games after 1864 such as GTC) is treated as a corps for purposes of this rule. The Confederate player must state that the Lee bonus will be used immediately before the assault roll. If the subsequent assault roll fails, Lee's bonus is still tied to that corps for the rest of the turn.
Longstreet. In any scenario occurring in 1864 or later, the Confederate player adds 1 to his attack roll if the corps leader Longstreet successfully undertakes an assault action. This bonus is in addition to the +1 modifier due to assault, and is applied regardless of whether or not a "grand assault" takes place. The Longstreet bonus can never be combined with the Lee bonus.
Jackson. In the games SJW, HCR, and SLB the Confederate player adds 1 to his attack roll if the corps leader Jackson successfully undertakes an assault action. This bonus is in addition to the +1 modifier due to assault, and is applied regardless of whether or not a "grand assault" takes place. The Jackson bonus can never be combined with the Lee bonus. Note: in SLB Stonewall Jackson is treated as a leader with a 4 tactical for offense and defense, despite the 5/4 printed on his counter.
Types Of Attacks. In a march, the type of attack chosen by the active player may modify the attacker's die roll: Column of Route –3 to attacker's roll; Hasty –1 to attacker's roll; Normal no modifier to attacker's roll; Prepared +1 to attacker's roll.
Assault Action. In an assault action, modifiers for column of route, hasty, normal, and prepared attacks never apply. Instead, an assault action always provides a +1 modifier to the attacker's die roll.
Rain. The attacker subtracts 1 from all his die rolls in rain turns (see 12.0).
Demoralization–2. If a unit with a Demoralize-2 marker is alone in a hex and is attacked by an enemy unit, the defending player subtracts 1 from his combat die roll. If the demoralized-2 unit is in a stack of friendly units that is attacked, the –1 die roll modifier only applies if more than one-half of the total Combat value in the hex is contributed by units with Demoralize-2 markers.
Flank Attacks. If, at the moment of combat, defending units are partially or completely surrounded by active and inactive enemy units or their ZOC (or impassable terrain), the attacker's die roll is enhanced. This bonus, called a "flank attack," applies even if some of the enemy units surrounding a defender do not participate in the attack. The flank attack bonus is computed as follows:
- "Covered" Hexes: The active player determines the number of "covered" hexes among the six hexes adjacent to the defender. A covered hex is one meeting any of the following conditions: (a) it is occupied by an undemoralized unit friendly to the attacker (including the attacking unit itself); (b) it is in the ZOC of any undemoralized unit friendly to the attacker (including the attacking unit itself and including "restricted" ZOC; see 2.4); (c) it is a mountain or swamp hex (including provisional swamps in a rain turn) or the defender's hex is a mountain or swamp hex, and the two hexes are not connected to each other by a road, pike, RR or trail; (d) it is separated from the defender's hex by a major or minor river hexside not containing a bridge, dam, ferry, or ford (Exceptions: In a turn when a river is unfordable, a hex is covered if it is separated from the defender by a ford hexside over such a river. In a rain turn, a hex is covered if it is separated from the defender by a creek hexside untraversed by a road, pike, trail or RR.); (e) it is a hypothetical hex just off the map that would be adjacent to a map edge hex occupied by the defender. Note: Each of the six hexes adjacent to the defender may be counted only once in this step even if it fulfills more than one definition of "covered."
- Basic Flank Bonus: Six Covered Hexes—if all six hexes adjacent to the defender are covered, the "basic flank bonus" is +4; proceed to Step 3. Five Covered Hexes—if five of the six hexes adjacent to the defender are covered, the "basic flank bonus" is +2; proceed to Step 3. Four or Fewer Covered Hexes—if four or less of the six hexes are covered, there is no flank bonus; skip the rest of this procedure.
- Final Flank Bonus: The basic flank bonus from Step 2 may be reduced to determine the "final flank bonus." The basic flank bonus is reduced by one for each covered hex meeting at least one of the following conditions: (a) it is occupied by an undemoralized unit friendly to the defender; (b) it is unoccupied and is separated from all adjacent units friendly to the attacker (including the attacking unit itself) by woods hexsides (see 2.3) untraversed by a road, pike, trail, or RR (Exception: In SLB only, if the Confederate player is attacking, he ignores Step 3b of the flank bonus procedure. The basic flank bonus is not reduced by one for each unoccupied covered hex separated from adjacent Confederate units by woods hexsides untraversed by a road, pike, or RR. Step 3b does apply to the Union player in SLB.); (c) it is a mountain or swamp hex (including provisional swamps in a rain turn) or the defender's hex is a mountain or swamp hex, and the defender's hex and the covered hex are not connected to each other by a road, pike, trail, or RR; (d) it is separated from the defender's hex by a major or minor river hexside not containing a bridge, dam, ferry, or ford (this case also includes a turn when a river is unfordable, if a hex is separated from the defender by a ford hexside over such a river, and a rain turn, if a hex is separated from the defender by a creek hexside untraversed by a road, pike, trail or RR); (e) it is a hypothetical hex just off the map that would be adjacent to a map edge hex occupied by the defender. Note: Each of the six hexes adjacent to the defender may be counted only once in this step even if it fulfills more than one of the above conditions. Maximum Reduction: The maximum reduction that may be applied to the basic flank bonus in this step is –3, even if a greater reduction would normally apply. Also, the final flank bonus may never be less than 0. Thus, if all six hexes adjacent to a defender are covered (yielding a basic flank bonus of +4 in Step 2), there will always be a final flank bonus of at least +1.
Flank Bonus Reductions: The final flank bonus from Step 3 may be reduced in either of the following circumstances: Flanks Refused—flank attack bonuses may be modified by "Flanks Refused" markers (Flanks Refused markers are no longer optional; they are used in all GCACW games; see 7.8); Cavalry—flank attack bonuses may be modified if both the attacker and defender possess cavalry units (see "Cavalry and Flank Attacks," below).
Flank Bonus Conditions: The status of the attacker's units may modify a flank bonus. If one or more of the attacker's units occupy or exert a ZOC into a hex adjacent to the defender, and all of those units together have a combined Combat Value (not including entrenchments) less than one-fourth the defender's Combat value (including the defender's entrenchments and possibly capped by the Maximum Value from Section 7.2), that hex is not considered "covered" in Step 1a or 1b of the flank attack procedure. (The attacking player's units in different hexes can combine their Combat values to reach the one-fourth the defender's Combat value total, as long as all of the units are adjacent to the same "covered" hex). Demoralized units (active or inactive) belonging to the attacker may not contribute in any way to the achievement of a flank attack bonus. A unit helping to provide a flank attack bonus which does not participate in the attack may not contribute its Tactical value to a combat, nor does it trigger terrain modifiers.
Cavalry and Flank Attacks. The final flank bonus may be reduced if both of the following conditions are in effect: the active attacking unit is a cavalry unit (or the active leader making an assault is a cavalry leader); and more than one-half of the total Combat value in the defender's hex is contributed by cavalry units. If both of these conditions are fulfilled in a combat in which a flank bonus applies, that combat's final flank bonus may be modified as follows: a "final flank" bonus of +4 is reduced to a +2 bonus instead; a "final flank" bonus of +3 or +2 is reduced to a +1 bonus instead; a "final flank" bonus of +1 is ignored (no bonus is awarded). Note: Non-flank attacks under these conditions do not provide the attacker with a +1 die roll bonus, as is the case with Flanks Refused markers (see 7.8). Also, if a Flanks Refused marker is already situated in the defender's hex, or if the defending units occupy a redoubt hex, normal flanks refused/redoubt rules apply instead of the above cavalry rules.
Combat Example (from HSN). In this example, all units' Strength markers are organized; all units are at Fatigue Level 1. Wagner's Union division (Combat/Manpower value, 7; Artillery value, 2; Tactical value, 2) is in hex 4610, a rough hex. Brown's Confederate division (Combat/Manpower value, 8; Artillery value, 2; Tactical value, 2) is performing a march in an Activate Leader action, and is attached to its division leader Cheatham (Tactical value, 3). Armstrong's Confederate brigade (Combat/Manpower value, 2; Artillery value, 0) is currently situated in 4510 (southwest of Wagner). Brown moves into 4611 (east of Wagner) and the Confederate player declares a hasty attack against Wagner, expending his last (one) movement point. The Confederate player must subtract 1 from his combat die roll due to the hasty attack. The Confederate player compares Brown's Combat value (8) to Wagner's Combat value (7) to obtain a combat ratio of 8-7, which is rounded down to a 1-1 ratio. The ratio modifier for a 1–1 attack is 0. The Confederate player compares Brown's Artillery value (2) to Wagner's Artillery value (2). The Artillery Value Differential is 0. Consulting the Artillery Modifier Summary on the "–3 to +1" column and cross-referencing it with the "Rough" terrain line corresponding to Wagner's hex, there is a "–1*" artillery modifier applicable to the Confederate player's die roll. The "*" means that a die must be rolled to determine whether the modifier is used. The Confederate player rolls a die and obtains a 3, so the "-1" modifier is not used. To determine the tactical modifier, the Union player's highest Tactical value in the hex (Wagner's 2) is subtracted from the Confederate player's highest Tactical value (Cheatham's 3). The result is 1, so there is a +1 modifier to the Confederate player's combat die roll. For flank attack purposes, the presence of Armstrong's brigade in W5618 means that five hexes adjacent to Wagner are "covered" because they are either enemy-occupied or enemy ZOC hexes. Armstrong helps to provide a flank attack bonus since his Combat value of 2 is at least one-fourth of Wagner's Combat value of 7. Five covered hexes yields a basic flank attack bonus of +2. This is also the final flank bonus since there are no conditions present reducing the basic flank bonus. The final modifier to the Confederate combat roll is therefore +2: –1 (hasty attack) +0 (ratio) +1 (tactical) +2 (flank) = +2 (final). The Union roll is not modified. Both players roll a die: the Confederate player obtains a 4 (modified by +2 to 6), and the Union player obtains a 2. The Union roll is subtracted from the Confederate roll, yielding a result of +4 (6 – 2 = +4). The Union player cross-references the +4 line with the "7-11" Combat Value column on the Defender's Combat Value (left) side of the Combat Chart (Wagner's Combat value is 7). The result is "1DR". Wagner's Strength marker is removed and is replaced with a new one showing a Manpower value of 6. The new marker is placed on its disorganized side due to the "D". Wagner's Fatigue 1 marker is increased by 3 to Fatigue Level 4. A demoralized-1 marker is also placed on Wagner due to the "R" result. Wagner routs four hexes to 4908, using Retreat Chart 1 for all four hexes entered in the retreat. In all cases, a retreat path hex existed with a Priority Number of 1, so the Union player had to retreat into Priority 1 hexes. The Union player could have retreated two additional hexes past 4908 (using Retreat Chart 2) but declined to do so. There is no additional manpower loss due to this retreat. The Confederate player cross-references the +4 line with the "7-11" Combat Value column on the Attacker's Combat Value (right) side of the Combat Chart. (Brown's Combat value was 8.) The result is "fa". His new Strength marker remains organized because he did not suffer a "D" result, and his Fatigue Level is increased by 1 to Fatigue Level 2 due to the "f" result. Brown's march must now end due to the "f" result, but the "a" allows him to advance into the hex vacated by Wagner. He does so, accompanied by Cheatham, ending the action.
7.5 Combat Results
The Combat Chart is used to resolve combat. A combat produces two results: one for the attacker, one for the defender. To resolve a combat, the defender's modified die roll is subtracted from the attacker's modified roll. On the Combat Chart, the attacker cross-references the result with the column corresponding to his combined Combat value; the defender cross-references the result with the column corresponding to his combined Defense value (prior to applying entrenchment benefits). Both players' results, which are applied immediately, may consist of a number and/or one or two letters. A dash indicates that the player's units are unaffected.
Note: A Combat value may fall between two columns on the Combat Chart (e.g. 3½). If so, round the value up by ½ and use the right column of the two possible choices. Note: Union panic is triggered in the SJW advanced game by any italicized result on the GCACW Standard Combat Chart (see SJW Advanced Rule 6.0).
Letter Results. There are eight possible letter results: D (Disorganize/Fatigue)—the unit's Strength marker is flipped to its disorganized side (if it is already disorganized it remains so); the unit's Fatigue Level is also increased by 3 (to a maximum of 4); if the unit is already at Fatigue Level 4, it remains so; finally, an active unit obtaining a "D" may not expend any more MP—its march action is over and a new Action Phase begins. F (Fatigue-2)—the unit's Fatigue Level is increased by two (to a maximum of 4); an active unit may not spend any more MPs; its march is over and a new Action Phase begins. f (Fatigue-1)—the unit's Fatigue Level is increased by one (to a maximum of 4); an active unit may not spend any more MP; its march is over and a new Action Phase begins. E (End Action)—an active unit may not spend any more MP; its march is over and a new Action Phase begins; this result has no effect on an assault action, since an assault automatically ends after the combat has been resolved. r (Retreat)—the unit must retreat (see 7.6). R (Rout/Demoralize-1)—the unit is routed (see 7.6); also, the unit gains a Demoralize-1 marker; if it already has such a marker, it is flipped to its Demoralize-2 side; if it is already at Demoralize-2, there is no further effect. R* (Rout/Demoralize-2)—the unit is routed (see 7.6); also, the unit gains a Demoralize-2 marker; if it is already at Demoralize-1, flip the marker to its Demoralize-2 side and there is no further effect; if it is already at Demoralize-2, its Manpower value is reduced by one in addition to its normal manpower loss result. a (Advance)—the unit may advance after combat (see 7.6).
Note: An "extended march" never takes place due to a combat result, even if a unit goes to a new Fatigue Level of 2, 3 or 4.
Number Results. Number results, which precede letter results, indicate a reduction of the unit's Manpower (not Artillery) value. Remove the unit's Strength marker and replace it with another one showing its reduced Manpower value (i.e., the unit's Manpower value before the combat minus the number result). The new Strength marker may assume a new status (organized or disorganized): if the original Strength marker was disorganized before the combat, the new Strength marker is also disorganized; if the original Strength marker was organized prior to the combat, the new Strength marker is disorganized if the combat result contains a "D" (Disorganized/Fatigue), or organized if the combat result does not contain a "D." Exception: If in a grand assault, the total Combat value of attacking units is 80 or more, the attacker's Manpower value loss in that combat is increased (see 7.2).
Applying Results. Attacker: In a march, the attacker's letter and number results apply only to the active unit, even if other friendly units occupy the same hex. In an assault, the attacker's letter result applies to each participating unit, including those joining in a grand assault. The attacker's number result applies to the attacking force as a whole—not to each individual unit. As long as the number result is fully applied, the attacker may divide it among any of his attacking units as he wishes. Units providing flank attack bonuses which do not participate in the attack are unaffected by combat results. Defender: The defender's letter result applies to each defending unit. The defender's number result applies to the defending force as a whole—not to each individual unit. As long as the number result is fully applied, the defender may divide it among any of his defending units as he wishes. Combat results are always applied to the defending unit(s) before they are applied to the attacking unit(s).
Entrenchments And Combat Values. Defending units' Combat values may be enhanced by entrenchments (see 9.0). However, when determining the defender's combat result, the Combat Chart columns represent the defender's Combat value prior to the application of entrenchment benefits. Example: If Hindman's division defends with a Combat value of 8, its combat result is determined in the "7 to 11" column of the Combat Chart. If Hindman's division defends under a completed Breastwork marker, its Combat value is 16 (8 x 2). Although Hindman's Combat value of 16 would be used to calculate the ratio in that combat, its combat result is determined in the "7 to 11" column of the Combat Chart.
Unit And Leader Elimination. A unit is eliminated at the moment its Manpower value is reduced to 0. If, due to the elimination of a unit, a leader remains in that hex with no subordinate units, the leader is placed in the nearest hex occupied by a subordinate. A leader is eliminated at the moment no units subordinate to that leader exist.
7.6 Retreats, Routs, and Advances
There are three types of retreats: normal ("r"), rout ("R"), and cavalry retreat. In a normal retreat, a player must retreat all his defending units a minimum of two hexes and a maximum of four hexes. In a rout, a player must retreat all his defending units a minimum of four hexes and a maximum of six hexes. See 7.7 for cavalry retreats. The choice of retreat distance and path is left to the defender, as long as the path adheres to the following rules. Retreating units must move as a stack and cannot separate. Leaders must accompany retreating units with which they are attached. MP are not expended in retreats and, with the following exceptions, terrain is irrelevant.
Retreat Restrictions. Retreating units are subject to the following restrictions: Mountains and Swamps—a retreating unit may only enter or exit a mountain or swamp hex (including a provisional swamp hex in a rain turn) across a road, pike, trail, or RR hexside. Rivers—a retreating unit may cross a major or minor river hexside only at a bridge, dam, ferry, or ford; in a rain turn, a unit may not retreat across a ford hexside or a creek hexside untraversed by a road, pike, trail, or RR. Off-Map—a unit may not retreat off the map. Start Hex—a retreating unit may not enter the hex where a retreat began. Same Hex—a retreating unit may not enter the same hex twice. Adjacent Hex—a retreating unit may not end a retreat in a hex adjacent to the hex where the retreat began (Exception: The retreating unit may end up adjacent in a one-hex voluntary retreat, see "Defender's Retreat Option"). Closer to Attacker—a retreating unit may not enter a hex that is closer to the active enemy unit triggering the retreat than the hex retreated out of, counting by the shortest possible path; if there is a Grand Assault, the active enemy unit is the one initiating the corps assault; a unit may not retreat into the hex occupied by the active enemy unit.
Surrender: If there is no hex to retreat into that does not violate any of the aforementioned restrictions, a retreating unit surrenders, and is eliminated from play. VP are awarded for this occurrence.
Retreat Priorities. In addition to adhering to "retreat restrictions," a retreating player must follow "retreat priorities," which are listed on Retreat Charts 1 and 2. A retreating unit must adhere to retreat priorities in each hex entered in that retreat. Furthermore, the appropriate chart to use may change from hex-to-hex in that retreat.
Retreat Chart 1: A player must use Retreat Chart 1 in any of the following cases: for the first hex entered in a normal retreat; for each of the first four hexes entered in a rout/cavalry retreat; if in a retreat, rout, or cavalry retreat, a unit exits an enemy ZOC (including "restricted" ZOC; see 2.4).
Retreat Chart 2: A player must use Retreat Chart 2 in any of the following cases: for the second, third, or fourth hexes entered in a normal retreat, assuming the unit is not exiting an enemy ZOC; for the fifth or sixth hexes entered in a rout/cavalry retreat, assuming the unit is not exiting an enemy ZOC.
Using the Retreat Charts: Prior to entering each hex in a retreat, a player checks the appropriate chart and follows this procedure: 1. Check Legal Retreat Hexes: The player determines how many of the six hexes adjacent to the retreating unit may be legally retreated into according to the "retreat restrictions" rules. 2. Retreat Description: For each of the legal retreat hexes determined in Step 1, the player determines the "Retreat Description" from the appropriate Retreat Chart corresponding to a retreat into that hex. 3. Priority: Each Retreat Description consulted in Step 2 has a corresponding "Priority Number." The player must retreat his unit into a hex using the Retreat Description from Step 2 with the lowest Priority Number. (Exception: see "Overriding Retreat Priorities.") If more than one hex fulfills this requirement, the player may retreat his unit into any of those hexes. Also, if two different Retreat Descriptions have the same Priority Number, the player may choose either description when retreating into a hex. 4. Complete Retreat: The player repeats Steps 1, 2, and 3 for each hex entered in that retreat. When he fulfills retreat requirements (at least two and up to four hexes in a normal retreat; at least four and up to six hexes in a rout or cavalry retreat), the retreat is over.
Overriding Retreat Priorities. If, by adhering to retreat rules, there is no possibility of avoiding surrender of a retreating unit due to "retreat restrictions," a player may "override" retreat priorities no more than once in that retreat. To override, a player may retreat a unit into a hex by choosing any Retreat Description on the appropriate chart, regardless of its Priority Number. He is not obligated to choose the lowest Priority Number. If the unit cannot avoid surrender due to a single override, it is eliminated. The player can make this override at any point in the retreat path, it does not have to be at the exact point that destruction would occur; thus the player may look ahead to avoid destruction. For example, if in a retreat path by following the retreat priorities a unit would get destroyed in the 3rd hex, the unit is allowed to do its override in the 1st or 2nd or 3rd retreat hex.
Manpower Loss. If a unit retreats into a hex using a Retreat Description with an accompanying Manpower loss, the retreating unit's Manpower value is reduced by the indicated number. Replace its Strength marker with a new one on its disorganized side reflecting the loss. If a stack of more than one unit retreats into a hex calling for Manpower loss, the loss number is applied to each unit in the stack—not just one. Note: Manpower losses in retreats may vary depending on whether a unit retreats into a hex across a road, pike, trail, or RR hexside, or if the hex retreated into is friendly-occupied (see Retreat Charts). In a retreat, entering or exiting a city hex is the equivalent of crossing a road hexside, even if no road actually crosses that hexside.
Basic Retreat Principles. At first it may seem difficult to consult the Retreat Charts for every hex entered in a retreat. However, players will find them easy to use after a few games. To help the players become more familiar with the Retreat Charts, some of their basic principles are outlined below. Retreat Chart 1: the highest priority retreat is to move one hex more distant from the active enemy unit by crossing a road, pike, trail, or RR hexside into a nonenemy-occupied/non-enemy-ZOC hex. If that cannot be achieved, the next-highest priority is to attempt to do the same thing by crossing a non-road/pike/trail/RR hexside. If that in turn cannot be achieved, the next-highest priority is to retreat into any hex that is not enemy-occupied, nor in an enemy-ZOC. (This may incur manpower loss.) If that in turn cannot be achieved, the next-highest priority is to avoid retreating into an enemy-occupied hex. (This may incur manpower loss.) Retreat Chart 2: the highest priority retreat is to move into any hex that is not enemy-occupied, nor in an enemy-ZOC. If that cannot be achieved, the next-highest priority is to avoid retreating into an enemy-occupied hex. (This may incur manpower loss.)
Retreats Into Enemy-Occupied Hexes. Some Retreat Descriptions allow retreats into an enemy-occupied hex, an occurrence which causes a Manpower value loss of three to the retreating unit. (However, a unit may never retreat into the hex occupied by the active enemy unit.) A unit may not end its retreat in an enemy-occupied hex. If there is no alternative except to do so, its retreat may be extended by a sufficient number of hexes so that it ends the retreat in a hex unoccupied by an enemy unit.
Defender's Retreat Option. On any combat result applying to the defender not containing an "r" or "R", the defender may voluntarily retreat one or more of his units from one to four hexes subject to retreat rules. This is considered a retreat, not a rout. In this case the defender may end the retreat in a hex adjacent to the hex where the retreat began. There is no Fatigue cost to do this. (Exception: If the defender receives a "—" result [no effect], all units participating in the defender's retreat option gain one Fatigue Level, to a maximum of level 4.) Even units at Fatigue Level 4 may join in this retreat. The defender must execute a voluntary retreat immediately, before the enemy player performs further actions.
Advance After Combat. If the attacker receives an "a" result, none, some, or all of the attacking units may advance into the hex vacated by the defender. An advance is not considered movement and does not expend MP. A unit may enter or exit an enemy ZOC, or advance from one enemy ZOC to another, without penalty. Regardless of whether or not a unit obtaining an "a" advances, its march may continue as long as it did not also suffer a "D", "F", "f", or "E" result. However, it may not continue to move if it advances into an enemy ZOC. In this case, the unit must either attack again or end its march. Leaders (including army/district leaders) may advance with subordinate units (and must advance if no subordinate units remain in the leader's hex). A leader may advance with a subordinate unit to which it had not been attached prior to the attack, although if it does so the active player must specify its new attachment. A leader may not advance with and attach to a non-subordinate unit.
7.7 Cavalry Retreat
A cavalry unit may use "cavalry retreat" to avoid attack by an enemy infantry or artillery (not cavalry) unit. A cavalry unit may perform a cavalry retreat more than once per action. The player owning a cavalry unit may declare a retreat in any of the following circumstances: Enemy Movement—an enemy infantry/artillery unit performing a march moves into a normal (not restricted) ZOC exerted by a cavalry unit. Starts Adjacent—an enemy infantry/artillery unit begins a march in a normal (not restricted) ZOC belonging to a cavalry unit. (Exception: If an enemy infantry unit begins a march in a restricted ZOC belonging to a cavalry unit and selects the cavalry unit as the target of his attack in Step 1 of the Attack Procedure, then the cavalry unit may perform a cavalry retreat.) Advance After Combat—an enemy infantry/artillery unit advances after combat into a cavalry unit's normal (not restricted) ZOC. Assault—the enemy player declares an assault action against a hex containing at least one cavalry unit (unless the assault is declared by a cavalry leader—in which case a cavalry retreat is not possible). A player wishing to declare a cavalry retreat must make his declaration as soon as any of the above circumstances occur—before the enemy player declares an attack (or, in the case of an assault action, before the enemy player rolls a die to determine whether or not the assault takes place). If he does not make the declaration at this moment, he forfeits his ability to perform a cavalry retreat in the hex occupied by his cavalry unit for the duration of the enemy unit's march.
Performing A Cavalry Retreat. A cavalry retreat is voluntary. A cavalry unit may perform a retreat regardless of its status—even if it is demoralized, disorganized, exhausted, or at Fatigue Level 4. A player wishing to perform a cavalry retreat states this fact as soon as his opponent has performed one of the aforementioned actions. The enemy unit's march (or assault) is temporarily suspended while the retreat takes place. A cavalry retreat is performed as follows: 1. Roll Die: The cavalry player rolls a die. This roll may be modified (see Cavalry Retreat table in Charts & Tables handout). The modified roll is halved (round fractions down to a whole number). The result is the number by which the enemy unit's Active Movement Allowance marker is reduced on the Movement Track. In assault actions, this roll has no effect since no Movement Allowance is determined. However, the roll still takes place to see if the cavalry unit suffers loss in Step 2. 2. Manpower Loss: If the Step 1 roll (before modifications and halving) is 1, the cavalry unit's Manpower value is reduced by one. Place the new Strength marker on its disorganized side. On a roll of 2 to 6, no loss occurs. 3. Retreat 4–6 Hexes: The cavalry unit must retreat from four to six hexes. The retreating player must adhere to retreat restrictions, using Retreat Charts 1 and/or 2 to fulfill this retreat. However, a cavalry unit does not suffer any Manpower value loss in a cavalry retreat, even if it retreats into a hex calling for a loss on a Retreat Chart. (Exception: If in a cavalry retreat, a unit retreats into an enemy-occupied hex, Retreat Priority #5 applies and the unit(s) suffers a Manpower value loss of 3. Note: A cavalry unit may use the above rule 7.6, "Overriding Retreat Priorities", to attempt to avoid destruction.) 4. Fatigue: After executing its retreat, the cavalry unit's Fatigue Level is increased by 1 (to a maximum of 4). Note: An extended march is never triggered by a cavalry retreat. 5. Disorganization: The cavalry unit's Strength marker is flipped to its disorganized side. If it is already disorganized, there is no further effect. 6. Resume Action: The active enemy unit or leader resumes its activities from the point of interruption. If a unit's Movement Allowance has been reduced to 0, its march ends. (Exception: If the unit has not yet moved, it is permitted to move one hex; see 6.2. It may not refuse flanks.) In an assault action, if the hex the active leader is assaulting is completely vacated by the cavalry retreat, the units participating in the assault may advance into the hex vacated by the cavalry unit. No attack occurs and the assault action ends. (Exception: If the active player's command die roll in Step 5 of the assault procedure is unsuccessful, the units participating in the assault may not advance into the hex vacated by the cavalry unit.)
Cavalry Stacked With Other Units. With Cavalry Unit: If two or more cavalry units are stacked in the same hex, they must perform a cavalry retreat together. Only one die roll is made in Step 1, and all units must end the retreat in the same hex. If a 1 is rolled for the cavalry retreat, only 1 cavalry unit suffers a manpower loss. With Infantry Units: A cavalry unit stacked with an infantry unit may perform a cavalry retreat, but the infantry unit may not.
Multiple Cavalry Retreats. Same Unit: A cavalry unit may perform a cavalry retreat more than once per action. Cavalry Units—Separate Hexes: If two or more cavalry units occupying separate hexes are eligible to perform a cavalry retreat and all of them wish to retreat, each performs the retreat separately. The enemy unit's Movement Allowance reduction, if any, is cumulative.
7.8 Refusing Flanks
At a cost of one MP, the active player may place a "Flanks Refused" marker of the appropriate side on top of a unit performing a march. (Exception: A Flanks Refused marker may not be placed on a unit in a mountain or swamp hex; also, it may not be placed on top of a unit performing an assault.) As soon as a unit gains a Flanks Refused marker, its march ends. (It may perform actions later.) Since a unit must stop moving upon entering an enemy normal ZOC, it may not refuse flanks when entering an enemy normal ZOC. A unit may refuse flanks if it marches in place in a hex with an enemy normal ZOC (an extended march must be done if required per 5.1). A maximum of one Flanks Refused marker may exist in a hex at a time; its effects apply to all units in the hex. A unit does not have to spend one MP to enter a hex in which a Flanks Refused marker is already situated; it may enter the hex at no extra MP cost and receive the marker's benefits—and may continue its march. A Flanks Refused marker never accompanies a unit when it leaves a hex. A marker may not be placed on a unit after it performs a retreat, rout, or advance after combat. The players are not limited to the number of markers provided in the game.
Effects Of Flanks Refused Markers. Units in a hex with a Flanks Refused marker may perform all actions normally (although they may be forced to remove the marker after the action is over; see below). Units occupying a hex containing a Flanks Refused marker defend against enemy flank attacks more effectively, but less effectively against normal attacks: flank attacks fulfilling the requirements for a +4 attacker die roll bonus are reduced to a +2 bonus instead; flank attacks fulfilling the requirements for a +3 or +2 attacker die roll bonus are reduced to a +1 bonus instead; flank attacks fulfilling the requirements for a +1 attacker die roll bonus are unchanged (the bonus remains +1); all non-flank attacks always provide the attacker with a +1 die roll bonus (in addition to other modifiers), even though requirements for flank attacks have not been fulfilled.
Removal Of Flanks Refused Markers. A Flanks Refused marker may be voluntarily removed from a stack of units at no MP cost if one of the units in the hex initiates a march. (The active unit does not actually have to leave the hex.) The marker must be removed if all the units in the hex participate in an assault action. It also must be removed if only one unit is in a hex and it moves or attacks. (This does not preclude the owning player from placing another marker on the unit later in its march at a cost of one MP.)
8.0 Recovery
In the Recovery Phase, the following actions are performed strictly in the listed order:
- Units at Fatigue Level 0 may entrench, build bridges, or repair bridges/ferries. A unit may not perform more than one of the aforementioned activities per Recovery Phase and may not perform any at all in a rain turn or if demoralized. In RTG, Confederate infantry units may impose a "levy" on Pennsylvania towns in this step (see RTG 14.0).
- In the Advanced Game, units at Fatigue Level 0, 1, or 2 may forage (see each GCACW game's "Forage" rules), but not if they undertook any activities in Step 1 of the Recovery procedure. Note: Units in RTG and SLB may not forage.
- Units at Fatigue Level 0 or 1 may be affected as follows: (a) Units at Fatigue Level 0 or 1 with disorganized Strength markers have their Strength markers flipped to their organized sides. Exceptions: If a unit has a Demoralize-2 marker at the start of this step, its Strength marker remains disorganized. Also, in each GCACW volume's Advanced Game, out of supply units with disorganized Strength markers remain disorganized. Note that there is no "out of supply" status in SLB and RTG. (b) Units at Fatigue Level 0 or 1 which are on their exhausted sides are flipped to their normal sides. Exception: If an exhausted unit has a Demoralize-2 marker at the start of this step, it remains on its exhausted side. (c) Units at Fatigue Level 0 or 1 with Demoralize-1 markers have these markers removed; units at Fatigue Level 0 or 1 with Demoralize-2 markers have these markers flipped to their Demoralize-1 sides.
- Units at Fatigue Level 3 or 4 are flipped to their exhausted (reverse) sides. If they are already on their exhausted sides, they remain so and there is no further effect.
- All units at Fatigue Level 1 or more lose three Fatigue Levels (to a minimum Fatigue Level of 0). Replace each unit's Fatigue marker with a new marker three less than the one being removed. (Units at Fatigue Level 0 do not have markers.)
- In the Advanced Game Scenarios of HCR, SIV (Union units only), OTR, GTC, BAC, RWH (Confederate units only), SJW, AGA, AIO, and TPC out of supply units with organized Strength markers have their Strength markers flipped to their disorganized sides. Note: Step 6 of the Recovery Phase is skipped in SLB, RTG, and HSN because units are never out of supply in those games.
9.0 Entrenchments
Entrenchments enhance a unit's defensive capabilities. Units may construct entrenchments in the Recovery Phase, and in games taking place in 1863 or later, in the Action Phase. Players may also gain entrenchment benefits from a hex feature called "redoubts." Another hex feature, a permanent Fort, provides even further defensive capabilities and is described in the Advanced Game Rules of any module in which it appears. Permanent Forts typically provide the same entrenchment benefit as a Redoubt when units occupy those hexes.
Building Entrenchments. There are four types of entrenchments: redoubts, abatis, breastworks, and forts. Redoubts and permanent Forts, which are printed on the map and represent permanent fortifications, may not be built. However, abatis, breastworks, and forts may be built in either the Action Cycle (see 5.5) or the Recovery Phase. Units building entrenchments in the Recovery Phase must be at Fatigue Level 0. A unit building a bridge or repairing a bridge/ferry may not also entrench in the same Recovery Phase. Units may not entrench in rain turns or if demoralized. The procedure for building entrenchments in the Action Phase (for games in 1864-1865 or games in 1863 if the Entrenchment Action optional rule is being used) is described in Section 5.5. The procedure for building entrenchments in the Recovery Phase is described below. Depending on the year depicted in the game being played, players use one of three different procedures. Please select the appropriate procedure for the time frame of the game: 1861 (games occurring within the year 1861); 1862 (games occurring within the year 1862); 1863 (games occurring within the year 1863); 1864-1865 (games occurring in 1864 or later).
Entrenchments (1861): AGA. 1861 Entrenchment Procedure: if a unit entrenches, place an Abatis-Build marker atop the unit (Exception: if a Confederate unit entrenches in a redoubt hex, place a BW-Complete marker atop the unit); if a unit already possessing an Abatis-Build marker entrenches, place an Abatis marker atop the unit; if a unit already possessing an Abatis marker entrenches, place a BW-Complete marker atop the unit. Forts: the only units that may be entrenched above the BW-Complete level are those that start a scenario in a fort marker. If those units leave the fort marker they may not re-entrench beyond the BW-Complete level.
Entrenchments (1862): SJW, HCR, SIV, and OTR. 1862 Entrenchment Procedure: if a unit entrenches, place a Breastwork–Build marker atop the unit (Exception: If a unit is in a redoubt hex that it is eligible to benefit from, place a Breastwork-Complete marker atop the unit); if a unit already possessing a Breastwork–Build marker entrenches, flip the marker to its Complete side; if a unit already possessing a Breastwork–Complete marker entrenches, place a Fort–Build marker atop the unit; if a unit already possessing a Fort–Build marker entrenches, flip the marker to its Complete side.
Entrenchments (1863): SLB, RTG and BAC. 1863 Entrenchment Procedure: if a unit without an entrenchment marker (or possessing a Breastworks-Build) entrenches, place a Breastwork marker atop the unit — this is the equivalent of the 1862 "Breastwork–Complete," and in SLB, the Complete side of the Breastwork marker is used (Note: if a unit is in a redoubt hex (that it is eligible to benefit from), this same procedure is still used); if a unit already possessing a Breastwork marker entrenches, place a Fort–Build marker atop the unit; if a unit already possessing a Fort–Build marker entrenches, flip the marker to its Complete side.
Entrenchments (1864-1865): GTC, AIO, RWH, HSN, TPC. 1864-1865 Entrenchment Procedure: if a unit without an entrenchment marker entrenches, place a Breastwork marker atop the unit (Exception: if a unit is in a redoubt hex that it is eligible to benefit from, place a Fort-Build-1 marker atop the unit); if a unit already possessing an Abatis marker entrenches, place a Fort-Build-1 marker atop the unit; if a unit already possessing a Breastworks-Build marker entrenches, place a Fort-Build-2 marker atop the unit; if a unit already possessing a Breastworks, Fort-Build-1, or Fort-Build-2 marker entrenches, place a Fort Complete marker atop the unit.
Removing Entrenchments. A unit's Abatis, Breastwork or Fort marker is removed at the moment the unit leaves the hex. If a unit with an Abatis, Breastwork or Fort marker exits a redoubt hex, its marker is removed but there is no effect on the permanent redoubt.
Effects Of Entrenchments. Entrenchments may enhance the Combat and Artillery values of defending (not attacking) units: many of the games in the series have Redoubts either printed on the map or added with special counters (the basic rules for each game define which player owns and gets the benefits for the Redoubts in that game); units in a redoubt hex (that they are eligible to benefit from) with no other entrenchments have their Combat and Artillery values multiplied by 1.5 when defending (for Combat values, retain fractions; for Artillery values, multiply the sum of all the Artillery values in the hex by 1.5 and round fractions up to the nearest whole number); all Naval Batteries printed on the maps are considered to also contain a Confederate Redoubt (even if there is a destroyed Naval Battery counter in the hex); units directly under an Abatis marker (or a Breastworks-Build marker if the year is 1864 or later) have their Combat and Artillery values multiplied by 1.5 when defending; units directly under a completed Breastwork, a Fort-Build marker (1863 or earlier), or a Fort-Build-1 marker (1864 or later) have their Combat and Artillery values doubled when defending; units directly under a Fort-Build-2 marker (1864 or later) have their Combat and Artillery values multiplied by 2.5 when defending; units directly under a completed Fort marker have their Combat and Artillery values tripled when defending; units directly under a Breastworks-Build marker do not have their Combat and Artillery values modified if the year is 1863 or earlier. Abatis, Breastwork, and Fort effects apply individually by unit, not by hex. In a stack of units, some may possess markers while others do not. Only units which actually entrenched in an earlier Action or Recovery Phase receive the Combat/Artillery value multiple provided by an entrenchment marker. Units without markers in the same hex use unenhanced values.
Exception: Units in a redoubt hex belonging to a player eligible to receive redoubt benefits gain the defensive benefit of the redoubt. However, only those units which entrench further in an Action or Recovery Phase gain defensive enhancements beyond those provided by the redoubt. Entrenchments do not enhance the combat value of units for the purposes of determining if they have enough Combat value to contribute to the achievement of a flank bonus (see "Flank Bonus Conditions", 7.4). Entrenchments also do not boost a unit's Combat value for the purpose of determining the additional MP cost to enter that unit's hex (see "Enter Friendly-Occupied Hex", 6.2).
Flank Attacks Against Redoubt Hexes. If a unit occupies a redoubt and is eligible to receive defensive benefits from that hex, its defensive capabilities against some flank attacks are enhanced (see 7.4). +4 Bonus: If the attacking player fulfills requirements for a +4 final flank bonus in an attack against one or more units in a redoubt hex, that bonus is reduced to +2. +3/+2 Bonus: If the attacking player fulfills requirements for a +3 or +2 final flank bonus in an attack against one or more units in a redoubt hex, that bonus is reduced to +1. +1 Bonus: If the attacking player fulfills requirements for a +1 final flank bonus in an attack against one or more units in a redoubt hex, he receives no flank bonus at all. Unlike Flanks Refused markers, non-flank attacks against redoubt hexes do not provide the attacking player a +1 die roll bonus. Defending units situated under Breastwork or Fort markers in redoubt hexes retain the redoubts' capabilities against flank attacks. However, Breastwork or Fort markers situated in non-redoubt hexes do not provide these capabilities.
10.0 Bridges, Dams, And Ferries
Units may cross major and minor rivers only at bridges, dams, ferries, and fords. A unit entering a hex across a bridge, dam, or ford ignores the cost of the major terrain in that hex and instead pays 1 MP as long as a road, pike, or RR crosses that bridge, dam, or ford. A unit also pays 1 MP if a pontoon bridge is constructed over that river (as long as both hexes connected by the pontoon bridge have a road, pike, trail, or RR in them). Units entering a hex across a bridge or ford which is not traversed by a road, pike or RR must pay that hex's major terrain MP cost. (See 6.2 for ferry MP penalties.) Roads crossing creek hexsides are not considered bridges, dams, ferries, or fords.
10.1 Pontoon Bridges
In the GCACW Standard Rules, bridges built during the game are known as "pontoon" bridges to differentiate them from "permanent" bridges which are printed on the map. Also, in all GCACW games except SLB (see below), a player must make a die roll if he wishes to build a bridge, rather than building it automatically. Note: In SLB, all original bridge building rules (see SLB 10.0) are in effect, including major river bridges. These rules are unmodified by the GCACW Standard Rules.
Building Pontoon Bridges. Eligible infantry units may attempt to build pontoon bridges. Note: In some GCACW games, units had formerly been prohibited from building bridges over major rivers, but this is now permissible in the Standard Rules. Also, in the Standard Rules, bridges may always be built at fords. An infantry unit is eligible to build a pontoon bridge only if it meets all of the following conditions in Step 1 of the Recovery Phase: it is at Fatigue Level 0 and is not demoralized; it has a Combat value of 5 or more (Exception: In SIV, it must have a Combat value of 3 or more); it occupies a hex containing at least one unbridged/undammed major or minor river hexside (Exception: Confederate units may only attempt to build a bridge over a major river in OTR, GTC, AIO, and TPC. Union units may attempt to build a bridge over a major river in all GCACW games except SIV); it must not have entrenched or repaired a bridge or ferry in the same Recovery Phase; if the bridge is to be built over a minor river, the player must have an unused minor river Bridge marker (Exception: In SJW, HCR, RTG, and SIV, the number of minor river Bridge markers in the game is not a limit — players may build as many minor river bridges as they wish); if the bridge is to be built over a major river, the player must have an unused major river Bridge marker. In games in which either or both players may build major river bridges, they are limited to one major river Bridge marker each. Exceptions: in AIO the Union may build 3 major river bridges, in SLB the Union may build 2, and in TPC each side may build 3. If a game limits the number of Bridge markers that may be employed, and all the Bridge markers of that type are in use, a player may not build a pontoon bridge of that type until one or more markers become available for use again due to dismantling or destruction (see 10.2).
Pontoon Bridge Restrictions. Cavalry/artillery units and leaders may not build bridges. Bridges may not be built across creek hexsides. A bridge may not be built between two hexes if one of the hexes contains an enemy unit (or units) with a combined Combat value of 5 or more. It may be built into a hex if the enemy unit(s) in that hex have a combined Combat value of less than 5. Entrenchments are not taken into account in determining the Combat value that prevents a bridge from being built. (Exception: In SIV, a bridge may not be built between two hexes if one of the hexes contains an enemy unit (or units) with a combined Combat value of 3 or more. It may be built into a hex if the enemy unit(s) in that hex have a combined Combat value of less than 3.) An eligible unit may attempt to build a maximum of one bridge per Recovery Phase, although it may attempt to build more than one bridge per game—even in the same hex. A maximum of one infantry unit per hex may make a bridge-building attempt in Step 1 of each Recovery Phase. A maximum of one bridge (of any kind) may be situated on each hexside at any time. Units may not build bridges in rain turns.
Pontoon Bridge Construction. For each eligible unit attempting to build a bridge in Step 1 of the Recovery Phase, the owning player follows this procedure (Exception: In SLB, bridges are not built according to this procedure. The original SLB bridge rules are in effect.): 1. He specifies the hexside over which the bridge will be built. 2. He rolls a die, modifying this roll if necessary (see below). 5 or Less: If the modified roll is 5 or less, the bridge is successfully built. Place an appropriate Bridge marker (minor or major) belonging to the building player directly on the hexside, with one end of the bridge symbol pointing to the unit's hex and the other end pointing to the hex directly across the river. (Exception: On an unmodified die roll of 6, the bridge is not built.) 6 or More: If the modified roll is 6 or more, the bridge is not built. No action is taken. Another attempt to build a bridge across that hexside may not be made until the following turn.
Construction Die Roll Modifiers. A player's pontoon bridge construction die roll is modified if any of the following conditions are in effect (modifiers are cumulative): –3 if the Confederate player attempts to build a major river bridge within 10 hexes of the Confederate Capitol (OTR N0627); –1 if the Union player attempts to build a minor river bridge in 1865; +1 if the river being bridged is currently unfordable (see 12.0); +1 if the bridge is being built between hexes OTR S3409 and OTR S3509 (Barrett's Ferry); +2 if the river being bridged is a major river (does not apply to the Union starting in June 1864); +1 if there is no ford or ferry (or destroyed permanent bridge or ferry) across the hexside being bridged—but there is a road, pike, trail, or RR in both of the hexes to be connected; +2 if there is a road, pike, trail, or RR in only one of the two hexes to be connected; +3 if both of the hexes to be connected do not contain a road, pike, trail, or RR.
Note: If a pontoon bridge is successfully built, it is considered to have a road (not pike) running across it as long as both hexes connected by the bridge have roads, pikes, trails, or RR in them. Otherwise the bridge is not considered to be traversed by a road.
Chatham Bridge in SJW/SLB: In SJW, Chatham Bridge (S4328-S4427) is considered a Union pontoon bridge, even though it is printed on the map. It is subject to all GCACW Standard Rules applying to dismantling and destruction (see 10.2), and it may be rebuilt if it is destroyed or dismantled. Chatham Bridge does not count against the Union player's limit of one major river bridge in SJW. In SLB, Chatham Bridge is considered destroyed at the start of the game.
10.2 Destroying Bridges and Ferries
In the GCACW Standard Rules, rules for bridge/ferry destruction and dismantling supersede the pertinent rules sections in all GCACW games, including the SIV Advanced Game (see SIV, 23.1). In all games, permanent bridges, pontoon bridges, and ferries may be destroyed, although permanent bridges/ferries are more difficult to destroy than pontoon bridges. Bridges and ferries may be destroyed in rain turns and while rivers are unfordable.
Destroying Pontoon Bridges. When a player builds a pontoon bridge, he "owns" it. Enemy units may not cross that bridge in a march, retreat, or advance after combat; nor may they attack across it. The bridge remains on the map until an undemoralized enemy unit with a Combat value of 5 or more (or, in SIV, 3 or more) ends a march, retreat, or advance after combat in one of the two hexes connected by the bridge. At that time the Bridge marker is immediately removed. A pontoon bridge is automatically destroyed at the end of the Attachment Phase if the previous turn's Recovery Phase or the current turn's Attachment Phase has caused an undemoralized enemy unit to have an unentrenched combat value of 5 or more (or, in SIV, 3 or more) in one of the two hexes connected by the bridge. Entrenchments are not taken into account in determining the Combat value that is needed to destroy a bridge. ZOC extend across undestroyed bridges normally, even a pontoon bridge constructed by the enemy player.
Dismantling. If at any time during a march, an active unit occupies one of the two hexes connected by a friendly pontoon bridge, the active player may "dismantle" that bridge. If so, the Bridge marker is removed. This does not cost any MP, and the active unit may continue its march afterwards.
Destroying Permanent Bridges And Ferries. If an undemoralized infantry unit with a Combat value of 5 or more (or, in SIV, 3 or more) ends a march in either of the two hexes connected by a permanent bridge, or if an infantry or cavalry unit of any Combat value ends a march in either of the two hexes connected by a ferry, the active player may attempt to destroy that bridge/ferry. A unit may make a maximum of one attempt to destroy bridges/ferries per turn. However, a player may make more than one attempt to destroy the same bridge/ferry in a turn, as long as the attempts are made by different units. (Exceptions: If an enemy unit occupies one of the two hexes connected by a bridge/ferry, the active player may not attempt to destroy it. Also, if one of the two hexes connected by a bridge/ferry is an enemy ZOC—including restricted ZOC—and that ZOC is not occupied by a friendly unit, the active player may not attempt to destroy it. Finally, some permanent bridges are indestructible (see below).) Dams and Fords: Dams and fords may not be destroyed.
Permanent Bridge/Ferry Destruction Procedure: To attempt to destroy a permanent bridge or ferry, a player rolls a die (this roll may be modified; see below). Bridge: If the modified roll is 2 or less, a permanent bridge is "destroyed." If the modified roll is 3 or more, the attempt to destroy the permanent bridge has failed. Ferry: If the modified roll is 1 or less, a ferry is "destroyed." If the modified roll is 2 or more, the attempt to destroy the ferry fails. If a permanent bridge/ferry is destroyed, place a "Destroyed" marker directly on the hexside. If a destroy attempt fails, the player may attempt to destroy the bridge/ferry again, as many times as he wishes, as long as a given unit makes no more than one attempt per turn. Note: SLB does not have Destroyed markers. Players may use Destroyed markers from other games, if available, or they may make their own markers.
Destruction Die Roll Modifiers: If a player attempts to destroy a permanent bridge or ferry, his die roll is modified if any of the following conditions are in effect (modifiers are cumulative): –2 if the Confederate player is attempting to destroy a ferry; –1 if neither hex connected by the bridge/ferry is an enemy ZOC hex (including restricted ZOC); –1 if the active unit attempting the destruction spent its entire march in the hex connected by the bridge or ferry, and the unit neither moved nor attacked during its march; +2 if the active player is attempting to destroy the C&O Canal Aqueduct (HCR W4126).
Indestructible Bridges: The following permanent bridges may not be destroyed: Chain Bridge (SJW N5809; HCR E0537); Aqueduct Bridge (HCR E0739); Patterson Viaduct (HCR E2317); Thomas Viaduct (HCR E2519); Frederick Junction RR Bridge (HCR W4317; RTG S2428); Long Bridge (HCR E0941); Hunting Creek Bridge (HCR E0845).
C&O Canal Aqueduct: This aqueduct at HCR W4126 is not a terrain feature that affects unit movement (it cannot be used as a bridge). Its only effect is destroying it gives the Confederates VPs in some scenarios. It is treated as a permanent bridge across hexside HCR W4126-W4226 only for the purpose of what rules to use for how to destroy it. Note the +2 Destruction Die Roll Modifier for the Aqueduct.
Destroyed Permanent Bridge/Ferry Effects. If a permanent bridge or a ferry over a minor river is destroyed, a ford is considered to cross the hexside formerly occupied by the bridge/ferry. (ZOC do not extend across destroyed bridge/ferry hexsides when the river they are on is unfordable.) If a permanent bridge or ferry over a major river is destroyed, no ford is considered to exist at that location. Exception: If Snicker's Ferry or Berry's Ferry, both on the Shenandoah River, are destroyed, a ford is considered to exist across that hexside.
10.3 Repairing Permanent Bridges and Ferries
The following GCACW Standard Rules for permanent bridge and ferry repair apply to all GCACW games. Note: These rules supersede the pertinent repair rules in SIV (see SIV 23.2). In SIV, both Union and Confederate units may attempt to repair bridges and ferries according to the GCACW Standard Rules procedure. An infantry unit is eligible to repair a permanent bridge/ferry only if it meets all of the following conditions in Step 1 of the Recovery Phase: it is at Fatigue Level 0 and is not demoralized; it has a Combat value of 5 or more (Exception: In SIV, it must have a Combat value of 2 or more); it occupies a hex containing at least one destroyed permanent bridge or ferry hexside; it must not have entrenched or built a pontoon bridge in the same Recovery Phase; in SIV, the Union player may only attempt to repair a bridge or ferry if at least one of the hexes connected by the bridge is situated in a county that is currently controlled by the Union player (see SIV, 22.1).
Repair Restrictions. Cavalry/artillery units and leaders may not repair bridges or ferries. A permanent bridge or ferry may not be repaired if one of the hexes connected by the bridge/ferry contains an enemy unit or units with a combined Combat value of 5 or more (or, in SIV, 2 or more). It may be repaired if the enemy unit(s) in the connecting hex have a combined Combat value of less than 5 (or, in SIV, a Combat value of less than 2). Entrenchments are not taken into account in determining the Combat value that prevents a bridge from being built. Each player may make a maximum of one repair attempt per Recovery Phase. Units may not repair in rain turns.
Repair Procedure. If an eligible unit attempts to repair a permanent bridge/ferry in the Recovery Phase, the owning player follows this procedure: 1. He specifies the hexside on which the repair will be attempted. 2. He rolls a die, modifying this roll if necessary (see below). Permanent Bridge: If the modified roll is 3 or less, the bridge is repaired. Remove the Destroyed marker: the bridge is functional again. If the modified roll is 4 or more, the repair attempt fails. Ferry: If the modified roll is 5 or less, the ferry is repaired. Remove the Destroyed marker; the ferry is functional again. If the modified roll is 6 or more, the repair attempt fails. Exception: In AIO, a roll of "1" for a major river bridge repair is always successful, regardless of the modifiers.
Repair Die Roll Modifiers: A player's repair die roll is modified if any of the following conditions are in effect (modifiers are cumulative): +1 if the river on which a permanent bridge or ferry is situated is currently unfordable (see 12.0); +2 if the river on which a permanent bridge or ferry is situated is a major river; +1 if the attempt is for the Etowah RR bridge (across hexsides AIO W5417-W5517); +1 if the attempt is for the Chattahoochee RR bridge (across hexsides AIO E2514-E2614).
Chatham Bridge in SLB: In SLB, Chatham Bridge (4328–4427) may not be repaired, although the Union player may build a bridge at that hexside according to normal SLB bridge rules (see SLB 10.0).
11.0 Demoralization
A unit is assigned a Demoralize-1 marker (or has an existing Demoralize-1 marker flipped to its Demoralize-2 side) if it suffers an "R" result in combat. A unit is assigned a Demoralize-2 marker if it suffers an "R*" result in combat. Leaders are never demoralized. Demoralized units may be chosen to perform actions normally, although their attack capabilities are less than normal.
Common Effects of Demoralization-1 and Demoralization-2. A unit with a Demoralize-1 or Demoralize-2 marker is affected as follows: it may not entrench; demoralized units (active or inactive) belonging to the attacker may not contribute in any way to the achievement of a flank attack bonus; its Artillery value is 0 in both attack and defense; it may not be selected to participate in a grand assault; it may not burn a RR station, build a bridge, repair a bridge/ferry, destroy an enemy pontoon bridge, or destroy a permanent bridge.
Additional Effects of Demoralization-1 and Demoralization-2. A unit with a Demoralize-1 marker is also affected as follows: its Combat value when attacking is halved, rounded down to a whole number (Exception: A demoralize-1 unit with a Combat value of 1 or ½ has a Combat value of ½ when attacking); the unit's Combat value when defending is normal. A unit with a Demoralize-2 marker is also affected as follows: its Combat value when attacking is 1 (Exception: A demoralize-2 unit with a Combat value of 1 or ½ has a Combat value of ½ when attacking); the unit's Combat value when defending is normal; if a hex being attacked contains any units with Demoralize-2 markers, the defender may have to subtract 1 from his combat die roll (see 7.4).
Removal Of Demoralization Markers. A Demoralized marker remains on top of the unit to which it is assigned wherever that unit moves. However, a unit's Demoralize-1 marker may be removed (or a Demoralize-2 marker flipped to its Demoralize-1 side) during Step 3c of the Recovery Phase if that unit has a Fatigue Level of 0 or 1 (see 8.0).
12.0 Rain
Rain is a random event in all GCACW games. The GCACW Standard Rules do not change the fact that rain effects apply only in the Advanced Game in some games, and in both Basic and Advanced Games in others. Furthermore, the GCACW Standard Rules do not modify how players determine whether or not rain occurs. Each GCACW game uses its original Random Events Table according to that game's specific rules, without modification. Also, note that in rain turns, units may not perform Entrenching actions, nor may they entrench in the Recovery Phase.
Rain. The Random Events Table has four possible "Rain" results: Rain (Current)—rain rules are in effect throughout the current turn only; place a Rain marker on the Turn Track in the box corresponding to the current turn. Rain (Current+1)—rain rules are in effect throughout the current turn and the following turn; place Rain markers on the Turn Track in the boxes corresponding to the current and immediately succeeding turns. Rain (Current+2)—rain rules are in effect throughout the current turn and the following two turns; place Rain markers on the Turn Track in the boxes corresponding to the current and immediately succeeding two turns. Rain (Current+3)—rain rules are in effect throughout the current turn and the following three turns; place Rain markers on the Turn Track in the boxes corresponding to the current and immediately succeeding three turns.
Note: If a multiple turn Rain result occurs when there are already one or more Rain markers on the Turn Track, additional markers are placed on the track only if the new Rain result extends the rain time period into turns which did not previously possess a Rain marker. For example, if a "Rain (Current+2)" result occurs on Turn 6, Rain markers are placed in the Turns 6, 7, and 8 boxes on the Turn Track. If on Turn 7 a "Rain (Current+1)" result occurs, no additional Rain markers are placed on the track because the new result does not extend the rain period. However, if on Turn 7 a "Rain (Current+2)" result had occurred, a Rain marker should be added to the Turn 9 box due to the extension of the rain period.
Rain Effects. Provisional Swamps: Provisional swamp hexes function as full swamp hexes in rain turns. If a Rain event occurs while a unit is in a provisional swamp hex with no road, pike, or RR, the unit gains one Fatigue Level and its Strength marker is disorganized. (If it is already disorganized, it is not further affected.) It also must be immediately moved into an adjacent, non-enemy occupied hex. This special movement does not require activation and does not expend MP. It may not be into an enemy ZOC unless there are no non-enemy ZOC present. It also may not be into another swamp hex or across a major/minor river hexside without a bridge or ferry. If no legal hex is available to move into, the unit is eliminated, and VP are awarded for its loss.
Zones of Control: ZOC do not extend across ford or destroyed bridge/ferry hexsides in rain turns. They also do not extend across creek hexsides untraversed by roads, pikes, RR or trail (unless at least one of the two hexes joined by that creek hexside is a city hex).
Attacks: The attacker subtracts 1 from all combat die rolls in rain turns. Attacks cannot be made across ford or destroyed bridge/ferry hexsides in rain turns. Attacks cannot be made across creek hexsides in rain turns unless the hexside is crossed by a road, pike, trails, or RR (or at least one of the two hexes joined by the creek hexside is a city hex). In an attack across a permissible creek hexside in a rain turn, the defender gains a +2 combat die roll modifier (instead of the normal +1).
Movement: If a unit enters a hex across a road or RR hexside in a rain turn, it expends 2 (not 1) MP. A unit entering a hex across a pike hexside expends 1½ (not 1) MP in a rain turn. If a unit enters a mountain hex through a hexside crossed by a trail in a rain turn, it expends 3 MP instead of 2; if a unit enters a non-mountain hex through a hexside crossed by a trail in a rain turn, it expends 2 MP instead of 1. In rain turns, the cost to enter all types of major terrain without benefit of roads, pikes, trails, or RR is increased (see Terrain Chart).
Rivers and Creeks: In rain turns, units may cross minor and major rivers only at bridge, dam, and ferry hexsides—never at fords or destroyed bridges/ferries. Units may cross creeks only across road, pike, RR or trail hexsides in rain turns. Exception: Units may always cross a creek hexside if at least one of the two hexes joined by that hexside is a city hex.
Bridges: Units may not build or repair bridges or ferries in rain turns but may destroy them.
Entrenching: Units may not entrench in rain turns.
River Fordability. In rain turns, units may not use fords to cross major or minor river hexsides. Furthermore, Rain results on the Random Events Table may cause fords to be unusable for an extended period of time after rain turns. Each time a Rain result occurs, the players must place a "Major Rivers Unfordable" and a "Minor Rivers Unfordable" marker on the Turn Track. (If they are already on the Track, they must be advanced a variable number of boxes.) Note: If the game being played does not have either or both of these markers, players may use OTR or GTC markers, or they may make their own. The placement and movement of these two markers on the Turn Track is governed by the type of Rain result that has occurred and the game being played. When a Rain result occurs in any game, consult the chart below to get a Rain Number for minor rivers.
Minor River Rain Number Table
| Rain Event | OTR/AIO | SIV | All Others |
|---|---|---|---|
| Rain (Current) | 1 | 0 | 0 |
| Rain (Current+1) | 2 | 1 | 1 |
| Rain (Current+2) | 4 | 3 | 2 |
| Rain (Current+3) | 6 | n/a | 3 |
Place the Minor Rivers Unfordable marker on the Turn Track a number of boxes ahead of the current turn equal to the Minor River Rain Number. If the Minor Rivers Unfordable marker is already on the Turn Track, advance it by a number of turns equal to the Rain Number. Do not place the Minor Rivers Unfordable marker on the Track if the Rain Number is 0. Next, consult the chart below to get a Rain Number for major rivers.
Major River Rain Number Table
| Rain Event | OTR/AIO | SIV | All Others |
|---|---|---|---|
| Rain (Current) | 1 | 1 | 1 |
| Rain (Current+1) | 3 | 3 | 2 |
| Rain (Current+2) | 6 | 5 | 3 |
| Rain (Current+3) | 9 | n/a | 4 |
Place the Major Rivers Unfordable marker on the Turn Track a number of boxes ahead of the current turn equal to the Major River Rain Number. If the Major Rivers Unfordable marker is already on the Turn Track, advance it by a number of turns equal to the Rain Number. For example, in any of the games, for a Rain Current result on turn 3, if the Major Rivers Unfordable Marker is not already on the Turn Track, place it on turn 4.
Unfordability Effects. If the Major Rivers Unfordable marker is on the Turn Track, units may not move, retreat, or advance across major rivers at fords in the current turn and all succeeding turns up to and including the box occupied by the marker. If the Minor Rivers Unfordable marker is on the Turn Track, units may not move, retreat, or advance across minor rivers at fords or destroyed bridges/ferries in the current turn and all succeeding turns up to and including the box occupied by the marker. If a unit cannot cross a hexside due to unfordability effects then its ZOC does not extend across that hexside. If a unit uses a ferry to move across a minor river that is currently unfordable, that unit must pay the normal ferry movement point penalty (Manpower value divided by 3, see Section 6.2). Remove a marker from the Turn Track at the end of the turn corresponding to the box it occupies on the Track.
Limited Intelligence (Optional Rule)
This optional rule can be used with any game in the series to better reflect the uncertainties of Civil War era command. It does significantly increase the time required to complete a scenario. This rule requires mutual trust between the players and should not be used for competitive play.
The Force Display. As described in Section 6.4, each player may remove stacks of counters and replace them with a Force Marker. Normally, forces kept off-map on the Force Display may be examined by either player at any time. When using these rules, each player's Force Display is kept secret from the enemy player. Hide each player's Force Display behind a screen or under a spare game box lid.
Placing Force Markers. Each player is allowed to utilize up to ten force markers at a time. Not all games in the Great Campaigns series include ten force markers for each player; players should substitute additional counters as necessary. A player may place one or more force markers during the Action Cycle whenever he possesses the initiative. (He is not required to activate the units being replaced with force markers during this action; he is free to take the action elsewhere). As described in Section 6.4, the units are removed from the map and placed on the force display. Two or more force markers may be simultaneously placed in the same hex (or one or more force markers may be added to a hex that already has a force marker in it) to confuse the enemy about the direction in which a force will move. When more than one force marker is in a hex, the player is free to divide the units in that hex between those forces as he sees fit. A player is permitted to assign no actual units to a force marker; a phantom force of this type is referred to below as a "dummy marker". Dummy markers may be activated and moved (see below), but may not be used to reveal enemy forces, collect VP, or trigger any other action pursuant to the rules that requires the presence of an actual unit. Placement of force markers must adhere to the following restrictions: a force marker may not be placed adjacent to an enemy unit (unless impassable terrain makes it impossible to move between the two hexes); a force marker may not be placed within two hexes of an enemy cavalry unit (Exception: A force marker may be placed within two hexes of enemy cavalry if all two-hex paths between the units are blocked by either: impassable terrain; woods hexsides not crossed by a road, pike, trail, or RR; or a friendly unit in the hex between the force marker and the enemy cavalry unit).
Moving Force Markers. Units on the Force Display must move according to the published rules. A player moving a hidden force still rolls for that force's movement in view of the enemy player. Thus, the enemy player will have a good idea whether or not a friendly force marker contains infantry or cavalry based on the number of dice rolled for the movement. Dummy markers can be moved as either infantry or cavalry (with or without a leader) at the discretion of the owning player. The player's choice of how to move dummy markers should be based on which type of unit he is trying to trick the enemy player into thinking is present in that force. Any extended march rolls should be rolled in view of the enemy player; however, the moving player may make fake extended march rolls for hidden forces to confuse the enemy. Movement of dummy markers normally requires the player to win initiative and spend an activation. The only exception occurs when more than one force marker starts an activation in the same hex. In that case, one or more dummy markers may be moved from that hex at the same time as the force markers with actual units without requiring a separate activation.
Revealing Enemy Forces. Players replace friendly forces markers with the units they represent (or remove them if they are dummies) in the following cases: if an enemy unit or force marker is adjacent to the friendly force marker (unless impassable terrain makes it impossible to move between the two hexes); if an enemy cavalry unit is within two hexes of the marker (Exception: A force marker may remain on the map within two hexes of enemy cavalry if all two-hex paths between the units are blocked by either: impassable terrain; woods hexsides not crossed by a road, pike, trail, or RR; or a friendly unit in the hex between the force marker and the enemy cavalry unit. Note: This case requires actual cavalry units to be present on the map within two hexes of the force marker; cavalry units under force markers can never reveal the composition of an enemy force). Besides removing force markers in the cases listed above, force markers can be voluntarily removed at any time by the owning player (usually when he would rather use them elsewhere on the map).
Woods Hexside (Restricted ZOC) Summary of Effects
- Movement: Restricted ZOC do not restrict movement in any way (Section 6.2). A unit can move through a restricted ZOC without having to stop and can leave a restricted ZOC without having to pay a +1 movement penalty.
- Attacks: Units may only attack across a woods hexside in certain conditions. Refer to Section 7.0, Combat, Attack Restrictions.
- Flank Attacks: Restricted ZOC count as covered hexes when computing the basic flank bonus. However, the final flank bonus is reduced by one for each hex covered by a restricted ZOC. Refer to Section 7.4, Flank Attacks.
- Retreat and Rout: Restricted ZOC affect retreats and routs just like normal ZOC.
- Command Radius: Restricted ZOC block an enemy leader's command radius just like normal ZOC.
Games of the Great Campaigns of the American Civil War Series
Volume 1: Stonewall Jackson's Way (1992). Volume 2: Here Come the Rebels! (1993). Volume 3: Roads to Gettysburg (1994). Volume 4: Stonewall in the Valley (1995). Volume 5: Stonewall's Last Battle (1996). Volume 6: On to Richmond (1998). Volume 7: Grant Takes Command (2001). Skirmisher 2 Magazine: Burnside Takes Command (2003). Skirmisher 2 Magazine: Rebels in the White House (2003). Volume 8: Battle Above The Clouds (2009). Volume 9: Stonewall Jackson's Way II: Battles of Bull Run (contains redesign of SJW and All Green Alike, 2013). Volume 10: Atlanta Is Ours (2018). Volume 11: Roads to Gettysburg II: Lee Strikes North (contains redesigns of HCR, RTG, and Rebels in the White House, 2018). Volume 12: Hood Strikes North (2020). Volume 13: On To Richmond II: The Union Strikes South (contains redesigns of OTR & GTC and the new design The Petersburg Campaign, 2023). Skirmisher 4 Magazine: Lee's Last Offensive (2023).
Here Come The Rebels
Here Come The Rebels simulates the Civil War campaign in Virginia and Maryland during September 1862 (the Antietam Campaign) between the Confederacy's Army of Northern Virginia and the Union's Army of the Potomac.
Basic Game Rules
1.0 Introduction
Here Come The Rebels simulates the Civil War campaign in Virginia and Maryland during September 1862 between the Confederacy's Army of Northern Virginia and the Union's Army of the Potomac. Players should first read the Introduction at the beginning of this rulebook, and then continue reading below.
Abbreviations. AP: Army of the Potomac (Union). ANV: Army of Northern Virginia (Confederate). Balt: Baltimore defense force. Brig: Brigade. Cav: Cavalry. DC: District of Columbia defense force. Div: Division. Inf: Infantry. J: Jackson's corps. Kw: Kanawha Division (Union). L: Longstreet's corps. Ldr: Leader. PHB: Potomac Home Brigade. RR: Railroad or Union "Railroad Brigade". Regt: Regiment. Shen: Shenandoah Military District (Union). HCR: Here Come The Rebels. VC: Victory Condition. VP: Victory Points. ZOC: Zone of Control.
2.2 Playing Pieces
Military Units. The Union player has two army leaders: McClellan (commander of the Army of the Potomac - AP) and Burnside (AP commander used only in scenario 6). These army leaders may stack with any infantry unit, even ones that are not part of the Army of the Potomac. All Union leaders are part of the Army of the Potomac. The color of the box around an AP leader's tactical value (or command value for army leaders) is green to indicate this (the same color as AP leaders in Stonewall Jackson's Way, in case players are joining HCR with that game). Union military units (infantry and cavalry units) are either part of the AP or are not part of the AP. Players can identify AP and non-AP military units based on the color of the box around a unit's tactical value. For non-AP units this color is blue, and for AP units this color is green. Infantry substitute counters have no box color around their tactical since they can be either AP or non-AP. The only AP infantry units are those that have a roman numeral as part of the text in their "Organization" text to the left of the infantry box symbol (see Standard Rules section 2.2). For example "V-2" and "IX-KW". All Union cavalry units are AP. Union cavalry do not have a leader in most scenarios; however, the cavalry division leader Pleasonton may come into play via random event in two of the scenarios. All Union military units with any of the following in their "Organization" text are non-AP: Balt, DC, PA, RR, and Shen. These units do not have a corps leader.
5.1 Extended March Table Modifiers. Reminder: players should take special note of the various modifiers specific to different Union units.
5.4 Burn RR Station. Per the Standard Rules version included with HCR, and with all subsequent versions, the RR station at Frederick Junction (W4317) may be destroyed (it is no longer specifically excluded as it was in previous versions). However, the bridge across hexsides W4317-W4417 may still not be destroyed (see Standard Rules section 10.2).
7.4 Combat Die Roll Modifiers — Jackson. Reminder: reference section 7.4 in the Standard Rules for a special rule on assaults with Jackson.
13.0 Scenarios and Control Markers. Some scenarios specify which side controls certain "objective hexes" at the start of the game and the VPs given for control of an objective hex. Players may wish to place Union or Confederate "Control" markers on objective hexes to denote which side controls them. A player gains control of an enemy-controlled objective hex at the moment one of his undemoralized infantry (not cavalry) units enter that hex. A player maintains control of an objective hex even if he does not have an infantry unit occupying it, assuming the enemy does not gain control of that hex. Note: if a player's infantry unit has its "Demoralize-1" marker removed while it occupies an enemy-controlled objective hex, the player immediately gains control of that hex. Some scenarios specify that Victory Points are given for occupation by infantry of certain objective hexes. Players should take care to note when Victory Conditions require occupation or just control of an objective hex.
14.0 Special Units — D.H. Hill. The Confederate division commanded by D.H. Hill has the corps color of Longstreet's corps, but it is also considered part of Jackson's corps, which is the reason for the L/J designation on the unit. Thus, D.H. Hill may participate in corps activation and corps assault actions with either Longstreet or Jackson, and either or both of those leaders may stack with D.H. Hill.
Basic Game Scenarios
There are six Basic Game scenarios of varying degrees of length and complexity. Unless otherwise noted in the following instructions, all units begin the game with their front (normal) sides face-up at Fatigue Level 0 with organized Strength markers. Before starting, place the Turn marker on the Turn Track in the box corresponding to the date on which the scenario begins. This is Turn one. At the end of the game, calculate Victory Points (VP) and determine a winner. Since combat losses cause VP gain or loss, the players should keep track of Manpower value losses as they occur during the game.
Map. The HCR map is divided into west and east sections. In scenario 8 of the Advanced Game, the two maps link up and are used together. In scenario 7 of the Advanced Game and in all Basic Game scenarios only a single map is used. In set-up instruction, hexes are listed by four-digit numbers preceded by a "W" (indicating the west map) or "E" (indicating the east map). For example, "W4214" means hex 4214 on the west map (the town of Frederick). When placing the two maps together, note that they overlap. Lay the west map on top of the east map in the overlap area. The westernmost hex row on the east map (i.e. all hexes whose first two digits number "01") should be placed so that it lies directly underneath the west map's hexes whose first two digits number "56". For example, hex E0120 (Goshen) on the east map should lie directly underneath hex W5626 (also Goshen) on the west map. In the set-up instructions for scenario 8 which is the only scenario that uses both maps, hexes in the overlap area are listed by the west map's hex number.
Scenario 1: South Mountain
NOTES: This scenario simulates Lee's desperate attempt to hold back McClellan's Army of the Potomac at the South Mountain passes while his scattered Army of Northern Virginia reunited west of the mountains.
MAP: Use only the west map.
GAME LENGTH: 1 turn, September 14, 1862.
SPECIAL RULES: 1. Turn 1: The Union player automatically wins the initiative die roll in the first Action Phase of the game. Afterwards, initiative is determined normally. 2. Union Movement Restrictions: Union units may not enter or retreat into any hex adjacent to Burkittsville (W3117) or Knoxville (W3020).
Victory Conditions. The Union player gains and loses VPs for the following occurrences at the end of the game: +7 if a Union infantry unit occupies Boonsboro (W2910); +4 if a Union infantry unit occupies Zittlestown (W3111); +3 if a Union infantry unit occupies Rohrersville (W2914); +3 if a Union infantry unit occupies Mountain House (W3211); +1 for each point of Confederate Manpower value lost in combat, retreat, or cavalry retreat (not in extended march, force march, or moving from one enemy ZOC to another); -1 for each point of Union Manpower value lost in combat, retreat, or cavalry retreat (not in extended march, force march, or moving from one enemy ZOC to another). At the end of the game, the Union VP total is calculated and the players consult the chart below to determine the winner.
Union VP Winner: 8 or more = Union Decisive Victory; 5 to 7 = Union Substantive Victory; 2 to 4 = Union Marginal Victory; 0 to 1 = Confederate Marginal Victory; -3 to -1 = Confederate Substantive Victory; -4 or less = Confederate Decisive Victory.
Union Set-Up
| Unit/Leader | Size | Command | Type | Manpower Value | Hex |
|---|---|---|---|---|---|
| 8 IL-A Regt | III | - | Cav | 1 | W3414 |
| Reno | Corps | IX | Ldr | - | W3814 |
| Sturgis | Div | IX | Inf | 7 | W3814 |
| Willcox-A | Div | IX | Inf | 7 | W3714 |
| Cox |
Confederate Set-Up
| Unit/Leader | Size | Command | Type | Manpower Value | Hex |
|---|---|---|---|---|---|
| 5 VA Regt Cav | III | Cav | Cav | 1 | W3212 |
| Garland | Brig | L | Inf | 2 | W3211 (Mountain House) |
| Colquitt | Brig | L | Inf | 2 | W3312 |
| D.H. Hill-A | Div | L | Inf | 4 | W3111 (Zittlestown) |
Scenario 2: Harpers Ferry–Crampton Gap
NOTES: This scenario simulates the Confederate attack against the Union stronghold at Harpers Ferry and the attempt by the Union VI Corps to relieve the beleaguered garrison by forcing a passage through the weak Confederate positions in Crampton's Gap in the South Mountain range.
MAP: Use only the west map.
GAME LENGTH: 4 turns, September 12 to September 15, 1862.
SPECIAL RULES: 1. Turn 1: The Union player automatically wins the initiative die roll in the first two Action Phases of turn 1. Afterwards, initiative is determined normally. The Union player may not activate Franklin and any units in his corps in these first two activations. 2. Union Movement Restrictions: The Union player is subject to the following movement restrictions: Ward may not activate for the entire game (he is released from this restriction if he is retreated or routed in combat); Franklin, Slocum, Smith, Couch, and the 6 PA cavalry may not cross a Potomac River hexside; Union units may not enter, attack, or retreat into any hex adjacent to Mountain House (W3211) or Boonsboro (W2910); nor may they enter, attack or retreat into any hex within two hexes of Sharpsburg (W2413) — these hexes are considered off-map to the Union for all game-play purposes. 3. Confederate Movement Restrictions: The Confederate player is subject to the following movement restrictions: Confederate units may not entrench; Confederate units may not enter or retreat into any hex adjacent to Mountain House (W3211); Stuart and Hampton may not activate on turn 1, but this restriction is removed at the moment a Union unit moves within one hex of their set-up hex. 4. Harpers Ferry: Although this is not an Advanced Game scenario, all rules listed in the "Harpers Ferry" section 4.0 of the Advanced Game apply in this scenario. Thus, the Harpers Ferry Phase is added to the sequence of play (see Advanced Game section 1.0). Also, Harpers Ferry is a Union fort so all rules in Advanced Rule 10.0 on "Union Forts" apply. 5. Union Depots: The Union player has two depots—one in Martinsburg and one in Harpers Ferry. Depots may not move, participate in combat, or retreat. At the moment a Confederate infantry unit enters Martinsburg, the depot there is removed from the map and is considered destroyed. In order to destroy the Union depot in Harpers Ferry, a Confederate infantry or cavalry unit with a Combat Value of 2 or more must perform a Burn RR Station action in that hex. 6. Harpers Ferry Bridge: The Union player may not attempt to destroy the bridge across hexside W2521-W2620.
Victory Conditions. The Confederate player gains and loses VP for the following: +3 if the Union depot at Harpers Ferry (W2521) is destroyed; +2 if the Union depot at Martinsburg (W1314) is destroyed; +8 for each undemoralized Confederate infantry division or brigade in or adjacent to Sharpsburg (W2413), however the Confederates may only gain these VP if the Union depots in Harpers Ferry and Martinsburg have both been destroyed; +2 for each demoralized Confederate infantry division or brigade in or adjacent to Sharpsburg (W2413), however the Confederates may only gain these VP if the Union depots in Harpers Ferry and Martinsburg have both been destroyed; -4 for each destroyed Confederate infantry unit or for each Confederate infantry unit in the at-start setup which cannot trace a path of hexes no more than 20 hexes in length to Sharpsburg (W2413), Winchester (W0330), Berryville (W1332), or Leesburg (W2413) — this path may not enter a Union-occupied hex or a Union ZOC unless that ZOC is occupied by a Confederate unit (Note: if a Confederate infantry unit is destroyed, both these destruction VPs and any applicable loss VPs in the VP condition below both apply); -2 for each point of Confederate Manpower value lost in combat, retreat, or cavalry retreat (not in extended march, force march, or moving from one enemy ZOC to another); +2 for each point of Union Manpower Value lost in combat, retreat, or cavalry retreat (not in extended march, force march, or moving from one enemy ZOC to another) — this VP condition applies to all Union units except those designated as RR or Shen; +1 for each point of Union Manpower Value lost in combat, retreat, or cavalry retreat (not in extended march, force march, or moving from one enemy ZOC to another) for Union units designated as RR or Shen; +1 for each point of Union Manpower Value that surrenders due to a Harpers Ferry Surrender (see Advanced Game section 4.0). At the end of the game, the Confederate VP total is calculated and the players consult the chart below to determine the winner.
Confederate VP Winner: 100 or more = Confederate Decisive Victory; 90 to 99 = Confederate Substantive Victory; 80 to 89 = Confederate Marginal Victory; 70 to 79 = Union Marginal Victory; 60 to 69 = Union Substantive Victory; 59 or less = Union Decisive Victory.
Confederate Set-Up
| Unit/Leader | Size | Command | Type | Manpower Value | Hex |
|---|---|---|---|---|---|
| 7 VA Regt | III | Cav | Cav | 1* | W1207 (Hedgesville) |
| Jackson | Corps | J | Ldr | - | W1509 |
| A.P. Hill | Div | J | Inf | 10* | W1509 |
| J.R. Jones | Div | J | Inf | 7* | W1307 (North Mt. Depot) |
* Indicated units begin the game on their exhausted sides at Fatigue Level 0 with organized strength markers.
Union Set-Up
| Unit/Leader | Size | Command | Type | Manpower Value | Hex |
|---|---|---|---|---|---|
| 12 IL Regt | III | - | Cav | 1 | W1312 |
| White | Brig | Shen | Inf | 3 | W1314 (Martinsburg) |
| Union Depot | - | - | - | - | W1314 (Martinsburg) |
| D'Utassy | Brig | RR | Inf | 4# | W2420 (Bolivar Heights) |
* Ward begins the game under a Fort marker. % Ford begins the game under a Breastwork marker. # Indicated units begin the game under Breastwork Build markers.
Scenario 3: McClellan's Opportunity
NOTES: Following the Battle of South Mountain on September 14, Lee ordered his scattered army to concentrate at Sharpsburg. Since much of the Army of Northern Virginia was still besieging Harpers Ferry, this concentration could not be completely achieved for several days. This scenario simulates the period between South Mountain and the Battle of Antietam, when McClellan's Army of the Potomac was presented with a golden opportunity to defeat Lee's army in detail.
MAP: Use only the west map.
GAME LENGTH: 3 turns, September 15 to September 17, 1862.
SPECIAL RULES: 1. Turn 1: The Confederate player automatically wins the initiative die roll in the first Action Phase of turn 1. Afterwards, initiative is determined normally. 2. Union Movement Restrictions: Union units may not enter any hex in Berkeley County. If a Union unit is forced to retreat into Berkeley County, it is removed from the game (with no additional loss other than what may have occurred in the retreat). 3. Franklin's Paralysis: On turn 1, Franklin and the units in his VI corps operate under paralysis. No other Union units are subject to paralysis, only Franklin's corps, and only on turn 1. The effects of paralysis on Franklin's units are: the Movement Allowance of a unit performing a march is reduced by two to a minimum of one (even in an Activate Corps Leader action); units may not force march (they may extended march); Franklin may not conduct a corps assault action; however, his units are allowed to participate in a Grand Assault. Exception: the paralysis is removed in any Union Activation Segments that meet both of the following restrictions at the start of the Activation Segment: a Union infantry unit occupies Rohrersville (W2914); no Confederate infantry unit occupies Brownsville (W2917). 4. Confederate Movement Restrictions: The Confederate player is subject to the following movement restrictions: A.P. Hill may not activate on Turns 1 and 2, but he may entrench; Thomas may not activate for the duration of the game but he may entrench (this restriction is removed if the Union has at any time occupied Harper's Ferry); Lawton, J.R. Jones, Walker, and Armistead may not activate in the first two Activation Segments of Turn 1 (counting the 1st Activation Segment that the Confederate automatically wins). 5. Harpers Ferry Fort: The Union fort in Harpers Ferry is destroyed in this scenario (see Advanced Game rule 10.0).
Victory Conditions. The Union player gains and loses VPs for the following occurrences at the end of the game: +50 if a Union infantry unit occupies Sharpsburg (W2413); if an undemoralized Union infantry unit occupies any hex adjacent to Sharpsburg (W2413) but no Union infantry unit occupies Sharpsburg, the Union player receives the following VPs: +12 if a qualifying Union unit occupies any one hex adjacent to Sharpsburg, +6 for each additional hex adjacent to Sharpsburg occupied by a qualifying Union unit (for example, if the Union does not occupy Sharpsburg but undemoralized Union infantry unit(s) occupy both W2513 and W2514 then the Union gains 18 VP from this condition); -3 if there is no Union infantry unit within 2 hexes of Sharpsburg (W2413); +10 if a Union infantry unit occupies Harpers Ferry (W2521); +2 for each destroyed Confederate infantry division or for each Confederate infantry division which cannot trace a path of continuous hexes at the end of the game, no more than 20 hexes in length, to Shepherdstown (W2115), Harpers Ferry (W2521), or Charlestown (W1924) — this path may not enter a Union occupied hex or a Union ZOC unless that ZOC is occupied by a Confederate unit (Note: if a Confederate infantry division is destroyed, both these destruction VPs and any applicable loss VPs in the VP condition below both apply); +1 for each point of Confederate Manpower value lost in combat, retreat, or cavalry retreat (not in extended march, force march, or moving from one enemy ZOC to another); -1 for each point of Union Manpower value lost in combat, retreat, or cavalry retreat (not in extended march, force march, or moving from one enemy ZOC to another). At the end of the game, the Union VP total is calculated and the players consult the chart below to determine the winner.
Union VP Winner: 21 or more = Union Decisive Victory; 12 to 20 = Union Substantive Victory; 3 to 11 = Union Marginal Victory; -6 to 2 = Confederate Marginal Victory; -15 to -7 = Confederate Substantive Victory; -16 or less = Confederate Decisive Victory.
Confederate Set-Up
| Unit/Leader | Size | Command | Type | Manpower Value | Hex |
|---|---|---|---|---|---|
| Lee | Army | ANV | Ldr | - | W2910 (Boonsboro) |
| Longstreet | Corps | L | Ldr | - | W2910 (Boonsboro) |
| D.R. Jones | Div | L | Inf | 9* | W2910 (Boonsboro) |
| Evans | Brig | L | Inf | 2* | W2910 (Boonsboro) |
* Indicated units begin the game on their exhausted sides at Fatigue Level 1 with disorganized strength markers. % Indicated units begin the game on their exhausted sides at Fatigue Level 0 with organized strength markers.
Union Set-Up
| Unit/Leader | Size | Command | Type | Manpower Value | Hex |
|---|---|---|---|---|---|
| Cox | Corps | IX | Ldr | - | W3212 |
| Sturgis | Div | IX | Inf | 7* | W3212 |
| Willcox-A | Div | IX | Inf | 6* | W3212 |
| Scammon | Div | IX | Inf | 5* | W3212 |
| Rodman |
* Indicated units begin the game on their exhausted sides at Fatigue Level 1 with disorganized strength markers. # Indicated units begin the game on their exhausted sides at Fatigue Level 1 with organized strength markers. % Indicated units begin the game on their exhausted sides at Fatigue Level 0 with organized strength markers.
Scenario 4: Three Cigars
NOTES: Lee's Special Order 191 detailed the movements for splitting his army to capture Harpers Ferry and re-assemble near Hagerstown. Early on the 13th, the Union found a copy of these orders wrapped around three cigars. McClellan issued orders to attempt to defeat the split apart Confederates, but he still maintained much of his usual caution and missed a rare opportunity. This scenario combines the Harpers Ferry, South Mountain, and McClellan's Opportunity scenarios starting with the day the three cigars were found and ending with the battle of Antietam.
MAP: Use only the west map.
GAME LENGTH: 6 turns, Sept. 13 to Sept. 18, 1862.
SPECIAL RULES: 1. Three Cigars: On turn 1, all Union Army of the Potomac infantry units receive an extra -1 modifier on extended marching. For example, if an unexhausted Army of the Potomac infantry unit marched to Fatigue Level 3 it would have a final modifier of zero (-1 special turn 1 modifier, +1 Union AP infantry unit). 2. Turn 1: The Union player automatically wins the initiative die roll in the first Action Phase of turn 1. Afterwards, initiative is determined normally. 3. Humphreys: The Union infantry division Humphreys may not move on turn 1. 4. Confederate movement restrictions: The following movement restrictions apply during turn 1: Confederate units may not entrench on turn 1; Lee and Longstreet may not leader transfer in the leader transfer phase at the start of turn 1; all Confederate military units and leaders that start in or adjacent to Hagerstown may not move until a Union unit enters any hex adjacent Cavetown (W3201), Smoketown (W3107), Mt. Pleasant (W3008), Boonsboro (W2910), Springvale (W2912), or Rohrersville (W2914) — if not lifted on turn 1, this restriction is removed at the start of turn 2. 5. Harpers Ferry: Although this is not an Advanced Game scenario, all rules listed in the "Harpers Ferry" section 4 of the Advanced Game apply in this scenario. Thus, the Harpers Ferry Phase is added to the sequence of play (see Advanced Game rule 1.0). Also, Harpers Ferry is a Union fort so all rules in Advanced Rule 10 on "Union Forts" apply. In this scenario only, for each successive immediately preceding turn that the Confederate player gets a No Effect on the Harpers Ferry Table, he gets an additional +1 modifier on his Harpers Ferry dice roll. For example: on turn 2 the Confederate is able to make a Harpers Ferry roll and gets a No Effect; on turn 3 he is also able to make a Harpers Ferry roll so he now gets an additional +1 modifier but he still gets a No Effect; on turn 4 he still is able to make a Harpers Ferry roll and he now gets an additional +2 modifier; if he got a No Effect on turn 4, was not able to make a roll on turn 5, but was then able to make a roll again on turn 6 then he would get no additional modifier for this condition since he did not get a No Effect on the immediately preceding turn due to not making a roll. 6. Union Depot: The Union player has one depot in Harpers Ferry. It may not move, participate in combat, or retreat. In order to destroy this depot, a Confederate infantry or cavalry unit with a Combat Value of 2 or more must perform a Burn RR Station action in Harpers Ferry. 7. Substitute Units: Although this is not an Advanced Game scenario, both sides may attach units as per Advanced Game rule section 7. Only the Confederate player may detach units. The Attachment Phase is added to the sequence of play (see Advanced Game rule 1.0). 8. Variants: After determining sides, one die is rolled and the variant below that corresponds to that roll is used. The "A" item for the roll is the variant that affects the Confederate player, and the "B" item is the variant that affects the Union player.
1A. Confederate Falls & Balls: Lee broke both his hands restraining Traveller just before the campaign, Jackson hurt himself falling off a new horse, and Stuart held a gala ball in the middle of the campaign. At the start of each turn, the Confederates roll a die, and Jackson is healed on a die roll less than or equal to the turn number. Until Jackson is healed, the Jackson assault bonus is not in effect and when he activates units they get a +1 on the movement roll instead of +2. At the start of each turn, the Confederates roll another die, and Lee is healed on a die roll less than the turn number. Until Lee is healed, Lee does not get his +1 assault bonus and the Confederates may not conduct a Grand Assault. At the start of every turn, the Confederate rolls another die. If the die roll is higher than the turn number, then Stuart holds a gala ball and he only adds +1 to movement rolls this turn instead of +3.
1B. Union Reserve: McClellan was cautious and typically did not commit all his forces. In a famous quote during the battle, Porter said "Remember, General! I command the last reserve of the last Army of the Republic." On turns 5 and 6 the Union player must have one corps meet the requirements of the "army reserve" at the start of the Recovery Phase or he loses 5 VP. It may be a different corps each turn; and the 5 VP penalty is applied each turn if the condition is not met. To meet the requirements of the army reserve, all units in a corps may not have marched to fatigue level 4 or participated in an attack of any type all turn (they may be attacked and end up at fatigue level 4 from the attack). Exception: when marching, units in this reserve corps may attack a hex containing only cavalry.
2A. Night March: After the battle at Turner's Gap, the Confederate forces in the area slipped away from the Union in a night march. The Confederates may declare a Night March immediately after the Leader Transfer Phase on any one turn except turns 1 and 2. In a Night March, the Confederates automatically win the first two Activation Segments on this turn without the need for an initiative roll. In these two Night March Activation Segments, Confederate units may not attack and may not enter enemy ZOC except if moving from one enemy ZOC directly to another enemy ZOC. No military unit may move twice (i.e., no military unit which moves in the first initiative may move in the second initiative; but any leader may be used in more than one initiative, provided that he activates different units during each initiative.) Union cavalry may not conduct a cavalry retreat during the Confederate Night March. Initiative is rolled for normally after the two Night March Activation Segments. The Confederates may use only one of these Night March Activation Segments if they do not want to use both.
2B. Spirited March: The Union army was in high spirits during its march towards Sharpsburg the day after the battle at Turner's Gap. If the Confederates conduct a Night March, on that turn all Union units receive a special extended march modifier of -1 (in addition to normal modifiers).
3A. Early Intelligence: Intelligence from a Confederate sympathizer about the Union's increased activity did not get to Lee until late at night on the 13th but it could easily have arrived earlier and been firmer. On turn 1, Confederate units in and adjacent to Hagerstown may move to fatigue level 1 (force marching not allowed in this instance) without being "released" due to the Union moving a unit adjacent to the hexes indicated in the above special rule. However, Lee and Longstreet may not leader transfer this turn unless released. These units are still released from all restrictions if a Union unit moves adjacent to one of the indicated hexes.
3B. Improved Intelligence: Intelligence to McClellan could have been even better, such as the amount of Confederate manpower, thus making McClellan even more aggressive. The Union player wins the first two tied initiative die rolls in every turn.
4A. Flags & Delay: Jackson had trouble communicating with signal flags with the Confederate forces across the rivers which helped cause a delay in the bombardment. After the surrender, A.P. Hill was held up for more than a day paroling Union troops. There is an additional -1 modifier on any Harpers Ferry surrender rolls on turns 2 and 3. To destroy the depot at Harpers Ferry, a division must perform the Burn RR Station action, it must be a Destroy RR Station not a Damage, and it takes 3 fatigues to do this action (the unit performing the burn must be at fatigue level 1 or 0; all 3 fatigues are expended in the one burn action).
4B. Franklin's Paralysis: Franklin was slow to attack Crampton's Gap, and after the engagement he hardly moved for 2 days. Franklin and the units in his VI corps may be subject to paralysis. At the end of the Leader Transfer Phase in turns 1-5, the Union player rolls a single die. On a modified die roll 5 or more, Franklin's corps operates under paralysis for the turn. The die roll is modified by +1 for each VI corps division that is both exhausted and disorganized. The die roll is also modified by -1 if the leader Franklin is in the 3 hex Command Radius of McClellan. The effects of paralysis on Franklin's units are: the Movement Allowance of a unit performing a march is reduced by two to a minimum of one (even in an Activate Corps Leader action); units may not force march (they may extended march); Franklin may not conduct a corps assault action; however, his units are allowed to participate in a Grand Assault.
5A. Longstreet's Conservative Plan: On the night of the 13th, Longstreet strongly advised Lee to pull the Hagerstown and Boonsboro forces back to Sharpsburg. Confederate infantry may not move within 2 hexes of Mountain House (W3211) or Jerusalem Church (W3408).
5B. McClellan's Conservative Plan: McClellan received the intelligence from the 3 cigars late morning on the 13th but issued a conservative plan that did not have Union corps moving forward until the next day. On turn 1, Union units may not force march and may not march above fatigue level 2, except for Porter's corps which has no restrictions. Union units may assault on turn 1 going to any fatigue level.
6A. Cavalry Esprit de Corps: Stuart held a ball in the middle of the campaign that "was a triumph for Southern chivalry" [Sears, Landscape Turned Red]. The Confederates get an extra +1 on cavalry retreat rolls, and a special +1 attack modifier when Confederate cavalry attack a hex containing only Union cavalry.
6B. Effective Cavalry: McClellan created an overall cavalry command, giving the job to Pleasonton. The cavalry division (not corps) leader Pleasonton is added to the Union setup, starting the game in Frederick. He can activate any Union cavalry but only 3 units at a time, and per Standard Rules section 5.2, he adds one to his movement dice roll. Also, Union cavalry activated by Pleasonton get a special -1 extended march modifier in addition to other existing modifiers.
Victory Conditions. The Union player gains and loses VPs for the following occurrences at the end of the game: +60 if a Union infantry unit occupies Sharpsburg (W2413) and no Confederate infantry unit occupies any adjacent hex; +50 if a Union infantry unit occupies Sharpsburg (W2413) and a Confederate infantry unit occupies any adjacent hex; if an undemoralized Union infantry unit occupies any hex adjacent to Sharpsburg (W2413) but no Union infantry unit occupies Sharpsburg, the Union player receives the following VPs: +25 if a qualifying Union unit occupies any one hex adjacent to Sharpsburg, +5 for each additional hex adjacent to Sharpsburg occupied by a qualifying Union unit (for example, if the Union does not occupy Sharpsburg but undemoralized Union infantry unit(s) occupy both W2513 and W2514 then the Union gains 25 VP from this condition); -12 if there is no Union infantry unit within 2 hexes of Sharpsburg (W2413); +8 if a Union infantry unit occupies Harpers Ferry (W2521); +2 for each of the following hexes occupied by a Union infantry division: Shepherdstown (W2115), Charlestown (W1924); -4 if the Union depot at Harpers Ferry (W2521) is destroyed; +2 for each destroyed Confederate infantry division or for each Confederate infantry division which cannot trace a path of hexes to Shepherdstown (W2115), Harpers Ferry (W2521), or Charlestown (W1924) — this path may not enter a Union-occupied hex or a Union ZOC unless that ZOC is occupied by a Confederate unit (Note: if a Confederate infantry division is destroyed, both these destruction VPs and any applicable loss VPs in the VP condition below both apply); +1 for each point of Confederate Manpower value lost in combat, retreat, or cavalry retreat (not in extended march, force march, or moving from one enemy ZOC to another); -1 for each point of Union Manpower value lost in combat, retreat, or cavalry retreat (not in extended march, force march, or moving from one enemy ZOC to another); combine the Manpower value of all Union units which have surrendered due to a Harpers Ferry Surrender and multiply this sum by one-half, rounding fractions down — the negative of this number is the total VPs for this victory condition (for example, 5 manpower surrendered is –2 VPs). At the end of the game, the Union VP total is calculated and the players consult the chart below to determine the winner.
Union VP Winner: 30 or more = Union Decisive Victory; 15 to 29 = Union Substantive Victory; 0 to 14 = Union Marginal Victory; -15 to -1 = Confederate Marginal Victory; -30 to -16 = Confederate Substantive Victory; -31 or less = Confederate Decisive Victory.
Confederate Set-Up
| Unit/Leader | Size | Command | Type | Manpower Value | Hex |
|---|---|---|---|---|---|
| 7 VA Regt | III | Cav | Cav | 1 | W1514 (Opequon Station) |
| Jackson | Corps | J | Ldr | - | W1514 (Opequon Station) |
| A.P. Hill | Div | J | Inf | 10* | W1514 (Opequon Station) |
| J.R. Jones | Div | J | Inf | 7* | W1414 |
^ Indicated units have a turn 1 movement restriction—see special rules. * Indicated units begin the game on their exhausted sides at fatigue level 0.
Union Set-Up
| Unit/Leader | Size | Command | Type | Manpower Value | Hex |
|---|---|---|---|---|---|
| Ward | Brig | RR | Inf | 3+ | W2521 (Harpers Ferry) |
| White | Brig | Shen | Inf | 3# | W2521 (Harpers Ferry) |
| 12 IL Regt | III | - | Cav | 1 | W2521 (Harpers Ferry) |
| 8 NY Regt | III | - | Cav | 1 | W2521 (Harpers Ferry) |
^ Humphreys may not move on turn 1. @ Indicated units begin the game under a breastwork marker. + Ward begins the game under a fort marker. # White begins the game on his exhausted side at fatigue level 1. * 1 RI begins the game on his exhausted side at fatigue level 0.
Scenario 5: The Baltimore Raid
NOTES: This scenario simulates what might have happened during the Maryland campaign had JEB Stuart's Confederate cavalry embarked on a large scale raid against the critical Union railroad network in and around Baltimore.
MAP: Use only the east map.
GAME LENGTH: 7 turns, Sept. 10 to Sept. 16, 1862.
SPECIAL RULES: 1. Turn 1: Only the Confederate player may perform actions on turn 1. Because no Union actions are allowed on turn 1 (even if a Confederate unit moves adjacent to a Union unit), do not make initiative die rolls at the start of each Action Phase of turn 1. The Confederate player may perform actions with his units in consecutive Action Phases for as long as he is willing or able to do so; after which, the turn 1 Action Cycle ends. However, on turn 1, Confederate units may not make extended marches (they may not reach fatigue level 3 due to a march). They may reach fatigue level 3 or 4 due to burning a RR station or combat. Starting on turn 2 all these restrictions are lifted on all units on both sides. 2. Union Forts and Redoubts: Ignore all forts and redoubts that are printed on the map. They have no effect in this scenario. 3. Entrenching: No units may entrench in this scenario. Exception: the Union regiment 138 PA begins the game under a fort marker; however, if it moves, it may not re-entrench. 4. Confederate Movement Restrictions: Confederate units may not enter or retreat into any of the following hexes: any hex in the District of Columbia; any hex within five hexes of Rockville (E0328); any hex within two hexes of Camden Station (E3115). 5. Staunton: The Union brigade Staunton may not enter any hex whose last two digits number "22" or less (e.g. 2722).
Victory Conditions. The Confederate player gains and loses VPs for the following occurrences at the end of the game: +3 for each of the following RR stations with a Damage marker: Back River Bridge (E3712), Relay House (E2518), Annapolis Junction (E2223), Laurel (E2026), Beltsville (E1630), Hyattsville (E1634), Annapolis (E3932); +2 for each of the following RR stations with a Damage marker: Lutherville (E2906), Relay House (E2808), Sykesville (E1210), Ellicott Mills (E2116); +1 for each of the following RR stations with a Damage marker: Owings Mills (E2207), Gambrills Station (E2927); +1 for each of the following hexes entered by a Confederate unit at least once during the game (Note: the Confederate player receives a maximum of 1 VP for each hex, even if a Confederate unit enters the hex more than once during the game): US Arsenal (E2510), Canton (E3414), Brooklyn (E3217), Bladensburg (E1635); +1 for each point of Union Manpower value lost for any reason whatsoever; -1 for each point of Confederate Manpower value lost for any reason whatsoever; -2 for each Confederate cavalry brigade (not the leader Stuart) which does not end the game in any of the following locations: any hex in Frederick County East, in or within 3 hexes of Shaferville (E0314), in or within 4 hexes of Methodist Church (E0701) (Note: if a Confederate cavalry unit is eliminated, the Confederate player automatically loses 2 VP for that unit at the end of the game for this victory condition — this VP loss is in addition to the VPs lost due to the loss of the unit's manpower value). At the end of the game, the Confederate VP total is calculated and the players consult the chart below to determine the winner.
Confederate VP Winner: 21 or more = Confederate Decisive Victory; 17 to 20 = Confederate Substantive Victory; 13 to 16 = Confederate Marginal Victory; 9 to 12 = Union Marginal Victory; 5 to 8 = Union Substantive Victory; 4 or less = Union Decisive Victory.
Confederate Set-Up
| Unit/Leader | Size | Command | Type | Manpower Value | Hex |
|---|---|---|---|---|---|
| Stuart | Corps | Cav | Ldr | - | E0211 (Parrsville) |
| F. Lee | Brig | Cav | Cav | 2 | E0211 (Parrsville) |
| Hampton | Brig | Cav | Cav | 2 | E0210 (Mt. Airy) |
| Munford | Brig | Cav | Cav | 2 | E0111 (Ridgeville) |
Union Set-Up
| Unit/Leader | Size | Command | Type | Manpower Value | Hex |
|---|---|---|---|---|---|
| 1 MA Regt | III | - | Cav | 1 | E0120 (Goshen) |
| 8 IL-A Regt | III | - | Cav | 1 | E1020 (Brighton) |
| 1 NY-A Regt | III | - | Cav | 1 | E1526 (Burton's) |
| 1 RI Regt | III | - | Cav | 1 | E1634 (Hyattsville) |
* 138 PA starts the game under a fort marker.
Scenario 6: The Battle for Washington
NOTES: In the Battle of Second Manassas in late August 1862, John Pope's Army of Virginia suffered a severe defeat at the hands of the Rebels, but his army managed to escape in reasonable order toward the Washington defenses. This scenario simulates what might have happened had Pope's army been completely crushed at Second Manassas. The scenario assumes that Lee would still have moved into Maryland to avoid attacking the fortifications around Washington on the south side of the Potomac. Due to the fact that the Army of the Potomac would have been far too weak to confront Lee aggressively in western Maryland, the scenario postulates that the Rebels would not have been content to rest in Frederick County, hoping that Maryland would join the Confederacy, but would have taken the offensive into Montgomery County to isolate the Federal capital or attack it directly. This scenario assumes that Generals Pope and McClellan would both have been relieved of command by President Lincoln following Second Manassas and that Maj. Gen. Ambrose Burnside would have been placed in command of the Army of the Potomac.
MAP: Use only the east map.
GAME LENGTH: 3 turns, Sept. 12 to Sept. 14, 1862.
SPECIAL RULES: 1. Turn 1: The following rules are in effect on turn 1 only: the Confederate player automatically wins the initiative die roll in the first Action Phase of turn 1 (afterwards, initiative is determined normally); the Union player may not activate Humphreys and Whipple; no units may entrench. 2. Movement restrictions: No units may enter a hex in Baltimore County. 3. Union Forts: Although this is not an Advanced Game scenario, all rules listed in Advanced Rule 10.0 on "Union Forts" apply. 4. Control: At the start of the game the Union controls all the objective hexes. 5. Automatic Instant Victory: The game is over and the Confederates immediately win a Decisive victory if at any time an undemoralized Confederate infantry unit enters the Capitol (E1140).
Victory Conditions. The Confederate player gains and loses VPs for the following occurrences at the end of the game: +50 if a Confederate infantry unit occupies any hex within 2 hexes of the Capitol (E1140) — however, in order to receive these VP, the Confederate unit must be able to trace a continuous path of city, road, pike, or RR hexes of unlimited length to any hex on the west map edge; this path may not enter an undestroyed fort hex, a hex occupied by a Union infantry unit, or a Union infantry ZOC (the path may enter Union infantry ZOC occupied by Confederate units); +2 for each Union fort destroyed; +3 for each of the following objectives controlled by the Confederate player: Stone Tavern (E0733), Grace Church (E1032), Burnt Mills PO (E1232), Bladensburg (E1635); +8 if the Confederate player controls all four of the above objectives (these 8 bonus VPs are gained in addition to the 3 VPs for each objective); for each of the following RR stations, it is +1 VP if there is a Damage marker in the hex, and +2 VP for a Destroy marker — if a station has been both Damaged and Destroyed, then only the VPs for the Destroy are counted: Annapolis Junction (E2223), Laurel (E2026), Beltsville (E1630), Hyattsville (E1634); +1 for each point of Union Manpower value lost in combat, retreat, or cavalry retreat (not in extended march, force march, or moving from one enemy ZOC to another); -1 for each point of Confederate Manpower value lost in combat, retreat, or cavalry retreat (not in extended march, force march, or moving from one enemy ZOC to another). At the end of the game, the Confederate VP total is calculated and the players consult the chart below to determine the winner.
Confederate VP Winner: 50 or more = Confederate Decisive Victory; 39 to 49 = Confederate Substantive Victory; 28 to 38 = Confederate Marginal Victory; 17 to 27 = Union Marginal Victory; 6 to 16 = Union Substantive Victory; 5 or less = Union Decisive Victory.
Confederate Set-Up
| Unit/Leader | Size | Command | Type | Manpower Value | Hex |
|---|---|---|---|---|---|
| Lee | Army | ANV | Ldr | - | E0122 |
| Longstreet | Corps | L | Ldr | - | E0122 |
| D.H. Hill-B | Div | L | Inf | 12 | E0122 |
| Anderson-B | Div | L | Inf | 14 | E0122 |
| D.R. Jones |
Union Set-Up
| Unit/Leader | Size | Command | Type | Manpower Value | Hex |
|---|---|---|---|---|---|
| 1 MA Regt | III | - | Cav | 1 | E0131 |
| 8 IL-A Regt | III | - | Cav | 1 | E0328 (Rockville) |
| Franklin | Corps | VI | Ldr | - | E0428 |
| Smith | Div | VI | Inf | 13 | E0428 |
| Slocum |
^ Humphreys & Whipple may not move on turn 1.
Advanced Game Rules
The following rules are used only in Advanced Game Scenarios, unless they are specifically called for in the special rules of the Basic Game scenarios. Rules colored blue in the original booklet are Standard Advanced Game Rules. Where these rules are used in other games in the GCACW series, they will not be changed. However, text that is not colored blue may change in other games.
1.0 Advanced Game Sequence Of Play
Each turn in the Advanced Game is performed according to the following "sequence of play:"
- Random Events Phase. Two dice are rolled; the players consult the applicable Random Events Table. (Exception: this phase is skipped on turn 1 in scenario 8. Note: scenario 8 uses the Random Events described in section 2.0, while scenario 7 has its own random events table and rules that are listed in the special rules of that scenario.)
- Harpers Ferry Phase. The players determine whether Union units in or near Harpers Ferry are surrounded. If so, the players consult the Harpers Ferry Table to see if surrender occurs.
- PA Militia Phase (starting Sept. 13). The Union player consults the Pennsylvania Militia Table.
- Reinforcement Phase. The players consult scenario instructions to see if they are due reinforcements. If so, they are placed on the map.
- Leader Transfer Phase. Leaders may be transferred from one subordinate unit to another.
- Attachment Phase. Substitute units may be reattached to other units.
- Supply Line Phase (only on Sept. 8, 13, & 18). The Union player may first attempt to repair damaged RR stations. Then the Union player may build a depot.
- Supply Status Phase (only on Sept. 8, 13, & 18). Both players determine the supply status of their units. Under some circumstances, a unit's Manpower Value may be reduced.
- The Action Cycle. Action Phase: A. Initiative Segment: Both players roll a die. The player with the higher roll wins (the Confederate player wins ties). The winner must take initiative or pass. If both players roll 1s in scenario 8 on turn 2 or later, the Action Cycle may end (see 3.0). B. Activation Segment: The player who has taken initiative must perform a single action with an eligible leader or unit. At the end of an Activation Segment, the players return to the Initiative Segment and a new Action Phase begins. Players continue to perform Action Phases indefinitely until both players pass in the same Action Phase.
2.0 Random Events
This section on random events only applies to scenario 8 (the long campaign). Scenario 7 (the short campaign) has its own random events described in the special rules for that scenario. In the Random Events Phase of each turn of scenario 8, starting with turn 2, one of the players rolls two dice. The players consult the Random Events Table, checking the result corresponding to that dice roll sum. The results are described below.
2.1 Random Events Table (Scenario 8)
| Dice | Result |
|---|---|
| 2 | Late Rain (Current) % |
| 3 | Rain (Current) % |
| 4 | Union Command Paralysis* |
| 5 | Union Commitment |
| 6 | Union Command Paralysis* |
| 7 | Union Commitment |
| 8 | Union Command Paralysis |
| 9 | Union Command Paralysis* |
| 10 | Rain (Current) % |
| 11 | Union Commitment |
| 12 | Union Command Paralysis* |
* Starting on turn 9 (Sept 12), the indicated results are converted to Union Commitment. % There are several special rules for rain: 1. On game turn 2, all Rain and Late Rain results are treated as No Effect and the random event must be re-rolled until another result is achieved. 2. On game turn 3, all Rain results are converted to "Late Rain". 3. No more than three turns may be rain turns. After the maximum number of rain turns occurs, all rain results are treated as No Effect (the random event is not re-rolled in this situation) and instead are clear weather. Note: If a random event was Late Rain, and if rain does not end up taking effect in the turn, then the turn does not count as a Rain turn for purposes of counting as one of the maximum three allowable rain turns.
2.2 Explanation of Random Events
Rain. All rain results are for the current turn only. For the effects of rain, refer to the Standard Rules section 12.0.
Late Rain. It rained sparingly during the Maryland campaign, and for the most part the rain was in the evening and night. In a turn with a Late Rain result, it is clear weather at the start of the turn. Rain does not take effect in the turn unless/until both players roll a 1 when determining initiative and the turn continues because there is a "Random End of Action Cycle" roll that is a 3-6 (see section 3.0). In this situation, rain begins immediately on this double 1's initiative and continues for the rest of the current turn. Units may dig in the Recovery Phase in turns that had Late Rain. If the "Minor Rivers Unfordable" and "Major Rivers Unfordable" are not on the Turn Track, place them on the Turn Track in the box corresponding to the current turn if Late Rain takes effect. If they are already on the Turn Track, they are not advanced. Note: If both players have not won at least one initiative when a double 1's occurs, then there is no subsequent "Random End of Action Cycle" roll, so clear weather continues. So, in Late Rain turns, a double 1's initiative can either be: of no special effect because both players have not won an initiative yet, or it can end the turn, or it can cause rain to start immediately.
Union Command Paralysis. At the start of the game, the Union player places a Union Paralysis marker in the At Start box of the Union Commitment Track. Each time the Union player obtains a Union Command Paralysis result on the Random Events Table, this marker is advanced one box on the track. If this paralysis tracking marker reaches the 4th position on the track then the game length is extended from 17 turns to 18 turns. If this paralysis tracking marker reaches the 7th position on the track then the game length is extended from 18 turns to 19 turns. If a Union Command Paralysis result occurs, the Union player suffers the following penalties throughout the Action Cycle of the current turn: the Movement Allowance of every infantry unit performing a march is reduced by two to a minimum of one (even in an Activate Corps Leader action); the Movement Allowance of every cavalry unit performing a march is reduced by four to a minimum of one; units may not force march (they may extended march); the Union player may not conduct a corps assault action. The following paralysis penalty only applies in Advanced Game scenario 8: if the current turn is September 11 (turn 8) or earlier, all Union units and leaders occupying a hex in any of the following counties may not activate or entrench (starting on September 12 (turn 9), this particular penalty is ignored); also, if a Confederate infantry unit occupies or moves into a hex in any of the listed counties, this particular activation and entrenchment restriction (but not the rest of the paralysis restrictions) is immediately lifted for all units for this turn in all of these counties, even if no Union units occupy the county in which the Confederate unit is situated; if a Confederate cavalry unit occupies or moves into a hex in any of the listed counties, this activation and entrenchment penalty is immediately lifted for Union cavalry units for this turn in all of these counties, even if no Union units occupy the county in which the Confederate unit is situated. The counties are: Montgomery, Prince George's, Anne Arundel, Baltimore, Howard, Carroll, Frederick-East, Fairfax, District of Columbia.
Union Commitment. At the start of the game, the Union player places the Union Commitment marker in the At Start box of the Union Commitment Track. Each time the Union player obtains a Union Commitment result on the Random Events Table, this marker is advanced one box on the track. The union units and leaders displayed underneath this box, all of which begin the game "uncommitted" (meaning they may not activate, entrench, or attach), are immediately "committed" and may begin to activate and entrench normally. For example, the first Union Commitment result moves the marker to box 1; Sykes and the 6 US are underneath this box and so these two units are immediately "committed". Notes: Union units may also be committed if Confederate units move within eight hexes of their set-up hex (see scenario 8 special rules). The Union Commitment marker may never advance more than one box per Union Commitment result on the Random Events Table, even if all the Union units and leaders displayed underneath that box on the track have already been committed due to the proximity of Confederate units. Abercrombie may only be released due to the proximity of Confederate units.
3.0 Random End Of Action Cycle
In scenario 8 only, starting with turn 2, Action Cycles may end due to the players' Initiative Segment die rolls. If in any Initiative Segment of an Action Cycle from turn 2 to the end of the game, both players roll a 1 when determining initiative, there is a chance that the Action Cycle may end. In this event, either player rolls another die. If this result is a 1-2 then the Action Cycle immediately ends and play proceeds to the Recovery Phase. If the subsequent die roll is not as indicated above, then the Action Cycle continues normally (with the Confederate player winning that double-1 initiative die roll). Note: even if one of the players can not perform any actions, initiative must be rolled (except on turn 1). Exception: If double "1's" occur in an Initiative Segment, the Action Cycle automatically continues if both players have not either won at least one previous initiative in the current cycle or conducted an action. In this case, the Confederate player wins the double "1's" initiative roll and play proceeds normally.
4.0 Harpers Ferry
In the Advanced Game scenario, the players must determine whether Union units in and around Harpers Ferry (W2521) are surrounded, and if so, whether or not they surrender. This determination takes place in the Harpers Ferry Phase.
How To Determine If Harpers Ferry Is Surrounded. In the Harpers Ferry Phase, every Union unit occupying Harpers Ferry/Bolivar (W2521) or within three hexes of hex W2521, must attempt to trace a continuous path of road, pike, or RR hexes of unlimited length to any hex on the north or east map-edge. This path may not enter a Confederate-occupied hex or a Confederate ZOC unless that ZOC is occupied by a Union unit.
How To Determine If Harpers Ferry Surrenders. If there are no Union units in or within three hexes of W2521, or all Union units in or within three hexes of W2521 can successfully trace such a path, no action is taken and play proceeds to the next phase. However, if at least one union unit cannot trace such a path, the Confederate player rolls two dice, combines the rolls into a single sum, and consults the Harpers Ferry Table. (The dice sum may be modified; see below.) If the modified dice sum is 11 or less, the result is "no effect", and play proceeds to the next phase. If the modified dice sum is 12 or more, the result is "surrender" (see below). The Confederate player may take a maximum of one dice roll per turn to attempt to achieve the surrender of Harpers Ferry. Note: if undestroyed, the Union fort (see section 10) in Harpers Ferry counts as a "Union unit" for purposes of the above surrender action (there does not need to be any Union military units in the above mentioned area, just the Union fort qualifies for this purpose).
Surrender Of Harpers Ferry. If the Confederate player achieves a "surrender" result, all Union units and leaders in or within three hexes of Hex W2521 which cannot trace a path of hexes as previously described are immediately eliminated from play. The Confederate player receives VP if this occurs (see scenario victory conditions). Note the VP difference between "Harpers Ferry Surrender" and "surrender" from retreat which is retreat losses (Standard Rules section 7.6). Note: if a surrender result is achieved then the Union fort in Harpers Ferry (W2521) is immediately destroyed (see section 10). The Union depot in Harpers Ferry remains on the map, but may be destroyed as per section 6.1.
Harpers Ferry Table: Dice Sum ≤11 = No Effect; Dice Sum ≥12 = Surrender.
Harpers Ferry Table Modifiers: The Confederate player's Harpers Ferry Table dice roll is modified if any of the following conditions are in effect (all modifiers are cumulative): +3 if a Confederate infantry unit with an Artillery Value of at least 1 occupies Hex W2620 (Naval Battery); +1 if a Confederate infantry unit with an Artillery Value of at least 1 occupies Hex W2621 (Loudoun Heights); +1 if a Confederate infantry unit with an Artillery Value of at least 1 occupies Hex W2420 (Bolivar Heights).
5.0 Pennsylvania Militia
In each Pennsylvania Militia Phase starting with September 13 (turn 4 in scenario 7; turn 10 in scenario 8), the Union player rolls a die and consults the Pennsylvania Militia Table. This roll may be modified (see below). If the result is "No Effect", no action is taken on the current turn. If the Pennsylvania Militia arrives, the Union player no longer consults the table for the rest of the game. He may place the "PA Militia" unit counter on the map as described below.
Pennsylvania Militia Table: Die Result 1 or less = Arrives; 2-6 = No Effect. Die Roll Modifier: If at least one Confederate infantry unit currently occupies a hex in Carroll or Baltimore County, the Union player subtracts one from this die roll.
Placement Of The Pennsylvania Militia. If the Pennsylvania Militia arrives, the Union player places an organized Strength marker with a Manpower Value of 15 underneath the unit. The unit may then be placed on the map anywhere on the north map-edge within eight hexes of Hagerstown (W2502) and not in a Confederate occupied hex. The Union player may elect to delay the arrival of this unit and place it as described above in any future Pennsylvania Militia Phase.
Pennsylvania Militia Special Rules. The Pennsylvania Militia unit functions normally except for the following restrictions: it may not make an extended march and it may not force march; each time it makes a "normal" march (as opposed to an "extended" march), the Union player consults the Extended March table to see if it suffers any penalty (for example: if the unit is in supply, on its normal (non-exhausted) side, and is marching from Fatigue Level 0 to 1, then its only modifier is +2 for Union Garrison Unit; if the Union player rolls a 4, the final result of 6 means the unit goes Disorganized if it was Organized, or loses 1 Manpower if it was already Disorganized); it may not participate in a corps activation, corps assault, or grand assault.
6.0 Supply
To function at full effectiveness, units must be in supply.
6.1 Depots. Both players possess depots, listed in the Setup for each player. Only the Union player may build additional depots (see Supply Line Phase section below). Depots act as supply sources. They have no Combat Value and may not be attacked, nor may they move or retreat. Units may enter a hex occupied by an enemy depot as long as no enemy units occupy that hex. At the moment a unit with a Combat Value of 2 or more performs a "Burn RR Station" action in a hex occupied by an enemy depot, that depot is removed from the map and is considered destroyed (in addition, if the hex contains a RR station, the station is either damaged or destroyed as per the Burn RR Station action). A player may perform a Burn RR Station action in a hex occupied by an enemy depot even if that hex does not contain a RR station. A player is not allowed to destroy his own depots.
6.2 Supply Line Phase. The Supply Line Phase (which occurs on the September 8, 13, and 18 turns only) has two parts, which take place in this order: 1. The Union player may attempt to remove Damage markers from RR station hexes. 2. The Union player may build one Depot in an eligible hex.
Repairing Damaged RR Stations. During step one of the Supply Line Phase, the Union player may attempt to remove Damage markers from RR station hexes. Destroy markers may never be removed. For each RR station on the map with a Damage marker which is neither occupied by a Confederate unit nor in a Confederate ZOC, the Union player rolls a die. If the Damage marker is situated in Baltimore, Anne Arundel, Prince George's, Howard, Montgomery, Frederick-East, or Carroll Counties, on a roll of 1-5 the Damage marker is removed; on a roll of 6 the Damage marker remains in place. If the Damage marker is situated in any county except those listed above, it is removed on a roll of 1-4. If the Union player fails to remove a Damage marker in a Supply Line Phase, he may make another attempt to remove it in a later Supply Line Phase.
Building Union Depots. In step two of the Supply Line Phase, the Union player may build one additional depot. To do this, the Union player may place a depot in any one RR station on the map as long as that hex meets all the following requirements: it is neither damaged nor destroyed; it is not Confederate occupied or in a Confederate ZOC (Exception: the depot may be placed in a Confederate ZOC if the RR station is Union occupied); a continuous path of RR hexes can be traced from the depot's intended hex to any of the hexes listed below. This path of RR hexes may not enter a damaged or destroyed RR station, nor may it enter a hex occupied by a Confederate unit situated under a Breastwork or Fort marker. The path may enter hexes occupied by unentrenched Confederate units. It may also enter all Confederate ZOC. This path may not cross a hexside containing a destroyed bridge (this rule applies even if a friendly pontoon bridge has been built across the hexside).
Scenario 7 hexes: W2501; W5806 (New Windsor); W5817. Scenario 8 hexes: W2501; E2906 (Lutherville); E3911 (Rossville); E3115 (Camden Station); E1139 (Baltimore Depot); E3932 (Annapolis). Note: The RR station in W5806 (New Windsor) is considered to connect off-map to E1602 from which it must trace this path.
6.3 Supply Status. During the Supply Status Phase (which occurs on the September 8, 13, and 18 turns only), both players must determine whether each of their military units is "in supply" or "out of supply". Players do not determine supply status for leaders.
How To Determine Supply Status. The county currently occupied by each unit determines that unit's supply status. If during a Supply Status Phase a unit cannot achieve "in supply" by either of the applicable methods listed below, then it is "out of supply". Note: The District of Columbia is considered a county for supply purposes.
Determining Confederate Supply Status. There are two methods of determining the supply status of Confederate units. 1. If during the Supply Status Phase a Confederate unit is situated in a county which currently contains a Confederate depot, the unit is automatically in supply. The presence of enemy units (or their ZOC) in this county has no effect on Confederate supply status, unless an enemy unit occupies the hex of the Confederate depot, in which case the Confederate units in that county are out of supply. 2. If during the Supply Status Phase a Confederate unit occupies the same hex as a Union depot, up to five Confederate units in the depot hex or in any adjacent hex are considered in supply. If there are more than five such units, then the Confederate player picks which ones to be in supply.
Determining Union Supply Status. There are five methods of determining the supply status of Union units: 1. If during the Supply Status Phase a Union unit is situated in a county which currently contains a Union depot, the unit is automatically in supply. The presence of enemy units (or their ZOC) in this county has no effect on Union supply status, unless an enemy unit occupies the hex of the Union depot, in which case that depot may not provide Union supply. 2. If during the Supply Status Phase a Union unit occupies the same hex as a Confederate depot, up to five Union units in the depot hex or in any adjacent hex are considered in supply. If there are more than five such units, then the Union player picks which ones to be in supply. 3. If during the Supply Status Phase a Union unit is situated in a qualifying county which is adjacent to a qualifying county that currently contains a Union depot, the unit is automatically in supply. A "qualifying" county is any county north of the Potomac River; therefore, all counties except Fairfax, Loudoun, Clarke, Frederick VA, Jefferson, and Berkeley. The presence of enemy units (or their ZOC) in either county has no effect on Union supply status, unless an enemy unit occupies the hex of the Union depot, in which case that depot may not provide Union supply. 4. If during the Supply Status Phase, a Union unit can trace a continuous path of road, pike, or RR hexes no more than ten hexes in length to a Union depot (in any county different from the Union unit), the unit is in supply. This path may not enter a Confederate occupied hex (including the depot's hex) or a Confederate ZOC (unless that ZOC is Union occupied). The path may not cross a hexside unless that hexside is traversed by a road, pike, or RR. The path may cross an unfordable river hexside. 5. If during the Supply Status Phase a Union unit is situated in a county which has at least one RR station without a Damage or Destroy marker, the unit is in supply if a continuous path of railroad hexes can be traced from that RR station to any hex containing a Union depot. Neither the RR station from which the path originates nor any RR station along that path may contain a Damage or Destroy marker. The path may not cross a destroyed RR bridge, even if a Union pontoon bridge is across the hexside. The path may enter hexes containing Confederate units or ZOC, except the hex containing the depot at the end of the path may not contain a Confederate unit. The path may not enter a Maryland county that is controlled by the Confederate player (see 11.0). Note: the Western Maryland RR in hex W5806 (New Windsor) is considered to connect directly with the railroad in hex E1602.
In Supply. Units which are in supply function normally in all respects. All units start the game in supply. Units which are calculated to be in supply in a Supply Status Phase automatically remain in supply (no matter where they move) until the next Supply Status Phase, at which time their supply status is again determined. Units which are calculated to be in supply in the final Supply Status Phase of a scenario automatically remain in supply for the rest of the game no matter where they move. If a unit is determined to be in supply (during the Supply Status Phase or by foraging) then it should not have an Out of Supply (OOS) marker. If it does not have an OOS marker, then nothing is done to the unit during the Supply Status Phase. If the unit does have an OOS marker, then that marker is removed and nothing further is done to the unit at the instant of removal of this marker.
Out Of Supply. If a unit is "out of supply" it should have an Out of Supply (OOS) marker. If a unit is determined to be out of supply during the Supply Status Phase and it does not already have an OOS marker, it gets this marker and nothing further is done at this point in time. If a unit is determined to be out of supply during the Supply Status Phase and it is already out of supply, it retains the OOS marker; and in addition its Strength marker is replaced by one with a Manpower Value one less than the one being removed and the new Strength marker is placed on its disorganized side. A unit can be eliminated in such a fashion. See section 6.5 for the effects on units of being out of supply. Out of supply units may regain "in supply" status prior to the next Supply Status Phase by foraging (see the next section).
6.4 Foraging. In the Recovery Phase (before fatigue levels are reduced; see Standard Rules 8.0) out of supply units at Fatigue Levels 0-2 may forage (but not if they entrenched or built/repaired a bridge in that phase). Units which are in supply or at Fatigue Levels 3 or 4 may not forage. Leaders may not forage and have no need to. For each eligible unit wishing to forage, the owning player performs the following procedure in Step 2 of the Recovery Phase: 1. Determine the "Forage Value" of the county occupied by the unit by consulting the Forage Value Chart. Each county has two Forage Values: one Union, one Confederate. Use the value corresponding to the unit's nationality. 2. Roll a die and modify this roll with all the following modifiers that apply: add the unit's current Fatigue Level (if the unit is at Fatigue Level 0 the roll is not modified); forage die rolls for units foraging in some counties may be modified depending on who controls Harpers Ferry (see next section for Harpers Ferry control determination); add one if all six hexes adjacent to the foraging unit are enemy-occupied or in enemy ZOC (even if occupied by a friendly unit), or are hexes into which the foraging unit cannot move due to terrain restrictions. 3. Compare the modified roll to the Forage Value determined in Step 1 above: if the modified roll is less than or equal to the Forage Value, the unit has successfully foraged and its OOS marker is removed (the unit is now in supply and remains so until the next Supply Status Phase, at which time its supply status is determined normally); if the modified roll is greater than the Forage Value, the unit has not foraged successfully and remains out of supply (it may forage again in Recovery Phases of ensuing turns, assuming it meets the above requirements).
Control Of Harpers Ferry. Immediately before units forage in the Recovery Phase, the players must determine which side (if any) controls Harpers Ferry (W2521). There are two ways of controlling Harpers Ferry: 1. If a unit occupies Harpers Ferry, the player owning that unit controls Harpers Ferry. 2. If a unit occupies a hex adjacent to Harpers Ferry, the player owning that unit controls Harpers Ferry as long as an enemy unit does not occupy Harpers Ferry or any hex adjacent to Harpers Ferry. Note: if the Union fort (see 10.0) in Harpers Ferry is undestroyed, it counts as a Union unit for the above Harpers Ferry control determination. If the Union player controls Harpers Ferry, place the Harpers Ferry marker in Harpers Ferry (W2521) on the "Union Control" side. If the Confederate player controls Harpers Ferry, place the Harpers Ferry marker in that hex on the "Confederate Control" side. If neither player controls Harpers Ferry (this could happen if the Confederates destroyed the Union fort in that hex and no units from either side are in or adjacent to Harpers Ferry), do not place the marker in Harpers Ferry.
Dispersal (Optional). To simulate the fact that foraging was most effectively performed by armies that were dispersed over wide areas, players may use the following optional rule: A player must add 1 to an infantry unit's forage die roll for each friendly infantry unit that has already made a forage attempt in that unit's hex or any adjacent hex at an earlier point in the current Recovery Phase. For example, if three infantry units were stacked in the same hex and all three attempted to forage in the same Recovery Phase, the first would forage normally; the second would have 1 added to its forage roll; the third would have 2 added to its forage roll. This is in addition to the unit's Fatigue Level modifier, and any Harpers Ferry control modifier. Foraging cavalry units are unaffected by this rule; similarly, cavalry units adjacent to infantry units do not affect those infantry units when the infantry units forage.
Forage Values Table (Confederate / Union, per county): Washington 4 / 5. Frederick-West 4+ / 6. Frederick-East 4++ / 6. Carroll 4++ / 6. Howard 4++ / 6. Montgomery 4+ / 6. Baltimore 4++ / 6. Anne Arundel 4++ / 6. Prince George's 4++ / 6. District of Columbia# 4++ / 6. Berkeley 5 / 5*. Jefferson 5 / 5*. Frederick-VA 5 / 5**. Clarke 5 / 5**. Loudoun 3 / 4. Fairfax 3 / 5.
+ Confederate units foraging in the indicated counties add 1 to their forage die rolls if Harpers Ferry is under Union control. ++ Confederate units foraging in the indicated counties add 2 to their forage die rolls if Harpers Ferry is under Union control. * Union units foraging in the indicated counties add 1 to their forage die rolls if Harpers Ferry is under Confederate control. ** Union units foraging in the indicated counties add 2 to their forage die rolls if Harpers Ferry is under Confederate control. # The District of Columbia is considered a county for supply purposes.
6.5 Supply Effects. Units which are in supply function normally in all respects. Out of supply units may perform actions normally and do not have their movement or combat restricted. However, they may suffer a penalty in the Recovery Phase (ref. Standard Rules 8.0). Out of supply units also add one to their extended marches. Out of supply units may become re-supplied prior to the next Supply Status Phase by foraging (see Foraging Section).
Recovery Phase Reminders: In step 3a of the Recovery Phase in the Standard Rules, out of supply units possessing disorganized Strength markers do not have their disorganized Strength markers flipped to their organized sides if they are at Fatigue Level 0 or 1; instead, their Strength markers remain disorganized. In step 6 of the Recovery Phase, out of supply units with organized Strength markers have their Strength markers flipped to their disorganized sides. Note: the redesigned HCR campaigns must be used with the version of the Standard Rules included with HCR or a later version. Earlier versions of the Standard Rules have an exception for HCR in Recovery Phase step 6 that no longer applies.
7.0 Substitute Units
The Confederate player has six "substitute" infantry brigades and two "substitute" cavalry regiments. The Union player has six "substitute" infantry brigades but does not have any "substitute" cavalry units. Note: the extra 2 Union substitute infantry and the 2 substitute cavalry counters are used in RWH and may not be used in HCR.
7.1 Detachment. Either player may detach one or more substitute infantry brigades from a marching infantry unit as long as the unit has a Manpower value of 2 or more. The Confederate player may detach one or more substitute cavalry regiments from a marching cavalry unit as long as the unit has a Manpower value of 2 or more.
How To Detach. To detach, a player places a substitute in the same hex as the unit from which it detaches and assigns it a Manpower value. A Strength marker equal to the Manpower value assigned to the substitute is placed under it. The substitute's Manpower value is subtracted from the parent unit's Manpower value, and the parent unit is assigned a new Strength marker, on the same side as the one it replaces, reflecting its reduced value.
Placement Of Detached Units. A detached substitute may be placed in the hex in which an active infantry unit begins its march or in any hex entered by the active unit during its march. After a substitute is placed on the map, the active unit may continue its march (but the substitute may not move further during this action). After placement, substitutes function normally.
Detachment Restrictions. Counter Limits: The number of substitutes provided in the game is a strict limit. If all substitutes are currently in use, no more may be used. However, if substitutes reattach to other units, they are removed from the map and again become available for use. Each player has 6 infantry substitute brigades, and the Confederate player has 2 substitute cavalry regiments. Size: After detaching, a parent unit must have a minimum Manpower value of 1. The Manpower value of a substitute is limited: substitute infantry brigades must be assigned a Manpower value of 7 or less; substitute cavalry regiments must be assigned a Manpower value of 2 or less.
Determining Status Of Detachments. Fatigue: If a substitute is placed in the hex in which an active unit begins a march, the substitute is assigned a Fatigue marker equal to the active unit's Fatigue Level before it was selected to march. If a substitute is placed in any hex except the one in which the active unit begins a march, the substitute is assigned a Fatigue marker equal to the active unit's Fatigue Level at that moment. Entrenchment: If an entrenched active unit detaches a substitute in the hex in which it begins a march, the substitute is assigned the same kind of entrenchment marker possessed by the active unit. Disorganized, Demoralized, Exhausted, Supply: If an active unit has a disorganized Strength marker, is on its exhausted side, possesses a Demoralized marker, or possesses an Out of Supply marker, any substitute detached by this unit must possess the same characteristics. Command: The owning player should note on a piece of paper the number of each substitute placed on the map and the command to which it belongs. It belongs to the same command as the unit from which it detaches, but it may eventually attach to a unit of a different command.
7.2 Attachment. In the Attachment Phase, a substitute (or a normal infantry regiment or brigade, or cavalry regiment—see "Special Attachment") stacked in the same hex as a friendly unit of the same type may "attach" to that unit. As long as one of these allowable units attaches to a unit of the same type (infantry or cavalry), it may attach to any friendly unit regardless of size or affiliation. Artillery units, cavalry brigades, and infantry divisions may not attach. (Exception: Union cavalry regiments may not attach.)
How To Attach. Remove attaching units and all accompanying markers from the map. The Manpower value of an attaching unit is added to the Manpower value of the unit to which it attaches; this unit receives a new Strength marker with an enhanced Manpower value.
Attachment Restrictions. Unity: A unit may not attach a portion of its strength to another unit. The whole unit must be attached (and the unit removed from the map). Size: A unit may not attach to another unit if the addition of its Manpower value would raise the Manpower value of the unit remaining on the map above the following strengths: infantry divisions may not be raised above a Manpower Value of 14; infantry brigades may not be raised above a Manpower Value of 7; infantry regiments may not be raised above a Manpower Value of 2; cavalry brigades may not be raised above a Manpower Value of 4; cavalry regiments may not be raised above a Manpower Value of 2.
Determining Status After Attachment. Strength Marker: The unit to which a unit attached is assigned a new Strength marker on the same side (organized or disorganized) as the one it replaces. Exception: If the Manpower value of an attaching unit is greater than the Manpower value of the unit to which it attaches, the new Strength marker of the unit remaining on the map is placed on the same side as the attaching unit's Strength marker. Fatigue, Exhaustion: If a unit attaches to a unit and the two units have different Fatigue Levels, the unit remaining on the map after attachment receives a Fatigue Level equal to the highest of the two levels. If a unit attaches to a unit and one of the units is exhausted and the other is on its normal side, the unit remaining on the map is flipped to (or remains on) its exhausted side. Entrenchments: If an entrenched unit attaches to an unentrenched unit, the unit remaining on the map remains unentrenched. However, if an entrenched unit or unentrenched unit attaches to an entrenched unit, the unit remaining on the map remains entrenched. Demoralized: If a unit attaches to a unit and at least one of the units is demoralized, the unit remaining on the map is assigned a demoralization level equal to the most severe level possessed by one of the units prior to attachment. Supply: Supply status is determined by the supply status of the unit with the larger manpower. Thus the unit remaining on the map is out of supply if either: the unit being attached to was out of supply and possessed a manpower value at least equal to the attaching unit, or the attaching unit was out of supply and was greater in manpower than the unit to which it is attaching. In all other cases, the unit remaining on the map is in supply.
Special Attachment. Both players' non-substitute infantry regiments and brigades may attach to any friendly infantry unit as long as attachment rules are adhered to. Similarly, non-substitute Confederate cavalry regiments may attach to any friendly cavalry regiments. (Exception: Union infantry units that are not Army of the Potomac (or not detachments from such units) may not attach to Army of the Potomac infantry units.) Artillery: If a unit attaches to another unit, assign the attaching unit's entire Artillery value to the unit to which it attaches. This unit receives a new Artillery marker with an enhanced Artillery value.
7.3 Substitutes And Artillery Values. If the players wish, they may transfer Artillery value points to or from detaching and attaching units. Detachment: If a substitute detaches from a unit, it may be assigned some or all of the Artillery value points of the parent unit. If so, an Artillery marker equal to the Artillery value assigned to the substitute is placed under it. The substitute's Artillery value is subtracted from the parent unit's Artillery value, and the parent unit is assigned a new Artillery marker, reflecting its reduced value. Attachment: If a unit attaches to another unit, assign the attaching unit's entire Artillery value to the unit to which it attaches. This unit receives a new Artillery marker with an enhanced Artillery value.
8.0 Union Railroad Movement
Units Eligible For Rail Movement. Rail movement may only be performed in scenario 8 and only by Union infantry units and attached leaders. In order to move by rail, a Union infantry unit must begin a march action on the east map in any undamaged and undestroyed RR station in a county that is not controlled by the Confederate player (see 11.0).
How Rail Movement Is Performed. To move an eligible unit by rail, the Union player declares a March action. The unit's Fatigue Level is increased by one. An extended march never occurs due to rail movement (no matter what the fatigue level of the unit). The unit may then move up to 35 hexes, regardless of terrain or rain, as long as it moves only along continuous railroad hexes. It may transit Union occupied hexes without penalty. After moving by rail, a unit may perform actions later in the Action Cycle if it has fatigues remaining (but it may not move by rail again in the same turn).
Rail Movement Restrictions. A maximum of one Union infantry division or two infantry brigades/regiments, plus attached leaders, may move by rail per turn. A unit moving by rail is subject to the following limitations: it may not start in or enter an enemy occupied hex or ZOC (even if that ZOC is Union occupied); it may not enter a hex containing a damaged or destroyed RR station; it may not cross a hexside containing a destroyed bridge (this rule applies even if a friendly pontoon bridge has been built across the hexside); it may not enter a hex on the west map (Note: some western rows of the east map lie on top of the west map; therefore, the Union may move by rail to these east map hexes if otherwise allowable, for example to Mt. Airy at W5717); it may not enter a hex in a Confederate controlled county (see 11.0).
9.0 Death Of Confederate Leaders
How Confederate Leaders Are Killed. In any combat in which one or more Confederate corps leaders occupy either the defending hex or any hex containing subordinate attacking units, one of those corps leaders may be killed. If in the combat procedure both players roll a 1 before any modifiers are taken into account, combat resolution is temporarily halted while the Confederate player rolls another die. If this roll is even, a Confederate corps leader is killed; if the roll is odd, Confederate corps leaders are unaffected. If more than one Confederate corps leader occupies the defending hex or the hexes containing subordinate attacking units, the one with the highest Tactical Value is killed (if the two leaders involved are Jackson and Longstreet, then roll another die to randomly determine which is killed). The Confederate army leader Lee may never be killed.
Effects Of A Confederate Corps Leader's Death. If a Confederate corps leader is killed, flip its counter over to its reverse side, revealing a substitute leader ("Sub" is printed on the back of the counter). This leader is considered the new corps commander. Aside from reduced Tactical and Command Values, the new leader functions in exactly the same way as the one who was killed. If Jackson is killed, his substitute does not get the special Jackson assault bonus but does get the Lee assault bonus if stacked with Lee. A substitute leader remains in play for the rest of the game and may never be killed. A leader's death does not affect the tactical modifier in the current combat.
10.0 Union Forts
Several Union forts are printed on the map. These forts are Union controlled and undestroyed at the start of all scenarios unless otherwise indicated. Union forts printed on the map are not the same as entrenchment fort marker counters that both players may build on their units per section 9 on Entrenchments in the Standard Basic Rules. Note: the fort in Harper's Ferry (W2521) only exists in 1862 scenarios (so for HCR); for scenarios in games in other years (RTG, RWH), it should be ignored. The fort in Naval Battery (W2620) only exists for scenarios in 1863-1865 (RTG, RWH); for scenarios in HCR it should be ignored.
Effects Of Union Forts. Confederate units may not enter or retreat into a hex containing an undestroyed Union fort. Similarly, Confederate leaders may not transfer or exert a command radius into or through an undestroyed fort hex. Confederate units adjacent to an undestroyed Union fort do exert a ZOC into the fort; however an undestroyed fort is always treated as occupied by a Union unit when determining the effects of Confederate ZOC. Union forts do not exert ZOC (unless a Union unit occupies its hex). A Union fort hex adjacent to a defending Confederate unit is considered "covered" for flank attack determination. Union units may enter fort hexes without restriction. Forts themselves may not activate or entrench.
Union Forts And Combat. Union forts in HCR have an intrinsic Combat Value of 2 and an intrinsic Artillery Value of 1. (Exception: the forts in and adjacent to Baltimore city hexes have an intrinsic Combat Value of 4 and an intrinsic Artillery Value of 0.) This intrinsic Combat Value may only be used in defense; a fort may never join in a Union attack (although Union units in fort hexes may attack). Confederate units may attack an adjacent fort hex. If no Union units occupy the fort hex, the fort's intrinsic combat and artillery value is used to resolve the combat. If one or more Union units occupy the fort hex, the Union player's Combat and Artillery values are calculated by adding the fort's intrinsic values to the Combat and Artillery values of the Union units defending in the fort hex. In Confederate attacks against forts, there can never be a tactical modifier in favor of the Confederate player. If the Confederate player has a higher tactical value than the Union player, or if no Union units occupy the fort hex, no tactical modifier is used. If the Union player has a higher tactical value, that combat die roll modifier is applied normally. In Confederate attacks against fort hexes, the Confederate player may never gain a flank attack bonus. All other combat modifiers are applied normally.
How Union Forts Are Destroyed. If the Union player suffers a combat result containing an "r" (retreat) or "R" (rout) in any Confederate attack against a Union fort hex, the fort is permanently destroyed. Any Union units in the fort hex must also retreat or rout. Place a "Destroyed" marker in the hex—a Union fort is no longer considered to occupy that hex. When calculating the Defender's Combat Value to determine the proper column on the Combat Chart, do not include the intrinsic Combat value of the fort. Combat results containing Manpower Value losses, "f" (fatigue-1), "F" (fatigue-2), and "D" (disorganize) results have no effect on forts; however, these results do affect Union units defending in the fort hex. A manpower value loss may not be taken by the fort; if there are any units in the fort, they take the full manpower loss. The destruction of a fort does not count as a Manpower value loss for Victory Point purposes in the scenarios. A destroyed fort is considered to be a Union redoubt hex (see Standard Rules section 9.0) for the rest of the scenario. If Union units re-enter the hex, they gain all the normal benefits of a redoubt hex.
Entrenchment In Fort Hexes. Union units in a fort hex are treated as if they occupied a redoubt hex for entrenchment purposes. Thus, in a fort hex, Union units with no other entrenchments have their Combat and Artillery values multiplied by 1.5 when defending. Units in fort hexes may continue to entrench normally until they are under a completed Fort marker (which should not be confused with a printed fort hex).
11.0 Control Of Maryland Counties
In the Maryland County Control Phase, the Confederate player determines whether he fulfills the requirements for control of each Maryland County. There are two effects of Confederate control for each Maryland County: the Union player may not move units by rail in that county in the following turn (even if during the next turn's Action Phase the Confederates no longer fulfill the requirements for control of the county); the Confederate player immediately receives VP, which are recorded on the VP track. If the Confederate player fulfills the requirements for control of more than one county, he receives VP only for the county with the highest VP award.
County Control Hexes. Each Maryland County has a "county control seat" (see the Terrain Effects Chart). For example, the county control seat for Washington County is Hagerstown (W2502). Exception: in scenario 7 only, the county control seat for Montgomery County is considered to be Gaithersburg (W5531); in scenario 8, this county control seat is Rockville (E0328) as printed on the map. Note: the control seat for Baltimore County is Camden Station (E3115); the county seat marker in Reisterstown (E1905) is the control seat for Baltimore County only in RTG.
How To Determine Confederate Control Of A County. During each Maryland County Control Phase, the Confederate player must achieve both of the following conditions to control a Maryland county: 1. The county control seat must be occupied by a Confederate unit with a Manpower Value of 2 or more. This unit must be able to trace a continuous path of road, pike, or RR hexes of unlimited length to any of the following hexes. The path may not enter a Union occupied hex, a Union ZOC (unless that ZOC is occupied by a Confederate unit), or an undestroyed Union fort hex. The path may cross an unfordable river hexside. Qualifying hexes: Winchester (W0330) or Charlestown (W1924); Harpers Ferry/Bolivar (W2521)—however, the Union fort in Harpers Ferry must be destroyed; any south mapedge hex in Loudon, Clark, or Frederick (VA) County. 2. In addition, the county must be occupied by Confederate units with a total Manpower Value of 13 or more (the unit(s) in the control seat may be included in this total). Aside from the unit in the control seat, Confederate units do not have to trace a path of hexes to the south mapedge, and they may be situated anywhere in the county.
Advanced Game Scenarios
There are two Advanced Game scenarios. Unless otherwise specified, units begin the scenario on their front (unexhausted) sides at Fatigue Level 0 and possess organized Strength markers. Place the Turn marker on the Turn Record Track in the box for the start date of the scenario being played, this is turn one. At the start of each scenario, place the three Confederate Victory Point markers ("x1", "x10", and "x100") in the "0", "00", and "000" boxes on the Victory Point Track. As the Confederate player gains and loses VPs for the following occurrences, these VP markers should be adjusted to reflect the current Confederate VP total. If the Confederate VP total is a negative number, flip the VP markers over to their reverse ("minus") side. Note: VPs for Union units designated "RR" or "Shen" are different from other Union units and must be kept track of separately.
Scenario 7: From Frederick to Sharpsburg
NOTES: This scenario simulates the week preceding the Battle of Antietam, when Lee's Army of Northern Virginia withdrew from Frederick County, Maryland and moved against the Union bastion at Harpers Ferry. Meanwhile, McClellan's Army of the Potomac marched from the Washington defenses against Lee's dispersed and badly depleted army.
MAP: Use only the west map.
GAME LENGTH: 9 turns; September 10 to September 18, 1862.
SPECIAL RULES: 1. Union Movement Restrictions: The Union player is subject to the following movement restrictions. An individual Union unit is removed from its restriction at the moment a Confederate unit moves adjacent to the Union unit's set-up hex. All Union units and leaders may not activate or entrench on turn 1. Couch and French may also not activate on turn 2. The following Union units may not entrench until turn 3: all units designated RR or Shen, the 12 IL cavalry, and the 8 NY cavalry. This restriction applies to Ford even though he begins the game under a breastwork marker. 2. Turn 1: Because no Union units or leaders may activate on turn 1, there is no initiative die roll on turn 1 and the Confederate player may conduct consecutive actions for as long as he is willing or able to do so. However, if the Confederate player moves adjacent to a Union unit, then that unit is immediately released and players revert to the normal Action Phase procedure. 3. Union Reinforcements: Hooker, Meade, Hatch, and Ricketts may enter the game on turn 2. To enter, during any Union Activation Segment on turn 2, which is the only action allowed in this Activation Segment, these units are placed on the map on the east map edge, all units in one hex, from W5816 to W5826, inclusive. They may enter adjacent to a Confederate unit, but not on an enemy unit. They enter at fatigue level 1 (on their normal sides), and are considered to be entering the map with 0 movement points remaining. They may not move for the rest of turn 2; but they are removed from this particular restriction the instant a Confederate unit is within 7 hexes of them. On turn 3 these units are removed from all restrictions if they entered on turn 2. If they elected not to enter the map on turn 2, then when they do enter on a subsequent turn, their entry rules are the exact same as on turn 2 except they enter at fatigue level 0 and they may move in subsequent Activation Segments later in the turn whether Confederate units are near them or not. 4. Off Map Union Depots: The Union has off map depots in both Rockville in Montgomery County and Ellicott Mills in Howard County. Therefore, Union units in Montgomery County and Howard County and all counties adjacent to these two counties (except Loudoun County) are automatically in supply in this scenario in the Supply Status Phase. 5. East map edge: Union units may retreat off the east map edge without loss due to off map retreat, but other retreat losses still apply. If a Union unit retreats off map, if it is a leader it may immediately return to the map to the closest unit in its command from its exit hex. Union military units that retreat off the east map edge may re-enter the map 2 turns later at the end of the Random Events Phase (and with the leader if it had no other units in its command on map). To re-enter, all the units that exited together, are placed on map in any hex within 4 hexes from where they exited the map (at fatigue level 1, normal side, not demoralized, with 0 movement points remaining after entry). They may enter in a Confederate ZOC but not a Confederate occupied hex. They may enter on later turns (than 2 turns after their off map retreat) if there is no eligible entry hex or if they elect to delay re-entry. 6. Random Events: This scenario has its own special random events table. In the Random Events Phase of each turn, starting with turn 1, one of the players rolls two dice. The players consult the Random Events Table below, checking the result corresponding to that dice roll sum. The results are described below.
Random Events Table (Scenario 7): 2 = Snake Eyes; 3 = Pleasonton; 4 = Confederate Falls & Balls; 5 = Accelerate Union Reinforcements; 6 = 3 Cigars; 7 = 3 Cigars; 8 = 3 Cigars; 9 = Slow Parole; 10 = Improved Union Intelligence; 11 = Confederate Night March; 12 = Late Rain.
Explanation Of Random Events (Scenario 7):
Snake Eyes. Advanced game rule in section 3.0 (Random End of Action Cycle) is in effect for the current turn. Note: snake eyes is the English gambling term for rolling ones on two dice. Exception: this result is converted to No Effect on turns 1, 2, and 9.
Pleasonton. The following rules are immediately in effect for the rest of the game: the cavalry division (not corps) leader Pleasonton is added to the game—the Union player should immediately place him on any Union cavalry unit that is north of the Potomac River; Pleasonton can activate any Union cavalry units but only 3 units at a time, and per Standard Rules section 5.2, adds one to his movement dice roll; Union cavalry activated by Pleasonton get a special -1 extended march modifier in addition to existing modifiers.
Confederate Falls & Balls. Lee broke both his hands restraining Traveller just before the campaign, Jackson hurt himself falling off a new horse, and Stuart held a gala ball in the middle of the campaign. The Confederate player rolls a single die and for the current turn on a 1-2 the 1st event below is in effect, on a 3-4 the 2nd event is in effect, and on a 5-6 the last listed event is in effect: Jackson has a relapse (Jackson does not get his +1 assault bonus); Lee suffers a relapse (Lee does not get his +1 assault bonus); Stuart holds a gala ball and he only adds +1 to movement rolls this turn instead of +3.
Accelerate Union Reinforcements. All Union reinforcements scheduled to arrive in the following turn arrive in the current turn's Reinforcement Phase instead. This result has no effect if the Union player has no scheduled reinforcements in the following turn.
3 Cigars. For the current turn only, Union Army of the Potomac infantry units receive an extra -1 modifier on extended marching. For example, if an unexhausted AP infantry unit marched to Fatigue Level 3 it would have a final modifier of zero (-1 special turn 1 modifier, +1 Union AP infantry unit). This event only occurs if there is at least one Union AP infantry unit both west of the Monocacy River and north of the Potomac River, otherwise the event is converted to No Effect. Furthermore, this event can only actually occur once in a game. A No Effect result does not count as the event having occurred.
Slow Parole. After the surrender at Harpers Ferry, A.P. Hill was held up for more than a day paroling Union troops. For the remainder of the game, to destroy the depot at Harpers Ferry (if it has not already been destroyed), a division must perform the Burn RR Station action, it must be a Destroy RR Station not a Damage, and it takes 3 fatigues to do this action (the unit performing the burn must be at fatigue level 1 or 0; all 3 fatigues are expended in the one burn action). After this event has occurred once, further rolls that yield this result are converted to No Effect.
Improved Union Intelligence. Intelligence to McClellan could have been even better, such as the amount of Confederate manpower, thus making McClellan even more aggressive. The Union player wins the first two tied initiative die rolls in the current turn. Exception: this result is converted to No Effect if the 3 Cigars random event has not yet happened (and without a No Effect).
Confederate Night March. In the current turn, the Confederates may declare a Night March immediately after the Leader Transfer Phase. In a Night March, the Confederates automatically win the first two Activation Segments on this turn without the need for an initiative roll. In these two Night March Activation Segments, Confederate units may not attack and may not enter enemy ZOC except if moving from one enemy ZOC directly to another enemy ZOC. No military unit may move twice (i.e., no military unit which moves in the first initiative may move in the second initiative; but any leader may be used in more than one initiative, provided that he activates different units during each initiative.) Union cavalry may not conduct a cavalry retreat during the Confederate Night March. Initiative is rolled for normally after the two Night March Activation Segments. The Confederates may use only one of these Night March Activation Segments if they do not want to use both.
Late Rain. It rained sparingly during the Maryland campaign, and for the most part the rain was in the evening and night. In a turn with a Late Rain result, it is clear weather at the start of the turn. Rain does not take effect in the turn unless/until both players roll a 1 when determining initiative (it takes immediate effect on this initiative). If it does start raining in the turn, it only lasts for the current turn. For the effects of rain, refer to the Standard Rules section 12.0; however, units may dig in the Recovery Phase in turns that had Late Rain. If the "Minor Rivers Unfordable" and "Major Rivers Unfordable" are not on the Turn Track, place them on the Turn Track in the box corresponding to the current turn if Late Rain takes effect. If they are already on the Turn Track, they are not advanced. Exceptions: This result is converted to No Effect on turns 1, 2, and 9. Rain can only occur once in the game. If rain has occurred after turn 2, then subsequent rain results are converted to No Effect.
Victory Conditions. The Confederate player gains and loses VPs for the following: for each Maryland County Control Phase in which the Confederate player controls a county (if the Confederate player fulfills the requirements for control of more than one county, he receives VP only for the county with the highest VP award): +10 Montgomery County, +4 Frederick County–East, +2 Frederick County–West, +2 Carroll County, +1 Washington County; at the end of the game, if the Confederate controls a Maryland County (again only the highest-award county counts; Note: on the last turn, for each Confederate controlled Maryland County, the Confederate player will gain VP in both the Maryland County Control Phase and these end game VP): +150 Montgomery County, +120 Frederick County–East, +90 Frederick County–West, +90 Carroll County, +60 Washington County from Hagerstown (W2502), +30 Washington County from Sharpsburg (W2413) (Note: at the end of the game the Confederate player can control Washington County from either Sharpsburg or Hagerstown—for the purposes of the VC only, Sharpsburg is considered an additional Washington County control hex); for each Union depot destroyed, the indicated VP: +10 Harpers Ferry/Bolivar (W2521), +5 Martinsburg (W1314), +2 each Union depot except those listed above; +4 if the C&O Canal Aqueduct (W4126) is destroyed (see Aqueduct note in Basic Rule 10.2)—these VP are awarded the instant the Aqueduct is destroyed; +2 if Mt Airy (W5717) RR station has a Destroy (not Damage) marker at the end of the game; +1 for each of the following RR stations with Destroy (not Damage) markers at the end of the game: North Mountain Depot (W1307), Opequon Station (W1514), Duffields Depot (W2018), Weverton (W2920), Catoctin Switch (W3522), Frederick Junction (W4317); +2 for each point of Union Manpower Value lost in combat, retreat, or cavalry retreat (not in extended march, force march, moving from one enemy ZOC to another, or due to supply effects)—this VP condition applies to all Union units except those designated as RR or Shen; +1 for each point of Union Manpower Value lost for any reason whatsoever (including supply effects and due to marching) for Union units designated as RR or Shen or the PA Militia (Note: do not double-count these units that surrender, by including them in both this VC and the below Harpers Ferry Surrender VC); +1 for each point of Union Manpower Value that surrenders due to a Harpers Ferry Surrender (see section 4.0); -2 for each point of Confederate Manpower Value lost in combat, retreat, or cavalry retreat (not in extended march, force march, moving from one enemy ZOC to another, or due to supply effects); -15 if any undemoralized Union infantry unit occupies Harpers Ferry/Bolivar (W2521) at the end of the game; -5 if an undemoralized Union infantry division occupies Winchester (W0330) at the end of the game; -15 if any undemoralized Union infantry unit occupies Boonsboro (W2910) at the end of the game. At the end of the game, the final Confederate VP total is calculated and the players consult the following chart to determine the winner.
Confederate VP Winner: 140 or more = Confederate Decisive Victory; 120 to 139 = Confederate Substantive Victory; 100 to 119 = Confederate Marginal Victory; 80 to 99 = Union Marginal Victory; 60 to 79 = Union Substantive Victory; 59 or less = Union Decisive Victory.
Union Set-Up (Scenario 7)
| Unit/Leader | Size | Command | Type | Manpower Value | Hex |
|---|---|---|---|---|---|
| 12 IL Regt | III | - | Cav | 1 | W1314 (Martinsburg) |
| White | Brig | Shen | Inf | 3 | W1314 (Martinsburg) |
| Union Depot | - | - | - | - | W1314 (Martinsburg) |
| D'Utassy | Brig | RR | Inf | 4 | W2521 (Harpers Ferry) |
* Ward is deployed underneath a fort marker. # Ford is deployed underneath a breastwork marker.
Union Reinforcements (Scenario 7)
| Turn | Unit/Leader | Size | Command | Type | Manpower Value | Hex |
|---|---|---|---|---|---|---|
| 4–Sept 13 | Porter | Corps | V | Ldr | - | W5833 |
| 4–Sept 13 | Morell | Div | V | Inf | 13 | W5833 |
| 4–Sept 13 | 6 PA Regt | III | - | Cav | 1 | W5833 |
| 6–Sept 15 | Humphreys | Div |
During the Reinforcement Phase of the indicated turns, place the above Union units on the map in the indicated hex. If hex W5833 is occupied by a Confederate unit at the moment a Union reinforcement is to be placed on the map, the reinforcement may be placed in any hex on the west mapedge within six hexes of W5833 as long as the placement hex is unoccupied by a Confederate unit.
Confederate Set-Up (Scenario 7)
| Unit/Leader | Size | Command | Type | Manpower Value | Hex |
|---|---|---|---|---|---|
| Lee | Army | ANV | Ldr | - | W4414 |
| Longstreet | Corps | L | Ldr | - | W4414 |
| D.R. Jones | Div | L | Inf | 12 | W4414 |
| D.H. Hill-B | Div | L | Inf | 13 | W4415 |
| Hood |
* Funk is deployed underneath a fort marker.
Scenario 8: The Maryland Campaign
NOTES: This scenario simulates Lee's invasion of Maryland from the Army of Northern Virginia's crossing of the Potomac in early September 1862 to the Battle of Antietam two weeks later.
MAP: Use both the east and west maps. In the set-up instructions, hexes in the overlap area are listed by the west map's hex number.
GAME LENGTH: 17-19 turns; September 4 to September 20-22, 1862.
SPECIAL RULES: 1. Turn 1: On turn 1, only the Confederate unit D.H. Hill may activate or entrench. No other units or leaders of either player may perform activate or entrench on turn 1. Initiative die rolls are not made on turn 1; instead the Confederate player may conduct consecutive actions with D.H. Hill for as long as he is willing or able to do so, at which time the turn 1 Action Cycle ends. 2. Confederate Movement Restrictions: The Confederate unit Funk may not activate or entrench until turn 4. Funk is removed from this restriction at the moment a Union unit moves within 8 hexes of Winchester (W0330). 3. Union Movement Restrictions: The Union player is subject to the following movement restrictions: all Union units and leaders whose Manpower Values are parenthesized in the set-up instructions are "uncommitted" at the start of the game—they may not activate, entrench, or attach until they are "committed" (see section 2.0); once a unit is committed, it may activate and entrench normally for the rest of the game (Exception: An uncommitted Union unit is automatically committed at the moment a Confederate unit moves within 8 hexes of the Union unit's set-up hex); Union units may not enter any hex in Loudoun County until turn 5; Union units belonging to the "Railroad Brigade" (those with a "RR" unit designation), the Shenandoah District (those with a "Shen" unit designation) and the 12 IL and 8 NY cavalry regiments may not activate until turn 5 (but they may attach) — a unit is removed from this restriction at the moment a Confederate unit moves within 8 hexes of the Union unit's set-up hex; regardless of the proximity of Confederate units, the aforementioned Union units may not entrench until turn 9 (Note: this restriction applies even to Ford's brigade which begins the game under a Breastwork marker). 4. Confederate NC Reinforcements: At the start of turn 5, the Confederate player adds a total of three manpower points to his army. However, this manpower may only be added to the divisions Walker, A.P. Hill, and/or D.H. Hill. To reinforce a division, replace its Strength marker with a new one reflecting its enhanced Manpower value (on the same side, organized or disorganized, as the one it replaces). Restrictions: a division may only be reinforced if it is situated four or more hexes from a Union infantry unit. These reinforcement points must be taken as soon as possible on a unit that meets these restrictions. If all of these points cannot be taken on turn 5, the unused points must be taken at the start of the next turn that the restrictions can be met. 5. Game Length: This scenario starts out as lasting 17 turns. Depending on the number of Union Command Paralysis results, the scenario could last 18 or 19 turns (see Union Command Paralysis in section 2.2).
Victory Conditions. At the moment an undemoralized Confederate infantry unit enters the White House (E0939), the Capitol (E1140), or the Baltimore Depot (E1139) [the Baltimore Depot is in DC, not Baltimore], the game immediately ends in a Confederate Decisive Victory, regardless of the number of VP accumulated by the Confederate player up to that point. Otherwise, victory is determined as described below. The Confederate player gains and loses VPs for the following: for each Maryland County Control Phase in which the Confederate player controls a county (if the Confederate player fulfills the requirements for control of more than one county, he receives VP only for the county with the highest VP award): +20 Baltimore County, +15 Prince George's County, +12 Anne Arundel County, +10 Montgomery County, +10 Howard County, +4 Frederick County–East, +2 Frederick County–West, +2 Carroll County, +1 Washington County; at the end of the game, if the Confederate controls a Maryland County (again only the highest-award county counts; Note: on the last turn, for each Confederate controlled Maryland County, the Confederate player will gain VP in both the Maryland County Control Phase and these end game VP): +200 Baltimore County, +150 Prince George's County, +140 Anne Arundel County, +125 Montgomery County, +125 Howard County, +100 Frederick County–East, +75 Frederick County–West, +75 Carroll County, +50 Washington County from Hagerstown (W2502), +25 Washington County from Sharpsburg (W2413) (Note: at the end of the game the Confederate player can control Washington County from either Sharpsburg or Hagerstown—for the purposes of this VC only, Sharpsburg is considered an additional Washington County control hex); for each Union depot destroyed, the indicated VP: +10 Harpers Ferry/Bolivar (W2521), +10 Camden Station (E3115), +5 Martinsburg (W1314), +2 each Union depot except those listed above; +4 if the C&O Canal Aqueduct (W4126) is destroyed (see Aqueduct note in the Standard Basic Game rules, section 10.2)—these VP are awarded the instant the Aqueduct is destroyed; +3 for each of the following RR stations with Destroy (not Damage) markers at the end of the game: Hyattsville (E1634), Beltsville (E1630), Laurel (E2026), Annapolis Junction (E2223), Relay House (E2518), Relay House (E2808), Lutherville (E2906), Back River Bridge (E3712); +2 for each of the following RR stations with Destroy (not Damage) markers at the end of the game: Mt. Airy (W5717), Sykesville (E1210), Ellicott Mills (E2116), Gambrills Station (E2927); +1 for each of the following RR stations with Destroy (not Damage) markers at the end of the game: North Mountain Depot (W1307), Opequon Station (W1514), Duffields Depot (W2018), Weverton (W2920), Catoctin Switch (W3522), Frederick Junction (W4317), Owings Mills (E2207); +2 for each point of Union Manpower Value lost in combat, retreat, or cavalry retreat (not in extended march, force march, moving from one enemy ZOC to another, or due to supply effects)—this VP condition applies to all Union units except those designated as RR or Shen; +1 for each point of Union Manpower Value lost for any reason whatsoever (including supply effects and due to marching) for Union units designated as RR or Shen or the PA Militia (Note: do not double-count these units that surrender, by including them in both this VC and the below surrender VC); +1 for each point of Union Manpower Value that surrenders due to a Harpers Ferry Surrender (see section 4.0); -2 for each point of Confederate Manpower Value lost in combat, retreat, or cavalry retreat (not in extended march, force march, moving from one enemy ZOC to another, or due to supply effects); -15 if any undemoralized Union infantry unit occupies Harpers Ferry/Bolivar (W2521) at the end of the game; -5 if an undemoralized Union infantry division occupies Winchester (W0330) at the end of the game; -15 if any undemoralized Union infantry unit occupies Boonsboro (W2910) at the end of the game. At the end of the game, the final Confederate VP total is calculated and the players consult the following chart to determine the winner.
Confederate VP Winner: 175 or more = Confederate Decisive Victory; 145 to 174 = Confederate Substantive Victory; 115 to 144 = Confederate Marginal Victory; 85 to 114 = Union Marginal Victory; 55 to 85 = Union Substantive Victory; 54 or less = Union Decisive Victory.
Union Set-Up (Scenario 8)
| Unit/Leader | Size | Command | Type | Manpower Value | Hex |
|---|---|---|---|---|---|
| 12 IL Regt | III | - | Cav | 1 | W0820 (Bunker Hill) |
| White | Brig | Shen | Inf | 3 | W1314 (Martinsburg) |
| Union Depot | - | - | - | - | W1314 (Martinsburg) |
| 3 PHB Regt | III | Shen | Inf | 1 | W1717 (Kearneysville) |
* Ward and the 138 PA are deployed underneath fort markers. # Ford is deployed underneath a breastwork marker. Note: Union units/leaders with parenthesized Manpower Values are "uncommitted"—see special rules.
Confederate Set-Up (Scenario 8)
| Unit/Leader | Size | Command | Type | Manpower Value | Hex |
|---|---|---|---|---|---|
| D.H. Hill-B | Div | L | Inf | 12 | W3631 (Big Spring) |
| Funk | Brig | - | Inf | 3* | W0330 (Winchester) |
| Confederate Depot | - | - | - | - | W0330 (Winchester) |
| Confederate Depot | - | - | - | - | W1332 (Berryville) |
* Funk is deployed underneath a fort marker.
Confederate Reinforcements (Scenario 8). During the Reinforcement Phase of the indicated turns, place the following Confederate units on the map in Leesburg (W3533) or within two hexes of Leesburg. A maximum of one military unit may be deployed per hex. Leaders must be placed on top of any subordinate unit.
Turn 2 (September 5): Stuart (Corps, Cav, Ldr); F. Lee (Brig, Cav, Cav, 2); Hampton (Brig, Cav, Cav, 3); Jackson (Corps, J, Ldr); Lawton (Div, J, Inf, 7); A.P. Hill (Div, J, Inf, 10); J.R. Jones (Div, J, Inf, 8).
Turn 3 (September 6): Lee (Army, ANV, Ldr); Longstreet (Corps, L, Ldr); D.R. Jones (Div, L, Inf, 12); Hood (Div, L, Inf, 4); Evans (Brig, L, Inf, 2); McLaws-B (Div, L, Inf, 13); Anderson-B (Div, L, Inf, 14); Munford (Brig, Cav, Cav, 2).
Turn 4 (September 7): Walker (Div, L, Inf, 5).
The Game As History
By Joseph M. Balkoski
July-August 1862 (Background). Following the Seven Days Battles (June 25-July 1, 1862), General George McClellan's Army of the Potomac retired to a strong position at Harrison's Landing on the James River, only about twenty miles southeast of the Rebel capital at Richmond. General Robert E. Lee's offensive against McClellan's army during the Seven Days had inflicted severe punishment on the Federals, but the Army of the Potomac still poised a grave threat to Richmond. Meanwhile, General John Pope's new Federal army, designated the Army of Virginia, began to consolidate in Culpeper County in late July -- a move that threatened Richmond's vital Virginia Central Railroad link with the Shenandoah Valley. While keeping a sharp eye on McClellan, Lee dispatched Stonewall Jackson to Gordonsville to protect the Virginia Central from Pope's army. Unknown to Lee, however, on August 4 the Federal high command in Washington had ordered McClellan to abandon his James River position and return by water to northern Virginia to support Pope. McClellan protested this order vigorously, but the new commander of all the armies of the United States, General Henry W. ("Old Brains") Halleck was unyielding. On August 9, Jackson's Confederates clashed with a wing of Pope's army at Cedar Mountain. Although Jackson's little army drove the Federals from the field, thereby halting Pope's advance against the Virginia Central Railroad, Pope's entire army—which outnumbered Jackson considerably—would soon arrive on the scene. Two days later, Jackson retired behind the Rapidan River, leaving the battlefield to Pope. Although by mid-August McClellan had made little progress in withdrawing his army from the James, Lee correctly surmised that the Federals on the Richmond front no longer posed a threat against the Rebel capital. Lee therefore decided to shift the bulk of his Army of Northern Virginia to reinforce Jackson on the Rapidan, a move that was performed with great rapidity and secrecy. Lee took the offensive against Pope on August 20, but thanks to a Yankee cavalry patrol which had captured a key set of Confederate orders two days previously, Pope had been warned of the threat and had already begun to retire his forces behind the Rappahannock by the time the Rebels crossed the Rapidan. It was not until the last ten days of August that the bulk of McClellan's army finally began to embark on transports for the trip to northern Virginia. Because Lee had failed to bag Pope's army in the vicinity of the Rapidan, the Rebel commander realized that Southern success in the upcoming campaign was now a question of time: should Pope be reinforced by McClellan's entire Army of the Potomac, the odds against the Confederates would be formidable—even for a gambler like Lee. Lee therefore decided to move his army northward up the Rappahannock, thereby lengthening the distance between Pope and McClellan and forcing Pope to occupy less defensible terrain. For several days Pope skillfully matched Lee move-for-move and was encouraged by the arrival of the first reinforcements from the Army of the Potomac. The campaign entered its decisive phase on August 25, when Stonewall Jackson's wing commenced a wide sweep around Pope's right flank. Two days later, the bewildered Pope discovered that Jackson had gotten in his rear. Sitting astride Pope's main supply artery to Washington, the Orange and Alexandria Railroad, the wily Confederates tore up track, wrecked locomotives, burned bridges, and destroyed a major Federal depot at Manassas Junction. As the rest of Lee's army moved up to Jackson's support, Pope vainly attempted to entrap the elusive Jackson. Late in the afternoon of August 28, Jackson's force attacked an unsuspecting Federal division near the old battlefield at Bull Run. The following day, the opposing armies promptly concentrated at that point and initiated an intense two-day struggle known as the Battle of Second Manassas (or Second Bull Run). Federal attacks in both days of the battle failed to dislodge the Confederates, and led to heavy casualties on both sides. In the afternoon of the second day, however, Longstreet's wing of Lee's army launched a successful attack against Pope's left, catching the weak Federal forces in that area completely by surprise. After dark, Pope's army retired behind Bull Run in fairly good order. Lee's troops did not pursue aggressively. Pope was down but not out. Indeed, immediately after Second Manassas, his army was strongly reinforced by two corps of the Army of the Potomac, fresh from the Peninsula. Instead of attacking Pope in his new position, Lee sent Jackson in another march around the Federals' right flank to get between them and Washington. This time Pope was alerted to Lee's strategy and pulled his army back even closer to Washington to evade the closing trap. On September 1, elements of Pope's army clashed with Jackson about four miles west of Fairfax Court House in an engagement known as the Battle of Chantilly. Federal attacks against Jackson were unsuccessful, but the Confederate advance toward Washington was halted. On the following day, Lincoln and Halleck agreed to Pope's suggestion that the Federal army retire to the safety of the Washington defenses. Meanwhile, Lincoln directed McClellan to take charge of the consolidated Army of Virginia and Army of the Potomac, leaving Pope out of a job. In a brilliant campaign lasting less than two weeks, Robert E. Lee's Army of Northern Virginia had brought the war from Richmond's doorstep to the gates of the federal capital at Washington, D.C. Rarely did the initiative swing from one side to the other so quickly and decisively in the Civil War; never again during the four-year struggle were the South's fortunes so bright and the North's so bleak as they were after Second Manassas. According to Lee, however, "The proximity of the fortifications around Alexandria and Washington rendered further pursuit useless." Thus, Lee -- who considered his enemies to be close to total collapse -- planned to finish them off by immediately embarking on a new campaign: the invasion of Maryland. (To learn more about the Second Manassas campaign, consult the first game in this series, Stonewall Jackson's Way.) The game is about to begin.
September 4, 1862. "The present seems to be the most propitious time since the commencement of the war for the Confederate Army to enter Maryland," Robert E. Lee writes to President Jefferson Davis. "The two grand armies of the United States that have been operating in Virginia, though now united, are much weakened and demoralized. Their new levies, of which I understand sixty thousand men have already been posted in Washington, are not yet organized, and will take some time to prepare for the field. If it is ever desired to give material aid to Maryland and afford her an opportunity of throwing off the oppression to which she is now subject, this would seem the most favorable." Accordingly, the Army of Northern Virginia turns away from Washington and marches northwestward in the direction of Leesburg (W3533). Late that afternoon, D.H. Hill's division crosses the Potomac at Cheeks' Ford (W4026). Hill's division is probably the freshest in Lee's army, since it had arrived in northern Virginia too late to participate in the Battle of Second Manassas. Within the Washington defenses, McClellan is in the process of consolidating the Army of Virginia and the Army of the Potomac. (The I, II, and III Corps of the Army of Virginia become, respectively, the XI, XII, and I Corps of the Army of the Potomac.) Federal scouts report that the Rebels have suddenly disappeared from the Washington front and appear to be headed westward. "The information which I received induced me to believe that he [Lee] intended to cross the Upper Potomac into Maryland." McClellan would later note. "This materially changed the aspect of affairs and enlarged the sphere of operations; for, in case of a crossing in force, an active campaign would be necessary to cover Baltimore, prevent the invasion of Pennsylvania, and clear Maryland." McClellan therefore orders three army corps (II, IX, and XII) to cross the Potomac from Virginia into the District of Columbia. By nightfall, the II and XII Corps are encamped at Tennallytown (E0835), while the IX is situated just north of Washington on the Seventh Street Road (E1137). Meanwhile, "Little Mac" orders the meager cavalry force at his disposal, consisting of only a few weak regiments, to patrol the roads west of Washington and keep an eye on the Potomac fords. In western Virginia the Union garrison in Harpers Ferry (W2521), commanded by Colonel Dixon S. Miles, is reinforced by White's brigade, which had hastily evacuated Winchester (W0330) two days previously. Miles has served 43 years in the Army, but has been passed over for general officer rank. He graduated from West Point in 1824—five years before Robert E. Lee.
September 5, 1862. D.H. Hill's division spends much of the day inflicting damage on the Chesapeake and Ohio Canal, a vital Federal artery linking Washington and western Maryland. However, Hill's attempt to destroy the sturdy C&O aqueduct over the Monocacy River (W4126) fails, according to Hill, "for want of powder and tools." Meanwhile, Jackson's wing, consisting of three divisions, marches from Leesburg and crosses the Potomac into Maryland at White's Ford (W3928). Later in the day, Fitz Lee's and Hampton's brigades of Confederate cavalry, led by JEB Stuart, cross the Potomac and advance on Poolesville (W4431). Here they brush aside Union cavalry patrols—the first encounter in Maryland between the armies during the campaign. Stuart greatly exaggerates the facts when he states, "The reception of our troops in Maryland was attended with the greatest demonstrations of joy, and the hope of enabling the inhabitants to throw off the tyrant's yoke stirred every Southern heart with renewed vigor and enthusiasm." Meanwhile, the Federal II and XII Corps march from Tennallytown to Rockville (E0328). Couch's division (formerly of the IV Corps, which had been left behind in the Peninsula -- now attached to the VI Corps) moves from Tennallytown along the River Road to Offut's Crossroads (5 miles southwest of Rockville). Aside from the cavalry, which skirmishes with the Rebels in western Montgomery County, the rest of the Army of the Potomac remains within the Washington defenses. That morning, McClellan writes to his wife, "Again I have been called upon to save the country. The case is desperate, but with God's help I will try unselfishly to do my best, and, if He wills it, accomplish the salvation of the nation. My men are true and will stand by me till the last." In Harpers Ferry, Miles organizes his force into four brigades. Many of Miles' regiments are unseasoned. Indeed, one outfit, the 126th New York, had only been mustered into service on August 22. General White proceeds to Martinsburg (W1314) to assume command of the small Union force guarding the Baltimore and Ohio Railroad in that vicinity.
September 6, 1862. Jackson's wing, accompanied by D.H. Hill's division, marches northward up the west bank of the Monocacy to Frederick (W4214). Jackson is injured during the march when his horse, a recent gift from a Maryland farmer, throws him. Stonewall spends the rest of the day in an ambulance while D.H. Hill (Jackson's brother-in-law) assumes command of the wing. During the day the rest of the Army of Northern Virginia (except for Walker's division), led by Longstreet and accompanied by Lee, fords the Potomac in the wake of Jackson's column. Meanwhile, Stuart's cavalry moves to Urbana (W4620), where it patrols the main road between Frederick and Washington and observes Federal troop movements. In the Northern camp, Federal cavalry patrols are providing strong evidence that Lee's entire army has moved into Maryland. As a result, McClellan orders two more army corps (I and VI), plus elements of a third (Sykes's division of V Corps), from the Virginia side to the District of Columbia. Meanwhile, the II and XII Corps rest and reorganize at Rockville, and the IX Corps moves up the Seventh Street Road a few miles to Leesboro (E1031). The III and XI Corps, however, still remain south of the Potomac. In Harpers Ferry, a Federal telegraph operator receives the following message: "How are you, General Pope? Signed, General Jackson's army." General John E. Wool, Union commander of the Middle Department (with headquarters in Baltimore), had urged Miles long ago to fortify the heights surrounding the town. "This was not accomplished because the colonel gave it no countenance," Wool would later recall.
September 7, 1862. Bringing up the Army of Northern Virginia's rear, Walker's division crosses the Potomac at Cheeks' Ford (W4026). The rest of Lee's army consolidates in and around Frederick. Two of Jackson's divisions, commanded by Lawton and A.P. Hill, are posted to Frederick Junction (W4317) with orders to destroy the iron suspension bridge carrying the Baltimore and Ohio Railroad over the Monocacy River. Although the Rebels manage to destroy some of the bridge trestle, the sturdy stone arches defy destruction. East of the Monocacy, Stuart's cavalry fans out to cover Lee's position at Frederick. Deploying around New Market (W5016), Fitz Lee's brigade covers the "National Road" to Baltimore; Hampton's brigade moves to Hyattstown (W4923) on the Georgetown Pike; Munford's brigade covers Stuart's right at Barnesville (W4527) and Poolesville (W4431). Several cavalry skirmishes erupt between Munford's troopers and Union horsemen approaching from Washington. In Frederick, Lee is becoming concerned about his army's ability to accomplish its mission. The Army of Northern Virginia has been on the march continuously since the middle of August, and its numbers—particularly in the past three days—have dwindled. For example, Ewell's (now Lawton's) division began the Second Manassas campaign with about 7,000 men; when it reached Frederick on September 6, its manpower was less than one-half that figure. D.H. Hill's division of about 9,000 men, which did not even participate in the Battle of Second Manassas, was down to almost 5,000 by the time the Rebels arrived in Frederick. The problem is straggling—a difficulty that is worsened when Lee moves into Maryland because many of his men are reluctant to "invade" another state. Lee would later note: "I have taken every means in my power from the beginning to correct this evil [straggling], which has increased instead of diminished. A great many men belonging to the army never entered Maryland at all; many returned after getting there, while others who crossed the river kept aloof...It occasions me the greatest concern in the future operations of the army." In and around Washington, most of McClellan's army remains in bivouac. The VI Corps, however, marches from Tennallytown to Rockville. In the afternoon, McClellan moves his headquarters to Rockville. He writes to his wife, "We are all well and the entire army is now united, cheerful, and confident. You need not fear the result, for I believe that God will give us the victory... The feeling of the government towards me, I am sure, is kind and trusting." Halleck wires to Miles in Harpers Ferry: "It is important that Harpers Ferry be held to the latest moment. The Government has the utmost confidence in you, and is ready to give you full credit for the defense it expects you to make." Miles telegraphs back: "Thanks for the confidence. Will do my best."
September 8, 1862. The Army of Northern Virginia remains stationary around Frederick, resting and foraging. Most of McClellan's army is inactive as well, although the I and IX Corps commence a march from Leesboro (E1031) to Brookeville (E0821) via the Clarksburg Pike. Cavalry skirmishes continue in western Montgomery County. McClellan writes to Halleck, "After full consideration, I have determined to advance the whole force tomorrow." In Harpers Ferry, Colonel Miles instructs Colonel Thomas H. Ford, the brigade commander responsible for the defense of Maryland Heights (W2720), that his position is the key to Harpers Ferry and must be held at all costs. Robert E. Lee writes to President Davis from Frederick: "The present posture of affairs, in my opinion, places it in the power of the Government of the Confederate States to propose with propriety to that of the United States the recognition of our independence."
September 9, 1862. Lee had expected that his invasion of Maryland would force the Federals to abandon their post at Harpers Ferry. Now it is obvious that the Union garrison will remain, so Lee decides to change the tempo of the campaign completely. He issues his Special Orders Number 191 -- which will soon become the most famous order he has ever issued. Lee's goal is to encircle and capture the 14,000 Union defenders of Harpers Ferry. Although Union troops at "The Ferry" occupy very strong natural defensive positions in the heights around the town, they are beyond supporting range of McClellan's army—or so Lee thinks. So confident is Lee that Harpers Ferry is ripe for capture that he allocates only three days for its seizure. Lee's plan calls for the abandonment of Frederick County -- its residents were not flocking to the Confederate colors anyway -- and a general move westward. He decides to divide his army into five widely scattered parts: Jackson's wing of three divisions will recross the Potomac and move against Harpers Ferry from the west; McLaws' and Anderson's divisions will capture the formidable Maryland Heights north of Harpers Ferry; the bulk of Longstreet's wing will move to Hagerstown (W2502); Walker's division will re-enter Virginia and besiege Harpers Ferry from Loudoun Heights (W2621); and finally, D.H. Hill's division will bring up the rear and guard the South Mountain passes near Boonsboro (W2910). Stuart's cavalry will screen these moves from Federal observation. Confederate General John G. Walker would later note that when he heard of these plans directly from Lee, "I was very much astonished." According to Walker, Lee declared: "You doubtless regard it hazardous to leave McClellan practically on my line of communication, and to march into the heart of the enemy's country?... He [McClellan] is an able general but a very cautious one. His enemies among his own people think him too much so. His army is in a very demoralized and chaotic condition, and will not be prepared for offensive operations -- or he will not think it so -- for three or four weeks." For the first time in the war, Lee has made a serious miscalculation. In the Federal camp, McClellan's entire army is in motion (with the exception of the III and XI Corps, and elements of the V Corps, which remain on the south side of the Potomac due to Halleck's fear of a sudden Rebel attack on Washington from that direction). McClellan would later recall: "Partly in order to move men freely and rapidly, partly in consequence of the lack of accurate information as to the exact position and intention of Lee's army, the troops advanced by three main roads." By nightfall the I and IX Corps, marching by way of the Clarksburg Pike, reach Brookeville (E0821); the II and XII Corps march from Rockville to Middlebrook (W5329) via the Georgetown Pike (the main artery connecting Washington and Frederick); the VI Corps, also marching from Rockville, halts at Darnestown (W5033) on the Poolesville Road. Cavalry skirmishes continue in the no-man's land between the armies. Fearing that the Rebels will invade Pennsylvania, Governor Andrew G. Curtin calls out the Pennsylvania militia and orders it to assemble in Harrisburg. The militiamen, however, are woefully unprepared to face Lee's veterans in battle.
September 10, 1862. Lee's Special Orders Number 191 are put into effect. Jackson's three divisions march from Frederick to Boonsboro (W2910). Just outside of Boonsboro, Jackson is nearly captured by a Federal cavalry patrol. Longstreet's wing follows in Jackson's wake on the National Road. McLaws' and Anderson's divisions head directly to Harpers Ferry via the minor roads in the valley of Catoctin Creek. Since most of the Rebel army is heading in the same general direction and using the same roads, there are significant delays in departing Frederick. Meanwhile, Walker's division (which actually had started its march on September 9), reaches the C&O Canal aqueduct (W4126). Like D.H. Hill before him (see September 5), Walker attempts to destroy the aqueduct, but fails. "So admirably was the aqueduct constructed and cemented that it was found to be virtually a solid mass of granite," Walker would later recall. "Not a seam or crevice could be discovered in which to insert the point of a crowbar." Stuart's cavalry continues to patrol the roads east of the Monocacy. The Army of the Potomac continues its methodical advance toward Frederick. Hooker's I Corps marches northward from Brookeville, reaching the National Road near Lisbon (E0612); Reno's IX Corps marches to Damascus (W5422), as does the XII Corps under Williams (who will soon be superseded by Mansfield); Sumner's II Corps makes a short march from Middlebrook to Clarksburg (W5025); and the VI Corps under Franklin moves from Darnestown to Barnesville (W4527), although Couch's division of the VI Corps guards the Army of the Potomac's southern flank at Poolesville (W4431). In typical fashion, McClellan is convinced that the Rebels are much more numerous than they really are. "It is hard to get accurate news from the front," he writes to his wife. "The last reports from Pleasonton [Union cavalry leader] are that the enemy have 110,000 on this side of the river. I have not so many, so I must watch them closely and try to catch them in some mistake, which I hope to do." In Martinsburg (W1314), Federal General Julius White expresses his concerns to Colonel Miles in Harpers Ferry: "The enemy will be whipped in Maryland, and we will be gobbled up in their retreat."
September 11, 1862. Special Orders Number 191 continue to unfold. Starting the day at Boonsboro, Jackson's three divisions march to Williamsport (W2004) and cross the Potomac at Light's Ferry (W1905). In Berkeley County, Virginia (soon to be West Virginia), Jackson's column splits: A.P. Hill's division heads down the Valley Pike toward Martinsburg, encamping for the night at Hainesville (W1510); J.R. Jones' and Lawton's divisions move to North Mt. Depot (W1307) on the Baltimore and Ohio Railroad. Jackson's objective is to encircle and destroy the Union garrison at Martinsburg or drive it back to Harpers Ferry. "Jackson's Foot Cavalry" has hiked 22 miles from dawn to dusk. Meanwhile, Longstreet's wing continues its journey along the National Road to Hagerstown, McLaws' and Anderson's divisions pass through Brownsville Gap (W3017) into Pleasant Valley -- only about seven miles from Harpers Ferry. Walker's division moves from the C&O aqueduct to Point of Rocks (W3623), where it crosses the Potomac into Virginia and bivouacs for the night. Now that the Rebel infantry has pulled out of Frederick, Stuart's cavalry retires to the west bank of the Monocacy. Curiously, much of McClellan's army is inactive. The only exceptions are the I and IX Corps, which take the lead on the road to Frederick. The IX Corps marches from Damascus to New Market (W5016); the I Corps from Lisbon to Parrsville (W5718). Sykes's division of Porter's V Corps is also marching from Rockville to join the rest of the army. Lincoln promises McClellan that he will release the rest of the V Corps shortly. McClellan is still not aware that the bulk of the Army of Northern Virginia has departed Frederick in the direction of Hagerstown and Harpers Ferry. He reasons that he must be cautious until he discovers the enemy's true intentions, but his failure to move his army westward with greater aggressiveness on the 11th will later be viewed as a grave mistake. Union scouts from Harpers Ferry observe Confederate columns in Pleasant Valley moving toward Solomon's Gap (W2717). Lee's trap is about to be sprung.
September 12, 1862. White's Federal brigade hastily evacuates Martinsburg for Harpers Ferry when its commander realizes that he is about to be encircled by Jackson's approaching columns. Jackson's men enter Martinsburg on the heels of their enemies and proceed on the road to Harpers Ferry. In Pleasant Valley (W2818), McLaws splits his command into four parts: two brigades (under Kershaw) ascend Maryland Heights at Solomon's Gap (W2717) and march southward along the trail atop the crest; two more brigades (under Semmes) are left to guard Crampton's and Brownsville Gaps (W3016/W3017) in the South Mountain range; one brigade (Wright's) is deployed to Weverton (W2920) to guard the Baltimore and Ohio Railroad tracks along the Potomac River; the rest of the command marches straight down Pleasant Valley toward Sandy Hook (W2721). The third wing of Lee's Harpers Ferry force, Walker's division, marches from the Potomac near Catoctin Creek (W3524) to Hillsborough (W2729). Longstreet's wing consolidates at Hagerstown, and D.H. Hill's division, bringing up the rear, guards the army's wagon trains en route from Frederick to Boonsboro. Along the Monocacy, Stuart's cavalry falls back slowly as the main body of McClellan's army approaches Frederick on the National Road and the Georgetown Pike. McClellan, now fully convinced that the Rebels are evacuating Frederick County, puts his entire army in motion. Its progress, however, is leisurely. The IX Corps marches from New Market to Frederick, which it reaches by noon. According to General Jacob Cox, a IX Corps division commander, "As Hampton's cavalry [a Confederate brigade] went out at one end of the street and our infantry came in at the other, while the carbine smoke and the smell of powder still lingered, the closed window-shutters of the houses flew open, the sashes went up, the windows were filled with ladies waving their handkerchiefs and the national flag, and the men came to the column with fruits and refreshments for the marching soldiers." The IX Corps halts for the day just beyond Frederick. The rest of McClellan's army closes in on Frederick. The I Corps follows in the wake of the IX Corps, halting for the night at New Market; the XII Corps marches from Damascus to Ijamsville (W4818); the II Corps from Clarksburg to Urbana (W4620); the VI Corps from Barnesville to Licksville (W4025). The average distance marched by a Union corps for the day is no more than about nine miles, alarmingly slow progress given the fact that the Union garrison at Harpers Ferry -- only about 18 miles away -- is about to be encircled by a powerful Confederate force. Clearly, McClellan is no Jackson.
September 13, 1862. Reno's IX Corps continues to lead the Army of the Potomac into Frederick County. However, McClellan's pursuit of Lee is hardly hurried. One IX Corps division (Cox's) advances from Frederick to Middletown (W3613); the rest of the corps encamps along the National Road near the pass over Catoctin Mountain (W3814). The remainder of the army unites in and around Frederick, except for Franklin's VI Corps, which is guarding McClellan's southern flank between Buckeystown (W4219) and Licksville. Back in Washington, Halleck views the situation differently than McClellan. Even McClellan's deliberate daily advances are too fast for "Old Brains," who constantly fears for the safety of Washington. "Until you know more certainly the enemy's force south of the Potomac you are wrong in thus uncovering the capital," Halleck writes to McClellan. "I am of the opinion that the enemy will send a small column towards Pennsylvania to draw your forces in that direction, then suddenly move on Washington with the forces south of the Potomac." As a result, Halleck will not release the Army of the Potomac's III and XI Corps, which are currently manning the Washington defenses south of the Potomac. However, the V Corps—including a new division under Humphreys—has been permitted to join McClellan. Little Mac also believes that the Harpers Ferry garrison should have abandoned the town and retreated northward at the start of the campaign. According to Halleck, however, "To withdraw [the garrison] entirely from that position, with the great body of Lee's forces between [it] and our army, would not only expose the garrison to capture, but all the artillery and stores collected at that place must either be destroyed or left to the enemy." Suddenly, a remarkable development. In a field outside Frederick, a soldier in Williams' division, XII Corps, finds a piece of paper wrapped around three cigars. It is the cigars that first interest the soldier, but a hasty perusal of the paper leads him to hurry to his colonel's tent. The paper appears to be an original copy of Lee's Special Orders Number 191! The document is immediately brought to McClellan's attention. Here is a description of the Rebel army, including its apparent dispersal all over western Maryland and northern Virginia, that McClellan could never have obtained through normal intelligence methods. Little Mac declares exuberantly to his friend General John Gibbon, "Here is a paper with which if I cannot whip Bobbie Lee, I will be willing to go home!" Unfortunately for McClellan, the order is four days old. Harpers Ferry is already in grave danger, as the Confederates tighten the noose around the town. On Maryland Heights (W2720), Ford's brigade is attacked by elements of McLaws' division. Ford sends word to Colonel Miles that "his regiments won't fight, and he cannot hold the heights." Miles retorts, "You will hold on, and can hold on, until the cows' tails drop off." In mid-afternoon, however, Ford's men retire from Maryland Heights into Harpers Ferry without orders—much to Miles' surprise and disgust. On the east bank of the Shenandoah, Walker's division marches from Hillsborough to Loudoun Heights (W2621). Here the Rebels begin to clear gun positions on the mountain, which looks directly down into Harpers Ferry. On the opposite side of the Shenandoah, Jackson's wing, marching hard from Martinsburg, completes the investment of Harpers Ferry by noon. A.P. Hill's division takes position near Halltown (W2322), blocking the Federals' escape route on the Charlestown Pike; J.R. Jones' and Lawton's divisions go into line around Loman's Mill (W2320).
September 14, 1862. Armed with vital new information about Lee's intentions, McClellan sets out in pursuit of the Rebel army. The IX Corps, led by Cox's division, approaches South Mountain on the National Road. Warned that Rebels from D.H. Hill's division are guarding Turner's Gap (W3211), Cox decides to turn off the National Road at Bolivar (W3412) and outflank the enemy position by way of Fox's Gap (W3212). Garland's Rebel brigade lies in wait, however, and as Cox's troops approach the pass at about 9 A.M., the Battle of South Mountain begins. Cox drives the Southerners back, but his exhausted troops are not supported by the rest of the IX Corps until mid-afternoon. Fighting continues until dusk, but the stubborn Rebels are not driven from the gap. General Jesse Reno, the commander of the IX Corps, is killed at the close of the battle. Meanwhile, Hooker's I Corps, following in the wake of Reno's IX, turns off the National Road to the north at Mt. Tabor Church (W3411). Shortly after 4 PM, Hooker's three divisions attack Rodes' brigade near Frosttown (W3311). Despite overwhelming odds in the Northerners' favor, Rodes only slowly yields ground. At dusk, Gibbon's Federal brigade, composed entirely of western troops, attempts an assault directly along the National Road against Colquitt's Rebels in Turner's Gap. The attack fails, but the westerners' bravery earns the outfit the nickname "The Iron Brigade." Lee is saved from disaster thanks to the timely arrival of Longstreet's troops from Hagerstown in the afternoon. Had the Federal I and IX Corps attacked with greater aggressiveness on the 14th, D.H. Hill's Rebels would have been overwhelmed long before Longstreet's arrival. At nightfall the Rebels still hold the gaps, but just barely. Considering that two more Federal corps (II and XII) will be in position to join the fight on the following day, Lee decides to withdraw before dawn. Further south along the South Mountain range, Franklin's VI Corps approaches Burkittsville (W3117) in the afternoon. Only Munford's weak Rebel cavalry brigade and Parham's infantry brigade (from Anderson's division) guard Crampton's Gap (W3016). Despite his overpowering advantage in numbers, Franklin delays his attack several hours. When the Union attack is finally launched, Slocum's division drives the Rebels from the gap. The Federals pour into Pleasant Valley around Brownsville (W2917), but due to the lateness of the hour and the disorganized condition of his troops, Franklin fails to exploit his victory -- either by moving against the Rebel besiegers of Harpers Ferry at Sandy Hook (W2721) and Weverton (W2920), or by advancing northward toward Rohrersville (W2914) in support of the rest of the Army of the Potomac at Turner's Gap. After the South Mountain battles, the Army of Northern Virginia is in dire peril. Its units -- depleted, divided, and disorganized -- are faced with a relatively fresh enemy army. Lee decides to call off the siege of Harpers Ferry. In the evening, he writes to McLaws: "The day has gone against us and this army will go by Sharpsburg and cross the [Potomac] River. It is necessary for you to abandon your position tonight." Lee, however, does not realize how close his subordinates are to success at Harpers Ferry. In mid-afternoon, Confederate batteries in commanding positions on Maryland Heights, Schoolhouse Ridge (W2321), and Loudoun Heights commence a furious bombardment against the Union garrison. Colonel Miles wonders out loud, "Where is McClellan and his army?" Shortly before dusk, elements of A.P. Hill's Confederate division move covertly along the Shenandoah (W2422) against the Union left flank near Chambers Farm (W2421), gaining a good position from which to launch an attack the following day. "We are as helpless as rats in a cage" notes a Union officer. At 8 P.M., all Union cavalry in the garrison—about 1,500 men commanded by Colonel "Grimes" Davis—successfully breaks out of Harpers Ferry by way of the pontoon bridge over the Potomac (W2620). The troopers make it all the way to Pennsylvania the next day, capturing parts of Longstreet's ammunition train along the way.
September 15, 1862. "I am pushing everything after them with the greatest rapidity, and expect to gain great results" McClellan writes to his wife. "I thank God most humbly for His great mercy. How glad I am for my country that it is delivered from immediate peril! ... If I can believe one-tenth of what is reported, God has seldom given an army a greater victory than this." Given the impending Union disaster at Harpers Ferry, the irony of McClellan's overstatement is obvious. Even as Little Mac pens the letter to his wife, Colonel Miles decides to surrender the Harpers Ferry garrison. The reasons? The Union artillery has run out of ammunition; the Confederates hold the dominating heights north and east of the town; and, probably most significantly, Miles sees no hope of rescue by the Army of the Potomac. The white flag goes up; the Confederates march into town to parole the 12,500 prisoners—the largest surrender in U.S. Army history prior to the Philippines campaign in 1942. Jackson rushes a courier to Lee with the following message: "Through God's blessing, Harpers Ferry and its garrison are to be surrendered." Immediately prior to the surrender, Miles is mortally wounded by a Confederate shell. Lee and Longstreet execute a skillful withdrawal from Turner's Gap by way of Boonsboro (W2910). The Confederates deploy in a defensive position on the west side of Antietam Creek (W2513/W2514). Lee, with only about 13,000 infantry in line, is vastly outnumbered by McClellan. The Federal II Corps leads the Army of the Potomac's pursuit of Lee through Boonsboro and Keedysville (W2711). Upon reaching the Antietam, McClellan notes that Lee has halted his retreat and is preparing for battle. It is mid-afternoon, but McClellan would later note, "After a rapid examination of the position, I found that it was too late to attack that day." Further to the south Franklin's VI Corps forms line of battle across Pleasant Valley (W2917), facing parts of McLaws' division, but takes no action of any consequence throughout the day. Since Harpers Ferry had surrendered early in the morning, Franklin can do nothing to relieve Miles in any case. However, he can attempt to prevent McLaws from joining Lee—but he fails to do so. After a short rest in Harpers Ferry, Jackson sends J.R. Jones' and Lawton's divisions on the road to Sharpsburg to succor Lee. A.P. Hill's division remains in Harpers Ferry to rest and secure the captured stores.
September 16, 1862. The main body of the Army of the Potomac reaches the Antietam around Keedysville and Porterstown (W2612). Even though the odds are overwhelmingly in the Northerners' favor, McClellan remains passive. McClellan would later note that he was "compelled to spend the morning in reconnoitering the new position taken up by the enemy, examining the ground, finding fords, clearing the approaches, and hurrying up the ammunition and supply trains, which had been delayed by the rapid march of the troops over the few practicable approaches from Frederick." In mid-afternoon, Hooker's I Corps crosses the Antietam at the Upper Bridge (W2610) and marches via Smoketown (W2510) to the Hagerstown Turnpike (W2410/W2411). Here, the corps deploys for battle, facing south, with orders to attack the Rebel left flank the following morning. Mansfield's XII Corps follows in Hooker's wake and encamps near Smoketown at nightfall. McClellan's inactivity on the 16th is a blessing for Lee. After a hard march from Harpers Ferry, J.R. Jones' and Lawton's divisions of Jackson's wing reach Sharpsburg (W2413) by morning. In the afternoon Confederate observers detect Hooker's movement toward Smoketown, so Lee strengthens his left flank around the Dunker Church (W2412). D.H. Hill's division is positioned in the center along the sunken road (W2513). D.R. Jones' and Walker's divisions hold the left flank (W2514). McLaws' and Anderson's divisions, much fatigued from their ordeal at Harpers Ferry, rest for a short while at Halltown (W2322) and then commence their march to join Lee at Sharpsburg. As the Rebels slip out of Pleasant Valley, Franklin's VI Corps of the Army of the Potomac remains inert (in W2917) for the entire day.
September 17, 1862. The Battle of Antietam begins at dawn. Hooker's I Corps opens the fight for the Federals, attacking Jackson's wing (supported by Hood's division) north of the Dunker Church. The battle sways back and forth for ninety minutes with inconclusive -- but bloody -- results. At 7:30 A.M., Mansfield's XII Corps enters the battle on Hooker's left (W2512). Despite a mortal wound suffered by Mansfield at the start of his assault, the Yankee attack threatens to shatter the Confederate left flank. After another ninety minutes of close-range fighting, the Rebels are only barely holding their ground. Losses on both sides are extraordinarily high. General Hood, when asked where his division is located, replies "Dead on the field, sir." The II Corps joins the fray after the XII Corps' attack had used itself up, but the corps commander, General Edwin V. Sumner, commits his men piecemeal. Sedgwick's division attacks due west across the Hagerstown Turnpike north of the Dunker Church (W2411), and for a moment it appears as if the Confederates cannot resist them. However, McLaws' and Walker's Rebel divisions arrive on the field without a moment to spare and rout the Federals with a vigorous attack against Sedgwick's exposed left flank. Sumner's two remaining divisions (first French's and then Richardson's) attack D.H. Hill's division in the Sunken Road (W2513). A vicious fight ensues, lasting nearly three hours. When the Yankee drive finally loses its momentum, the Southerners have almost no one left to hold the line. General Longstreet himself helps to man a decimated artillery battery in the last stages of the fight. McClellan has so far mismanaged the battle badly. Three separate attacks -- by three different corps -- have failed to break the Confederate line. Lee has been able to shift forces back and forth to respond to each threat in turn. Had the Federal attacks been made with a greater degree of coordination, it is likely that Lee would not have been able to hold his ground. But the battle is not yet over. On the south side of the battlefield, General Burnside (commanding the left wing of the Army of the Potomac) and General Cox (commanding the IX Corps since Reno's death) receive an order from McClellan around 10 A.M., to cross the Antietam and push towards Sharpsburg. This is the only area of the field in which the Federals must make an attack directly across the Antietam. Two crossing sites are available: Rohrbach Bridge (W2613; soon to be known as "Burnside's Bridge") and Snavely's Ford (W2614). The Federals make two feeble attempts to take the bridge by noon, both of which fail. Further south, Rodman's division makes a lengthy search to find Snavely's Ford and crosses it several hours behind schedule. Finally, at about 1 P.M., two regiments from Sturgis's division successfully storm Rohrbach's Bridge. The entire IX Corps then crosses the creek and deploys for a final attack against the Rebel line, which has fallen back to the outskirts of Sharpsburg. Unfortunately for McClellan, Cox's limited success on the south flank comes too late. It is 3 P.M. by the time the IX Corps begins its final attack—and by then the fighting in the other areas of the field has died out. Nevertheless, Cox's men practically win the battle for McClellan on their own initiative, driving the Confederates back into Sharpsburg itself. Lee is saved yet again by the timely arrival of reinforcements, this time from A.P. Hill's division, which had just made a grueling fifteen-mile force march from Harpers Ferry. Hill's attack sends Cox's left flank reeling, and the Federal drive staggers to a halt. The battle ends. The casualty toll for the day is 12,401 for the Federals (including 2,108 dead) and 10,318 for the Rebels (including 1,546 dead)—the costliest day of battle in American history.
September 18, 1862. At 8 A.M., McClellan writes to his wife: "The general result [of the battle] was in our favor; that is to say, we gained a great deal of ground and held it. It was a success, but whether a decided victory depends upon what occurs today... Those in whose judgment I rely tell me that I fought the battle splendidly and that it was a masterpiece of art." In his report on the Antietam campaign, Lee would later note: "This great battle was fought by less than forty thousand men on our side, all of whom had undergone the greatest labors and hardships in the field and on the march. Nothing could surpass the determined valor with which they met the large army of the enemy, fully supplied and equipped." Despite McClellan's assertion that a "decided victory" could be achieved on the 18th, his army remains inactive throughout the day. McClellan cannot blame this passivity on his lack of fresh troops, for Porter's V Corps and Franklin's VI Corps -- both of which were unengaged in the previous day's battle -- are available to him. Lee, on the other hand, has no hope of reinforcement, so he decides to retreat his army back over the Potomac into Virginia after nightfall. The retirement is completed successfully with no interference from the Northern side.
September 19, 1862. McClellan writes to Halleck: "Our victory was complete. The enemy is driven back into Virginia. Maryland and Pennsylvania are now safe." McClellan orders his army forward to the Potomac in a half-hearted pursuit of Lee. Lee is not yet willing to call an end to the campaign. He orders Stuart's cavalry to move up the Potomac, cross the river at Williamsport (W2004), move down the Hagerstown Pike, and threaten the Army of the Potomac's right flank. He also directs that the west bank of the Potomac at Shepherdstown (W2115) and Boteler's Ford (W2215) should be held by the army's reserve artillery and a small body of infantry in order to cover the retirement of the main body of the army toward Martinsburg (W1314).
September 20, 1862. Elements of Porter's V Corps cross the Potomac and attack the Confederates on the west bank. At first the attack is highly successful; several Rebel artillery pieces are captured and their infantry supports routed. Jackson comes to the rescue, however, ordering A.P. Hill's division to launch a vigorous counterattack. The Federals are promptly driven back across the river. In the evening, Lee orders his entire army to retire behind Opequon Creek near Martinsburg. McClellan does not pursue. McClellan writes to his wife: "I feel that I have done all that can be asked in twice saving the country. If I continue in its service I have at least the right to demand a guarantee that I shall not be interfered with... I can retire from the service for sufficient reasons without leaving any stain upon my reputation. I feel now that this last short campaign is a sufficient legacy for our child, so far as honor is concerned."
September 21, 1862. The Army of Northern Virginia completes its retirement to Martinsburg. The Army of the Potomac remains in Maryland. According to McClellan, "I look upon this campaign as substantially ended, and my present intention is to seize Harper's Ferry [which had already been evacuated by the Confederates] and hold it with a strong force; then go to work and reorganize the army ready for another campaign." The Antietam campaign has come to an end.
September 22, 1862. Nothing of note happens militarily this day. However, in Washington, a momentous political decision is made. Encouraged by McClellan's "victory" at Antietam, President Lincoln decides to issue an Emancipation Proclamation, freeing all slaves in the rebellious states as of January 1, 1863. The tenor of the war has changed completely.
Map Gazetteer
By Joseph M. Balkoski (2017 additions by Ed Beach)
Kernstown (W0133): Site of the opening battle of Stonewall Jackson's famous Shenandoah Valley campaign on March 23, 1862. Also the site of a battle on July 24, 1864 during Jubal Early's operations in the Valley.
Winchester (W0330): Founded in 1732. George Washington made his headquarters in Winchester as commander of the Virginia militia from 1755 to 1758. Three Civil War battles were fought at Winchester: the first during Jackson's Valley campaign in 1862; the second during the Gettysburg campaign in 1863; and the third during Sheridan's operations against Early in 1864. The town changed hands more than 70 times during the war.
Spout Spring Mill (W0731): The Battle of Third Winchester was fought just west of here on September 19, 1864. Union wounded were treated in and around the mill. An observer noted: "Spout Spring Place, once the pride of the [Opequon] crossing, now presented a harrowing picture of the destructibility of War, the only thing left intact, besides the Spout Spring, being [the owner's] fine brick residence at the end of a once-handsome lawn, on a commanding site from the Opequon."
Stephenson's Depot (W0627): Site of a minor engagement in Sheridan's Valley campaign on July 20, 1864.
Soldier's Rest (W1230): Home of Revolutionary War hero Daniel Morgan, who first settled here in 1762.
Berryville (W1332): Founded in 1798. Berryville was occasionally referred to as "Battletown"—not because of the Civil War battles that were fought in the vicinity but due to the legendary brawls in which Daniel Morgan and his friends engaged during the colonial period.
Rippon (W1728): "The shutters of the remainder of the dwellings comprising [Rippon] were likewise closed and the place presented a veritable Deserted Village," noted a northerner in 1864. "The inmates were either keeping shady, paralyzed by fear at the presence of the foe, or had taken their departure for other quarters in anticipation of their arrival."
Kabletown, Myerstown (W1928/W1929): The Union counter-guerrilla group known as "Blazer's Scouts" was ambushed here by Confederate partisan Colonel John S. Mosby's band on November 18, 1864.
Washington's Masonic Cave (W1925): According to legend, these subterranean passages were visited by a young George Washington during Masonic rituals.
Fenton (W2125): William Little, a Scotsman who emigrated to America in 1763 and helped establish nearby Charlestown, built this house on a hill overlooking the Shenandoah. The house still stands.
Charlestown (W1924): Founded in 1786, Charlestown is famous as the site of John Brown's trial and execution following the abolitionist's raid on the US Arsenal at Harpers Ferry on October 17, 1859.
Hunter's Mansion (W2023): The home of Judge Andrew Hunter, the prosecutor at the John Brown trial. Hunter was the cousin of Union General David Hunter, who issued direct orders to the 1st New York Cavalry on July 17, 1864 that the Judge's mansion should be burned.
Col. Washington's House (W2221): Also known as Beall Air, this house was built in 1800. During the Civil War, the home was owned by Lewis Washington, George Washington's great grand-nephew. On the morning of John Brown's Harpers Ferry raid, Washington was seized here by some of Brown's men and taken as a hostage to Harpers Ferry. The house is still standing.
Chambers Farm (W2421): During the siege of Harpers Ferry, Federal defensive lines were situated here and in the adjacent hex (W2420, Bolivar Heights).
Harpers Ferry/Bolivar (W2521): Situated at the confluence of the Potomac and Shenandoah Rivers, the view from the heights above Harpers Ferry was described by Thomas Jefferson as "worth a trip across the Atlantic." During the Civil War, few sites in America were more significant militarily. For the North, control of Harpers Ferry and its surrounding heights was vital because the Baltimore and Ohio Railroad, the most direct link with the western states, crossed the Potomac here. Furthermore, another key transportation artery, the Chesapeake and Ohio Canal, passed Harpers Ferry on the Maryland side the Potomac. The federal arsenal and armory, built here in 1796, were the targets of John Brown's raid in October 1859. Much of the old town is now owned by the National Park Service, and it is a "must" stop for Civil War tourists.
Naval Battery (W2620): This position on Maryland Heights, occupied by seven heavy Union artillery pieces, dominated Harpers Ferry and the surrounding area. The failure of Colonel Thomas Ford's Federal brigade to hold the mountain crest (hex W2720) against an attack by McLaws' division led to the Union abandonment of Maryland Heights and the Naval Battery on September 13, 1862—an event which helped precipitate the Union decision to surrender the 12,500-strong Harpers Ferry garrison two days later. Today, visitors can take a steep walking path to reach the Naval Battery. Further up the slope of Maryland Heights are the ruins of the "Stone Fort," a Union redoubt built after the close of the Maryland campaign.
Boteler's Ford (W2215): The Potomac ford used by A.P. Hill's "Light" Division during its epic march from Harpers Ferry to Sharpsburg on September 17, 1862.
Ferry Hill Place (W2214): The home of Henry Kyd Douglas, one of Stonewall Jackson's most trusted aides. Douglas authored I Rode With Stonewall, one of the classic memoirs of the Civil War. After the war, Douglas became commander of the Maryland National Guard. The house still stands.
Shepherdstown (W2115): Shepherdstown traces its origins to the early 18th century. Its original German settlers christened the town Mecklenburg, but its name was changed in 1798.
Kearneysville (W1717): During the Civil War, Kearneysville consisted of no more than two private dwellings and a two-story train depot.
Duffield's Depot (W2018): This station on the Baltimore and Ohio Railroad was raided by Mosby's partisans on June 29, 1864. The Confederates referred to the operation as the "Calico Raid" because of the large quantity of fancy ladies' fabric carried off by the raiders.
The Bower (W1418): Home of Stephen Dandridge who sent three of his sons to fight with the Army of Northern Virginia. A favorite headquarters and resting spot for JEB Stuart and his officers who described the Bower as "filled with the sounds of revelry every evening." Stuart purchased the horse Lucy Long from Dandridge to serve as a gentler steed for Robert E. Lee after Lee had fallen from his famous horse Traveler during the Antietam campaign. Lee would ride Lucy Long for much of the next two years. (Stephen Dandridge is also the great-great-grandfather of designer Ed Beach).
Traveller's Rest (W1617): The home of General Horatio Gates, the American commander at the Battle of Saratoga in 1777. Gates acquired the home in 1773 and held it until 1790.
Leetown (W1520): Leetown traces its origins to 1742. It was originally known as Hue's Town.
Prato Rio (W1420): The home of Revolutionary War General Charles Lee, a former British Army officer who sided with the Patriots. Lee was disgraced at the Battle of Monmouth in 1778 and never took the field again.
Smithfield (W1222): A series of small engagements took place here during the Valley campaign on August 28 and 29, 1864.
Lake Louise (W1323): A 44-foot deep lake formed by the collapse of the roof of a subterranean water-filled cavern.
Harewood Hall (W1623): The home of George Washington's brother, Samuel.
Bunker Hill (W0820): Described by a northern observer as "pleasantly situated on high ground, comprising a mill, a hotel, [and] two dozen dwellings or more."
Gerardstown (W0618): The Gerard House, situated in the center of Gerardstown and built in 1743, is one of the oldest structures in West Virginia. (Note that this area was part of Virginia in 1862.)
Darkesville (W1018): Also known as Bucklestown, this village was founded in 1791.
Big Spring (W1215): This spring, just south of Martinsburg was a popular watering hole for both sides during military operations in the Valley.
Martinsburg (W1314): This town dates to the mid-18th century, but it did not flourish until the Baltimore and Ohio Railroad was completed in the next century. Both sides' armies passed through here frequently during the war, and the town always demonstrated its divided loyalties. The famous Confederate spy Belle Boyd, who was only 17 when she began to provide valuable intelligence on Union troop movements to Stonewall Jackson, resided in Martinsburg. In her parents' Martinsburg home, she is reported to have shot a Federal soldier who had threatened her mother.
Laurel Hill (W1413): This mansion east of Martinsburg was Union General Franz Sigel's headquarters in early July 1864. As Jubal Early's Rebels marched northward to Martinsburg from Winchester at the start of their raid on Washington, Sigel is reported to have paced on the Laurel Hill porch muttering "Vot shall I do? Vot shall I do? My army vill all be captured!"
Falling Waters (W1607): Here, on the night of July 13, 1863, two-thirds of Lee's Army of Northern Virginia escaped across the Potomac on pontoon bridges from Maryland to Virginia, thereby bringing the Gettysburg campaign to a close. At the same time, the remainder of Lee's army forded the Potomac at Lights Ferry near Williamsport (W2004). Falling Waters earned its name due to the Potomac's nearby three-foot waterfall.
Hainesville (W1510): In July 1861, Hainesville was occupied by Colonel Thomas J. Jackson's Virginia brigade of General Joseph Johnston's Army of the Shenandoah. During the First Bull Run campaign, Jackson's troops redeployed to Manassas Junction from here. In the subsequent battle, Jackson earned the nickname "Stonewall," and his unit became known as the "Stonewall Brigade."
Old Fort Frederick (W1004): This fort was built in 1756 to protect settlers during the French and Indian War. Today the fort is part of a Maryland state park.
Williamsport (W2004): Founded in 1787, Williamsport petitioned Congress in 1791 to be selected as the country's new national capital. President George Washington inspected the town and denied its petition because it was situated above the Potomac's head of navigation. Instead, Washington selected a marshy area near Georgetown for the national capital -- and the rest is history.
Downsville (W2108): Following the Army of Northern Virginia's defeat at Gettysburg in July 1863, Lee retreated to the Potomac, formed line of battle, and awaited Meade's attack. This little crossroads village was the right flank of Lee's line as he waited for the swollen Potomac to subside.
St. James College (W2307): This preparatory school was founded in 1842. Most of its students fought for the South in the Civil War. The school buildings occupied a key point in Lee's defensive position around Williamsport following the retreat from Gettysburg in July 1863.
Hagerstown (W2502): The county seat of Washington County since 1776. Much of Longstreet's wing of the Army of Northern Virginia occupied Hagerstown prior to the Battle of South Mountain on September 14, 1862. A severe cavalry engagement took place in the streets of Hagerstown on July 6, 1863 during Lee's retreat from Gettysburg. In the battle, Captain Ulric Dahlgren of the Union cavalry suffered a wound in the foot, eventually causing the amputation of his lower leg. His father, Admiral John Dahlgren, encased the leg in a brick wall in the Washington Navy Yard. Young Dahlgren (by then a colonel) was killed in the Kilpatrick raid on Richmond on March 3, 1864.
Funkstown (W2704): Now a suburb of Hagerstown, General Meade observed the Confederate line of battle around Williamsport from Funkstown at the close of the Gettysburg campaign, July 10 to 14, 1863.
Boonsboro (W2910): This village thrived before the Civil War because it lay directly astride the National Road, which carried thousands of settlers heading west. Stonewall Jackson was nearly captured here in September 1862 during his epic march to Harpers Ferry. Two cavalry engagements took place in and around Boonsboro: the first during Lee's retreat to Sharpsburg in September 1862, and the other during Lee's retreat from Gettysburg in July 1863.
Keedysville (W2711): McClellan's attempt to outflank Lee's position on the Antietam began here on September 16, 1862—the day prior to the great battle. Two Union corps (later followed by a third) crossed the Antietam at the Upper Bridge, which still stands today.
Rohrbach Bridge (W2613): This bridge, which still stands, came to be known as "Burnside's Bridge" because of the attack made across it by Burnside's IX Corps during the Battle of Antietam on September 17, 1862.
Dunker Church (W2412): During the early phase of the Battle of Antietam, heavy fighting swirled around this tiny white edifice. The building still stands.
Bakersville (W2310): Here, on October 3, 1862, President Lincoln reviewed Franklin's VI Corps, Army of the Potomac.
Sharpsburg (W2413): Most of the September 17 battle took place north and east of Sharpsburg, so the town suffered little damage during the fight. Still standing on Sharpsburg's main street is the only surviving slave auction block in Maryland.
Mt Airy (W2314): At this manor house, built in 1800 and still standing, President Lincoln visited General McClellan on October 3, 1862 -- two weeks after the great battle of Antietam. The photographer Alexander Gardner took a series of famous photographs of the Lincoln visit at this site. The area surrounding the house is now threatened by commercial development and is the focus of a fund-raising campaign by Civil War preservationists.
Antietam Iron Works (W2515): This iron foundry operated from 1765 to 1880. It reportedly forged cannon and cast cannon balls during the Revolution.
Solomon's Gap (W2717): Just prior to the siege of Harpers Ferry in September 1862, two brigades from McLaws' division marched up Solomon's Gap and then south along a mountain trail to confront the Union brigade defending Maryland Heights.
Crampton's Gap (W3016): Site of a battle on September 14, 1862. Here Franklin's VI Corps, Army of the Potomac, overwhelmed elements of McLaws' division. However, Franklin did not take advantage of his success and failed to relieve the beleaguered Union garrison at nearby Harpers Ferry. Today a memorial to Civil War newspapermen, known as the War Correspondents Arch, occupies the site of the final Confederate defensive position in the gap.
Burkittsville (W3117): President Lincoln visited Union and Confederate wounded in Burkittsville on October 4, 1862.
Berlin (W3121): Now known as Brunswick, this important Potomac crossing site was used by McClellan's Army of the Potomac on October 26, 1862, at the start of the Fredericksburg campaign.
Point of Rocks (W3623): Site of a pre-war Potomac River bridge, burned by the Confederates on June 15, 1861. Rebel partisans under the command of Mosby raided Point of Rocks on July 4, 1864.
Aqueduct (W4126): This aqueduct, which carried the Chesapeake and Ohio Canal over the broad Monocacy River, was a prime candidate for destruction during the Confederate invasion of Maryland in 1862. However, according to Rebel General John G. Walker, "Not a seam or crevice could be discovered in which to insert the point of a crow-bar. So admirably was the aqueduct constructed and cemented that it was found to be virtually a solid mass of granite."
White's Ford (W3928): The Army of Northern Virginia used this and adjacent fords to cross the Potomac into Maryland at the start of the Antietam campaign, September 4 to 7, 1862. The last surviving Potomac River ferry, the General Jubal Early, still operates daily at what used to be known as Conrad's Ferry (W3820).
Leesburg (W3533): Founded in 1758, Leesburg was a haven for President James Madison and his Cabinet following the British capture of Washington in August 1814.
Loudoun Heights (W2621): General John G. Walker's Confederate division occupied these heights during the siege of Harpers Ferry. Union positions in and around the town were at the mercy of Walker's guns atop this commanding position.
Snicker's Gap (W2033): Jubal Early's army returned to the Shenandoah Valley through this gap in July 1864 following its unsuccessful raid on Washington.
Middletown (W3613): During Stonewall Jackson's march to Harpers Ferry in September 1862, his corps passed through this village. According to his aide Henry Kyd Douglas, "Two very pretty girls with ribbons of red, white, and blue in their hair and small Union flags in their hands, came out of their house as we passed, ran to the curb-stone and laughingly waved their colors defiantly in the face of the General. He bowed and lifted his cap and with a quiet smile said to his staff, 'We evidently have no friends in this town.'"
Fox's Gap (W3212): The Federal IX Corps forced their way to the top of this gap at the Battle of South Mountain, September 14, 1862. Its commander, Maj. Gen. Jesse Reno, was killed here. There is a monument to Reno near the crest of the mountain.
Mountain House (W3211): Just north of here, Hooker's I Corps, Army of the Potomac, attacked the Confederate defenders of Turner's Gap at the Battle of South Mountain, September 14, 1862. The Mountain House, which still stands as a popular restaurant known as the Old South Mountain Inn, was built in the 18th century. After the war, it was purchased by Admiral John Dahlgren's widow, who was also the mother of Colonel Ulric Dahlgren (see entry on Hagerstown).
Washington Monument (W3110): This monument to the first President was erected in a single day (July 4, 1827) by the citizens of nearby Boonsboro. It had nearly collapsed by the time of the Civil War, but Union forces still managed to use it as a signal station. A reconstruction of the original monument, built in 1936, now stands at the site.
Mechanicstown (W4202): Founded in 1751, this town's name was changed to Thurmont in 1872 when the Western Maryland Railroad was extended to this point. Camp David, the Presidential retreat, is situated in the Catoctin Mountains just west of here.
Catoctin Furnace (W4105): Cannon balls for the Continental Army were cast here during the Revolution. Parts of the furnace are still standing.
Double Pipe Creek PO (W5002): When the Western Maryland Railroad was extended to this village after the Civil War, its name was changed to Detour because the original name could not fit on the railroad's timetables.
Lewistown (W4108): Many Hessian soldiers who were captured in the Revolution settled here in the 1780's.
Frederick (W4214): One of Maryland's most historic towns, Frederick was a focal point in three different Civil War campaigns. Frederick's most famous Civil War resident was 95-year old Barbara Fritchie, the subject of John Greenleaf Whittier's popular (at least in the North) poem. As Stonewall Jackson's troops passed through the town in September 1862, Fritchie, according to Whittier, defiantly waved the American flag in front of the Rebels and declared, "Shoot if you must this old grey head, but spare your country's flag!" Historians have since proved that the incident could not have occurred, although generations of Northern schoolchildren who learned the poem thought of it as fact. A reconstruction of the Barbara Fritchie house is open to the public.
Frederick Junction (W4317): Here, on August 6, 1864, Generals Grant and Sheridan met to plan the upcoming Shenandoah Valley campaign. The Battle of Monocacy was fought just east of here on July 8, 1864, during Early's raid on Washington. In 1755, British General Edward Braddock planned his ill-fated foray into western Pennsylvania at a fort located at this site.
Jug Bridge (W4515): This bridge, built in 1807 to carry the National Road over the Monocacy River, earned its name because a huge decorative stone jug was erected on the bridge's eastern side. According to legend, a mason encased a bottle of whiskey inside the jug.
New Market (W5016): Now the "Antiques Capital of Maryland," New Market was the eastern limit of Confederate penetration into Maryland during the 1862 campaign.
Barnesville (W4527): Several cavalry skirmishes took place in this vicinity and nearby Poolesville (W4431) as Confederate forces crossed the Potomac into Maryland in early September 1862.
New Windsor (W5806): This village was raided by Confederate cavalry during Jubal Early's attack on Washington in July 1864.
Uniontown (W5803): Hancock's II Corps, Army of the Potomac, encamped here on June 30, 1863—the day prior to the Battle of Gettysburg. This beautiful village has changed little since the Civil War.
Union Bridge (W5506): This village gained its name in the late 18th century when scattered Quaker settlements on both sides of Little Pipe Creek were "united" by a new bridge.
Doughoregan Manor (E1616): This mansion, built around 1740, was the ancestral home of Maryland's famous Carroll family. One of its famous residents was Charles Carroll of Carrollton, who had been the oldest surviving signer of the Declaration of Independence until his death in 1832. The vast Doughoregan estate encompassed a large portion of Howard County.
Hood's Mill (E0911): Here JEB Stuart's Rebel cavalry crossed the Patapsco on their ride around Hooker's Army of the Potomac during the Gettysburg campaign, June 1863. The Confederates lingered here for several hours to burn bridges and destroy Baltimore and Ohio Railroad track.
Ellicott Mills (E2116): Founded in 1774, this mill town flourished when one of the first railroad stations in the United States was built here in 1830 as part of the new Baltimore and Ohio Railroad. Union forces defeated at the Battle of Monocacy in July 1864, retreated here.
Oakland Mills (E1919): The original frame house, blacksmith shop and smokehouse still stand on this site. Constructed in 1820, this property was set up as a toll house along the newly-commissioned Columbia Pike that was being constructed from Ellicott City to Georgetown. The property now gives its name to the nearby village within the planned community of Columbia, Maryland – and to the nearby high school, home of the Oakland Mills Scorpions.
Blandair (E2019): This 300-acre slave plantation was owned by Theodorick Bland from 1828 to 1845 and was renamed "Blandair" during that period. Recently purchased by Howard County, the estate is being developed into a large regional park.
Waveland (E2020): The Dorsey family owned this early 19th Century estate during the Civil War. The family was active in smuggling medical supplies across the Potomac to their Confederate compatriots during the war. One story claims that the senior Dorsey had to hide inside a wardrobe to avoid capture when the Union army arrived to search his property. (The original Waveland house still stands, directly adjoining the residence of designer Ed Beach).
Pikesville (E2409): Now a suburb of Baltimore, this town was named after the famous soldier-explorer Zebulon Pike.
US Arsenal (E2510): Built in 1816, this sturdy brick edifice still stands. The Confederate cavalryman (and Marylander) Harry Gilmor passed here during his raid around Baltimore in July 1864. According to legend, Gilmor's uncle persuaded him not to burn down the arsenal because Pikesville was overwhelmingly pro-southern in its sympathies. After the war the arsenal was converted to a home for Maryland's Confederate veterans. Today it is the headquarters of the Maryland State Police.
Mt. Washington Female College (E2709): Situated on a hill overlooking the valley of the Jones Falls, this "Octagon House" (an eight-sided building) was constructed in 1856. Its most famous pupil was Belle Boyd (see entry on Martinsburg), who enrolled here at the age of 12. Octagon houses were popular in the 1850's, and there are several surviving examples in the Mt. Washington area—which is now part of Baltimore City. (Designer Joe Balkoski lived for many years in this area.)
Rockland (E2708): Now a Baltimore suburb, this little crossroads village of ancient stone houses traces its origins to the late 17th century -- several decades before the establishment of Baltimore City. Supposedly some of the surviving houses here still show remnants of defenses against Indian attacks.
Bare Hills (E2608): Founded by free Blacks in the 1830's, Bare Hills is one of the oldest African-American communities in Maryland. The community is still predominantly Black. Indeed, many Bare Hills residents are descendants of the community's founding father, the Reverend Aquila Scott.
Lutherville (E2906): This village flourished in the post-Civil War period. Today its restored Victorian homes are among the finest in Maryland.
Towsontown (E3108): Now a Baltimore suburb, Towsontown was established in 1685 as a stagecoach stop on the road to York, Pennsylvania. Now known as Towson, it is the Baltimore County seat.
Gov. Bradford's House (E3009): This home, owned by Governor Augustus Bradford of Maryland, was burned on July 11, 1864 by Bradley Johnson's Confederate raiders.
Woodberry (E2911): Many of the original stone buildings in this old mill village on the Jones Falls still stand. Today, Baltimore's "Light Rail" commuter train has a stop at Woodberry.
Druid Hill Park (E2912): Now the site of the Maryland Zoo, this park was dedicated in 1860.
Mt Royal Depot (E3013): The southern terminus of the Northern Central Railroad. Today, Baltimore's new "Light Rail" commuter train, which uses the old Northern Central tracks up to and north of Lutherville (E2906), switches from rail to trolley tracks around the site of the old Mt. Royal Depot.
Mt Clare Station (E3014): This historic building now houses the Baltimore and Ohio Railroad Museum. The area around the roundhouse, which was once known as "The Railroad University," was the focal point of American railroading for a generation.
Camden Station (E3115): This is the oldest train station in the United States still in use. The station was recently restored to its Civil War appearance and is now an integral part of the city's famous baseball complex "Oriole Park at Camden Yards." Some of the first deaths of the Civil War took place outside this station when a Baltimore mob tried to prevent the passage of the 6th Massachusetts Infantry from President Street Station (E3214) to Camden Station during the regiment's journey to Washington D.C. on April 19, 1861.
Fort Federal Hill (E3215): This prominent hill on the south side of Baltimore's Inner Harbor was occupied by General Ben Butler's troops on the night of May 13, 1861. Federal forces fortified the position and held it for the rest of the war. In truth, the fort was not intended as a means of defense against a Rebel attack, but rather as a powerful reminder to the city's pro-southern sympathizers that Federal forces would secure the city by force if necessary.
President St. Station (E3214): The southern terminus of the Philadelphia, Wilmington, and Baltimore Railroad. Passengers traveling on this railroad who wished to proceed to Washington had to transfer to Camden Station (E3115). The facade of President Street Station still stands and it reopened as Baltimore's Civil War Museum in 1997.
Washington Monument (E3114): This monument, begun in 1815 and completed in 1829, predates the more famous monument in Washington, D.C. by several decades. According to legend, the city decided to place the monument on what was then a sparsely populated hill so that no one would be injured if the structure collapsed. At the beginning of the Civil War, when Baltimore demonstrated strong pro-southern sympathies, a young Federal artillery officer threatened to train his guns on the Washington Monument. A prominent resident of the city replied, "If you do that, and a woman or child is killed, there will be nothing left of you but your brass buttons to tell who you were!"
Ft. McHenry (E3316): During the War of 1812, this fort held off a British attack in September 1814, inspiring Francis Scott Key to write "The Star Spangled Banner." During the Civil War, many Maryland residents with southern sympathies were held as prisoners in Ft. McHenry after President Lincoln suspended the writ of habeas corpus.
Canton (E3414): This village, along with neighboring Fells Point (E3314), was a community of seafarers and merchants. Today both communities retain a nautical flavor. Canton was named after the city of the same name in China to which Baltimore sea captains sailed in search of exotic Oriental goods.
Battle Acre (E3814): The site of the Battle of North Point on September 12, 1814, when the Maryland Militia delayed a British expeditionary force en route to Baltimore. The British, who had just burned Washington, D.C, penetrated as far as the Philadelphia Road (E3513) but did not dare attack the strong Baltimore defenses frontally. They withdrew when nearby Ft. McHenry withstood a 25-hour naval bombardment.
Cockeysville (E2903): A town established by the Cockey family who moved into the area as early as 1725 and who established the train station in the 1830s. Bradley Johnson's Confederate cavalry raided the town and destroyed telegraph lines and track on July 10, 1864.
Perry Hall (E3905): A huge plantation completed by Harry Dorsey Gough in 1776. The house is now owned by Baltimore County and the estate's name has been appropriated by the sprawling suburban community that has arisen in this area.
Harkersville (E3409): The location of the Avalon Hill Game Company when it was in business.
Hampton Mansion (E3206): This grand Georgian house, now a National Historic Site, was built shortly after the Revolution.
Dickeyville (E2613): Time seems to stand still here -- you would never imagine that this old mill village is now a part of Baltimore City. The village was also known as Wetheredsville.
Crimea (E2714): The home of Ross Winans, a well-known Baltimorean of southern sympathies. On May 14, 1861, while returning to his home from a session of the Maryland legislature in Frederick, Winans was arrested by order of General Ben Butler and confined in Ft. McHenry.
Oella (E2215): This old mill village was the home of Benjamin Banneker, a brilliant free Black man who had been commissioned by George Washington to help lay out Washington, D.C.
Avalon Iron Works (E2517): This is the area from which the Avalon Hill Game Company drew its name.
Relay House (E2518): When the first railroad in the United States was opened between Baltimore and Ellicott Mills on May 24, 1830, the original trains were drawn by horses. The 13-mile trip between the two points was too strenuous for a single horse team, so a switch to a new team, known as a "relay," was made at the halfway point. The switching point eventually developed into a station known as "Relay." The first telegraph line in the United States, which began operating between Baltimore and Washington in May 1844, ran through Relay.
Thomas Viaduct (E2519): The most famous railroad bridge in the United States. The bridge design originated in 1832 when the Baltimore and Ohio Railroad decided to build a spur to Washington. The major obstacle was the Patapsco River, which flows in a gorge with 60-foot banks near the Relay House. The B&O called upon Benjamin Latrobe, one of the creators of the U.S. Capitol, to design the bridge. The job was thought to be impossible, and during bridge construction the site was referred to as "Latrobe's Folly." The 612-foot stone-arch bridge was completed in three years. It is the only bridge of its type in the world to be built on a curve. It has been in constant use since 1835 and reportedly has never needed major repairs of any kind.
Pumphrey (E3120): The ancestral home of Avalon Hill graphic artist Matt Pumphrey.
Laurel (E2026): Before the Civil War, Laurel's cotton mills were among the busiest in Maryland.
Annapolis (E3932): One of the oldest chartered cities in the United States, Annapolis traces its origins to the mid-17th century. The city became Maryland's capital in 1694 and served as the U.S. capital in 1783 and 1784. The U.S. Naval Academy was established here in 1845. In the spring of 1861, with Baltimore in virtual open rebellion, the most secure route to Washington for Federal troops arriving from the northern states was by water to Annapolis, railroad to Annapolis Junction (E2223), then on to the capital.
Bladensburg (E1635): Site of an August 24, 1814, battle in which the British routed an American force sent out to defend Washington. The Redcoats then marched into the capital and burned most U.S. government buildings. The British referred to the battle as the "Bladensburg Races."
Agricultural College (E1533): Founded in 1856, this site is now the home of the University of Maryland.
Fort Stevens (E1034): Site of a half-hearted attack against the Washington defenses on July 11-12, 1864, by Jubal Early's Confederates. President Lincoln personally witnessed the battle from the Fort Stevens parapet. According to legend, a Union officer standing next to Lincoln was shot causing Captain (and future Supreme Court Justice) Oliver Wendell Holmes to exclaim to the President, "Get down, you fool!"
Silver Spring (E1033): This mansion was owned by Francis Preston Blair, a well-known politician who had been a close associate of President Andrew Jackson. Blair also owned the famous "Blair House," which still stands across the street from the White House. Blair's son Montgomery, who served as Lincoln's Postmaster General, lived nearby in a house known as "Falkland." Following the Battle of Fort Stevens on July 12, 1864, Early's retreating Rebels set fire to Falkland and destroyed it. In retaliation for this act, General Ben Butler ordered a raid up the Rappahannock River to burn Major John Seddon's home, known as "Snowdon" (see Stonewall Jackson's Way map). Seddon, who had died in late 1863, was the brother of the Confederate Secretary of War. In an August 10, 1864, letter, Montgomery Blair reprimanded Butler: "I have a great horror of lawlessness, and it does not remove my repugnance to it that it is practiced upon the lawless. If we allow the military to invade the rights of private property on any other grounds than those recognized by civilized warfare, there will soon cease to be any security whatever for the rights of civilians, on either side."
Tennallytown (E0835): The highest point in the District of Columbia at 410 feet.
Rockville (E0328): Rockville has been the Montgomery County seat since 1777. Jubal Early's Rebels passed through here during their raid on Washington. Today Rockville has been swallowed up in the Washington metropolitan area.
Langley (E0336): Now the site of CIA headquarters.
Georgetown (E0838): Georgetown traces its origins to the late 1600's, although it was not chartered as a city until 1789. One of its most famous residents was Francis Scott Key. It was annexed to the city of Washington in 1878.
The White House (E0939): The home of every President of the United States except for George Washington. British Army units burned the house in August 1814, after which President James Madison moved temporarily to the nearby Octagon House. The Presidential mansion gained its name when its walls were painted white in 1814 to hide the scorch marks caused by the fire set by the Redcoats.
The Capitol (E1140): The cornerstone of the Capitol was laid by President Washington on September 18, 1793. The original Capitol was burned by the British in 1814. During the 1850's, architects drew up plans to enlarge the Capitol with two new wings and a 287-foot iron dome. During the Civil War, President Lincoln insisted that this work continue. Indeed, the dome, topped by a 19-foot statue symbolizing Freedom, was completed in 1863.
Fort Washington (E1148): The site of the first fort built to protect the United States capital city, completed in 1809. The original fort was destroyed by its own garrison to prevent it falling into British hands during the War of 1812. Work on the second Fort Washington was begun soon thereafter; it became the first of the 68 forts to protect the District of Columbia during the Civil War.
Surrattsville (E1746): The main building in town was owned by the widow Mary Surratt. John Wilkes Booth stopped at Surratt's tavern to pick up weapons and supplies just two hours after his assassination of Abraham Lincoln. Surratt was tried and convicted of complicity in the murder and hung on July 7, 1865. Due to the notoriety from this incident the town was soon renamed -- first to Robeysville and then to Clinton. However the "Surrattsville" name has not fallen totally out of use: locals still attend Surrattsville High.
Upper Marlborough (E2643): Incorporated in 1744, Upper Marlborough served as the principal port for the tobacco trade that flourished along the Patuxent River for several centuries.
Designer's Notes
By Joseph M. Balkoski
[The following are the original designer's notes from when this game was originally published in 1993. Joe's vision and prediction for the future direction of the series was remarkably prescient.]
Here Come the Rebels is the second installment in Avalon Hill's series on the great campaigns of the American Civil War. In truth, the Confederate invasion of Maryland in September 1862 was only the latter half of a larger campaign that began on August 19, 1862 on the Rapidan River in Virginia. Stonewall Jackson's Way, the series' initial title, covered the first part of this campaign, which culminated in the Confederate triumph at Second Manassas. The Maryland campaign was therefore a logical choice for the series' second volume.
The Rebel invasion of Maryland was a challenge to simulate accurately. Confederate troops were already at the limit of their endurance as they forded the Potomac in early September 1862; and the accomplishment of any significant military goals was severely hampered by straggling, lack of supply, and the high casualties suffered in the Second Manassas campaign. For Robert E. Lee, however, the Maryland campaign was more significant politically than militarily. He was convinced that the Union was close to yielding on the issue of Southern independence, and a Confederate offensive -- even by his exhausted army -- might be enough to force the Federals to finally give in. Indeed, following Pope's defeat at Second Manassas on August 30, 1862, Union troops in and around Washington DC. were in no condition to counter Lee's move across the Potomac. Furthermore, Lee fervently hoped that the Army of Northern Virginia's march into Maryland would swing the "Old Line State" into the Confederacy's camp. Such an accomplishment would be disastrous for the North, since the Federal capital in Washington D.C. would thereby be isolated from the loyal states. A triumph of this magnitude could bring about foreign recognition of the Confederacy or even direct foreign support.
Thus, Lee's political goals in the Maryland campaign strongly influence both players' conduct in Here Come the Rebels. In the two campaign games, Southern victory is dependent on Confederate control of key Maryland counties -- particularly Frederick and Montgomery, which lay astride Washington D.C.'s lines of communication with the west. Unlike Stonewall Jackson's Way, in which the victory conditions demand that Lee's forces aggressively attack and destroy Pope's Army of Virginia, it is the Federal army in Here Come the Rebels that must take the offensive. In game terms, if Lee's Army of Northern Virginia is permitted to sit undisturbed in Frederick County (MD) for the entire scenario, the Confederate player will win—especially if he also captures the critical Union strongpoint at Harpers Ferry. Had McClellan allowed Lee to accomplish such a goal in September 1862, Washington's ties with the western states would have been severely impaired, and the Lincoln administration -- already crumbling in the eyes of many -- would have crumbled still further. The war might well have ended at that point.
From a game designer's viewpoint, Lee's invasion of Maryland is intriguing. Significantly, there has never been a wargame devoted entirely to this campaign, so the subject matter is fresh. Furthermore, it was the Maryland campaign rather than Lee's invasion of Pennsylvania in the following year that truly represented the "High Water Mark of the Confederacy." At no other time during the war were the fortunes of the South as bright and the North's as bleak as they were when Confederate troops first forded the Potomac into Maryland. Finally, the campaign was one of the most dynamic and hard-fought struggles of the Civil War. Stonewall Jackson's "foot cavalry" were in their prime and performed several marches of astounding rapidity and length—the most famous example of which was A.P. Hill's march of fifteen miles in less than eight hours from Harpers Ferry to Sharpsburg on September 17, 1862. If one includes Second Manassas as an integral part of this campaign, two of the war's largest battles, several minor engagements, and a decisive siege all took place in less than one month. Confederate losses during this period were close to 24,000 men, not counting large numbers of stragglers and deserters; the Federals lost 42,000, including 12,500 prisoners who surrendered at Harpers Ferry.
A note on future games in the series: Although plans are by no means definitive, it appears as if Volume III, entitled High Tide at Gettysburg, will cover the Gettysburg campaign from about June 25 to July 14, 1863. The 1862 (and possibly 1864) Shenandoah Valley campaign will probably be dealt with in Volume IV, to be titled Stonewall in the Valley. Volume V will most likely deal with the Peninsula campaign, and Volume VI with Grant's offensive from the Wilderness to Petersburg. Maybe then we will move into the Western theater. If enough gamers are interested, we may do expansion kits for campaigns that took place in areas that have been portrayed on maps in existing games. For example, the Fredericksburg and Chancellorsville campaigns could be produced as an inexpensive add-on for those already owning Stonewall Jackson's Way, since these two campaigns could be fully played out using only the south map from that game. Similarly, the First Manassas campaign could be played on the north map from Stonewall Jackson's Way, and Early's 1864 invasion of Maryland could be simulated using the two maps in Here Come the Rebels. As usual, we want to produce what you want to buy, so we would appreciate hearing your views about any of the aforementioned plans.
The Here Come the Rebels maps were drawn from a variety of sources. Most important were Maryland and Virginia county maps from the mid-1800's, most of which are held (and often available in reprint form) in county historical societies. The degree of detail on these maps is remarkable. Complete road networks are portrayed, as are fords, bridges, mountains, and creeks. Even home and business owners are delineated. Most likely these county maps were the ones actually used by senior commanders on both sides during the campaign. The Atlas accompanying the Official Records of the Union and Confederate Armies in The War of the Rebellion was also consulted extensively, particularly its highly detailed maps of the Sharpsburg/Harpers Ferry area and the Washington defenses. This atlas was reprinted about 15 years ago, and is still available in some bookshops. Another indispensable source was the richly detailed map of Maryland and Pennsylvania prepared by the famous Confederate cartographer Jed Hotchkiss for his commanding officer, Stonewall Jackson, in early 1863. The original Hotchkiss map, which is available in a much-reduced version in the Official Records Atlas, is held at the public library in Winchester, Virginia. Finally, my own trips to sites through which the armies passed during the Maryland campaign immeasurably increased my understanding of the area's topography and its effects on Civil War military operations.
Above all, Avalon Hill artist Charlie Kibler and I were determined that the game maps should get the players into the spirit of the 1860's. Even if you do not have time to play a scenario, we hope that you can pass time enjoyably simply by studying and learning from the maps. Indeed, combined with a modern road atlas, the game maps are valuable guides if you ever embark on a tour of the area in which the armies marched and fought in the 1862 Maryland campaign. The gazetteer should enhance the players' feel for the region portrayed on the Here Come the Rebels maps.
Redesign Notes. The main design portion of the HCR redesign project, which took place in the last half of 2013, was a fascinating and busy time for me. Play test of the redesign of Roads To Gettysburg was in its final stages and design for the Atlanta campaign was in full swing. Various stacks of civil war books drifted around the house, and my valued CD of The War of the Rebellion: A Compilation of the Official Records of the Union and Confederate Armies (the "OR") got plenty of use. Research of troop strengths in the Atlanta campaign alternated with rewriting the HCR campaign rules.
First up in the HCR project was rebalancing the old stalwarts McClellan's Opportunity and Harpers Ferry-Crampton's Gap. These had been Confederate biased, even with the modified Harpers scenario. In McClellan's Opportunity, the key was to give the Union significant points for getting adjacent to Sharpsburg since they could rarely take the town. The VPs had to be high enough for getting adjacent hexes to offset the inevitable heavy Union losses. In the Harpers scenario, calculated increases were made to the VPs the Union got for preventing the various Confederate divisional requirements.
After lots of play testing for balance we moved on to the next set of Basic game scenarios. A definition of what "we" means here is called for. This was, and still is, a core group of expert GCACW players who long ago became friends of mine: Steve Likevich, Ian MacKay, and Niall Taylor. Without these guys endlessly play testing scenarios with me and each other and helping me resolve the balance issues that frequently happen with new and revised scenarios, the final product would not be anywhere near as robust. I am determined that publicized scenarios should be historically accurate, have multiple paths to victory for each side, and should be perfectly balanced. Anyone reading this should have perfect confidence that any scenario they play should have an equal chance of victory for both sides, and that the game is not already lost on side selection. To conclude that thought, without these three dedicated gamers, this would not be possible.
Battle for Washington in the original game always resulted in the Union running into the forts, even with a high Confederate bid. The revision simplified objectives and VPs and reduced the number of turns. Now, the Union no longer has to run into the forts, and both sides have multiple ways they can win.
The Baltimore Raid I confess that I had never tried, and when I first played it solitaire I realized what an "undiscovered" gem it was. A minor balance change, a lot of play test checking, and it was good to go.
Three Cigars is a new scenario, basically somewhat combining the Harpers Ferry and McClellan's Opportunity scenarios. In this new scenario I added one of my favorite elements, random events, to increase its interest and re-playability. Some of the fun here for me was coming up with somewhat amusing yet descriptive event names, such as "Confederate Falls and Balls". This scenario is one of my favorite due to all the turn 1 tension in the need to maneuver quickly for position, but with some combat occurring.
In both campaigns and the Advanced Rules I made some significant changes. In the rules, the main change was to Union supply, improving the ability of the AP to advance and stay in supply, due to an analysis of various quartermaster reports from the Official Records. Players of the old campaigns might note that rain is now severely restricted, both in frequency and when it can happen. Lee opened up the campaign with clear skies so little rain is allowed in the early turns while the Confederates advance across the river(s). Also, it only rained three days in this campaign, and often the rain was at night, thus the new Late Rain random event. I didn't want to upset the frequency of Union Paralysis and Commitment in the longer campaign. But in the short campaign, there were no random events so I was able to add some spice.
The main change in the campaign scenarios was to add in a significant victory condition for what county the Rebels controlled at the end of the game and the addition of VPs for control of Boonsboro.
Please take a moment to review all the credits below. All of these individuals contributed significant time and effort to producing this game.
Chris Withers
Roads to Gettysburg
Roads to Gettysburg simulates the Gettysburg Campaign of June–July 1863 between the Confederacy's Army of Northern Virginia and the Union's Army of the Potomac.
Basic Game Rules
1.0 Introduction
Roads to Gettysburg (RTG) simulates the Civil War campaign in Pennsylvania and Maryland in June and July 1863 between the Confederacy's Army of Northern Virginia and the Union's Army of the Potomac. Players should first read the Introduction at the beginning of this rulebook, and then continue reading below.
Abbreviations. AP: Army of the Potomac (Union). ANV: Army of Northern Virginia (Confederate). Art: Artillery. Art-Res: Artillery Reserve. Balt: Baltimore garrison. Brig: Brigade. Cav: Cavalry (or Stuart's cavalry corps). DC: District of Columbia garrison. Disorg: Disorganized. Div: Division. HF: Harpers Ferry garrison. Inf: Infantry. Ldr: Leader. MP: Movement Points. OOA: Out of Ammunition. Org: Organized. PA: Pennsylvania Militia. RR: Railroad. Regt: Regiment. Rich: Richmond garrison. Sub: Substitute unit. VA: Virginia. VC: Victory Condition. VP: Victory Points. WV: West Virginia. ZOC: Zone of Control.
2.2 Playing Pieces
Military Units. The Union player's units are divided into two groups: Army of the Potomac (AP) and non-Army of the Potomac. All Union leaders are part of the Army of the Potomac. The color of the box around an AP leader's tactical value (or command value for army leader) is green to indicate this. Union military units (infantry and cavalry units) are either part of the AP or are not part of the AP. Players can identify AP and non-AP military units based on the color of the box around a unit's tactical value. For non-AP units this color is blue, and for AP units this color is green. Note: Union infantry substitute counters can only be AP per section 8.1. The Union has units from the following military districts and garrisons (these are not part of the Army of the Potomac) which have the indicative designation in parenthesis on the counter: Pennsylvania (PA), West Virginia (WV), Harpers Ferry (HF), Baltimore (Balt), and the District of Columbia (DC). These Union military district/garrison units do not have a corps affiliation, and therefore have no corps leader but may participate in grand assaults (and the army leader Meade may stack with these units). The Confederates have a similar set of units, the Richmond garrison (Rich), used only in the Advanced Game (and Lee may stack with them).
5.2 Activate Leader. Reminder: as noted in the Standard Rules, the following four Confederate cavalry units do not belong to the "Cavalry" command and may not be chosen to participate in an Activate Leader action with the leader Stuart: Imboden (12 VA), A. Jenkins (17 VA). Note: any substitute cavalry regiment detaching from Imboden or Jenkins may also not participate in an Activate Leader action with Stuart.
7.4 Combat Die Roll Modifiers — Lee. Reminder: the special Lee assault bonus does not apply in RTG.
13.0 Scenarios and Control Markers. Some scenarios specify which side controls certain "objective hexes" at the start of the game and the VPs given for control of an objective hex. Players may wish to place Union or Confederate "Control" markers on objective hexes to denote which side controls them. A player gains control of an enemy-controlled objective hex at the moment one of his undemoralized infantry (not cavalry or artillery) units enter that hex. A player maintains control of an objective hex even if he does not have an undemoralized infantry unit occupying it, assuming the enemy does not gain control of that hex. Note: if a player's infantry unit has its "Demoralize-1" marker removed while it occupies an enemy-controlled objective hex, the player immediately gains control of that hex. Some scenarios specify that Victory Points are given for occupation by infantry of certain objective hexes. Players should take care to note when Victory Conditions require occupation or just control of an objective hex.
Basic Game Scenarios
There are nine Basic Game scenarios of varying degrees of length and complexity. Unless otherwise noted in the following instructions, all units begin the game with their front (normal) sides face-up at Fatigue Level 0 with organized Strength markers. Before starting, place the Turn marker on the Turn Track in the box corresponding to the date on which the scenario begins. This is Turn one. At the end of the game, calculate Victory Points (VP) and determine a winner. Since combat losses cause VP gain or loss, the players should keep track of Manpower value losses on a piece of paper.
Map. The Roads to Gettysburg map is divided into a north and south section. In set-up instruction, hexes are listed by four-digit numbers preceded by "N" (north map) or "S" (south map). For example, "N4124" means hex 4124 on the north map. To place the two map sections together, align the south edge of the north map with the north edge of the south map so that all hexrows line up evenly. Note that there is a small amount of overlay on the maps. In the odd-numbered hexrows (i.e., hexrows whose first two digits are odd), the southernmost hex on the north map is identical to the northernmost hex on the south map. For example, hex N0134 is the same as hex S0101. Since the two RTG maps are seamless (the transition area is identical), it does not matter which map goes on top.
Scenario 1: Meade Moves North
NOTES: As late as June 28, 1863, both the Union and the Confederate armies had little idea of their enemy's whereabouts. This scenario portrays the five most critical days in the campaign, when the armies probed blindly for each other and then clashed – accidentally – at Gettysburg.
MAP: Use both maps.
GAME LENGTH: 5 turns, June 29 to July 3, 1863.
SPECIAL RULES: 1. Meade Moves North: On turn 1, all Union Army of the Potomac infantry units receive an extra -1 modifier on extended marching. For example, if an unexhausted Army of the Potomac infantry unit marched to Fatigue Level 3 it would have a final modifier of zero (-1 special turn 1 modifier, +1 Union AP infantry unit). 2. Union Movement Restrictions: The Union player is subject to the following movement restrictions. A unit's restriction is removed the moment a Confederate unit moves into any hex adjacent to the unit: 6 NY, 7 NY, and J. Smith may not activate for the entire game; Knipe, Ewen, Brisbane, and Yates may not activate or entrench on turn 1. 3. Confederate Movement Restrictions: Only two Confederate infantry divisions (of the Confederate player's choice) and the cavalry brigades of Hampton, F. Lee, and Chambliss may perform actions on turn 1. If any of these units are within the command radius of their corps leader, they may join in an Activate Corps Leader Action (and the leader may transfer and move with the units). Pickett may not be one of the two divisions chosen on turn 1. In addition, if both Rodes and Johnson move on turn 1, then Jenkins may also move. If Early moves on turn 1 then 17 VA may also move. The leader Stuart and the cavalry brigades of Hampton, F. Lee, and Chambliss may not enter or retreat into any hex in Frederick-West or Adams County until the start of turn 5 unless either of the following two conditions is fulfilled: 1) All three cavalry brigades begin a turn stacked in the same hex as a Confederate infantry division and neither the cavalry brigades nor the infantry division performs any actions throughout that turn (although they may be attacked); 2) OR, all three cavalry brigades end a turn in any hexes within Cumberland County, and at least one of these three brigades is in or within two hexes of Carlisle (N3312), Mechanicsburg (N4311), New Cumberland (N5010), or Shippensburg (N1621). If either of these two conditions is fulfilled these brigades and Stuart may enter Frederick-West and Adams County before turn 5. Law, Jones, and Robertson may not perform any actions or entrench until turn 3. Pickett and Imboden may not perform any actions or entrench until turn 4. Pickett and Law are both immediately released from this restriction if a Union unit is within 12 hexes of Chambersburg (N0929) on turn 2 or after. A cavalry unit is individually released from this restriction if a Union unit enters a hex adjacent to it. Confederate units may not move or retreat to any hex within 5 hexes of Frederick (S2326). 4. Union Militia: Union militia (any infantry unit not in the Army of the Potomac) can retreat or rout off-map, scoring no additional VP's for the Confederates. However, they may not retreat off-map across a hexside they could not normally move across. Union militia that retreat or rout off-map are out of play for the rest of the game. They may not voluntarily "run-away" off-map in a March action. 5. Permanent fort: Hex N4809 (Bridgeport) contains Fort Washington which is a permanent Union fort (reference RTG Advanced Rule 12.0). 6. Marysville Bridge: The Union may not destroy the bridge at Marysville (N4603).
Victory Conditions. The Confederate player gains and loses VP for the following (occupation/control is if the player occupies/controls the hex at the end of the game): +20 if the Confederates control Gettysburg (S3201) and no Union infantry units occupy any adjacent hex (note: the Union controls Gettysburg at the start of the game); +12 if a Confederate infantry unit occupies Gettysburg (S3201) and a Union infantry unit occupies any adjacent hex; +20 if there is no Union infantry unit within 2 hexes of Gettysburg (S3201) (Note: 40 is the maximum VPs the Confederates may receive from Gettysburg: 20 for the above control VP condition plus 20 for this VP condition); +8 if a Confederate infantry unit occupies Harrisburg (N4909); +4 for each of the following towns occupied by Confederate infantry units: Littlestown (S4006), Taneytown (S3611); +1 for each of the following RR stations with Damage or Destroy markers at the end of the game: Ellicott Mills (S5734), Sykesville (S4828), Mt Airy (S3828), Westminster (S4516), Hanover (S4503); +1 for each point of Union Manpower value lost in combat, retreat, or cavalry retreat (not in extended march, force march, or moving from one enemy ZOC to another); -1 for each point of Confederate Manpower value lost in combat, retreat, or cavalry retreat (not in extended march, force march, or moving from one enemy ZOC to another); -3 if a Union infantry unit occupies Gettysburg (S3201) and a Confederate infantry unit occupies any adjacent hex; -6 if a Union infantry unit occupies Gettysburg and no Confederate infantry units occupy any adjacent hex; -3 if a Union infantry division occupies Chambersburg (N0929). At the end of the game, the Confederate VP total is calculated and the players consult the chart below to determine the winner.
Confederate VP Winner: 53 or more = Confederate Decisive Victory; 43 to 52 = Confederate Substantive Victory; 33 to 42 = Confederate Marginal Victory; 23 to 32 = Union Marginal Victory; 13 to 22 = Union Substantive Victory; 12 or less = Union Decisive Victory.
Union Set-Up
| Unit/Leader | Size | Command | Type | Manpower Value | Hex |
|---|---|---|---|---|---|
| 7 NY Regt | III | Balt | Inf | 1+ | S5734 (Ellicott Mills) |
| 6 NY Regt | III | Balt | Inf | 1+ | S5734 (Ellicott Mills) |
| Huey | Brig | 2nd | Cav | 2 | S3328 |
| J.I. Gregg | Brig | 2nd | Cav | 2 | S3128 (New Market) |
* Indicated units begin the game at Fatigue Level 1 on their normal sides. (Note: The AP infantry & artillery started early on the 29th; their setup is at an intermediate point in their amazing march.) # Birney and Humphreys begin the game at Fatigue Level 1 on their exhausted sides. + Indicated units begin the game under fort markers.
Confederate Set-Up
| Unit/Leader | Size | Command | Type | Manpower Value | Hex |
|---|---|---|---|---|---|
| Stuart | Corps | Cav | Ldr | - | S4529 (Hood's Mill) |
| F. Lee | Brig | Cav | Cav | 3 | S4529 (Hood's Mill) |
| Hampton | Brig | Cav | Cav | 3 | S4530 |
| Chambliss | Brig | Cav | Cav | 2 | S4531 (Cooksville) |
Scenario 2: Stuart Rides North
NOTES: Stuart rode east around the Union army to try to meet Ewell's corps. Stuart captured a Union wagon train, tore up RR track, engaged with Union cavalry, and shelled Carlisle before finally meeting the Confederate army at Gettysburg on July 2.
MAP: Use both the North and South maps.
GAME LENGTH: 4 turns, June 29 to July 2, 1863.
SPECIAL RULES: 1. First Initiative of Turn 1: The Confederate player automatically wins the first initiative on turn 1 (there is no die roll). All succeeding initiatives are rolled for normally. 2. Confederate Movement Restrictions: Stuart's cavalry corps (not 17 VA) may not enter into any hex in Frederick-West or Adams County unless either of the following conditions is fulfilled: all three Confederate cavalry brigades end a turn in any hexes within Cumberland County, and at least one of these brigades is in or within 2 hexes of Carlisle (N3312); OR all three Confederate cavalry brigades begin a turn stacked in the same hex as Early and neither the cavalry brigades nor Early performs any actions throughout that turn (although they may be attacked). If a Confederate cavalry brigade has been destroyed before a release condition has been fulfilled, there is no way to release the remaining brigades. These units may retreat into the restricted area without penalty but any further movement of a unit within the restricted area must be on the shortest path possible out of the restricted area. Stuart's cavalry corps may not enter N5826 (York) on turn 1. 3. Union Cavalry Restrictions: Union cavalry units may not enter any hex in Adams County that is both north of row NXX31 and west of column 37XX (both inclusive; so N3731 is illegal). If forced to retreat into this area any further movement by such a Union cavalry unit must be on the shortest path as possible out of this area. 4. Union Infantry Restrictions: All Union infantry units are not released to move until turn 3 (Exception: if a Confederate unit enters Cumberland County before turn 3, then all units are immediately released). Upon release they may not move into or south of row NXX14. They may not attack a Confederate unit; however, Confederate cavalry and the wagon may still cavalry retreat. If any Union infantry unit is attacked, then all Union infantry units are immediately released from all restrictions. 5. Captured Wagon Train: The wagon train is captured and functions as a Confederate cavalry unit except as follows: it must be stacked with a Confederate cavalry unit in Stuart's corps (not 17 VA) at the end of all Activation Segments or it is destroyed; it is also destroyed if it loses its manpower; it may be deliberately abandoned in which case it is destroyed; it may only be activated by any individual cavalry brigade in Stuart's corps in a march action or by Stuart in a corps activation—it may not be activated by itself; however, its movement allowance is the 2 die rolled for the cavalry unit(s) +1 (whether activated by a unit or by Stuart); if activated by an individual unit then both the activating unit and the wagon must activate; it may not force march; it subtracts 1 from its extended die rolls (this replaces the +1 modifier for wagons in the Standard Rules Extended March Table); it may not attack and at least one unit stacked with it may not attack; its manpower is not used for any purpose other than as a marker for organized/disorganized; on defense its manpower value is not counted in the defense total and it may not be used to take combat losses; it is destroyed if in a hex that receives a retreat or rout result in combat; it may voluntarily retreat normally; if destroyed (in any manner) its manpower value is not counted as a combat loss for VP purposes. 6. Removing units from the map: Once a Union cavalry unit or leader moves within 3 hexes of Gettysburg or a Confederate cavalry corps unit (including the wagon) or leader moves within 5 hexes of Gettysburg the unit is considered to have satisfied that VC and must be immediately removed from the game. 7. Early and 17 VA: These units may not move until turn 2. Stuart may not activate 17 VA. Each of these two units is individually and immediately removed from the game upon entry to Adams County.
Victory Conditions. The Confederate player gains and loses VP for the following: +8 if the RR station at Mt. Airy (S3828) has a Damage marker at the end of the game; +5 if the RR station at Sykesville (S4828) has a Damage marker at the end of the game; +2 for each of the following RR stations with a Damage marker at the end of the game: Westminster (S4516), Hanover (S4503), Carlisle (N3312); +8 if the wagon train moves within 5 hexes of Gettysburg; +2/+3 for each Confederate cavalry corps manpower (but not the wagon or 17 VA) that moves within 5 hexes of Gettysburg—if a unit satisfies this condition on turn 3 or earlier the Confederate gets 3 VP per manpower of the unit; if a unit satisfies this condition on turn 4 the Confederate gets 2 VP per manpower of the unit; -1/-2 for each Union cavalry manpower that moves within 3 hexes of Gettysburg or occupies and remains in either Westminster (S4516) or Manchester (S5111) or Hanover (S4503)—if a unit satisfies this condition on turn 3 or earlier the Union gets -2 VP per manpower of the unit; if a unit satisfies this condition on turn 4 the Union gets -1 VP per manpower of the unit; a unit cannot get both the turn 3 and the turn 4 VPs (units that move within 3 hexes of Gettysburg are immediately removed from the game per the special rule above; units occupying Westminster, Manchester, or Hanover are not removed from the game—to get the turn 3 VPs, a unit must be in one of these hexes at the end of turn 3 and not leave that hex on turn 4; to get just the turn 4 VPs, a unit must end the game in one of these hexes); the following VPs are based on the turn Early enters Adams County—do not add up previous turn VPs to the final total for this VC (e.g. it is -8 and not -10 VPs if Early enters Adams County on turn 4): Turn 2 = 0 VP, Turn 3 = -2 VPs, Turn 4 = -8 VPs if Early enters Adams County on Turn 4, Game end = -16 VPs if Early does not enter Adams County by the end of the game; +1 for each point of Union Manpower value lost in combat, retreat, or cavalry retreat (not in extended march, force march, or moving from one enemy ZOC to another); -1 for each point of Confederate Manpower value (excluding the wagon) lost in combat, retreat, or cavalry retreat (not in extended march, force march, or moving from one enemy ZOC to another). At the end of the game, the Confederate VP total is calculated and the players consult the chart below to determine the winner.
Confederate VP Winner: 9 or more = Confederate Decisive Victory; 5 to 8 = Confederate Substantive Victory; 1 to 4 = Confederate Marginal Victory; -3 to 0 = Union Marginal Victory; -7 to -4 = Union Substantive Victory; -8 or less = Union Decisive Victory.
Confederate Set-Up
| Unit/Leader | Size | Command | Type | Manpower Value | Hex |
|---|---|---|---|---|---|
| Stuart | Corps | Cav | Ldr | - | S4529 (Hood's Mill) |
| F. Lee | Brig | Cav | Cav | 3 | S4529 (Hood's Mill) |
| Hampton | Brig | Cav | Cav | 3 | S4530 |
| Wagon Train 1 | Brig | - | Cav | 1 | S4530 |
Union Set-Up
| Unit/Leader | Size | Command | Type | Manpower Value | Hex |
|---|---|---|---|---|---|
| Knipe | Brig | PA | Inf | 2 | N4609 (Stonepeace Church) |
| Ewen | Brig | PA | Inf | 4* | N4809 (Bridgeport) |
| Brisbane | Brig | PA | Inf | 5* | N4809 (Bridgeport) |
| J. Smith | Brig | PA | Inf | 5* | N4909 (Harrisburg) |
Methods of Victory. This scenario is much less complicated than it may seem on a first reading. An explanation of the ways each side can achieve victory will help deconstruct the scenario for the player. The Rebels could abandon the wagon and race Stuart's corps to Carlisle by the end of turn 2. This would let them enter Adams County on turn 3 and get the maximum 3 VPs/manpower times 8 for 24 VP. However, the Union could match that by easily moving all their 12 cavalry manpower to VP locations on turn 3 and getting -24 VP for a net 0 VP for an exact Union win. Therefore, the Rebels must do something extra to win. They either must bring the wagon along or do some RR burns or both, all of which will slow them up. The more they slow up, the more chance the Union has of engaging or blocking them. If the Rebels abandon the wagon and just do a RR burn, then the Union could counter by slowing Early down while still gaining cavalry manpower VPs. Early could foil this strategy by combining with the 17VA cavalry to flank attack Union cavalry in the way. If the Union commits a full cavalry division of 6 manpower to block Early and prevent flanking by 17VA, then they will not have as much counter VPs to Stuart ending near Gettysburg. Of course if the Union blocks Early well enough then they will gain progressively more VPs from keeping Early from the battle at Gettysburg. A completely different game can develop if the Union could march fast enough and with enough initiatives to block Stuart's move to the north. In this case Stuart could either try to run around the Union or burn several RR stations and attack the Union to pin some of their units and prevent them from getting VPs. One can see that there are numerous tactics both sides can employ to eke out a win. While it is 4 turns, this scenario plays extremely fast, so it is excellent for a two out of three match and will likely result in different outcomes each time.
Historically Stuart captured the wagon on the 28th, the day before this scenario starts. On the 29th the Rebels tore up some track along the RR line they start on so I will give them credit for one RR burn there (5 VPs). Still on the 29th, Stuart then moved to Westminster, foraged and tore up more track (2 more VPs), and ended the day at Union Mills (S4411). Meanwhile, Kilpatrick moved to Littlestown and Gregg rode to Westminster (marching all night). On the 30th Stuart moved to Hanover and engaged Kilpatrick there most of the day. After breaking away, the Rebels marched all night to Dover (N5223). Kilpatrick camped at Hanover after the battle, while Gregg had marched to Manchester. On the 1st Hampton and the wagon train moved to Dillsburg (N4217; close enough for game purposes to Cumberland County), while the rest of Stuart's force went to Carlisle. However, the entire Union militia force in the scenario had beaten him there. Stuart shelled the town, burned the barracks, and repeatedly demanded the surrender of the town but the Union refused (0 VPs for game purposes). Meanwhile Kilpatrick moved to Berlin (N4528) searching for Rebel infantry. However, Early had moved the day before (the 29th) from York, through Berlin, and on to Heidlersburg (N3627; for 0 game VPs). On the 1st (and 2nd) Gregg's division countermarched all over the place due to conflicting orders, with Huey ending up at Manchester and the rest of the division at Hanover (-12 VPs total for this division). Stuart's entire force arrived near Gettysburg early on the 2nd (24 VPs), still with the captured wagon train (8 VPs). Kilpatrick rode to northeast of Gettysburg on the 2nd (-6 VPs). The final tally for game purposes is 21 VPs for a Decisive Confederate Victory. Players will find that this is extremely difficult to achieve. Awarding Stuart some of the burns is subjective of course, so the historical VP total could also be considered to be 14 VPs, which is still a Confederate Decisive.
Scenario 3: Confederate High Tide
NOTES: This is a conjectural scenario simulating a Confederate attempt to seize the Pennsylvania capital of Harrisburg. Although this plan was not implemented in reality, it very nearly was. Indeed, Ewell's II Corps at Carlisle stood ready to march towards the Susquehanna before Lee's unexpected order to rejoin the Army of Northern Virginia reached it. Note: This is a solitaire scenario. The player controls only Confederate units; Union units may not activate.
MAP: Use only the North map.
GAME LENGTH: 3 turns, June 29 to July 1, 1863.
SPECIAL RULES: 1. Solitaire: This is a solitaire scenario. The player may activate only Confederate units. Because no Union activities are permitted, do not make initiative die rolls. The player may perform actions with Confederate units for as long as he is willing or able to do so, at which point the Action Cycle ends. 2. Permanent fort: Hex N4809 (Bridgeport) contains Ft. Washington which is a permanent Union fort (reference RTG Advanced Rule 12.0). 3. Union Retreats: When Union units are forced to retreat or rout, the player retreats these units as he sees fit subject to normal retreat rules and the following restrictions: if the units are west of the Susquehanna River, they must attempt to retreat or rout over a Susquehanna River hexside by the shortest possible path of hexes; if the units are east of the Susquehanna River, they may retreat or rout in any direction the player wishes.
Victory Conditions. The (Confederate) player wins instantly if he occupies Harrisburg with a Confederate infantry unit. If the player has not occupied Harrisburg by the end of the game then the inactive Union side wins – the player has beaten himself.
Confederate Set-Up
| Unit/Leader | Size | Command | Type | Manpower Value | Hex |
|---|---|---|---|---|---|
| Ewell | Corps | II | Ldr | - | N3411 (Carlisle Barracks) |
| Rodes | Div | II | Inf | 16 | N3411 (Carlisle Barracks) |
| Johnson | Div | II | Inf | 14 | N3312 (Carlisle) |
| A. Jenkins | Brig | - | Cav | 2 | N4311 (Mechanicsburg) |
Union Set-Up
| Unit/Leader | Size | Command | Type | Manpower Value | Hex |
|---|---|---|---|---|---|
| Brisbane | Brig | PA | Inf | 5* | N4809 (Bridgeport) |
| Ewen | Brig | PA | Inf | 4* | N4809 (Bridgeport) |
| Yates | Brig | PA | Inf | 6* | N4603 (Marysville) |
| Knipe | Brig | PA | Inf | 2 | N4609 (Stonepeace Church) |
* Indicated units begin the game under fort markers.
Scenario 4: First Day at Gettysburg
NOTES: This scenario simulates the meeting engagement that took place just northwest of the town of Gettysburg, Pennsylvania on July 1, 1863 between advance elements of the Army of the Potomac and the Army of Northern Virginia.
MAP: Use both the North and South maps.
GAME LENGTH: 1 turn; July 1, 1863.
SPECIAL RULES: 1. Control: The Union controls Gettysburg (S3201) at the start of the game.
Victory Conditions. The Confederate player gains and loses VP for the following (control/occupation is if the player controls/occupies the hex at the end of the game): +5 if the Confederates control Gettysburg (S3201), and Evergreen Cemetery (S3202) and Culp's Hill (S3302) are both unoccupied by Union infantry units (if the Confederate fulfills the above VP requirement, he gains an additional 2 VP if Confederate units occupy two of the following three hexes at the end of the game: Peach Orchard (S3103), Round Top (S3203), and the Parsonage (S3403)); +2 if the Confederates control Gettysburg (S3201), and a Union infantry unit occupies either Evergreen Cemetery (S3202) or Culp's Hill (S3302)—not both; +1 if the Confederates control Gettysburg (S3201), and Union infantry units occupy both Evergreen Cemetery (S3202) and Culp's Hill (S3302); -2 if a Union infantry unit occupies Gettysburg (S3201); +1 for each point of Union Manpower value lost for any reason; -1 for each point of Confederate Manpower value lost for any reason. At the end of the game, the Confederate VP total is calculated and the players consult the chart below to determine the winner.
Confederate VP Winner: 12 or more = Confederate Decisive Victory; 8 to 11 = Confederate Substantive Victory; 4 to 7 = Confederate Marginal Victory; 0 to 3 = Union Marginal Victory; -4 to -1 = Union Substantive Victory; -5 or less = Union Decisive Victory.
Confederate Set-Up
| Unit/Leader | Size | Command | Type | Manpower Value | Hex |
|---|---|---|---|---|---|
| Hill | Corps | III | Ldr | - | N2230 (Union Hotel) |
| Pender | Div | III | Inf | 14 | N2230 (Union Hotel) |
| Heth | Div | III | Inf | 17 | N2532 (Cashtown) |
| Anderson | Div | III | Inf | 15 | N1531 (Fayetteville) |
Union Set-Up
| Unit/Leader | Size | Command | Type | Manpower Value | Hex |
|---|---|---|---|---|---|
| Buford | Div | 1st | Ldr | - | N3134 (Seminary) |
| Gamble | Brig | 1st | Cav | 3 | N3134 (Seminary) |
| Devin | Brig | 1st | Cav | 2 | N3233 (Alms House) |
| Reynolds | Corps | I | Ldr | - | S3103 (Peach Orchard) |
* Indicated units begin the game at fatigue level 0 on their exhausted sides. # Indicated units begin the game at fatigue level 1 on their normal sides. Do not change these to f0/exhausted. The indicated setup for these units is after an initial early move of the day.
Redesign Notes. A few changes needed to be made to the original version of this scenario in this redesign. Unit status was adjusted for the Standard Rules, some units' status was adjusted to better reflect their short march the day before, the VCs were slightly simplified, the Union leader Buford was added, and the VPs for the Confederates to win were increased by one. In the original game this scenario had a slight Confederate bias and 1 VP was often bid for them, thus the increase in the VPs needed for the Confederates to win. As with any 1 turn scenario, this one of course is "dicey". A good way around this with 1-turn scenarios is for players to play twice, switching sides, and with no bid allowed. Then, if both players have won one game, play a 3rd game, with standard tournament rules for picking sides and bidding. Note that "any reason" for the loss VPs includes extended marching, force marching, and moving from ZOC to ZOC.
Scenario 5: Battle of Gettysburg
NOTES: This scenario simulates the original three-day battle with Gettysburg as the only objective. The setup is the exact same as the "Pipe Creek Plan" scenario; however, the length, victory conditions, and special rules completely differ.
MAP: Use both the North and South maps.
GAME LENGTH: 3 turns, July 1 to July 3, 1863.
SPECIAL RULES: 1. Leader Transfer Phase of turn 1: Lee may not transfer in the Leader Transfer Phase of turn 1. 2. First initiative of turn 1: The first action phase on turn 1 is automatically an Activate Army Leader action for the Union (see Advanced Rule 13.0). The action is automatically successful (no die roll is necessary to determine success), but otherwise is performed exactly as described. As specified, the Confederate player automatically gains the following initiative, but then initiatives are determined normally. This is the only time during the game that either player can use the Activate Army Leader action. (Reminder: no leader transfers (army or corps) are allowed during an Activate Army Leader action, but in the Leader Transfer Phase of turn 1, the Union may transfer any leaders, including Meade.) 3. Confederate Movement Restrictions: Pickett's division and Imboden's brigade may not perform any actions until turn 2. The leader Stuart and the cavalry brigades of Hampton, F. Lee, and Chambliss are restricted as follows: they may not enter into any hex in Adams County or row Nxx24 until the start of turn 3 unless the following condition is fulfilled: all three cavalry brigades end a turn in any hexes within Cumberland County, and at least one of these three brigades is in or within 2 hexes of Carlisle (N3312), Mechanicsburg (N4311), New Cumberland (N5010), or Shippensburg (N1621). If this condition is met, these units may move normally before turn 3.
Victory Conditions. The Confederate player gains and loses VP for the following (Gettysburg occupation/proximity VPs are calculated at the end of the game): +13 if the Confederates control Gettysburg (S3201) and no Union infantry units occupy any adjacent hex (note: the Union controls Gettysburg at the start of the game); +6 if a Confederate infantry unit occupies Gettysburg (S3201) and a Union infantry unit occupies any adjacent hex; +10 if there is no Union infantry unit within 2 hexes of Gettysburg (S3201) (Note: 23 is the maximum VPs the Confederates may receive from Gettysburg: 13 for the above control VP condition plus 10 for this VP condition); +1 for each point of Union Manpower value lost in combat, retreat, or cavalry retreat (not in extended march, force march, or moving from one enemy ZOC to another); -1 for each point of Confederate Manpower value lost in combat, retreat, or cavalry retreat (not in extended march, force march, or moving from one enemy ZOC to another); -2 if a Union infantry unit occupies Gettysburg (S3201) and a Confederate infantry unit occupies any adjacent hex; -6 if a Union infantry unit occupies Gettysburg (S3201) and no Confederate infantry units occupy any adjacent hex. At the end of the game, the Confederate VP total is calculated and the players consult the chart below to determine the winner.
Confederate VP Winner: 28 or more = Confederate Decisive Victory; 22 to 27 = Confederate Substantive Victory; 16 to 21 = Confederate Marginal Victory; 10 to 15 = Union Marginal Victory; 4 to 9 = Union Substantive Victory; 3 or less = Union Decisive Victory.
Confederate Set-Up
| Unit/Leader | Size | Command | Type | Manpower Value | Hex |
|---|---|---|---|---|---|
| Stuart | Corps | Cav | Ldr | - | N5223 (Dover) |
| F. Lee | Brig | Cav | Cav | 3* | N5223 (Dover) |
| Hampton | Brig | Cav | Cav | 3* | N5223 (Dover) |
| Chambliss | Brig | Cav | Cav | 2* | N5223 (Dover) |
* Indicated units begin the game on their exhausted sides at fatigue Level 0.
Union Set-Up
| Unit/Leader | Size | Command | Type | Manpower Value | Hex |
|---|---|---|---|---|---|
| Reynolds | Corps | I | Ldr | - | S2906 |
| Wadsworth | Div | I | Inf | 8 | S2906 |
| Doubleday | Div | I | Inf | 5 | S2906 |
| Robinson | Div | I | Inf | 6 | S2808 |
| Stannard |
* Indicated units begin the game on their exhausted sides at fatigue Level 0. # Indicated units begin the game on their exhausted sides at fatigue Level 1.
Scenario 6: The Pipe Creek Plan
NOTES: Meade took command of the AP on June 28 under orders by Halleck to "cover the Capitol and also Baltimore." Meade marched the AP on a broad front seeking good ground to achieve this objective. Part of the army advanced towards Gettysburg, while the rest marched to the Pipe Creek area. Meade issued the Pipe Creek Circular early on July 1st but did not invoke it. This plan was to "withdraw the army from its present position, and form line of battle…the general direction being that of Pipe Creek…the right flank in Manchester (S5111)…the left wing in Middleburg (S3415)". A detailed map of the Pipe Creek Line can be found at http://www.civilwarhome.com/map2.htm. Note that the setup is the exact same as the "Battle of Gettysburg" scenario; however, the length, victory conditions, and special rules completely differ.
MAP: Use both the North and South maps.
GAME LENGTH: 6 turns, July 1 to July 6, 1863.
SPECIAL RULES: 1. Confederate Movement Restrictions: The leader Stuart and the cavalry brigades of Hampton, F. Lee, and Chambliss are restricted as follows. They may not enter into any hex in Adams County or row Nxx24 until the start of turn 3 unless the following condition is fulfilled: all three cavalry brigades end an Action Cycle (e.g., end a turn) in any hexes within Cumberland County, and at least one of these three brigades is in or within 2 hexes of Carlisle (N3312), Mechanicsburg (N4311), New Cumberland (N5010), or Shippensburg (N1621). If this condition is met, these units may move normally before turn 3. This rule differs slightly from its use in "Meade Moves North". Imboden may not move until turn 2. (Note: unlike other RTG scenarios, Pickett has no movement restriction.) Confederate units may not move or retreat to any hex within 5 hexes of Frederick (S2326). 2. Objectives Controlled at Start: At the start of the game the Union controls all of the objectives.
Victory Conditions. The Confederate player gains and loses VP for the following (control/occupation is if the player controls/occupies the hex at the end of the game): +9 for each of the following Pipe Creek area objectives controlled by the Confederate player: Middleburg (S3415), Frizzellburg (S4114), Union Mills (S4411), Manchester (S5111); +18 if a Confederate infantry unit occupies Westminster (S4516); +3 if a Confederate infantry unit is adjacent to Westminster (S4516) and no Confederate infantry unit occupies Westminster (a Union unit may occupy Westminster); +3 if the Westminster (S4516) RR station is destroyed or damaged; +1 for each point of Union Manpower value lost in combat, retreat, or cavalry retreat (not in extended march, force march, or moving from one enemy ZOC to another); -1 for each point of Confederate Manpower value lost in combat, retreat, or cavalry retreat (not in extended march, force march, or moving from one enemy ZOC to another). At the end of the game, the Confederate VP total is calculated and the players consult the chart below to determine the winner.
Confederate VP Winner: 37 or more = Confederate Decisive Victory; 31 to 36 = Confederate Substantive Victory; 25 to 30 = Confederate Marginal Victory; 19 to 24 = Union Marginal Victory; 13 to 18 = Union Substantive Victory; 12 or less = Union Decisive Victory.
Set-Up. Identical to the Confederate and Union set-ups for Scenario 5: Battle of Gettysburg, above.
Scenario 7: The Battle Continues
NOTES: After the three-day Battle of Gettysburg, the beaten Confederates had limited ammunition and retreated to Virginia. Both armies rested on the 4th, a strong rain started falling just after noon, and Lee slipped away that night. This what-if scenario is based on the premise that the Confederates had the ammunition to continue the battle.
MAP: Use both the North and South maps. Both maps may be folded along their East-West lines (i.e. fold the top half of the North map under) before joining so they equal a single map's size. Players will have no need to move units outside this effective single-map area.
GAME LENGTH: 2 turns, July 4 to July 5, 1863.
SPECIAL RULES: 1. Rain: On turn 1, players must note the tied initiative rolls. On the 5th tied initiative roll, rain rules take immediate effect for that action phase and for the rest of the turn. Before this point rain rules are not in effect. Rain rules are also in effect for all of turn 2. If rain never starts on turn 1 because both players pass before the required number of tied initiatives, rain is still in effect for all of turn 2 (starting at the beginning of that turn). 2. Leaderless Union Corps: The infantry units labeled 'I Corps', 'II Corps', 'III Corps', and 'XI Corps' are designated as corps; but they are considered infantry divisions. The corps leaders commanding these corps do not appear in this scenario. Thus, these four units may not participate in an Activate Corps Leader action or a corps assault. They may participate in a grand assault. 3. First Initiative of Turn 1: The Union automatically wins the first initiative on turn 1 (there is no die roll). All succeeding initiatives on turns 1 and 2 are rolled for normally. 4. Huey: The Union cavalry leader David Gregg is not used in this scenario. His brigades Irvin Gregg and McIntosh operate without a leader, while Huey is attached to Kilpatrick's Division (so Kilpatrick may activate him). 5. Confederate Cavalry: Stuart may activate Jenkins as an exception to the Standard Rules section 5.2 on Activate Leader. However, Stuart may still not activate Imboden. 6. Objectives Controlled by Each Side at Start: The Confederate player controls the following objectives at the start of the game: Gettysburg, hex S3102, Peach Orchard, Benner's Hill, and Wolf Hill. The Union player controls the following objectives at the start of the game: Culp's Hill, Evergreen Cemetery, Round Top, and hex S3303.
Victory Conditions. The Confederate player gains and loses VP for the following (control points are for if the player controls the hex at the end of the game): +10 if the Confederate player controls Gettysburg (S3201); +5 if the Confederate player controls hex S3102; +5 if the Confederate player controls Peach Orchard (S3103); +5 if the Confederate player controls Benner's Hill (N3334); +5 if the Confederate player controls Wolf Hill (S3401); +5 if the Confederate player controls Culp's Hill (S3302); +5 if the Confederate player controls Evergreen Cemetery (S3202); +5 if the Confederate player controls Round Top (S3203); +5 if the Confederate player controls hex S3303; +1 for each point of Union Manpower value lost in combat, retreat, or cavalry retreat (not in extended march, force march, or moving from one enemy ZOC to another); -1 for each point of Confederate Manpower value lost in combat, retreat, or cavalry retreat (not in extended march, force march, or moving from one enemy ZOC to another). At the end of the game, the Confederate VP total is calculated and the players consult the chart below to determine the winner.
Confederate VP Winner: 49 or more = Confederate Decisive Victory; 44 to 48 = Confederate Substantive Victory; 39 to 43 = Confederate Marginal Victory; 34 to 38 = Union Marginal Victory; 29 to 33 = Union Substantive Victory; 28 or less = Union Decisive Victory.
Confederate Set-Up
| Unit/Leader | Size | Command | Type | Manpower Value | Hex |
|---|---|---|---|---|---|
| Ewell | Corps | II | Ldr | - | S3201 (Gettysburg) |
| Rodes | Div | II | Inf | 10+ | S3201 (Gettysburg) |
| Early | Div | II | Inf | 8+ | N3334 (Benner's Hill) |
| Johnson | Div | II | Inf | 10* | S3401 (Wolf Hill) |
+ Indicated units begin the game at Fatigue Level 0 on their exhausted sides. * Indicated units begin the game at Fatigue Level 1 on their exhausted sides, with Disorganized strength markers.
Union Set-Up
| Unit/Leader | Size | Command | Type | Manpower Value | Hex |
|---|---|---|---|---|---|
| III Corps | Div | AP | Inf | 11+ | S3303 |
| I Corps | Div | - | Inf | 8 | S3303 |
| Sykes | Corps | V | Ldr | - | S3203 (Round Top) |
| Barnes | Div | V | Inf | 5 | S3203 (Round Top) |
+ Indicated units begin the game at Fatigue Level 0 on their exhausted sides. * Indicated units begin the game at Fatigue Level 1 on their exhausted sides, with Disorganized strength markers. # Indicated units begin the game at Fatigue Level 0 on their exhausted sides, with Disorganized strength markers.
Redesign Notes. This was the first scenario I designed; I did the research way back in December, 1998! The original scenario had 2 variants: "Lee's Retreat" and "The Battle Continues". In this re-design the "Lee's Retreat" variant has been eliminated. It was a bit complicated and would not convert well from the original recovery rules to the Standard Rules. "The Battle Continues" on the other hand has been a popular slugfest played repeatedly at the World Boardgaming Championships. The only changes to "The Battle Continues" from the original publication are converting the setup to the Standard Rules and incorporating the typical Union 2 bid into the victory conditions to re-balance the scenario.
Scenario 8: The Wagoneer's Fight
NOTES: This scenario depicts the cavalry action in the days after the battle of Gettysburg. The Confederates needed to get their wagon trains safely to the Potomac and secure the key river crossing at Williamsport.
MAP: Use both the North and South maps. The North map may be folded along the East-West line (i.e. fold the top half of the North map under) before joining it to the South map.
GAME LENGTH: 3 turns, July 4 to July 6, 1863.
SPECIAL RULES: 1. Turn 1: The Union automatically wins the 1st initiative of turn 1 without having to roll for it. After this, initiative is determined normally. 2. Confederate Movement Restrictions: The Confederates have the following movement restrictions: 54 NC and 58 VA may not activate or entrench on turns 1-2 unless a Union unit enters an adjacent hex; Confederate units may not enter or attack any hex in or east of column 31xx except for N3133 & N3134. 3. Union Movement Restrictions: Union units may not enter or attack the following hexes in Adams County: in column 29 from N2932 to S2905; within 2 hexes of Gettysburg; N2631, N2831, S2805, S2806, S2707, S2606, S2405. 4. Union 13 PA: The 13 PA may not activate on turns 1-2 unless a Confederate unit enters an adjacent hex. 5. Huey: The Union cavalry leader David Gregg is not used in this scenario. His brigades Irvin Gregg and McIntosh operate without a leader, while Huey is attached to Kilpatrick's Division (so Kilpatrick may activate him). 6. Confederate Cavalry: Stuart may activate Jenkins as an exception to the Standard Rules section 5.2 on Activate Leader. However, Stuart may still not activate Imboden. 7. Confederate Wagon Trains: The Confederate wagon trains function as Confederate cavalry except as follows: they may be activated either individually or by any single cavalry unit within a 3 hex leader range (as many wagons in range as desired); they may not be activated by Stuart; their Movement Allowance is the same as an individual cavalry unit (two die + 1), and if activated by a cavalry unit they use the same die roll as the cavalry unit; however, a wagon's Movement Allowance is reduced by one if it crosses any non-pike hex side (not one per non-pike hex side but one total for the entire move); they may not force-march; they may not participate in an assault or attack in a march action; Confederate infantry or wagon trains that enter a hex occupied by a wagon train pay a severe movement point (MP) penalty for that hex: +4 MP for a mountain or woods hex, +2 MP for a clear, rolling, or rough terrain hex—the presence of additional wagons or infantry in the hex does not increase the penalty, and the penalty is in addition to the normal movement cost to enter the hex; if a wagon train makes an extended march, the Confederate player adds 1 to his extended march die roll in addition to other modifiers (this is a reminder of the normal +1 for wagons in the Standard Rules Extended March Table)—if a "D" or "1" result occurs, it is applied normally; however, the Confederate player loses VP (see Victory Conditions); one or more wagon train units alone in a hex do exert a zone of control that inhibits enemy movement and retreat—however, wagon trains can never contribute to flank bonuses in any way; any hexes covered solely by the ZOC of wagon trains, or hexes occupied solely by wagon trains, are not considered to be covered for the purposes of computing flank bonuses; wagon trains stacked in a hex with other units do not contribute their manpower for flanking purposes.
Victory Conditions. The Union player gains and loses VP for the following at the end of the game: +20 if a Union unit occupies Williamsport; +5 if a Union unit occupies Hagerstown; -1 for each point of Union Manpower value lost in combat, retreat, or cavalry retreat; +1 for each point of Confederate Manpower value lost in combat, retreat, or cavalry retreat; +2* for each hex into which a Confederate wagon train unit retreats due to combat (even by voluntary retreat); +3* for each "D" or "1" result suffered by a Confederate wagon train unit in an extended march (not for combat or retreat); +10* for each Confederate wagon train unit that does not end the game within 2 hexes of Williamsport or is eliminated. *For each wagon train unit, the total number of Confederate VP lost due to the three victory conditions marked with asterisks may not exceed 10. However, Manpower value losses in combat (or retreat) for wagon trains do not count toward this limit. For example if a wagon train suffers a "D" and then "1" result in extended marches and is later eliminated in combat (losing the 1 other manpower in combat), the total VP effect is +11. At the end of the game, the Union VP total is calculated and the players consult the chart below to determine the winner.
Union VP Winner: 21 or more = Union Decisive Victory; 16 to 20 = Union Substantive Victory; 11 to 15 = Union Marginal Victory; 6 to 10 = Confederate Marginal Victory; 1 to 5 = Confederate Substantive Victory; 0 or less = Confederate Decisive Victory.
Confederate Set-Up
| Unit/Leader | Size | Command | Type | Manpower Value | Hex |
|---|---|---|---|---|---|
| Stuart | Corps | Cav | Ldr | - | N3133 |
| A. Jenkins | Brig | - | Cav | 2 | N3133 |
| Chambliss | Brig | Cav | Cav | 1+ | N3133 |
| Hampton | Brig | Cav | Cav | 2+ | N3133 |
| F. Lee |
+ Indicated units begin the game at Fatigue Level 0 on their exhausted sides.
Union Set-Up
| Unit/Leader | Size | Command | Type | Manpower Value | Hex |
|---|---|---|---|---|---|
| McIntosh | Brig | 2nd | Cav | 2+ | S3601 |
| J.I. Gregg | Brig | 2nd | Cav | 2 | S3601 |
| Huey | Brig | 2nd | Cav | 2 | S4516 (Westminster) |
| Kilpatrick | Div | 3rd | Ldr | - | S3104 |
+ Indicated units begin the game at Fatigue Level 0 on their exhausted sides.
Scenario 9: The Battle That Never Happened
NOTES: This scenario simulates the Army of Northern Virginia's retreat to the Potomac following the Battle of Gettysburg. President Lincoln urged General Meade to pursue the Confederates aggressively and crush them once and for all, but the Army of the Potomac failed to bring the Rebels to battle. By mid-July, Lee's army escaped to Virginia and the war went on.
MAP: Use both maps (much of the north map is not needed).
GAME LENGTH: 8 turns, July 5 to July 12, 1863.
SPECIAL RULES: 1. First Initiative of Turn 1: The Confederate player automatically wins the first initiative on turn 1 (there is no die roll). Afterwards, initiative is determined normally. 2. Potomac River: Neither player's units may cross a Potomac River hexside. 3. Union Movement Restrictions: The Union player is subject to the following movement restrictions. A unit's restriction is removed the moment a Confederate unit moves into any hex adjacent to the unit: Kenly, Morris, and 13 PA may not activate or entrench until turn 2; the 1 CT regiment may not activate or entrench until turn 3; Briggs, Elliott, and B. Smith may not activate or entrench until turn 4 (when they first activate, they may move by rail—see special rule 4); Wells and Spinola may not activate or entrench until turn 5 (when they first activate, they may move by rail—see special rule 4). 4. Railroad Movement: Although this is not an Advanced Game scenario, Union units may move by rail per the Advanced Game rules section 11.0. Exception: Union units may only move by rail on the Baltimore & Ohio Railroad. 5. Confederate Movement Restrictions: The Confederate player is subject to the following movement restrictions: units may not enter any hex within five hexes of Frederick (S2326); 54 NC and 58 VA regiments may not activate or entrench until turn 4 (these units are considered to be guarding the wagons)—this restriction is removed the moment a Union unit moves adjacent to them. 6. Leaderless Union Corps: The infantry units labeled 'I Corps', 'II Corps', 'III Corps', and 'XI Corps' are designated as corps; but they are considered infantry divisions. The corps leaders commanding these corps do not appear in this scenario. Thus, these four units may not participate in an Activate Corps Leader action or a corps assault. They may participate in a grand assault. 7. Huey: The Union cavalry leader David Gregg is not used in this scenario. His brigades Irvin Gregg and McIntosh operate without a leader, while Huey is attached to Kilpatrick's Division (so Kilpatrick may activate him). 8. Stone Fort: Hex S0732 (Naval Battery) contains the Stone Fort which is a Union fort (reference Advanced Rule 12.0). 9. Ammunition: All rules in Advanced Game Section 9.0 on ammunition apply in this scenario except section 9.3 (replenishment) which should be ignored. All Confederate infantry divisions start the game with a marker in the first box in their Ammunition Tracks.
Victory Conditions. The Confederate player gains and loses VP for the following: +6 if at least one Confederate unit occupies the Naval Battery (S0732) at the end of the game; +4/+1 the Confederate player receives 4 VP for each infantry division and 1 VP for each cavalry brigade ending the game in or within three hexes of any of the following hexes: Williamsport (S0116), Falling Waters (S0119), Ferry Hill Place (S0326), Naval Battery (S0732) (Notes: The Confederate player does not receive VP for units in or within three hexes of a given hex if a Union unit either occupies or is adjacent to that hex at the end of the game. The above VP are in addition to the VP awarded if a Confederate unit occupies the Naval Battery.); +10 if there is not at least one Union infantry division or leaderless corps infantry unit adjacent to a Confederate unit at the end of the game; -2 for each Confederate infantry division that is Out of Ammunition at the end of the game; +1 for each point of Union Manpower value lost in combat, retreat, or cavalry retreat (not in extended march, force march, or moving from one enemy ZOC to another); -1 for each point of Confederate Manpower value lost in combat, retreat, or cavalry retreat (not in extended march, force march, or moving from one enemy ZOC to another). At the end of the game, the Confederate VP total is calculated and the players consult the chart below to determine the winner.
Confederate VP Winner: 55 or more = Confederate Decisive Victory; 49 to 54 = Confederate Substantive Victory; 43 to 48 = Confederate Marginal Victory; 37 to 42 = Union Marginal Victory; 31 to 36 = Union Substantive Victory; 30 or less = Union Decisive Victory.
Confederate Set-Up
| Unit/Leader | Size | Command | Type | Manpower Value | Hex |
|---|---|---|---|---|---|
| Lee | Army | ANV | Ldr | - | S2406 |
| Longstreet | Corps | I | Ldr | - | S2406 |
| Hood | Div | I | Inf | 11* | S2406 |
| McLaws | Div | I | Inf | 10* | S2405 |
| Pickett |
* All nine Confederate infantry divisions begin the game at Fatigue Level 0 on their exhausted sides.
Union Set-Up
| Unit/Leader | Size | Command | Type | Manpower Value | Hex |
|---|---|---|---|---|---|
| III Corps | Div | AP | Inf | 11 | S3303 |
| I Corps | Div | AP | Inf | 8 | S3303 |
| Sykes | Corps | V | Ldr | - | S3203 (Round Top) |
| Barnes | Div | V | Inf | 5 | S3203 (Round Top) |
Advanced Game Rules
The following rules are used only in Advanced Game Scenarios, unless they are specifically called for in the special rules of the Basic Game scenarios. Rules colored blue in the original booklet are Standard Advanced Game Rules. Where these rules are used in other games in the GCACW series, they will not be changed. However, text that is not colored blue may change in other games.
1.0 Advanced Game Sequence Of Play
Each turn in the Advanced Game is performed according to the following "sequence of play:"
- Falling Waters Bridge Phase (starting turn 6). Starting on turn 6, the Confederate player checks if he can place a pontoon bridge at Falling Waters. Once placed, this phase is skipped the rest of the game.
- Random Events Phase. Two dice are rolled; the players consult the Random Events Table. (Exception: this phase is skipped on turns 1, 2, and 3.)
- Union Reinforcements Phase (starting turn 11). Starting turn 11, the Union player determines if he is due reinforcements.
- Harpers Ferry Phase. The players determine whether Union units in or near Harpers Ferry are surrounded. If so, the players consult the Harpers Ferry Table to see if surrender occurs.
- Army of the Potomac Arrival Phase (not on turn 1). The Union player determines if any Army of the Potomac (AP) units arrive and conducts its deployment if indicated.
- Stuart Phase (starting turn 6). Starting turn 6, the Confederate player determines if Stuart arrives. Once Stuart arrives, this phase is skipped the rest of the game.
- Leader Transfer Phase. Leaders may be transferred from one subordinate unit to another.
- Attachment Phase. Substitute units may be reattached to other units.
- The Action Cycle. Action Phase: A. Initiative Segment: Both players roll a die. The player with the higher roll wins (the Confederate player wins ties). The winner must take initiative or pass. Note: a player's roll may be affected by "command paralysis" (see Random Events). B. Activation Segment: The player who has taken initiative must perform a single action with an eligible leader or unit. At the end of an Activation Segment, the players return to the Initiative Segment and a new Action Phase begins. Players continue to perform Action Phases indefinitely until both players pass in the same Action Phase.
2.0 Confederate Pontoon Bridge
In the Falling Waters Bridge Phase starting with turn 6 (June 27), the Confederate player places a Confederate major river bridge marker in hex S0119 (Falling Waters). As an exception to the rules, this bridge build is automatic, a die roll is not needed; however, this bridge does use up the Confederate's only allowable major river bridge. However, if major rivers are not fordable (Falling Waters is on the Potomac which is a major river) on turn 6, or if a Union unit occupies S0119 (Falling Waters), do not place the bridge on the map until the start of the first turn in which both major rivers are fordable and in which a Union unit does not occupy Falling Waters. Once placed, the bridge marker is removed from the map the moment any Union unit enters Falling Waters; and it may not be placed on the map again for the rest of the game (it may not be rebuilt at Falling Waters or any other location). The Confederate major river pontoon bridge at Falling Waters only affects the implementation of the following random events (see 3.0): the placement of Confederate reinforcements, the placement of the Richmond garrison, and the Confederate Ammunition Train. Other than those three game elements, the Confederate major river pontoon bridge at Falling Waters has no game impact.
3.0 Random Events
In the Random Events Phase of each turn starting with Turn 4, one of the players rolls two dice. The players consult the Random Events Table, checking the result corresponding to that dice roll sum. The results are described below.
3.1 Random Events Table: 2 = Rain (Current +1); 3 = Rain (Current +1); 4 = Rain (Current); 5 = Union Command Paralysis; 6 = Confederate Reinforcements; 7 = Confederate Ammunition Train; 8 = Confederate Reinforcements; 9 = Stuart; 10 = Confederate Command Paralysis; 11 = Richmond Garrison; 12 = End Game.
3.2 Explanation Of Random Events
Rain. Refer to the Standard Rules section 12.0.
Command Paralysis. If this result occurs, the indicated player subtracts 1 from all his initiative die rolls in the Action Cycle of the current turn. The Confederate player wins tied initiative die rolls after the subtraction.
Stuart. If this result occurs, all movement restrictions applying to Stuart's three Confederate cavalry brigades (Hampton, F. Lee, Chambliss; see section 7.0 on Stuart) are immediately lifted. This result has no effect if it occurs on Turn 12 (July 3) or later. The result also has no effect if Stuart and his units have not yet arrived on the map.
Confederate Reinforcements. If this result occurs on turn 6 (June 27) or later, the Confederate player consults his Reinforcement Track (this result is ignored if it occurs on turn 5 or earlier). There are four sets of reinforcements on this track, numbered consecutively from 1 to 4. The first time the Confederate player receives a Confederate Reinforcements result, he places the unit comprising the first set (Imboden) on the map; the second time he obtains this result, he places the units comprising the second set (Jones and Robertson) on the map; etc. If the Confederate player has already received all four reinforcement sets, this result has no effect.
Placement of Reinforcements (except Imboden): Confederate reinforcements (except for Imboden) may be placed on the map in any of the following hexes as soon as they are made available by the status of the Potomac River (a major river) and the Confederate bridge at Falling Waters: Williamsport (S0116); Falling Waters (S0119); any hex on the west mapedge from S0123 to S0134. Reinforcements may not be placed in a Union occupied hex, but they may be placed in Union ZOC. If the Potomac River is unfordable and the Confederate bridge at Falling Waters is not on the map, reinforcements may not be placed in Williamsport or Falling Waters; they may only be placed on the west mapedge from S0123 to S0134. If the Potomac River is unfordable and the Confederate bridge at Falling Waters is on the map, reinforcements may be placed in any of the above 3 placement locations. If the Potomac River is fordable, regardless of the existence of the Confederate bridge at Falling Waters, reinforcements may be placed in any of the above 3 placement locations.
Delaying Reinforcements: The Confederate player may delay the arrival of his reinforcements and place them on the map in any later Random Events Phase. If he delays them two or more turns, he may place them on the map as described above or he may place them according to the same restrictions as Imboden (see below).
Placement of Imboden: Imboden may be placed on the map in any hex on the west mapedge in or within three hexes of Upton (S0104). He may not be placed in a Union occupied hex, but may be placed in Union ZOC. Imboden's arrival may be delayed until any future Random Events Phase. Imboden's arrival is unaffected by the status of the Potomac River.
Richmond Garrison. If this result occurs on turn 7 (June 28) or later, the Confederate player consults his Richmond Garrison Track (this result is ignored if it occurs on turn 6 or earlier). This track has four units, numbered consecutively from 1 to 4. The first time the Confederate player receives a Richmond Garrison result, he places the first unit (Corse) on the map; the second time he obtains this result, he places the second unit (M. Jenkins) on the map; etc. If the Confederate player has already received all four Richmond Garrison units, this result has no effect. Richmond Garrison units may participate in any activate corps leader or corps assault action with any Confederate corps leader except for Stuart.
Placement of Richmond Garrison Units: Richmond Garrison units are placed on the map in the same manner as Confederate reinforcements (except for Imboden). Therefore their placement is dependent on the status of the Potomac River and the Confederate bridge at Falling Waters. Richmond reinforcements may be delayed per the Delaying Reinforcements section above.
Confederate Ammunition Train. This result is treated as no effect until two turns after the first increment of the AP is placed on the map (see section 6.2). However, this result is always treated as no effect (no matter when the AP first increment arrives) if it occurs on turn 6 or earlier. For example, if the AP first increment is due to arrive on turn 6, but the Union player delays its placement until turn 7, then this result is treated as no effect until turn 9. Exception: if all four of the following hexes are currently occupied by Union brigades or divisions (not regiments), this result is not valid and is treated as no effect: Williamsport (S0116), Falling Waters (S0119), Sharpsburg (S0525), Naval Battery (S0732). If the Confederate Ammunition Train result is valid, then the Confederate player may replenish some of his units' ammunition (see section 9.3). If the Potomac River (a major river) is unfordable and the Confederate bridge at Falling Waters (see 2.0) is not on the map when a valid Confederate Ammunition Train result occurs, the Confederate player must postpone the effects of this result until the first turn in which the Potomac becomes fordable again (the Falling Waters Bridge does not need to be on the map when the Potomac becomes fordable). At that time, he may replenish his units' ammunition (with each previous valid occurrence of this result he had to postpone due to the Potomac River and Falling Waters bridge status). Exception: if at the time of the result, if no Confederate units have a marker in a box on their Ammunition Tracks (see 9.1), then the result may not be postponed, it is treated as no effect.
End Game. If this result occurs on turn 14 (July 5) or later, the game immediately ends. If the result occurs on turn 13 or earlier it is always treated as no effect. Furthermore, this result is also treated as no effect until 5 turns after the AP 1st increment is placed on the map (see section 6). For example, the AP arrival result is a "C" on turn 9 (so the 1st increment arrives that turn), but the Union player delays the increment and places it on the map on turn 10; therefore an End Game result is treated as no effect until turn 15.
4.0 Union Reinforcements
During every Union Reinforcements Phase starting with turn 11, the Union player rolls a die once for each Union Reinforcement Table to see if he receives any reinforcements. There are three Union Reinforcement Tables, each of which corresponds to a different area: Pennsylvania Militia, West Virginia, and Baltimore/DC. The rolls may be modified (see below). Each Reinforcement Table has a corresponding track containing numbered sets of reinforcements (see both the Union Setup and the map). The first time the Union player receives a "Reinforce" result on a table, he consults this table's corresponding track and places the units comprising that track's first set of reinforcements on the map; the second time he obtains this result, he places that track's second set of reinforcements on the map; etc. A result of "No Effect" means that no new Union reinforcements from that area are placed on the map in the current turn. If the Union player has already received all of a track's reinforcement sets, the Union player no longer rolls the die for that area.
Union Reinforcement Tables: PA Militia—3 or less: Reinforce, 4 or more: No Effect. West Virginia—1 or less: Reinforce, 2 or more: No Effect. Baltimore/DC—3 or less: Reinforce, 4 or more: No Effect.
Die Roll Modifiers: West Virginia—starting on turn 15 (July 6), 1 is subtracted from all rolls on the West Virginia table. Baltimore/DC—if a Confederate infantry unit occupies any hex in one of the following counties then 2 is subtracted from Baltimore/DC rolls: Frederick-West, Frederick-East, Carroll, Baltimore, Howard, or Montgomery County.
Placement Of Reinforcements. Union reinforcements may be placed on the map as soon as they are made available. The Union player is never required to place available reinforcements; they may be delayed as desired and placed on the map in any later Union Reinforcements Phase. The placement of reinforcements depends on the area from which they come.
Pennsylvania Militia: PA Militia reinforcements are placed in Camp Curtin (N4907). If Camp Curtin is occupied by a Confederate unit, the reinforcements are not placed on the map until the first Union Reinforcements Phase in which Camp Curtin is not Confederate occupied.
West Virginia: West Virginia reinforcements may be placed in any hex on the west mapedge between hexes S0103 and S0113 (inclusive). Exception: The 1NY/12PA cavalry regiment is placed in or within three hexes of St. Thomas (N0130). Reinforcements may not be placed in a hex occupied by a Confederate unit, but they may be placed in Confederate ZOC.
Baltimore/DC: Baltimore/DC reinforcements are placed in Ellicott Mills (S5734). If Ellicott Mills is occupied by a Confederate unit, the reinforcements may not be placed on the map until the first Union Reinforcements Phase in which Ellicott Mills is not Confederate occupied. Exception: If players have added the optional HCR East map to the play area (see 17.0), then these units may be placed as follows: in Ellicott Mills if desired if it is not Confederate occupied (if it is not Confederate occupied, units may still be placed as per the below); for Baltimore units, in any hex (not Confederate occupied) from HCR E2812–E2816; for DC units, in any hex (not Confederate occupied) on the HCR East map in row xx22 from E1722 to E2322.
5.0 Harpers Ferry
In the Advanced Game scenario, the players must determine whether Union units in and around Harpers Ferry (S0632) are surrounded, and if so, whether or not they surrender. This determination takes place in the Harpers Ferry Phase.
How To Determine If Harpers Ferry Is Surrounded. In the Harpers Ferry Phase, every Union unit occupying Harpers Ferry/Bolivar (S0632) or within three hexes of hex S0632, must attempt to trace a continuous path of road, pike, or RR hexes of unlimited length to any mapedge hex. This path may not enter a Confederate-occupied hex or a Confederate ZOC unless that ZOC is occupied by a Union unit. Note: the B&O Railroad in hex S1734 is considered to connect with the railroad in hex S1934, even though a rail line does not join the two hexes.
How To Determine If Harpers Ferry Surrenders. If there are no Union units in or within three hexes of S0632, or all Union units in or within three hexes of S0632 can successfully trace such a path, no action is taken and play proceeds to the next phase. However, if at least one Union unit cannot trace such a path, the Confederate player rolls two dice, combines the rolls into a single sum, and consults the Harpers Ferry Table. (The dice sum may be modified; see below.) If the modified dice sum is 11 or less, the result is "no effect", and play proceeds to the next phase. If the modified dice sum is 12 or more, the result is "surrender" (see below). The Confederate player may take a maximum of one dice roll per turn to attempt to achieve the surrender of Harpers Ferry. Note: if undestroyed, the Union fort (see section 12) in Naval Battery counts as a "Union unit" for purposes of the above surrender action (there does not need to be any Union military units in the above mentioned area, just the Union fort qualifies for this purpose).
Surrender Of Harpers Ferry. If the Confederate player achieves a "surrender" result, all Union units and leaders in or within three hexes of Hex S0632 which cannot trace a path of hexes as previously described are immediately eliminated from play. The Confederate player receives VP if this occurs (see scenario victory conditions). Note the VP difference between "Harpers Ferry Surrender" and "surrender" from retreat from combat which is retreat losses (Standard Rules section 7.6). Note: if a surrender result is achieved the Union fort in Naval Battery (S0732) is immediately destroyed.
Harpers Ferry Table: Dice Sum ≤11 = No Effect; Dice Sum ≥12 = Surrender.
Harpers Ferry Table Modifiers: The Confederate player's Harpers Ferry Table dice roll is modified if any of the following conditions are in effect (all modifiers are cumulative): +3 if a Confederate infantry unit with an Artillery Value of at least 1 occupies Hex S0732 (Naval Battery); +1 if a Confederate infantry unit with an Artillery Value of at least 1 occupies Hex S0733 (Loudoun Heights); +1 if a Confederate infantry unit with an Artillery Value of at least 1 occupies Hex S0532 (Bolivar Heights). Note: A Confederate infantry unit with an OOA marker (see 9.0) can not be used to meet any of the above conditions.
6.0 The Army of the Potomac
During each Army of the Potomac Arrival Phase starting with turn 2, the Union player rolls two dice and consults the AP Arrival Table. The dice sum is cross-referenced with the column corresponding to the current turn. There are six possible results: "NE" (no effect), and five "arrival" results (a single letter—A, B, C, D, or E—and a number after the letter). If the result is "NE", nothing is done; the Union player rolls the dice again in the following turn's AP Arrival Phase. If the Union player obtains an "arrival" result, the units and leaders comprising the AP will shortly be placed on the map. Once an arrival result occurs, the Union player no longer rolls the dice in this phase. The number after the letter is the VPs to be subtracted from the Confederate VP total at the end of the game.
6.1 Arrival Results. The AP is divided into three groups called "increments". When the AP arrives, its three increments are placed on the map as described below. The three increments are listed in the Advanced Game setup instructions. When all three increments have been placed on the map, the AP Arrival Phase is skipped for the rest of the game.
Army of the Potomac Arrival Table (Dice Sum by Turn/Date):
| Dice Sum | Turn 2 (Jun 24) | Turn 3 (Jun 25) | Turn 4 (Jun 26) | Turn 5 (Jun 27) | Turn 6 (Jun 28) | Turn 7 (Jun 29) | Turn 8 (Jun 30) | Turn 9 (Jul 1) |
|---|---|---|---|---|---|---|---|---|
| 2 | E/4 | NE | A/0 | A/2 | A/4 | A/7 | NE | B/15 |
| 3 | D/2 | NE | B/2 | NE | NE | NE | A/10 | A/13 |
| 4 | NE | C/2 | NE |
Key: NE is No Effect; A, B, C, D, or E see Arrival Results Explanation; number after slash is VPs subtracted from Confederates.
Arrival Result "A". First Increment: these units are deployed in the current AP Arrival Phase and they receive two "Bonus Cycles" upon placement. Second Increment: these units are deployed in the current AP Arrival Phase and they receive one "Bonus Cycle" upon placement. Do not place second increment units on the map until first increment units have completed their two Bonus Cycles. Third Increment: these units are deployed in the current AP Arrival Phase. They receive no Bonus Cycle. Do not place third increment units on the map until first and second increment units have completed their Bonus Cycles.
Arrival Result "B". First Increment: these units are deployed in the current AP Arrival Phase and they receive one Bonus Cycle upon placement. Second Increment: these units are deployed in the current AP Arrival Phase. They receive no Bonus Cycle. Do not place second increment units on the map until first increment units have completed their Bonus Cycle. Third Increment: these units are deployed in the AP Arrival Phase of the following turn. They receive no Bonus Cycle.
Arrival Result "C". First Increment: these units are deployed in the current AP Arrival Phase. Second Increment: these units are deployed in the AP Arrival Phase of the following turn. Third Increment: these units are deployed in the AP Arrival Phase two turns from the current turn.
Arrival Result "D". First Increment: these units are deployed in the AP Arrival Phase of the following turn. Second Increment: these units are deployed in the AP Arrival Phase two turns from the current turn. Third Increment: these units are deployed in the AP Arrival Phase three turns from the current turn.
Arrival Result "E". First Increment: these units are deployed in the AP Arrival Phase two turns from the current turn. Second Increment: these units are deployed in the AP Arrival Phase three turns from the current turn. Third Increment: these units are deployed in the AP Arrival Phase four turns from the current turn.
6.2 Deployment Of The Army Of The Potomac. Union units comprising an AP increment are placed on the map on their normal unexhausted sides at Fatigue Level 0, with organized strength markers, subject to the following restrictions: they may be placed in any hex on the south mapedge of the south map from S2134 to S3534 (Note: the Union player may delay the placement of an increment and deploy it further eastward, see "Deployment Option"); units may be placed stacked in the same hex up to a limit of three arriving units and two leaders per hex (units already on the map in a previous turn do not count towards this stacking restriction of newly arriving AP units); units may not be placed in a Confederate occupied hex, but they may be placed in a Confederate ZOC.
Deployment Option. The Union player may delay the deployment of any or all of his increments by one turn in order to place them on the map further eastward. The Union player does not commit to delaying an increment until the turn the increment is initially due to arrive. For example, if the Union gets an AP arrival result of E on turn 6, the first increment arrives on turn 8. It is on turn 8 that the Union declares whether the first increment is being delayed or not. If an increment is delayed, then the entire increment must be delayed. If the increment was due Bonus Cycles, then it still gets those Bonus Cycles when it is finally deployed. If this option is chosen, the units comprising the selected increment must be deployed in any hex on the south mapedge of the south map from S2134 to S5334 in the AP Arrival Phase of the turn following their normal arrival turn. If this option is chosen, an increment must be placed on the map on the turn after it is due to arrive—it may not remain off map. For example, if an increment is due to arrive turn 6 and delays deployment until turn 7, it must be deployed and placed on the map on turn 7, it may not be held off the map any longer. If a deployment delay results in two increments being placed on the map on the same turn and neither increment has bonus cycles then they must jointly obey the above placement stacking restrictions. In this same situation, if an increment(s) has bonus cycles, then it is deployed and conducts those bonus cycles before the next numerical increment is deployed.
Bonus Cycles. Arrival results "A" and "B" allow some AP increments "Bonus Cycles" when they are placed on the map. Bonus Cycles begin as soon as the units are deployed in the AP Arrival Phase. If an increment is allowed two Bonus Cycles, the units comprising that increment complete the first Bonus Cycle and then immediately undertake the second Bonus Cycle.
How a Bonus Cycle Takes Place: A Bonus Cycle consists of a special Action Cycle and Recovery Phase in which only Union units comprising the increment undertaking that cycle may perform actions and then recover. Confederate units and ineligible Union units do nothing (exception: Confederate cavalry units may perform cavalry retreats—but may not recover). Because only Union units may activate in a Bonus Cycle, no initiative die rolls take place. The Bonus Cycle consists of a continuous series of Union Activation Segments in which the Union player may perform actions with his eligible units and leaders for as long as he is willing or able to do so. Actions cause Union units to gain Fatigue Levels normally. Units may make extended and force marches. After the Union player is finished performing actions, he undertakes a special Recovery Phase for the increment which participated in the Bonus Cycle. These units lose three Fatigue Levels and may build bridges and entrench according to normal recovery procedures.
Bonus Cycle Restrictions: Union units participating in a Bonus Cycle must always remain at least four hexes away from Confederate infantry units during that cycle. Therefore, they may not attack Confederate infantry units. Union units may move adjacent to and attack Confederate cavalry units, but the cavalry units may perform cavalry retreats. These movement restrictions are lifted as soon as the Bonus Cycle ends.
7.0 Stuart
During each Stuart Phase starting with turn 6 (June 27), the Confederate player rolls a die and consults the Stuart Arrival Table. The roll may be modified (see below). There are two possible results: "No Effect" and "Arrives". If the result is No Effect, nothing is done; Stuart's forces do not arrive and the Confederate player rolls the die again in the following turn. Upon an Arrives result, Stuart and his three brigades are immediately placed on the map and the Confederate player no longer rolls the die in this phase for the rest of the game.
Stuart Arrival Table Modifiers. The Confederate player's die roll on the Stuart Arrival Table is modified as follows: -2 on turn 6 (June 27); -1 on turn 7 (June 28); +1 on turn 9 (June 30); +3 on turn 10 (July 1) (Note: causes automatic Arrives result).
Stuart Arrival Table: Die 3 or less = No Effect; Die 4 or more = Arrives.
Deployment Of Stuart. Stuart's force consists of himself (the leader counter) and three cavalry brigades (Hampton, F. Lee, and Chambliss; see Advanced Games setup instructions). Upon an arrival result, the Confederate player may place Stuart and his units on the map on their normal unexhausted sides at Fatigue Level 0 subject to the following restrictions: they may be placed in any hex on the south mapedge of the south map from hex S3134 to hex S5833 (the Confederate player may delay Stuart's placement and deploy him on the east mapedge, see Stuart's Delayed Entry section below); Stuart and his three units must be placed stacked in the same hex; the placement hex must not be Union occupied, but it may be in a Union ZOC.
Stuart's Delayed Entry. The Confederate player may delay Stuart's arrival by one turn in order to place him and his units on the east mapedge. If this option is chosen, Stuart and his units must be deployed in any hex on the east mapedge of the south map from S5825 to S5833 in the Stuart Phase of the turn following their normal arrival turn.
Stuart's Movement Restrictions. Stuart and his three units may not enter or retreat into any hex in Frederick-West or Adams County until the start of turn 12 (July 3) unless any one of the following three conditions is fulfilled: all three cavalry brigades begin an Action Cycle stacked in the same hex as a Confederate infantry division and neither the cavalry brigades nor the infantry division perform any actions throughout that Action Cycle (but they may be attacked); all three cavalry brigades end a turn in any hexes within Cumberland County, and at least one of these three brigades is in or within two hexes of Carlisle (N3312), Mechanicsburg (N4311), New Cumberland (N5010), or Shippensburg (N1621); a "Stuart" random event result is obtained (see 2.0). If any of these conditions is fulfilled, Stuart and his units may enter or retreat into any hex in Frederick-West or Adams County for the rest of the game.
8.0 Substitute Units
Each player has five "substitute" infantry brigades and three "substitute" cavalry regiments.
8.1 Detachment. Either player may detach one or more substitute infantry brigades from a marching infantry unit as long as the marching unit has a Manpower value of 2 or more. Either player may detach one or more substitute cavalry regiments from a marching cavalry unit as long as the marching unit has a Manpower of 2 or more.
How To Detach. To detach, a player places a substitute in the same hex as the unit from which it detaches and assigns it a Manpower value. A Strength marker equal to the Manpower value assigned to the substitute is placed under it. The substitute's Manpower value is subtracted from the parent unit's Manpower value, and the parent unit is assigned a new Strength marker, on the same side as the one it replaces, reflecting its reduced value.
Placement Of Detached Units. A detached substitute may be placed in the hex in which an active infantry unit begins its march or in any hex entered by the active unit during its march. After a substitute is placed on the map, the active unit may continue its march (but the substitute may not move further during this action). After placement, substitutes function normally.
Detachment Restrictions. Counter Limits: The number of substitutes provided in the game is a strict limit. If all substitutes are currently in use, no more may be used. However, if substitutes reattach to other units, they are removed from the map and again become available for use. Artillery: Unlike other GCACW games, in RTG substitutes always have an artillery value of 0; they may never be assigned artillery from the active unit. Size: After detaching, a parent unit must have a minimum Manpower Value of 1. The Manpower value of a substitute is limited. (Exception: After detaching, an infantry division parent unit must have a minimum Manpower Value of 4. Designer's note: this prevents excessive and unrealistic reorganization.) Substitute infantry brigades must be assigned a Manpower Value of 8 or less. Substitute cavalry regiments must be assigned a Manpower Value of 2 or less. Union non-AP infantry: the following groups of Union units may not detach units: Union West Virginia, Union Pennsylvania Militia, Union Baltimore/DC garrison, Union Harpers Ferry garrison.
Determining Status Of Detachments. Fatigue: If a substitute is placed in the hex in which an active unit begins a march, the substitute is assigned a Fatigue marker equal to the active unit's Fatigue Level before it was selected to march. If a substitute is placed in any hex except the one in which the active unit begins a march, the substitute is assigned a Fatigue marker equal to the active unit's Fatigue Level at that moment. Entrenchment: If an entrenched active unit detaches a substitute in the hex in which it begins a march, the substitute is assigned the same kind of entrenchment marker possessed by the active unit. Disorganized, Demoralized, Exhausted, Insubordination: If an active unit has a disorganized Strength marker, is on its exhausted side, or possesses a Demoralized marker, then any substitute detached by this unit must possess the same characteristics. Ammo: Only Confederate infantry divisions are subject to Ammo requirements (see section 9); therefore a substitute detached from a Confederate division does not have an Ammunition Level and does not get any type of Ammo marker even if the detaching division has one. Command: The owning player should note on a piece of paper the number of each substitute placed on the map and the command to which it belongs. It belongs to the same command as the unit from which it detaches, but it may eventually attach to a unit of a different command.
8.2 Attachment. In the Attachment Phase, a substitute (or a normal infantry regiment or brigade, or cavalry regiment—see "Special Attachment") stacked in the same hex as a friendly unit of the same type may "attach" to that unit. As long as one of these allowable units attaches to a unit of the same type (infantry or cavalry), it may attach to any friendly unit regardless of size or affiliation. Artillery units, cavalry brigades, and infantry divisions may not attach.
How To Attach. Remove attaching units and all accompanying markers from the map. The Manpower value of an attaching unit is added to the Manpower value of the unit to which it attaches; this unit receives a new Strength marker with an enhanced Manpower value.
Attachment Restrictions. Unity: A unit may not attach a portion of its strength to another unit. The whole unit must be attached (and the unit removed from the map). Size: A unit may not attach to another unit if the addition of its Manpower value would raise the Manpower value of the unit remaining on the map above the following strengths: infantry divisions may not be raised above a Manpower Value of 16; infantry brigades may not be raised above a Manpower Value of 8; infantry regiments may not be raised above a Manpower Value of 2; cavalry brigades may not be raised above a Manpower Value of 4; cavalry regiments may not be raised above a Manpower Value of 2. Note: the Confederate division Heth starts out at 17 manpower, but if he falls below this value he may not be raised back up to it, nor may other divisions be raised above 16 manpower by attachment.
Determining Status After Attachment. Strength Marker: The unit to which a unit attached is assigned a new Strength marker on the same side (organized or disorganized) as the one it replaces. Exception: If the Manpower value of an attaching unit is greater than the Manpower value of the unit to which it attaches, the new Strength marker of the unit remaining on the map is placed on the same side as the attaching unit's Strength marker. Fatigue, Exhaustion: If a unit attaches to a unit and the two units have different Fatigue Levels, the unit remaining on the map after attachment receives a Fatigue Level equal to the higher of the two levels. If a unit attaches to a unit and one of the units is exhausted and the other is on its normal side, the unit remaining on the map is flipped to (or remains on) its exhausted side. Entrenchments: If an entrenched unit attaches to an unentrenched unit, the unit remaining on the map remains unentrenched. However, if an entrenched unit or unentrenched unit attaches to an entrenched unit, the unit remaining on the map remains entrenched. Demoralized: If a unit attaches to a unit and at least one of the units is demoralized, the unit remaining on the map is assigned a demoralization level equal to the most severe level possessed by one of the units prior to attachment.
Special Attachment. Both players' non-substitute infantry regiments and brigades may attach to any friendly infantry unit as long as attachment rules are adhered to. Similarly, non-substitute cavalry regiments may attach to any friendly cavalry regiments. Artillery: If a unit attaches to another unit, assign the attaching unit's entire Artillery value to the unit to which it attaches. This unit receives a new Artillery marker with an enhanced Artillery value. Exception: the following groups of units may only do this special attachment within their own group. The separate and distinct groups of units are as follows: Union West Virginia, Union Pennsylvania Militia, Union Baltimore/DC garrison, Union Harpers Ferry garrison.
8.3 Substitutes And Artillery Values. Unlike other GCACW games, in RTG substitutes always have an artillery value of 0; they may never be assigned artillery from the active unit.
9.0 Ammunition
Ammunition only affects Confederate infantry divisions. To function at full effectiveness, these units must not be at either Low Ammunition or Out of Ammunition.
9.1 Ammunition Expenditure & Reduction. The Confederate Player records ammunition expenditure for each infantry division on their Ammunition Tracks on the map. All Confederate divisions have 3 boxes, each of which represents one Ammunition Level. Use a spare game marker for each of these units to track its Ammunition Level. At the start of the game, no marker should be on any of the tracks and no unit should have an ammunition marker. When a unit's marker moves from off the track to the 1st space on its track (level 1), there is no further effect. When a unit's marker moves to the 2nd space (level 2) on a track, that unit is at Low Ammunition and should have a Low Ammo marker (add one if it has no marker). If the marker moves from the 2nd space on the track to the 1st space, then the unit's Low Ammo marker is removed. When a unit's marker moves to the 3rd space (level 3) on a track, that unit is Out of Ammunition and it should have an Out of Ammo (OOA) marker. A unit may never have both a Low Ammo and an OOA marker at the same time: if a unit's marker moves from its 2nd to 3rd spot or vice-versa, then its ammunition marker is flipped appropriately from its Low Ammo to OOA side, or vice-versa.
How Ammunition Is Expended. When a Confederate division receives a "D" (Disorganized) result in combat, whether attacking or defending, it gains one Ammunition Level. The Confederate player moves the unit's ammunition marker one space numerically higher (i.e. from level 1 to level 2) along its Ammunition Track—if the unit does not have an ammunition marker on the track, then one is put on the track in the first space (level 1). Exception: a unit receiving a "D" result which already has its marker at the 3rd space on its track is already Out of Ammunition and can not lose another Ammunition Level. A unit engaging in combat which does not receive a "D" result does not lose an Ammunition Level. If several units are attacking or defending in the same combat and they receive a "D" result, they each gain one Ammunition Level. Units may never lose more than one Ammunition Level per combat, although they may lose more than one per turn.
9.2 Effects Of Being At Low Ammo Or OOA. A Confederate infantry division which is at Low Ammunition or Out of Ammunition should have a Low Ammo or OOA marker respectively. A unit which has either ammunition marker does not suffer any penalties in the Recovery Phase and does not have an additional extended march modifier. In RTG, a unit which has a Low Ammo marker is penalized as follows: its Artillery Value is halved in both attack and defense—round fractions up (e.g. an artillery value of 3 halves to 2; if several units in a combat have Low Ammo then round up after summing their values). In RTG, a unit which has an OOA marker is penalized as follows: its Artillery Value is 0 in both attack and defense; a unit which is also demoralized may not attack.
9.3 Confederate Ammunition Replenishment. During the Random Events Phase, the Confederate player may be able to replenish some of his infantry divisions' ammunition if he obtains a "Confederate Ammunition Train" result (subject to the conditions of this result explained in section 3.2). In this event, he may immediately move ammunition markers on the Ammunition Tracks a total of five Ammunition Levels lower (not 5 per unit but 5 total for all units). The markers' movements may be applied to several units, as the Confederate player wishes, as long as a total of no more than five levels are reduced. For example, if 3 units each have their ammunition marker at their 3rd level on the OOA box, the Confederate could move one unit's marker off its track for 3 levels reduced and then reduce each of the other two units' levels by one level each to their 2nd level on the track (the Low Ammo level). As a unit reduces its Ammunition Level, if it has an OOA or Low Ammo marker, the marker is changed per section 9.1.
Confederate Replenishment Restrictions. Any Ammunition Replenishment not used in the Random Events Phase it is obtained in is lost—none may be carried over to subsequent turns. (Exception: an Ammunition Train result may be postponed in certain situations per section 3.2.) Units selected for replenishment must be in the same or any adjacent county as the one occupied by the army leader Lee. If all six hexes surrounding a Confederate unit are Union occupied or in Union ZOC (exception: a Confederate unit in a hex cancels a Union ZOC for this purpose) or impassable from the hex of the Confederate unit, the Confederate player may not reduce that unit's Ammunition Level.
10.0 Union RR Station Repair
During the RR Station Repair Phase, which occurs only on turns 8, 12, and 16, the Union player may attempt to remove Damage markers from RR stations. Destroy markers may never be removed. For each damaged RR station which is neither occupied by a Confederate unit nor in a Confederate ZOC, and which is 10 or fewer hexes away from the nearest Union unit, the Union player rolls a die. On a roll of 3 or less, the Damage marker is removed; on a roll of 4 or more, the marker remains. Exception: if the damaged RR station is situated in Howard, Carroll, Baltimore, Frederick-East, or Frederick-West County, then on a roll of 4 or less the Damage marker is removed. If the Union player fails to remove a particular Damage marker, he may make other attempts to remove it in later RR Station Repair Phases. Note: the only game effect of damaged RR Stations is the ability of the Union to move units by rail.
11.0 Union Railroad Movement
Units Eligible For Rail Movement. Rail movement may only be performed by Union infantry units and attached leaders and only starting on turn 9 (June 30). Exception: Knipe's brigade may perform rail movement starting on turn 1. In order to move by rail, a Union infantry unit must have a Fatigue Level of two or less; and it must begin a march in any undamaged and undestroyed RR station on the Baltimore & Ohio Railroad, the Northern Central Railroad, or the Cumberland Valley Railroad (including all RR stations east of the Susquehanna River). Demoralized units and units with disorganized strength markers may move by rail.
How Rail Movement Is Performed. To move an eligible unit by rail, the Union player declares a March action. The unit's Fatigue Level is increased by two (not one). An extended march never occurs due to rail movement (no matter what the fatigue level of the unit). The unit may then move up to 60 hexes, regardless of terrain or rain, as long as it moves only along continuous railroad hexes and does not enter an enemy occupied hex or ZOC (even if that ZOC is Union occupied), or a damaged/destroyed RR station. It may transit Union occupied hexes without penalty. After moving by rail, a unit may perform actions later in the Action Cycle if it has fatigues remaining.
RR Connection Notes. The B&O Railroad in hex S1734 is considered to connect with the railroad in hex S1934, even though a rail line does not join the two hexes. The distance between the two hexes in terms of RR movement is three hexes. The Northern Central Railroad in hex N5816 is considered to connect with the railroad in hex N5821, even though a rail line does not join the two hexes. The distance between the two hexes in terms of RR movement is six hexes.
Rail Movement Restrictions. A maximum of one Union infantry division or three brigades/regiments, plus attached leaders, may move by rail per turn on the Baltimore & Ohio RR. A maximum of one Union infantry brigade or regiment, plus attached leader, may move by rail per turn on the Cumberland Valley/Northern Central RR. Union infantry divisions may not move by rail on the Cumberland Valley/Northern Central RR. Units may not move by rail on the Winchester & Potomac, Hanover Branch, Gettysburg, and Western Maryland Railroad lines. Cavalry units and artillery units may not move by rail. Units may only move by rail once per turn.
12.0 Union Forts
There are two Union forts printed on the map: Fort Washington (N4809) and Stone Fort (S0732). These forts are Union controlled and undestroyed at the start of all scenarios unless otherwise indicated. Union forts printed on the map are not the same as entrenchment fort marker counters that both players may build on their units per section 9 on Entrenchments in the Standard Basic Rules.
Effects Of Union Forts. Confederate units may not enter or retreat into a hex containing an undestroyed Union fort. Similarly, Confederate leaders may not transfer or exert a command radius into or through an undestroyed fort hex. Confederate units adjacent to an undestroyed Union fort do exert a ZOC into the fort; however an undestroyed fort is always treated as occupied by a Union unit when determining the effects of Confederate ZOC. Union forts do not exert ZOC (unless a Union unit occupies its hex). A Union fort hex adjacent to a defending Confederate unit is considered "covered" for flank attack determination. Union units may enter fort hexes without restriction. Forts themselves may not activate or entrench.
Union Forts And Combat. Both forts have an intrinsic Combat Value of 2. Stone Fort has an intrinsic Artillery Value of 0 and Fort Washington has an intrinsic Artillery Value of 1. These intrinsic combat and artillery values may only be used in defense; a fort may never join in a Union attack (although Union units in fort hexes may attack). Confederate units may attack an adjacent fort hex. If no Union units occupy the fort hex, the fort's intrinsic Combat value and Artillery value are used to resolve the combat. If one or more Union units occupy the fort hex, the Union player's Combat and Artillery values are calculated by adding the fort's intrinsic values to the Combat and Artillery values of the Union units defending in the fort hex. In Confederate attacks against forts, there can never be a tactical modifier in favor of the Confederate player. If the Confederate player has a higher tactical value than the Union player, or if no Union units occupy the fort hex, no tactical modifier is used. If the Union player has a higher tactical value, that combat die roll modifier is applied normally. In Confederate attacks against fort hexes, the Confederate player may never gain a flank attack bonus. All other combat modifiers are applied normally.
How Union Forts Are Destroyed. If the Union player suffers a combat result containing an "r" (retreat) or "R" (rout) in any Confederate attack against a Union fort hex, the fort is permanently destroyed. Any Union units in the fort hex must also retreat or rout. Place a "Destroyed" marker in the hex—a Union fort is no longer considered to occupy that hex. When calculating the Defender's Combat Value to determine the proper column on the Combat Chart, do not include the intrinsic Combat value of the fort. Combat results containing Manpower Value losses, "f" (fatigue-1), "F" (fatigue-2), and "D" (disorganize) results have no effect on forts; however, these results do affect Union units defending in the fort hex. A manpower value loss may not be taken by the fort; if there are any units in the fort, they take the full manpower loss. The destruction of a fort does not count as a Manpower value loss for Victory Point purposes in the scenarios. A destroyed fort is considered to be a Union redoubt hex (see Standard Rules section 9.0) for the rest of the scenario. If Union units re-enter the hex, they gain all the normal benefits of a redoubt hex.
Entrenchment In Fort Hexes. Union units in a fort hex are treated as if they occupied a redoubt hex for entrenchment purposes. Thus, in a fort hex, Union units with no other entrenchments have their Combat and Artillery values multiplied by 1.5 when defending. Units in fort hexes may continue to entrench normally until they are under a completed Fort marker (which should not be confused with a printed fort hex).
13.0 Activate Army Leader
The "Activate Army Leader" action is an Advanced Game rule enabling players to use their army leaders to activate units as normal leaders do in an "Activate Leader" action. In all Advanced Game Scenarios, the Activate Army Leader action is added to the menu of actions available to the player who takes initiative in each Action Phase. The active player may only choose an Activate Army Leader action if all of the following conditions are fulfilled: a player's army leader must be stacked in the same hex as another friendly, non-cavalry leader; at least one friendly infantry unit at a Fatigue Level of 3 or less must be situated within the command radius of the army leader; if a player successfully executed an Activate Army Leader action in the previous turn, he may not choose an Activate Army Leader action in the current turn; each player may execute an Activate Army Leader action a maximum of once per turn (if an attempt at an Activate Army Leader fails, see below, a player may make a second attempt to perform it in a later Action Phase, but no more than two attempts are permitted per turn); each player is limited to 2 successful Activate Army Leader actions per game; the Union may not attempt an Activate Army Leader action during an AP Bonus Cycle.
An Activate Army Leader action is attempted as follows: 1) The active player selects an eligible army leader anywhere on the map and rolls a die. This roll may be modified (see below). If the modified roll is 4 or more, the Activate Army Leader action fails. If the modified roll is 3 or less, the Activate Army Leader action succeeds. Failure: If an Activate Army Leader die roll fails, the action is over—do not proceed to Step 2 of this procedure. No units gain Fatigue Levels. The player may attempt one more Activate Army Leader action in the current turn, but it may only be attempted in a later Action Phase. A new Action Phase begins, and initiative is determined normally. Success: If an Activate Army Leader die roll succeeds, the action continues. Proceed to Step 2. 2) The active player must select from 1 to 10 eligible friendly military units. Unlike an Activate Leader action, in which participating units must belong to the active leader's command, the units selected in an Activate Army Leader action may be of any command affiliation. Furthermore, the selected units may be any combination of infantry, cavalry, or artillery. Selected units must be situated within the army leader's command radius and must be at a Fatigue Level of 3 or less. (Exception: A unit may be at Fatigue Level 4 if the pertinent optional rule in Basic Rule 5.2 is in use.) 3) The active player, rolling one die, determines the army leader's Movement Allowance in exactly the same way a normal (non-cavalry) leader determines its Movement Allowance in an Activate Leader action (see Step 3, Basic Rule 5.2). However if the die roll is a 1, add 1 to the Movement Allowance (so the minimum die roll is a 2—a die roll of 1 is treated as a die roll of 2). 4) The army leader's Movement Allowance determined in Step 3 applies to each infantry and artillery unit selected in Step 2. The army leader's Movement Allowance determined in Step 3 multiplied by two applies to each cavalry unit selected in Step 2. Place markers on the Movement Track in the boxes corresponding to these numbers. 5) The active player performs Steps 5 to 9 of the normal Activate Leader procedure (see Basic Rule 5.2). The Activate Army Leader action ends when this procedure is completed, and the next Action Phase begins.
Note: The opposing player automatically wins initiative in the next Action Phase (see "Initiative Penalty", below). The player may not attempt another Activate Army Leader action for the rest of the current turn and throughout the entire following turn. He may attempt an Activate Army Leader action again in the second turn following the current turn.
Activate Army Leader Restrictions. In an Activate Army Leader action, all units selected in Step 2 are restricted in their activities as follows: a marching unit may not attack during its march—attacks of all kinds are prohibited in an Activate Army Leader action; a marching unit may not enter an enemy ZOC (including restricted ZOC) during its march (Exception: If, in order to exit a given hex, a unit has no choice but to enter an enemy ZOC, it may do so—a unit may exit an enemy ZOC during an Activate Army Leader action, subject to normal movement penalties); units selected to participate in an Activate Army Leader action may not perform Burn RR Station or Entrench actions.
Initiative Penalty. If a player's Activate Army Leader action die roll succeeds, the opposing player automatically wins initiative in the Action Phase following the Activate Army Leader action, regardless of the die rolls in the Initiative Segment of that phase.
14.0 Confederate Levies
The Confederate player may impose a "levy" on all 13 town hexes in Pennsylvania.
How Levies Are Imposed. If a Confederate infantry unit with a Manpower Value of 5 or more and a Fatigue Level of 0 occupies a town hex in Pennsylvania at the start of a Recovery Phase (ref. step 1 of Recovery, Standard Rules section 8.0), the Confederate player may impose a levy on that town. If a levy is imposed on a town, place a "levied" marker in that town. At the end of the game, the Confederate player receives Victory Points for all levied towns (see Advanced Game VCs). It does not cost any Fatigue Levels to impose a levy. A unit imposing a levy may also entrench or build bridges in the same Recovery Phase in which the levy is imposed.
Levy Restrictions. Each town in Pennsylvania may be levied a maximum of once per game. A levy may not be imposed on a town if a Union unit(s) with a total Manpower Value of 3 or more occupies a hex adjacent to the town.
15.0 Washington County
In each Washington County Phase, the Union player determines whether all four of the following hexes are occupied by Union brigades or divisions (not regiments)—if so, the Confederate player immediately loses 1 Victory Point: Williamsport (S0116), Falling Waters (S0119), Sharpsburg (S0525), Naval Battery (S0732). If Union brigades or divisions (not regiments) occupy Chambersburg (N0929), Greencastle (S0604), and Frederick (S2326), in addition to all four of the above hexes, the Confederate player loses 2 additional VPs. Confederate VP loss due to Union occupation of these hexes is imposed each Washington County Phase in which the listed requirements are fulfilled.
16.0 County Control
At the end of the game, the Confederate player determines if he "controls" any of the following seven counties:
County Control Seats: Howard County, MD — Ellicott Mills (S5734). Baltimore County, MD — Reisterstown (S5523). Carroll County, MD — Westminster (S4516). Frederick-East County, MD — New Market (S3128). Frederick-West County, MD — Frederick (S2326). York County, PA — York (N5826). Adams County, PA — Gettysburg (S3201).
The Confederate player receives Victory Points if he controls one of these counties at the end of the game (see Advanced Game VCs). If he controls more than one county, he receives VP only for the county with the highest VP award. The Union player may not control counties.
How To Control A County. At the end of the game, the Confederate player must achieve both of the following conditions to control a county: 1. The county control seat must be occupied by a Confederate unit with a Manpower Value of 3 or more. (Exception: if Union infantry divisions either occupy or exert ZOC into all six hexes adjacent to the control seat, and no Confederate infantry divisions are situated in any of these six hexes, the Confederate player cannot control that county even if he occupies the control seat.) Note: each of the seven aforementioned counties has a county control seat. For example, the control seat for Carroll County is Westminster (S4516). 2. The county must be occupied by Confederate units with a total Manpower Value of 70 or more (the unit(s) in the control seat may be included in this total). Aside from the unit in the control seat, these units may be situated anywhere in the county.
17.0 Using the HCR East Map (Optional)
If both players agree in advance, the Here Comes the Rebels II (HCR) East map may optionally be used under certain circumstances. If a Confederate infantry unit comes within 10 hexes of Ellicott Mills (RTG S5734), then players may add on the HCR East map for more maneuver room around Ellicott Mills. Place the HCR East map under the RTG south map; but only use HCR East columns from 14xx to 28xx, inclusive, and HCR East rows from the south edge of the RTG map to HCR East xx22, inclusive.
Advanced Game Scenario
There is a single Advanced Game scenario. Unless otherwise specified, units begin the scenario on their front (unexhausted) sides at Fatigue Level 0 and possess organized Strength markers. Place the Turn marker on the Turn Record Track in the June 22 box, this is turn one. At the end of the game, calculate Victory Points (VP) and determine a winner. Some VPs must be tracked during the course of the game. Manpower Value losses from combat, retreat, cavalry retreat, and Harpers Valley surrender must be either recorded as VPs as they occur or noted separately in some manner. Players must also record Washington County VPs and AP First Increment arrival VPs as they occur. Destroyed RR stations are automatically indicated by the RR station destroy markers and levies are indicated by the levy markers.
Scenario 10: The Gettysburg Campaign
NOTES: This scenario simulates the Gettysburg campaign, starting from the point at which Confederate infantry units first began to cross the Potomac in force.
MAP: Use both maps.
GAME LENGTH: 18 turns; June 22 to July 9, 1863 (the game may end earlier or later – see special rule 1 below).
SPECIAL RULES: 1. Game End: The game does not end if, at the end of turn 18, the "Major Rivers Unfordable" marker occupies a hypothetical turn-box after turn 18. In this event, the game is extended by an indefinite number of turns. The game ends only at the end of the turn corresponding to the hypothetical box occupied by the Major Rivers Unfordable marker. For example, if due to a Rain result the marker is advanced to a hypothetical box labeled "turn 20", then the game ends at the end of turn 20. If the game extends past turn 18, the Union RR Station Repair Phase takes place on all turns divisible by 4 (i.e. turns 20, 24, etc). (Exception: on turn 14 or later, the game ends as soon as an "End Game" random events result occurs—even if the Potomac is unfordable.) 2. Confederate Movement Restrictions: The Confederate player has the following movement restrictions: Confederate infantry units may not enter or retreat into any hex in Frederick-West, Carroll, or Baltimore County until the "first increment" of the Army of the Potomac has been placed on the map (delaying the deployment of the first increment delays when they are placed on the map). The following units have the additional restrictions listed below. A Confederate unit is removed from its restriction below at the moment a Union unit moves into any hex adjacent to the Confederate unit's set-up hex: Hill, Heth, Pender, and Anderson may not activate or entrench until turn 3 (June 24); Longstreet and Pickett may not activate or entrench until turn 4 (June 25); McLaws and Hood may not activate or entrench until turn 5 (June 26); Lee may not be transferred out of hex S0116 until turn 4 (June 25). 3. Early, Johnson, & Rodes: From turn 1 (June 22) to turn 9 (June 30), inclusive, non-corps leader march actions with Early, Johnson, and Rodes have the die roll used to determine the Movement Allowance in that action increased by 2 (not the normal 1). Substitute detachments from these units do not get this additional bonus. If Ewell (the corps leader of these 3 divisions) is activated in a corps leader action, the Confederate player calculates his Movement Allowance normally (he adds 2 to his roll). 4. Union Movement Restrictions: The Union player is subject to the following restrictions. A Union unit is removed from its restriction at the moment a Confederate unit moves within 5 hexes of the Union unit's set-up hex; also, all restrictions on all units are lifted at the moment a Confederate infantry unit enters a hex in Frederick-West, Carroll, or Baltimore County: Knipe is the only Union unit that starts the game on the map that may activate or entrench on turns 1, 2, and 3 (June 22-24) (Note: Army of the Potomac units are exempt from this restriction—there is a chance that the first increment of the Army of the Potomac may arrive on turn 2); Lockwood may not activate until turn 4 (June 25); Yates, Ewen, Brisbane, Crooke, and J. Smith (all PA Militia) may not activate or entrench until turn 5 (June 26); Elliott, B. Smith, Morris, Kenly, 2 MA, 13 PA, 6 NY, and 7 NY may not activate or entrench until the turn in which the "third increment" of the Army of the Potomac has been placed on the map. 5. Sharpsburg: Union units may not move in or adjacent to Sharpsburg (S0525) until turn 4. 6. 2 MA, 6 NY, & 7 NY: These Union regiments may not move or retreat into any hex on the south map whose last two digits number "25" or less, inclusive. This restriction is never lifted. 7. Union non-AP infantry: Any Union infantry unit not in the AP can retreat or rout off-map, scoring no additional VP's for the Confederates. However, they may not retreat off-map across a hexside they could not normally move across. These Union units that retreat or rout off-map are out of play for the rest of the game. They may not voluntarily "run-away" off-map in a March action. 8. Marysville Bridge: The Union may not destroy the bridge at Marysville (N4603).
Victory Conditions. At the start of the game, place the three Confederate Victory Point markers ("x1", "x10", and "x100") in the "0", "00", and "000" boxes on the Victory Point Track. As the Confederate player gains and loses VPs for the following occurrences, these VP markers should be adjusted to reflect the current Confederate VP total. If the Confederate VP total is a negative number, flip the VP markers over to their reverse ("minus") side.
+70 if the Confederate player controls Howard County; +60 if the Confederate player controls Baltimore County; +50 if the Confederate player controls Carroll County; +40 if the Confederate player controls Frederick-East County; +30 if the Confederate player controls York County; +28 if the Confederate player controls Frederick-West County; +25 if the Confederate player controls Adams County (Notes: County control VP are only awarded at the end of the game. If the Confederate player fulfills the requirements for control of more than one county, he receives VP only for the county with the highest VP award.); +12 if the Confederate player imposes a levy on Harrisburg (N4909) (Play note: A Union force of 3 manpower in Bridgeport prevents the levy per section 14.0); +6 if the Confederate player imposes a levy on York (N5826); +2 for each of the following towns in which the Confederate player imposes a levy: Carlisle (N3312), Greencastle (S0604), Chambersburg (N0929), Hanover (S4503), Gettysburg (S3201), Shippensburg (N1621); +1 for each of the following towns in which the Confederate player imposes a levy: Littlestown (S4006), Newville (N2214), Mechanicsburg (N4311), Waynesboro (S1406), New Cumberland (N5010); +2 for each of the following B&O Railroad stations with Destroy (not Damage) markers at the end of the game: Ellicott Mills (S5734), Catoctin Switch (S1633), Sykesville (S4828), Weverton (S1031), Mt. Airy (S3828), Harpers Ferry (S0632), Frederick Junction (S2428); +1 for each Confederate infantry division (not brigade) with a Manpower Value of 5 or more ending the game in or adjacent to Williamsport (S0116), Falling Waters (S0119), Sharpsburg (S0525), or the Naval Battery (S0732) (Note: If a Confederate infantry division is adjacent to one of these four hexes and that hex is occupied by a Union unit, the Confederate player does not receive VP for that hex); -1 or -3 the Confederate player loses 1 VP for each Washington County Phase in which all four of the following hexes are occupied by Union brigades or divisions (not regiments): Williamsport (S0116), Sharpsburg (S0525), Falling Waters (S0119), Naval Battery (S0732) (Exception: If, in a Washington County Phase, Union brigades or divisions (not regiments) occupy Chambersburg (N0929), Greencastle (S0604), and Frederick (S2326), in addition to all four of the aforementioned hexes, the Confederate player loses 3 (not 1) VP. Note: Confederate VP loss due to Union occupation of these hexes is imposed each turn in which the listed requirements are fulfilled, not just at the end of the game.); the Confederate player subtracts the VPs, if any, indicated by the AP arrival result; +1 for each point of Union Manpower Value lost in combat, retreat, cavalry retreat, or due to the surrender of Harpers Ferry (not in extended march, force march, or moving from one enemy ZOC to another) (Exception: for Harpers Ferry surrender of units designated as "HF" see below); +1/2 for each point of Union Manpower Value, for units designated as "HF", lost due to the surrender of Harpers Ferry (at the end of the game, this VP total is rounded up—for example, if the total HF manpower that surrenders is 5, then the VP total is 3); -1 for each point of Confederate Manpower Value lost in combat, retreat, or cavalry retreat (not in extended march, force march, or moving from one enemy ZOC to another). At the end of the game, the final Confederate VP total is calculated and the players consult the following chart to determine the winner.
Confederate VP Winner: 100 or more = Confederate Decisive Victory; 85 to 99 = Confederate Substantive Victory; 70 to 84 = Confederate Marginal Victory; 55 to 69 = Union Marginal Victory; 40 to 54 = Union Substantive Victory; 39 or less = Union Decisive Victory.
Campaign Scenario Set-Up
Union Set-Up
| Unit/Leader | Size | Command | Type | Manpower Value | Hex |
|---|---|---|---|---|---|
| Lockwood | Brig | XII | Inf | 4* | S5734 (Ellicott Mills) |
| 7 NY Regt | III | Balt | Inf | 1* | S5734 (Ellicott Mills) |
| Morris | Brig | HF | Inf | 6* | S2428 (Frederick Junction) |
| 6 NY Regt | III | Balt | Inf | 1* | S2428 (Frederick Junction) |
* Indicated units begin the game under fort markers.
Army of the Potomac First Increment
| Unit/Leader | Size | Command | Type | Manpower Value | Hex |
|---|---|---|---|---|---|
| Reynolds | Corps | I | Ldr | - | S2134 to S3534^ |
| Wadsworth | Div | I | Inf | 8 | S2134 to S3534^ |
| Robinson | Div | I | Inf | 6 | S2134 to S3534^ |
| Doubleday | Div | I | Inf | 5 | S2134 to S3534^ |
^ May delay entry and enter further eastward (see advanced rule 6.2).
Army of the Potomac Second Increment
| Unit/Leader | Size | Command | Type | Manpower Value | Hex |
|---|---|---|---|---|---|
| Hancock | Corps | II | Ldr | - | S2134 to S3534^ |
| Caldwell | Div | II | Inf | 7 | S2134 to S3534^ |
| Gibbon | Div | II | Inf | 7 | S2134 to S3534^ |
| Hays | Div | II | Inf | 8 | S2134 to S3534^ |
^ May delay entry and enter further eastward (see advanced rule 6.2).
Army of the Potomac Third Increment
| Unit/Leader | Size | Command | Type | Manpower Value | Hex |
|---|---|---|---|---|---|
| Sedgwick | Corps | VI | Ldr | - | S2134 to S3534^ |
| Wright | Div | VI | Inf | 9 | S2134 to S3534^ |
| Howe | Div | VI | Inf | 8 | S2134 to S3534^ |
| Newton | Div | VI | Inf | 11 | S2134 to S3534^ |
^ May delay entry and enter further eastward (see advanced rule 6.2).
West Virginia Reinforcement Track
| Unit/Leader | Size | Command | Type | Manpower Value | Hex | Reinforcement Set # |
|---|---|---|---|---|---|---|
| 1 NY/12 PA Regt | III | WV | Cav | 1 | See advanced rule 4.0 | 1 |
| Mulligan | Brig | WV | Inf | 3 | See advanced rule 4.0 | 2 |
| Campbell | Brig | WV | Inf | 3 | See advanced rule 4.0 | 2 |
| Wilkinson | Brig |
Baltimore/DC Reinforcement Track
| Unit/Leader | Size | Command | Type | Manpower Value | Hex | Reinforcement Set # |
|---|---|---|---|---|---|---|
| 1 CT Regt | III | Balt | Cav | 1 | See advanced rule 4.0 | 1 |
| Briggs | Brig | Balt | Inf | 5 | See advanced rule 4.0 | 2 |
| Spinola | Brig | DC | Inf | 4 | See advanced rule 4.0 | 3 |
| 39 MA Regt | III |
Pennsylvania Militia Reinforcement Track
| Unit/Leader | Size | Command | Type | Manpower Value | Hex | Reinforcement Set # |
|---|---|---|---|---|---|---|
| Frick | Brig | PA | Inf | 3 | N4907 (Camp Curtin) | 1 |
| Franklin | Brig | PA | Inf | 11 | N4907 (Camp Curtin) | 2 |
| Nagle | Brig | PA | Inf | 10 | N4907 (Camp Curtin) | 3 |
| Beaver | Brig |
Note: the "Command" designation for Balt, DC, HF, WV, and PA units is the garrison/militia designation on the left side of these counters.
Confederate Set-Up
| Unit/Leader | Size | Command | Type | Manpower Value | Hex |
|---|---|---|---|---|---|
| A. Jenkins | Brig | Cav | Cav | 3 | S0608 (Middleburg) |
| Rodes | Div | II | Inf | 16 | S0815 (Funkstown) |
| Ewell | Corps | II | Ldr | - | S0525 (Sharpsburg) |
| Johnson | Div | II | Inf | 14 | S0525 (Sharpsburg) |
Placed Upon Stuart's Arrival
| Unit/Leader | Size | Command | Type | Manpower Value | Hex |
|---|---|---|---|---|---|
| Stuart | Corps | Cav | Ldr | - | S3134 to S5833^ |
| Hampton | Brig | Cav | Cav | 3 | S3134 to S5833^ |
| F. Lee | Brig | Cav | Cav | 3 | S3134 to S5833^ |
| Chambliss | Brig | Cav | Cav | 2 | S3134 to S5833^ |
^ May delay entry (see advanced rule 7.0).
Confederate Reinforcement Track
| Unit/Leader | Size | Command | Type | Manpower Value | Hex | Reinforcement Set # |
|---|---|---|---|---|---|---|
| Imboden | Brig | Cav | Cav | 3 | See advanced rule 3.2 | 1 |
| Jones | Brig | Cav | Cav | 3 | See advanced rule 3.2 | 2 |
| Robertson | Brig | Cav | Cav | 2 | See advanced rule 3.2 | 2 |
| 54 NC Regt | III |
Richmond Garrison Track
| Unit/Leader | Size | Command | Type | Manpower Value | Hex | Reinforcement Set # |
|---|---|---|---|---|---|---|
| Corse | Brig | Rich | Inf | 4 | See advanced rule 3.2 | 1 |
| M. Jenkins | Brig | Rich | Inf | 4 | See advanced rule 3.2 | 2 |
| Cooke | Brig | Rich | Inf | 4 | See advanced rule 3.2 | 3 |
| Wise | Brig |
The Game As History
By Joseph M. Balkoski
Background. May-June 1863: Following the Rebels' rout of the Army of the Potomac at Chancellorsville on May 1-4, General Robert E. Lee prepared to carry out an operation he had been contemplating for some time. As early as February 1863 he had directed Jedediah Hotchkiss, Stonewall Jackson's able cartographer, to make a detailed map of the region from Winchester, Virginia to Harrisburg, Pennsylvania, for use in an invasion of the North, "wishing the preparation to be kept a profound secret." Two months later, on April 9, 1863, Lee explained his thoughts to Secretary of War James A. Seddon: "Should General Hooker's army assume the defensive, the readiest method of relieving pressure upon General Johnston and General Beauregard [in the western theater] would be for this army to cross into Maryland...This is what I would recommend if practicable." In addition to relieving Union pressure against Rebel strongholds in other theaters, Lee knew that a Confederate invasion of Pennsylvania would thwart any offensive moves by Hooker against Richmond, for Union concerns for the safety of the Federal capital at Washington, D.C. would dominate Northern strategy. Furthermore, bringing the war into the enemy's country would allow agriculture in northern Virginia to recover from the war's deprivations. At the same time, the Confederates would be able to draw supplies from the enemy's country in a region that had not yet been touched by the war. Finally a decisive Confederate military victory on Northern soil might prove disastrous to the shaky Union war effort.
On May 10, Stonewall Jackson died from the wounds he had received at Chancellorsville. The South mourned. "I know not how to replace him," Lee declared. But Jackson had to be replaced. In late May, Lee reorganized the Army of Northern Virginia from two corps to three: the I Corps under Longstreet; the II Corps (Jackson's old command minus A.P. Hill's famous "Light Division") under Ewell; and the III Corps under A.P. Hill. According to Lee, the Army of Northern Virginia would be "invincible if it could be properly organized and officered. There never were such men in an Army before. They will go anywhere and do anything if properly led. But there is the difficulty -- proper commanders -- where can they be obtained?"
The Gettysburg campaign began on June 3, 1863 when Lee began to pull parts of his army away from the Fredericksburg area, where the Army of Northern Virginia had squared off against the Army of the Potomac across the Rappahannock off and on since November 1862. By June 5 Longstreet's and Ewell's corps were concentrated near Culpeper Court House, while A.P. Hill's corps remained in position in the Fredericksburg defensive lines. On the opposite bank of the Rappahannock, Joe Hooker was fully aware of the departure of part of Lee's army from his front. He suspected an enemy scheme to outflank the Army of the Potomac on its right, as John Pope had been outflanked in the Second Manassas campaign during the previous summer. Hooker, who had lost the respect of many of his subordinates since the Chancellorsville debacle, proposed to President Lincoln that the Union forces "pitch into" A.P. Hill's rearguard at Fredericksburg. Lincoln vetoed the plan, however, suggesting that Hooker's major concern should be with the Rebels' main force, which could easily get between him and Washington should the Army of the Potomac get involved in a fight at Fredericksburg.
On June 9, Hooker launched a combined force of cavalry and infantry over the upper Rappahannock near Culpeper to discover Lee's intentions. JEB Stuart's Rebel cavalry pickets on the Rappahannock fords were taken completely by surprise by the unexpected aggressiveness of the Yankees. In the subsequent chaotic battle in and around Brandy Station -- the largest cavalry action of the Civil War -- Stuart narrowly averted disaster. Although the Yankees were eventually driven from the field, they gained information about Confederate troop dispositions and, more important, bruised the fragile ego of JEB Stuart. The repercussions of Brandy Station would be felt later in the campaign.
On June 10 Ewell's II Corps began moving northward in earnest. By June 12, Ewell's men had passed Front Royal into the Shenandoah Valley. Ewell sent two divisions to surround the unfortunate Union garrison at Winchester, while his remaining division, under Rodes, headed toward Berryville in an attempt to capture a small enemy force there. On June 15 the Union force at Winchester, under the command of General Robert Milroy, was put to flight with a loss of 3,800 prisoners -- more than half its total. The Union troops at Berryville, however, escaped northward, hotly pursued by Rodes as far as Martinsburg. Here the Federals made a feeble stand and were quickly driven back by Rodes toward the Union bastion at Harpers Ferry. On June 15 Jenkins' cavalry brigade, which supported Ewell's corps throughout the campaign, crossed the Potomac near Williamsport (S0116) with orders to proceed as far as Chambersburg, Pennsylvania (N0929) that same day. Thus, less than one week after breaking loose from Lee's army at Culpeper, Ewell's forces had driven the Yankees out of the Shenandoah Valley and moved up to and beyond the Potomac. In the words of the historian Douglas Southall Freeman, it was "as if a second Jackson had come."
Meanwhile, Hooker responded to Lee's moves by shifting his right wing slightly northward up the Rappahannock as far as the Orange and Alexandria RR bridge at Rappahannock Station. On June 14 he moved his base of supply from Aquia Creek, near Fredericksburg, to an as yet unnamed point on the Orange and Alexandria RR closer to Washington. Lincoln urged him to do something to retrieve the deteriorating situation in the Shenandoah Valley, but Hooker demurred. "If the head of Lee's army is at Martinsburg and the tail of it on the Plank road between Fredericksburg and Chancellorsville, the animal must be very slim somewhere," Lincoln pointed out. "Could you not break him?" Lee set the rest of his army in motion once he learned of Hooker's departure from the Fredericksburg area, sending Hill's III Corps in Ewell's wake and Longstreet's I Corps northward east of the Blue Ridge to guard the passes in that mountain chain and cover Hill's advance into the Shenandoah Valley. Meanwhile, Stuart's cavalry shielded Lee's forces from Yankee probes in the area between the Blue Ridge and Bull Run Mountains.
On Ewell's front, Rodes' division crossed the Potomac into Maryland at Williamsport on the night of June 15, fueling panic north of Mason's and Dixon's Line. Rodes remained stationary here for three days waiting for the rest of the II Corps to reach the Potomac. Further north, Jenkins' cavalry brigade, acting as Ewell's advance guard, plundered the Chambersburg area for two days before retiring to Hagerstown (S0613). On June 17 Hooker directed his cavalry to move into Loudoun County to see what they could find out about the Rebels' intentions. For the next several days, cavalry skirmishes erupted at Aldie, Middleburg, and Upperville. In the meantime the Army of the Potomac marched rapidly northward into Fairfax, Prince William, and Loudoun Counties. As Lee later noted in his official report of the Gettysburg campaign, "The Federal Army was apparently guarding the approaches to Washington, and manifested no disposition to resume the offensive."
After Rodes' division had entered Maryland on June 15, Lee held Ewell's invasion in check for several days. "Not knowing what force there is at Harpers Ferry, or what can be collected to oppose your progress, I cannot give definite instructions, especially as the movements of General Hooker's army are not yet ascertained," Lee wrote to Ewell. It was not until June 19 that Lee permitted Ewell to throw a second infantry division across the Potomac. This division (Johnson's) crossed the Potomac at Boteler's Ford (S0327), while Rodes was given permission to advance a short distance from Williamsport to Funkstown (S0815). Ewell's last remaining division south of the Potomac (Early's) was ordered to hold in Shepherdstown (S0226) until relieved by one of A.P. Hill's divisions of the III Corps. As Hill's troops neared the Potomac, Longstreet's men were to fall in behind them, bringing up the Army of Northern Virginia's rear. Although Hooker had effectively maneuvered his army so as to keep it between Lee and Washington, he had done nothing to rescue the unfortunate Union troops in the Shenandoah, nor had he attempted to seize the initiative from Lee. As of June 21 nothing stood between Ewell's forces and the rich agricultural regions of Pennsylvania except for a handful of local home guard companies. According to Marsena Patrick, the provost marshal of the Army of the Potomac, "He [Hooker] acts like a man without a plan and is entirely at a loss what to do, or how to match the enemy, or counteract his movements. Whatever he does is the result of impulse now, after having failed, so signally, at Chancellorsville."
On the evening of June 21, Lee was ready to set the invasion of Pennsylvania in motion. In preparation for the movement into the enemy's country, Lee prepared General Orders No. 72, which specified the means by which provisions would be requisitioned from the civilian populace. In these orders Lee warned, "No private property shall be injured or destroyed by any person belonging to or connected with the army, or taken, excepting by the officers hereinafter designated." The game is about to begin.
Monday, June 22, 1863. "If you are ready to move, you can do so," Lee writes to Ewell. "I think your best course will be toward the Susquehanna...Your progress and direction, of course, depend upon the development of circumstances. If Harrisburg comes within your means, capture it." Ewell sets his corps into motion: Rodes moves from Funkstown (S0815) to Greencastle (S0604); Johnson moves from the old battlefield at Antietam (S0524) to near Beaver Creek (S1019); Early marches from Shepherdstown (S0226) to near Boonsboro (S1021). That evening the three division commanders confer with Ewell about the method by which the invasion of Pennsylvania will be carried out. It is decided that Rodes and Johnson will proceed toward Harrisburg (N4909) via Carlisle (N3312), while Early will head to York (N5826) by way of Gettysburg (S3201). Jenkins' cavalry brigade, moving ahead of Rodes' division, skirmishes with a company of the 1st New York (Lincoln) Cavalry just north of Greencastle. On the Union side, two New York militia regiments (8th and 71st, under the command of General Joseph Knipe) which had been deployed to Chambersburg (N0930) to help protect crews repairing a railroad bridge destroyed by Jenkins' men during their foray here a week previously, are ordered to withdraw to Carlisle by train upon learning of the Rebels' approach. Their departure is so hasty that they leave behind their tents, rations, two cannon, and several companies from the 71st Regiment. Meanwhile in Harrisburg, fresh militia regiments raised for the current emergency, mostly in Pennsylvania and New York, are arriving every day. With these second-rate troops, General Darius Couch, recently a corps commander in the Army of the Potomac and now commander of the Department of the Susquehanna, is preparing to defend Pennsylvania's capital.
Tuesday, June 23, 1863. Early in the morning, Jenkins' cavalry re-enters Chambersburg. They had occupied the town for a short time in the previous week before retiring to Hagerstown. Rodes' division moves but a short distance this day from Greencastle to Marion (N0633) while waiting for Johnson's division to come up from Boonsboro. Early's division marches to Waynesboro (S1406) via Cavetown (S1313), Smithsburg (S1412), and Ringgold (S1409). Marching hard down the Shenandoah Valley from Winchester, A.P. Hill's III Corps reaches the Potomac at Shepherdstown (S0226) and prepares to cross into Maryland the following day. Longstreet's men are not far behind. At Harpers Ferry (S0633), the Union garrison including the refugees from the recent disaster at Winchester prepare for the worst as parts of Lee's army pass less than ten miles away. With some trepidation, they recall the fate of Harpers Ferry in the Antietam campaign, when Stonewall Jackson surrounded the town and forced the surrender of 12,500 Union troops. Hooker shows some inclination to rescue Harpers Ferry by ordering Howard's XI Corps to march there as rapidly as possible. However, he countermands this order the next day.
Wednesday, June 24, 1863. Headed by a regimental band playing the jaunty Southern jig "Bonnie Blue Flag", Rodes' division enters Chambersburg. Johnson's division is not far behind. Jenkins' cavalry brigade advances from Shirks Hill (N1026) to Shippensburg (N1621), supported by Daniel's brigade of Rodes' division. In Chambersburg, the largest town north of Mason's and Dixon's Line occupied by the Army of Northern Virginia so far in the war, Ewell imposes a levy on the town for 50,000 pounds of bread, 100 sacks of salt, 500 barrels of flour, 11,000 pounds of coffee, 10,000 pounds of sugar, 100,000 pounds of hard bread (crackers), and dozens of miscellaneous items such as horseshoes, nails, rope, and even Neat's foot oil. Meanwhile Early's division moves from its encampment at Waynesboro to Greenwood (N1731) via Quincy (S1403) and Altodale (S1401). At Shepherdstown, A.P. Hill's III Corps fords the Potomac and advances as far as Boonsboro. Two-thirds of Lee's army is now in Maryland and Pennsylvania. In the Union camp, alarming intelligence reports of the Confederate advance into Maryland and Pennsylvania reach Hooker's headquarters at Fairfax Courthouse, Virginia. The entire Army of the Potomac is still on the Virginia side of the Potomac and the Lincoln administration in nearby Washington has become deeply concerned. Much to Hooker's credit, however, he has been preparing to move his army north of the Potomac for several days. Indeed, Federal engineers have just completed two pontoon bridges at Edwards' Ferry, near Leesburg.
Thursday, June 25, 1863. Ewell's II Corps makes no major moves throughout the day. Instead, "Old Bald Head" is content to rest, collect supplies from the burghers of Chambersburg, and wait for A.P. Hill's corps to come up from Boonsboro. Hill's three divisions make it as far as Hagerstown by day's end, a march of only about ten miles. Pickett's division, at the head of Longstreet's I Corps, fords the Potomac at Williamsport (S0116). Back in northern Virginia, Lee considers how to best utilize JEB Stuart's five cavalry brigades, which have been guarding the Army of Northern Virginia's eastern flank in Fauquier County. A few days previously, Stuart had suggested to Lee a raid around Hooker's army. Lee agreed, specifying that "If you find that [Hooker] is moving northward, and that two brigades can guard the Blue Ridge and take care of your rear, you can move with the other three into Maryland, and take position on General Ewell's right, place yourself in communication with him, guard his flank, keep him informed of the enemy's movements, and collect all the supplies you can for the use of the army." The next day Lee noted to Stuart, "You will, however, be able to judge whether you can pass around their army without hindrance, doing them all the damage you can." Still stinging from the criticism he had received in the Richmond press over the recent affair at Brandy Station, Stuart eagerly sets out in the morning with the brigades of Hampton, Fitz Lee, and Rooney Lee (now commanded by Chambliss). Robertson's and Jones's brigades are left behind to guard the rear of Lee's army. Passing through the Bull Run Mountains near Hay Market, Stuart's troopers barely avoid Hancock's II Corps of the Army of the Potomac, which is marching northward to Edwards' Ferry on the Potomac. At Army of the Potomac headquarters, Hooker decides to throw his army into Maryland in pursuit of Lee. Under the command of General John F. Reynolds, a wing of three corps (XI, I, and III), as well as Stahel's cavalry division, cross the Potomac at the Edwards' Ferry pontoon bridges. In the lead, Howard's XI Corps reaches Jefferson (S1730) by nightfall. Lockwood's brigade of infantry, from the defenses of Baltimore, departs Ellicott Mills (S5833) for Frederick (S2326) to join Hooker.
Friday, June 26, 1863. The entire infantry force of the Army of Northern Virginia is now on Northern soil as McLaws' and Hood's divisions of Longstreet's I Corps cross the Potomac at Williamsport. Just up the turnpike at Hagerstown, A.P. Hill's III Corps, accompanied by General Lee, plods northward to Chambersburg by way of Greencastle. In the lead, Heth's division turns east on the Gettysburg Turnpike when it reaches Chambersburg, camping that evening at Fayetteville (N1531). Meanwhile, Ewell's corps continues its advance into the heart of Pennsylvania. Jenkins' cavalry marches from Shippensburg toward Carlisle (N3312), encountering almost no resistance. Rodes' and Johnson's divisions undertake an easy 11-mile march from Chambersburg to Shippensburg, where further requisitions are imposed upon the townspeople. Early's division, accompanied by a small cavalry force from the 17th Virginia Cavalry and 35th Virginia Cavalry Battalion, transits Newman's Pass through South Mountain en-route to Mummasburg (N2932) and Gettysburg (S3201). Shortly after leaving his camp at Greenwood, Early comes to Pennsylvania Congressman Thaddeus Stevens' Caledonia Iron Works (N1931). Early orders the place burned "in retaliation for the various deeds of barbarity perpetrated by Federal troops." Four miles north of Gettysburg, a Pennsylvania militia regiment (the 26th), sent out from Harrisburg by train to search for the Rebels, is scattered by Early's men, with 174 taken prisoner. So far in the campaign Lee has every reason to be pleased, for he has already fulfilled some of his major objectives. Most important, Virginia is being spared another military campaign, while it is now the North's turn to feel the blunt effects of war. Furthermore, whatever grand plans Joe Hooker had for his Army of the Potomac this summer have long since been forgotten. In the Union camp, Reynolds' wing of the Army of the Potomac floods into the valley between South Mountain and Catoctin Mountain, preparing to defend the South Mountain passes at Turner's Gap (S1323) and Crampton's Gap (S1128) against any Rebel incursions. By dusk Howard's XI Corps is at Middletown (S1725), Reynolds' I Corps is at Jefferson (S1730), and Sickles' III Corps (actually under the command of General David Birney during Sickles' absence) is at Point of Rocks (just off-map, near Catoctin Switch S1633). Meanwhile, Hancock's II, Meade's V, and Slocum's XII Corps cross the Potomac into Maryland at Edwards' Ferry, heading for Frederick. At Harpers Ferry, General William French formerly a division commander in the II Corps assumes command of the Union garrison of some 9,000 troops. In northern Virginia, JEB Stuart's three cavalry brigades travel in a 22-mile arc from Buckland to Wolf Run Shoals on the Occoquan River. Stuart is behind schedule and has a long way to go to fulfill the objectives set forth by Lee, and his men and horses are already tired and hungry from their exertions so far in the campaign. Remarkably, at a point when Stuart is sorely needed by Lee and Ewell, he is separated from the main body of the Army of Northern Virginia by 85 miles and from Ewell's II Corps by over 100 miles. Moreover, the entire Army of the Potomac is situated between him and his comrades.
Saturday, June 27, 1863. Sedgwick's VI Corps and two cavalry divisions cross the Potomac at Edwards' Ferry, and so by the end of the day the entire Army of the Potomac is on Maryland soil. Reynolds' advance wing, consisting of the I, III, and XI Corps, is bivouacked near Middletown (S1725); Meade's V Corps, along with the army's reserve artillery, is near Frederick; Hancock's II Corps is at Barnesville (off-map, near S2734); Slocum's XII Corps is at Knoxville (S1132); and Sedgwick's VI Corps is at Poolesville (off-map, near S2334). Although Hooker is rapidly closing the distance between his forces and Lee's army, his petulant personality is in full flower. He is asking for the use of French's 9,000 men at Harpers Ferry in the advance against Lee, a move which would necessitate the abandonment of that post. "My original instructions require me to cover Harpers Ferry and Washington," Hooker writes to Halleck. "I have now imposed upon me, in addition, an enemy in my front of more than my number [sic]. I beg to be understood, respectfully, but firmly, that I am unable to comply with this condition with the means at my disposal, and earnestly request that I may at once be relieved from the position I occupy." In Washington, President Lincoln is concerned about a nasty rumor that Hooker was recently absent without leave from the army. "It did not come from the newspapers, nor did I believe it," Lincoln writes to Hooker, "But I wished to be entirely sure it was a falsehood." Nevertheless, Lincoln fully understands that Hooker has lost the respect of most of his senior corps and division commanders. He therefore decides to relieve Hooker from command of the Army of the Potomac. Rodes' and Johnson's divisions of Ewell's II Corps march more than 20 miles today from Shippensburg to Carlisle, Rodes travelling by the Harrisburg Pike and Johnson via the Walnut Bottom Road. As usual Jenkins' cavalry marches ahead of the infantry. In the face of this Rebel onslaught, Knipe's tiny brigade of two New York militia regiments retreats from its defensive position on Stony Ridge (N3810) to the defenses of Harrisburg (N4710). In the meantime, Early's Rebel division moves from the Gettysburg area through Hunterstown (N3631), New Chester (N3930), Hampton (N4128), and Berlin (N4528), camping on the road between Berlin and Dover (N5223). Back in Franklin County the main body of Lee's army concentrates near Chambersburg. A.P. Hill's III Corps camps east of town on the Gettysburg Pike near Fayetteville, while Longstreet's I Corps bivouacs in and around Chambersburg itself. Lee has some 45,000 men here, well-positioned to defend his lines of communication to the Potomac or to advance deeper into Pennsylvania. However, Lee has no cavalry: Jenkins is at Carlisle with Ewell; Jones's and Robertson's brigades are still in the Shenandoah Valley; and JEB Stuart's three brigades are only now approaching the Potomac in Fairfax County, Virginia in their raid behind Union lines. Due to this deficiency, Lee is completely unaware that the Army of the Potomac has crossed the Potomac into Maryland and is concentrating at Frederick. As a result, Lee still regards the campaign more as a raid to plunder Pennsylvania rather than an offensive against Hooker's army. Had he known of the Federals' rapid approach, he would probably have recalled Ewell to Chambersburg, or concentrated his entire army at Gettysburg. Here he would have been in good position to threaten Baltimore and Washington.
Sunday, June 28, 1863. Most of Lee's army rests. One of the few active units is Early's division, which seizes York (N5826). Even though it is the Sabbath day, Early imposes severe requisitions on the citizens of York, most of which are complied with. Meanwhile, Early sends one of his brigades (Gordon's) eastward to seize the bridge over the Susquehanna at Wrightsville (off-map). As Gordon approaches the town, however, the Pennsylvania militia burns the bridge. The immense smoke cloud from the conflagration can be seen for miles. Jenkins' cavalry brigade marches eastward on the Harrisburg Pike to Mechanicsburg (N4311) to scout the enemy's Harrisburg defenses. General Ewell expects that Rodes' and Johnson's infantry divisions will move up to attack Harrisburg on the following day. Just east of Mechanicsburg, Jenkins' troopers skirmish with Yankee militia at Oyster Point (N4710). The firing from this engagement can be heard in Harrisburg, only three miles distant. By this time more than 15,000 Federal militiamen, mostly from New York and Pennsylvania, have gathered in Harrisburg and nearby Marysville (N4603) to contest Ewell's expected attempt to cross the Susquehanna. Stuart's cavalry also has an eventful day. They move from the Potomac to Rockville, Maryland less than ten miles from the defenses of Washington. Here the Rebel troopers encounter a massive Federal wagon train en route for the Army of the Potomac at Frederick. In the ensuing chase, Stuart's men capture 125 wagons and 400 prisoners. "The wagons were brand new, the mules fat and sleek and the harness in use for the first time," recalls the commanding officer of a Virginia cavalry regiment. "Such a train we had never seen before and did not see again." Although Stuart's capture of the wagon train is a marked success for him, the chase consumes precious time. He knows he is behind schedule, for he orders his men to ride northward almost all night long. By dawn of the 29th, his leading elements are at Cooksville (S4531), a few miles short of the Baltimore and Ohio Railroad. June 28th is a momentous day in the history of the Army of the Potomac. At 3:00 that morning, Major General George G. Meade, commander of the V Corps, is woken up by an officer bearing news from Washington. Hooker has been relieved of command of the Army of the Potomac by President Lincoln, and Meade has been appointed in his place. Frederick Law Olmsted, the famous American landscape architect (and later designer of Central Park in New York City), describes Meade as "simple, direct, deliberate and thoughtful in manner of speech and general address...He is a gentleman and an old soldier." Meade changes little of the Army of the Potomac's deployment during the day, except to concentrate the army even further at Frederick. By nightfall five of the army's seven infantry corps (I, II, V, XI, and XII) are encamped in and around the town. The III Corps is at Woodsborough (S2819) and the VI Corps is at Hyattstown (off-map, near S2934). Meanwhile, Buford's cavalry division, consisting of the brigades of Devin, Gamble, and Merritt, takes position on the army's western flank at Middletown. Gregg's cavalry division, comprised of Huey's, Gregg's, and McIntosh's brigades, deploys on the opposite flank at New Market (S3128) and Ridgeville (S3729). Finally, Stahel's cavalry division at Frederick receives a new commander, General Judson Kilpatrick. It is also assigned two new brigade commanders: the 1st under Farnsworth and the 2nd under George Armstrong Custer.
Suddenly a remarkable development: A Confederate scout by the name of Harrison arrives at Longstreet's headquarters near Chambersburg. The entire Yankee army, according to this man, is not only north of the Potomac, but is concentrating at Frederick a march of only two days from Chambersburg. Lee is surprised to hear this news. "In the absence of the cavalry, it was impossible to ascertain [Hooker's] intentions," Lee later notes. "It was expected that as soon as the Federal Army should cross the Potomac, General Stuart would give notice of its movements, and nothing having been heard from him since our entrance into Maryland, it was inferred that the enemy had not yet left Virginia."
Monday, June 29, 1863. Lee makes a critical decision: He will call off Ewell's advance on Harrisburg and concentrate the Army of Northern Virginia east of the South Mountain chain somewhere near Cashtown (N2532). Why does Lee do this, when he could concentrate his army west of the mountains and invite the Federals to come to him on terrain of his own choosing? He later explains his reasoning in his official report of the campaign: He wished "to deter [Meade] from advancing further west, and intercepting our communications with Virginia." Despite Lee's decision, the Army of Northern Virginia remains strangely passive on the 29th. Only Heth's infantry division of Hill's III Corps is put into motion, marching from Fayetteville through Newman's Pass to Cashtown, a distance of only about ten miles. Lee sends word to Ewell to call off the attack on Harrisburg and "move in the direction of Gettysburg, via Heidlersburg, where you will have the turnpike most of the way, and you can thus join your other divisions to Early's...When you come to Heidlersburg, you can either move directly on Gettysburg or turn down to Cashtown." However, Ewell fulfills this order only partially. In the afternoon, Johnson's division starts to move back toward Chambersburg, rather than Gettysburg, carrying with it much booty and the entire corps artillery train. Rodes' division remains at Carlisle for the moment. Meanwhile, Jenkins' cavalry continues to skirmish with the Yankee militia in the environs of Harrisburg. In York, Early does not hear of Lee's new scheme until evening. His men spend the day resting and collecting provisions from local merchants and farmers. Back in Maryland, Stuart's escapades continue. In the morning, his troopers advance to the Baltimore and Ohio Railroad near Hood's Mill (S4529) and Sykesville (S4828) and hastily tear up some track. The damage, however, is insignificant. From there Stuart moves straight north to Westminster (S4516), driving off a squadron of Federal horsemen from the 1st Delaware Cavalry which has been sent out on a reconnoitering mission from the Baltimore defenses. In the evening the Rebel troopers move a few miles north on the Baltimore Pike to Union Mills (S4411), where they encamp. In all his adventures, Stuart has gained absolutely no intelligence of Ewell's whereabouts. Furthermore, he is providing no information to Lee concerning Union movements. In the Union camp the new commander of the Army of the Potomac demands a great deal in leg power of his men and receives it. Reynolds' advance wing of the army, consisting of the I and XI Corps, marches all the way from Frederick to Emmitsburg (S2709), a distance of more than 20 miles. Reynolds' remaining corps (the III under Sickles) moves to Taneytown (S3611). In the meantime, Hancock's II Corps moves to Uniontown (S3915); Sykes' V Corps to Liberty (S3221); Slocum's XII Corps (and the army's artillery reserve) to Bruceville (S3314); and Sedgwick's VI Corps to New Windsor (S3918), where they are joined by Gregg's cavalry division from Ridgeville. The Army of the Potomac's march on the 29th is probably its most rapid of the entire war. It is an amazing physical and logistical accomplishment given that Meade has had only one full day as army commander. Meade orders his cavalry to probe for the Rebels ahead of his hard-marching infantry. Buford's cavalry division is the first Army of the Potomac unit to move north of Mason's and Dixon's Line in the campaign, riding all the way from Middletown, Maryland to Fairfield, Pennsylvania (S2504). Here, Buford later notes, "The whole community seemed stampeded, and afraid to speak or to act, often offering as excuses for not showing some little enterprise, 'The Rebels will destroy our houses if we tell anything.'" Buford leaves one of his brigades, under Merritt, in reserve near Mechanicstown (S2314). Fifteen miles to the east of Buford, Kilpatrick's cavalry division performs a similar reconnoitering mission in front of Meade's infantry, probing northward from Frederick to Littlestown (S4006).
Tuesday, June 30, 1863. June 30th is a day of calm before the storm. Due to his lack of cavalry, Lee is completely unaware that the enemy is rapidly approaching the Mason-Dixon Line. Indeed, Buford's Union cavalry division at Fairfield is less than six miles away from the leading elements of A.P. Hill's corps at Cashtown. Had Lee known that Meade's army was in such close proximity and was also moving with such unaccustomed speed he would have done much more to prepare for the inevitable battle. Instead, much of the Army of Northern Virginia remains inactive. Among the three divisions of Hill's corps, only Pender's makes any appreciable move, marching from Fayetteville to Cashtown to join Heth. A single brigade from Heth's division (Pettigrew's) advances from Cashtown toward Gettysburg to requisition much-needed shoes from the locals. Pettigrew, however, returns to Cashtown when he encounters Federal cavalry pickets a few miles from Gettysburg (N2933). Anderson's division remains in camp at Fayetteville. Hood's and McLaws' divisions of Longstreet's I Corps march only eight miles from Chambersburg to Greenwood (N1731) -- this after two full days of rest. Hood detaches Law's brigade to New Guilford (N1432) to watch for any Federals approaching from the south. Pickett's division remains in Chambersburg guarding the army's supplies, a duty that could have been performed by a cavalry unit had Stuart been present. Clearly the Army of Northern Virginia is not expecting to meet the enemy in the next 24 hours. On Ewell's front, Johnson's division continues its return journey from Carlisle to Chambersburg, reaching Scotland (N1226) by nightfall. Rodes' division makes a furious 20-mile march from Carlisle to Heidlersburg (N3627). Here it joins with Early's division, which has just made an equally stressful return journey from York. Neither Rodes nor Early know where they are headed tomorrow. According to a message from Lee, it may be Cashtown or Gettysburg, "as the circumstances might dictate." At Union Mills, Stuart's cavalry gets an early start in its search for Ewell's II Corps. Proceeding to Hanover (S4503), they clash with Union cavalry from Kilpatrick's division, which has just moved into town from nearby Littlestown. In the skirmish, Stuart is very nearly captured by the surprisingly aggressive Yankee cavalry. Stuart's three brigades then follow the Hanover Branch Railroad out of town to Jefferson (N5334) and then head north. When they turn in for the night they have reached Dover (N5223). In the evening, Stuart crosses the road used by Early's division in its march from York to Heidlersburg earlier that same day. Remarkably, Stuart remains utterly unaware of the close proximity of friendly troops. Had he turned west for Gettysburg at Dover, he probably would have made it in time to join in the July 1st battle. After its furious marching on the previous day, most of the Army of the Potomac slows down on June 30. Reynolds' advance wing does little except to adjust its position. Only his own I Corps advances closer to the enemy, moving a short distance from Emmitsburg to Moritz Tavern (S2907). Here they are only eight miles from Gettysburg. Meanwhile, Sykes' V Corps moves up from Liberty to Union Mills (S4411), which had been occupied by Stuart's troopers earlier that morning. Slocum's XII Corps advances to Littlestown, and the artillery reserve to Taneytown (S3611). Finally, Sedgwick's VI Corps, accompanied by Gregg's cavalry division, marches from New Windsor to Manchester (S5111). Meade's decision to occupy Manchester, far to the east of his headquarters at Taneytown, reveals that he like Lee is not aware of the enemy's real dispositions and does not expect battle on the following day. Buford's cavalry division (minus Merritt's brigade) moves from Fairfield to Gettysburg by a roundabout route via Emmitsburg (S2709). Outside of Gettysburg, the Union troopers skirmish with Pettigrew's brigade of Heth's division. General Meade issues a circular to his troops. It concludes: "Corps and other commanders are authorized to order the instant death of any soldier who fails in his duty at this hour." On the Harrisburg front the Union militia probes westward toward Mechanicsburg following the departure of Jenkins' Rebel cavalry from the Oyster Point area (N4710). The capital of Pennsylvania is, for the moment, secure. At Meade's direction, French's 9,000-strong garrison at Harpers Ferry abandons that post even though the Army of Northern Virginia is 50 miles distant to the north. Two brigades head for Frederick to guard that town and other important points on the Baltimore and Ohio Railroad. Two other brigades remain until July 2, to help haul away stores, returning to Washington by way of the Chesapeake and Ohio Canal. That night, at Cashtown, A.P. Hill declares to his subordinate Heth: "The only force at Gettysburg is cavalry, probably a detachment of observation. I am just from General Lee, and the information he has from his scouts corroborates that I have received from mine -- that is, the enemy are still at Middleburg (S3415), and have not struck their tents." "If there is no objection, I will take my division tomorrow and go to Gettysburg and get those shoes," says Heth. "None in the world," replies Hill.
Wednesday, July 1, 1863. As he approaches Gettysburg, Heth is surprised to discover more than a "detachment of observation" blocking his path. Instead it is Buford with two Yankee cavalry brigades. Buford's troopers, armed with breech-loading carbines, skirmish with Heth, forcing the Rebels to deploy into line of battle (N3033). Wadsworth's division, at the head of the Union I Corps, arrives on the field of battle and routs two of Heth's overconfident brigades. However, General Reynolds, commander of the I Corps, is killed in the action. Although the battle has gone badly for the Rebels so far, reinforcements are at hand. Pender's "Light" division is close behind Heth on the Chambersburg Pike, and Rodes' and Early's divisions of Ewell's II Corps are marching to the sound of the guns from the north. Early moves directly to Gettysburg from Heidlersburg; Rodes first moves to Middletown (N3129) before receiving word to turn south to Gettysburg. On the Union side Howard's XI Corps arrives on the battlefield shortly before noon. Two divisions (Barlow's and Schurz's) form line of battle on the I Corps's right, just north of Gettysburg (N3233). The remaining division (von Steinwehr's) is held in reserve at Evergreen Cemetery (S3202, known as "Cemetery Hill"). At about 2:00 PM, the Confederates resume the offensive. Rodes' division, however, is severely repulsed when it attacks Robinson's Union division on the right flank of the I Corps line (N3134). When he reaches the field, Lee cannot be happy with the results of the battle so far. "I am not prepared to bring on a general engagement today," he says to Heth. "Longstreet is not up." But suddenly Confederate fortunes take a better turn. At about 3:30, Early's division deploys for an attack on the east bank of Rock Creek (N3333), unbeknownst to the Federals. His furious attack crushes Barlow's division and forces the XI Corps to retreat into Gettysburg (S3201). Shortly thereafter Pender's Rebel division attacks the Union I Corps line near the Lutheran Theological Seminary (N3134) and forces it back through town. The disorganized remnants of the Union I and XI Corps retreat to Evergreen Cemetery and prepare to make a stand. The Rebels, however, are almost as worn out and disorganized from the day's fight as their opponents. Furthermore, the nearest Rebel reinforcements, Anderson's and Johnson's divisions, do not arrive in time to resume the assault by day's end. That evening Union troops of the I Corps occupy the critical position at Culp's Hill (S3302). By nightfall scattered units in both armies have received news of the fight at Gettysburg and are proceeding in haste to that place. Significantly, Pickett's division of Longstreet's I Corps remains at Chambersburg guarding Lee's supply line. But what of Stuart and his cavalry? Dawn of July 1 finds Stuart at Dover, Pennsylvania. He gets an early start with Fitz Lee's brigade and heads for Carlisle, where he hopes to find Ewell. Moving by way of Dillsburg (N4217), Stuart arrives at Carlisle only to find it occupied by Union militia under the command of General William "Baldy" Smith. Late that night, after a desultory shelling of Union positions in Carlisle, Stuart receives word from Lee about the battle at Gettysburg earlier that morning. After burning the Carlisle Barracks army post, Stuart immediately turns south with his three exhausted brigades -- two of which are still strung out on the Carlisle-Dillsburg road -- and heads for the scene of action. They have been in the saddle for seven long days.
Thursday, July 2, 1863. In contrast to the whirlwind action of the previous day, there is quiet along the battle-lines at Gettysburg throughout the morning and early afternoon as Lee and Meade gather and deploy their forces for a second round of battle. Meade arranges his forces in a "fishhook" configuration, with Slocum's fresh XII Corps on the right at Culp's Hill, the battered I and XI Corps on Cemetery Hill, and the II and III Corps on the left, near the prominent hill known as "Round Top" (S3203). Sykes' V Corps is in reserve and Sedgwick's VI Corps is marching hard from Manchester by way of Littlestown. In the Confederate camp, Lee decides to resume the offensive by attacking the Union left with Longstreet's I Corps (minus Pickett's division), aided by a diversionary effort by Ewell against the Union right at Culp's Hill. In attempting to avoid observation by Union signalmen, Longstreet takes an extraordinary amount of time to deploy his two divisions for battle (S3002 and S3003). Indeed, he is not ready to attack until 4:00 PM, even though Lee had expected the assault to be made well before noon. But by mid-afternoon the situation on the Union side of the hill has changed dramatically. Sickles, on his own initiative, advances his two divisions from their position on Cemetery Ridge to a new line centered on a small peach orchard (S3103) about one-half mile to his front. Here his men have better fields of fire, but Sickles' awkward deployment leaves them vulnerable to enemy enfilade fire and a flank movement. Furthermore, Sickles does not occupy Round Top and the smaller and more important adjacent hill, Little Round Top, which several Union officers recognize as the key to the Federals' left flank. Longstreet opens his attack with Hood and McLaws at 4:00 PM. The battle rages until dusk. When it is over, Sickles' line has been broken and his disorganized troops have fallen back to their former position on Cemetery Ridge (S3203). The Federals, however, retain control of the Round Tops and manage to stabilize their line by effectively shifting fresh troops to threatened points. Indeed, Longstreet's failure to break the Union line may be attributed to a lack of support by nearby units to exploit local successes. Only Anderson's division enters the fight in aid of Longstreet and then only very late in the day. Had Pickett's division or Stuart's cavalry been available to help Hood and McLaws, the result could have been different. In contrast Meade fights Longstreet with all or part of four corps; in addition, Sedgwick's VI Corps arrives on the scene at the end of the day, but does not enter the battle. Meanwhile, Ewell's "demonstration" against the Union right turns into a full-fledged assault. At dusk Johnson's division fails to take Culp's Hill, even though Union strength there has been stripped to a minimum to reinforce Meade's left. However, Johnson manages to occupy a key position vacated by the Yankees near Rock Creek, on the extreme right of their line. From here the Rebels plan to resume the attack on the following day. At sunset Early's division also achieves some local success against the Union stronghold on Cemetery Hill, but these gains are only temporary as timely Union reinforcements drive the Rebels down the steep slopes again. Longstreet's remaining division, commanded by Pickett, makes a long and tiresome march from Chambersburg to the environs of Gettysburg. It does not reach the battlefield in time to play a role on July 2, but Lee has plans for the division on the following day. Stuart's three cavalry brigades, absent from the army since June 25, finally reach Lee at Gettysburg. According to a witness, Lee greets Stuart coldly with these simple words: "Well, General Stuart, you are here at last."
Friday, July 3, 1863. "General, I have had my scouts out all night," Longstreet declares to Lee at an early morning meeting. "I find that you still have an excellent opportunity to move around to the right of Meade's army and maneuver him into attacking us." Lee disagrees, stating that he intends to resume the offensive for the third straight day this time with 15,000 men directly against the Union center. Longstreet is aghast. "General, I have been a soldier all my life. I have been with soldiers engaged in fights by couples, by squads, companies, regiments and armies, and should know, as well as anyone, what soldiers can do. It is my opinion that no 15,000 men ever arrayed for battle can take that position." Lee wishes to draw Meade's attention away from his center by ordering Ewell to make another attempt to wrest Culp's Hill from the enemy. Early in the morning, Johnson's division assaults the hill, but is driven back by Slocum's XII Corps. Even worse for Lee, the attack is useless as a diversion, for it is delivered long before Longstreet is ready to move against the Union center. At 1:00 PM Longstreet commences his attack with a short note to his chief of artillery: "Let the batteries open." For two hours, Yankee and Rebel artillerymen trade salvos. Then, at 3:00 PM, the Rebel infantry emerges from the wood-line on Seminary Ridge (S3102). It is a line of battle comprising nearly 15,000 men of Pickett's, Heth's, and Pender's divisions. The Confederates are met with a withering fire by Hancock's II Corps as they approach Cemetery Ridge. Part of Heth's division, shattered by artillery and musketry from its left flank, breaks for the rear only halfway into the charge. Despite terrible losses, the rest of the assault force presses on. But Longstreet is right, the attack cannot possibly succeed. Only small groups of Pickett's men make it into the Union lines, only to be driven back by the powerful array of reinforcements at Meade's disposal. It is a terrible setback for Lee, who takes the blame for the failed assault. "It is all my fault," he says. Earlier that day, Lee had directed Stuart to take his cavalry around the Army of the Potomac's right and attempt to get astride its supply line along the Baltimore Pike. With four brigades, Stuart turns south from the York Pike near Granite Hill (N3534) and encounters Custer's and McIntosh's brigades of Union cavalry. Although the ensuing battle is a draw tactically, Stuart is prevented from fulfilling the mission prescribed by Lee. After dark Lee pulls back Ewell's II Corps from its position opposite Culp's Hill to the northern end of Seminary Ridge (N3134). The Battle of Gettysburg is over.
Saturday, July 4, 1863. Lee's army remains in position all day expecting a Union counterattack. It never comes. With more than 20,000 casualties per side in the three-day fight, both armies are weak and weary. Ammunition stocks in both camps are also low, but for Lee this problem is acute. In the invasion of Pennsylvania, the Army of Northern Virginia has carried with it enough ammunition for only one major battle. That battle is now over, and Lee has not been victorious. The nearest friendly railhead is more than 150 miles away at Staunton, Virginia -- a very long and dangerous journey for wagon trains. In contrast Meade's army can be handily resupplied with ammunition from the depot at Westminster (S4516), only 25 miles away. Lee sees no alternative but retreat. In the afternoon he sets his wagon and ambulance train in motion for the mountains by way of the Chambersburg Pike. This 17-mile long column, guarded by the cavalry brigades of Fitz Lee, Hampton, and Imboden, reaches Greencastle (S0604) by morning. Although some senior officers urge Meade to launch an attack against Lee, the bulk of the Army of the Potomac remains stationary in its lines at Gettysburg. Meade's cavalry, however, probes aggressively toward the South Mountain passes at Monterey Gap (S2107) and Fairfield Gap (S2105). A detachment of the 13th Pennsylvania Cavalry from French's command at Frederick raids behind Confederate lines and destroys an enemy pontoon bridge over the Potomac at Falling Waters (S0119). This action will have significant consequences in the days ahead.
Sunday, July 5, 1863. The Army of Northern Virginia retires from Gettysburg, unmolested by the Federals. A.P. Hill's III Corps leads the retreat, followed by Longstreet's I Corps and Ewell's II Corps. The route of retreat is by way of Fairfield (S2504) and over South Mountain via Fairfield Gap and Monterey Gap. Meanwhile the Army of Northern Virginia's immense wagon train, which had left Gettysburg on the 4th, reaches Williamsport (S0116) fairly intact. Here General Lee plans to retreat his army back to Virginia. Throughout the day, Federal cavalry harasses the Confederates. Early in the morning, the brigades of Custer, Farnsworth, and Huey capture part of Ewell's wagon train in Monterey Gap (S1907). Later, Yankee cavalry from Loudon (off-map, near N0130) raids Lee's wagon train near Greencastle and captures 90 wagons and more than 600 prisoners, most of whom are wounded from the fighting at Gettysburg. Back in Washington, President Lincoln urges Meade to press hard on Lee's retreating army. However, only Sedgwick's VI Corps, which had hardly been engaged at Gettysburg, advances in the direction of the enemy. Late in the afternoon Sedgwick's men skirmish with Ewell's rearguard about two miles east of Fairfield (S2703), but the Rebels' retreat goes unchecked. Meanwhile, Smith's division of Pennsylvania and New York militia moves south from Carlisle and comes under Meade's command. Smith's 9,000 inexperienced troops will be of little value against Lee's veterans, but they march well, passing over South Mountain towards Gettysburg by way of Mt. Holly Springs (N3317) and Laurel Forge (N3021). At the same time, a second division of Federal militia is preparing to move out from Harrisburg (N4909) to Shippensburg (N1621).
Monday, July 6, 1863. The Army of Northern Virginia's retreat to Williamsport continues, its long columns snaking through Waynesboro (S1406), Ringgold (S1409), and Hagerstown (S0613). Aside from hit-and-run raids by enemy cavalry, the Federals do not interfere with the retreat. However, Lee's projected crossing site of the Potomac at Williamsport is threatened by Buford's division of Federal cavalry, which nearly captures a large Rebel supply train before being driven off by Imboden's brigade. Meanwhile, in nearby Hagerstown, Stuart's cavalry, supported by parts of Hood's infantry division, drives Kilpatrick's Union cavalry division out of town. At day's end, Lee's route to Williamsport is secure. Both Union cavalry divisions encamp for the night near Jones Crossroads (S0619). Remarkably, Meade's army has hardly moved from Gettysburg since the battle's end. The I and XI Corps, both badly battered on the first day of the battle, make a short march to Emmitsburg (S2709). The II Corps withdraws to Two Taverns (S3504) to rest. The V Corps moves to Moritz Tavern (S2907). Slocum's XII Corps retires to Littlestown (S4006). Elements of Sedgwick's VI Corps continue to probe the South Mountain gaps near Fairfield. Upon learning from Sedgwick that the gaps are strongly held by the enemy, Meade decides not to pursue along the same route already used by Lee. Instead it is his intention to move the Army of the Potomac south to Frederick (S2326) and then to march across the Catoctin and South Mountain ranges by way of the National Road (S1926). If Lee's army is still Meade's objective, this is a very circuitous route by which he can come to grips with the enemy. Furthermore, Lee has had a two-day head start on Meade and is almost at the Potomac already. Much to the annoyance of President Lincoln, it looks as if Lee has made a clean getaway. General French's command, which had evacuated Harpers Ferry at the end of June, is ordered to reoccupy the Stone Fort atop Maryland Heights (S0732). French is heavily reinforced by troops from the defenses of Baltimore and Washington, some of whom have only recently arrived from the North Carolina coast. French also deploys a brigade (Morris's) to Crampton's Gap (S1128), a critical pass in the South Mountain chain. Smith's militia continues to march well, moving from Pine Grove Iron Works (N2722) to Graffenburg PO (N2030) in Newman's Pass.
Tuesday, July 7, 1863. Meade finally moves the Army of the Potomac in earnest. The I Corps moves from Emmitsburg to Hamburg (S1920); the II Corps from Two Taverns to Taneytown; the III Corps from Gettysburg to Mechanicstown (S2314); the V Corps from Moritz Tavern to Utica (S2419); the VI Corps from Emmitsburg to Hamburg (S1920); the XI Corps from Emmitsburg to Middletown (S1725); and the XII Corps from Littlestown to Walkersville (S2722). Skirmishing intermittently with Stuart's cavalry, the cavalry divisions of Buford and Kilpatrick retire to Boonsboro (S1021). Meanwhile, Smith's division of militia marches from Graffenburg PO to Altodale (S1401). The main body of Lee's army closes in on Hagerstown. Normally the fords over the Potomac at Falling Waters and Williamsport would have been suitable at this time of year for the passage of the entire Army of Northern Virginia, including its lengthy wagon trains. However, the heavy rains of the past week have made the Potomac into an impassable torrent. Three days previously, a Yankee cavalry regiment had destroyed a Confederate pontoon bridge at Falling Waters, so now Lee has no alternative except to make a stand with his back to the river and wait for the Potomac to subside and for his engineers to build another pontoon bridge -- a task that is expected to take a week. In the meantime, the sick and wounded are ferried over the river on a couple of flat-bottomed ferry boats that have fallen into the Rebels' hands. Fortunately for Lee, his men are not being pressed hard by the enemy.
Wednesday, July 8, 1863. While waiting for the Potomac to subside, Lee and his senior officers carefully examine the ground between Williamsport and Downsville (S0219) to establish an impregnable defensive position for the Army of Northern Virginia. "I hope Your Excellency will understand that I am not in the least discouraged," Lee writes to President Jefferson Davis. "But, though conscious that the enemy has been much shattered in the recent battle, I am aware that he can be easily reinforced, while no addition can be made to our numbers." Despite his tardiness in pursuing Lee, Mother Nature has given George Meade a rare opportunity. With the recent Union triumph at Vicksburg, President Lincoln believes strongly that the war can be won in the next few days. "The opportunity to attack [Lee's] divided forces should not be lost," General Halleck writes to Meade. "The President is urgent and anxious that your army should move against him by forced marches...You will have forces to render your victory certain. My only fear now is that the enemy may escape by crossing the river." The Army of the Potomac continues its pursuit of Lee. The I Corps moves from Hamburg to Turner's Gap (S1323; the site of the Battle of South Mountain on September 14, 1862); the II Corps moves from Taneytown to Frederick; the III Corps from Mechanicstown to Ballinger Creek (S2128); the V Corps from Utica to Middletown (S1725); the VI Corps from Hamburg to Middletown; the XI Corps from Middletown to Turner's Gap; and the XII Corps from Walkersville to Jefferson (S1730). Smith's division of militia marches from Altodale to Waynesboro (S1406).
Thursday, July 9, 1863. Lee plans to deploy the Army of Northern Virginia in an extraordinarily long defensive line, with the right flank resting on the Potomac near Downsville (S0219) and the left flank anchoring on Conococheague Creek (S0113). Longstreet's I Corps will hold the southern flank of the line (around S0319), Hill's III Corps the center (around S0317), and Ewell's II Corps the northern flank (around S0414). Stuart's cavalry screens the army's front and flanks. A skirmish with Federal cavalry erupts at the bridge over Beaver Creek (S0919), near Boonsboro. Meanwhile the Confederate infantry begins to entrench in preparation for the anticipated attack by Meade. Meade reorganizes his III Corps, which had been shattered in the recent battle at Gettysburg. In place of the wounded Sickles, General William French, formerly commander of the Union garrison at Harpers Ferry, is appointed the new III Corps commander. Three brigades from French's old command (Morris's, Elliott's, and B. Smith's) are assigned to the III Corps as a new 3rd Division. The Army of the Potomac's pursuit of Lee slows. The II Corps moves from Frederick to Rohrersville (S1025); the III Corps from Ballinger Creek to Fox's Gap (S1223); the V and VI Corps from Middletown to Boonsboro; and the XII Corps from Jefferson to Rohrersville. Union reinforcements from the Department of West Virginia gather at Hancock, Maryland (off-map, near S0113) with orders to move in behind Lee on the north bank of the Potomac. Meanwhile several brigades from the Washington defenses are being dispatched to Maryland Heights (S0732) on the Baltimore and Ohio Railroad. "The evidence that Lee's army will fight north of the Potomac seems reliable," Halleck writes to Meade. "In that case you will want all your forces in hand...I shall do everything in my power to re-enforce you. I fully appreciate the importance of the coming battle."
Friday, July 10, 1863. "It would appear to be the intention of the enemy to deliver battle, and we have no alternative but to accept it if offered," Lee writes to President Davis. While waiting for the Potomac to subside, the Army of Northern Virginia strengthens its long defensive line covering the Williamsport and Falling Waters crossing sites. A Union officer would later remark that the Rebel fortifications here were "built as if they [were] meant to stand a month's siege." The Army of the Potomac finally begins to close in on Lee. The II, III, and XII Corps cross Antietam Creek north of Keedysville (S0820) and concentrate on the east side of Marsh Run near Tilghmantown (S0520). Here they can observe Longstreet's corps entrenching near Downsville. Meade's other four infantry corps bivouac on the east bank of the Antietam (S0820). Meanwhile, Meade's cavalry moves north from Boonsboro to Funkstown (S0815). The Federals are now in good position to attack Lee on the following day.
Saturday, July 11, 1863. Meade does nothing of significance on this day except to advance the II and XII Corps a mile or two northward up the east bank of Marsh Run. With the Federals in plain view, the Rebels redouble their efforts at fortifying their lines.
Sunday, July 12, 1863. As Lee waits and worries, Meade for the second straight day does little except to cautiously advance elements of his army. Today only the I, VI, and XI Corps move, marching from the south side of Beaver Creek near Boonsboro to Funkstown (S0815) only six miles distant. Meade writes to Halleck: "It is my intention to attack them tomorrow, unless something intervenes to prevent it, for the reason that delay will strengthen the enemy and will not increase my force."
Monday, July 13, 1863. But Meade does not attack. "Upon calling my corps commanders together and submitting the question to them, five out of six were unqualifiedly opposed to it," Meade writes to Halleck. "Under these circumstances, in view of the momentous consequences attendant upon a failure to succeed, I did not feel myself authorized to attack until after I had made more careful examination of the enemy's position, strength, and defensive works. These examinations are now being made." An angry Halleck telegraphs back: "You are strong enough to attack and defeat the enemy before he can effect a crossing. Act upon your own judgment and make your generals execute your orders. Call no council of war. It is proverbial that councils of war never fight...Do not let the enemy escape." With great relief, the Rebels determine that the Potomac is finally subsiding. More important, the pontoon bridge at Falling Waters (S0119) is completed by noon and Lee's 4,000 wagons begin to move to the Virginia side. "All thought we should surely have a desperate battle, but the firing soon ceased and comparative quiet reigned along the lines most of the day," a Confederate staff officer later recalls.
Tuesday, July 14, 1863. Starting before dawn, Lee's army slips over the Potomac to the Virginia side with little or no interference from the Army of the Potomac. Longstreet's and Hill's corps cross over on the Falling Waters pontoon bridge; Ewell's corps fords the Potomac at Williamsport, where the water is up to the soldiers' chests. A Confederate officer remarks that 8,000 pairs of shoes are lost in the crossing. Meade prepares to attack in the morning only to discover that the Rebels have departed. Halleck wires to Meade: "I need hardly say to you that the escape of Lee's army without another battle has created great dissatisfaction in the mind of the President, and it will require an active and energetic pursuit on your part to remove the impression that it has not been sufficiently active heretofore." The Gettysburg campaign is over.
Gazetteer
By Joseph M. Balkoski (2017 updates by Ed Beach)
The following gazetteer should enhance the players' feel for the region portrayed on the Roads to Gettysburg map:
Col. Washington's House (S0333): Also known as Beall Air, this house was built in 1800. During the Civil War, the home was owned by Lewis Washington, George Washington's great grand-nephew. On the morning of John Brown's Harpers Ferry raid (October 17, 1859), Washington was seized here by some of Brown's men and taken as a hostage to Harpers Ferry. The house still stands.
Chamber's Farm (S0533): During the siege of Harpers Ferry in September 1862, Federal defensive lines were situated here and in the adjacent hex (S0532, Bolivar Heights).
Harpers Ferry/Bolivar (S0632): Situated at the confluence of the Potomac and Shenandoah Rivers, the view from the heights above Harpers Ferry was described by Thomas Jefferson as "worth a trip across the Atlantic." During the Civil War, few sites in America were more significant militarily. For the North, control of Harpers Ferry and its surrounding heights was vital because the Baltimore and Ohio Railroad, the most direct link with the western states, crossed the Potomac here. Furthermore, another key transportation artery, the Chesapeake and Ohio Canal, passed Harpers Ferry on the Maryland side the Potomac. The federal arsenal and armory, built here in 1796, were the targets of John Brown's raid in October 1859. Much of the old town is now under the auspices of the National Park Service, and it is a "must" stop for Civil War tourists.
Naval Battery (S0732): This position on Maryland Heights dominated Harpers Ferry and the surrounding area. During the siege of Harpers Ferry in September 1862, the failure of Colonel Thomas Ford's Federal brigade to hold the mountain crest against an attack by McLaws' division led to the Union abandonment of Maryland Heights and the Naval Battery -- an event which helped precipitate the Union decision to surrender the 12,500-strong Harpers Ferry garrison. (See Here Come the Rebels!) Today, visitors can take a steep walking path to reach the Naval Battery. Further up the slope of Maryland Heights are the ruins of the "Stone Fort," a Union redoubt built after the Antietam campaign.
Boteler's Ford (S0327): The Potomac ford used by A.P. Hill's "Light" Division during its epic march from Harpers Ferry to Sharpsburg on September 17, 1862. (See Here Come the Rebels!) Johnson's division of Ewell's II Corps, Army of Northern Virginia, also crossed the Potomac here during the Gettysburg campaign in June 1863.
Ferry Hill Place (S0326): The home of Henry Kyd Douglas, one of Stonewall Jackson's most trusted aides. Douglas authored I Rode With Stonewall, one of the classic memoirs of the Civil War. After the war, Douglas became commander of the Maryland National Guard. The house still stands.
Shepherdstown (S0226): Shepherdstown traces its origins to the early 18th century. Its original German settlers christened the town Mecklenburg, but its name was changed in 1798.
Duffield's Depot (S0130): This station on the Baltimore and Ohio Railroad was raided by Mosby's Confederate partisans on June 29, 1864. The Rebels referred to the operation as the "Calico Raid" because of the large quantity of fancy ladies' fabric carried off by the raiders from the depot.
Falling Waters (S0119): Here, on the night of July 13, 1863, two-thirds of Lee's Army of Northern Virginia escaped across the Potomac on pontoon bridges from Maryland to Virginia, thereby bringing the Gettysburg campaign to a close. At the same time, the remainder of Lee's army forded the Potomac at Lights Ferry near Williamsport (S0116). Falling Waters earned its name due to the Potomac's nearby three-foot waterfall. Note: Falling Waters is actually situated on the Virginia side of the Potomac (Hex W1607 on the Here Come the Rebels! map), but is placed on the mapedge on the Maryland side on the Roads to Gettysburg map so that the players can see Lee's primary Potomac crossing site during the Gettysburg campaign.
Williamsport (S0116): Founded in 1787, Williamsport petitioned Congress in 1791 to be selected as the country's new national capital. President George Washington inspected the town and denied its petition because it was situated above the Potomac's head of navigation. Instead, Washington selected a marshy area near Georgetown for the national capital and the rest is history.
Downsville (S0219): Following the Army of Northern Virginia's defeat at Gettysburg, Lee retreated to the Potomac, formed line of battle, and awaited Meade's attack. This little crossroads village was the right flank of Lee's line as he waited for the swollen Potomac to subside.
St. James College (S0418): This preparatory school was founded in 1842. Most of its students fought for the South in the Civil War. The school buildings occupied a key point in Lee's defensive position around Williamsport following the retreat from Gettysburg.
Hagerstown (S0613): The county seat of Washington County, Maryland since 1776. Much of Longstreet's wing of the Army of Northern Virginia occupied Hagerstown prior to the Battle of South Mountain on September 14, 1862. A severe cavalry engagement took place in the streets of Hagerstown on July 6, 1863 during Lee's retreat from Gettysburg. In the battle, Captain Ulric Dahlgren of the Union cavalry suffered a wound in the foot and had a leg amputated. His father, Admiral John Dahlgren, encased the leg in a brick wall in the Washington Navy Yard. Young Dahlgren (by then a colonel) was killed in the Kilpatrick raid on Richmond on March 3, 1864.
Funkstown (S0815): Now a suburb of Hagerstown, General Meade observed the Confederate line of battle around Williamsport from Funkstown at the close of the Gettysburg campaign, July 10 to 14, 1863.
Ringgold (S1409): This village was founded in 1825 and was originally named Ridgeville. Its name was changed to Ringgold in 1850 in honor of a Washington County hero of the Mexican War, Samuel Ringgold, who was killed at Palo Alto. Ringgold supposedly developed the famous McClellan saddle, which was standard U.S. Army issue for half a century.
Leitersburg (S1210): Leitersburg was laid out in 1815 by the descendants of Jacob Leiter, who had purchased the land in 1762.
Fiddlersburg (S0712): According to legend, this village was named for a group of travelling musicians who performed for social engagements and dances in the region.
Boonsboro (S1021): This village thrived before the Civil War because it lay directly astride the National Road, which carried thousands of settlers heading west. Stonewall Jackson was nearly captured here in September 1862 in his epic march to Harpers Ferry during the Antietam campaign. Two cavalry engagements took place in and around Boonsboro: the first during Lee's retreat to Sharpsburg in September 1862, and the other during Lee's retreat from Gettysburg in July 1863.
Keedysville (S0822): McClellan's attempt to outflank Lee's position on Antietam Creek began here on September 16, 1862 -- the day prior to the great battle. Two Union corps (later followed by a third) crossed the Antietam at the Upper Bridge, which stands today and is still traversed by automobile traffic.
Rohrbach Bridge (S0725): This bridge, which still stands, came to be known as "Burnside's Bridge" because of the successful attack made across it by Burnside's IX Corps during the Battle of Antietam on September 17, 1862.
Dunkard Church (S0524): During the morning phase of the Battle of Antietam, heavy fighting swirled around this tiny white church. The building still stands.
Bakersville (S0421): Here, on October 3, 1862, President Lincoln reviewed Franklin's VI Corps, Army of the Potomac.
Sharpsburg (S0525): Most of the September 17, 1862 battle took place north and east of Sharpsburg, so the town suffered little damage during the fighting. Still standing on Sharpsburg's main street is the only surviving slave auction block in Maryland. Johnson's and Early's divisions of Ewell's II Corps passed through Sharpsburg at the start of the Gettysburg campaign.
Mt. Airy (S0425): At this manor house, built in 1800 and still standing, President Lincoln visited General McClellan on October 3, 1862 -- two weeks after the great battle of Antietam. The photographer Alexander Gardner took a series of famous photographs of the Lincoln visit at this site. The area surrounding the house is now threatened by commercial development and is the focus of a fund-raising campaign by Civil War preservationists.
Antietam Iron Works (S0626): This iron foundry operated from 1765 to 1880. It reportedly forged cannon and cast cannon balls during the Revolution.
Solomon's Gap (S0828): Just prior to the siege of Harpers Ferry in September 1862, two brigades from McLaws' division marched up Solomon's Gap and then south along a mountain trail to confront the Union brigade defending Maryland Heights.
Crampton's Gap (S1128): Site of a battle on September 14, 1862. Here Franklin's VI Corps, Army of the Potomac, overwhelmed elements of McLaws' division. However, Franklin did not take advantage of his success and failed to relieve the beleaguered Union garrison at nearby Harpers Ferry. Today a memorial to Civil War newspapermen, known as the War Correspondents Arch, occupies the site of the final Confederate defensive position in the gap. During the Gettysburg campaign, the gap was occupied by a Union cavalry brigade on June 25, 1863, probing for the Confederates ahead of Hooker's Army of the Potomac.
Burkittsville (S1228): President Lincoln visited Union and Confederate wounded in Burkittsville on October 4, 1862. The town gained unwanted attention and visitors after the release of the 1999 movie The Blair Witch Project which was set in this sleepy town.
Berlin (S1232): Now known as Brunswick, this important Potomac crossing site was used by McClellan's Army of the Potomac on October 26, 1862 at the start of the Fredericksburg campaign.
Loudoun Heights (S0733): General John G. Walker's Confederate division occupied these heights during the siege of Harpers Ferry in September 1862. No one in Harpers Ferry could hide from Walker's guns atop this commanding position.
Middletown (S1725): During Stonewall Jackson's march to Harpers Ferry in September 1862, his corps passed through this village. According to his aide Henry Kyd Douglas, "Two very pretty girls with ribbons of red, white, and blue in their hair and small Union flags in their hands, came out of their house as we passed, ran to the curb-stone and laughingly waved their colors defiantly in the face of the General. He bowed and lifted his cap and with a quiet smile said to his staff, 'We evidently have no friends in this town.'" As Hooker's Army of the Potomac crossed the Potomac during the Gettysburg campaign, Reynolds's wing, consisting of the I, III, and XI Corps, concentrated in and around Middletown prior to the northward move towards Gettysburg on June 29, 1863.
Fox's Gap (S1324): The Federal IX Corps forced their way to the top of this gap at the Battle of South Mountain, September 14, 1862. Its commander, Maj. Gen. Jesse Reno, was killed here. There is a monument to Reno's memory near the crest of the mountain.
Mountain House (S1323): Just north of here, Hooker's I Corps, Army of the Potomac, attacked the Confederate defenders of Turner's Gap in the Battle of South Mountain, September 14, 1862. The Mountain House, which still stands as a popular restaurant known as the Old South Mountain Inn, was built in the 18th century. After the war, it was purchased by Admiral John Dahlgren's widow, who was also the mother of Colonel Ulric Dahlgren (see entry on Hagerstown).
Washington Monument (S1221): This monument to the first President was erected in a single day (July 4, 1827) by the citizens of nearby Boonsboro. It had nearly collapsed by the time of the Civil War, but Union forces still managed to use it as a signal station. A reconstruction of the original monument, built in 1936, stands at this site today.
Mechanicstown (S2314): Founded in 1751, this town's name was changed to Thurmont in 1872 when the Western Maryland Railroad was extended to this point. Camp David, the Presidential retreat, is situated in the Catoctin Mountains just west of here. Merritt's brigade of Buford's Union cavalry division occupied Mechanicstown just prior to the Battle of Gettysburg. Before the Civil War, William Nelson Pendleton, Lee's chief artilleryman during the Gettysburg campaign, would occasionally preach at Mechanicstown's 1840 Episcopal Church. The same church has been visited by several presidents during their stays at Camp David.
Catoctin Furnace (S2216): Cannon balls for the Continental Army were cast here during the Revolution. Parts of the furnace are still standing.
Double Pipe Creek PO (S3114): When the Western Maryland Railroad was extended to this village after the Civil War, its name was changed to Detour because the original name could not fit on the railroad's timetables.
Lewistown (S2219): Many Hessian soldiers who were captured in the Revolution settled here in the 1780's.
Frederick (S2326): One of Maryland's most historic towns, Frederick was a focal point in three different Civil War campaigns. Frederick's most famous Civil War resident probably was 95-year old Barbara Fritchie, the subject of John Greenleaf Whittier's popular (at least in the North) poem. As Stonewall Jackson's troops passed through the town in September 1862, Fritchie, according to Whittier, defiantly waved the American flag in front of the Rebels and declared, "Shoot if you must this old grey head, but spare your country's flag!" Historians have since proved that the incident could not have occurred, although generations of Northern schoolchildren who learned the poem thought of it as fact. A reconstruction of the Barbara Fritchie house is open to the public.
Frederick Junction (S2428): Here, on August 6, 1864, Generals Grant and Sheridan met to plan the upcoming Shenandoah Valley campaign. The Battle of Monocacy was fought just east of here on July 8, 1864 during Early's raid on Washington. In 1755, British General Edward Braddock planned his ill-fated foray into western Pennsylvania at a fort located at this site.
Jug Bridge (S2626): This bridge, built in 1807 to carry the National Road over the Monocacy River, earned its name because a huge decorative stone jug was erected on the bridge's eastern side. According to legend, a mason encased a bottle of whiskey inside the jug.
Cearsville (S2623): Cearsville (sometimes spelled "Ceresville") was the site of several large grist mills dating back to the early 19th century.
New Market (S3128): Now the "Antiques Capital of Maryland," New Market was the eastern limit of Confederate penetration into Maryland during the 1862 campaign.
New Windsor (S3918): This village was raided by Confederate cavalry during Jubal Early's raid on Washington in July 1864.
Union Bridge (S3617): The western terminus of the Western Maryland RR during the Civil War. The village gained its name in the late 18th century when scattered Quaker settlements on both sides of Little Pipe Creek were "united" by a new bridge.
Uniontown (S3915): Hancock's II Corps, Army of the Potomac, encamped here on June 30, 1863 -- the day prior to the Battle of Gettysburg. This beautiful village has many homes dating back to the early 19th century.
Hood's Mill (S4529): Here JEB Stuart's Rebel cavalry crossed the Patapsco on their ride around Hooker's Army of the Potomac during the Gettysburg campaign. The Confederates lingered here for several hours to burn bridges and destroy Baltimore and Ohio Railroad track.
Ellicott Mills (S5734): Founded in 1774, this mill town flourished when one of the first railroad stations in the United States was built here in 1830 as part of the new Baltimore and Ohio Railroad. Reinforcements from Baltimore and the District of Columbia passed through here on their way to join Meade's Army of the Potomac following his victory at Gettysburg. Union forces defeated at the Battle of Monocacy in July 1864 retreated here.
Oella (S5833): This old mill village was the home of Benjamin Banneker, a brilliant free black man who was commissioned by George Washington to help lay out Washington, D.C.
Sykesville (S4828): Fitzhugh Lee's Confederate cavalry brigade passed through this town on the Baltimore and Ohio RR on June 29, 1863.
Owings Mills (S5825): Now the northern terminus of the Baltimore City subway system, Owings Mills was established in the mid-18th century when the Owings family built several flour mills at the headwaters of the Gwynns Falls. Little of the old town survives and even the shopping mall here has shuttered its doors as of 2016.
Reisterstown (S5523): This village, which dates to the mid-18th century, was a favorite coach stop for travelers journeying to points northwest of Baltimore.
Bonaparte Mansion (S5420): This estate was built in the early 19th century by William Patterson, a prominent Baltimore merchant. Patterson gained a famous son-in-law when Napoleon's younger brother Jerome married his daughter Betsy. Over Jerome's objections, Napoleon managed to annul the marriage in 1806 and forced his brother to return to royal duties as the King of Westphalia. Betsy continued to use the name Bonaparte, however, and her son also named Jerome inherited this estate. In 1886 the property was converted to the Female House of Refuge, a home for delinquent and homeless young girls. The property continued to be used for this purpose for almost 100 years until it was acquired by the Maryland Army National Guard as an educational facility, training site, and home for the Maryland Military Academy. Today an Iraqi tank captured in the Persian Gulf War sits just off "Omaha Beach Drive," a few hundred yards from the Bonaparte Mansion.
Hampstead (S5314): This town was first settled in the latter half of the 18th century. After the Revolution, German settlers from York County, Pennsylvania moved south into this area.
Manchester (S5111): Manchester dates to 1765, when a Captain Richards laid out the town, which he named after his English birthplace. During the Gettysburg campaign, Sedgwick's VI Corps of the Army of the Potomac rested here on July 1, 1863. Upon receiving news of the battle at Gettysburg, the corps marched 25 miles on July 2, reaching the battlefield that afternoon.
Westminster (S4516): Westminster was established in 1764 and became the seat of Carroll County in 1837. In 1863, the town had 2,500 occupants. As Meade's Army of the Potomac moved northward from Frederick to Gettysburg, Westminster became the army's major supply depot because of its direct railroad connection to Baltimore. (The Western Maryland RR had been extended to Westminster only in 1861, the year the Civil War began.) It is said that 5,000 wagons and 30,000 mules were in the fields around Westminster during and after the battle. On June 29, 1863 Stuart's cavalry passed through Westminster during its celebrated and much criticized ride around the Army of the Potomac. A squadron of the 1st Delaware Cavalry from the defenses of Baltimore foolishly tried to resist the passage of Fitz Lee's Confederate cavalry brigade through the town but was easily brushed aside. Stuart later exaggerated this affair when he reported that the Union retreat "created a great panic in [Baltimore], impressing the authorities with the belief that we were just at their heels."
Union Mills (S4411): The original grist mill here dates to 1797 and is still operational. It is now open to the public, as is the adjacent Shriver homestead. Stuart's cavalry encamped on the Shriver lands on the night of June 29-30. It is said that Stuart and his staff sang and played the piano in the Shriver household, and even gained the enthusiastic services of young Herb Shriver to guide the Confederate cavalry to Hanover. Herb's mother later recalled, "Our only regret was that our entertainment was so inadequate for the occasion, but they made us feel as though it was elegant." Another branch of the Shriver family lived directly across the Westminster Turnpike and refused to have anything to do with the Confederates. They must have been cheered later in the day when the lead elements of the V Corps, Army of the Potomac, passed through Union Mills.
Taneytown (S3611): Pronounced "Tawney-town." This town was laid out in 1740 by Maryland's prominent Taney family, of which Chief Justice of the United States Roger B. Taney was a member. Meade moved the headquarters of the Army of the Potomac here on June 30, 1863. On the following day, couriers from Reynolds' I Corps arrived in Taneytown to inform Meade that a battle had erupted just outside of Gettysburg.
Emmitsburg (S2709): This village was originally known as Silver Fancy (or Poplar Fields) when it was established sometime before the Revolution. Two weeks before Union troops passed through Emmitsburg on their way to Gettysburg, a large portion of the village was destroyed by fire. Reynolds' I Corps and Howard's XI Corps of the Army of the Potomac encamped in and around Emmitsburg on the night of June 29-30, 1863.
Moritz Tavern (S2907): The site of Major General John F. Reynolds' headquarters on the night of June 30-July 1, 1863. Here, Reynolds received orders from Meade to move his I Corps north to Gettysburg. Reynolds was killed within hours of receiving these orders.
St. Joseph's Sisterhood (S2710): St. Joseph's was founded as a Catholic school for girls in 1809 by Elizabeth Seton, who was elevated to sainthood in 1975. On June 30, 1863 the grounds of St. Joseph's were occupied by De Trobriand's brigade of the III Corps, Army of the Potomac. De Trobriand later recalled that he addressed the concerns of the school's occupants about the impending battle. "Ask St. Joseph to keep the Rebels away from here," he said, "for if they come before I get away, I do not know what will become of your beautiful convent."
Mt. St. Mary's College (S2510): Founded as a seminary in 1808 by Father Dubois, later Bishop of New York. It is said that Union soldiers visited Mt. St. Mary's priests for absolution when parts of Sickles' III Corps passed nearby on June 30, 1863.
Greencastle (S0604): This town lay directly athwart Lee's invasion route into Pennsylvania, so virtually the entire Army of Northern Virginia passed through here. However, the Rebels did not linger as they did at nearby Chambersburg. The campaign's first casualty north of the Mason-Dixon line occurred just north of Greencastle on June 22, 1863. He was Corporal William Rihl of the 1st NY ("Lincoln") Cavalry, who was killed in a skirmish with Jenkins' Rebel cavalry brigade.
Waynesboro (S1406): Jubal Early's Confederate infantry division encamped here on the night of June 23-24, 1863 en route to Gettysburg and York. The abolitionist John Brown was a Sunday school teacher here just prior to his raid on the U.S. Arsenal at Harpers Ferry in October 1859.
Monterey Gap (S2107): Much of the Army of Northern Virginia passed through here on its retreat from Gettysburg.
Liberty Mt (S2506): Now a popular ski resort.
Fairfield (S2504): Most of Lee's army retreated through here after Gettysburg. On the afternoon of July 3, 1863 the 6th U.S. Cavalry, which was attempting to get astride Lee's line of communication through Monterey Gap, was put to rout just north of Fairfield by "Grumble" Jones's brigade of Rebel cavalry.
Black Horse Tavern (S2902): On the morning of July 2, 1863, Longstreet's I Corps marched and countermarched here in its attempt to flank the Union line on Cemetery Ridge without being seen by Union signalmen atop Little Round Top. The Rebel artilleryman E.P. Alexander noted that at one point the column marched back and forth on different roads for more than four miles, but actually progressed less than one mile towards its objective.
Lutheran Theological Seminary (S3101): From the cupola atop this edifice on July 1, 1863, Federal cavalryman John Buford observed the advance of Heth's division down the Chambersburg Pike towards Gettysburg. Here Buford met with General John Reynolds of the I Corps to discuss the impending battle. Reynolds was killed a few hundred yards west of the seminary shortly thereafter. Later in the day, fighting raged in the fields adjacent to the building. The Seminary still stands and is home to both a museum that opened in 2013 and the Adams County Historical Society. (Some of the maps used in the design of this game were purchased there.)
Peach Orchard (S3103): The apex of Sickles' III Corps line on July 2, before it was attacked by McLaws' division and driven back to Cemetery Ridge.
Evergreen Cemetery (S3202): Cemetery Hill, the focal point of the Union "fishhook" line at Gettysburg, gained its name from this cemetery. The brick gatehouse of Evergreen Cemetery still stands, a prominent landmark on the Baltimore Pike. At the time of the battle, the cemetery -- as the legend goes -- had a signpost with the following words: "All persons found using firearms in these grounds will be prosecuted with the utmost rigor of the law."
Culps Hill (S3302): The extreme right of the Union "fishhook" at Gettysburg, defended by the XII Corps and elements of other corps.
Gettysburg (S3201): Gettysburg is of course best known for the Civil War battle, but it is an historic town in its own right. Founded in the 1780's, Gettysburg had become a major agricultural and commercial center well before the Civil War. Indeed, seven major turnpikes joined there, and a railroad had just been extended to the town. It was by this railroad that President Lincoln came to Gettysburg to deliver his famous address at the dedication of the Soldiers' National Cemetery on November 19, 1863. Although Gettysburg was virtually no-man's land between the armies on the second and third days of the battle, only a single resident of the town died in the struggle. Her name was Jennie Wade, and she was killed when baking bread in her home near Cemetery Hill. Her house still stands.
Two Taverns (S3504): Slocum's XII Corps of the Army of the Potomac encamped here for a time on July 1, 1863 and could supposedly hear firing from the battle at Gettysburg. The corps reached the battlefield late that afternoon, but it was too late to save the crumbling Union position north and northwest of Gettysburg.
Littlestown (S4006): Meade's main supply route from Gettysburg to the Union depot at Westminster passed through Littlestown via the Baltimore Pike. The XII and VI Corps of the Army of the Potomac marched to the battlefield at Gettysburg through Littlestown.
Hanover (S4503): Once nicknamed "Rogue's Rest" because of the many outlaws who lived in the area, Hanover was the site of a clash between Union and Confederate cavalry on June 30, 1863. JEB Stuart narrowly escaped capture in the melee by jumping his horse over a gully.
Hanover Junction (N5632): President Abraham Lincoln changed from the Northern Central RR to the Hanover Branch RR here on his way to Gettysburg for the dedication of the Soldiers' National Cemetery on November 19, 1863.
York (N5826): While the British Army occupied Philadelphia throughout the fall and winter of 1777-1778, York served as the national capital. During the Gettysburg campaign, Jubal Early's Rebel infantry division occupied the town on June 28-29, 1863. Early demanded 2,000 pairs of shoes, 1,000 pairs of socks, 165 barrels of flour, 28,000 pounds of bread, 3,500 pounds of sugar, 32,000 pounds of fresh beef and $100,000 in cash from its citizens -- most of which was delivered. When the Confederates first moved into York one of Early's brigade commanders began to address its citizens lightheartedly in the town square, causing a Rebel column to bunch up on one of the approach streets. When "Old Jube" came upon the scene, he became enraged. "What the devil are you about?" he yelled. "Stopping the head of the column in this cursed town!" The column continued its march and the war went on.
Dover (N5223): JEB Stuart's column of three Rebel cavalry brigades passed through here on July 1, 1863 on their way from Hanover to Carlisle. The Battle of Gettysburg had erupted that morning 25 miles to the southwest, but Stuart was completely unaware of it and continued his northward ride.
Dillsburg (N4217): Stuart's cavalry also passed through this village on July 1. When Stuart, at Carlisle, finally received word from Lee about the engagement at Gettysburg, Hampton's brigade, bringing up the rear of Stuart's column, had not yet reached Dillsburg. Stuart thereupon ordered Hampton to head directly south to Gettysburg as quickly as possible along the Dillsburg Turnpike.
Mechanicsburg (N4311): Confederate cavalrymen from General Albert Jenkins' brigade occupied Mechanicsburg without opposition on Sunday June 28, 1863. Jenkins' mission was to scout the defenses of Harrisburg in preparation for an attack by Rodes' and Johnson's infantry divisions of Ewell's II Corps on June 30. According to the mayor of the town, a Rebel seized the Stars and Stripes from the roof of a house, placed it on his saddle, remounted his horse, and sitting on the flag rode off.
Sporting Hill (N4510): The northernmost point reached by a Confederate unit during Lee's invasion of Pennsylvania.
Oyster Point Hotel (N4710): Brisbane's brigade of Union militia manned a forward line in the Harrisburg defenses here and skirmished with Jenkins' brigade on June 29, 1863 -- an engagement which could be clearly heard in Harrisburg. This point marked the closest Rebel approach to the Pennsylvania capital during the campaign. It is said that Union militiamen looted local homes and farms in this area to an equal or greater degree than the Rebels in nearby Mechanicsburg.
Fort Washington (N4809): This fort was the focal point of the Harrisburg defenses during the Gettysburg campaign. It was situated on the western side of the Theodore Burr bridge, which spanned the Susquehanna into Harrisburg. The fort was begun on June 14 and, through the herculean efforts of the Union militia and the citizens of Harrisburg, it was completed before the arrival of the Rebels on June 29. The fort, however, was never attacked.
Harrisburg (N4909): Harrisburg was laid out in 1785 and became the capital of Pennsylvania in 1812. It was one of the Army of Northern Virginia's major objectives in the Gettysburg campaign and was very nearly captured by Ewell's II Corps. However, Lee ordered Ewell to withdraw from the Cumberland Valley on June 30 and join the rest of the army at Cashtown and Gettysburg, thereby sparing Harrisburg.
Camp Curtin (N4907): Named after Pennsylvania's wartime governor, this camp was one of the major training sites for Pennsylvania troops during the Civil War. In the Gettysburg campaign, thousands of Union militiamen, mainly from New York and Pennsylvania, gathered here to defend Harrisburg against the approaching Rebels. No trace of the camp remains.
Marysville (N4603): During the Gettysburg campaign, Pennsylvania Central RR workers erected blockhouses on both sides of the critical Susquehanna railroad bridge to protect it from marauding Rebels. Later two New York militia regiments guarded the bridge and built additional fortifications in and around Marysville. The Penn Central line was critical to the Union cause in the Civil War because it and the Baltimore and Ohio RR (which was frequently cut by the Confederates) were the only rail lines to directly connect the eastern and western states.
Stony Ridge (N3811): On June 27, 1863 General Joseph Knipe's brigade of New York militia made a temporary stand on this boulder-strewn, wooded ridge. The Union troops hastily pulled back toward Harrisburg, however, when they learned of the approach of Ewell's corps. Today the Appalachian Trail follows the crest of Stony Ridge between the South Mountain and Blue Mountain ranges.
Carlisle Barracks (N3411): This has been a military post since before the Revolution. Today it houses the U.S. Army War College and the U.S. Army Military History Institute (where much of the research for this game was done), and is the oldest Army post in the United States. During the Civil War it functioned as a depot for Union cavalry recruits some of whom saw emergency service in the field during the Gettysburg campaign. The post was occupied by Rodes' Rebel infantry division of Ewell's II Corps on the afternoon of Saturday June 27. Early in the morning of July 2, troopers from Fitz Lee's brigade of Confederate cavalry set fire to the barracks before their hasty departure for Gettysburg.
Carlisle (N3312): Established in 1751, Carlisle is one of the oldest settlements in the Cumberland Valley. One of the town's most famous residents was Molly Pitcher (real name Mary Hays), who served in a Continental Army artillery battery at her husband's side at the Battle of Monmouth in 1778. She is buried in Carlisle. The town was occupied by Johnson's and Rodes' infantry divisions of Ewell's II Corps during the invasion of Pennsylvania. After Ewell's departure, Union militia under the command of William F. "Baldy" Smith occupied the town. On July 1, 1863 lead elements of Stuart's Rebel cavalry approached Carlisle expecting to find Ewell. Instead they were met by fire from Smith's militiamen. The Rebels demanded the town's surrender, which was refused by Smith. A desultory shelling of Carlisle by Stuart's gunners ensued, after which the Rebels departed in haste for Gettysburg.
Papertown (N3417): During their march from Carlisle to Gettysburg, Rodes' division of Ewell's II Corps passed through here. Situated at the northern end of the gigantic South Mountain chain, the Papertown region was known for its lumber and iron mine industries.
Heidlersburg (N3627): Rodes' and Early's infantry divisions of Ewell's II Corps united here on June 30, 1863 during their march to rejoin the Army of Northern Virginia at Gettysburg.
Benner's Hill (N3334): Confederate batteries atop this hill exchanged heavy fire with Union batteries on Cemetery Hill on the second day of Gettysburg.
PA College (N3233): One company of the 26th Pennsylvania Militia was recruited from students at this school, situated just north of Gettysburg. The unit was mustered into service at Camp Curtin on June 18, 1863 and one week later, in Gettysburg, found itself directly in the path of Jubal Early's Rebel division on its march to York. On June 26, four miles north of Gettysburg, the regiment was routed by Early's men, losing 176 prisoners. Early lectured the unfortunate Yankee prisoners in Gettysburg's town square. "You boys ought to be home with your mothers and not out in the fields where it is dangerous and you might get hurt," he declared.
Cashtown (N2532): Upon learning of the Army of the Potomac's advance across the Potomac into Maryland on the night of June 28, 1863, Robert E. Lee decided to concentrate the Army of Northern Virginia at this tiny village at the eastern end of Newman's Pass. It was from Cashtown that Harry Heth's Rebel infantry division departed for Gettysburg early on the morning of July 1, 1863 -- supposedly to look for shoes for his footsore soldiers. The rest is history.
Caledonia Iron Works (N1931): This iron foundry, owned by the Hon. Thaddeus Stevens of the U.S. House of Representatives, was burned by order of Jubal Early on June 26, 1863 during the march of Early's division from Greenwood (N1731) to York (N5826). Stevens was the leader of the House's Radical Republicans and was viewed with great hostility throughout the South. "My reasons for giving the order were founded on the fact that the Federal troops had invariably burned such works in the South wherever they had penetrated," Early later wrote. "Moreover in some speeches in Congress Mr. Stevens had exhibited a vindictive spirit toward the people of the South. The burning was simply in retaliation for the various deeds of barbarity perpetrated by Federal troops."
Fayetteville (N1531): A.P. Hill's III Corps of the Army of Northern Virginia encamped in this vicinity from the evening of June 26 to the morning of June 29, 1863. When Hill's corps departed for Cashtown (N2532), Longstreet's I Corps followed in its wake. Years later E.P. Alexander, an artillery battalion commander in the I Corps, recalled Rebel infantry marching through a Pennsylvania Dutch farmer's wheat field here, stopping to fill their canteens at his well. Alexander asked for a drink from the farmer. "No! Dere ain't no water! De well is done pump dry!" the farmer exclaimed. "And just look at dis porch vere dey been! And see dere vere dey trampled down dat wheat! Mine Gott! I'se heard of de horrors of war before but I never see what dey was till now!"
Scotland (N1226): On June 16, 1863 a Cumberland Valley RR bridge here was blown up by troopers from Jenkins' brigade, which was leading the way for the Army of Northern Virginia in its invasion of Pennsylvania.
Chambersburg (N0929): Chambersburg was an unlucky place in the Civil War. The Rebels occupied it on three occasions (actually four considering that it was occupied twice during the Gettysburg campaign). On October 10-11, 1862 1,800 Confederate troopers ransacked the town during one of JEB Stuart's famous cavalry raids behind Union lines. In the Gettysburg campaign, virtually every unit in the Army of Northern Virginia passed through here; indeed, Lee made his headquarters on the eastern edge of town. The produce and livestock of local farmers were in large measure seized by Rebel foraging parties, which operated under strict restrictions from Lee. The third visit by the Rebels to Chambersburg, which took place on July 30, 1864, was by far the worst. Rebel cavalry under the command of John McCausland entered the town and demanded $500,000 in currency or $100,000 in gold and threatened to burn the place down if this ransom was not met. The citizens of the town failed to raise the money and much of Chambersburg was promptly burned to the ground.
Roxbury (N0818): The Kittatinny and Blue Mountain Tunnels of the Pennsylvania Turnpike pass under the Blue Mountain range just north of here. The Pennsylvania Turnpike, which transits the entire state from east to west, was the first super-highway in the United States built for the automobile.
Strasburg (N0621): Today the Letterkenny U.S. Army depot is located just south of here.
Newville (N2214): This town was bypassed by the major elements of Ewell's II Corps during its march to Carlisle, but a small Rebel foraging party of 50 men entered the town unopposed on June 27, 1863, seizing farmers' produce and 300 head of cattle.
Shippensburg (N1621): Shippensburg is the oldest town in the Cumberland Valley. Unfortunately for its inhabitants, it lay directly athwart Ewell's route from Chambersburg to Carlisle during the Gettysburg campaign. Ewell's men swept the town and surrounding area for provisions, sending much of the captured stores back to Virginia in an immense wagon train. Colonel Arthur Fremantle, an observer from the British Army travelling with the Army of Northern Virginia, noted: "So completely was the country through which the Confederate army passed robbed and plundered...[that] farm labor had come to a complete standstill." Jed Hotchkiss, Ewell's well-known mapmaker, wrote in his diary, "The people [of Shippensburg] looked sullen...The people are fearful of retribution from us, but some were disposed to joke and spoke of our being in the Union now."
Designer's Notes
By Joseph M. Balkoski. Set forth below are the notes of the original designer of the game, Joe Balkoski, from its publication in 1994.
Welcome to the third installment of Avalon Hill's series on the great campaigns of the Civil War. Like its predecessors Stonewall Jackson's Way and Here Come the Rebels!, Roads to Gettysburg is an operational game, concentrating on the factors that brought the armies together at Gettysburg rather than on the battle itself. In my view this is long overdue, for Gettysburg the battle has been gamed and regamed ever since the birth of our hobby in the 1950's, whereas the campaign has been virtually ignored. Too often historians view Gettysburg in a vacuum, ignoring both sides' overall objectives in the campaign. True, the outcome of the campaign was in large measure decided on the field of Gettysburg, but a great many events of significance happened both before and after the battle. Furthermore, the actual battle was essentially an accident and easily could have occurred in a different location under very different circumstances. The fulfillment (or lack of fulfillment) of Union and Confederate goals in the campaign cannot be fully grasped unless one understands how the armies maneuvered before July 1 and after July 3. At the height of Lee's invasion of Pennsylvania, the Army of Northern Virginia and the Army of the Potomac were separated from each other by at least fifty miles. Throughout the four years of the Civil War, only rarely were the major antagonists of the war's eastern theater situated so widely apart.
As the Army of Northern Virginia plundered Pennsylvania in late June 1863, neither side had definitive intelligence of what their enemy was doing. For example, Lee did not even detect the presence of the Army of the Potomac in Maryland until four days after Hooker's army had actually moved north of the Potomac. Such a situation leads to a very exciting game for the players, for as the armies move inexorably towards one another, there are dozens of strategic options to choose from when playing either side. Should Meade move against Lee's supply lines and Potomac crossing sites rather than against the Army of Northern Virginia itself? Should Lee confront Meade directly or wait for the Army of the Potomac to come to him on terrain of his own choosing? One of the most surprising things I learned during the design of Roads to Gettysburg was how easily the campaign could have developed and ended differently than it really did. For example, the Confederates were on the verge of capturing Harrisburg, the capital of Pennsylvania, when Lee suddenly turned General Richard Ewell's II Corps around and redirected it to Gettysburg -- much to Ewell's shock and disappointment. It is hard to judge how Harrisburg's capture would have affected the campaign in military terms, but it certainly would have been a blow to the Lincoln administration. Similarly, Lee's sudden desire to concentrate his army east of the mountains at Cashtown and Gettysburg in the last days of June once he had discovered that the Army of the Potomac had entered Maryland changed the campaign profoundly. By ordering such a move, it is obvious that Lee was preparing for a decisive battle somewhere in the vicinity of Gettysburg. Surprisingly, however, he did not take immediate steps to prepare for this battle. On the morning of June 29, Hill's III Corps of the Army of Northern Virginia was only 18 miles west of Gettysburg at Fayetteville, Pennsylvania; meanwhile, Reynolds' I Corps of the Army of the Potomac was 31 miles southwest of Gettysburg at Frederick, Maryland. Yet it was Reynolds' men that made it to Gettysburg first. It is interesting to speculate what would have happened had Lee reined in his army at Cashtown and let the Unionists seize Gettysburg without a fight, or had he moved his army with greater speed and purpose eastward on the Chambersburg Pike towards Gettysburg on June 29.
From a game designer's viewpoint, these many "what ifs" of the Gettysburg campaign make for a very intriguing game. Indeed, of the three games in the series so far, this was probably the most enjoyable to design and play. However, it was also the most difficult to fulfill. In essence, I was challenged by history: the campaign's many variables made it extremely difficult to simulate the actual result in playtesting. This design difficulty was not of great concern to me, however. As long as the players are challenged to fulfill the real objectives and strategies of the opposing armies in the campaign, I am satisfied and I hope you will be too.
At recent gaming conventions, I've informally polled players to determine what direction the series should take. Although I was thoroughly flattered by the overwhelming positive response to the games, I was somewhat puzzled by the diversity of opinions about what campaigns should be covered next. At some seminars, requests for games on the western theater -- particularly the Atlanta campaign -- predominated. Many others, however, argued that we should complete the eastern theater before embarking on western campaigns. One thing is certain: Volume IV of the series, which is already being worked on, will cover Jackson's 1862 Shenandoah Valley campaign. The game, which will probably be titled Stonewall in the Valley, will have three maps, portraying the Valley from Staunton to Harpers Ferry. The maps will be directly linkable to the Stonewall Jackson's Way, Here Come the Rebels!, and Roads to Gettysburg maps, so that if anyone has a table big enough, the nine maps can be joined to show the eastern theater of the Civil War from Staunton, Virginia to Harrisburg, Pennsylvania. As usual, ownership of the previous three games in the series will not be required to play the Shenandoah game. We're not yet sure where we'll go with Volume V. The Atlanta campaign is a strong possibility. The two other most likely options are Grant's offensive against Richmond in May-June 1864 from the Wilderness to Petersburg; or McClellan's Peninsula campaign in the spring of 1862. If you have thoughts on these subjects, do not hesitate to let us know.
The preparation of accurate, functional, and attractive maps for this series of games takes up more time than any other single design element. The maps are the foundation of the games; their flavor adds immeasurably to the gamers' understanding of Civil War operations. For the most part, the maps are based on county maps from the mid-nineteenth century, which are usually available in Maryland, Virginia, and Pennsylvania county historical societies. Without doubt the most difficult part of the Roads to Gettysburg design involved transferring the information from these maps onto a wargame map. Each and every road and railroad had to be meticulously plotted by hand on the hexfield. Unfortunately, hexes channel roads into arcs of sixty degrees (each hex has six sides of sixty degrees each), so a game map must distort reality in some small measure. However, the map scale of 1:116,000 (roughly one mile per hex) allows roads and pikes to be shown in full detail, unlike other Civil War games at larger scales which are forced to "fudge" real road networks. Any Civil War staff officer planning the movement of a unit had to have some knowledge of the area's roads, for armies did not simply move from "Point A" to "Point B" in a perfectly straight line, tramping across farmers' fields, brush, and woods to reach their objectives. Armies stuck mostly to roads, so an accurate portrayal of road networks is an integral element of the games. Of course, the Battle of Gettysburg itself came about because the opposing armies gravitated toward this small Pennsylvania town simply because it was an important junction of several roads and turnpikes.
Avalon Hill artist Charlie Kibler has exerted a great deal of effort in attempting to impart the spirit of the 1860's onto the game maps. I hope you will agree with me that he has succeeded, as he did in the previous two games of the series. As usual, I urge any of you who are lucky enough to visit the area portrayed in the game to take these maps along with you in your car. There have been less changes in the regions over which the armies marched 130 years ago than you might think, and your understanding of the Gettysburg campaign will be greatly enhanced. Thanks for your interest in this series of games, and I hope you continue to enjoy them.
Redesign Notes. The redesign of RTG essentially started when I designed my first GCACW scenarios for Skirmisher 1 in 1999; these scenarios were The Battle Continues and Lee's Retreat. This rewarding experience caused me to seek new GCACW design opportunities and lead to me being part of the design team for other GCACW games: SJW2/AGA, Atlanta, and HCR. However, that first design experience reinforced one of my engineering work mantras that should apply even in historical war game design -- K.I.S.S. (Keep It Simple Stupid). The Lee's Retreat scenario, which I thought to be rather clever and fun, instead got a poor reception from most players. It was thought to be too confusing in Victory Conditions and rather complicated for just a basic scenario. On the other hand, The Battle Continues scenario -- which I had designed as somewhat an easy afterthought (it starts on the same day as Lee's Retreat so it required no additional research) -- turned out to be a tournament favorite for years, because both sides needed to engage the enemy and attack away.
This Spartan philosophy shows up in several parts of this redesign. For example, Lee's Retreat is not included; it is replaced by The Wagoneer's Fight. While this new scenario does still have wagon rules which increase its complexity, it has the low unit count and sweeping maneuver that make cavalry scenarios so popular -- and its victory conditions are simple. Hopefully while playing this scenario you will feel like Imboden, as he so well described those days in history in The Confederate Retreat From Gettysburg (reference Battles and Leaders of the Civil War, Volume III), which was the inspiration for this scenario.
The redesign of the campaign game rules and scenario show an intermix of my desire for rule austerity and the guiding principle of "it isn't broken, don't fix it" -- meaning, leave the original design alone as much as possible. The two main changes to the original campaign scenario are the inclusion of VPs that depend on when the AP arrives and the ammunition rules. With such a wide variation on when the AP arrives, it was not possible to balance the scenario without adding in these variable VPs. The issue with the original ammunition rules was they hardly ever affected the game so most players did not bother using them. The revised ammo rule is very pared down and will now indeed affect games where there is extended combat. It also has the bonus of significantly cutting down on various aspects of the game: player book-keeping (only 9 units require ammo records instead of every unit), game components (no ammo pad is needed now), and sections in the rulebook (no Union depots section for example) -- and yet the typical game-play result is still quite historical in nature (although the field of battle is usually shifted farther south than Gettysburg).
One surprising outcome of this redesign is all the new scenarios I was able to devise for a campaign with only one battle, and yet with only two of them being what-if. The new scenarios are: Stuart Rides North, The Pipe Creek Plan, The Battle of Gettysburg, The Battle Continues, and The Wagoneer's Fight. Play-testing all this new and redesigned material was done by a core team of regular testers -- please see the credits below for all the members of this group. Special thanks are in order to Steve Likevich, Ian Mackay, and Niall Taylor. These three experts replayed scenarios endlessly with me and each other to get them balanced; and they helped with some of the research and refining of the rules.
Chris Withers
Rebels in the White House
Rebels in the White House simulates Confederate General Jubal Early's raid on Washington, D.C. in the summer of 1864.
Basic Game Rules
1.0 Introduction
Rebels in the White House (RWH) simulates the Confederate attempt to capture Washington in the summer of 1864. Players should first read the Introduction at the beginning of this rulebook, and then continue reading below. Playing RWH requires ownership of the northern Stonewall Jackson's Way map for two of the five scenarios.
2.2 Playing Pieces. All Union leaders are Regular Army. The color of the box around a Regular Army leader's tactical value (or command value for army leaders) is green to indicate this. Union military units (infantry and cavalry units) are either Regular Army or are not Regular Army. Players can identify Regular Army and non-Regular Army military units based on the color of the box around a unit's tactical value. For non-Regular Army units this color is red, and for Regular Army units this color is green. Infantry substitute counters have no box color around their tactical since they can be either Regular Army or non-Regular Army.
2.6 Abbreviations. ANV: Army of Northern Virginia. AP: Army of the Potomac. Art: Artillery. B: Breckinridge's Corps. Brig: Brigade. Cav: Cavalry. Div: Division. E: Early's Corps. HCR: Here Come the Rebels. IL: Illinois. Inf: Infantry. MD: Maryland. M: Middle Department. NE: No Effect. NY: New York. OH: Ohio. PHB: Potomac Home Brigade. Regt: Regiment. Res: Reserve. RR: Railroad. RWH: Rebels in the White House. RTG: Roads to Gettysburg. SIV: Stonewall in the Valley. SJW: Stonewall Jackson's Way. V: Valley District. VP: Victory Points. W: District of Washington. WV: West Virginia District.
5.1 March. Reminder: Players should take special note of the various modifiers specific to different Union units.
5.2 Activate Leader. If the Confederate player performs an activate leader action with Early, Breckinridge may not transfer as part of the action (even if the units activated are part of Breckinridge's corps). The only time Breckinridge may transfer during an activate leader action is when the Confederate player performs an activate leader action with Breckinridge. Note: The Confederate leader Early is a district leader, but he also commands his own corps, labeled "E-V".
5.4 Burn RR Station. The restriction that the Frederick Junction RR station (W4317) may only be damaged and never destroyed applies in this game also.
10.1 Pontoon Bridges. The Union player is limited to one minor river Bridge marker, and one major river Bridge marker. They may be built over either major or minor rivers. The Confederate player may not build bridges.
Basic Game Scenarios
There are three Basic Game scenarios of varying degrees of length and complexity. Unless otherwise noted in the following instructions, all units begin the game with their front (normal) sides face-up at Fatigue Level 0 with organized Strength markers. Before starting, place the Turn marker on the Turn Track in the box corresponding to the date on which the scenario begins. This is Turn one. At the end of the game, calculate Victory Points (VP) and determine a winner. Since combat losses cause VP gain or loss, the players should keep track of Manpower value losses as they occur during the game.
Map. RWH uses the Here Come the Rebels (HCR) map. The HCR map is divided into west and east sections. In both scenarios (4 & 5) of the Advanced Game, and scenario 3 of the Basic Game, the two maps link up and are used together. In Basic Game scenarios 1 & 2 only a single map is used. In set-up instruction, hexes are listed by four-digit numbers preceded by a "W" (indicating the west map) or "E" (indicating the east map). For example, "W4214" means hex 4214 on the west map (the town of Frederick). When placing the two maps together, note that they overlap. Lay the west map on top of the east map in the overlap area. The westernmost hex row on the east map (i.e. all hexes whose first two digits number "01") should be placed so that it lies directly underneath the west map's hexes whose first two digits number "56". For example, hex E0120 (Goshen) on the east map should lie directly underneath hex W5626 (also Goshen) on the west map. In the set-up instructions for scenarios which use both maps, hexes in the overlap area are listed by the west map's hex number. Scenario 5 of the Advanced Game and Scenario 3 of the Basic Game use the north map from Stonewall Jackson's Way (SJW). The area on this map overlaps the area on the HCR maps, and the SJW north map should be placed under the HCR maps. For example, hex W0301 (Winchester Toll House) on the HCR west map should lie directly on top of hex N0301 (also Winchester Toll House) on the SJW north map.
Scenario 1: Monocacy
NOTES: In one month's time, Jubal Early had secretly disengaged from Richmond, routed Hunter's command at Lynchburg, and cleared the Shenandoah Valley of Sigel's forces. On July 5-6, 1864 he crossed the Potomac in what would be the Confederate's third attempt in as many years to bring the war to the North. After securing his line of communication, ransoming the towns of Hagerstown and Frederick for $220,000 and acquisitioning some much-needed supplies, Early turned east towards his ultimate objective. With the goal of relieving the siege of his own capitol by applying pressure to the enemy's, Early now moved on Washington DC. Opposing him on the Monocacy River was a scratch force of Union veterans and 100-day volunteers pieced together by Lew Wallace (post-war author of Ben Hur: A Tale of the Christ). Composed of units of the Middle Department and elements of the VI Corps—the first units of the Army of the Potomac to arrive in defense of the Capitol—the Federals were aligned on the east side of the Monocacy in order to contest the Rebel crossings. Collectively, they were the last major Union obstacle between Early and the Forts of Washington.
MAP: Use only the eastern half of the HCR West Map (Hex rows 30xx – 58xx inclusive).
GAME LENGTH: 1 turn; July 9, 1864.
SPECIAL RULES: 1. Random Events: Random events are not determined in this scenario. The Action Phase and the scenario end the moment the Confederate player passes. 2. Fatigue Level 4 Marches: A unit at Fatigue Level 4 may be selected in Step 1 of a March action if its Strength marker is organized. If a unit at Fatigue Level 4 marches, its Strength marker is automatically flipped to its disorganized side. (It retains its Fatigue Level 4 marker.) The player does not consult the Extended March Table. If a unit at Fatigue Level 4 marches, it may not also force march. 3. Union Movement Restrictions: Staunton, who begins in Monrovia (5017), may only activate by rolling a 2 or less on one die. There is a -2 modifier if the unit is in command radius. If successful, the unit may roll for March MP. Should the Union player fail this roll, he may try again during later initiatives, but no other unit may activate during this initiative, nor does Staunton increase in Fatigue Level; the initiative is simply lost. Once successfully activated, Staunton may activate in future initiatives without the need to roll. 4. Second Initiative: No matter which side wins the first initiative of the scenario, the other side automatically wins the second initiative. From that point on initiatives are determined normally.
Victory Conditions. The Confederate player gains and loses VP for the following occurrences: +2 for each level of Fatigue less than five of each Confederate Infantry Division east of the Monocacy River and south of hex row (xx17) inclusive (Example: If Rodes and Gordon are the only Divisions that qualify at scenario end, and are at Fatigue level 2 and 4 respectively (prior to the recovery phase), the Confederate player would earn eight points [((5-2)+(5-4)) x2=8]); -4 at the end of the game for each non-demoralized Union Infantry unit that occupies or is adjacent to a turnpike hex on the Georgetown Pike between Frederick Junction (4317) and Urbana (4620) inclusive of both; +2 for each point of Union Manpower Value lost in combat, retreat, or cavalry retreat (not in extended march, force march, or moving from one enemy ZOC to another); -3 for each point of Confederate Manpower Value lost in combat, retreat, or cavalry retreat (not in extended march, force march, or moving from one enemy ZOC to another). At the end of the game, the Confederate VP total is calculated and the players consult the chart below to determine the winner.
Confederate VP Winner: 14 or more = Confederate Decisive Victory; 10 to 13 = Confederate Substantive Victory; 6 to 9 = Confederate Marginal Victory; 2 to 5 = Union Marginal Victory; -2 to 1 = Union Substantive Victory; -3 or less = Union Decisive Victory.
Historic Results. Early believed that only a few scattered militia units remained on the far side of the Monocacy; consequently his crossing was somewhat uninspired. His cavalry made a shallow bridgehead on the Union left but were prevented in going any further by elements of the Federal VI Corps. Early ordered Breckinridge's Corps to clear the path. Union resistance was initially spirited, but succumbed to superior numbers in the late afternoon. By the end of the day, Early's army had secured all of the key crossings on the Monocacy, but was too spent to advance any further towards the Federal Capitol that evening. Although Early had won a victory by taking the field, Wallace had achieved his objective of buying Lincoln one more day.
Confederate Set-Up
| Unit/Leader | Size | Command | Type | Manpower Value | Hex |
|---|---|---|---|---|---|
| Early | Dist | (E)-V | Ldr | - | W3714 |
| Breckinridge | Corps | B-V | Ldr | - | W3714 |
| Gordon | Div | B-V | Inf | 7 | W3714 |
| Echols | Div | B-V | Inf | 5 | W3613 (Middletown) |
+ Ramseur and Rodes-B begin the game on their exhausted sides.
Union Set-Up
| Unit/Leader | Size | Command | Type | Manpower Value | Hex |
|---|---|---|---|---|---|
| Wallace | Dist | M | Ldr | - | W4517 |
| 11 MD Regt | III | M | Inf | 1+ | W4517 |
| Tyler | Brig | M | Inf | 3 | W4515 |
| McClennan | Brig | VI | Inf | 3 | W4417 |
| Ricketts-B |
+ 11 MD begins the game under a Breastworks-Build marker.
Scenario 2: Fort Stevens
NOTES: After the battle of Monocacy the road to the Capitol was open. The Confederates raced down to punch through the extensive fort system encircling the city before it could be reinforced. Blistering heat caused extensive straggling, but the exhausted Confederates got to the forts on the afternoon of the 11th. However, they could do little when confronted by the VI corps reinforcements from the AP. Fearing both heavy losses in a frontal assault on the forts and then getting cut-off from a retreat route, Early called off his intended attacks and retreated on the night of the 12th. The scenario starts mid-morning of the 11th.
MAP: Only the HCR East map is used.
GAME LENGTH: 2 turns, July 11 to July 12, 1864.
SPECIAL RULES: 1. Heat: Heat is in effect for both turns. The only effect of heat is that both players add one to their extended march die rolls (ref. section A2.1 of the Advanced Game). 2. Union Forts: Refer to section A5.0 of the Advanced Game for Union fort rules. 3. Union Reinforcements: Union reinforcements arrive in the Action Cycle on the turn and order indicated in the Union Setup (Russell on turn 2, all others on turn 1, Wright enters with Getty). For a reinforcement to enter play the Union player must use an initiative, and a unit is placed at fatigue level 1 in E0838, E0939, E1141, E1240, E0944, or E1148 (landing hexes in and near Washington). A reinforcement may not move in the Action Phase in which it is placed, but it may move normally in any following Action Phase. 4. Union Movement Restrictions: The Union units Wisewell, Slough, 25 NY, Briggs, and Beal may not move outside the DC fort perimeter. These units may not attack enemy units outside the fort perimeter, but do exert a ZOC as normal outside the forts. If forced to retreat outside the fort perimeter, these units may only move by the most direct path back to the nearest enemy-unoccupied undestroyed fort, and may not enter an enemy ZOC except if entering an undestroyed fort hex. 5. Line of Communication (LOC): The LOC is used in the Victory Conditions. A LOC is a path of continuous hexes from the unit's hex (inclusive) to any road/pike/RR hex in column 01xx on the west map edge (inclusive). The path may be of any length, but may only be traced hex-to-hex across road/pike/RR/city hex-sides. The path may not enter an enemy occupied hex, an undestroyed fort hex, or an enemy unrestricted ZOC (even if a Confederate unit occupies that ZOC). However, the hex a unit itself is in may be in an enemy ZOC. 6. Potomac River: Confederate units may not move or retreat across the Potomac River. (They may move or retreat across the Anacostia River.)
Victory Conditions. The Confederate player gains and loses VPs for the following occurrences. VPs are for those conditions at the end of the game unless otherwise specified: +30 for each D.C. city hex (including Georgetown) occupied by a Confederate infantry unit(s) that can trace a LOC; +15 if at any point in the game a Confederate infantry unit ends an Action Phase (ends a move) in any D.C. city hex (including Georgetown) — the maximum VPs that may be obtained for this condition are 15; these VPs are not gained if the Confederates receive any VPs for occupying a city hex at the end of the game; +4 for each destroyed D.C. area fort hex — the maximum VPs that may be obtained for this victory condition is 12; +2 for each point of Union Manpower value lost in combat, retreat, or cavalry retreat (not in extended march, force march, or moving from one enemy ZOC to another); -3 for each point of Confederate Manpower value lost in combat, retreat, or cavalry retreat (not in extended march, force march, or moving from one enemy ZOC to another); -6 for each Confederate infantry unit that cannot trace a LOC; -12 for each Confederate infantry division that is destroyed — there are no additional VPs lost for such units for the LOC VP condition, but combat losses are still counted. At the end of the game, the Confederate VP total is calculated and the players consult the chart below to determine the winner.
Confederate VP Winner: 28 or more = Confederate Decisive Victory; 21 to 27 = Confederate Substantive Victory; 14 to 20 = Confederate Marginal Victory; 7 to 13 = Union Marginal Victory; 0 to 6 = Union Substantive Victory; -1 or less = Union Decisive Victory.
Confederate Set-Up
| Unit/Leader | Size | Command | Type | Manpower Value | Hex |
|---|---|---|---|---|---|
| Early | Dist | (E)-V | Ldr | - | E0428 |
| Breckinridge | Corps | B-V | Ldr | - | E0428 |
| Gordon | Div | B-V | Inf | 6+ | E0428 |
| Echols | Div | B-V | Inf | 5+ | E0428 |
| Ramseur |
+ Indicated units begin the game on their exhausted sides at Fatigue Level 1.
Union Set-Up
| Unit/Leader | Size | Command | Type | Manpower Value | Hex |
|---|---|---|---|---|---|
| Lowell-A | Brig | W | Cav | 1# | E0733 (Stone Tavern) |
| Wisewell | Brig | W | Inf | 3 | E0834 (Ft Pennsylvania) |
| Slough | Brig | W | Inf | 1# | E1036 (Columbia College) |
| 25 NY Regt | III | AP | Inf | 1# | E1138 |
# Indicated units begin the game on their normal sides at Fatigue Level 1. ^ Indicated units are reinforcements. See Special Rules for placement location.
Scenario 3: The Retreat From Washington
NOTES: With the VI Corps occupying the forts, Early could no longer hope to capture Washington. Instead, he would have to remove his little army from a precarious position. The VI corps was in his front, and within a few days, Crook's entire army would be in his rear. The Union could now take the offensive; with coordinated action, they might even be able to destroy Early's force.
MAP: Use both HCR maps and the SJW North map. However, only the northern half of the SJW North map will be used, and only the west half of the HCR East map, so these maps may be folded in half.
GAME LENGTH: 6 turns; July 13 to July 18, 1864.
SPECIAL RULES: 1. Random Events: Random events are determined in this scenario. However, the only results that have any effect are Heat (any type - see section A2.1 of the Advanced Game Rules). No more than three days of Heat may occur in the game. If more than three occur, they are converted to NE. For example, if a Heat (+1) has already occurred, and another Heat (+1) happens, it is converted to Heat (Current) and all Heat events after this are ignored. 2. Union Reinforcements: During the Random Events Phases of Turns 2, 3, and 5, the Union player receives reinforcements. All reinforcements are placed at the beginning of the turn, before the Random Events Phase, at Fatigue Level 0, and organized. These reinforcements are listed below: Turn 2—He may place Emory and Dwight in any DC city hex with a landing. Turn 2—He may place Duffie, Tibbits, and Wynkoop, in Martinsburg (W1314). If Martinsburg is Confederate-occupied they may be placed together in any hex on the northwest edge of the map from W0901 to W0806 (Johnsontown). Turn 3—He may place Crook and Duval in Martinsburg (W1314). If Martinsburg is Confederate-occupied they may be placed together in any hex on the northwest edge of the map from W0901 to W0806 (Johnsontown). Turn 3—He may place Ricketts and Kenly in Baltimore Depot (E1139). However, if any Confederate infantry unit occupies Prince George's, Howard, Anne Arundel, or DC counties, or Montgomery County (east of column 47xx on the HCR west map and SJW north map) Ricketts and Kenly may not be placed. They are delayed until the first Recovery Phase in which none of the above mentioned counties is occupied by a Confederate infantry unit. Turn 5—He may place Averell, Schoonmaker, Oley, and Powell in Martinsburg (W1314). If Martinsburg is Confederate-occupied they may be placed together in any hex on the northwest edge of the map from W0901 to W0806 (Johnsontown). 3. Union Movement Restrictions: Howe, Mulligan, and Blakley may not activate or entrench until Turn 2. This restriction is lifted for each unit if a Confederate unit moves within 7 hexes of the unit. 4. Confederate Movement Restrictions: Godwin may not exit Warren, Frederick (VA), and Clarke counties, and may not move east of the Shenandoah River while in these counties. However, Godwin is free to attach to any Confederate infantry unit that enters any of these counties (see Special Rule 9, Attachment). 5. Vaughn: In the Recovery Phase of Turn 3 (July 15th) or later, the Confederate player may place the cavalry brigade Vaughn with a manpower value of 1 in the hex occupied by Echols. Echols' manpower must be reduced by one. Vaughn is placed at the same status (fatigue, disorganization, exhaustion, etc.) that Echols is at. If Echols has been eliminated the Confederate player may not place Vaughn. 6. Union Forts: Refer to the section A5.0 of the Advanced Game for Union fort rules. 7. Wagon Train: The Confederate player has one wagon train unit, which moves like Confederate infantry (although it may not force march). If activated, it must perform a march action. It may not attack. (It may participate in an activate leader action with Early (but not Breckinridge), but not in an assault action. Early may not stack with the wagon train unless there is an infantry unit present in the same hex.) If a Confederate infantry unit enters the hex occupied by the wagon train, it must pay the most severe possible MP penalty for entering a friendly-occupied hex (+2 MP to enter a clear, rolling, or rough hex; +4 MP to enter a woods or mountain hex; see 6.2), even if the hex occupied by the wagon train has a combined combat value of less than 12. If the wagon train makes an extended march, the Confederate player adds 1 to his extended march die rolls in addition to all other modifiers. If a "D" or "1" result occurs, it is applied to the wagon train normally—and the Confederate player loses VP (see Victory Conditions). The wagon train pays an additional +5 MP penalty to cross over a ford in a minor river. The wagon train may not cross over a ford in a major river unless it begins the Action Phase in the hex adjacent to the ford. It must expend its entire MP allowance to cross the ford, so it may only move one hex during that Action Phase. There is no additional MP penalty for the wagon train to cross a bridge, dam, or ferry. Note that the wagon train unit may not entrench. 8. Washington: If, at the end of a Recovery Phase, a Confederate infantry unit occupies a Washington DC city hex (including Georgetown), the game immediately ends in a Confederate Decisive Victory. 9. Attachment: Attachment rules (See section A10.0 of the Advanced Game Rules) apply for both players throughout this scenario. However, Beal and Kenly may not attach to any unit other than Dwight. In addition, Wisewell, Slough, Briggs, and the 25 NY may not attach to any unit. Units may not detach in this scenario. Only attachment is allowed. 10. End of Game: If all the Confederate infantry divisions and the Confederate wagon train cannot fulfill the first Victory Condition [i.e., occupy Berkeley County, Jefferson County (west of the Shenandoah River), etc., and trace a LOC to the west mapedge] at the end of July 18th, either player may choose to continue the game another day. The game does not end until either all Confederate infantry divisions are in the areas listed below in the first Victory Condition, or both players agree to end the game.
Victory Conditions. The Confederate player gains and loses VPs for the following occurrences: +8 for each Confederate infantry division or wagon train ending the game in any of the locations listed below, that can trace a LOC of no more than 30 hexes to any hex on the west mapedge between W0128 and SJW N0116: Berkeley County, Jefferson County (west of the Shenandoah River), the Naval Battery (HCR W2620), Frederick (VA) County, Clark County (west of the Shenandoah River), Warren County (west of the Shenandoah River); +4 for each Confederate infantry division or wagon train ending the game in any of the locations listed below, that can trace a LOC of no more than 30 hexes to any hex on the west mapedge between W0128 and SJW N0116: Washington County (except the Naval Battery (HCR W2620—see above), Jefferson County (east of the Shenandoah River), Clark County (east of the Shenandoah River), Warren County (east of the Shenandoah River), Loudoun County, Fauquier County, Rappahannock County. For the purposes of the two victory conditions listed above, a line of communication (LOC) is defined to be a path of hexes connected by road, pike, RR, bridge, dam, ford, or ferry hexsides between the two locations listed above. (Note: The LOC for the wagon train may not be traced over a ford. It may be traced over a bridge, dam, or ferry.) It includes both the hex the path begins in and the hex the path ends in. Union units or their ZOC may not be present along any hex of the path, except the hex the path begins in (the hex the unit occupies), regardless of the presence of Confederate units.
+8 if either the Naval Battery (W2620) or Martinsburg (W1314) is occupied by a Confederate unit (infantry or cavalry) at the end of the game; -4 if Winchester (W0330) is occupied by a Union unit (infantry or cavalry) at the end of the game; -8* if the Confederate wagon train is destroyed by the Union player; -3* for each "D" or "1" result suffered by the Confederate wagon train unit in an extended march (not for combat or retreat); -1* for each hex into which the Confederate wagon train unit retreats due to combat (even by voluntary retreat). *For the Confederate wagon train unit, the total number of Confederate VP lost due to the three victory conditions marked with asterisks (*) may not exceed 8. For example, if a wagon train suffers a "D" or "1" result in an extended march (-3 VP) and is later eliminated (-8 VP), the total loss is 8, not 11. However, Manpower value loss for the Confederate wagon train does not count toward this limit. Thus, if the Confederate wagon train is eliminated, the Confederate player loses 8 VP from the asterisked condition and an additional 6 VP from the loss of the wagon train's Manpower value of 2.
+2 for each point of Union Manpower Value lost in combat, retreat, or cavalry retreat (not in extended march, force march, or moving from one enemy ZOC to another); +1 for each point of Union Manpower Value lost in extended march, force march, or moving from one enemy ZOC to another; -3 for each point of Confederate Manpower Value lost in combat, retreat, or cavalry retreat (not in extended march, force march, or moving from one enemy ZOC to another) — this includes Manpower lost from the Wagon Train, and is in addition to any VP lost for a "D" or "1" result in extended march (as above); -2 for each point of Confederate Manpower Value lost in extended march, force march, or moving from one enemy ZOC to another. At the end of the game, the Confederate VP total is calculated and the players consult the chart below to determine the winner.
Confederate VP Winner: 36 or more = Confederate Decisive Victory; 28 to 35 = Confederate Substantive Victory; 20 to 27 = Confederate Marginal Victory; 12 to 19 = Union Marginal Victory; 4 to 11 = Union Substantive Victory; 3 or less = Union Decisive Victory.
Confederate Set-Up
| Unit/Leader | Size | Command | Type | Manpower Value | Hex |
|---|---|---|---|---|---|
| Breckinridge | Corps | B-V | Ldr | - | W5534 |
| Echols | Div | B-V | Inf | 5* | W5534 |
| Gordon | Div | B-V | Inf | 6* | W5633 |
| Wagon Train | - | E-V | - | 2* | W5734 |
| Early |
* Indicated units begin the game at Fatigue Level 2. + Ramseur begins the game at Fatigue Level 2 and on his exhausted side. ^ Indicated units begin the game at Fatigue Level 1 and on their exhausted sides. # Godwin begins the game under a Fort marker.
Union Set-Up
| Unit/Leader | Size | Command | Type | Manpower Value | Hex |
|---|---|---|---|---|---|
| Sullivan | Div | WV | Inf | 14 | W1314 (Martinsburg) |
| 1 NY-B Regt | III | Cav-1-WV | Cav | 1 | W1314 (Martinsburg) |
| Howe | Div | WV | Inf | 8# | W2620 (Naval Battery) |
| Mulligan | Brig | WV | Inf | 4 | W3219 (Petersville) |
# Indicated units begin the game under Fort markers. ^^ Getty begins the game on his exhausted side. ++ Slough and Briggs begin the game under Fort-Build 1 markers.
Advanced Game Rules
The following rules are used only in Advanced Game Scenarios, unless they are specifically called for in the special rules of the Basic Game scenarios. Rules colored blue in the original booklet are Standard Advanced Game Rules. Where these rules are used in other games in the GCACW series, they will not be changed. However, text that is not colored blue may change in other games.
A1.0 Advanced Game Sequence Of Play
Each turn in the Advanced Game is performed according to the following "sequence of play:"
- Random Events Phase. Two dice are rolled; the players consult the Random Events Table.
- Harpers Ferry Phase. The players determine whether Union units in or near Harpers Ferry are surrounded. If so, the players consult the Harpers Ferry Table to see if a surrender occurs.
- Reinforcement Phase. The Union player checks to see if he receives any reinforcements. He may also place reinforcements and return AP reinforcements.
- Leader Transfer Phase. Leaders may be transferred from one subordinate unit to another.
- RR Station Repair Phase (only on July 4th, 9th, 14th, and 19th). The Union player may attempt to repair damaged RR stations (see A8.0).
- Attachment Phase. Substitute units may be reattached to other units.
- The Action Cycle. Action Phase: A. Initiative Segment: Both players roll a die. The player with the higher roll wins (the Confederate player wins ties) although rolls of a 1 by both players may lead to the end of the Action Cycle (see A3.0). The winner must take initiative or pass. B. Activation Segment: The player who has taken initiative must perform a single action with an eligible leader or unit. At the end of the Activation Segment, the players return to the Initiative Segment and a new Action Phase begins. Players continue to perform Action Phases indefinitely until both players pass in the same Action Phase or a roll of a 1 by both players leads to the end of the Action Cycle.
- Point Lookout Phase (only on July 10th, 11th, 12th, and 14th). The Confederate player may send cavalry to attempt to capture the Point Lookout prison camp as in A13.0. This cavalry returns during this phase on July 14th.
- Recovery Phase. Eligible units may entrench, build bridges, repair bridges and ferries, forage, and recover from fatigue, disorganization, exhaustion, and demoralization. The Confederate player must also determine his units' supply status. Confederate units may also impose levies on towns in Maryland.
A2.0 Random Events
Either player rolls two dice in each Random Events Phase. The players consult the Random Events Table, checking the result corresponding to that dice roll sum. ("Rain" results are discussed in the Standard Rules, section 12.0.)
A2.1 Heat. The Random Events Table has three possible "Heat" results:
Heat (Current): Heat rules are in effect throughout the current turn only. Place a Heat marker on the Turn Track in the box corresponding to the current turn.
Heat (Current+1): Heat rules are in effect throughout the current turn and the following turn. Place a Heat marker on the Turn Track in the boxes corresponding to the current turn and immediately succeeding turns.
Heat (Current+2): Heat rules are in effect throughout the current turn and the following two turns. Place a Heat marker on the Turn Track in the boxes corresponding to the current turn and immediately succeeding two turns.
If a Heat marker occupies the Turn Track of the current day, both players add one to all extended march die rolls. If a Rain result is received on the Random Events Table, all Heat counters for that day and any days following are removed and have no effect. Note: If a multiple turn Heat result occurs when there are already one or more Heat markers on the Turn Track, additional markers are placed on the track only if the new Heat result extends the heat time period into turns which did not previously possess a Heat marker. For example, if a "Heat (Current+2)" result occurs on Turn 6, Heat markers are placed on the Turns 6, 7, and 8 boxes on the Turn Track. If on Turn 7 a "Heat (Current+1)" result occurs, no additional Heat markers are placed on the track because the new result did not extend the heat period. However, if on Turn 7 a "Heat (Current+2)" result had occurred, a Heat marker should be added to the Turn 9 box due to the extension of the heat period.
A2.2 Command Paralysis. If this result occurs, the indicated player subtracts 1 from the Movement Allowance of each of his infantry units and 2 from the Movement Allowance of each of his cavalry units in the current turn. Note: If a unit is reduced to a Movement Allowance of 0, it may still move 1 hex (see Standard Rules, 6.2).
A2.3 NY Militia. If the current turn is July 8th or later, the Union player may place the NY Militia in any landing hex immediately, during the current Random Events Phase. If the current turn is July 7th or earlier the result is NE. If the NY Militia has already been placed the result is also NE.
A2.4 Vaughn. If the current turn is July 10th or later, the Confederate player may place the cavalry brigade Vaughn with a manpower value of 1 in the hex occupied by the infantry division Echols. Echols' manpower must be reduced by one. Vaughn is placed at the same status (fatigue, disorganization, exhaustion, etc.) that Echols is at. If Echols has been eliminated the Confederate player may not place Vaughn. The Confederate player may decide not to place Vaughn at this time; if so, Vaughn may be placed (subject to the rules above) in any following Reinforcement Phase. If the current turn is July 9th or earlier the result is NE. If Vaughn has already been placed the result is also NE.
A2.5 Mosby. During the current turn, the Union player may not move units by rail on the following railroads unless the counties through which the units move are Union-controlled (e.g. neither neutral nor Confederate controlled; see A9.0): Orange and Alexandria RR, Loudoun and Hampshire RR, Manassas Gap RR, Warrenton Branch RR, Baltimore and Ohio RR (Berkeley, Jefferson, Washington, and Frederick-West counties only). In addition, the Union player loses VP if Union cavalry units of at least two manpower do not occupy Fairfax or Alexandria counties in the VP Phase of that turn and the turn following. If a "Mosby" event occurs on two or more succeeding days, they are treated normally; i.e., the Union player cannot move on the above RR's unless he controls the county the unit moves through on any of these turns, and VP are lost for cavalry units in Fairfax or Alexandria counties through the VP phase following the last "Mosby" event.
A2.6 Godwin. If the current turn is July 7th or later, the Confederate player may place Godwin, in the Random Events Phase, in any hex on the west mapedge from W0130 to SJW N0117. Note: In Scenario 4, Godwin may also be placed in any hex on the south mapedge in Frederick (VA) County. Neither Godwin, nor any substitute unit from Godwin, may exit Warren, Frederick (VA), or Clarke counties, or move east of the Shenandoah River while in these counties. However, Godwin is free to attach to any Confederate infantry unit that enters any of these counties. Godwin is placed with his supply track marker in the "5" box (see A11.0). If the current turn is July 6th or earlier the result is NE. If Godwin has already been placed the result is also NE.
A2.7 Random Events Table: 2 = Heat (Current +2); 3 = NY Militia; 4 = Godwin; 5 = Vaughn; 6 = Union command paralysis; 7 = Heat (Current); 8 = Mosby; 9 = Heat (Current +1); 10 = Confederate command paralysis; 11 = Godwin; 12 = Rain (Current).
A3.0 Random End Of Action Cycle
In the Basic Game, if one player has no units eligible for activation in an Initiative Segment, his opponent automatically wins initiative, and the dice are not rolled. In the Advanced Game, however, both players must roll the dice in each Initiative Segment, even if one player has no units eligible for activation. If the player who has no eligible units wins the roll, he must pass. If, in any Initiative Segment of an Action Cycle, both players roll a 1 when determining initiative, there is a chance the Action Cycle may end. In this event, a player rolls a die. If this roll is 1 or 2, the Action Cycle immediately ends and play proceeds to the Recovery Phase. If this roll is from 3 to 6, the Action Cycle continues normally. (In this case, the Confederate player wins the double "1's" initiative roll in the current Action Phase.) Note: The Action Cycle may not end unless both players have performed at least one action in the current cycle. In this case, the Confederate player wins the double "1's" initiative roll and play proceeds normally.
A4.0 Union Railroad Movement
Only the Union player may move units by rail.
A4.1 Embarkation. Only "embarked" units may perform RR movement. The Union player may embark a unit for RR movement if it meets all of the following requirements: it must occupy a RR station (except for RR stations on certain railroads, see below); it must be an infantry (not cavalry) unit; it must have a Fatigue Level of 0 or 1 (it may be exhausted); it must not occupy an enemy ZOC; it must not occupy a Confederate-controlled county (the county may be neutral; see A9.0). To embark an eligible unit, the Union player must select that unit for a march, and the unit gains one Fatigue Level. An extended march never occurs due to RR embarkation. Instead of performing a march, the Union player places a "RR Movement" marker on the unit. The action ends, and a new Action Phase begins. An embarked unit may move by rail. A unit selected to participate in a leader activation may not embark. A leader stacked in the same hex as an embarked subordinate may also embark.
A4.2 Railroad Movement Restrictions. The Union player may embark and move units on all railroads on the map, except the following: Winchester & Potomac RR; Loudoun & Hampshire RR west of SJW N5013 (the Loudoun & Hampshire RR may only be used in SJW N5013 and all hexes east of this). Note: The Western Maryland RR in hex E1601 is considered to connect with the railroad in hex W5806 (New Windsor), even though a rail line does not join the two hexes. The distance between the two hexes in terms of RR movement is 16 hexes.
A4.3 Manpower Limitations. The Union player may embark up to 3 units per turn, although only one per Action Phase, as long as the total amount of manpower embarked is no more than 16 per turn.
A4.4 Disembarking. The Union player may "disembark" a unit, removing its "RR Movement" marker, any time he holds the initiative. There is no cost in Fatigue Levels to disembark. It is not an action. A unit must disembark under any of the following circumstances: the Action Cycle ends; an enemy unit moves into an adjacent hex; it finishes a rail move of 1 or more hexes.
A4.5 How RR Movement Is Performed. To move an embarked unit by rail, the Union player activates that unit for a march action. (It may not move by rail as part of an activate leader action.) Subject to RR movement restrictions, he may then move the embarked unit up to 60 hexes, regardless of terrain, as long as the unit moves only across RR hexsides. As soon as the unit finishes its movement, it disembarks and its "RR Movement" marker is removed. The unit may end its move in any RR hex, not just in a RR station. The unit gains Fatigue Levels depending on how many hexes it moves: 1 to 20 hexes = 1 Fatigue Level; 21 to 40 hexes = 2 Fatigue Levels; 41 to 60 hexes = 3 Fatigue Levels. If a rail move would increase a unit's Fatigue Level above 4, a move of that distance is prohibited. An extended march never occurs due to RR movement. Leaders may accompany units moving by rail. RR movement may take place in rain turns with no detrimental effect.
A4.6 RR Movement Limitations. A unit moving by rail is subject to the following limitations: it may not cross a hexside containing a destroyed bridge; it may not enter a hex containing a destroyed or damaged RR station; it may not enter an enemy ZOC; it may not enter a Confederate-controlled county (the county may be neutral; see A9.0) — county control is re-determined when a unit moves by rail, i.e., if the Confederate player has gained control of a certain county since the last VP Phase, the Union player may not move through it by rail; it may not move on certain railroads during a "Mosby" event (see A2.5); it may not move on certain railroads at all (see A4.2).
A5.0 Union Forts
Several Union forts are printed on the map. These forts are Union controlled and undestroyed at the start of all scenarios unless otherwise indicated. Union forts printed on the map are not the same as entrenchment fort marker counters that both players may build on their units per section 9 on Entrenchments in the Standard Basic Rules.
A5.1 Effects Of Union Forts. Confederate units may not enter or retreat into a hex containing an undestroyed Union fort. Similarly, Confederate leaders may not transfer or exert a command radius into or through an undestroyed fort hex. Confederate units adjacent to an undestroyed Union fort do exert a ZOC into the fort; however an undestroyed fort is always treated as occupied by a Union unit when determining the effects of Confederate ZOC. Union forts do not exert ZOC (unless a Union unit occupies its hex). A Union fort hex adjacent to a defending Confederate unit is considered "covered" for flank attack determination. Union units may enter fort hexes without restriction. Forts themselves may not activate or entrench.
A5.2 Union Forts And Combat. Union forts in RWH have differing Combat and Artillery Values, which are listed below. This intrinsic Combat Value may only be used in defense; a fort may never join in a Union attack (although Union units in fort hexes may attack). Confederate units may attack an adjacent fort hex. If no Union units occupy the fort hex, the fort's intrinsic combat and artillery value is used to resolve the combat. If one or more Union units occupy the fort hex, the Union player's Combat and Artillery values are calculated by adding the fort's intrinsic values to the Combat and Artillery values of the Union units defending in the fort hex. In Confederate attacks against forts, there can never be a tactical modifier in favor of the Confederate player. If the Confederate player has a higher tactical value than the Union player, or if no Union units occupy the fort hex, no tactical modifier is used. If the Union player has a higher tactical value, that combat die roll modifier is applied normally. In Confederate attacks against fort hexes, the Confederate player may never gain a flank attack bonus. All other combat modifiers are applied normally.
A5.21 Combat And Artillery Values For Union Forts. Union forts are divided into four types. Each type has different Combat and Artillery Values. Types and locations are specified below:
- DC forts south of the Potomac (all forts in Alexandria County and Fairfax County): Combat Value 3, Artillery Value 8. Note: The following forts have intrinsic Combat and Artillery Values of 0, even though they are located within the area of "DC forts south of the Potomac": E0440 (Ft. Ramsay), E0841 (Ft. Runyon), E0941 (Ft. Jackson).
- DC forts north of the Potomac (all forts in the District of Columbia, Montgomery County, and Prince George's County): Combat Value 1, Artillery Value 4.
- Baltimore: (a) Fort Federal Hill (HCR E3215) and Fort Marshall (HCR E3414): Combat Value 2, Artillery Value 8. (b) Fort McHenry (HCR E3316): Combat Value 2, Artillery Value 2. Note: Forts Federal Hill & McHenry are in city hexes. However, these two hexes are treated as Rolling when determining the Artillery Modifier in combat.
- Naval Battery, W2620: Combat Value 1, Artillery Value 0.
Note: No fort exists in Harpers Ferry/Bolivar (W2521); this fort is only for games which take place in 1862.
A5.3 How Union Forts Are Destroyed. If the Union player suffers a combat result containing an "r" (retreat) or "R" (rout) in any Confederate attack against a Union fort hex, the fort is permanently destroyed. Any Union units in the fort hex must also retreat or rout. Place a "Destroyed" marker in the hex—a Union fort is no longer considered to occupy that hex. When calculating the Defender's Combat Value to determine the proper column on the Combat Chart, do not include the intrinsic Combat value of the fort. Combat results containing Manpower Value losses, "f" (fatigue-1), "F" (fatigue-2), and "D" (disorganize) results have no effect on forts; however, these results do affect Union units defending in the fort hex. A manpower value loss may not be taken by the fort; if there are any units in the fort, they take the full manpower loss. The destruction of a fort does not count as a Manpower value loss for Victory Point purposes in the scenarios. A destroyed fort is considered to be a Union redoubt hex (see Standard Rules section 9.0) for the rest of the scenario. If Union units re-enter the hex, they gain all the normal benefits of a redoubt hex.
A5.4 Entrenchment In Fort Hexes. Union units in a fort hex are treated as if they occupied a redoubt hex for entrenchment purposes. Thus, in a fort hex, Union units with no other entrenchments have their Combat and Artillery values multiplied by 1.5 when defending. Units in fort hexes may continue to entrench normally until they are under a completed Fort marker (which should not be confused with a printed fort hex).
A6.0 Reinforcements
Only the Union player may receive reinforcements. There are two types of reinforcements: West Virginia and Army of the Potomac.
A6.1 West Virginia Reinforcements. During each Reinforcement Phase starting July 8th, the Union player rolls one die and consults the WV Arrival Table. If the result is "NE", no reinforcements are received; if the result is "Reinforcement", the first increment of the WV Reinforcements is placed on the map. During each Reinforcement Phase following this, the Union player continues to roll for WV Reinforcements. The second time a "Reinforcement" result is received, the second increment of WV reinforcements is placed on the map; the third time a "Reinforcement" result is received, the third increment of WV reinforcements is placed on the map; and the fourth time a "Reinforcement" result is received, the fourth increment of WV reinforcements is placed on the map. After the fourth increment is received, the Union player does not roll for WV Reinforcements.
First Increment: Sullivan; 1 NY. Second Increment: Duffie; Tibbits; Wynkoop. Third Increment: Crook; Duval. Fourth Increment: Averell; Schoonmaker; Oley; Powell.
WV Arrival Table, 1st Increment: Die 1 or less = Reinforcement; Die 2-6 = No Effect. Modifier (1st Increment only): -1 for each day following July 8th (cumulative).
WV Arrival Table, 2nd, 3rd, and 4th Increments: Die 1 to 3 = Reinforcement; Die 4-6 = No Effect.
A6.11 Placement Of WV Reinforcements. WV Reinforcements may be placed as follows: Entering by road (any units)—reinforcements of any type (infantry or cavalry) may be placed within three hexes of W0904 (Runners Ferry); these reinforcements are placed at Fatigue Level 0. Entering by rail (infantry only)—infantry reinforcements may be placed in W0904 (Runners Ferry), or in any RR station on the Baltimore & Ohio RR in Berkeley or Jefferson counties; they must be able to trace a path of RR hexsides from the hex they are placed in to W0904 (Runners Ferry); the path (including the hex the units are placed in) may not cross a destroyed or damaged RR station, destroyed bridge, or a Confederate unit or Confederate ZOC; if a reinforcement is placed in a hex in the W13XX column or west it is placed at Fatigue Level 0; if it is placed in a hex east of the W13XX column it is placed at Fatigue Level 1. Any reinforcements placed in RR stations have no effect on Union railroad movement during the current turn.
A6.2 Army Of The Potomac Reinforcements. All Army of the Potomac reinforcements (except the XIX corps units Emory, Dwight, and Grover) begin the game in the Petersburg Box of the Off-Map Movement Chart. Emory, Dwight, and Grover are placed in the Petersburg Box at the beginning of the Reinforcement Phase of July 12th. This is because the XIX corps was being sent from Louisiana to Petersburg and did not arrive there until July 12th. Some or all Army of the Potomac reinforcements are sent to Maryland as the game progresses. Note that the NY Militia unit only comes in per rule A2.3. Beginning on the turn after Union units are "alerted" (see Scenarios 4 & 5, Special Rule 8), in the Reinforcement Phase, the Union player performs the following actions, in the order listed:
- The Union player rolls two dice and consults the AP Reinforcement Table (see A6.24). This roll may be modified. If he receives a reinforcement result, he moves the corresponding units (see A6.21) to the Potomac River and/or Chesapeake Bay boxes. If several units are being sent, they may be split among the Potomac and Chesapeake boxes or sent to only one box at the Union player's choice. A corps leader is sent when the second division of his corps is sent. The first time a reinforcement result is received on the AP Reinforcement Table, the infantry brigade Beaumont is also sent. A maximum of 15 manpower of reinforcements may occupy the Potomac River and Chesapeake Bay boxes at any time (15 total for the 2 boxes, not up to 15 in each). If more than 15 manpower are sent, any manpower above 15 is placed in the City Point Box. Any units which occupy the City Point Box may be moved to the Potomac River or Chesapeake Bay boxes on succeeding turns (assuming that no more than 15 manpower occupies these boxes at any time). Exception: XIX Corps units may be moved to the Potomac River or Chesapeake Bay boxes even if 15 manpower already occupies these boxes. This is because the XIX Corps was being sent from Louisiana and had their own transports with them. (Note: The Union player may not detach substitute units from reinforcements before they are placed on the map, so that exactly 15 manpower occupies the Potomac River and Chesapeake Bay boxes. Reinforcements must be sent as entire units.) The Union player is not obligated to receive AP Reinforcements, since he loses VP when they are sent. If he does not want all or some AP Reinforcements, he places them in the City Point Box (or leaves them there if they already occupy the City Point Box; VP are not lost for manpower in the City Point Box). They may be placed in the Potomac River or Chesapeake Bay boxes on succeeding turns. Once placed in the Potomac and Chesapeake boxes, however, they must be received (although they may be sent back—see A6.23).
- If any reinforcements were in the Potomac River or Chesapeake Bay boxes at the beginning of the turn (not units which were moved there in the current turn), the Union player moves them forward by one box. Units in the Potomac River Box are moved to the Washington Box, and units in the Chesapeake Bay Box are moved to the Baltimore Box. He then rolls a die to determine when each unit is placed (infantry units only, not leaders—leaders may be placed with any unit under their command). Die 1-2: the reinforcement is placed on the map immediately at Fatigue Level 0. Die 3-5: the reinforcement is placed at Fatigue Level 1 during the Action Cycle of the current turn. The first time the Union player wins the initiative die roll with a 6 or the Confederate player passes, he may place one unit on the map. This is not considered an action, and he may activate the just-placed unit (this unit would then go to Fatigue Level 2) or another unit during this Action Phase. The next time he rolls a 6 or the Confederate player passes, he may place the next unit, and so on until all of the reinforcements have been placed. If any units are left in Washington or Baltimore Boxes at the end of the Action Phase, they are placed on the map at that time. Die 6: the reinforcement is placed on the map at Fatigue Level 2 in step 1 of the Recovery Phase. See A6.22 for where AP reinforcements are placed.
A6.21 Selection Of AP Reinforcements. Reinforcements are selected in the following manner: the first corps sent is the VI, then the XIX, and lastly the IX. Divisions are selected randomly from the corps to be sent (either roll a die, or pick one from a cup). Exception: IX corps units must be sent instead of XIX corps units if all units from the VI corps have been sent, a reinforcement result has occurred on the AP Reinforcement Table, and the current turn is July 11th or earlier. If one IX corps division is sent, all following reinforcements are also chosen from the IX corps until it is fully sent, even if the current turn is July 12th or later.
A6.22 Placement Of AP Reinforcements. AP Reinforcements must be placed on the map as follows, depending on whether they have been moved into the Washington or Baltimore boxes: Washington Box—any landing hex on the Potomac River, Anacostia River, or Piscataway Creek. Baltimore Box—any landing hex on the HCR East map, except for those on the Potomac River, Anacostia River, or Piscataway Creek. Reinforcements may be placed in a Confederate ZOC, but not in a Confederate occupied-hex. Leaders may be placed with any unit under their command.
A6.23 Return Of AP Reinforcements. AP reinforcements may be returned in the following manner: in any Reinforcement Phase in which AP reinforcements occupy any landing hex, they may be removed from the map and placed back in the Petersburg Box. (Note: Substitute units may not be sent back. Only the original units which were received as reinforcements may be sent back. In addition, these units may not have a manpower value greater than when they were placed on the map.) The Union player may wish to send Grant back to Petersburg; to do so he removes Grant from the map during any Reinforcement Phase and places him in the Petersburg Box. He may occupy any hex on the map when he is sent back. He does not need to occupy a landing hex.
A6.24 AP Reinforcement Table: 2-12 = NE; 13-16 = 1 division; 17-20 = 2 divisions; >20 = 3 divisions.
Modifiers: -1 each 3 manpower which have already been sent as AP reinforcements (cumulative). Example: If the Union player has already been sent Beaumont (3 manpower) and Ricketts-C (10 manpower) then the modifier is 13/3 for a -5 modifier. Fractions are rounded up. +8 if a Confederate infantry (not cavalry) unit occupies a Baltimore or Alexandria city hex (Note: This is in addition to the county occupation modifier; see below). +4 if a Confederate cavalry unit occupies a DC, Baltimore, or Alexandria city hex (Note: This is in addition to the county occupation modifier; see below. Also, this modifier does not apply if a Confederate infantry unit occupies a city hex, as above). +4 if a Confederate infantry unit is adjacent to a DC fort hex (north or south of the Potomac).
County occupation modifier: The Union player notes which counties Confederate units (infantry or cavalry) occupy. If the county is occupied by cavalry ONLY, the modifier is halved, rounding up. The occupation situation with the highest modifier is used: +4 Jefferson, Berkeley, Rappahannock, Culpeper. +6 Washington, Fauquier. +7 Frederick-West. +8 Loudoun. +10 Prince William. +11 Frederick-East. +12 Carroll, Fairfax. +14 Montgomery, Howard, Prince George's, Anne Arundel. +16 Baltimore, Alexandria. +24 DC.
A7.0 Confederate Levies
The Confederate player may impose a levy on any town hex in Maryland, and the city-hex of Annapolis. All rules on levying towns (below) also apply to levying Annapolis.
A7.1 How Levies Are Imposed. If a Confederate infantry unit with a Manpower Value of 5 or more and a Fatigue Level of 0 occupies a town hex in Maryland at the start of a Recovery Phase, the Confederate player may impose a levy on that town. Note: A levy may not be imposed on a town if a Union unit with a Manpower Value of 3 or more occupies an adjacent hex. At the end of the game, the Confederate player receives Victory Points for all levied towns (see Advanced Game Victory Conditions). It does not cost any Fatigue Levels to impose a levy. A unit imposing a levy may entrench or repair a bridge or ferry in the same Recovery Phase in which the levy is imposed. Any Confederate unit (infantry or cavalry) with a Manpower Value of 3 or more may levy a town, subject to the restrictions above, if no Union unit is within 4 hexes of the town.
A7.2 Levy Restrictions. Each town in Maryland and Annapolis may be levied a maximum of once per game.
A8.0 Repairing Damaged RR Stations
During the RR Station Repair Phase (which occurs on the July 4, 9, 14, and 19 turns only), the Union player may attempt to remove Damage markers from RR station hexes. Destroy markers may never be removed. For each RR station on the map with a Damage marker which is neither occupied by a Confederate unit nor in a Confederate ZOC, the Union player rolls a die. If the Damage marker is situated in Baltimore, Anne Arundel, Prince George's, Howard, Montgomery, Frederick-East, or Carroll Counties, the Damage marker is removed on a roll of 1 to 5; on a roll of 6, the Damage marker remains in place. If the Damage marker is situated in any county except those listed above, the Damage marker is removed on a roll of 1 to 4; on a roll of 5 or 6, the Damage marker remains in place. If the Union player fails to remove a Damage marker in a RR Station Repair Phase, he may make another attempt to remove it in a later RR Station Repair Phase.
A9.0 County Control
In the VP Phase, the Confederate player must check to see whether he controls any counties. The Union player must control any counties which he moves units through by rail. Any county that may be controlled contains a "control seat". These are identified with a red star. Note: The control seat for Baltimore County is Camden Station (E3115); the county seat marker in Reisterstown (E1905) is the control seat for Baltimore County only in RTG. For the purposes of this game, all hexes east of the Monocacy River in Frederick-West County are in Frederick-East. These are as follows: W4517 south along the Monocacy River to W4225, northeast along the county line to W4922, and northwest along the county line back to W4517. In addition, hex E0934 is in Montgomery County, not the District of Columbia; and hexes E1538 and E1638 are in Prince George's County, not the District of Columbia. In a VP Phase, a player controls a county if a friendly infantry (not cavalry) unit with a manpower value of 2 or more occupies the control seat. Counting this unit, the player must also have a combined manpower value among his units (including cavalry) in that county of at least 10. If neither player controls a county, that county is "neutral"; the Union player does NOT automatically control all counties that the Confederate player does not control. The Confederate player can also control a county if he has at least 15 manpower of infantry units in the county, no Union infantry unit occupies the control seat, and the amount of Union infantry manpower in the county is less than 15. Exception: The Confederate player cannot control DC, Alexandria, or Baltimore counties in this way. Instead, he must occupy the control seat (as above). Union RR movement in "neutral" counties is affected by the Mosby random event (see A2.5).
A10.0 Substitute Units
The Union player has eight "substitute" infantry brigades and two "substitute" cavalry regiments. The Confederate player has three "substitute" infantry brigades and two "substitute" cavalry regiments.
A10.1 Detachment. Either player may detach one or more substitute infantry brigades from a marching infantry unit as long as the unit has a Manpower value of 2 or more. Either player may detach one or more substitute cavalry regiments from a marching cavalry unit as long as the unit has a manpower of 2 or more.
How To Detach. To detach, a player places a substitute in the same hex as the unit from which it detaches and assigns it a Manpower value. A Strength marker equal to the Manpower value assigned to the substitute is placed under it. The substitute's Manpower value is subtracted from the parent unit's Manpower value, and the parent unit is assigned a new Strength marker, on the same side as the one it replaces, reflecting its reduced value.
Placement Of Detached Units. A detached substitute may be placed in the hex in which an active infantry unit begins its march or in any hex entered by the active unit during its march. After a substitute is placed on the map, the active unit may continue its march. After placement, substitutes function normally.
Detachment Restrictions. Counter Limits: The number of substitutes provided in the game is a strict limit. If all substitutes are currently in use, no more may be used. However, if substitutes reattach to other units, they are removed from the map and again become available for use. Size: After detaching a parent unit must have a minimum Manpower value of 1. The manpower value of a substitute is limited: substitute Union infantry brigades must be assigned a Manpower value of 8 or less; substitute Confederate infantry brigades must be assigned a Manpower value of 6 or less; substitute cavalry regiments must be assigned a Manpower value of 2 or less.
Determining Status Of Detachments. Fatigue: If a substitute is placed in the hex in which an active unit begins a march, the substitute is assigned a Fatigue marker equal to the active unit's Fatigue Level before it was selected to march. If a substitute is placed in any hex except the one in which the active unit begins a march, the substitute is assigned a Fatigue marker equal to the active unit's Fatigue Level at that moment. Entrenchment: If an entrenched active unit detaches a substitute in the hex in which it begins a march, the substitute is assigned the same kind of entrenchment marker possessed by the active unit. Disorganized, Demoralized, Exhausted: If an active unit has a disorganized Strength marker, or is on its exhausted side, or possesses a Demoralized marker, any substitute detached by this unit must possess the same characteristics. Supply: A substitute unit is assigned the same supply status (supply track marker location on the Supply Chart or "out of supply" marker) as the active unit from which it detached. Command: The owning player should note on a piece of paper the number of each substitute placed on the map and the command to which it belongs. (It belongs to the same command as the unit from which it detaches, but it may eventually attach to a unit of a different command.)
A10.2 Attachment. In the Attachment Phase, a substitute (or a normal infantry regiment or brigade, or cavalry regiment—see "Special Attachment") stacked in the same hex as a friendly unit may "attach" to that unit. As long as a unit attaches to a unit of the same type (infantry or cavalry), it may attach to any friendly unit regardless of size or affiliation.
How To Attach. Remove attaching units and all accompanying markers from the map. The Manpower value of an attaching unit is added to the Manpower value of the unit to which it attaches; this unit receives a new Strength marker with an enhanced Manpower value.
Attachment Restrictions. Unity: A unit may not attach a portion of its strength to another unit. The whole unit must be attached (and the unit removed from the map). Size: A unit may not attach to another unit if the addition of its Manpower value would raise the Manpower value of the unit remaining on the map above the following strengths: Union infantry divisions may not be raised above a Manpower Value of 14; Union infantry brigades may not be raised above a Manpower Value of 8; Union infantry regiments may not be raised above a Manpower Value of 2; Union cavalry brigades may not be raised above a Manpower Value of 4; Union cavalry regiments may not be raised above a Manpower Value of 2; Confederate infantry divisions may not be raised above a Manpower Value of 10; Confederate infantry brigades may not be raised above a Manpower Value of 6; Confederate cavalry brigades may not be raised above a Manpower Value of 3; Confederate cavalry regiments may not be raised above a Manpower Value of 2. Non-Regular Army Units (Union player only): No unit that detaches from a non-Regular Army unit, or any non-Regular Army unit, may attach to a Regular Army unit, or to a substitute unit detached from a Regular Army unit.
Determining Status After Attachment. Strength Marker: The unit to which a unit attached is assigned a new Strength marker on the same side (organized or disorganized) as the one it replaces. Exception: If the Manpower value of an attaching unit is greater than the Manpower value of the unit to which it attaches, the new Strength marker of the unit remaining on the map is placed on the same side as the attaching unit's Strength marker. Fatigue, Exhaustion: If a unit attaches to a unit and the two units have different Fatigue Levels, the unit remaining on the map after attachment receives a Fatigue Level equal to the highest of the two levels. If a unit attaches to a unit and one of the units is exhausted and the other is on its normal side, the unit remaining on the map is flipped to (or remains on) its exhausted side. Entrenchments: If an entrenched unit attaches to an unentrenched unit, the unit remaining on the map remains unentrenched. However, if an entrenched unit or unentrenched unit attaches to an entrenched unit, the unit remaining on the map remains entrenched. Demoralized: If a unit attaches to a unit and at least one of the units is demoralized, the unit remaining on the map is assigned a demoralization level equal to the most severe level possessed by one of the units prior to attachment. Supply: If a unit attaches, remove its supply track marker from the Supply Chart. The unit to which it attaches maintains its current supply status. Exception: If the Manpower value of an attaching unit is greater than the Manpower value of the unit to which it attaches, the unit remaining on the map has its supply track marker moved to the same location on the Supply Chart as the location of the supply track marker possessed by the attaching unit. If the unit remaining on the map was "Out of Supply", it is now "In Supply".
Special Attachment. Both players' non-substitute infantry regiments and brigades may attach to any friendly infantry unit as long as attachment rules are adhered to. Similarly, Union non-substitute cavalry regiments may attach to any friendly cavalry unit. Also, Confederate non-substitute cavalry brigades may attach to any friendly cavalry unit. The infantry brigade Beaumont may not attach to any other Union unit, infantry or cavalry. This is because Beaumont's men were dismounted cavalry from the Army of the Potomac and would not have been able to fight well with infantry.
A10.3 Substitutes And Artillery Values. If the players wish, they may transfer Artillery value points to or from detaching and attaching units. Detachment: If a substitute detaches from a unit, it may be assigned some or all of the Artillery value points of the parent unit. If so, an Artillery marker equal to the Artillery value assigned to the substitute is placed under it. The substitute's Artillery value is subtracted from the parent unit's Artillery value, and the parent unit is assigned a new Artillery marker, reflecting its reduced value. Attachment: If a unit attaches to another unit, assign the attaching unit's entire Artillery value to the unit to which it attaches. This unit receives a new Artillery marker with an enhanced Artillery value.
A11.0 Supply
To function at full effectiveness, units must be in supply.
A11.1 Depots. The Union player possesses depots. Depots act as supply sources; they have no Combat Value and may not be attacked, nor may they move or retreat. Confederate units may enter a hex occupied by a Union depot as long as no Union units occupy that hex. At the moment a Confederate unit with a Combat Value of 2 or more performs a Burn RR Station action in a hex occupied by a Union depot, that depot is destroyed and is removed from the map. (In addition, if the hex contains a RR station, the station is either damaged or destroyed; see "Burn RR Station," 5.4.) Note: The Confederate player may perform a Burn RR Station Action in a hex occupied by a Union depot even if that hex does not contain a RR station. Note: Only the Confederate player may destroy depots. The Union player may not destroy any of his depots.
A11.2 Supply Status. During the Recovery Phase, the Confederate player must determine the supply status of each of his military units. He does not need to determine supply status for leaders. The Union player does not need to determine the supply status of his units; Union units are always considered to be "in supply". On the RWH Supply Chart, all Confederate units have six "ration boxes", numbered from five to zero, representing up to five days' supplies. A spare out of supply marker, hereafter called a "supply track marker", is moved down from one box to another as a unit uses up its supplies, and the marker is moved up when the unit regains supplies.
How To Determine Supply Status. Perform the following actions, specifically in the order listed, in place of Step 2 of the Recovery Phase (8.0). These actions are known as the "Supply Procedure": All Confederate units have their supply track markers moved down one box (towards zero). If a unit's supply track marker is already in the "0" box, place an "out of supply" marker on the unit. Example: At the start of Scenario 4 Confederate units have their supply track markers in the "1" box. Their markers are moved down into the "0" box during this step on turn 1, but all units remain in supply — their markers were not in the "0" box as the phase started. All Confederate units on a Union depot or adjacent to a Confederate-occupied Union depot have their markers moved up to the "5" box. If any of these units has an "out of supply" marker on it, it is removed now. Confederate units at Fatigue Level 0, 1, or 2 may forage (see A11.3), but not if they undertook any activities in Step 1 of the Recovery Phase. During Step 6 of the Recovery Phase each "out of supply" unit possessing an organized Strength marker has its Strength marker flipped to its disorganized side.
Out Of Supply. Place an "Out of Supply" marker on a unit that is out of supply. This marker accompanies the unit wherever it goes until the unit regains "in supply" status, at which time the marker is removed. Out of supply units function normally in terms of movement and combat. However, if an out of supply unit performs an extended march, 1 is added to all other modifiers on the Extended March Table. In addition, out of supply units suffer penalties in Step 6 the Recovery Phase (see 8.0).
A11.3 Foraging. In Step 3 of the Supply Procedure (see A11.2), the Confederate player may "forage" with any of his units (even those which are in supply) which are at Fatigue Level 0, 1, or 2. A unit may not forage at Fatigue Level 3 or 4, nor may it forage if it built a bridge, repaired a bridge or ferry, or entrenched in Step 1 of the Recovery Phase. An exhausted unit may forage. Leaders may not forage. The Confederate player performs the following procedure for each foraging unit: Roll a die and modify this roll by adding the unit's current Fatigue Level. (At Fatigue Level 0, the roll is not modified.) In addition, if all six hexes adjacent to a foraging unit are enemy occupied, in an enemy ZOC (even if occupied by a friendly unit), or are hexes into which the foraging unit cannot move due to terrain restrictions, 1 is added to the unit's forage roll. If the modified roll is less than or equal to the Forage Value of the county the unit occupies (see below), the unit has successfully foraged. If a unit forages successfully, its supply track marker (on the Supply Chart) is moved up to the "5" box. If it has an "out of supply" marker on it, it is removed now. If the modified roll is greater than the county's Forage Value, the unit has not foraged successfully, and no further action is taken; if the unit was out of supply, it remains out of supply. Its supply track marker is not moved.
Forage Values: 3—all counties in Maryland. 2—all counties in Virginia (except the "Shenandoah Valley", see below). 4—the Shenandoah Valley (Berkeley, Jefferson, Frederick (VA), Clarke, and Warren counties).
A12.0 Harpers Ferry
In the Advanced Game scenario, the players must determine whether Union units in and around Harpers Ferry (W2521) are surrounded, and if so, whether or not they surrender. This determination takes place in the Harpers Ferry Phase.
How To Determine If Harpers Ferry Is Surrounded. In the Harpers Ferry Phase, every Union unit occupying Harpers Ferry/Bolivar (W2521) or within three hexes of hex W2521, must attempt to trace a continuous path of road, pike, or RR hexes of unlimited length to any mapedge hex. This path may not enter a Confederate-occupied hex or a Confederate ZOC unless that ZOC is occupied by a Union unit.
How To Determine If Harpers Ferry Surrenders. If there are no Union units in or within three hexes of W2521, or all Union units in or within three hexes of W2521 can successfully trace such a path, no action is taken and play proceeds to the next phase. However, if at least one union unit cannot trace such a path, the Confederate player rolls two dice, combines the rolls into a single sum, and consults the Harpers Ferry Table. (The dice sum may be modified; see below.) If the modified dice sum is 11 or less, the result is "no effect", and play proceeds to the next phase. If the modified dice sum is 12 or more, the result is "surrender" (see below). The Confederate player may take a maximum of one dice roll per turn to attempt to achieve the surrender of Harpers Ferry. Note: If undestroyed, the Union fort (see A5.0) in Naval Battery counts as a "Union unit" for purposes of the above surrender action (there do not need to be any Union military units in the above mentioned area, just the Union fort qualifies for this purpose).
Surrender Of Harpers Ferry. If the Confederate player achieves a "surrender" result, all Union units and leaders in or within three hexes of Hex W2521 which cannot trace a path of hexes as previously described are immediately eliminated from play. The Confederate player receives VP if this occurs (see scenario victory conditions). Note the VP difference between "Harpers Ferry Surrender" and "surrender" from retreat which is retreat losses (Standard Rules section 7.6). Note: if a surrender result is achieved then the Union fort in Naval Battery (W2521) is immediately destroyed.
Harpers Ferry Table: Dice Sum ≤11 = No Effect; Dice Sum ≥12 = Surrender.
Harpers Ferry Table Modifiers: The Confederate player's Harpers Ferry Table dice roll is modified if any of the following conditions are in effect (all modifiers are cumulative): +3 if a Confederate infantry unit with an Artillery Value of at least 1 occupies Hex W2620 (Naval Battery); +1 if a Confederate infantry unit with an Artillery Value of at least 1 occupies Hex W2621 (Loudoun Heights); +1 if a Confederate infantry unit with an Artillery Value of at least 1 occupies Hex W2420 (Bolivar Heights).
A13.0 Point Lookout
On the peninsula south of Washington was a large camp for Confederate POW's. Early was ordered to support an attempted naval attack that would be made on that camp on July 12th. Bradley T. Johnson, a Marylander, would lead the raid. The rules below simulate this. Different actions are taken during each Point Lookout Phase. They are described as follows:
July 10th: The Confederate player may exit cavalry units to Point Lookout off the south edge of the HCR East map from 0850 to 2750. To do so, he removes the cavalry from the map, and notes the amount of manpower and the date removed. Cavalry sent to Point Lookout may not be demoralized, but may be at any fatigue level, and may be disorganized.
July 11th: The Confederate player may exit cavalry units as above, noting the manpower and date.
July 12th: The Confederate player rolls two dice. This roll may be modified (see below). He notes the result on the Point Lookout Table. If the result is "Minor Success" or "Complete Success", he receives VP; if the result is "Failure", no VP are awarded.
Point Lookout Table: Dice Roll ≤9 = Failure; 10-13 = Minor Success; ≥14 = Complete Success.
Modifiers: +1 each 1 manpower of Confederate cavalry exited on July 10th; +1 each 2 manpower of Confederate cavalry exited on July 11th (rounded down; if the Confederate player exits 5 manpower, the modifier is +2); -1 if the cavalry brigade Johnson is not sent to Point Lookout; -3 if no cavalry units are sent to Point Lookout.
Note: If the result is "Complete Success", the Confederate player may immediately place a second manpower marker (of 4 manpower) under any cavalry unit which participated in the Point Lookout raid. This manpower represents escaped prisoners that would be armed, and riding horses that the Confederates would have taken on their ride down. This manpower may not attack with the cavalry unit, although its strength may be used in defense, and it may take any manpower losses as a result of defense. It is considered to be at the same status (fatigue, supply status, etc.) as the cavalry unit it is with. If the cavalry unit undertakes an extended march, a separate die is rolled for the escaped prisoners. If the cavalry unit is eliminated, the escaped prisoners unit is removed (but no VP are lost). If the cavalry unit occupies the same hex as another infantry unit in an Attachment Phase, the prisoners may attach to the infantry unit as long as all attachment restrictions are adhered to. While this manpower is riding with the cavalry unit, the Confederate player must subtract two from the cavalry unit's movement allowance whenever it performs a march action.
July 14th: All Confederate cavalry units that had exited the map (and the "escaped prisoners" unit, if it applies) are placed back on the HCR East map from 0850 to 2750. These units are placed at Fatigue Level 0 but disorganized and on their exhausted sides, with their supply track markers in the "3" box. They may not recover or entrench in the following Recovery Phase.
A14.0 Destruction of DC Structures
Besides RR stations, several hexes in Washington contain structures that may be damaged/destroyed. Destroying or damaging these structures is done according to "Burn RR Station" rules. Damaged structures may never be repaired, as RR stations may in the RR Station Repair Phase. If damaged (or destroyed) they stay that way for the entire game.
A15.0 Exiting Confederate Units
Under certain circumstances, the Confederate player may exit his units from the map. If, at the end of a Recovery Phase, a Confederate infantry unit occupies Frederick (VA), Clarke, or Warren counties, the Confederate player may remove the unit from the map if no Union infantry units in those counties occupy hexes southwest of the Confederate infantry unit. Example: Gordon occupies Winchester (W0330) and Rodes occupies W0133. Ricketts occupies Salem Church (W0734), and Russell occupies Stephenson's Depot (W0627). The Confederate player may remove both of his units (Gordon and Rodes) if he wishes in this position. However, he could not remove Gordon if Ricketts had occupied W0130 (Toll House) or W0332. The Confederate player may exit any of his cavalry units from the map in the same manner if no Union infantry or cavalry units occupy hexes southwest of the cavalry unit.
Advanced Game Scenarios
Scenario 4: From Winchester To Washington
NOTES: This scenario covers the period from when the Union first learned of Early's presence in the Valley to when Early's army recrossed the Potomac into Virginia.
MAP: Use both HCR maps. Remember that the east map is placed over the west map.
GAME LENGTH: 13 days: July 3 to July 15, 1864.
SPECIAL RULES: 1. Advanced Rules: All Advanced Rules are required for this scenario. However, the Advanced Rules reference several counties and railroads that are located only on the SJW North map, which is not used in this scenario. The counties are Warren, Rappahannock, Fauquier, Culpeper, and Prince William, and the railroads are the Manassas Gap RR and Warrenton Branch RR. Ignore any reference to these counties and railroads. 2. WV Movement Restrictions: No WV unit which begins the game on the map may move out of the following counties until the third increment of WV reinforcements has been received: Washington, Jefferson, Berkeley, Frederick-West. These WV units may retreat out of these counties. However, if forced to retreat outside of these counties, a WV unit must move by the most direct path back to the nearest hex of one of the counties listed above, and may not enter an enemy ZOC except if entering one of those counties. In addition, no WV units may attach to non-WV units until the first increment of WV reinforcements arrives. 3. Harpers Ferry Bridge: The Union player begins the game with a major river bridge across HCR W2620-2521 (Harpers Ferry-Naval Battery). This is in addition to the permanent bridge and counts as the Union player's major river bridge. 4. Confederate Setup: Confederate setup is as follows: infantry units may be placed anywhere within one hex of HCR W0330 (Winchester) — they may not be stacked; cavalry units may be placed anywhere within two hexes of HCR W0330 (Winchester) — they may be stacked with any units (including infantry); leaders may be placed on any unit under their command; all units have their supply track markers placed in the "1" box (i.e., they have 1 day's supply remaining). 5. End of Game: If all Confederate units do not occupy Loudoun, Frederick (VA), or Clarke counties at the end of the game, the Union player may choose to continue the game another day. He may keep doing so until all Confederate units are in the counties listed above (or have been exited from the map). He is not obligated to do this, however. This rule applies in addition to A15.0 (Exiting Confederate Units). 6. Loudoun and Hampshire RR: The Union player may use the Loudoun and Hampshire RR only from HCR E0943 to HCR E0139. 7. Confederate Movement Restrictions: No Confederate unit may enter Loudoun County until Turn 5 (July 8th). 8. Union Movement Restrictions: The Union player may not activate or entrench any of his units at the beginning of the game. Union units may activate or entrench only when they are "alerted", which happens when one of the following conditions has been met: a Confederate unit has moved within 4 hexes of Berkeley or Jefferson counties; a Confederate unit has come within 8 hexes of a Union unit; or the current turn is July 4th. Until one of these happens, the Confederate player does not need to determine initiative; during the Action Cycle, he moves his units as long as he is willing or able to do so. However, in the Action Phase following when any Union unit is "alerted", initiative must be determined, and all Union units may move freely.
Victory Conditions. The Confederate player gains and loses VP for the following occurrences: +50 each VP Phase the Confederate player controls the District of Columbia; +35 each VP Phase the Confederate player controls Baltimore or Alexandria counties; +15 each VP Phase the Confederate player controls Carroll, Montgomery, Prince George's, Howard, or Anne Arundel counties; +5 each VP Phase the Confederate player controls Frederick-East County; +3 each VP Phase the Confederate player controls Frederick-West or Loudoun counties; +2 each VP Phase the Confederate player controls Washington, Berkeley, or Jefferson counties (Note: If the Confederate player should gain VP for controlling more than one county in a given VP Phase, he is awarded VP only for the county with the highest VP award. Exception: If he controls both DC and Baltimore counties, he is awarded VP for both counties.); +15 each VP Phase that a Confederate unit (infantry or cavalry) occupies the District of Columbia, or at least 8 manpower of Confederate infantry are adjacent to any DC fort hex(es) (south or north of the Potomac, except Fort Ramsay (HCR E0440) or Fort Washington (HCR E1148), see A5.0) — Exception: These VP are not awarded if the Confederate player controls the District of Columbia; +10 each VP Phase that a Confederate unit (infantry or cavalry) occupies a Baltimore city hex — Exception: These VP are not awarded if the Confederate player controls Baltimore County.
+15 if the Capitol (HCR E1140) is destroyed; +5 if the Capitol (HCR E1140) is damaged; +15 if the White House (HCR E0939) is destroyed; +5 if the White House (HCR E0939) is damaged; +15 if the US Arsenal (HCR E1141) is destroyed; +5 if the US Arsenal (HCR E1141) is damaged; +15 if the Navy Yard (HCR E1240) is destroyed; +5 if the Navy Yard (HCR E1240) is damaged (Note: VP for damaging a structure are not awarded if the structure is later destroyed. In this case only the VP for destroying the structure are awarded.); +5 each fort destroyed — Exception: No VP are awarded for Fort Ramsay (HCR E0440).
+6 if the depot at Martinsburg (HCR W1314) is destroyed; +8 if the depot at Harpers Ferry (HCR W2521) is destroyed; +5 if the depot at Frederick (HCR W4214) is destroyed; +12 if the depot at Camden Station (HCR E3115) is destroyed; +15 if the depot at Baltimore Depot (HCR E1139) is destroyed; +3 for each of the following RR stations with Destroy (not Damage) markers at the end of the game: North Mountain Depot (HCR W1307), Opequon Station (HCR W1514), Duffield's Depot (HCR W2018); +2 for each of the following RR stations with Destroy (not Damage) markers at the end of the game: Weverton (HCR W2920), Catoctin Switch (HCR W3522), Mt. Airy (HCR W5717), Sykesville (HCR E1210), Ellicott Mills (HCR E2116), Relay House (HCR E2518), Relay House (HCR E2808), Lutherville (HCR E2906), Cockeysville (HCR E2903), Owings Mills (HCR E2207), Glen Morris Station (HCR E1904), Finksburg (HCR E1703), Back River Bridge (HCR E3712), Annapolis Junction (HCR E2223), Gambrills Station (HCR E2927), Laurel (HCR E2026), Beltsville (HCR E1630), Hyattsville (HCR E1634), Arlington Mills Station (HCR E0741), Falls Church Station (HCR E0238); +1 for each of the above RR stations which has a Damage marker placed on it at any time during the game (including North Mountain Depot, Opequon Station, and Duffield's Depot) — also, the Confederate player receives VP for damaging Frederick Junction (HCR W4317); note that Frederick Junction can only be damaged, never destroyed (see Basic Rules, 5.4) (Note: These VP are not awarded if the RR station is later destroyed. Also, these VP can only be awarded once in the game; if a RR station is damaged and later repaired these VP cannot be reawarded.); +1 for each of the following RR stations with Destroy (not Damage) markers at the end of the game: 6-Mile Post (HCR E0344), Springfield (HCR E0145).
+16 if the Confederate player imposes a levy on Annapolis (HCR E3932); +8 for each of the following towns in which the Confederate player imposes a levy: Hagerstown (HCR W2502), Frederick (HCR W4214), Rockville (HCR E0328), Ellicott Mills (HCR E2116), Laurel (HCR E2026); +4 for each of the following towns in which the Confederate player imposes a levy: Williamsport (HCR W2004), Sharpsburg (HCR W2413), Bladensburg (HCR E1635), Pikesville (HCR E2409), Towsontown (HCR E3108), Brooklyn (HCR E3217), Canton (HCR E3414).
+2 for every manpower point that comes in as AP reinforcements (Note: These VP are calculated during each VP Phase for all reinforcements placed in the Potomac River or Chesapeake Bay boxes during the current turn.); -1 for every manpower point of AP reinforcements that is sent back (Note: These VP are calculated during each VP Phase for all reinforcements sent back during the current turn.); +5 each VP Phase in which Grant does not occupy the Petersburg Box; +2 for each point of Union Manpower lost in combat, retreat, or cavalry retreat (not in extended march, force march, or moving from one enemy ZOC to another); +1 for each point of Union manpower that surrenders in or around Harpers Ferry (see A12.0); -3 for each point of Confederate Manpower lost in combat, retreat, or cavalry retreat (not in extended march, force march, or moving from one enemy ZOC to another); +5 each day that a "Mosby" random event occurs (and the day following) in which cavalry units of at least two manpower do not occupy Fairfax or Alexandria counties in the VP Phase, and the Confederate player does not control Fairfax or Alexandria counties (see A2.5); -8 if no Confederate cavalry units are sent to Point Lookout; +15 if a Minor Success result is received on the Point Lookout Chart; +30 if a Complete Success result is received on the Point Lookout Chart; -60 if all Confederate infantry divisions are eliminated; -30 for each Confederate infantry division which does not end the game in any of the following counties: Loudoun, Frederick (VA), or Clarke (Note: These VP are also lost for any Confederate infantry division that is destroyed). At the end of the game, the Confederate VP total is calculated and the players consult the chart below to determine the winner.
Confederate VP Winner: 280 or more = Confederate Decisive Victory; 220 to 279 = Confederate Substantive Victory; 160 to 219 = Confederate Marginal Victory; 100 to 159 = Union Marginal Victory; 20 to 99 = Union Substantive Victory; 19 or less = Union Decisive Victory.
Confederate Set-Up
| Unit/Leader | Size | Command | Type | Manpower Value | Hex |
|---|---|---|---|---|---|
| Early | District | (E)-V | Ldr | - | See Special Rule 4 |
| Breckinridge | Corps | B-V | Ldr | - | See Special Rule 4 |
| Gordon | Div | B-V | Inf | 8* | See Special Rule 4 |
| Echols | Div | B-V | Inf | 7* | See Special Rule 4 |
* Indicated units begin the game on their exhausted sides.
Union Set-Up
| Unit/Leader | Size | Command | Type | Manpower Value | Hex |
|---|---|---|---|---|---|
| Sigel | Div | WV | Inf | 3 | W1313 (Martinsburg) |
| Depot | - | - | - | - | W1313 (Martinsburg) |
| Weber | Brig | WV | Inf | 1 | W2521 (Harpers Ferry) |
| Depot | - | - | - | - | W2521 (Harpers Ferry) |
West Virginia Reinforcements
| Unit/Leader | Size | Command | Type | Manpower Value | Hex |
|---|---|---|---|---|---|
| Sullivan | Div | WV | Inf | 14 | See A6.1; WV Reinforcements |
| 1 NY-B Regt | III | Cav-1-WV | Cav | 1 | See A6.1; WV Reinforcements |
| Duffie | Div | Cav-1-WV | Ldr | - | See A6.1; WV Reinforcements |
| Tibbits | Brig | Cav-1-WV | Cav | 2 | See A6.1; WV Reinforcements |
Army of the Potomac Reinforcements
| Unit/Leader | Size | Command | Type | Manpower Value | Hex |
|---|---|---|---|---|---|
| Beaumont | Brig | AP | Inf | 3 | Petersburg Box |
| Wright | Corps | VI | Ldr | - | Petersburg Box |
| Russell-B | Div | VI | Inf | 11 | Petersburg Box |
| Getty | Div | VI | Inf | 11 | Petersburg Box |
Scenario 5: Early's Raid
NOTES: This scenario covers the period from when Early's army advanced from the Shenandoah Valley to the gates of Washington, and then fell back once more into the Valley.
MAP: Use both HCR maps, and the SJW north map. Remember that the HCR east map is placed over the HCR west map, and the SJW north map is placed under both HCR maps.
GAME LENGTH: 20 days: July 1 to July 20, 1864.
SPECIAL RULES: All special rules in Scenario 4 are also required in this scenario, with the following changes: 1. Advanced Rules: Since the SJW north map is used in this scenario, all of these counties and railroads are on the map. 2. WV Movement Restrictions: This rule applies exactly as in Scenario 4. 3. Harpers Ferry Bridge: This rule applies exactly as in Scenario 4. 4. Confederate Setup: Ignore the Scenario 4 special rule on Confederate setup. Instead, use this one: At the beginning of the game, the Confederate player must decide where he wished to place his units. He has two choices, Front Royal or Winchester. Depending on which choice is made, Confederate units and the turn marker are placed as indicated:
Front Royal: Turn Marker—July 1st; Gordon—SJW N0115; all other infantry—SJW N0116 (Toll House); Cavalry—SJW N0214 (Front Royal); leaders may be placed with any unit under their command. All units are placed at Fatigue Level 1, on their exhausted sides, with their supply track markers placed in the "3" box (i.e., they have 3 days' supply remaining).
Winchester: Turn Marker—July 2nd; Gordon—HCR W0134; Echols—SJW N0104 (Bartonsville); Ramseur and Rodes—SJW N0105 (Newtown); Cavalry—any hex within 5 hexes of SJW N0105 (Newtown); leaders may be placed with any unit under their command. All units are placed at Fatigue Level 2, on their exhausted sides, with their supply track markers placed in the "2" box (i.e., they have 2 days' supply remaining).
Designer's Note: Playtesting has shown that if the Confederate player starts in Front Royal, he has a considerably better chance of getting into DC than if he starts in Winchester. (This is the reason for the –90 Victory Condition if the Confederate player begins the game in Front Royal.) However, historically Early did not know how few Union forces were in northern Virginia, nor how far he could get before the Union would have become aware of his presence. In addition the Winchester route makes for a more interesting game for the Union player because he has a much greater opportunity to obstruct Early's route to Washington. Both routes are included for players to choose from, however; and the Front Royal route will by no means necessarily end in a Confederate victory.
- End of Game: Change this rule to read as follows: If all Confederate units do not occupy Frederick (VA), Clarke, or Warren counties at the end of the game, the Union player may choose to continue the game another day. He may keep doing so until all Confederate units are in the counties listed above (or have been exited from the map). He is not obligated to do this, however. This rule applies in addition to A15.0 (Exiting Confederate Units). 6. Loudoun and Hampshire RR: This rule does not apply because the Loudoun and Hampshire RR is entirely on the map. 7. Confederate Movement Restrictions: Change this rule to read as follows: No Confederate unit may enter Loudoun or Fauquier counties until July 8th. This restriction is lifted if the Confederate player places his units in Front Royal (see Special Rule 4). 8. Union Movement Restrictions: This rule applies as in Scenario 4. However Union units are also alerted if any of the following conditions have been met: a Confederate unit has moved into Prince William or Loudoun counties, or a Confederate unit has moved into the portion of Fauquier county east of column 28xx. In addition, if a Confederate unit performs an extended march in Warren, Clarke, or Frederick (VA) counties, and the Union player has not yet been alerted, the Confederate player may subtract one from his extended march die roll. 9. Destroyed Bridges: Place Destroyed Bridge markers on the following bridges: Bull Run Bridge (SJW N4522 – SJW N4422), SJW N3925 – SJW N3825, Catlett's Station (SJW N3330 – SJW N3230). 10. Destroyed RR Stations: Place RR Station Destroyed markers on the following RR Stations: Hunter's Mill Station (SJW N4913), Thornton Station (SJW N4711), Herndon Station (SJW N4510), Guilford Station (SJW N4309), Piedmont Depot (SJW N1615), Markham Depot (SJW N1215), Linden Station (SJW N0815), Front Royal (SJW N0214).
Victory Conditions. Victory conditions are the same as in Scenario 4, except that the following victory conditions are changed or added to include counties and RR Stations on the SJW North map: The Confederate player gains and loses VPs for the following: +10 each VP Phase the Confederate player controls Fairfax County; +4 each VP Phase the Confederate player controls Prince William County; +2 each VP Phase the Confederate player controls Fauquier County; +1 for each of the following RR stations with Destroy (not Damage) markers at the end of the game: Burke's Station (SJW N5220), Fairfax Station (SJW N0520), Sangster's Station (SJW N4721), Bull Run Bridge (SJW N4422), Manassas Junction (SJW N4124), Bristoe Station (SJW N3726), Catlett's Station (SJW N3330), Warrenton Junction (SJW N3131); -30 for each Confederate infantry division that is destroyed (Note: The Confederate player does not lose VP for not ending the game with his infantry units in certain counties, as in Scenario 4); -90 if the Confederate player begins the game in Front Royal (see Special Rule 4).
Confederate Set-Up. Confederate set-up is different from Scenario 4, and is explained in Special Rule 4.
Union Set-Up. Union set-up is the same as Scenario 4, except that the starting hex for Lowell-B is changed to SJW N5715 (Falls Church).
West Virginia Reinforcements. West Virginia Reinforcements are the same as Scenario 4.
Army of the Potomac Reinforcements. Army of the Potomac Reinforcements are the same as Scenario 4.
The Game As History
May 4th-June 12th, 1864. On May 4th, 1864, General Ulysses S. Grant's Army of the Potomac had begun a drive toward Richmond. To oppose it, as in 1862 and 1863, was Robert E. Lee's Army of Northern Virginia. Unlike the two previous years, the Army of the Potomac had not been driven back, or even stopped; instead, through some of the bloodiest fighting of the war, Grant's army had pushed to the outskirts of Richmond. There his offensive had at last been halted, at least temporarily, at the battle of Cold Harbor (June 3rd). Now, June 12th, the armies sat behind their entrenchments, less than 10 miles from Richmond. In early May, 1864, another Union offensive had begun, 50 miles away to the west, in the Shenandoah Valley. A small Union army under Franz Sigel had advanced up the Valley only to be beaten back by an even smaller army under John C. Breckinridge at the battle of New Market on May 15th. By late May the Union army had regrouped and was again ready to advance, under the command of David Hunter. This time the Union army was larger, and the Confederates had even less to oppose Hunter than they had had to oppose Sigel. At the battle of Piedmont (June 6th) the Confederates were routed with heavy losses, and the commander, W. E. Jones, was killed. Hunter continued south up the Shenandoah, heading toward Lynchburg, a vital rail junction just 80 miles west of Richmond. Back in front of Richmond, Lee knew that Hunter had to be stopped. If Lynchburg fell the Confederates would lose one of the few routes by which they could supply Richmond. To oppose Hunter he sent Breckinridge's small division, which had fought Sigel at New Market. When Breckinridge reached the Valley he could collect whatever forces had been scattered after the battle of Piedmont. However, several days later Lee realized that this would not be enough to stop Hunter. Instead he decided to take more drastic measures. Instead of merely stopping Hunter, he would detach roughly a quarter of his army, the entire II corps, under Jubal Early. Early's orders were not only to defeat Hunter, but also to carry the war north. If Grant detached enough force to deal with Early, Lee might be able to come out from his entrenchments and defeat Grant's weakened army. On June 12th Early's II corps marched north.
June 13th–July 2nd, 1864. Marching north to Charlottesville and then taking the railroad south to Lynchburg, Early's corps arrived in Lynchburg just after Hunter's army appeared in front of the city. Hunter was hesitant to attack, realizing that he was now facing at least some of Lee's army, not just the army he had beaten at Piedmont. He was worried, in fact, that Early might attack him – as indeed Early was planning to do. Hunter's army left Lynchburg on the night of June 18th. Early's army left in pursuit the following morning, but could not catch the fleeing Federals. However, instead of heading north, back the way he had come, Hunter fled west into the West Virginia mountains. After several days of pursuit Early finally gave up. Hunter had gotten away, but now that he was gone, there was no major military force between Early and Washington. After a day's rest, the Army of the Valley headed north. On June 26th Early reached Staunton, and on July 2nd the army occupied Winchester (HCR W0330). Now Early encountered the first Federal troops he had seen for over 100 miles: Franz Sigel (beaten a month and a half earlier at New Market) commanded a reserve division, composed largely of Ohio militia, guarding the Baltimore and Ohio Railroad.
July 3rd, 1864. Not only were Sigel's troops worse than Early's, he had less of them. And Early knew this. To trap Sigel's troops at Martinsburg (HCR W1314), Early sent McCausland's cavalry north around Sigel's right to burn the Back Creek bridge and otherwise hinder Sigel's movement. Meanwhile, Johnson's brigade rode northwest to cut off Sigel's retreat toward the Potomac. However, Sigel had planned ahead. On July 2nd he had become aware that a large Confederate force was again in the Valley, and in fact had just entered Winchester. All day July 2nd Sigel had frantically sent as much of the supplies from the depot at Martinsburg east along the railroad as he could. Then on the 3rd he evacuated Martinsburg, heading for the Potomac, then south towards Harpers Ferry (HCR W2521). Johnson's cavalry, riding towards the Potomac to head off Sigel, ran head on into Mulligan's brigade at Leetown (HCR W1520). Mulligan promptly attacked Johnson and drove his cavalry back until he ran into Early's lead infantry division under Ramseur. Mulligan pulled back, but by that time Sigel had escaped across the Potomac, and Mulligan followed.
July 4th, 1864. Sigel had escaped, but he had left much behind him. He had been unable to send most of the stores out of Martinsburg, and the entire depot at Harpers Ferry had been left behind when the Federals evacuated to the much more defensible position of the Naval Battery (HCR W2620). Early's army had been nearly out of supplies and the men feasted on the Federal stores.
July 5th–July 8th, 1864. Early could not stand letting another Federal force escape his grasp; so on July 5th most of Early's army crossed the Potomac at Sharpsburg and headed south toward the Naval Battery, while one division stayed behind in Harpers' Ferry. On the 7th, Gordon's division tested the Federal defenses and found them strong. Rather than waste his army against an impregnable position, Early marched his army east on the 8th, and by evening was only a few miles from Frederick (HCR W4214). Early's cavalry had not sat idle; but they could have done more. On the 6th McCausland's troopers entered Hagerstown and demanded $20,000. McCausland got his $20,000; but unfortunately for him, Early had ordered him to ask for $200,000. Somewhere along the line a zero had been dropped, and the city had been more than happy to pay so small a sum. Meanwhile, the Federals had been busy too. On hearing that a large Confederate force was north of the Potomac, Grant, with the Army of the Potomac at Petersburg, ordered a division north on the 6th. Ricketts' division of the VI corps was sent. Around Baltimore, Lew Wallace, future author of Ben Hur: A Tale of the Christ, had been busy collecting his troops. Hoping against hope that he could stop or at least delay this rebel invasion, he took as many of his troops as he could spare to the very limit of his district, the Monocacy River. There he waited for the Confederates. On the 8th, Ricketts' division arrived in Baltimore and was sent forward on the railroad to the Monocacy.
July 9th, 1864. Wallace's troops waited behind the Monocacy, strung out along the river for several miles just east of Frederick Junction (HCR W4317). Early's troops arrived in front of the river midmorning. Not wanting to risk an all-out assault, Early tried to find a way around Wallace's troops. It was McCausland that found it first, going with his cavalry brigade across a ford just south of the Union forces (HCR W4318, Worthington Ford). Part of Ricketts' division (the rest was coming up from Baltimore) was positioned in this area, because Wallace had expected that the main Confederate assault would be on his left. McCausland charged Ricketts' line but was thrown back with heavy losses. Rallying his men, McCausland attacked again but was thrown back. However, his attack had shown Early where he could break Wallace's line. Early sent Gordon's division across the Monocacy at the same ford. Ricketts' outnumbered men were able to hold on for a while, but Gordon finally went around Ricketts' left. When Ricketts' men broke and ran, the rest of the Union line fled too. Early did not pursue, because he did not want to be overloaded with prisoners. Now his men would have to put every ounce of their energy toward marching to Washington. With nothing between Early and Washington, Grant would be sure to send heavy reinforcements, if he hadn't already. If Early could move quickly, however, he might be able to beat any troops coming up from Petersburg and take an undefended Washington. Meanwhile he ordered the city officials of Frederick to pay a hefty $200,000 ransom. They had refused while Wallace sat entrenched only a few miles off but with Wallace routed they agreed, and produced the sum Early requested. Down in Petersburg Grant was worried. He had realized a few days earlier, after Early crossed the Potomac, that Early's corps was gone from Petersburg, but had thought that a division would be enough to stop it. He was convinced that Hunter would come in on Early's rear and, with whatever forces were in Washington and Baltimore, Early's small army could be defeated. But Hunter had gone so far west that he was out of the picture militarily, and Ricketts' division had been routed at the Monocacy. Grant knew now that Early was a much larger threat than he had originally thought. On the morning of the 9th he had considered sending the rest of the VI corps. News of Wallace's defeat convinced him that these divisions had to be sent. In addition, Grant decided to send the XIX corps, which would soon be arriving from Louisiana. It would be a race to see which side would be able to reach Washington first.
July 10th–11th, 1864. There was nothing between Early and an empty Federal capitol – or so it seemed. But Early could not control the weather. That summer of 1864 had been blistering hot, and July 10th and 11th were two of the hottest days of the year. Although Early rode alongside his men to encourage them, they fell out of the lines by droves. However, when Rodes' division arrived in front of Fort Stevens (HCR E1034) in the early afternoon of July 11th only a few Ohio militia, Veteran Reserves, and some dismounted cavalry from the Army of the Potomac occupied the last real barrier between the Confederates and Washington. But the incredible heat of the previous days had so exhausted Early's men, along with the hard marching—thirty miles in two days—that there were not enough men even to attack the small Union force in Fort Stevens. Early was forced to let his men rest and wait until morning. Meanwhile, Early had sent Bradley T. Johnson's cavalry brigade on a separate mission. 50 miles southeast of Washington, at the end of a long peninsula, was the Point Lookout POW camp. Housed there were at least 15,000 Confederate prisoners. Lee had sent a dispatch to Early, which he had received before Monocacy, in which Lee stated that an attempt would be made to free the prisoners on the night of the 11th. Two blockade-runners, loaded with guns for the freed prisoners, and with 1,000 Confederate soldiers, would leave the port of Wilmington, South Carolina. They would land at Point Lookout on the night of the 12th, overrun the garrison, and march the prisoners north to Washington, which Early would by then have taken. Lee ordered Early to send Johnson's brigade south to aid in the attempt. If able to rejoin Lee's army, the freed prisoners could add as much another corps to the Army of Northern Virginia. Early ordered Johnson to threaten Baltimore, and then ride south and help in the attempted escape. On the 10th and 11th, Johnson rode around Baltimore, greatly worrying Wallace's force which had retreated to Baltimore, but did not succeed in entering the city.
July 12th, 1864. In front of Washington, Early's army woke to see the parapets in front of them filled with dull blue uniforms – the dull, dusty blue of soldiers of the Army of the Potomac. The previous afternoon, just after Early's army arrived in front of Washington, the last two divisions of the VI corps had begun arriving at the 6th Street Wharf in Washington. Lincoln, knowing that Washington would be in little danger once these veterans were facing Early, had greeted the first soldiers with the quip, "You can't be late if you want to catch Early." Originally these soldiers had been held in reserve should Early break through the ring of forts, but now they occupied Fort Stevens itself. With this many soldiers occupying what was already a formidable barrier, Early knew that a failed assault might weaken his little army so much that Wright's VI corps, along with Hunter's army coming in his rear, might be able to completely obliterate what was left of the II corps of the Army of Northern Virginia. A defeat of this magnitude might be so devastating as to be nearly the end of the war for Lee. So instead of risking everything in an all-out assault, Early decided to hold Washington under siege for another day, and then pull out under cover of night. He also ordered a courier to recall Johnson's brigade from its Point Lookout expedition. It was just as well, because the ships intended to take the POW camp had never left; the officers had been unable to procure anywhere near enough guns to arm the prisoners, and somehow the secret had leaked out, causing President Davis to order the mission to be cancelled. That evening a few brigades of Wright's corps tested Early's position. For a while some of the Confederates thought that they might be overrun, but the Federals were happy to content themselves with clearing the Rebels out of the immediate vicinity of the fort, much to the delight of the senators, the representatives, and Lincoln himself. During the evening the Rebels quietly left camp and marched back towards the Valley.
July 13th–21st, 1864. Federal pursuit of Early's army was timid. Wright feared that his force—only two divisions of the VI corps, a few odd regiments of the XIX corps which was arriving, and whatever could be spared from the Washington garrison—was too small to attack Early with. If Wright was defeated Early could march back and possibly even take Washington. So Wright only followed Early; when the Rebels recrossed the Potomac at White's Ford (HCR W4028) and rested at Leesburg (HCR W3533) for a couple days, Wright kept his force on the other side of the Potomac and waited for Early to move on again. Meanwhile Hunter was at last arriving on the scene. On the 11th Sullivan's division arrived at Martinsburg and marched to Harpers Ferry, and marched to Hillsborough (HCR W2729). When Hunter arrived, he was insulted that Wright was placed in command of the forces pursuing Early, and asked to be relieved. Grant obliged him and placed Crook (one of his division commanders) over the West Virginia forces. When Crook reached Hillsborough on the 16th, he found that no patrols had been sent out and that Sullivan had no idea where Early was. Crook immediately sent cavalry patrols out in all directions. One encountered a portion of Early's wagon train, and Tibbits' cavalry brigade was ordered to attack it. Tibbits' men attacked the wagon train near Purceville (HCR W2732), capturing 200 men and 200 wagons, before being counterattacked by the Confederate cavalry and a division of infantry. Tibbits burned the wagons he couldn't carry off, and retreated with 54 prisoners and 80 wagons. However, before Crook could bring his infantry into contact with the Confederates, Early had already passed through Snicker's Gap (HCR W2033) and into the Valley. By the 18th, Wright's troops, with both of Crook's divisions, arrived at Snicker's Ferry (HCR W1833) and found Early's army on the other side of the river. Wright decided to attack and try to force Early out. After some early successes, the one Union division which crossed the river was pushed back to the eastern side. However, Averell's cavalry division, which had arrived in Martinsburg on the 18th, was moving down directly south towards Early's position. Threatened from two directions, and outnumbered more than 2 to 1, Early decided to save his army for another day and retreated to Strasburg (off-map, nine hexes west of Cedarville, SJW N0211) on July 21st. Early's raid was over; his small Confederate army had come within a few miles of the Union capitol and returned to the Shenandoah unscathed. The first phase of the Shenandoah campaign of 1864 was over; it would now be up to General Phil Sheridan to drive the Confederates from the Shenandoah Valley once and for all.
Designer's Notes
By Mike Belles, 2003
Looking back now as I write the designer's notes, it seems like a long time since I started working on RWH. I'd never designed any games before so this was a completely new experience for me. Two and a half years ago, I was leafing through a Civil War atlas, and saw the page on Early's Raid. I thought it looked interesting; it didn't look like anything that had been done yet in the GCACW series. The more I looked into it, the more interesting it got. Confederate soldiers so close to the Capitol they could see the dome of the White House in the distance! After several months of work I sent off a rough draft to Ed Beach. It turned out that several other people (Chris Withers, Trevor Bender, and Pat Duffie) had already done some preliminary research on a game covering this period, so we combined forces and the result is in your hands. But now to the 1864 history. My work was mainly on the Advanced Game; Chris, Trevor, and Pat worked on the Basic Scenarios.
I haven't tried to make this game so that the Confederate player has a clear road to get into Washington; only to duplicate the actual situation and conditions to give players the same opportunities and dilemmas that the generals faced. And actually, if the Union player plays well, the Confederate player will be hard pressed to get into Washington. Historically the Union made a couple of relatively large mistakes: first, Sigel fell back to Harpers' Ferry without even making an attempt to slow Early. While it's true that Sigel was heavily outnumbered and had much poorer troops, if he'd done what Wallace did and tried to block Early's advance at the Potomac fords, he probably could have delayed Early's advance by a day or two. Second, Grant was very slow to react. Grant knew that Early's entire corps was in Maryland by July 6th, yet he sent only a division north. The Army of the Potomac Arrival Table is set up so that the historical result is almost the best possible result the Union player can get (Historically, the Union "player" rolled an 11 or 12 on July 10th, the day after Monocacy). If Grant had sent the whole 6th Corps any earlier than he did Early would have had no chance of entering the Capitol. On the other hand, Early didn't do the best he could have done either; he spent several days trying to trap Sigel's army, days that would have been better spent hoofing it toward Washington. But hindsight is always better; both sides did well with the forces under their command. Just for interest's sake, I compiled the VP's the Confederates would have gotten historically, and this is how it adds up:
+2 Controlled Jefferson county for 1 day. +6 Controlled Washington county for 3 days. +3 Controlled Frederick-West county 1 day. +5 Controlled Frederick-East county for 1 day. +45 Controlled Montgomery county for 3 days. +6 Controlled Loudon county for 2 days. +30 8 CSA manpower adjacent to a DC fort for 2 days. +6 Martinsburg depot destroyed. +8 Harpers Ferry depot destroyed. +5 Frederick depot destroyed. +8 Hagerstown levied. +8 Frederick levied. +88 44 manpower of AP reinforcements sent. +14 7 Union manpower lost in combat. -9 3 Confederate manpower lost in combat. -8 No cavalry units sent to Pt. Lookout. +217 Confederate marginal victory.
Since the Confederate player will usually have a tough time getting into Washington, I had to adjust the game to match. Thus if the Confederate player can threaten Washington for several days and generally create panic in the countryside, he'll generally get a marginal victory, as Early did historically. And beware of an all-out attempt on Washington: I succeeded in one playtest (and only one) in getting into the Capitol. But I made the mistake of overstaying my welcome by one day and had my army trapped and wiped out at Rockville as I tried to flee, and ended up losing heavily. So even if the Confederate player can get into the Capitol it's not always the best idea unless he's sure he has a way out, and even then caution is always necessary. Along these lines, don't underestimate Crook. I did at the beginning, as did others; but although his units have a low tactical value, he's more than enough to hold up Early long enough for the VI corps to close in. At that point, with Crook's infantry, his two cavalry divisions, the VI corps, plus whatever else has been sent from the Army of the Potomac, the Confederate player will usually be outnumbered at least three to one. Then it's up to the Confederate player to do some hard marching to get himself out of a sticky situation or to fight it out on very uneven terms. Not that the Confederate player can't win in this situation; but it requires Jackson-like maneuvering.
I'd originally wanted to do this game with lots of maps (Chris & Trevor quickly persuaded me to drop this idea as unplayable, though). It's amazing how well the HCR maps fit Early's route; historically none of his infantry units ever left the maps. His cavalry did leave the HCR maps twice, though, and players can add extra maps if they want to: Imboden rode west, destroying some of the B&O railroad and attempting to destroy several bridges. The north SIV map may be added to allow the Confederate player to send his cavalry west to try to break up the railroad and delay Hunter. In this case players should start rolling for Hunter's arrival (actually Crook in the game) on July 6th, not July 8th. The die roll modifier for the first increment should read "-1 For each day following July 6th (cumulative)". When WV reinforcements are placed, section A6.11 is not used. Instead, reinforcements must be placed in SIV N0111 (Patterson's Depot), N0112, N0114 or N0116. The Union player's setup should include two more regiments: the 153rd Ohio, at South Branch Depot (SIV N1013); and the 135th Ohio, at Sir John's Run (SIV N2805). Both regiments are WV units, have 1 manpower, and have tactical and artillery values of 0. The only other unit to go off-map was Bradley T. Johnson's cavalry brigade. Johnson rode through a portion of southern Pennsylvania: starting in Frederick (W2412), he rode through Liberty (W5110), New Windsor (W5806), Westminster (RTG S4516), Reisterstown (E1905), Cockeysville (E2903), and then south towards Baltimore. Players may add on the south RTG map to give the Confederate cavalry more room to roam. No Union units should be added. (Adding the north RTG map is not recommended, because if Confederate units had gone that far north there would likely have been a good amount of the Pennsylvania militia called out, much as during the Gettysburg campaign.) The Confederate player can levy any town on the south RTG map, with 8 VP given for Westminster (S4516) or Gettysburg (S3201), and 4 VP for any other town on the map.
Probably more than any of the other GCACW games, this has been a real team effort. Chris Withers, first of all, put together Scenario 2 (Fort Stevens) and designed the Advanced Rules with me. He's shot holes through several of my less-than-playable rules and added several good ones of his own. This game is almost as much his work as it is mine. Trevor Bender designed Scenario 1 (Monocacy) and contributed much toward the rules. Pat Duffy's ideas were also very helpful. Playtesters for this game were invaluable. If this game hadn't been playtested it wouldn't look at all like it does now—and I doubt that anyone would play it. Paul Nied was the lead playtester, while Chris Withers, Trevor Bender, Ed Beach, Scott Spurgeon, Steve Fetherman, Dave Belles (my brother), & I also playtested the scenarios; hopefully we worked out most (if not all) of the bugs! I hope you enjoy playing RWH, and look forward to helping produce more of the same games. It's just as enjoyable learning the history and developing the scenarios as it is playing the finished games.
Further Reading
Benjamin Franklin Cooling, Jubal Early's Raid on Washington, 1864; Baltimore, The Nautical & Aviation Publishing Company of America, 1989.
Joseph Judge, Season of Fire: The Confederate Strike on Washington; Berryville, Rockbridge Publishing Company.
Frank E. Vandiver, Jubal's Raid: General Early's Famous Attack on Washington in 1864; New York, McGraw-Hill, c1960.