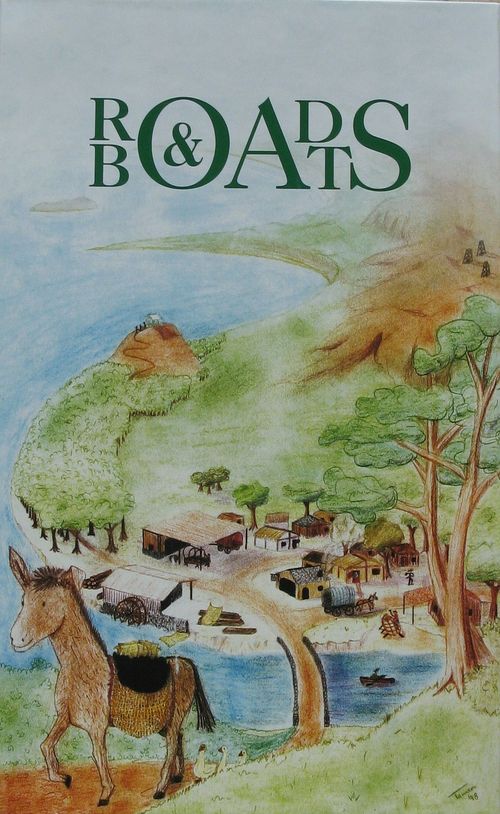
Roads & Boats
Roads & Boats Rulebook
Table of Contents
Table of Contents
Components
For each player (red, yellow, green or blue) there are:
- 30 wooden transporters, 15 walls (wooden rods), 2 wooden discs in the player's colour
- 40 cardboard wonder bricks in the player's colour
- 1 home marker in the player's colour (for technical reasons, the counter sheets contain 3 red and 3 yellow home markers, but only one of each is needed)
- 1 research table
- 8 research markers (glass stones)
- 1 player aid that lists the most important rules
Furthermore, there are:
- 15 neutral walls (plain-wooden rods)
- 33 neutral (white) wonder bricks
- 18 mines (brown wooden cylinders)
- 18 little plastic bags that go with the mines
- a sheet of stickers
- 140 hexagonal tiles; check that you have three copies of sheet Ax3 and one copy of sheet Bx1
- plastic cover sheet
- non-permanent marker
- several types of goods (small cardboard squares) and buildings (large cardboard squares); check that you have three copies of sheet Cx3 and one copy of Dx1
- a game board in two parts, featuring the temple row on top, the wonder, the phase chart indicating the four phases of the game, and the sequence chart with numbers 1 to 6
- one more glass stone (to use on the phase chart)
- rule book and scenario book
If you ever need more goods, buildings, walls or coloured (non-white) wonder bricks, you may create new ones. The number supplied is not meant to limit the game.
First-Time Preparations
The sticker sheets hold a series of mine numbers and 8 stickers in the players' colours. For each of the numbers, put one sticker on a mine and the other sticker on a mine bag. The players' stickers should go on the wooden discs of the same colour. For each player there is a praying figure and a sequence marker.
Colofon
ROADS & BOATS - third edition. For 1 - 4 players from 14 years. Duration about 3 to 4 hours.
Game design: Jeroen Doumen and Joris Wiersinga
Graphic design: Herman Haverkort and Tamara Jannink
Tested by (thank you very much!) Arnold Crans, Bram van Dam, Maurice Dekker, Gerben Dirksen, Bianca van Duyl, Mirjam Gorter, Herman Haverkort, Guido van den Heuvel, Marc Jager, Tamara Jannink, Lars Faulenbach, Evert-Jan van der Kaa, Mark-Jan Lenstra, Ragnar Krempel, Corné van Moorsel, Gerard Mulder, Viktor Müller, Richard Renes, Pieter Simoons, Chantal Smulders, Samuel le Wallon, Srecko Suznjevic, Ties-Jan Kluter, authors and others; apologies if you are not on the list.
Published by Splotter Spellen BV - Zijpendaalseweg 17 - 6814 CB Arnhem - Nederland - www.splotter.com. © 2003 Splotter Spellen BV.
Contents: Summary of Play (page 5), Setting Up (page 5), Order of Play (page 7), (Re-)production Phase (page 8), Movement Phase (page 10), Building Phase (page 12), Wonder Phase (page 15), Research (page 16), Conflict (page 17), End of the Game (page 19), Tables (back cover).
Summary of Play
ROADS & BOATS is played in turns. Each turn consists of four phases. In each phase, all players play simultaneously.
Players first go through a production phase in which all buildings produce goods. There are primary producers which produce goods every production phase (such as a woodcutter, which produces one pile of trunks every production phase). Secondary producers produce goods only when fed the appropriate input goods (for example, the sawmill will cut each pile of trunks delivered into two sets of boards in the production phase).
Second, players go through a movement phase in which all their transporters may move according to their abilities. The transporters move goods from one tile to another in order to produce new goods or to build new buildings. As the game progresses, players will make new transporters which can carry more and move more steps.
The next phase that the players go through each turn is the building phase. Players may construct buildings on tiles on which they have one of their transporters and the goods required to build that building (e.g. two sets of boards for a stone quarry). These buildings will start producing goods in the next production phase. Players may also build roads to allow their transporters to move to new tiles, and walls to prevent other players from taking away goods that they want to use.
At the end of the turn, in the wonder phase, all players may contribute bricks to build a wonder. When this wonder is finished, the game ends. The player who has gathered most wealth points, especially stock bonds, wins the game. Players can influence the length of the game by building more bricks in the wonder.
After the wonder phase, the production phase of the next turn starts.
Beginners at the game are advised to regard their first (few) games as practice. ROADS & BOATS is one of those games that you should start without knowing all the rules. Understanding will come through experience. The player aids contain a summary of the most important rules. Use them. For hints on strategy and for one-player rules, see the scenario book.
This book should answer all questions about the game rules. If you still find something missing or unclear, feel free to write us. Please try to phrase your questions so that we can answer them with "Yes (because ...)" or "No (because ...)". You can also check our website for any previously asked questions. Our addresses can be found on the inside of the cover.
Setting Up
The game world will be as large as the plastic sheet. Keep in mind that extra space is needed around it for the player aids, research tables, the wonder and the piles of other game parts. The wonder board is put next to the playing area so that every player can see it. Put a glass stone on the phase chart. The tiles, the buildings and the goods are placed so that players can easily reach them. Each player chooses a colour and takes the corresponding supplies of transporters, walls and wonder bricks, a home marker, a research table and a player aid. Cover each item on each research table with a research marker (glass stone).
Creating the World
The world map consists of hexagonal tiles of six different types (some of the tiles contain a river): woods (dark green), pasture (light green), rock (grey), mountains (brown), desert (yellow) and sea (blue).
There are two ways to make a map. Inexperienced players are advised to select one of the maps provided in the scenario book. More experienced players may want to make a map of their own using the following rules.
World Size. Determine how big the map is going to be. As a rough estimate, use about ten land tiles per player. The number of sea tiles can be varied as you please. You can use more land tiles if you want to have a long build-up phase before the interaction starts, or less if you want to start interacting with each other right away. In our opinion, it is advisable to give every player at least some opportunity to settle before being harassed by others, but you may think otherwise. A lot of sea tends to give very interactive, hostile games.
Starting Player. The player who proposed to play ROADS & BOATS starts laying the map.
Tile Placement. Proceed clockwise. Every player places two tiles in the playing area, one by one, such that each tile borders on at least one other tile already present. Each tile can be placed anywhere, except for rivers.
Rivers. Rivers must be placed in a natural way. You may start a river only by playing a source tile or by playing a normal river tile such that it flows into the sea. You may not place a tile such that a river ends without a source or that finishing another river becomes impossible. For instance, you may not use the last "straight" river tile if it is needed elsewhere, nor may you start a river if all sources have been used elsewhere. A river may not run off the map.
Covering the Map. Place the plastic sheet over the map. Make sure the entire map is covered. Fix the sheet in place with adhesive tape that can be removed easily after playing.
Determining the Starting Sequence
Put the praying figures in a cup and take them out one by one. Place the markers in the row at the temple. The first figure taken out of the cup is placed closest to the temple. The corresponding sequence markers are placed on the sequence chart in the same order from left to right. So the first position is for the player whose praying figure is furthest from the temple. The players choose their starting places in the order as indicated on the sequence chart.
Starting Places and Resources
Any land tile may be chosen as a starting place, provided there is at least one empty tile between you and your nearest neighbour. It is advisable to select a starting tile close to rock, woods and pasture. Mark the tile by putting your home marker on the tile. All initial resources are also placed on the tile: each player gets 3 donkeys, 5 sets of boards, 1 pile of stones and 2 geese.
On some maps, it may be advisable to determine which tiles will be starting tiles instead of letting the players choose freely. In many scenarios, starting tiles are so marked.
Order of Play
All players start the game simultaneously. Each game turn consists of four phases. These are:
- (re-)production
- movement
- building
- wonder construction
Throughout the game, the phase chart is used to indicate which phase is being played.
In principle, all players resolve each phase simultaneously. Sometimes, conflicts may arise as to the order of play within a phase. Each player may request that the order of play is established when the phase is about to begin. If such a request is made, the order of play is determined according to the conflict rules on page 17.
If the order of play has not been determined at the beginning of the phase, conflicts may nevertheless arise during the phase. In that case, play is in the order of the sequence markers on the sequence chart.
(Re-)production Phase
In the (re-)production phase, every tile is checked for production. Production takes place on tiles with primary producers, secondary producers and on empty pasture tiles containing livestock. Research can also be produced. This is explained in a separate section.
Some goods (stone, fuel) can be produced by either a primary or a secondary producer.
Primary Producers
Primary producers are represented by large square pieces with an encircled symbol. They produce one item of the appropriate type every production phase. They produce even if no transporter is nearby! The item produced should be placed on the tile or on a transporter on that tile. In case of a conflict, see the rules about the order of play above.
Primary producers (and their products) are: woodcutters (trunks), stone quarries (stone), clay pits (clay), oil rigs (fuel) and mines (gold and iron) (pictures on the back cover).
Mines. Mines have a variable output. Each turn, for each mine, a counter is drawn randomly from the bag with the mine's number. This counter is either iron ore or gold. The mine produces the product drawn. Mines with empty bags do not produce anything.
Secondary Producers
Secondary producers are represented by large square pieces with the symbol of their product. Secondary producers produce one item of the appropriate type if the required input goods are available.
If more than one set of input goods is available, a secondary producer produces as many sets of output goods, provided its capacity is high enough. The capacity of a producer is the maximum number of output goods it is able to produce per turn.
E.g. a sawmill produces 2 sets of board if 1 pile of trunks is present, 4 sets with 2 piles and 6 sets for 3 piles. If more than 3 piles of trunks are present, the sawmill still produces only 6 boards; the surplus trunks remain on the tile.
Secondary producers (products) are: sawmills (board), stone factories (stone), coal burners (fuel), papermills (paper), mints (coins), and stock markets (stock bonds). Pictures can be found on the back cover.
Coal burners and papermills can use either two piles of trunks, two sets of boards, or one of both for input.
Goods on Transporters. Goods on transporters will only be used as input goods if the owner of the transporter wants them to be used. To determine the order in which goods from different transporters are processed, see the conflict rules on page 17.
All output goods are placed on (one of) the transporter(s) the input goods came from. It is not possible to forcibly take somebody else's output goods if he or she turned in the input goods. If the transporter cannot carry all output (see the movement section), any excess is placed on the tile.
Goods on the tile. During the production phase, players with a transporter on a factory tile can take goods from the tile, deliver them to the factory for processing and receive the output. They can take the output even if they hand in goods from the tile only. In case of a conflict, see the conflict rules (page 17).
After all players have produced what they want, each factory will attempt to process any complete set of input goods which remains on the tile. The output will be placed on the tile unattended. The factory continues processing goods from the tile until the full capacity for that round has been exhausted, or until no complete set of input goods remains. Coal burners and paper mills will use all remaining boards on the tile before starting to process trunks.
Transporter Production
Some factories produce transporters. A transporter automatically takes the colour of whoever handed in the input goods.
Wagons. Wagons are always assigned to the player who handed in the donkey. No other transporter of the donkey's owner needs to be present to claim the wagon.
Water transporters. Water transporters must be placed in the water immediately upon production. The transporter must be placed in a river flowing through the tile, or on the coastline between the factory tile and a neighbouring sea tile. In the latter case, the transporter can only leave the tile by going to the sea tile chosen.
If a player cannot launch a water transporter because all shores of the factory tile have been blocked by other players' walls, he or she cannot use the factory.
Limited number of Transporters. At the end of the production phase, a player may own no more than eight transporters; no more than five of these may be land transporters, and no more than five may be water transporters.
As soon as a player owns too many transporters, he has to put excess transporters out of use immediately. Only a transporter that is currently at a transporter factory can be put out of use: the transporter is destroyed by simply taking it off the board. The transporter that is destroyed does not need to have the same type as the transporters produced by the factory. If the newly built transporter and the one that delivered the input goods are the only transporters at a transporter factory, one of them must be destroyed immediately. When a transporter is destroyed, the goods used for its production are not refunded.
Unclaimed transporters. If enough input goods remain on the tile at the end of the production phase, and the transporter factory's capacity has not been used by the players, the factory will produce a transporter by itself. Since the players have already completed their production phase, no one can claim the new transporter. The transporter must therefore be destroyed. The input goods are lost and no new transporter is brought into the game.
Livestock. Livestock (donkeys, geese) will reproduce if left as a pair on an empty pasture tile. A tile is empty if it contains no building, goods or other transporters. In the presence of a building, goods or other transporters, donkeys or geese do not reproduce, not even if they are on the other side of a river. However, roads, walls and a home marker may be present. So two donkeys of the same player will produce another donkey, but three will not. Donkeys do not reproduce if their owner does not want them to.
Note that deserts change into pasture, and can thus be used for reproducing, as soon as the irrigation mark is built (see the wonder phase).
Exchange of Goods, Rivers
During the entire production phase, transporters on the same tile can exchange goods with the tile and with each other freely, if their owner(s) want them to.
Goods can be exchanged, delivered or taken across a river only if there is a bridge, or a transporter in the river that is willing to act as a ferry.
Practical Matters. It is advisable to place newly produced goods on the building, so as not to get confused. Every player should look after the buildings he or she built to make sure production is not forgotten. Place the goods on the tile or transporter at the end of the production phase.
Timing. Usually, all production takes place at the same time. Sometimes, two players may want to use the same secondary producer, or they may want to take the products of a primary producer before anyone else can. In case of such a conflict, use the conflict rules on page 17. Every player may choose to produce in whatever sequence he or she prefers. So, it is possible to produce paper first, then use it to produce research, upgrade a transporter factory (see page 16) and produce a transporter there in one turn.
Movement Phase
Every transporter may move once per turn. Land and water transporters move differently.
Land Transporters
Land transporters can move only over roads, except for donkeys, which can also move over tiles without roads. However, a donkey moving over tiles without roads moves only one tile per turn, while a donkey moving over roads can move two tiles per turn.
To use a road, the starting tile, end tile and all tiles in between must be directly connected by roads.
Example: Tile A is connected by roads to all numbered tiles. The number indicates the distance. Note that the tile marked C is only connected indirectly. Transporters will have to pass through the tile marked B to get there. The river blocks any road movement except on source tiles or if a bridge is present. Only a donkey could move from A to D. Even donkeys cannot cross unbridged rivers.
A land transporter may move a number of tiles up to its movement capacity each turn; it may move up and down a road in one turn, provided it has enough movement points available. Donkeys may move a maximum of 2 tiles (1 if there is no road), wagons 3 and trucks 4 tiles per turn.
Example: Three possible truck routes. It may drive up and down, circle or drive four spaces in a straight line. Note that it cannot reach tile X, as there is no road to that tile.
Example: The donkey may move two steps over roads, or one if there are no roads. So it cannot reach any of the tiles marked X.
While moving, a land transporter can pick up things and drop them on any tile it passes, including the tile it starts from and the tile it ends at. Goods can also be taken from or given to another transporter if its owner is willing to yield or accept the goods. Goods can be dropped on transporters instead of on the tile.
Goods which are dropped on a tile can be carried further by another player who moves later. However, no goods may be moved by more than one transporter of the same player in the movement phase of any one turn. To reflect this, flip over goods that have been moved this turn.
Any transporter may carry a number of goods up to its carrying capacity. The goods are placed on top of the transporter which carries them. Donkeys may carry up to 2, wagons up to 3 and trucks up to 6 goods at a time. A transporter may move more goods in a turn, if it drops some goods before picking up more.
Example: The donkey moves two steps, taking one pile of trunks out of its tile and returning with two piles of stones. The wagon moves three steps, first taking three stocks, which it drops on the donkey's tile, taking two piles of trunks with it on the next step. It cannot take any stones, as the stones have already been moved this turn.
Rivers. No land transporter, not even a donkey, may cross a river without a bridge. You must always specify on which side of a river land transporters, buildings, goods, or roads are.
Boats
Boats can move only on sea and rivers. On a river, a boat moves just like a land transporter on a road. Moving from a river to open sea takes up one movement point. On open sea, boats can move from the coast to open sea, between sea tiles and from a sea tile to a land tile at the cost of one movement point per step. Moving from a sea tile to a land tile, if not to enter a river, is called docking. After docking, a boat may not move any further. A docked boat is placed on the coastline between the land tile and the sea tile it came from.
Only docked boats and boats on a river may interact with a land tile. A docked boat can only leave the tile by moving to the sea tile it came from.
Boats can exchange goods if they are on the same tile, even on open sea.
The carrying/movement capacities of the water transporters are 3/3 for rafts, 5/4 for rowing boats and 8/6 for steamers.
It is not allowed to leave goods on a sea tile or to discard them in any way.
Oil rigs. It is allowed to store goods on an oil rig. After interacting with an oil rig, a ship may move on; it does not count as docking.
Example: The docked steamship first has to move into the open sea, which would take up one movement point. It could use its remaining five points to dock anywhere on the coasts marked O. This will end its turn, no matter how many movement points it used. The coast marked X is too far to reach in one turn. When docking near the river mouth, it has to choose at which side to dock, so it can take either the boards or the trunks. Note that docking at B does not give access to the stones on that tile (but it would if there were a bridge). Before or instead of docking, the ship could travel up and down the river, taking the boards, trunks and/or stones and dropping resources without ending its turn. It could also pass by the oil-rig or the raft and exchange goods there without ending its turn.
Walls
No transporter may move through a wall of another player's colour. Moving through your own walls is allowed, as is moving through neutral walls. When a non-neutral wall has been built along the coast, only the wall's owner can dock there.
Conflict
It is impossible under any circumstances to take goods forcibly from somebody else's transporter. In case of conflicts about taking goods from a tile, confer to the conflict rules on page 17.
Carrying Transporters
Any transporter may carry another transporter. However, it is not allowed to move a transporter that has moved on his own already in the same phase. Neither transporter may carry anything else while one is carrying the other. The transporter can only be unloaded at the beginning of a subsequent movement phase. In that movement phase both transporters may carry goods as normal.
Water transporters can be unloaded only at a river or a sea shore. It is impossible under any circumstances to leave a water transporter on the land, unless it is being carried. A boat in a river can unload another boat only in that river. A boat on shore can unload another boat only on the same shore.
A transporter which is carrying another transporter can still be followed by geese (see below).
Geese
Geese do not have to be carried by transporters, although they can be. A goose will follow any transporter moving out of its tile, if the owner of the transporter wants it to. However, geese cannot be left alone at sea: a goose at sea will always follow a transporter moving out of its tile, if no other transporter remains with the goose (but geese can be dropped on an oil-rig, of course). Geese do not follow transporters on the other side of a river, unless there is a bridge.
Geese which had been following one player's transporter, will follow the transporter of another player which passes through the tile, if that player wants them to. The first player can prevent this only by loading the geese on his transporter. In case of conflicts, see the rules about the order of play on page 17.
Building Phase
Players may build by using goods from tiles on which they have a transporter. It is possible to build buildings, roads, bridges, walls and new mine shafts. It is also possible to demolish walls.
Presence of Transporter
You may only build on tiles in which either a land transporter, a boat in a river, or a docked boat of your own colour is present. You cannot build anything on the other side of a river unless a bridge is present. A boat in the river can build on both sides. You cannot build on a tile on which you have no transporter.
Buildings
Any building can be built by taking the relevant building goods (a combination of boards and stones, as indicated on the player aid) from your own transporter(s) or the tile. Cooperation between transporters of different players is possible, that is, you may also use goods from other players' transporters if they are willing to put them at your disposal.
Only one building may be built on each tile. This is true even if a river splits the tile. The home marker does not count as a building. Buildings can never be removed.
Some buildings can only be built on certain tiles, as indicated on the player aid. Possible restrictions are mountains, rock, woods, sea or shore (i.e. a river tile or a tile next to a sea tile). Only oil rigs may be built on a sea tile. If no restriction applies, a building can be built on any land tile except deserts.
Note that deserts convert into pasture as soon as the irrigation mark has been built on (see the wonder phase). Before that, only roads and walls can be built in the desert.
Any factory that requires a shoreline can only be built on a tile that contains a river or on a tile that borders on a sea tile. A shore tile will always remain a shore tile, even if it has been surrounded by walls. Note, however, that you cannot produce a boat if you cannot put it directly into the water. This allows players to deny other players' the use of boat factories by building walls on the shore of the tile that the boat factory is on.
Some buildings can only be built after the appropriate research has been performed. See the research rules for details.
Mines
If a player builds a mine, fill the appropriate bag with 3 gold nuggets and 3 iron ore counters (or 4/0, 0/4, 5/5 if the appropriate research has been performed, see page 16).
The player who built the mine randomly draws one counter from the bag each turn during the production phase. This constitutes the production of that mine. If the bag is empty, the mine does not produce anything.
It is, however, possible to extend the mine by building new shafts, refilling the bag.
It is allowed at any time to look in the bags and count.
Building New Mine Shafts
If the appropriate research has been performed, a player may choose to build new shafts in any mine at which he or she has a transporter. When building a new shaft, three gold nuggets and three iron ore are added to the contents of the mine's bag, whether it was already empty or not. Instead of three gold and three iron, you can add four of one kind or five of both. In that case you must have done the appropriate research for that mixture as well as for building new shafts (see page 16). The added mixture can be another one than the original one.
You may build as many shafts as you like, as long as you hand in the necessary input goods (a new shaft costs one iron and one fuel).
Oil Rigs
As an oil rig is built in open sea, it is not possible to leave goods on the tile to build it. A player must therefore carry all the required goods on his or her transporter(s) to build it.
Roads
A road may be built from the middle of the building tile to the middle of a neighbouring tile by using one pile of stones from (a transporter on) that tile. All roads on a tile are automatically linked to each other, unless there are rivers between the roads. Parallel roads can be built on river shores. It is allowed to build a road that crosses a wall, even if the wall belongs to another player. However, only the owner of the wall will be able to use the road.
A road is built by drawing it with the marker on the plastic plate.
Bridges
A bridge can be built by expending one pile of stones on that tile. All roads on both sides of the river are subsequently connected. A bridge may be built even if there are no roads present.
If a river tile contains no bridge, transporters, goods, buildings and roads on that tile are considered to be on one side of the river. For instance, a transporter on the right side of the river cannot access goods or build anything on the left side of the river.
River springs never need a bridge. At river splittings, two bridges are needed to connect all parts of the tile.
Walls
A wall can be built between any two tiles, except between two sea tiles. Only the player who owns the wall may pass through it. Other players may not pass.
A wall is built by using one pile of stones on any of the two tiles it borders on. Place a wall token (wooden rod) there.
The owner of a wall can strengthen it by paying an additional two piles of stones for a second wall token, an additional three for a third, etc. This can be done immediately or in later turns. So a three token wall costs a total of six piles of stone. There can never be walls of more than one colour between two tiles at any one time.
Demolishing. Walls can be demolished by using two sets of board on any of the tiles bordering the wall. The wall counter is then taken from the tile and replaced by a neutral wall token.
Walls that consist of two tokens may be demolished at a cost of three sets of board, walls of three tokens by expending four sets, etc.
Subsequent Walls. A wall which is built "on top of" a demolished wall counts as strengthening the existing wall, even if it is done by another player. So, a second wall costs two piles of stones and will be two tokens strong, a third wall costs three stones and will be three tokens strong, etc. To keep track of this, neutral wall tokens are used. A demolished wall is replaced with a number of neutral wall counters equal to the number of tokens in the demolished wall.
No Building From Both Sides. When building, strengthening or demolishing a wall, all necessary material has to be provided from one side of the wall. It is not allowed to provide the necessary goods for a wall or for a demolition from both sides of the wall. However, you can build a wall from one side, then strengthen it from the other.
Building from boats. A docked boat can build or demolish walls on any of the borders of the land tile it is in (except on the other side of a river if there is no bridge). A boat on sea, which is not docked, pays two extra piles of stone or board to build or demolish a wall. Walls cannot be built between sea tiles.
Building across rivers. Walls can be built across rivers at no extra cost.
Shutting Out Docked Boats. If a boat has docked and another player builds a wall so as to close off its exit to sea, so that the wall dissects the boat, then the boat is placed immediately in the sea tile it came from. It is then in open sea.
Example: The steamship can build a wall at A or C at a cost of 1 + 2 = 3 piles of stones because it is building from sea. Demolishing wall D will cost 2 + 2 = 4 sets of boards, and it would take 2 + 2 = 4 stones to immediately build a new, stronger wall there. Both rafts could build at A (cost: 1 stone); any wall at A will push the other player's raft into the open sea. Both rafts could also build a wall in the spaces marked F (1 stone). Because of the river, they cannot build in stretch G, unless they first build a bridge. The truck could build at G, and/or demolish wall H (for 2 boards) or J (3 boards) and rebuild a wall there (at H for 2 stone; at J for 3 stone). The two donkeys cannot cooperate to build a strong wall on top of the neutral wall at B, as they are not on the same tile. The lower donkey could build on all the places marked E.
Wonder Phase
After the building phase, every player has the opportunity to buy one or more bricks in the wonder. A brick may yield 1 to 10 wealth points at the end of the game (see victory conditions).
A player can buy an infinite amount of bricks each turn, provided he or she has enough goods to do so. Goods used to buy bricks in the wonder must be expended from the player's starting tile. This tile must also contain at least one of that player's transporters. Bricks are always placed on the leftmost open place on the lowermost uncompleted level of the wonder.
As long as the first four rows of the wonder have not been fully built, the first brick bought by each player in any one turn costs one goods token (any goods will do), the second two, the third three, etc. Buying three bricks in one turn is thus very costly (six goods). Bricks bought by other players in the same turn do not count towards this increase in price. As soon as the first four rows of the wonder have been fully built, the first brick costs two goods, the second three, etc.
As soon as a brick is built on the irrigation mark in the wonder, all deserts are irrigated and converted into pastures. The actual tiles do not have to be replaced.
After all players have had their chance to build in the wonder, a neutral brick is added. It is placed on the leftmost open place on the lowermost uncompleted level of the wonder.
As soon as a brick is built on the mark indicating the number of players, the wonder is complete and the game ends.
Research
Research may be produced during the production phase. It enables a player to build things which cannot be built otherwise.
Producing Research
Research may be produced during the production phase at the cost of two geese and one paper. No building is needed. The geese and the paper must be on the same tile, which must also contain one of the player's transporters. If two geese and a paper are left on a tile, that is, if they are not being carried by a transporter, both geese and paper are used by the game and disappear. This leads to a great increase in metaphysical understanding which has no practical relevance in the game.
Allocating Research Points
Any research point must immediately be allocated to one of the seven possible "projects". This is indicated by taking the glass stone off the appropriate slot on your research table. Research points cannot be saved, nor can they be traded in any way.
Research Subjects
Factories. Researching these subjects gives a player the right to build certain buildings. These buildings are indicated by an R in the buildings table on the player aid. No player may build any of these buildings (rowboat factories, truck factories, steam ship factories and oil rigs) unless the appropriate research has been completed.
Mines. In addition, it is possible to research the ability to build better mines. There are two types of improvements: specialized and big mines.
When built, specialized mines are not filled with the usual three gold nuggets and iron ore, but may be filled with 4 gold and 0 iron or vice versa.
Big mines are filled with 5 gold nuggets and 5 iron ore. You cannot combine specialization and big mines. Nevertheless you may research both to specialize some mines and enlarge others.
Researching mines does not alter the stock of existing mines in any way. You can still build normal mines afterwards if you want to.
New Shafts. This subject enables a player to build additional mine shafts (see building rules).
Light bulb. This slot has no effect. It is reserved for possible use with future expansion rules.
Upgrading Transporter Factories
If a player researches a transporter factory (e.g. steam ship factories), he or she may upgrade all (or some) transporter factories of the appropriate type (land or sea) provided one of that player's transporters is on the same tile as the factory. So, if you have a wagon on a tile with a raft factory, you may upgrade it to a steam ship factory even if you did not build the factory yourself; on the other hand, you may not upgrade factories on a tile in which you do not have a transporter, even if you built the factory yourself. Another player cannot prevent you from upgrading even if he, too, has a transporter present.
Upgrading must be done immediately after the research is produced (and thus occurs in the production phase); in later turns, upgrading is no longer possible. Upgrading a factory does not cost any goods.
After upgrading, the new factory may build a transporter of the new type in the same production turn. After the upgrade, it is not possible to produce the old type of transporters at that factory anymore.
Only transporter factories can be upgraded. The transporters themselves cannot be upgraded, nor can mines be upgraded. New transporters will have to be produced in the transporter factory. The contents of mines change by production and shaft building only.
Conflict
In most cases, all players play simultaneously. However, on some occasions a player may want to perform an action before or after another player, so that conflict arises. In that case it is necessary to determine a playing sequence.
Other types of conflict do not occur. It is impossible under any circumstances to take goods from somebody else's transporter, to destroy other player's transporters or to destroy buildings, roads or bridges already present.
Choosing a Playing Sequence
At the beginning of each phase, every player may declare that he wants the sequence of play to be determined. If no player wants this, all may play simultaneously. If conflicts arise after the phase has already started, use the order as indicated on the sequence chart, the player on position one playing first.
In the production phase, determine what will be produced by the mines before determining the order of play.
All players have a praying figure, lined up in front of the temple. The figure closest to the temple is said to be in front of the row. The order of the praying figures corresponds to the order in which players may choose when to play. People close to the temple are busy praying, and are thus late in attending to mundane, wordly matters like playing sequences. However, they may invoke the favour of the gods to alter this state of affairs.
A sequence of play is determined in two steps. First, players may decide either to keep praying or to "cash in" their piety. Starting from the player whose praying figure is closest to the temple, all players have the option to move their praying figure to the back of the row. If more than one player chooses to do so in the same phase, the player whose praying figure was closest to temple originally now becomes the last player in the row.
Second, each player chooses a playing position. The player whose praying figure is furthest from the temple may start. He puts his sequence marker on the sequence chart at whatever slot he prefers. Note that the number of slots corresponds to the number of players, i.e. with three players, only slot 1, 2 and 3 are used. After the first player has chosen his position, the other players take turns in choosing their positions, the player who is closest to the temple choosing last.
After all players have chosen their positions, play proceeds in the order indicated by the playing sequence chart.
For an example of a conflict round, see the next page.
Example of a Conflict Round
Production. Both mines produce gold. Blue declares he wants the order of play to be determined.
Starting from Red, each player has the chance to stop praying. Red decides to be pious. Blue, however, stops praying and moves his praying figure to the back of the row. It is of no use to Yellow to stop praying as he was last in the row at the beginning of the turn.
Blue chooses to play first; Yellow then chooses to play second and Red plays last.
Blue gets the gold at mine 1 and the pile of trunks at the woodcutter.
At the sawmill, both Yellow and Blue can hand in trunks and get boards in return, to a maximum of six sets of boards between the two of them. Blue plays first and has his pile of trunks cut into two sets of boards. Yellow has two piles of trunks cut into four sets of boards. The factory has now produced its full capacity of six sets; therefore Yellow cannot have his third pile of trunks cut.
At the quarry, Yellow gets the stone; there is no other transporter there.
The papermill can only produce one paper each turn and will do so for Yellow, since Yellow plays before Red. Only if Yellow does not use the mill, can Red use it.
Movement. Conflict arises again. This time it is Red that wants an order of play to be determined.
Starting from Red, each player has the chance to stop praying. Red decides to do so and moves his praying figure to the back of the row. Yellow wants to keep praying. Blue started the phase at the end of the row, and thus has no options.
Starting from Red, each player may now choose when to play. Red chooses to move first; Blue then chooses to play second and Yellow plays last.
Red moves first and takes the gold piece at mine 2. Blue only has two boards and does not know whether to take them to A or to B. Yellow threatens to build walls to close off either mine 1 or 2, but as Yellow will move last, Blue cannot predict which mine will be closed off, and therefore cannot prevent it. Blue moves a donkey with two boards to A. The donkey on the mine stays there and the third Blue donkey moves to the second mine.
Yellow moves the donkey with two stones to mine 2. Yellow's other donkeys stay put.
Building. The order of play does not matter, so players agree to build at the same time. Yellow builds walls at the dash-marked spots. The other players cannot build anything due to lack of goods.
Wonder. No one buys wonder bricks. A neutral brick is placed and the next turn starts.
End of the Game
The game ends as soon as the wonder has been completed. The size of the wonder depends on the number of players; bricks can be built until a brick covers the symbol indicating the number of players.
The game also ends when the last neutral brick is built. This is after 33 turns.
Victory Determination
The player with the most wealth points wins the game. Wealth points are awarded for:
- gold nugget: 10 points
- set of coins: 40 points
- stock bond: 120 points
These items must be in your possession! That is: they must be on a transporter. Objects lying on a tile unattended do not count towards wealth points.
Wealth points are also awarded for bricks in the wonder. Each row in the wonder scores 10 points; these are divided evenly among all players' bricks on that row.
If a player's total on a row is not a whole number, it is rounded down. The last row of the wonder scores 10 points too, even if it is incomplete.
Example: There are six players' bricks on the row. Blue scores 2 x 10/6 = 3 points (3 1/3, rounded down), the red player scores 3 x 10/6 = 5 points, and Yellow scores 1 x 10/6 = 1 point (1 2/3, rounded down). The neutral (white) brick does not influence the score in any way.
Instead of calculating, you can use the table on the back cover to determine the scoring of wonder rows.
Breaking Ties
In case of a tie, the tied player whose praying figure is closest to the temple wins the game.
Reference Tables
The following tables appear on the back cover of the rulebook.
Goods
| Good | Produced by |
|---|---|
| trunks | woodcutters |
| boards | sawmills |
| paper | papermills |
| goose | geese |
| clay | clay pits |
| stone | quarries or stone factories |
| fuel | oil-rigs or coal burners |
| iron | mines |
| gold (10 wealth points) | mines |
| coins (40 wealth points) | mint |
| stock (120 wealth points) | stock exchange |
Buildings
| Building | Produces |
|---|---|
| woodcutter | trunks (in woods only) |
| sawmill | boards out of trunks |
| papermill | paper out of trunks and/or boards |
| clay pit | clay (on sea or river shores only) |
| stone factory | stones out of clay |
| quarry | stones (on rocks only) |
| oil-rig | fuel (on sea only) |
| coal burner | fuel out of trunks and/or boards |
| mine | gold and/or iron (in mountains only) |
| mint | coins out of gold and fuel |
| stock exchange | stock out of coins and paper |
| wagon factory | wagons out of donkeys and boards |
| truck factory | trucks out of iron and fuel |
| raft factory | rafts out of trunks |
| rowboat factory | rowboats out of boards |
| steamer factory | steam-ships out of iron and fuel |
Wonder
Wealth points for bricks in the wonder depend on the number of your own bricks and the number of other players' bricks on the row. Your score for a row can be found in this table (rows = your bricks on the row, columns = other players' non-white bricks on the row):
| Your bricks \ Others' bricks | 0 | 1 | 2 | 3 | 4 | 5+ |
|---|---|---|---|---|---|---|
| 1 | 10 | 5 | 3 | 2 | 2 | 1 |
| 2 | 10 | 6 | 5 | 4 | 3 | 2 |
| 3 | 10 | 7 | 6 | 5 | 4 | — |
| 4 | 10 | 8 | 6 | 5 | — | — |
| 5+ | 10 | 8 | 7 | — | — | — |
(All values are points.)
Transporters
| Transporter | Movement (per turn) | Carrying capacity |
|---|---|---|
| donkey | 2 tiles (1 without a road) | 2 goods |
| wagon | 3 tiles | 3 goods |
| truck | 4 tiles | 6 goods |
| raft | 3 | 3 goods |
| rowboat | 5 | 4 goods |
| steam-ship | 8 | 6 goods |
Research
| Subject | Effect |
|---|---|
| rowing | enables a player to build rowboat factories |
| trucking | enables a player to build truck factories |
| shipping | enables a player to build steam-ship factories |
| drilling | enables a player to build oil-rigs |
| specialisation | enables a player to fill mine bags with either gold or iron |
| enlargement | enables a player to fill mine bags with 5 gold and 5 iron |
| new shafts | enables a player to replenish bags of existing mines |
| bright idea | no effect (reserved for expansion rules) |