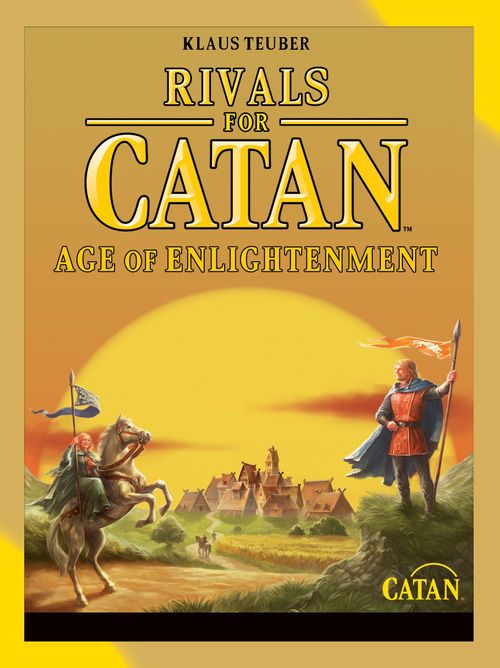
Rivals for Catan: Age of Enlightenment
Rivals for Catan: Age of Enlightenment Rulebook
Table of Contents
Table of Contents
Contents
Age of Enlightenment contains 6 ship tokens and 125 cards consisting of 3 Theme Sets:
- 50 cards in The Era of Explorers
- 41 cards in The Era of Sages
- 34 cards in The Era of Prosperity (also using 6 explorer ships from The Era of Explorers).
Expansion Rules
Innovations
If you have the first printing of The Rivals for Catan (©2010), you will find that the format of the Age of Enlightenment cards differs in one detail from the cards in that edition. In the newer editions, each card has a second "tab" above the text box. The function of this tab is to specify where you can place a card in your principality.
This is especially important for players with color blindness. In the first printing of The Rivals for Catan, the settlement/city expansions and city expansions could only be distinguished by means of the colored text box. Now the new, second tab also contains this information. For example, previously, a hero could be recognized as a settlement/city expansion via the classification "Unit – Hero" and the green text box. Now the second tab is labeled "Settlement/City."
The cards in later printings of The Rivals for Catan have this tab. The play of the game is not affected by the inclusion or absence of this second tab. So all Rivals cards can be used together, regardless of the status of a second tab.
New Card Types
There are new locations where cards may be placed. From The Rivals for Catan, you are already familiar with "center cards," "settlement/city expansions," and "city expansions." The type "region expansions" was already in Rivals for Catan, but was not initially labeled as such.
Age of Enlightenment includes road complements and metropolises as new center cards. It also has marker cards and sea cards as additional starting cards.
In The Rivals for Catan, you expanded your principality with units and buildings. In addition, there was one extraordinary site: Gold Cache. Since the Gold Cache is an expansion card, for the purposes of placement it now also incorporates a second tab that classifies it as a "Region" expansion.
The Rivals for Catan featured only 1 region expansion—the Gold Cache. Age of Enlightenment, however, includes various other region expansions, so below we present some information regarding region expansions.
Region Expansions
Region expansions are always placed either above or below a region. However, only 1 region expansion may be placed adjacent to each region. Some region expansions (e.g., the Gold Cache) may be placed adjacent to any region; other region expansions must be placed adjacent to a specific region type. For example, you may only place Peter, Sage of the Forest adjacent to a forest region.
In addition, The Era of Explorers contains region expansions that are tied to a locality; you may only place them adjacent to particular cards.
The new region expansions are either buildings extraordinary sites, or units. Cards that refer to buildings, or units in general, may also concern the corresponding region expansions. However, regions are not part of a settlement/city. For example, if a card refers to a "building in a settlement/city," then region expansions can't be affected by it. If a region changes its location (e.g., by means of Relocation), its region expansion changes its location together with that region. In contrast, if a region expansion changes its location, the region it moves away from is not affected. Placement after a change of location must be compliant with the rules. It may be that a region cannot arbitrarily "relocate" because of one of its region expansions.
Extraordinary Sites
"Extraordinary Sites" are expansions that are neither units nor buildings. "Extraordinary Sites" are characterized by the fact that their essential elements are of natural origin, with only some elements being added by humans. Therefore, they are immune to attack cards and events that refer to buildings, such as Feud and Arsonist. The Rivals for Catan already includes an "Extraordinary Site," Gold Cache.
Extraordinary Sites: Sea Cards
In The Era of Explorers set, the sea cards are also classified as "Extraordinary Sites." They are not expansion cards. They are still related to center cards, for you cannot remove them nor can your opponent attack them. Unlike center cards, however, sea cards do have functions, and you can interact with them. The special rules for The Era of Explorers contain more details about the sea cards.
Road Complements
Road complements can be distinguished by their light blue text box and the word "Road" in the second tab. A road complement does not remove any of the innate functions of the road it is covering—it only adds functions or properties. Therefore, the illustration of each road complement still depicts a road.
In Age of Enlightenment, road complements can either be buildings or units. Cards referring to buildings or units in general may also refer to corresponding road complements. However, roads are not part of a settlement/city. So, road complements can't be affected by a card that refers, for example, to a "building in a settlement/city" or a "unit in a settlement/city."
New Center Cards: Metropolises
Although metropolises are part of the draw stacks, in a formal sense they are center cards; that is, you can neither remove them nor can your opponent attack them. A metropolis is a city upgrade, just as a city is a settlement upgrade. Age of Enlightenment only includes one metropolis—Explorer Metropolis—in The Era of Explorers set.
Apart from the above-mentioned characteristic, the Explorer Metropolis in many aspects behaves similarly to road complements: the city underneath the metropolis retains all its properties. This means that you may continue to place city expansions on its building sites, and you may play all cards that require a "city" even if you upgraded your only city to a metropolis. The Explorer Metropolis itself is worth 2 victory points. Since the city underneath is also worth 2 victory points, the Explorer Metropolis depicts a total of 4 victory points—2 for the metropolis and 2 for the city.
Marker Cards
The function of marker cards is to indicate a player's status in a certain area. Marker cards aren't expansion cards. You should regard them as "abstract" cards that "geographically" are not part of the principality. Only effects and consequences directly related to marker cards have any impact on them. Other effects can't act upon, destroy, or otherwise affect marker cards. For the sake of clarity, marker cards are placed either above or below a region (like region expansions). However, you may move a marker card to another region at any time. If, in exceptional cases, all regions are occupied, you also may place a marker card adjacent to your principality. A marker card never blocks the building site for a region expansion. For example, if your opponent plays the foreign card Thieves' Hideout, and claims a building site that is occupied by a marker card, you are forced to move the marker card.
Age of Enlightenment contains two marker cards, Public Feeling in The Era of Prosperity and Manifesto of Humane Conduct in The Era of Sages. Other expansions contain various other marker cards.
New Game Concepts
New Symbols
Age of Enlightenment introduces five new symbols:
General
- Any Resource: The symbol for any resource of your choice. Wherever this symbol appears, you receive (or pay) any 1 resource of your choice. In Age of Enlightenment, this symbol only appears in The Era of Explorers.
The Era of Explorers
- Cannon Points: Required to fight pirates; explained in detail in the description of The Era of Explorers set (pp. 7-10).
- Sail Points: Required for determining the movement points of the explorer ships; explained in detail in the description of The Era of Explorers set (pp. 9-10).
The Era of Sages
- Wisdom Points (Owls): The "currency" of the sages; explained in detail in the description of The Era of Sages set (pp. 10-11).
The Era of Prosperity
- Contentment Points (Stars): They represent the contentment of the population; explained in detail in the description of The Era of Prosperity set (pp. 11-12).
Foreign Cards
"Foreign cards" are cards that you play in your opponent's principality instead of your own. If you build a foreign card, you are always the "owner" of that card. Therefore, only you may remove, use, etc. this card. Foreign cards may have positive consequences for their owner or negative consequences for the owner's opponent. Some foreign cards are removed automatically if certain requirements are met. Other foreign cards stay in place until the end of the game, unless the owner of a foreign card removes it themself or their opponent successfully plays an Arsonist against that card if it is a building in a settlement/city.
Age of Enlightenment contains only 1 foreign card, Thieves' Hideout in The Era of Prosperity.
Thieves' Hideout: If the opponent pays 3 stars, they remove the Thieves' Hideout. It is removed automatically if the opponent has 5 strength points in their principality.
The Theme Sets
Essentially, all rules established in The Rivals for Catan continue to apply. Additional rules and special rules are explained below. The Era of Explorers introduces a new layer of the game: the discovery of sea cards, which is why the additional rules are a little more comprehensive. There are only a few special rules for The Era of Sages and The Era of Prosperity sets.
1. The Era of Explorers
Catan is an island not only in the board game but also in the card game. One of your two starting settlements is directly adjacent to an Explorer Harbor, which serves as a starting point for your exploration of nine adjacent sea cards. Pirates, islanders, and Shipwrecks await discovery. If you become a more successful explorer than your opponent, you will acquire additional victory points.
The 2 draw stacks of the Theme Set each contain 12 cards. The face-up expansion card stack consists of 2 Shipyard cards. Each player receives 10 sea cards of their shield's color as well as 3 explorer ships (wooden ship markers) in their chosen color (red or blue).
1. Preparation
Place the Explorer Harbor face up next to one of your two starting settlements. Shuffle the remaining 9 sea cards and place them face down on a 3x3 grid beside the Explorer Harbor.
It doesn't matter whether you place your Explorer Harbor and the sea cards on the right or left side of your principality. You should bear in mind, though, that you can add new roads and settlements to your principality only on the side without sea cards. (For the sake of clarity, it is also better if you and your opponent place the sea cards in such a way that they face each other—although this is not required.) Place the 3 explorer ships on the spaces marked with circles on the Explorer Harbor. 1 explorer ship begins active (stand the ship marker upright); 2 explorer ships must still be built (lie the ship markers on their sides).
2. Sea Cards
There are 3 different types of sea cards: islands, pirates, and shipwrecks. Each player has a set of these sea cards. Except for their backs, the 2 sea card sets are identical. During the game, you must first discover the sea cards. Afterwards, you can carry out missions to discovered islands and pirates to obtain advantages in the game and earn victory points.
3. Explorer Ships (Overview)
You need explorer ships to both discover sea cards and to go on missions to discovered sea cards. On each of your own turns, you may use your explorer ships at any point during your action phase. You may first use an explorer ship, then build something or play an action card, and then use the next explorer ship. However, each explorer ship may only be used once per turn. You thus have (normally) a maximum of 3 explorer ship actions per turn.
4. Building Explorer Ships
You can build an explorer ship by paying 1 lumber and 1 wool during your action phase. Once built, you stand the explorer ship up. Once you have all 3 of your explorer ships built and in play, you can't build more. You may use an explorer ship on the same turn you build it. If you lose an explorer ship during the game (meaning that you have to lay the ship on its side), you may rebuild it during a later turn.
5. Explorer Ship Actions
5a. Overview
There are 2 kinds of explorer ship actions: "discovery" and "mission." Each action targets a sea card that is within range of your explorer ships. When you take a "discovery" action, your explorer ship moves to and targets a face-down sea card. When you take a "mission" action, your explorer ship moves to and targets a face-up (already discovered) sea card.
Important: On your turn, you can normally only perform 1 action with each sea card.
5b. Range of the Explorer Ships
The range of all your explorer ships is determined by the number of sail points depicted on the buildings of your principality. The sum of sail points yields the number of movement points you have available each turn for each of your explorer ships.
The Sailmakers' Shop has 1 sail point.
Starting from your Explorer Harbor, for each movement point, you can move each of your explorer ships by 1 field in horizontal or vertical direction (orthogonally, not diagonally).
If you only have 1 sail point, you can only reach the sea card directly in front of the Explorer Harbor. If you have 2 sail points, you can reach the 3 sea cards marked with a "2" (see the diagram at the bottom of page 10). Any explorer ship's unused movement points are forfeited as soon as the ship reaches its destination.
At the beginning of the game you won't have any sail points, so your 0 movement point ships cannot perform explorer actions.
5c. Discovery
If you want to discover a sea card that is within range, turn it face up. Then, place one of your explorer ships on that card. Then read the text under "Discovery" aloud and carry out the instructions. The explorer ship remains on the sea card until the end of your turn, to indicate that an action has already been performed with this card. Finally, return the explorer ship to your Explorer Harbor, where it is available to be used again or to be rebuilt if it has been destroyed. Therefore, you cannot go on a mission to the newly discovered sea card until a later turn.
Important: You may only discover 1 new card per turn!
5d. Mission
You can carry out missions to visit islands or to fight pirates once you discover them. If you want to go on a mission, simply place one of your explorer ships on the card you wish to visit. Then read aloud the text under "Mission" and carry out the instructions. If your mission is successful (i.e., you can satisfy the mission's conditions), rotate the card 90°. Your explorer ship remains on the sea card until the end of your turn, to indicate that an action has already been performed with this card.
Important: Remember that when you and your opponent have discovered sea cards with the same name, only 1 of you can reach mission level 3 and obtain the corresponding victory point for that mission. If you have reached level 3 on a particular sea card, your opponent may still carry out missions on their corresponding island cards (but not pirate cards) but cannot rotate the card to level 3 in the process.
6. Fighting Pirates and Lost Ships
When fighting pirates, add up the cannon points on the buildings in your principality. Each set of sea cards contains 3 pirates. The fighting strength of those pirates is 5, 6, and 8 respectively. To determine the result of the fight, roll the production die and add the number of cannon points in your own principality to the roll result. If the sum is larger than the pirate's strength, you are victorious and receive the reward indicated on the card. In case of a tie, repeat the die roll. If the sum is smaller than the pirate's strength, you lose your explorer ship. If you are defeated, turn the explorer ship over so that its blank side faces up. It remains on the sea card, to indicate that an action has already been performed with this card. You proceed in exactly the same fashion if your ship runs aground on a reef during a mission to the Island of the Forgotten Tribe. In such case, you lose your explorer ship.
Important: If your opponent is at level 3 and you are at level 2, you can't take bounty on a mission to a pirate card.
Hint: Detailed information on the individual sea cards can be found in the Card Index at the end of these game rules.
7. End of the Turn
When you have finished your turn, remove all your ship tokens (explorer ships and ships you might have lost) from the sea cards visited. Return them to your Explorer Harbor, without changing their status.
2. The Era of Sages
You will quickly come to appreciate the Sage cards. After all, wisdom points (the currency of the sages) give you the opportunity to influence the occurrence of events. Your access to the cards in the draw stacks also improves, and you can take the sting out of your opponent's attacks. You also should show a little bit of wisdom when it comes to fending off famines.
The Theme Set's 2 draw stacks contain 17 and 18 cards, respectively. The face-up expansion card stack consists of 2 Manifesto of Humane Conduct cards.
The following rule changes and additions apply:
- The set introduces wisdom points in the form of owls. To receive wisdom points, you first must place sages in your principality.
- All Sage cards are region expansions. The set contains a total of 8 sage cards: 1 sage for each region type; 2 sages that can be placed adjacent to any region type.
- If you have a sage adjacent to a region, and you roll that region's number during production, that sage receives 1 owl. Note that the production boosters (e.g., Grain Mill) do not generate additional owls.
- Owls are the required currency for certain expansion and action cards. For example, you must pay 1 owl each time you want to use the expansion card Grove of Peace.
- To play an action card in The Era of Sages, you have to pay owls (in most cases) in addition to meeting the other requirements of the card. For example, you must pay 3 owls if you want to play the action card Wise Compensation. Owls are also required to build certain buildings and units—also to rotate the Manifesto of Humane Conduct to the next (higher) level.
- Owls are not resources. You can't obtain them in exchange for resources, and they do not count when a Brigand Attack occurs.
- Manifesto of Humane Conduct marker card: There are no building costs for this card. When you build your first city, you take this marker card and place it above or below any region of your choice. You can move this marker card adjacent to another region at any time (if you need the region's building site, for example).
3. The Era of Prosperity
Would you like to be a good prince and govern wisely? You have the opportunity to do so when you play this set. Make your Catanian subjects happy: build Village Schools, construct a Hospital, and promote the arts. All this raises your people's spirits and spurs the expansion of your principality. But if you allow the level of contentment to drop, riots will soon end the Age of Enlightenment and your carefree existence as a prince.
The 2 draw stacks of this Theme Set each contain 12 cards. The face-up expansion card stack consists of 2 Builders' Hut cards, the Prince card, and the Princess card. In addition, you and your opponent each receive 1 Public Feeling card, which you place adjacent to any region of your opponent's choice. (Since Public Feeling is a marker card, it can be moved to another region at any time.)
The following rules changes and additions apply:
-
The set introduces contentment points—depicted as stars. The degree of the population's contentment is recorded on the marker card, similar to the resources on the regions. The higher the degree of contentment, the more likely your people are to serve you.
-
Stars can be used to take advantage of the effects described on the Public Feeling card. Stars are also required to build some buildings and units.
-
Stars are not resources. You can't obtain them in exchange for resources, and they do not count when a Brigand Attack occurs. However, once during your turn you may pay 2 stars and take any 1 resource of your choice (see Public Feeling card).
-
Assembling the event card stack: To assemble the event card stack for the first time, momentarily set aside the 2 Insurrection event cards and the Yule card. Then shuffle the other event cards of the Basic Set together with the Taxation event cards and place 3 cards face down. Place the Yule card on top. Shuffle the other 7 event cards together with the 2 Insurrection cards and place them face down on the remaining stack—that is, on top of the Yule card.
If you draw an Insurrection during the game, follow its instructions. Afterwards, place it under the 4 topmost cards of the event card stack instead of returning it to the bottom of the event card stack as usual.
If you draw the Yule card during the game, reassemble the event card stack as described above.
The Duel of the Princes
The Duel of the Princes is played according to the existing Rivals rules—only the event card stack is assembled differently. Each player chooses 1 Theme Set from the available Theme Sets (the starting player chooses first). The third Theme Set is chosen by lot: take 1 event card from each of the Theme Sets that have not yet been chosen, shuffle them face down, and draw 1 card at random. This card determines the third set to be included in the Duel. Alternatively, you may want to leave things entirely to chance: take 1 card from each available Theme Set, shuffle them, and draw 3 cards at random; to play, use the 3 sets these cards belong to. Either way, put the Theme Sets you don't use back into the box until you start a new game.
If the Duel of the Princes includes The Era of Explorers, each player begins with a smaller sea area, consisting of a total of 6 sea cards in 2 columns of 3 (instead of 9 cards in 3 columns of 3), and the Explorer Harbor (the card without half moon). If the Duel includes The Era of Prosperity, each player places a Public Feeling card adjacent to any one of their regions, as in the Theme Game.
Assembling the Event Card Stack
To assemble the event card stack, choose only cards that belong to the Theme Sets you are actually using in the game. The event card stack always contains the cards of the Basic Set that are not marked with a half moon: Yule, Invention, Year of Plenty, and Traveling Merchant. From the 3 chosen sets, you now add the cards that do not depict a half moon symbol:
| Theme Set | Event cards added (no half moon) |
|---|---|
| The Era of Gold | none |
| The Era of Turmoil | 1x Riots |
| The Era of Progress | 1x Plague |
| The Era of Explorers | 1x Most Successful Explorer, 1x Friendship Between Peoples |
| The Era of Sages | 1x Famine, 1x Council of the Sages |
| The Era of Prosperity | 1x Insurrection, 1x Taxation |
| The Era of Intrigue | 1x Good Neighbors, 1x Religious Dispute |
| The Era of Merchant Princes | 1x Fortunate Trade Voyage, 1x Capricious Sea |
| The Era of Barbarians | 2x Barbarian Attack |
Note: If using The Era of Prosperity, at the beginning of the game shuffle the Insurrection event card into the stack as you would normally do.
You can also play the Duel of the Princes with the expansion Rivals for Catan: Age of Darkness theme sets: The Era of Intrigue, The Era of Merchant Princes and The Era of Barbarians, as listed in the table above.
Depending on which sets you chose, you now have a set of event cards containing 6-10 cards. Shuffle the remaining event cards of the Basic Set and the chosen sets. Add cards to the set of event cards until it contains a total of 12. Put the rest of the cards back into the box.
Note: Do not look at any of the randomly added or discarded event cards. Afterwards, assemble the event card stack according to the normal rules.
Goal of the Game
"The Duel of the Princes" always ends when a player reaches 13 victory points on their turn.
Tournament Game
The Tournament Game is the most challenging variant of The Rivals for Catan. To be able to play the Tournament Game, each player needs one copy of The Rivals for Catan and (if possible) all game expansions. In the Tournament Game, each player assembles their own "deck" from their cards. During the game, each player only has access to their own card stacks. Therefore, each player determines which cards they want to build or play during the game.
A PDF of the Tournament Game rules can be found at http://www.catan.com/en/download/?RfC-Tournament_Game.pdf
Please note: Most of the differences between the card texts of the Theme Game and, respectively, The Duel of the Princes stem from the fact that in the Theme Game and in the Duel you use shared draw decks and a shared discard pile. In the Tournament Game, each player has their own draw stacks and discard pile. To determine which discard pile or draw stack a player must access in the Tournament Game, a respective reference in parenthesis is included. The reference on the Grove of Freedom, for example, looks like this: "1x during your turn: Choose 1 card from a draw stack (from one of your own draw stacks)." The text in parenthesis has no bearing on the Theme Game and the Duel of the Princes. They only apply to Tournament Game play.
The full Tournament Game rules are not part of this booklet.
Card Index
The printed card index is laid out in several columns. Each card below is transcribed with its printed type, its per-set copy count in parentheses, and its printed text. Printed notes and discrepancies are marked in the text. Where a card's flavour quote, explanatory text and card-face text sit in different columns of the printed index, they were matched to the card name by position on the page; the Grove cards in particular should be checked against the card faces.
The Era of Explorers (50 Cards)
Action Cards (10 Cards)
Ambassador (2): If you have rotated any of these islands to level 1 or higher, you must choose 1 of the advantages. If you haven't rotated at least 1 of the three named on the card to level 1, you can't play the Ambassador. If you can't use at least 1 of the available advantages for discovery, you can't play the Ambassador either.
Action – Attack. You get the advantage of discovering the Island of the Bards, the Island of the Scholars, or the Island of the Merchants another time. Requires: You have rotated the respective card at least to level 1.
Broadside (2): If you don't have at least 2 cannon points, you can't play the Broadside. If your opponent neither has an explorer ship nor an island of level 1 or higher, you can't play the Broadside either. You may only rotate an opponent's island to the next lower level. You may not rotate an opponent's pirate card.
Action – Attack. Your opponent must either rotate 1 island card to the next lower level or lose 1 explorer ship (lay the ship marker on its side) – you choose. Requires: At least 2 cannon points.
Cartographer (2): If you don't have a sail point, you can't play the Cartographer. But, you may play the Cartographer if you don't have unrevealed sea cards; in this case, however, you must swap 2 sea cards. If you have viewed an unrevealed sea card, you don't have to swap sea cards afterwards.
Action – Neutral. View up to 2 of your face-down sea cards and/or switch the positions of any 2 sea cards of your choice in your principality. Requires: At least 1 sail point.
Lars the Naval Hero (2): You can play Lars only if you are fighting against a pirate. If you don't have at least 1 cannon point, you can't play Lars. You may play Lars even if you would win the fight for sure. You are not allowed to play Lars after you have lost a fight.
Action – Neutral. When you fight against a pirate, the die roll is omitted and the pirate is defeated. Requires: At least 1 cannon point.
Navigator (2): If you don't have 2 sail points, you can't play the Navigator. If you can't (or don't want to) perform another action, you can't play the Navigator either.
Action – Neutral. Return 1 of your ships you have used for an action to your Explorer Harbor. You may perform another action with this ship. Requires: 2 sail points.
You may only return explorer ships. If an explorer ship was sunk due to a fight (i.e., turned over so that its blank side faces up), you can't return this ship token via the Navigator. Note: The Navigator doesn't allow you to make a second discovery during the same turn. The second action of an explorer ship can be a discovery, but only if no new sea card was discovered during this turn! (However, you may go on a second mission to a card.) Exception: In combination with the Astronomer, the explorer ship you returned via the Navigator can also make a second discovery.
Note on explorer ships (printed in the card index): It costs 1 lumber and 1 wool to build an explorer ship. A Ship Builder (Age of Darkness: The Era of Master Merchants) doesn't lower the building costs of an explorer ship. Explorer ships are not units and are not affected by cards that refer to units. They are also not considered as units with regard to the Barbarian Attack (Age of Darkness: The Era of Barbarians).
Region Expansions (4 Cards)
Buildings
Landing Stage (2): You may only build 1 Landing Stage in your principality. If you don't have a free region directly adjacent to your Explorer Harbor, you can't build the Landing Stage.
Building – Region. Place above or below a region directly adjacent to your Explorer Harbor. 1x during your turn: On a mission to the Island of the Bards, Island of the Scholars, or Island of the Merchants, you may replace 1 of the resources you have to pay with 1 gold.
Shipyard (2): You may only build 1 Shipyard in your principality. If you don't have a free region directly adjacent to your Explorer Harbor, you can't build the Shipyard.
Building – Region. Place above or below a region directly adjacent to your Explorer Harbor. 1x during your turn: You may trade any 1 resource of your choice for 1 lumber or 1 wool.
Extraordinary Sites: Islands
Island of the Bards (1 each): If your opponent doesn't have (corresponding) cards in their hand, you forfeit this advantage.
Extraordinary Site – Sea. Discovery: Your opponent shows you their hand of cards, from which you may draw 1 action card or unit into your hand. Mission: Pay 2 grain to rotate the card to the next higher level. The grain you give to the Bards may come from different fields.
Island of the Forgotten Tribe (1 each): After discovering the island, you may immediately carry out a mission. If you do so, you can choose the Island of the Forgotten Tribe as the mission's destination again. If your die roll result is 2–4, the event rolled applies to both players.
Extraordinary Site – Sea. Discovery: Return the ship to Explorer Harbor. You may carry out 1 additional mission. Mission: Roll the production die! 1: Reef – you lose your ship (lay the ship marker on its side). 2-4: Event – Roll the event die. 5-6: Treasure – rotate the card to the next higher level.
Island of the Merchants (1 each): If you don't have a resource, you can't use this advantage. If you only have room for 1 resource, you forfeit the second resource.
Extraordinary Site – Sea. Discovery: You may immediately trade any 1 resource of your choice for any 2 other resources of your choice. Mission: Pay 2 wool to rotate the card to the next higher level. The wool you give to the Merchants may come from different pastures.
Island of the Scholars (1 each): If you choose a stack that contains only 1 card, you only receive this card. The lumber you give to the Scholars may come from different forests.
Extraordinary Site – Sea. Discovery: You may choose up to 2 cards from any 1 draw stack of your choice (from any 1 of your own draw stacks of your choice) and draw them into your hand. Mission: Pay 2 lumber to rotate the card to the next higher level.
Sea Cards (20 Cards, 10 per player)
Explorer Harbor (1 each): The Explorer Harbor is always placed on the right or left side of the principality, instead of a road. At the beginning of the game place 1 explorer ship (ship marker standing up) and 2 unbuilt ships (laying down) on this card. Building an explorer ship costs 1 lumber and 1 wool (stand the ship marker upright). You may only make 1 discovery during each of your turns.
Extraordinary Site – Sea. (See the Explorer Harbor rules above.)
Pirates
Cimmarone, Jean, and Haidao Chang (1 each): The pirates differ in their fighting strengths and in their demands (either resources or gold). If you don't have gold or resources or you don't want to pay your gold or resources, you must fight. Once you are defeated, you no longer can decide to comply with the demand for resources or gold.
For this purpose, you add up all cannons on your Cannon Foundry, Armory, and Shipyard cards and roll the production die. Then you add the die roll result to the number of your cannons. If the sum is greater than the pirate's number of cannons, you win and rotate the pirate card to the next higher level. In case of a tie, you must roll the die again. If the sum is smaller, you must lose your ship (lay the ship marker on its side).
Cimmarone (1):
Extraordinary Site – Sea. Discovery/Mission: Pay 1 gold or fight. Fight: Roll the production die and add up the cannons. Victory: Rotate card to the next higher level and take the bounty. Defeat: You lose your ship (lay the ship marker on its side). Tie: Roll the production die again!
Jean (1):
Extraordinary Site – Sea. Discovery/Mission: Pay 2 resources or fight. Fight: Roll the production die and add up the cannons. Victory: Rotate the card to the next higher level and take bounty. Defeat: You lose your ship (lay the ship marker on its side). Tie: Roll the production die again!
Haidao Chang (1):
Extraordinary Site – Sea. Discovery/Mission: Pay 1 gold or fight. Fight: Roll the production die and add up the cannons. Victory: Rotate the card to the next higher level and take the bounty. Defeat: You lose your ship (lay the ship marker on its side). Tie: Roll the production die again!
Shipwreck (2 each): After you have discovered a Shipwreck, for the remaining part of the game you are not allowed to perform further actions with this card.
Extraordinary Site – Sea. Discovery: You receive any 1 resource of your choice. Missions to the Shipwreck are not possible.
Metropolises (Center Card) (2 Cards)
Explorer Metropolis (2): If you don't have a city adjacent to your Explorer Harbor, you can't build the Explorer Metropolis. If you neither have 6 discovered sea cards nor 2 or more level 2 islands, you can't build the Explorer Metropolis either. The Explorer Metropolis is worth a total of 4 victory points; this includes the upgraded city. All effects and consequences that refer to cities also refer to the Explorer Metropolis. Like settlements, roads, and cities, the Explorer Metropolis can't be removed or affected by effects other than those directly referring to cities.
Center Card. Place on the city adjacent to the Explorer Harbor. Requires: At least 6 discovered sea cards or at least 2 level 3 islands.
Printed discrepancy: the card index says "2 or more level 2 islands", while the card face and the Metropolis rules text (p. 4 and p. 15) say "at least 2 level 3 islands". The card face and rules text are transcribed here as printed; the index wording is also reproduced as printed.
Settlement/City Expansions (6 Cards)
Buildings
Armory (3): Gives 1 strength point and 1 cannon point.
Building – Settlement/City.
Sailmakers' Shop (3): Gives 1 commerce point and 1 sail point.
Building – Settlement/City.
City Expansions (4 Cards)
Buildings
Cannon Foundry (2): You may only build 1 Cannon Foundry in your principality.
Building – City. 1x during your turn: If you lose against a pirate, you may repeat the die roll once.
Units
Astronomer (2): You may only build 1 Astronomer in your principality. The Astronomer is the only possibility to discover more than 1 sea card during a turn—provided that you have at least 2 explorer ships (or also make use of the Navigator).
Unit – City. 1x during your turn: If you have discovered fewer sea cards than your opponent, you may pay 1 gold to carry out a second journey of exploration.
Event Cards (4 Cards)
Friendship Between Peoples (2): If you receive more resources than you can store, you lose the excess resources.
Event. Each player receives any 1 resource of their choice for each island card they have rotated at least to the next higher level.
Most Successful Explorer (2): In case of a tie, both players may also draw from the same stack. The player whose turn it is decides first from which stack they want to draw; then their opponent must make their choice.
Event. The player who discovered the most sea cards in their principality (at least 1) may draw up to 2 cards from any 1 draw stack of their choice (from any 1 of their own draw stacks of their choice). Tie: Each player may draw 1 card. The player whose turn it is begins.
The Era of Sages (41 Cards)
Action Cards (12 Cards)
Age of Enlightenment (2): It costs 1 owl to play the Age of Enlightenment card. If you don't have an owl, you can't play the Age of Enlightenment card. If you haven't reached at least level 1 of your Manifesto of Humane Conduct, you can't play the Age of Enlightenment card either.
Action – Neutral. Pay 1 owl: You receive any 1 resource of your choice for each victory point on the Manifesto of Humane Conduct card.
Dispute of the Sages (2): If you do not have a sage, you can't play the Dispute. If your opponent does not have a sage, you can't play the Dispute. It costs 1 owl to play the Dispute. If you don't have an owl, you can't play the Dispute either.
Action – Neutral. Pay 1 owl: You and your opponent roll the production die, and each adds their sages' owls to their result. The winner receives any 2 resources of their choice. Tie: Both players each receive 1 resource. Requires: Both players each have at least 1 sage.
Great Foresight (2): It costs 1 owl to play the Great Foresight. If you don't have an owl, you can't play the Great Foresight.
Action – Neutral. Pay 1 owl. View the event card stack and remove – without changing the order of the cards – 1 event (except for the Yule). You don't have to show your opponent the card you removed (it's best to return it face-down to the box).
Power of the Groves (2): If you don't have a grove, you can't play the Power of the Groves. If you don't have at least 2 sages, you can't play the Power of the Groves either.
Action – Neutral. You receive 1 owl for each grove in your principality. You may distribute the owls among your sages as desired. Requires: At least 2 sages.
Wise Compensation (2): It costs 3 owls to play the Wise Compensation. If you don't have 3 owls, you can't play the Wise Compensation. If you have as many cities as, or more cities than, your opponent, you can play the Wise Compensation only if you have fewer victory points. If you have as many, or more, victory points than your opponent, you can play the Wise Compensation only if you have fewer cities. If you don't have a settlement that you could upgrade to a city, you can't play the Wise Compensation.
Action – Neutral. Pay 3 owls: You may build 1 city for free (without paying resources). Requires: Fewer cities or victory points than your opponent.
Wise Protection (2): It costs 1 owl to play the Wise Protection. If you don't have an owl, you can't play the Wise Protection. If your opponent has no cards in their hand, you can't play the Wise Protection either.
Action – Attack. Pay 1 owl: Your opponent must show you their hand of cards. If it contains an action attack card, they must place all cards in their hand under any matching draw stacks (under any matching draw stacks of their own). If your opponent's hand contains at least 1 action attack card, they must place all cards in their hand under matching stacks. Your opponent decides which stack(s) they want to place the cards under.
Region Expansions – Units (8 Cards)
Sages in General: All sages are units. Each sage has 0 owls when it comes into play. Sages are considered as units and region expansions and can be affected by all effects that refer to either of the two categories. Sages are not heroes and cannot be affected by effects that refer to heroes.
Principal Sage Woman (2): You may only build 1 Principal Sage Woman in your principality. The only way a Principal Sage Woman differs from a specialized sage is that she can be placed adjacent to any region. If you don't have a free region, you can't place the Principal Sage Woman.
Unit – Sage. Region. Place adjacent to any region of your choice with at least 1 resource. Pay this resource. If the number of the adjoining region is rolled during the production roll, rotate Principal Sage Woman to the next higher level.
Specialized Sages (6): Barbara, Sage of the Fields; Frederich, Sage of the Hills; Michaela, Sage of the Pasture; Peter, Sage of the Forest; Piet, Sage of the Mountains; Walther, Sage of the Gold Field.
Specialized sages only differ regarding the type of region they can be placed adjacent to. Each sage can only be placed adjacent to "his" or "her" region. If you don't have a matching free region, you can't place the respective sage.
Unit – Sage. Region.
- Barbara, Sage of the Fields: Place adjacent to a fields region with at least 1 grain. Pay this grain. If the number of the adjoining fields region is rolled during the production roll, rotate Barbara to the next higher level.
- Frederich, Sage of the Hills: Place adjacent to a hills region with at least 1 brick. Pay this brick. If the number of the adjoining hills region is rolled during the production roll, rotate Frederich to the next higher level.
- Michaela, Sage of the Pasture: Place adjacent to a pasture region with at least 1 wool. Pay this wool. If the number of the adjoining pasture region is rolled during the production roll, rotate Michaela to the next higher level.
- Peter, Sage of the Forest: Place adjacent to a forest region with at least 1 lumber. Pay his lumber. If the number of the adjoining forest region is rolled during the production roll, rotate Peter to the next higher level.
- Piet, Sage of the Mountains: Place adjacent to a mountains region with at least 1 ore. Pay this ore. If the number of the adjoining mountains region is rolled during the production roll, rotate Piet to the next higher level.
- Walther, Sage of the Gold Field: Place adjacent to a gold field region with at least 1 gold. Pay this gold. If the number of the adjoining gold field region is rolled during the production roll, rotate Walther to the next higher level.
Settlement/City Expansions – Extraordinary Sites: Groves (7 Cards)
Groves in General: All groves are extraordinary sites: and as such, they are not buildings. Cards that refer to buildings can't affect the groves.
Grove of Courage (1): "Only when the courageous have become wise and the wise courageous will we feel that which has often been mistakenly claimed before: mankind is making progress." – (Erich Kästner)
Extraordinary Site – Settlement/City. If, during your own or your opponent's turn, you were to lose cards from your hand or buildings due to a Feud or Fraternal Feud, these event cards would have no effect. You may also use the grove during your opponent's turn.
Grove of Fraternity (1): "Fraternity is innate to man. Not being fraternal—being separate—is tenaciously instilled into man." – (Leo N. Tolstoy)
Extraordinary Site – Settlement/City. 1x during your turn: You may draw 3 cards from any 1 or more draw stack(s) of your choice (from any 1 or more of your own draw stacks of your choice). Afterwards, your opponent may draw 1 card from any draw stack of their choice (from any of their own draw stacks of their choice). If possible, you may immediately use the cards you have drawn. You don't have to place excess cards (if you have them) under matching stacks until the end of your turn. As usual, afterwards you still may exchange a card. Your opponent doesn't have to place excess cards in their hand (if they have them) under matching stacks until the end of their next turn. [The parenthesis "(from any 1 or more of your own draw stacks)" and "(from any 1 of their own draw stacks)," respectively, refers to the Tournament Game.]
Grove of Freedom (1): "Man's freedom does not reside in the fact that he can do what he wants, but that he does not have to do what he does not want." – (Jean-Jacques Rousseau)
Extraordinary Site – Settlement/City. 1x during your turn: Choose 1 card from a draw stack (from one of your own draw stacks). You may decide in which order you want to place the cards under the stack. However, you may not alter the order of the cards you leave on top of the stack. If possible, you may immediately use the card you have drawn. You don't have to place an excess card (if you have one) under a matching stack until the end of your turn. As usual, afterwards you still may exchange a card. [The parenthesis "(from one of your own draw stacks)" refers to the Tournament Game.]
Grove of Great Foresight (1): "The strangest thing about the future is that they will be referring to our time as 'the good old days.'" – (John Steinbeck)
Extraordinary Site – Settlement/City. 1x during your turn: You may view the 3 topmost event cards. You may place as many of these event cards under the stack as you like, except for the Yule card. When choosing the card, you may not change the order of the cards in the stack. If possible, you may immediately use the card you have drawn. You don't have to place an excess card (if you have one) under a matching stack until the end of your turn. As usual, afterwards you still may exchange a card.
Grove of Justice (1): "Temper justice with the weight of mercy, not the weight of money." – (Miguel de Cervantes y Saavedra)
Extraordinary Site – Settlement/City. Use this card before your dice roll and determine the result of the event die roll. You may also use the Grove of Justice in combination with Brigitta the Wise Woman (Basic Set)—in this case, no die is rolled at all.
Grove of Peace (1): "Peace and freedom have something in common: just as freedom is also the freedom of others, peace is also the peace of others." – (Franz Alt)
Extraordinary Site – Settlement/City. Roll the production die if your opponent plays an action attack card. If the roll result is larger than 3, the card has no effect and your opponent must place it on the discard pile. If your opponent has to pay for playing their action attack card (e.g., Wise Protection), they must pay these costs before you decide to play the Grove of Peace. If you have also placed Robert, Herald of the Sages in your principality, rolling a "3" is sufficient to fend off the action attack card played by your opponent.
Grove of Vigilance (1): "Caution and distrust are good things, but one must use caution and distrust with them." – (Christian Morgenstern)
Extraordinary Site – Settlement/City. If the event Trade, Celebration, or Brigand Attack is rolled, you may declare the event void. Instead, the event "Event Card" applies. Rotate the event die so that a side depicting a "?" faces up. If you use the grove when the Brigand Attack event occurs, each player receives their respective resources, and then you draw the event card. If you use the Grove of Vigilance, you declare the event rolled void.
City Expansions (8 Cards)
Units
Cole, Paladin of the Sages (1): "Sometimes the owls are not what they seem." – (Cole)
Unit – Hero. City. Duel of the Princes & Tournament Game: If you have built a Drill Ground (The Era of Turmoil), you may pay 1 ore or 1 grain less when building Cole, but you still have to pay 3 owls. Owls aren't resources and must always be paid in their entirety. 1x during your turn: You may use the function of one of your opponent's groves if you pay the number of owls indicated on that grove.
Robert, Herald of the Sages (1):
Unit – Hero. City. Duel of the Princes and Tournament Game: If you have built a Drill Ground ("The Era of Turmoil"), you may pay 1 ore or 1 grain less when building Robert, but you still have to pay 2 owls. Owls aren't resources and must always be paid in their entirety. Each time you must roll the production die to surpass either a certain number indicated on a card or the number rolled by your opponent, you win also in case of a tie.
Buildings
Academy of Sages (2): If you have built both Academy of the Sages cards, you also may use both of them to provide 1 owl or 2 sages with a total of 2 owls during a turn.
Building – City. 1x during your turn: Pay any 1 resource of your choice and rotate any 1 sage card to the next higher level.
Courthouse (2): You may only build 1 Courthouse in your principality. If you lose resources when the event Trade is rolled, you determine which resources to give to your opponent.
Building – City.
Granary (2): You may only build 1 Granary in your principality. If your opponent doesn't have a resource other than grain, you can't use the Granary's function.
Building – City. 1x during your turn: If one of your opponent's fields regions has no grain, you may give them 1 grain, which they must store in this fields region. Afterwards, demand any 1 resource of a different type of your choice from them.
Event Cards (4 Cards)
Council of the Sages (2): Each player may distribute, at their own discretion, either up to 2 owls among their sages or up to 2 resources among regions with an adjacent sage. You cannot receive 1 owl and 1 resource. If you choose resources and only have room for 1 resource, the other resource is forfeited. If you choose owls and only have room for 1 owl, the other owl is forfeited.
Event. You receive either (up to) 2 owls or (up to) 2 resources on regions adjacent to which you have placed sages.
Famine (2): If you have grain, you must discard grain, even if you would rather discard 2 different resources.
Event. Each player without a Granary must discard 1 grain. If a player doesn't have grain, they must discard 2 resources of their choice.
Marker Cards (2 Cards)
Manifesto of Humane Conduct (2): When you build your first city, you may immediately take the Manifesto from the face-up expansion card stack and place it adjacent to one of your regions. Duel of the Princes and Tournament Game: You must have the Manifesto in your hand and place it as soon as you have built a city. Place the Manifesto above or below any region of your choice. If you later need the building site adjacent to this region, you may place the Manifesto adjacent to any other region of your choice, at any time (see also p. 6, Marker Cards).
Marker Card. Pay 1 lumber, 2 gold, and 3 owls to rotate the card to the next higher level. For 2 of the owls you have to pay, you also may place 1 action attack card on the discard pile. Requires: City.
The Era of Prosperity (41 Cards)
The printed heading for this set reads "41 Cards"; the Contents page above gives 34 cards for The Era of Prosperity. Both are reproduced as printed.
Action Cards (9 Cards)
Artworks (4): Epic (1), Fountain (1), Relief (1), Sculpture (1). You can't play any of the Artworks until you have first placed the Prince or the Princess in your principality. If your Public Feeling card only has room for 1 star, the 2nd star is forfeited.
- Artwork: Epic. Action – Neutral. You receive 1 star. If you have a Theater, you receive another 1 star. Requires: Prince or Princess.
- Artwork: Fountain. Action – Neutral. You receive 1 star. If you have an Aqueduct, you receive another 1 star. Requires: Prince or Princess.
- Artwork: Relief. Action – Neutral. You receive 1 star. If you have a City Palace, you receive another 1 star. Requires: Prince or Princess.
- Artwork: Sculpture. Action – Neutral. You receive 1 star. If you have a Builders' Hut, you receive another 1 star. Requires: Prince or Princess.
Court Astrologer (1): You can't play any of the Court Astrologer until you have first placed the Prince or the Princess in your principality.
Action – Attack. If you play this card and pay 1 star, you may once more determine an event die roll result during your turn. The chosen event applies to both players. Requires: Prince or Princess.
Feeding the Poor (2): If you can't pay grain, you can't play Feeding the Poor. If your Public Feeling card only has room for 1 star, you can't play any of the Artworks either.
Action – Neutral. Pay 1 grain. You receive up to 2 stars. If your Public Feeling card only has room for 1 star, the 2nd star is forfeited. (Tournament Game: You can also distribute the stars received among both Public Feeling cards if you have placed both.)
Bera the Insurgent (1): If your opponent has neither stars nor resources, you can't play Bera. If you have as many victory points as—or more victory points than—your opponent, you can play Bera only if your opponent has at least 1 star. If you haven't placed a Public Feeling marker card in your principality, you can't play Bera either. (Primarily, this requirement is relevant in the Tournament Game. It is also important because of the function of the City Palace, for example).
Action – Attack. You choose: Your opponent either gives you up to 2 stars, or they give you 1 resource of their choice for each victory point they have in excess of your own victory point total – up to a maximum of 3 resources. Requires: Public Feeling.
Printed discrepancy: the card index heading reads "Bera the Insurgent"; the card face reads "Bera the Insurrectionist". Both are reproduced as printed.
Prosperity (1): If you don't have an Aqueduct, you can't play the Prosperity card. If you don't have a settlement that you can upgrade to a city, you can't play the Prosperity card either.
Action – Neutral. Building a city costs you only 1 ore and 2 grain. Requires: Aqueduct.
Region Expansions (1 Card)
Thieves' Hideout (1): The Thieves' Hideout is an extraordinary site and thus not a building. Cards that refer to buildings can't affect the Thieves' Hideout. The Thieves' Hideout is a foreign card you build in your opponent's principality. If your opponent doesn't have a free region, you can't build the Thieves' Hideout. If, later in the game, your opponent doesn't have another free region with at least 1 resource, you can't move the Thieves' Hideout. If you want to build the Thieves' Hideout at a region adjacent to which a marker card has been placed, or if you want to move it there, then your opponent must place the marker card adjacent to another region (see also p. 6, Marker Cards). If your opponent has 5 or more strength points (or pays 3 stars), the Thieves' Hideout is immediately removed and placed on the discard pile (Tournament Game: on the discard pile of the owner of the Thieves' Hideout). If your opponent already has 5 or more strength points, you can't build the Thieves' Hideout.
Extraordinary Site – Region. Place adjacent to a free region of your opponent. 1x during your turn: For 1 wool, you may place the Thieves adjacent to another region. You receive 1 resource from this region. Removal: The opponent has at least 5 strength points or pays 3 stars.
Settlement/City Expansions (3 Cards)
Extraordinary Sites
Common Land (1): The Common Land is an extraordinary site and thus not a building. Cards that refer to buildings can't affect the Common Land.
Extraordinary Site – Settlement/City. 1x during your turn: Pay 1 star to trade any 1 resource of your choice for 1 different resource.
Buildings
Village School (2): You may only build 1 Village School in your principality. If you are building the Village School and your Public Feeling card only has room for 1 star or no room at all, the star or stars are forfeited. If your Public Feeling card doesn't have room for the star when the Trade event occurs, the star is forfeited.
Building – Settlement/City. After building the Village School, you immediately receive up to 2 stars. You receive another 1 star each time the event Trade occurs.
City Expansions (12 Cards)
Units
Prince (1): You may only build 1 Prince in your principality. If you have built the Princess, you can't play the Prince. The Prince is a unit required for some action cards. If you use the Prince to retrieve an Artwork from the discard pile, the order of the cards in the discard pile remains unchanged. You must show your opponent the retrieved card. The Prince never changes over to the opponent's principality or to their hand. The Prince can never be taken over directly or enticed away by the opponent. [The parenthesis "(from your own discard pile)" refers to the Tournament Game.]
Unit – City. 1x during your turn: For 1 gold, you may retrieve 1 Artwork from the discard pile (from your own discard pile). The Prince never changes over to the opponent's principality or to their hand. Requires: Not having a Princess.
Princess (1): You may only build 1 Princess in your principality. If you have built the Prince, you can't play the Princess. The Princess is a unit that serves as requirement for some action cards. If you use the Princess to retrieve an Artwork from the discard pile, the order of the cards in the discard pile remains unchanged. You must show your opponent the retrieved card. The Princess can never be taken over directly or enticed away by the opponent. [The parenthesis "(from your own discard pile)" refers to the Tournament Game.]
Unit – City. 1x during your turn: For 1 gold, you may retrieve 1 Artwork from the discard pile (from your own discard pile). The Princess never changes over to the opponent's principality or to their hand. Requires: Not having a Prince.
Buildings
Aqueduct (2): You may only build 1 Aqueduct in your principality. The Aqueduct has an effect on all 4 regions adjacent to the city. The Aqueduct is a building required for other city expansions and certain action cards.
Building – City. If the number of a fields or pasture region adjacent to the city with the Aqueduct is rolled, you receive 1 additional resource there.
Builders' Hut (2): You may only build 1 Builders' Hut in your principality. Stars (and owls) are not resources and thus are not taken into account to pay for buildings you can build at a reduced cost by means of the Builders' Hut. The Builders' Hut only makes it cheaper to build buildings—it does not lower the cost of other cards with similarly high building costs. The Builders' Hut can be combined with the Building Crane ("The Era of Progress"); in this case, the corresponding buildings for city expansion become 2 resources cheaper.
Building – City. (1) If the event Celebration is rolled, you receive 1 star. (2) A building that costs at least 6 resources costs you 1 resource less.
City Palace (1): You may only build 1 City Palace in your principality. You may choose a unit that has a requirement.
Building – City. 1x during your turn: Pay 3 stars and draw 1 action card (the card text must not include requirement) or a unit from the discard pile (from your own discard pile) into your hand. Duel of the Princes and Tournament Game: in the 2nd edition of The Rivals for Catan, the Doctor card (The Era of Progress) and Gudrun, Terror of the Seas (The Era of Gold) have requirements and thus cannot be chosen via the City Palace. [The parenthesis "(from your own discard pile)" refers to the Tournament Game.]
Hospital (2): You may only build 1 Hospital in your principality. If you don't have an Aqueduct, you can't build the Hospital.
Building – City. 1x during your turn: You receive 1 star, or you pay 1 star and receive any 1 resource of your choice in exchange. Requires: Aqueduct.
Monument to the Prince (2): You may also build the Monument to the Prince if your opponent doesn't have any units. If your opponent has only 1 unit, you receive that unit.
Building – City. After you have built the Monument, your opponent must determine 2 of the units they placed. Choose 1 of them and add it to your hand. Your opponent is not allowed to choose units you can't include in your hand (e.g., Prince and Princess). If your opponent has only this type of units, you do not receive any unit.
Theater (1): If you don't have room for the star on the Public Feeling when building the Theater, you forfeit the star.
Building – City. After building the Theater, you immediately receive 1 star.
Road Complements (3 Cards)
Mercenaries (1): If you don't have a free road (without road complement), you can't build the Mercenaries.
Unit – Road. Place on one of your own free roads. You may keep 1 gold and 1 wool when the event Brigand Attack occurs; if you pay 1 star, you keep all resources.
Traveling Theater (1): If you don't have room for the star on the Public Feeling when building the Traveling Theater, this star is forfeited. If you don't have a free road (without road complement), you can't build the Traveling Theater. If, later in the game, you don't have another free road with at least 1 resource on an adjacent region, you can't move the Traveling Theater. You are not allowed to move the Traveling Theater during the turn you play this card.
Unit – Road. Place on one of your own free roads. You receive 1 star. 1x during your turn: Move the Traveling Theater onto one of your own free roads. Trade 1 resource of an adjacent region for 1 star.
Small Market Town (1): If you don't have a free road (without road complement), you can't build the Small Market Town.
Building – Road. Place on one of your own free roads. 1x during your turn: If one of your regions has 3 resources, you may trade 1 of these resources for any 1 different resource.
Event Cards (4 Cards)
Insurrection (2): Mind the special rule for assembling the event card stack at the beginning of the Theme Game and for the Duel of the Princes (see above). Each player must place 1 building that costs at least 2 resources under a matching draw stack (under one of their own matching draw stacks). Afterwards: Place this card under the 4 topmost cards of the event card stack, instead of returning the Insurrection to the event card stack. [The parenthesis "(under one of their own matching draw stacks)" refers to the Tournament Game.]
Event. Each player must place 1 building that costs at least 2 resources under a matching draw stack (under one of their own matching draw stacks). Afterwards: Place this card under the 4 topmost cards of the event card stack.
Taxation (2): If a player has only room for 1 gold or 1 resource, they only receive 1.
Event. Each player who pays 1 star receives any 1 resource of their choice and 1 gold.
Marker Cards (2 Cards)
Public Feeling (2): In the Theme Game and in the Duel, each player receives 1 Public Feeling card at the beginning of the game. (Tournament Game: You must incorporate the Public Feeling in your deck and may place it as soon as you have it in your hand. In the Tournament Game, you may also place both Public Feeling cards.) Place the Public Feeling above or below any region of your choice. If you later need the building site adjacent to this region, you may place the Public Feeling adjacent to any other region of your choice, at any time. However, the Public Feeling can never be removed! (See also p. 6, "Marker Cards" and p. 13-14, The Era of Prosperity.)
Marker Card. If you pay 1 star, the events Riots and Insurrection do not affect you. 1x during your turn: For 2 stars, you receive any 1 resource of your choice.
Printed note: the Insurrection, Taxation and Public Feeling texts are reproduced from the card index, which is printed in several columns. Check against the card faces if a reviewer needs a verbatim line-by-line match.