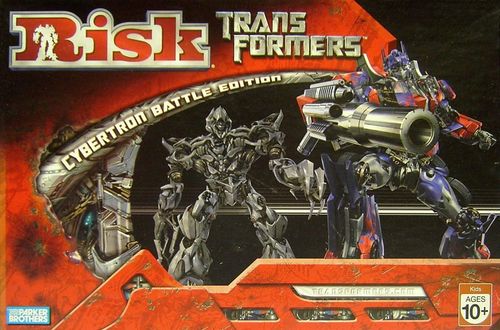
Risk: Transformers – Cybertron Battle Edition
Risk: Transformers – Cybertron Battle Edition Rulebook
Table of Contents
Table of Contents
Object
To take control of the most zones and sectors on CYBERTRON.
Tip: Wise leaders fight for control of the Launch Pad – it could win them the war in the case of a draw!
If you've never played RISK before, read the rules all the way through before playing. Once you know how to play, use the reference cards to remind you of the key points.
What's Different From Standard Risk
If you are a seasoned RISK player, use this section to see how RISK TRANSFORMERS is different from the standard game:
- The game is played over 6 days (rounds). Each day everyone takes a turn. See page 18.
- The gameboard shows the TRANSFORMERS' world of CYBERTRON.
- Territories are called zones and continents are called sectors. See page 7.
- Four of the zones can change (spin or slide). See page 9.
- Infantry units are called robots. Cavalry units are called vehicles.
- Each player has a leader in addition to an army of standard robots. Leaders can be flipped between robot form and vehicle form, with different special bonus powers in each form. See page 9.
- Sea lines are called hyperlinks.
- There are five 8-sided dice and five standard 6-sided dice.
- Cards have special upgrades that give you bonuses during the game. See page 11.
Components
Gameboard, 42 upgrade cards, 4 reference cards, 4 leader cards, 5 six-sided dice, 5 eight-sided dice, 4 sets of army pieces (robots and vehicles), 4 leaders, 2 cardboard spinning zones, 2 cardboard sliding zones, 6 plastic pegs.
Setup
-
Open the gameboard onto a flat surface. Insert the spinning zones and sliding zones as shown on page 19.
-
There are 4 leaders to choose from: 2 AUTOBOTS (OPTIMUS PRIME and BUMBLEBEE) and 2 DECEPTICONS (MEGATRON and BARRICADE). RISK TRANSFORMERS is different depending on how many people are playing. When you know how many people are playing, each choose a leader and take the matching leader card.
- 2 PLAYERS (HEAD-TO-HEAD): one player must choose an AUTOBOT leader and the other a DECEPTICON.
- 3 PLAYERS (FREE-FOR-ALL): one player must choose an AUTOBOT leader. The others each take a DECEPTICON.
- 4 PLAYERS (ALLIED FORCES): play in 2 teams – AUTOBOTS vs. DECEPTICONS. At the start, sit opposite your teammate.
Some rules only apply to the 4-player game and are explained throughout this book.
-
Take all robots and vehicles of your leader's color. Count out 30 robots. These are operational robots and can be placed at the start of the game. The other robots and vehicles are out of action on your scrapheap.
Leader: a figure standing on a base. Robot: a small figure. Vehicle (worth 3 robots): a flat vehicle piece.
-
Place your leader and one operational robot on the leader's start zone (as shown on his leader card). Stand your leader up to show his robot form.
-
Starting with the youngest player, take turns placing a robot on an empty zone until all zones contain a robot. There are 42 zones. You control any zone that contains one of your robots.
YOU ARE NOW READY TO FIGHT THE CYBERTRON BATTLE!
Playing the Game
Things to Know
- You win upgrade cards by capturing other players' zones during the game (maximum 1 per turn).
- If a robot is destroyed in an attack, return it to your scrapheap.
- A zone must never be empty during the game. It must always contain at least one robot or a leader.
- You can exchange 3 robots for 1 vehicle, or vice versa, at any time.
Taking Your Turn
The youngest player takes the first turn and play continues clockwise. Each turn consists of 5 phases, played in the following order:
- Phase 1: Place Robots
- Phase 2: Morph! (Optional)
- Phase 3: Attack! (Optional)
- Phase 4: Call for Back-Up (Optional)
- Phase 5: Draw a Card
When you have completed all 5 phases, the next player takes a turn. When all players have taken a turn, the round is over. See page 18 for details.
Read on to see each phase explained in detail...
Phase 1: Place Robots
In this phase new robots join your army. Follow steps A to E below.
A. Count Your Zones
Count up all the zones you control (i.e. have at least one robot in). Now look at the ZONES ▶ ROBOTS panel at the bottom of the gameboard. Find the number of zones you control in the black numbers. Take the number of robots shown in the corresponding red number and place them in your operational robot pile. You can place these in step E of this phase.
(e.g. if you control the green zone, take 7 extra robots). See below.
Printed sector bonus strip (color: robots): green 7, blue 5, purple 5, red 3, yellow 2, orange 2.
Note: If a secret war factory is open, it counts as one of the sector's zones.
[Transcription note: the ZONES ▶ ROBOTS panel on the gameboard is a small graphic in this scan. Its black zone-count and red robot-count numbers are not legible in the rulebook image, so the full table is not reproduced here. The only value legible in the rulebook is the example on page 8: 21–23 zones gives 7 operational robots. Verify the complete panel against the physical gameboard.]
B. Play Cards
If you have any upgrade cards that give you bonus robots, you can play them now. Put them faceup on a separate discard pile next to the draw pile. See page 17 for details of upgrade cards.
C. Sector Bonus
CYBERTRON is divided into 42 zones which are grouped into 6 colored sectors.
| Sector | No. of zones |
|---|---|
| Red | 6 |
| Yellow | 4 |
| Green | 12 |
| Blue | 9 |
| Purple | 7 |
| Orange | 4 |
You receive extra operational robots for controlling all the zones in a sector. Take robots for each sector you control
[Source note: the sentence ends here at the foot of page 7 in the rulebook as printed; no continuation appears on the page.]
D. Secret War Factories
The two sliding zones have secret war factories under them. These are always closed at the start of the game but can be opened in Phase 2.
- For each robot (or leader) you have in an open secret war factory, put one extra robot in your operational robot pile (maximum 3 per factory).
- You receive nothing if the war factory is closed.
E. Place Your Robots
Place your operational robots in any zone(s) you control. You can put them all in the same zone or divide them as you wish.
REMEMBER: The more robots in a zone, the better its attack and defense.
Phase 1 example (page 8): Red controls 23 zones, including all zones in the purple sector and 2 robots on the Decagon's secret war factory. On this turn, Red performs Phase 1 as follows:
- A. Count Your Zones: Controlling 23 zones gives Red 7 operational robots.
- B. Play Cards: Red plays the following upgrade cards. Mass-Production gives Red 3 extra operational robots. Interlock Initiators doubles the sector bonus.
- C. Sector Bonus: Controlling the purple sector gives Red a bonus of 5 robots. This is doubled by Interlock Initiators, so he gets 10 robots.
- D. Secret War Factories: Having 2 robots on the secret war factory gives Red 2 extra operational robots, which can be placed in step E.
- E. Place Your Robots: Red has 22 operational robots and can now place them in any zone(s) which already has a red robot in it.
Upgrade card text shown on page 8: Mass-Production – "Play on your turn in Phase 1. Place 3 extra robots this turn." Interlock Initiators – "Play on your turn in Phase 1. Double your sector bonus this turn."
When you have placed all your operational robots on the board, move on to Phase 2.
Bring Back Your Leader
If your leader is on your scrapheap because he has been destroyed in battle, you can pay 3 operational robots to bring him back. Put the 3 robots on the scrapheap and place your leader in any zone you control in either robot or vehicle form (your choice).
Phase 2: Morph! (Optional)
In this phase you can morph your leader and change special spinning or sliding zones.
Morph Your Leader
Flip your leader over to change him from robot form to vehicle form or vice versa. Your leader has different bonus powers depending on which form he is in (see your leader card).
Change a Special Zone
To change a spinning or sliding zone you must both:
- Control the special zone itself or another zone in the same sector, AND
- Play an upgrade card with a change icon on it.
Spinning Zones
Use the spinning zones (Praxus and Pion Tower) to open or close routes between neighboring zones:
- Line up the arrows to make one zone neighbor the next, OR
- Separate one zone from the next by lining up the walls on the zone with the arrows on the board.
To change a spinning zone:
- Play a change card.
- Rotate the spinning zone to open or close a route.
Sliding Zones
The sliding zones (Decagon and Moon Alpha) have secret war factories beneath them. [Part of this sentence is illegible in the scan.]
Sliding zones should be closed at the start of the game.
To open a sliding zone:
- Play a change card.
- Open the zone to reveal a secret war factory.
- Place a robot from your scrapheap in the war factory.
The war factory counts as a normal zone [part of this sentence is illegible in the scan] is closed.
To close a sliding zone:
- Play a change card.
- Close the zone. Any robots on it are crushed and returned to their owner's scrapheap.
Phase 2 Examples (page 10)
Example 1: OPTIMUS PRIME (in vehicle form) is in The Arena, surrounded by enemy robots. In Phase 2, Red morphs OPTIMUS PRIME into robot form, giving him a bonus of +1 on any one die when rolling for defense. See page 14.
Example 2: Yellow wants to attack Praxus, which is defended by just one black robot. However, the path is blocked because the spinning zone is closed. In order to attack, Yellow plays a change card and spins Praxus to open the channel between Praxus and the two zones on either side of it.
Example 3: There are 3 red robots in the Decagon's secret war factory. Blue controls Plasma Energy Chamber and plays a change card on the sliding zone. It closes, shutting down the secret war factory, crushing the red robots and sending them back to the scrapheap!
Phase 3: Attack! (Optional)
In this phase you can make one or more attacks to try and capture zones from other players!
Neighboring Zones
- You can only attack an enemy zone that neighbors one of your zones.
- Zones neighbor each other if they share a border or are connected by a hyperlink.
- Spinning zones only neighbor the zones next to them when their arrows line up.
Example: Uraya neighbors Primus and Protihex (because they share a border) and The Praetorus Wharf (because they are joined by a hyperlink). Uraya only neighbors Pion Tower when their arrows line up.
Note: two of the hyperlinks go off the board and wrap around the planet. These are:
- Autobase (red sector) and Kalis (yellow sector), AND
- Protihex (green sector) and The Neutral Territories (red sector).
When Can I Attack?
- You must have 2 or more robots in the zone you are attacking from, because at least one must be left behind to defend that zone.
- The maximum number of robots that you can attack with is 3.
- In the 4-player game you cannot attack your teammate.
Which Dice Do I Use?
As a rule, robots and vehicles use the 6-sided dice and leaders use the 8-sided dice in battle. However, some upgrade cards allow exceptions to the rule!
Play Cards
The attacker and defender can play upgrade cards during the attack. Each card tells you when to play it and how it affects the attack.
- If a card reads "for this attack," the bonus lasts until you end your invasion from 1 zone to another (see Results, page 13).
- If it reads "this turn," it lasts until the attacking player has finished all of his attacks.
- Otherwise the card has an instant effect. Do what it says, then put it faceup on the discard pile.
How to Attack
On your turn you are the attacker and the player being attacked is the defender.
-
Say which zone you are attacking and where you are attacking from.
-
Say how many robots you are attacking with (1, 2 or 3). Remember that one piece must stay behind to defend the zone you are attacking from, and cannot be used in battle.
-
The defender must say how many robots he is defending with (1 or 2).
(The defender does not have to leave a robot behind. If there are 2 robots in the zone, both can be used to defend it.)
Both the attacker and the defender can choose to use their leader in battle, as long as he is in the right zone.
IMPORTANT: If you use your leader, check his leader card for any bonuses that will help you. If you use a leader in battle, read page 14 for details.
-
The attacker uses black dice and the defender uses white. Make sure you use the right dice (6-sided for robots/vehicles or 8-sided for your leader).
At the same time: you both roll one die for each of the robots you are using (including leaders).
-
Compare your highest die roll with the defender's highest die roll. The higher roll wins. If the rolls are equal, the defender wins.
-
The loser takes a robot from his zone and puts it on his scrapheap.
Tip: Only put your leader on the scrapheap if he is the last robot left.
Results
An attack has three possible outcomes.
Outcome 1: If the defender has no robots left in his zone, you capture it!
- This ENDS the attack.
- Move all the attacking robots into the captured zone.
- You can also move other robots from the attacking zone into the captured zone, as long as you leave at least one behind.
You can now launch a NEW attack from any zone that has more than one robot.
Outcome 2: If the defender has any robots left in the battle zone AND you have 2 or more robots in your zone, either...
- CONTINUE the attack. Repeat steps 2–7 in How to Attack, OR
- END the attack. You can then launch a NEW attack either from the same zone or a different zone.
Outcome 3: If you have only 1 robot left in your zone, your attack has failed!
- This ENDS the attack.
- You can launch a NEW attack from another zone.
Out of Robots!
- If you have no robots on the gameboard, your army is destroyed and you are out of the game! Return your cards (if you have any) to the draw pile and reshuffle it.
- If you destroy all enemy armies, you win the game!
Leaders in Battle
Leaders always use an 8-sided die when attacking and defending. Read the leader cards to see each leader's special powers in robot form and vehicle form. When attacking with a leader, count him as 1 of your [3 or 5 – digit not clear in scan] robots.
Robot Form
- OPTIMUS PRIME and BARRICADE add +1 to any die when defending.
- BUMBLEBEE and MEGATRON add +1 to any die when attacking.
This bonus can be added to any die, not necessarily the leader's.
Tip: The bonus only applies if the leader is involved in the battle.
Vehicle Form
Each leader has a bonus power that he can only use in vehicle form.
- OPTIMUS PRIME (Truck): During Phase 4, you can move OPTIMUS PRIME in vehicle form to any zone you control to defend or attack there on future turns.
- BARRICADE (SALEEN police car): When BARRICADE attacks in vehicle form, the defender can only use one robot to defend even if there are two or more robots in his zone.
- BUMBLEBEE (Chevrolet Camaro): If BUMBLEBEE loses in battle, move him to a neighboring zone instead of your scrapheap. If you do not control a neighboring zone, put him on your scrapheap as normal.
- MEGATRON (Alien jet fighter): MEGATRON can attack any zone. If the zone is not neighboring, move him to the [word illegible in scan] zone and attack. He must attack alone.
Battle Example (page 15)
Example:
- Black declares an attack on the Launch Pad (controlled by Red) from neighboring Hexima State.
- Black attacks with 3 robots.
- Red defends with 2 robots – one normal robot and the leader (OPTIMUS PRIME).
- Black rolls three 6-sided dice for the 3 robots. Red rolls a 6-sided die for the robot and an 8-sided die for the leader.
- They compare their highest rolls and Black wins (6 vs. 4).
- Red chooses to put the normal robot on the scrapheap rather than losing the leader.
- They now compare their second highest rolls. Red uses OPTIMUS PRIME'S +1 defense bonus to increase his roll from 3 to 4. They now have the same score (4 vs. 4). As the defender wins any ties, Red wins. Black exchanges a vehicle for 3 robots and puts one of them on his scrapheap.
Result: Red still has a single robot left on the Launch Pad while Black has 5 in Hexima State.
Black decides to continue the attack and declares battle on Red.
- Black attacks again with 3 robots.
- Red defends with the last robot in the zone (OPTIMUS PRIME).
- They roll... Even with OPTIMUS PRIME'S +1 bonus, Black has the higher roll. OPTIMUS PRIME is sent to the scrapheap.
Result: Black has captured the Launch Pad and now moves all 3 attacking robots into the captured zone. Black can choose to move 1 more robot into the zone, but must leave one behind to defend Hexima State.
Phase 4: Call for Back-Up (Optional)
Calling for back-up lets you move robots from one zone to another, to improve its defense.
Take as many robots as you want from one zone (remembering to leave at least one robot behind) and move them to a connected zone. Zones are connected if you control all the neighboring zones between them. See page 11.
OPTIMUS PRIME
In vehicle form OPTIMUS PRIME can jump to any of your zones in Phase 4, even if they are not connected.
- You can move Optimus Prime as well as calling for back-up.
- Remember: you cannot leave a zone empty.
Example: In Phase 4, Red calls for back-up and moves 5 robots from Autobase to Plasma Energy Chamber.
Calling for back-up (Phase 2): There are upgrade cards which allow you to call for back-up in Phase 2 before an attack. The rules for back-up are exactly the same as for this phase but you cannot move OPTIMUS PRIME in vehicle form.
4-Player Game
You can call for back-up through your teammate's zones.
Or, you can give a zone to your teammate instead of calling for back-up.
- Say which zone you are giving away.
- Put all robots from that zone on your scrapheap.
- Your teammate puts a robot from his scrapheap into the zone. He now owns that zone.
Phase 5: Draw a Card
If You Can
If you captured another player's zone on this turn, draw an upgrade card.
- You can only draw one card per turn, even if you captured more than one zone.
- Keep the card hidden from other players until you are ready to play it.
- Whenever you play an upgrade card, place it faceup on the discard pile.
- Some upgrade cards have both Upgrade and Change sections. You can use one or the other on your turn, not both.
Card anatomy:
- Upgrade: This is a special bonus that you can play during the game. The card tells you when to play it and what bonus you get.
- Zone: This tells you which zone the AllSpark affects at the end of each day.
- Change: If the card has this icon, you can play it in Phase 2 to change a sliding or spinning zone. See page 9.
Sample card on page 17: FUSION CANNONS – "Play before you attack. Add 1 to each die for this attack." Zone: Perihex. Change: "Change a zone in Phase 2."
At the end of Phase 5, your turn is over. If you are the last player, follow the steps in Rounds on page 18. Otherwise, the next player now takes his turn.
Rounds (Days)
At the end of each round, the last player must:
- Take the top card from the draw pile. Place it faceup on the discard pile. The zone shown on the card is where the AllSpark brings new life. The player who controls this zone immediately puts 3 robots from his scrapheap on it.
- Move the vehicle marker to the next square of the day counter.
- A new day begins and each player takes another turn.
- If there are no days left, the game is over. See Winning.
Winning
- All players count their zones. If you control the most zones at the end of day 6, you win!
- If there is a tie for the most zones controlled, the player who controls the Launch Pad automatically wins the game (no matter how many zones he has).
Example: In a 3-player game, Black and Yellow are tied with 16 zones each, while Red has 10 zones. However, Red controls the Launch Pad and wins the game!
4-Player Game
At the end of day 6 both sides add up their zones. The side with the most zones wins. If there is a tie for the most zones controlled, the team that controls the Launch Pad automatically wins.
First-Time Assembly
- Carefully detach the 2 spinning zones and 2 sliding zones from the cardboard parts sheet. Discard the cardboard waste.
Sliding Zones
- Insert two pegs up through the gameboard.
- Press the sliding zone down onto the pegs to attach. The pegs will come up through the tracks in the sliding zone.
- Repeat for the 2nd sliding zone.
Spinning Zones
- Insert a peg up through the gameboard.
- Press the spinning zone down onto the peg to attach.
- Repeat for the 2nd spinning zone.