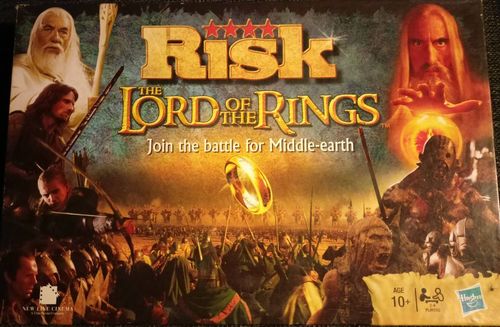
Risk: The Lord of the Rings Trilogy Edition
Risk: The Lord of the Rings – Trilogy Edition Rulebook
Table of Contents
Table of Contents
Contents
- Gameboard
- 4 Armies in different colors
- 64 Territory cards
- 2 Wild cards
- 60 Adventure cards
- The One Ring in Gold-tone Pewter
- 3 red Dice
- 2 black Dice
Object
To score as many points as possible before the Fellowship, with The One Ring, reaches Mount Doom. You score points for each Territory you occupy and each Region you control, as well as for cards played and Strongholds held.
Assembly
Remove all of the pieces from the plastic bags. Discard the bags.
A Look at the Stuff in the Game
First, take all of the game pieces and set them out where you can see them. As you read these rules, look at these pieces so you know how they all work.
Let's Start with the Gameboard...
There it is – Middle-earth, just waiting for you to conquer it. The gameboard is divided into 64 territories, each with its own name. These territories are grouped into regions (9 of them), each a different color. The regions are:
| Region | Color | No. of Territories |
|---|---|---|
| Arnor | Red | 11 |
| Gondor | Brown | 10 |
| Rhovanion | Orange | 8 |
| Rohan | Blue | 7 |
| Eriador | Yellow | 7 |
| Mordor | Gray | 6 |
| Haradwaith | Tan | 6 |
| Mirkwood | Green | 5 |
| Rhûn | Purple |
Example: North Mirkwood, Carrock, Eastern Mirkwood, Anduin Valley and South Mirkwood are territories. Together, these 5 territories make up the region of Mirkwood.
Your battalions will be able to move from one territory to another as long as the territories are adjacent. Territories are adjacent if they share a border, or a sea-line connects them across water. However, mountains and rivers are impassable. Therefore, territories separated by mountains are not adjacent; nor are territories, separated by a river, if there is no bridge between the territories allowing passage.
Example: The territory of Minhiriath is adjacent to South Downs because they share a border as well as Enedwaith and Dunland because bridges allow passage across the separating river. Minhiriath is also adjacent to Mithlond, Belfalas and Umbar because sea-lines connect them across the ocean. Battalions in Minhiriath can attack any of these adjacent territories. But beware, the battalions in Minhiriath can also BE attacked from any of these territories. Minhiriath is not adjacent to Harlindon or the Shire because a river separates them and there are no bridges to pass over.
In the lower left corner of the gameboard, there is a battleground. This is where your battles will take place. We will discuss this in more detail soon.
Other Features
Some of the territories in Middle-earth have special sites that come into play. These are explained in more detail below.
Strongholds: These are counted as part of, not in addition to, the territory they are in. Battalions defending a territory with a Stronghold add 1 to their higher defensive die roll. The Strongholds are: Mines of Moria, Annúminas, Isengard, Helm's Deep, Rivendell, Dol Guldur, Udûn, Barad-dûr, Minas Morgul, Minas Tirith.
Sites of Power: These are counted as part of, not in addition to, the territory they are in. Using a Leader to conquer a territory with a Site of Power allows you to draw an Adventure card at the end of your turn. Some Adventure cards can only be turned in after you've moved a Leader to a Site of Power. The Sites of Power are: Hobbiton, Elven Halls, Bree, Carn Dûm, Mount Gundabad, Grey Havens, Tharbad, Harlond, Lothlórien, Weathertop, Gates of Moria, Erebor, Edoras, Easterling Encampment, Osgiliath, Pelargir, Haradrim Encampment, Erech, Rauros, Dol Amroth, Dagorlad, Mount Doom.
The Path of the Fellowship: This dotted line passes through 18 territories from the Shire to Mount Doom. At the end of most turns, the Fellowship (represented by The One Ring) moves one territory along the path. The game ends when the Fellowship reaches Mount Doom.
Now Let's Look at the Plastic Pieces...
There are 4 armies in this game, each a different color. Each player will be a different colored army.
If you look at the pieces closely, you'll see that there are 6 different shapes: 3 for good and 3 for evil. All of these pieces represent your battalions, but each one represents a different number of battalions. They are:
Forces of Good
| Piece | Battalions |
|---|---|
| Elven Archer | 1 battalion |
| Rider of Rohan | 3 battalions |
| Eagle | 5 battalions |
Forces of Evil
| Piece | Battalions |
|---|---|
| Orc | 1 battalion |
| Dark Rider | 3 battalions |
| Cavetroll | 5 battalions |
During the game, you will have many pieces on the board, sometimes many in one territory. When this happens, use a larger piece to save space. It's a lot easier to have 2 Eagles on the board instead of 10 Elven Archers (both equal 10 battalions). Just like it's easier to carry 2 nickels instead of 10 pennies, it's easier to move 2 Cavetrolls instead of 10 Orcs.
Example: In Minhiriath, Green has 1 Rider of Rohan and 2 Elven Archers. Since a Rider of Rohan represents 3 battalions and an Elven Archer represents 1 battalion, the Green player has 5 battalions in Minhiriath (3+1+1). The Red player has 1 Cavetroll, 1 Dark Rider and 1 Orc in Enedwaith. This represents 9 battalions (5+3+1).
You also have 2 pieces that look like shields. These are your Leaders. Leaders give you combat bonuses and also allow you to draw (and, in some cases, play) Adventure cards.
The Dice
You use the dice when attacking and defending territories. The 3 red dice are used when attacking. The 2 black dice are used when defending.
The Cards
There are 2 types of cards – Territory cards and Adventure cards.
Territory Cards
There is 1 Territory card for each of the 64 territories on the board. Each of these has the name and picture of a territory, a picture of a piece from the game (an Elven Archer, a Dark Rider or an Eagle), and – possibly – a symbol marking that territory as good or evil (a good shield or an evil shield). There are also 2 wild cards that don't have territories or good/evil symbols on them but do have pictures of the 3 battalion types.
Territory cards are used to determine positions at the start of the game, and bonus reinforcements throughout the game.
Adventure Cards
There are 3 types of Adventure cards:
Mission Cards. These cards contain secret missions for your Leaders.
Event Cards. These may help or hinder your quest with events that occur when you play them.
Power Cards. Power cards can make a big difference to your strategy.
Getting Started
- First set out the gameboard so everyone can reach it.
- Separate the cards into Territory cards and Adventure cards.
- Remove the 2 wild cards from the Territory card deck and set them aside for now. Then separate the remaining Territory cards into good, evil and neutral decks. The good Territory cards have the good shield symbol on them; the evil Territory cards have the evil shield symbol on them; and the neutral Territory cards have no symbol on them. Shuffle each deck separately and place them facedown next to the gameboard.
- Each player chooses a color and takes all of the battalions of that color. Place your battalions in a pile near you. The yellow and green pieces represent the good armies, while the black and red ones represent the evil armies.
- In a 3-player game, one player will control a good army while the remaining two players control the two evil armies.
Now get out your starting battalions. These battalions will be placed on the board before play begins. The number of starting battalions depends on the number of players.
| # of Players | Starting Battalions |
|---|---|
| 2 players | 60 each (See 2-player rules) |
| 3 players | 52 each |
| 4 players | 45 each |
Count out your starting battalions from your battalion pile, and put them in front of you. Also take your 2 Leaders and add these to your starting battalions.
Claiming Territories
Players are randomly given some starting territories by dealing out cards from the Territory card decks. In a 4-player game, divide the good Territory card deck in half and give 8 cards to each of the good players. Then divide the evil Territory card deck in half and give 8 cards to each of the evil players. (In a 3-player game, give all 16 good Territory cards to the good player. Then divide the evil Territory card deck in half, giving each of the evil players 8 evil Territory cards, as well as 8 cards each from the neutral Territory card deck.) Players should place one battalion in each of the territories shown on their cards. Then put all the Territory cards together, including the wild cards, and reshuffle them back into one deck, which is placed facedown near the gameboard.
Now, each player rolls 1 die to see who goes first – the high die roll wins. Play then passes to the left.
To claim an additional territory, take one of your starting battalions and place it into an empty territory. You now control this territory. The next player places a battalion into an empty territory, claiming that territory, and so on. You cannot put a battalion into a territory that has already been claimed.
Eventually, all 64 territories will be claimed. Some players may control one more territory than the other players. This is OK.
IMPORTANT: From now on, there will be no unclaimed territories on the board. Control of a territory (the player who has battalions there) may change, but a territory will never be unclaimed.
Reinforcing Territories
Now that all of the territories are claimed, you will start reinforcing your territories. The more battalions you have in a territory, the easier it is to attack and defend from.
Reinforcing a territory is simple: just place one of your starting battalions into a territory that you control. You cannot place reinforcements into an enemy's territory. After you place your reinforcement, the player to your left reinforces one territory, then the next player to the left, and so on. Keep going around the table until all of each player's starting battalions have been placed.
There is no limit to the number of battalions that can be in a territory. You can choose to reinforce one territory with a large number of battalions or you can spread your battalions out across all of your territories.
Placing Leaders
After all battalions are on the board, place 1 Leader on the board in a territory you control. After everyone has placed 1 Leader, place your second Leader in turn order. You CANNOT place 2 Leaders in the same territory.
Territory Cards
Deal 1 Territory card, facedown, to each player. This makes it easier to create territory sets early in the game.
Adventure Cards
Remove the Event cards (the ones that read "Play Immediately") from the Adventure card deck and set these aside. Then deal 4 Adventure cards, facedown, to each player.
Return the Event cards to the Adventure card deck, shuffle, and place it facedown next to the gameboard.
The One Ring
Place The One Ring in the Shire. This is where the Fellowship begins its journey. From now on The One Ring will represent the Fellowship.
Now it's time to declare war. Each player rolls 1 die to see who starts the game. Note: The player who placed his/her battalions first may or may not be the player who takes the first turn.
Your Turn
Overview
At the start of each one of your turns, you will receive additional battalions, which you will place on the board to reinforce your army. Then you will be able to attack your enemies, if you want. After you are done with combat, you will get one chance to relocate some of your battalions. If you conquer a territory on your turn, you get to draw a Territory card. Also, if your Leader conquers a territory that had a Site of Power within it, you'll get to draw an Adventure card. At the end of your turn, you will move The One Ring forward 1 territory along the Fellowship's path.
That's all there is to a turn. Now let's go over things in more detail so you can plan your conquest.
The 7 Steps of Your Turn
Your turn has these 7 steps that must be done in order.
- Receive and Place Reinforcements (always)
- Combat (if you like)
- Fortify Your Position (if you like)
- Collect a Territory Card (as long as you have conquered a territory)
- Collect an Adventure Card (as long as your Leader has conquered a territory that has a Site of Power within it)
- Replace a Leader (if you have none on the board)
- Move the Fellowship
Step 1: Receive and Place Reinforcements
At the start of your turn, you get additional battalions to reinforce your territories. How many reinforcements you get depends on the number of strongholds you control, the number of territories you control, the number of regions you control (if any), and any Territory card sets you turn in.
Reinforce Your Strongholds: The first thing you do is place 1 battalion into each territory with a stronghold that you control.
Count Your Territories: Now count the number of territories you control (these are the territories with your battalions in them). Take your total number of territories and divide them by 3 (ignore any remainders). This is the number of reinforcements you receive. However, the number of reinforcements you receive can NEVER be fewer than 3, so even if you control only a few territories, you'll always receive at least 3 reinforcements. Take your reinforcements from your battalion pile and put them in front of you. This is the start of your "reinforcement pile."
Example: Green controls 13 territories at the start of his turn. 13 divided by 3 is 4 (Remember: You ignore the remainder). Green gets 4 reinforcements.
Example: Red controls 5 territories at the start of her turn. 5 divided by 3 is 1. However, you can never receive fewer than 3 reinforcements, so Red gets 3.
Look at the list below to help you determine your reinforcements.
| Territories | Reinforcements |
|---|---|
| 1-11 | 3 |
| 12-14 | 4 |
| 15-17 | 5 |
| 18-20 | 6 |
| 21-23 | 7 |
| 24-26 | 8 |
| 27-29 | 9 |
| 30-32 | 10 |
| 33-35 | 11 |
| 36-38 | 12 |
| 39-41 | 13 |
| 42-44 | 14 |
| 45-47 |
Do You Control Any Regions? You also get reinforcements for every region you control. Remember that a region is a group of territories of the same color. If you control every territory within the region, then you control the region.
The number of reinforcements you receive depends on which region (or regions) you control (if any). The chart on the left side of the gameboard shows how many reinforcements you receive for each region. Count out these reinforcements from your battalion pile and add them to the reinforcement pile in front of you (the pile you started by counting your territories).
Example: Red controls Mirkwood. In addition to the reinforcements she received for controlling her territories, Red also gets 4 reinforcements for controlling Mirkwood.
Example: Black controls Rhovanion and Mordor. In addition to the reinforcements he received for controlling his territories, Black receives 7 reinforcements (5 for Rhovanion and 2 for Mordor) for controlling these 2 regions.
Turn In Any Card Sets You May Have: This may seem a little out of place because we haven't talked about how you get Territory cards yet (we'll talk about that more in Step 4), but this is the time when you would turn in Territory cards for bonus reinforcements.
Remember how each Territory card has an image at the bottom – an Elven Archer, a Dark Rider or an Eagle (the wild cards have all 3)? When you have a set of 3 cards that show either the same picture or one of each picture, you can turn them in for reinforcements. If you have a wild card, it can count as any one of the 3 – an Elven Archer, a Dark Rider or an Eagle.
The number of reinforcements you get for turning in cards depends on what type of set you turn in. Look at the chart below to determine how many reinforcements you'll get for a card set, then add these bonus battalions to your reinforcement pile and discard your card set.
You can turn in cards when you have one of the following:
| Set | Bonus Battalions |
|---|---|
| 3 Elven Archers | 4 |
| 3 Dark Riders | 6 |
| 3 Eagles | 8 |
| 1 Elven Archer, 1 Dark Rider, and 1 Eagle | 10 |
REMEMBER: A wild card can be used for any one of the above cards.
IMPORTANT: When you have 5 or more cards, you must turn in a set as you will always have at least one of the above.
Example: Red has 4 cards at the start of her turn. They show 2 Elven Archers, a Dark Rider and an Eagle. She turns in a 3 card set: an Elven Archer, a Dark Rider and an Eagle and receives 10 bonus battalions, which she adds to her reinforcement pile.
Now, It's Time to Place Your Reinforcements: After gathering your reinforcements, place ALL of them into territories that you control. You can choose to put all of your reinforcements into one territory or spread them out across your territories. Remember: You must place ALL of these reinforcements.
Step 2: Combat
Combat is the main part of your turn. It is here that you attack your opponents and attempt to take territories from them. You can choose how many times you want to attack, in what order, and when to call it off. You can choose not to attack at all (if so, skip to Step 3) or to attack until you have almost no battalions left. You can even attack more than one territory on your turn.
A Few Words about Combat
Here are some terms used during combat:
- The ATTACKER is the player whose turn it currently is.
- The DEFENDER is the player being attacked.
- An INVASION is when a territory is being attacked. The invasion lasts until either the territory is taken over or until the attacker calls off the invasion. You may be able to invade more than one territory on your turn.
- A BATTLE is one roll of the dice (for each, the attacker and defender) during an invasion. An invasion may require one battle or it may require dozens of battles.
Where Can I Invade?
You can invade from any one territory you control into an adjacent enemy's territory. You can only invade an enemy's territories – not your own. Choose a territory you control and announce the adjacent territory you wish to invade.
Leaders: Leaders have properties of strength in both attack and defense; however, they do not represent a battalion in their own right. Leaders must move with a battalion.
How You Battle
You must have at least 2 battalions in a territory in order to attack. This is because 1 battalion must stay behind in order to protect the territory you are invading from. This battalion must be set aside and cannot be part of any battle.
Now choose how many battalions you will send from your attacking territory into the battle. You can send 1, 2 or 3 battalions. Your invasion force may be much larger than 3, but no more than 3 battalions can be sent into each battle.
Take your attacking battalions and place them on the attacker's spaces on the battleground (in the lower left corner of the gameboard).
Leader: If your Leader is present in the attacking territory, you may also move him to the battleground. If you do so, you will gain a +1 bonus to your highest attack die.
Next, the defender chooses how many battalions will defend from the attacked territory. You can defend with either 1 or 2 battalions. There may be more battalions in the territory, but 2 is the maximum number of battalions you can defend with during a battle. You will continue defending the attacked territory until either your last battalion is defeated or your opponent calls off the invasion.
Take your defending battalions and place them on the defender's spaces on the battleground.
Leader & Stronghold: If your Leader is present in the defending territory, you may also move him to the battleground. If you do so, you will gain a +1 bonus to your higher defense die. If the defending territory contains a stronghold, you automatically gain a +1 bonus to your higher die. If both a Leader and a stronghold are defending, the bonus becomes +2 to the higher die.
Let the battle begin… Each side rolls 1 die for each battalion attacking or defending. This means the attacker will roll 1, 2 or 3 dice and the defender will roll 1 or 2 dice.
Resolving the Battle
After both sides roll the dice, put your dice in order from highest to lowest. You will then compare your highest die to your opponent's highest die to see who won. IMPORTANT: In case of a tie roll, the DEFENDER wins.
The player with the highest die roll wins. The loser removes a battalion from the battleground. This battalion has been defeated. Put the defeated battalion back into its respective battalion pile off the board.
After you and your opponent compare the highest dice, compare the next-highest dice.
If there is no die to compare yours to, meaning you rolled 1 or 2 more dice than your opponent, then ignore those dice rolls.
When the battle is over, all remaining battalions return to their respective territories – but don't worry, you may send them back into battle immediately.
Calling Off an Invasion
After any battle, you (the attacker) may choose to call off the invasion. You may choose to invade a new territory, invade a territory you attacked earlier during combat, or end the combat part of your turn.
Changing the Attacking Territory During an Invasion
In between battles, you can change the territory from which you are invading and continue the invasion from a different, adjacent territory. What you cannot do is battle with battalions from different territories at the same time. During one battle, all of your battalions must be from the same territory.
Winning an Invasion and Moving In
You win the invasion when you defeat the last defending battalion from a territory. Take the battalions used to win the battle and move them from the battleground into the territory you invaded. You may now move any additional battalions from your invading territory in to join them. So even though you can only battle with 3 battalions, once you've won the invasion, you can move more troops into your new territory. However, you must do this before you declare a new invasion.
Leaders: If a Leader is used in combat when conquering a territory, then you must move the Leader into that territory at the end of that combat.
If the last battalion in a territory with a Leader is defeated, the Leader is also defeated and must be removed from the board.
Eliminating Another Player
You eliminate another player if you defeat his/her last battalion on the board. This player is now out of the game. As a reward, you get all of that player's Territory cards (if he/she has any). Add these Territory cards to your hand. You DO NOT get the player's Adventure cards. They are immediately placed in the discard pile, whether they have been played or not.
If your new hand of Territory cards is now 5 or more, you must stop and immediately turn a set in for bonus reinforcements. You place these reinforcements into any of your territories. If you still have 5 or more cards, then turn in another set and place these reinforcements as well. Finally, when you have 4 or fewer cards, continue your turn.
Adventure Cards
You may play as many Adventure cards during your turn as you want or are able to.
Mission cards are completed by getting a Leader to the Site of Power listed on the card. You may have to conquer the territory, or may already control it and just have to move your Leader there. Some missions have different rewards for good or evil players. Keep completed Mission cards in front of you, as you will score points for them at the end of the game.
Power cards will help you during the Combat phase of your turn or, in some cases, during other players' turns. Keep played Power cards in front of you, as you will score points for them at the end of the game.
Step 3: Fortify Your Position
After you are finished with combat (and it is your choice when you are done), you get ONE fortification (or "free move") with your battalions.
To fortify your position, take as many battalions as you'd like from one of your territories and move them to another connected territory. (Remember: You MUST leave at least one battalion behind – you cannot abandon a territory.)
Territories are "connected" if all the territories in between are also CONTROLLED BY YOU. You cannot pass through territories controlled by another player.
Fortification is not an attack; it is simply a movement from one of your territories to another in order to protect your front line or to get into position for your next turn.
Example: At the end of your turn, you can fortify from your newly acquired territory, Borderlands, through Lune Valley, through Mithlond, and into Forlindon since you control all these territories. Since you only went through your own territories, Borderlands and Forlindon are "connected."
Leaders: Your Leader can be moved through a Territory containing your other Leader, he just can't end up in the same territory. If you use a Leader to fortify one of the Sites of Power listed on one of your Mission cards, you can claim the mission immediately.
Step 4: Collect a Territory Card
At the end of your turn, you may be able to collect a Territory card.
If you conquered at least 1 territory on your turn, then you get 1 Territory card. Draw it off the top of the deck and add it to your hand. It doesn't matter whether you conquered 1 territory or 40 territories, you only get 1 Territory card. If you didn't conquer any territories on your turn, then you do not get a Territory card.
Step 5: Collect an Adventure Card
If, on your turn, one of your Leaders conquered a territory containing a Site of Power, you get to draw 1 card off the top of the Adventure card deck.
If the card you draw is an Event card (it reads "Play Immediately"), then play the card immediately. After playing it, draw another card. Continue to play any drawn Event cards until you draw a Mission or Power card.
When you do draw a Mission or Power card, add it to your hand. If this causes you to have more than 4 Adventure cards in hand, discard one (of your choice). It doesn't matter whether your Leader conquered 1 Site of Power or several, you only get 1 Adventure card.
After a Mission or Power card has been drawn, no more cards can be played on your turn.
Step 6: Replace a Leader
If you have no Leaders in play, place one Leader into any of your territories.
Step 7: Move the Fellowship
The Fellowship, represented by The One Ring, starts in the Shire. At the end of each player's turn, move it into the next territory along the Fellowship's dotted path. When it is in a territory with a DIE symbol, you must roll the die before moving it. A roll greater than 3 will move the Fellowship into the next territory along its path. If the roll is 3 or less, the Fellowship remains in its current territory. The next player will try again. The Fellowship will remain in this territory until a successful die roll is made.
Winning
When the Fellowship reaches Mount Doom, a final die roll must be made to destroy The One Ring. A roll greater than 3 means The One Ring was thrown into Mount Doom and destroyed. This ends the game. The player with the highest number of points wins!
A die roll of 3 or less means the Fellowship has not yet destroyed The One Ring. The game continues with each player, at the end of his/her turn, rolling to destroy The One Ring, until a successful die roll is made.
Note: It is possible, but unlikely, to win by conquering all of Middle-earth before the Fellowship throws The One Ring into Mount Doom.
Scoring Points
Calculate points as follows:
- 1 point for every territory you control;
- 2 points for every stronghold you control;
- Points for Adventure cards you played (as indicated at the bottom of the card). Cards in your hand do not count;
- Points for complete regions held, equal to the battalion bonus of that region (for example, Mirkwood is worth 4 points since it gives you 4 battalions for controlling it).
Other Ways to Play
The 2-Player Game
Gameplay for the 2-Player version is the same as the 3- to 4-Player Individual game with the following exceptions:
When playing with only 2 players, one must play a good army and the other must play an evil army. A third, neutral army (one of the two unused colors) also comes into play.
-
Remove the wild cards from the Territory card deck. Separate the remaining cards into a good, an evil and a neutral deck. Shuffle each deck and deal them to the players as shown below.
- GOOD PLAYER – 16 Good
- EVIL PLAYER – 16 Evil
- NEUTRAL ARMY – 21 Neutral
-
Each player places 1 battalion into each of his/her territories. Each neutral territory gets 2 battalions of the neutral's color (for a total of 42 neutral battalions).
-
Roll a die to see who starts; the player with the higher roll begins. In turn, place 1 battalion into an unclaimed territory until each territory on the board has battalions in it. Players then alternate placing their battalions into territories they already control until all 60 of their starting battalions are on the board.
-
The neutral army acts as opposition with the following restrictions:
- The neutral army cannot attack or redeploy.
- In battle, the neutral army only defends. The second player rolls the defending (black) dice for the neutral army.
- The neutral army receives no Leader or Adventure cards.
- The Fellowship, represented by The One Ring, is not moved by the neutral army.
Standard Risk
You can play standard RISK on the RISK The Lord of the Rings Edition gameboard. Simply follow all the rules in black, ignoring the rules in blue. The game will continue until one player controls the entire board.
Alliance Risk
For 4 Players
Gameplay for Alliance RISK is the same as the 3- to 4-Player Individual game with the following exceptions:
The two good armies play as a team and the two evil armies play as a team. Players, although on the same team, play separately. They cannot give each other territories, fortify through each other's territories, or share cards.
The winning player is the one with the higher score on the team with the higher score.
At the end of the game, first add up the points for each team (good and evil). Then determine which player, on the higher scoring team, has more points. That player wins.
It is possible in this version for the player with the highest score not to win if his/her teammate does very poorly.
Team Risk
For 4 Players
Gameplay for Team RISK is the same as the 3- to 4-Player Individual game with the following exceptions:
In this game, players do not win individually, but instead win as a team. Points do not matter in this version. Players, although on the same team, play separately. They cannot give each other territories, fortify through each other's territories, or share cards.
Setup
The evil player who controls more strongholds in Mordor places last and goes last. The person to his/her left places first and goes first.
Winning
Good wins if one of the following happens:
- Both evil players are eliminated, OR
- The One Ring is thrown into Mount Doom.
Evil wins if one of the following happens:
- Both good players are eliminated, OR
- The One Ring is found by an evil player (how you find The One Ring is explained below).
Finding the Ring
There is one extra step to your turn. This is where the evil player may try to find The One Ring.
The 8 Steps to Your Turn
Your turn has these 8 steps that must be done in order.
- Receive and Place Reinforcements (always)
- Combat (if you like)
- Fortify your Position (if you like)
- Collect a Territory card (as long as you have conquered a territory)
- Collect an Adventure card (as long as your Leader has conquered a territory that has a Site of Power within it)
- Replace a Leader (if you have none on the board)
- Try to Find The One Ring (only if The One Ring is in a territory controlled by an evil player)
- Move the Fellowship
Step 7: Try to Find The One Ring
Just before moving the Fellowship, check to see if The One Ring is in a territory controlled by evil. If so, the evil player who controls the territory rolls 2 dice (it doesn't matter which color).
- If that evil player controls the entire region, add 1 to the dice roll.
- If that evil player's Leader is in the territory, add 1 to the dice roll.
- If that evil player controls the entire region, and has a Leader present, add 2 to the dice roll.
If the total of the dice roll, plus any bonuses added, is 12 (or higher), The One Ring is found and evil instantly wins.