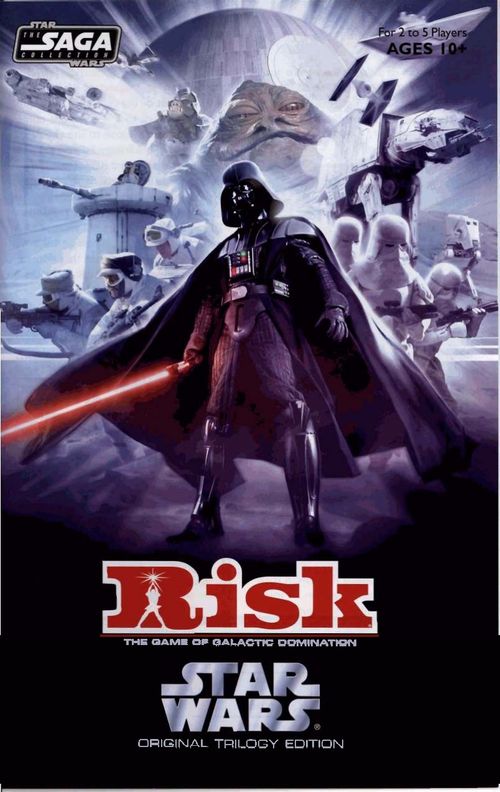
Risk: Star Wars – Original Trilogy Edition
Risk: Star Wars – Original Trilogy Edition Rulebook
Table of Contents
Table of Contents
- Contents
- Assembly
- How to Read These Instructions
- Section 1: Standard RISK (3 to 4 Players)
- Section 2: RISK Star Wars Original Trilogy Edition (2-5 Players)
- Section 3: Neutral Hutts
- Section 4: Team Play
- Overview
- Ownership of Planets (Don't Attack Your Teammate)
- Troop Fortification - Change of Command (Helps with Region Bonus)
- Placing Imperial Base Tokens (You May Place on a Teammate's Planet)
- Placing, Moving, and Firing the Death Star (Decide as a Team)
- Faction Cards (Share a Deck and Show Your Teammate)
- Section 5: Winning
- Setup Chart
- Turn Reference
Contents
- Gameboard
- 5 Armies (in different colors)
- 18 Empire ships
- 18 Rebel ships
- 9 Hutt ships
- 2 Death Stars
- 27 Empire Faction Cards
- 27 Rebel Faction Cards
- 27 Hutt Faction Cards
- 5 six-sided dice
- 4 eight-sided dice
- 5 Imperial Base tokens
- 3 Asteroid Field tokens
Assembly
Remove all of the pieces from the plastic bags. Discard the bags. Carefully detach the tokens and ships from the cardboard sheet. Discard the cardboard waste.
How to Read These Instructions
Risk Star Wars Original Trilogy Edition can be played a number of different ways. Before you read these instructions, it will greatly simplify things if you can answer these questions:
Have you played standard RISK before? If you are familiar with the standard RISK rules and want to start playing the Star Wars Original Trilogy Edition quickly, just skip Section 1: Standard RISK and go on to the rest of the rule book. You can always refer back to it if questions come up. You may also choose to use the RISK Star Wars Original Trilogy Edition gameboard to play standard RISK, by leaving out the special elements. If you have never played any form of RISK before, we suggest you only read Section 1: Standard RISK and play that way until you are familiar with the game. Then go back and read the other sections that contain the special rules for the RISK Star Wars Original Trilogy Edition.
How many players will be playing the first time you play? In RISK Star Wars Original Trilogy Edition, there are three factions at war: the Empire, the Rebel Alliance, and the Hutts. While these 3 factions are always in the game, they are represented differently depending on the number of players. Sometimes the Hutts are Active (controlled by an actual player) and sometimes they are Neutral (their pieces start on the board but are not controlled by any one player and cannot attack). Also, sometimes the Rebel Alliance and the Empire are controlled by individual players (solo), and sometimes they are controlled by teams.
Use this chart to help determine which sections you can skip to get into your first game quickly.
| # of Players | Hutts | Empire & Rebel Alliance | Sections You Can Skip |
|---|---|---|---|
| 2 | Neutral | Solo | Skip Section 4: Team Play |
| 3 | Active | Solo | Skip Section 3: Neutral Hutts and Section 4: Team Play |
| 4 | Neutral | Teams | Read All Sections |
| 5 | Active | Teams | Skip Section 3: Neutral Hutts |
Section 1: Standard RISK (3 to 4 Players)
Object
If you are playing standard RISK, you win when you have defeated all of your opponents' troops and you control the entire gameboard.
A Look at the Stuff in the Game
First, take all of the game pieces and set them out where you can see them. As you read these rules, look at these pieces so you know how they all work.
The Gameboard
This is not a map of the entire Star Wars galaxy (that contains tens of thousands of inhabited planets), but it is a map of the key planets from the Original Trilogy.
The gameboard is divided into 42 planets, each with its own name. These planets are grouped into Regions (6 of them), each a different color.
| Region | Color | # of Planets |
|---|---|---|
| Mid Rim | Gray | 11 |
| Core Worlds | Red | 9 |
| Outer Rim | Orange | 8 |
| Elrood Sector | Blue | 6 |
| Ison Corridor | Yellow | 4 |
| Wild Space | Green | 4 |
Your troops will be able to move from one planet to another as long as the planets are adjacent. Planets are adjacent if they share a border, or a hyperspace line connects them.
Example: The planet of Gamorr is adjacent to Rodia, Kothlis, Bothawui, and Nar Shaddaa because they share a border. Gamorr is also adjacent to Excarga because a hyperspace line connects them. Forces in Gamorr can attack any of these planets. But beware! The forces in Gamorr can also BE attacked from any of these planets. Falleen is not adjacent to Gamorr because they share no borders and there are no hyperspace lines connecting them.
The Plastic Pieces
There are 3 unique sets of pieces and 5 different colors in the game. In standard RISK, each player uses a separate color to represent his armies. There are only enough pieces included for a 3 or 4 player game of standard RISK.
Each army has 2 pieces representing troops. All troops function the same, the pieces simply represent different amounts of troops. You'll use your troops to take over and control planets.
The Rebel Alliance (Yellow and Orange)
- Rebel Trooper // Represents 1 troop
- Snowspeeder // Represents 3 troops
The Empire (White and Gray)
- Stormtrooper // Represents 1 troop
- AT-ST // Represents 3 troops
The Hutts (Green)
- Gamorrean Guard // Represents 1 troop
- Rancor // Represents 3 troops
During the game, you will have many pieces on the board, sometimes many on one planet. When this happens, use a 3-troop piece to save space.
Example: In Hoth, the Orange player has 1 Snowspeeder and 2 Rebel Troopers. Since a Snowspeeder represents 3 troops and a Rebel Trooper represents 1 troop, the Orange player has 5 troops in Hoth (3+1+1). The Gray player has 2 AT-STs and 1 Stormtrooper in Bespin. This represents 7 troops (3+3+1).
The Dice
You use the 6-sided dice when attacking and defending planets.
The Faction Cards
There are 3 decks of Faction cards. For standard RISK, shuffle them all together. Cards are used to gain bonus troops.
Other Components
Place the Ship tokens, Imperial Base tokens, Asteroid Field tokens, 8-sided dice, and Death Stars back in the box. You will not need them to play standard RISK.
Getting Started
First set out the gameboard so everyone can reach it. Then, shuffle the Faction cards into one deck. Now, place the 6-sided dice to the side of the gameboard.
Each player chooses a color, takes all of the pieces of that color, and counts out his starting troops. In standard RISK, it doesn't matter which colors you choose to use. Place your pieces in a pile near you. Now get out your starting troops.
In standard RISK, the number of starting troops depends on the number of players.
| # of Players | Starting Troops |
|---|---|
| 3 Players | 35 each |
| 4 Players | 30 each |
These troops will be placed on the board before play begins.
Claiming Planets (Plan Your Strategy)
Now, each army will alternate claiming one planet until all of the remaining planets are controlled. Players roll a 6-sided die. The player with the highest roll begins. Play then continues clockwise.
To claim a planet, take one of your starting troops and place it onto an empty planet. You now control this planet. The next army then places one troop onto an empty planet, claiming that planet, and so on. You cannot put a troop onto a planet that has already been claimed. Eventually, all 42 planets will be claimed. Some armies will control more planets than the others. This is OK.
IMPORTANT: From now on, there will never be an unclaimed planet on the board. Control of a planet (the player who has troops there) may change, but a planet will never be unclaimed.
Reinforcing Planets (Prepare for War)
Now that all of the planets are claimed, you will start reinforcing your planets. The more troops you have on a planet, the easier it is to attack and defend from. Reinforcing a planet is simple: just place one of your starting troops onto a planet that you control. You cannot place reinforcements onto another army's planet.
The first army to reinforce a planet is the same army who first claimed a planet – in other words, the turn order continues as above.
After you place your reinforcement, the army to your left reinforces one planet, then the next army to the left, and so on. Keep going around the table until all of each army's starting troops have been placed.
There is no limit to the number of troops that can be placed on a planet. You can choose to reinforce one planet with a large number of troops or you can spread your troops out across all of your planets.
General Notes
Overview
On each one of your turns, you'll receive additional troops, which you will use to reinforce your army. You may be able to play cards to get more troops. You'll probably invade one or more planets. If you're successful, you'll be able to collect one card at the end of your turn. But whether you engage in combat or not, you'll get to relocate your forces.
Turn Order
Roll a 6-sided die to determine which army will have the first turn. The highest roll wins and play proceeds clockwise.
Your Turn (6 Easy Steps)
Step 1: Count Planets/Regions
At the start of your turn, you get additional troops to reinforce your planets. How many reinforcements you get depends on…
- The number of planets you control,
- The number of Regions you control (if any).
Count Your Planets
Count the number of planets you control.
Take the total number of planets you control and divide this number by 3 (ignore any remainders). This is the number of reinforcements you receive.
However, the number of reinforcements you receive can NEVER be fewer than 3, so even if you control only a few planets, you'll always receive at least 3 reinforcements.
Take your reinforcements from your troop pile and put them in front of you. This is the start of your "reinforcement pile."
You can use the list below to help you calculate how many reinforcements you receive.
| Planets | Reinforcements |
|---|---|
| 1-11 | 3 |
| 12-14 | 4 |
| 15-17 | 5 |
| 18-20 | 6 |
| 21-23 | 7 |
| 24-26 | 8 |
| 27-29 | 9 |
| 30-32 | 10 |
| 33-35 | 11 |
| 36-38 | 12 |
| 39-41 | 13 |
Do You Control Any Regions?
You also get reinforcements for every Region you control. Remember that a Region is a group of planets of the same color. If you control every planet within the Region, then you control the Region.
The number of reinforcements you receive depends on which Region (or Regions) you control (if any). Each Region has a number near it that shows you how many reinforcements you receive for that Region. For example, controlling the Mid Rim Region will give you 5 additional reinforcements. Count out these reinforcements from your troop pile and add them to the reinforcement pile in front of you (the pile you started by counting planets).
Step 2: Play Cards for Troops (Turn In Matching Sets)
This may seem a little out of place because we haven't talked about how you get cards yet (we'll talk about that more in Step 10, but it is at this point that you could turn in a set of 3 cards to muster more troops. Place the 3 turned-in cards out of play and take troops equal to this chart below (also on the board).
| Set | Troops Gained |
|---|---|
| 3 Fighter Class Cards | 4 |
| 3 Bomber Class Cards | 5 |
| 3 Capital Class Cards | 6 |
| 1 Fighter Class, 1 Bomber Class, 1 Capital Class | 7 |
Add these troops to your reinforcement pile.
In standard RISK, if you have 5 cards in your hand, you must turn in a set so that your card total is below 5 before you start your turn.
Step 3: Place Troops (On Any Planets You Control)
Now it's time to place your reinforcements. After gathering your reinforcements, place ALL of your ground troop reinforcements onto planets you control. You can choose to put all of them onto one planet or spread them out across your planets. Remember: You must place ALL of your ground troop reinforcements.
Step 4: Invade (Roll Dice to Determine Outcome)
Invasions are the main part of your turn. It is here that you attack the opposing armies and attempt to take planets from them. You can choose how many times you want to attack, in what order to attack, and when to call off an attack. You can also choose not to attack at all (if so, move on to Step 5) or to attack until you have almost no troops left. You can even attack more than one planet on your turn.
A Few Words About Combat
Here are some terms used during combat:
- The attacker is the player whose turn it currently is.
- The defender is the player being attacked.
- An invasion is when a planet is being attacked. The invasion lasts until either the planet is taken over or until the attacker calls off the invasion. You may be able to invade more than one planet on your turn.
- A battle is one roll of the dice (for each, the attacker and defender) during an invasion. An invasion may require one battle or it may require dozens of battles.
Where Can I Invade?
You can invade from any one planet where you have troops adjacent to an enemy's planet. (If you need a refresher on what makes planets adjacent, refer back to page 3.) Choose a planet with your army's troops on it and announce the adjacent planet you wish to invade.
How You Battle
Attacking
There must be at least 2 troops on a planet in order to attack. This is because one troop must stay behind in order to protect the planet you are invading from. This troop cannot be part of any battle.
Now choose how many troops you will send from your attacking planet into the battle. You can send 1, 2 or 3 troops. Your invasion force may be much larger than 3, but no more than 3 troops can be sent into each battle.
Defending
Next, the defender chooses how many troops will defend from the attacked planet. You can defend with either 1 or 2 troops. There may be more troops on the planet, but 2 is the maximum number of troops you can defend with during a battle. You will continue defending the attacked planet until either your last troop is defeated or the attacker calls off the invasion.
Let the battle begin…
Now roll your battle dice.
- The attacker takes 1, 2, or 3 6-sided dice depending on the number of troops he sent into battle. The defender takes 1 or 2 6-sided dice depending on the number of troops he sent into battle.
- The attacker rolls his dice. The defender rolls his dice.
Resolving the Battle
Now, put your dice in order from highest to lowest. You will then compare your highest die to your opponent's highest die to see who won.
The higher die roll wins. The loser removes a troop from the gameboard and returns it to his troop pile. This troop has been defeated. IMPORTANT: In case of a tie roll, the DEFENDER wins.
After you and your opponent compare the highest dice, compare the next-highest dice.
If there is no die to compare yours to, meaning you rolled 1 or 2 more dice than your opponent, then ignore those dice rolls.
Calling Off an Invasion
After any battle, you (the attacker) may choose to call off the invasion. You may choose to invade a new planet, invade a planet you attacked earlier during this step of your turn, or end the combat part of your turn.
Changing the Attacking Planet During an Invasion
In between battles, you can change the planet from which you are attacking and continue the invasion from a different, adjacent planet. What you cannot do is battle with troops from different planets at the same time. During one battle, all of your troops must be from the same planet.
Winning an Invasion and Moving In
You win the invasion when you defeat the last defending troop on a planet.
Take the troops used to win the battle and move them onto the planet you invaded. You may now move any additional troops from your invading planet in to join them. So even though you can only attack with 3 troops, once you've won the invasion, you can move more troops onto your new planet. However, you must do this before you declare a new invasion.
Eliminating Another Player
You eliminate another player if you defeat his last troop on the board. This player is now out of the game.
You, as the player who eliminated him, get his cards and may place them in your hand. If your new hand is now 5 or more, you must stop immediately and turn in a set for bonus reinforcements. You place these reinforcements onto any of your planets. If you still have 5 or more cards, then turn in another set and place these reinforcements as well. Finally, when you have 4 or fewer cards, continue your turn.
Step 5: Troop Fortification (Secure Your Borders)
After you are finished with combat (and it is your choice when you are done), you get ONE fortification ("free move") with your troops.
To fortify your position, take as many troops as you'd like from one of your planets and move them to one other connected planet. (Remember: There MUST be at least one troop left behind on a planet – you cannot abandon a planet.)
Planets are "connected" if all of the planets in between are CONTROLLED BY YOU. You cannot pass through planets controlled by your opponents' armies.
Fortification is not an attack; it is simply a movement from one of your planets to another in order to protect your front line or to get into position for your next turn.
Step 6: Draw a Card (If You Successfully Invaded a Planet)
At the end of your turn, you draw a card if you took a planet from at least one opposing army. You only get one card even if you take multiple planets from multiple players.
End Game (You May Need More Troops)
As the game nears the end, a circumstance could arise in which you do not have enough pieces to fill all of your planets on the gameboard. After making change with as many 3s as possible, you may use any eliminated or unused color pieces to represent your army.
Winning
In standard RISK, you win if you are the last player in the game, meaning you control all 42 planets.
Section 2: RISK Star Wars Original Trilogy Edition (2-5 Players)
Object
In the RISK Star Wars Original Trilogy game, there are 3 factions, each with its own victory condition.
- The Rebel Alliance must find and destroy the Emperor, who will be hiding at one of his Imperial Bases. He is the mastermind of the evil Galactic Empire.
- The Empire must eliminate all Rebel forces. Wipe them out. All of them.
- The Hutts must take control of 10 out of the 13 resource planets. The moment their 10th resource planet has been conquered, the game is over and the Hutts have won.
Special Components
There are many special components you will be using in the RISK Star Wars Original Trilogy Edition as well as some enhanced components from the standard game.
The Faction Cards
There are 3 separate decks of Faction Cards – one for each faction in the game. They should be separated by color (Empire-red; Rebel Alliance-gray; Hutts-green) but they all function in the same way. Cards are used to gain bonus troops, build ships, and to initiate special directives.
Force Meter (On the Gameboard)
On the gameboard you will find a track labeled "Force Meter." This is used throughout the game to keep track of whether the Force is strong with the dark side (the Empire) or the light side (the Rebellion). The Force Meter does not affect the Hutts. We will discuss this in more detail later.
Resource Planet Counter (On the Gameboard)
On the gameboard you will find a track labeled "Resource Planets." This is used throughout the game to keep track of how many resource (green) planets the Hutts control. This track does not affect the Rebellion or the Empire and is not used in the 2-player or 4-player games.
The Death Stars
Two Death Stars are included in the game. You will use one to keep track of the Force on the Force Meter and the Imperial player(s) will use the other to terrorize the galaxy.
The Ships
Each faction also has cardboard tokens representing 3 different classes of ships: Fighter class, Bomber class, and Capital class. You cannot use ships to conquer planets. Ships are only used to assist ground troops in attacking and defending during invasions. And unlike ground troops, ship classes are not interchangeable.
The Rebel Ships
- X-Wing Fighter // Represents 1 Fighter Class Squadron
- Y-Wing // Represents 1 Bomber Class Squadron
- Rebel Cruiser // Represents 1 Capital Class Squadron
The Imperial Ships
- TIE Fighter // Represents 1 Fighter Class Squadron
- TIE Bomber // Represents 1 Bomber Class Squadron
- Star Destroyer // Represents 1 Capital Class Squadron
The Hutt Ships
- IG-2000 // Represents 1 Fighter Class Squadron
- Slave I // Represents 1 Bomber Class Squadron
- Jabba's Cruiser // Represents 1 Capital Class Squadron
8-Sided Dice
Some cards and some ships will allow you to use the 8-sided dice.
Imperial Base Tokens
These tokens represent Imperial Bases controlled by the Empire. At the start of each Imperial turn, one Imperial Base token must be placed facedown on the gameboard. These tokens add bonuses to the defense of the planets they are on, and one will hide the Emperor.
Asteroid Field Tokens
These tokens will be placed on the gameboard when the Death Star blows up a planet. The planet's space is covered up and the asteroid field that replaces it cannot be attacked or fortified through.
Getting Started (Are You Feeling Good, Evil, or Indifferent?)
- Separate the Faction Cards into 3 decks, the Empire, the Rebellion, and the Hutts (according to the card backs). Shuffle each separately and place them to the side of the game board.
- Place one of the Death Stars (it doesn't matter which one) on the gameboard on the Start space of the Force Meter. Give the remaining Death Star to the Imperial player. If there are 2 Imperial players, they will decide as a team how to use it. More on this later…
- Get out the 8-sided dice in addition to the 6-sided dice and place them near the game board.
- Place the Imperial Base tokens face-down (Imperial Base icon up) on the table and mix them up. Then stack them facedown and place them to the side of the gameboard near an Imperial army.
- Determine how many players will be playing and decide which factions you want to control. This will determine which colors you use, where you sit around the gameboard, the turn order of the game, how many pieces to start with, and if there are any limitations when claiming planets. All of this information is located in the Setup Chart on page 13. Players should sit clockwise from player 1 to player 5. Also, if a neutral army is indicated, no player will play that color, but you will need to use those pieces during game setup.
NOTE: In a 2-player game, you may need to mix the orange and yellow Rebellion pieces and the white and gray Imperial pieces together so that you have enough to finish the game.
- Each player takes all of the pieces and ships of his color and counts out his starting troops as well as the neutral army's starting troops (if necessary). Use the Setup Chart on page 13 to determine your starting troops.
Claiming Planets (The Hutts and Rebels Have Limits)
If no factions are neutral, the rules for claiming planets are the same as those in standard RISK (see page 5). If the Hutts are used as a neutral faction, see Section 3: Neutral Hutts.
There are some limitations (indicated in the above chart) to the amount of starting planets allowed for the Rebels and the Hutts. For instance, in a 3-player game, after claiming his 7th planet, the Hutt player will stop claiming planets and use the rest of his pieces during the reinforcement phase. Similarly, after claiming his 15th planet, the Rebel player will stop and let the Imperial player claim the rest of the planets. Once all planets are claimed and the Death Star is placed (see page 14), the original turn order will resume and all players reinforce as usual.
Placing the Death Star – Empire Only (On Any Imperial Planet)
After claiming the last planet, the Imperial player must decide where to place the Death Star. Although during the game you may move the Death Star to any planet, initially it MUST be placed on a planet controlled by the Empire.
Keep in mind when placing that the Death Star has 2 functions:
- Defensively, a planet controlled by the Empire that contains the Death Star cannot be attacked until the Death Star is moved or destroyed.
- Offensively, the Death Star can eventually be moved onto and destroy entire planets (all troops, ships, and the planet itself are blown to smithereens!) controlled by your opponents. This requires rare special cards in the Empire Faction deck to be executed but can be very powerful. This will be explained in detail in Step 8.
Once the Death Star has been placed, the reinforcement of troops will begin, starting with the first player. Reinforcement in RISK Star Wars Original Trilogy is the same as reinforcement in standard RISK. (See Reinforcing Planets on page 5 for details.)
General Notes
Overview
On each of your turns you'll receive additional troops to reinforce your army. You also may be able to play cards to get more troops, build ships, or initiate directives. If you successfully invade some planets, you will be able to collect one or more cards at the end of your turn and then fortify your forces.
If you are the Empire, you'll also place Imperial Base tokens and move (and possibly fire) the Death Star.
Faction Cards (They Have 3 Functions)
You will collect cards by conquering planets controlled by opposing factions. You can use any of these cards in one of three ways: to raise more troops, build ships, or initiate special directives. You will need to decide throughout the game which purpose best suits your strategy for winning the game.
If you choose to use the card for its special directive, it will be used at different times – each card indicates when its directive can be used. Read the card carefully to determine when and how to use it. You may play as many cards for directives as you want on your turn. This will come in handy when making big maneuvers such as the Rebellion attacking the Death Star or the Emperor; the Hutts taking their 10th resource planet; or the Empire wiping out the Rebels for good.
IMPORTANT: Some of the special directives indicated on the cards conflict with the general rules of play. If this occurs, follow the instruction on the card.
Force Meter (Light Side Helps the Rebels - Dark Side Helps the Empire)
At the start of the game, the Force Meter will always start on the red bordered start space that is located on the dark side of the Force. When the Force is stronger with the dark side, the meter indicates that the Imperial players may draw one or two extra cards at the end of their turn, in addition to any they earned by conquering planets from opposing factions. If the Force is stronger with the light side, the Rebel players may draw one or two extra cards at the end of their turn. When the Force is balanced, there are no special rules.
The Force Meter can also make it easier or more difficult for the Rebels to destroy the Death Star by adding or subtracting 1, 2, or 3 to their dice roll when they attack it. This will be described in further detail in the section: Attacking the Death Star.
The Rebels and the Empire can move the Force Meter in these ways:
- Either faction may use a special directive on a Faction card. The cards indicate when to play them and how many spaces the Force Meter will move.
- If a Rebel player conquers a planet with an Imperial Base token on it (thereby destroying the Imperial Base), the Force Meter will move one space toward the light side.
- If the Death Star is destroyed, the Force Meter will move one space toward the light side.
- If the Empire uses the Death Star to blow up a planet (requires special cards), the Force Meter will move one space toward the dark side.
- If the Empire builds a new Death Star (requires a special card), the Force Meter will move one space toward the dark side.
Resource Counter (If the Hutts are "Active," They Earn Cards for Controlling Resource Planets)
Once all planets have been claimed, take an extra Hutt piece and place it on the Resource Counter on the gameboard in the space that indicates the amount of green resource planets the Hutts occupy. Throughout the game, move the counter every time the Hutts claim a new or lose a resource planet. At the end of the Hutt player's turn, he may take the extra cards that are indicated next to the counter.
Turn Order
Use the Setup Chart on page 13 to determine turn order. This will be the order for claiming planets, reinforcing planets, and actual turns.
Using the Setup Chart and Turn Reference Chart
After reading these rules, for quick reference during setup and on each player's turn, keep this book next to your gameboard and use the charts located on the back page so that you don't have to memorize all the details.
Your Turn
Step 1: Place Token (Empire Only)
The Imperial player must take the top token from the Imperial Base token stack, secretly look at it, and place it on any planet controlled by the Empire.
You cannot place it on a planet that already has a token on it unless that is your only option. Remember that Imperial Bases will help you defend planets but one of them will contain the Emperor. If the Emperor is captured, all is lost.
Step 2: Count Planets/Regions (And Divide by 3)
This step is identical to Step 1 in standard RISK (if you need to refresh your memory, see page 6). Count your planets and calculate your reinforcements. Then, add to that any Region bonus troops you might be entitled to.
Step 3: Play Cards for Troops/Ships (A Set for Troops or One Card for a Ship)
As in standard RISK, you may turn in a set of 3 cards for additional troops. The chart on the bottom right side of the gameboard shows how many troops each card set will get you.
| Set | Troops Gained |
|---|---|
| 3 Fighter Class | 4 Troops |
| 3 Bomber Class | 5 Troops |
| 3 Capital Class | 6 Troops |
| 1 of Each Class | 7 Troops |
Also, you may turn in one (and only one) card per turn to build the ship listed on the turned-in card. For example, if you turn in a Fighter Class card, you may build a Fighter. Place the turned-in card in the discard pile, take a ship token of that class, and place it in your reinforcement pile.
There is a limit to how many ships each army may have. Each army may build up to 3 of each type of ship. If all 3 ships of a type are on the board (for example, the gray army has all 3 TIE Fighters on the board), then no more of that class may be built until one is destroyed.
IMPORTANT: You may build only one ship per turn.
Step 4: Place Units (Troops and Ships)
First, place all of your ground troop reinforcements onto planets you control. Then place any ship you built. Your ship must also be placed onto a planet you control. A planet may have more than one ship on it at a time.
Step 5: Invade
All rules for invading are the same as standard RISK, with the following exceptions…
Using Ships (They're Die Modifiers)
Ships are great support for your troops by adding to the strength of your die rolls when attacking and defending. However, they do not represent troops in their own right. Ships must attack or defend with accompanying troops.
Ship Advantage
Note that each ship brings with it a special advantage:
Fighter Class: Fighter class ships prevent 1 or more dice from being a "1." One fighter prevents 1 die from being a "1," 2 fighters prevent 2 dice from being "1s," and 3 fighters (only possible for the attacker) prevent all 3 dice from being "1s." Any "1s" rolled are re-rolled until they are any number other than "1."
Bomber Class: Bomber class ships add 1 to a die roll, starting with your highest. One bomber would add 1 to your highest die, 2 bombers would add 1 to your 2 highest dice and 3 bombers (only possible for the attacker) would add 1 to 3 of the dice. NOTE: Bombers cannot be used to add 2 or 3 to one die.
Capital Class: Capital class ships allow you to replace 6-sided dice with 8-sided dice. One Capital class ship allows you to replace 1 6-sided die with 1 8-sided die, 2 Capital class ships allow you to replace 2 6-sided dice with 2 8-sided dice, and 3 Capital class ships allow you to replace 3 6-sided dice with 3 8-sided dice (only possible for the attacker).
Winning an Invasion and Moving In (Bring Your Ships)
If you win the invasion by destroying all of your opponent's troops, any ships defending that planet are also destroyed. If you used ships to attack with, you must move them onto the planet you conquered along with your invading troops. You may then move any additional troops and ships onto the planet as well.
Invading an Imperial Base (They Defend With 8-Siders)
At the start of each Imperial turn, a new Imperial Base will be placed on an Empire controlled planet. The Imperial Bases are strongholds for the Empire and one of them will be the hiding place of the Emperor.
If either the Rebel faction or Hutt faction decide to invade a planet with an Imperial Base token on it, the Imperial player controlling the planet may replace all defensive dice with 8-sided dice for the entire invasion, unless there is only one troop on the planet with the Imperial Base, the defender can roll only one 8-sider.
Once all of the troops have been destroyed, that base token is removed from the board. The player that destroyed it may look to see whether it was hiding the Emperor.
If a Hutt destroys an Imperial Base (even the base was hiding the Emperor) the token is revealed but the Imperial player immediately moves it to another Imperial planet. The planet it is moved to cannot have another Imperial Base on it (unless that is your only option).
If a Rebel destroys an Imperial Base and reveals the Emperor, the game is over and the Rebellion has won. If the base token reveals a red-clad Imperial Guard, the game continues. The Rebel player takes the token off the board for the rest of the game and keeps it with his troops. The Force Meter should be moved one space toward the light side.
Eliminating a Player (Turn in Any Cards They Had)
Any player that is eliminated from the game must turn in all cards to the discard pile. His turn is skipped from this point on.
Step 6: Troop Fortification
After you finish with combat, you get one fortification (free move) with your troops. See Step 5 in the Standard RISK rules (page 9) for details.
Step 7: Ship Fortification
Ships also get one fortification. This works the same way as the troop fortification – as many ships as you want from one planet to one connected planet.
Step 8: Death Star Move (Empire Only - Roll a 6-Sider)
If you would like to move the Death Star, roll one 6-sided die. You may move the Death Star up to the number of planets you rolled.
After moving it, if you have a "Fire the Death Star" card, you may use it to destroy the planet it is on (provided it is in the Region specified on the card). Make sure to check the Region specified on the card you have before revealing it.
If you destroy the planet, you destroy all of the troops and ships that were on that planet as well. Now take an Asteroid Field token and place it on that space. From now on, this planet is impassable. An impassable space cannot be attacked or fortified through. This means that an asteroid field can possibly block a hyperspace connection between two Regions.
Attacking the Death Star (Roll an 18 to Destroy It)
Aside from the threat of blowing up whole planets, the Death Star can be used by the Empire to protect planets from being attacked. However, the Death Star itself can also be attacked from any planet adjacent to it or from the planet it is on (if the planet is not controlled by the Empire).
As usual, the attacking player decides how many troops to attack with and whether or not to use ships. However, the Imperial player does not roll dice in defense.
Unless the total of all the dice rolled by the attacker (including all ship, card, and Force Meter bonuses) is 18 or higher, all attacking troops are destroyed.
The attacking player may then decide to attack again or call off the invasion.
If the dice roll total (including ship, card, and Force Meter bonuses) equals 18 or higher, the Death Star is destroyed and comes off the board. The planet that it was on is now open to attack.
If a Rebel player destroys the Death Star, move the Force Meter one space toward the light side.
The Hutt player may also choose to try and destroy the Death Star. He may want to do this because the Death Star is blocking his path or just to even the game out a bit. The Force Meter is not affected if the Hutt player destroys the Death Star.
Step 9: Draw Card(s) (One Per Faction You Invaded)
At the end of your turn, you draw one card if you took at least one planet from an opposing faction (not player). You draw 2 cards if you took at least one planet from 2 opposing factions. Then if you are the Rebels or the Empire, check the Force Meter to see if you can draw any extra cards. For example, at the end of the white Imperial player's turn he will collect 3 cards: one because earlier on his turn, he attacked the Hutts and captured a planet; one because he also attacked the yellow Rebel player and captured a planet; and one because the Force Meter was shifted in favor of the dark side. He also captured a planet from the orange Rebel player, but he can collect only 1 card per faction.
Section 3: Neutral Hutts
Overview
In the 2-player and 4-player games of RISK Star Wars Original Trilogy Edition, the Hutt faction will be neutral. This means that they will start on the board (placed equally by the Rebellion and the Empire) and can defend against invasions, but they will get no turn and will not be able to attack. The Rebel and Imperial players can attack them to draw an extra card, and to take over strategic planets.
Claiming Planets (Each Player Claims One for the Hutts Each Turn)
Count out the starting troops for the Hutts and follow the turn order indicated on the Setup Chart (see page 13). After each player claims a planet, they will each take a Hutt piece and claim a planet for the Hutts. This continues until the Hutts have reached their planet-claiming limit of 7 or 8. Once this happens, players continue to claim planets for themselves as indicated in the above rules.
Reinforcing Planets
Once all of the planets are claimed, the original turn order resumes for reinforcement. After each player reinforces a planet of his own, he takes a Hutt piece and may reinforce any of the Hutt planets (even the ones that were claimed on his opponent's turn).
Attacking the Hutts (To Get an Extra Card)
You may attack the Neutral Hutts as you would any other opponent. One of the other players will roll the Hutts' defense dice.
The Neutral Hutts get no modifiers, ships, or cards. Once they are defeated, the pieces come off the board and cannot be reinforced or fortified.
Attacking the Neutral Hutts counts as attacking another faction when drawing cards at the end of your turn. So, if the Rebel player successfully invades 4 planets on his turn, 3 belonging to Imperial players, and 1 belonging to the Neutral Hutts, he can draw 2 cards at the end of his turn (before drawing any bonus cards indicated on the Force Meter).
Section 4: Team Play
Overview
With 4-players or 5-players, RISK Star Wars Original Trilogy Edition becomes a team game – Rebel and Imperial players win or lose as a team, not as individuals. The Hutts are still on their own.
Ownership of Planets (Don't Attack Your Teammate)
Although the armies work together, they set up on their own planets and may not share planets. You CANNOT attack the other player in your faction. However, during the game, you may be able to take over command of planets controlled by the other player in your faction.
Troop Fortification - Change of Command (Helps with Region Bonus)
You may count all planets controlled by your faction as "connected" when fortifying. However, although you may fortify your troops and ships through your teammate's planets you must end your fortification on a planet YOU control.
After fortifying your troops and ships, you may ask the other player in your faction if you can take over command of one of his planets. There are certain restrictions to this:
- Your teammate must agree to give you command. You cannot take command of the planet by force;
- You may take command of only one planet per turn;
- You may take command only of a planet that has exactly one troop on it;
- You may not take command of a planet if it has ships or base tokens on it.
If there is a planet with only one troop on it, and your teammate agrees to give up command of it, then you may replace that one troop with one troop of your own color. Return the replaced army's troop to its troop pile and place one troop from your troop pile on the planet. You now have command of this planet.
Placing Imperial Base Tokens (You May Place on a Teammate's Planet)
At the start of each Imperial player's turn he must place an Imperial Base token. Before placing it, show it to your teammate. You may want to discuss where it should go.
You may place an Imperial Base on any planet controlled by you or your teammate.
Placing, Moving, and Firing the Death Star (Decide as a Team)
There will never be more than one Death Star in play even when there are 2 Imperial players. Together, you should decide where it will be placed at the start of the game.
On each Imperial player's turn, he may move the Death Star. You might want to consult with your teammate before doing so, just in case he has other plans.
Faction Cards (Share a Deck and Show Your Teammate)
Both players in the same faction will draw from the same deck of Faction cards. You may share the information on your cards with your teammate but you cannot give or trade cards with your teammate.
Section 5: Winning
- The Empire wins the moment they eliminate all armies of the Rebellion.
- The Rebellion wins the moment they eliminate all Imperial armies OR when they take control of the planet with the Emperor's Imperial Base token.
- The Hutts win the moment they conquer their 10th green resource planet.
Setup Chart
| Turn Order | 2 Players | 3 Players | 4 Players | 5 Players |
|---|---|---|---|---|
| Player 1 | Orange and Yellow Rebels — Starting Troops: 40 — Planet Claiming Limit: 15 | Orange and Yellow Rebels — Starting Troops: 30 — Planet Claiming Limit: 15 | Orange Rebels — Starting Troops: 28 — Planet Claiming Limit: 8 | Orange Rebels — Starting Troops: 28 — Planet Claiming Limit: 8 |
| Player 2 | Gray and White Empire — Starting Troops: 45 | Green Hutts — Starting Troops: 25 — Planet Claiming Limit: 7 | Gray Empire — Starting Troops: 31 | Gray Empire — Starting Troops: 31 |
| Player 3 | — | Gray and White Empire — Starting Troops: 35 | Yellow Rebels — Starting Troops: 28 — Planet Claiming Limit: 8 | Green Hutts — Starting Troops: 25 — Planet Claiming Limit: 8 |
| Player 4 | — | — | White Empire — Starting Troops: 31 | Yellow Rebels — Starting Troops: 28 — Planet Claiming Limit: 8 |
Turn Reference
Standard RISK
- Step 1: Count Planets/Regions
- Step 2: Play Cards for Troops
- Step 3: Place Troops
- Step 4: Invade
- Step 5: Troop Fortification
- Step 6: Draw Card
RISK Star Wars Original Trilogy Edition
- Step 1: Place Token (Empire Only)
- Step 2: Count Planets/Regions
- Step 3: Play Cards for Troops/Ships
- Step 4: Place Units
- Step 5: Invade
- Step 6: Troop Fortification (then Change of Command in Team Play)
- Step 7: Ship Fortification
- Step 8: Death Star Move (Empire Only)
- Step 9: Draw Card(s)