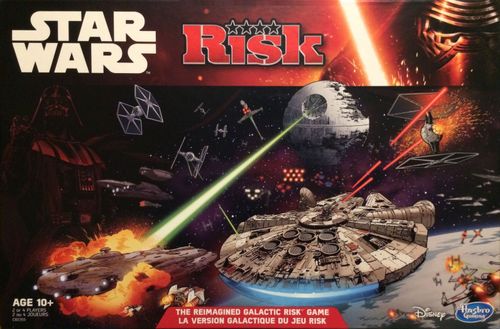
Risk: Star Wars Edition
Risk: Star Wars Edition Rulebook
Table of Contents
Table of Contents
Contents
- 3 gameboard pieces
- 6 Rebel fleet markers
- Millennium Falcon token
- Executor token
- 20 X-wings
- 16 Y-wings
- 15 B-wings
- 56 TIE fighters
- 4 hit tokens
- 9 Stormtrooper tokens
- Rebel Strike Team token
- 30 Rebel order cards
- 30 Empire order cards
- 5 dice
Aim
Recreate the final moments of Return of the Jedi. Play as the Empire and destroy the Rebel fleet, or play as the Rebel Alliance and destroy the Death Star.
The First Time You Play
Punch out the three gameboard pieces, four hit tokens, nine Stormtrooper tokens, six Rebel fleet markers, the Executor token, the Millennium Falcon token, and the Rebel Strike Team token from the parts sheet. Discard any waste.
Get Ready
-
Decide which player is playing as the Empire and which is playing as the Rebels. Each player takes the appropriate deck of order cards: Empire or Rebel. (For instructions on playing the four-player version of the game, see Four-Player Game Variation on page 15.)
-
Set up the game as shown, connecting the three gameboard pieces and six Rebel fleet markers by inserting the tabs.
-
The Empire player takes the Empire order cards, and the Rebel player takes the Rebel order cards. Both of you shuffle your decks and place them face down. Then, each of you draws six cards from your deck to form a hand. You may look at your hand, but do not show your cards to your opponent.
Setup diagram callouts: On the red (Empire) board piece — Millennium Falcon hit token, Luke Skywalker hit token, Darth Vader hit token, Executor hit token; "Shuffle Empire order deck and place here". Around the central board piece — 5 dice, 6 Rebel fleet markers, "Shuffle Rebel order deck and place here", the Millennium Falcon token, the Executor token, extra TIE fighters. On the green (Rebel) board piece — Rebel Strike Team token, 9 Stormtrooper tokens. "Place TIE fighters, X-wings, Y-wings and B-wings as shown."
Your Mission
There are three battles going on simultaneously: the attack on the Death Star, the shield assault, and the battle between Luke Skywalker and Darth Vader.
- Rebel player: Your mission is to destroy the Death Star, but first you must destroy the shield generator protecting it on Endor. Be careful that the Emperor and Darth Vader don't destroy Luke, though, as that will tilt the game to the Dark Side.
- Empire player: Your mission is to defeat all Rebel ships before they destroy the Death Star. Stop the Rebels from destroying the shield generator, and make sure Luke doesn't destroy Darth Vader… or worse, redeem him and strengthen the Rebels' assault.
Each side gets to pick which battles to fight, and when, by playing order cards.
Imperial Deck: this card gives the Empire player two choices: either attack with the Death Star or use the Emperor's Force lightning attack.
Rebel Deck: this card gives the Rebel player three choices: attack with X-wings or Y-wings, or launch a shield assault.
Let's Play
The game is played in rounds in which players take turns to give orders. You will get at least three turns during each round.
1. Plan Your Assault
To begin a round, each of you chooses three cards from your hand of six at the same time and places those three cards face down to form your order pile. The top card will be your first order, the middle card your second order, and the bottom card your third order. Set aside the remaining three cards in your hand, face down, until the end of the round.
2. Take Turns Giving Orders
The Rebel player goes first in each round. On your turn, flip over the top card of your order pile and choose which order to play. Take turns flipping over cards and giving orders until neither of you has any cards left in your order piles, marking the end of the round.
For example, the Rebel player plays this order card. It has three orders:
- Millennium Falcon
- Y-wing
- Rebel Strike Team
The player can choose any one of the three orders to play.
Bonus orders: During a round, you can earn bonus orders for achievements in battle, such as clearing a sector or destroying Luke Skywalker or Darth Vader. (See The Battles on page 8 for details.) Draw bonus order cards from the top of your deck and place them, without looking, at the bottom of your order pile, to be played at the end of the round. If you still have cards when your opponent's order pile runs out, you can give back-to-back orders.
NOTE: As the game progresses, some battles will be decided, making some orders useless. (For example, if the shield is already down, the Empire cannot order a shield ambush.) You must always create an order pile of three cards, even if not all the orders can be used.
3. Draw Three Cards
Each player draws three cards from their order deck and adds them to their hand.
4. Repeat Steps 1–3
Repeat steps 1–3 above until one side wins the game.
Played Cards
Each player should create a discard pile next to their order deck. Players place all cards they have played face-up in their discard piles.
No More Order Cards
If either deck of order cards runs out, shuffle the discard pile to create a new draw deck.
The Battles
The order you pick when you reveal an order card corresponds to one of three battles, detailed below.
Attack on the Death Star
The space battle is key to the game, determining who wins. Rebel and Imperial ships collide as the Rebels seek to destroy the Death Star and the Empire strives to defend it. This battlefield is divided into different sectors, with the Death Star at the centre. In order to attack the Death Star, the Rebels must first lower the shield protecting it by destroying the shield generator on planet Endor.
The Ships
There are three types of ships at play in this battle:
- Fighters: the plastic pieces in four different colours. These are TIE fighters, X-wings, Y-wings and B-wings.
- Rebel fleet: the six Rebel fleet markers from the parts sheet, each including multiple Rebel ships.
- Special ships: the Millennium Falcon and the Executor.
Moving Into Sectors
Ships can only move into adjacent sectors that are either occupied by other ships you own or are clear. Ships selected to be moved during a move order must all move into the same adjacent sector selected. Ships cannot move into or through a sector that contains enemy ships, and no ship may move through or occupy the same sector as the Death Star.
There is no limit on the number of fighters that can occupy a sector, and each sector may contain any combination of a player's fighters and special ships. The Millennium Falcon may be in a sector with Rebel fighters or on its own. The Executor may be in a sector with TIE fighters or on its own. A sector is considered clear if there are no ships of any type in it.
Diagram callouts: "This sector is clear." "This sector contains X-wings and B-wings." "The Millennium Falcon is alone in a sector but may enter any sector with Rebel fighters." "The Empire player may have as many TIE fighters in one sector as wanted." "The Executor may share a sector with TIE fighters."
Orders for the Attack on the Death Star
TIE fighters (Empire Order)
When this order is given, you may either deploy four new TIE fighters to the sector the Executor occupies OR move any number of TIE fighters from one sector to an adjacent one. After moving, you may attack a connected sector by rolling one die for each TIE fighter (up to five dice). The Empire may choose not to move a squad of TIE fighters but still attack with it. See Attacking (on page 11) for full attack rules.
Executor (Empire Order)
When this order is given, you may move the Executor up to two adjacent sectors. After moving, you may attack a connected sector by rolling four dice. The Empire may choose not to move the Executor but still attack with it. See Attacking (on page 11) for full attack rules.
Death Star (Empire Order)
This is a chance to show the capabilities of the fully operational Death Star by destroying part of the Rebel fleet. Choose a face-up Rebel fleet marker (either one with fighters on it or not) as your target and roll two dice. As long as one die is a 5 or a 6, the Death Star hits that fleet marker, destroying that part of the Rebel fleet and all fighters on it, if any. If a Rebel fleet marker is destroyed, flip it over. If no Rebel fleet markers are left face-up, the Empire may choose to target any sector and, if successful, destroy all ships in it, including the Millennium Falcon.
X-wings (Rebel Order)
When this order is given, you may move any number of X-wings from one sector to an adjacent one. After moving, you may attack a connected sector by rolling one die for each X-wing (up to five dice). The Rebels may choose not to move a squad of X-wing fighters but still attack with it. See Attacking (opposite) for full attack rules.
Y-wings (Rebel Order)
When this order is given, you may move any number of Y-wings from one sector to an adjacent one. After moving, you may attack a connected sector by rolling one die for each Y-wing (up to five dice). The Rebels may choose not to move a squad of Y-wing fighters but still attack with it. See Attacking (opposite) for full attack rules.
B-wings (Rebel Order)
When this order is given, you may move any number of B-wings from one sector to an adjacent one. After moving, you may attack a connected sector by rolling one die for each B-wing (up to five dice). The Rebels may choose not to move a squad of B-wing fighters but still attack with it. See Attacking (opposite) for full attack rules.
Millennium Falcon (Rebel Order)
This is a chance for the Rebels to move and attack with the Millennium Falcon. When this order is given, you may move the Millennium Falcon up to two adjacent sectors. After moving, you may attack a connected sector by rolling two dice. The Rebels may choose not to move the Millennium Falcon but still attack with it. See Attacking (opposite) for full attack rules.
Attacking
When you attack, you attack ships in an adjacent sector. You may attack after moving ships or choose to attack without moving any ships. If an attack clears a sector, you receive a bonus order. See Bonus Orders on page 12 for details.
- To attack with fighter ships, roll one die for each fighter in the sector from which you are attacking.
- To attack with the Millennium Falcon, roll two dice.
- To attack with the Executor, roll four dice.
- Once the shields are down, the Rebel player can win the game by destroying the Death Star. This attack must come from a sector adjacent to the Death Star. As long as one die rolled is a 6, the Death Star is destroyed and the Rebellion wins.
NOTE: There are only five dice in the game. This is the most dice you can roll in a single attack.
Add up the number of dice you can attack with and roll them all at once. Each die can be applied to one ship, and the attacker decides to which ship it applies. Different ships require different numbers to take a hit, as shown below:
REBEL SHIPS
- Millennium Falcon: 5 or higher
- Rebel fleet markers: 5 or higher
- B-wings: 5 or higher
- Y-wings: 4 or higher
- X-wings: 3 or higher
IMPERIAL SHIPS
- Executor: 5 or higher
- TIE fighters: 3 or higher
- Death Star (once shields are down): 6
When a fighter or a Rebel fleet marker is hit, it is immediately destroyed. When a special ship is hit, move the hit token down one space for each hit. If the hit token gets to the last space, the special ship is destroyed.
EXAMPLE: The Rebel player played a Y-wing order and is attacking with six Y-wings into an adjacent sector containing four TIE fighters and the Executor. Although the Millennium Falcon is in the same space, only one type of ship on an order card is activated. Since you can only roll five dice, this player takes all five and rolls a 1, 2, 4, 6 and 6. The 1 and 2 are misses since both the TIE fighters and Executor need at least a 3 to be hit. The 4 hits a TIE fighter, destroying it. The Rebel player now has a choice, since the 6s could hit either the Executor or the TIE fighters. The Rebel player decides to put the hits on the Executor, and the Empire player moves the hit token down 2 on the Executor's hit track.
At the start of the game, each Rebel fleet marker contains a squad of Rebel fighters. If a Rebel fleet marker is destroyed, any Rebel fighters on that marker are destroyed. The Executor contains all the TIE fighters not yet in play. If the Executor is destroyed, all the TIE fighters not yet in play are destroyed. Destroyed ships are placed back in the box. Destroyed TIE fighters cannot be redeployed.
Bonus Orders
- If an attack clears a sector (no fighters or special ships remain in that sector), the attacking player immediately draws the top card from their deck and places it, without looking, at the bottom of their order pile.
- If the Millennium Falcon is destroyed, the Empire player immediately draws two order cards off the top of the Empire deck and puts these cards, without looking at or rearranging them, at the bottom of the Empire order pile. These are in addition to any card received for clearing a sector.
The Shield Assault
In order to attack the Death Star, the Rebels must first destroy the shield generator by reaching the end of the shield assault track on Endor. The Rebel Strike Team token begins the game on the start space of the track. As the Rebels move forward, the Empire may slow them down by placing Stormtrooper tokens on the track.
Once the Rebel Strike Team token reaches the end of the shield assault track, the shields are down and the Rebel ships can attack the Death Star.
Diagram callouts: "Rebel Strike Team token starts here and moves towards the shield generator." "Stormtrooper tokens."
Orders for the Shield Assault
Shield Ambush (Empire Order)
This is a chance for the Empire to slow down the Rebel Strike Team token by placing Stormtrooper tokens on the shield assault track. When this order is given, the Empire player places three Stormtrooper tokens on the three spaces directly in front of the Rebel Strike Team token, increasing the numbers on these spaces by one. If fewer than three Stormtrooper tokens are available, the Empire may place all that are left. If no Stormtrooper tokens are available, this order cannot be given.
Shield Assault (Rebel Order)
This is a chance for the Rebels to advance along the shield assault track. When this order is given, the Rebel player rolls all five dice. Each space on the shield assault track has a number on it that shows the minimum the Rebels must roll to move onto that space. The Rebels can advance the Rebel Strike Team token by using a die whose number is equal to or higher than the number on the track. Each die used advances the Rebel Strike Team token one space. The most the token can move with this order is five spaces.
If there is a Stormtrooper on the track, that space's number is one higher than listed. (For example, a Stormtrooper on a 3 makes it a 4.) When the Rebel Strike Team token is moved onto a space with a Stormtrooper token, that Stormtrooper token is removed from the track and can be used on future turns by the Empire.
The Battle Between Luke Skywalker and Darth Vader
While the battles rage on in space and on Endor, Luke Skywalker makes a desperate gamble by entering the Death Star to confront Darth Vader and the Emperor. Luke hopes to redeem his father from the Dark Side, but the Emperor seeks to corrupt Luke. The battle begins.
Both Luke and Darth Vader have a hit track. When either character's token reaches the end of his track (or both do), he is destroyed and the opposing player gets bonus orders.
Diagram callouts: "Luke's hit token and path." "Darth Vader's hit token and path." "Redemption spaces."
Orders for the Battle Between Luke Skywalker and Darth Vader
Darth Vader (Empire Order)
This is a chance for Darth Vader to attack Luke Skywalker, lowering Luke's hit track. When this order is given, roll four dice. Any roll of a 4, 5 or 6 deals one hit to Luke, for a maximum of four hits. If Luke reaches the last spot on his hit track, he is destroyed and out of the game. The Empire player claims four bonus order cards and immediately adds them to the bottom of the Empire order pile. This order cannot be given if Darth Vader has been defeated.
Emperor (Empire Order)
This is the Emperor's Force lightning attack. When this order is given, immediately deal two hits to Luke Skywalker. If Luke reaches the last spot on his hit track, he is destroyed and out of the game. The Empire player claims four bonus order cards and immediately adds them to the bottom of the Empire order pile. This order cannot be given if Darth Vader has been redeemed.
Luke Skywalker (Rebel Order)
This is a chance for Luke Skywalker to attack Darth Vader, lowering Darth Vader's hit track. When this order is given, roll four dice. Any roll of a 4, 5 or 6 deals one hit to Darth Vader, for a maximum of four hits. If Darth Vader reaches the last spot on his hit track, he is destroyed and is out of the game. The Rebel player claims three bonus order cards and immediately adds them to the bottom of the Rebel order pile. This order cannot be given if Luke has been defeated.
Darth Vader Redeemed (Rebel Order)
This is a chance for Luke Skywalker to redeem Darth Vader and kill the Emperor. This order can only be given if Darth Vader's hit token is on a red highlighted spot (3, 2 or 1 hit remaining). When this order is played, both Darth Vader and the Emperor are destroyed. The Rebel player claims five bonus order cards and immediately adds them to the bottom of the Rebel order pile.
Darth Vader Redeemed
Darth Vader's track has three red spaces at the end, which are redemption spaces. While Darth Vader's hit token is on one of these spaces, the Rebel player can play a Darth Vader Redeemed card to destroy the Emperor (and Darth Vader in the process).
Bonus Orders
- If Luke Skywalker is destroyed, the Empire player immediately draws four order cards off the top of the Empire deck and puts these cards, without looking at or rearranging them, at the bottom of the Empire order pile.
- If Darth Vader is destroyed, the Rebel player immediately draws three order cards off the top of the Rebel deck and puts these cards, without looking at or rearranging them, at the bottom of the Rebel order pile.
- If both the Emperor and Darth Vader are destroyed, the Rebel player immediately draws five order cards off the top of the Rebel deck and puts these cards, without looking at or rearranging them, at the bottom of the Rebel order pile.
Winning
The Empire wins by destroying all Rebel ships — fighters, fleet and the Millennium Falcon — before the Death Star is destroyed.
The Rebel Alliance wins the game by destroying the Death Star. After the shields are down, the Rebel player may use fighters and/or the Millennium Falcon to attack the Death Star. This attack must come from a sector adjacent to the Death Star. As long as one die rolled is a 6, the Death Star is destroyed and the Rebellion wins.
Four-Player Game Variation
The four-player game is played in almost exactly the same way as the two-player game, but with the following changes:
- Players are in teams: one pair as the Rebel Alliance, one pair as the Empire.
- Each player has a hand of six cards and plays two from their hand.
- At the end of the round, each player draws two cards from the team's deck.
- Play passes clockwise from the left-most Rebel Alliance player, and turns are taken as follows: Rebel Alliance player 1, Empire player 1, Empire player 2, Rebel Alliance player 2.
- Team-mates are allowed to consult each other about the best possible move, but all moving of game pieces and rolling of dice is completed by the player who played the card.
- When choosing cards to play, team-mates may show each other cards and discuss strategies, but may not exchange cards with one another.