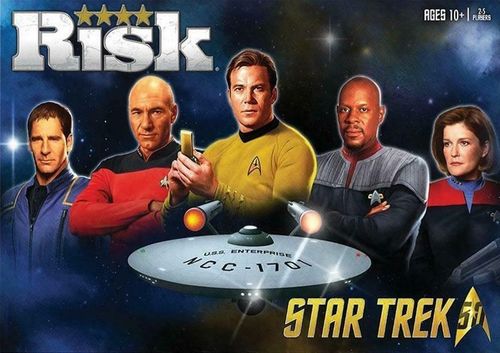
Risk: Star Trek 50th Anniversary Edition
Risk: Star Trek 50th Anniversary Edition Rulebook
Table of Contents
Table of Contents
Introduction
Begin by reviewing the information here and in the Mission 1: Exploration section, designed as an introduction to RISK: Star Trek 50th Anniversary Edition. Once you are comfortable with the basic rules, feel free to move on to Mission 2: The Final Frontier game play mode, for more in-depth strategic action.
Overview of Components
Contents: Game Board featuring the Alpha and Beta Quadrants, 225 Ships, 5 Captain's Logs, 44 Location cards, 30 Crew cards, 50 Q-Vent cards, 4 Q's Quests, 72 Alien Lifeform tokens, 5 Manhunt markers, 2 Wormholes, 107 Command Credits, 50 Tribbles, 5 Dice, Game Guide.
Game Board. The board features select locations in the Alpha and Beta Quadrants. The map is divided into six Sectors: Breen Confederacy, Cardassian Union, Ferengi Alliance, Klingon Empire, Romulan Star Empire and United Federation of Planets.
Ships. Each player will control the ships of one Captain. A fleet of ships is represented by two different pieces, representing either 1 or 3 units. Use the 3-unit Starships to save space by representing three of your 1-unit shuttlecraft. Note: the generic term ship always refers to a single unit.
Captain's Logs. Each Captain has a Captain's Log to help him or her keep track of their Crew Cards, Command Credits and Quests achieved.
Dice. Dice are used when attacking and defending locations to resolve engagements. There are five 6-sided dice (three yellow Attack and two black Defense) in the game.
Command Credits. Each crew member has a command value that is required to use their power. There are two denominations (100 and 500) of credits. Any Command Credits not spent during a turn may be saved.
Cards. There are three different decks of cards: Location Cards, Q-Vent Cards and Crew Cards.
- Location Cards are used for initial set-up and will be collected to gain extra reinforcements.
- Crew Cards feature six prominent members of your crew. By paying an associated cost, your crew members will grant special abilities for your Starship.
- Q-Vent Cards are events that may help or harm you, depending on Q's mood.
Wormholes. There are 2 Wormholes to create a connection between the Alpha and Beta quadrants.
Tribbles and Manhunt Markers. There are 50 Tribbles and 5 Manhunt Markers to be used in conjunction with certain Q-Vent Cards.
Alien Lifeforms. These are neutral units. They will not attack, but you can engage them.
Q's Quests. Objectives to be completed in order to earn victory.
Game Missions
- Mission 1: Exploration (2-5 players): introductory version of RISK: Star Trek 50th Anniversary Edition.
- Mission 2: The Final Frontier (2-5 players): advanced version including Captain's Logs, Crew, Q's Quests and more.
Mission 1: Exploration (2-5 players)
Mission 1: Exploration is designed as an introductory version of RISK: Star Trek 50th Anniversary Edition game play. It is shorter and easier to learn, and recommended that you play this version until you are comfortable with the basic rules and mechanics of this RISK game. Once you have perfected your strategies, Q invites you to move on to the more challenging Mission 2: The Final Frontier.
Object of the Game
The first player to control 25 locations wins the game.
Set Up
- Place the game board, dice and Location Card deck in the middle of the table.
- Each player chooses a Captain. Take the plastic pieces associated with that Captain, but for this game you can leave the Captain's Log and Crew Cards in the box.
- Roll a die to see who will go first. Play will continue clockwise. In addition to going first, the highest roller will place one end of the wormhole in the Alpha Quadrant. The lowest roller will place the other end of the wormhole in the Beta Quadrant.
| 3 Player Game | 4 Player Game | 5 Player Game | |
|---|---|---|---|
| Alien Lifeforms | 16 Location Cards (32 Units) | 14 Location Cards (28 Units) | 12 Location Cards (24 Units) |
| 1st Player | 10 Units | 8 Units | 8 Units |
| 2nd Player | 11 Units | 10 Units | 10 Units |
| 3rd Player | 12 Units | 10 Units | 10 Units |
| 4th Player | 12 Units | 12 Units | |
| 5th Player | 12 Units |
Note: If you are playing with two players, see the additional 2-player instructions below.
- Shuffle the Location Deck. Flip the top cards of the deck based on the chart above. Put two Alien Lifeforms on each of the locations revealed. Shuffle all revealed cards back into the Location Deck.
- In turn order, each player will place all of their allocated ships on a single uninhabited location. Players will be able to expand from there. At the start of the game, some locations will be unoccupied.
Game Play Overview
On your turn, you will take the following four actions:
- REINFORCE by deploying additional armies to bolster your Fleet.
- EXPAND AND INVADE opposing and/or neutral locations.
- MANEUVER your ships.
- DRAW a Location Card, if eligible.
Reinforcement
At the start of your turn, you will deploy additional ships to reinforce your locations. The number of ships you can deploy is determined as follows:
- Count up the locations you control and divide that number by 3, rounding down. For example, if you control 10 locations, you divide 10 by 3 to get 3 units to deploy. Note: You ALWAYS gain at least 3 units each turn, so if this number is less than 3 (such as at the start of the game), round up to 3 units.
- Determine if you have any sector bonuses. If you control every location in a sector, you earn the sector bonus indicated on the map as additional units. For example, if you control all 4 locations that comprise the Ferengi Alliance, you get 2 bonus units.
- Trade in Location Cards for bonus ships. How you get Location Cards is explained in the Location Cards section below. Location Cards have 1 or 2 stars on them. If you have cards containing a total of 2 or more stars you may choose to turn in some or all of them to deploy more units. The number of stars determines how many units you get. You may turn in a maximum of 10 stars in any one turn. Refer to the Reinforcements chart on the game board to see how many units you get for a set of cards. Add these units to your reinforcements pile from steps 1 and 2.
| Stars | Units |
|---|---|
| 2 | 2 |
| 3 | 4 |
| 4 | 7 |
| 5 | 10 |
| 6 | 13 |
| 7 | 17 |
| 8 | 21 |
| 9 | 25 |
| 10 | 30 |
Example: If you have 2 cards containing a total of 3 stars at the start of your turn, then turning in both cards will give you 4 reinforcement units.
- Deploy ships. After totaling up reinforcement units to deploy for your turn, place ALL of them into locations you control. You can choose to deploy all ships onto one location or spread them out across multiple locations you already control. Note: On your first turn, your reinforcements must all be deployed with your initial fleet of ships.
Expand and Invade
This is the main part of your turn, where you decide where to expand and whom to attack in order to gain control of more locations. Expanding into and invading other locations is optional; you do not have to do this each turn.
You may move any number of your ships into any adjacent, unoccupied location. You can continue to expand from there to other adjacent locations, but you must always leave at least one unit behind on each successive location. If you want to expand onto a location controlled by an opponent's fleet or Alien Lifeforms, you must declare an invasion. You may declare multiple invasions during your turn, but each invasion can only come from one of your locations at a time. Deciding to invade is always optional, so you can choose if and when to invade each turn.
To Invade an Opposing Location
-
To declare an invasion, choose a location you control from which to invade, and an opposing location you seek to control. The two locations involved must be connected to each other by a shared border, connection line, or wormhole. Your invading location must have at least 2 units in it. Note: Once you have expanded into a location, you can never leave it unoccupied. At least 1 unit must always remain behind in order to retain control. All other units may be used to invade new locations.
-
Once you have declared an invasion, decide how many ships in your invading location you will commit to the engagement. For each engagement, 1, 2, or 3 ships may attack (even if you have more), and you will roll a die for each attacking ship.
-
The defending player then chooses how many ships to commit in defense. They may choose to engage either 1 or 2 ships, even if there are more in the defending territory, and will roll a die for each defending ship.
For example: Captain Kirk decides to invade a location controlled by Captain Picard with three of his ships, so he will roll 3 Attack dice. Captain Picard decides to defend his location with two ships. He will roll 2 Defense dice.
-
After the dice have been rolled, you and the defending player must pair up the attack and defense dice in order from highest to lowest, and compare the pairs.
- If the attack die is higher than the defense die, remove one defending ship from the battle and return it to the reserves.
- If the defense die is higher than or equal to the attack die, remove one attacking army from the battle and return it to the reserves (defender wins ties).
-
Continue by comparing the second highest pair of dice, again with the loser removing 1 ship from the board. If there is no die to pair up with and compare, meaning you rolled more dice than your opponent, simply ignore those extra dice (with the lowest numbers).
Scenario: Captain Kirk (7 ships) on Bajor declares an invasion on the Captain Picard-occupied planet Chin'Toka. Kirk commits 3 units to the first engagement, while Picard only has 2 ships to defend the location. Captain Kirk rolls 3 dice, one for each attacking ship, rolling 6, 4 and 1. Captain Picard rolls 2 dice to defend, rolling 5 and 4. Comparing highest die rolls for each side, Captain Kirk's 6 beats Captain Picard's 5, so Picard removes 1 ship. Then, comparing second highest rolls, both sides rolled a 4. Captain Picard as the defender wins ties, and Captain Kirk removes 1 ship. The third attack die is not used, since there is no defending die to compare.
If the defender still has ships on the location being invaded, the attacker may continue the current invasion from the same location by committing more ships to that battle, but can always choose to end an invasion after the first engagement and declare another invasion elsewhere.
Conquering a Territory. When the last defending ship is defeated in an invasion, you have conquered the location. Move the remaining attacking ships committed to the final engagement onto the defending location. You may also move in additional ships from the invading location. So even though you can only attack with 3 units at a time, you may move additional units into the same location. Remember that you must always leave 1 ship behind on the location that attacked, as no territory may ever be left unoccupied.
Example: The Captain Kirk player continues the attack with 3 more ships, and defeats the last of Captain Picard's ships on Chin'Toka. All 3 attacking units must move from Bajor to Chin'Toka. Kirk decides to move 2 more ships to Chin'Toka to join the 3 attackers, leaving 1 ship behind on Bajor.
REMEMBER, you can declare as many invasions as you like on your turn, provided you have the ships available. Also, you can wage as many engagements as you like during each invasion, or can stop after just one engagement. The choice is up to you: play it safe, or risk it all in the name of exploration!
If you manage to remove all of another player's ships from the map, that player is eliminated from the game. You collect that player's Location Cards.
Maneuver
Once you have decided that you are done expanding and invading, you may make one maneuver to reinforce a location you control. To make a maneuver, take as many ships as you like from one location you control and move them to one other connected location. Remember: you must leave at least 1 unit on the first location, and locations are connected if you control all the locations in between the two. You cannot maneuver through locations controlled by other players or lifeforms. This is not considered an attack, just a way to reinforce a strategic or vulnerable position.
Scenario: At the end of his turn, Captain Kirk wants to move more units onto Chin'Toka. He can take 2 ships from Vulcan, and maneuver them through Trill and onto Chin'Toka since he controls all of those locations and they are connected.
Location Cards
Location Cards are an important and game-changing part of RISK: Star Trek 50th Anniversary Edition strategy. If you successfully invaded and conquered at least one opposing location during your turn, you draw the top card from the Location Card deck. You can only draw one card, regardless of how many locations you conquered.
NOTE: You may not take a Location Card if you only expanded into unoccupied locations on your turn.
Location Cards may be traded in at the start of your turn to gain bonus ships to deploy (see Reinforcement). Each card has either one or two star symbols on it. When you trade in Location Cards, simply discard them face-up to a separate pile beside the deck. Cards can be redeemed at the start of your turn for bonus ships based on the Reinforcement chart above and on the game board.
Winning
The first player to control 25 locations on the map wins the game. For a longer or shorter game, adjust the number of locations required to win.
Mission 2: The Final Frontier (2-5 players)
Mission 2 is an advanced version of RISK: Star Trek 50th Anniversary Edition. In this game, Q has assembled the Captains on the holodeck in an epic showdown to see who is the greatest commander in all of Starfleet. Each player will assemble an away team to aid his Captain in victory.
Object of the Game
The first player to complete 3 of Q's Quests wins the game. (See Winning below.)
Set Up
- Each player rolls a die, highest roller gets first choice of Captain. In descending order, each other player does the same. Note: We recommend that you choose your Captain and then seat yourselves around the table in turn order based on the air date of the first episode of the TV Series in which they starred.
- Each player takes the Captain's Log, Crew cards, and ships associated with their Captain. Players may choose 4 of their 6 Crew Members to bring on their away team. Place your 4 cards face-up on your Captain's Log and return the other 2 cards to the box.
| 3 Player Game | 4 Player Game | 5 Player Game | Command Credits | |
|---|---|---|---|---|
| Alien Lifeforms | 14 Location Cards (28 Units) | 13 Location Cards (26 Units) | 12 Locations (24 Units) | |
| 1st Player - Captain Kirk | 10 Units | 8 Units | 8 Units | 300 |
| 2nd Player - Captain Picard | 11 Units | 10 Units | 10 Units | 400 |
| 3rd Player - Captain Sisko | 12 Units | 10 Units | 10 Units | 400 |
| 4th Player - Captain Janeway | 12 Units |
Note: If you are playing with two players, see the additional 2-player instructions below.
- Shuffle the Location cards and flip over cards from the deck based on the chart above. Place 2 Alien Lifeforms on each of the locations revealed. Reshuffle the revealed cards back into the deck.
- Each player rolls a die, the highest roller places one end of the wormhole in the Alpha Quadrant and the lowest roller places the other end in the Beta Quadrant.
- Shuffle the Q's Quests and randomly pick 6 to be active on the game board. Put the other Q's Quests in a pile nearby.
- Shuffle the Q-Vent cards and place them on the game board. Place all remaining components to the side of the board. These will be used to resolve certain Q-Vent cards.
- In turn order, each player will place all of their allocated ships on a single uninhabited location. Players will be able to expand from there.
Game Play Overview
On your turn, you will take the following five actions:
- RESOLVE the topmost Q-Vent card.
- REINFORCE with additional ships.
- EXPAND AND INVADE opposing locations.
- MANEUVER your ships.
- DRAW A LOCATION CARD OR Q'S QUEST if eligible.
Resolve
Wanting the Captains to expand and engage quickly, Q has set up a few events for the Captains to react to. Beginning with round 2 (all players have one round to expand), read the topmost Q-Vent card aloud at the start of each player's turn. Most of the cards will relate only to the active player, but some will affect the entirety of the board. Once a card has been resolved, discard it.
Some Q-Vent cards may require some elaboration. Refer to the Q-Vent Card Expanded Descriptions below for more information on how to resolve those cards, including examples of how to deal with Tribbles.
Reinforcement
Deployment for Mission 2: The Final Frontier works like it does in Mission 1, with the addition of collecting Command Credits to use.
- Count up the number of locations and starbases you control and divide that number by 3, rounding down. Collect that many ships and that number times 100 in Command Credits. For example, if you control 10 locations and 3 Starbases (totaling 13), you will get 4 ships and 400 Command Credits.
- Determine if you have any sector bonuses. If you control every location in a sector, you earn the sector bonus on the map as additional ships and Command Credits. For example, if you control all 4 locations that comprise the Ferengi Alliance, you get 2 bonus ships and 200 extra Command Credits.
- Trade in a set of Location Cards for bonus ships. You may not collect Command Credits for redeeming cards.
After totaling up reinforcement ships for your turn, you must deploy ALL ships into locations you control. You can choose to deploy all ships into one location, or spread them out across multiple ones. Command Credits are added to your Captain's Log to be used to command your Crew at any time. You may save up your Command Credits, and do not have to use them all on each turn.
Crew Member Cards
Each Captain can have four Crew Members on their away team. Each Crewman has a special ability, utilizable once per round, based on their position in Starfleet (for example, all First Officers give a +1 to the highest Attack Die for the duration of an Invasion).
To command a Crew member and utilize their ability, you must turn in the required number of Command Credits shown on the card. Then you can resolve the ability, and must flip that character over. This denotes that the ability has been used for the round. At the start of your next turn (before resolving the Q-Vent and deploying reinforcements), flip all Crew Members face-up again, ready to be commanded for the next round.
Expand and Invade
Expansion and Engagement in Mission 2 works similarly to Mission 1. You may expand onto empty locations by moving a ship there from an adjacent location. Or you may invade a location controlled by another Captain or Alien Lifeform in an engagement to try and conquer one of the locations next to a location you control. You may declare multiple invasions during your turn, but each invasion can only come from one of your locations at a time.
If you manage to remove all of another player's ships from the map, that player is eliminated from the game. You collect that player's Location cards and Command Credits, but you do not get their completed Q's Quests. These are returned to the Q's Quest reserves.
Crossing the Neutral Zone
To simulate the stealth needed to cross from Federation to Romulan airspace and vice versa, players can only invade with a maximum of 2 ships across The Neutral Zone instead of 3 ships. This means that a player is only able to roll 2 dice instead of 3 dice, one die per ship engaged in the conflict.
Scenario: Captain Janeway on Vulcan (6 ships) wants to invade Hobus controlled by Captain Kirk (2 ships). She can only commit 2 ships to the conflict even though she has more, rolling 2 Attack dice. Captain Kirk can defend with 2 ships and also rolls 2 dice, plus he still wins all ties. Janeway rolls a 6 and 4, while Kirk rolls a 6 and 4, so Janeway loses 2 ships. At this point she can choose to continue the attack with 2 more ships or call off the engagement.
Maneuver
As in Mission 1, once you have decided that you are done engaging, you may make one maneuver to reinforce a key strategic position. Some Crew Cards may allow you to make an extra maneuver or maneuver through opponents' locations.
Location Cards and Q's Quests
As in Mission 1, if you successfully invaded and conquered at least one opposing location, you may draw the top card from the Location deck. Location Cards may be traded in during your Reinforcement phase to gain bonus ships to deploy.
However, if you have completed one of Q's Quests you may claim it at the end of your turn instead of taking a Location Card. You may only take one Q's Quest per turn, regardless of how many you qualify for.
For example: Captain Janeway controls all of the locations in the Cardassian Union and none in the Breen Confederacy. If at the end of her turn she has successfully invaded and conquered all 4 locations in the Breen Confederacy, she qualifies for 2 different Q's Quests: "Control 2 Sectors" and "Conquer an entire Sector in one turn". Because she is only allowed to take one of Q's Quests per turn, she chooses to take the "Conquer an entire Sector in one turn" Quest, because she may still be able to claim the other one on her next turn. She does not get a Location Card also.
Once one of Q's Quests has been claimed, place a new Quest on the board.
Winning
The game ends as soon as one player completes 3 of Q's Quests.
Additional 2 Player Rules
Mission 1: Exploration (2 player variant)
Setup
- Place the two wormholes on Ferenginar in the Ferengi Alliance and Narendra III in the Klingon Empire.
- Flip the top 16 Location Cards, putting 2 Alien Lifeforms on each of those locations. Shuffle all revealed cards back into the Location Deck.
- Each player starts with 14 units. The higher roller chooses whether to place all his ships on a location in the Alpha or Beta Quadrant. The lower roller must choose a location in the other Quadrant.
Game Play Overview. On your turn, you will take the same 4 actions as in the 3-5 player game:
- REINFORCE by deploying additional ships to bolster your Fleet.
- EXPAND AND INVADE to control more locations.
- MANEUVER your units.
- DRAW A LOCATION CARD if eligible.
Winning. The game ends when one Captain has eliminated the other.
Mission 2: The Final Frontier (2 player variant)
Setup. Begin by setting up the game with steps 1-3 above (Mission 1's two-player setup).
- Each Captain will need his Captain's Log and Crew members. After choosing 4 crew members, return the other 2 to the box.
- Sort through the Q-Vent cards and find the ones with the II symbol in the lower right corner. These will be used in the two player game. All others can be returned to the box. Shuffle the deck and place it next to the game board. (If the symbol is not on a card, do not use it in a 2 player game.)
- Each player starts with 14 ships and 500 Command Credits. The higher roller chooses whether to place all his ships on a location in the Alpha or Beta Quadrant. The lower roller must choose a location in the other Quadrant.
Game Play Overview. On your turn, you will take the same 5 actions as in the 3-5 player game:
- RESOLVE the topmost Q-Vent Card.
- REINFORCE with additional ships.
- EXPAND AND ENGAGE to control more locations.
- MANEUVER your ships.
- DRAW A LOCATION CARD OR CLAIM A Q'S QUEST if eligible.
Winning. To win you will need to complete 4 of Q's Quests or eliminate the other player.
Q-Vent Card Expanded Descriptions
"Before and After" At the start of your turn you will deploy ships and may make a maneuver. At the end of your turn, you may add 2 more ships and still make a maneuver.
"Booby Trap" This applies only to the active player, not everyone.
"I, Borg" If you are the player who has to sacrifice one of your crew, it is now impossible for you to collect the Q's Quest "Use the powers of all your crew members in one round," because you are short a crew member.
"In a Mirror, Darkly" When resolving dice rolls, look at the lowest 2 dice rolled by each player and compare values. The lowest value wins. Then match the 2 dice with the next highest values and resolve them. All ties go to the defender. NOTE: Crew member bonuses can negatively affect the outcome of an engagement. For instance, if you use your First Officer for a +1 to your attack dice, it will still give a +1 not a -1.
"Manhunt" Manhunt markers cannot be collected from locations you already control. They can be collected if you expand onto or successfully invade a location. Leave the markers on the board at the end of your turn, they are now available for other players to try and collect.
"Operation: Annihilate!" Because the Alien Lifeforms are attacking, they roll 3 dice. Each defending player rolls up to 2 dice, and will win all ties.
"Return to Tomorrow" You do not need to take any ships off of the board. This is an opportunity to re-deploy ships that could better help you in a new location. If you choose to remove ships, you may not take the last ship from a location.
"The Cloud" The affected planets are: Amleth Prime, Argus X, Bolarus IX, Cardassia, Coridan, Minos Corva, and Soukara. The Etnap Nebula in Klingon space acts as a border to those planets' space.
"That Which Survives" A defender is successful and gets 2 ships, even if you choose to continue invading the same location from a different location.
"To the Death" This is the only time you are allowed to commit the last ship on a location to an Invasion.
"Tomorrow is Yesterday" Refer to the chart to see how many reinforcements you are entitled to.
| 3 Players | 4 Players | 5 Players | |
|---|---|---|---|
| 1 - Captain Kirk | 5 Units | 4 Units | 4 Units |
| 2 - Captain Picard | 6 Units | 5 Units | 5 Units |
| 3 - Captain Sisko | 6 Units | 5 Units | 5 Units |
| 4 - Captain Janeway | 6 Units | 6 Units | |
| 5 - Captain Archer | 6 Units |
"The Trouble with Tribbles" and "Trials and Tribble-ations" Once the Tribbles are introduced, at the start of each successive player's turn add 1 Tribble to the location. Note: Tribbles can be attacked like any other Alien Lifeform.
If you add the 10th Tribble to a location on your turn, move 1 Tribble from the overrun location onto each surrounding location (including other locations with Tribbles, Alien Lifeforms and unoccupied locations) working clockwise. If there are ships or Alien Lifeforms on the invaded location, the Tribble will attack, rolling one die. Players can defend with up to two dice.
Note: If you ever run out of Tribbles in the reserves, Q and the Tribbles win and all players lose.
For example: If there are 9 Tribbles on Coridan at the end of the previous player's turn, you will place the 10th Tribble, causing them to overrun. Immediately move 1 Tribble onto all surrounding locations: Andoria, Archanis, Boreth, Planet Q, Betazed, and Trill, leaving 4 Tribbles on Coridan. Resolve all conflicts in order.
Captain Janeway has 3 ships on Trill so she can defend against the Tribbles with 2 defense dice while the Tribble can only roll 1 attack die. Janeway rolls a 3 and 1, while the Tribble rolls a 5. Janeway removes one ship and the Tribble continues to attack the remaining 2 ships on Trill. This time Janeway rolls a 6 and the Tribble rolls a 4, so the Tribble is defeated and returned to the reserves.
There are no ships or Alien Lifeforms on Andoria, so the Tribble remains and the Tribble population will continue to grow.
Captain Archer has 1 ship on Archanis. Archer and the Tribble both roll a 5 since he is defending. Archer wins the engagement and returns the Tribble to the reserves.
Continue until all conflicts are resolved.
"Year of Hell" All locations in the determined sector lose one unit, including locations controlled by Alien Lifeforms and Tribbles.