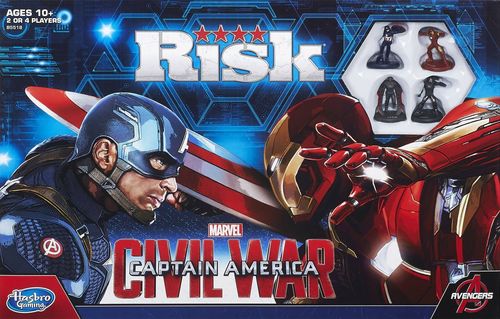
Risk: Captain America – Civil War Edition
Risk: Captain America – Civil War Edition Rulebook
Table of Contents
Table of Contents
Object of the Game
Earn the most points at the end of the game by completing the following missions:
- Capture the Winter Soldier
- Leave the airport with the Quinjet
- Control the most territories
(Printed as "Control the most territories" on the cover summary; Mission 3 on the Mission Tokens page reads "Control the most rooms." The mission text is transcribed as printed.)
Playing With Two or Four Players
If you are playing with:
Two players: Choose your side – Team Captain America or Team Iron Man. Players are in control of both heroes on their team, alternating turns.
Four players: Each player is in control of his or her own hero. Players work together in teams of two either as Captain America and Falcon or as Iron Man and War Machine. This is the best way to play!
Overview of Components
The Gameboard
The gameboard is an airport divided by a runway into two wings, with each wing containing 17 rooms. Rooms are grouped into six buildings, which are color coded (there are three buildings on each wing). Troops will be able to move from one room to another as long as the rooms are adjacent and not blocked by a security gate. Crossing lines link the north and south wings and allow movement between connected rooms. When the Quinjet is placed on the runway, it represents the game's round counter and operates as a moving room, bringing the total number of rooms up to 35.
The gameboard diagram labels: Breach Point, Security Gates, Crossing Lines, Resupply Space, Supply Rooms, Rooms, and Building.
The Quinjet
During play, the Quinjet acts as a round counter. At the end of each round (after all players have finished their turns), the Quinjet moves forward one space. There are five spaces on the runway, meaning the game always ends after the fifth round. In addition to counting rounds, the Quinjet also acts as a separate room and may be occupied for a tactical advantage.
Turn-order Advantage
If you are in control of the Quinjet at the end of a round, you may choose your turn-order marker for the next round. See page 11 for details.
Heroes and Troops
Each army contains three types of pieces: single troop markers (each worth one troop), triple troop markers (each worth three troops), and one hero. At any time during the game, you may convert three single troop markers into one three troop marker, or one three troop marker into three single troop markers. Heroes have their own separate health system (see Health Tracking on the next page).
Team Captain America
- Captain America: Augmented by a unique Super-Soldier serum during WWII, war hero Steve Rogers was preserved in arctic ice for decades. After his revival and reintroduction to modern society, the legendary Captain America found a second calling in life, combatting evil and tyranny alongside his fellow heroes as leader of the Avengers.
- Falcon: A former Air Force pararescue who went on to work with recovering veterans, Sam Wilson aided the legendary Captain America in adjusting to modern life, quickly becoming Cap's close friend in the process. Using an experimental winged harness, Wilson takes to the skies as the high-flying Falcon.
Team Iron Man
- Iron Man: Ever since an incident overseas inspired him to create an invincible suit of armor, the eccentric billionaire inventor Tony Stark has dedicated his life to using his advanced technology to protect the world. The chief source of funding and equipment for the Avengers, Stark still finds time to suit up and join Earth's Mightiest Heroes as Iron Man.
- War Machine: U.S. Air Force Colonel James "Rhodey" Rhodes has long served as both Tony Stark's best friend and special liaison to Stark Industries. In battle, Rhodey dons the War Machine armor, a modified variant of Stark's own Iron Man suit. Armed with a new modular Gatling cannon and enough firepower to take on a legion of enemies, the War Machine is a true one-man army.
Breach Points
Each hero has one breach point. Breach point placement is determined in the setup phase of the game. This is the starting point and spawning location for your hero and troops for the entire game. Breach points are not considered rooms, and may not be interacted with outside of a player's deployment phase.
Dice
You'll use dice when attacking and defending rooms, or attempting to unlock security gates. Heroes always attack, defend, and unlock security gates with an eight-sided die. All other troops attack, defend, and unlock gates with six-sided dice.
Attack dice: three six-sided dice and one eight-sided die. Defense dice: two six-sided dice and one eight-sided die.
Heads-up Displays (HUDs)
Each player will use a heads-up display (HUD) to keep track of important factors during the game:
- Turn order: your turn-order marker fits into the bottom left corner of the HUD.
- Amount of troops to deploy at the start of your turn (refer to Troop Deployment chart on page 12).
- Hero's health (see Health Tracking below).
- Hero cards.
- On-your-turn reminder.
The HUD diagram labels: Hero mat, Inactive hero cards (face down), Hero's health bar and health marker, Troop Deployment chart, Turn-order marker, On-your-turn reminder.
Health Tracking
Each hero has five units of health represented by hearts. Health is tracked by placing one of your troops on the heart symbol labeled 5. This troop piece is now your health marker. If your hero takes damage, the health marker is moved to the right. If your marker reaches the heart with an "X" across it, your hero has been knocked out.
If your hero is knocked out, you must remove him from the board. He may re-enter the battle (from your breach point) at the end of your next turn at 3 health.
Hero Cards
Each hero has five hero cards. Hero cards provide powerful attack, defense, or movement modifiers that, when active, will remain in play for the duration of the game (with the exception of the hero's "Call an Ally" card). At the beginning of each game, these cards are stacked in order, with your hero's Level 1 card on top, and placed on your hero mat.
You may earn up to two hero cards on your turn. See Phase 4 on page 16 for more details.
Note: Once active, your cards are visible to all players and remain face up.
The hero card diagram labels: Name and type, Power, When this card is used. The example card shown is "Rally the Troops" (Attack Modifier, Attack Phase): "Add +1 to your lowest die roll when attacking with Captain America."
Turn-order Markers
Turn order will change from round to round. Turn-order markers are used as reminders and are placed into your HUD(s) for the duration of a round. At the end of each round, turn-order markers are returned to the center of the table.
Mission Tokens
Missions are team-based objectives and are scored at the end of the game. Every game is played with the following missions:
- Mission 1: Capture the Winter Soldier. To complete this mission, the Winter Soldier must be in a room controlled by your team with at least one of your troops at the end of Round 5. 3 Points
- Mission 2: Leave the airport with the Quinjet. To complete this mission, at least one member of your team (a hero or a troop) must be in control of the Quinjet at the end of Round 5. 3 Points
- Mission 3: Control the most rooms. To complete this mission, your team must control the most rooms at the end of Round 5. The Quinjet may be counted as a room. 2 Points
Security Gates
There are eight Level 3 security gates locking down buildings, and ten Level 4 security gates locking down supply rooms. See page 13 for more details.
(Please note: this game comes with four extra security gate tokens.)
Supply Tokens
There are 12 supply tokens in the game. Supplies provide one-time advantages that may be kept and played at any time. One token reveals the location of the Winter Soldier.
- Support (x2): You may add three troops to any room you control contiguous to your breach point.
- Rocket (x2): This supply may be kept and played when attacking or defending. You may turn your lowest die roll into a 6.
- Health Kit (x2): Your hero gains three health units. Your hero may not exceed max health.
- Security Gate Key (x2): This supply may be kept and played to open or close one security gate connected to a room you control.
- Map (x2): Play at the end of your turn to gain an additional reinforcement.
- Radio Jam (x1): This supply cancels out the use of an opponent's hero card. The target card may not be used for the remainder of the current turn.
- Winter Soldier Token (x1): This token represents the Winter Soldier. When flipped, the Winter Soldier figure is instantly placed into this room. Discard this token. The team that occupies this room is now in possession of the Winter Soldier.
Winter Soldier
Presumed dead after a dangerous WWII mission ended in tragedy, Captain America's childhood friend, Lieutenant James Buchanan "Bucky" Barnes, was secretly recovered by enemy forces. Subjected to a battery of experiments, Bucky's mind and body were altered, transforming him into the dangerous agent known as the Winter Soldier. Now, Bucky seeks to unshackle himself from his condition so his abilities will never be used for the wrong side again.
The Winter Soldier is not present on the gameboard until his token is flipped over. Note that the Winter Soldier does not defend or attack, but does give the team who controls him a defense bonus; see below.
The Winter Soldier card (reference card) reads: "When defending a room with Winter Soldier: +1 to Lowest Defense Roll."
Moving the Winter Soldier: The Winter Soldier moves like any other troop you control.
Defending with the Winter Soldier: The Winter Soldier adds + 1 to your lowest die roll when you are defending the room he occupies. The Winter Soldier does not count as a troop when defending, and therefore does not roll any defense dice. If, when defending, you lose control of the room the Winter Soldier occupies, he is now controlled by the attacker.
Winter Soldier Reference Card: If you control the Winter Soldier, take the reference card as a reminder of the above. If another player takes the Winter Soldier from your control, he or she takes the reference card as well.
Assembly and Setup
The first time you play, you will need to punch out the Quinjet parts, security gates, mission tokens, supply tokens, and HUDs. Next, assemble the Quinjet as shown here.
Get Ready
Determine the Teams: First, decide on the makeup of your teams.
- If you are playing with four players, split up into teams of two, with Captain America and Falcon on one team and Iron Man and War Machine on the other. If necessary, roll a die to determine who will pick first.
- If you are playing with two players, each player must decide which team he or she would like to play as. Players will control both heroes on the team they choose.
Set Up the Board:
- Place the gameboard in the center of the table. Place the mission tokens, Winter Soldier figure, and Winter Soldier reference card near the Final Turn end of the board.
- Shuffle all of the supply tokens face down. Place one supply token face down in each supply room. Stack the remaining supply tokens on the RESUPPLY space on the runway face down. Note: This stack will be equally distributed into all supply rooms at the beginning of Round 3, regardless of if there is already a supply in the room.
- Place all of the security gates on the board as shown in the illustration. Level 3 security gates lock down building connections, and Level 4 security gates lock down the supply rooms.
- Depending on the teams that you've created, place your hero's HUD, breach point, and troops in front of you. Place your hero cards on your HUD. Then, place your hero's health marker on max health.
Breach into the Airport (initial placement):
- Determine Breach Order: Captain America and Iron Man roll a die to see which team will breach first. Breach order must alternate, so teams must either breach first and third or second and fourth.
- Breaching: Place your breach point into one of the eight breach zones on the board. You may not place your breach point adjacent to a building that has already been breached (see Figure 1). Once you breach into a building, distribute seven troops plus your hero into either, or both, rooms that the arrows on your breach point are pointing to (see Figure 2).
Figure 1: Players may choose to breach into any building that hasn't yet been breached. See above for potential breach locations, A, B, C, and D. If a player chooses to breach from position B, all other players may not breach from positions A or C.
Figure 2: If a player breaches from location A, he or she may deploy troops into rooms 1 and 2. If the player breaches from location B, he or she may deploy troops into rooms 2 and 3.
Note: Your breach point is the source of your troops for the remainder of the game. Be sure to defend the rooms you've secured; if your opponent takes over the rooms that you have breached into, you'll need to fight your way back in!
Determine Play Order: Lay the turn-order markers out on the table. Captain America and Iron Man will each roll a die to see which team will pick first. Turn order must alternate, so teams must either claim turn-order markers 1 and 3 or 2 and 4. Once a team has claimed their turn-order markers, they may decide among themselves which member of the team will go first or second.
Place the Quinjet: Place the Quinjet in the first segment of the runway, signifying the beginning of Round 1.
Let's Play!
On his or her turn, each player will take the following actions:
- Deploy Troops (Claim new supplies, Round 3 only): At the start of your turn, deploy additional troops to your rooms. Based on room count and building bonus. (Round 3: Claim any new supplies that are in your territory at the start of your turn.) 2A. Secure Rooms: Move troops into an unoccupied room or a room occupied by a teammate. 2B. Attack: If attempting to secure a room occupied by an opposing hero's forces, you must first battle. Once all troops are removed from the room, you may invade.
- Reinforce Troops: Once you have finished battling and securing rooms, you may move troops from one room you control to another room you control, as long as they are connected by secured rooms.
- Draw Hero Card (Redeploy knocked-out hero): At the end of your turn, you may draw up to two hero cards: one if you have taken at least one room from an opposing force, and another if you have defeated a hero. If your hero was knocked out in a previous turn, you may redeploy him now at 3 health.
At the End of Each Round
Each player returns his or her turn-order markers back to the middle of the table. The Quinjet is moved forward one space. The game is over at the end of Round 5.
Starting in the second round, any player in control of the Quinjet by the end of the round gets first pick of turn order for the next round. Turn order must alternate, so teams must either claim turn-order markers 1 and 3 or 2 and 4. Once a team has claimed their turn-order markers, they may decide among themselves which member of the team will go first or second. Choose wisely when deciding on order — a well-planned round can reverse the course of a game!
(Note: if no player is in control of the Quinjet at the end of the round, turn order stays the same as it was in the previous round.)
Phase 1: Deploy Troops (Claim New Supplies, Round 3 Only)
(Round 3: You will also claim any new supplies that are in your territory at the start of your turn.)
At the start of your turn (including your first turn), you will deploy additional troops to your rooms. The number of troops you can deploy is determined as follows:
- Count up the number of rooms you control, and refer to the Troop Deployment chart on your HUD. Set aside the number of troops that the Troop Deployment chart states.
Troop Deployment Chart: The top number represents the number of rooms you currently control. The bottom number is how many troops you are able to deploy.
| Room count | 0 | 1 | 2 | 3 | 4 | 5 | 6 | 7 | 8 | 9 | 10+ |
|---|---|---|---|---|---|---|---|---|---|---|---|
| Troops | 7 | 2 | 2 | 2 | 3 | 3 | 3 | 4 | 4 | 4 | 5 |
- If you control all the rooms in a building, you earn extra troops as a building bonus. Refer to the building bonus chart below and set aside the number of troops that the chart states.
- Northwest Wing: Bonus +2 troops
- North-Central Wing: Bonus +3 troops
- Northeast Wing: Bonus +2 troops
- Southwest Wing: Bonus +2 troops
- South-Central Wing: Bonus +3 troops
- Southeast Wing: Bonus +2 troops
- After you've determined how many troops you may deploy, send them to your breach point. You may place your troops in any rooms you control, so long as there is an unbroken path of secured rooms leading back to your breach point. See diagrams below. Never place your troops in empty rooms, rooms controlled by your teammate, or enemy-controlled rooms.
Diagram captions: This player may deploy troops in any of the designated rooms. This player may only deploy into one room because the opposing team has secured this player's other breach room. This player is forced to attack from their breach point. They must attempt to fight their way back into the building.
Note: You must deploy all of the troops you have earned on your turn. You may not leave any troops on your breach point.
Phase 2A: Secure Rooms
Move troops into unoccupied rooms or rooms occupied by a teammate.
Choose a room you control that contains at least two troops. Select at least one troop to stay behind and keep the territory secure. The remaining troops may invade an unoccupied room or teammate-occupied room. You may secure as many territories on your turn as your troop count and movement strategy allow. If attempting to invade a room currently occupied by an opposing hero's forces, you must battle and clear the room before you may move into the room to secure it.
Hint: Don't spread your troops too thin; it is important to maintain control of secured rooms, especially those leading back to your breach point.
Movement of Troops
Troops may move from one room to any other room that is not already occupied by your team, so long as there is at least one troop left in the room the troops are leaving. Troops may not re-enter rooms that are already secure until the reinforcement phase of your turn (see Phase 4 on page 16).
Movement of Heroes
A hero's movement is less restrictive than a troop's movement. As a commander of the battlefield, your hero may freely move through secured rooms at any time during the invade and attack phase of your turn. Use your hero to help invade rooms, hack security gates, and fight in battles. Your hero may not move if he is in a room with no other troops. He must remain in that room until reinforcement troops enter. It is suggested to always move your hero with at least one additional troop.
Security Gates
If you are attempting to move into a territory blocked by a security gate, you must first roll one die to attempt to unlock it (six-sided die if attempting to open with troops, eight-sided die if attempting to open with a hero). You must roll equal to or higher than the number on the door (for instance, in order to open a Level 4 door, you must roll a 4 or higher). Doors are then placed in a pile next to the board. If you are unsuccessful, you may not move through the gate on this turn. You may attempt to open any number of security gates on your turn, but you are limited to one attempt per gate, per turn.
Picking Up Supplies
You may pick up a supply token if you secure the room containing the supply token on your turn. In some instances, there may be two supplies in a room. If this happens, you may take both.
Phase 2B: Attack
If attempting to invade a room occupied by an opposing hero's forces, you must first battle. Once all opposing troops are removed from the room, you may invade.
Attacking and Defending with Troops
- Declare an invasion by choosing a room under your control to attack with, and an adjacent room you wish to secure.
- Choose how many troops you would like to attack with. You may attack with up to three troops, and you will roll a die for each attacking troop.
- The defender may roll either one or two dice. To roll two dice, they must have at least two troops in the room being attacked.
- Pair up your highest attack die with your opponent's highest defense die, and so on. Then, for each pair of dice, do the following:
- If the attack die is higher, remove one defending troop from the battle and place it in the off-the-board troop pile.
- If the defense die is equal to or higher than the attack die, remove one attacking troop and place it in the off-the-board troop pile. The defender always wins a tie.
When all dice pairs are resolved, you may choose to attack again, or to stop attacking. If there are no more troops in the defending room, you won the battle. You must move at least as many troops as the number of dice you rolled during the winning attack.
Note: you can attack as many times as you want on one turn, even if your first attack was unsuccessful. You can continue attacking the same room, or you may shift your attack from one room to another.
Example 1: Attacker's dice and defender's dice; highest pair. Result: Defender loses one troop.
Example 2: Highest pair and next-highest pair. Result: Defender loses one troop and attacker loses one troop.
Example 3: Highest pair and next-highest pair. Result: Attacker loses two troops.
Example 4: Highest pair only. Result: Defender loses one troop.
Attacking and Defending with Your Hero
Heroes possess elite skills in both attacking and defending that can turn the tide of a battle. And because heroes are not restricted to the limited movement of a troop, you may choose to use your hero in many battles when attacking.
When attacking or defending with your hero, you will roll an eight-sided die. (Up to 2 troops can attack with your hero, and 1 troop can defend with your hero. For troops, you will still roll six-sided dice.) If your hero's roll is lower than an opponent's, you must take a health point from your hero. Note that a tie always goes to the defender, so if the attacker rolls for their hero and there's a tie, the attacker must take a health point from their hero. See examples above for attacking and defending with your hero.
Example 1 (hero): Highest pair 8 vs 3. Result: Defender loses one health unit on their hero.
Example 2 (hero): Highest pair 8 vs 3, and next-highest pair. Result: Defender loses one health unit on their hero and attacker loses one troop.
Example 3 (hero): Highest pair 3 vs 4, and next-highest pair. Result: Attacker loses one health unit on their hero and one troop.
Example 4 (hero): Highest pair 6 vs 5. Result: Defender loses one health unit on their hero.
If Your Hero is Knocked Out
When all of your hero's health units are depleted, he is removed from the board. You may redeploy your hero back into battle at the end of your next turn with three health units (see Phase 4 on the next page).
Using Hero Cards on Your Turn
Some hero cards may be used during the attack or defense phase of your turn. Pay attention to the text on the card; it will tell you what the card does, when the card can be used, and in some instances, how long the power may be used.
If you choose to use a power, read it out loud and move the card to the side to indicate that it is in use. After the card's indicated phase is complete, move the card back to indicate that the power is no longer in use.
Phase 3: Reinforce Troops
Once you have finished battling and securing rooms, you may move troops from one room you control to another you control, so long as secured rooms connect them.
After you have finished with invasions and attacks, you may reinforce your troops. Reinforcing troops is optional. Unless you have a power that says otherwise, you can only reinforce one room per turn.
How to Reinforce
Take as many troops as you'd like from one of your rooms and move them to one other connected room that you control. Rooms are considered connected if all of the rooms in between are also under your control. You cannot pass through enemy, empty, or teammate-controlled rooms, and you must always leave at least one troop behind in the original room. This is not an attack or an invasion; it is simply a movement from one of your rooms to another one in order to protect or provide additional support to one room, or to get into a better position for your next turn.
Phase 4: Draw Hero Card (Redeploy Knocked-out Hero)
At the end of your turn, you may draw up to two hero cards: one if you have taken at least one room from an opposing force, and another if you have defeated a hero. If your hero was knocked out in a previous turn, you may redeploy your hero now with 3 health points.
If you attacked and secured at least one room during your turn, then you may draw one hero card. You must have taken a room from an opponent in order to draw a hero card. Invading an unoccupied room does not enable you to draw a card. If you knocked out an opponent's hero on your turn, then you may draw an additional hero card. You may not draw more than two hero cards on your turn. Flip your card(s) over and place them next to your HUD; they are now active.
Winning
As soon as the last player finishes his or her turn on Round 5, the game is over, and mission tokens are scored. The team with the most points wins the game.