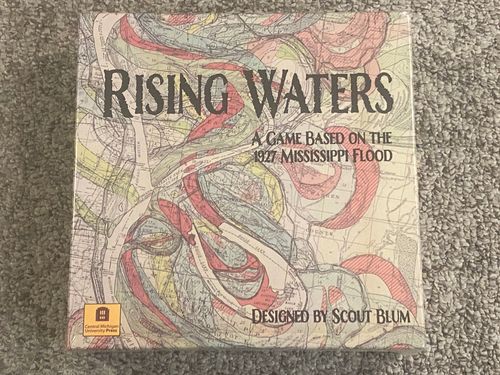
Rising Waters
Rising Waters Rulebook
Table of Contents
Table of Contents
Objectives
During the flood, work together as members of the African American community to keep your family and neighbors alive by minimizing losses during the flood. Players must also negotiate the arbitrary demands of White landowners. If players keep below the maximum level of losses for a certain number of rounds, they've survived the worst of the flood and win the game!
While normally a 2–4 player game, Rising Waters is also an open information, cooperative game, which means it can be played solo or two-handed.
For helpful hints, examples of game play, and additional explanations, look for info in these rose boxes. Historical notes about the game appear in blue boxes.
Goals
The game ends when either of the following possibilities occur: (1) The players reach the round limit below; OR (2) The cumulative losses of land, levees, landowners, people, and/or towns (and other in-game losses) add up to the maximum shown below.
| Fall, 1926 Version | Spring, 1927 Version | |
|---|---|---|
| Rounds | 7 | 10 |
| Max losses, 2 players | 22 | 25 |
| Max losses, 3 players | 18 | 22 |
| Max losses, 4 players | 14 | 19 |
Components
- 1 double-sided main board (1926 side and 1927 side)
- 6 player boards (6 colors)
- 6 towns (6 colors)
- 27 pawns (7 colors)
- 66 cubes (6 colors)
- 100 Community cards
- 100 Landowner cards
- 77 Weather Report cards
- 4 Player aid cards
- 89 blue flood hexes
- 60 blue water level tokens
- 60 brown levee tokens
- 7 relief camp hexes
- 10 raft tokens
- 10 Community Goal cards
- 1 first player marker
- 3 track counters
Initial Set Up: Fall, 1926
- Place the main board within reach of all players. The board is 2-sided (1926/1927), so make sure that you have the correct side face up.
- Place the piles of blue flood hexes, raft tokens, brown levee tokens, and the blue water level tokens by the main board. Do not use the relief camp hexes.
- Place the track counters on the zero space on the Loss and Weeks/Rounds tracks.
- Give each player 1 player board, 1 town, 11 cubes, and 4 pawns of their color choice. Five of the cubes should be placed on the farthest left spaces of the Permanent powers on the player board. If players are using the optional individual goals on the player board, they will (1) each place a cube on that track; and (2) move a cube to the red box of the player board for their specific power.
- Place 1 purple pawn (Survivor) on land within one hex of the dot near Mounds Landing on the main board. Place the unused pawns (purple and unselected colors) near the upper left-hand corner of the main board as additional Survivors.
- Remove all heavy rain cards from the Weather Report deck. Shuffle the heavy rain cards, and then keep the top 9 for the deck. Return the rest to the box. Shuffle the Weather Report deck and place it on its corresponding location on the lower left-hand side of the main board.
- Adjust the Landowner deck by removing all landowner flees, relief camp, and dynamite cards. Keep only 5 force cards, 5 race hatred cards, 10 threat cards and all job offer cards.
- Shuffle the starred and main sets of the Landowner deck separately. Place the starred cards on top of the main deck (do NOT reshuffle at this point). Place the Landowner deck on its space to the upper left of the main board.
- Reveal the top 3 Landowner cards and place them in their corresponding spaces next to the main board. For the initial few turns, these should be all starred cards.
- Shuffle the Community cards and place the deck in its location on the lower right-hand side of the main board.
- Deal 7 Community cards to every player. The game has a hand limit of 7 cards.
- Pick an initial player randomly. That player should get the first player marker.
Hint: Initially, work to shore up especially low-lying areas with levees. Don't forget about the lakes—they can flood, too.
Historical note: Levees actually could be set back as much as a mile from the banks of the river. They could also be built up almost 40 feet.
Initial Set Up: Spring, 1927
- Place the main board within reach of all players. The board is 2-sided (1926/1927), so make sure that you have the correct side face up.
- Place the piles of blue flood hexes, raft tokens, brown levee tokens, relief camp hexes, and the blue water level tokens by the main board.
- Place the track counters on the zero space on the Loss, Weeks/Rounds, and Relief Camp Donations tracks.
- Give each player 1 player board, 1 town, 11 cubes, and 4 pawns of their color choice. Five of the cubes should be placed on the farthest left spaces of the Permanent powers on the player board. If players are using the optional individual goals on the player board, they will (1) each place a cube on that track; and (2) move a cube to the red box of the player board for their specific power.
- Place 1 purple pawn (Survivor) on land within one hex of the dot near Mounds Landing on the main board. Place the unused pawns (purple and unselected colors) near the upper left-hand corner of the main board as additional Survivors.
- Shuffle the Weather Report deck and place it on its corresponding location on the lower left-hand side of the main board.
- Adjust the Landowner deck by separating the starred Landowner cards and the landowner flees cards from the main deck.
- Shuffle the starred and main sets of the Landowner deck separately. Randomly insert the landowner flees cards into the main deck. Place the starred cards on top of the main deck (do NOT reshuffle at this point). Place the Landowner deck on its space to the upper left of the main board.
- Reveal the top 3 Landowner cards and place them in their corresponding spaces next to the main board. For the initial few turns, these should be all starred cards.
- Shuffle the Community cards and place the deck in its location on the lower right-hand side of the main board.
- Deal 7 Community cards to every player. The game has a hand limit of 7 cards.
- Pick an initial player randomly. That player should get the first player marker.
- Each player must place their town on a hex of their choice on the main board. In a two-player game, place an additional town in a different color. Each town must be placed within 3 hexes of a water source and at least 5 hexes apart. No towns may be placed in or within 5 hexes of Vicksburg (lower right of main board).
Errata note (publisher's Rising Waters errata, Central Michigan University Press resource page): the player boards show two starting pawns on the board, but the correct starting number on the board is three, as step 14 describes; the fourth pawn is kept in reserve. For the optional sharecropper character power, the sharecropper starts with four pawns on the board rather than three.
Difficulty Levels
The game has two difficulty levels: the Fall, 1926 version and the Spring, 1927 version.
The Fall, 1926 version is recommended for less experienced players or players wanting an introduction to the mechanics. It represents events that happened prior to the main floods of the spring of 1927. The water level begins at a lower level, the weather is less intense, more levees are initially present, and the game is played over fewer rounds.
In the Spring, 1927 version of the game, the players experience more intense weather—leading to more flooding—over more rounds. Because of the floods the previous fall, water levels begin higher. The weather is more difficult, with fewer levees and more rounds.
For added complexity and replayability, players also have the option to add in community or individual victory goals (see Optional Elements).
Component Key
Main Board
The main board contains four named locations: Yazoo Valley, Mounds Landing, Cabin Teele, and Tensas Basin (pronounced "Ten-saw"). Green or brown hexes indicate land. Blue hexes indicate water.
The numbers on the map indicate land elevation levels. The lower the number, the lower the land elevation. Water levels: 1926 – 1; 1927 – 2.
For the Fall, 1926 version, all water (blue) hexes on the map begin the game with an elevation of 1. For the Spring, 1927 version, all water hexes begin with an elevation of 2.
All hexes within a "hex group" (hexes outlined by heavier white or green lines) have the same elevation.
Player Boards
The left side of the player board shows the renewable powers available, with icons representing the Community cards which need to be discarded to obtain them. Renewable powers are used once, then must be purchased again to be used again. When a renewable power is purchased, players should place a cube on the space on the player board.
The right side of the player board lists the permanent powers each player has in the game, with icons showing which Community cards are associated with those actions. Starting values are in the empty boxes. The rectangular icons inside the other boxes indicate how many of each special type of Community card players must discard to increase that power.
Weather Report Cards
Weather Report cards contain the location of the weather event and the type of weather event, indicating how much water to add through water level tokens.
Special Weather Report cards: The Weather Reports can also indicate "cloudy" days (no change to the water level) or "sunny" days (water level reduced by 1 if the level is above starting level).
Example: With a heavy rain card for Cabin Teele, the number of drops indicates the amount of rain to be added. For heavy rain in Cabin Teele, add 3 to the water level there. For more info, see pages 22–24.
Community Cards
There are 2 kinds of Community cards: power cards and resistance cards.
Note: If the Community deck is depleted during the game, then simply reshuffle the discard pile and replace.
Education cards are wild cards. They can be used in place of any power card, but not resistance cards.
Power cards: There are 6 different power cards. They can be collected and discarded to upgrade renewable or permanent powers listed on the player board. They can also be donated to other players or to the relief camps, or used for community goals. Each power card has icons on the upper left of the card representing its type (top) and associated power (bottom).
- Blues cards can be collected and discarded to give the player the ability to move across water. Historical note: Blues music had strong roots in the Mississippi Delta. The flood inspired songs from many famous blues artists, including Bessie Smith.
- Church cards can be collected and discarded to increase the number of cards a player can donate.
- Family cards can be collected and discarded to increase the number of pawns a player has.
- Farm Animal cards can be collected and discarded to increase a player's movement.
- Garden cards can be collected and discarded to increase the number of actions a player has per turn.
Resistance cards: There are 4 different kinds of resistance cards. They can be used for their special powers. They can also be used to counter threat cards when they appear in the Landowner cards. All resistance cards have this icon.
- Newspaper cards: Discarding a newspaper card allows the player to see the next 3 Weather Report cards. This information may be shared with other players.
- Vaudeville fundraiser cards: Discarding 1 vaudeville fundraiser card allows that player individually to gain 2 additional Community cards. If a player discards 2 vaudeville fundraiser cards, all players may take 2 additional Community cards.
- Outside activism cards: Discarding an outside activism card during the Landowner or Player Action phase causes a race hatred card to be discarded without penalties. Can only be done once per round.
- Radio cards: Discarding a radio card allows the player to see the next 3 Landowner cards. This information may be shared with other players.
Landowner Cards
The Landowner cards reveal the actions of the Landowners during the game. These can include offers of work (job offer cards) or crisis cards, which include threats, the use of force and violence, the appearance of race hatred (racism), or the creation of relief camps.
Note: If the Landowner deck is depleted during the game, then simply reshuffle the discard pile and replace.
Several Landowner cards have a star icon in the upper right of the card. These cards are to be separated and played during the first phases of the game (see the Set Up rules for more info).
Cards with the "!" icon in the upper left-hand corner are crisis cards. These cards must be resolved immediately during the Landowner phase or when it appears during the Player Action phase.
Job offer cards can be used to build levees during the Player Action phase. If a player wants to build a levee, they need to take the job offer cards and discard them (as many as they need): 1 job offer card increases the level of an existing levee, while 2 job offer cards allow a new levee to be built. Players may also use job offer cards for renewable powers by keeping them in their hand.
Crisis cards: There are 5 types of crisis cards in the Landowner deck. Not all of the crisis cards are used in the Fall, 1926 version of the game.
-
Dynamite cards are removed from the Fall, 1926 version of the game. When a dynamite card appears, a specific levee (stated on the card) must be removed. Players should then resolve and adjust Loss track for all flooding. Discard the dynamite card after completing. If no levee exists which fits the card's description, then the card can be discarded without action. Historical note: During the flood, leaders in New Orleans became increasingly worried about the fate of the city and their fortunes. They decided to dynamite a levee south of New Orleans, deliberately destroying land and the livelihoods of many people.
-
Threat cards. Responsibility for the threat: When a threat card appears during the Landowner phase of the game, the First Player is responsible for resolving that card. If the threat card appears during the Player Action phase, then the player who revealed the card must resolve the threat. Resolving the threat: Players can resist the threat by discarding any 1 resistance Community card. The threat card is then discarded as well. If the player does not have a resistance Community card (and therefore cannot resist the threat), they must take the threat card into their hand (it counts as part of the hand limit of 7 cards and may not be donated). Players must keep all threat cards until they can be discarded with a resistance card. (NOTE: Playing a resistance Community card to counter a threat card once taken into your hand counts as an action and may only be done during the Player Action phase. It does not count as an action during the Landowner phase of the game.) If more than 1 threat card appears at once, one is distributed to the first player, then 1 to each player in turn order until exhausted. Each player may resist as able. Threat cards (and the resistance cards used to resolve them) should be discarded once resolved.
-
Landowner flees cards should be removed from the game in the Fall, 1926 version. The appearance of a landowner flees card results in an immediate loss. Adjust the Loss track by one and discard the card.
-
Force cards: When force cards appear, players collectively pay any 2 Community cards immediately (for example, in a 4 player game, the group pays a total of 2 cards). Players may not resist force cards. If more than one force card appears at once, players must pay additional penalties. Discard force cards once they have been resolved (by payment or by losses). If the players collectively are unable to pay the full penalty, adjust the Loss track by one for each force card unable to be paid in full.
Game Play: Rounds
The game is played over a series of rounds (weeks) where players have a choice of actions. For the Fall, 1926 version, the game is played over 7 rounds; for the Spring, 1927 version, players have 10 rounds.
Rounds include the following phases (in order):
- Upgrade player abilities (players complete simultaneously);
- Replenish and resolve Landowner cards (players work cooperatively);
- Player actions (players complete by turn);
- Reveal and resolve Weather Report cards (players work cooperatively); and
- Clean up (players work cooperatively).
Round Phase 1: Upgrade Player Abilities
Players may discard the required number and type of Community cards to increase their abilities. Player boards reflect the number and type of cards required to increase abilities (indicated by the black rectangular icons). At least one of the set must be an actual Community card of the type required. Players may not skip levels of a power, but multiple abilities may be increased during a single phase. The same power may also be increased twice during a single phase.
Players have two different types of abilities to choose from to upgrade—renewable powers and permanent powers. Renewable powers may only be purchased during the Upgrade Abilities phase of a round and may be used during that round or a subsequent round during the Player Action phase. Place a cube on the player board to indicate that the ability has been purchased. Once the renewable ability is used, the cube should be removed from the player board.
Permanent abilities are kept for the rest of the game once earned, with the exception of number of pawns. Note that if a player loses a pawn (to flooding, for example), then they need to reflect that on their player board by moving their cube back one space.
Players complete this phase simultaneously.
Example: Upgrading Abilities. Madalyn has a hand with 1 family Community card and 2 farm animal Community cards. During the Upgrade Player Abilities phase, they can discard the 2 farm animal cards to increase their movement ability per action from 3 to 4. [Note: To upgrade from 4 to 5 moves per action, they would have to discard an additional 3 farm animal Community cards.]
Round Phase 2: Replenish/Resolve Landowner Cards
Replenish Landowner cards on the board if needed (3 should be face up). Any Landowner card with a "!" icon (a crisis card) must be resolved before moving to the next phase. Some of the cards affect only the First Player, while others affect the entire group. Resolving Landowner cards does not count as a player action as those take place in the next phase of the round. Resolved Landowner cards should be discarded.
During this phase, individual players may discard any resistance Community card to resist a threat and/or may also play an outside activist Community card to resist race hatred during this phase. Force cannot be resisted. Only 1 outside activist Community card may be played per round.
Round Phase 3: Player Actions
During the third phase of the round, players take turns performing actions (beginning with the First Player and proceeding clockwise). Players take as many actions as allowed by their player boards. Initially players begin with 2 available actions.
On their turn, players have the following choices of actions:
- Donate
- Move
- Resist
- Work
Actions may be performed more than once during a player's turn. More information about player actions can be found on pages 16–19.
Round Phase 4: Weather Report Cards
After the player actions have been completed, reveal and resolve 3 Weather Report cards. Players should work together in this phase. See pages 22–29 for those directions.
Adjust Loss track as necessary if any land hex groups, levees, towns, or pawns are flooded. See page 30 for those directions.
Round Phase 5: Clean Up
During the last phase of each round, perform the following actions in order:
- First Player marker moves clockwise to next player.
- Add one to the Weeks/Rounds track.
- If any player has a hand of less than 5 cards, they draw Community cards to bring their hand total to 5 cards.
- Add 1 Survivor to the board on land near the dot at Mounds Landing.
Note: Do not replenish the Landowner cards at this point. Wait until the "Replenish and Resolve Landowner cards" phase of the next round.
Game Play: Player Actions
On their turn, players have the following choices of actions:
- Donate
- Move
- Resist
- Work
Move
On your turn, as one action, you may move any combination of your pawns up to the maximum amount allowed by your abilities on your player board. In the Fall, 1926 version, players move by hex group whether on land or water. In the Spring, 1927 version, they move by individual hex whether on land or water. Crossing a water hex in any way may not be completed until the "swim" ability has been obtained (by discarding 2 blues cards during the Upgrade Player Abilities phase). With their permission, you may also move other players' pawns on your turn using the move action.
Rafts and moving: Survivor pawns may only be moved with a raft. Rafts are a renewable power and are made during the Upgrade Player Abilities phase. During the Player Action phase, a player places a raft token at the location of any of their pawns (make sure to remove the renewable power cube). The pawn should be placed on the raft token and moves with it. Rafts may be "dragged" across land up to the number of movements on the player board; on water, rafts can move twice the number of moves reflected on the player board. To move a raft on water, the player must have earned the "swim" ability. NOTE: Picking up and dropping off a Survivor counts as 2 actions.
Why choose movement? Players may want to "move" to get to a location that needs a levee (you have to be on or next to the hex where the levee is constructed), get to farming or forest spaces on the board (which have benefits), rescue a Survivor, or fulfill their individual goals.
Players can increase the number of moves available during an action by discarding farm animal Community cards. Players earn the ability to move across water by discarding 2 blues Community cards.
Donate
On your turn, as 1 action, you may donate a card to any other player(s), up to the number of cards allowed on your player board. Players may also donate up to their maximum number of Community cards allowed to the Relief Camp Donation track or toward Community Goal cards. Donated cards are discarded into the Community discard pile. Threat cards may not be donated.
Players can increase the number of cards traded during an action by discarding church Community cards.
Why choose donation? Players may want to donate to help another player, especially if they lack resistance cards, to help avoid bad effects from an orange relief camp, to fulfill community goals (if using the Community Goal cards), or fulfill their individual goals.
Work
Players may choose from 3 different forms of the "work" action:
- Accepting work (building or raising a levee)
- Seeking work (replenishing the Landowner cards)
- Working for the community (taking a Community card)
Why choose work? Players may want to build a levee to protect against floodwaters. Work also allows players to replenish the Landowner cards for themselves or the next player, and also to obtain more Community cards if they need them.
Accepting work. As one action, players may "accept work" to build a levee by taking as many job offer cards from the visible Landowner cards as they wish: 1 card raises an existing levee, while 2 cards create a new levee. Job offer cards used to build levees must be discarded. [Note: as a renewable power, players may discard 1 garden and 1 farm animal card to get a discount on work. Raising or building new levees then costs one less job offer card.]
To build or raise levees, a pawn must be on or adjacent to the hex where the levee token is placed. Players may use other players' pawns to build or raise levees. Building a levee only protects that hex where the levee is placed, not the entire hex grouping.
Players "build" a levee by placing a brown levee token on the chosen land hex. The token number should be turned so that a number equal to +1 the elevation number of the land hex shows. To "raise" a levee, players turn an existing brown levee token to the next number.
Seeking work. As another option for the work action, players may also "seek work," meaning replenishing missing Landowner cards on the board. Only a maximum of 3 Landowner cards may be visible at any time on the board. Players must respond to any crisis cards revealed at this time (see info on the crisis cards on pages 12–13).
Working for the community. Players may also "work for the community" for the work action, meaning they may take Community cards. Players may take 1 card, plus 1 additional card for each of their pawns in a forest or agricultural field in the game. Players must stay at or under the 7 card hand limit (players who have 7 cards may still work for the community, as long as they immediately discard a card).
Resist
Certain Community cards, called resistance cards, give the players special powers. Playing each of these cards counts as one action. Education Community cards (which are wild cards) may NOT substitute for any resistance card, unless the player has taken the role of the Teacher.
Why choose resistance? Players may need to counter a threat by the landowners. Resistance cards can also help you see problems that are coming and they have powers of their own as well.
Game Play: Survivors and Rafts
Survivors enter the game on land near the dot for Mounds Landing during initial set up. One additional survivor is added to the board at the same location during each Clean Up phase. Survivors may not be used to build levees and may only be moved with a raft. Survivors may be lost if the land they are on floods. Each Survivor lost counts as a separate loss on the Loss track.
Rafts and moving: Rafts are a renewable power and are made during the Upgrade Player Abilities phase. To use a raft, a player uses an action and places a raft token at the location of any of their pawns during the Player Action phase (make sure to remove the renewable power raft cube). The player then moves their pawn and the raft together. Rafts may be "dragged" across land up to the number of movements on the player board; on water, rafts can move twice the number of moves reflected on the player board. Once the pawn/raft reaches the Survivor (or other pawn), both pawns should be placed on the raft token and move with it. Picking up a Survivor (or other pawn) counts as an action for the player with the raft. No more than two pawns may be on a raft at any one time. Rafts may also be used to rescue other players' pawns if they don't have the movement ability to swim.
Survivors can be dropped off at any relief camp or a town if no relief camp exists. If a player moves a Survivor to any existing relief camp, the Loss track may be reduced by 1. Survivors are protected from floods in a relief camp, but not at a town. Dropping off a pawn at either location counts as an action for the player with the raft. That Survivor is then removed from the board. Other players' pawns may be dropped off at any land location.
Optional Elements
Community Goals
As an optional element of the game, players can include community goals. Community Goal cards are fulfilled by donating specific cards and/or performing certain tasks. These cards are labeled with either an A or a B in the upper right-hand corner. Cards labeled "B" require the completion of an "A" level goal first.
Set up and use: If playing with community goals, the Community Goal cards should be separated into A and B stacks during initial set up. Shuffle each stack separately. Place the A stack on top of the B stack and turn over 2 Community Goal cards.
During the Clean Up phase of each round, players may either keep both Community Goal cards or discard 1 and replace it with the next card. Community Goal cards may be completed more than once. If the Community Goal cards are depleted, simply reshuffle the discard pile (all together) and reuse.
Benefits: These goals, once fulfilled, allow players to reduce the number of losses on the Loss track. Completion of an A card moves the Loss track back 1 (meaning from 3 to 2). Completion of a B card moves the Loss track down 2 spaces.
Available community goals:
- Spread African American Music: Write New Blues Songs (A)
- Spread African American Music: Found a New Record Label (B)
- Build Rescue Equipment: Build Rafts (A)
- Build Rescue Equipment: Build Makeshift Motorboat (B)
- Increase Community Communication: Raise Education Levels (A)
- Increase Community Communication: Establish an African American Newspaper (B)
- Labor Organizing: Hold a Labor Meeting (A)
- Labor Organizing: Form a Sharecroppers Union (B)
- Increase Self-Help Efforts: Feed Local Survivors (A)
- Increase Self-Help Efforts: Form a Mutual Aid Society (B)
Individual Goals
As an optional element to the game, players can play with individual goals. In this part of the game, players take on the roles of certain characters. Goals and objectives for each are listed below and in abbreviated form on the player boards.
Gaining individual points does not count as an action, although players may be required to expend actions to earn them. For example, the Blues Singer does not use an action to "perform" (discard a blues card), but may need to use actions—like moving—to get to desired locations. The movement does count as an action.
Characters for individual goals:
- Blues Singer: Your goal is to perform for as many others as you can. Add a point each time you're on the same hex as another pawn or town of a different color and discard a blues card. You may not perform for the same town or pawn twice in a row. You may only perform for your own town or pawns if you have performed for another town or pawn immediately prior. Performing may only take place during the Player Action phase.
- Outside Activist: Your goal is to bring attention to force and race hatred used by the landowners. When force or race hatred cards appear (during the Landowner phase or the Player Action phase), add a point each time you discard a newspaper or radio card. This can also count toward your individual resolution of either Landowner card, but not other players.
- Preacher: Your goal is to help as many others as possible through the church. Add a point every time you donate a church card to another player or the Relief Camp Donation track. This may only take place during the Player Action phase.
- Sharecropper: Your goal is to engage in economic activity. Add a point each time your pawn is in the same space with a town or pawn of a different color and you discard a farm animal or a garden card. You may not sell to the same town/pawn twice in a row. You may only sell to your own town or pawns if you have sold for another town or pawn immediately prior. This may only take place during the Player Action phase.
- Child/Young Person: Your goal is to add hope to the community by finding needed items. While any of your pawns are in Vicksburg, you can use your resistance action to take any card from the Community or Landowner discard piles. Add one point each time you donate that card (during the same turn) to the Relief Camp Donation track, the community goals, or another player. (Note: Taking the card and donating it count as one action.)
- Teacher: Your goal is to use education to empower others through resistance. Add a point for each time you counter a threat card (yours or others) with an education card. If you play an education card for another player or the group, they do not have to pay a penalty.
Errata note: see the sharecropper starting pawn count in the Initial Set Up: Spring, 1927 errata note above.
Water Level Rules
Note: The water rules in the game are designed to mimic the actual flow of water during a flood. Water in the game moves to flood land and also moves downstream, as real water would.
Water in the game follows several general rules. Each of these is explained in more detail in subsequent sections.
- In the Fall, 1926 version, all initial water levels (blue hex groups) are set to an "elevation" of 1. In the Spring, 1927 version, all initial water levels are set to an elevation of 2.
- Water flows or moves downhill or downstream. On the main board, this means blue water level tokens are first placed in the north (the top of the map) and move southward (the bottom of the map), as the rain appears on the Weather Report cards.
- In the game, water movement involves 2 steps, done in order: (1) add the required water tokens from all the Weather Report cards for each round; and (2) resolve the water levels by flooding land, then moving water downstream, then flooding more land as needed. The value on the water level token decreases as flooding occurs. Once the water level token's value is equal to or lower than the neighboring land values, it is considered "resolved" and no further action is necessary.
Note: Water level tokens do NOT need to be equal to or lower than neighboring water hex groups for a token to be "resolved." They only need to be equal to or lower than neighboring land hex groups.
Weather Report Cards: Adding Water
Rainfall generates rising water levels on the map. The Weather Report cards (drawn during the 4th phase of the round) reveal the location and severity of rainfall during the game. There are 4 locations on the main map for the Weather Reports, each representing historical sites of levees: the Yazoo Valley (the 4 lakes—abandoned loops of water—on the eastern part of the map); Mounds Landing (at the northern end of the map); Cabin Teele (about 1/3 of the way down the map on the Mississippi River); and the Tensas Basin (about ½ way down the map on the Mississippi River). The Mississippi River and Yazoo Valley lakes are divided into hex groupings like the land elevations. Every hex in the individual hex grouping has the same water level value.
How to add water: The Weather Report cards also list the severity of the weather as "heavy" (add 3 points of water); "medium" (add 2 points of water); or "light" (add 1 point of water). The Weather Reports also can indicate "cloudy" days (no change to the water level) or "sunny" days (water level reduced by 1 if the level is above starting level). Rainfall points are added or subtracted to the water level using blue water tokens. Place a blue water level token on the required location with a number equal to the starting level plus the Weather Report requirement.
Where to add water: When a Weather Report reveals a location for the first time, place a blue water level token on the dot near that area first. Subsequent Weather Report cards with that same location should be placed on the next water hex grouping to the south that does not yet have a token. Once all hex groupings in that area have a token, return to the original dotted location and add a flood hex to the existing token to show that grouping has received a second round of water. If the water level exceeds 6, you can add another token to represent the correct amount. See Example 2 below.
Once all the water level tokens have been placed on the map, players then resolve each water token. See pages 24–25 for information on resolving water.
Note: The following examples assume the water level starts at a level of 2, as is correct for the Spring, 1927 version of the game. When playing the Fall, 1926 version, adjust that starting water level to 1.
Example 1: Adding Water to the River. How do I add water to an area? During the first phase of the round, you turn over the following Weather Report cards (in this order): 1) light rain in Tensas Basin, 2) heavy rain in Tensas Basin, and 3) another heavy rain in Tensas Basin.
For the first Weather Report card (light rain at Tensas Basin): the original level of the water is 2 (1927 version), so the first token will be a value of 3 [2 (original value) + 1 (light rain)]. Place a blue water level token on the dotted Tensas Basin hex grouping since it's the first for that area. Now all hexes in that hex grouping, bound by thicker white lines, have a water level value of 3.
The next Weather Report card (heavy rain at Tensas Basin) will impact the next hex grouping to the south, which does not yet have a token. Add a blue water level token of 5 (2 for the initial water level + 3 for the Weather Report). The final Weather Report card will cause a blue water level token to be placed in the next empty hex grouping to the south, also with a value of 5.
The dot here shows you where to put the first water level token for each area.
Example 2: Adding Water to the Map. How do I add water to an area when all of its hex groupings already have a flood token? During a round, 1 Weather Report card calls for light rain in Mounds Landing. Since you have gone through several rounds, all of the hex groupings on the river between Mounds Landing and Cabin Teele are already occupied by a blue water level token. Going south one more hex grouping would put the water in Cabin Teele. Therefore, place the new amount back on the initial dotted hex grouping. This yields a level of 4 (current level of 3 + 1 for light rain = 4). The token on that location is changed to a 4 value and a blue flood hex is added to the hex grouping to indicate that the location has received a second turn of water.
Hint: Remember: Always ADD all water level tokens first. You'll determine what the water does in the next step. This is called "resolving" the water.
Resolving Water Levels
Flooding: If the water level of the hex grouping on the river (indicated by the number on the blue water level token) exceeds the number on any land elevation hex touching that water hex group, then flooding occurs. Flooding does NOT occur if the water level token is ONLY higher than any adjacent water hex grouping. If flooding occurs, follow the rules below in order.
- Begin with the northernmost (top of the map) blue water level token in each area. Resolve all Yazoo Valley lakes first, then move from north to south on the Mississippi River (Mounds Landing, then Cabin Teele, then Tensas Basin). This applies regardless of the order the Weather Report cards first appeared.
- If any water hex group has a value higher than any adjacent land hex group, flooding will occur and water will move first to land. When water "moves," the player fills all land hexes in the lower-elevation hex grouping with blue flood hexes. That flooded hex grouping now counts as water and counts as one loss on the Loss track. After moving water onto the land, reduce the water elevation token by 1 (for an example, see page 28).
- If more than 1 land hex grouping is lower than the token, follow the Clockwise Rule (see below).
- If there are still land hex groupings with a lower elevation than the water level token, DO NOT immediately flood more land. At this point, the water will move downstream and flood the next (southern) water hex grouping. To flood the next water hex grouping, add a water level token to the water hex grouping equal to its original number plus 1. Lower the water level on the initial water token by one. Complete this action even if the downstream level is higher. Flooding downstream does NOT result in an automatic loss. However, note that water moving downstream might result in that water hex grouping also having to be resolved, which may result in losses (see page 29 for examples).
- After the water has moved downstream, repeat these 2 steps (flood land then water) if the water level token remains higher than surrounding land hex groupings. A water level token is resolved (meaning no further action is necessary) if its value is equal to or less than the values of the land surrounding it. Water level tokens can be higher than the water hex groupings next to it.
The Clockwise Rule: If more than 1 land hex grouping is lower than the water level hex, imagine a clock imposed on the water level token. Moving clockwise from 12 o'clock (due north on the map), flood the first land hex grouping with the lowest number touching the water hex grouping of the water level token.
In the example printed with this rule, moving clockwise and starting on the right side of the river, the first land hex is at a level of 3, the second is at 2. Crossing the river, the third and fourth are at 2, and the fifth is at 3. Flood the second land hex grouping (the one circled in red on the printed diagram). The diagram is not reproduced here.
Special Conditions
Flooding with a levee (Fall, 1926): If the map contains a levee adjacent to the river, then that levee raises the land elevation level for the entire hex grouping.
Flooding with a levee (Spring, 1927): If the map contains a levee adjacent to the river, then that levee raises the land elevation level for that hex ONLY, not the entire hex grouping. Flooding of any part of the land hex group still counts as a loss.
In the game, water cannot flow "off" the map. In that case, water will continue to flood land until resolved. In addition, if water cannot move "downstream" in a river or lake area, it will continue to flood land until resolved.
Example 1: Resolving Water. How do I tell if I need to flood or not? While playing the Fall, 1926 version of the game, you have the water level at Tensas Basin at level 2 in the first river hex grouping. Using the Clockwise Rule, find the elevation values of all the land touching the water hex grouping with the token. The land values touching that water hex grouping are indicated by red arrows on the printed diagram. Clockwise from the top, they're at values of 3, 2, 2, 2, and 3. The token is equal to or less than the land level, so there is no flooding from this water. This token is considered resolved.
Example 2: Resolving Water with Flooding. How do I handle flooding when there are multiple tokens to be resolved? At Tensas Basin, you have level 3 in the first water hex grouping, 3 in the second, and 5 in the third. Always begin with the northernmost token on the map. Its value (3) is higher than 3 land hex groupings touching it. Using the Clockwise Rule, it will flood the land hex circled in red. Place blue flood hexes in all flooded land hexes and add 1 to the Loss track. Reduce the token to level 2 (because 1 unit of water level has moved to flood the land). Token 1 is now resolved, since no hexes touching it are lower.
Now repeat the same procedure on the next water level token (moving southward on the map). Using the Clockwise Rule, it will flood the hex grouping on the left side of the token. Add the flood hexes, lower the token to 2, and add 1 to the Loss track.
Then resolve the third token, which is above all but 1 of the land hex groupings touching it. Using the Clockwise Rule, it will first flood the land circled in red. (Note: This one is also higher than the 4 hex at "noon," but always look for the lowest level first.) Add flood hexes to the flooded land, add 1 to the loss track, and subtract 1 from token 3. Token 3 is still not resolved (it's still higher than 1 land group touching it to the left). When this happens, the water will flow "downstream." This means add a token to the next river hex grouping, rather than another land. Subtract 1 from the token and add a new token at level 3 to the next water grouping. All tokens are now resolved.
Example 3: Resolving Water with Levels. What happens if the water is higher than a levee? Here you have the water level at Tensas Basin at level 4 in the first water hex grouping. You have also built several levees (the brown squares) along the river, and there is a town (the yellow square). Again, begin with the most northern token. No land is lower than its value, so it's resolved. Move on to the next one. Its value (4) is higher than all the hexes around it but 1 (remember, levees protect only a HEX, not the entire grouping). Using the Clockwise Rule, the land group directly north will flood. Remove the levee, since it has failed. Reduce the water level token to 3, remove the town, and place blue flood hexes on the land grouping. Note that this results in 3 losses (from the land, levee, and town).
Example 4: Resolving Water with Levels. What happens if there's a flooded area next to the water? Here you have the water level at 1 Cabin Teele hex grouping at level 3. Initially, it looks like the water level token is resolved, since none of the land directly touching it is lower. However, remember that any flooded area touching the hex grouping becomes a part of the hex grouping. In this instance, because of the flooding, the hex grouping is the part circled in white. The area circled in red will flood, since it's the first lowest grouping you come to after applying the Clockwise Rule.
Example 5: Resolving Water on the Lakes. How does flooding work on the lakes? Resolving the water tokens in lakes generally proceeds in the same way as on the river using the Clockwise Rule, with one exception. If the water levels are higher than land, flood land first as usual. However, if the token is still higher, water in the lakes only has so much room to flow downstream. When resolving water in the most southern/last hex grouping of the river, the water simply continues to flood land until resolved.
In this example for the Spring, 1927 version, you draw the Weather Report cards on the left. Just like placing water on the river, start with the northernmost lake hex grouping and move southward, skipping to the next lake when one is full (when placing the water level tokens, remember to add the amount on the cards to the starting value, which is 2).
Starting with the first Yazoo Valley location (the level 5 token in the upper right of the printed image), the level is higher than all the land around it. Using the Clockwise Rule, it will first flood the hex grouping directly north. This lowers its level to 4, which is still higher than the rest of the land. Normally, water would then move downstream, but it can't do that here. The water will then flood the hex grouping to the right, and then the grouping to the southwest. Remember to adjust the Loss track. The 3 water level token will be resolved next. It will resolve by flooding the level 2 land hex. With the last water token (level 4), use the Clockwise Rule to flood the land hex grouping directly north. Lower the token to a level 3. Remember that the flooded hex grouping is now a part of the lake hex grouping, so this is a situation where the lake's water can move downstream. Add a new token (level 3) to the last hex grouping of that lake, and lower the original token to 2.
Board diagrams for the examples in this section are not reproduced.
Game Play: Losses
Pawns, towns, landowners, levees, and land can all be "lost" in the game. If these losses exceed a certain amount before the end of the game (round 7 for the Fall, 1926 version; round 10 for the Spring, 1927 version), the players lose the game. Losses are counted on the Loss track of the main board and should be adjusted at the time of the loss.
- Land hex groups are lost when they are flooded and the hexes are covered in blue flood hexes (either completely or partially). Only count the hex groupings as a loss, not the individual hexes.
- Towns are lost when their hex floods. Lost towns should be removed from the board.
- Levees are lost when they are flooded or dynamited. Lost levees should be removed from the board.
- Pawns are lost if the land hex they're on is flooded. When a pawn is "lost," the player must reduce their pawn number by one on their player board. Lost pawns should be removed from the board. Players may "reuse" lost pawns by increasing their pawn numbers through the player board abilities.
- Landowners are lost when they flee the area, indicated by the appearance of a landowner flees card from the Landowner deck. When a landowner flees, that card should be discarded during the Landowner phase of the game.
- Penalty losses can also accrue if a player lacks sufficient cards to pay penalties (for race hatred or force cards, for example).
Winning: End of the Game
The game ends when the first of 2 possibilities occur:
- The players reach the round limit (7 for the Fall, 1926 version of the game; 10 for the Spring, 1927 version of the game).
- The cumulative losses of land, levees, landowners, people, and/or towns (and other in-game losses) add up to:
Fall, 1926 Version – losses allowed:
- 22 for a 2-player game
- 18 for a 3-player game
- 14 for a 4-player game
Spring, 1927 Version – losses allowed:
- 25 for a 2-player game
- 22 for a 3-player game
- 19 for a 4-player game
If the players make it to the end of the game while remaining under the prescribed loss totals, they win the game as a group!
If using the individual goals, when the game ends (either by the group losing or the required rounds being finished) each player should reveal their individual point totals. The player with the highest point total wins.