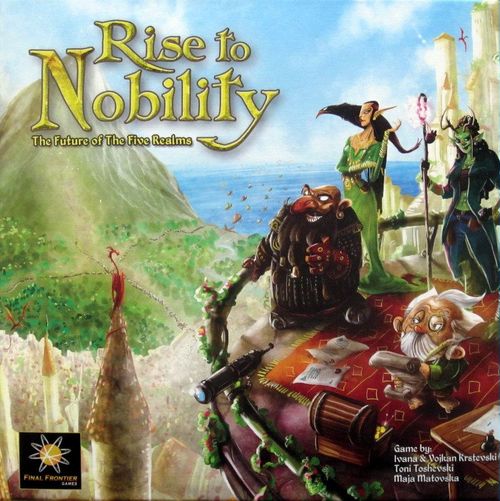
Rise to Nobility
Rise to Nobility Rulebook
Table of Contents
Table of Contents
- Game Components
- 2-5 Player Setup
- Object of the Game
- Gameplay
- Game End
- Player Boards
- Locations in the City
- Settlers Cards
- Construction Yard
- Guilds
- Guild Hall
- Port
- Stone Council
- Berk the Clerk's Office
- The White Castle
- Player Board Die Slot
- 6 Player Setup
- Event Cards
- Solo Play
- The Chancery Expansion
- Commission Cards
- Workshop Tiles
- Quick Reference Page
- Easily Overlooked Rules
Game Components
- Double-sided main board
- Cloth bag
- 13 Character cards
- 120 wooden cubes: Books, Artwork, Weaponry, Magic, Jewelry, Furnishings
- Score board
- First Player marker
- Round marker
- 6 double-sided Player Boards
- 48 Settlers cards
- 5 Setup cards
- 48 Coins
- 16 Event cards
- 30 Dice
- 48 double-sided Building tiles
- 12 Multiplier tokens
- 84 Meeples
- 18 Ship tiles
- 6 Reference cards
- 15 Solo objectives cards
- 42 Houses
- Chancery expansion (pp. 20–22): Chancery board, 18 Dice tiles, 18 Commission cards, 36 City tokens, Cloth bag
- 30 Stone Council tiles
- 18 Markers
- 20 Modifier tokens
Most components in the game are double-sided (Day and Night artwork variations). You can play Rise to Nobility the same way on either side. Visit finalfrontiergames.com to learn about the Night Mode variant.
2-5 Player Setup
(See "1 Player Setup", "6 Player Setup" and "Event cards" for 1-player, 6-player and Event deck setup)
Prepare Game Board
The board represents the newly built town of Caveborn. You can choose to play the standard game on either the Day side or the Night side of the board. Once you've placed the board on the table, place the Round Marker on the "1" space on the Round track.
Prepare Cards
Setup card
- Consult the Setup Card for your player count. In a 2-player game, a Workshop is placed in the center Workshop slot for each Guild.
Settlers cards
- Separate the cards into two decks (marked on the back with a 1 or 2).
- Each player randomly draws one Settlers card from deck 1.
- Then shuffle both decks to form one deck.
- Draw 6 Settlers cards and place them face up near the top left corner of the main board.
Prepare Tiles
Ship tiles
- Shuffle the Ship tiles and place them face down near the board.
- Place 1 tile face up next to the port on the main board.
Stone Council tiles
- Shuffle the Stone Council tiles and place them face down near the board.
- Place 1 tile face up on each slot in the Council.
Prepare General Supply
Place the Meeples, Goods (wooden cubes), Houses, Coins and Modifier tokens to the side of the game board within easy reach of all players.
Prepare Modifier Tokens
At certain player counts, some players will begin the game with bonus Modifier tokens.
- In a 4-player game, the fourth player receives one Modifier token.
- In a 5-player game the fourth player receives one Modifier token and the fifth player receives two Modifier tokens.
Prepare Building Tiles
Workshop and Community Building tiles
- Place the Building tiles in the cloth bag.
- Randomly draw Building tiles and place 1 Building tile face up in each of the 6 slots in the Guild Hall.
Prepare Players
Each player:
- Chooses a color and takes the five dice of their color.
- Takes a player reference card.
- Randomly chooses a Character card.
- Takes a Player Board.
- Takes a value of 8 Coins.
- Takes one Good of each kind.
- Takes 1 House of their color and places it on their Construction Platform.
- Places their Reputation Marker on number 9 on the Reputation track of their Player Board.
- Places their Nobility Marker on the 0 space on the Nobility track on the game board.
- Places their Score Marker on the 0 space of the Score track.
The First Player marker goes to the player who last moved to a new apartment/house.
Object of the Game
In Rise to Nobility, players take on the role of landowners attempting to rise from anonymity to the rank of lords. Players gain victory points by upgrading their land value, by housing Settlers and helping them become Apprentices and Guild Masters (it's always good to have friends in influential places), and by fulfilling various demands from the Stone Council. At the end of 10 rounds, the player with the most victory points replaces Berk the Clerk as Head of the Stone Council and wins the game.
Gameplay
Each Round Has 4 Phases
1. PREPARATION: Rolling Dice
Each player rolls the 5 dice of their color.
2. ACTIONS: Taking Turns
Players take their turns in clockwise order, starting with the player with the First Player marker.
On a TURN you can perform any or all of these actions once:
- Place a die on a location and take the associated action.
- Complete a Settlers card.
- Sell a Building.
You may perform these actions in any order.
Players continue taking turns until everyone has placed all of their dice or reached their reputation limit and cannot place more dice. After every player passes, move to the Income phase.
3. INCOME: Collecting Income
- Receive Coins for your Apprentices (the amount each Apprentice earns is based on the number of Apprentices in the Guild).
- Receive Goods for your Workshops (1 Good from the Guild associated with each of your Workshops).
- Receive rewards for your Community Buildings (the reward shown above your built buildings).
4. UPKEEP: Resetting for the next Round
- Return your dice to your Player Board.
- Return Goods that were sold on the ship to the supply and place a new Ship tile.
- Fill any empty slots in the Stone Council with Stone Council tiles. Tiles are placed from top left to bottom right.
- Fill any empty slots in the Guild Hall by first moving the remaining Buildings in the Guild Hall to the left and then adding new Building tiles into the empty slots from left to right.
- Pass the First Player marker to the left.
- Advance the Round marker to the next round.
Game End
The game ends after 10 rounds. Award end-game points for:
- Goods on your Player Board; 1 VP for every 2 Goods regardless of type
- Level reached on the Nobility track (gain VP for current space. Players ending on the white shield gain 6 VP)
If there is a tie, the winner is the player with the most Houses built. If there is still a tie, the player with the highest Reputation in the City wins. In the unlikely event that there is still a tie, the player with the most Coins wins. And in the ridiculously unlikely event that there is still a tie, all tied players win.
Player Boards
Your Player Board represents the small piece of land you own.
- Good Storage Area: Store Goods until you spend them.
- Workers Lot: Store unemployed Workers (meeples) you've received from completed Settlers cards.
- Die slot: Return an Apprentice (meeple) from the main board to your Workers Lot.
- Construction Platform: Store Houses you've purchased from the Construction Yard.
- House Lot: Place Houses on these lots as part of the requirement to fulfill a Settlers card. Each lot can hold 1 House and fulfill one Settlers card. You can build a maximum of 7 Houses.
- Community Building Lot: Place purchased Community Buildings on these lots.
- Reputation track: Keep track of your reputation.
Reputation
It's important to keep up your good name in the City and maintain good relations with High Queen Tabita. Your reputation is tracked on the Reputation track on your Player Board. All players start with a reputation of 9. If you take an action that increases or decreases your reputation, your new dice value limit takes effect immediately after you place your die. If a decrease causes your placed dice value to exceed your limit, it doesn't affect the actions you have already played.
Your reputation represents the value of dice you can play in one round. You cannot place dice with a total value greater than your current reputation. Always check your current reputation before placing a die. You always roll all 5 dice at the beginning of the round and choose throughout the round which dice to use.
Example: Kevin rolls: 5, 2, 3, 2, 4 and his current reputation is 11. Throughout the round he can choose to use 5, 2, 3 because their combined value is 10, or he could play 2, 3, 2, 4 because their combined value is 11. If his reputation increases during the round, his new dice value limit immediately takes effect and he could have access to more dice or different combinations of dice. He can adjust his plans throughout the round as long as the die he places doesn't exceed his current reputation limit.
By discarding a Modifier token, you can increase or decrease the value of one die by 1. You cannot wrap around the die to turn a 6 into a 1, or a 1 into a 6. You may discard multiple Modifier tokens to change the value of a die multiple times. If you use a Modifier token, count the new (modified) value of your die when you calculate your total dice value.
Nobility
As your Nobility rises, you will unlock new benefits and gain additional end-game Victory Points. You can move up the Nobility track by completing Settlers cards and buying Buildings. Each star allows you to move up one space. In order to become a Lord, you must reach level 5. When you reach level 12, you become a White Lord.
Character Cards
Each player assumes the role of a landowner. There are various characters, including a local bandit, a merchant chief, a guard etc.
Each Character has the ability to spend +1 Good from a certain type when completing a Settlers card. For that type of Good a player can spend 4 Goods instead of the normal limit of 3 Goods per type. This ability is available from the start of the game and can be played an unlimited number of times throughout the game.
The benefit on the bottom of the card unlocks when you reach level 5 on the Nobility track. It is a one time benefit that you immediately receive when you become a Lord.
Locations in the City
There are many locations in the beautiful city of Caveborn where you can place your dice in order to perform actions or gain benefits. Some locations have a fixed number of available die slots no matter the number of players, while other locations have available slots based on the specific number of players. Instructions are listed on the Setup cards for each player count.
Dice Placement
The slots on the board require you to place a die of a certain value. You can only place a die on an open slot. The die fills the slot and remains on it for the remainder of the round. Dice cannot be combined. You may place only one die per turn.
Cavern Tavern
One of your most important tasks is to house Caveborn's new Settlers. They will wait for you to pick them up in the Cavern Tavern.
In order to take one of the 6 face-up Settlers cards, you must follow these dice placement rules:
- Dice are placed on the slots in order from left to right.
- The number of available die slots is equal to the number of players.
- The die placed in the first slot can be any value.
- Other dice must have a value equal to or higher than the previously placed die.
Example: Sara places a die of value 2 on Cavern Tavern and takes a Settlers card. Katie is next and she has to place a die of 2 or higher. She places a 3. Melissa is next and she needs to place a 3 or higher. She places a 6.
When a Settlers card is taken from Cavern Tavern, immediately replace it with a new one. Players can hold up to 3 uncompleted Settlers cards.
Settlers Cards
The Settlers cards represent the families and groups that have come to Caveborn looking for a better life. Each group has certain requirements (Goods) they want for their house and a specific budget (Victory Points) they are prepared to spend for their accommodation.
Completing a Settlers Card
To complete a Settlers card you must:
- Move a House from your Construction Platform to a House Lot on your Player Board. (Once moved, the House cannot be used for any other Settlers card.)
- Spend the Goods listed on the card by returning them to the general supply.
When completing the card you must spend at least 1 Good of each type listed on the card, but no more than 3 wooden cubes per type. (Your Character card allows you to spend one extra Good of a certain type). The number of Goods you spend must fall within the minimum and maximum number of Goods required.
After completing the card you immediately:
- Gain the number of Workers (meeples) shown on the card and place them on your Workers Lot.
- Move 1 space up on the Nobility track for each star on the card (if any).
- Gain Victory Points equal to the number of Goods you have spent.
- Gain Victory Points from the Community Buildings on your land (if you have any).
Example: Ryan has Settlers with a budget of 8–12 that require Furnishings, Weapons, Magic Items, and Books.
To fulfill their demand, Ryan needs to spend at least 1 of each type of Good they need (in this case 4) and spend a total number of Goods within the Settlers demands (from 8–12). He cannot spend more than 3 Goods of any type of Good.
If he chooses to go for their maximum demand and gain the maximum VP from this card (12), he must spend 3 Goods of each of the 4 types. By spending 12 Goods he'll score 12 points.
If he chooses to meet their minimum demand and score 8 points, he could spend 3 Furnishings, 2 Weapons, 1 Magic, and 2 Books. Or he could spend some other combination of Goods.
The same rules apply if he chooses to spend a number of Goods between the minimum and maximum (9, 10, or 11).
Do not discard your completed Settlers cards. Turn them or stack them in a way that the races are still visible. Some actions are affected by which races you have completed.
You can hold up to 3 uncompleted Settlers cards. You can take a fourth card at Cavern Tavern and discard one of the 3 uncompleted settlers cards. There is no penalty for not completing a card.
You cannot complete more than one Settlers card on your turn or complete the same Settlers card more than once.
Construction Yard
One of the requirements for completing a Settlers card is to have a House associated with that card. You can buy Houses at the Construction Yard.
In order to buy a House you must pay 5 Coins and follow these dice placement rules:
- Dice are placed on the slots in order from left to right.
- The number of available die slots is equal to the number of players.
- The die placed in the first slot can be any value.
- Other dice must have a value equal to or lower than the previously placed die.
With each die placement, you can buy 1 House. Take a House of your color and place it on your Construction Platform.
Example: Will places a die of value 6 on the Construction Yard and buys a House. Jonathan is next and he has to place a die of 6 or lower. He places a 3. Valerie is next and she needs to place a 3 or lower. She places a 2.
Guilds
There are 6 different Guilds:
- Artists Guild
- Blacksmiths Guild
- Carpenters Guild
- Merchants Guild
- Scholars Guild
- Wizards Guild
The same rules apply for every Guild.
There are three die slots in every Guild. To place a die you have to meet 2 conditions:
- The die slot must be empty and available according to the number of players (see Setup card).
- The die you place must have the value that is indicated on the slot.
1. Activate Workshops
When you place a die in a Guild, you immediately activate certain Workshops that have been built in the Guild (if there are any). You may choose to receive the benefit shown on the Building tile.
The Workshops activate from left to right.
- If you place a die with value 1 or 2, you activate the first Workshop on the left.
- If you place a die with value 3 or 4, you activate the first and second Workshop from the left.
- If you place a die with value 5 or 6, you activate all three Workshops.
When a Workshop is activated, the owner of the Workshop receives the reward shown on the board above the Workshop. If a player activates their own Workshop, they do not receive the ownership reward.
In a 2-player game the owner receives x2 the reward.
After activating Workshops, you may end your turn OR perform one or both of these actions in the following order: Buy Goods and Place Workers.
2. Buy Goods
Each Good costs 1 Coin. The number of Goods you can buy is shown on the die slots: 1, 2, or 3. The supply of Goods is not limited. Use the multiplier tokens to represent a larger number of Goods.
3. Place Workers
Some of the die slots allow you to place your Workers (meeples) as Apprentices in the Guild. You can use a Worker from your Workers Lot or transfer one of your Apprentices from another Guild. You can place a Worker only on an empty Apprentice slot.
The number of available Apprentice slots in a Guild is equal to the number of players in the game. For example, in a 2-player game there are only 2 Apprentice slots available.
- You can place up to 2 Apprentices in the Guild (1 meeple per slot).
- You can place 1 Apprentice in the Guild.
- You cannot place or transfer meeples.
There are 3 benefits from placing Apprentices in the Guilds. The benefits take effect on your next turn.
FREE GOODS
When you buy Goods from a Guild, you receive one extra Good of that type for free for every Apprentice you have in that Guild. If you don't buy Goods, you don't receive extra Goods from your Apprentices.
Example: Will has 2 Apprentices in the Artists Guild. If he places a die with value 3, he can buy up to 2 Goods and receive 2 extra Goods for free (1 for each Apprentice) for a total of 4 Artwork Goods.
ABILITY TO PURCHASE WORKSHOPS
Only when you have an Apprentice in a Guild can you buy a Workshop for that Guild from the Guild Hall.
END OF ROUND INCOME
At the end of the round, each of your Apprentices earns Coins. The amount of Coins is determined by the total number of Apprentices in the Guild (yours and other players').
| Total number of Apprentices in a Guild | Coins per Apprentice in a 2-player game | Coins per Apprentice in a 3-player game | Coins per Apprentice in a 4-player game | Coins per Apprentice in a 5-player game | Coins per Apprentice in a 6-player game |
|---|---|---|---|---|---|
| 1 | 3 | 3 | 3 | 3 | 4 |
| 2 | 2 | 2 | 2 | 2 | 3 |
| 3 | — | 1 | 2 | 2 | 2 |
| 4 | — | — | 1 | 1 | 2 |
Guild Hall
At the Guild Hall, you can buy a Workshop or a Community Building. The Guild Hall has 6 die slots with a specific die value and cost associated with each slot.
To purchase a Building, you must follow these dice placement rules:
- The die placed must match the die value shown above the Building tile.
- You must pay the cost shown above the Building tile.
- You must have the required Apprentice or Worker associated with the Building type (see the Buying and Placing sections).
Purchased buildings are not replaced until the Upkeep phase. During the Upkeep phase, fill any empty slots by first moving the remaining Buildings to the left and then adding new Building tiles to the empty slots from left to right.
Buying and Placing Workshops
If your Apprentices want to become Guild Masters, they must own a Workshop. Every Workshop is associated with a certain Guild, and can be placed only in that Guild.
You can buy a Workshop only if you have an Apprentice (meeple) in the Guild associated with that Workshop.
After you buy a Workshop, do the following:
- Place the Workshop in the corresponding Guild on the leftmost available Workshop slot.
- Place one of your Apprentices from that Guild on top of it to claim ownership of the Workshop.
- Move as many spaces up on the Nobility track as there are stars on the Workshop slot.
- Gain the Victory Point reward shown on the Workshop slot.
The meeple you place in the Workshop becomes a Guild Master and is no longer an Apprentice. You immediately stop receiving Apprentice benefits from that meeple.
- The Guild Master does not earn you Coins during the Income phase.
- The Guild Master does not give you extra Goods when you buy Goods.
- The Guild Master earns you a Good from its Guild during the Income phase.
During the Income phase receive 1 Good (matching the associated Guild) for each Workshop you own.
When adding new Building tiles to the Guild Hall at the end of the round, discard and replace any Workshops that are associated with a Guild that already has all 3 Workshop slots filled.
Buying and Placing Community Buildings
Community Buildings increase the value of your land and score extra Victory Points when you complete Settlers cards.
You can buy a Community Building only if you have a Worker (meeple) on the Workers Lot of your Player Board.
After you buy a Community Building, do the following:
- Place the Community Building on any empty community lot on your Player Board.
- Place a Worker from the Workers Lot on top of the Community Building.
- Move 2 spaces up on the Nobility track (as shown by the stars on the lot space).
- Gain the 5 VP reward shown on the lot.
During the Income phase receive the reward shown above your built Community Buildings.
Selling a Workshop or Community Building
On your turn, you can sell a building as a free action. This action is not associated with a location in the city or a specific die placement.
If you sell a Workshop, immediately:
- Gain 3 Coins.
- Lose the VP you gained by placing the Workshop.
- Return your meeple to the Workers Lot in your Player Board.
The Workshop stays in play but it is ownerless. No one receives the ownership rewards when a player activates that Workshop.
If you sell a Community Building, immediately:
- Gain 3 Coins.
- Lose 5 VP.
- Return your meeple to the Workers Lot in your Player Board.
- Discard the Community Building.
Port
Traders from all over the Five Realms come to Caveborn to trade and sell their Goods. You can sell Goods you've gathered by placing them on the Ship tile at the Port.
There are 6 available slots on the Port with a dice value required from 1 to 6. The value of the die you place, determines how many Goods you can sell. You can choose any combination of Goods to sell.
Selling Goods
The Ship tiles represent the current demand for Goods in the City.
When you sell a Good, do the following:
- Place the Good (wooden cube) on top of the matching icon (it must be empty).
- Immediately gain the amount of Coins shown on the tile.
Example: Brian places a die with the value of 3 and chooses to sell 1 Jewelry, 1 Magic item, and 1 Furnishing. He receives 3 Coins for the Jewelry, 2 Coins for the Magic item, and 1 Coin for the Furnishing.
Goods remain on the Ship tile until the end of the round. Once the spaces for a type of Good are filled, players may not sell any more of that Good. During the Upkeep phase, return sold Goods to the supply and place a new Ship tile in the Port.
Stone Council
Six Councilors, one from each race, sit on the Stone Council. The Councilors' primary responsibility is to ensure that their races have enough Goods and Coins to prosper in the city. The demands of each Councilor are represented by Stone Council tiles.
When you do business with a Councilor, you will be rewarded. But the other Councilors will resent your display of favoritism and your reputation in the city and with the High Queen will suffer.
You must meet 2 criteria in order to do business with a Councilor.
- You must be at the same level or higher on the Nobility track as the nobility requirement indicated on the tile.
- You must have housed Settlers from the same race as your chosen Councilor.
For example: If you have Elven and Dwarven Settlers on your land, then you can only deal with the Elven and Dwarven Councilors. The race of each Councilor is illustrated on the main board.
There are three available slots in front of each Councilor, 1 slot per row.
Fulfilling a Stone Council Tile
To fulfill a Stone Council tile:
- You must meet the 2 criteria for doing business with the Councilor.
- The die must correspond to the die value shown on the tile's row.
- Take the tile and place your die in the tile's spot (not on the die-value slot).
- Immediately spend the listed Goods and Coins (if required).
Once you fulfill a Stone Council tile you immediately:
- Gain the VP listed on the tile.
- Go back 2 spaces on the Reputation track.
During the Upkeep phase, add new Stone Council tiles to the empty spaces starting with the top row from left to right.
Berk the Clerk's Office
Sometimes you'll need to call in some favors with the city management. In order to do that, you'll have to visit Berk the Clerk's Office and ask for his help. All three die slots are available at every player count. When you place a die on one of the slots, you can choose to perform one or both of these actions:
1. TAKE MODIFIER TOKENS
- If you place a die with value 1 or 2, you can take one Modifier token for free.
- If you place a die with value 3 or 4, you can take one Modifier for free and choose to buy one Modifier for 1 Coin.
- If you place a die with value 5 or 6, you can take one Modifier for free and choose to buy up to two Modifiers for 1 Coin each.
2. REPLACE SETTLERS OR BUILDINGS
- Either discard the face-up Settlers cards and replace them with new cards from the Settlers cards deck
- OR discard the Buildings from the Guild Hall and replace them with new Buildings from the bag. Place new Buildings from left to right, excluding the Building slots already filled with a die.
The White Castle
It's very important that you keep your reputation and your good name if you want to be the head of the Stone Council someday. The best way to do that is by visiting the White Castle to maintain your relations with High Queen Tabita.
All three die slots are available at every player count. When you place your die on a slot, you immediately increase your Reputation by the amount indicated.
Your new dice value limit takes effect immediately.
Player Board Die Slot
On your Player Board, if you place a die with value of 5 or 6, you may return an Apprentice from the main board to your Workers Lot. You cannot use this slot to return a Guild Master.
6 Player Setup
Setup changes for 6 players:
- Must play with the Chancery expansion (see The Chancery Expansion)
- Add the extra White Castle dice slot tile to the board. All four dice slots are available at the White Castle.
- Players use 4 dice instead of 5.
- Players start with 7 Reputation instead of 9.
- The fourth player starts with one Modifier token, the fifth player starts with two Modifier tokens, and the sixth player starts with three Modifier tokens.
Event Cards
Setup if you choose to play with the Event deck:
- Separate the cards into two decks (marked on the back with a I or a II).
- Randomly choose 5 cards from deck I and 5 cards from deck II. Return the rest of the cards to the game box.
- Form an Event deck by stacking the deck I cards on top of the deck II cards.
- At the beginning of each round, reveal the next Event card. The effects of the card apply for the entire round.
- During the Upkeep phase, discard the Event card.
Solo Play
Objective
Complete the chosen Solo Objective by the end of ten rounds.
Setup
Set up the game normally with these exceptions:
- Place 1 corresponding Workshop on the second Workshop slot in each Guild.
- Use the black components as your player color: meeples, dice, houses, and markers
- Take one die of each other color: white, yellow, red, green and blue to be used as the Automa dice.
- Draw a Solo Objective card.
- Do not play with The Chancery expansion.
Reference Guide
(Same as a 2-player game)
- Available die slots in Cavern Tavern and Construction Yard: 2
- Available die slots in Guilds: 1
- Available Apprentice slots in Guilds: 2
- Income per Apprentice in each Guild:
- 1 Apprentice: 3 Gold
- 2 Apprentices: 2 Gold
Gameplay
The game is played according to normal rules but at the beginning of each Round in the Preparation phase, roll all of the Automa dice and place each die in these locations:
- White die: first die slot at Cavern Tavern
- Green die: first die slot at the Construction Yard
- Yellow die: corresponding die slot at the Guild Hall
- Discard the Building associated with that slot.
- Red and Blue dice: a die slot in a Guild (blocking the Guild for the Round)
- Value 1: Scholars Guild
- Value 2: Blacksmiths Guild
- Value 3: Carpenters Guild
- Value 4: Wizards Guild
- Value 5: Merchants Guild
- Value 6: Artists Guild
- If both dice have the same value, place one and set aside the other.
- When an Automa die is placed in a Guild, activate all the Workshops you own in that Guild.
- You receive x2 the ownership rewards shown above the Workshops.
The Chancery Expansion
The Chancery expansion adds a new location where Apprentices can gain income and benefits. It also adds a new way to score points with secret end-game scoring goals.
Components
- Chancery board
- 18 Dice tiles
- 18 Commission cards
- 36 City tokens
- Cloth bag
Additional Setup
- Place the Chancery board beside the main board.
- Place all 18 dice tiles in the cloth bag (along with the Building tiles).
- Give each player 3 City tokens.
- Shuffle the Commission cards and deal 3 cards face down to each player.
- Each player looks at their cards and chooses 1 to keep. The chosen card should be kept secret from the other players.
- Return the unselected cards to the deck, shuffle the deck, and place it near the Chancery board.
- Each player draws 1 dice tile from the bag and places it above their Commission card.
The Chancery Board
Sending Workers to become Apprentices in the Chancery will give you valuable benefits.
Apprentice slot: Each slot is associated with a certain Race and Desk.
Benefit: Each Desk provides a benefit to the player whose Apprentice sits at that Desk.
Die slot: Each slot is associated with the Desks above and below it. There are six available die slots in the Chancery with a dice value required from 1 to 6.
Only the top 6 Desks are available in games with 2 to 4 players. All 12 Desks are available in games with 5 or 6 players.
In order to place a Worker as an Apprentice in the Chancery you must meet these requirements:
- Place a die on an empty die slot that matches the die value shown on that slot.
- Have a completed Settlers card that matches the race of the desk associated with the die slot.
- Have a Worker in your Workers Lot to place an Apprentice. (The Apprentice must be placed on an empty and associated desk; Other Apprentices and Guild Masters cannot be transferred to the Chancery).
Apprentices in the Chancery must stay where you place them. You are not allowed to:
- Recall them back to your Workers Lot.
- Move them to a Guild.
- Move them to another Desk in the Chancery.
Having Apprentices in the Chancery gives you 3 benefits:
Desk Benefit
You can use the benefit from your desk an unlimited number of times throughout the game.
- Fulfill Stone Council tiles without paying the Coins shown on the tiles.
- Receive +1 Coin for each Good you sell at the Port.
- Go back 1 space (instead of 2) on the Reputation track when you fulfill a Stone Council tile.
- Take 2 Settlers cards (instead of 1) when you visit Cavern Tavern.
- Pay 1 less Coin when you buy a House at the Construction Yard.
- Pay 1 less Coin when you buy a Building at the Guild Hall.
End of Round Income Benefit
During the Income phase, you collect 3 Coins for each of your Apprentices in the Chancery.
Ability to Take Additional Commission Cards Benefit
Each Apprentice you have in the Chancery gives you the ability to take one additional Commission card (one card per Apprentice).
Commission Cards
When playing with the Chancery expansion, you start the game with one Commission card. Commission cards grant bonus Victory Points at the end of the game if you successfully activate them and meet the conditions written on the card. They should be kept secret from other players.
Each Commission card requires a separate dice tile. To activate a Commission card you need to complete the dice tile associated with it by placing all of the required dice on the tile's dice slots.
On your turn, you can use your die placement action to place a die on a matching spot on the dice tile. You do not have to complete a dice tile in a single round. You can complete it step by step throughout the game.
When you take your die back during the Upkeep phase, place a City token on the die slot to indicate that is has been completed. After the entire tile has been completed, you can activate the associated Commission card by placing the tile on the designated space on the back of the card. Only activated cards will grant Victory Points at the end of the game.
Taking a Commission Card
Throughout the game you can take additional Commission cards. The number of cards you can hold is equal to the number of Apprentices you have in the Chancery plus one (your original card).
To take an additional Commission card you must meet these requirements:
- Have an Apprentice in the Chancery (each Apprentice allows you to take one Commission card).
- Place a die (according to normal placement rules) in Berk the Clerk's office.
Each slot provides a different action.
- If you place a die with value 1 or 2:
- Draw 1 Commission card from the top of the deck.
- Go back 1 space on your Reputation track.
- If you place a die with value 3 or 4:
- Draw 2 Commission cards from the deck, choose 1 and return the other to the bottom of the deck.
- Go back 2 spaces on your Reputation track.
- If you place a die with value 5 or 6:
- Draw 3 Commission cards from the deck, choose 1 and return the other 2 to the bottom of the deck.
- Go back 3 spaces on your Reputation track.
After choosing a Commission card from any of the die slots, immediately:
- Draw a random dice tile from the cloth bag.
- Take 3 City tokens.
When using Berk the Clerk's Office to take a new Commission card, you can still perform the normal actions and take Modifier tokens and/or replace Settlers or Buildings.
Workshop Tiles
Workshop tiles are available for each Guild: Artists Guild Buildings, Blacksmiths Guild Buildings, Carpenters Guild Buildings, Wizards Guild Buildings, Merchants Guild Buildings, and Scholars Guild Buildings.
Workshop Tiles Effects
- +1 Coin: You can take 1 Coin.
- +1 on Reputation track: You can increase your dice value limit on the Reputation track by 1.
- Reroll: You can reroll as many of your remaining dice as you choose.
- +1 Good: You can take 1 Good for free from the Workshop's Guild.
- Good from any Guild: You can buy one additional Good from any Guild.
- Exchange 1 Good: You can exchange 1 Good from your personal supply with 1 Good of your choice from the general supply.
- Community Building: Receive 1 extra VP when you complete a Settlers card.
If a tile contains two effects the player chooses which one to use.
Quick Reference Page
Player Count Specifics
| 2 Players | 3 Players | 4 Players | 5 Players | 6 Players | |
|---|---|---|---|---|---|
| Available die slots in Cavern Tavern and Construction Yard | 2 | 3 | 4 | 5 | 6 |
| Available die slots in Guilds | 1 | 2 | 2 | 3 | 3 |
| Available Apprentice slots in Guilds | 2 | 3 | 4 | 5 | 6 |
| Coins per Apprentice in Guild | See chart under "End of Round Income" in the Guilds section. |
Easily Overlooked Rules
Settlers
- You have to have a House on your Construction Platform in order to complete a Settlers card.
- You have 7 House slots on your Player Board and can complete a maximum of 7 Settlers cards.
- When you complete a Settlers card, each Good you spend equals 1 VP.
- If you have Community Buildings on your land, you immediately gain +1 VP per Community Building when completing a Settlers card. You don't receive extra points for the Settlers cards you've completed before placing the Community Building.
- Placing dice and completing Settlers cards are two separate actions. You cannot complete a Settlers card in the middle of doing your die action. (For example: You cannot get Goods from a Guild, complete a Settlers card to get Workers, and then place them as Apprentices in that Guild during the same die action.)
Guilds and Apprentices
- When you place a die on a Guild, first you activate the appropriate Workshops (if any) by default. You can choose to not receive the benefit on the Workshop tile. Regardless of your choice, the other players who own activated Workshops receive the ownership bonuses.
- After activating Workshops (if any), you can choose to either: end your turn or perform one or both of these actions in the following order: Buy Goods and Place Workers.
- When you buy Goods from a Guild, you receive 1 extra Good for free for every Apprentice you have in that Guild. If you don't buy Goods, you don't receive extra Goods from that Guild.
- When you take an action that allows you to place Apprentices, you can transfer your Apprentices from another Guild to the Guild you placed your die in.
- By placing a die valued 5 or 6 on your Player Board, you can return 1 of your Apprentices (not Guild Masters) from a Guild to your Workers Lot.
- During the Income phase, collect Coins and Goods for your Apprentices and Guild Masters.