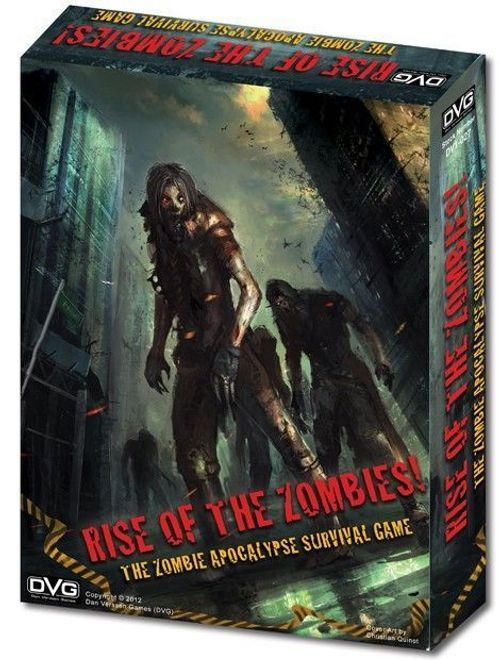
Rise of the Zombies!
Rise of the Zombies! Rulebook
Table of Contents
Table of Contents
- Learning the Game
- Preparing to Play a Game
- Card Text and Decks
- Game Duration
- Starting the Game
- Victory
- Survivor Cards
- Location Cards
- Readying a Card
- Weapon Cards
- Item Cards
- Instant Cards
- Skill Cards
- Companion Cards
- Location Attachment Cards
- Zombie Cards
- Epic Cards
- Sequence of Play
- Drawing Cards due to Card Effects
- Movement
- Attacking
- Experience
- Trading Cards
- Zombie Turn
- Card Keywords
- Otis Rule (Optional)
- Campaign Game
- Stopping the Timer
- Sample Game
Learning the Game
When you start playing Rise of the Zombies! you will start the digital timer that is included with the game. You do not stop the Timer for any reason.
To set the Timer, press the "M" and "S" buttons as needed to set the proper amount of time. The times are noted in the Game Duration section of these rules. To clear the Timer, press both the "M" and "S" buttons at the same time. To Start the Timer, press the "Start/Stop" button.
In preparation, punch out the counters and place them off to the side. Many of the game's terms can be found in the Card Keywords section of this rulebook.
Preparing to Play a Game
There are several types of cards included in the game. You can tell them apart by their backs. Separate the cards into different piles: the Safe House card, the Rescue Helicopter card, Survivor cards, Action cards, and Zombie cards.
Ask each player to select the Survivor card they want to play. Place any Survivor cards not selected off to the side. You will not use them during the game.
Place the Safe House card on the table where you would like the Survivors to begin the game. Throughout the game, you'll be building a path of cards from the Safe House to the Rescue Helicopter. The game starts with no Zombies in the Safe House. Place the Rescue Helicopter card to the side or about 7 card lengths in front of the Safe House. The Rescue Helicopter is always the 8th Location card.
Insert each of the tall Survivor counters selected for the game into one of the plastic stands. Place the selected Survivor stands on the Safe House card.
Shuffle the Action cards and form a deck. Place the deck face down on the table within easy reach of all players.
Assign one player the task of drawing Zombie cards during the game. This player plays the game as a normal Survivor. He simply has an extra task of also drawing Zombie cards as needed. Shuffle the Zombie cards and form a deck. Place the deck face down on the table within easy reach of the player that will draw Zombie cards.
Card Text and Decks
Each player may choose to keep the cards in their hand secret, or not secret throughout the game. Each player has complete control over how they want to reveal their card information to the other players.
When the card text contradicts the rulebook text, the card text takes precedence.
When a deck is depleted, pick up the discards of the deck, shuffle them, and form a new deck.
Game Duration
Before beginning a new game, you must determine the Rescue Helicopter's Departure Time.
The number of starting Survivors and the Difficulty level you choose, determines how many real world minutes you have to reach the Rescue Helicopter.
Select a Difficulty level and determine the Helicopter's Departure Time using the table below.
| Difficulty | Starting Survivors: 5 or more | 4 or 3 | 2 or 1 |
|---|---|---|---|
| Introductory | 95 | 85 | 75 |
| Standard | 85 | 70 | 55 |
| Expert | 60 | 50 | 45 |
| Insane | 50 | 45 | 40 |
Example: You have 70 minutes to reach the Rescue Helicopter in a Standard game with 4 Starting Survivors.
Starting the Game
Start the Timer and place it on the table in easy view of all players. The game ends when the Timer reaches the Rescue Helicopter's Departure Time.
Group Counter
There are 3 double-sided Group counters in the game. These counters show you the Survivor Health and the Zombie Infestation modifier.
- Number of Survivors - On the left.
- Health and Hand Size of each Survivor - Top-right corner.
- Location Infestation modifier - Bottom-right corner.
Survivors have a Hand Size equal to their current Health. Deal each Survivor a number of Action cards equal to their Health.
Example: The above Group counter is for 3 Survivors. The Survivors start with a Health and Hand Size of 5 and all Locations have a +1 Infestation value.
Example: In a game with 5 people, each Survivor has a Health and Hand Size of 4 and all Locations have a +3 Infestation value.
Select the counter that shows the number of starting Survivors in your game. Place the appropriate Group counter next to the Safe House. Place the other Group counters off to the side.
If Survivors die during the game, replace the Group counter with the appropriate Group counter based on the number of remaining Survivors. Replace the Group counter after any step in which a Survivor dies. Doing so instantly changes the remaining Survivor's Health, Hand Size, and Infestation modifier.
If Survivors die, do not adjust the time remaining to reach the Rescue Helicopter.
Example: The Expert Difficulty game started with 3 Survivors. Two Survivors die. Replace the Group counter for 3 Survivors with the counter for 1 Survivor. That Survivor now has an unwounded Health and Hand Size of 8, and he still has the time remaining from the original 50 minutes to reach the Rescue Helicopter.
Victory
Figuring out Victory is easy. If your Survivor is in the Rescue Helicopter at the end of the game, you win! If a Zombie eats you, or you are not in the Rescue Helicopter when the game ends, you lose!
The game ends when you meet the first of 3 conditions: (1) The last Survivor dies. (2) All remaining Survivors are in the Rescue Helicopter card and there are no Zombies in the Helicopter card. (3) You run out of time. If there are Zombies in the Helicopter card, everyone dies. If you are not in the Helicopter card, you die. If you are in the Helicopter card -and- there are no Zombies in the Helicopter card, you live.
If your Survivor dies from time to time, or even if your entire group dies, don't worry about it. This is after all, the Zombie Apocalypse.
Survivor Cards
The Survivor cards detail the game information for your Survivor character. Place your Survivor card in front of you, face up on the table.
- Type of Survivor - Top-left edge.
- Survivor's Inherent Weapon and Attack Chart (if any) - Bottom-left corner.
- Survivor's Special Ability (if any) - Bottom-right corner.
Location Cards
The Location cards detail the areas you travel through on your way to the Rescue Helicopter. They are part of the Action deck. Play each Location card face up on the table, adjacent to the last Location card played, to continue the path.
You will build a line of Location cards from the Safe House to the Rescue Helicopter. The text on a Location card only applies to that Location card.
- Name of Location - Top-left edge.
- Dangerous Location Card Draws - Top-right corner. Draw this number of cards when you enter a Location.
- Flavor Description - Bottom. Describes the Card Effect.
- Card Effect - Bottom.
- Attack and/or Follow Symbols - Left edge.
Readying a Card
Some Action cards have an Experience cost that must be paid before those cards can be Readied or played.
An Action card's Experience cost is shown in its top-right corner. To Ready or play the card, pay the cost by discarding that number of Experience points you have previously earned. You can only discard your own Experience points.
You earn Experience points by Killing Zombies.
Example: To Ready a 2 point Chainsaw, discard 2 points of your Experience counters.
Weapon Cards
Weapons inflict Wounds on Zombies. They are part of the Action deck.
When you Ready a Weapon card, pay its cost and place it next to your Survivor card face up on the table. It remains with you until you or a game effect discards it, or you give the card to another Survivor.
- Name of Weapon - Top-left edge.
- Experience Cost to Ready Weapon - Top-right corner.
- Weapon Range and Attack Chart - Bottom-left corner. Each Wound inflicted removes 1 Health from the targeted Zombie.
- Weapon Type and Special Notes - Bottom-right.
- Final Attack Information (if any) - Bottom-right.
- Attack and/or Follow Symbols - Left edge.
Example: You play the Baseball Bat card from your hand. It has an Experience cost of 0, so you do not need to discard any Experience points to pay for it. You place the Baseball Bat next to your Survivor card.
Example: A Weapon with Range 0 can only attack Zombies in your same Location card. A Weapon with range 0-2 can attack Zombies in your Location card, an adjacent Location card, and the Location card adjacent to that one.
Example: You play the Beauty card from your hand. It has an Experience cost of 3, so you need to discard 3 Experience points to pay for it. You place the Beauty card next to your Survivor card.
Item Cards
Items aid your Survivor in reaching the Rescue Helicopter. They are part of the Action deck.
When you Ready an Item card, pay its cost and place it next to your Survivor card face up on the table. It remains with you until a game effect discards it or you give the card to another Survivor.
- Name of Item - Top-left edge.
- Experience Cost to Ready Item - Top-right corner.
- Card Effect - Bottom.
- Attack and/or Follow Symbols - Left edge.
Example: You play the Canteen card from your hand. It has an Experience cost of 1, so you need to discard 1 Experience point to pay for it. You place the Canteen next to your Survivor card. During any Play Cards step, you can discard the Canteen to gain its effect.
Instant Cards
Play Instant cards from your hand. They are part of the Action deck. Play the Instant card face up on the table and declare what you are doing for all to hear. Apply the effects of the card, and then discard it.
- Name of Instant Action - Top-left edge.
- Card Effect - Bottom.
- Attack and/or Follow Symbols - Left edge.
Example: You play the In the Zone card from your hand on the table for all to see. You discard it when the Player Turn ends.
Skill Cards
Skill cards permanently enhance your Survivor. They are part of the Action deck.
When you Ready a Skill card, pay its cost and place it next to your Survivor card face up on the table. The card and its effect remains with your Survivor throughout the remainder of the game.
- Name of Skill - Top-left edge.
- Experience Cost to Ready Skill - Top-right corner.
- Card Effect - Bottom.
Example: You play the Cardio card from your hand. It has an Experience cost of 2. You must discard 2 Experience points to pay for it. You place the Cardio card next to your Survivor card.
Companion Cards
Companions are friends you encounter in the game. These cards aid your Survivor in reaching the Rescue Helicopter. They are part of the Action deck.
When you Ready a Companion card, pay its cost and place it next to your Survivor card face up on the table.
Zombie cards do not Engage Companion cards, but after resolving a Zombie Attack, you can redirect the Wounds targeting you to your Companion. Redirect the Wounds 1 at a time. Stop redirecting Wounds if the Companion is reduced to 0 Wounds.
Companion cards have 2 Health. Treat Companions the same as Survivors for the purposes of Healing. A Companion dies if its Health equals 0. If a Companion card dies, remove it from the game. If your Survivor dies, discard any Companions you have.
Treat Companion cards that can Attack as being an independent Attack. They do not benefit from your cards such as In the Zone and Slayer, or from cards with an Attack symbol. You do receive the Experience for the Zombie cards your Companion Kills.
- Name of Companion - Top-left edge.
- Experience Cost to Ready Companion - Top-right corner.
- Card Effect and Health - Bottom.
- Attack and/or Follow Symbols - Left edge.
Location Attachment Cards
The Location Attachment cards modify the Location cards in the game. These cards alter a Location in a lasting way. They are part of the Action deck.
When you Ready a Location Attachment card, pay its cost and place it next to your Location card face up on the table. It remains with the Location card. If you are later Killed, do not discard the Location Attachment. They continue to affect the game as normal.
- Name of Attachment - Top-left edge.
- Experience Cost to Ready Attachment - Top-right corner.
- Card Effect - Bottom.
Example: You are in the Corner Store Location card. You play the Barricade card from your hand. It has an Experience cost of 3, so you need to discard 3 Experience points to pay for it. You place the Barricade card next to the Corner Store. Later, you leave the Corner Store. The Barricade remains with the Corner Store.
Zombie Cards
Zombie cards detail the game information for Zombies you encounter on your way to the Rescue Helicopter. As you draw them from their deck, place them face up on the table for all to see.
Some Zombie cards are named for their attributes, such as "Ambusher". Other Zombie cards are named for people you knew that are now zombies, such as "Frank".
- Type of Zombie - Top-left edge.
- Experience Points - Top-right corner. Gain this number of Experience points when you kill the Zombie.
- Zombie Attack Chart - Bottom-left corner. Each Wound inflicted removes 1 Health from the targeted Survivor.
- Zombie's Health - Bottom middle. You must inflict this number of Wounds to Kill this Zombie.
- Zombie's Special Ability (if any) - Bottom-right corner. For an explanation of Zombie Abilities, see the Card Keywords rule section.
Epic Cards
There are several cards in the game with the Epic trait. If you win the game, you are victorious, however winning the game while burdening yourself with Epic cards makes it all the more heroic and gives you bragging rights. You can achieve a normal Victory, or a level 1 through 4 Epic Victory based on how many Epic cards you overcome during the game.
- The Mutated Prisoners Zombie - If you choose to place the Mutated Prisoners Zombie card, Kill the card, and you win the game, you earn 1 level of Epic Victory.
- The Scientist Survivor - If you select the Scientist, and he safely exits the game in the Rescue Helicopter, you earn 1 level of Epic Victory.
- The Sewers Location - If you choose to place the Sewers Location and you win the game, you earn 1 level of Epic Victory.
- The Graveyard Location - If you choose to place the Graveyard Location and you win the game, you earn 1 level of Epic Victory.
Sequence of Play
Player Turn
All players perform these steps simultaneously.
- Discard Cards - You can discard 0 or more of the cards in your hand.
- Draw Cards - Draw cards until the number of cards in your hand equals your Survivor's current Health points.
- Play Cards - Play cards and Attack at the same time as the other players. Stay in this step until all players say they are done playing cards. You can also purchase cards and trade Weapon and Item cards during this step. Unless a card specifies otherwise, this is the only time you can play cards, trade cards, use card effects, or discard cards to gain an effect.
Zombie Turn
- Zombies Move - Move all Zombies 1 card closer to the nearest Survivor. If a Zombie is already in a Survivor's card, do not move it.
- Zombies Attack - Resolve Attacks for all Zombies in the same Location cards as Survivors.
- Zombies Spawn - Draw 1 Zombie card and place it in the Location card behind the rearmost Survivor. If the rearmost Survivor is in the Safe House, place the Zombie in the Safe House.
Drawing Cards due to Card Effects
You can always draw cards due to a card effect, even if the card puts you in excess of your Hand Size.
Example: You have a Health of 5 and 5 cards in your hand. You play a Canteen card. You still get to draw a card into your hand.
You do not ever need to discard due to having too many cards in your hand.
Your ability to draw a card is only limited during the "Draw Cards" step of the Player Turn. During that step, you cannot draw a card if it would put you in excess of your current Hand Size limit.
Example: You started the game with 6 Health and a hand size of 6. You have suffered 3 Wounds, so your Hand Size is now 3. When you draw cards during the Draw Cards step, you cannot draw a card if it would be your fourth or higher card.
Movement
Your Survivor starts the game in the Safe House card. You need to play and move into 6 Location cards played from a Survivor's hand. You then enter the Rescue Helicopter card as the eighth Location card.
Your Survivor will always be in a Location card. Each Survivor can only move once during each Player Turn.
Your Survivor can move even if you are Engaged with a Zombie. You cannot Advance if a Zombie you are Engaged with has the Blocks trait, or if there is a Group Zombie in your Location card with the Blocks trait.
Example: If you are Engaged against Shamblers and a Crawler, you can move.
Example: If you are Engaged against a Hulker, you cannot move because it has the Blocks trait. If there is a Herd in your Location card, you cannot move because it has the Blocks trait.
Placing a New Location
One Survivor in the Safe House must play a Location card to Advance toward the Rescue Helicopter. Place the Location card on the table above the Safe House card to form a path and move your Survivor stand-up counter from the Safe House to your new Location card. Regardless of how many Survivors are in the game, only 1 new Location card can be placed during each Player Turn.
Example: You played the City Hall card to extend the path toward the Rescue Helicopter.
During future Player Turns, continue to play Location cards to extend the path.
Example: During a later Player Turn, you play the School Bus card to continue the path out of City Hall.
Zombie Infestation
Zombie Infestation only occurs when you place a new Location card.
When you place a new Location card, move your Survivor stand-up counter onto the new Location card, and then start drawing Zombie cards from the Zombie deck.
A Location has an Infestation value equal to its place in the path. Include the Safe House when counting.
Example: The School Bus card is the 3rd Location card on the path. The School Bus has an Infestation value of 3.
Draw Zombie cards one at a time and keep an on-going total of the Experience points you have drawn. When you draw a Zombie card bringing your Zombie's total Experience points equal to, or greater than, the Location card's Infestation value, stop drawing Zombie cards.
Example: You just entered the 3rd Location card. The card has an Infestation value of 3. You draw Shamblers (value 2), the Loner (value 0), and The Pack (value 2). You stop drawing cards because the total Experience points are equal to or exceed the Infestation value of the Location card.
Place all the Zombie cards you drew, including the last Zombie card, next to the new Location card.
Infestation Modification
Larger groups of Survivors will encounter more Zombies. Adjust the Infestation values of each Location card based on the Infestation modifier on the Group counter that you placed next to the Safe House at the start of the game.
Example: You start a game with 5 Survivors. All the Location cards have an Infestation value 3 higher than normal. This means Location card number 3 has an Infestation value of 6.
Following
If a Location card is already in place adjacent to your current Location card, discard an Action card with a Follow symbol to move into the adjacent card. Do not Infest a card when you Follow to move into a previously placed Location card.
Example: All the Survivors are in the Safe House. Another player plays the City Hall Location card, places it next to the Safe House, and then moves their Survivor into the City Hall card. After Infesting the Location, you discard an Action card with a Follow symbol and move your Survivor into the City Hall card.
Assigning Zombies
When you place a new Location card and move into it, all the non-Group Zombie cards drawn for that card automatically Engage you.
Example: You place and enter a Location card. You draw Shamblers (a Group), The Pack, and a Loner. The Pack and the Loner Engages you.
It is a helpful reminder to move your Survivor Stand-Up next to the Zombie(s) Engaged against you.
Example: You place and enter a Location card. You draw Shamblers, The Pack, and a Loner. Move your Stand-Up near The Pack and the Loner to show they are Engaged on you.
Group Zombies Engage all Survivors in their Location card.
If you attempt to Attack a non-Group Zombie card in your Location, even if your Attack inflicted 0 Wounds, move the Zombie to Engage you. This includes Attacks performed by cards you have played, such as Wall of Fire.
Example: Another Survivor is Engaged against a Hulk. You shoot at the Hulk and miss. Move the Hulk to Engage you.
Example: You previously played a Wall of Fire and inflicted 1 Wound on each Zombie in your Location. All the surviving non-Group Zombies move to Engage you.
Zombies that are in a Location card without Survivors, do not Engage.
If a non-Group Zombie moves into a Location card containing Survivors, randomly determine which Survivor the Zombie Engages.
If you leave a Location, all the Zombies remaining in that Location Disengage from their Survivors.
Dangerous Locations
All Location cards have a Card Draw value in their top-right corner. If the value is "+0", you do not receive any Action cards for entering the Location. If the value is "+1", "+2", or "+3", each Survivor receives that number of Action cards the first time they Advance into the Location card. You do not draw additional Action cards if you Retreat and re-enter the Location.
Example: You Advance into the Downtown Location card for the first time. You draw 3 cards. Place the cards into your Hand.
New Location Card Sequence
Perform the following steps when you play a new Location card.
- Place the new Location card on the table.
- Advance the Survivor who played the Location into the card.
- Draw Dangerous Location Action cards.
- Draw Zombies equal to the Location's modified Infestation value.
- Fast Zombies Attack the Survivor.
- Other Survivors may move into the Location by discarding cards with Follow symbols.
- Draw Dangerous Location Action cards.
- All Survivors play cards as normal.
Rescue Helicopter Card
To put the Rescue Helicopter into play, you must be in the 7th Location card, and not be Blocked.
If you meet these 2 conditions, discard a card with a Follow symbol from your hand and attach the Rescue Helicopter to the 7th Location card to complete the path.
The normal limit of only being able to move once per Player Turn still applies for this move.
When the first Survivor enters the Rescue Helicopter card, draw Zombie cards for Infestation as normal.
If you are in the Rescue Helicopter card, and there are no Zombies in the Rescue Helicopter card, you win if the time runs out.
If all the remaining Survivors are in the Rescue Helicopter card, and there are no Zombies in the Rescue Helicopter card, immediately end the game, all Survivors in the Rescue Helicopter card win.
Attacking
You receive 1 Free Attack during each Player Turn. Many Survivors have an Inherent Weapon built into their Survivor card. Survivors can also use a Weapon card they have Readied. You receive a total of 1 Free Attack. You do not receive 1 Free Attack with each of your Weapons.
Example: Your Scout has an Inherent Knife Weapon. You also have a Readied Pistol. You can use your Free Attack to Attack with the Knife -or- Pistol, not both.
You also receive 1 Attack for each Action card you discard that has an Attack symbol. There is no limit to the number of Attacks you can make each Turn as long as you have the cards to discard.
How to Attack
When you Attack a Zombie, use your Inherent Weapon or a Readied Weapon card's Attack chart. When Zombies Attack you, use the Attack chart on each Zombie card.
The process for resolving an Attack works the same for both Survivors and Zombies.
If you are Attacking a Zombie, declare which of your Readied Weapons you are using and which Zombie you are Attacking.
To use a Weapon, the Zombie must be within the Weapon's Range. A Weapon's Range is shown above its Attack chart.
Your Inherent Weapon is always Readied. Roll a die. Compare the roll to the Attack chart. The result is the number of Wounds inflicted on the Zombie. You must inflict all Wounds on the same Zombie.
Example: You Attack a Zombie with your Readied Pistol. You roll a 4 and consult the Attack chart on the Pistol card. You inflict 1 Wound.
You can use the same or a different Readied Weapon with each Attack.
Example: You use your Free Attack to Attack with a Readied Machete card. You discard any card with an Attack Symbol, then Attack with your Machete again.
Example: You use your Free Attack to Attack with a Readied Machete card. You discard any card with an Attack Symbol, then Attack with your Readied Shotgun.
You can target the same or a different Zombie with every Attack as long as the Zombie is within the Range of the Weapon.
Example: You Attack a Creeper with a Pistol using your Free Attack. You roll a 5, and inflict 1 Wound. You discard a card with an Attack symbol and roll another Pistol Attack. You roll a 1, missing. You discard another card with an Attack symbol to use your Readied Shotgun, roll an Attack, and get a 6, inflicting 2 Wounds. You Kill the Creeper with 1 of the 2 Wounds. The second Wound inflicted by the Shotgun is wasted and not applied to another Zombie. Place the Killed Creeper card next to your Survivor card.
If you and another Survivor happen to roll and Kill a Zombie at the same time, decide who gets the Kill. The other Attack is wasted.
Final Attacks
If a Weapon card has a Final Attack notation, you can discard the Weapon to perform a Final Attack. Final Attacks do not expend a Free Attack or Attack symbol. You can freely perform them. Inflict the noted number of Wounds on any Zombies within the Weapon's range, then discard the Weapon card.
Example: You perform a Final Attack with a Rifle. It inflicts 3 Wounds. The Rifle has a Range of 0 or 1. You allocate 1 Wound against a Howler 1 Location card away and Kill it. You allocate 2 Wounds on a Herd in your Location card. You then discard the Rifle.
You can even perform a Final Attack with a Weapon that you previously rolled a Reload result for.
Non-Killing Attacks
If your Attack does not Kill the Zombie card, place Wound counters on the Zombie card to record the Wounds you inflicted on the Zombie. You and/or other players can continue to Attack the Zombie card as normal. Zombies do not Heal Wounds.
Killing Attacks
If your Attack inflicts the final Wound needed to Kill a Zombie card, place the Zombie card face up next to you for later spending or exchange the Zombie card for Experience point counters.
Discard Zombie cards you have Killed, or Experience point counters you have collected, to purchase Action cards with an Experience cost.
Zombie Attacks
If a Zombie is Attacking you, roll a die and compare it to the Zombie's Attack chart. The result is the number of Wounds the Zombie inflicts on you.
Example: You are Attacked by Shamblers. You roll a 3, and consult the Attack chart on the Zombie card. You suffer 1 Wound.
Record the Wounds you suffer by placing Wound counters on your Survivor card. Remove the counters as you Heal. You are free to exchange counters as needed to record the proper Wounds inflicted on your Survivor.
Survivor Wounds
You have a Hand Size equal to your current Health. This means that as you suffer Wounds you can hold fewer Action cards.
Example: At the start of a 1 player game, you had a Health of 8. You have now suffered 3 Wounds so your Hand Size is currently 5.
If you ever have 0 remaining Health, you are dead. Discard all your cards and stop participating in the game as a player. You can still do helpful things though, like Spawning Zombie cards and rolling for Zombie Attacks.
Experience
You can purchase cards during the Play Cards step by discarding your previously Killed Zombies and Experience point counters.
The Experience points you gain from Killing a Zombie card is also its value for purchasing Action cards. The cost to purchase an Action card is located in the Action card's top-right corner. When you purchase an Action card, remove it from your hand and place it face up on the table next to your Survivor.
Example: Previously, you Killed an Ambusher card (1 point). You have the card placed next to you on the table. You discard the Ambusher into the Zombie discard pile and Ready a Canteen (costing 1 point). You move the Canteen from your hand and place it on the table next to your Survivor.
Exchange Experience point counters as needed when you make purchases. More than one player cannot contribute his Killed Zombies to purchase an Action card.
Trading Cards
You can give Readied or Unreadied Weapon or Item cards to other Survivors in your Location card during the Play Cards step. They always place the card in their hand even if you handed them a Readied card.
Example: You have a Readied Shotgun. You hand the card to another player in your Location card. That player places the card in their hand. They must pay its Experience cost to Ready the Shotgun.
Each Weapon card can only be used to Attack by one Survivor each Turn. Other players can still use its Attack symbol.
Example: The Cheerleader Attacks using a Pistol card. She hands the Pistol to the Scoundrel. The Scoundrel places the Pistol in his hand, and then Readies it. The Scoundrel cannot Attack with the Pistol this Turn.
Example: The Cheerleader Attacks using a Pistol card. She hands the Pistol to the Scoundrel. The Scoundrel places the Pistol in his hand. He then discards it to use its Attack symbol to Attack with his Baseball Bat.
You can only give Weapon and Item cards to other Survivors. You cannot give another Survivor any other type of Action card.
You may move a Readied Weapon or Item back to your hand during the Play Cards step. You cannot move other types of Action cards back to your hand.
Example: You have a Readied Pistol. You Attack with it. You move the Pistol back to your hand. You discard the Pistol to use its Attack symbol to Attack with your Inherent Weapon.
You may have an unlimited number of Readied Weapons and Items.
Zombie Turn
Zombies Move
Move all Zombies one Location card closer to the closest Survivor. If there is more than one Survivor in equally close Location cards, randomly select which Survivor the Zombie moves toward.
If a non-Group Zombie moves into a Location card containing Survivors, randomly determine which Survivor the Zombie Engages.
Example: A Creeper moves into a Location card with your Cheerleader, a Biker, and a Paramedic. Roll a die. On a 1 or 2 the Creeper Engages your Cheerleader, 3 or 4 it Engages the Biker, and 5 or 6 it Engages the Paramedic.
Zombies Attack
Resolve an Attack for each Zombie in the same Location card as a Survivor. Each Zombie Attacks the Survivor it is Engaged with.
Example: A Screamer is Engaged with your Scout. Roll a die for the Zombie's Attack against your Scout.
Group Zombies Engage all Survivors in their Location card. Resolve an Attack against each Survivor in the Group Zombie's Location card.
Example: A Herd is in a Location card with the Scout, the Scientist, and the Scoundrel. Roll an Attack for the Herd against each of the Survivors.
You can have more than one Zombie Engaged against your Survivor.
Example: Your Survivor is Engaged against a Loner, Hulker, Shamblers, and The Pack. Roll an Attack for each of the 4 Zombie cards against your Survivor.
Zombies Spawn
Draw a Zombie card from the Zombie deck and place it 1 Location card behind the rearmost Survivor (the Survivor that is farthest from the Rescue Helicopter). If a Survivor is in the Safe House, place the Zombie in the Safe House.
Example: Your Scout and the Biker are in the School Bus. The Scoundrel is in City Hall. The new Zombie card Spawns in the Safe House.
Example: All Survivors are in the School Bus. The Zombie Spawns in City Hall.
Example: The Graveyard Location is in play, so you draw 2 Zombie cards during each Spawn step.
Card Keywords
The following game terms appear on the cards. Here's what they mean...
- (#) - This notation appears on some cards. This result happens when you roll the natural unmodified number that is in the parenthesis. If you roll the noted number, do not apply die roll modifiers, and resolve the noted result.
- Example: You Attack with a Rifle and roll a "1". Even though you are a Slayer and have played an In the Zone card, the natural roll is still a "1". Do not apply your modifiers. Your Rifle suffers the Reload effect.
- Example: You Attack with a Chainsaw and roll a "1". You must immediately perform a Final Attack with the Chainsaw.
- Example: The Historian rolls a "1" with a Scoped Rifle, she can use her ability to re-roll the Attack.
- Advance - When you move to a Location card that is closer to the Rescue Helicopter.
- Again - Perform another Attack. If your Survivor receives the effect, you may target the same, or a different Zombie. If a Zombie receives the effect, it will attack the same Survivor. If the Survivor died, ignore the effect.
- Attract - Draw a Zombie card and place it in the Location card of the Survivor or Zombie that activated the Attract effect. Zombies drawn due to an Attract effect do not count toward the Infestation value or Spawn cards.
- Blocks - If you are Engaged with a Zombie card that has the Blocks trait, you cannot Advance out of the Location card. You may still Retreat.
- Companion - An Action card that aids the Survivors in reaching the Rescue Helicopter.
- Enter - When a Survivor or Zombie moves into a Location card.
- Epic - Describes a harder than normal Victory. Also used during Campaigns to score additional Campaign Points.
Otis Rule (Optional)
This is an Optional rule. To use this rule, all players must agree to use this rule at the start of the game.
This rule allows players to Attack other Survivors during the Play Cards step. Use the normal Attack rules as if you were Attacking a Zombie to resolve your Attacks and the targeted Survivor's Reactions.
Attacking another player tends to be a dramatic moment in the game. We recommend you do not get bogged down in sequencing, but rather resolve the event like a movie scene.
Example: The Cheerleader declares "I am discarding a Fire Axe card to get an Attack with my readied Shotgun to attack the Paramedic." Using normal game rules, the action is declared, the card has been discarded, and the player would roll for the Attack. In this situation however, we recommend giving the Paramedic a chance to respond before the Cheerleader's Action becomes "real". The Paramedic picks up a die and says, "If you attack me, I'll use my free attack to attack you with my Chainsaw!"
Both players freeze, dice held high, ready to roll. Do they roll? Do they stare at each other as the timer ticks down? All very dramatic stuff, and sure to ruin friendships. So, let it play out as dramatically as possible.
Campaign Game
A Campaign is a set of 3 games. The results of one game do not carry over to the next, and you can switch Survivors between games. It is okay for different numbers of players to play in each game. Your goal is to earn as many Campaign points as possible during the 3 games.
Scoring Each Game
- If all the Starting Survivors live, score 2 Campaign points.
- If not all the Starting Survivors live, but at least 1/2 the Starting Survivors (rounding up) live, score 1 Campaign point.
- Score 1 Campaign point for each "Epic" card's challenge you overcome.
Example: You are playing a 5 Survivor Campaign. In the first game, 3 Survivors live, so you score 1 point. In the second game, 2 Survivors live, so you score 0 points. In the third game, all the Survivors live and the Scientist (Epic) was part of your group, and survived so you score 3 points. You score a total of 4 points for the Campaign, which is an "Adequate" result.
Overall Evaluation
At the end of the 3 games, total your Campaign points and compare them to the chart below.
| Point Total | Result |
|---|---|
| 12 or more | Legendary |
| 8 to 11 | Great |
| 5 to 7 | Good |
| 3 or 4 | Adequate |
| 2 | Poor |
| 1 or less | Dismal |
Stopping the Timer
Once you start the Timer, never, ever, ever stop it for any reason whatsoever until the end of the game.
Now you would think that using words like "never, ever, ever" is pretty clear, but we know gamers. They are a special breed of people. Here are a few common questions they will ask, followed by the proper response.
Is it okay to stop the game timer if...
- We need to shuffle the cards? No.
- We need to look up a rule? No.
- Someone spilled their drink all over the table? No. But you should force him to use a sippy cup in the future.
- Someone has to go to the bathroom? No.
- Doorbell? No.
- Phone call saying a close relative has died? Did they rise from the dead as a flesh eating zombie? Um, they didn't say. I think they would have mentioned it. So no.
- Microwave dinged because the tasty snacks are done? No.
- The die fell on the floor and rolled under a heavy cabinet? No. Great time for teamwork though.
- The dog just vomited on the carpet? No. Yuck, but no.
- A real world zombie apocalypse has broken out? No. But I would recommend gathering guns and ammo while the other players are playing cards.
Sample Game
This is a Standard Difficulty 4 player game. The four Survivors are the Cheerleader, Scoundrel, Scout, and Paramedic.
We have 70 minutes to reach the Rescue Helicopter.
With a Health and Hand size of only 4, it's going to be a challenging game. The Infestation modifier is +2, so we will be encountering a few extra Zombies.
We begin in the Safe House. After scouring our initial hands of cards, we notice that the Scoundrel has drawn the Private Home Location card. We could play it, but we only have a couple Weapons to Ready. We decide to wait, and move next turn.
The Cheerleader plays a 0 Experience cost Pistol card from her hand and places it next to her Survivor card.
It is now the Zombie's time to act. We skip the Zombie Move step because there are no Zombies in play. We skip the Zombie Attack step because there are no Zombies in our Location. We resolve the Zombie Spawn step, and a new Zombie spawns into the Safe House. We draw the top card from the Zombie deck and lay it face up on the table. It's a Spitter.
We roll a die to find out who the Spitter Engages, and it Engages the Cheerleader. During the next Player Turn, we discard and draw, and then we Attack in no set order. It is a flurry of declared Actions and die rolls. The Scout uses his Free Attack to stab with his inherent Knife, rolls a 1, and misses. The Cheerleader, Scoundrel, and Paramedic are looking through their cards, and the Scout discards a Rifle card to use its Attack symbol. He swings again with the Knife, rolls a 5, and inflicts 1 Wound. He then plays a Head Shot to inflict a second Wound. That is enough to Kill the Spitter. He places the Spitter card next to him. He has a Canteen in his hand with an Experience cost of 1. He discards the Spitter to use its 1 point to buy the Canteen. He places the Canteen next to his Survivor card. We have 65 minutes to go!
The Scoundrel plays the Private Home and moves into that Location. When he enters, he draws 1 card. As noted on the Private Home card, we must deal with +3 Infestation.
Once in, he draws 7 points of Zombies. 2 points because the Private Home is the second card along the path, 3 points because of the card text on the Location card, and 2 more points from our Group counter's Infestation modifier. Things are not looking good!
We draw the Zombie cards and the Scoundrel finds himself up against the 2 point Shamblers, a 1 point Creeper, a 1 point Runner, 2 point Responders, and a 2 point Hulker. The Creeper has the Fast trait. That means that as soon as she appears, she attacks the Scoundrel! The Creeper, Hulker, and Runner Engage the Scoundrel. The Shamblers and Responders are Group Zombies, so they automatically Engage the Scoundrel as well as any other Survivors that come into the Location card.
The Scoundrel rolls for the Creeper's Fast Attack, and he rolls a 3. Unfortunately, she inflicts 1 Wound on the Scoundrel.
Each of the rest of us discard a card with a Follow symbol to move from the Safe House to the Private Home. We each draw 1 card. We are now all in the Private Home.
We roll for our Attacks and inflict some Wounds. It is then the Zombie's turn to act. There are no Zombies to move. We roll for the Zombie attacks and they inflict some Wounds on us. We then Spawn in a new Zombie in the Safe House.
We start a new Player Turn by discarding and drawing cards. We resolve our Attacks and Kill the remaining Zombies.
Only 53 minutes until the Rescue Helicopter leaves us behind to die!
Alright, we can't keep getting smacked around like this or we'll be goners. Every Wound the Survivors takes is a hit to their Hand size. Hand size equals options. The Cheerleader suffered 2 Wounds. Now, she can only draw until she holds 2 cards in her hand.
We suffered some major wounds during the fight, but we have a few Experience points to spend on some much needed Items and Weapons. Laying out our supplies and Experience points we decide to stock up on some healing items like some Beef Jerky, Canteens, and whatever we can get our hands on. Bless those First Aid classes, the Paramedic has an inherent ability. She can choose to use her Free Attack to heal one Wound for someone in her Location.
We decide to buy some 2 point Beef Jerky with our slain 2 point Hulker. Someone else buys a 1 point Canteen with their 2 point Shamblers and grabs a 1 point Experience counter. Both of these will be very beneficial for our healing.
We move a couple more times and bash enough Zombies to buy some pretty decent weapons. The Cheerleader is rocking the Shotgun and the Paramedic has a Crossbow. As long as the only Weapon the Paramedic is carrying is that Crossbow, the Group Zombies swarm the other survivors, and she can pick them off at a distance. She's not a very combative Survivor, so this weapon is perfect for her. The Scout is using his machete and Slayer Skill combo which gives him +1 on all of his Attack die rolls. That means an almost automatic hit, and a chance of straight out killing anything! The Scoundrel is cutting the Zombies down with a Chainsaw. 21 minutes until the Helicopter takes off without us!
We gotta get moving, Zombies are building up behind us. The Scoundrel plays a Location Card and most of us move by discarding Follow Cards. One problem, the Cheerleader doesn't have a Follow card. Now the group has a hard choice. We have a mass of Zombies behind us, so, leaving her behind is almost certainly killing her off. Luckily the Paramedic has a Flashlight. She hands the Flashlight to the Cheerleader. The Flashlight has a Follow symbol on it so the Cheerleader can stay with the group, just ahead of the oncoming Zombies.
The Zombies behind us move one Location card closer to us every turn as they try to get at us! We are in a desperate situation, even for zombie apocalypse standards. We have to slow down and grab some cards to prepare for the next big fight. Luckily, the Scoundrel has a Barricade Card. He buys it with some Experience points he's saved up and attaches it to the Police Station we are in, which is thankfully our 7th card. We are one card away from the Rescue Helicopter card which is in card number 8.
We hold up for a while in the Police Station fighting off a huge mass of Zombies. In the end we vanquish the Zombies that have been following us since the beginning. Now we have to fight the most challenging battle of the game, the struggle to climb aboard the Helicopter. We only have 15 minutes!
The brave Scout plays a Follow to enter the Rescue Helicopter card. He draws the 10 points of Zombies and suffers 2 Fast Attacks. The rest of us then each play a Follow card to enter the Helicopter card.
We see a Howler who brings Frank to their ranks. We are also swarmed by Crawlers, 2 Shamblers, Spitters, an Ambusher, a Creeper, and a Herd. We are down to the wire! Saying we have a problem in an understatement. We are in the biggest fight so far. We'll be throwing everything we have at them! We use our weapons and every Attack symbol card we have. We even do our Final Attacks in pure desperation. 5 minutes to go!
At the end of the blood bath, there is one last Zombie card standing between us and the Helicopter. The dreaded Herd with 7 remaining Health. By this point we are pretty much out of Weapons... but, the Scoundrel pulls through for us, and plays that wonderful Ambush card. Now is the time to band together. We have to discard all of the cards remaining in our hands, but we get to roll one Ambush Attack for each card we discard. We get to roll 6 Attacks. Referencing the Attack chart on the Ambush card, we roll and inflict 9 Wounds, Killing the Herd!
With the Herd Killed, we drag ourselves into the Helicopter with the last of our strength. Seconds later the buzzer goes off, our time has ended, and we fly away to safety!