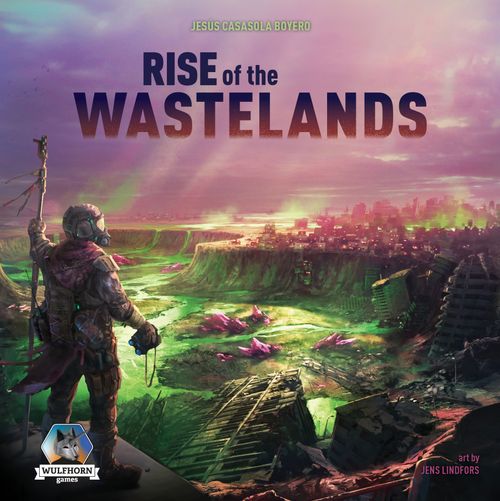
Rise of the Wastelands
Rise of the Wastelands Rulebook
Table of Contents
Table of Contents
Game Summary
Rise of the Wastelands is set in a futuristic post-apocalyptic world, where resources are scarce and the remaining human survivors fight to survive and rule the wastelands. Players lead one of the six factions with their own unique abilities. Starting from their Capital, they will explore the dynamically generated map, discovering new areas and establishing Outposts to recycle materials.
With these newly generated resources, they can construct buildings and units, all while striving to upgrade their technology and gain a strategic advantage. This will allow players to accomplish the ever-changing achievements and let them spread their influence to rule over the other players.
Global Components
- 4 Capital tiles
- 17 Map tiles
- 3 Special map tiles
- 4 Neutral units standees + 4 Neutral units wooden miniatures
- 20 Achievement cards
- 20 Exploration Event cards
- 40 Power cards
- 8 Combat Tactics cards
- 15 Solo Mode cards
- Resource die
- Loot die
- 6-sided die (1D6)
- Temporary Action Point cubes x 10
- 6 Faction Leader boards
Toxic Cloud Module
- Toxic Cloud movement card
- 3 'Cloud Maker' Power cards
- Toxic Cloud tokens x 5
Faction Components
Components for each player:
- Player board (in all 4 player colours)
- Action tracker (in all 4 player colours)
- Reference card
- Resource cubes x 2 (water), x 2 (ammunition), x 2 (energy), x 2 (metal)
- Crystal cube x 1
- Action Point cubes x 6
- Leader cubes x 9
- Faction cubes x 10
- People Support cube x 1
- Influence tokens x 7
- Military Prestige cube x 1
- Capital (in all 4 player colours) x 1
- Outposts (in all 4 player colours) x 4
- Outpost Expansions (in all 4 player colours) x 4
- Comms Tower building (in all 4 player colours)
- Market building (in all 4 player colours)
- Tech Lab building (in all 4 player colours)
- Scout units (in all 4 player colours) x 2
Armies
Each colour has 3 melee-type army miniatures and 3 ranged-type army miniatures.
Game Setup
-
Create the map using the tiles face down as shown in the image (check the overview on the right for the different configurations for 2, 3 or 4 players).
The Capital tiles should be placed with the Capital image on the outer side of it.
Place the Capital pieces of each player on the starting locations, together with a Scout unit in the centre space of the tile.
-
Divide the Achievement cards into 2 stacks: the starting stack with the Starting Cards (with the icon in the bottom right corner) and another stack with the rest of the cards.
After shuffling both stacks separately, create the Achievement deck. To do so, place 5 cards of the starting stack on the top of the other stack and 5 on the bottom. Place the Achievement deck face down somewhere clearly visible to all players. Then reveal 3 cards and place them in a row face up next to the deck.
-
Take the Power cards and shuffle them. Place the deck face down nearby.
-
Do the same with the Exploration Event cards, placing them next to the Power cards deck.
-
Create 2 sets of Combat Tactics cards, each set with cards from 0 to 3, and then place them nearby.
-
Place the Resource and Loot dice, together with the standard 1D6, next to the board.
-
Each player receives the components that match their colours and places them in front of them.
-
Player board and Action tracker board.
-
Leader board, randomly dealt or chosen by the players.
See page 6 for more information about the setup for the Player board, Action tracker and Leader board.
-
One Reference card per player.
Player Setup
Fill your Player board with the components of your player colour:
- 7 Influence tokens on the Influence pool.
- 3 Army units on the Armies section.
- 1 Scout on the Scouts section.
- 4 Outposts on the Outposts section.
- 4 Outpost Expansions buildings on the Outpost Expansions section.
- 3 Capital buildings (Tech Lab, Market and Comms Tower) on their corresponding sockets on the Capital Buildings section.
- The People Support tracking cube on the number 0 slot of the People Support track.
- Place 1 Leader cube on the socket on the top and another one on the socket on the bottom of the People Support track.
- Place 1 Action Point cube on the socket next to the People Support track.
- The Military Prestige tracking cube on the number 0 slot of the Military Prestige track.
- Take 2 cubes of each resource colour, placing one of each colour on the number 1 slot of the matching Resource track. Place the other 4 cubes on the corresponding matching Outposts. Also place 1 Crystal cube on the number 1 slot of the Crystal track.
- Place 1 Action cube on the Extra Action upgrade socket.
- On your Action tracker, fill the Action Points pool with 4 Action Point cubes.
- Place Faction cubes on the marked sockets in the Buy and Propaganda actions.
- On your Leader board, fill all the sockets with Leader cubes (5 on the top and 2 on the right side of the Leader goal).
Place the remaining Faction cubes next to your Player board. They will be used to mark the acquired upgrades.
To start the game, randomly select the first player and begin.
Winning the Game
The goal of the game is to spread at least 5 of your Influence tokens among the other players. If a player has 2 or fewer Influence tokens left in their influence pool at the end of their turn, the endgame is triggered (see Endgame on page 10). When the game is over, the player who has given away the most Influence tokens wins the game. In case of a tie, the secondary victory conditions will determine the winner.
There are 2 ways of spreading your Influence tokens:
- By claiming achievements (see page 9).
- By defeating the Capital of another player (see Combat Rewards on page 18).
In order to win the game, players must place at least one Influence token on every other player.
See page 10 for more information about the endgame.
For an alternative and longer gameplay, you can change 1 of these 2 rules (or apply both changes at the same time):
- To trigger the endgame, you need to place all your Influence tokens instead of just 5.
- You need to do the hard version of the achievements from the start.
Gameplay
In Rise of the Wastelands there are no rounds or phases. Players take turns one after another until the endgame is triggered at the end of a player's turn.
On your turn, do the following in sequential order:
- Allocate Influence
- Perform Actions
- Claim Achievements
- Reset Action Points
1. Allocating Influence
First, check whether there are any achievements already claimed by you. If there aren't, skip this step. Otherwise, both you and any other players with Influence tokens on those achievements must allocate them.
To allocate, place the tokens on the leftmost empty slot of the other players' received influence areas. You may distribute the tokens across multiple players or place them all on a single player. This process proceeds clockwise, starting with you, and each player places all their tokens before the next player places theirs.
The influenced players will reduce their People Support by 1 point per influence received. Additionally, if any of those Influence tokens are placed on top of a slot with the draw a Power card icon, the influenced player gains a Power card.
Last, all the achievements claimed by you are removed from the table and new ones are drawn from the Achievement deck (unless it is the player's last turn, as explained in the Endgame section on page 10).
2. Performing Actions
Now you can perform actions from the Action tracker. The amount of actions that you can perform on your turn is determined by the cost of the actions and the amount of Action Points in your Action Point pool and Surplus.
Initially, all players begin with 4 Action Points located on the Action Points pool of their Action tracker. However, this amount can be increased to a maximum of 6 by acquiring the Extra action upgrade and by having positive People Support.
You are not forced to use all your Action Points on your turn. Any unused Action Points can be transferred to your Surplus (up to 3). These surplus Action Points can be used as regular Action Points on your next turn. However, if used, they must be removed from the Action tracker at the end of your turn.
3. Claiming Achievements
At the end of your turn, if you accomplish one or several achievements, you may claim them. Take the leftmost tokens from your influence pool and place them on top of the corresponding achievement cards (note that you are allowed to claim achievements already claimed by other players).
Achievement cards are divided into 2 halves. The upper half shows the easy version of the achievement, while the lower half shows a harder version of it. When claiming the 1st, 2nd and 3rd achievements, you need to accomplish the easy version of them, while for the rest you need to accomplish the hard version. This is indicated on the Player board by the different border colour around the Influence tokens in the Influence pool. Additionally, in order to claim the 5th, 6th and 7th achievements, you also need to have positive People Support.
Be aware that you cannot claim achievements on your first turn.
4. Resetting Action Points
Return your used Action Points to the Action Point pool. If you have any Action Points in your Surplus, place them back in the Action Point pool. Get an equivalent number of temporary Action Points and place them in the Surplus.
If you still have unused temporary Action Points in your Surplus from the previous turn, you may keep them. However, you cannot carry over more than 3 temporary Action Points to the next turn.
Endgame
When a player has 2 or less Influence tokens left in their influence pool at the end of their turn, the endgame is triggered. This means that the rest of the players play one more turn (during these last turns, no new achievements will be drawn).
After that, one last influence allocation step takes place, spreading all the Influence tokens on the achievement cards.
The allocation sequence starts with the player who first claimed the 5th achievement. When the allocation process ends, the game is over.
Secondary Victory Conditions
It is common that at the end of the game two or more players have spread the same amount of influence. That is why it is important to also consider the secondary victory conditions when planning your strategy. When a tie happens, the player that wins the most secondary victory conditions wins the game*:
- The player with the highest People Support
- The player with the highest Military Prestige
- The player with the most Upgrades.
- The player with the most Outposts on the map.
- The player with the most Crystals
In the event that a tie still persists, the tying players share the victory.
If two or more players tie for a secondary victory condition, they are all considered winners of that condition.
Actions
During your turn, you perform a series of actions. To perform an action, you need to move 1 Action Point (or 3 in the case of the Build Outpost action) from your Action Points pool or Surplus to an empty socket next to the action. If there are no empty sockets left for that action, or some of those sockets are still locked, you cannot perform that action. Certain actions require you to pay a cost, such as the Buy or Propaganda actions. If you cannot pay the cost, you cannot perform that action.
Build Outpost
Performed by Scouts
It costs 3 Action Points and can be done once per turn. To perform this action, your Scout must be on a ruined city space. Then you choose one of the Outposts from your Player board, placing it on that space, and returning the Scout to your Player board. Finally, you get 1 resource of the type generated by the Outpost.
Recycle
Performed by Outposts
It costs 1 Action Point and can be done up to 4 times per turn (by the same or different Outposts). With a single Recycle action, 1 of your Outpost generates 1 resource of the corresponding type (the Increased productivity upgrade and Outpost Expansions can increase the amount of resources generated per Recycle action).
Move
Performed by Scouts and Armies
It costs 1 Action Point and can be done up to 4 times per turn. With a single Move action, a unit can move to an adjacent valid space (this can be improved by the All-terrain speed upgrade, see page 15). When performing several consecutive Move actions, your unit can go through spaces occupied by your own Outposts or units (never by enemy units or Outposts), but it must end its movement on a valid space (a space on a face-up tile that has no mountains, toxic lakes, Outposts or units on it).
Explore
Performed by Scouts
It costs 1 Action Point and can be done once per turn. To perform this action, your Scout must be adjacent to a face-down tile. Then you flip the tile, rotating it as you please, and place it back on the map. After this, you draw a card from the Exploration Event deck and resolve it.
There are 2 types of Exploration Events: those presenting a choice between two options and those triggering an encounter. In the latter scenario, players must place a neutral unit on the space marked with the encounter icon. These neutral units do not initiate attacks against players, but they can be targeted by anyone. Once defeated, they provide the reward specified on their card and are then removed from the map.
When placing neutral units, use the corresponding standees or wooden miniatures.
Attack
Performed by Armies
It costs 1 Action Point and can be done up to 2 times per turn. When an Army unit is adjacent to a target, such as enemy units, Outposts, Capitals or neutral units, it can perform an attack (see Combat on page 17).
Buy
Performed by the Capital
It costs 1 Action Point and can be done up to 3 times per turn*. The Buy action allows you to acquire upgrades, buildings, Scouts and Armies by spending the corresponding resources (the cost of each item is indicated on the Player boards). When you buy a unit, you must place it on a valid space adjacent to either your Capital or any of your Outposts.
When you spend resources to buy something, you can use Crystals as well. They are not considered resources, but they can be used as any type of resource.
Initially, players are limited to performing only 1 Buy action per turn. However, building the Market unlocks the 2 additional Buy actions.
Propaganda
Performed by the Capital
It costs 1 Action Point and can be done up to 2 times per turn. To perform this action, you must pay 1 Crystal. Then, choose between increasing your People Support by 1 point or decreasing another player's People Support by 1 point.
Initially, this action is locked, so you cannot perform it. To unlock it, you must build the Comms Tower building in your Capital.
Trade
Performed by the Capital.
It costs 1 Action Point and can be done up to 2 times per turn. With a single Trade action, you can spend 2 of your resources (same or different type) to get 1 Crystal (this can be improved by the Improved trade upgrade).
Power Card
Performed by the Capital
It costs 1 Action Point and can be done up to 2 times per turn. To perform this action, you need to pay 1 Crystal to get 1 Power card or discard 1 of the Power cards in your hand to get 1 Crystal.
Collect Taxes
Performed by the Capital
It costs 1 Action Point and can be done up to 2 times per turn. Collecting taxes grants you 1 Crystal, but your People Support will be decreased by 1 point (see People Support on page 19).
This action can still be performed even if your People Support is already -3. In this case there are no negative consequences for you.
Units
There are two types of units: Scouts and Armies. Each type of unit has a different cost and can perform a series of different actions.
Scouts
They can perform the Build Outpost, Explore and Move actions. They have Basic Combat rank, but they cannot attack.
Armies
They can perform the Move and Attack actions. Initially they have Basic Combat rank, but they can be upgraded to Medium and Superior Combat rank.
Constructions
In Rise of the Wastelands there are 3 types of constructions: Capitals, Outposts and Buildings. Capitals and Outposts are placed directly on the map, while Buildings are placed on the Capitals or Outposts.
Capital
It serves as the base for each faction, with each player starting with one placed on their Capital tile. They cannot attack, but when defending, Capitals have Superior Combat rank. They cannot be destroyed, but they can be defeated (for more information, check the Combat Rewards section on page 18).
Tech Lab
It is built on the Capital. It allows you to acquire level 2 upgrades. If the Tech Lab gets destroyed (i.e., by a Sabotage card), the already acquired level 2 upgrades are not affected.
Market
It is built on the Capital. It unlocks 2 additional Buy actions, allowing you to perform the Buy action up to 3 times on your turn.
Comms Tower
It is built on the Capital. It unlocks the Propaganda action, while also providing a +1 to your combat strength.
Outpost
It is built on a ruined city space by Scouts. They cannot attack, but when defending, Outposts have Medium Combat rank. You start with 4 Outposts on your Player board, each dedicated to a different resource type.
They generate 1 resource per Recycle action when they are on the map. Upon construction, Outposts automatically generate 1 resource of the corresponding type, and they can already perform Recycle actions on that turn. When defeated in combat, the Outpost, along with its expansion (if any), is removed from the map and returned to its owner's Player board.
Outpost Expansion
It is built on an Outpost. It generates 1 extra resource of the corresponding type when performing the Recycle action on that Outpost. Additionally, it provides a +2 to the Outpost's combat strength, and when built, it immediately grants you 1 point of People Support.
Upgrades
Upgrades allow you to improve your Armies, actions and your overall capabilities. They can be acquired through the Buy action and their effects are applied immediately. Initially, you are limited to buying level 1 upgrades. However, building the Tech Lab grants you access to level 2 upgrades (if your Tech Lab is destroyed, the level 2 upgrades that you may have remain unaffected). When you acquire an upgrade, place a faction cube on the socket of that upgrade to indicate that you own it.
Level 1 Upgrades
Improved Trade — When you perform the Trade action you only need to spend 1 resource to gain 1 Crystal.
All-terrain Speed — Your units move an extra space per Move action. Additionally, they can move through any type of terrain with no restrictions or penalties (but they must end their movement on a valid space).
Radioactivity Immunity — Your units, Outposts and Capital are immune to the effects of radioactivity (including the Toxic Clouds from the Toxic Cloud module).
Combat Support — Add a +2 to your combat strength as long as your People Support remains at +2 or +3.
Combat Training — Add a +1 to your combat strength.
Medium Combat — Your Armies now have Medium Combat rank.
Level 2 Upgrades
Requires: Tech Lab
Extra Action — You get an extra Action Point, which can be used immediately. If you lose this Upgrade, return the Action Point to the left socket on this Upgrade.
Increased Productivity — When you perform the Recycle action in any of your Outposts, it generates 1 extra resource of the corresponding type.
Superior Combat — Your Armies now have Superior Combat rank. To acquire this Upgrade, you first need to have Medium Combat.
Power Cards
Power cards are a special type of cards with two mutually exclusive purposes: providing a one-time powerful action and increasing your combat strength.
They are divided into two sections:
- The upper section indicates the action you can perform.
- The lower section indicates the Combat rank values that will be used in a combat.
These cards can be acquired in different ways:
- By performing the Power card action (paying 1 Crystal).
- When you get influenced by another player and the Influence token is placed on a slot with the draw Power card icon.
- Using the faction leader ability Power seeker.
- As rewards in some Exploration Events or after winning a combat.
1. Action Section
This section contains special actions that you can perform during different moments of the game (on each card it is specified when and how they can be used). Generally speaking, playing cards from your hand does not cost any Action Points, but some cards require you to spend an Action Point in a specific action. This means that to use the card, you must move 1 Action Point from your supply to the corresponding action socket. Therefore, you cannot use the card if there are no available sockets for that action, if it is not unlocked yet, or if you don't have any Action Points left.
2. Combat Rank Section
This section shows 3 values, each corresponding to Basic, Medium and Superior Combat rank. When participating in a combat, your Combat rank will be determined by who you are fighting with:
- Armies: initially basic, upgradable to medium and superior.
- Scouts: always basic.
- Outposts: always medium.
- Capitals: always superior.
The possible values for each rank are:
- Basic: 1, 2, 3, 4
- Medium: 2, 3, 4, 5
- Superior: 3, 4, 5, 6
For more information about how the Combat rank is used, check the Combat section on the next page.
Combat
When an Army performs an Attack action (see page 12) against an adjacent enemy, combat begins. Before engaging in a combat, it is important to know which combat modifiers will apply to both players, how many Leader cubes they have, and the potential rewards they can gain. With this information, players can decide whether initiating combat is worthwhile.
Combat Sequence (Player vs. Player)
-
Get Power Cards — The attacker draws a Power card first, followed by the defender. Each player chooses between the card they just drew and any other Power cards they might have in their hand*. The Combat rank value used in the combat is determined by the selected card. (For more information, check the Combat rank section on the previous page.)
*If you choose to use a card other than the one you just drew, you keep the drawn card.
-
Check Combat Modifiers — Both players check the applicable combat modifiers on their reference cards. This information is open and should be shared with all players.
-
Select Leader Cubes — Both players get a set of Combat Tactics cards, and secretly choose one to indicate the number of Leader cubes they will use in combat (from 0 to 3, with each Leader cube adding a +1 to their combat strength). For more information about Leader cubes, see page 21.
-
Resolution — Simultaneously, both players reveal their Combat Tactics and Power cards. Each player then adds the value of their Combat Tactics card, the corresponding Combat rank on their Power card and their combat modifiers. The total sum determines each player's total strength, and the player with the highest combat strength wins. In the event of a tie, there is no winner or loser.
-
Aftermath
- Used Power cards go to the discard pile.
- The defeated player removes the involved unit or Outpost from the map, placing it back on their Player board.
- The defeated player keeps the Leader cubes used in combat, while the winning player (or both players in case of a tie) loses the used ones (if any).
- Players get the corresponding combat rewards (see the Combat rewards section on the next page).
Combat Modifiers
There are 2 types of combat modifiers: default and acquired.
Default (always applied in any combat)
- +1 if you are the attacker.
- +1 if you have more Military Prestige than the opponent (only player vs. player).
- -1 if your unit is on a space with a desert.
Acquired (can be gained through various means)
- +1 if you have built the Comms Tower.
- +2 if you have the Combat support upgrade and your People Support is +2 or +3.
- +1 if you have the Combat Training upgrade.
- +2 if one of your Outposts is under attack, and you have an Outpost Expansion built in it.
Combat Rewards (Player vs. Player)
- Attacking: 1 point of Military Prestige.
- Tying a combat: 1 point of Military Prestige to the defender.
- Defeating an Army: 1 point of Military Prestige and 1 Loot die roll (this is applicable to both, attacker and defender).
- Defeating a Scout: no reward.
- Defeating an Outpost: 1 point of Military Prestige and 2 Loot die rolls. The defeated player gets 2 resources of the type generated by the Outpost (resources salvaged by the fleeing workers).
- Defeating a Capital: 2 points of Military Prestige and 2 Loot die rolls.
- The attacker may place 1 Influence token on the defeated player*.
- The attacker cannot attack this Capital anymore.
*The Influence token is placed right away after the combat and no positive People Support is required to place this influence.
Combat Against a Neutral Unit
In a combat between a player and a neutral unit, the attacker will follow the normal combat steps, while another player will take the role of the neutral unit. The Exploration Event card shows the combat strength of the neutral unit, which is determined by drawing a Power card or rolling a die. Either way, the combat strength of the neutral unit will be revealed at the end of the combat.
Defeating a neutral unit provides the reward specified on the corresponding Exploration Event card.
People Support
In Rise of the Wastelands, an important part of every faction is its people. Besides providing some extra benefits, having happy or supportive people is required in order to trigger the endgame*. It is tracked on your Player board and at the beginning of the game your people have a neutral attitude (0 points). There is a maximum People Support value that can be reached (+3) and a minimum (-3).
The endgame can be triggered without positive People Support if a player places their 5th Influence token by defeating the Capital of another player.
People Support Is Important
- In order to claim the fifth (as well as the sixth and seventh) achievement, you must have positive People Support.
- As long as you have positive People Support, you are granted an extra Action Point.
- If you have the Combat support upgrade, your People Support may grant you extra combat strength (for more information about Upgrades, see page 15).
- The first time you reach +3 or -3 points of People Support, you are rewarded with a Leader cube.
How To Increase People Support
- By performing the Propaganda action: when you perform this action, you can decide to increase your People Support by 1 point.
- By Military Prestige: every time you reach an even number in your Military Prestige track (2, 4, 6 and 8), your People Support goes up by 1 point.
- By building an Outpost Expansion: every time you build an Outpost expansion, your People Support goes up by 1 point.
How To Decrease People Support
- By performing a Propaganda action: when you perform this action, you can decide to decrease another player's People Support by 1 point.
- By getting influenced by another player: when another player places an Influence token on your Player board, your People Support is decreased by 1 point.
- By performing a Collect taxes action: when you perform a Collect taxes action, your People Support is decreased by 1 point.
In addition to all this, People Support can be increased or decreased by some Exploration Events and by the Rumours power card.
If your People Support is decreased to 0 during your turn, you must immediately return one of your unused Action Points (or any if all are already used) to the People Support track on your Player board.
Map Tiles
The map in Rise of the Wastelands consists of several tiles, each divided into 7 spaces. These spaces feature various types of terrain, along with 2 special icons that can appear on the map, all of which influence gameplay in different ways.
Capital
Found on each Capital tile, at the start of the game players must place their Capital on it.
Plain
These spaces have no special characteristics, but often include flavour artwork on them.
Ruined City
These spaces are the only ones where Scouts can build Outposts on.
Mountain
Units cannot cross or end their movement on spaces with mountains (exception: the All-Terrain Speed upgrade enables units to cross mountains, but they still cannot end their movement on them).
Desert
When a unit moves to a space with a desert, it cannot perform more movements on that turn (this also applies when a unit is built on a desert). Exiting a desert on the next turn will occur as usual (the All-Terrain Speed upgrade removes this movement penalty, though). In combat, units on a desert receive a -1 penalty to their combat strength.
With the All-Terrain Speed upgrade there is no movement penalty caused by the deserts.
Toxic Lake
These spaces can be crossed normally, but units cannot end their movement on them.
Radioactivity Icon
At the beginning of your turn, if you have a unit on a space with radioactivity, you must roll the 1D6. If you roll a 1, 2 or 3, you lose the unit. If your roll a 4, 5 or 6, your unit survives.
With the Radioactivity immunity upgrade you don't need to perform any radioactivity check.
Encounter Icon
When you explore a tile, the revealed Exploration Event might trigger the placement of a neutral unit on the map. In that case, the neutral unit must be placed on the space with the encounter icon.
Factions
Each faction has a leader, represented on their corresponding Leader board. Each leader has 3 abilities and 5 Leader cubes, which will be used to activate their abilities. While Combat Tactics is shared among all leaders, the remaining abilities are unique.
Each ability can be only used once per turn and only on your turn (except for Combat Tactics).
In addition to their abilities, each leader has a personal goal aligned with their life aspirations. Achieving this goal will grant the leader 2 extra Leader cubes.
On the back of each Leader board you can learn more about the leader, along with tips for using their abilities more efficiently. Be aware that when a leader spends a Leader cube, it is gone forever, so you have to use them wisely. However, there are 2 ways to get some extra Leader cubes:
- Accomplishing the leader goal
- Getting a +3 or -3 in your People Support for the first time.
If you obtain a Leader cube, but your Leader cube pool is full, just place it nearby.
Example leader — The Adventurer:
- Combat tactics — In combat you may spend up to 3 Leader cubes to increase your combat strength (1 Leader cube = +1 combat strength).
- Resourceful — Once per turn, spend 1 Leader cube to gain 1 Crystal.
- Sprinter — Once per turn, spend 1 Leader cube to move one of your units up to 4 spaces (following the standard movement rules). The effects of the All-terrain Speed upgrade are not applicable.
- Leader goal — At the end of your turn, have 3 units (at least one Scout) on 3 different tiles (excluding your capital tile). One of the units must be 2 tiles away from your capital tile.
Toxic Cloud Module
This module adds the following components to the base game:
- 5 Toxic Cloud tokens
- 1 movement card
- 3 new Power cards
During game setup, place the Toxic Cloud tokens next to the map. Also add the 3 new Power cards to the Power card deck and shuffle.
It is advised to make sure that some tiles with toxic lakes will be part of the map.
When you reveal a tile with a Toxic Lake, place a Toxic Cloud token on the space with the lake. Whether this is the first cloud or there are already clouds on the map, you must handle the clouds' movement at the end of your turn. From that point on (until all clouds leave the map), at the end of each turn, the active player will manage their movement.
The direction the clouds move is determined by the Toxic Cloud movement card. At the beginning of the game, decide the map's North and place the movement card beside the map, aligning its top side with North. Then, when you need to take care of the clouds' movement, roll the 1D6 and refer to the card to determine the wind direction. Move all clouds on the map 1 space in the indicated direction. If a cloud moves into an undiscovered area or off the map, remove it from the game.
When a unit is on a space with a Toxic Cloud, it can only perform the Move action. Additionally, Toxic Clouds affect units in the same way as the radioactivity icon (see Map tiles on page 20). However, when clouds are on an Outpost or Capital, the effects are different.
When a Toxic Cloud is on a space with an Outpost, that Outpost cannot perform any Recycle action on that turn. And when it is on a Capital, its owner cannot perform any of the actions within the Capital section of the Action tracker during their turn.
The Toxic Clouds have no effect on neutral units. The effects of the Radioactive Immunity upgrade also apply to the Toxic Clouds.
Special Tiles Expansion
This expansion adds 3 new special tiles with unique mechanics to the base game.
When setting up the map, randomly chose 1 (or 2 in the case of a 2-player map) of the 3 special tiles, and follow the setup shown in the rulebook:
- 2 players — Use the alternative 2-player map, placing the 2 special tiles face up.
- 3 players — Use the alternative 3-player map, placing the special tile in the centre of it, face up.
- 4 players — Place the special tile in the centre of the map, face up.
1. Crystal Crater
This tile represents a huge crater filled with Crystals. If you have a Scout on any space of this tile, you can perform an Explore action to get 1 Crystal.
All the spaces of the tile can be crossed as any plain terrain.
2. Isolated City
This tile portrays a city that has remained isolated due to the surrounding deserts. Mechanically speaking, this city functions as a powerful neutral unit.
Its combat strength is Superior Combat +1, and when defeated, it provides 2 points of Military Prestige + 2 Loot dice as reward.
Once defeated, it cannot be attacked again, and the central space can be crossed as any plain terrain.
3. Lost Explorers
This tile depicts a ring of mountains with a clearing in the centre. Explorers from all factions have ventured into this weird formation, only to become lost along the way.
At the beginning of the game, each player must place 1 of their Faction cubes in the centre space of the tile, representing the lost explorers.
To rescue your explorer, you must first reach the centre space with a Army or Scout. Then, move your unit out of the tile, so the rescue is successful. Now remove your cube from the centre and gain 2 points of People Support and roll 1 Loot die.
Be aware that in order to cross the mountains and reach the centre, you must have the All-terrain Speed upgrade.
Once your explorer has been rescued, you cannot go back to the centre space of the tile.
Solo Mode
Automated Players
When playing solo or in a 2-player game, you can add 1 or 2 automated players, while in a 3-player game you can only add 1.
Human players follow the same rules as they would in a game against other humans. However, automated players perform a reduced set of actions, which are described in the automated action cards.
Automated Action Cards
Automated Action cards are divided into two halves, each describing an action for the automated players to perform. One automated player will perform the action in the upper half of the card, while the other will follow the action in the bottom half.
If there is only one automated player in the game, just use the upper half of the cards.
The actions that automated players can perform are:
- Explore a tile.
- Build an Outpost or the Comms Tower.
- Place an Army.
- Get a combat upgrade.
Automated Action cards are divided into 3 subsets: Beginning, Middle and End, which is indicated by the numbers on their back. Besides these sets, there is 1 Starting Card, indicated by the letter S.
Some cards, known as Claiming Achievement cards, display a 'Claim an Achievement' message at the top of each half, above the action to perform.
The Beginning set has 1 card of this type, the Middle set has 2 and the End set has 3.
Setup
Player setup is done as usual for human players, and the map setup will depend on the total number of players (human + automated). For the automated players, you only need their Player boards, which have to be filled with the components of the corresponding colour, and the Automated Action deck.
Then prepare the Automated Action deck according to the difficulty level you want to play:
- Easy: remove the Claiming Achievement card from the Beginning set. Remove a random Non-Claiming Achievement card from the Middle set.
- Medium: remove 2 random Non-Claiming Achievement cards from the Beginning set. Remove a Claiming Achievement card and a random Non-Claiming Achievement card from the Middle set.
- Hard: remove 3 random Non-Claiming Achievement cards from the Beginning set. Then, take 1 Claiming Achievement card from the Middle set and put it aside. Next, remove 3 random cards from the Middle set. Finally, return the set-aside Claiming Achievement card back to the Middle set to complete it.
Then, shuffle each set separately and create a face-down deck. Place the End set at the bottom, the Middle set in the middle, and the Beginning set on top. To finish the Automated Action deck, place the Starting card on top of it.
Gameplay
A human player always starts the game. The turn order of the rest of the players, human and automated, is determined by the order of the capitals on the map, going clockwise from the capital of the first player. Players continue to take turns until a human or automated player has 2 or less Influence tokens in their influence pool at the end of their turn, which triggers the endgame. The endgame and winner are resolved as in a standard game.
A turn for an automated player consists of 4 steps:
- Allocate influence.
- Draw a new card from the Automated Action deck.
- Perform the action on the Automated Action card.
- Claim an Achievement (if stated on the card).
1. Allocate Influence
Allocating influence works as usual for human players (in order to win the game, players also need to influence all the automated players). Automated players allocate influence starting from the next player (human or automated) in the turn order. Then they follow the turn order whenever they need to allocate influence again. Note that influenced automated players also get Power cards when required.
2. Draw a New Card From the Automated Action Deck
Whether it is the first of the automated players or the only automated player in the game, draw a new card from the Automated Action deck. Otherwise, skip this step.
3. Perform the Action on the Automated Action Card
The automated player performs the action described on the top half of the automated action card (or the bottom half if it is the second automated player):
- If it has to place an Army unit, place it on a valid space with no radioactivity on it.
- If it has to build an Outpost, choose the type following this order: water, ammunition, energy and metal. The automated player gets a resource of the corresponding type.
- If it has to explore, choose the corresponding undiscovered tile and flip it (you may rotate it in any direction before placing it back on the map). Draw an Exploration Event card and resolve it (if there is a choice, always take the first option).
If the automated player cannot perform the action described on the card, then ignore it (the automated player will not perform any action on this turn).
Follow this order for automated player Outpost placement: water, ammunition, energy, metal.
When the automated player has to select a tile to explore or place an Outpost or Army, imagine the back of the automated player's capital as 12 o'clock. Then, going clockwise, choose the first available tile.
4. Claim an Achievement
The automated player claims an achievement if it is stated on the card, even if the action couldn't be performed. To decide which achievement to claim, roll a 1D6:
- 1 or 2: claim the leftmost achievement.
- 3 or 4: claim the achievement in the middle.
- 5 or 6: claim the rightmost achievement.
In case of having less than 3 achievements for the automated player to claim in the last turn, the automated player doesn't claim anything if the die roll corresponds to a non-existing achievement.
Combat Against Automated Players
Combat against automated players works as against other human players. The automated player will:
- Draw a Power card and use the corresponding Combat rank value depending on their upgrades. They will always use the power card they just drew, even if they have other combat cards in their 'hand'.
- Add any applicable combat modifier.
- Add Leader cubes to their combat strength depending on the last revealed automated card:
- If the card is from the Beginning set, they won't use any Leader cubes.
- If the card is from the Middle set, they will use 1 Leader cube (if available).
- If the card is from the End set, they will use 2 Leader cubes (if available).
The rewards for combat against automated players are the same as against human players (and the automated players also get the corresponding rewards if applicable).
FAQ
- Spending Action Points in the Buy action when using Power cards also count for the Buyer achievement.
- In some Exploration Event cards and some Leader abilities, you can get a resource plus rolling a die. You are allowed to do those 2 things in any order.
- The 'Rain of Fire' and 'Ballistic Missile' Power cards say: "No more modifiers will be applied". This includes combat modifiers, Leader cubes and the Moral Boost Power card.
- Losing an attack using the 'Rain of Fire' or 'Ballistic Missile' Power card doesn't have negative consequences for the attacking player.
- You can use the 'Rain of Fire' Power card on another player's turn, but if that player has already declared an action (attacking, moving, buying, etc), you have to wait until that action is resolved before using the card.
- When you play the 'Crystal Miner' or 'Bandit' Power card on your turn, you can already use its ability on that turn.
- In the Achievements, combat related upgrades are those that have the word combat in their title.
- On the Exploration Event cards you usually have some text followed by ">> gain something". You only need to pay attention to the ">> gain" part. The rest of the text is just to add some thematic flavour.
Glossary
- Action Points: cubes that represent the points a player can use to perform actions.
- Action Points pool: the slot on a players' Action tracker containing their Action Points.
- Capital tile: the players' starting tile, where their Capital is located.
- Control (a tile): to control a tile, you need to either have an Outpost on it or be the only player with an Army on it (and no Outposts from anyone). You always control your Capital tile.
- Crystal: a rare and polyvalent type of mineral that came to Earth in the meteors. It is not considered a resource, but it can be used as any type of resource when performing the Buy action.
- Encounter space: the space on a tile with an encounter icon on it.
- Influence pool: the slots on a players' Player board containing their Influence tokens.
- Loot die: the die featuring resources on four sides, a Crystal on one side, and a "draw a Power card" symbol on the remaining side.
- Map: the representation of the wastelands, which is made of tiles and can have different layouts.
- Neutral unit: any unit or construction placed on the map as a result of an Exploration Event that doesn't belong to any player.
- Positive People Support: any number above 0 in the People Support track.
- Received influence area: the slots on a players' Player board where the other players place their Influence tokens during the Influence allocation phase.
- Resource die: the die with resources in 4 of its sides and 2 other blank sides.
- Space: each of the 7 hexagons on a tile.
- Surplus: the slots on a players' Action tracker where they can keep their unused Action Points for the next turn.
- Tile: each physical piece that forms the game map.
- Unit: any miniature from a player that can move around the map. They can be Scouts or Armies.
- Valid space: a space on a face-up tile that has no mountains, toxic lakes, Outposts or units on it.
Icons
- Water resource
- Ammunition resource
- Energy resource
- Metal resource
- Any resource
- Crystal
- People Support
- Military Prestige
- Leader cube
- Action cube
- Temporary action cube
- Recycle action
- Combat strength
- Draw a Power card
- Power card
- 6-sided die
- Radioactivity
- Encounter