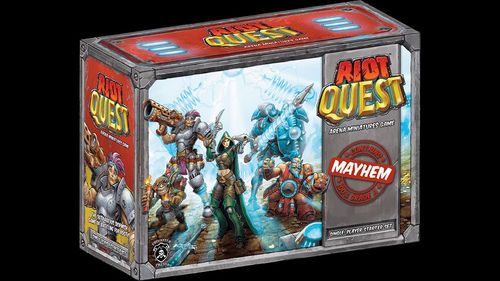
Riot Quest: Single-Player Starter Set
Riot Quest: Single-Player Starter Set Rulebook
Table of Contents
Table of Contents
Components
- Hero models and Hero Stat cards x 5 (Sir Dreyfus the Storm Knight, Gubbin, Bamfist, Eiryss, Fortune Hunter of Ios, Dez)
- Action Dice x 6
- Boost Dice x 4
- Power Dice x 4
- Six-sided die x 1
- Riot Gear cards x 5
- Treasure cards x 6
- Bounty cards x 12
- Scrap cards x 8
- Dice Well
- Rules Reference
- Arena Map
- Loot tokens x 14
- Damage tokens x 10
- Treasure Chest tokens x 6
- Turret token, Gremlin token, Malfunction token, Cortex token, Mysterious token, Trap token, Bomb token, Target token
- This rulebook
Overview
A game of Riot Quest typically lasts 20 to 30 minutes and can be played head-to-head between two players or as a free-for-all for up to four players. Players first determine which Arena they will play in and which decks they will use to represent the types of Treasure available in that Arena, as well as various Bounties each player can claim to score points. Once the stage is set, each player builds their Crew of Heroes and their hand of Riot Gear cards before diving into the fray.
Each round, players alternate taking turns activating one of their Heroes to perform various actions, such as running around the Arena, attacking Enemies, or raiding Treasure Chests. A player has a limited pool of Action Dice to spend each round, with at least one die being spent for each action a Hero performs.
Throughout the game, Treasure Chests will randomly appear around the Arena, which a Hero can raid to gain valuable Loot. Loot is spent to purchase the Riot Gear a player selected at the beginning of the game. This Riot Gear upgrades that player's Heroes.
PRO TIP: Be first to shoot and grab the loot!
Bounty cards represent the goals each player is attempting to achieve to score Victory Points and ultimately win the game. These Bounty cards might require a player's Hero to do a certain amount of damage to an Enemy during their turn, to interact with a specific token that was put into play by the Bounty card via a rig action, or any number of other possible goals. Every time a player meets the goals of a Bounty card, that player claims that card and its associated Victory Point value.
Claiming Bounty cards isn't the only way a player can score Victory Points. By attacking and knocking out Enemies, a player can claim Scrap cards, which are also worth Victory Points.
The first player to score 7 Victory Points wins the game.
As Treasure Chests are raided, Bounty cards are claimed, and Heroes are knocked out, they are constantly replaced at the start of each turn. This means the Arena is a dynamic battlefield with constantly evolving conditions and situations. To achieve victory in Riot Quest, a player needs the right tools at the right time, the cunning and foresight to react to the chaos of the Arena, and a little bit of luck.
Common Terminology
Riot Quest uses several game terms to describe the various concepts in the game. Below are basic descriptions of terms you'll see throughout this rulebook:
- Heroes are the models a player controls in Riot Quest.
- A Crew is the group of Heroes a player can spawn and play with during a game. Each player brings their own Crew in Riot Quest.
- Enemies include all Heroes in your opponents' Crews.
- The Arena is the map the game is played on.
- Dice are used to resolve the action in the game. Action Dice, the primary resource you use to perform actions with your Heroes, are stored and spent from your Dice Well.
- Treasure Chests randomly spawn in the Arena and contain valuable Loot, which is used to purchase Riot Gear. Chests spawn at Treasure Beacons, which are labeled on the Arena map.
- Riot Gear cards are upgrades that Heroes can equip to become stronger, more durable, and trickier.
- Treasure cards randomly determine what type of goodies a Hero finds when they open a Treasure Chest and also determine what type of Treasure Chest spawns.
- Bounty cards provide a variety of goals that a player must achieve to score Victory Points and ultimately win the game.
- Scrap cards provide a reliable method to score Victory Points (VPs) by knocking out Enemies.
What You Need to Play
Riot Quest is a game for 2-4 players. You'll need a few important things before you dive into the mayhem of Riot Quest.
Models
The primary models used to play Riot Quest are the Heroes in a player's Crew. Other model types will be introduced in future expansions.
Each Hero comes with a card detailing its stats and special rules. This card is also used to track the Hero's stamina (see Hero Stats) as it suffers damage during play, how many Action Dice have been spent by the Heroes, and any special tokens the model might be carrying.
A model is referred to as "in play" if it is in the Arena. For example, a model within a hex space on the Arena map is in play while a model on the Bench is not.
Arena
Games of Riot Quest are played on Arena maps, where the action takes place. The Arena map determines where your Heroes spawn into battle, what type of terrain your Heroes must traverse, where Treasure Chests are located, and the position of other key elements that can affect the course of the game.
Each Arena map is sectioned into hex spaces. If a Hero or barrier terrain (see Terrain) is within a hex, that hex is considered occupied. A hex can only be occupied by one model or barrier at a time, though some rules allow models to pass through occupied hexes during their movement as long as they do not stop in that hex.
Dice
Dice play a pivotal role in Riot Quest, and strategic use of them throughout the game is the key to victory. The white Action Dice are used as a resource in the game in addition to being rolled to determine various results. Each player must have their own set of dice. The four types of dice are Action Dice, Boost Dice, Power Dice, and traditional six-sided dice (d6).
Cards
Cards provide the stats for the various Heroes and Riot Gear upgrades and also represent the ever-changing bounties and Treasure Chests throughout the game. Each player must have their own set of Hero cards, Riot Gear cards, and Scrap cards. All players will share a single Bounty deck and a single Treasure deck.
Tokens
Tokens represent the accumulation of damage on Heroes, a player's collected Loot, the location of Treasure Chests, and some of the Bounty card goals Heroes try to complete. Each player must have their own set of damage and Loot tokens. The player providing the Bounty deck and the Treasure deck (see Choosing Decks & Maps) also provides the appropriate Bounty and Treasure Chest tokens.
Dice in Riot Quest
In addition to six-sided dice, Riot Quest uses special dice. Instead of using pips or numbers, Riot Quest's special dice use explosion symbols to indicate strikes and blank faces to indicate misses. A strike is indicated by one explosion on the die. A super strike, indicated by two explosions, counts as two strikes. When rolling dice in Riot Quest, simply add up the number of explosion symbols rolled to determine the total result. For instance, the three dice shown in the rulebook (a miss, a strike, and a super strike) add up to three strikes.
Riot Quest uses colored dice with different chances of rolling a strike depending on the color. There are three types and colors of dice:
Action Dice
The white Action Dice are comprised of three misses, two strikes, and one super strike. Action Dice are the basic resource of Riot Quest. Many of the actions a Hero can perform during an activation require spending at least one Action Die.
You begin the game with six Action Dice in your Dice Well. During the game, you move your Action Dice between your Dice Well and your Hero cards. After you spend dice from your Dice Well, place them on the card of your Hero who spent them. At the end of each round, you remove all Action Dice from each of your Heroes and return them to your Dice Well. Your Action Dice move back and forth between your Heroes and your Dice Well in this way throughout the game. A player can never have more than six Action Dice in their Dice Well.
If one of your Heroes is knocked out of play, or if a Hero returns to the Bench for any other reason, any Action Dice previously spent by that Hero remain on that Hero's card until the end of the round.
Boost Dice
The blue Boost Dice are comprised of two misses, three strikes, and one super strike. Boost Dice are special dice rolled based on the stats of a Hero's weapon when that Hero attacks, when they rig (see Rigging), or because of certain abilities or special circumstances. Boost Dice have better odds of success than Action Dice. Boost Dice are not placed either in your Dice Well or on your Heroes' cards and do not get used up when you roll them. They are bonus dice you get for free.
Power Dice
The red Power Dice are comprised of one miss, four strikes, and one super strike. Power Dice are special dice rolled based on the stats of a Hero's weapon when they attack or because of certain abilities or special circumstances. Like Boost Dice, Power Dice are not placed either in your Dice Well or on your Heroes' cards.
If you ever need to roll more Boost Dice or Power Dice than you have available, make your roll as normal, note the number of strikes rolled, then roll a number of dice again equal to the number of remaining dice to be rolled or up to what you have on hand. Continue doing this until you roll the number of dice required.
d6
This is a standard six-sided die with a number on each side. It is used to randomly determine different factors of gameplay, such as where Heroes spawn and which Treasure Beacon a Treasure Chest spawns to (see Loot & Treasure).
Some rules may call for a d3 to be rolled. This is shorthand for "roll a d6, divide by 2, and round up." When rolling a d3, a result of a 1 or 2 is a 1, a roll of 3 or 4 is a 2, and a roll of 5 or 6 is a 3.
Hero Stats
Each Hero has a corresponding stat card with a variety of information that indicates how quickly they run across the Arena, their combat prowess, unique abilities, etc.
Core Stats
- Name: This is the Hero's name. A player's Crew cannot contain any Heroes with the same name.
- Speed (SPD): This is how many spaces a model can move on the grid when it performs a Run action (see Movement & Terrain).
- Defense (DEF): A model's DEF stat determines how hard it is to hit this model with an attack. The DEF stat has two numbers: the first is the number of strikes your opponent must roll during a single attack to hit this model. The second is the number of strikes your opponent must roll to also score Super Damage on the model in addition to hitting it (see Super Damage).
- Stamina (STA): This is how much damage a model can take before being knocked out.
Class
Each Hero has a class that represents its role in the game. Classes include Fighter, Guard, Gunner, Rogue, Scout, and Specialist.
Classes are important for interacting with Bounty cards and Treasure Chests. Additionally, each class has an associated ability. This means that all Heroes of the same class have this ability in common.
- Fighters emphasize melee combat. Fighters all have the Charge ability.
- Guards emphasize durability; they protect the members of their crew. Guards all have the Safeguard ability.
- Gunners emphasize ranged combat. Gunners all have the Aim ability.
- Rogues emphasize stealth and loot acquisition. Rogues all have the Sneak ability.
- Scouts emphasize speed and offensive utility. Scouts all have the Spotter ability.
- Specialists emphasize support capabilities and gear acquisition. Specialists all have the Tinker ability.
Abilities
A model's special abilities are listed on its stat card, first by the name of the ability and then a description of its effect.
Some abilities are on the Hero themselves, such as their class abilities. These types of abilities are always in effect or, in the case of special actions, are always available to perform unless another specific rule prevents it.
The other abilities typically found on a stat card are tied to a specific weapon and are only in effect when that weapon is being used to make an attack.
Attack Stats
A model's attack options are represented by its weapon stat bars. There are two basic forms of attack: melee and ranged attacks. On a model's weapon stat bar, a melee icon denotes a melee weapon, and a ranged icon denotes a ranged weapon. (See Making Attacks.)
- Name & Icon: This is the name of the weapon being used. Next to a weapon's name will be the appropriate icon to indicate whether it is a melee or ranged weapon. A model must have a melee weapon to make melee attacks and must have a ranged weapon to make ranged attacks.
- Range (RNG): This indicates how many spaces away the target of an attack can be from the attacking model.
- Boost Dice and Power Dice: This is the number of Boost Dice and Power Dice that you roll (in addition to any Action Dice spent) when making an attack with this weapon.
Hero card anatomy (example: Dez): 1. Class; 2. Name; 3. Speed Stat; 4. Defense Stat; 5. Stamina Stat; 6. Hero Abilities; 7. Weapon Icon; 8. Weapon Name; 9. Weapon Range; 10. Weapon Dice; 11. Weapon Abilities.
Starting a Game
Players begin a game of Riot Quest by choosing which Bounty Deck to play (see Bounties & Winning the Game), the quality of Treasure to discover (see Loot & Treasure), and an Arena to play on. The Bounty deck in particular will heavily influence a player's choice of models to use in a given game.
For your first games of Riot Quest, it is recommended you use the Heroes, decks, Riot Gear, and map from the starter box.
Choosing Decks & Maps
Players can either agree on which Bounty and Treasure decks to use for the game or randomly determine which two to use by rolling a d6. The player who rolls highest chooses the Bounty deck, and then the player who rolled lowest chooses the Treasure deck. In the case of ties, reroll to determine highest and lowest roll.
Each Bounty and Treasure deck contains a specific set of cards. This is indicated by a deck icon and card number (Set Icon & Number, e.g. 1/12). Cards cannot be swapped between individual Bounty or Treasure decks; each deck must be played with the specific cards in that deck's set. However, any Bounty deck can be played with any Treasure deck when choosing which decks to use for a game.
After the decks for the game have been determined, players can either agree on which Arena map to use for the game, or the player who rolled highest to determine which Bounty deck to use can also choose the map.
Finally, each player should keep a stack of Scrap cards nearby. They will use these to score Victory Points each time one of their Heroes knocks out an Enemy by using an attack.
Building Your Crew
After the Bounty cards, Treasure cards, and Arena map have been determined, players choose the models on their Crew. Creating a Crew is easy -- just pick up to 10 Heroes from the available cast of Riot Quest characters you own. Your Crew can be made up of as many as 10 models or as few as five. Heroes are unique, so you cannot have more than one of each of them on your Crew. The more models on your Crew, the more options you will have available to you during play. In addition to your Crew giving you a selection of models to field, you also start with a hand of Riot Gear cards equal to the number of models on your Crew.
Four of the Heroes on your Crew begin the game in play, and you will generally have no more than four Heroes in play at any given time. The remaining Heroes on your Crew that do not begin the game in play remain on the Bench until they are spawned into play.
As models are knocked out of play (see Knocked-Out Models & Loot Tokens) during the course of the game, they are eventually returned to the Bench and other models in your Crew are spawned to replace them in your Arena.
Choosing Riot Gear Cards
After choosing the Heroes on your Crew, you next select a hand of Riot Gear cards. You start with one Riot Gear card for each Hero on your Crew (one Riot Gear card per model) and can choose from any Riot Gear cards you own. Riot Gear cards are unique; you cannot have more than one of each of them in your hand.
The rules for using Riot Gear cards are explained in Loot & Treasure.
PRO TIP: Bigger crew means more gear! And more gear means more face wreckin'! Slap it on every chance you get!
Setup & Initial Spawning
Once all players have chosen the models for their Crews and selected their hands of Riot Gear cards, choose one player to be in charge of resolving the Bounty and Treasure decks. Each time a new Bounty card is flipped over and each time a new Treasure Chest spawns, this player draws the card and makes any appropriate dice rolls required to set up any associated tokens.
Before the first round of play begins, the player in charge of these decks flips over two Bounty cards and spawns one Treasure Chest as described in Loot & Treasure and Bounties & Winning the Game. Next, players make a one-time setup roll to determine the order of the initial Hero spawning and who begins with Priority in the first round of the game. Each player rolls six Action Dice for the setup roll. The player who rolls the most strikes wins the setup roll. If two or more players roll the same number of strikes, the tied players reroll.
The player who wins the setup roll spawns the first Hero, then players take turns spawning Heroes until each player has spawned four Heroes. The rules for spawning Heroes are described in the Go Time section.
Multi-Player Games
In games with more than two players, the player who won the setup roll spawns the first Hero, followed by the other players in clockwise order.
Order of Play
With everything set up, it's time to battle! Riot Quest is played in a series of rounds in which players alternate activating one of their Heroes to run, attack, raid treasure chests, rig bounties, and perform special actions with their models until one player has succeeded in snagging victory.
A Round consists of:
- Priority Roll, when players roll off to determine who begins the Go Time for this round with Priority.
- Go Time, when players alternate activating their Heroes, performing actions, and spawning additional Heroes if necessary.
- The Cool Down, when players return their Action Dice to their Dice Well, evacuate Heroes, and determine which of their models leave the Cooler.
Priority Roll
At the start of each round (except the first), players make a Priority Roll. Each player rolls six Action Dice, and the player who rolls the most strikes wins the Priority Roll. If two or more players roll the same number of strikes, the tied players reroll. The player who wins the roll begins this round's Go Time with Priority.
Remember: don't make a Priority Roll for the first round of the game. The player who won the setup roll begins the first round's Go Time with Priority.
After the setup roll and each Priority Roll, players return their six Action Dice to their Dice Well.
Go Time
Go Time is when most of the action will take place each round. A player with Priority takes their turn, first by spawning Heroes if necessary and then by activating a single Hero. When the Hero's activation ends, Priority proceeds clockwise to the next player. That player takes their Turn and so on until all players have chosen to pass.
A player's turn is divided into two steps: spawning and activating.
At the start of each turn, before a player begins spawning or activating, the player in charge of the Bounty and Treasure decks must resolve any new Bounties or Treasure Chest spawns required. This is described in greater detail in later sections.
Spawning
When your turn begins, if you have less than four Heroes in play, immediately spawn Heroes from your Bench until you have four in play. If you do not have enough available Heroes, spawn as many as possible.
To spawn a Hero, start by selecting a model from your Bench. Heroes in the Cooler cannot be spawned into play (see Damaging Models, Getting Knocked Out & The Cooler). Once a Hero is selected, roll a d6 to determine which Spawn Gate on the Arena map the Hero will spawn to. Spawn Gate spaces are highlighted in blue on the Arena map. Place that Hero in any unoccupied space adjacent to the Spawn Gate. If there is not a space adjacent to the Spawn Gate for a model to occupy, roll again to determine another Spawn Gate.
Spawn Gates are barrier spaces, so Heroes never spawn directly onto the same hex as the Spawn Gate, only adjacent to it (see Adjacent).
Activating
Next, choose one of your Heroes in play that does not have any Action Dice on its stat card and activate it. When a model activates, it can perform the following five actions. A brief description of each follows, but the rules in later sections explain these in greater detail:
- Run: Spend an Action Die to move the Hero
- Attack: Spend one or more Action Dice and roll them to perform either a melee or ranged attack
- Raid: Spend an Action Die to open an adjacent Treasure Chest
- Rig: Spend an Action Die to interact with a Bounty, according to its specific rules
- Special Action: Spend an Action Die to perform a Special Action listed on the Hero's card
Example: Gubbin spends an available Action Die to run, allowing him to move across the Arena. Then, he spends another Action Die in the same turn to raid an adjacent Treasure Chest. Finally, Gubbin performs a ranged attack against a nearby Enemy, deciding to spend two Action Dice to do so instead of just one.
A model can perform any combination of these five actions during a single activation as long as enough Action Dice are available, but a model can perform each action only once per activation unless an ability or rule allows otherwise. For example, a model cannot run twice in a single activation. A model cannot perform both a melee attack and a ranged attack in the same activation unless a special rule allows it. However, in a single turn, a model can run, attack, and raid a Treasure Chest.
Models can perform these actions in any order but cannot interrupt their movements and attacks when doing so.
For each action performed, you must spend Action Dice from your Dice Well. Some actions, like attacks, allow the player to spend more than one Action Die. As your Hero moves, makes attacks, rigs bounties, etc., place the Action Dice spent on that Hero's card. These remain on the card until they are removed during the Cool Down phase at the end of the round.
A Hero must perform at least one action when that Hero activates.
When a player is done activating their Hero, Priority proceeds to the next player in clockwise order and their turn begins.
Remember, you can also spend Loot to equip your Heroes in play with Riot Gear cards (see Riot Gear) during Go Time when you have Priority. You can equip one or more of your Heroes when you have Priority even if the Hero being equipped isn't activating.
Passing
If your turn begins and you cannot activate a model (typically because all of your Action Dice have been spent for the round), you must pass. You can also voluntarily pass even if you still have Action Dice available, but it's usually not a good idea to do so. When you pass, you do not take a turn. Instead, Priority immediately proceeds to the next player, and you can no longer gain Priority this round. This means once you have passed, you will not have another turn until the next round.
Note: Because you do not actually take a turn when you pass, you do not spawn any Heroes nor does the player in charge of the Bounty and Treasure decks resolve these decks when you pass.
Cool Down
After all players have passed, the final phase of the round begins.
First, remove all Action Dice from your Heroes. Next, each player has the option to evacuate one of their Heroes in play. Starting with the last player to have Priority this round and continuing clockwise, each player can return one of their Heroes in play to their Bench. For a Hero to be evacuated, the Hero must meet the following criteria:
- the Hero must be undamaged
- the Hero must be on or adjacent to the center hex of the Arena map.
Evacuating a Hero is a great way to prepare yourself for the following round when you might need to spawn a different type of Hero to perform a specific action or to help complete a Bounty but do not want to wait until one of your Heroes is knocked out. Remember: when a Hero leaves play, any Riot Gear equipped to that Hero is discarded, so there is a potential "cost" to evacuating a Hero.
After the evacuation step is complete, roll to determine which of your Heroes in the Cooler are returned to your Bench (see Damaging Models, Getting Knocked Out & The Cooler), and finally, return all of your Action Dice to your Dice Well.
Loot & Treasure
Throughout a game of Riot Quest, Heroes run around the Arena, gathering up Loot tokens and raiding Treasure Chests. Loot is used to equip Heroes in play with Riot Gear cards from your hand (see Riot Gear). Loot is also gained by knocking out an Enemy and then gathering the Loot tokens the knocked-out model leaves behind. Some Bounty cards have additional rules enabling players to accumulate Loot tokens. Unlike Riot Gear, which is equipped to a Hero or some Bounty tokens, which can be held by a specific Hero, Loot tokens belong to a player and not to any specific Hero in that player's Crew. Each player begins the game with 0 Loot.
Knocked-Out Models & Loot Tokens
When one of your models is knocked out of play, place one Loot token on the space the model previously occupied. When a model enters a space with a Loot token on it, that model's controlling player gains that Loot token. If another type of token, perhaps specific to a Bounty card, enters the same space as a Loot token, the Loot token is not removed from the Arena map. Multiple tokens can exist in the same space because, unlike models or barriers, they do not occupy a space.
A player cannot have more than 10 Loot tokens at any time. If a Hero controlled by a player with 10 Loot tokens moves into a space with a Loot token on it, that token is not removed from the Arena map like normal.
Treasure Beacons, Treasure Chests & Raiding
Treasure Chests, and raiding them with your Heroes, provide massive benefits that will help you achieve victory in Riot Quest. The benefits available are determined by the Treasure deck.
Each Treasure card is made up of the following elements:
- Chest Type: The type indicates which type of Treasure Chest is spawned. This determines which Heroes can raid the Treasure Chest without spending an Action Die. Text under the type explains which Heroes can do so. (Example: "Iron Chest: Fighters can raid this Treasure Chest without spending any Action Dice.")
- Treasure Table: The table is the list of benefits a player can possibly receive when they raid the Treasure Chest.
Example card, Iron Chest (1. Chest Type, 2. Special Rule, 3. Treasure Table; set icon 1/6): "Iron Chest. Fighters can raid this Treasure Chest without spending any Action Dice." Treasure Table, three numbered rows:
- Gain 3 Loot tokens.
- Gain 4 Loot tokens, and you can immediately remove all damage tokens from a model in your Crew.
- Gain 3 Loot tokens, and you can immediately return one spent Action Die on a model in your Crew to your Dice Well.
To spawn a Treasure Chest, the player in control of the Treasure deck draws the top card and rolls a d6 to determine which Treasure Beacon space the Treasure Chest will spawn in. Treasure Beacon spaces are numbered 1-6 and are part of the Arena map. Treasure Beacon spaces are highlighted in yellow on the Arena map. Place the appropriate Chest token on the determined Treasure Beacon. Each Chest token matches one of the cards in the Treasure deck. The drawn card is placed near the Arena map to reference later if it is raided.
A Hero can raid a Chest during that Hero's activation by spending one Action Die while adjacent to the Chest. This Action Die is placed on that Hero's stat card after the raid is complete. If the special rules match the Hero raiding it, the Hero can raid the Chest without spending an Action Die!
When a Chest is raided, remove the Chest token from the Beacon, and then the raiding player immediately rolls a Boost Die and receives the benefit found on the Treasure table for the Treasure card in play. The Treasure card is then discarded next to the Treasure deck.
At the beginning of each player's turn, if there is no Treasure Chest on the map, the player in control of the Treasure deck spawns a new Chest as described above. If there are no cards left to draw in the deck, reshuffle the discarded Treasure cards to create a new Treasure deck.
While Treasure Beacons are barrier spaces (see Terrain), Treasure Chest tokens are not treated as models in terms of occupying hexes and are placed in the same space as the Beacon. A Hero never picks up a Treasure Chest token if that Hero has an ability that allows them to move through the Treasure Chest's space.
Riot Gear
Riot Gear cards are made up of the following elements:
- Name: This is the gear's name. A player's starting hand of Riot Gear cards cannot include any cards with the same name.
- Loot Cost: This is how many Loot tokens you must spend to purchase the Riot Gear card from your hand and equip it to one of your Heroes in play. The rules below explain the specifics of equipping gear.
- Effect: This explains how the Hero's core stats, weapons, and abilities are affected by having the Riot Gear card equipped.
Example card, Galvanic Repulsor (1. Loot Cost 3; 2. Name; 3. Effect): "This Hero gains the Shove ability. Shove: When this model performs this action, move an adjacent Enemy up to 4 spaces. The Enemy cannot end this movement adjacent to this model."
You can equip gear on your Heroes at any time during Go Time when you have Priority (see Go Time) by spending Loot tokens equal to the card's Loot Cost. You cannot, however, interrupt a model's movement or attack to equip it with gear. Once you have spent the Loot to pay the Loot Cost, place the Riot Gear card alongside the Hero's stat card.
Each Hero can have only one piece of gear equipped at a time. Only Heroes in play can have Riot Gear cards equipped to them. Heroes on your Bench or in the Cooler (see Damaging Models, Getting Knocked Out & The Cooler) can never have gear equipped to them for any reason.
You can choose to equip a piece of Riot Gear on a Hero that is already equipped with gear. If you do so, you must return the previously equipped Riot Gear card to your hand.
If a Hero with gear equipped is knocked out of play or placed on the Bench for any reason, its Riot Gear is broken, and the Riot Gear card is discarded. Additionally, some Riot Gear cards are discarded after they are used once, which is indicated by that card's effect. Each player should keep their discarded Riot Gear cards in a card pile nearby, as some abilities and rules may allow a player to return discarded cards to their hand for later use.
Bounties & Winning the Game
Players primarily score Victory Points (VPs) by claiming Bounty cards and Scrap cards.
Bounty Cards
Most cards are made up of the following elements:
- The Name of each card has no game effect. Bounty decks do not include any cards with the same name.
- The Setup indicates any tokens that need to be placed on the Arena map for this specific card. Not every Bounty card uses a Setup.
- The Goal indicates the condition that must be met for a player to claim a Bounty, as well as any special rules that are in effect while the card is active.
- The Value indicates how many VPs a Bounty is worth when claimed.
- The Rig Bonus indicates which kind of Heroes receive a bonus dice when attempting a rig action associated with this Bounty card. Not every Bounty card uses a Rig Bonus.
Example card, Telepandemonium (1. Name, 2. Setup, 3. Goal, 4. Value 2, 5. Rig Bonus: Specialist Heroes): "Setup: Place a Malfunction token on a random Spawn Gate. Goal: If a Hero would spawn at the malfunctioning Spawn Gate, that Hero spawns adjacent to a random Treasure Beacon instead. A Hero adjacent to the malfunctioning Spawn Gate can rig to fix it. If successful, that Hero's controlling player claims this Bounty."
When the player in control of the Bounty deck draws cards (such as the two that player draws during setup), the player resolves any Setup effects on those cards in the order they were drawn and then places the cards faceup next to the Arena map. While a Bounty card is faceup next to the Arena in this manner, it is considered active.
During a player's turn, when that player meets the requirement listed in the Goal of a Bounty, the player immediately claims the Bounty and scores a number of VPs equal to the card's Value. The Bounty card should be placed in front of the player who claimed it as a method to track their total VP score. The card is no longer active, its special rules no longer apply, and any Bounty tokens that were placed as part of its Setup are removed from the Arena.
At the beginning of each player's turn, if there are not two active Bounty cards, the player in control of the Bounty deck draws and resolves the setup of Bounty cards until there are two active cards. If there are no cards left to draw in the deck, do not reshuffle any Bounty cards claimed by players. Instead, players will have to rely on Scrap cards to score the remaining VPs required to win the game.
Bounty Tokens
The Setup of some Bounty cards includes placing various tokens on the Arena map. These are referred to as Bounty tokens. A Hero can enter a space with a Bounty token on it unless that space is restricted in some way, such as by being a barrier space.
Unless the Bounty card indicates the token can be picked up, do not remove the token when a Hero enters its space. If a token can be picked up, put the token on a Hero's stat card when a Hero enters its space to indicate that Hero is holding it. A Hero cannot hold more than one Bounty token at a time. If a Hero holding a Bounty token enters a space with another Bounty token that can be picked up, the token remains in the space and is not picked up.
If a Hero holding a token is knocked out or removed from the Arena for any reason, the token is placed in the space the Hero was occupying before being removed. This is referred to as dropping the token.
A Hero cannot voluntarily drop a token unless the Goal of a Bounty card indicates they can do so.
Rigging
The Goal of some Bounty cards will require Heroes to rig a particular element, typically a Bounty token, in order to claim the Bounty. Rigging can be performed during a Hero's activation, and an Action Die must be spent in order to do so (see Dice in Riot Quest).
If a Bounty card requires rigging, a Rig Bonus is displayed at the bottom of the Bounty card. The Rig Bonus indicates the type of Hero that receives an extra die when attempting the rig that is specific to that Bounty card. For example, if a Rig Bonus indicates "Fighter Heroes," Heroes with the Fighter class receive this dice bonus.
When a Hero rigs, roll three Boost Dice. If the total number of strikes rolled is three or more, the rig is successful; otherwise, it fails. If the Hero performing the rig receives a bonus, roll a Power Die in addition to the three Boost Dice.
Example: Eiryss is adjacent to the Deathtrap token, and the rules of the Bounty card that put the token into play say that a Hero adjacent to the Deathtrap can rig to disarm it. Eiryss spends one Action Die to perform the rig. Because she matches the Rig Bonus, she rolls a Power Die in addition to the three Boost Dice. Five strikes were rolled. The number needed to successfully rig is three strikes, regardless of if the roll received the rig bonus or not. With this roll, Eiryss has successfully rigged the Deathtrap.
Scrap Cards
Scrap cards are a constant method that any player can use to score VPs. All Scrap cards are identical, and all read "When a Hero you control knocks out an Enemy with an attack, claim this card," and all have a Value of 1.
Each time a Hero knocks out an Enemy as described, the controlling player adds a Scrap card to that player's stack of claimed Bounty cards, increasing their total VPs. If a player runs out of Scrap cards in their stack, they should either borrow some from an opponent or use a token such as glass bead to indicate they've scored a VP. In other words, even if Scrap cards aren't available, a player can always score a VP in this manner.
It is important to note that Scrap cards are only gained when Enemies are knocked out as the direct result of the damage from an attack. For example, if an Enemy is knocked out by stepping on a trap placed by a Bounty card, or if a piece of Riot Gear equipped to a Hero in your Crew damages Enemies every time your Hero gets hit, no Scrap card is gained.
Winning
In a standard game, a player immediately wins the game by earning seven or more VPs. For longer games, players can agree to play on a higher VP goal instead.
If two or more players score the required amount of VPs simultaneously, the player with the higher final VP total wins. If both players are tied for VPs, use the tiebreaker rules below.
If you must end your game before one player wins, the player with the highest VP total wins. If this results in a tie, the player with the most Loot tokens wins. If this results in a tie, the player with the most Riot Gear cards currently equipped to their Heroes wins. If the result is still a tie, the match ends in a draw.
Movement & Terrain
The most common type of movement in Riot Quest is running. Each model has a Speed (SPD) stat that indicates how many spaces it can move on the map each time it runs. When you want to move one of your models by running, you first spend an Action Die, place the die on that model's card, and move the model up to a number of spaces equal to its SPD stat. A model can run once per activation, though some abilities allow a model to move in ways other than running during their own or their opponent's turn.
Example: Bamfist spends one Action Die to run. His Speed is 4, so he can move up to 4 spaces when he runs.
A model can move in any direction. See the diagram in the rulebook.
At no point during a model's movement can it move through the same space as an Enemy unless the moving model has a special rule enabling it to do so. However, a model can move through the same space as a model in their own Crew. Remember, no model can end its movement on a space occupied by another model or on a barrier space.
Models cannot move off the Arena map. If at any time a model would be moved beyond the edge of the map, the model stops at the edge of the map. When you put models into play, you must put them on spaces they can legally occupy.
Some effects can cause a Hero to move. This movement is not considered running, but it follows all other normal rules for movement. Additionally, some effects can cause a Hero to be placed. When a model is placed, it is not considered movement; simply pick the model up and place it in an unoccupied hex space according the rules of the effect.
Example: Sir Dreyfus has the Jump ability, which (as printed in the rulebook; the card's ability is named LEAP) allows him to spend an Action Die to be placed on any unoccupied hex within two spaces of himself. Placing models in this manner does not follow the normal movement rules. The model is picked up and placed in an unoccupied hex. You are able to ignore the barrier space of the Spawn Gate when counting hexes in this manner, whereas with normal movement you could not move Dreyfus into this hex at any time.
Example: Dez has the Beatback ability on her Bazooka, which allows you to move Enemies she hits with this weapon up to 2 spaces. Moving models in this manner follows all the normal movement rules. When Bamfist is moved by Beatback into the obstacle space, it counts as 2 spaces instead of 1 due to the obstacle terrain rules, so he stops there.
Terrain
The spaces on the Arena map represent various types of terrain your models will traverse. Some are more difficult to cross than others.
- Open Terrain: The majority of spaces on an Arena map are these spaces and have no special restrictions.
- Obstacles: Count these spaces twice when a model moves into them. Obstacle spaces are highlighted in hazard markings on the Arena map. While a model is in an Obstacle space, it gains Cover.
- Barriers: Models cannot enter or move across these spaces unless they have an ability that lets them do so. A model cannot end its movement on a barrier space.
Remember, both Spawn Gates and Treasure Beacons are barrier spaces. Some cards and abilities can reference the "center of the map." Every Arena map has one open terrain hex space that features the Riot Quest logo in it -- this is the center of the map.
Cover
Some terrain and abilities grant Cover.
A model with Cover gains +1 DEF. This affects both the first and second DEF stat of a model, making it harder to damage them normally and to cause Super Damage.
Adjacent
The term adjacent describes something in a space next to a model, space, or token. A model is always considered adjacent to itself and to any tokens in the same space as that model.
Example: Dez and Gubbin are adjacent to each other. Eiryss is adjacent to the Loot token. Bamfist is adjacent to the Spawn Gate.
Making Attacks
Riot Quest has two types of attacks: melee attacks and ranged attacks. To make an attack, first choose the weapon the Hero making the attack will use and then choose a target within Range (RNG) of that attack. You must roll at least one Action Die from your Dice Well to make an attack, but you can use any number of Action Dice currently in your Dice Well.
Two other types of dice can affect attacks: Boost Dice and Power Dice. The weapon stat will indicate how many of each dice you add to your Action Dice roll when making the attack. Riot Gear and abilities can add or subtract dice as well.
Once you've gathered all your dice, roll them, count up the total number of strikes, and compare that total to the Defense (DEF) of your target. If the total number of strikes is equal to or greater than the target's Defense, the attack is successful and hits the target. After the attack resolves, place all the Action Dice used in the attack on your Hero's card.
All attacks cause the target to suffer 1 point of damage when they hit. However, if the attack roll results in enough strikes to equal or exceed the target's second DEF stat, they also suffer Super Damage (see below). Place a damage token on a Hero's card for each point of damage they suffer.
You can never target models in your own Crew with attacks unless a special ability or effect allows you to do so. And don't forget, even though many Heroes will have more than one weapon available to them, they can only make one attack each activation.
Example: Dez attacks Sir Dreyfus with her Bazooka and also has a piece of Riot Gear equipped that adds an additional Power Die to any ranged attacks she makes. Her controlling player opts to spend two Action Dice to make this attack. A 7 is rolled, which is greater than or equal to Dreyfus' upper DEF stat. Dreyfus is hit and suffers Super Damage, which causes 2 points of damage.
Example: Dez attacks Sir Dreyfus with her Bazooka, and her controlling player opts to spend the minimum number of Action Dice to make an attack (only one). This roll also includes three Boost Dice and one Power Die as those are the stats associated with the weapon being used. A 4 is rolled, which is greater than or equal to Dreyfus' lower DEF stat but not his upper DEF stat. Dreyfus is hit and suffers 1 point of damage.
Target Models
When you choose to have a model attack, you must select an Enemy as the target.
A model can make an attack targeting any Enemy within range. An attack's RNG is based on the weapon used. For example, a ranged weapon with a RNG 3 can target models up to three spaces away, while a melee weapon with a RNG 1 can only target an adjacent model.
Example: Dez has Range 1 on her Dagger melee weapon, and Range 3 on her Bazooka ranged weapon. Dez can make a melee attack against an Enemy within 1 space of her. Alternatively, Dez could make a ranged attack against an Enemy within 3 spaces of her. Note that models or barrier spaces don't hinder a model's weapon range in any manner, so Dez can target Eiryss with her Bazooka even with Gubbin and the Treasure Beacon between them.
Super Damage
When an attack rolls enough strikes to meet or exceed a target model's second DEF stat, the model suffers Super Damage from the attack, which means the target suffers 1 additional point of damage from the attack.
Some special rules enable a model's attacks to cause Super Damage if the attack simply hits its target whether enough strikes to meet or exceed the model's second DEF stat or not. If multiple abilities or effects that cause Super Damage occur on the same model, the target still only suffers 1 additional point of damage.
Damaging Models, Getting Knocked Out & the Cooler
Each model has a set amount of Stamina that determines how much damage it can suffer before being knocked out of play. Models are knocked out when they suffer damage equal to or greater than their Stamina.
When a model is knocked out, it is taken off the Arena map and placed in its controller's Cooler. Place 1 Loot token on the map in the space the model occupied (see Knocked-Out Models & Loot Tokens). Any Riot Gear cards that model had equipped are discarded. Any Action Dice already spent on that model this round remain on the model's stat card until the Cool Down phase.
Remember, your models that are knocked out of play are replaced by spawning new models during your next turn (see Spawning).
Models in the Cooler cannot be spawned into play. Instead, during a player's Cool Down phase, that player rolls a number of Action Dice equal to the number of models in their Cooler. For each strike rolled, that player can move one Hero from the Cooler to the Bench.
Example: Both Bamfist and Gubbin were knocked out and are in the Cooler. At the end of the round, you would roll two Action Dice since you have two Heroes in your Cooler. With one strike as the result, you can only choose one of these Heroes to leave the Cooler and return to your Bench. The Hero that remains in the Cooler won't be available when you spawn more Heroes into the Arena next round.
Additional Rules
Special Actions
Special actions are a type of ability that requires an Action Die to use. A model can perform a special action during its activation by spending one Action Die from the Dice Well. A special action cannot interrupt the movement of a model and cannot interrupt an attack. A model can only perform one special action each time it activates.
Duplicate Abilities & Special Rules
Each time abilities or special rules with the same name affect a single model, only apply that ability or special rule once. Similarly, if abilities or special rules with the same name affect a single attack, only apply that ability or special rule once.
Example: Dez's Bazooka has the Beatback ability normally (Beatback: If this model hits an Enemy with this attack, after the attack is resolved, you can move that Enemy up to 2 spaces so long as the Enemy ends farther from this model than it began). The Bang Rounds Riot Gear ("This Hero gains +1 Power Die on its ranged attacks, and their ranged attacks gain the Beatback ability.") also provides the Beatback ability to a model's ranged attacks. If Dez equipped Bang Rounds, she would receive the bonus Power Dice when making ranged attacks but would still only apply the Beatback ability once per hit, not twice.
Modifying Defense
If an ability or rule modifies a model's DEF, such as Cover granting +1 DEF, it affects both the first and the second DEF stat, unless stated otherwise.
Example: Sir Dreyfus has a Defense of 3/6. Standing in obstacle terrain, he gains Cover, so his Defense against any type of attack becomes 4/7 instead. This time, Sir Dreyfus is not benefitting from Cover and is suffering an enemy Eiryss' Spotter ability, which lowers his Defense against ranged attacks by 1. If the enemy Eiryss were to attack Dreyfus with a ranged attack, his Defense would become 2/5.
Timing of Abilities
A number of abilities can be triggered as part of an attack. Some specify they take place after the attack has been resolved, and others resolve as part of the attack in a particular order. When multiple abilities trigger at the same time, follow these steps to resolve them:
- The attacking player's abilities that trigger on a hit resolve first, in an order chosen by that player.
- The other player's abilities that trigger on a hit resolve next, in an order chosen by that player.
- The attacking player's abilities that trigger on damage resolve first, in an order chosen by that player.
- The other player's abilities that trigger on damage resolve next, in an order chosen by that player.
- The attacking player's abilities that trigger on knocking out a model resolve next, in an order chosen by that player.
- The other player's abilities that trigger on a model being knocked out resolve next, in an order chosen by that player.
- The attacking player's abilities that are resolved "after an attack is resolved" resolve first, in an order chosen by that player.
- The other player's abilities that are resolved "after an attack is resolved" resolve next, in an order chosen by that player.
If a model is removed from the Arena map before its abilities are triggered, its abilities do not take effect.