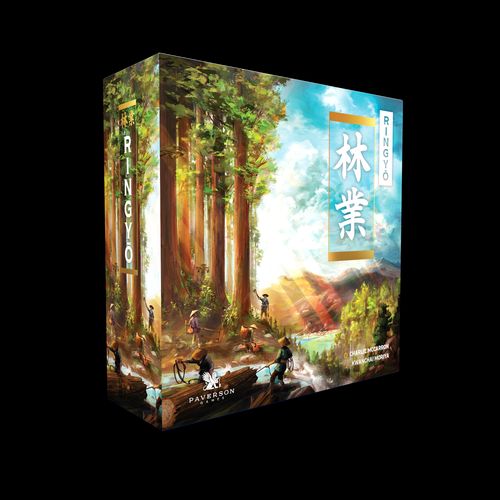
Ringyō
Ringyō Rulebook
Table of Contents
Table of Contents
- Components
- Game Setup
- Player Setup
- Game Structure
- Province Boards
- Forestry Track Board
- Structures Board
- Forestry Cards & Shogun's Favor Cards
- Research & Military Tokens
- Edo Council Phase
- Province Phase
- Structures
- Province Phase Example
- Weather Phase
- Weather Phase Example
- Lakes (Not Included in Preview Copy)
- Shogun's Demands Phase
- Shogun's Demand Phase Example
- End of Round
- Endgame Scoring
- Simultaneous Play Etiquette
- Endgame Scoring Example
- Forestry Track Board & Structures Board Bonuses
Components
- Edo Board
- Province Boards (4)
- Forestry Track Boards (4)
- Structure Boards (4)
- Forecast Cards (8)
- Shogun's Gifts Cards (10)
- Diplomat Cards (24)
- Forestry Cards (31)
- Shogun's Favor Cards (27)
- Weather Cards (10)
- Province Setup Cards (4)
- Player Aid Cards (12)
- Solo Board & Cards (18) (not included in preview copy)
- Round Marker
- Priority Order Markers (4)
- Research Tokens (32)
- Military Tokens (32)
- Forestry Track Markers (4)
- Rice Track Markers (4)
- Demands Markers (36, 9 per player)
- Shogun's Demands Tiles (12)
- Flood/Paddy Tiles (48)
- Structure Tokens (48)
- Farm/Fortress Tokens (48)
- Lake Tokens (6) (not included in preview copy)
- Bonus Land Tiles (20)
- Tree Segments (300, 75 of each)
- Worker Tokens: Villagers (24), Artisans (8), Yellow Samurai (16), Green Samurai (8)
Game Setup
- Place the Edo board in the center of the table.
- Place the round marker in the first position on the round track.
- Shuffle the Bonus Land Tiles and place them in a face-down stack next to the Edo board.
- Shuffle the Shogun's Favor cards, deal two to each player, and place the remaining cards in a face-down deck in the designated space on the Edo board.
- Shuffle the Forestry cards, deal one to each player, and place the remaining cards in a face-down deck in the designated space on the Edo board.
- Shuffle the Shogun's Gifts cards and place them in a face-down deck next to the Edo board. Then reveal one card from this deck per player, and place them face up in the display area. Where the card shows Bonus Land Tiles, a Forestry card, or a Shogun's Favor card, draw these from the relevant stack and place them face up on the Shogun's Gift card.
- Shuffle the Shogun's Demands tiles and place them in a face-down stack next to the Edo board. Then reveal the top two tiles and place these face-up in the display area.
- Shuffle the Forecast cards and place them in a face-up deck in the designated space on the Edo board.
- Shuffle the Weather cards and place these in a face-down deck next to the Edo board. Then draw the top three cards and, without looking at them, place them face down in the three spots to the left of the Forecast deck. These Weather cards will be revealed in the Weather phase of the first round.
- Take a Priority Order Marker for each player, in their color, and randomly determine a start of game priority order, placing the markers in that order on the priority track on the Edo board.
- Create a general supply within reach of all players of all the Villagers, Artisans, and Samurai, research tokens, military tokens, flood/paddy tokens, Farm/Fortress tokens, and the tree segments, split by color.
If using the advanced B sides of the Province boards, randomly mix together the Lake tokens and place them in a face down stack above the Forecast card deck. Then reveal the top Lake token and place it face-up on the top Forecast card. (NOTE: NOT INCLUDED IN KICKSTARTER PREVIEW COPY)
Player Setup
- Give each player a random Province Board and the matching Province Setup card, the Forestry Track Board and Structure Board in their color, 2 Yellow Samurai, a set of 6 Diplomat cards, 12 structure tokens, 2 standard player aids (portrait orientation), as well as a Rice Track Marker, Forestry Track Marker, and the Demands Markers in their color.
- Place the Province Board, A side up, in the middle of your player area, and place your Forestry Track board to the left of it, and your Structure Board to the right of it.
- Place the Forestry Track Marker on the bottom most step of your Forestry Track, your Rice Track Marker on step 5 on your Rice Track, and the Demands Cubes to one side in your personal supply. These will be used to score the Shogun's Demands.
- Place a structure token on each of the 12 structure spots on your Structure Board.
- Use the Province Setup card to populate your Province with matching tree segments (1, 2, or 3 high) and flood/paddy tiles (flood side up) from the general supply, based on the icons in each area shown on the card. Some areas start empty. Return the Province Setup card after setup.
- Choose one of the two Shogun's Favor cards you were dealt to keep, and return the other to the bottom of the deck. The chosen card, along with your Forestry card and 6 Diplomat cards can be kept in your hand, or placed down on the table near your Province.
Game Structure
The detailed rules are covered in the coming pages, but here is a brief overview of the game.
The game lasts 5 rounds, and each round is split into four phases:
- Edo Council Phase: Send diplomats to determine priority order (ties broken in reverse previous order). Gain Diplomat bonus, and choose Shogun's gift in priority order.
- Province Phase: Simultaneously take actions in your province using workers and special actions.
- Weather Phase: Gain military tokens from Fortresses and resolve Weather cards in order; grow trees, harvest paddies, flood empty & flooded areas.
- Shogun's Demands Phase: Contribute to the Shogun by fulfilling his demands, one at a time in priority order.
At the end of rounds 1-4 perform the end of round steps, and at the end of round 5 go straight to end game scoring.
Province Boards
Your Province Board is split up into 20 different areas, each with one of the four tree types in the game: Cypress, Oak, Pine, and Beech.
Some areas start the game with a tree of a certain height, others start empty, and some start with a Flood token. In between areas are pathways where your workers can be placed.
The Province Setup cards show you where to place the starting trees and flood tokens for each province.
At certain times during the game you may be able to expand your province by adding a Bonus Land Tile. When this happens the tile must be placed touching two other areas of your original Province (other bonus land tiles it is touching are not counted). You cannot place a tile above the top row of your Province, and can add a maximum of 8 tiles. Bonus land tiles will open up new intersections where your workers can be placed. When placing a tile, add either a 2 or 3 height tree, or a rice paddy, as shown.
Each Province Board has an A and a B side. The A side should be used for your first few games. More experienced players can choose to use the B side, which includes a less balanced combination of tree types, adding more asymmetry between players. The B side also introduces Lakes (p.15), blocking off two areas from use, but also increasing the productivity of surrounding structures. Feel free to use a mixture of both sides in your games, depending on the experience of each player.
Forestry Track Board
The Forestry Track is climbed by completing the Study worker action. Each step on the track has two options of a tree that can be studied. When studying, you must study a tree of that type and exact height of either of the two options.
Some steps in the center of the track show white tree segments, which means that any type of tree can be studied to advance to one of these steps, but it must be the exact height.
At various points on the track there are two or three paths that you can advance up, and it's up to you which one you choose. However, you can never go back down the track, so once a path has been chosen you must stick to it until you reach the next intersection.
Whenever you advance on the Forestry Track you gain the bonus shown. See page 20 for an explanation of all of these bonuses.
There are three levels of the track that provide additional honor points at the end of the game based on the trees in your province. These sections are cumulative, so if you reach the top you score all three (see End Game Scoring on p.16 for details).
Remember: You only ever need to study one of the two tree options at each step of the Forestry track.
Structures Board
The Structure Board includes your Rice Track at the top. Each time you spend or gain rice, move your marker on your Rice Track to show how much rice you have. The track may never go below zero, and you may have up to 18 Rice.
Below this are the 12 Structure tokens that can be built into Farms or Fortresses. The honor points that each structure is worth and the tree requirements to build it are shown directly below each structure.
When you build the second of two horizontally adjacent structures in the middle and top row, you gain a small bonus of either rice, military tokens, Forestry card, or peek at a Weather card, as shown in between those spots.
When you build the last structure in a column or a row, immediately gain the bonus shown for that column or row. See page 20 for an explanation of all of these bonuses.
Below your structures is your tree storage area, where you can store tree segments that have been cut from your province. Only tree segments in your storage area can be used to build structures.
Forestry Cards & Shogun's Favor Cards
All players start the game with one Forestry card and one Shogun's Favor card, and can gain more through the Shogun's Gifts, advancing up their Forestry Track, and building structures. There is no limit to how many of these cards you may have at a time.
Forestry cards can be used at any time during the Province Phase to gain some kind of bonus or to complete an action without using a worker.
Most Forestry cards are one time use, and are immediately discarded after use. Some Forestry cards' text starts with 'This round' and when played they remain active until the end of the Province Phase, and are discarded at the end of the phase. They cannot be applied retroactively.
All Forestry cards can be discarded during the Province Phase to gain 2 Rice. If you choose to do this you cannot also benefit from the card's ability.
Example: one Forestry card shown reads "Peek at the bottom 2 Shogun's Demands. Add 1 to the display and return the other to the bottom." This Forestry card adds an extra Shogun's Demand tile to the game. This is in addition to the 10 tiles that are normally revealed. Place the extra tile to the right side of the Edo board, this is available for all players to score in the Shogun's Demand Phase.
Shogun's Favor Cards are your personal goals, and they will reward you with honor points at the end of the game depending on how well you have achieved them.
For example, the Shogun's Favor "Beech Forests" shown here will score 2 honor points if you have 1 or 2 Beech trees, which are at least 2 high, in your Province at the end of the game, 6 honor points if you have 3 or 4, and 11 honor points if you have 5 or more.
While there is no limit to how many Shogun's Favor cards you may have, you will only be able to score up to 3 of them at the end of the game.
Research & Military Tokens
Research tokens represent knowledge learned in your Province. They are gained by completing the Study worker action. They are used to fulfill the Share Forestry Knowledge Shogun's Demands and can also be spent to peek at the Weather cards through the Foresee special action (p.11).
Military tokens represent armies being trained in your Province. They are gained by having Fortresses in your province and by completing the Muster worker action. They are used to fulfill the Bolster Military Shogun's Demands, and can also be spent to add extra land to your Province through the Expand special action (p.11).
Running out of cards, tiles, tokens, workers, or tree segments
If a stack ever runs out of cards or tiles, shuffle the discarded cards or tiles of that type to form a new stack. Tree segments, workers, flood/paddy tiles, research tokens and military tokens are intended to be unlimited. If you run out of any of these, use a suitable alternative.
Edo Council Phase
In this phase players will send one of their diplomats to the council meeting in Edo, to determine the priority order for the round and claim a gift from the Shogun. Priority set during this phase is also important for the Shogun's Demands phase (p.14).
- To start, secretly choose one of your Diplomat cards and place it face down on the table. The #6 diplomat can only be selected if you are able to pay the 2 rice cost (after revealing it).
- Once everyone has chosen their Diplomat card, reveal all cards and work out the priority order.
- The player who played the highest value card will take first priority, then the player who played the next highest value card, and so on. Update the priority track accordingly.
- Where multiple players played the same value card, the relative priority order of tied players is the reverse order from the previous round.
- Next, all players resolve any Diplomat bonus or cost stated in the top right corner of their chosen card.
Diplomat card effects:
| Diplomat | Effect |
|---|---|
| 1 | Draw 3 bonus land tiles, choose one to add to your province and discard the others. If multiple players played their #1 Diplomat this round, then they should take bonus land tiles from the stack in priority order. |
| 2 | Gain 1 Artisan |
| 3 | Gain 3 Rice |
| 4 | Gain 1 Villager |
| 5 | No Bonus |
| 6 | Must pay 2 Rice |
- Then, in priority order, choose one of the available Shogun's Gifts and claim the gift.
- Diplomat cards played remain face up on the table for all players to see, and do not return to your hand. Therefore each round you will have fewer and fewer options.
Most of the Shogun's Gifts cards can be discarded once the gift has been claimed. The exception to this are the #0 and #7 diplomat cards, these cards go into the player's hand and can be played by that player in a future round.
Shogun's Gifts:
- Gain 1 Artisan
- Gain 2 Villagers
- Grow 2 trees, or the same tree twice
- Gain the Forestry Card revealed
- Gain the Shogun's Favor Card revealed
- Convert up to 2 Floods to Rice Paddies
- Convert a Yellow Samurai to a Green Samurai
- Gain both Bonus Land Tiles revealed
- #0: When played in a future round, the #0 diplomat provides a Yellow Samurai
- #7: When played in a future round, the #7 diplomat guarantees priority
Province Phase
In this phase you will use a combination of workers, special actions, and Forestry cards to manage your province. This phase can be completed simultaneously by all players.
- To use a worker they must be placed on an open intersection between 3 areas in your province.
- Each area has up to 6 intersections where a worker can be placed. Only one worker may be placed in each intersection.
- Workers cannot be placed on the edge of your Province since it will only be between 2 areas.
- Once placed, workers may then perform a single action in one, two, or three adjacent areas, depending on which type of worker they are (see below).
- When using a Samurai or Artisan, you must complete all of their actions before you can use another worker, though you may use special actions in between their actions. You do not have to use all of their actions if you do not want to.
Example: 3 Villagers can be placed on an open intersection between 3 areas in a province. 2 Villagers cannot be placed at the edge of a province, since they would only be between 2 areas.
There are eight different worker actions. These first four basic actions can be performed by any worker.
- Plant: Add a tree of the matching type of that area of height 1 to an empty or flooded area. If there was a flood token in the area, return it to the supply.
- Grow: Add 1 segment on top of an existing tree in your province, up to max height 5.
- Cut: Take all segments of a tree from one area of your province into your supply, and keep connected.
- Harvest (Rice Paddy Only): Gain 1 rice if a paddy, or gain 2 rice if a paddy with a Farm (on top of the paddy).
The next two worker actions can only be performed by Artisans and Samurai. Villagers cannot perform these actions.
- Create Rice Paddy: Turn a flood tile into a rice paddy by flipping the tile over.
- Build: Pay the full tree cost from your storage area to build an available structure, by returning the tree segments used to the general supply. The structure must be built in the area where the action is being performed.
The final two worker actions can only be performed by a Samurai. Villagers and Artisans cannot perform these actions.
- Muster (Fortress Only): Gain two military tokens.
- Study: Examine an adjacent tree of the matching type and exact height of one tree of the next Forestry Track requirement. Advance your cube up the Forestry Track and take the bonus covered.
Worker Types
There are four types of workers, which you will use during the Province Phase.
- Yellow Samurai are your main workers in the game. They can perform an action in 2 adjacent areas. They are permanent workers and are returned to you at the end of each round.
- Green Samurai are upgraded versions of your Yellow Samurai. They can perform an action in all 3 adjacent areas. They are permanent workers and are returned to you at the end of each round.
- Artisans represent skilled craftspeople sent to help you from Edo. They can perform an action in 2 adjacent areas (similar to Yellow Samurai). They are returned to the general supply at the end of a round in which they were used.
- Villagers represent people from your province that can be gained or hired to help. They can perform an action in 1 adjacent area. They are returned to the general supply at the end of a round in which they were used.
Remember: A worker cannot perform more than one action in each adjacent area per turn.
Special Actions
There are also five special actions that can be performed during the Province Phase. These do not require a worker to use.
- Split: Separate a tree in your storage into 2 segments. For example, a 3-high tree could be split into a 1-high and a 2-high tree. This does not cost anything and can be done multiple times to the same tree to create multiple smaller segments.
- Join (1 rice): Pay 1 rice to join two trees of the same type in your storage. This is useful when you have smaller trees in your supply and need to create a larger tree in order to build a structure or fulfill a demand. For example, a 2-high Pine tree and a 3-high Pine tree could be combined into a 5-high Pine tree. Joining three segments of the same type costs 2 rice, and so on.
- Hire (2 rice): Pay 2 rice to take a Villager from the supply. The Villager is available to use immediately. This is one of the main ways of gaining more workers, although Villagers are limited to performing the four basic actions.
- Expand (3 military tokens): Discard 3 military tokens to draw the next two bonus land tiles from the stack, choose one to add to your province and discard the other. This will add more trees or rice paddies to your province, as well as open up more intersections for your workers.
- Foresee (1 research token): Discard 1 research token to peek at one of the Weather cards for the current round. Multiple tokens can be spent to peek at multiple cards.
If you upgrade the active worker to a Green Samurai during their activation, they can then perform an action in a third adjacent area as part of the same activation.
Structures
At the start of the game you only have access to the bottom row of structures. As you build the smaller structures, your knowledge and skill increases and other structures become available.
- Alongside the bottom row, structures that are orthogonally adjacent to a previously built structure are available.
- Building higher up in your province requires more labor to transport the materials. Therefore, you must also pay 1 rice to build in the third row up in your province, 2 rice to build in the fourth row up, and 3 rice to build in the fifth row up. These costs also apply when building structures on any Bonus Land Tiles that have been added to these rows.
- When building a structure, you can choose it to be either a Fortress or a Farm. Exchange the structure token for a Farm/Fortress token from the general supply and place it in your province with the relevant side showing.
A Fortress can only be built in an empty area in your province. Fortresses train the armies for the Shogun. They generate a military token at the start of each Weather Phase, and give your Samurai access to the Muster action.
A Farm can only be built on top of an existing Rice Paddy. Farms double the rice production of your paddies, both when using the Harvest action and when it rains.
- After building a structure take any column, row, or horizontally adjacent bonuses unlocked.
Example: If you build your 2HP structure, your 6HP structure above it becomes available. If you then build the 6HP structure, your 5HP and 7HP structures in the middle row, and your 10HP structure in the top row become available since they are adjacent to the 6HP structure.
Example: A player uses an Artisan to build two structures in their province. The first structure is a Farm, which is placed on top of an existing rice paddy. As it's in the second row from the bottom it does not require any additional rice to be paid. The second structure is a Fortress, and is being built in an empty area in the third row up. In addition to the trees cost, they also have to pay 1 rice to build there.
Province Phase Example
This round the Blue player has their two Yellow Samurai, a Villager (from their diplomat bonus), and an Artisan (from the Shogun's Gift) available to use, as well as 5 rice.
- To begin they place their Villager on an intersection between 3 areas, and use their action to Cut down a 2-height Oak tree, and place this in their storage area.
- Next they spend 2 rice to Hire another Villager, which they place on an intersection to Cut down a 3-height Beech tree, and place this in their storage.
- They want to build their 2HP structure, which requires a 1-height Beech tree and a 2-height Oak tree, so use the Split special action to separate the Beech tree.
- Next they use their Artisan to Create a Rice Paddy in a flooded Cypress area, and Build a Fortress in the empty Oak area, discarding the trees from their storage.
- Then they use a Yellow Samurai to Muster at their new fortress, gaining 2 military tokens, and Study the 1-height Cypress Tree. This doesn't remove the tree. Studying allows them to advance their marker left on their Forestry Track, letting them peek at a Weather card, which they see is Oak.
- Next they Hire another Villager, which they use to Plant a tree in a flooded Oak area, since they know it will rain there. This removes the flood token from the area.
- Finally they use their other Yellow Samurai to Study the 2-height Pine tree, gaining them 2 research tokens from the Forestry track, and Harvest at the rice paddy, gaining them 1 rice.
They decide to keep their remaining 2 rice for next round, and therefore end their Province Phase.
Weather Phase
This phase is completed simultaneously by all players. At the start of the Weather Phase, each player gains one military token from the general supply for every Fortress in their province.
Then reveal and resolve each Weather card one at a time from top to bottom. Each Weather card will either show a tree type or a letter A, B, or C. When a letter is revealed, consult the Forecast card to determine which areas are affected. There are 3 x A's in the deck, 2 x B's, and 1 x C.
- To resolve a Rain card, first all existing trees of that type in each province grow by one segment, up to a maximum height of 5.
- Next, all rice paddies in each province generate one rice if they are in the area type that received the rain. If the paddy has a Farm structure on top of it, then it will instead generate two rice. Each player increases their Rice Track by the total number of rice generated from their paddies.
- Finally, any empty or flooded areas gain a flood token (reverse side of a paddy token). If an area now has two flood tokens, one of the flood tokens may cascade down the province into one of the two areas directly below. Resolve these one at a time from top down and then left to right.
- If there are two areas without a flood token below, consult the Forecast card, and cascade the flood token into the area that is highest on the Forecast.
- A flood token can never cascade into an area that already has a flood token, so if there is only one area without a flood token below, the flood token must cascade into that area.
- If both areas below already have a flood token, then the cascading flood token is returned to the general supply.
When a flood token cascades into an area containing a tree, rice paddy, or structure, it will destroy and replace whatever was there. Return trees, paddies, and farm/fortress tokens to the general supply (do not return structure tokens to your board, you will still score points at the end of the game for having built them). If the flood cascades into the water at the bottom of your Province, then it is removed and nothing further happens.
Weather Phase Example
Continuing the Province Phase example from p.12, this is the Blue player's Province Board. At the start of the Weather Phase they gain 1 military token from their Fortress.
The first Weather card revealed is Oak, so their 3 Oak trees grow once, and the empty Oak area gains a flood token. Nothing happens when it rains on their Fortress.
The next card revealed is an "A", which means it is Cypress. Their 3 Cypress trees grow once, they gain 1 rice from their paddy, and the empty Cypress area gains a flood token.
The next card is Beech. Their 2 Beech trees grow once, and the 3 empty/flooded areas gain a flood token. As a Beech area has two flood tokens, one will cascade down.
The cascading flood token can go into the Oak or Cypress area below. Since Cypress is higher up on the Forecast it cascades there, destroying the tree.
Lakes (Not Included in Preview Copy)
The B side of each province board includes two lakes. Workers cannot perform actions in a lake area, and lakes can never contain a tree, rice paddy or structure. The surrounding pathway intersections are still available for your workers though, to carry out actions in adjacent areas.
During the Weather Phase, floods will never cascade into a lake, in the same way they do not cascade into another flood token.
When revealing the Forecast card for each round, also reveal the next Lake token from the top of the stack and place it on top of the current round's Forecast card. Farms and Fortresses may be more productive when built next to a lake, depending on the active Lake token.
- This round, during the Weather Phase, Farms surrounding a lake produce 1 extra rice each time the rain falls on their area type. This bonus does not double if the Farm is adjacent to both lakes.
- This round, at the start of the Weather Phase, Fortresses surrounding a lake provide 1 extra military token. This bonus does not double if the Fortress is adjacent to both lakes.
Shogun's Demands Phase
In this phase players take turns in priority order to claim an available spot on a Shogun's Demand tile by paying the required amount of resources. They then place one of their demand cubes above the spot claimed, which will earn them the honor points shown at the end of the game.
Each round two demands are revealed and added to the display. Revealed demands stay out all game, so you may claim a spot on a demand that was revealed earlier in the game, if it's still available.
In a 2-player game, only the left spot on each demand is available. In a 3-player game, only the left and right spots are available. In a 4-player game, all three spots are available. Once a spot is claimed it is no longer available, and each player can only claim one spot on each individual demand.
You may claim a spot on multiple demands in the same round if you are able to do so, but only one per turn. Resources are public knowledge, and players are free to use this information when deciding what order to fulfill demands in. If you are not able to claim a spot on a demand, you must pass. If you are able to claim a spot, but do not wish to, you may also pass. Once you pass, you can no longer participate in the phase this round.
There are four types of Shogun's Demands, each with three different tiles. Each tile shows its relative tier (I, II, or III) in the bottom corner.
- Pay Rice Tax: The Shogun wants you to help feed the people of Edo. To claim a spot on one of these demands you must spend the stated amount of rice (5/7/9). Reduce your rice track by the amount paid. Remember, you can only trade Forestry cards for rice during the Province Phase.
- Share Forestry Knowledge: The Shogun wants you to share the knowledge you've gained through studying. To claim a spot on one of these demands you must be able to discard the stated number of research tokens (2/4/6). Discarded tokens are returned to the general supply.
- Bolster Military: The Shogun wants you to help build his armies. To claim a spot on one of these demands you must be able to discard the stated number of military tokens (3/5/7). Discarded tokens are returned to the general supply.
- Build in Edo: The Shogun wants you to help build Edo into a grand and magnificent city. To claim a spot on one of these demands, you must discard two trees of the correct heights from your supply. The tree types do not matter and can be different types. Trees in your province that have not yet been cut cannot be used.
Remember: Special actions and Forestry cards cannot be used in the Shogun's Demand Phase, so make sure you have what you need during the Province Phase if you want to score the demands!
Shogun's Demand Phase Example
It is round 3, and there are now 6 Shogun's Demands available, though some of the spots on the first 4 demands have already been claimed in the first two rounds.
- Black has priority this round, so they begin by paying 7 rice to claim the left spot on the new Pay Rice Tax demand worth 11 HP.
- Next in priority order is Red, and they discard 6 research tokens to claim the left spot on the new Share Forestry Knowledge demand worth 11 HP.
- Next is Blue, they also plan to pay 7 rice, but they know Red and Gray do not have 7 rice to pay, so instead they decide to Build in Edo before Red's second turn. They discard a 2-height and a 3-height tree from their storage and claim the middle spot of the demand worth 4 HP.
- Next is Gray, they follow Red and discard 6 research tokens to claim the middle spot on the Share Forestry Knowledge demand worth 9 HP.
- Now it goes back round to Black, but they cannot fulfill any other demands so they pass.
- Red then claims the final spot on the Build in Edo demand worth 2 HP.
- Then it's back to Blue, who pays 7 rice to claim the middle spot on the Pay Rice Tax demand worth 8 HP.
- This is all the demands that players can fulfill this round, so then Gray, Black, and Blue also pass. The unfulfilled spots remain available to claim next round.
End of Round
At the end of rounds 1-4 follow these steps:
- Return used Artisans and Villagers to the general supply.
- Take back Yellow Samurai and Green Samurai, ready to use again next round.
- Reveal one new Shogun's Gifts card per player.
- If the deck has run out, shuffle discarded cards to form a new deck to draw from.
- Where the card shows Bonus Land Tiles, a Forestry card, or a Shogun's Favor Card, draw these from the relevant stack and place them face up on the Shogun's Gift card.
- Discard the top-most Forecast card to reveal a new one for the next round. If using the Lake tokens, also reveal a new token for the next round and place it face-up on the Forecast card.
- Add the 3 previously revealed Weather cards to the 7 face-down ones, shuffle, and place 3 face down in position for the next round.
- Reveal two more Shogun's Demands tiles and add these to the display.
- Advance the Round Track one step.
At the end of round 5 go to endgame scoring instead.
Endgame Scoring
After the 5th round use the scorepad to tally honor points (HP) for the following:
-
Structures Built
Score the HP stated under each structure you have built (structures destroyed by cascading floods still count).
-
Trees in Province
Score HP based on the trees in your province for each level your marker has reached or advanced above on your Forestry Track: a. The first level from the bottom provides 1HP per 4+ height tree. b. The next level up provides 1HP per 3+ height tree. c. The top level, achieved by reaching the top of the track, provides 1HP per 2+ height tree.
These levels are cumulative, so a 4+ height tree will score for all three levels. Tree types do not matter.
-
Shogun's Demands
Score HP per level achieved on each of the Shogun's Demands where you have placed a Demand Marker.
-
Shogun's Favor Cards
Score HP per level achieved on up to 3 of your Shogun's Favour cards. If you have collected more than 3 of these, you choose which 3 to score.
Remaining rice, military tokens, research tokens, or trees in your storage are not worth any points at the end of the game.
The player who has the most honor points wins the game. In case of a tie, the tied player who fulfilled the most Shogun's Demands—at any level—wins. If there is still a tie, the tied players share the victory.
Simultaneous Play Etiquette
Much of Ringyō is played simultaneously by all players. A level of trust is therefore required between players, and intentional cheating is dishonorable. If you make a mistake, it is acceptable to take back the most recent action you performed, and re-do it. However, we recommend avoiding rewinding multiple actions, since this can significantly add to the length of the game.
The simultaneous play is not intended to allow players to hold back performing their actions, while they wait to see what their competitors do, before deciding what to do in their province. This kind of behavior is not in keeping with the spirit of the game and will also add to the length of the game.
If you require a way for players to let the table know when they have completed all of their actions in the Province Phase, players can simply flip over the Diplomat card they played that round. Don't forget to flip the cards face up again at the start of the next round so they are visible to all players at the start of the Edo Council Phase.
If you'd prefer to play non-simultaneously, then you can instead take turns to perform a few actions at a time, moving around the table clockwise, starting with the player with priority. However, this will add significant time to the length of the game.
Endgame Scoring Example
In this 4-player game, the Blue player has scored the following, for a total score of 114 HP.
- They have built their 2HP, 3HP, 6HP, 10HP, and 11HP structures, scoring them 32 HP.
- They have advanced beyond the first two levels on their Forestry Track, scoring them 5 HP for their 4+ height trees, plus 11 HP from their 3+ height trees, for a total of 16 HP.
- They have fulfilled six of the Shogun's Demands, at various levels, scoring them 40 HP.
- They ended the game with three Shogun's Favor cards. They achieved the middle level for Emperor's Rice since they have 5 rice paddies, the middle level for Shogun's Favourite since they fulfilled 6 Shogun's Demands, and the highest level for Cypress & Beech since they have 5 sets of the two tree types. They therefore scored a total of 26 HP from their Shogun's Favor cards.
Forestry Track Board & Structures Board Bonuses
Advancing on the Forestry Track or completing structure bonuses grants one of the following:
- Gain 1 / 2 rice
- Peek at 1 / 2 / 3 Weather cards
- Gain 2 / 3 / 4 research tokens
- Gain 1 / 2 Forestry cards
- Draw 2 Shogun's Favor Cards, keep 1, discard the other
- Gain 2 Bonus Land Tiles
- Gain 1 / 2 military tokens
- Convert a Yellow Samurai to a Green Samurai
- Gain 1 Yellow Samurai
- Gain 1 / 2 Artisans
- Gain 4 Villagers