Riichi Mahjong
Riichi Mahjong Rulebook
Table of Contents
Table of Contents
- 1. The Tiles
- 2. Setup
- 3. Game Play
- 4. Scoring
- 5. Etiquette and Tournament Rules
- 6. Scoring Tables
1. The Tiles
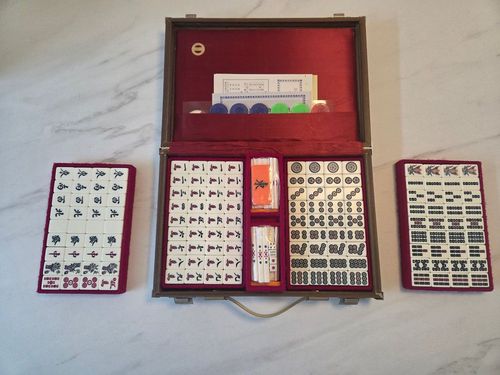
The 34 basic mahjong tiles are presented here. A full set of mahjong tiles contains four identical tiles of each of these.
1.1 The Three Suits
There are three suits, each has tiles numbered from one to nine: Circles, Characters, and Bamboo, each running 1 through 9 (shown here as a chow of 1-2-3, a pung of matching tiles, and a kong of four identical tiles for illustration).
The one of Bamboo is often decorated with a bird, the design of which often varies across mahjong sets. The ones and nines are called terminal tiles.
1.2 Honours
In addition to the suit tiles, there are seven different honour tiles: four winds and three dragons. The winds are shown in the order: East-South-West-North. The dragons are shown in the order: White-Green-Red. The design of the White Dragon varies across mahjong sets; usually it is either a blank tile or a blue frame is depicted.
1.3 Additional Tiles
With four of each of the above tiles, a mahjong set consists of 136 tiles. Sometimes mahjong sets contain further tiles: flower, season or joker tiles, which are not used in riichi mahjong. Japanese tile sets often include red fives. The red fives are sometimes used to replace normal fives, so that each suit has one red five and three normal fives. The red fives would then add an additional fan to the hand value. Red fives are no longer used in EMA riichi rules.
1.4 Additional Equipment
Mahjong sets often have markers for indicating the prevalent wind and sticks used for keeping score. These are also used for counters and riichi bets. The value of the scoring sticks are: 100, 1,000, 5,000 and 10,000. A stick of a different colour can be used for the value 500. Players begin with 30,000 points. The set should also come with at least two dice.
2. Setup
2.1 Seat Wind
Mahjong is played by four players, each of whom is associated with a directional wind known as the seat wind. East is the starting player. South is sitting at East's right, West is sitting across from East, and North is sitting at East's left. Note that the counter-clockwise order East-South-West-North is not as could be expected from the compass directions. Between hands the seat winds will change, see section 3.4.11. During a full game, each player is East at least twice.
2.2 Prevalent Wind
When the game begins, East is the prevalent wind. When the player who started the game as East becomes East again after all other players have played at least one hand as East, the South round begins, and South is the prevalent wind. A wind marker should be placed permanently by the player who begins as East, and when this player becomes East again after the first (East) round of the game, the marker is flipped to indicate the new prevalent wind, South.
2.3 Seating at the Table
The players' positions at the table are determined by drawing lots if they are not predefined by a tournament schedule. For drawing lots, one of each wind tile is used. The four tiles are shuffled face down and each player picks one of the tiles; the player who shuffled the tiles is the last to pick a tile. The player who picked the East tile will begin the game as East. The player who picked the South tile will begin the game as South. The player who picked the West tile will begin the game as West. The player who picked the North tile will begin the game as North.
(Diagram: the four walls form a square, with East, South, West, and North marked at their respective sides in counter-clockwise order.)
2.4 Building the Wall
The tiles are thoroughly mixed. Players should take care to mix the tiles face down. Each player builds in front of himself a wall of face-down tiles, seventeen tiles long and two tiers high. The four walls are pushed together to form a square.
2.5 Breaking the Wall
East rolls two dice and counts that number of players counter-clockwise, starting with himself. The player thus determined breaks the wall in front of him, by counting from the right the same number of stacks as indicated by the dice. After the last counted stack the wall is broken by pushing the two wall sections a bit apart. If East's dice roll was 12, the wall is broken as shown in the diagrams accompanying this section.
2.6 The Dead Wall
The seven tile stacks to the right of the break make up the dead wall. The dead wall continues around the corner to the next wall, if the end of the wall is reached. After the seventh tile stack, the two sections of the wall may be pushed a bit apart to set the dead wall apart from the end of the wall. The tiles in the dead wall are not used in the play, except for the providing of replacement tiles for kongs.
It is recommended for the player who has the dead wall in front of him to place the first replacement tile to the immediate left of the dead wall, so that the wall has first two single tiles and then six tile stacks. This is in order to decrease the risk of knocking down and revealing the first replacement tile.
2.7 The Dora Indicator
Count three tile stacks into the dead wall from the original break in the wall, and turn the top tile over to determine the dora indicator. This tile indicates which tile is dora. If the dora indicator is a suit tile, the dora is the next tile in the same suit, e.g. seven Bamboo is dora if six Bamboo is the dora indicator. If the indicator is a nine, the dora is the one in the same suit.
If the indicator is a dragon, the dora is also a dragon, and the following order applies: Red points to White, White points to Green, and Green points to Red. For winds, likewise, the following order applies: East-South-West-North-East.
For example: 2-Characters is dora when the indicator is 1-Characters. 6-Circles is dora when the indicator is 5-Circles. Green Dragon is dora when the indicator is White Dragon. South is dora when the indicator is East.
2.8 The Deal
The player who is East takes the first four tiles in the wall after the original break in the wall. Tiles are taken clockwise, while the players' turns proceed counter-clockwise. South takes the next four tiles, West the next four, North the next four and so on until all players have twelve tiles. East continues by taking two tiles: the top tiles in the first and third stacks in the wall. South, West and North each take one tile in order. (This corresponds to East taking one tile, waiting for the other players to take one tile each, and then East takes his fourteenth tile). East now has a starting hand of fourteen tiles, whereas the other players have thirteen tiles each.
Each player arranges his tiles upright in front of himself, so only he can see the faces. The dice are placed at East's right; in this way it is always clear to all players which player is East.
3. Game Play
The object of play is to form a complete hand. The ultimate object of the game is to accumulate the most points from the winning hands. It doesn't matter how many hands each player has won, the accumulated score determines the winner.
3.1 Phases of the Game
A player's turn begins when a tile is acquired and ends when a tile is discarded. During a normal set of turns all players have their turn once. A normal set of turns is interrupted if a tile is claimed for kong, pung or chow, or a concealed kong is declared. A hand lasts until a player has completed a hand and won, or a drawn game occurs. During a round all players are East in turn. A complete game consists of two rounds: the East round and the South round.
3.2 Mahjong Hand
A complete mahjong hand is composed of four sets and a pair. A set may be either a chow, a pung or a kong. In addition, a complete hand must have at least one yaku (scoring pattern). A player who is furiten, is not allowed to win on a discard.
A chow is three consecutive tiles of the same suit. Chows cannot be made with dragons or winds. 8-9-1 in the same suit is not a chow. A pung is composed of three identical tiles. A kong is composed of four identical tiles. A pair is composed of two identical tiles.
Example: a chow of 4-5-6 Characters; a pung of three identical Circles tiles; a kong of four East Wind tiles.
Two special hands exist in riichi which are not composed of four sets and a pair: Seven Pairs and Thirteen Orphans.
3.3 A Player's Turn
Players take their turns in order. East begins, and the turn order proceeds counter-clockwise.
A player begins his turn by drawing a tile. However, since East begins with fourteen tiles, East doesn't draw a tile on his first turn. If the player can't or won't declare a win or a kong, the player ends his turn by discarding one of his concealed tiles. East should wait until all players have seen and sorted their tiles before making the first discard.
Players should take care to discard tiles without covering them with the hand. Discards are placed in an orderly fashion, left to right and six tiles to a row, in front of each player and within the wall, so that it is clear who discarded which tiles and in which order.
3.3.1 Precedence and Timing When Claiming a Tile
The most recent discard can be claimed by any player for a pung or kong until the next player draws. The most recent discard can be claimed for a win by any player until the next player discards, except in case of tsumo.
A claimed kong or pung may result in players losing their turn, as play continues from the claiming player, not from the discarding player. If a player claims a tile for winning, any concurrent claim for kong, pung or chow is ignored. It is possible for several players to win on the same discard. The player about to begin his turn can claim the most recent discard for a chow. If the player doesn't want to claim the discard, he begins his turn by drawing a tile from the wall.
(Diagram: an in-progress table showing the four walls, each player's hand, discards, and melded sets arranged around the play area.)
Claiming a tile for winning takes precedence over any other claim. Claiming a tile for kong or pung takes precedence over a claim for chow. A player who has claimed a tile for winning cannot change his claim.
Players are not limited in time to play, but they are expected to play at a reasonable pace. A player drawing tiles too fast for the other players to have time to call, or repeatedly taking an overly long time, can be penalized for obstruction at the referee's discretion.
If a player is drawing a tile too fast for the other players to have time to call, the call is still valid and the drawn tile is replaced in the wall.
3.3.2 Swap-calling (kuikae)
Swap-calling (kuikae) is not allowed. It is not allowed to claim a tile and immediately discard the same tile. It is not allowed to claim a tile for chow and discard the tile from the other end of the chow.
Example: it is not allowed to claim a 5-Circles for pung against a hand holding two more 5-Circles and then discard a 5-Circles. It is not allowed to claim a 5-Circles for chow against a hand holding 6-Circles and 7-Circles and then discard a 5-Circles or an 8-Circles.
3.3.3 Melded Chow
A tile can only be claimed for a chow from the player on the left. Claiming the last discarded tile for a chow is done by first clearly calling "chow" or "chi". Secondly the player reveals the matching tiles from the hand and thirdly discards a tile from the hand and claims the tile called for. For the third step the order of the two actions is not important: the player can take the claimed tile first and then discard, or the other way round.
3.3.4 Melded Pung
Claiming the last discarded tile for a pung is done by first clearly calling "pung" or "pon". Secondly the player reveals the matching tiles from the hand and thirdly discards a tile from the hand and claims the tile called for. For the third step the order of the two actions is not important: the player can take the claimed tile first and then discard, or the other way round.
3.3.5 Melded Kong
Claiming the last discarded tile for a melded kong is done by clearly calling "kong" or "kan", placing the tile face-up along with the three matching tiles from the hand. After revealing a new kan dora, the player takes a replacement tile from the dead wall and continues his turn as if he'd drawn a tile from the wall.
The dead wall always comprises 14 tiles, so after a kong the last tile of the wall becomes part of the dead wall.
3.3.6 Extending a Melded Pung to a Kong
A melded pung may be extended to a melded kong in a player's turn after the player has taken a tile from the wall or a replacement tile, i.e. not in a turn where a tile was claimed for chow or pung. The player must call "kong" or "kan" clearly, place the fourth tile by the rotated tile of the pung and then reveal a kan dora and take a replacement tile. The tile used to extend the pung counts as a discard, and can be claimed for a win. The dead wall always comprises 14 tiles, so after a kong the last tile of the wall becomes part of the dead wall.
3.3.7 Concealed Kong
A concealed kong may be declared in a player's turn after the player has taken a tile from the wall or a replacement tile, i.e. not in a turn where a tile was claimed for chow or pung. The player must call "kong" or "kan" clearly, reveal the four tiles of the kong, then turn the two middle tiles face-down, reveal a kan dora and take a replacement tile. The dead wall always comprises 14 tiles, so after a kong the last tile of the wall becomes part of the dead wall.
A player still has a concealed hand after declaring a concealed kong, if the player has no open sets.
A concealed kong cannot be robbed, except to win on Thirteen Orphans.
Note that four identical tiles only make up a kong, if a concealed kong is declared.
(Diagram: the dead wall and its four possible replacement-tile / kan-dora-indicator positions, numbered for the 1st through 4th kong of a hand.)
3.3.8 Displaying Sets
Tiles in melded sets can not be rearranged to form other sets, and they cannot be discarded.
After calling a tile, the relevant tiles from the hand are immediately exposed. It is allowed to make the discard before the claimed tile is taken. If the claimed tile is not taken within the next two opponents' turns, i.e. before another two discards has been made, the player has a dead hand.
Melded sets are placed to the right of the player's tiles in clear view for all players. Claimed tiles are rotated to indicate which player made the discard. If the tile was discarded by the player sitting on the left, the claimed tile is put on the left side of the set. If the tile was discarded by the player sitting in front, the claimed tile is put in the middle of the set. If the tile was discarded by the player sitting on the right, the claimed tile is put on the right side of the set. A claimed kong has one rotated tile. A kong made by extending an open pung has two rotated tiles: the extending tile is placed by the previously rotated tile.
3.3.9 Liability: Third Melded Dragon Pung and Fourth Melded Wind Pung
A player who feeds the third dragon pung/kong to an opponent with two melded dragon pungs/kongs or the fourth wind pung/kong to an opponent with three melded pungs/kongs of winds must pay the full value of the hand in case Big Three Dragons or Big Four Winds are made on a self-draw (the two remaining opponents pay nothing). In case another opponent feeds the Big Three Dragons or Big Four Winds, he shares the payment equally with the player who fed the third dragon pung/kong or the fourth wind pung/kong, but only the discarder pays for any counters.
3.3.10 Fourth Kong
After declaration of a fourth kong the game continues, but no further kongs may be declared during this hand. Under no circumstance can a fifth kong be made.
3.3.11 Winning on a Discard (ron)
A player who can form a valid mahjong hand with at least one yaku with the last discard, can win by clearly declaring ron or mahjong, unless he is furiten.
3.3.12 Winning on Self-draw (tsumo)
A player who can form a valid mahjong hand with at least one yaku with a tile just drawn from the wall or the dead wall, can win by clearly declaring tsumo or mahjong. The player should keep the winning tile apart from the rest of the hand, so that it is clear to all players which was the winning tile. A player who is furiten can still win on self-draw.
3.3.13 Tenpai
A player's hand is tenpai or waiting if the hand needs only one more tile to complete a winning hand. A player is still considered tenpai if all his waiting tiles are visible among the discards and declared sets. A player is not considered tenpai if he is waiting only for a tile of which he already has 4. A player is not considered tenpai if his hand has been declared a dead hand.
3.3.14 Riichi
A player with a concealed waiting hand can declare riichi by clearly saying riichi, rotating the discarded tile sideways and paying 1,000 points to the table by placing a stick by the discards. If an opponent claims the rotated discard for winning, the riichi declaration is invalid and the 1,000 points are returned to the riichi declarer. If an opponent claims the rotated tile for a melded set, rotate your next discarded tile.
A player is not allowed to declare riichi if there are less than four tiles left in the wall.
The 1,000 points goes back to the riichi declarer if he wins. If another is the winner of the current hand, he collects the 1,000 points. In case of multiple winners, the 1,000 points are collected by the winner first in order after the discarder. In case of a drawn game the riichi bet stays on the table to be claimed by the next player to win a hand.
A player who declared riichi can no longer change his hand. However, he may declare a concealed kong if a tile is drawn that matches a concealed pung, if this does not change the waiting pattern and if the three tiles to be konged can only be interpreted as a pung in the original riichi hand. (In case of three consecutive pungs in the same suit, no kong may be declared, since the tiles can be interpreted as three identical chows).
It is permissible for a player who is furiten to declare riichi. A player who after declaring riichi, chooses not to win on a discard that completes his hand, becomes furiten. A player who is furiten can still win on self-draw.
Riichi is a yaku. A player who wins in the first set of turns after the riichi declaration (including the player's next draw) can claim an additional yaku for ippatsu. The ippatsu chance is lost if the set of turns is broken by claims for kong, pung or chow, including concealed kongs.
A player who wins after declaring riichi, reveals the tiles underneath the dora indicator and any kan dora indicators. These tiles indicate ura dora which can be claimed only by players who declared riichi.
3.4 End of a Hand
A hand can end in three ways: by exhaustive draw (no-one declares a win after the discard after the last tile), by abortive draw or by one or more players declaring a win. Chombo results in a re-deal and does not count as a hand.
At the end of a hand players should never look at tiles in the wall.
3.4.1 Last Tile
The last tile in the wall can only be claimed for a win, not for a kong, pung or chow. In case a kong is declared at the second-to-last tile, the replacement tile becomes the last tile. It is not allowed to declare a concealed kong on the last tile.
3.4.2 Exhaustive Draw
An exhaustive draw occurs if no-one declares a win after the discard after the last tile. The 14 tiles of the dead wall are not used. After an exhaustive draw the noten players (players who can't or won't show a tenpai hand) pay a penalty to tenpai (waiting) players (players who show a tenpai (waiting) hand). Players announce whether they are tenpai or noten in order: East declares first, then South, then West and finally North. It is permissible to declare out of turn, but the announcement cannot be changed. Players who have declared riichi are obliged to show their tenpai hands in case of an exhaustive draw.
The total noten penalty amounts to 3,000 points. If three players are tenpai, the noten player pays 1,000 to each. If two players are tenpai, they each receive 1,500 points from a noten player. If only one player is tenpai he receives 1,000 points from each of the noten players. If none or all players are tenpai no points are exchanged.
After an exhaustive draw, a counter (100 point stick) is placed on the table at East's right-hand side. If the dealer rotates, the new East places the current number of sticks; e.g. if there were 2 sticks before the draw the 3 sticks are placed by the new East.
3.4.3 Abortive Draw
Abortive draws are no longer used in EMA riichi rules.
3.4.4 Handling Riichi Bets After Drawn Games
In case of a drawn game, any riichi bets stay on the table to be claimed by the next player who declares a win.
3.4.5 Furiten
If a waiting player can form a mahjong hand using one of his previous discards, he is furiten and is not allowed to claim a win on a discard, even if the hand completed with the previous discard is without a yaku.
A player who is furiten can choose to change his hand to avoid being furiten (except if he has declared riichi).
A player who is furiten, can still win on a self-drawn tile.
A player who fails to claim a win on a discard that completes a mahjong hand, is temporarily furiten, even if the passed tile gives him no yaku, and he cannot claim a win on a discard in the current set of turns. The state of temporary furiten ends next time the player draws or claims a tile. However, if the player has declared riichi he remains temporarily furiten until the end of the hand. A player is never considered furiten on a self-drawn tile.
Furiten – example 1: consider a player with a hand of a pair of 3-Characters, a pung of 1-Bamboo, and a run of Circles 1 through 8 (1-2-3-4-5-6-7-8 Circles). The player has a three-sided wait for 3-6-9. The player is furiten if any of the three waiting tiles are among his discards.
Furiten – example 2: consider a player with a hand of a pair of 3-Characters, two identical chows of 1-2-3 Bamboo, and a Circles shape waiting on 1-4 Circles. The player is waiting 1-4 Circles. A discarded 7 Circles does not make the player furiten. Only if one of the waiting tiles (1 or 4 Circles) are among the discards is the player furiten.
Furiten – example 3: consider a player with a hand of a pair of Red Dragons, a Circles shape, and two identical chows of 1-2-3 Characters. The player is waiting for three tiles: 4 and 7 Circles and Red Dragon. If the player has discarded one of these tiles, he is furiten.
3.4.6 Chombo
Severe offenses are punished by chombo, after which there is a re-deal of the current hand. If a win is declared at the same time as a chombo occurs, the chombo is voided.
In a tournament the chombo penalty is 20,000 points which are deducted from the player's overall tournament score after the game is finished, and after the uma is added to the players' scores. Outside tournaments the chombo penalty is a reverse mangan payment: 4,000 to East, 2,000 to other players. If the offending player is East, 4,000 is paid to each of the other players.
The following offences are subject to chombo penalty:
- Invalidly declaring a win and showing the tiles. The win can be invalid because the hand is not a valid winning hand or because the declaration was not valid (see section 5.1.2).
- Declaring riichi on a hand that is not waiting. This is determined only in case of a drawn game. In the case where a valid riichi hand is only considered noten because it was declared a dead hand after the riichi declaration, it is not considered a chombo, and only the noten penalty is paid.
- Making an invalid concealed kong after declaring riichi (determined only if the offender declares a win or in case of a drawn game).
- Attempting to claim a tile after the hand has been declared a dead hand.
- Play cannot continue due to a mistake of a player. E.g. too many tiles were revealed for the game to continue fairly.
After a chombo riichi bets are returned to the players who declared riichi, and there is a re-deal. No counter is placed, and the dealer does not rotate.
3.4.7 Dead Hand
Some irregularities that are not punished by chombo result instead in a dead hand. A player who has a dead hand is not allowed to declare a win, kong, pung or chow, and can never be considered tenpai.
The following irregularities result in a dead hand:
- Invalidly declaring a win without showing the tiles. See section 5.1.2.
- Attempting to declare riichi on an open hand.
- Attempting to declare riichi, but failing to call "riichi" or failing to rotate the discard. See section 5.3.
- Too few or too many tiles on the hand.
- Making an invalid kong, pung or chow. The mistake can be corrected if it is realized or pointed out before the discard is made.
- Swap-calling.
- A referee call may result in a dead hand, e.g. for passing information.
In the case where a valid riichi hand is declared a dead hand after the riichi declaration, and the hand ends in an exhaustive draw, the noten penalty is paid. The case does not result in chombo.
3.4.8 Minor Irregularities
Minor irregularities are generally not penalized. Please refer to chapter 5 on Etiquette and tournament rules.
3.4.9 When a Win Is Declared
When a hand ends with one or more players declaring a win, the hand(s) are scored. Only winners receive payment. If there is more than one possibility for which way the winning tile finishes the hand, the highest-scoring possibility is always chosen.
A player winning on a self-draw, receives payment from the three opponents. A player whose discard results in one or more winning declarations, pays the full value of each hand to the winner.
East receives more points for a win, but also pays more in case of an opponent's self-draw.
When East wins the hand (whether more players win or not), a counter is placed on the table at East's right-hand side.
3.4.10 Counters
A counter is placed on the table at East's right-hand side after a hand where East declared a win and after an exhaustive draw.
Each counter on the table increases the value of a winning hand by 300 points. In case of self-draw the payment is shared, so each opponent pays 100 points for each counter to the winner, in addition to the standard payment for the hand.
All counters are removed after a hand where another player than East declared a win, and East did not.
3.4.11 Dealer Rotation
After the end of a hand, it is determined whether East stays East or whether the privilege proceeds to the next player.
East stays East if he declares a win or if he is tenpai when there is an exhaustive draw. If there are multiple winners, East stays East if he was one of the winners. Otherwise, the deal rotates, and the player who was South now becomes East, while West becomes South, North becomes West and East becomes North.
In case of chombo there is no dealer rotation: East stays East.
3.5 Continuation of the Game
When the dealer rotation is resolved, the tiles are shuffled face-down, and a new hand begins.
When the player who began the game as East, becomes East again after all opponents have had at least one hand as East, the South round begins.
When the player who began the game as East, becomes East again after all opponents have had at least one hand as East in the South round, the game ends.
3.6 End of the Game
When the South round ends, and the game is over, the winner is the player with the most points. It is of no consequence how many individual hands were won, the total sum of points determines the winner. Ties may occur.
Any riichi bets remaining on the table are collected by the winner; the points are split in case of a tie.
Agari yame is not allowed. This is a rule that would allow East to end the game early if he wins the final hand and is leading the game.
There is no bankruptcy rule. The game does not end if a player's score goes below zero. The game continues without any changes. The player can borrow point sticks from an opponent, or the referee may have extra sticks for such cases. Note the debt on the scoring sheet.
When calculating the final scores, the players count their scores and subtract the 30,000 points they began the game with. After the winner bonus (uma) is added, scores are sometimes divided by 1,000 for simplicity.
3.6.1 Winner Bonus
At the end of the game an extra bonus/penalty (uma) is applied to the scores. The two best ranked players receive a bonus from the two lowest ranking players in the game, according to this scheme: Winner receives 15,000 points, second ranked player receives 5,000 points, third ranked player is penalized with -5,000 points and the last player is penalized with -15,000 points.
If there is a tie, the points for the relevant places are split between the tied players. E.g. if two players are tied at the first position, each gets a bonus of 10,000 points.
4. Scoring
4.1 Scoring a Winning Hand
All players at the table are responsible for ensuring that each winning hand is scored correctly and to the maximum points.
First find the number of fan (doubles): add the number of fan given by the yaku (at least one), the number of dora tiles, kan dora tiles and, in case of a riichi hand, the number of ura dora in the hand. This sum is the fan value of the hand.
Then the base value of the hand, the minipoints, is calculated. Round the number up to the next 10 (e.g. 32 minipoints are rounded up to 40). In case of a seven pairs hand, the hand is worth 25 minipoints and there is no rounding up. For hands with five or more fan the minipoints are irrelevant.
The value of the hand can be found in the scoring tables (section 6). The tables are further described in section 4.1.3. To the value in the table are added 100 for each counter on the table in case of self-draw, and 300 in case of winning on a discard. In addition any riichi bets from players who didn't win the hand are collected by the winner.
In case more than one player wins at the same time, the discarder settles the score with each winner individually. Each winner receives the value of the hand including the value of counters in play.
In case more than one player wins at the same time, the riichi bets from players who declared riichi without winning go to the winner closest to the discarder's right. Riichi declarers that win, always get their riichi bet back.
When scoring is done with sticks, players should put the sticks on the table where all players can see them during the exchange. When scoring is done with sticks, players are obliged to count up their sticks when asked to by opponents. The game continues if a player's score goes below zero; the player borrows score sticks from an opponent or the referee.
4.1.1 Minipoints
You always get minipoints for one of the three following ways of winning:
| Minipoints for winning | |
|---|---|
| Concealed on a discard | 30 |
| Seven pairs (no further minipoints are added) | 25 |
| Otherwise (Self-draw or Open hand) | 20 |
Add minipoints for pungs and kongs in the hand. Chows have no minipoint value. If the winning tile finishes a pung, it counts as a concealed pung in case of self-draw, and it counts as an open pung in case of winning on a discard.
| Minipoints | Open | Concealed |
|---|---|---|
| Pung, 2-8 | 2 | 4 |
| Pung, terminals/honours | 4 | 8 |
| Kong, 2-8 | 8 | 16 |
| Kong, terminals/honours | 16 | 32 |
In addition 2 minipoints are added for each of the following:
2 minipoints for:
- Pair of dragons
- Pair of seat wind
- Pair of prevalent wind
- Winning on an edge, closed or pair wait
- Winning on self-draw (except in case of pinfu)
- Open pinfu
The 2 minipoints for edge, closed or single wait can be claimed even if the hand is waiting for other tiles. Edge wait is 1-2 waiting for 3 or 8-9 waiting for 7. Closed wait is waiting for the centre tile of a chow. Single wait is waiting to finish the pair.
Example — edge wait: winning on the 3 (or 7) tile that completes a 1-2 or 8-9 shape.
Example — closed wait: a hand with two chows already formed plus a lone middle tile, winning on the tile that completes the centre of a chow.
The highest-scoring possibility decides which set is finished by the winning tile. Consider a waiting pattern such as a run of Circles 3-4-5-6-7 waiting on 2 or 8: winning on the middle tile of such an overlapping shape can either finish an edge/closed wait (claiming minipoints) or finish a two-sided chow, claiming no minipoints but instead one fan for pinfu on a concealed hand. The highest-scoring possibility must always be chosen.
In special cases — such as a hand containing a pung plus a chow-like shape where the winning tile could only ever complete the pung — no minipoints can be claimed, since the tile finished neither an edge wait, a closed wait, nor a single wait (pair wait).
2 minipoints are awarded for winning on a self-drawn tile. This is voided, however, in case a fan is claimed for pinfu.
Open pinfu is an open hand worth no minipoints (except the 20 minipoints for winning). It is rewarded 2 minipoints. Example: an open hand with a claimed chow, a chow, a pung of dragons, a chow of 7-8-9 Characters, and a pair of Bamboo.
4.1.2 Exact Calculation of the Hand Value
Instead of calculating manually the value of the hand, the tables provided are recommended. For completeness, however, the calculation procedure is given here. For hands worth five or more fan, the table for limit hands is used. For hands worth less than five fan, the value is calculated as follows:
The base value of the hand (the minipoints rounded up) are doubled by the number of fan plus 2. This figure is the base figure to be paid by all three opponents in case of self-draw. For East, however, the figure is doubled one more time. East receives double payment, but also pays twice the amount of the base figure in case of an opponent's self-draw. Payments are rounded up to the next 100, though never exceeding the value of a mangan.
In case of winning on a discard, the discarding player must pay for all opponents, incl. East, i.e. four times the base figure if the winner is not East, and three times the doubled base figure if the winner is East. The payment is rounded up to the next 100, though never exceeding the value of a mangan.
In addition to this is the value of counters and riichi bets on the table.
4.1.3 Scoring Tables
The scoring tables are categorized by whether the winner is East or not, and whether the win was on a discard (ron) or on self-draw (tsumo).
In the relevant table, use the column that gives the fan value of the hand and the row that gives the minipoint value of the hand.
The table East on self-draw (Tsumo) gives the amount that each opponent should pay to East. The table Others on self-draw (Tsumo) gives two numbers; the largest number is the payment from East, the other number is the payment from each of the two other opponents. The tables for winning on a discard (Ron) give the amount that the discarder should pay to the winner. The tables for limit hands give the amount that each opponent should pay to a self-drawn win. In case of winning on a discard, the discarder pays for all, e.g. for a haneman the payment is 18,000 to East or 12,000 otherwise.
The value of any counters and riichi bets are added to the value found in the tables.
The full scoring tables are reproduced in section 6.
4.2 Yaku Overview
Several yaku require that the hand is concealed. A concealed hand can be won on a discard. If the discarded winning tile finishes a pung, the pung is considered open when scoring the minipoints, but the hand as such is still concealed.
The yaku are all cumulative, so several yaku may be combined in the same mahjong hand. E.g. a concealed hand with All Simples and Mixed Triple Chows is worth 4 fan on a self-draw. If the hand is open, it is worth only two fan. No more than thirteen fan can be obtained in this way.
Yakuman are not cumulative.
4.2.1 One Fan Yaku
Riichi RIICHI — Concealed waiting hand declared at 1,000 points stake. See section 3.3.14 for the detailed rules of declaring riichi. An extra yaku, IPPATSU, is awarded for winning within the first un-interrupted set of turns after declaring riichi, including the next draw by the riichi declarer. If the set of turns is interrupted by claims for kong, pung or chow, including concealed kongs, the chance for IPPATSU is gone.
An extra yaku, DABURU RIICHI, is awarded for declaring riichi in the first set of turns of the hand, i.e. in the player's very first turn. The first set of turns must be uninterrupted, i.e. if any claims for kong, pung or chow, including concealed kongs, has occurred before the riichi declaration, DABURU RIICHI is not possible.
Fully Concealed Hand MENZEN TSUMO — Winning on a self-draw on a concealed hand.
Pinfu PINFU — Concealed all chows hand with a valueless pair. I.e. a concealed hand with four chows and a pair that is neither dragons, nor seat wind, nor prevalent wind. The winning tile is required to finish a chow with a two-sided wait. The hand is by definition worth no minipoints, only the base 30 on a discard or 20 on self-draw.
Pure Double Chow IIPEIKOU — Concealed hand with two completely identical chows, i.e. the same values in the same suit, e.g. two identical chows of Circles: 2-3-4 and 2-3-4.
All Simples TANYAO CHUU — Hand with no terminals and honours.
Mixed Triple Chow SAN SHOKU DOUJUN — Hand with three chows of the same numerical sequence, one in each suit, e.g. a chow of 1-2-3 Circles, 1-2-3 Characters, and 1-2-3 Bamboo. Gives an extra fan if concealed.
Pure Straight ITSU — Hand with three consecutive chows in the same suit, e.g. three consecutive chows in Bamboo: 1-2-3, 4-5-6, and 7-8-9. Gives an extra fan if concealed.
Dragon Pung FANPAI/YAKUHAI — Pung/kong of dragons.
Seat Wind FANPAI/YAKUHAI — Pung/kong in player's seat wind.
Prevalent Wind FANPAI/YAKUHAI — Pung/kong in the prevalent wind.
Outside Hand CHANTA — All sets contain terminals or honours, and the pair is terminals or honours. The hand contains at least one chow. Gives an extra fan if concealed.
After a Kong RINSHAN KAIHOU — Winning on a replacement tile after declaring a kong. Counts as self-draw.
Robbing the Kong CHAN KAN — Winning on a tile that an opponent adds to a melded pung in order to make a kong, see section 3.3.6. Since the kong is not declared successfully, no kan dora is revealed. Counts as ron (win on a discard). Robbing the kong also applies when winning on Thirteen Orphans on a tile used by an opponent for making a concealed kong. Only in the case of Thirteen Orphans can a concealed kong be robbed.
Under the Sea HAITEI — Winning on self-draw on the last tile in the wall. Does not combine with After a Kong RINSHAN KAIHOU.
Under the Sea HOUTEI — Winning on the discard after the last tile in the wall. (This discard can only be claimed for winning, not for kong, pung or chow).
4.2.2 Two Fan Yaku
Seven Pairs CHI TOITSU — Concealed hand with seven different pairs. Two identical pairs are not allowed. Seven Pairs always scores exactly 25 minipoints; extra minipoints for e.g. a pair of dragons is not awarded.
Triple Pung SAN SHOKU DOKOU — Hand with three pungs/kongs, one in each suit, of the same number, e.g. a pung of 4 in each suit: Circles, Characters, and Bamboo.
Three Concealed Pungs SAN ANKOU — Hand with three concealed pungs/kongs. Note, the entire hand is not required to be concealed.
Three Kongs SAN KAN TSU — Hand with three kongs.
All Pungs TOI-TOI HOU — Hand with four pungs/kongs and a pair.
Half Flush HONITSU — Hand with tiles from only one of the three suits, in combination with honours. Gives an extra fan if concealed.
Little Three Dragons SHOU SANGEN — Hand with two dragon pungs/kongs and a pair of dragons. Add one fan for each of the individual dragon pungs.
All Terminals and Honours HONROUTOU — Hand containing only terminals and honours. Add two fan for All Pungs (TOI-TOI HOU) or Seven Pairs (CHI TOITSU).
Terminals in All Sets JUNCHAN — All sets contain terminals, and the pair is terminals. The hand contains at least one chow. Gives an extra fan if concealed.
4.2.3 Three Fan Yaku
Twice Pure Double Chows RYAN PEIKOU — Concealed hand with four chows which two and two form Pure Double Chows, e.g. two identical chows of 5-6-7 Circles and two identical chows of 5-6-7 Characters. No additional fan for Pure Double Chow (IIPEIKOU) are counted.
4.2.4 Five Fan Yaku
Full Flush CHINITSU — Hand composed entirely of tiles from only one of the three suits. No honours allowed. Gives an extra fan if concealed.
Blessing of Man RENHO — Winning on a discard in the very first un-interrupted set of turns, before the player has had his first turn. Concealed kongs are also considered to interrupt the set of turns. Not cumulative with other yaku and dora.
4.2.5 Yakuman
Thirteen Orphans KOKUSHI MUSOU — Concealed hand with one of each of the 13 different terminal and honour tiles plus one extra terminal or honour tile, e.g. the 13 terminals/honours (1 and 9 of each suit, all four winds, all three dragons) plus an extra North Wind.
Nine Gates CHUUREN POOTO — Concealed hand consisting of the tiles 1112345678999 in the same suit plus any one extra tile in the same suit, e.g. 1-1-1-2-3-4-5-6-7-8-9-9-9 Characters plus an extra 7-Characters.
Blessing of Heaven TENHO — East winning on his initial deal. Concealed kong is not allowed.
Blessing of Earth CHIHO — Winning on self-draw in the very first un-interrupted set of turns. Concealed kong is not allowed.
Four Concealed Pungs SUU ANKOU — Concealed hand with four concealed pungs/kongs. Winning on a discard is allowed only in case of single wait on the pair.
Four Kongs SUU KAN TSU — Hand with four kongs.
All Green RYUU IISOU — Hand composed entirely of green tiles. Green tiles are: Green Dragons and 2, 3, 4, 6 and 8 of Bamboo, e.g. two chows of 2-3-4 Bamboo, a pung of 6 Bamboo, a pung of Green Dragons, and a pair of 8 Bamboo.
All Terminals CHINROUTO — Hand composed entirely of terminal tiles.
All Honours TSUU IISOU — Hand composed entirely of honour tiles.
Big Three Dragons DAI SANGEN — Hand with three pungs/kongs of dragons. In case of three melded dragon pungs/kongs, the player feeding the third set of dragons must pay for the entire hand in case of self-draw, and split the payment with the discarder in case of win on a discard. See section 3.3.9.
Little Four Winds SHOU SUUSHII — Hand with three pungs/kongs of winds and a pair of winds.
Big Four Winds DAI SUUSHII — Hand with four pungs/kongs of winds. In case of four melded wind pungs/kongs, the player feeding the fourth set of winds must pay for the entire hand in case of self-draw, and split the payment with the discarder in case of win on a discard. See section 3.3.9.
4.2.6 Obsolete Hands
Nagashi Mangan NAGASHI MANGAN — This special hand is no longer used in EMA riichi rules. It is described here due to its popularity as a house rule. This hand cannot be combined with any other hand. After an exhaustive draw, a player can claim this special hand if he has a concealed hand, has discarded only terminal and honour tiles and none of his discards has been claimed. The player does not have to be tenpai. The player receives payment equivalent to a self-drawn mangan, plus counters and riichi bets.
4.3 Scoring Examples
Scoring example 1: Hand: a pair of 3-Characters, a chow of 1-2-3 Characters, and three bamboo chows 1-2-3, 4-5-6, 7-8-9. The winning tile is 9 Bamboo on self-draw. The hand is concealed. The player has declared riichi. The hand scores 1 fan for Riichi, 1 fan for Fully Concealed Hand, 1 fan for Pinfu, 2 fan for Pure Straight (because the hand is concealed). Total: 5 fan. If there are no dora, kan dora or ura dora, the hand value is 5 fan. 5 fan is the limit hand called Mangan and it scores 4,000 from each if the winner is East; a total of 12,000 points. If the winner is not East, he receives 4,000 from East and 2,000 from each of the other opponents; a total of 8,000 points.
Scoring example 2: Same hand shape as example 1. The winning tile is 9 Bamboo on discard. The hand is concealed. The player has declared riichi. The hand scores 1 fan for Riichi, 1 fan for Pinfu, 2 fan for Pure Straight (because the hand is concealed. Note that even though it is a claimed tile that finishes the Pure Straight, it still scores an extra fan because the hand is concealed). Total: 4 fan. Minipoints: 30 for going out on a discard on a concealed hand. Since it is a pinfu hand there are no further minipoints. If there are no dora, kan dora or ura dora, the hand value is 4 fan, 30 minipoints, and it scores 11,600 from the discarder if the winner is East. If the winner is not East, he receives 7,700.
Scoring example 3: Same hand shape as examples 1-2, but the hand contains a melded set. The winning tile is 9 Bamboo on discard. 7 Bamboo is dora. The hand scores 1 fan for Pure Straight. Total: 1 fan. The hand scores an additional fan for the dora tile. Minipoints: 20 for going out on an open hand, and an additional 2 minipoints for Open Pinfu. 22 minipoints are rounded up to 30 minipoints. The hand value is 2 fan, 30 minipoints, and it scores 2,900 from the discarder if the winner is East. If the winner is not East, he receives 2,000.
Scoring example 4: Hand: a concealed pung of 3-Characters, a concealed pung of 2-Circles, a concealed pung of 4-Circles, a pair of 2-Bamboo, and a pung of 8-Bamboo. The winning tile is 8 Bamboo on self-draw. The hand is concealed. The hand scores a yakuman for Four Concealed Pungs. Further yaku or dora tiles are irrelevant since yakuman is the limit. If the winner is East, he receives 16,000 from each; a total of 48,000. If the winner is not East, he receives 16,000 from East and 8,000 from each of the other opponents; a total of 32,000.
Scoring example 5: Same hand shape as example 4. The winning tile is 8 Bamboo on a discard. The hand is concealed. 4 Circles is dora. Even though the hand is concealed, the last pung (which was finished with the claimed tile) is not considered concealed. The hand scores 2 fan for Three Concealed Pungs, 2 fan for All Pungs and 1 fan for All Simples. Total: 5 fan. The hand scores an additional fan for each of the dora tiles (three 4-Circles tiles) for a total of 8 fan. 8 fan is the limit hand called Baiman, and it scores 24,000 points from the discarder if the winner is East. If the winner is not East, he receives 16,000 points from the discarder.
Scoring example 6: Hand: seven pairs — 2-Characters, 3-Characters, 5-Characters, 2-Circles, 4-Circles, and two Bamboo pairs. The winning tile is 4 Bamboo on self-draw in the set of turns immediately after the player has declared riichi. The hand scores 1 fan for Riichi, 1 fan for Ippatsu, 1 fan for Fully Concealed Hand, 1 fan for All Simples and 2 fan for Seven Pairs. Total: 6 fan. This is the limit hand called Haneman, and it scores 6,000 from each if the winner is East; a total of 18,000 points. If the winner is not East, he receives 6,000 from East and 3,000 from each of the other opponents; a total of 12,000 points.
Scoring example 7: Same hand shape as example 6, but the first pair is Green Dragons instead of 2-Characters. The winning tile is 4 Bamboo on a discard. The player had not declared riichi. The hand scores 2 fan for Seven Pairs. Minipoints: 25 for going out on Seven Pairs. The hand scores no further points even though there is a pair of dragons and a pair wait. The hand value is 2 fan, 25 minipoints, and it scores 2,400 points from the discarder if the winner is East and 1,600 points otherwise.
Scoring example 8: Hand: two identical chows of 3-4-5 Characters, two identical chows of 1-2-3 Circles, and a pair of Red Dragons. The winning tile is Red Dragon on self-draw. The hand is concealed and contains no dora tiles. The hand scores 3 fan for Twice Pure Double Chow and 1 fan for Fully Concealed Hand. The hand cannot also score for Seven Pairs, since the hand is either constructed as seven pairs or as four sets and a pair. Since the hand is more valuable when considered as four sets and a pair than when considered as seven pairs, the hand scores for Twice Pure Double Chow rather than for Seven Pairs. Minipoints: 20 for going out on self-draw, 2 for pair wait, 2 for self-draw, 2 for pair of dragons. 26 minipoints are rounded up to 30 minipoints. The hand value is 4 fan, 30 minipoints and it scores 3,900 from each (a total of 11,700) if the winner is East, and it scores 3,900 from East and 2,000 from the two other opponents otherwise (a total of 7,900).
Scoring example 9: Hand: a pair of 1-Bamboo, a chow of 1-2-3 Bamboo, a chow of 7-8-9 Bamboo, a pung of East, and a pung of West (won on the discard). The winning tile is West on a discard. 7 Bamboo is dora. The player is East in an East round. The hand scores 2 fan for Half Flush, 1 fan for Seat Wind, 1 fan for Prevalent Wind and 1 fan for Outside Hand. Total: 5 fan. The hand scores an additional fan for the dora tile, for a total hand value of 6 fan. The winner scores 18,000 from the discarder.
Scoring example 10: Hand: a pung of North, a concealed pung of honours, and a Circles shape resolving to a three-sided wait. The winning tile is 7 Circles on self-draw. The hand is concealed. The player is South. The hand scores 3 fan for Half Flush (because the hand is concealed) and 1 fan for Fully Concealed Hand. Minipoints: 20 points for going out, 8 minipoints for a concealed pung of honours, 2 minipoints for self-draw and 2 minipoints for edge wait. Note that even though there is a three-sided wait, the winner chooses which set the winning tile finishes in such a way that the score is maximized. 32 minipoints are rounded up to 40 for a total hand value of 4 fan 40 minipoints, equivalent to a mangan in payment: 4,000 from East and 2,000 from the others for a total of 8,000 points.
5. Etiquette and Tournament Rules
5.1 Errors in Claiming Tiles
When claiming a tile for kong, pung or chow the player first calls "kong", "pung" or "chow" clearly. The calls "kan", "pon" or "chi" are equally valid. Secondly the player reveals the matching tiles from the hand and thirdly discards a tile from the hand and claims the tile called for. For the third step the order of the two actions is not important: the player can take the claimed tile first and then discard, or the other way round.
Errors in the order above when claiming tiles should be pointed out to the player, but there will be no penalty.
5.1.1 Failing to Take the Claimed Tile
While a player who claims a tile can make a discard before placing the claimed tile with his revealed tiles, the player should take the tile before the next two players have made a discard. Failing to take the tile in a timely manner results in a dead hand, since the player will have a false set.
5.1.2 Empty Calls
Empty calls for kong, pung or chow (calling kong, pung or chow and regretting it immediately before revealing any tiles) are not penalized.
Empty calls for ron or tsumo (calling ron, tsumo or mahjong, but not showing the tiles before realising the mistake) results in a dead hand.
A player must use a valid term for calling a win. A player calling "Ippatsu" and revealing his tiles is subject to chombo penalty. A player immediately correcting an invalid term, e.g. "Hu – I mean tsumo" or "Ippatsu – I mean ron" have a valid hand. Players confusing the terms "ron" and "tsumo" have a valid hand, but it should be pointed out that a valid term should be used and repeated offenses of this type are subject to further penalty at the referee's discretion.
5.1.3 Changing Calls
Calls are not supposed to be changed. The first call should be the valid one. However, unless the call was for winning, a quick correction is allowed.
A player calling "pung, no ron" has made a valid correction of his call, and the ron call is valid.
A player calling "ron, no pung" has made a call for winning. The player can claim the tile for ron, but not for pung. If he doesn't have a winning hand, he has a dead hand if no tiles were revealed or if two tiles for the pung call was revealed. If the player has revealed all his tiles in this case, he receives a chombo penalty.
5.1.4 Claiming a False Set
If a player claims a false set, it can be corrected if it is discovered before the player discards a tile. After the discard, the mistake cannot be corrected, resulting in a dead hand.
5.2 Exposing Tiles
Exposing a few tiles is not penalized. Exposed tiles are placed back in the wall or in the hand where they came from.
Exposing tiles during the deal is not penalized. If the situation is judged problematic for the game play there is a re-deal, but no penalties.
If too many tiles are exposed during the game, play cannot continue. This is a judgment that depends on the circumstances and the progression of the game. As a rule of thumb, play cannot continue if a large fraction of the wall is destroyed or several tiles revealed from an opponent's hand. If the game cannot continue, the offending player receives a chombo penalty. If the mistake happened due to no mistake on a player's part, there is a re-deal (like chombo, but without any point penalty).
After the hand ends, players should not expose tiles from the wall or the dead wall.
Tiles exposed on purpose in severe or repeated cases is considered obstruction.
5.2.1 Drawing a Tile from the Wrong Part of the Wall
If a player draws a tile from the wrong part of the wall, and the mistake is realised or pointed out before the discard, the mistake should be corrected. After the discard the error cannot be corrected. In either case there is no penalty.
5.3 Errors in Connection with Riichi Declaration
A valid riichi declaration should be announced in three steps:
- The player clearly calls "riichi"
- The player discards a tile and rotates it sideways in the discard line.
- The player places a 1,000 point stick on the table close to his discards and close to the center of the table where it is clearly visible to all opponents.
A player who completes the first two steps, but forgets to place the riichi bet of 1,000 points still has a valid riichi, but should correct the mistake as soon as it is realised or pointed out. Opponents should point out the mistake. A player who fails to call "riichi" or fails to rotate the discard has not made a valid riichi declaration. The riichi bet is returned and the player has a dead hand.
If an opponent claims the rotated tile for a melded set, and the player forgets to rotate the next discarded tile, opponents should point out and the mistake. There is no penalty.
Attempting to declare riichi on an open hand results in a dead hand.
5.4 Passing Information
Passing information or hints on opponents' strategy in any way, e.g. on tenpai status, whether discards are dangerous or what yaku someone might be aiming for is bad behaviour and in serious or repeated cases the player is subject to dead hand or point penalties at the referee's discretion. Normally the opponents should give the offending player a clear warning and in serious or repeated cases call a referee who can choose to penalize the player.
It is permissible to correct a player who is about to commit a minor irregularity or etiquette error, e.g. drawing a tile from the wrong place in the wall, claiming a false set or forgetting to take a replacement tile.
It is permissible to make it clear if a player has a dead hand, e.g. too many or too few tiles.
5.5 Cheating and Obstruction
Cheating and obstruction are disruptive disturbances of a tournament and deliberate disturbances should be punished hard. Players should enact fair play and not abuse the rules or exploit loopholes.
A player caught cheating should be immediately disqualified; but it is a very serious accusation so the evidence must be clear.
Deliberate obstructive behaviour is penalized at the referee's discretion with point penalties of 8,000 or 12,000 points (chombo level), or in serious or repeated cases with point penalties between 12,000 and 48,000. These point penalties are deducted from the player's score at the end of the game after uma is added, thus not affecting ranking at the table. The points are not added to the other players' scores. Further repeated obstructive behaviour results in immediate disqualification.
5.6 Telephones
Players and spectators should have their telephones in silent and non-vibrating mode during play sessions. Depending on the level of disturbance a player is subject to point penalties at the referee's discretion for a telephone ringing or making other disturbing noises. A player with a specific and important reason for expecting a call should make an agreement with the referee before the session about how to handle the situation.
5.7 Being Late at a Tournament
A player who is late by 10 minutes or less is subject to a point deduction of 1,000 points per minute he is late. Thus a player who is 1 minute late has 1,000 points deducted from his score, while a player who is 10 minutes late has 10,000 points deducted from his score. These point penalties are deducted from the player's score at the end of the game after uma is added, thus not affecting ranking at the table. The points are not added to the other players's scores.
A player who is late by more than 10 minutes is replaced by a substitute player.
5.8 Substitute Players
If it is clear to the organizers that a player won't be able to play, e.g. due to illness, a substitute player will take his place.
Substitute players' session results will always be entered in the tournament score keeping as -15,000 points and -15,000 uma, i.e. a total of -30,000.
However, at the table the substitute's score will count for determining the opponents's uma if the substitute played from the beginning of the session (also if the substitution was due to more than 10 minutes lateness). E.g. if the substitute wins the table, the other players will get umas of 5,000, -5,000 and -15,000. So when entering the results, two players will have uma of -15,000 and no one will have the winner uma of 15,000 in this case.
Substitute players who are substituted after the playing has begun at the table (e.g. if a player falls ill during the session, or in case a player is disqualified), will always receive the -15,000 uma, meaning that the other three players will get the 15,000, 5,000 and -5,000 uma even if the substitute scored the most point at the table. This is only the case in the session where the substitution occurs after play has begun. In later sessions, the substitute will play from the beginning of the sessions, and the substitutes result will count when determining the opponent's umas.
A disqualified player will be ranked at the bottom of the result list and the result will count for the EMA ranking list.
A player who was substituted will receive -15,000 points plus an uma of -15,000 points for each session missed. In case of acceptable reasons like illness the head referee and the tournament organizers may decide to remove the player's name from the final results, so that it will not count for the player's EMA ranking.
5.9 Tournament Sessions
In tournaments it is convenient to play sessions on time limits. Often, sessions are scheduled at 90 minutes. When playing with time limited sessions, a clear sound must indicate when 15 minutes remain. After the sound the current hand is finished, and one more hand is played (unless a full game is already completed). There is no sound at 90 minutes; the players should be able to finish the last one or two hands within the remaining time, but if that is not the case they will play until the hands are finished.
A hand begins when the dice are thrown after the walls have been built. If the dice have not been thrown yet when the time signal sounds, the players will play only the current hand. If the dice have just been thrown, the players would get to play two hands. In case of chombo there is a complete re-deal, i.e. it does not count as a hand played.
At the beginning of sessions, waiting for the signal to begin, players are allowed to build the walls, but the dice cannot be thrown and the deal cannot begin before the signal.
6. Scoring Tables
The tables below give the payment for a winning hand by minipoints (rows) and fan (columns). "East" tables apply when the winner is East; "Other" tables apply when the winner is South, West or North. "Tsumo" is self-draw (paid by each opponent, or by each opponent and East as shown), "Ron" is winning on a discard (paid by the discarder).
East / Tsumo (payment from each opponent)
| Minipoints | 1 fan | 2 fan | 3 fan | 4 fan |
|---|---|---|---|---|
| 20 | — | 700 | 1,300 | 2,600 |
| 25 | — | — | 1,600 | 3,200 |
| 30 | 500 | 1,000 | 2,000 | 3,900 |
| 40 | 700 | 1,300 | 2,600 | 4,000 |
| 50 | 800 | 1,600 | 3,200 | 4,000 |
East / Ron (payment from the discarder)
| Minipoints | 1 fan | 2 fan | 3 fan | 4 fan |
|---|---|---|---|---|
| 25 | — | 2,400 | 4,800 | 9,600 |
| 30 | 1,500 | 2,900 | 5,800 | 11,600 |
| 40 | 2,000 | 3,900 | 7,700 | 12,000 |
| 50 | 2,400 | 4,800 | 9,600 | 12,000 |
| 60 | 2,900 | 5,800 | 11,600 | 12,000 |
East / Limit Hands
| Limit hand | Fan | Tsumo (from each) | Ron (from discarder) |
|---|---|---|---|
| Mangan | 5 | 4,000 | 12,000 |
| Haneman | 6-7 | 6,000 | 18,000 |
| Baiman | 8-10 | 8,000 | 24,000 |
| Sanbaiman | 11+ | 12,000 | 36,000 |
| Yakuman | - | 16,000 | 48,000 |
Other / Tsumo (payment from each non-dealer / from East)
Each cell gives two values: the payment from each of the two non-dealer opponents, then the payment from East.
| Minipoints | 1 fan | 2 fan | 3 fan | 4 fan |
|---|---|---|---|---|
| 20 | — | 400 / 700 | 700 / 1,300 | 1,300 / 2,600 |
| 25 | — | — | 800 / 1,600 | 1,600 / 3,200 |
| 30 | 300 / 500 | 500 / 1,000 | 1,000 / 2,000 | 2,000 / 3,900 |
| 40 | 400 / 700 | 700 / 1,300 | 1,300 / 2,600 | 2,000 / 4,000 |
| 50 | 400 / 800 | 800 / 1,600 | 1,600 / 3,200 | 2,000 / 4,000 |
Other / Ron (payment from the discarder)
| Minipoints | 1 fan | 2 fan | 3 fan | 4 fan |
|---|---|---|---|---|
| 25 | — | 1,600 | 3,200 | 6,400 |
| 30 | 1,000 | 2,000 | 3,900 | 7,700 |
| 40 | 1,300 | 2,600 | 5,200 | 8,000 |
| 50 | 1,600 | 3,200 | 6,400 | 8,000 |
| 60 | 2,000 | 3,900 | 7,700 | 8,000 |
Other / Limit Hands
Tsumo figures show payment from each non-dealer opponent, then from East.
| Limit hand | Fan | Tsumo (non-dealer / East) | Ron (from discarder) |
|---|---|---|---|
| Mangan | 5 | 2,000 / 4,000 | 8,000 |
| Haneman | 6-7 | 3,000 / 6,000 | 12,000 |
| Baiman | 8-10 | 4,000 / 8,000 | 16,000 |
| Sanbaiman | 11+ | 6,000 / 12,000 | 24,000 |
| Yakuman | - | 8,000 / 16,000 | 32,000 |
The tables are described in section 4.1.3.
Overview Sheet
The EMA also publishes a one-page overview sheet condensing the full yaku list, minipoint rules, and every scoring table above alongside the tile reference (1-9 of each suit, the four winds, and the succession of dragons White-Green-Red) for use as a quick-reference at the table. Its content is fully covered by the sections above.