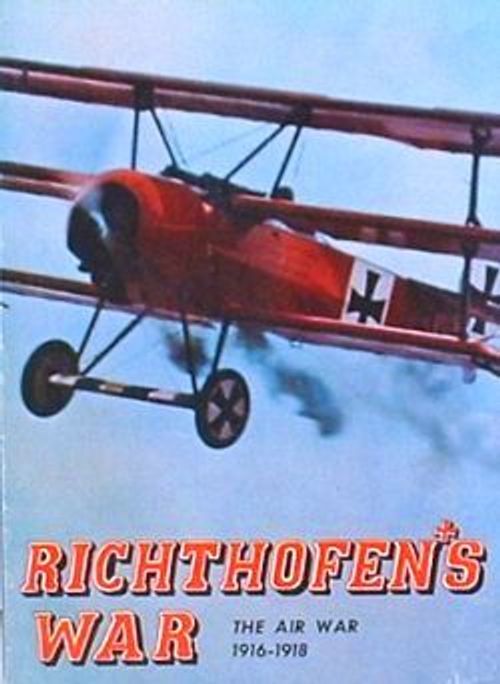
Richthofen's War: The Air War 1916-1918
Richthofen's War: The Air War 1916-1918 Rulebook
Table of Contents
Table of Contents
- Game Equipment
- The Mapboard
- Playing Pieces
- Prepare for Play
- Basic Game Rules
- Multi-Aircraft, Multi-Player
- Aircraft Capabilities Chart
- Outline of Play
- Examples of Play
- Maneuver Schedule Chart
- Balloon Defense (example)
- Tournament Game Rules
- Introduction to Scenarios
- The Campaign Game — "Bloody April"
- Optional Rules
- Victory Credit
- Solo Game
Game Equipment
- Mapboard
- Aircraft Counters
- Set of Scenario Cards
- Rules Folder
- Aircraft Status Pad
- Mission Briefing Manual
- Two Dice
- Target Damage/Critical Hit Table Sheet (formerly printed on top of inner box lid)
NOTE: Inner box and plastic tray available in earlier editions no longer available.
The Mapboard
The mapboard is an artist's rendition of an actual aerial photograph of the front-line trenches of World War I. The mapboard encompasses the area near the River Somme between Le Hamel and Sailly-Le-Sec where Brown engaged Richthofen in their famous dogfight. Superimposed over the map is a hexagonal grid used for movement purposes. Each hexagon (hereafter called a hex) represents 50 meters of real space from hexside to hexside. Certain important terrain features are explained below:
Trench-line hexes: Irregular brown lines represent the opposing trench-lines. Hexes containing any amount of brown splotch line are defined as being trench-line hexes. In general, assume that both trench-lines run continuously from one side of the mapboard to the other. Allied territory extends from (but not including) the northern-most trench-line north to all three mapboard edges. German territory extends southward in the same manner.
No-Man's-Land consists of the hexes between the two trench-lines, as well as the trench lines themselves.
Roads: Light-brown lines represent roads. Note that in many cases they do not run through hexes cleanly. In scenarios where roads must be bombed or photographed, it will be necessary to refer to the target-hex listing on the scenario card to ascertain the correct target locations.
Hex-grid: to locate targets, and as a general playing aid, a military style hex-grid has been superimposed on the mapboard. Letters A through OO run down the east edge of the mapboard; numbers 1 through 52 run along the north and west edges of the mapboard. To locate a particular hex, simply cross index the two: for example; X-19 locates the bridge over the River Somme, D-26 locates the "R" in "Richthofen's War" on the logo.
Playing Pieces
- AIRCRAFT COUNTERS: the aircraft counters represent the types of aircraft being flown and mark their position on the mapboard.
Each aircraft counter shows, in its four corners and center, the front-facing arrow, the aircraft designation, the aircraft profile silhouette, and the identification number.
-
BALLOON COUNTERS: the balloon counters represent fixed-position observation balloons used to direct artillery fire or to observe troop movements: a prime target for fighter aircraft.
-
ANTI-AIRCRAFT COUNTERS: the anti-aircraft counters represent larger caliber guns used to defend observation balloons and other important targets from enemy aircraft.
-
MACHINE GUN COUNTERS: the machine gun counters represent concentrations of smaller caliber guns used for anti-aircraft purposes.
-
DUMMY COUNTERS: the dummy counters, when inverted, are used to mask the actual disposition of the AA or MG counters. Also, they mark the initial starting position of the aircraft counters.
-
CURRENT SPEED, ALTITUDE-THOUSANDS, and ALTITUDE-HUNDREDS COUNTERS: See Prepare for Play: "Aircraft Status Pad" for explanation of the function of these counters.
-
WIND DIRECTION COUNTER: used for optional rule only.
Prepare for Play
-
SCENARIO CARDS: Before beginning play, players should select one of the seven scenarios from the set of scenario cards. (It is suggested that beginning players play the "Richthofen vs. Brown" scenario first.) Contained on the cards will be important information such as the number and type of aircraft on each side, starting positions, victory conditions, and type of mission.
-
AIRCRAFT STATUS PAD (ASP): After selecting the scenario to be played and choosing sides, players must prepare the Aircraft Status Pad (ASP) with the pertinent performance information for the aircraft they will be "flying" as indicated in the scenario card. The information needed for the ASP is located in the Aircraft Capabilities Chart (ACC) found in the Instruction Folder. The exact procedure is as follows:
SPEED (item "a"): players indicate their maximum and minimum speeds (column No. 1 and No. 2) on the Aircraft Capabilities Chart (ACC) by CIRCLING the appropriate matching number on the SPEED section of the ASP. Also, place one of the "Current Speed" indicator counters in the appropriate box to indicate your aircraft's speed at the start of the game. Note that speed is indicated as being the box to the RIGHT of the "Current Speed" counter (in the direction the arrow points to) and NOT by the box that the counter physically occupies.
ACCUMULATED DAMAGE (item "b"): players indicate their Accumulated Damage Factor (column No. 3 on the ACC) by circling the appropriate number on the ACCUMULATED DAMAGE section of the ASP.
As damage is taken, these boxes should be checked off from left to right. When the Accumulated Damage factor is reached, the aircraft is considered shot down.
AMMUNITION SUPPLY (items "c" and "d"): players indicate the ammunition supply capacities for their front-firing and rear-firing guns (columns No. 4 and No. 5 on the ACC) by CIRCLING the appropriate numbers on the AMMUNITION SUPPLY (front) and the AMMUNITION SUPPLY (rear) section of the ASP. Whenever the word "none" appears in columns No. 4 or No. 5 it indicates that the aircraft in question is not equipped with guns that fire in that particular direction.
MAXIMUM ALTITUDE (item "e"): players indicate the maximum altitude at which their aircraft may fly (column No. 6 on the ACC) by writing in the appropriate number in the MAXIMUM ALTITUDE section of the ASP.
MAXIMUM CLIMB (item "f"): players indicate the maximum climb per turn capability (column No. 7 on the ACC) by writing in the appropriate number in the MAXIMUM CLIMB section of the ASP.
MAXIMUM DIVE (item "g"): players indicate the maximum dive per turn capability (column No. 8 on the ACC) by writing in the appropriate number in the MAXIMUM DIVE section of the ASP.
MAXIMUM DIVE SPEED (item "h"): (NOTE: used in Tournament Game only!) players indicate the maximum speed at which they can perform a dive maneuver (column No. 9 on the ACC) by writing in the appropriate number in the MAXIMUM DIVE SPEED section of the ASP.
MAXIMUM OVERDIVE SPEED (item "i"): (NOTE: used in Tournament Game only!) players indicate the maximum speed at which they can perform an overdive maneuver (column No. 10 on the ACC) by writing in the appropriate number in the MAXIMUM OVERDIVE SPEED section of the ASP.
MANEUVER SCHEDULE (item "j"): For Basic Game: players copy the Basic Game maneuver schedule used for all aircraft which is located in the MANEUVER section of the Basic Game Rules.
For Tournament Game: players copy the correct maneuver schedule as indicated (column No. 11 on the ACC) on the MANEUVER SCHEDULE CHART as a quick reference when making a move.
CRITICAL HITS (item "k"): (NOTE: used in Tournament Game only!) as critical hits are taken, the dice-roll number is recorded in the CRITICAL HITS TAKEN section of the ASP.
ACE STATUS (item "l"): (NOTE: used in Tournament Game only!) If the "ACE" rule is being employed, place an "X" in the box if the aircraft in question is being flown by an ACE.
ALTITUDE (items "m" and "n"): players are required to keep a record of the exact altitude at which their aircraft are flying at all times. Players accomplish this by placing the "Altitude Thousands" indicator counter in item "m" ("Thousands of Meters") and the "Altitude Hundreds" indicator in item "n" ("Hundreds of Meters"). As players dive and/or climb their aircraft, they should re-adjust the two counters to reflect changes in altitude.
An example: 4350 meter altitude would be indicated by placing the "Altitude-Thousands" counter pointed toward "4" and the "Altitude-Hundreds" counter pointed to "350." Remember, as with the "Speed" indicator, the altitude is indicated by the boxes above the counters, in the direction the arrows point towards, and NOT by the boxes that the counters physically occupy.
JAMMED GUNS (item "o"): (NOTE: used in Tournament Game only!) whenever a gun is jammed, the proper box is checked off to avoid confusion.
GAME RECORD SECTION (item "p"): This section should be filled out by players wishing to keep accurate records of victories and defeats. It can also be used in the Campaign Game or with certain of the Optional Rules.
Basic Game Rules
I. Sequence of Turns
Richthofen's War is played in turns. Each turn is divided into two segments with each segment being further divided into three phases. The exact sequence is outlined below:
FIRST SEGMENT:
-
Movement Phase: player "A" moves his aircraft.
-
Attack Phase: player "A" executes attacks, if any, by firing his machineguns.
-
Defensive Phase: player "B" returns defensive fire (if possible).
SECOND SEGMENT:
-
Movement Phase: player "B" moves his aircraft.
-
Attack Phase: player "B" executes his attacks, if any, by firing his machineguns.
-
Defensive Phase: player "A" returns defensive fire (if possible).
II. Movement
GENERAL RULE:
Each aircraft has a certain movement capability which refers to the aircraft's ability to move through a certain number of hex sides. This capability is known as an aircraft's "movement allowance" which is stated in terms of a certain number of "movement points." The movement allowance of an aircraft on a particular turn is found in the SPEED section of the Aircraft Status Pad. Additionally, a player is allowed to change his altitude, up or down, within the limits of the dive, climb, and maximum altitude restrictions as found on the Aircraft Status Pad.
-
On each turn, an aircraft must expend its entire movement allowance either by expending one movement point for each hex a player's aircraft is moved into or by maneuvering his aircraft inside one hex.
-
A player's aircraft cannot remain stationary during his movement phase: he must expend his aircraft's full movement allowance each turn.
-
Two aircraft can occupy the same hex only if they are at different altitude levels.
-
Players may move their aircraft counters through other aircraft (friendly or enemy) at the same altitude level only if they do not remain there at the end of the movement phase.
-
The aircraft counter must be moved with the front of the aircraft diagram facing towards the direction of movement.
-
Aircraft counters must be facing forward toward one definite hex-side so that there can be no possible ambiguities of facing. If the facing is not clear, the opposing player has the option of correcting the facing to one of the two ambiguous hex sides. (A "correct" facing points squarely into one hex side; an "incorrect" facing straddles two hex sides ambiguously.)
-
Before players touch the aircraft counters or mapboard, they must announce any speed changes, dives, or climbs. Players who commence moving aircraft counters before announcing changes forfeit their right to make changes and must execute their movement phase at the same speed and altitude that they began the phase. Once a player has completed his movement phase and taken his hand away from an aircraft counter, he may make no further adjustments.
-
Whenever an aircraft moves into such a position that its next move would force it off the mapboard edge, resolve the problem in one of the following two ways:
a) one-on-one (involving no more than two aircraft on the mapboard): Making note of the relative position of the two aircraft, move them both towards the center of the mapboard, carefully preserving their same facing direction and distance apart.
b) multi-aircraft (involving more than two aircraft on the mapboard): Allow the offending aircraft to turn in place without moving forward one hex in order to face a direction where it can continue normal movement. Penalize the offending aircraft one movement point PLUS the movement point cost of executing the turn maneuver.
- Half-hexes are not part of the regular playing area of the mapboard.
a) all aircraft start the game on the half-hexes on their respective mapboard edge. (except when otherwise specified in the individual scenario.)
b) when aircraft enter half-hexes during play, they are considered to have exited from the mapboard and cannot return.
c) half-hexes can never be used for normal movement. Players employ rule No. 8 (above) whenever an aircraft cannot maneuver without involuntarily moving off of the mapboard.
- Players must use one of the DUMMY counters to mark the initial position of their aircraft counters at the beginning of each movement phase. It remains in the initial position until the end of the movement phase to avoid disputes as to the legality of the move. It should then be placed with the aircraft counter in the new position to mark the starting position of the next movement phase.
III. Maneuver
GENERAL RULE:
A player is allowed to maneuver his aircraft during his movement phase within the limits of his movement allowance, subject to the restrictions stated below:
-
The first hex a player moves his aircraft counter into at the beginning of his movement phase must be the hex directly in front of the aircraft in the direction the aircraft is facing.
-
After moving at least one hex forward the aircraft may continue in a straight line or turn in place a maximum of three hex sides, in one direction only, in any one hex by expending the appropriate movement points as given below:
a) an aircraft may be turned one hex side in a particular hex by expending one movement point.
b) an aircraft may be turned two hex sides in a particular hex by expending three movement points (one for the first hex side plus two more for the second = three m/p cost.)
c) an aircraft may be turned through three hex sides in a particular hex by expending six movement points (three m/p for the first two hex sides plus 3 m/p for the third = six total m/p expended.)
Basic Game Maneuver Schedule: turning one hex side in a hex costs 1 movement point (in either direction), turning two hex sides in the same hex costs 2 additional points (3 total), and turning three hex sides in the same hex costs 3 additional points (6 total).
d) these movement point cost schedules do not include the cost of entering the hex where the turn maneuver is executed.
-
A player can never turn his aircraft through more than three hex sides in the same hex.
-
A player may make as many turn maneuvers or combinations of turn maneuvers and straight flight as he wishes as long as he has sufficient movement points to expend in doing so.
IV. Climbing
GENERAL RULE:
Each aircraft-type has a certain ability to gain altitude (climb) which is stated as the aircraft-type's MAXIMUM CLIMB ability which is given in meters per turn.
-
At the beginning of a player's movement phase, before actual movement of the aircraft counter, the player must state whether or not his aircraft is going to climb, and if so, how many meters (in increments of 50) the aircraft will climb.
-
In any one turn, an aircraft can climb only the maximum distance in meters as stated in the Aircraft Capabilities Chart.
-
The aircraft can gain less than the maximum, but must gain altitude in 50 meter "steps."
-
To climb, the player states he intends to climb, moves the appropriate altitude marker(s), then executes his move. There is no movement cost for climbing. The aircraft is assumed to be at it's new altitude at the beginning of it's movement phase.
-
Players keep track of altitude changes in the ALTITUDE SECTION of their Aircraft Status Pad.
V. Diving
GENERAL RULE:
Each aircraft-type has a certain ability to lose altitude (dive) which is stated as the aircraft-types' MAXIMUM DIVE ability which is given in meters per turn.
-
In any one movement phase, an aircraft can lose no more than the maximum altitude as stated on the Aircraft Capabilities Chart.
-
The aircraft can lose less than the maximum amount, but must lose altitude in 50 meter "steps."
-
At the beginning of a player's movement phase, before actual movement of his aircraft counter, the player must state whether or not his aircraft is going to dive, and if so, how many meters the aircraft will dive.
-
To dive, the player states he intends to dive, moves the appropriate altitude marker(s), then executes his move. There is no movement cost for diving.
-
Dives are executed in the first hex that the aircraft enters at the beginning of its movement phase.
-
NOTE: an aircraft may not dive in the same movement phase in which it climbs. It can only do one or the other.
VI. Speed
GENERAL RULE:
The speed of individual aircraft varies by their maximum and minimum possible speeds (inherent in the aircraft's design) and their current speed (dependent upon the decisions of the players.)
-
In any one turn, a player may increase his aircraft's speed by one or two movement points, or decrease his speed by one or two movement points.
-
Increases or decreases in speed must be announced at the beginning of a player's movement phase before any movement of the aircraft counter takes place. The SPEED indicator on the AIRCRAFT STATUS PAD must be adjusted accordingly.
-
An aircraft's speed may never be greater than its maximum possible speed nor slower than the minimum speed as stated on the ACC.
VII. Combat
GENERAL RULE:
During the attack phase, one player attempts to inflict damage upon the other player's aircraft with his machineguns. A player may fire his aircraft's machineguns at another aircraft only when field-of-fire, range, and altitude difference requirements have been satisfied:
- To fire at a target, two basic conditions must be met:
a) the target aircraft must be within a seven hex range of the firing aircraft.
b) the target aircraft must be within the firing aircraft's field-of-fire.
- Range:
a) the range of all aircraft machineguns in Richthofen's War is seven hexes.
b) if the target aircraft is beyond the seven hex range it cannot be fired at.
- Field-of-Fire:
a) the field-of-fire of front-firing machineguns consists of the single row of hexes through which the aircraft counter is facing.
b) for aircraft mounting rear-firing machineguns, the field-of-fire extends out from the rear three hex sides. The rear machineguns can fire into all of the hexes contained within this area except for the single hex directly behind and adjacent to the firing aircraft (The "Blind" Spot).
c) note that the field-of-fire also extends above and below the altitude level of an aircraft. The "blind spot" for rear-firing machineguns exists ONLY at the same altitude or below the firing aircraft.
d) see Examples of Play section for examples of fields-of-fire.
- Aircraft at different altitudes are restricted in their ability to fire at each other:
a) aircraft at different altitudes may only fire at each other if the difference in their altitudes is equal to or less than 200 meters.
b) If the altitude difference is greater than 200 meters there can be no firing.
c) EXCEPTION: Two aircraft occupying the same hex but at different altitudes cannot fire at each other regardless of the altitude difference.
- Resolving Machinegun fire:
a) After having satisfied the two requirements for firing, players may then resolve their attacks.
b) Locate the name of the firing aircraft-type in one of the four right hand columns of the Target Damage Table, located on the inner box lid. (Note that all rear-firing machineguns for all planes are located in column C.)
c) Determine the range-to-target (in hexes) and locate that range within the firing aircraft's column.
d) Roll two dice and cross index the dice roll outcome with the range to determine the number of hits scored on the target aircraft.
-
The defender may return fire during the defensive fire phase if the attacker is within the defender's field-of-fire and the defender has ammunition remaining to fire with. The same procedure as outlined above is followed.
-
NOTE: it is NOT necessary for the attacker to have actually fired on the defender for the defender to return fire. In some instances, rear-firing machineguns will be able to fire on targets during a player's attack phase. The rules as worded are not intended to exclude the rear-firing machinegun from being used in an offensive manner. Generally speaking, there are no restrictions as to what machineguns can fire in which phase at what target.
In multi-aircraft scenarios, a situation could arise in which front-firing machineguns fire at a target aircraft in the defensive fire phase while the target aircraft never fired on that particular aircraft during it's attack phase. This is perfectly legal.
-
When the AMMUNITION indicator on the ASP reaches '0' a player may no longer fire that particular machinegun. The other machinegun (front or rear), if any, may still fire as long as it has ammunition.
-
Since in reality the fire of both players is simultaneous, damage to the defender does not affect his aircraft until after the defensive phase is completed.
VIII. Ammunition and Rate of Fire
-
In the Basic Game, both players have a set supply of ammunition: each player can fire each type of machinegun (front or rear-firing) 12 times in one game before the ammunition supply is exhausted.
-
In the Basic Game, a player may only fire his machineguns ONCE per turn.
a) if a player fires his machineguns in his attack phase, he cannot fire them in his subsequent defensive phase. If he fires his machineguns in his defensive phase, he cannot fire them during his subsequent attack phase.
b) if a player has front-firing and rear-firing machineguns, they are considered separate and independent machineguns for this rule: firing the front machinegun does not exclude a player from firing the rear machinegun in the very next phase, or vice-versa.
Multi-Aircraft, Multi-Player
The rules for multi-aircraft, multi-player games are basically the same as one-on-one play with these clarifications:
-
Communications in multi-player games should be limited. Verbal communications should be considered as taking unfair advantage of the situation. Communications should be limited to hand motions, stopping short of pointing to specific hexes or touching the board.
-
An Aircraft Status Pad should be prepared for each aircraft (including balloons) involved in play.
-
Changes of speed, altitude, etc. must be announced for all aircraft before any are moved in the movement phase.
-
All aircraft must move in the movement phase before play procedes to the attack phase.
-
Players may resolve attacks in any order they wish.
-
Aircraft may fire their machineguns through hexes containing other aircraft in order to fire at a target beyond.
-
When two or more attacking aircraft are firing at one target aircraft, all aircraft must fire even if the target aircraft was destroyed by the first aircraft's attack.
-
All attacking aircraft and targets must be announced before any attacks are resolved.
-
NOTE: it is suggested that no more than three aircraft or players per side be allowed. Any more tends to bog down the game considerably.
Aircraft Capabilities Chart
The Aircraft Capabilities Chart (above) lists the data for all aircraft-types included in the game. Refer to the Prepare for Play section of the rules when transferring the information from the Aircraft Capabilities Chart on to the Aircraft Status Pad.
KEY — Uses: F = fighter missions, B = bombing missions, R = photo-recon missions, T = trench-strafing missions, A = artillery-spotting missions.
Columns: (1) = maximum speed (hexes/turn); (2) = minimum speed (hexes/turn); (3) = accumulated damage factor; (4) = ammo supply/front; (5) = ammo supply/rear; (6) = maximum altitude (meters); (7) = maximum climb (meters/turn); (8) = maximum dive (meters/turn); (9) = maximum dive speed (hexes/turn); (10) = maximum overdive speed; (11) = maneuver schedule.
| Aircraft | Designation | Uses | (1) | (2) | (3) | (4) | (5) | (6) | (7) | (8) | (9) | (10) | (11) |
|---|---|---|---|---|---|---|---|---|---|---|---|---|---|
| Armstrong-Whitworth | FK/8 | B, R, A | 8 | 3 | 10 | none | 10 | 3950 | 50 | 200 | 5 | 6 | A |
| Bristol | BR/f2b | F, B, R, T, A | 9 | 4 | 13 | 10 | 10 | 6100 | 200 | 450 | 7 | 8 | C |
| DeHavilland 2 | DH/2 | F, B, T | 7 | 3 | 7 | 6 | none | 4250 | 100 | 250 | 3 | 4 | B |
| DeHavilland 4 | DH/4 | B, R, T, A | 8 | 4 | 12 | 6 | 10 | 5300 | 150 | 250 | 6 | 7 | B |
| DeHavilland 5 | DH/5 | F, B, T | 9 | 4 | 11 | 10 | none | 4900 | 150 | 350 | 7 | 8 | B |
| Hanriot 1 | HD/1 | F, B, T | 9 | 4 | 11 | 10 | none | 6100 | 200 | 400 | 7 | 8 | C |
| Nieuport 11 | NIEU/11 | F, B, T | 8 | 4 | 6 | 6 | none | 4600 | 100 | 250 | 4 | 5 | B |
| Nieuport 12 | NIEU/12 | B, R, T, A | 8 | 4 | 8 | 6 | 6 | 5500 | 50 | 250 | 4 | 5 | B |
| Nieuport 17 | NIEU/17 |
Outline of Play
The following is a brief outline of play that players should refer to during the course of the first few games until they have the general "feel" of the way the game should go.
A. FIRST PLAYER SEGMENT:
-
Announces changes of speed, dive, overdive, (TOURNAMENT GAME ONLY) or climb, if any. If aircraft will execute bombing, strafing, photo recon, or artillery spotting mission, players must state that such a mission is being executed.
-
Executes his movement phase:
a) his dummy counter remains in initial position until after move is finished.
b) executes overdives (if any) then rolls one die to see if he survived the overdive. (TOURNAMENT GAME ONLY!)
c) if opponent agrees movement was within rules, dummy counter is placed under aircraft counter in new position.
d) both players determine if any aircraft are "sighted" (TOURNAMENT GAME ONLY).
- Executes his attack phase:
a) announces attack, target, and range-to-target.
b) rolls dice, cross-indexes dice roll with range under proper aircraft-type column.
c) hits (if any) are recorded on opponent's ASP.
d) Critical Hits (if any) are rolled immediately and type of hit and the damage are recorded on opponent's ASP TOURNAMENT GAME ONLY).
e) checks off one box on the AMMUNITION SUPPLY section of his ASP for each type of machinegun fired (front or rear-firing).
- Second Player defensive phase: follows same procedure as First Player attack phase. NOTE: in order to fire in defensive phase, Second Player must have announced "sighted" at a target aircraft at the end of the First Player's movement phase (2c) above (TOURNAMENT GAME ONLY).
B. SECOND PLAYER SEGMENT:
Exactly the same as the First Player segment above. Note that First Player defensive phase occurs during Second Player segment.
C. END OF ONE TURN OF RICHTHOFEN'S WAR:
Sequence continues until Victory Conditions of scenario being played are met.
Examples of Play
FIELD-OF-FIRE (example): A Bristol F2b (BR/f2b) faces "up" the mapboard. Its front-firing machineguns fire through the single row of hexes straight ahead of it, numbered outward from the aircraft: 1, 2, 3, 4, 5, 6, 7 hexes range. A DeHavilland 2 (DH/2) below faces "up" as well; its rear-firing machineguns fire out through the rear three hex sides (also numbered 1 through 7 hexes range outward), except for the single hex directly behind and adjacent to it, marked the "BLIND SPOT," which is out of the field-of-fire for the rear-firing guns.
Example of Tournament Game Aircraft Status Pad: the Instruction Folder illustrates a filled-in Aircraft Status Pad for a sample Bristol F2b, #1, showing how each item ("a" Speed through "p" Game Record Section) is filled in during play: on the Speed row (2 through 11), the minimum speed (4) and maximum speed (9) are circled, with the physical "Current Speed" counter sitting between them to mark the aircraft's speed for the turn; Accumulated Damage boxes 1 through 7 are crossed off with box 13 circled as the aircraft's Accumulated Damage Factor; Ammunition Supply (Front) has boxes 1-9 crossed off and 10 circled as the front ammo capacity, and Ammunition Supply (Rear) is filled in the same way; Maximum Altitude is 6100; Maximum Climb Per Turn shows 200 crossed off and 100 circled as the aircraft's actual value; Maximum Dive shows 450 crossed off and 250 circled; the Maneuver Schedule box shows schedule "C" (1 movement point to turn one hex side, 3 total to turn two hex sides, 6 total to turn three hex sides); Maximum Dive Speed is 7 and Maximum Overdive Speed is 8 (Tournament/Optional Rules section); the Critical Hits Taken box shows a 7; and the Game Record Section is filled in with a sample player name, date, opponent, the opponent's aircraft (FOK/Dr1), and a career victory total.
Maneuver Schedule Chart
The maneuver schedule chart illustrates the movement point costs for turning the aircraft counter in place in one hex. The numbers next to each hex side refer to the number of movement points which must be expended for EACH hex side. That is, the movement point costs are ADDITIVE NOT CUMULATIVE. For example, for an aircraft using schedule 'A', it costs 1 m/p to turn one hex side; to turn two hex sides, it costs 1 m/p (for the first) PLUS 2 m/p's (for the second) for a total of THREE movement points expended to turn two hex sides. REMEMBER: aircraft may only turn in ONE direction any one particular hex and the movement point costs above are additive for each hex side the aircraft turns through.
Each schedule gives, per side (left/right), the cost to turn 1 hex side, then 2 hex sides, then 3 hex sides (directly to the rear):
| Schedule | Turn 1 hex side | Turn 2 hex sides | Turn 3 hex sides (rear) |
|---|---|---|---|
| A | 1 / 1 | 2 / 2 | 4 / 4 |
| B | 1 / 1 | 2 / 2 | 3 / 3 |
| C | 1 / 1 | 1 / 1 | 3 / 3 |
| D | 0 / 0 | 2 / 2 | 3 / 3 |
| E | 1 / 0 | 2 / 1 | 3 / 2 |
Note that schedule E is asymmetric: the costs differ depending on whether the aircraft turns to its left or its right.
Lower Altitude — Blind Spot (example)
A Roland C-2 (ROL/c2) is at altitude 3500 m. A Nieuport 17 (NIEU/17) is four hexes directly behind it at altitude 3450 m. Note that even though the NIEU/17 is four hexes away, the ROL/c2 cannot return fire because the NIEU/17 is DIRECTLY behind the ROL/c2 at a LOWER altitude (i.e., in its rear-firing "blind spot").
Tournament Game Climb (example)
A Nieuport 17 (NIEU/17) begins at altitude 2300 m with a speed of 8, and climbs over the course of its move to altitude 2450 m, still at speed 8, six hexes later. Movement points are expended BEFORE the climb is actually executed. Note that even though the aircraft only traveled six hexes, the SPEED indicator would still show a speed = 8.
Optional Rule — Deflection (example)
Note that even though the range-to-target (NIEU/17) is the same for both the ALB/d2 and the ALB/d3, the ALB/d2 must subtract '1' from the dice roll because of the angle of deflection.
Optional Rule — Prevailing Winds (example)
At the end of a turn, the die roll for prevailing winds = '1', therefore the wind is towards the southeast. Since ALB/d2 No. 2 is at 1000 m., it is moved one hex. Since ALB/d2 No. 1 would be forced to move off of the mapboard involuntarily, the owning player opts to ignore the effects of wind.
Tournament Game Dive (example)
Tournament Game dive showing a SPAD/7, speed = 8, diving 250 meters (going from altitude 2550 m. up through the dive hexes to altitude 2300 m.), thereby gaining three extra movement points (one extra movement point for the first 50 m. dive hex, plus one extra movement point for each of the next two 100 m. dive hexes). Note that the extra movement points are not expended until after the aircraft has completed the dive (in the dive hexes).
Balloon Defense (example)
A typical positioning of balloon defenses is illustrated: dummy counters, anti-aircraft (AA) counters, and machine gun (MG) counters are placed in a cluster of hexes surrounding a balloon so that an attacking aircraft cannot easily tell, before it is too late, which hexes actually hold the defending AA and MG counters and which hold dummies (shown here un-inverted, for illustration, though in play they would be inverted to conceal their identity).
Balloon — Spontaneous Ignition (example)
If a balloon spontaneously ignites, a "Zone of Effect" radiates out from the balloon's hex. Aircraft 'A' (range = 3 hexes) would not be affected if it does not enter the Zone of Effect; aircraft 'B' (range = 2 hexes) would have to roll one die to see if it survives at the end of it's movement phase because it cannot avoid the Zone of Effect due to it's facing; aircraft 'C' (range = 1 hex) would be automatically destroyed because it must enter the ignited balloon's hex during it's next movement phase.
MG Field-of-Fire
A machine gun (MG) counter's field-of-fire covers all six hexes adjacent to it (each at range 1).
AA Field-of-Fire
An anti-aircraft (AA) counter's field-of-fire covers all six adjacent hexes (range 1) plus the ring of twelve hexes beyond them (range 2).
Tournament Game Rules
After mastering the Basic Game, players may advance to the Tournament Game which is an extension of the Basic Game that includes rules for more realism and complexity. All Basic Game rules apply unless otherwise stated.
I. Maneuver
In the Basic Game, all aircraft types are given identical maneuver schedules for simplicity. However, in the Tournament Game, there are five different schedules for various types of aircraft as explained below:
-
In preparing for play, players refer to the Aircraft Capabilities Chart under column 11, "Maneuver Schedule" to locate the appropriate schedule for the type of aircraft they are flying.
-
Players fill in the "MANEUVER SCHEDULE" section (item "j") of their Aircraft Status Pad for quick reference.
II. Climbing
When an aircraft gains altitude, there is a corresponding loss of forward movement. Therefore, directly after a player announces that his aircraft intends to climb in a particular movement phase, he must subtract movement points from his movement allowance for that movement phase:
-
A player must subtract one movement point from his aircraft's movement allowance for every 100 meters or less that it climbs.
-
Movement point costs for climbing are subtracted before the aircraft counter is actually moved by way of a simple subtraction process:
-
For example, a NIEU/17 with a speed of "9" intends to climb 150 meters; therefore he has "7" movement points available for horizontal movement since he expends "2" movement points to climb 150 meters. Its SPEED indicator would still point towards "9", however.
-
An aircraft is further limited in climbing to the extent that points subtracted for climbing may never reduce an aircraft's available movement points below its minimum speed. For example, a FOK/dr1 (minimum speed = 3), traveling at a speed of "5" could not climb 300 meters because it would then have only two movement points available for movement.
III. Diving
In the Basic Game, diving was over-simplified for ease of play. For the Tournament Game, the rules have been changed and expanded. Note the differences carefully!
-
Unlike the Basic Game, where the entire dive was executed in one hex, only 100 meters of any dive can be executed in one hex. A dive of three hundred meters, for example, would have to be executed in three adjacent hexes. These hexes are called "dive hexes."
-
Dives can only be executed once per turn:
i.e., a dive of three hundred meters must be executed in three adjacent hexes (not necessarily the first three) one after the other. It could NOT be executed by diving 100 meters, traveling two hexes horizontally, then diving two hundred more meters.
-
For every 100 meters an aircraft dives, it gains one movement point. Dives of less than 100 meters still gain one movement point. (Thus a dive of 50 meters would gain one movement point and a dive of 250 meters would gain three movement points.) Movement points gained by diving can only be used after the entire dive has been executed (in the same movement phase).
-
Additionally, subtract "1" m/p from the TOTAL cost of turn maneuvers executed within each "dive hex." That is, if it normally costs "5" m/p to turn three hex sides within one hex in level flight, in a "dive hex" it would cost only "4" movement points to turn three hex sides.
-
Note that movement points gained in diving do not cause any increase in the aircraft's SPEED indicator: the SPEED indicator would be at the same position at the end of a dive as it was in the beginning.
IV. Dive Speed
-
Diving places considerable strain on an aircraft. To compensate for this, the maximum speed at which an aircraft can dive is found under column 9 MAXIMUM DIVE SPEED in the Aircraft Capabilities Chart. He can dive at less than maximum dive speed so long as he does not reduce his current speed to less than minimum.
-
If an aircraft is traveling too fast to reduce speed to maximum dive speed (at the rate of two movement points per turn) then the player simply moves his speed counter to MAXIMUM DIVE SPEED and executes his dive. There is no penalty for exceeding the speed reduction limit in this case.
-
OVERDIVE: The maximum possible dive per turn is given on the Aircraft Capabilities Chart (column No. 8). This is the maximum vertical distance an aircraft can safely dive. However, it is possible to exceed the safety limits of the aircraft and dive an even greater vertical distance. Of course, the chances of shedding a wing surface and consequently crashing are also increased. To simulate this reckless, but sometimes lifesaving, maneuver employ the following rules:
a) in any movement phase, an aircraft may exceed its maximum dive limit by 200 meters (or less in steps of 50 meters) but he must roll one die to see if he survives the overdive.
b) a roll of "1" or "2" means the aircraft has broken up and the pilot has perished. Any other roll means he has successfully completed the overdive.
c) when overdiving, the aircraft MUST employ the MAXIMUM OVERDIVE SPEED (column No. 10 on the ACC) instead of the regular MAXIMUM DIVE SPEED unless, due to accumulated damage, its maximum possible speed is less than the MAXIMUM OVERDIVE SPEED.
d) a player may choose to overdive once per turn, as many times in a game as he wishes, but he must roll the die each time.
V. Combat
Note the additional rules and requirements for firing in the Tournament Game:
- SIGHTING: In addition to the two previously stated requirements for firing at a target a third requirement, SIGHTING, must also be satisfied:
a) in order to fire at a target, an aircraft must expend its last two movement points with the target aircraft in its field-of-fire.
b) defensively, in order to fire, the attacking target-aircraft must have expended its last two movement points in the field-of-fire of the aircraft firing in the defensive phase.
c) movement points expended by the attacking aircraft in turning maneuvers do not count towards satisfying the requirements for attacking aircraft, but DO count for defensive machine guns if the movement points were expended in that machine gun's field-of-fire.
d) in the attack phase, for all rear-firing machine guns (and optional rule machine guns for FE/2) movement points expended in turning maneuvers DO count towards the sighting requirements IF the target aircraft was in the field-of-fire before the turning maneuver began.
e) to avoid confusion, players should announce "sighted" when attacking or target-aircraft satisfy the requirements.
- TARGET-ALTITUDE DIFFERENCE: In the Basic Game, firing at aircraft flying at an altitude greater than 200 meters higher or lower was not permitted. To better reflect the actual geometry involved employ the following rules:
a) the range-to-target is calculated as in the Basic Game, but in addition, every 100 meters or less in altitude difference equals one hex added to the range to a maximum altitude difference of 250 meters.
b) for example: aircraft "A" fires on aircraft "B" at a range of two hexes. Aircraft "A" is flying at 6500 meters and aircraft "B" at 6250 meters, for a 250 meter difference in altitude. Therefore the REAL range-to-target would be 5 hexes and not 2 hexes. (3 hexes added to range for 250 meter altitude difference.)
c) aircraft at greater than 250 meters altitude difference cannot be fired upon.
-
FIELD-OF-FIRE for a rear-firing gun does not extend below that particular aircraft's altitude level in the row of hexes directly to the rear of that aircraft. Example: an aircraft with a rear machine gun flying at 5500 meters could not fire on an aircraft flying directly behind it, 4 hexes away at 5450 meters, with the rear machine gun. (see Examples of Play section for another example.)
-
CRITICAL HITS: Critical Hits (hits that by chance strike a particularly vital part of an aircraft) can occur any time an aircraft takes fire from enemy aircraft or anti-aircraft guns. To simulate this possibility, incorporate the Critical Hit Table, located on the inner box lid, as part of the results from the Target Damage Table. On the Target Damage Table, there are asterisks indicating critical hits in certain outcomes; whenever an outcome is rolled that calls for a critical hit, the attacker rolls two dice to determine the effects of the critical hit as stated on the chart. Critical hit damage takes effect immediately.
-
GLIDING: When called for on the Critical Hit Table, a player must attempt to glide his aircraft in a "deadstick" fashion off his own side of the board under these conditions:
a) the aircraft can no longer fire its forward-firing machine guns. Rear machine guns, if any, may still fire normally.
b) the aircraft cannot gain speed: speed immediately reverts to the aircraft's minimum speed.
c) the aircraft must lose 100m. altitude (with no dive bonus) for every turn it is in the air. Dive maneuvers, however, are executed normally, ignoring the 100m. glide loss.
d) turning maneuvers are limited to one hex side for every hex traveled through.
e) once in a glide, accumulated damage can never force an aircraft below its minimum speed.
f) once a player force-lands on the mapboard or glides off one of the four sides of the mapboard, he is removed from the game: if he exited from a mapboard hex in friendly territory (i.e., behind his respective trench line) he is not considered shot down for victory purposes. If he exits from a hex in enemy territory (which includes his own trench line hex-row and No-Man's Land) he is considered shot down for victory purposes. If he force-lands on the mapboard he is considered shot down, regardless of which side of the trench line he lands on.
- ACCUMULATED DAMAGE: In the Basic Game, severe damage does not decrease an aircraft's performance. To reflect the effects of severe damage, employ the following set of rules:
a) if an aircraft suffers more than 50% damage (50% of its damage boxes have been marked off, rounding off in favor of the aircraft; i.e., 50% of 11 boxes = 6 boxes) that aircraft must substract one movement point off its maximum speed, and lose 50 meters off of its MAXIMUM CLIMB capability for every hit it sustains after passing the 50% damage point.
b) EXAMPLE: a SPAD/13 which already has 7 damage boxes out of 14 marked off and flying at a maximum speed of 11, is attacked and suffers four more hits for a total of 11 damage boxes marked off. Its speed is immediately reduced by 4 movement points to 7 hexes per turn, and its MAXIMUM CLIMB capability is reduced to zero for the remainder of the game.
c) reductions of speed and climb through accumulated damage are permanent: once reduced, speed and climb can never be brought up to their initial maximums.
d) speed can never be reduced below an aircraft's minimum speed by accumulated damage. If accumulated damage would force an aircraft below minimum speed, the aircraft must go into an immediate glide.
- ACE STATUS: as called for in the different scenarios, or at the players' discretion, any aircraft can be designated as being flown by an ACE. When so designated, aircraft have these improved capabilities:
a) when ATTACKING, the ACE adds "1" to the dice roll on all attacks resolved on the Target Damage Table: if he rolls a "7" with the dice, this would become an "8" on the Target Damage Table.
b) when the ACE is flying the target-aircraft, "1" is subtracted from the dice roll of the attacker. This does NOT apply to defensive fire, in the defensive phase, directed at an ACE. When two ACES are involved in an attack with each other, there are no additions or subtractions to the dice roll.
c) Rear gunners, when firing at a target-aircraft in the attack phase, get no extra dice benefit if their aircraft is piloted by an ACE. The Target-aircraft, of course, would get the benefit of the dice-roll subtraction if it was piloted by an ACE.
d) indicate that an aircraft is being flown by an ACE by marking item "l" on the ASP.
NOTE: this rule is further expanded under the OPTIONAL RULES section.
- AMMUNITION SUPPLY: unlike the Basic Game, different aircraft machineguns have different ammunition capacities. The ammunition supplies for the various aircraft are found in column No. 4 and No. 5 on the Aircraft Capabilities Chart:
a) every time a machinegun is fired, one of the boxes in the AMMUNITION SUPPLY section of the Aircraft Status Pad must be marked off.
b) the first number on the chart represents the capacity for the front-firing guns (if any) and the second number represents the capacity for the rear-firing guns (if any).
- JAMMING: a player may elect to fire his machineguns in two successive firing phases (attack phase, then defensive phase or vice-versa) instead of in the normal, once per turn, fashion. However, by firing his machineguns twice in a row, he risks permanently jamming his machineguns:
a) if a player fires his machineguns two fire phases in succession, he must roll one die to see if he has jammed his guns: a die roll of "1" or "2" means that his guns are jammed and may not be fired for the remainder of the game.
b) jamming is permanent. Front-firing and rear-firing guns are considered separate and independent weapons for jamming purposes.
c) to avoid confusion, players should indicated jammed machineguns by marking off the JAMMED box (item "o") on the ASP whenever it occurs.
Introduction to Scenarios
Seven scenarios are provided in Richthofen's War that represent some of the types of missions that pilots were required to fly on the Western Front. Each scenario is divided into Basic and Advanced levels. Usually the Advanced levels contain more aircraft and present more challenging tactical situations. It is suggested that each scenario first be played on the Basic level to gain an understanding of the tactics involved. Some scenarios require additional rules as found under the "Special Rules For Scenarios" section. Note that each Basic and Advanced level is further divided into sub-levels. The Basic sub-levels usually contain one aircraft per side while the Advanced sub-levels contain two or more aircraft per side. Each sub-level contains the aircraft required to play one game. Not all of the sub-levels represent evenly matched contests. Rather the attempt has been made to provide match-ups as they occurred in actual combat over the Western Front. Other aircraft, instead of the ones mentioned, may be substituted in all scenarios. Refer to the Chronological Order of Appearance Chart, located in the Mission Briefing Manual, to ascertain if the aircraft selected were actually in operational use against each other at the same time. NOTE: in most scenarios, the Allied Player starts his aircraft on the NORTH edge. Starting speeds of the aircraft are chosen at the players' option.
Special Rules For Scenarios
The following set of rules are for use with some of the scenarios. Before attempting to play a scenario, check to see if there are any extra rules needed.
PHOTO-RECON (SCENARIO NO. 3)
-
Photo-recon missions can only be executed by Photo-Recon-type aircraft as designated on the ACC.
-
Photographing of target hexes can take place only at altitudes equal to or greater than 2500 meters.
-
Photo-recon targets are chosen in secret. There are two types of photo-recon targets: trench lines and road networks. For trench lines, it is only necessary to write the word "trench line" on a piece of paper and place it folded in a location visible to both players. For road nets, the exact grid coordinates as given on the scenario card must be written down.
-
TRENCH LINES: to execute a successful mission, an aircraft must begin its movement phase on a trench line hex. The aircraft must then trace a path through 15 trench hexes along the enemy trench line. The aircraft can vary off of the trench line if necessary. The only requirement is that it must pass through 15 different, adjacent trench line hexes to execute its mission. As each trench line hex is passed through it should be marked with a spare counter to signify that it has been successfully photographed.
-
ROAD NETWORKS: there are four grid coordinates for road sections given for each side in the scenario card. (Note that the German road nets consist of 11 hexes and the Allied nets 8 hexes.)
The procedure is the same as for trench line hexes except a) the aircraft is not required to begin its movement phase on a road hex to begin photographing the target, and b) hexes totalling the proper number (German- 11 hexes; Allied- 8 hexes) that approximate the course of the road in the best fashion must be passed through to receive credit for a successful mission.
-
The recon aircraft must leave its own side of the mapboard under its own power (or, if Forced-Landing Optional Rule is used: must roll "successful landing" on the Forced-Landing Table) to receive credit for a successful mission.
-
No altitude changes are permitted when an aircraft is in the act of photographing. All 15 hexes must be photographed from the same altitude.
-
NOTE: Any differences of opinion regarding mapboard target locations that cannot be compromised should be resolved by a friendly roll of the dice.
TRENCH-STRAFING (SCENARIO NO. 4)
-
Trench-strafing missions can only be executed at an altitude of 350 meters or less.
-
To initiate a successful trench-strafing attack, the aircraft must begin its movement phase on a trench line hex. The act of passing over a trench line hex represents the actual firing of machine guns into that hex. Each hex that is fired on must be marked with a blank counter to receive credit for it at the end of the game. There is no limit to the number of trench line hexes that may be strafed, but one AMMUNITION SUPPLY box must be checked off for each movement phase in which the aircraft strafes.
-
If an aircraft fires at any trench hexes in its movement phase, it cannot fire those machine guns in its attack phase and can only fire them in its defensive phase at the risk of jamming them.
-
Only forward-firing machine guns may be used for strafing.
TACTICAL BOMBING (SCENARIO NO. 5)
-
Player with bombers secretly picks one target for each bomber from the list of targets on the scenario card, writing the grid coordinates on paper, folded, to be kept in view of both players.
-
Two different bombers can both be assigned to the same target.
-
Maximum altitude for executing bombing missions is 2500 meters.
-
To bomb a target hex, an aircraft must first execute a "dry run" by passing over the target hex at the same speed and altitude as it will use when it makes the actual bombing run. In the next earliest possible movement phase, the aircraft must retrace the exact path of the "dry run" through the target hex: it must enter and exit the target hex from the same hex sides and it must execute the bombing run at the same speed and altitude.
-
No turns are permitted in the target hex during the "dry run" or the actual bombing run.
-
Locations of bombed hexes should be marked on the mapboard with a spare counter to compare with coordinates written on the paper.
-
NOTE: Aircraft can bomb targets even if the observer is killed (2-seaters).
BALLOON BUSTING (SCENARIO NO. 7)
- Balloon Counters:
a) Balloons are stationary. Once placed on the mapboard they may never be moved.
b) Balloons have the following characteristics:
-
The maximum altitude at which balloons can be elevated for observation is: German — 800 meters; Allied — 1000 meters.
-
Balloons can gain or lose altitude at the rate of 50 meters per turn (when being hauled up or down by motor winch).
-
Balloons have an Accumulated Damage factor of 12 (i.e.: they are destroyed if they are damaged by twelve or more machine gun hits).
c) Destroying Balloons: balloons can be destroyed in two ways:
-
by accumulating twelve hits from enemy aircraft attacks.
-
by spontaneous ignition from enemy aircraft attack. Spontaneous ignition occurs any time a Critical Hit outcome is rolled on the Target Damage Table.
-
ZONE OF EFFECT: when spontaneous ignition occurs (i.e.: the balloon explodes from the near instantaneous burning of the hydrogen gas) there is a "zone of effect" of the explosion created which consists of the hex containing the balloon and the six surrounding hexes through an altitude 250 meters above and below the balloon's altitude inclusive. This "zone of effect" lasts for one full turn after the balloon ignites. If a balloon was ignited in player "A's" attack phase, the "zone of effect" would remain until after player "A's" movement phase of the next turn. Any aircraft that enters the balloon's hex (within 250 meters above or below) during the period of spontaneous ignition is automatically destroyed.
-
Anti-aircraft Balloon Defenses: there are two types of anti-aircraft weapons in the game:
a) MG counters which represent small caliber automatic weapons. The range of the MG weapons are: 1 hex horizontally to an altitude of 600 meters.
b) AA counters which represent larger caliber anti-aircraft guns. The range of the AA guns are: 2 hexes horizontally to an altitude of 2000 meters.
c) both types of counters have an all-around, 360 degree, field-of-fire.
d) both types of counters fire in the attack phase of the owning player's turn-segment.
e) both types of counters can be placed anywhere behind the owning player's trench line except for an area within one hex of any observation balloon.
f) there is no ammunition supply limit for MG or AA counters.
g) during prepare for play, the player with the observation balloon sets up his balloon, AA, MG, and DUMMY counters (the amount of each is determined on the scenario card) on the board in any configuration he desires. AA, MG, and DUMMY counters are placed on the board face-down. Only when individual counters fire must they be turned face-up. (The only purpose of DUMMY counters is to mask the actual disposition of the anti-aircraft defenses.)
h) AA and MG attacks on aircraft are resolved in the same manner as aircraft vs. aircraft attacks. AA and MG dice roll outcomes are found on the first two lines of the Target Damage Table.
- Aircraft Attacks on Balloons: Aircraft initiate attacks on balloons in the same manner as attacks on other aircraft, modified by the following restrictions:
a) in order to attack a balloon, an aircraft's altitude must be equal to or lower than the target-balloon's altitude.
b) an aircraft cannot fire at a balloon if it ends its movement phase in the same hex as the balloon.
c) once a balloon has reached zero altitude, it may no longer be attacked by enemy aircraft.
d) Field of Effect:
-
If an attacking aircraft spontaneously ignites a balloon in its attack phase at a range of one hex, that aircraft is automatically destroyed (and the pilot perishes) because in its next movement phase it would have to fly through the hex containing the ignited balloon within 250 meters above or below the balloon.
-
Any aircraft that ends its movement phase in such a position that it must fly through one of the six surrounding hexes of the "zone of effect" of an ignited balloon (within 250 meters above or below) must roll one die to see if it is caught in the blast. A roll of "1" or "2" on the die means that the aircraft is destroyed. Any other result means the aircraft survived the experience.
-
If an aircraft is in such a position that, by turning, it does not enter any of the "zone of effect" hexes in its next movement phase, it does not have to roll the die to see if it survives.
-
Die rolls for "zone of effect" survival are executed at the end of the movement phase in which the aircraft enters the "zone of effect."
-
If re-adjustment of aircraft counters near mapboard edge is required, the multi-aircraft method (Basic rules, II-8-b) must be used.
The Campaign Game — "Bloody April"
The Campaign Game is designed for extended play and is not recommended for those wishing to conclude play in one sitting. Refer to "Campaign Game" specifics printed on the reverse side of the Scenario No. 7 card for appropriate Tables.
I. Introduction
Thus far, Richthofen's War has presented the opportunity to simulate isolated aircraft vs. aircraft combat during World War I, the results affecting only the outcome of that particular encounter. The Campaign Game is basically a method of stringing together many of these isolated combats to simulate the effects of extended combat on one operational unit. In the Campaign Game, the loss of each aircraft places added burdens on those that remain to accomplish the operational objectives. Players will find that long-range planning is essential to achieving operational goals.
II. Situation
It is Easter Monday, April 9, 1917. The British Army, under Field Marshal Sir Douglas Haig, is launching the massive Arras Offensive in support of a later French attack against the Aisne. To support this assault, the ground forces require constant aerial reconnaissance and secondary bombing support over and behind the front lines. The German Imperial Air Service must deny this ability to the Royal Flying Corps. What followed during the next three weeks generated one of the most bitter air battles of the war. The British took frightful losses in obsolete BE/2's, FE/2's, DH/2's and other first-line fighter aircraft but were able to provide the reconnaissance needed by the ground troops. The German qualitative superiority was barely balanced by the Allied quantitative superiority.
In the Campaign Game, the Allied Player must execute photo-recon and bombing missions with one squadron of out-dated FE/2's while attempting to inflict casualties with another squadron of NIEU/17's.
Opposing them is Richthofen's crack Jasta 11 equipped with ALB/d2's and the superior ALB/d3's. Both sides are provided with reserve aircraft and replacement personnel. Note, however, that there is extra paperwork required which is not provided in the game. The following rules are given only as a framework: players may make the Campaign Game as simple or as complex as they want. It is hoped that from this, players will devise Campaign Games of their own. The possibilities are endless.
III. Prepare For Play
Tournament rules will be in effect for the Campaign Game. Before actual play commences, players should organize the necessary information roughly as follows:
-
Prepare a master sheet, titled "AIRCRAFT ROSTER": on the roster assign each combat aircraft a number, each pilot a single letter, and each observer a double letter (only FE/2 and BE/2 aircraft have observers). Match each aircraft with a pilot and observer (where required): these will be permanent assignments unless the crew is killed or wounded or the aircraft is damaged or destroyed.
-
The AIRCRAFT ROSTER will be used to record the following information:
a) which aircraft are flown by which pilots.
b) which observers are assigned to which aircraft.
c) which pilots are (or become) ACES.
d) which pilots destroy enemy aircraft.
e) which friendly aircraft are destroyed.
f) damage and repair time for friendly aircraft.
g) wounded and/or killed pilots and observers.
IV. Special Rules For The Campaign Game
For the purposes of the Campaign Game, a new concept is introduced: the "operational turn." An operational turn encompasses one day's activities and may include as many as five separate games. Operational turns will be referred to in the Rules as "days."
-
Before the start of each day, the Allied Player must secretly allocate his available forces to the day's scheduled missions. He may never plan more than five missions per day but must always attempt to fly the number and type of missions listed on the mission schedule.
-
Each mission may be composed of 1, 2, or 3 aircraft. The maximum number of aircraft that can be assigned to one mission is three.
-
The Allied Player may fly more missions (to a maximum of five per day) than allocated by the mission schedule, but such missions must be flown as dogfight missions.
-
No aircraft, pilot or observer may fly more than once per day.
-
To allocate his forces to the day's missions, the Allied Player prepares a "flight schedule" at the beginning of each day. The flight schedule should list:
a) the number of missions being flown that day.
b) the order in which they are to be executed.
c) the composition of each mission: the number of aircraft, their type, and their identification number as taken from the Aircraft Roster.
d) the type of mission being executed by each flight of aircraft.
-
The German Player likewise completes a flight schedule, listing the type and number of aircraft in each mission. However, the German missions need not be taken in sequence. The German Player has the choice of which of his missions to commit against a particular Allied mission.
-
NOTE: Players may not attempt to bomb the same target or photograph the same target more than ONCE per day. Once the day's missions start, no changes may be made in the flight schedules or aircraft rosters.
After the day's missions have been completed, players should exchange flight schedules to verify that they have been followed.
-
Players at this point should realize that each mission on the flight schedule represents ONE game. Therefore the maximum number of games possible per day is five. Each game can constitute only one type of mission (Photo-recon, bombing or dogfight).
-
INTERCEPTION: The German Player is not required to intercept every or any Allied mission. As strategy dictates, he may let some Allied missions fly unopposed. In this case, the Allied Player automatically completes his mission and receives the proper number of Victory Points.
-
FLUGMELDIENST: Due to the outstanding work of the then newly-organized Flugmeldienst (a telephone network of air observation stations along the Front) the Germans were almost always notified of the extent of Allied air activity over the Front lines. Before the start of each mission, the Allied Player must inform the German Player of the number of aircraft and their altitudes (rounded off to the nearest 1000 meters). He does NOT inform the German Player concerning the type of aircraft being flown nor their mission. At this point, the German Player must decide to intercept or let the mission fly unopposed. If he intercepts, he must disclose which of his missions will be intercepting.
-
SET-UP: Once the German Player chooses to intercept, the mapboard is set up with the aircraft starting on the first row of hexes on their respective sides of the mapboard. The Special Rules for Scenarios should be followed for each type of mission, modified by the fact that the number, types, and altitudes of the aircraft are determined by the individual players.
Both players must have the altitudes of their aircraft predetermined and noted somewhere on their aircraft's ASP before play starts. Once play commences, both sides reveal the exact starting altitudes of their aircraft.
- DAMAGE: Damage suffered by an aircraft during a mission affects its ability to be used in the following days of the campaign. The limitations on availability of aircraft due to damage are:
a) 50% or less damage . . . . available next day.
b) more than 50% damage . . . . out of service for one day.
c) sustains Critical Hit (any number or kind) . . . . out of service for two days.
d) sustains successful forced-landing . . . . add one day to out-of-service time in addition to other penalties listed above.
e) destroyed aircraft are, of course, stricken from the Aircraft Roster and are lost for the duration of the campaign. Damage is cumulative: i.e., an aircraft that sustains more than 50% damage, plus a Critical Hit, and executes a successful forced-landing would be out-of-service for FOUR days. NOTE: Critical Hit No. 6 — 'Observer Killed' does not affect the flying performance of aircraft without observers. However, it still counts as a Critical Hit for the purposes of out-of-service time.
- RE-ASSIGNMENT: As aircraft-crew assignments are permanent and may not be changed after determination of the Aircraft Roster, crews may be re-assigned to other aircraft only if:
a) reserve aircraft are available and the crew's original aircraft is destroyed or out-of-service due to damage.
b) an original aircraft is made available because of the wounding of a pilot or observer and an extra crew is available due to damage of their original aircraft.
c) pilots may not arbitrarily exchange aircraft with pilots of lesser skill.
-
PILOTS AND OBSERVERS: Wounded pilots and observers are lost for the duration of the campaign. Their aircraft may be utilized by extra or replacement air crews. Note that for two-seat aircraft the pilot and observer are considered as one unit and the wounding of one or the other forces re-deployment of the healthy member of the crew, or replacement of the wounded crew member. Because observers provided most of the firepower for two-seat aircraft, they cannot fly without an observer. The pilot, however, may be re-assigned to another squadron (No. 60 in this instance) until replacement observers are available.
-
ACE STATUS: Particular attention should be paid to the records of individual pilots. Should an ordinary pilot amass a score of 5 victories during the Campaign Game, he gains ACE status and performs with all of the advantages of an ACE. An ACE may obtain double-ACE status in the same fashion.
-
RESERVES AND REPLACEMENTS: note the following procedure for utilization:
a) Reserve Aircraft: may be utilized whenever an extra crew is available due to an aircraft being destroyed or out-of-service due to damage. When a crew receives a reserve aircraft, the assignments become permanent, and they cannot switch back to their original aircraft, which, when repaired would go into reserve status.
b) Replacement Pilots and Observers: The Order of Battle lists the number of pilots and observers available to each side as replacements. The date in parenthesis next to the number represents their earliest availability. They may be employed as needed. NOTE: Pilots may never be used as observers (or vice-versa!).
-
MISSION NUMBERS: Photo-recon, dogfight, and bombing missions may be flown by any combination of aircraft: i.e., 3 bomber aircraft, 1 bomber aircraft, two bombers and one fighter, or any other such combinations of aircraft. For Victory Point purposes, only one of the specified type of aircraft must successfully complete the mission.
-
FIGHTERS: Fighter aircraft may perform photo-recon and bombing missions ONLY if no recon or bombing aircraft are available on that particular day. However such fighters may never "bounce" enemy aircraft; they must be fired upon first before they can return fire.
-
PHOTO-RECON/BOMBER AIRCRAFT: If, at the beginning of a day, the Allied Player has only enough photo-recon/bomber aircraft to fly one such type per mission (so as to complete the Mission Schedule for that day) he must spread his photo-recon/bomber aircraft to cover all scheduled photo-recon and bomber missions with at least ONE per mission before he may substitute fighter aircraft for those types.
-
FORCED-LANDINGS: Any time an aircraft is forced into a glide and either force-lands on the mapboard or glides off of the mapboard behind its own side of the trench-lines, the owning player must roll one die on the Forced-Landing Table (printed on Scenario card) to determine if the aircraft and/or crew survives. Unwounded crew members that survive the forced-landing are available for use the next day. Aircraft that survive can be brought into service after their damage has been repaired as stated in the Damage section of these rules.
-
TABLES: All dice-roll tables are printed on the reverse side of the Scenario No.7 card.
Optional Rules
I. Prevailing Wind
The prevailing winds over the Western Front exerted most of their effect on the Allied flyers. Often, prevailing westerly winds made flying towards the German lines easier, but made the return to safe haven a laborous process. To reflect this, employ the following rules:
- At the end of each complete turn, one die is rolled and the following chart consulted to determine from which direction the wind is blowing:
| Die roll | Wind Direction |
|---|---|
| 1 | towards southeast |
| 2 | towards southeast |
| 3 | towards east |
| 4 | towards east |
| 5 | towards northeast |
| 6 | towards southwest |
The "WIND" counter is placed near the mapboard compass with the arrow pointing in the proper direction as a reference.
-
All aircraft flying above 2000 meters are moved two hexes towards the direction determined by the die roll.
-
All aircraft flying between 850 and 2000 meters, inclusive, are moved one hex towards the direction determined by the die roll.
-
Aircraft flying below 850 meters are not affected by the prevailing winds.
-
The effects of prevailing winds may be ignored in the following situations:
a) when aircraft are in the process of executing photo-recon missions.
b) when prevailing winds movement would 'involuntarily' move an aircraft off of the mapboard.
In both cases, the effects of prevailing winds may be applied to the individual aircraft involved at the owning player's option.
II. Reaction Rule
Since the time of each turn in Richthofen's War is a mere ten seconds it is possible to further simulate the demands of aerial combat by imposing a similar time limit on the players. Thus, a player no longer has the advantage of hindsight over his real life counterpart and must react to the situation with the same swiftness actually required of the combatants. The reaction rule will greatly enhance the player's need for a sixth sense and detract from the unrealities of well thought out moves. The ten second move refers ONLY to the physical movement of the counter. Actual firing procedures, die rolling, and ASP adjustments do not have to be made within the 10 seconds. The 10 seconds 'begin to elapse' as soon as all ASP adjustments are recorded. Failure to move within the 10 second limit results in straight ahead movement with no turns allowed.
III. Forced-Landings
Forced-landings, as explained in the Campaign Game, may be included as an optional rule in any version of the game you care to play.
IV. Endurance
In the Campaign Game, and other versions of your own design which call for multi-day combat, you may wish to allow a pilot to fly more than one sortie per day. When using this rule, two conventions must be employed: a) the number of sorties that individual aircraft will fly must be pre-determined; b) it must be assumed that the time interval between sorties is equal, dependent on the number of sorties to be flown. Note that the effects of extended combat are separate and independent in regards to the pilot and the aircraft. A pilot, regardless of the aircraft he flies, will be forced to subtract "2" from his TDT dice rolls if he flies four sorties/day. Likewise, an aircraft flown four sorties/day could have only two damage boxes repaired between sorties. The maximum number of sorties a pilot or aircraft may fly per day is four. Remaining missions may be aborted at any time. Note that this optional rule does not 'mesh' with the Campaign Game Rules and should be used only in 'experimental' situations.
| Sorties/Day | No. of damage boxes repairable between flights | effects on pilot |
|---|---|---|
| 2 | 5 | none |
| 3 | 3 | -1 from TDT dice rolls |
| 4 | 2 | -2 from TDT dice rolls |
V. Ace Status
Heretofore, a player has simply been designated as being an ACE or a non-ACE. To avoid this rather arbitrary rule, employ the following:
-
ACE status must be "earned"; i.e., players must shoot down five opponents (the number can vary depending on the qualifications you wish to use; the Germans actually used 10 as the minimum number of kills necessary for ACE status, while the French used 5 as their figure) to qualify to use the ACE rules.
-
Aircraft Status Pad sheets should be saved to verify the five victories.
-
The five victories must be earned without being shot down (i.e., the pilot killed). That is, if a player runs a string of 4 victories and in the 5th contest is shot down, he must start all over again.
If the aircraft is not shot down, but is successfully force-landed (i.e., the pilot survives), the victory string is not broken (i.e., the pilot "lives to fight again another day") although a victory would be earned by his opponent.
-
Similarly, once a player has become an ACE, he may attempt to become a double ACE by shooting down another five enemy aircraft. When he becomes a double ACE, he adds "2" to the dice roll of all attacks, and "2" is subtracted from the dice roll when he is piloting the target aircraft. When a double ACE is involved in combat with a regular ACE, combat is handled as if the double ACE was a regular ACE and the ACE was a non-ACE. (For double ACES: all dice rolls of "12" become "13" on the TDT)
-
This optional rule should generally be used only in extended series play where pre-arrangements for employing this rule have been made.
VI. Variable Anti-Aircraft
Because the defenses of balloons were by no means standardized at a set number of anti-aircraft weaponry, players may wish to use the following table to determine the defenses of any balloon:
| Die Roll | Defense Allotment |
|---|---|
| 1 | 2AA, 5MG, 5 Dummy |
| 2 | 3AA, 5MG, 4 Dummy |
| 3 | 4AA, 4MG, 4 Dummy |
| 4 | 4AA, 5MG, 3 Dummy |
| 5 | 5AA, 5MG, 2 Dummy |
| 6 | 6AA, 6MG, 0 Dummy |
To avoid giving away the depth of his defenses through a die roll, the balloonist may opt to substitute a drawing for the die roll. This is done in the following manner: Number six pieces of paper from one through six; fold them, and allow the balloonist to draw one at random. He then consults the Variable Anti-Aircraft table and sets up his defense accordingly, keeping the slip of paper in his possession. At the end of the game, the opposing player may inspect all of the numbered papers to insure that the proper defense configuration was used.
VII. Special Aircraft Characteristics
- RAF FE/2 — Special Field of Fire:
The FE/2 was a pusher aircraft carrying a pivot mounted machinegun in the nose. This gave it a considerable arc in its forward field-of-fire. To simulate this, allow the FE/2 a field-of-fire which extends out from the front facing three hex-sides (similar to, but exactly opposite from a rear gun's field of fire).
Additionally, to simulate those FE/2's equipped with two machine guns (factory installed armament) add a rear machine gun to the FE/2's armament with these restrictions:
a) the rear machine gun has the usual rear-three-hex-side field-of-fire.
b) the rear machine gun cannot fire at targets at altitudes equal to or less than the firing aircraft's altitude.
c) only one machine gun (front or rear) may fire in any single fire phase.
d) ammunition capacity for rear machine gun is 6.
e) rear machine guns fire on column 'C'.
Roland C-II — because of the ROL/c2's peculiar design, allow the rear machine gun a 360 degree field-of-fire instead of the usual rear three hex sides.
Variable Armament Configurations: changes were continually made in the armament carried by certain aircraft. As an aid to play-balance, you may choose to employ the following:
a) NIEU/17 — some later models were equipped with a top wing-mounted Lewis machine gun; allow these aircraft to fire on column 'B' of the Target Damage Table.
b) HALB/d3 — later models of HALB/d3 were equipped with twin deck-mounted machine guns. Allow these to fire on column 'A' of the Target Damage Table.
c) BR/f2b — later models of BR/f2b were equipped with twin REAR machine guns. Allow these to fire on column 'A' of the TDT.
- Pusher Aircraft: (DH/2, FE/2) Unsuccessful Forced Landings: Because of the rear-mounted pusher engines in these aircraft, chances of surviving an unsuccessful forced-landing were less for a crew of a pusher aircraft than for a tractor-type aircraft. Many times the engine would be propelled through the cockpit area, killing the crew. To simulate this disadvantage, modify the Forced Landing Table (located on the Campaign Game Card) thusly:
a) under the "Pilot Wounded" column, change die roll "3" to read "Aircraft destroyed, Crew killed."
b) under the "Pilot Not Wounded" column, change die roll "5" to read: "Aircraft destroyed, Crew killed."
c) these changes are incorporated for PUSHER-type aircraft only!
VIII. Anti-Balloon Rockets
The Nieuport 17's and Spad 7's flown by the French sometimes mounted 6 aerial rockets for use against balloons. Rockets may only be used against balloons. Rockets have an effective maximum range of two hexes. Rocket attacks are resolved on the Target Damage Table "MG" column. Any hit scored results in a spontaneous ignition. Rockets may be fired at the rate of 1 or 2 rockets per attack phase at the pilot's option. The dice are rolled once for each rocket fired. Rockets are fired in the attack phase only. A side record of rockets fired should be kept on the Aircraft Status Pads of those aircraft equipped with rockets.
IX. Angle of Attack: Deflection
Deflection is the degree of angle formed by the horizontal axis of an attacking aircraft and the horizontal axis of a target aircraft. The success of a machine gun attack was often dependent upon the degree of deflection an attacker had on the target aircraft. An attack from directly behind or head on (i.e., 0° deflection) had a better probability of inflicting damage than an attack from the side (between 30° and 150° deflection). This can be simulated by adjusting the dice roll outcome on the Target Damage Table for deflection attacks:
-
If the attacking aircraft attacks from directly behind or head-on, the dice roll is not changed.
-
If the attacking aircraft attacks from one of the four "side" hexsides of the target aircraft, subtract "1" from the dice roll.
-
For example: At any range, a SPAD/7 attacking an ALB/d3 head-on rolls a dice roll of "7": damage is assessed normally. The same attack from one of the "side" hexes converts the dice roll of "7" to a "6" because of the deflection.
-
Note that deflection has nothing to do with the range to target, but is concerned only with angle relationships.
-
Dice roll subtractions are in addition to any other dice roll modifications due to the ACE rules, etc.
-
See diagram in Examples of Play section.
Victory Credit
Generally speaking, most aircraft will require more than one attack to be shot down. In multi-aircraft situations, it is possible for one target-aircraft to be attacked by more than one attacking aircraft during the course of a game. To avoid argument as to who actually shot down an aircraft (and hence get victory credit towards "ACE" status) employ the following criteria:
-
The player who made the last attack upon the downed aircraft is given credit for that victory.
-
In a situation where 2 or more players fired at a downed aircraft in the same turn, victory credit is given to:
a) the player whose attack caused the greatest number of hits, or that being equal:
b) the player who was closest to the target aircraft at the time of attack.
If neither criterion is sufficient to establish a victor, then neither player gets credit for the victory.
- If an aircraft glides off, or flies off the mapboard on its opponent's side of the trench line, credit for the victory is given to the player who caused the target to move off the mapboard. If an aircraft force-lands on the mapboard, victory credit is given to the player causing the forced-landing. If, however, subsequent attacks destroy the aircraft before it can effect a landing or get off the board, the player who actually shot down the target is credited with the victory.
Solo Game
Most games are difficult to play solitaire — Richthofen's War among them. But Scenario No. 7 — Balloon Busting provides a good solitaire situation because, admittedly, there is not much for the balloonist to do in the Basic level. To play Scenario No. 7 solitaire:
-
Use the Basic level situation.
-
Place six counters each of AA, MG, and DUMMY units face down on the mapboard well mixed; pick twelve counters at random and arrange them in any sort of intelligent defense around the balloon.
-
When an attacking aircraft ends its movement phase on or adjacent to an inverted counter, the counter is turned face up.
-
Only AA and MG counters that are face up may fire.
-
The balloon must lose 50 meters of altitude every turn.
-
Play proceeds normally in all other respects.