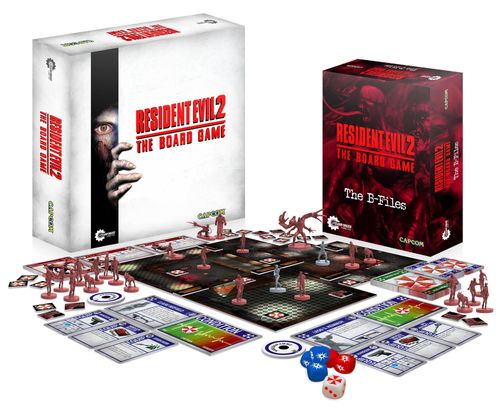
Resident Evil 2: The Board Game
Resident Evil 2: The Board Game Rulebook
Table of Contents
Table of Contents
- Game Contents
- Cards
- Character Profiles
- Item Cards
- The Playing Area
- Enemy Reference Cards
- Gameplay – The Basics
- Character Activations
- Scenario 1A Brief – Getting to the Police Department
- Playing Scenario 1A
- Additional Game Rules
- Characters
- Enemies
- Getting Ready to Play Scenario 2A
- Advanced Rules
- Bosses
- Alternate Game Modes
- Quick Reference Sheet for Activations
Game Contents
Characters: Leon S. Kennedy, Claire Redfield, Ada Wong, Robert Kendo.
Bosses: G-Mutant, Birkin Stage 3.
Enemies: 4x Zombie Dogs, 2x Lickers, 12x Zombies.
Tiles: 1x 4x4 Tile, 5x 4x4 L Tile, 4x 2x4 P Tile, 4x 3x3 Tile, 4x 2x3 Tile, 4x 2x2 Tile, 4x 2x1 Tile.
Terrain Elements: 20x Doors, 4x Stairwells, 3x Typewriters, 1x Item Box, 10x Corpses, 4x Short Walls, 2x Long Walls.
Sustained Effect & Gameplay Tokens: 12x Wound/G-Imago Tokens, 14x Item Tokens, 8x Sustained Effect Tokens.
Cards
To help players get started with the game, the order of cards in each pack is preset, so try not to shuffle or mix up the decks when you take them out of the box!
Item Cards: 26x Item Deck A Cards, 20x Item Deck B Cards, 12x Starting Item Cards.
Character Profile Cards: 4x Character Profile Cards.
Enemy Reference Cards: 5x Enemy Reference Cards.
Boss Reference Cards: 2x Boss Reference Cards.
Locked Door Cards: 10x Locked Cards.
Tension Deck Cards: 30x Green Cards, 15x Amber Cards, 12x Red Cards.
Boss Behaviour Cards: 8x G-Mutant Behaviour Cards, 11x Birkin Stage Three Behaviour Cards.
Health Tracks & Player Tokens: 4x Health Tracks, 6x Health Track/Poison Condition Markers, 6x Ink Ribbons, 1x Side Pack.
Dials: 10x Weapon Dials, 1x Boss Health Dial.
Dice: 3x Blue Attack Dice, 2x Red Attack Dice, 1x Encounter Dice.
Scenario Booklet: Resident Evil™ 2: The Board Game Scenario Booklet.
Character Profiles
Profile Cards
Each character in Resident Evil™ 2: The Board Game has a unique profile card to represent their characteristics.
- The character's name.
- Each character has an inventory limit—the maximum number of items the character may hold.
- This is how many blue attack dice the character rolls when making an evade roll.
- Each character has a limited weapon proficiency. If a weapon is not pictured on a character's profile card, they cannot use it to make attacks. Note that even if a character cannot use a weapon, they can still can take it into their inventory—weapons are far too valuable to be left behind!
- Every character has special rules. Players should read them carefully to get the best out of their character when playing the game.
Example — Leon S. Kennedy: inventory limit 2, evade roll 8. Special rule, Cool Under Fire: Once per activation, Leon may use an item while one or more enemies are in his square without making an evade roll.
The Health Track
The health track represents how injured a character is. Every time a character suffers damage, move the marker down one or more levels towards Danger. Each time a character is healed, move the marker up one or more levels towards Fine.
Inventories
Players should make a space underneath the health track to place items. This is their inventory. Any time a character searches for an item, it is placed in their inventory. A character may discard a card from their inventory at any time during their activation without spending an action. Do not resolve any text on a card discarded this way.
Item Cards
Item cards belong to a specific deck. There are five types of item cards.
- Weapons allow characters to make attacks.
- Ammunition is used to reload weapons by the amount indicated on the card.
- Scenario items are typically required in order to progress in each scenario.
- Recovery items are used to heal characters.
- Campaign items are used during campaign mode (p.23).
Example item cards: Handgun (15), Handgun Bullets (discard this card to increase this character's ammunition dial for a Handgun, Custom Handgun, or Colt S.A.A. by 8 points), Lockpick (unlocks doors locked by the Lockpick), Green Herb (discard this card to heal this character or another character in the same or an adjacent square one level), Red Key Card (unlocks doors locked by the Red Key Card), Knife, First-Aid Spray (discard this card to heal this character or another character in the same or an adjacent square by three levels or to resuscitate an unconscious character).
The Playing Area
- Tile
- Square
- Spawn Point
- Wall
The playing area of Resident Evil™ 2: The Board Game is made up of a series of tiles. These tiles have rows of squares on them, used for determining movement and range. The edge of each tile is a wall. Characters can move between tiles only by using an open door.
Square Model Limits
Multiple models may fit in the same square, provided there is sufficient space for them. If there is no space in a square, a model cannot move or be pushed into it. A square may contain the following, at most:
- Four standard models, or
- One large model and two standard models, or
- Two large models, or
- One huge model.
Range
All attacks in Resident Evil™ 2: The Board Game have a range, representing how many squares away they may be used. An attack with Range 0 can only be used in the same square as the model, whereas a Range 2 attack can be made from up to two squares away, for example.
Line of Sight
A model has line of sight to another model if an uninterrupted line can be drawn between the centres of the two squares without crossing an intervening wall, corner, or closed door.
A character making an attack, using an item, or trading an item must have line of sight to the target model.
Enemy Reference Cards
Each enemy type has a reference card which details their characteristics. At first, we won't need to know all of the information on these cards, only the highlighted areas. Once we've made it to the Police Department, we'll look at enemies again in more detail.
- This is the type of enemy.
- This is the Zombie's hit points. If it suffers 1 or more damage, it is killed and removed from the playing area.
- Whenever the Zombie performs a move, it moves 1 square.
- This is the Zombie's basic attack profile, listing the range of the attack and the effect if it hits.
Example — Zombie: hit points 1, move 1. Basic attack, Suicide Lunge (range 0, damage 1): this attack cannot be evaded. After resolving the attack, the Zombie is killed. Reaction: the Zombie performs a move reaction and attacks using the following profile.
Gameplay – The Basics
This section of the rulebook is designed to teach you the basics of Resident Evil™ 2: The Board Game and walk you through your first scenario before introducing more advanced rules.
We're sure you want to jump straight into the action, so let's not waste any more time! First up: learning how to take a turn with your character.
Character Activations
In Resident Evil™ 2: The Board Game, players take turns activating their characters, moving clockwise around the table.
A character's activation is made up of three phases, which must be completed in this order: Action Phase, Reaction Phase, and Tension Phase. During their activation a character is the active character.
1. The Action Phase
The Action Phase is when characters move around, attack, search for items, and interact with their environment. A character may perform up to four actions during this phase. Possible actions are:
- Move
- Open/Close Door
- Search
- Trade
- Use Item
- Attack
A character can perform an action any number of times, providing they make only four actions in total (i.e., a character may make up to four moves but cannot make four moves and then open a door).
A character may skip one or more actions unless they are in the same square as an enemy, corpse, or boss.
Move
When a model moves, place it in any adjacent square (including diagonally) which is not blocked by an intervening wall. Models cannot cross over corners and can move between tiles only by using an open door.
Example: Leon may use one action to move to square 1 but cannot use it to move to square 2, as this would cross a corner. In order to move to square 2, Leon must use two move actions, moving first to square 1 and then to square 2.
Open/Close Door
A character in the same square as a door token may flip the token to open or closed.
Search
A character may remove an item token in the same square and draw a card from the corresponding item deck. A character cannot use the search action if their inventory is full.
Trade
If a character is in the same square as another character or in an adjacent square, they may exchange any number of items between their inventories.
Use Item
A character may use an item in their inventory, allowing them to resolve the text on the card.
Attack
A character with a weapon in their inventory may make an attack against an enemy. If there are one or more enemies in the same square as the character, they can only attack one of those enemies.
When making attacks, follow the process below.
- Declare the target model and which weapon is being used to make the attack. The target must be in line of sight and in range of the weapon being used to attack, and the weapon must have sufficient ammunition points to make the attack.
- Reduce the value of the ammunition dial by 1 point.
- Roll the attack dice indicated. If at least one hit or critical hit symbol is rolled, the attack is successful. If no hits are rolled, the attack is unsuccessful.
- If the attack is successful, resolve any effects as shown by the icons on the weapon card. Results are applied only to the target model, even if there are multiple enemies in the same square.
- A push result allows a model to be placed in any adjacent square, as long as it does not cross an intervening wall, corner or closed door.
- A damage result indicates the target suffers damage equal to the number shown.
Example: Claire declares an attack against the Zombie using the Handgun. She has line of sight, and the Zombie is in range. She reduces her Handgun ammunition dial by 1 and rolls a blue die. She scores a hit and pushes the Zombie into an adjacent square, as shown by the arrow.
See the rapid fire icon on the Handgun card? This means it's a rapid fire weapon. When making attacks with a rapid fire weapon, a player may spend 1 additional ammunition point to roll an extra blue die, or 2 additional ammunition points to roll an extra red die.
2. The Reaction Phase
In Resident Evil™ 2: The Board Game, enemies do not have their own turn. Instead, they lurch forward to attack as nearby characters dash past or draw attention to themselves by making noise.
Once a character has completed their Action Phase, their controlling player must perform a reaction for all enemies which are on the same tile as the active character or on a linked tile. Linked tiles are tiles connected to the active character's tile via one or more open doors. Enemy reactions should be resolved one at a time, in an order chosen by the active character's controlling player.
- If a character is in range and line of sight of an enemy, the enemy will perform a basic attack (see below). If multiple enemies are in range to attack a character, only the enemy with the highest threat level performs a basic attack. (Don't worry about threat levels for now, though. You'll learn about them later, in Scenario 2A.)
- If the enemy cannot attack, it will move up to its movement value towards the closest character. Enemies observe the same limitations on movement as characters and must take the shortest route, ending in the same square if possible.
Example: Tiles A and B are connected to Ada's tile via open doors and are both therefore linked. Tile C is connected to Ada's tile via a closed door and so is not linked. In Ada's Reaction Phase, enemies on the same tile and enemies on linked tiles will perform reactions. Because Tiles A and B are both linked to the active character's tile, enemies on those tiles will react. Enemies on Tile C will not react, as this tile is not linked.
Once all enemies on the same and linked tiles have performed a reaction, move on to the next phase.
Basic Attacks
Each enemy has a basic attack profile listed on their reference card which details the range of the attack and the effects of being hit.
Example — Zombie: basic attack Suicide Lunge, range 0. This attack cannot be evaded. After resolving the attack, the Zombie is killed. Reaction: the Zombie performs a move reaction and attacks using the following profile.
When an enemy attacks a character, the controlling player makes an evade roll with the number of dice listed on their character's profile.
Example — Claire Redfield: evade roll 8 dice. Special rule, Made in Heaven: Once per scenario, Claire may spend an action to heal another character on the same tile by two levels.
To successfully evade the attack, the player must roll at least one hit, critical hit, or evade symbol. If an evade roll fails, the character is hit and suffers the effects listed on the enemy's attack profile. After resolving these effects, if the attacking enemy is in the same square as its target, the target character may push the enemy, moving it to an adjacent square.
If the enemy is on a large base (such as a Licker, for example), evading it is more difficult. To successfully evade an attack from an enemy on a large base, the player must roll at least one critical hit or evade symbol.
If multiple enemies are in range to attack a character, increase the difficulty of the evade roll by one for every additional enemy in range. This means that to evade an enemy on a standard base when there is one additional model in their character's square, the player needs to roll at least one critical hit or evade symbol. If there are two additional models or the attacking model is on a large base, the player needs to roll an evade symbol to avoid being hit. An evade roll of an evade symbol always succeeds, no matter how many enemies are in range.
After an attack is resolved, do not perform a reaction for additional enemies in range; they are considered to have already contributed to the first attack.
Example: Kendo is in the same square as two Zombies. During his Reaction Phase, one of them will attack him. As they both have the same threat level, Kendo chooses one and makes an evade roll. Kendo rolls one hit. Ordinarily this would be successful, as the Zombie is on a standard base. Because there is an extra enemy, however, Kendo requires a critical hit or evade symbol to be successful. Kendo is hit and suffers damage. Kendo's controlling player moves his health track marker one level down and then pushes the Zombie which hit Kendo into an adjacent square.
Out-of-Sequence Reactions
Although there is a specific phase for enemies to make reactions, some enemies will perform additional reactions if they are provoked or have faster reflexes. These are called out-of-sequence reactions. The most common examples are included below. If multiple enemies would perform out-of-sequence reactions, the players may resolve them in any order they choose.
Making an Attack
Attacking generates a lot of noise and attracts attention. When a character makes an attack, after the action is resolved perform a move reaction for all enemies on the same or linked tiles which were not hit by the attack. An enemy in the same square as a character will remain where it is—it is far more concerned with its unfortunate victim than with chasing the sound of a gunshot!
Making an Action in the Same Square as an Enemy
Being close to an enemy is extremely dangerous! If a character declares any action other than an attack while in the same square as one or more enemies, before the action is resolved the enemy with the highest threat level makes a basic attack as described above.
If the evade roll is successful, the action is resolved as normal. If the roll fails, in addition to the character suffering the effects of the attack (and pushing the enemy), the action is not resolved, although it still counts towards the number of actions the character has taken.
Attacking an Enemy in the Same Square
Attacking at point-blank range is only advisable as a last resort, to prevent a character from being overwhelmed. A character making an attack against an enemy in the same square resolves the attack as normal. If the attack is successful, enemies in the character's square do not perform reactions. If the attack is unsuccessful, the targeted enemy makes a basic attack which cannot be evaded.
3. The Tension Phase
Each scenario in Resident Evil™ 2: The Board Game utilises a unique tension deck, representing both the growing sense of unease and urgency felt by the characters and the unexpected events which might befall them.
For Scenario 1A, the order of cards in the tension deck is preset, so don't shuffle the deck when you take it out of the box!
During a character's Tension Phase, their controlling player must draw a card from the tension deck and resolve any text on the card. If a player is required to draw multiple cards, resolve effects in the order in which the cards were drawn.
The tension deck is made up of three types of cards: green, amber, and red.
- Green cards make up most of the tension deck and are non-hostile, indicating nothing presently seems to be amiss or threatens the characters.
- Amber cards represent strange noises, sudden movement, or an unusual situation nearby. These cards typically force players to make difficult decisions about how to proceed.
- Red cards include dire events such as Zombies breaking through windows or barricades, or nearby enemies unexpectedly lurching into action. They nearly always spell disaster, and players will soon come to fear them!
If a player is unable to resolve the text on a tension card (for example, if a card would spawn additional enemies when none are available) place the card in the discard pile and draw two more cards from the tension deck.
Now that we know how to activate characters, attack with enemies, and use the tension deck, it's time to set up the first scenario and try to make our way to the Raccoon City Police Department!
Scenario 1A Brief – Getting to the Police Department
In this scenario the characters have arrived in Raccoon City, only to find it overrun! With the streets no longer safe, they must make their way to the Raccoon City Police Department, which should be much more secure…
The scenario map legend: Character Start (positions 1 and 2), Zombie, Item (Deck A), Item (Deck B), Green tile, and the RPD Entrance door. The map shows a connected suite of rooms built from green tiles, with Zombies placed throughout, two Item (Deck A) tokens and one Item (Deck B) token scattered through the rooms, and the two character starting positions at opposite ends of the map from the RPD Entrance.
Item Deck A: 1x Handgun Bullets, 2x Green Herb.
Item Deck B: 1x Shotgun.
Tension Deck: 16x Green Card, 1x Echoes in the Darkness (amber card), 1x Undead Ambush (red card).
Setting Up
The Playing Area
See the brief above for the number and shape of the tiles needed to make up the playing area and lay them out as shown. Don't worry about finding tiles with the exact artwork shown in the brief—any tiles can be used, as long as they're the right shape.
Once the tiles are laid out, place tokens for the doors, walls, and items on the tiles in the positions shown, taking care to not mix up Item A and Item B tokens and making sure all doors are closed. Next, place a Zombie model in each square shown on the brief. When placing a model, the exact position within the square isn't important, as long as the model is in the correct square.
Each player selects a character to control and places the corresponding profile card on a health track in front of them, with the health track marker set to Fine. This player then becomes the controlling player for that character.
- Profile Card
- Health Track Marker
- Inventory
Each player places their character on one of the two starting positions shown (1 or 2). It doesn't matter which characters start in each position, as long as each position has at least one character on it.
Choosing Characters
Each character begins this scenario with a Knife and a Handgun. Locate the cards for these items at the top of the item card pack and place them underneath the character profiles. Each player takes a Handgun ammunition dial and sets it to 15.
Example — Leon S. Kennedy: inventory limit 2, evade roll 8. Special rule, Cool Under Fire: Once per activation, Leon may use an item while one or more enemies are in his square without making an evade roll.
Item cards for this scenario: First-Aid Spray (discard this card to heal this character or another character in the same or an adjacent square by three levels or to resuscitate an unconscious character), Knife, Handgun.
Card Decks
During each game, characters will find a variety of weapons, ammunition caches, and recovery items as well as scenario items which are specific to the scenario. For this tutorial scenario, the items listed are at the top of the item card pack. Shuffle the three Item A cards together, place them face down beside the playing area and place the single Item B card next to them.
Take the top 18 face down cards from the tension card pack and shuffle them together to create the tension deck for this first scenario. Place them face down to the side of the playing area, within easy reach of all players and with enough space to create an adjacent discard pile. If the tension deck runs out during the game, shuffle the discard pile and place it face down once more to refresh the deck.
Equidistant Targets and Rules Conflicts
On occasion, two or more characters will be the same distance from an enemy that is making a move reaction, multiple characters will be in range of an enemy's basic attack reaction, or there are multiple options for a game effect. In situations like these, the active character is always prioritised as the target. If the situation or effect cannot be resolved using this rule, the active character's controlling player may choose how to proceed, selecting one of the available options so the game can keep moving.
Example: During Leon's Reaction Phase, the Zombie will make a move but is equally close to Leon and Claire. Because Leon is the active character however, the Zombie will move towards him.
Playing Scenario 1A
Now that setup is complete, it's time to start the game! The players successfully complete this scenario if all of the characters leave the playing area via the door marked as the RPD Entrance on the map. Once a player has left the playing area, they cannot activate—they have reached the safety of the Police Department and can only cheer on their allies behind them.
Resident Evil™ 2: The Board Game is a fully cooperative game. If any character's health track marker drops below Danger, the players fail the scenario and must reset and try again—so they have to work together to make sure that doesn't happen, by keeping Zombies away from each other as best they can during their activations.
Pick a player to go first, and using the rules for activations, see if the characters can make it to the Raccoon City Police Department!
Resident Evil™ 2: The Board Game is a game of survival horror, meaning that defeating enemies isn't the only way to survive. Sometimes, the best option is to avoid dangerous situations… you don't always have to go into every room in a scenario or eliminate every enemy!
Additional Game Rules
Well done! Looks like you survived your first scenario and now have some experience of how to play the game. Next, we're going to move onto some more advanced rules in preparation for the next scenario.
Tiles
Now that the players are familiar with moving characters and enemies around, it's time to look at the tiles in a little more detail.
Tile Encounter Levels
Each step in Resident Evil™ 2: The Board Game is a step into the unknown, with no guarantee of what might be lurking in the darkness.
At the beginning of each scenario the tiles which make up the playing area are unexplored. When a character is placed on an unexplored tile, their controlling player must roll the encounter die to see what awaits them. Once the encounter die has been rolled for a tile, that tile is considered explored for the remainder of the scenario and there is no need to roll the encounter die again.
Tiles are colour-coded according to how dangerous they are likely to be. Each scenario has a unique encounter table for each colour of tile, listed in the scenario brief. When a player rolls the encounter die, they should reference the corresponding encounter table for the tile their character has been placed on and follow the instructions in the table entry.
- Green tiles are either secure rooms with no enemies or fixed encounters, and players do not have to roll an encounter die to see whether enemies lie in wait for them.
- Yellow tiles are eerily quiet, likely to either be empty or have only one or two enemies prowling through them.
- Amber tiles are potential danger areas, with several enemies lurking in the darkness—or perhaps a single, more powerful foe awaiting.
- Red tiles are extremely hazardous places, and characters entering them should always make sure to be prepared for the worst!
When placing enemies which are spawned by an encounter die, use the squares on the tile marked with a biohazard symbol, starting with the one closest to the character and dividing enemies as equally as possible between each biohazard symbol. Do not spawn enemies in the same square as a character unless there is only one biohazard symbol in the room and the character is unlucky enough to be in the same square!
Example encounter dice table (Yellow Tile): 6 = Empty. 5 = Unsettling Feeling – The active character draws an extra card during the Tension Phase. 4 = Snatching Talons – The active character must pass an evade roll or their Action Phase ends immediately. 3 = 1x Zombie. 2 = 2x Zombie at the closest biohazard symbol. Biohazard symbol = Roll on the amber encounter table instead.
Here we can see Leon has entered an unexplored tile from Scenario 2A, which is colour-coded yellow. The encounter die is rolled and the result is a 3, meaning a single Zombie is spawned.
Terrain Elements
Some tiles contain terrain elements. These range from commonplace doors, stairwells, and walls to much more sinister hazards.
1. Doors
Doors may be locked, closed, or open.
All doors are closed when a scenario begins. In addition, some doors begin the game locked and require a character to have a specific item in their inventory in order to open them, as indicated by the scenario brief. These doors should have the corresponding locked card beneath them. Once a locked door has been opened, remove the locked card and treat the door as a standard door for the rest of the scenario. Enemies cannot open doors.
2. Stairwells
Stairwells, always in connected pairs, allow characters to move between floors. A character in the same square as a stairwell may spend an action to leave the tile they are on and be placed on the connected stairwell. Enemies cannot use stairwells.
3. Walls
Walls are shown on a tile by a thick border (as a tile edge or as a wall token). An intervening wall between two squares prevents any model from moving or being pushed across it. Walls block line of sight.
If an enemy must move towards a character which is obstructed by an intervening wall, they will move around the wall in a way which reduces the total distance between the two models.
4. Item Boxes
A character in the same or an adjacent square who has line of sight to an item box may spend an action to place any number of items from their inventory into the item box. Place the cards for these items underneath the item box token so it is clear they are inside.
A character in the same or an adjacent square who has line of sight to an item box may take any number of items from it into their inventory by making a search action. An item box token counts as a large base.
Characters
Remember the health track from the first scenario? From here on out things will be much more difficult—and it's entirely possible a character might find themselves overcome by their undead adversaries! Let's take a closer look at some more detailed rules for characters.
The Health Track
The health track represents how injured a character is. At the start of a scenario the health track marker begins on Fine. Every time a character suffers damage, move the marker down one or more levels. Each time a character is healed, move the marker up one or more levels.
If a character's health track marker moves beyond Danger, then that character becomes unconscious. Their model is placed on its side, and the character skips their activation until they are resuscitated. If a character becomes unconscious during their activation, the activation ends immediately. An unconscious character is ignored when determining enemy reactions and boss behaviour cards but still occupies the same space in a square.
A character in the same square as a character that is unconscious or has died (see below) may make a search action to take any item(s) from the unconscious or dead character's inventory into their own.
Resuscitation and Character Death
If a character is unconscious, all is not lost—another character in the same or an adjacent square may resuscitate them with a First-Aid Spray item. The resuscitated character is immediately stood up, and their health track marker is placed on Caution. They may activate as normal from this point on.
If an unconscious character cannot be resuscitated (because the remaining survivors do not have a can of First-Aid Spray and there are none left in either Item Deck A or Item Deck B), then the character dies and the scenario immediately ends in failure. The players have lost the game!
Items
Each scenario has a unique list of items, organised into item decks. In order to survive, characters must scavenge for these invaluable resources—without them, the way forward might be impassable or the enemies too strong to overcome.
Weapons are used to make attacks and are a little more complicated than other items. They are essential to survival, of course, but players should think carefully about when to use them. Ammunition is limited, and even the most accurate character cannot defeat every enemy they encounter!
Example weapon card layout — Bowgun: 1. Ammunition Capacity. 2. Range (LOS). 3. Attack Dice. 4. Hit Effects. 5. Special Rules.
Herb Items
The majority of recovery items in Resident Evil™ 2: The Board Game are Herbs, identified by a herb icon. Unlike other items, multiple Herbs may be discarded as part of the same action. Additionally, if a character has a Green Herb in their inventory, additional Herbs do not count towards their inventory limit.
Weapon Profiles
Each weapon in Resident Evil™ 2: The Board Game is unique, based on its ammunition capacity, how it attacks, and how powerful it is.
- Each weapon has a limited ammunition capacity. When a weapon is first placed in a character's inventory, take the corresponding ammunition dial and adjust it to the number shown on the card. If a weapon is traded or placed in an item box the ammunition dial is not reset for a new character. If a weapon's ammunition dial is at 0 it cannot be used to make attacks.
- A weapon's range is the distance at which a weapon can attack. If a weapon is listed as range 'LOS', it is always considered to be in range if the character has line of sight to the target.
- Attack dice indicates the colour and quantity of dice rolled when the weapon is used to make an attack.
- The results rolled will have different hit effects depending on the weapon.
- The push result allows a model to be placed in any adjacent square, as long as it does not cross an intervening wall, corner or closed door.
- The damage result indicates the target has suffered damage equal to the number shown.
- Special icons indicate that a weapon has unique rules.
- When making attacks with a rapid fire weapon, a player may spend 1 additional ammunition point to roll an extra blue die, or 2 additional ammunition points to roll an extra red die.
- This weapon inflicts fire damage, which may cause some targets to suffer additional damage.
- When making an attack using a blast weapon, the player may apply the results between multiple enemies in the same square. An individual result cannot be applied to more than one model (i.e., an individual result causing damage cannot be split between two enemies).
- A cumbersome weapon takes up two inventory slots.
Custom Weapons
During some scenarios the characters will encounter items which allow them to upgrade their weapons to custom variants. A custom weapon uses the same ammunition type as the standard version of the weapon. When upgrading, continue to use the same ammunition dial. Do not reload the ammunition dial when upgrading.
Enemies
So far, all we've seen on our way to the Police Department is Zombies, but that will soon change. In Resident Evil™ 2: The Board Game, characters will encounter a variety of enemies in every scenario, each offering a unique challenge.
Enemy Reference Cards
Each enemy type has a reference card which details their characteristics. Players will soon learn to pay close attention to these, as predicting and managing enemies is often crucial for survival!
- This is the type of enemy.
- Threat level indicates how dangerous an enemy is to the characters. Higher numbers signify more agile and powerful foes.
- An enemy's hit points indicate how much damage it can sustain. If an attack equals or exceeds this number, the enemy is killed and is removed from the playing area. When an enemy is damaged but not killed, place a wound token next to the model to track how much damage has been sustained.
- Whenever an enemy performs a move as a reaction, it does so up to its movement value.
- Each enemy has a basic attack profile, listing the range of the attack and the effect(s) if it hits.
- The target character suffers damage equal to the number shown.
- The target character must be pushed into an adjacent square of their choice. They may not cross an intervening wall, corner or closed door during this movement. If there is no available square the character must remain where they are.
- The target character suffers the Poison condition.
- The target character is rendered unconscious.
- The target character is killed.
- Enemies also have a special attack, which can be triggered by cards from the tension deck. These are resolved in the same way as a basic attack.
Example — Licker: threat level 3, hit points 3, move 3. Special, Scuttler: A Licker makes a move reaction every time a character on the same or a linked tile performs a move action, unless the character began the move in the same square as the Licker. Special attack, Leaping Claw: The Licker moves 2 and makes an attack using the following profile.
Getting Ready to Play Scenario 2A
Now that we've gone over the additional rules you'll need and you know how to read the information on each of the cards, it's time for the next scenario! Open the Scenario Booklet onto pg.4, 'Scenario 2A – The S.T.A.R.S. Office', and let's go over how to set up and complete a scenario!
Setting Up
Setting up a full-sized scenario of Resident Evil™ 2: The Board Game is just like setting up the tutorial scenario. Players each select a character to use for the game and lay out the tiles, tokens, and models following the scenario brief. (Remember to reset health track markers to Fine and Handgun ammunition dials to full!)
For this scenario, players will need to take the top three locked cards from the item deck pack and slide them under the corresponding doors shown on the brief, ensuring that the correct side of the card is showing.
Example locked card: S.T.A.R.S. Key — Locked.
The next twenty cards in the tension card pack are used for this scenario, which should be shuffled with the cards used for Scenario 1A to create the tension deck. Just like in Scenario 1A, if the tension deck runs out during the game, shuffle the discard pile and place it face down to create a new draw pile.
Take the next six cards from the item card pack, separating out the Item Deck A and Item Deck B cards. Shuffle the three new Item Deck A cards with the Item Deck A cards from Scenario 1A to create the Item Deck A used in this scenario, and place it face down within easy reach at the side of the playing area. Shuffle the new Item Deck B cards and do the same.
The Shotgun card from Scenario 1A should be returned to the box for the time being—unfortunately, the characters won't be able to find this powerful weapon during Scenario 2A.
Players should keep the starting equipment they already have. Draw the next two cards from the item card pack—these are cans of First-Aid Spray, which are recovery items, and players should choose two different characters to each receive one.
Finally, players should take two Echoes in the Darkness tokens and two Prehensile Grasp tokens and place them at the side of the playing area. You'll need these tokens during the game if a player is unlucky enough to draw one of these cards from the tension deck!
Playing the Scenario
The objective of this scenario is to reach the S.T.A.R.S. Office on the 2nd Floor. Have each player read the introduction to the scenario in the Scenario Booklet so they are familiar with how they can access this tile and understand the special rules for the scenario.
Gameplay is just like before, starting with the player activating their character first and then moving clockwise around the table. This will be a longer and more difficult scenario than 1A, so good luck!
Remember, you don't have to kill every enemy! If the Licker is causing you difficulty, try luring it onto a tile you don't need to go back to and closing the door behind you...
Advanced Rules
Congratulations! You survived the second scenario and are now carefully making your way through the eerie corridors of the deserted Police Department. It's time to learn the last rules you'll need in order to play scenarios from here on out, so you can think about escaping this dangerous location!
Gameplay and Scenarios
Each scenario will have special rules based on the location and how dangerous it is for the characters. These will be listed on the scenario brief. The following rules are universal rules which govern gameplay from Scenario 3A onwards.
Priority Items
From here on out, item decks will occasionally feature priority items, indicated by a priority item icon. Priority items are crucial for completing scenarios, but often they are hidden away. Finding them will require extensive searching by the characters.
When creating Item Deck A and Item Deck B during scenario setup, if a deck has a priority item in it, split the deck in half after shuffling. Shuffle the priority item into the bottom half before placing the other half back on top.
Adding Additional Cards to the Game
During some scenarios players will need to add extra cards to the tension deck. These cards and the method for adding them will be listed in the special rules for the scenario. To save time, players should separate these cards out and have them by the side of the playing area before the game begins.
Sustained Effect Tokens
Some cards from the tension deck require a token to be placed on a tile or next to a character. These are called sustained effect tokens, as their effects persist for longer than a single activation.
When placing a sustained effect token, place the corresponding card to the side of the playing area for ease of reference. Once the token is removed, place the card in the discard pile.
Some cards refer to an effect lasting for a round. A round is from the time the effect begins until the end of the current character's next activation.
The Tension Deck and Running Out of Time
So far, when the tension deck has run out, players have simply shuffled the discard card pile and created a new draw pile. From Scenario 3A onwards, if a player has to draw from the tension deck and there are no cards left, it's game over for the players—the undead are taking over the city, and the survivors don't have long before being overrun!
To prevent this happening, players can use Ink Ribbons to reset the tension deck, providing they're near a Typewriter.
Ink Ribbons and Typewriters
The number of Ink Ribbons the players begin the game with depends on the number of characters at the start of the game. For one or two characters, begin with one Ink Ribbon. For three or four characters, begin with two Ink Ribbons.
Generate Ink Ribbons at the start of a scenario and place them in a communal player pool to one side of the playing area. They may be used by any character during their activation.
Typewriters are a terrain element and are identified on a scenario brief. A Typewriter token counts as a standard base.
A character in the same or an adjacent square who has line of sight to a Typewriter may spend an action to refresh the tension deck by discarding an Ink Ribbon to shuffle the draw and discard piles together. After this is done, remove the Typewriter from the playing area.
Additional Terrain Elements and Conditions
Unfortunately for the characters, with every step closer to their escape they not only come across new and dangerous adversaries, but also face unexpected dangers!
Corpses
Corpses are a dangerous type of terrain element, each representing one of the many lifeless bodies to be found throughout Raccoon City.
If a character ends an action in same square as one or more corpses, after the action is resolved their controlling player must roll the encounter die. If a biohazard symbol is rolled, replace each corpse in the square with a Zombie!
Poison
Some enemies produce potent toxins and their attacks inflict the Poison condition on characters. Being poisoned will slowly cripple a character—and if no antidote is found, it can even mean death. If an enemy attack with the Poison effect hits a character, that character suffers the Poison condition.
A character suffering the Poison condition flips their health track marker to the poisoned side. Every time a player draws a tension card or rolls an encounter table result with a biohazard symbol, any character suffering from the Poison condition suffers damage.
If a character is cured of the Poison condition or becomes unconscious while suffering the Poison condition, flip the health track marker back to the standard side.
Bosses
Bosses are significantly more powerful than the other creatures roaming Raccoon City. Players should always approach bosses with great care—they are formidable and resilient foes capable of extremely powerful attacks.
Bosses are enemies with the following special rules.
- Bosses are not affected by encounter table or tension card rules and effects.
- Bosses do not perform reactions.
- Bosses cannot be pushed.
- Bosses cannot leave the tile they begin on, or attack characters on a different tile.
- If one or more models block a boss's movement into a square, place the boss in the destination square and resolve a push against all other models in the square.
- When a boss suffers damage, record it on the boss health dial instead of using wound tokens. When a boss's health dial reaches 0, the boss is killed.
- Once a character is placed on a tile with a boss, they cannot leave the tile until the boss has been killed. A character cannot attack a boss if they are not on the same tile.
- If a character dies as result of a boss's attack the players do not lose the game, provided there is at least one character remaining who is not unconscious, and it is still possible to complete the scenario. Bosses ignore unconscious and dead characters when resolving behaviour cards.
Bosses can be targeted by and suffer damage from attacks in the same way as enemies. Like enemies, each boss has a reference card listing its hit points, movement value, and special rules.
Example — G-Mutant boss reference card: 1. Name. 2. Movement Value (1). 3. Hit Points (25). 4. Special Rules — Lurching Gait: After resolving a behaviour card with an attack profile where the G-Mutant was unable to attack, it performs a move. G-Imago Bite: If a behaviour card with a G-Imago profile is drawn, each character suffers damage per G-Imago token on their profile card and then discards the token(s) before resolving the sequence printed on the card.
Behaviour Deck
Instead of performing reactions, each boss has a unique behaviour deck which dictates how it moves and attacks. When a character is on the same tile as a boss, instead of drawing from the tension deck in their Tension Phase they draw from the boss's behaviour deck and resolve the sequence on the card.
Resolve behaviour cards in vertical order, from the top of the card working downwards.
Example behaviour cards — G-Mutant, Lurch Forward: movement value 1, then an attack profile. G-Mutant, Spawn G-Imago: place a G-Imago token on the profile card of each character on the same tile as the G-Mutant.
- A move profile indicates the boss will move up to its movement value towards the active character.
- An attack profile indicates the boss makes an attack, prioritising the active character as the target. If the active character is out of range but the boss may attack another character, the boss will attack that character instead.
- A special profile provides any additional rules to be resolved.
Boss attacks do not use base size to determine the results required to successfully evade an attack; instead they list an evade difficulty. This is the minimum result a character must roll in order to successfully evade the attack.
If a boss's behaviour deck is exhausted, shuffle the discard pile and place it face down to refresh the deck.
Powerful Attacks
Bosses are capable of making much more dangerous attacks than other enemies. In addition to the normal enemy attack effects bosses use the following icons:
- If the all icon is displayed next to the range of a boss's attack, the boss attacks each character in LOS and range of the attack.
- A character hit by an attack with the unconscious effect is immediately rendered unconscious.
- A character hit by an attack with the killed effect is immediately killed.
If a character is unlucky enough to be hit by an attack which renders them unconscious or kills them, reduce their health track marker to beyond Danger, and follow the standard rules for unconscious or dead characters.
Alternate Game Modes
Resident Evil™ 2: The Board Game is designed to be playable in a variety of different game modes and will provide hours of enjoyment however you wish to play. What follows are some play variants, including rules for solo and campaign play as well as ways to adjust the difficulty level.
Easy Mode
This game mode is designed for those unfamiliar with the series or new to tabletop gaming. It allows players to play through Resident Evil™ 2: The Board Game at a more relaxed pace and increases ammunition and healing to improve character survivability.
If the players are playing in easy mode, make the following adjustments to the core rules.
- At the start of a scenario, generate one Ink Ribbon per character.
- After using a Typewriter, do not remove it from the playing area.
- When using an ammunition item to reload a weapon, restore the weapon to full instead of the printed amount.
- When using a First-Aid Spray to heal a character, restore the character to Fine.
- After failing an evade roll, a character may push every enemy in their square instead of only the model which made the attack.
- If a scenario requires players to replace ink ribbons with tension cards, add the maximum number of available cards.
Easy mode is fully compatible with both solo play mode and campaign mode, as well as with most expansions.
Solo Play Mode
This game mode allows a player to play on their own with only one character, so they can fully immerse themselves in the survival horror experience. It adjusts the health level of bosses so they can be defeated by a single character, and identifies which scenarios will require a player to use a support character in order to successfully complete them.
If you are playing in solo play mode, make the following adjustments.
- Reduce all boss health dials by 10.
- During the Birkin Stage Five boss encounter, lower all threshold values by 10.
- The character begins each scenario in square 1.
- Any attack or effect which would cause an unconscious or killed result reduces the character's health track to Danger instead, unless their health track is already on Danger.
Each scenario brief has a minimum character number icon, such as 1 in the top right corner. If this number is 2, the player is required to control a second character for the duration of this scenario.
Solo play mode is fully compatible with campaign mode as well as with most expansions.
Campaign Mode
Although each scenario can be played as a standalone game, this game mode allows players to play each scenario as part of a narrative campaign, fully immersing themselves in their escape from Raccoon City.
When playing in campaign mode, players should play each scenario in order to form a cohesive story arc. Campaign mode forces players to make difficult decisions that are not experienced as part of the standalone game, but it also rewards players for exploring each scenario thoroughly.
Players are free to pick any character at the start of the campaign, but they cannot change characters once the campaign has begun. Each character begins the campaign with a Handgun, a Knife, and a can of First-Aid Spray. When playing in campaign mode players ignore the Starting Equipment section of a scenario brief.
When players successfully complete a scenario in campaign mode, follow the steps below, in order. Characters are permitted to trade items during these steps.
- Return each character's Handgun ammunition dial to full, and increase the ammunition dial for each other weapon without the universal icon by 3. After this is resolved, each character may use any ammunition items in their inventory to further increase weapon ammunition dials by the printed amount.
- Each character may use recovery items in their inventory to heal by the printed amount. If a character is suffering from the Poison condition, flip their health track marker to the standard side.
- Without resolving their effects, discard any remaining Ink Ribbons, scenario items, ammunition items, and recovery items other than cans of First-Aid Spray.
- If the total number of First-Aid Spray cans in the characters' inventories is lower than the number of characters, the players may allocate one can of First-Aid Spray to a character of their choice.
If a character was unconscious or had been killed by a boss when the players completed the scenario, restore that character's health track marker to Caution before beginning the next scenario—we assume their allies have had a brief respite to get the stricken survivor back on their feet.
Alternatively, if the players prefer and there are additional characters available, replace a dead character with a new character. A character who dies cannot be used again during this campaign. The new character will start with a Handgun, a Knife, and a can of First-Aid Spray.
Other than by following the steps described above or using a continue, players cannot reset health track markers or ammunition dials between scenarios when playing in campaign mode.
Failing a Scenario and Using Continues
If the players fail to complete a scenario, all is not lost. At the start of each campaign the players are allocated two continues. At the end of any scenario they may choose to use a continue to reset each character's health track to Fine and all of their weapon ammunition dials to full. If the players failed the scenario, they can then reset the playing area and card decks and try again.
Once a continue has been used it is gone forever, so think carefully about using one. If the players fail a scenario and have no continues left, their journey is over, and their characters join the shambling monsters prowling the streets of Raccoon City!
Quick Reference Sheet for Activations
Activation Order
1. Action Phase
Characters may take up to four actions during their Action Phase.
- Move – Place a model in an adjacent square, without crossing a wall or corner.
- Attack – Make an attack with a weapon in the character's inventory.
- Open/Close Door – Flip a door token to open or closed.
- Search – Remove an item token in the same square and draw an item card.
- Trade – Exchange any number of items with another character in the same/adjacent square.
- Use Item – Resolve the text on an item card.
2. Reaction Phase
Resolve a reaction for any enemy on the same or linked tiles.
- If a character is in range and line of sight, the enemy will perform a basic attack.
- If the enemy model is not in range to attack, it will move towards the closest character.
3. Tension Phase
Draw and resolve a card from the tension deck.
Out-of-Sequence Reactions
Reactions which occur during a character's Action Phase.
- Making an Attack – Each enemy on the same or linked tiles performs a move reaction.
- Making an Action in the Same Square as an Enemy – Enemy performs an attack. If the evade roll fails, the action is not resolved.
- Attacking an Enemy in the Same Square – If the attack is not successful, the character is automatically hit by the target's basic attack.
Evade Rolls
Target results vs. models in the character's square.
| Dice Roll | Successful Against |
|---|---|
| Hit | Standard Base |
| Critical Hit | Large Base OR Two Standard Bases |
| Evade | Three Standard Bases OR Large Base and Standard Base |
Weapon Icons
Common icons used when resolving attacks and reading weapon cards.
- Push – Target may be placed in an adjacent square.
- Damage – Target suffers damage equal to the number shown.
- Rapid Fire – Player may spend 1 additional ammunition point to roll an extra blue die, or 2 additional ammunition points to roll an extra red die.
- Fire – Weapon inflicts fire damage.
- Blast – Player may apply effects amongst multiple enemies in the same square.
- Cumbersome – Weapon takes up two inventory slots.
- Universal – Weapon may be used by any character.
Enemy Attack Effect Icons
Common icons used when resolving enemy attacks.
- Damage – Target character suffers damage equal to the number shown.
- Push – Target character must be pushed into an adjacent square of their choice.
- Poison – Target character suffers the Poison condition.
- Unconscious – Target character is rendered unconscious.
- Killed – Target character is killed.