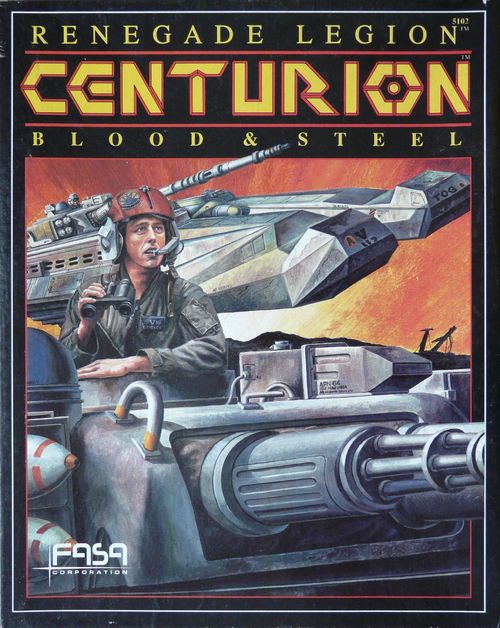
Renegade Legion: Centurion – Blood & Steel
Renegade Legion: Centurion – Blood & Steel Rulebook
Table of Contents
Table of Contents
- Game Set-Up
- Playing the Game
- Movement
- Combat
- Painting a Target
- Infantry Squad Painting
- Weapons Fire
- Line-of-Sight (LOS)
- Firing Arcs
- Shell and Missile Selection
- Base To-Hit Number
- To-Hit Modifiers
- Modified To-Hit Number
- Hit Location — Armor Hits
- Damage
- Damage Template
- Internal Damage
- Damage Locations and Effects
- Destroying a Unit
- Combat in the Same Hex
- Special Weapons
- Infantry
- Buildings
- Centurions
- Optional Rules
- Artillery
- Combat Engineering Vehicles
- Defense Installations
- Hidden Units
- Mines
- Smoke
- Troop Quality
- Morale Checks
- Thor Satellite System
- Orbital Fire Support
- Other Renegade Legion Systems
- Integrating Interceptor, Leviathan, and Centurion
- Scenario Design
- Vehicle Construction
Game Set-Up
Components
Counters
Grav Vehicle. Grav vehicle figures represent the most technologically advanced combat vehicle ever manufactured. Fast, heavily armored, and with enough firepower to raze a city, the grav tank has totally changed the nature of ground warfare.
Infantry Squad. Infantry Squad counters represent the men and women who hold the terrain won by the more glamorous grav tanks. Each squad contains up to eight troopers armed with weapons such as painting lasers, Gauss rifles, and a variety of antitank weapons. Squads are also equipped with bounce packs that give them the limited ability to move quickly while dismounted. The continuing need for infantry in warfare proves the adage that the more things change, the more they remain the same.
Vehicle Crew. Vehicle Crew counters represent TOG and Commonwealth vehicle crew members who have been forced to abandon their vehicles.
Crater. Crater counters represent field emplacements hastily dug out by the specialized digging charges carried by most vehicles.
Rubble. Rubble is what is left of buildings and forests when the military is finished with them. Weapons fire can reduce any building to rubble. Both forests and buildings can be nibbled by the use of artillery-delivered HELL rounds. Though it is more difficult to move through rubble, this terrain does offer limited protection and cover from weapons fire. Rubble has no Elevation Level.
Minefield. Minefield counters represent a field of artillery-delivered anti-tank and anti-personnel mines. The hex that the counter occupies is seeded with mines.
Smoke. Smoke counters indicate that the hex is filled with smoke. Most vehicles can fire smoke rounds and often carry smoke projectors or smoke canister launchers.
Pathway. Pathway counters indicate that a path has been cut through trees or through minefields. There are two types of pathway counters: straight and curved. These counters are aligned with the hex to indicate which hex-side is the entrance and which is the exit.
Thor Satellite. A Thor satellite uses kinetic energy weapons to bombard a planet from orbit.
Building. Building counters represent nonmilitary facilities constructed from a variety of materials. The scenario generally assigns a height to each building, with each level of a building equal to 20 meters. Each building counter represents approximately one city block. For line-of-sight purposes, buildings add their Elevation Level to the elevation of the hex they occupy. A building's armor rating indicates how much damage each story can absorb before that level is destroyed.
Thor Cluster. Thor Clusters represent the kinetic energy projectiles released by a Thor satellite.
HELL Missile. HELL missiles serve to protect ground targets from orbital bombardments. They use a gravitically induced fusion reaction to create an airburst explosion that can vaporize unshielded targets.
Painting. A painting counter is placed next to a unit to show that it has attempted to paint a target with a special laser during that turn.
Painted. The painted counter is placed next to a unit that has been successfully painted during the Painting Segment of the Combat Phase.
Fired. This counter is placed next to a unit to show that it has fired its weapons during the turn.
River. River terrain indicates that a wide river or stream flows through the hex. In this terrain, ground vehicle movement is restricted, while grav vehicles can use the river like a road.
Lake. A Lake hex is covered with water, either in the form of a lake, pond, or swamp. Ground vehicles or infantry are prohibited from moving into this terrain.
TTF. A TTF counter is placed next to a grav vehicle to show that it is operating in Tree-Top Flight mode.
LAF. A LAF counter is placed next to a grav vehicle to show that it is operating in Low-Altitude Flight mode.
Mapsheets
Centurion is played on two 24" x 36" mapsheets. To help regulate movement and combat, the map is divided into six-sided areas called hexes. Units move from hex to hex. Hex maps help make movement more realistic because they provide six possible movement directions instead of the four possible with square grids.
Each hex on the mapsheet represents an area of ground 200 meters (roughly 656 feet) across, and each turn represents one minute of real time. The forests, rivers, hills, and buildings on the mapsheet represent a typical mixture of the terrain in the populated areas on the inhabited planets in the year 6830. Shown below are the symbols used for each terrain type.
Clear. These are typical fields, meadows, and other grasslands. The ground is firm and may be gently rolling, but its elevation does not change significantly from one side of the hex to the other.
Light Woods. Light woods terrain is sparsely covered with 20-meter-high trees. Movement through these trees is fairly easy. It is impossible to see through light woods. For line-of-sight purposes, light woods add one Elevation Level to the terrain's normal Elevation Level.
Heavy Woods. Heavy woods terrain is thickly covered with 20-meter-tall trees and heavy undergrowth. Movement through these areas is very difficult. Heavy woods are too dense to be seen through. For line-of-sight purposes, heavy woods add one Elevation Level to the terrain's normal Elevation Level.
Contour Lines. Hills are defined on the map by contour lines. Each line represents a one-level change in elevation, or about 20 meters. The Elevation Level of any hex is equal to the height of the highest contour line. Moving from a lower elevation hex to a higher elevation hex is called going Up Slope. The Elevation Level increase is equal to the difference between the Elevation Levels of the two hexes. Going Down Slope is moving from a higher elevation to a lower elevation hex. The level decrease is the difference between the Elevation Levels of the two hexes.
Record Sheets
Grav Vehicle Record Sheets. The Vehicle Record Sheet is for keeping track of the damage done to individual grav vehicles during combat. Each record sheet may be used to record the information for any grav vehicles and infantry assigned to a platoon. Each sheet includes three separate records to represent three individual vehicles.
The Armor Diagram shows how much armor each section of the vehicle has, along with the section's shield factor. The Shield Factor is the vehicle's Shield Rating for that section, divided by 10. Immediately below the Armor Diagram are the internal systems of the vehicle. The use and effects of each of these areas are explained in the Combat and Damage sections of the rules.
Players will use the spaces on the left-hand side of the Grav Vehicle Record Sheet to record the number and type of missiles that vehicle carries, the number of TVLG missiles or mortars the squad has, and its Movement Points (MP).
The Velocity Record Track is used to record the vehicle's velocity at the end of each turn, and is located along the right-hand side of the form. The box marked "0" is for recording the vehicle's velocity at the start of the game. The Maximum Thrust box is located below the Velocity Record Track. Players record the maximum thrust for the vehicle here.
Weapons information is recorded in the Weapons Tables located in the lower-left section of the form. Up to eight weapon systems may be mounted on a vehicle. Boxes are provided to record the weapon's Type, Location, Damage, and Maximum Range. In most cases, the weapon's damage profile is on the template, and is represented by a "T" in the Damage box. An "S" means that the weapon is used in a special manner, as described later in the rules. A number in the Damage box indicates that the weapon is a laser. A laser destroys a vertical column of armor boxes equal to its damage number.
To the right of the Weapons Tables is a box for recording any firing modifiers due to targeting computer hits. Below the Fire Modifier boxes are locations for recording the number of smoke and digging charges the vehicle has. Finally, if an infantry squad is assigned to the vehicle, the player fills out the Infantry Squad Table. The Infantry Squad Table has spaces to record the number of active troops still left with the squad.
Ground Vehicle Record Sheets. Conventionally powered ground vehicles have a specialized record sheet. It is the same as the Grav Vehicle Record Sheet, except that the Internal Systems blocks are laid out differently, and the Velocity Record Track is eliminated along with the Shield Factor boxes.
Building Record Sheets. The Building Record Sheet is used to keep track of the status of buildings. It is simply an Armor Diagram showing the current status of each level of the building.
Damage Template
The damage template is made up of die-cut diagrams showing the damage profile for each weapon in the game, except lasers. It is used to mark off weapon damage on a target's armor and internal structure.
Die
Centurion uses a ten-sided die (1D10), whose sides are numbered from 0 to 9, with 0 representing 10. To succeed in actions such as hitting a target, avoiding a tree, and so on, the rules generally indicate a modified to-hit number. Unless otherwise noted, the player must roll a die result less than or equal to the modified to-hit number for the action to be successful. No matter what the circumstances, a roll of 1 is an automatic success and a roll of 10 means automatic failure in this game.
Legions
This is a separate booklet containing descriptions of the organizational structure of TOG, Commonwealth, and Renegade ground forces, game stats and descriptions of grav vehicles, and notable units.
Preparation for Play
Before play begins, players decide whether to play a published scenario or one of their own design. They should then choose sides and fill out record sheets for each unit to be used in the battle. From that point on, the players will simply follow the Sequence of Play and the rules given for each Game Phase.
Fill Out Record Sheets
Before the game starts, each player must first decide which Centurion units he will control, then record the information for his units on individual record sheets. It is best to use a pencil, as this information is likely to change during the course of play. The infantry portion of a Vehicle Record Sheet must indicate whether the squad carries anti-vehicle missiles or mortars. Unless otherwise noted, all infantry squads start with a full complement of eight men. All units should be assigned to platoons. There are three vehicles and/or infantry squads to a platoon, and the record sheet.
Example: The player starts by filling out the record sheet for the first platoon. He decides to assign three light Renegade Viper APCs to that platoon, along with three infantry squads. He then fills in the numbers that will represent these vehicles in the game. In this case, they are Vehicle #7, #8, and #9. Next, he fills in the shields for each section of the vehicle. The Viper has a Stern Shield of 50, Left Shield of 40, Front Shield of 50, Right Shield of 40, and Bottom Shield of 40. The Shield Factors are therefore 5, 4, 5, 4, and 4. Next, the player should cross out the unused armor blocks in each section. Each row of boxes equals 10 points. Starting from the top, the player crosses off armor in rows of ten. The Viper is a lightly armored tank. As it has 50 points of armor on the front and turret, the player crosses out the other 50 points in each of those two sections.
Mapsheet Layout
Lay out two or more mapsheets on a table or a floor in a way agreeable to all players. If buildings or other counters are desired or called for by the scenario, place them on the mapsheet now. This can be done randomly, or the players can take turns choosing where to place the counters.
Playing the Game
To play Centurion, the players simply move playing pieces and roll the die. The challenge of the game is for one player to outwit his opponent and to make better use of his forces. Though it requires skill to win consistently, even a novice can sometimes make a lucky shot enough to cripple the experienced player.
Sequence of Play
The following is a summary of the Game Phases that make up the Sequence of Play. This is provided for quick reference by the players. The complete rules for each phase and segment are fully described in the chapter devoted to that aspect of the game.
Initiative Phase
Movement Phase
- A. Team A moves 1 platoon
- B. Team B moves 1 platoon
- Teams alternate until movement is complete
Combat Phase
- A. Declare Painting Laser Fire
- B. Resolve Painting Laser Fire
- C. Declare Weapons Fire
- D. Resolve Weapons Fire
- E. Resolve offboard artillery and orbital fire support
End Phase
- A. Remove widowed armor
- B. Call in new artillery and orbital fire support missions
- C. Remove old smoke
- D. Lay down new smoke
Initiative Phase
One player from each side rolls the die for his team's Initiative. The team that rolls lowest may choose to be either Side A or Side B during the Movement Phase for this turn. The player with a Leadership Advantage may subtract some, none, or all of those Advantage Points from the result of his die roll (see Centurions). He must decide how much of his Leadership Advantage he will use before making the roll.
Movement Phase
The players will then alternate moving platoons. All of the vehicles and infantry squads listed on a vehicle record sheet are considered one platoon. All of these units will execute their movement during a turn at the same time regardless of combat casualties. Thus, if a platoon starts off the game with three Viper APCs and three infantry squads, and, due to combat, the platoon is reduced to a single infantry squad, moving that one squad will constitute moving a platoon.
For example, Team A has five platoons and Team B has three platoons. The movement of the units should follow this sequence: Team A moves one platoon. Team B moves one platoon. Team A moves two platoons. Team B moves one platoon. Team A moves two platoons. Team B moves one platoon.
Team A moves one platoon. Each unit in the platoon is moved individually in any order. Grav vehicles move by carrying out each step listed below in order:
- Apply Acceleration.
- Move the vehicle according to its total velocity, counting all Terrain Costs. If the vehicle exceeds the speed limit in any hex that it enters, make a Piloting Skill Roll for that hex, and take any damage.
- Apply any Deceleration.
- Ground, if desired or required.
- Record Ending Velocity.
Team B then moves one platoon. Each unit in the platoon is moved individually in any order, following the same five steps.
Movement alternates until all platoons have moved or declared their intention NOT to move. Team B should always move one of its platoons last. Movement should alternate between sides, but because platoons may be destroyed during the course of the game, this might not be possible. If, prior to any pair of movements, one team has twice as many platoons left to move as the other team, that team moves two platoons rather than one. (If one team has three times as many units, it moves three each time, and so on.) This means that the team that won the initiative moves at least one of its units last. Any platoon that has not had all of its vehicles and infantry destroyed may be moved.
Instead of moving during their portion of the Movement Phase, platoons may choose to declare Opportunity Fire instead. Units in platoons that declare Opportunity Fire may immediately fire on any enemy units that move into their line-of-sight during the remainder of the turn. Units may not fire at enemy units that move until they have declared Opportunity Fire. See the Opportunity Fire rules for a more detailed explanation.
The Movement sequence can also be affected by a player with a Leadership Advantage. Depending on the size of the advantage, the player can decide not to move one or more platoons, reserving the right to move them later during the normal Movement of one of his other units (see Centurions).
Combat Phase
Declare Laser Painting Fire. The team that lost the Initiative declares any laser painting attempts that they plan to make with one unit. The team that won the Initiative then declares any laser painting attempts that they plan to make with one unit. The declaring alternates until all painting has been declared. The team that won the Initiative declares the last attack.
Resolve Laser Painting Fire. All vehicles and infantry squads may fire painting lasers, one unit at a time. Painting lasers do no damage, but improve the chances of a hit from offboard artillery, missiles, MDCs, or lasers.
Declare Weapons Fire. The team that lost the Initiative declares any attacks that they plan to make with one of their units. Next, the team that won the Initiative declares any attacks that they plan to make with one of their units. The declaring alternates until all fire has been declared. The team that won the Initiative declares the last attack.
Resolve Weapons Fire. Weapons fire is resolved, one firing unit at a time. Damage to outer armor immediately takes effect, which allows subsequent shots to strike a weakened area and thus to penetrate the armor. Internal vehicle damage and infantry squad losses do not take effect until the end of the turn, allowing a unit destroyed in the turn a chance to avenge itself. Note that all weapons attacks by one unit must be resolved before those of any other unit take place. Damage is recorded as attacks are resolved, but internal damage does not affect the unit until after ALL weapons attacks have been resolved. At that point, all internal damage takes effect immediately.
Resolve Offboard Artillery and Orbital Fire Support. Any offboard artillery or orbital fire support due to arrive during this turn is resolved according to the appropriate rules.
End Phase
All widowed armor is removed after all attacks are resolved. New artillery and orbital fire missions are called in. The player should secretly record the target hex and the turn that the mission will arrive. Smoke screens laid down on the previous turn are removed. New smoke screens are laid down. Play continues with the start of a new Initiative Phase.
Movement
Grav Vehicles
Ground warfare in the 69th century is highly mobile and very deadly. The vast majority of combat vehicles use grav drives, which warp and manipulate a planet's gravity field in order to move the vehicle. Because the field creates a 95 percent frictionless surface around the tank, these combat craft can attain very high speeds despite their non-aerodynamic appearance.
Grav drives do have one drawback, however. Short of turning off the drive and slamming into the ground, it is difficult to decelerate quickly or to make a sudden turn in a fast moving grav vehicle. Additionally, because of engineering constraints, grav vehicles must follow ground contours fairly closely. This means that vehicles traveling at high speeds over rapidly changing terrain (hills, trees, canyons) run the risk of sinking into the ground and damaging the vehicle. Though conventional tracked and wheeled vehicles are much slower than grav vehicles and are more limited by terrain effects, they are more easily controlled.
Facing
Every hex on the map has six edges called hexsides. All vehicles, whether they are grav or conventionally powered, must be oriented to face one of those six hexsides, which is called facing. A vehicle's facing is determined by the direction of its front, or nose. This facing affects both movement and combat and can only be changed during the Movement Phase. If a vehicle is improperly aligned, the opposing player may choose which of the two hexsides the vehicle will face.
Acceleration
Each grav vehicle has a maximum number of Thrust Points that it can expend during its move. These Thrust Points are used to increase or decrease the grav vehicle's velocity during the turn. One Thrust Point can increase or decrease the vehicle's current velocity by 1. A grav vehicle may ONLY increase its velocity at the beginning of its movement, and ONLY decrease its velocity at the end of its movement, prior to grounding. The total acceleration and deceleration in a turn cannot exceed the vehicle's total Thrust Points.
For example, a Horatius tank has a Thrust of 6 and a beginning velocity of 5. The player decides to spend 3 of his Thrust Points on acceleration this turn, giving the Horatius a current velocity of 8. This leaves 3 Thrust Points that can be spent on deceleration after the vehicle has moved.
Grav Movement
After a grav vehicle has applied any acceleration, it must move and expend a number of Velocity Points equal to its current velocity. If a grav vehicle does not, or cannot, expend a number of Velocity Points equal to its full current velocity, it must ground at the end of its movement. (It does have the opportunity to decelerate before grounding.) It costs different amounts of Velocity Points to enter various terrain features, as indicated on the Terrain Effects Table. As the table indicates, the Velocity Cost to move into a clear hex is 1 Velocity Point (VP). The cost to move into a light woods hex is 2 VP.
A grav vehicle must have sufficient Velocity Points remaining to enter a hex. Turning restrictions might result in a vehicle not having enough VP to enter the hex that it is facing, even though it has not expended its full velocity for the turn. If this occurs, the grav vehicle must ground (see Grounding). Unless the terrain is prohibited, a grav vehicle may always move one hex forward, no matter what the Terrain Cost, as long as that is the only hex the vehicle enters that turn. If turning or other restrictions might force a grav vehicle to move forward into prohibited terrain, the vehicle must ground immediately in the previous hex at its current velocity (after any deceleration).
For example, the Horatius from the above example must move through terrain whose total Velocity Point Cost is 8. Moving from Point A, the Horatius would spend 8 points to go to B, C, or D. If the Horatius tried to move to F, however, it would not have enough VP to enter the hex and would be forced to ground in F. Before grounding, the player could spend his remaining Thrust Point to lower the velocity of the Horatius to 7, but the vehicle would still be forced to ground after the deceleration.
Traveling Up and Down Slope. Traveling Up Slope or Down Slope can add or subtract VP to the VP Cost of the terrain. Moving from a higher to a lower elevation reduces the VP Cost of the hex, as shown on the Terrain Effects Table. When moving from a lower elevation to a higher elevation, the VP Cost increases, again per the Terrain Effects Table. It is possible for a hex to have a negative VP, such as when a vehicle moves Down Slope into a clear hex with a slope of 6 or more. In this case, the cost for entering the terrain is 0.
For example, the Horatius goes from a Heavy Woods hex with an Elevation of 5 into a Light Woods hex with Elevation of 0. The VP Cost for entering that hex is 2 − 3, or −1. Therefore, the cost of entering that terrain is 0. If the Horatius were moving in the opposite direction, the VP Cost would be 3 + 5, or 8 VP.
Facing Changes. A grav vehicle turns by manipulating the gravity field via directional vanes. Thus, there is no Thrust Cost to turn the vehicle. However, the faster the vehicle moves, the larger its turning arc will be. A grav vehicle can only move forward into a hex that it is facing (see Traveling in Reverse for exceptions). A grav vehicle may change its facing only after it has moved at least the required number of hexes in a straight line. The Facing Change Table gives the number of hexes, during a turn, that a grav vehicle must travel before it can make a facing change.
Facing Change Table
| Current Velocity | Restrictions |
|---|---|
| 0 | May spin in place |
| 1–5 | 1 hex between each hexside turn |
| 6–10 | 2 hexes between each hexside turn |
| 11–19 | 3 hexes between each hexside turn |
| 20–29 | 4 hexes between each hexside turn |
| 30+ | 5 hexes between each hexside turn |
Because of these restrictions, a vehicle might not have the necessary VP to enter the hex that it is immediately facing. In such case, the vehicle must ground in its current hex at the end of its turn (though it may decelerate before grounding). If a grav vehicle starts a turn with a current velocity of 0, it may turn to face any direction prior to moving out of the hex. This is the only time when a grav vehicle may change its facing without moving into at least the hex directly in front of it.
For example, the Horatius starts the turn with a current velocity of 8 and a Thrust of 4. It does not accelerate at the beginning of the turn. The vehicle must move through terrain whose total VP Cost is 8. After its movement is complete, the player has the option of reducing the vehicle's current velocity to 4 (8 − 4).
Traveling in Reverse. While not a common practice, it is possible for a grav vehicle to move in reverse. If after deceleration a vehicle's current velocity is negative, it will move backwards, with all movement costs and facing restrictions in effect. Any acceleration applied during subsequent turns increases the current velocity. When the current velocity exceeds 0 the grav vehicle will move forward again. Note that if a player wishes to increase the speed that a vehicle is traveling backward, the thrust must be applied at the end of movement during Deceleration. If the player wishes to decrease the speed of reverse movement, the thrust must be applied at the start of the unit's movement during Acceleration. Because terrain avoidance sensors are primarily oriented forward, the speed limit for all terrain types is halved (see Exceeding the Speed Limit).
For example, a Liberator has a current velocity of 4 and has finished its movement. It has not expended any Thrust Points and now elects to expend all 6 of its remaining points. The Liberator will start the next turn with a velocity of −2. If it does not apply any acceleration, the Liberator will have to expend 2 VP, but it must move backward into the hex immediately behind it.
Exceeding the Speed Limit
All terrain has a maximum safe speed. Any grav vehicle whose current velocity is higher than the speed limit of the terrain it is entering may take damage as a result. In the case of hexes with both slopes and terrain, use the lower speed limit for the hex's overall speed limit.
When a vehicle's current velocity is higher than the speed limit of the hex it is entering, the player must make a Piloting Skill Roll. The Base Number for this roll is 5, minus 1 for every 2 points of current velocity (or fraction thereof) that the vehicle is over the limit. Additional modifiers might be added because of damage the vehicle has taken. If the player rolls greater than this target number, the vehicle takes damage equal to 10 points per point of velocity over the speed limit. Damage is evenly divided between the front and bottom sides. (Odd amounts may be divided in groups of ten, as the player wishes.) Mark off Armor blocks starting in the upper left-hand corner, moving left to right down the rows. If the player rolls less than or equal to this target number, the vehicle is not damaged. Remember that a 1 is always an automatic success and a 10 is an automatic failure. A vehicle's current velocity is not affected by damage taken from exceeding the speed limit. All internal damage takes immediate effect, however, as does the loss of armor. If the internal damage hits the Grav Drive or Vehicle Destroyed box, the vehicle stops all movement and must ground in the current hex at its current velocity. It may not decelerate prior to grounding.
For example, a grav vehicle with a current velocity of 10 enters a heavy woods hex, which has a speed limit of 6. This requires the player to make a Piloting Skill Roll of 3 or less (base of 5, minus 4 over the limit ÷ 2). If the roll fails, the vehicle will take 40 points of damage (4 over the limit x 10). This damage will be split up, with 20 points to the front armor and 20 points to the bottom armor. After resolving the damage, the vehicle continues its movement.
Grounding
Having completed all deceleration, the player may declare that the grav vehicle is grounding. The vehicle must also ground if it has not moved its full VP. A vehicle that grounds may take damage and its current velocity is reduced to zero. Only grav vehicles may ground themselves. A grav vehicle may ground itself at the end of its movement. Grounding occurs when the driver turns off the anti-grav field and allows the vehicle to drop to the ground. This stops the vehicle completely and kills all velocity.
Depending on the vehicle's current velocity (after deceleration is applied), damage might or might not occur. It costs one additional thrust point to go from being grounded to flight. It costs two thrust points to go from a crater to flight.
For example, the Horatius grounds at the end of its last turn. It accelerates to 3 this turn, but it costs 1 thrust point to lift up. The Horatius now has 2 thrust points that it must spend in moving through other terrain.
Grounding does not affect the crew or infantry squad of a vehicle unless damage is taken in the appropriate internal component section.
Ground Vehicles
Ground vehicles are conventionally powered vehicles that use contact with the ground via tracks, wheels, or surface effect skirts to move. Unless otherwise specified, use the Combat and Movement rules for grav vehicles. Ground vehicles are rated in Movement Points rather than Thrust. They do not use acceleration or deceleration and do not keep track of velocity. They may change their facing at any time during their movement.
To move from hex to hex, a ground vehicle must pay the Velocity Point Cost to enter that hex. Note that there are some movement restrictions listed on the Terrain Effects Table. A player may move a ground vehicle up to the limit of the unit's Movement Points (MP). Units may spend some, none, or all of their MP. Movement Points may not be saved from one turn to another, and so the player loses any MP not used during the current turn. Once a unit has used all its MP, it cannot move again until the next turn. A ground unit must have remaining MP sufficient for the cost of entering a hex. Unless the terrain is prohibited, a ground vehicle may always move one hex forward, no matter what the terrain cost, provided it is the only hex the vehicle enters that turn and that the terrain does not forbid the vehicle to enter. Ground vehicles are never affected by the speed limit restrictions of the terrain. Rather than moving forward during a turn, a ground vehicle may elect to travel backward one hex.
For example, a Horatius has a current velocity of 8 and has only moved one hex. Thus, the vehicle must ground at the end of its turn. The Horatius applies its maximum of 6 Thrust Points to decelerate, bringing the current velocity down to 2. Grounding Damage will be taken to the tank based on its new velocity of 2, not the previous 8.
Grounding in Water. Grav vehicles may ground in a full lake hex. Damage is taken as one-half normal, but the vehicle cannot fire out at any target nor be fired upon because it is under water. A grav vehicle that is under water must spend 1 additional Thrust Point to rise above the surface of the water prior to moving (for a total of 2 Thrust Points). While under water, a grav vehicle may not dismount or mount infantry. Vehicles may move while under water, but the terrain speed limit is 1. Vehicles under water may only be attacked by artillery or orbital fire support missions.
Damage from Grounding. Damage from grounding is equal to ten times the current velocity of the vehicle. Grounding damage is always taken on the bottom armor. Starting in the upper left-hand corner of the Armor row, the player crosses off damage straight across the row for as many boxes as there are points of damage. Boxes that are already damaged do not count.
Dismounted Infantry
In order to move, dismounted infantry use what is known as a bounce pack. This is a small anti-grav device that almost totally negates the weight of the individual soldier. This allows the trooper to move in a series of long, low jumps, or bounces, vastly increasing his maneuverability.
Dismounted infantry move as though they were ground vehicles with 3 MP. They receive no Road Bonus. Dismounted infantry may not enter hexes whose terrain is prohibited to ground vehicles. When inside buildings, an infantry unit may move only one level per turn.
A unit that makes an Opportunity Fire Attack may not make any attacks in the Weapons Fire Phase. A unit may not use an Opportunity Fire Attack to paint a target. If Opportunity Fire is declared, but the attack is not actually made, the unit may fire normally during the Combat Phase.
Loading and Unloading Infantry
If a dismounted infantry squad begins its Movement Phase in the same hex as a vehicle that can carry it, the squad can enter the vehicle rather than move. A grav vehicle must have a current velocity of 0 before a squad can mount it, however. Once mounted, the infantry moves with the vehicle and can perform no other actions.
For example, both a Viper and a friendly infantry squad start the Movement Phase in the same hex, with the Viper at a current velocity of 0. The infantry squad can mount the Viper this turn, and the Viper may move normally this turn. If the Viper had a current velocity greater than 0, the infantry could not have mounted before the vehicle moved. The Viper would have had to complete its movement for the turn and end in the infantry squad's hex with a velocity of 0. The squad would then be able to mount during the Movement Phase of the next turn. Finally, if the squad did not start in the same hex as the Viper, it could move to the Viper's hex during its movement turn. During the next turn's Movement Phase, the squad could mount the vehicle if the Viper's current velocity is 0.
Mounted infantry can dismount a vehicle only at the end of the vehicle's movement, and if its current velocity is 0. It may not move for the rest of the turn, but may engage in combat as normal. For all other purposes, the newly dismounted squad is treated as normal.
Road and River Movement
Vehicles and dismounted infantry may use roads to negate the effects of terrain as long as the unit moves from one road hex to the next adjoining road hex. Similarly, a grav vehicle may use a river in the same manner as a road. A road in a hex does not negate the combat effects of the surrounding terrain. A ground vehicle may receive a Road Bonus that allows it one additional hex of movement if it travels along a road for its entire turn. To gain this bonus, the vehicle must begin its turn on a road and continue to travel along the road for its entire Movement Phase.
Opportunity Fire
Units in a moving platoon may declare Opportunity Fire rather than moving during their portion of the Movement Phase if they have a starting velocity of 0. Units that declare Opportunity Fire may immediately fire on any enemy units that move into their line-of-sight during the remainder of the turn. Units may only fire at enemy units that move AFTER Opportunity Fire has been declared. As enemy units move from hex to hex, the opposing player must decide immediately if any eligible units (those having an LOS to the enemy's hex) will fire on the enemy unit in that hex. Once a player declares Opportunity Fire, the attack is resolved per the normal Combat rules, and all damage takes effect immediately. If the enemy unit survives the attack, it can continue its movement normally. A unit may make only one Opportunity Fire Attack per turn.
For example, a Horatius ends its last turn with a velocity of 0. The Horatius' platoon is third in line to move this turn, but declares no movement. Thus, the Horatius can use Opportunity Fire to fire at enemy units during the remainder of the Movement Phase. The Horatius cannot fire at the units of the two enemy platoons that moved before it declared. The vehicles of the other enemy platoons that have yet to move may be attacked as they move into the Horatius's LOS.
Hull Down
All vehicles on the battlefield attempt to use terrain to make themselves more difficult targets. One such method is to use a small ridge, crater, or other hole in the ground to cover or hide the lower portions of the vehicle. A vehicle in such a defensive posture is said to be hull down.
In Centurion, many vehicles carry digging cannons. This equipment fires a specially designed explosive charge into the ground immediately under the vehicle. The charge explodes and creates a crater into which the vehicle can drive and assume a hull-down profile. At the same time, the vehicle fires other charges that create a pattern of ten to twelve man-size foxholes that allow any accompanying infantry to take up protected positions.
At any time during a vehicle's movement, the player can announce that his vehicle is firing a digging charge if functioning digging cannons and sufficient charges remain. The player then places a crater counter in the hex and marks off one digging charge from that vehicle's record sheet. To gain the defensive benefits of a cratered hex, a vehicle must end its movement grounded in the hex. Ground vehicles only have to enter the hex to gain the advantage of an existing cratered hex.
A cratered hex gives the occupying unit a defensive modifier. It may fire all weapons, including hull-mounted ones, as normal. It normally costs a vehicle 1 thrust point to lift from grounding. It costs a grav vehicle 2 thrust points to raise up from a crater and move normally.
Once a crater has been created, it is removed from the board only if it is unoccupied and the hex it occupies has been rubbled or hit by a HELL round. Any unit may use the crater and gain its defensive modifiers. Only one vehicle and one infantry unit may gain the defensive benefits of a single crater, however. Multiple craters are allowed in the same hex. A vehicle may ground in a cratered hex without taking up a position inside the crater. Whether or not to use a crater is solely up to the discretion of the player that owns the vehicle.
Digging cannons have no effect on enemy units occupying the hex into which they are fired, nor can they be used against buildings. Digging cannons cannot be fired into lake hexes to create craters, though they can be fired into river hexes. (The vehicles take up positions on the river banks.)
Stacking
There is no limit to the number of units that can occupy the same hex. Enemy and friendly units in the same hex may engage each other according to the Combat in the Same Hex rules in the Combat section.
Terrain Effects Table
| Terrain | Velocity Point Cost | Movement Restrictions | Speed Limit | Combat Modifier |
|---|---|---|---|---|
| Clear | 1 VP/hex | — | 20 | None |
| Road | 1 VP/hex | Negates terrain effects for movement | 20 | None |
| Light Woods | 2 VP/hex | — | 8 | −1 |
| Heavy Woods | 3 VP/hex | — | 6 | −2 |
| River | 1 VP/hex for grav vehicles, 2 VP/hex for ground vehicles | — | 20 | None |
| Lake | — | No ground vehicles | 20 | None |
| Under Water | 4 VP/hex | No ground vehicles | 1 | Not allowed |
| Buildings | 1 VP/hex per level | 4 VP for ground vehicles | 10 | −2 |
| Rubble | 2 VP | See Digging Cannon rules | 8 | −1 |
| Craters | — | — | 20 | −2 |
Elevation change modifiers (added to the base terrain's Velocity Point Cost and used to determine the hex's overall Speed Limit):
| Slope | VP Change | Speed Limit |
|---|---|---|
| Up Slope, 1-Level Increase | +1 VP | 20 |
| Up Slope, 2-Level Increase | +2 VP | 20 |
| Up Slope, 3-Level Increase | +3 VP | 20 |
| Up Slope, 4-Level Increase | +4 VP | 16 |
| Up Slope, 5-Level Increase | +5 VP | 16 |
| Down Slope, 1-Level Decrease | 0 VP | 20 |
| Down Slope, 2-Level Decrease | −1 VP | 20 |
| Down Slope, 3-Level Decrease | −1 VP | 20 |
| Down Slope, 4-Level Decrease | −2 VP | 16 |
| Down Slope, 5-Level Decrease | −3 VP | 16 |
In the case of hexes with both slopes and terrain, use the lower speed limit for the hex's overall speed limit.
Combat
Painting a Target
Once the Movement Phase ends, all units may choose to designate targets for missiles, lasers, mass driver cannons, and offboard artillery by illuminating them with painting lasers. All vehicles are automatically equipped with painting lasers. Maximum range for vehicle painting lasers is 20 hexes.
Painting lasers offer two advantages. First, a painted target radiates laser energy that allows an indirect fire weapon to home in on it. Second, the painting laser is able to decipher the target's shield flicker pattern, which is downloaded into all friendly fire-control systems, thus negating the shield's effectiveness. This tactic is not viable in space, however. Even at close range in space (15 kilometers), the transmission lag time back to the targeting ship is long enough that the target can change its shield flicker rate before an offensive weapons system can be fired.
Painting lasers are fired as normal weapons, following all line-of-sight and to-hit modifier restrictions, as described below. A painting laser may fire at a target that is not being engaged by the vehicle's other weapons systems. This is the only instance when a vehicle can fire at more than two targets. Painting lasers have a 360-degree firing arc.
To paint a target, a vehicle must make a normal to-hit roll, taking into account the target's shields and other modifiers. If the painting laser hits, all friendly laser, MDC, and missile attacks on that target ignore the shield modifier for the rest of the turn. As long as the attack has been appropriately declared, one friendly unit can paint a single target for multiple attacks by any or all friendly units. The effects of painting only last until the end of the turn. A target must be painted anew in subsequent turns.
Infantry Squad Painting
Infantry squads need only declare that they are painting a target. The squad may attempt to paint any target that is within six hexes and to which they have a valid LOS. The Base Number for the attempt is 9, minus the number of casualties the squad has taken. For example, if the squad has taken three casualties, a painting attempt would be successful on a die roll result of 6 or less. Infantry squads may not paint targets at ranges of greater than 6 hexes. When painting a target, infantry may not fire personal weapons, missiles, or mortars that turn.
For example, a Viper sees a Horatius in clear terrain ten hexes away. The Viper attempts to paint the Horatius with its painting laser at a Base To-Hit Number of 9. Because the attempt is against the left side of the Horatius, the player subtracts its Side Shield Factor of 6 from the base to-hit number. The Viper needs to roll a 3 or less to paint the Horatius. If a full-strength Renegade infantry squad were within six hexes of the Horatius and had a valid line-of-sight to it, the squad could paint the target on a roll of 9 or less. In this case, the shields of the Horatius are disregarded.
Weapons Fire
For one unit to fire at another, it must have a clear line-of-sight (LOS) to the target (see Missiles and Artillery for exceptions) and the target must be within the range and firing arc of the weapons the player will fire. The likelihood of a shot hitting a target is then calculated based on range, target shielding, laser painting, and other factors.
Players roll separately for each firing weapon's attack. The weapons that do hit will all strike the same section of the target. This means that all, some, or none of the weapons fired may hit their target, but those that do hit will all hit the same section. Weapons fire damage first strikes the outer armor of the vehicle. Damage that penetrates the outer armor begins to damage the internal components of the vehicle. This internal damage can cause the vehicle to lose Thrust Points, knock out weapons or shields, or totally destroy the vehicle.
A vehicle can engage up to two targets a turn. All of a vehicle's direct fire weapons (lasers, MDCs, and Gauss cannon weapons) may engage any one target in its firing arc. Any missiles that the vehicle carries can engage that same target or a different target that is in the missile's firing arc.
Though internal damage to a unit does not take effect until the end of the turn, the damage to the outer armor takes effect immediately. This factor makes the order in which individual weapons damage is resolved an important aspect of combat. A player may fire any of his weapons in any order that he feels appropriate. In the case of multiple units firing at one target, the player may choose the order in which the units fire. All weapons fire from one unit must be resolved before any other unit can fire.
Line-of-Sight (LOS)
When a player wishes to fire on another unit, he must first discover whether or not his unit can see its intended target. Various terrain features can block a unit's line-of-sight to a target, making a shot impossible or requiring that the target be engaged by indirect missile fire.
The line-of-sight (LOS) is determined by laying a straightedge (a ruler or a sheet of paper) from the center of the attacker's hex to the center of the target's hex. Any hex that the straightedge crosses is on the line-of-sight. If the straightedge passes directly along the spine between two hexsides, the defender chooses which hex the line-of-sight passes through.
The players then look for blocking terrain that is higher than the tallest of the two units. If any blocking terrain is higher than the tallest unit, the LOS is blocked. Units are assumed to be at an Elevation Level equal to the level of the underlying terrain of their hex (i.e., the height of any woods in the hex is not added to the Elevation Level of the underlying terrain). Blocking terrain is equal to the Elevation Level of the terrain plus the height of any buildings or woods in the hex. Woods add one level to the height of the underlying terrain. Buildings add their total Elevation Level to the height of the terrain they occupy. The line-of-sight may be blocked by higher hills, woods, or buildings. Units never block line-of-sight.
For example, the Viper in Hex A is in a woods hex on top of a Level 2 hill. It has a LOS to the TOG tanks in Hexes B, C, and D. It cannot see the TOG tank in E because the trees on the intervening Level 2 hill block the LOS. The Viper can see the TOG tank in Hex F because it is on a Level 4 hill. The Viper cannot see the TOG tank in Hex G because the straight-edge passes along the spine of two hexes. The TOG player declares that the line-of-sight passes through the trees on the tank's right rather than through the clear terrain to the left.
In another example, the Liberator in Hex A cannot see the Horatius tanks in Hexes C, E, or F because the Level 3 terrain creates a dead zone. The Liberator in Hex A cannot see the Viper in Hex B because it is behind one level of elevation, which blocks LOS completely. The Horatius tanks can see the Viper in Hex B since the buildings are one level high. If the buildings were three levels high, then the Viper would be in a dead zone.
Dead Zones. The dead zone behind or below the peak of an elevated area may also block line-of-sight. Dead zones can only be created by terrain elevations, buildings, woods, or a combination of both. If the attacker is shooting up at more than one-hex range, the LOS is blocked if the hex next to the attacker is as high or higher than the target's hex. If the attacker is shooting down at more than one-hex range, the LOS is blocked if the target is directly behind a hex as high or higher than the attacker's hex.
Firing Arcs
Weapons are either mounted in a vehicle's turret or fixed in the hull (in either the Hull 1 or Hull 2 position), covering the forward-firing arc. Turret-mounted weapons have a firing arc similar to the forward-firing arc, but they can be aligned during the Combat Phase to face any of the six hexsides. Hull-mounted weapons may only engage targets in the forward-firing arc, but turreted weapons can fire at any target.
During combat, a vehicle's direct-fire weapons must be fired at the same target. The vehicle's missiles may engage the same target or a different one, however. If a vehicle uses direct-fire weapons to engage a target outside its forward arc, it may use only the direct-fire weapons in the turret. Similarly, if a vehicle fires missiles at a target outside of its forward arc, it may use only the turreted missiles. It is possible to use hull-mounted missiles to engage a target in the forward arc while the direct-fire weapons in the turret engage a target outside of the forward arc, or vice versa.
For example, the Horatius has two targets that it can engage, one in its front arc and one to its left. The Horatius could fire all its weapons at the target in its front arc. It could also rotate its turret and fire both its turreted direct-fire weapons and missiles at the target to the left. The tank could fire its hull-mounted direct-fire weapons at the target in its front arc and fire its turreted missiles at the target to the left. Finally, the tank could fire its hull-mounted missiles at the target in its front arc and fire its turreted direct-fire weapons at the target to the left.
Shell and Missile Selection
If the player is firing a Gauss cannon, he must now declare which type of shell he is using. Each type of Gauss cannon fires a different variety of shells, as listed in the Weapons Table (HEAP, APDS, or Hammer Head). Note that 150mm and 200mm cannon cannot fire Hammer Head rounds. All cannons use anti-personnel rounds against dismounted infantry (see Infantry for resolving attacks against dismounted infantry). It is assumed that the vehicle carries a sufficient mix of munitions to allow it to fire any type shell any number of times during the course of a game.
Missile ammunition is limited, however. The number of missiles available is listed with each vehicle description. If a player is firing a missile, he may use any of the missile types that his vehicle has currently available. A vehicle may fire only one SMLM and/or two TVLGs per turn. After the missile(s) is fired the player should mark off the appropriate number on the vehicle's record sheet.
Base To-Hit Number
Once the player decides which weapons he can fire, he must determine the base to-hit number, which is determined solely by the range to the target. Range is the distance between the attacking unit and its target. It is also the distance a weapon can fire. The range is determined by counting the number of hexes from the firing unit to its target. Following the shortest path to the target, begin at the hex next to the attacker along the line-of-sight and include the target's hex.
The range has an effect on how easy or difficult it is to hit the target, with distant targets generally being harder to hit. Some weapons are not able to fire at targets beyond a certain range. All weapons are given a maximum range. A player may not attempt to fire a weapon at a target whose range is greater than this number. Each time a missile is fired, the player should blank out an appropriate space on the vehicle or infantry record sheet. If all missile boxes have been blanked out, that unit can fire no missiles for the rest of the game.
Base To-Hit Number Table
| Range (hexes) | 1 | 2–3 | 4–6 | 7–10 | 11–15 | 16–20 | Off-board |
|---|---|---|---|---|---|---|---|
| Base To-Hit Number | 12 | 11 | 10 | 9 | 8 | 7 | 6 |
Note to Interceptor players: These base to-hit numbers assume a Gunnery Skill of 4 for all vehicle gunners. If players wish to use varying gunnery skills, they may reduce all Base To-Hit Numbers by 4 and add the gunner's Gunnery skill to the base number.
To-Hit Modifiers
Having determined the base to-hit number, the player must now add on the modifiers for terrain, shielding, and other factors. All applicable modifiers are cumulative, except where noted.
Target Shield Modifier. Shield factors only apply to attacks by lasers, painting lasers, MDCs, HELL rounds, GLAD rounds, infantry weapons fire, and missiles. Attacks by Gauss cannons, other artillery rounds, or Thor javelins are not affected by the shields. (Though a shield's field is proof against energy weapons, it is unable to turn large masses. The heavier rounds from Gauss cannons are able to penetrate a shield. The electronic circuitry of a missile is adversely affected by an active shield, causing it to detonate prematurely. It is not possible to accelerate a ballistic shell to the speeds necessary to be effective in space combat, and so Gauss cannons are only found on land-based vehicles, where the engagement ranges and speeds do not affect the accuracy of the slower projectiles.)
All vehicles carry shield generators. These generators cover the craft's front, right, left, stern, and bottom. The bottom shield factor is only used when the craft is being attacked from below, primarily by mines. The other four shield facings are illustrated below. Attacks that originate in the front arc use the front shield factors. Attacks originating from the left, right, or rear arcs use the appropriate left, right, or stern shield factors.
Shield factors equal the shield rating divided by 10. This number is listed in the data section of the vehicle record sheet and is applied as a negative modifier to the base to-hit number for all attacks by lasers, missiles, or MDCs. The shield factor modifier is negated for the turn if a friendly painting laser has successfully hit the target during the Painting segment of that Combat Phase. Regardless of which side is hit, all shield factors are negated.
Terrain Modifiers. Terrain also affects the probability of a successful shot because it makes a hit more difficult. The terrain modifier for the target's hex lowers the base to-hit number by the amount listed on the Terrain Effects Table. A unit occupying a cratered hex applies the terrain modifiers for both the crater and for the underlying terrain.
Hull Down Modifier. Any unit that is grounded in a crater is considered to be hull down. A crater conceals a large portion of the lower hull and provides a large defensive advantage to the grounded unit. Any shot at a hull down vehicle takes a To-Hit Modifier of −2. If the target is hit, the damage will usually apply to the turret, per the Hit Location Table.
Dismounted Infantry. There are no terrain or shield modifiers to the base to-hit number when firing at dismounted infantry. Damage is handled differently, as described in the Infantry section of the rules. Missiles may not be fired at dismounted infantry. Neither can players directly attack enemy infantry inside of buildings (not just in a building hex).
Other Modifiers. Other factors can raise or lower the base to-hit number. Primary among these are smoke and target painting. Direct damage to the firing unit's weapon targeting circuits and computers can also negatively affect the to-hit number. These factors are discussed in later sections of the rules.
Modified To-Hit Number
The modified to-hit number is equal to the base to-hit number plus any modifiers that apply. Once the player has determined that number, he rolls one die. If the result is equal to or less than the modified to-hit number, his weapon hit its target. If the result is greater than the modified to-hit number, the shot missed. Remember, a result of 1 is an automatic hit and a 10 is always a miss.
For example, the Horatius is firing at a Liberator that is seven hexes away. The Horatius will fire one SMLM missile, one 3/6 laser, and one 150mm HEAP round, in that order. The Liberator is occupying light woods. The Base To-Hit Number is 9 because of the range. Light woods give a −1 modifier. The Horatius attacks the Liberator's right side, which has a Shield Factor of 5. The Modified To-Hit Number for the laser and SMLM is 9 − 1 − 5 = 3. The Modified To-Hit Number for the 150mm HEAP Round is 9 − 1 = 8. The player must roll a 3 or less for each laser and missile to make a hit with those weapons. The 150mm HEAP round needs an 8 or less to hit. In our example, the player rolls a 4, a 1, and a 6 for the 150mm round. A 3/6 laser and the 150mm HEAP round do strike the side of the Liberator.
Hit Location — Armor Hits
All weapons fired from the firing vehicle will strike the same general location of the target vehicle. The player should roll once on the Hit Location Table, using the appropriate flight mode column, to discover which armor section all of his unit's weapons will strike. An Attacked Side result means that the weapons hit the front, stern, left, or right armor, as appropriate. A Turret result means that the weapons hit the vehicle's turret armor, and a Bottom result means that the vehicle's bottom armor was hit.
Each side of the vehicle has armor, as shown on the Armor Diagram of the vehicle record sheet. The Armor boxes are arranged in horizontal rows of ten. The number of rows depends on the amount of armor carried. To determine where the armor has taken damage, the attacker rolls one die to determine the center of the hit. The defender aligns the arrow of the damage template with the appropriate damage profile on the rolled column. He lowers the arrow on the armor diagram until it is above the highest remaining Armor box of the indicated column. The area indicated by the template is the area damaged by the hit. These boxes are marked off on the armor diagram. If a very low or very high number is rolled for the column location, it is possible that a portion of the damage template will not cover any armor boxes in the section. The damage template might also cover an area already damaged. In both cases, the damage is simply lost.
Hit Location Table
| Die Roll | Normal | Hull Down | TFF* | LAF* |
|---|---|---|---|---|
| 1 | Turret | Turret | Bottom | Bottom |
| 2 | Turret | Turret | Bottom | Bottom |
| 3 | Turret | Turret | Bottom | Bottom |
| 4 | Attacked Side | Turret | Bottom | Bottom |
| 5 | Attacked Side | Turret | Bottom | Bottom |
| 6 | Attacked Side | Turret | Bottom | Bottom |
| 7 | Attacked Side | Turret | Bottom | Bottom |
| 8 | Attacked Side | Attacked Side | Attacked Side | Bottom |
| 9 | Attacked Side | Attacked Side | Attacked Side | Bottom |
| 10 | Attacked Side | Attacked Side | Attacked Side | Bottom |
*See Optional Rules.
For example, the Liberator has been struck on the right side by two weapons. The player makes one roll on the Hit Location Table. Because he rolls a 7, both weapons hit the right side. On a result of 1 through 3, the turret would have been hit.
Damage
Once a shot has hit its target and the hit location has been determined, the exact type of damage taken can be calculated. Each weapon is rated according to the amount of damage it does, which varies according to the type of weapon or shell used. Each point of damage that the weapon inflicts will destroy 1 Armor Point or 1 Internal Component box of the target vehicle. Infantry and buildings are damaged in a different manner, as described in the appropriate section of these rules. Each weapon type has a different damage profile, as shown on the damage template. Lasers penetrate deeply into armor, while an SMLM's damage spreads out more laterally.
Damage Template
The damage template is made up of die-cut diagrams showing the damage profile for each weapon in the game, except for lasers. Each shape is labeled for weapon type and is centered by a small arrow along the top of the shape. Lasers need no template, for their damage simply descends down a column. The number of boxes marked off is equal to the strength of the laser.
For example, two 5-point laser shots and an MDC 8 hit the front armor of a Horatius. The Horatius has a total of 80 Armor Points on that side. The first laser hits in Column 3, and is marked off accordingly. The second laser hits in Column 5. The MDC 8 hits in Column 6, and the damage is marked off accordingly. The 2 points of armor missing from Column 5 were hit by the second laser and are lost. If the MDC 8 had hit in Column 5, the arrow for the MDC 8 hit would be centered over Column 5 and lowered until it reached an intact Armor box. This would have been in Row 7, as the laser shot removed the armor from the first six rows in Column 5.
Widowed Armor. During the Recovery Phase, each player should check his vehicles for widowed armor. Widowed armor is created when upper layers of armor are undercut by penetrating hits. Any such armor is also marked off even though it has not been hit. Widowed armor is created when any block of armor remaining on the Armor Diagram cannot trace a continuous path of Armor blocks to the bottom row. This path of Armor blocks must connect at the side and/or top or bottom of the block, not on a corner. Remember that widowed armor is not removed until the Combat Phase is complete.
Internal Damage
Below the Armor Diagram is the Internal Component Diagram. It is laid out on a grid just like the armor boxes, except that various sections are outlined and named for an internal component. When a damage template extends below the Armor Diagram, mark off that portion of the Internal Component Diagram in the same manner as the armor. For all practical purposes, the Internal Component Diagram is treated as an extension of the Armor Diagram, with the following exceptions: the boxes in the Internal Component Diagram are not affected by widowing, and except where locations are separated (between the turret and stern and between the right side and bottom), damage is transferable between sections.
For example, it is possible that a shot hitting the front of the vehicle can damage an internal component under the left side armor. Note that the Internal Component Diagram for ground vehicles is slightly different than that of grav vehicles.
Damage Locations and Effects
Internal systems that are hit (having lost one or more boxes in the section) become inoperative for the remainder of the game, except where noted. In some cases, the vehicle will not have any components to damage in a location. If this is the case, treat the area as having ballistic protection.
When an Armor box is hit during a campaign game, it takes qualified technicians with adequate tools and spare parts ten minutes to repair the damaged area. Areas indicated by Internal Component boxes require 30 minutes to fix, and areas under the Vehicle Destroyed boxes require 60 minutes of repair time each. The players decide how to determine whether or not adequate repair facilities are available. Note that repairs to crew and infantry sections can only patch up that compartment; dead and wounded crew members cannot be resurrected. Vehicles destroyed by ammunition explosions cannot be repaired.
Turret
Ballistic Protection. Ballistic protection represents the inherent survivability of the turret's internal components because of hardening, duplication of circuitry, and the ruggedness of the system itself. Hits to areas with ballistic protection have no effect on the vehicle's performance. For all purposes except widowing, treat the Ballistic Protection boxes as Armor.
Communications System (Comm). The intervehicle communications gear is damaged, which prevents the commander from being able to talk with other vehicle commanders. In team play, this vehicle's commander cannot talk to teammates or taunt the enemy. If a player is controlling more than one vehicle in a battle and receives this hit, he is not allowed to talk to his other vehicles. The vehicle can no longer engage in indirect fire, paint targets, call for artillery fire, or receive any benefit for firing at a painted target. (The exception is when he fires at a target that he himself has painted.)
Targeting Control Systems (Targ). The vehicle's targeting computers, weapons control linkages, weapons stabilization controls, and other systems are damaged. For each box marked off in the Targeting Control System, the vehicle must apply a −1 modifier to the base to-hit number for any weapons attacks it makes. Record this modifier in the Fire Mods box on the record sheet.
Gunner Hit (Gunner). The gunner suffers damage and must make a Consciousness Roll. The Base To-Hit Number to remain conscious is 8. For each box in the Gunner section that is blanked out, apply a −1 modifier to the base to-hit number. In other words, use the total number of blanked-out boxes, not just those blanked out this turn. If the player rolls higher than the modified base to-hit number, the gunner is unconscious. Remember, however, that a 1 is an automatic success and a 10 is an automatic failure. At the End Phase of the next turn, the gunner may make a die roll to regain consciousness. If the player rolls lower than or equal to the modified base to-hit number, the gunner regains consciousness. When all the boxes are blanked out, the gunner is dead. If the vehicle's gunner and commander are both unconscious, that vehicle may fire no weapons until one of them regains consciousness.
Turret Weapons Hit (Turret Wpns). All the weapons located in the vehicle's turret are knocked out. No turreted weapon systems may be used for the rest of the game. The vehicle may not paint any target for the remainder of the game.
Commander Hit (Cmdr). The commander suffers damage and must make a Consciousness Roll, as described under the Gunner Hit rule above. A vehicle whose commander is dead or unconscious cannot fire indirectly, paint targets, or call for artillery fire. If the vehicle's gunner and commander are both unconscious, no weapons may be fired by the vehicle until one of them regains consciousness. An unconscious commander can regain consciousness in the same manner as a gunner.
Vehicle Destroyed. All of the vehicle's major systems become inoperative. If the vehicle is moving, it must immediately ground at its current velocity and take grounding damage, as normal. Crew members and any mounted infantry squads may exit the vehicle at the beginning of the next turn, as normal.
Stern
Ballistic Protection. Ballistic protection represents the inherent survivability of the stern's internal components, due to hardening, duplication of circuitry, and the ruggedness of the system itself. Hits on areas with ballistic protection have no effect on the performance of the vehicle. For all purposes except widowing, treat the Ballistic Protection boxes as Armor.
Stern Shield (S. Shield). Stern shields are rendered inoperative and have a value of 0 for the remainder of the game. Note, however, that there are two stern shield locations. Both locations must be hit for the stern shields to cease functioning.
Maximum Thrust/Movement Reduced by 1/4, 1/2, or 3/4. This damage indicates that the Maximum Thrust for the vehicle is reduced by one-quarter, one-half, or three-quarters, with fractions rounded up. For convenience, consult the Thrust Reduction Table below. Hits to a ground vehicle in this area reduce the vehicle's movement points by the same amount. The results are noncumulative.
Thrust Reduction Table
| Starting Maximum Thrust | Reduced to 3/4 | Reduced to 1/2 | Reduced to 1/4 |
|---|---|---|---|
| 1 | 1 | 1 | 0 |
| 2 | 2 | 1 | 1 |
| 3 | 2 | 2 | 1 |
| 4 | 3 | 2 | 1 |
| 5 | 4 | 3 | 1 |
| 6 | 5 | 3 | 2 |
| 7 | 5 | 4 | 2 |
| 8 | 6 | 4 | 2 |
| 9 | 7 | 5 | 2 |
| 10 | 8 | 5 | 3 |
| 11 | 8 | 6 | 3 |
| 12 | 9 | 6 | 3 |
| 13 | 10 | 7 | 3 |
| 14 | 11 | 7 | 4 |
| 15 | 11 | 8 | 4 |
For example, a Liberator has a Thrust of 6. If its thrust were reduced by one-fourth, it would have a new Thrust of 5. If its thrust were reduced by three-fourths, it would have a new Thrust of 2.
Left Shield (L. Shield). The left shields are rendered inoperative and have a value of 0 for the remainder of the game. Note that there are two left shield locations. Both locations must be hit before the left shields stop operating.
Right Shield (R. Shield). The right shields are rendered inoperative, and have a value of 0 for the remainder of the game. Note that there are two right shield locations. Both locations must be hit before the right shields stop operating.
Left Directional Vanes (Left Vane). A left vane hit means that the grav vehicle may no longer turn to the left. This hit only affects grav vehicles.
Mobility. A mobility hit means that a ground vehicle has taken a hit on its tracks/wheels/surface-effect skirt. It can no longer move, but may change facings.
Right Directional Vanes (Right Vane). A right vane hit means that the grav vehicle may no longer turn to the right. This hit only affects grav vehicles.
Ammo (Ammo Stores Explode). Onboard ammunition explodes or an energy weapons capacitor destructively discharges. On a Base Roll of 7 or less, there is no explosion. A modifier of −1 is applied to this base number for every Internal Component block marked off in this location. If there is an explosion, the vehicle is totally destroyed and cannot be salvaged. The crew or infantry survives on a Base Roll of 8 or less. Apply a modifier of −1 to this base number for every point of current velocity. Make separate die rolls for any infantry squads or crew the vehicle carries. Dismounting in this manner counts as movement for the infantry squad or crew next turn.
Front
Ballistic Protection. Ballistic protection represents the inherent survivability of the front's internal components, due to hardening, duplication of circuitry, and the ruggedness of the system itself. Hits against areas with ballistic protection have no effect on the performance of the vehicle. For all purposes except widowing, treat the Ballistic Protection boxes as Armor.
Terrain Sensing and Reaction Circuits (TS&R). When the TS&R system is lost, all terrain speed limits are reduced by 50 percent of the amount (round fractions up) indicated for that vehicle. Note that there are two TS&R locations. Both locations must be hit before the system fails.
Infantry Compartment (Infantry). The vehicle's infantry compartment has been penetrated. If the vehicle is carrying infantry, the squad might also take damage. For every 4 points of damage taken in the infantry section, one infantryman is killed. If the entire location is destroyed, the vehicle cannot carry infantry and all infantry personnel aboard are killed.
Front Shields (F. Shield). The front shields are rendered inoperative and have a value of 0 for the remainder of the game. Note that there are two front shield locations. Both locations must be hit before the front shields stop operating.
Side (Left or Right)
Ballistic Protection. Ballistic protection represents the inherent survivability of the sides' internal components, due to hardening, duplication of circuitry, and the ruggedness of the system itself. Hits to areas with ballistic protection have no effect on the vehicle's performance. For all purposes except widowing, treat the Ballistic Protection boxes as Armor.
Driver Hit (Driver). On a driver hit, the driver must make a Consciousness Roll similar to the one described under the Gunner Hit rule. If the driver fails the roll, the vehicle cannot apply any thrust and will continue in its current direction until it strikes something. At that point, its current velocity falls to 0. If a Piloting Skill Roll is necessary, the vehicle will strike the terrain on any die roll result of 2 or greater. A driver may regain consciousness in the same manner as a gunner.
Hull Weapons 1 Hit (Hull Weap 1). All the weapons in the vehicle's Hull 1 location are knocked out. Any weapon systems located here are destroyed for the rest of the game.
Hull Weapons 2 Hit (Hull Weap 2). All the weapons located in the vehicle's Hull 2 location are knocked out. Any weapon systems located here are destroyed for the rest of the game.
Destroying a Unit
A grav or ground vehicle is considered destroyed if: (1) all of the crew is killed, (2) the vehicle suffers an ammunition explosion, or (3) it suffers a Vehicle Destroyed result. Infantry squads are considered destroyed if five of its members have been killed.
Bottom
Bottom Shields (B. Shield). Damage to the bottom shields renders them inoperative and with a value of 0 for the remainder of the game. Note that there are two bottom shield locations. Both locations must be hit for the bottom shields to stop operating.
Digging Cannons (Digging). Damage to the digging cannons means that the vehicle may not fire its digging cannons for the remainder of the game.
Helm. Helm damage means that it is no longer possible to steer the grav vehicle. The vehicle cannot apply thrust and will continue in its current direction until it strikes something. At that point, its current velocity will be reduced to 0. If a Piloting Skill Roll is necessary, the vehicle will strike the terrain on any die roll result of 2 or more.
Grav Drive. The grav vehicle's grav engine is hit and stops functioning. The vehicle may not move for the rest of the game and it may not change facing. If the vehicle was moving when hit, it must immediately ground at its current velocity and take any additional damage. All other systems (shields and weapons) are still functional.
Engine. The ground vehicle's engine is hit and stops functioning. The vehicle may not move for the rest of the game and it may not change facing. All other systems (shields and weapons) are still functional.
Ammo (Ammo Stores Explode). Onboard ammunition explodes or an energy weapons capacitor destructively discharges. There is no explosion on a Base Roll of 7 or less. A modifier of −1 is applied to this base number for every block marked off in this location. If there is an explosion the vehicle is totally destroyed and cannot be salvaged. The crew survives on a Base Roll of 8 or less. A modifier of −1 for every point of current velocity is applied to this base number. Separate rolls are made for any mounted infantry squads or crew that the vehicle carries. Dismounting in this manner counts as the infantry squad or crew's movement for the next Movement Phase.
Combat in the Same Hex
An enemy unit and a friendly unit may both occupy the same hex. Resolve attacks against vehicles in the same hex as normal and at a Range of 1. The side attacked depends on the facing of the enemy unit at the time that the friendly unit enters the hex. If a friendly unit entered a hex occupied by an enemy unit on the enemy's left side, the enemy unit would be in the friendly unit's front firing arc, and the enemy unit would have the friendly unit in its left firing arc.
Attacks against infantry squads in the same hex are resolved normally, regardless of facing. Infantry squads attacking vehicles in the same hex ignore all terrain modifiers, including craters, and may choose to attack any location of the vehicle except the bottom. (See Optional Rules for exceptions.)
Special Weapons
Most weapons carried by tanks are energy-based, utilizing the vehicle's fusion power plant to generate laser pulses or a mass driver cannon to accelerate small slugs to unheard-of speeds. Unlike space vessels, land combatants can also mount slower and more conventional weapons that use larger kinetic energy warheads.
Ballistic Weapons (Gauss Cannons)
Most tanks mount at least one type of direct-fire ballistic weapon, or cannon. These weapons differ from energy weapons because they fire an explosive shell rather than a stream of energy. They are similar to the mass driver cannon (MDC) in using a magnetic field to accelerate a shell down the length of a barrel. The muzzle velocity of the Gauss cannon projectile is drastically lower than that of an MDC, however, giving the Gauss cannon a greatly reduced range in comparison to the MDC. On the other hand, shields are unable to turn the heavier shell, and so the Gauss cannon is a more effective weapon at close range.
A Gauss cannon may fire various types of shells, including High-Explosive Armor Piercing (HEAP), Armor-Piercing Discarding Sabot (APDS), Hammer Head (HH), or anti-personnel. Though these shells may all fire from the same gun, they have different damage profiles. The types of shells available for each weapon system and its range are given on the Weapons Table. All weapons may fire anti-personnel rounds. Ammunition is unlimited for purposes of this game, but the player must announce what type of shell is being used prior to firing a Gauss cannon. Anti-personnel rounds may only be fired at infantry targets. The base to-hit number for all Gauss cannon attacks is not modified by the target's shield factor.
Missiles
In addition to direct-fire weapons such as lasers, mass drivers, and Gauss cannons, many vehicles and infantry units are equipped with a limited number of missiles. The two types of anti-vehicular missiles are SMLMs (Sub-Munitions Laser-Guided Missile) and TVLG (Tube or Vertically Launched Laser-Guided). Except for range and damage profile differences, these missiles use the same set of rules.
Missiles may be fired directly at a target, per the Weapons Fire rules. They use a base to-hit number based on range and all normal to-hit modifiers (the shield's field disrupts the circuitry of a missile and can cause it to explode prematurely). If a target is within a missile's firing arc, vehicle-mounted missiles can also fire indirectly over intervening terrain if a friendly unit has successfully painted the target that turn. Dismounted infantry squads may not fire their missiles indirectly.
A vehicle may fire up to one SMLM and/or two TVLG missiles a turn, regardless of the number of launchers the vehicle has. An anti-vehicle missile may not be fired at an infantry squad. There are a limited number of missiles that a vehicle can carry. The player is responsible for keeping track of the number of missiles that his vehicle has available. Once a vehicle has fired all its missiles, it has no more missiles for the rest of the game. Vehicles may not trade missiles among themselves during the course of the game.
Indirect Missile Fire. Vehicle-mounted anti-vehicle missiles do not require a direct LOS in order to engage their target. As long as another friendly unit has successfully painted the target in that turn, the missile may be fired at the target as normal, ignoring the shield factor and line-of-sight restrictions. Firing arc restrictions do still apply, however.
For example, the Horatius behind the heavy woods hex does not have a LOS to the Liberator on the other side. A Lupis within the heavy woods hex has a valid LOS to the Liberator, however. In the Painting portion of the Combat Phase, the Lupis successfully paints the Liberator. The Horatius may, therefore, fire one SMLM at the Liberator, ignoring its shields.
Anti-Personnel (AP) Lasers
Any vehicle can mount an anti-personnel (AP) laser, which is designed specifically to kill infantry but does no damage to armor. Follow the usual Infantry to-hit procedures for the AP laser. An AP laser cannot be used to attack infantry in buildings. Maximum Range for an AP laser is three hexes. AP lasers do not count against the direct fire restrictions.
Vulcan Anti-Missile Laser System
The Vulcan is a weapon system with its own radar to track and destroy incoming missiles from any direction. It utilizes rapid-fire, short-range lasers to destroy enemy missiles just before they hit the vehicle. A vehicle can use the Vulcan to engage any missiles that have scored a hit against it.
The Vulcan Anti-Missile To-Hit Table gives the to-hit numbers for various missile attacks, based on the type of Vulcan system. The player may decide to engage fewer than the maximum number of missiles attacking him. He may even decide not to use the Vulcan system at all. To use the system, the player must make a separate to-hit roll for each targeted missile. If he rolls the to-hit number or less, the missile is destroyed and his vehicle takes no damage. Surviving missiles may make a normal attack. A Vulcan system can only be used once per turn. After the first enemy attack, the player declares how many missiles he will engage in that turn. He can use that number of die rolls to meet missile attacks from various attacking vehicles.
Vulcan Anti-Missile To-Hit Table
| Type | 1 Missile | 2 Missiles | 3 Missiles | 4 Missiles | 5 Missiles |
|---|---|---|---|---|---|
| Vulcan-1 | 5 | 2 | 1 | — | — |
| Vulcan-2 | 8 | 4 | 2 | 1 | — |
| Vulcan-3 | 9 | 5 | 3 | 2 | 1 |
| Vulcan-4 | 9 | 6 | 4 | 3 | 2 |
For example, three vehicles are firing on a Horatius that mounts a Vulcan-2. The first vehicle hits with two TVLGs. The Horatius can declare that it will engage three missiles that turn and then make two of its to-hit rolls against the missiles that are coming in now. The player must roll a 2 or less to succeed. The attacks are then resolved normally. The other two vehicles make their attacks, each in turn. The Horatius is still able to engage one more incoming missile fired from those other two vehicles.
Infantry
An infantry squad consists of eight men. They are armed with small arms, bounce packs, and portable anti-tank missiles or mortars. These men are controlled abstractly as one squad, and thus the whole squad must carry out the same action. When mounted in a vehicle, the infantry squad is unable to perform any action. Once a target is hit, the squad uses the damage template appropriate to its current strength in men. Infantry weapons damage is given in the Infantry Effectiveness Table.
Infantry Movement
An infantry squad may spend 3 MP per turn when dismounted. They move like ground vehicles and so may enter any hex not prohibited to ground vehicles. Instead of moving, a dismounted squad may mount any vehicle that starts the Movement Phase in its hex at a Velocity of 0. It then moves with the vehicle as normal. When mounted in a vehicle, the infantry squad moves with the vehicle but cannot fire its weapons in the Combat Phase. A mounted squad may dismount a vehicle at the end of the vehicle's movement as long as the vehicle's current velocity is 0. The squad may not move for the rest of the turn. (See Optional Rules for exceptions.)
No more than one squad may be carried inside a vehicle. An additional squad may be carried on the outside. An infantry squad may mount a vehicle that has no infantry compartment (or a destroyed one). In such a case, they are riding on the outside of the vehicle and the squad takes damage whenever its vehicle is hit or takes damage from Grounding. The controlling player rolls 1D10 to determine how many squad members were killed. If the vehicle takes a hit and must Ground as a result, the squad has been hit twice. The controlling player must make two damage rolls for the squad.
Infantry Combat
Infantry fire and to-hit procedures are the same as for vehicles. The only difference is that infantry units have a 360-degree firing arc for all weapons, but the range of their personal weapons is severely limited. During the Combat Phase, an infantry squad may perform one of three actions. It may fire its personal weapons at a target, fire its anti-tank missiles or mortars, or paint a target. Remember, though, that mounted infantry may not fire at all.
Fire Personal Weapons. Infantry squads may fire their personal weapons at any one target within the normal restrictions. If the target has moved during the Movement Phase of the turn, the squad may make one attack. If the target has not moved during the Movement Phase of the turn, the squad may make two attacks. If the target is in the same hex as the squad and has not moved, the squad may make three attacks. Each attack is resolved separately, but only one enemy unit can be targeted in a turn. Infantry weapons fire is affected by the target's shield factor.
Infantry Effectiveness Table
| Squad Strength | Weapons Available | TVLGs Available | Mortars Available | Damage |
|---|---|---|---|---|
| 8 | Yes | 4 | 2 | IWF9 |
| 7 | Yes | 4 | 2 | IWF7 |
| 6 | Yes | 4 | 2 | IWF7 |
| 5 | Yes | 4 | 1 | IWF5 |
| 4 | Yes | 4 | 1 | IWF5 |
| 3 | Yes | 3 | 1 | IWF3 |
| 2 | Yes | 2 | 0 | IWF3 |
| 1 | Yes | 1 | 0 | IWF1 |
| 0 | — | — | — | Dead |
Infantry firing personal weapons at targets in the same hex are assumed to be making a Close Assault. They get to choose the location attacked, regardless of the vehicle's facing. A squad can elect to hit the front, side, stern, or turret, but cannot attack the bottom of a vehicle.
Painting Targets. The squad can use targeting lasers to paint for missiles, lasers, mass driver cannons, and some artillery shells fired from other sources. If the target is within six hexes, infantry squads need only declare that they are painting a target. Regardless of shield factors, the squad will succeed in painting the target on a die roll of 9 or less, minus the number of casualties the squad has taken. For these purposes, assume that an infantry squad that started the game with less than eight men has taken the appropriate number of casualties. Infantry squads cannot paint targets at ranges greater than 6 hexes.
When firing at infantry in rubble, buildings, or craters, no modifier is applied against the base to-hit number. Attacks against infantry inside buildings are carried out according to the Building Rules. Missile rounds may not be used to attack a dismounted infantry squad.
If the round hits, roll 1D10. Then modify the result by subtracting the normal terrain to-hit modifier from the result (−1, −2, or −3). Cross-reference the weapon type with the modified to-hit roll on the Infantry Damage Table, to find the number of infantry lost. Note that the damage can be 0. For each squad member killed, mark off one box on the appropriate infantry record. As a squad takes damage, its effectiveness declines. The Infantry Effectiveness Table shows what the squad can do as it takes casualties. Remember that all damage for infantry squads is taken after all fire is resolved. The last four infantrymen are assumed to be operating the squad's TVLG missiles.
TVLG Missile Fire. The squad may carry up to 4 TVLG anti-vehicle missiles. For casualty purposes, the last four men in the squad are considered to be carrying the TVLGs. The squad can fire one, some, or all its remaining TVLGs in one turn. The missile fire is resolved in the normal manner, except that the squad cannot engage in indirect fire.
Mortar Squads. Some special infantry squads are armed with two light mortars. These squads do not have any TVLG anti-vehicle weapons. When the mortar squad is firing directly, they use the normal to-hit procedure, but are not modified for shields, and their maximum range is 20 hexes. To operate a light mortar requires a minimum of three personnel. That means a squad that has taken losses might not have sufficient personnel to operate one or both mortars. (See the Infantry Effectiveness Table.)
Indirect Mortar Fire. A mortar fires small, laser-guided rounds and can be fired indirectly. After the forward observer has painted the target, the mortar round homes in on it. The to-hit procedure for a painted mortar round is the same as for a vehicle firing an indirect missile. If a mortar round strikes a building or a vehicle, determine the damage with an IWF7 template.
Light mortar squads may also fire a small anti-personnel round. In this case, all they need is an observer who can see the target. It is not necessary to paint the target. The player makes a normal to-hit roll, ignoring any shield factors and terrain modifiers. If the round hits the target hex, all dismounted infantry squads take damage, per the Dismounted Infantry Casualties rules below.
Dismounted Infantry Casualties
Dismounted infantry are considered to be dispersed throughout the 200-meter hex. When firing at dismounted infantry in woods, rubble, buildings, or craters, no modifier is applied against the base to-hit number. Attacks against infantry inside buildings are carried out according to the Building Rules. Missile rounds may not be used to attack a dismounted infantry squad.
If the round hits, roll 1D10. Then modify the result by subtracting the normal terrain to-hit modifier from the result (−1, −2, or −3). Cross-reference the weapon type with the modified to-hit roll on the Infantry Damage Table below, to find the number of infantry lost. Note that the damage can be 0. For each squad member killed, mark off one box on the appropriate infantry record.
Infantry Damage Table — number of infantrymen killed, by weapon/damage type and modified die roll:
| Modified Roll | 200mm | 150mm | MDC 12 | 100mm/MDC10 | 9 | MDC 8 | 50mm | 6 | 5 | 4 | 25mm | 2 | 1 | IWF9 | IWF7 | IWF5 | IWF3 | IWF1 | AP Laser | Mortar | HAFE-1 | Minefield |
|---|---|---|---|---|---|---|---|---|---|---|---|---|---|---|---|---|---|---|---|---|---|---|
| −1 | 0 | 0 | 0 | 0 | 0 | 0 | 0 | 0 | 0 | 0 | 0 | 0 | 0 | 0 | 0 | 0 | 0 | 0 | 0 | 0 | 0 | 0 |
| 0 | 0 | 0 | 0 | 0 | 0 | 0 | 0 | 0 | 0 | 0 | 0 | 0 | 0 | 0 | 0 | 0 | 0 | 0 | 0 | 0 | 1 | 0 |
| 1 | 0 | 0 | 0 | 0 | 0 | 0 | 0 | 0 | 0 | 0 | 0 | 0 | 0 | 0 | 0 | 0 | 0 | 0 | 1 | 1 | 2 | 0 |
| 2 | 0 | 0 | 0 | 0 | 0 | 0 | 0 | 0 | 0 | 0 | 0 | 0 | 0 | 0 | 0 | 0 | 0 | 0 | 1 | 1 | 2 | 0 |
| 3 | 1 | 0 | 0 | 0 | 0 | 0 | 0 | 0 | 0 | 0 | 0 | 0 | 0 | 1 | 0 | 0 | 0 | 0 | 1 | 2 | 3 | 1 |
As a squad takes damage, its effectiveness declines. The Infantry Effectiveness Table shows what the squad can do as it takes casualties. Remember that all damage for infantry squads is taken after all fire is resolved. The last four infantrymen are assumed to be operating the squad's TVLG missiles.
Concealed Infantry, Dismounted Vehicle Crew
A dismounted squad can effectively hide from observation and thus from attacks. Rather than moving, a dismounted infantry squad may declare that it is concealing itself during its Movement Phase. During the following turn, the squad may not be engaged by any enemy unit not in the squad's hex. Additionally, the concealed infantry squad may not move, fire any weapons, or paint a target until it is declared active again. The unit may become active during the Declare Weapons Fire portion of the Combat Phase. The squad may then engage any target normally. Enemy units that have not yet declared their fire in that phase may engage the infantry squad, per the normal Combat rules. By waiting until other units have declared their fire for the turn, an infantry squad can get a free shot at a target without having to take any return fire. Note that the infantry squad is a valid target during the turn that it declared that it was concealing itself. Concealed infantry units may not engage in Opportunity Fire.
A vehicle crew will sometimes survive the destruction of its vehicle. If the crew escapes, place a Crew counter next to the vehicle. In the next turn, the crew may move at a rate of one hex per turn. A dismounted crew cannot make attacks, paint targets, call in artillery fire, or recombine with an infantry squad. Except for these restrictions, the Crew counter is subject to all infantry rules. This rule is especially useful when a player is attempting to maintain troop quality.
Recombining Infantry Squads
If two infantry squads occupy the same hex and perform no other actions for one turn, members from one squad can be reassigned to another squad during the End Phase. This transfer of personnel can also include equipment, but no squad can operate more than four TVLGs or two mortars. Remember, too, that no squad has more than eight members. Recombined infantry squads must be assigned to one of the parent platoons for movement purposes.
Buildings
Cities have always created special problems for military operations. The many buildings among the long, narrow streets of urban areas block line-of-sight and provide the enemy with hiding places and protection from weapons fire. These factors obviously call for unique tactics and operations. From the earliest history of warfare up to the present day, combat in an urban area has been the most costly and destructive form of warfare known to man.
Buildings are rated by their Elevation Level (stories) and the number of Armor Points that each level has. (A level is 20 meters, and so each level of a building contains four to six actual floors.) As urban structures are not designed to withstand fire from modern combat weapons, they can be reduced to rubble very quickly.
Each Building Record Sheet shows a block that is 10 boxes high by 40 boxes wide. Each row represents one of the building's stories, numbered one through ten. When filling out the record sheet, the player should cross off any excess rows at the top. The building's armor factor can range from 1 to 40, and that same value is used for each story. The player should block out columns so that each story consists of a row of boxes equal to the building's armor factor. When the player is finished, the Armor Diagram should be a rectangle that is as high as the building's elevation and as wide as the building's armor factor.
Movement Effects
Vehicles are assumed to be moving through the streets and alleyways in the building hex. Vehicles can never enter the building. It costs 1 VP to move into a building hex, but the speed limit is lower than in open terrain, as shown by the Terrain Effects Table.
When dismounted infantry is in a building hex, the unit may declare entry into the building instead of moving. An infantry unit can enter at Level 1, 2, or 3. Once inside, the infantry squad can only change one Elevation Level a turn. An infantry squad can choose to exit a building from any level rather than moving. When moving out of a building, a dismounted infantry unit may not mount a vehicle until the next Movement Phase. An infantry unit may also move up and down levels. Each turn, the unit may move one level.
Combat Effects
Buildings may block line-of-sight in the same manner as trees. A building's height is added to the Elevation Level of the hex that it occupies. Buildings may be fired on as normal, but without to-hit modifiers for terrain. Buildings take damage a little differently than normal. Once a hit occurs, the player rolls a die to determine which level has been struck. If the result is higher than the height of the building, then the topmost surviving level of the building has been hit. Align the damage template sideways with the arrow pointing to the appropriate level, then slide the template over until the first full armor block is reached. Fill in the template as normal.
If all of the armor boxes on one level are destroyed, all levels above it collapse and are destroyed. If the bottom level is destroyed, then the whole building collapses and is destroyed. Replace the building counter with a rubble counter. Rubble does not block line-of-sight. Any infantry squad caught in a destroyed level is totally eliminated. Units outside of a building that is rubbled are not affected. The effects of rubbling a building take place at the End Phase of the turn.
Infantry that is inside a building may fire. For line-of-sight purposes, consider the squad to be at the elevation of the level they occupy, plus the level of the hex. Larger buildings do provide some protection for infantry. While a squad occupies a building, it may not be fired upon directly. Only the building can be attacked. The infantry unit does not take damage until the last five armor blocks of their level have taken damage. Whenever one of those five blocks is damaged, the damage value of the weapon system or round is cross-referenced to the Infantry Damage Table, as normal.
The building counters represent all of the buildings in the built-up area. It is very easy to destroy one building, but an entire city block is much more resilient. The randomness of the hit locations represents the fact that multiple individual buildings must be destroyed in order to significantly damage a city block. The hit location procedure is not any reflection on the relative difficulty of targeting and destroying a single stationary building.
Centurions
Strong and innovative leadership is necessary for the combat efficiency and effectiveness of any military unit. No matter how good the equipment or the training of the individual soldier, without leadership an army is just rabble waiting to be swept away.
Each player has one Centurion who is in charge of all of the player's units (normally three to five platoons of three vehicles each). These are known collectively as a Century. The Centurion should be assigned to one of the player's vehicles. He takes the place of the vehicle commander, and so whatever damage the commander takes applies to the Centurion. A Centurion cannot be assigned to an infantry squad rather than a vehicle. This is because the squad does not have the necessary communications systems to allow him to control a battle.
The unit's Centurion performs three functions in the game. He can affect who wins the Initiative, decide when a friendly platoon moves during the Movement Phase, and is necessary to call in attacks by offboard artillery and orbital fire support.
Leadership Rating
In each scenario, the Leadership Rating of the opposing Centurions is given. In most cases, the two Centurions have equivalent ratings, and so neither side has a Leadership Advantage. In such case, the movement sequence is not affected. When one Centurion does have a higher rating than the other, he has a Leadership Advantage equal to the difference between the two ratings.
For example, if a TOG Centurion has a Leadership Rating of 2 and a Renegade Centurion has a rating of 4, the Renegade side has a Leadership Advantage of 2 points.
There are two ways to use these Advantage Points during a turn. First, the player can subtract all, some, or none of the points from his Initiative Roll at the start of the Movement Phase for the turn. Points not expended to modify the Initiative Roll can be used to delay or advance the movement of any of the player's platoons. For every three full Advantage Points remaining, the player can pass on moving one platoon until later in the movement sequence. At that later point, he will move the units of that platoon immediately after the normal movement of another platoon. He can also use the points to move a platoon at the start of his portion of the Movement Phase.
Players may not save Leadership Advantage Points for other turns. For example, the Renegade player has 3 Leadership Advantage Points. Rather than using them to modify the Initiative Roll, he saves them until his units are to be moved. The Renegade player wins the Initiative and decides to be Player A. On his turn to move the units of a platoon, he may move one platoon as normal or elect to expend the 3 points to pass on moving that platoon. If he passes, Player A may move the passed platoon immediately after he has moved another platoon later in the turn. For example, he might wait until after moving his last platoon and then move the passed platoon. He might also wait until midway into the movement of his platoons, and decide to move the passed unit then.
Active Centurions are necessary to call in offboard artillery, orbital fire support, and air strikes. If a player's Centurion is killed, knocked unconscious, put out of communication, or has his vehicle destroyed, the Century cannot use any of its offboard assets (though current missions still come in). A Centurion whose vehicle has been knocked out cannot transfer to another vehicle because the special communications and encryption devices needed to control the Century have been lost in the wreckage of the original vehicle.
Loss of Centurion
Loss of the Centurion can, obviously, have disastrous results for the Century. If a player's Centurion is killed, knocked unconscious, put out of communication, or has his vehicle destroyed, the Leadership Rating for the Century is reduced to 0 and the difference between the sides is recalculated.
Centurion Advancement
An average Centurion usually has a Leadership Rating of 2. Unless otherwise specified by the scenario, assume that both Centurions have a Leadership Rating of 2. The players may also choose to randomly generate the starting Leadership Rating for their Centurions by rolling the die before the start of the game. See the Leadership Rating Table below.
Leadership Rating Table (starting rating)
| Die Roll | Leadership Rating |
|---|---|
| 1 | 1 |
| 2 | 1 |
| 3 | 2 |
| 4 | 2 |
| 5 | 2 |
| 6 | 2 |
| 7 | 2 |
| 8 | 2 |
| 9 | 3 |
| 10 | 3 |
Leadership Rating Advancement. Players may keep the same Centurion for future games. To do so, the player should keep track of the level of victory or defeat his Centurion achieves in the game. (Victory Levels are given in the published scenarios or can be calculated as described in Scenario Design.) Point values for each type of victory are given in the Advancement Points Table.
Advancement Points Table
| Victory Level | AP Earned |
|---|---|
| Decisive Victory | 3 |
| Substantive Victory | 2 |
| Marginal Victory | 1 |
| Draw | 0 |
| Marginal Defeat | −1 |
| Substantive Defeat | −2 |
| Decisive Defeat | −3 |
For every 5 Advancement Points that a Centurion gains, he increases his Leadership Rating by 1. For every 5 points that a Centurion loses, he decreases his Leadership Rating by 1. The Leadership Rating Table below shows the Leadership Ratings for Centurions with various Advancement Point levels.
Leadership Rating Table (by total advancement points)
| Total Advancement Points | Leadership Rating |
|---|---|
| −6 to −10 | 0 |
| −1 to −5 | 1 |
| 0–4 | 2 |
| 5–9 | 3 |
| 10–14 | 4 |
| 15–19 | 5 |
| 20–24 | 6 |
| 25–30 | 7 |
Beginning Centurions start with a Leadership Rating of 2. Negative Leadership Ratings are also possible.
Optional Rules
The following rules are presented to enhance and expand the Centurion game. Before the start of a game, the players should review these rules and agree on which ones they will use.
Alternate Grav Movement Modes
The preceding movement rules apply when a grav vehicle is operating in its normal flight mode (NF), that is, about one meter above the ground. Grav vehicles may also choose to operate in Tree-Top Flight mode (TTF) or in Low-Altitude Flight mode (LAF). While operating in TTF, the grav vehicle is about 20 meters off the ground, ignoring trees and low buildings for LOS and movement purposes. While operating in LAF, the vehicle is flying high enough to ignore all terrain for movement and LOS. Though these two modes increase the maximum speed that a vehicle can safely travel (up to 900kph in LAF), the vehicle becomes an easy target for any enemy unit that spots it.
TTF and NF Movement
At the start of the Acceleration portion of the Movement Phase, the player may expend Thrust Points to raise or lower a grav vehicle one level. It costs 1 Thrust Point to move from normal flight to Tree-Top Flight and 1 Thrust Point to move from Tree-Top Flight to Low-Altitude Flight, and vice versa. A vehicle that moves down from TTF or LAF is immediately subject to the terrain speed limits of the hex that it occupies.
Tree-Top Flight mode allows a grav vehicle to ignore all terrain and one Level of buildings, but such vehicles must still pay VP Costs for crossing contour lines as in NF mode. The vehicle treats the terrain features as clear terrain for speed limit purposes.
In Low-Altitude Flight mode, a grav vehicle ignores all terrain and contour lines for movement and line-of-sight purposes. The vehicle may accelerate up to 75 VP, but air resistance prevents it from going faster. It costs a LAF vehicle 1 VP to enter any hex.
Stacking. Normal stacking limitations are in force for each flight level. In other words, as many vehicles as desired can occupy the same hex at the same flight level.
Combat. A vehicle operating in TTF mode is one level higher than the terrain it is in for line-of-sight purposes. In LAF mode, line-of-sight is never blocked.
All attacks against units utilizing NF mode are handled per the normal Combat rules, except where noted below. Attacks between units operating in the same flight mode are handled per the normal Combat rules except where noted below. Attacks by a unit operating in NF or TTF mode against a target operating in LAF mode use the target's bottom shield rating in the to-hit number modifications, and all damage is taken against the bottom. Attacks by a unit operating in NF mode against a target operating in TTF mode use the target's bottom shield rating in to-hit number calculations, but damage may be taken against either the bottom or the appropriate facing. Use the TTF Hit Location Table below to determine the hit location, adding the Range to the die roll.
For example, a Horatius is operating at TTF, five hexes away from a Liberator on the ground. The line-of-sight between the two vehicles would normally be blocked by a light woods hex. Because the Horatius is at TTF the woods are ignored for line-of-sight purposes. The Horatius attacks the Liberator and the attack is handled as normal. The Liberator's attacks on the Horatius are also resolved normally, but the bottom shields are used and the TTF Hit Location Table replaces the normal Hit Location Table. To determine the damage from his successful attacks, the Liberator's player rolls a die and adds 5 for the Range. A modified result of 8–10 means that the Horatius is hit on the left side. A modified result of 1–7 results in a hit to the bottom armor.
TTF Hit Location Table
| Modified Die Roll* | Result |
|---|---|
| 1–7 | Bottom |
| 8–10 | Attacked side |
*Add Range.
Loss of Grav Drive. Loss of the grav drive while operating close to the ground is serious enough. Its loss at 50 meters above the surface normally results in the vehicle's total destruction. If the grav drive is knocked out while the vehicle is at NF, it must immediately ground at its current velocity. If the grav drive is lost while operating at TTF the vehicle must also ground, adding 2 to its current velocity. Loss of the grav drive while at LAF results in immediate grounding, with 10 added to the vehicle's current velocity.
Artillery. All artillery attacks against units operating at NF, TTF, and LAF are resolved normally, except that HAFE rounds have no effect on vehicles operating at LAF.
Infantry. The bounce packs worn by infantry have a governing device that prevents the soldier from exceeding a set velocity. The device temporarily boosts the strength of the grav fields and applies a braking force that slows the soldier down whenever that safe velocity is exceeded. (Though the pack makes the soldier almost weightless, his mass stays the same. Striking the ground at 60 kilometers per hour — weightless or not — still means that soldier ends up splattered all over the countryside.) Combat troops use this safety feature to engage in some innovative tactics. The most common of these is to jump out of a moving grav vehicle as it speeds over a target. The ground is too close to make this tactic useful while operating in NF mode, but it is very useful when attacking at TTF or LAF.
Infantry may only mount a vehicle that is operating at NF, and then only if the vehicle starts the turn in their hex and at a current velocity of 0. Infantry may dismount a vehicle at NF only at the end of the vehicle's movement and only if the vehicle's current velocity is 0. Bounce infantry may dismount a TTF or LAF grav vehicle at any time during its movement, and they are then placed in the hex at ground level. The dismounting infantry may be engaged by Opportunity Fire but the unit does not receive any terrain modifiers. Dismounting units engaged during the normal Combat Phase may be attacked per the normal rules. Infantry dismounting from a TTF or LAF vehicle onto a building hex can declare that they are landing in the top level of the building rather than outside of it.
Artillery
Artillery in the 69th century is grav mounted, capable of delivering accurate and devastating fire from distances of up to 100km. Effective use of assigned artillery support can give even greatly out-numbered forces victory.
General Artillery Rules
Artillery support is assigned as fire missions per turn in every scenario. Each assigned fire mission gives the player one artillery attack per turn. Artillery attacks are called in against a hex, not a vehicle or other unit. Artillery can be called in to attack any hex on the board, regardless of whether or not a friendly unit has a valid LOS to the target hex.
Each artillery attack takes one turn to arrive. Thus, during the End Phase of a turn, the player must record the target hex and type of round used (see Artillery Rounds). During the next turn's Combat Phase, the artillery attack on the hex is resolved.
If a friendly unit has a valid line-of-sight to the target hex on the turn that the artillery attack arrives, the hex is hit on a result of 9 or less. The round scatters on any other result. The observing unit cannot paint during the turn that the artillery lands. (It is using its painting lasers to mark the target hex, though the painting is automatic and not restricted by range.) An observer can only target one hex per turn. If there is no friendly unit spotting, the artillery attack will hit on a result of 6 or less. The attack scatters on any other result.
If an artillery attack misses its target hex, where it lands is determined on the Scatter Diagram.
Scattering. Artillery rounds that miss their targets are subject to scattering. Roll 1D10 to determine in which direction the round goes and consult the Scatter Diagram. A die result of 1–6 means that the round lands in the appropriately marked adjacent hex. If the result is 7–10, the round will travel one additional hex, which calls for a second roll to determine direction. A second 7–10 die result means that the round is another hex off in range. The player must roll again to see where it lands. The round will detonate in the hex where it lands, and will affect all units as normal.
Artillery Rounds
Artillery can fire a variety of munitions. When an artillery attack is plotted, the player should also determine the type of round to be used. Note that some of the rounds affect both the target hex and the six adjacent hexes, while others require a special modification to the General Artillery Rules.
HAFE-I Rounds. The HyperVelocity Airburst Flechette Explosive—Improved (HAFE-I) round is designed to explode into thousands of small flechettes, saturating the surrounding area with deadly, high-speed fragments. Because the flechettes are too large to be stopped by shields, the shields do not reduce damage to vehicles.
The HAFE-I affects both the target hex and the six adjacent hexes. Woods are reduced to rubble. All vehicles in the affected hexes take 10 points of damage on every facing, including the turret, except the bottom. The damage moves straight across the rows, left to right until all 10 points are used. Buildings take 10 points of damage on each level. All dismounted infantry squads in the hexes take damage per the Dismounted Infantry Casualty rules. If a hex is rubbled, all unoccupied craters in the hex are removed. Because combat is simultaneous, a woods hex reduced to rubble by HAFE-I rounds will still block line-of-sight until the end of the turn.
ADM Rounds. Artillery Dispensed Mines are fired to a target hex, per the General Artillery Rules. They do no damage when they hit, but scatter land/grav mines that will affect vehicles and dismounted personnel. The target hex is considered to be covered with mines. All general rules for artillery rounds apply. See Mines for further details. There are no advantages for overlapping minefields.
AMA Rounds. Anti-Mine Artillery (AMA) rounds may be fired into a target hex, per the General Artillery Rules. They send out a strong gravitic pulse that detonates all the mines in one hex. All General Artillery Rules apply. See Mines for further details.
HELL Rounds. The most deadly artillery round in use is the HELL round. When a HELL round goes off, it releases enough gravitic energy to cause an uncontrolled fusion reaction. This type of round is very clean, leaving little tactically significant radiation, but it does turn the topsoil to glass. It will also turn any type of terrain to clear terrain, and will literally melt the armor off vehicles. All General Artillery Rules apply.
If a vehicle is in the hex where a HELL round explodes, several plagues will befall it. First, the vehicle is automatically grounded at its current velocity, causing damage to the bottom. Second, all armor facings, except the bottom, take 100 points of damage, minus the shield rating. Thus, if the front of a tank has a Shield Rating of 70, and a HELL round goes off in its hex, the tank will take 30 points of damage on the Front (100 − 70 = 30). A similar calculation is made for the Left, Right, Turret (using the front shields), and Stern Facings. Damage is applied in the same manner as Grounding Damage.
All dismounted infantry squads are destroyed in the target hex, as are all unshielded buildings and trees. There is no rubble. Unoccupied craters are removed from the target hex. The gravitic aftershock of the HELL round affects all grav vehicles in the adjacent hexes. All such vehicles must make a die roll of 5 or less to avoid immediate grounding at their current velocity. Tree hexes adjacent to the blast hex are reduced to rubble. Because combat is simultaneous, a woods or building hex that is reduced to rubble by HELL rounds will still block LOS until the end of the turn.
Shielded buildings take damage from HELL rounds differently. The amount of damage that gets through the shield is calculated as for vehicles. Damage is marked off in rows, starting at the top of the building and working down, left to right. Infantry squads inside the building are destroyed by any damage reaching the last five boxes of the level that they occupy. If multiple HELL rounds land in the same hex, their effects are resolved separately. HELL round damage takes effect no matter what the vehicle's flight mode.
Smoke Rounds. An artillery attack can be used to lay a column of smoke three hexes long and one hex wide, centered on the target hex in any orientation the attacker chooses. These rounds are fired in the End Phase section of the turn. Use all the normal Smoke rules and General Artillery Rules.
Crater Rounds. Artillery may also be used to create blast craters in the ground to give vehicles and infantry some form of protection. A Crater round landing in a hex digs a crater in the same manner as a digging charge, providing hull-down protection for vehicles and infantry. A Crater round uses all the General Artillery Rules.
GLAD Round. The Guided by Laser, Artillery-Delivered round (GLAD) requires a painted target during the turn of the attack. All other General Artillery Rules apply, except that a missed round does not scatter. On the turn the GLAD round arrives, the painter must have successfully painted a vehicle in the target hex or in any of the adjacent hexes. If there is no painted target, the GLAD round will attack any unpainted vehicle in the target hex, at the attacker's choice.
GLAD attacks are handled as normal missile attacks. The Base To-Hit Number is 9, modified normally for terrain, shields, and painting. If the GLAD misses, it hits the ground with no damage. When a GLAD hits a vehicle, it will most often hit the stern or the turret since it is making a top-down attack. See the GLAD Hit Location Table.
GLAD Hit Location Table
| Die Roll | Effect |
|---|---|
| 1–3 | Turret Hit |
| 4–10 | Stern Hit |
The damage from GLAD is the same as from a 150mm HEAP round. GLAD rounds cannot be used against infantry.
On-Board Artillery Fire
Artillery is always located offboard. When playing breakthrough scenarios, however, it is possible for an artillery unit to find itself overrun and on the defensive. Artillery weapons are normally variations on the gravitic cannon (GPA or GPE). The gravitic cannon uses phased gravity pulses to accelerate its projectiles along the length of its barrel. Thus, the cannon launches its munitions at very precise speeds and trajectories, making its indirect fire accurate and fast. The system is incapable of launching indirect fire at a range of less than four kilometers, however.
Treat all GPA or GPE weapon attacks against targets at a Range of 20 hexes or less as a normal artillery attack, with a Base To-Hit Number of 7. The GPA/E cannot be fired indirectly at any target at a Range of 20 hexes or less. These targets must be fired on directly from a valid LOS. All GPA/E attacks hit in the turn that they are fired. The GPA/E may use any artillery round for its direct fire attacks except HELL rounds, which have a safety interlock that prevents their being armed within one kilometer of the firing unit. HELL rounds may only be used against targets at a Range of 6 or more. Except where noted above, use all other General Artillery Rules, including Scattering. On-board artillery may not use Opportunity Fire.
Combat Engineering Vehicles
Armies have deployed engineering vehicles for millennia to facilitate the advance of combat troops. These vehicles serve to clear obstacles that hamper the movement of friendly troops, open pathways through minefields, and create fortified positions. Even with the introduction of grav vehicles, specialized combat engineering vehicles still play an important role in a Legion's success.
Engineering vehicles are standard grav vehicles with some of their offensive weaponry replaced by specialized engineering equipment. If a vehicle has an engineering attachment, it is considered to be an engineering vehicle and may perform any or all of the following activities, in addition to its normal movement and combat.
Clearing Trees
An engineering attachment normally includes a planar laser. The planar laser consists of two projectors that create a continuous sheet of coherent light in a gap between them. The sheet is capable of cutting through most trees. The player may turn the planar laser on and off as desired during the engineering vehicle's movement.
The vehicle pays normal VP for moving through terrain, but if the engineering vehicle is operating at NF, it will cut a path through any woods hex through which it travels. No path is cut if the vehicle does not leave the hex, however. The player should place a path counter down on the woods hex to indicate this. The path is aligned to face the same direction that the engineering vehicle took through the hex. For the remainder of the game, grav vehicles may treat the cleared woods hex as though it had a road through it. All other vehicles and dismounted infantry treat the hex as a normal heavy or light woods hex.
For example, an engineering vehicle is at NF, its planar laser is on, and it moves through three light woods hexes and stops in a fourth. The three hexes through which the vehicle has moved are considered to have a path cut through them. The fourth hex does not, and will not, until the engineering vehicle moves out of the hex. Path counters are laid on the map, and aligned with the vehicle's direction of travel.
Clearing Minefields
Minefields may be cleared only by engineering vehicles traveling at NF. The engineering attachment sends out a combination of gravitic and magnetic pulses that detonate the mines harmlessly to create a safe pathway through the minefield. Some of the mines in the field are set to detonate after a delay of a few seconds, however, in order to knock out any engineering vehicles attempting to clear the field.
When an engineering vehicle enters a mine hex, hidden or otherwise, at NF, the player rolls the die. On a result of 9 or less, he succeeds in clearing a pathway through it. A path counter is laid down and aligned to the vehicle's direction of travel, just as in cutting a pathway through trees. The pathway is not laid down until the vehicle moves through the hex, however. If the vehicle ends its movement in a mine hex, the roll to clear a pathway is made, and any minefield attacks are resolved. It is only after the vehicle moves out of the minefield that the path counter is placed down. If the player had rolled a 10, the engineering vehicle would be attacked by a mine as normal.
Any unit that moves along a cleared pathway will not be attacked by the hex's mines. Any unit that does NOT travel along the path is subject to normal minefield attacks.
Digging Charges
Vehicles with an engineering attachment are equipped with double the number of cratering charges (eight instead of four). The charges are used with digging cannons in the usual manner. To keep track of the extra charges, players may use the Infantry TVLG Missile boxes on the record sheet. The engineering attachment is treated as a normal weapons system, except that it must be mounted in the hull and it takes up one space in Hull 1 and one space in Hull 2.
Defense Installations
Ground-based defensive installations are static turrets mounting ground weapons to protect some planetary facility. They are normally one part of a massive space defense system used to provide strategic targets such as cities and industrial centers with a defense against orbital bombardment. Such defense systems consist of multiple HELL missile launchers, bays of laser arrays for use against orbital ships, shield generators that cover the target area, and static defense installations. These systems normally make the city or industrial center proof against attack from space, and attacks by ground troops difficult. To destroy such a complex usually takes a combined effort by space and ground forces.
Below are rules to use installations both in Centurion and Interceptor.
Installation Type
Four typical defensive installations are described below. For Centurion/Interceptor purposes only the point/ground defense weapon systems are described. A typical ground-based space defense system would have multiple numbers of these installations and would also control massive arrays of lasers for use against orbiting capital ships. These laser arrays, or bays, are incapable of engaging ground forces and so are disregarded.
An installation takes up one hex, and is treated as a building for movement and line-of-sight purposes. Its shield generator creates a shield over its own hex and the adjacent hexes. The installation's point defense weapons are mounted in a turret elevated on a pylon sufficiently high to be twenty meters taller than the terrain in the surrounding hex. At least three infantry squads are assigned to any installation. The following table shows some of the most common installations used in this game.
Installation Table
| Type | Turret Weapons | Missile Launchers | Shield* |
|---|---|---|---|
| 1 | Two 7.5/6 Lasers, 200mm Gauss Cannon | 1 | 100 |
| 2 | Two 200mm Gauss Cannons, 7.5/6 Laser | 2 | 100 |
| 3 | Two 200mm Gauss Cannons, Vulcan-3 | 3 | 100 |
| 4 | Vulcan-4, Two 200mm Gauss Cannons | 4 | 100 |
*Interceptor players may use variable shields instead.
The typical installation has 1,600 Power Points available to it. Installation shields require seven times the normal power.
Installation Record Sheet
The defensive installation building has an Armor Factor of 40 and is topped by a turret with 100 Armor Points. The Defensive Installation Record Sheet is essentially a building record sheet combined with the turret section of the vehicle record sheet. The player should fill out a record sheet for each installation in the normal way. The height of the installation is one level higher than the height of the surrounding hexes.
Movement
Installations may not be moved nor change facing during the game. For all movement purposes, ground units should treat the installation as a building.
Combat
Except where noted, all rules governing Combat also apply to installations.
Firing Arcs. An installation's weapons are mounted in a turret. When engaging ground targets, the turret has the same firing arc as a vehicle turret. The weapons mounted in the turret may only fire at one target per turn. When engaging targets on the Interceptor map, use the firing arc shown in the game's diagrams. An installation's turreted Gauss cannons may not fire into the Interceptor map. Laser weapons may only fire at targets in the atmosphere or the atmosphere/space interface. HELL missiles may be used against targets in the atmosphere, in the interface, or in space, as long as the target is in the installation's firing arc.
Shields. The shields of a defensive installation protect the buildings both in the installation's hex and in the adjacent hexes. Rather than projecting a hemispherical bubble (a technological impossibility because of the scale), the installation generators are connected to individual shield projectors on each building. Thus, the streets and alleyways are normally unprotected. When firing at a building hex protected by a defensive installation's shield, the to-hit number is modified by the defensive installation's shield factor. Vehicles and dismounted infantry not inside the building do not get this advantage. They do receive the terrain modifier for being in a building hex, however.
Damage. The hit location of any successful attack against a defensive installation is resolved in the same manner as for a building. However, any hits that strike the upper level hit the turret. Damage to the installation's lower levels is also resolved per the Building rules. Hits to the turret are resolved as normal turret hits. Destruction of any of the levels results in destruction of the turret but not of the shield generators or the missile launchers. The shield generators and missile launchers are only destroyed when the bottom level is destroyed.
If an enemy infantry squad occupies the bottom level of the installation and there is no friendly squad present on that level, the shield generators and missile launchers may be destroyed. If the squad spends one turn without moving or firing, the installation's missile launchers are destroyed. In the next turn when they do not move or fire and still occupy the bottom floor, the installation's shield generators are destroyed.
Turret Internal Component Damage and Effects
If the installation's turret armor is penetrated, its internal components may be damaged. Internal component damage is recorded and resolved as normal.
Ballistic Protection. Ballistic protection represents the inherent survivability of the turret's internal components, due to hardening, duplication of circuitry, and the ruggedness of the system itself. Hits against areas with ballistic protection have no effect on the performance of the installation. For all purposes except widowing, treat the Ballistic Protection boxes as Armor.
Communications System (Comm). The installation's communications gear is damaged, which prevents the commander from talking to other installation commanders or friendly ground units. In team play, this installation's player cannot talk to teammates. The installation may not engage in indirect fire, paint targets, call for artillery fire, or receive any benefit for firing at a painted target. (The exception is that he may fire at a painted target that he himself has painted.)
Targeting Control Systems (Targ). The installation's targeting computers, weapon control linkages, weapon stabilization controls, and other systems have been hit. For each box blanked out in the Targeting Control System, the installation applies a −1 modifier to the base to-hit number for any weapons attacks that it makes. Record this modifier in the Fire Mods box on the record sheet.
Gunner Hit (Gunner). The gunner suffers damage and must make a Consciousness Roll. The Base To-Hit Number to regain consciousness is 8. There is a −1 modifier to this base number for each box blanked out in the Gunner section. Use the total number of blanked-out boxes, not just those marked off this turn. A roll greater than the modified base number means that the gunner remains unconscious. Remember that a 1 is an automatic success and a 10 is an automatic failure. When all the boxes are blanked out, the gunner is dead. If the installation's gunner and commander are both unconscious, the installation may fire no weapons for the rest of the game. The gunner may recover consciousness as normal.
Turret Weapons Hit (Turret Wpns). All the weapons located in the installation's turret are knocked out for the rest of the game. The installation may not paint any target for the remainder of the game.
Commander Hit (Cmdr). The commander suffers damage and must make a Consciousness Roll as described in the Gunner Hit rule above. An installation whose commander is dead or unconscious cannot fire indirectly, paint targets, or call for artillery fire. If the installation's gunner and commander are both unconscious, the installation may fire no weapons for the rest of the game. The commander may recover consciousness as normal.
Turret Destroyed. All of the installation's major systems are rendered inoperative, except for the shield generators and the HELL missile launchers.
Installation Weapon Attacks
During the Centurion Combat Phase, the installation commander may decide to have the installation's turret engage ground targets or engage targets on the Interceptor mapsheet. Ground targets may be engaged normally, per Centurion line-of-sight and firing arc rules. Only one ground target may be engaged per turn. Attacks on targets on the Interceptor mapsheet are handled as normal Interceptor attacks by an orbital installation, with the ground installation being located in the battlefield hex on the planet's surface. Turreted weapons may only attack targets in the atmosphere or the interface.
Missile Launcher. A defensive installation's primary means of defending itself against bombardment by orbital kinetic energy weapons (Thors and large rocks) is to fire massive HELL missiles at the incoming object. Each missile launcher can launch one HELL missile at a target on the Interceptor map each turn. Use all the Interceptor missile rules except where noted. The player may attempt to lock a HELL missile onto any spacecraft, Thor round, or Thor satellite that is in the launcher's firing arc. A roll of 4 or less means that the HELL missile has effectively acquired its target. Because of the massive destructive power of these missiles, compared to the artillery-delivered variety, they cannot be used against ground targets.
HELL Missile. This massive weapon is essentially an artillery HELL round except that its effective blast radius is 7.5 kilometers rather than 100 meters. The missile has an Intelligence of 8 and a Thrust of 4. HELL missiles are moved after all other missiles, asteroids, and Thor javelins. When the missile enters the same hex as its target, it explodes. All of the target's armor facings take 100 points of damage, minus the shield rating.
For example, an Avenger has a Front Shield Rating of 50. When a HELL round goes off in its hex, the fighter will take 50 points of damage on the Front (100 − 50 = 50) and 60 points to the Left, Right, and Stern Facings (100 − 40 = 60). If more than one ship is in the target hex, all are attacked in the same manner. Any Thor javelins, missiles, or asteroids present in a hex with an exploding HELL missile are destroyed. A patrol craft hit by a HELL missile takes damage only to the hex that was struck. The patrol craft's other hex is not affected.
HELL missiles are not affected by any form of ECM. Safeguard and MDC-G systems may be used against the missile, however, and it may be targeted by normal weapon systems, per the Missile rules. A successful hit destroys the missile without detonating it. HELL missiles can be carried and used like normal missiles by fighters, installations, and two-hex ships.
Hidden Units
Given sufficient time, a vehicle or infantry squad can dig in and camouflage itself so that battlefield sensors cannot detect it, typically through energy-absorbing camouflage netting and by running on low power. The scenario indicates which units, if any, may start the game hidden.
Hidden units always start in craters, at a velocity of 0, and may or may not need to spend a digging charge depending on the scenario. Dismounted infantry inside a building may also start hidden. Note the hidden unit's location and facing on paper. The unit is placed on the map — along with its crater — as soon as it moves, changes facing, engages in combat, uses Opportunity Fire, or has an enemy unit enter its hex; once revealed it is subject to normal attacks. Infantry hiding inside a building lose their hidden status under the same conditions (moving, fighting, or an enemy entering their hex).
A hidden unit still declares actions normally during the Movement Phase; it just isn't placed on the map unless it actually moves. A hidden unit can still use Opportunity Fire once it has declared it during the Movement Phase.
Mines
Minefields can be delivered by artillery, per the Artillery rules, or set up before play if the scenario calls for it. Mines dropped by artillery are visible to all players immediately; mines placed before the scenario begins are recorded secretly by the defending player and stay hidden until an enemy unit enters the hex.
When an enemy vehicle enters a mined hex (in NF or TTF mode), its bottom armor is attacked with a Base To-Hit Number of 12, modified normally for shields but not for terrain. A hit automatically strikes the bottom section and applies TVLG damage. A minefield stays active until cleared by an engineering vehicle, an AMA round, or a HELL round.
Friendly vehicles and infantry pass through a friendly minefield safely, since the mines carry IFF receivers that don't trigger for friendly traffic. Any enemy dismounted infantry entering a minefield is attacked, with losses taken from the Infantry Damage Table.
Smoke
Smoke can be delivered by ballistic weapons, offboard artillery, mortars, and vehicle smoke grenades. It's opaque across the visual, thermal, and electromagnetic spectra, so it both blocks visibility and raises the odds of a crash for anyone driving through it too fast.
During the End Phase, players clear all Smoke counters left from the previous turn, and then new smoke rounds and grenades may be fired. Any artillery, mortar, or Gauss cannon that didn't fire during the Weapons Fire segment may fire a smoke round instead — though if other direct-fire weapons were used that turn, the smoke-firing weapon must target the same hex those other weapons hit. Any vehicle still carrying smoke grenades may also launch one.
Smoke fired from artillery, mortars, or ballistic weapons follows all normal LOS restrictions and to-hit rolls, with no terrain modifiers applying; a missed shot scatters per the normal Scattering rules. Once a mortar- or ballistic-fired smoke round lands, a Smoke counter goes down in that hex — multiple counters in one hex have no extra effect. Smoke grenades work differently: launched from a vehicle, they fill three hexes adjacent to the firing vehicle's own hex.
For movement, a smoke-covered hex halves the terrain's normal speed limit (round fractions up); this only affects grav vehicles in NF or TTF mode, not LAF, and has no effect on ground vehicles or dismounted infantry. For line-of-sight and combat, smoke behaves like heavy woods: it imposes a −2 To-Hit Modifier on vehicles inside it and blocks LOS through the hex. Because smoke only reaches twenty meters high, a vehicle at a higher elevation can fire over it without penalty, as though it were an ordinary woods hex. Firing a cratering charge in a smoke-filled hex immediately clears the smoke there.
Troop Quality
The experience and quality of a Century's troops matter just as much as the skill of its Centurion — even a poor commander can win if his elite Guards are up against planetary militia.
Most Centuries are Regular quality: seasoned enough to avoid losing through poor discipline, but not skilled enough to win purely on ability. A Century can instead be rated Elite or Green. Regular units follow the normal Combat rules without modification, while Elite and Green Centuries use a small adjustment: whenever an Elite unit scores a hit, its player may shift the hit column on the Armor Diagram up or down by 1 (e.g., a hit rolled in Column 4 can be moved to Column 3, 4, or 5); when a Green unit scores a hit, it's the defending player who gets that same up-or-down-by-1 shift. These shifts only apply to a Century's own organic ground forces — units attached from outside for a single battle use their parent Century's quality instead, and Interceptors never use this shift (their equivalent edge comes from Piloting and Gunnery Skill improvements).
Skill Improvement
Combat experience tends to sharpen a Century's troops over time, but heavy losses of veterans can just as easily blunt it. Replacements a Century receives are one quality grade below the Century's own (Elites get Regular replacements, Regulars get Green replacements); as long as the Century hasn't lost a majority of its personnel, these replacements are absorbed without dragging down the unit's overall skill.
In a campaign game, Centuries start at Regular and move up or down using the following benchmarks. Green rises to Regular after destroying nine enemy vehicles or full infantry squads (fractions don't count), with kills able to accumulate across more than one battle — once the promotion happens, the tally resets to 0. Regular falls to Green if the Century loses 50 percent or more of its total personnel (personnel being 3 × the number of vehicles, plus 8 × the number of infantry squads) in a single engagement. Regular rises to Elite after destroying 27 enemy vehicles or full infantry squads (again, cumulative across battles). Elite falls to Regular after losing 30 percent or more of total personnel in one engagement.
For example, in one battle a Green Century knocks out twelve enemy vehicles and four full infantry squads, but loses eight vehicle crew and twelve infantrymen — over 60 percent of its own strength. The kill count promotes it to Regular, but the casualty rate simultaneously demotes it back to Green; because it did advance, its kill tally still resets to 0 for its next battle. Had it lost only twelve personnel instead, it would have stayed at Regular.
Morale Checks
Most military units don't fight to the last man or vehicle — heavy losses can break a unit's morale and send it fleeing without orders. Whenever a vehicle takes damage to its internal structure (ballistic-protection hits don't count), its controlling player rolls 1D10 as a morale check against the crew's Morale Number (see the Troop Morale Table). Rolling higher than that number forces the vehicle to withdraw; if there's no current commander, treat the Leadership Rating as 0. As always, a 10 is always a failure. Dismounted infantry only start making morale checks after their third casualty, and a squad that withdraws may not later recombine with another squad.
Troop Morale Table
| Troop Quality | Morale Number |
|---|---|
| Elite | 9 + Commander's Leadership Rating |
| Regular | 6 + Commander's Leadership Rating |
| Green | 3 + Commander's Leadership Rating |
Withdrawal
A unit that fails its morale check begins withdrawing on the Movement Phase of the next turn — the current turn finishes normally. From then on, the withdrawing unit heads for friendly lines by the fastest safe route. Grav vehicles keep accelerating at Maximum Thrust up to a velocity of 20, and the player may choose to shift the vehicle to TTF or LAF. A withdrawing unit may still fire.
Thor Satellite System
A Thor satellite can be deployed by specialized patrol craft or ground launchers. Once in orbit, it can receive fire missions from ground commanders and responds by dropping depleted-uranium javelins that pick up enormous kinetic energy as they fall through the planet's gravity well. As they near the ground the javelins home in on radiation sources. A javelin strike punches a hole deep enough to destroy most vehicles; javelins do no damage to woods and cannot be used against dismounted infantry, but a building struck by one will most likely be destroyed. Because Thor systems are so destructive, they draw fire from any Interceptors in the area and often become the focus of orbital battles.
A Thor mission can typically only be called in during a limited window of the battle, depending on the scenario, and takes three turns to arrive. One fire mission consists of three javelins, each aimed at a different target. When the mission arrives, the player designates any three enemy vehicles or buildings as targets (dismounted infantry may not be targeted), and may assign more than one javelin to the same target if desired. Because the javelins carry independent targeting systems, friendly units don't need an LOS to the target either at launch or on arrival.
Once targets are chosen, the player rolls to hit each one, needing 6 or less. A javelin that misses scatters per the normal Scattering rules, but a javelin that scatters will not attack any vehicle in the hex where it lands — though a building there is automatically hit. Because javelins seek out radiation sources, resolve their hit location on the GLAD Hit Location Table. The damage template for a Thor javelin is a straight vertical column three blocks wide and fifteen blocks deep.
A withdrawing unit may only return fire at units that have targeted them with a painting attempt this turn or attacked them last turn. Withdrawing units cannot paint targets, spot for artillery, or fire missiles indirectly, and cannot mount or dismount infantry while withdrawing.
Orbital Fire Support
A ground Legion's worst nightmare is unmolested enemy capital ships raining fire down in support of enemy ground forces — losing local space superiority quickly puts a planetary commander on the road to defeat. A Century might be assigned one or more orbital fire support missions, of two general types: Thor satellite bombardment (covered above) and naval fire support from orbiting warships. Fuller detail on both can be found in the Interceptor Integration section, and Leviathan players should note that what follows here is a simplified version of Leviathan's own, more detailed fire-support rules.
Naval Fire Support
Orbiting capital ships can support a Centurion battle much like an artillery fire mission, but with far greater effect. The scenario specifies which ship class is available and the turn window in which it can fire. A naval fire mission is called in the same way as an artillery mission, but is normally only available for a short window of turns. Each ship class can make one of two kinds of attack — a laser bay strike or, where the scenario allows it, a missile attack — and the scenario specifies which ship classes and attack types are in play.
Laser Fire Support. A capital ship's main armament is bays of high-powered lasers, and each ship class is rated for the damage its bay does; most classes list multiple damage values, each usable as a separate fire-support attack. For example, a TOG Shiva battleship can make three separate naval fire attacks — two rated at 450 and one at 55.
A Century may be assigned a Naval Fire Control Officer, represented by an extra medium or light grav APC whose infantry compartment is filled with communications gear for calling down naval support. If that vehicle is destroyed, leaves the play area, has its infantry compartment or communications section damaged, or loses its commander to death or unconsciousness, the player loses the benefits described below.
Naval fire support is called for during the End Phase and can target any hex on the board; it can only be requested by the unit's Centurion or its Naval Fire Control Officer. A request from the Fire Control Officer lands during the Artillery Resolution segment of the very next turn; a request from the Centurion takes two turns. No line-of-sight is required to the target hex. When the mission resolves, roll to hit: a Fire Control Officer request needs 9 or less, a Centurion's request needs 6 or less. A hit resolves damage as described below; a miss scatters per the normal Scattering rules.
A laser bay barrage bathes the target area in coherent light, superheating the air into a firestorm — its effect resembles a HELL round hitting both the target hex and its neighbors equally, but without any gravitic component. The strike automatically destroys dismounted infantry and vehicle crews, unshielded buildings and anyone inside them, minefields, trees, and unoccupied craters in the affected hexes. Shielded vehicles, installations, and buildings instead take damage per the HELL round rules — using the mission's damage rating from the Naval Fire Support Damage Table — applied to every facing except the bottom. Because there's no gravitic effect, a moving vehicle caught in the blast does not need to ground the way it would in an actual HELL strike.
Naval Fire Support Damage Table
| Ship Class | Laser Bay Damage | Missile Class | Missile Number |
|---|---|---|---|
| Commonwealth DD Exeter | 90/90 | C | 1 |
| Commonwealth DD Ajax | 90/70 | B | 1 |
| Commonwealth FG Valiant | 250/190 | G | 1 |
| Commonwealth CA Carthage | 460/80 | A | 2 |
| Commonwealth BB Repulse | 300/300/290 | E | 3 |
| TOG DD Serpens | 90/90 | G | 3 |
| TOG DD Fulgur | 140/10 | A | 2 |
| TOG FG Bantha | 100/60 | — | 1 |
| TOG CA Syracuse | 560/60 | G | 3 |
| TOG BB Shiva | 450/450/55 | F | 3 |
Missile Barrages. Ships may also fire missiles in support of ground troops or against a known target location. Because of the devastation this can cause, the authority to launch a missile barrage is normally reserved above field-officer level — having a ship with missile capability assigned for fire support does not automatically grant access to its missiles, and unless the scenario says otherwise a player cannot call for missile fire support at all. (Fighters' HELL missiles are a separate matter and cannot be used this way.)
Where allowed, a missile barrage is called for the same way as artillery or naval fire support. Each ship is rated for the missile type it carries and how many salvos it can fire. A barrage called by a Naval Fire Control Officer lands two turns later, during the Artillery Resolution segment, needing a 9 or less to hit; one called by a Centurion lands three turns later, needing a 6 or less. A missed barrage scatters normally.
A missile barrage's effect spreads across multiple hexes depending on the missile's strength — compare the missile's normal damage rating to the table below. Any Centurion units in the impact hex or within the Destroyed Radius are eliminated outright. Units within the 100-Point Radius take damage as though a HELL round had gone off in their hex. Units within the Gravitic-Effect Radius are treated as though one hex away from a standard artillery HELL round. Effects on trees, buildings, and craters follow the same rules as an artillery HELL round.
Missile Barrage Damage Table
| Missile Type | Destroyed Radius | 100-Point Radius | Gravitic-Effect Radius |
|---|---|---|---|
| A, B, G | 3 | 4–6 | 7–8 |
| C, D, F | 6 | 7–8 | 9–10 |
| E | 12 | 13–18 | 19–24 |
More detailed rules for orbital ground support can be found in Leviathan.
Other Renegade Legion Systems
Three other Renegade Legion game systems are compatible with Centurion. Legionnaire, the Renegade Legion roleplaying game, can be used to personalize the soldiers crewing the grav tanks. Interceptor recreates the fighter battles for control of the air and space above the battlefield. Leviathan simulates capital-ship combat and can resolve the actions of invasion fleets. Leviathan and Legionnaire each have their own detailed integration rules; the rules for combining Interceptor with Centurion — and for running all three systems together — follow below.
Interceptor Integration
Interceptor games can be run alongside Centurion, with TOG and Renegade fighters providing ground support, attacking Thor satellites, or screening against a space-based attack.
Map Set-Up. Both the Centurion and Interceptor mapsheets are used together. Set up the Centurion mapsheets per the scenario as usual. On the Interceptor map, Hexrow 26xx represents the planet's surface, Hexrows 25xx through 21xx represent its atmosphere, and Hexrow 20xx represents the atmosphere/space interface; the bottom row of the adjoining map represents the start of the planet's gravity well. Hex 2608 is normally used as the location standing in for the Centurion mapsheet — fighters that end their movement there may attack targets on the Centurion board.
Turn Sequence. When combining the two games, follow this order: Centurion Initiative Phase (as normal); Centurion Movement Phase (as normal); Interceptor Initiative Phase (as normal); Interceptor Movement Phase (as normal, except that any Interceptor ending its movement to make a ground attack is placed on the Centurion board); Interceptor Combat Phase (as normal, except Interceptors making ground attacks cannot also attack atmosphere targets); Centurion Combat Phase (as normal, except that Interceptors attacking ground targets resolve those attacks at the start of the Resolve Weapons Fire segment, as described below); Centurion End Phase (as normal).
Movement. Fighters move under normal Interceptor rules, treating Centurion ground hexes as atmosphere hexes for movement purposes. A powerless, out-of-control fighter that ends up in a ground hex is assumed to have crashed and is destroyed, though the pilot escapes and remains in that hex if the ejection system still works.
A fighter ending its turn on the Centurion battlefield hex may make a strafing or dive-bombing attack. For that attack, treat the fighter as a grav vehicle operating at LAF; the attack resolves at the start of the Resolve Weapons Fire segment, with damage handled normally.
Landing or Launching Centurion Units. Specially modified patrol craft can carry Centurion vehicles — each fighter bay carries one vehicle at or under the bay's tonnage rating, provided the craft also has room for that vehicle's crew and any attached infantry. A patrol craft carrying ground units that ends its Movement Phase on the battlefield hex may either land and unload its cargo, or have its grav vehicles deploy directly at LAF (only grav vehicles can deploy this way — ground vehicles and infantry must wait for the craft to land).
A craft that lands is placed anywhere the player likes on the Centurion mapsheet; its vehicles may disembark during the next turn's Centurion Movement Phase, and during the following Interceptor Movement Phase the patrol craft returns to the Interceptor map's Battlefield hex — which means the craft is exposed to one full Combat Phase of Centurion fire while grounded. A grounded patrol craft counts as a normal NF ground target for both Centurion and Interceptor attackers; either of its two hexes may be targeted by ground units, though strafing or dive-bombing Interceptors may only target one hex of the ship. All Centurion combat rules apply to it, except that hit location and internal damage follow the Interceptor rules instead. A grounded patrol craft may fire all its weapons except missiles, NPCs, and EPCs under the normal Centurion rules, using the Interceptor rules for firing-arc restrictions. All patrol craft weapons have a maximum range of 20 hexes, and their damage equals the Range-1 damage value from Interceptor.
If a patrol craft instead drops its vehicles without landing, they're placed anywhere on the Centurion map, in any facing, at LAF and a current velocity of 75. Dropped vehicles cannot fight during the turn they're released but can be fired upon normally, and they're subject to all normal LAF rules (remembering that a vehicle immediately becomes subject to terrain speed limits the moment it drops from LAF to a lower flight mode). After making its attack, the craft returns to the battlefield hex of the Interceptor map, heading either 1 or 4 at the player's choice, its velocity unaffected by the attack.
Combat
Depending on the situation, Interceptor-side ships can make several different kinds of attack against Centurion ground units.
Strafing. When a fighter or patrol craft ends its turn on the battlefield hex, it may declare a strafing run instead of any other action that turn, resolved during the Centurion Combat Phase. After all ground movement is complete, the fighter counter is placed anywhere on the map in any facing. It may be painted by any ground unit except infantry during the Painting segment, and may itself carry a hardpoint-mounted painting laser usable only against ground targets, which must fire before the strafing run begins.
Before ground weapons fire is resolved, the fighter makes its run: it flies straight ahead in its facing, attacking every target within one hex to either side — a strafing corridor three hexes wide — for a minimum of ten hexes (the attacker needn't reveal in advance exactly how long the run will be, only that it's at least ten hexes, and may run the fighter off the map edge entirely). Every ground unit in the corridor, friend or foe, must be engaged individually by the fighter's turret- and forward-mounted weapons, using each weapon's highest damage value; missiles, NPCs, and EPCs cannot be used while strafing, though a DFM cluster may be fired at one hex along the corridor. The Base To-Hit Number is 8, modified by the pilot's Gunnery Skill, the fighter's own condition, the target's terrain modifiers, and the target's shields if unpainted. Any vehicle, infantry unit, or building counts as a ground target; infantry sheltering inside a building are safe from the direct strafing fire (though the building itself can still be hit, and any unit hidden inside suffers the consequences per the Building rules — other hidden or concealed units are unaffected by a strafe).
For example, an Avenger ends its movement on the Interceptor battlefield hex and declares a strafing run. At the end of the Centurion Movement Phase it's placed on the map and begins moving, attacking as it goes; the defender doesn't know when the run will end, only that it must last at least ten hexes. After 15 hexes the Avenger pulls out, and any ground units that haven't yet fired get one last chance to do so. All the Avenger's lasers deal 7 points of damage and its MDCs deal 8 (its EPC cannot be used this way). A DFM fired during the run affects its target hex and the six adjacent hexes exactly like a HAFE-I artillery round.
Dive Bombing. Before a scenario begins, players may load ground-attack munitions onto their fighters' hardpoints instead of missiles or pods — for game purposes these act like artillery rounds. A hardpoint can carry one painting laser per ship, or a GLAD, HELL, ADM, smoke, or HAFE-I round.
A fighter ending its turn on the battlefield hex may declare a dive-bombing attack instead of any other action that turn, resolved during the Centurion Combat Phase. After ground movement finishes, the fighter is placed anywhere on the map in any facing, and the hex it occupies becomes the target hex; ground units may paint it during the Painting segment. Before ground weapons fire resolves, the fighter drops all or part of its ordnance on the target hex, rolling separately for each round. The Base To-Hit Number for any dive-bombed munition is 4, modified only by the pilot's Gunnery Skill (with a typical Gunnery of 4, the effective number is usually 8). Dive-bombed munitions scatter and damage exactly like their artillery equivalents, but — unlike artillery — resolve immediately with no one-turn delay.
After the attack, the fighter returns to the Interceptor battlefield hex with a heading of 1 or 4, the player's choice. An Interceptor that takes a hit to its anti-grav drive or atmospheric controls from ground fire is considered destroyed.
Attacks at LAF. In any scenario combining Interceptor and Centurion, fighters on the Interceptor board may engage tanks that are dropping from orbit or flying at LAF, using any normal weapon or ship-to-ship missile. Resolve the hit location from the appropriate table below.
Hit Locations While Dropping
| Die Roll | Hit Location |
|---|---|
| 1–3 | Bottom |
| 4–7 | Attacked Side (right, left, front, stern) |
| 8–10 | Turret |
Hit Locations at LAF
| Die Roll | Hit Location |
|---|---|
| 1–5 | Turret |
| 6–10 | Attacked Side (right, left, front, stern) |
A grav vehicle at LAF may only shoot back at a fighter on the Interceptor board if that fighter shares its Interceptor hex. Under that condition it may paint the fighter and engage with all its weapons (subject to the usual five-weapons-per-gunner limit), using a Base To-Hit Number of 7.
Return Fire. A fighter or patrol craft making a ground attack is exposed to fire from every ground unit except dismounted infantry. A unit that fires on a fighter cannot engage any other target for the rest of the Combat Phase, and internal damage from that return fire only takes effect at the end of the Combat Phase. For LOS purposes, fighters count as grav units at LAF: any enemy weapon in range may engage them, they can be painted, and they lose their shield factors against any attack that hits them.
Range for a dive-bombing attack is measured from the target hex to the firing unit, and the fighter's facing determines whether return fire strikes its front, sides, or stern. The base to-hit number against a dive-bomber is modified per the Centurion Shield rules and the Interceptor rules for Angle of Attack and Hit Location; the unit standing in the target hex is assumed to be firing at the fighter's front, at a −1 modifier.
Return fire against a strafing fighter works much like Opportunity Fire: as the fighter moves along its run, the defender may declare fire from any unit in range at any point, and once the attacker calls an end to the strafe, the defender gets one last chance to fire with anything that hasn't yet shot. All painting must happen before the strafing run begins. Range for a strafing attack is the distance between the fighter's current position and the firing unit, and that current position determines whether return fire hits front, side, or stern; the to-hit number is modified per the Centurion Shield rules and the Interceptor Angle of Attack rules, with Hit Location resolved per the Interceptor rules. A defender sitting well inside the strafe corridor gains an edge by holding fire until the fighter has passed overhead, allowing a shot at the fighter's rear with an Angle of Attack modifier of 0.
Stand-Off Attacks. Rather than flying into the Centurion hex to engage TTF or NF targets directly, an Interceptor can stay in the atmosphere and fire SSS missiles at painted enemy targets. This requires the target to be painted both in the turn the missile is fired and again in the turn it actually enters the Centurion hex — if it isn't painted at that second moment, the missile simply misses. A missile fired this way travels normally until it reaches the Centurion hex; if its original target is painted that turn, it makes its attack during the Offboard Artillery resolution segment of the Combat Phase. Damage location resolves like a GLAD round striking the target's top, using the GLAD Hit Location Table and the SSS damage profile, and the missile can still be intercepted by a Vulcan system under the normal missile rules. DFM and TGM missiles cannot be used this way.
Attacking Fighters from the Centurion Board
Defense installations and specialized air-defense grav vehicles can engage fighters and other craft that aren't directly attacking the Centurion board, resolving such attacks with the Interceptor rules. Unless a scenario says otherwise, use a Gunnery Skill of 4 for installation and air-defense gunners.
During the Interceptor Combat Phase, a defense installation or an air-defense-equipped grav vehicle may launch HELL or SSS missiles at any fighter within its firing arc, following the Interceptor missile rules. Each launch attempt needs a Lock-On Roll of 4 or less, and each installation or vehicle can attempt at most five missile launches per turn. A successful launch places a counter on the Centurion hex of the Interceptor map; the following turn the missile accelerates and pursues its target normally under the Interceptor rules, though its acceleration rating carries a −1 modifier until it climbs clear of the planet's gravity well.
Lasers can also engage fighters from the Centurion mapsheet, but only against targets in the atmosphere or at the atmospheric interface, firing during the Interceptor Combat Phase and resolved exactly like normal Interceptor combat, including range and damage attenuation for the laser class involved. Ballistic weapons, including TVLG and SMLM, cannot engage targets on the Interceptor map. An air-defense vehicle that engages a fighter that turn cannot also fire at Centurion-mapsheet targets, and a defensive installation that fires its turreted lasers at the Interceptor map cannot fire any turreted weapon at the Centurion map that same turn.
Thor Satellites
Rather than arbitrarily assuming that one side or the other has an operable Thor satellite system, players may instead place the satellite on the Interceptor mapsheet, exposing it to attack from both Interceptors and ground-based systems.
Thor Record Sheet. Damage against the Thor system resolves as normal fighter damage; the effects of specific internal-component hits are:
| Component Hit | Effect |
|---|---|
| Computer Transponder | Per Interceptor rules |
| Long Range Sensors | −1 To-Hit Modifier for all Thor attacks |
| Scanner Systems | −1 To-Hit Modifier for all Thor attacks |
| Main Weapons Control | Per Interceptor rules |
| Auxiliary Weapons Controls | Per Interceptor rules |
| Comm System | No Thor missions may be launched next turn |
| Target Locking Circuits | −1 To-Hit Modifier for all Thor attacks |
| Target Tracking Circuits | −1 To-Hit Modifier for all Thor attacks |
| Range-Finder Circuits | −1 To-Hit Modifier for all Thor attacks |
| Weapon Short | Per Interceptor rules |
| Massive Weapon Short | Per Interceptor rules |
| Weapon Destroyed | Per Interceptor rules |
| Fire Computer | −1 To-Hit Modifier for all Thor attacks |
| OC Short | Orbital controls short out for one turn; satellite drops one hex closer to the planet |
| OC 1/4, 1/2, 3/4 | Orbital control hit; no effect until OC destroyed |
| OC Destroyed | Orbital controls no longer function; satellite drops one hex closer to the planet every turn |
| Engineering Plant Hit 1/4, 1/2, 3/4 | Power plant hit; no effect until plant destroyed |
| Plant Destroyed | Satellite is destroyed as the plant explodes |
| Power Coupling Hit | Same effect as OC Short |
| Shield Short | Per Interceptor rules |
| Shield Destroyed | Per Interceptor rules |
| Shield Power Converter | Per Interceptor rules |
| Superstructure | Per Interceptor rules |
Satellite Movement. The Thor satellite operates in low orbit. It normally enters the Interceptor map at Map 2, Hex 1901, heading 4, at velocity 2, moving right to left just above the atmospheric interface — though the controlling player may instead place it anywhere along the xx01 column of Map 2, at any velocity, still heading 4. Unless it takes damage, its heading and velocity never change. The satellite moves after all fighters have finished moving, but before missiles move.
As long as its orbital controls and power plant are intact, planetary gravity has no effect on it. If either system is only temporarily shorted out, the satellite drops one hexrow toward the planet while keeping its heading and velocity — so a satellite at Hex 1803 whose orbital controls short out moves to Hex 1903 rather than 1804 next turn. If either system is destroyed outright, the satellite falls under normal gravity until it hits the atmospheric interface and is destroyed.
Thor Combat. The Thor satellite counts as a normal fighter target for combat purposes, its bow always pointed along its heading; damage and the effects of internal-component hits are resolved as above, with any Destroyed or Shorted weapon result applied to a non-depleted javelin hardpoint or to the ECM pod.
The satellite has ten hardpoints — nine each carrying a cluster of three Thor javelins (one full fire mission), and a tenth carrying an ECM pod. Only one cluster may be launched per turn, and once all nine are spent the satellite can no longer fly Thor missions. Clusters launch during the Missile Fire Phase, only against ground targets, and need no lock-on roll — the satellite need only have the target within its firing arc.
Once launched, a cluster is placed one hexrow below the satellite at velocity 1. On its second turn its velocity becomes 2 and it must close two hexes toward the battlefield hex while staying inside the firing arc; on turn three it moves three hexes, turn four four hexes, and so on — like a missile, always taking the shortest path to its target. The cluster's attack on the ground resolves the turn it actually enters the battlefield hex (in the standard setup, with the satellite starting on the 19xx row, that means the attack lands three turns after launch). The attack itself resolves normally, except that any targeting or sensor damage present on the satellite at the moment of launch lowers the to-hit number for every javelin in that cluster — for instance, target-locking circuits being out at launch means each javelin needs a 5 to hit instead of a 6.
Integrating Interceptor, Leviathan, and Centurion
It's possible to combine all three Renegade Legion board games into one game, though not simply — an Interceptor hex is one-fifth the width of a Leviathan hex and 75 times the width of a Centurion hex. Roughly, 25 Interceptor hexes correspond to one Leviathan hex, and two Centurion maps correspond to one Interceptor hex. Leviathan turns also run five minutes each, versus one minute for Interceptor and Centurion turns.
In general, movement and combat follow each game's own printed rules; only the exceptions are noted here.
Turn Sequence
For an integrated Leviathan/Interceptor/Centurion scenario: (A) Leviathan Initiative Phase; (B) Leviathan Movement Phase; (C) Spotting Phase; (D) five full Centurion/Interceptor turns, each consisting of (1) Centurion Initiative Phase, (2) Centurion Movement Phase, (3) Interceptor Initiative Phase, (4) Interceptor Movement Phase, (5) Interceptor Combat Phase, (6) Centurion Combat Phase, (7) Centurion End Phase; (E) Leviathan Launch and Recovery Phase; (F) Leviathan Combat Phase.
Boards
The three boards overlap as shown in the game's diagrams. As usual on the Leviathan board, Hex Row 01xx is the ground, Row 02xx the atmosphere, and Row 03xx the atmospheric interface. The Interceptor board overlaps the bottom center of the Leviathan board, between Leviathan Hexes 0612 (Map 1) and 0603 (Map 2) and below; on the Interceptor board, Row 01xx is the ground, Rows 02xx–06xx the atmosphere, and Row 07xx the atmospheric interface. On both the Leviathan and Interceptor boards, the Centurion board sits at Hex 0114.
Launching Fighters
All Interceptors start the scenario aboard their capital ships. To deploy them, a player launches a squadron-size (or larger) unit of Interceptors from a capital ship during the Leviathan Launch and Recovery Phase, placing the corresponding Leviathan fighter counter in whatever hex the ship currently occupies. A ship may launch any or all of its fighters in one turn. A newly launched counter cannot move or attack until the following turn (though it can be attacked), after which it moves normally during the Leviathan Movement Phase.
Moving Between Leviathan and Interceptor Boards
If a fighter counter ends its Leviathan movement in a hex that corresponds to the Interceptor board, its fighters may cross over and begin acting in Interceptor phases. For example, a counter ending the Leviathan Movement Phase at Hex 0603 on Leviathan Map 2 may move to any of Hexes 2212–2214, 2311–2314, 2412–2414, 2511–2514, or 2612–2614 on Interceptor Map 2. Place one Interceptor counter on the Interceptor board for every six fighters in the Leviathan unit (the Interceptor board only shows a slice of the wider three-dimensional battle — the rest of the unit is understood to be fighting elsewhere).
For example, a squadron of six Gladius fighters crossing over places a single Gladius Interceptor counter on one of the corresponding hexes. If a unit contains more than one fighter type, randomly determine which type appears. If a damaged squadron crosses over, roll 1D10: on 1–5 one fighter appears on the Interceptor board, on 6–10 all its survivors are assumed to be engaged elsewhere. For a damaged flight or group, instead divide its remaining Armor boxes by 6 (round up) to get the number of fighters that appear, keeping track of which Leviathan unit each one belongs to.
If a fighter leaves the Interceptor board without returning to the Leviathan board, or is destroyed there, mark off 6 Armor boxes on its Leviathan record sheet; a fighter that does make it back to the Leviathan board keeps its Leviathan record sheet unchanged, however damaged it looks on the Interceptor side. Only fighters move between the Leviathan and Interceptor boards, and units on one board cannot fire at units on the other (though either can interact with the Centurion board, per the integration rules in the Leviathan and Centurion rulebooks). A move from Leviathan to Interceptor is announced at the end of the Leviathan Movement Phase; a move back is announced at the end of the Interceptor Movement Phase.
Fighter Ground Missions
A Leviathan fighter unit can be designated for ground support, in which case its entire Missile Attack Factor drops to 0 and its hardpoints are loaded with ground-attack munitions instead. A unit assigned to ground attack must cross from the Leviathan board to the Interceptor board as above, and then on to the hex representing the Centurion board. Before play begins, a player fielding a ground-support unit must decide what type of ordnance it carries, with no more than 10 percent of the total ground-attack ordnance carried by fighters allowed to be HELL rounds.
Scenario Design
Designing a balanced scenario is genuinely difficult. Giving both sides identical forces is one way to guarantee fairness, but it costs the game some of its flavor. Players who want to build their own scenarios can use the point-based method below.
First, decide who plays TOG and who plays the Commonwealth/Renegade side, and lay out the mapsheets by mutual agreement. Designate one map (or a specific feature, such as a city or hilltop) as the objective, then agree on the game's length, the criteria for taking the objective, and which side of the map each force starts on. If desired, one player may set up on the map while the other enters from a chosen edge; only one player may start his forces already on the map. Both sides should receive the same number of Scenario Points (150 to 300 per side is suggested) to spend building their forces — a player need not spend every point. The cost of each type of unit is given in the Scenario Points Table.
Scenario Points Table
| Item | Scenario Point Cost |
|---|---|
| Vehicle | Cost / 100,000 (round fractions up) |
| Bounce Infantry Squad | 2 |
| Offboard Artillery | 30 per fire mission |
| Thor Mission | 10 per turn available |
| Naval Fire Support | Damage Factor per fire mission per turn |
| Setting Up On Objective* | 75 |
| Hidden Minefields* | 10 |
| Craters Starting on Map* | 5 |
| Defensive Installations (any type)* | 100 |
| Fighters | 2 × (Cost / 100,000) |
*Only one player per unit/feature.
A vehicle counts as destroyed only once it suffers an ammunition explosion or takes a Vehicle Destroyed hit in its Internal Systems Diagram; a dismounted infantry squad counts as destroyed once it has taken five or more casualties.
Victory Levels
Victory Levels are found by dividing the higher score by the lower score and consulting the Victory Table.
Victory Table
| Ratio | High-Scoring Player | Low-Scoring Player |
|---|---|---|
| 3+ | Decisive Victory | Decisive Defeat |
| 2–2.99 | Substantial Victory | Substantial Defeat |
| 1.5–1.99 | Marginal Victory | Marginal Defeat |
| 1.49 or less | Draw | Draw |
Vehicle Construction
The grav vehicles described in this game are the most common ground combat vehicles fielded by the TOG and Commonwealth Legions; future supplements will describe other models. Players who want to design their own vehicles can use the construction rules below.
Designing a vehicle can get complicated, since its overall performance hinges on total mass — a change to one component can force adjustments elsewhere to keep the design combat-effective. To design a vehicle, a player needs a construction worksheet, the various component tables, a blank Vehicle Record Sheet, and a pencil. Follow these steps in order:
- Choose Power Rating
- Choose Shields
- Choose Armor
- Choose and Allocate Weapons
- Add Crew, Targeting, and Infantry Components
- Add Digging Cannons
- Add Grav Drive
- Calculate Thrust
- Fill Out Vehicle Record Sheet
A running worked example follows each step below, designing a fairly well-protected, heavily armed medium grav tank willing to trade away some thrust for it.
Choose Power Rating
Grav vehicles use engines rated at 2,500 power or less; the total power drawn by all of a vehicle's systems can never exceed this rating. Only one engine is allowed per vehicle. Power not spent on weapons, shields, and other systems becomes thrust — the heavier the vehicle, the more power it takes to move it. A grav vehicle may have unlimited mass, but a ground vehicle is capped at 100 mass; ground vehicle engines weigh five times as much as a grav engine of the same rating but cost only 10 percent of the listed price.
Example: The player picks a 1,500-rated power plant for his vehicle, noting the engine's mass and cost on the construction worksheet.
Engine Table
| Rating | Mass | Cost |
|---|---|---|
| 50 | 1 | 25,000 |
| 100 | 1 | 50,000 |
| 150 | 1 | 75,000 |
| 200 | 1 | 100,000 |
| 250 | 1 | 125,000 |
| 300 | 1 | 150,000 |
| 350 | 1 | 175,000 |
| 400 | 1 | 200,000 |
| 450 | 1 | 225,000 |
| 500 | 2 | 250,000 |
| 550 | 3 | 275,000 |
| 600 | 4 | 300,000 |
| 650 | 5 | 325,000 |
| 700 | 6 | 350,000 |
| 750 | 7 | 375,000 |
| 800 | 8 | 400,000 |
| 850 | 9 | 425,000 |
| 900 | 10 | 450,000 |
| 950 | 11 | 475,000 |
| 1000 | 12 | 500,000 |
| 1050 | 13 | 525,000 |
| 1100 | 14 | 550,000 |
| 1150 | 15 | 575,000 |
| 1200 | 16 | 600,000 |
| 1250 | 18 | 625,000 |
| 1300 | 20 | 650,000 |
| 1350 | 22 | 675,000 |
| 1400 | 24 | 700,000 |
| 1450 | 26 | 725,000 |
| 1500 | 28 | 750,000 |
| 1550 | 30 | 775,000 |
| 1600 | 32 | 800,000 |
| 1650 | 34 | 825,000 |
| 1700 | 36 | 850,000 |
Choose Shields
Grav vehicles mount shields on the front, right, left, and stern; a separate shield generator is needed for each side, sized by Flicker Rate, from the Shield Table. Ground vehicles cannot mount shields.
Example: The player wants strong shields front and rear and lighter ones on the flanks, so he picks a Flicker Rate of 70 for the front and stern and 50 for the left and right sides. Since he doesn't plan to fly above the treetops in combat, he gives the bottom shield only a Flicker Rate of 10. Across all five shields, the power subtotal is 121, the mass subtotal is 10, and the combined cost is 125,000 talents.
Shield Table
| Flicker Rate | Power | Mass | Cost |
|---|---|---|---|
| 10 | 1 | 2 | 5,000 |
| 20 | 2 | 2 | 10,000 |
| 30 | 4 | 2 | 15,000 |
| 40 | 6 | 2 | 20,000 |
| 50 | 12 | 2 | 25,000 |
| 60 | 24 | 2 | 30,000 |
| 70 | 48 | 2 | 35,000 |
| 80 | 96 | 2 | 40,000 |
| 90 | 182 | 2 | 45,000 |
| 100 | 264 | 2 | 50,000 |
| 110 | 528 | 2 | 55,000 |
| 120 | 1056 | 2 | 60,000 |
| 130 | 2112 | 2 | 65,000 |
| 140 | 4228 | 2 | 70,000 |
Choose Armor
A vehicle can carry armor plating on all four sides and its turret. Ten points of armor weighs one ton and costs 50 talents; a vehicle may carry a maximum of 100 Armor Points per section.
Example: The player allocates 90 points of armor to the front and turret, 60 to each side, 70 to the stern, and 40 to the bottom (in case he needs to ground quickly). The total armor mass is 41 tons, costing 2,050 talents.
Choose and Allocate Weapons
A vehicle can mount fixed weapons in the Hull 1 and Hull 2 positions, or in the turret, for a total of eight weapon systems in any combination across the three locations. Any Vulcan Point Defense System must go in the turret. An engineering attachment takes up one weapons slot in each of Hull 1 and Hull 2. A vehicle may mount at most two ballistic weapons total (any mix of MDC or Gauss), and the combined millimeter rating of its Gauss cannons cannot exceed 300mm. Hardpoints may only carry Interceptor-class SSS or HELL missiles, and any vehicle using hardpoints must also mount an air defense system.
The Weapons Table gives the mass, power draw, and cost of each available weapon system. Two SMLM and four TVLG missile-system variants are available; the number in parentheses after each is how many missiles it carries, and no matter how many missiles it holds, a missile system only takes up one weapons slot.
Each weapon system's Weapons Table entry is marked "T" (its damage is read off the damage template) or "S" (it's resolved by a special procedure described elsewhere in the rules):
Weapon Systems
| Weapon | Damage Type |
|---|---|
| MDC 8, MDC 10, MDC 12 | T |
| 200mm Gauss Cannon (HEAP, APDS) | T |
| 150mm Gauss Cannon (HEAP, APDS) | T |
| 100mm Gauss Cannon (HEAP, APDS, H.H.) | T |
| 50mm Gauss Cannon (HEAP, APDS, H.H.) | T |
| 25mm Gauss Cannon (HEAP, APDS, H.H.) | T |
| SMLM (1), SMLM (2) | T |
| TVLG (2), TVLG (4), TVLG (6), TVLG (12) | T |
| Vulcan-1, Vulcan-2, Vulcan-3, Vulcan-4 | S |
| AP Laser | S |
| Engineering Attachment | S (see Combat Engineering Vehicles) |
| GPA/E | S (see Artillery rules) |
Lasers Table
| Type | Max Damage |
|---|---|
| 1.5/1 | 2 |
| 1.5/3 | 4 |
| 1.5/4 | 5 |
| 1.5/5 | 6 |
| 1.5/6 | 7 |
| 3/6 | 8 |
| 5/6 | 9 |
| 7.5/6 | 10 |
Full mass, power, and cost values for the Gauss cannon, MDC, missile, and Vulcan systems, along with each weapon's maximum range, are given in the printed Weapons Table.
Example: The player wants the largest ballistic weapon available plus a reasonable secondary armament, so he mounts a 200mm Gauss cannon in the turret (a second Gauss cannon could be no larger than 100mm, so he skips it). For secondary armament he mounts two 1.5/3 lasers, two SMLM (2) missile packs, and two TVLG (4) packs, split evenly between Hull 1 and Hull 2, and finishes with a Vulcan-3 anti-missile system in the turret (Vulcans must be turret-mounted, even though he'd rather have kept the turret's mass down). The weapons subtotals come to 31 power, 152 mass, and 774,000 talents in cost — the Gauss cannon is an efficient weapon, but an expensive one.
Add Crew, Targeting, and Infantry Components
Every vehicle has a crew compartment (1 ton, 1 Power Point) and targeting/sensing/communication systems (2 tons, 2 Power Points). A vehicle can optionally be designed to carry an infantry squad, which costs 8 tons and 8 Power Points. Each of these components costs 100 talents per ton.
Example: Since this vehicle won't carry infantry, the player only pays the standard crew and targeting costs: 3 power, 3 mass, and 300 talents.
Add Digging Cannons
Any vehicle may optionally mount a digging cannon. It weighs 10 percent of the vehicle's current mass (engine, shields, armor, weapons, and turret combined so far) and draws power equal to 5 percent of that same current tonnage; it costs 100 talents per ton of its own mass.
Example: Before adding the digging cannon, the vehicle's running subtotal stands at 156 power, 240 mass, and 1,282,350 talents. The digging cannon therefore draws 12 power (5% of 240, rounded up) and weighs 24 tons (10% of 240), costing 2,400 talents.
Add Grav Drive
To move, a grav vehicle needs a grav unit, weighing 1 percent of the total mass of all currently mounted components and drawing power equal to the vehicle's current mass (fractions rounded up, not counting the digging cannon); it costs 500 talents per point of power it draws. A vehicle with a grav drive follows the Grav Movement rules; any vehicle without one is a ground vehicle and uses the Ground Movement rules instead.
Turreted weapons also add extra mass and power to the turret itself: the turret's added mass equals 5 percent of the combined tonnage of its turreted weapons (rounded up), and each turret draws 1 Power Point regardless of what it mounts. A turret weighs at least one ton even carrying no weapons at all, since it's assumed to house the painting laser and other 360-degree-traverse equipment.
Example: The grav drive draws 240 power and weighs 3 tons (1% of 240, rounded up), costing 120,000 talents. The turret's two mounted weapons add 6 tons of extra turret mass (5% of their combined 118-ton weight = 5.8, rounded up), costing 6,000 talents.
Calculate Thrust
A vehicle's Thrust (or Movement Points, for a ground vehicle) equals its remaining power divided by its total mass across all systems — (Power Rating − Total Power Usage) ÷ Total Tonnage — rounding up at .5 or more and down below that. A ground vehicle can never end up with more than 8 MP.
Example: The finished vehicle has a total power usage of 408 and a total mass of 267, leaving 1,092 points of excess power (1,500 − 408). Dividing by mass gives a Thrust of 4.08, which rounds down to 4 (fraction below .5). The vehicle's total cost comes to 1,404,750 talents.
Fill Out Vehicle Record Sheet
The final step is to fill out a record sheet for the newly designed vehicle, following the same procedure described in Fill Out Record Sheets.