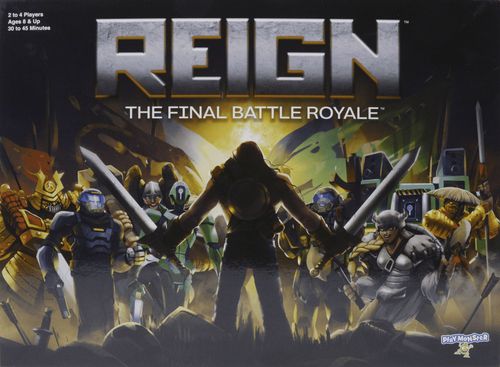
Reign
Reign Rulebook
Table of Contents
Table of Contents
Contents
- 24 Power Stones
- 12 Barbarian Minis
- 12 Samurai Minis
- 12 Super Soldier Minis
- 12 Droid Minis
- 4 Battle Dice
- 2 Power Dice
- 7 Disaster Cards
- Disaster Tracker Board with Marker
- Game Board (7 Zones, 1 Center)
Object
Strategically head for the center safe zone to be the last one standing in the fight to survive The Final Battle Royale!
Vital Information
On each turn, you can move three spaces and/or battle an opponent.
Watch as the Disaster Tracker counts down to the removal of one of the game board zones—get out before you lose members of your faction or choose to sacrifice those pieces.
Use Power Stones to make more moves or help win battles.
Set Up
Assemble the Game Board, as shown in the rulebook. It may be easiest to connect all of the zones and then place the final center piece.
Decide which faction each player will be, and then take those 12 pieces and the matching Die.
Shuffle the Cards and place them face down near the Game Board, along with the two Power Stone Dice.
Set the Disaster Tracker (hexagon-shaped board) near the Game Board and place the marker on the outer path on the number 11.
Divide the Power Stones among the players, and place them anywhere but the outer ring of the zones.
Starting with the youngest player, take turns placing your faction pieces on the Game Board in the outer area of the zones only. You may place them on any and all zones! Keep in mind that some of your pieces are more powerful than others, with a value of 1, 2 or 3.
Skill Levels (3 - Most powerful): 1, 2, 3.
Play
Turn over a Disaster Card. This will tell you which Game Board zone will be removed first. You now have until the marker on the Disaster Tracker counts down to get out of that zone and avoid losing your faction member(s).
The youngest player is the first to take a turn. On each turn, you can do one or all these…
-
Collect a Power Stone: If you land on a space with a Power Stone, you take it. When you pick up a Power Stone, your movement ends on that space.
On your turn, you may decide to use one Power Stone to either make extra moves or to improve your odds of winning a battle. See "Power Stones" below for more on how to use them.
-
Move One of Your Faction Members up to Three Spaces: You can move forward, backward, sideways…anyway you want. You cannot land in a space occupied by another player or faction member.
-
Battle Another Player: If you move into a space next to another player's faction member, you may battle them. See "Battles" below for more on how to battle.
-
At the end of your turn, you must move the marker on the Disaster Tracker down one. When the marker on the Disaster Tracker gets to a golden section, that zone shown on the up-turned Card is removed, along with any and all faction members and Power Stones on it. A new Disaster Card is turned over to reveal the next zone to be removed, and the Disaster Tracker is "restarted". See "Disaster Tracker" below for more details.
The player to the left then takes their turn, and so on.
Power Stones
You may use one Power Stone per turn, and you can either use it to move extra spaces OR to improve your power during battle. Once you decide to use a Power Stone and roll the Power Die, you cannot change your mind.
- Extra movement: Roll a Power Die to determine the number of extra spaces you get (1, 2 or 3) and move your faction member accordingly.
- Battle strength: Before you battle another player and you want to use a Power Stone, roll a Power Die to determine how many extra points you get in battle.
Battles
When you land in a space on the Game Board next to another player's faction member, you can choose to battle. This is where a faction member's value (1, 2 or 3) comes in to play.
To battle, each player involved rolls their Battle Die. The value they rolled, plus the value of their faction member, is their battle power. The player with the highest battle power wins the battle. The losing piece is removed from the Game Board.
If the attacker wants to use a Power Stone, they must say so before the Battle Dice are rolled, and then they roll the Power Die to get their additional power. The player being attacked can also choose to use a Power Stone.
The attacker CANNOT change their mind on whether to use a Power Stone or not once the player being attacked makes their decision.
The number rolled on a Power Die is added to the battle power to determine the winner.
For example, if you rolled 5 with your Battle Die, your piece is a value of 2, and you rolled a 2 for your Power Stone, your battle power is 9 (5 + 2 + 2).
If there is a tie during Battle, you get to battle again (and again, if needed!) until there is a winner.
If there is a tie when Power Stones are involved, they can be reused for tie-breakers (reroll the Power Die), but if no Power Stones were involved during a tie, you cannot add them to a tie-breaker.
Disaster Tracker
The Disaster Tracker begins with the pawn on the 11, and after each turn it is moved to the next space. When it hits the golden arrow area, that's when a piece of the Game Board is removed.
The marker then starts at the 9, and is moved down after each turn until it hits the bottom and the second piece of the Game Board is removed.
The tracker then starts over on the 7 and continues down. And then it starts over on the 7 again for the remainder of the game. This means you have The tracker then starts over on the 7 and continues down. And then it starts over on the 7 again for the remainder of the game. This means you have less time to flee from the zone in peril!
Note: the last sentence of this section is printed twice in the source rulebook; it is transcribed as printed.
Winning the Game
The last player with a faction member(s) left on the Game Board is the winner of The Final Battle Royale!