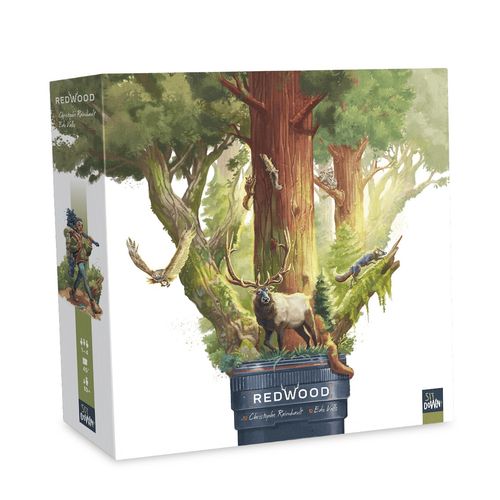
Redwood
Redwood Rulebook
Table of Contents
Table of Contents
Overview and Goal of the Game
Astonish everyone with your talent for photographing wildlife! Create a magnificent panorama and demonstrate your skill by including a wide variety of flora and fauna in your shots. At the end of the game, the player with the most points (pinecones) wins.
Designer: Christophe Raimbault — a French board game designer, best known for his game Colt Express (2014), winner of the prestigious German Spiel des Jahres award. In his designs, Christophe places special emphasis on immersive atmosphere and active interaction between players.
Illustrator: Edu Valls
A game by Sit Down!, published by Megalopole SRL. © Megalopole (2023). All rights reserved. These materials may only be used for private entertainment. Not suitable for children under three years of age; this game contains small parts that can be swallowed or inhaled. Visuals are non-contractual — shapes and colors may vary. Any reproduction of this game, in whole or in part, in any medium, physical or electronic, is strictly prohibited without written authorization from Megalopole.
Components
- 8 Photographer figures (2 of each of 4 colors)
- 8 neoprene bases for the photographer figures
- 1 First Player marker
- 1 Sun marker
- 7 Move templates
- 7 Angle-of-View templates
- 1 game board, divided into 5 biomes (the outer edge of each biome is marked with its matching color, and coincides with the edge of the play area)
- 7 double-thick Animal tokens (1 of each species: squirrel, raccoon, marten, beaver, gray fox, bear, and elk/wapiti)
- 42 Animal tokens (6 of each of the 7 species above)
- 60 Flower tokens: 20 each of 3 types
- 8 Sun tokens
- 56 Harmony tokens (36 single-value and 20 triple-value)
- 12 Redwood tokens
- 5 double-sided Dawn cards
- 20 Objective cards
- 32 Panorama cards: the side with a white triangle at the bottom of the card is for Basic Mode; the side with a black triangle at the bottom of the card is for Expert Mode
- 1 scorepad
- 1 string
- These rules, which you are holding in your hands
The following four token types are an unlimited resource. Even if you happen to run out of one of these tokens (unlikely as that is), substitute whatever you have on hand: Flower tokens, Sun tokens, Harmony tokens, and Redwood tokens.
Note: Do not confuse the Animal tokens in the general supply with the double-thick Animal tokens placed on the game board.
Basic Mode
The game is played over 5 rounds, after which players move on to final scoring. In each round, every player takes one turn. At the start of a new round, move the Sun marker. Then all players take their turn in order.
Setup
-
Place the game board in the center of the table.
-
Sort the Panorama cards by color. Place each stack of Panorama cards next to the biome of the matching color, Basic Mode side up (the side with a white triangle at the bottom of the card). The other side of the Panorama cards (with a black triangle at the bottom of the card) is used for Expert Mode — see the Expert Mode section.
-
Randomly choose a Dawn card (either side up); it shows how to arrange the corresponding components during setup:
- 3a. Objective cards: Sort the Objective cards by the number on their back (from 1 to 5), then randomly draw one card from each stack without looking at its face. Return all the other cards to the box — you won't need them in this game. Lay out the Objective cards face down according to the Dawn card, then flip over Objective card number 1.
- 3b. Sun marker: Place it on the stack of Panorama cards indicated by the Dawn card, so that it does not cover any of the target-reticle symbols.
- 3c. Animal tokens: Before your first game, assemble the double-thick Animal tokens using the supplied stickers. Insert the tokens into the special hexagonal holes on the game board according to the Dawn card (the orientation of the tokens does not matter).
Note: Don't confuse the Animal tokens from the general supply with the double-thick Animal tokens on the game board.
Now put all the Dawn cards back in the box.
Note: Ignore the red outline around some of the pointer symbols on the Dawn card — it is only relevant when playing in Solo Mode (see the Solo Mode section).
-
Prepare the general supply:
Game Turn
Moving the Sun Marker
At the start of a new round, move the Sun marker to the next stack of Panorama cards clockwise, and flip over the Objective card that the Sun marker just passed.
Important: Do not move the Sun marker in the first round!
Player Turn
Starting with the first player and continuing clockwise, each player must perform a turn made up of the following three actions:
- A. Choose templates
- B. Move the photographer
- C. Take a photo
A. Choose Templates
Choose a Move template and immediately place it in front of yourself.
Then choose an Angle-of-View template and also immediately place it in front of yourself.
Important: Once you have touched a Move template or an Angle-of-View template, you must take it for yourself — you can no longer choose a different template.
Note: A distinctive feature of this game is the ability to judge distances based on the components laid flat on the table and the game board.
You must choose a Move template and an Angle-of-View template from among...
- ...the templates in the general supply...
- ...and/or the templates in front of one or two other players. A player from whom you take a Move template or an Angle-of-View template receives 1 Harmony token from the general supply for each template (Move or Angle-of-View) that you took from them.
You cannot choose a Move template or an Angle-of-View template that is still lying in front of you from the previous round.
Note: All Move templates and Angle-of-View templates lying in front of you at the start of your turn are templates left over from the previous round. You may have fewer than two such templates in front of you (or even none at all), since other players may have taken them during their own turns.
Now that you have chosen your Move template and Angle-of-View template and placed them in front of yourself, return any templates left over from the previous round (if any) to the general supply.
B. Move the Photographer
To move your Photographer figure, you must use the Move template you just chose. It has 3 parts:
- A fork at one end that lets you attach the Move template to the base of the Photographer figure.
- An elongated central section that represents the path you will travel along.
- A round section at the other end, marked with the Move template's identification number, that represents the point where your movement will end.
To move, follow these steps:
- a) Attach the template.
- b) Check the path.
- c) Move.
a) Attach the Template
Attach the Move template to your Photographer figure on the game board. You may choose which way to orient the Move template (you may also flip it over to its other side).
Tip: Hold your Photographer figure lightly in place while attaching and rotating the Move template, so you don't accidentally knock it out of position.
b) Check the Path
While holding the Photographer figure in place, rotate the Move template to determine the endpoint. The position of the Move template is valid if the following two conditions are met:
- The template does not overlap (partially or completely) any Animal tokens or other Photographer figures.
- The round section at the end of the Move template lies at least partially within the play area (the area inside the wide, multicolored border around the edge of the game board). The central section of the template may extend beyond the play area.
Example: the round section at the end of the Move template partially lies within the play area (in the yellow biome), while partially extending beyond its border (in this biome, marked by a wide dashed yellow line). Its curve (the central section) lies outside the play area, beyond the border of the yellow biome.
c) Move
Place your second Photographer figure from your personal reserve exactly on the round section at the end of your Move template.
Now, with one hand, hold the second Photographer figure in place (without pressing down on it), and with your other hand, remove the first Photographer figure and the Move template from the game board into your personal reserve. Your move is now complete!
Something Went Wrong?
Whenever you move components around the game board, be careful not to accidentally bump other Photographer figures or Animal tokens. If this happens, return the components you accidentally moved to their previous positions (as precisely as possible).
Precision
Sometimes even a millimeter can make all the difference, so be as precise as possible when moving.
Can't Move?
In very rare situations, you may be unable to move a Photographer figure because it is blocked by other Photographer figures and/or Animal tokens. In that case, it stays where it is. Proceed to the next action.
C. Take a Photo
To take a photo, you must use the Angle-of-View template you chose. It has 5 parts:
- A fork at one end that lets you attach the Angle-of-View template to the base of the Photographer figure.
- A triangle with a rounded base, representing your lens's angle of view.
- An axis indicating the direction your lens is pointed.
- Two round holes, symmetrically placed on either side of the axis (used for completing objectives on cards numbered 1 on the back — see the Objective Card Reference section).
- The Angle-of-View template's identification number.
To take a photo, follow these steps:
- a) Choose an orientation.
- b) Determine the background color.
- c) Lay out a Panorama card.
- d) Capture the moment.
- e) Check the objective cards.
- f) Move the animals.
a) Choose an Orientation
Attach the Angle-of-View template you chose to your Photographer figure on the game board. Rotate the template as you like so that it completely covers the subjects you want to capture in the shot: Flowers and Redwoods printed on the game board, and/or Animals.
The Angle-of-View template may not overlap (partially or completely) other Photographer figures. However, it may extend beyond the play area.
b) Determine the Background Color
Mentally extend the axis on the Angle-of-View template until it reaches the outer border of the play area. The color of the biome where the axis lands indicates the color of the Panorama card that will serve as the background for your shot. Take a Panorama card of that color.
If the Panorama card you just took had a Sun marker sitting on it, leave that marker on the top card of the stack and instead take a Sun token from the general supply (unless you already have two such tokens on your Panorama cards).
If there are no Panorama cards of the needed color left in the stack, you cannot point the Angle-of-View template's axis at that biome.
There is a pointer symbol on the border between every two neighboring biomes. If the axis of the Angle-of-View template points at such a pointer symbol, you may take a Panorama card from either of those two biomes.
String
If you cannot determine which biome the axis of your Angle-of-View template is pointing toward, use the string: align it with the axis on the template and stretch it beyond the edge of the play area. Look from directly above to determine which biome the axis lands in. Once you have used the string, you can no longer change the orientation of the Angle-of-View template!
Can't Take a Photo?
In very rare situations, you may be unable to take a photo because other Photographer figures prevent you from placing the Angle-of-View template on the game board. In that case, your turn ends immediately.
c) Lay Out a Panorama Card
Lay out Panorama cards in a row in your personal reserve.
Place your first Panorama card in the center.
Lay out every subsequent Panorama card at either the left or right end of the row. You cannot place a new card between two previously placed cards. You cannot swap cards after they have been placed.
If you had to take a Sun token, place it on the sky illustration on the Panorama card you just laid out, taking care not to cover a target-reticle symbol. A Sun token can earn you points — see the End of Game section.
You will score points at the end of the game if the edge of the Panorama card you just laid out matches perfectly with the edge of the neighboring card (see the End of Game section).
d) Capture the Moment
From the general supply, take Animal, Flower, and/or Redwood tokens matching the subjects that you completely covered in step a), and place them on the empty special spaces on your new Panorama card.
Important: All Animal tokens stay on the game board!
You may place 1 Animal, Flower, or Redwood token on each target-reticle symbol on the Panorama card. You cannot place more tokens on a Panorama card than it has target-reticle symbols. Only tokens that you place on the Panorama card count as photographed.
Return any leftover tokens, for which there was no free target-reticle symbol on the Panorama card, to the general supply.
Try not to leave any target-reticle symbols uncovered, because at the end of the game you will lose 1 point for each such symbol.
Example: you managed to get 3 tokens. Unfortunately, there is only room for 2 tokens on the card. You must return the extra token to the general supply. You decide to return the yellow Flower token.
You may place tokens on a new Panorama card only. You cannot place them on a Panorama card from a previous round.
Note: Each Animal token shows on one side how many points it is worth. You may lay out tokens on Panorama cards either side up (this has no effect on your result).
e) Check the Objective Cards
Now that you have taken your photo, you score points for every open Objective card whose condition you have fulfilled.
Every Objective card shows the following information:
- A. The card's numerical value, corresponding to the round number at the start of which it is revealed.
- B. The condition (or conditions) you must fulfill to score points.
- C. The number of points you score for each condition fulfilled.
To make sure you don't accidentally skip an open Objective card, always check them in order, clockwise, starting from the card numbered 1.
You may score the reward for each Objective card only once per turn.
Take a number of Harmony tokens equal to the number of points earned for fulfilling the objective's conditions from the general supply, and place them in your personal reserve.
See the Objective Card Reference section for a detailed description of the Objective cards.
f) Move the Animals
Each animal has 2 favorite biomes on the game board (each biome corresponds to a color of Panorama card).
Move all Animal tokens that you just photographed on your shot.
To move an animal, follow these steps:
- Take the Angle-of-View template you just used and return it to your personal reserve.
- One at a time, in whatever order you choose, move the Animal tokens corresponding to the Animal tokens you were able to place on your new Panorama card: insert the token into another free hexagonal hole in one of that animal's two favorite biomes (see below). You may choose any orientation for the token, but you may not move any Photographer figures in the process.
If neither of an animal's two favorite biomes has a free hexagonal hole (they are occupied by other animals and/or blocked by Photographer figures), you may choose any other free hexagonal hole on the game board.
In very rare situations, the general supply may run out of Animal tokens matching a particular animal on the game board. In that case, remove that Animal token from the game board entirely — players may no longer take photos of that animal for the rest of the game.
Favorite Biomes of the Animals
A biome is one of the 5 sectors of the game board, corresponding to a particular type of Panorama card. Each biome has a dominant color and landscape type.
If you need to determine exactly which biome your Photographer figure is in, stretch the string along the dotted line between the middle of the lake at the center of the game board and the pointer symbol on the border between two neighboring biomes. Then look down at the game board from directly above. If your Photographer figure is visible on both sides of the string, it is located in both of those biomes at once. The lake at the center of the game board is a neutral zone: a Photographer figure standing entirely on the lake illustration is not located in any of the 5 biomes.
Your Turn Is Now Over!
Leave the Move template and Angle-of-View template you just used in your personal reserve.
Play now passes to the next player clockwise.
The round ends once every player has taken a turn. If it is not the fifth round, begin a new round.
Once the fifth round ends, the game is over: proceed to final scoring.
End of Game
The game ends after the fifth round. Proceed to final scoring and record your result in each category on the scoresheet.
Animal Sets
Count the number of different animal species in your row of Panorama cards, and score the corresponding number of points (each species counts only once):
| Different animal species | Points |
|---|---|
| 1 species | 0 points |
| 2 different species | 1 point |
| 3 different species | 3 points |
| 4 different species | 6 points |
| 5 different species | 10 points |
| 6 different species | 15 points |
| 7 different species | 21 points |
Panorama
Your panorama consists of the largest number of neighboring cards that match perfectly with each other (color and artwork line up).
Count the number of cards perfectly connected in an unbroken chain:
| Perfectly connected cards in a row | Points |
|---|---|
| 2 perfectly connected cards | 3 points |
| 3 perfectly connected cards | 6 points |
| 4 perfectly connected cards | 10 points |
| 5 perfectly connected cards | 15 points |
Example: on the left, 3 cards in a row are perfectly connected, while on the right only 2 cards are. Only the longest unbroken chain (on the left) counts as your panorama and scores points (6 points).
Harmony Tokens
Each single-value Harmony token is worth 1 point, and each triple-value Harmony token is worth 3 points.
Sun Tokens
Count the Sun tokens on your Panorama cards:
| Sun tokens | Points |
|---|---|
| 0 Sun tokens | 0 points |
| 1 Sun token | 4 points |
| 2 Sun tokens | −2 points |
Flower Tokens
Do not use this row of the scoresheet for scoring Flower tokens — it is reserved for Expert Mode.
Count the number of Flower tokens on your Panorama cards: each such token earns you 1 point.
Animal Tokens
Each Animal token is worth a set number of points depending on the species. Add up the points for all the animals in your photographs.
| Animal | Points |
|---|---|
| Squirrel | 1 |
| Raccoon | 2 |
| Marten | 2 |
| Beaver | 2 |
| Gray fox | 2 |
| Bear | 3 |
| Elk/wapiti | 3 |
Missed Opportunities
Do not use this row of the scoresheet for scoring — it is reserved for Expert Mode.
For every empty target-reticle symbol on your Panorama cards, you lose 1 point.
Redwood Tokens
Each Redwood token in your photographs is worth 2 points.
The player with the most points is declared the winner. In case of a tie, the winner is the player...
- ...with the most animals in their photographs...
- ...if still tied, the player with the longest panorama...
- ...if players are still tied, the player with the most Harmony tokens.
If players are still tied after that, they share the victory.
Team Mode (4 Players)
The game follows the same rules as Basic Mode, with a few changes and additions described below.
In Team Mode, players are split into 2 teams (2 players each), who play against each other.
When playing with 4 participants, we strongly recommend choosing Team Mode for the best game length.
You may combine Team Mode with Expert Mode (see the Expert Mode section).
Setup
Players from the two teams sit around the table in alternating order.
Starting with the team that will take its turn second, players place their Photographer figures on the game board.
Game Turn
Players on the same team take their turn simultaneously. They may discuss their actions freely.
Player Turn
Starting with the first player and continuing clockwise, players must perform the three actions described in the Basic Mode rules, one player at a time. The other member of the active player's team also performs these actions simultaneously with them.
A. Choose Templates
You and your teammate choose your Move templates and Angle-of-View templates simultaneously.
If you choose a Move template or an Angle-of-View template lying in front of your teammate, they do not score points for it.
B. Move the Photographer
You and your teammate use your chosen Move templates simultaneously.
Wait until you have both chosen the position of your Move template before continuing.
Important: Your Move templates cannot overlap each other!
Each of you moves your Photographer figure so as not to interfere with the other.
C. Take a Photo
You and your teammate use your chosen Angle-of-View templates simultaneously.
Wait until you have both chosen the position of your Angle-of-View template before continuing.
Important: Your Angle-of-View templates cannot overlap each other!
e) Check the Objective Cards
Each team member scores points for the open Objective cards whose conditions they personally fulfilled.
End of Game
Players on the same team add their points together.
The team with the most points wins.
Expert Mode
The game follows the same rules as Basic Mode, with a few changes and additions described below.
You may combine Expert Mode with any other mode.
Setup
Set up the game as in Basic Mode, with one exception: use the Expert Mode side of the Panorama cards (with a black triangle at the bottom of the card).
Player Turn
C. Take a Photo
d) Capture the Moment
The red target-reticle symbols on the Panorama cards represent a special restriction: you may place a token on such a target-reticle symbol only if the matching condition is fulfilled.
Each type of Panorama card has its own restriction:
Green Panorama Card: On this target-reticle symbol, you may only place a Redwood token.
Red Panorama Card: You may place a token on this target-reticle symbol only if all the other (regular) target-reticle symbols on this card are already occupied by tokens.
Yellow Panorama Card: On this special target-reticle symbol, you may only place a Flower token of the indicated type.
Gray Panorama Card: You may place a token on the special target-reticle symbol only if you used the indicated Angle-of-View template.
Blue Panorama Card: On the special target-reticle symbol, you may only place an Animal token of the indicated species.
End of Game
Flower Token Sets
Now, only sets of 3 different Flower tokens earn you points — 7 points per set. Each Flower token may be counted only once, and any leftover Flower tokens that don't belong to a set do not earn any victory points.
Use this row of the scoresheet to record points for Flower tokens.
Missed Opportunities
For every regular, unoccupied target-reticle symbol on your Panorama cards, you lose 1 point.
For every special, unoccupied target-reticle symbol on your Panorama cards, you lose 3 points.
Use this row of the scoresheet for this scoring.
Solo Mode
The game follows the same rules as Basic Mode, with a few changes and additions described below.
To play Solo Mode, choose one of the scenarios on this page. Each scenario introduces a special restriction: to win, you must fulfill the matching condition.
If you like, you may combine Solo Mode with Expert Mode (see the Expert Mode section).
Setup
Do not choose Objective cards randomly. Each scenario specifies which Objective cards to use during setup (see the scenarios below).
You may place your Photographer figure on only one of the two pointer symbols marked with a red outline on the Dawn card.
Player Turn
Only your Photographer figure moves around the game board and takes photos.
End of Game
You win only if you successfully fulfill the condition set by your chosen scenario.
After each game, record your result on the scoresheet and try to beat it in your next game.
Scenarios
Scenario 1: Studying Behavior
Restriction: during the game, you must photograph the same animal at least 3 times.
Objective cards: 01.01.01, 01.02.07, 01.03.09, 01.04.16, 01.05.20
Scenario 2: In Ambush
Setup: take 3 unused Photographer figures and use them to cover the Flower symbols on the game board, as shown in the accompanying picture.
Restriction: if, during the "Take a Photo" action, another Photographer figure ends up on the same axis as your chosen Angle-of-View template, remove that figure from the game board back into the box. If several Photographer figures end up on the same axis as your chosen Angle-of-View template at once, remove only the one closest to you. By the end of the game, you must have removed all 3 of the other Photographer figures from the game board.
Objective cards: 01.01.02, 01.02.05, 01.03.10, 01.04.15, 01.05.19
Scenario 3: Casual Hiker
Restriction: once you have used a given Angle-of-View template or Move template, remove it from the game box — you may no longer use it. In addition, you lose if even one of your photographs contains no animal at all.
Objective cards: 01.01.03, 01.02.08, 01.03.12, 01.04.13, 01.05.17
Scenario 4: Surrealism
Restriction: at the end of the game, your Panorama cards must have exactly 3 Sun tokens on them. You do not gain (or lose) victory points for Sun tokens.
Objective cards: 01.01.04, 01.02.06, 01.03.11, 01.04.14, 01.05.18
The game's designer (Christophe) and staff developer (Michaël) carefully tested Solo Mode. Can you beat their record for each scenario?
Objective Card Reference
Objective Card 01.01.01: +1 point if you made a perfect shot (see "Perfect Shot" below). +1 point if you photographed a yellow flower.
Objective Card 01.01.02: +1 point if you made a perfect shot. +1 point if you photographed a redwood.
Objective Card 01.01.03: +1 point if you made a perfect shot. +2 points if your Photographer figure at least partially covers a hexagonal hole.
Objective Card 01.01.04: +1 point if you made a perfect shot. +2 points if your Photographer figure partially covers the lake at the center of the game board.
Objective Card 01.02.05: +1 point if you moved using Move template number 2 or 3.
Objective Card 01.02.06: +1 point if you moved using Move template number 5 or 6.
Objective Card 01.02.07: +1 point if the Panorama card you used for your shot belongs to one of the two biomes adjacent to the one where the Sun marker currently sits.
Objective Card 01.02.08: +1 point if your Photographer figure is at least partially in the biome where the Sun marker currently sits.
Objective Card 01.03.09: +2 points if you photographed an animal that you had already photographed before.
Objective Card 01.03.10: +2 points if you used a Panorama card of a color for your shot that you had already used before.
Objective Card 01.03.11: +1 point if at least 1 regular or special target-reticle symbol on your new shot remained unoccupied.
Objective Card 01.03.12: +3 points if at least 2 regular and/or special target-reticle symbols on your new shot remained unoccupied.
Objective Card 01.04.13: +2 points if your Angle-of-View template is pointed toward the lake at the center of the game board, but lies completely outside it.
Objective Card 01.04.14: +2 points if your Angle-of-View template is pointed toward a pointer symbol, but lies completely beyond it.
Objective Card 01.04.15: +2 points if your Angle-of-View template is pointed toward another Photographer figure.
Objective Card 01.04.16: +2 points if your Angle-of-View template is pointed toward an Animal token, but does not reach onto it.
Objective Card 01.05.17: +3 points if your Photographer figure completely covers the full width of the outer border of the play area.
Objective Card 01.05.18: +3 points if you did not photograph a single flower.
Objective Card 01.05.19: +3 points if you did not photograph a single animal.
Objective Card 01.05.20: +3 points if your Angle-of-View template partially covers an Animal token.
Perfect Shot
Your shot is a perfect shot if part of one of its subjects (a flower, a redwood, or an animal) is visible through a hole in your Angle-of-View template. You may fulfill this condition only once per turn (the holes in the Angle-of-View template are placed symmetrically, so it looks the same no matter which way you flip it).
Example: through both holes in the Angle-of-View template, part of a flower is visible. Even so, you only score points for fulfilling this condition once. You gain 1 victory point.