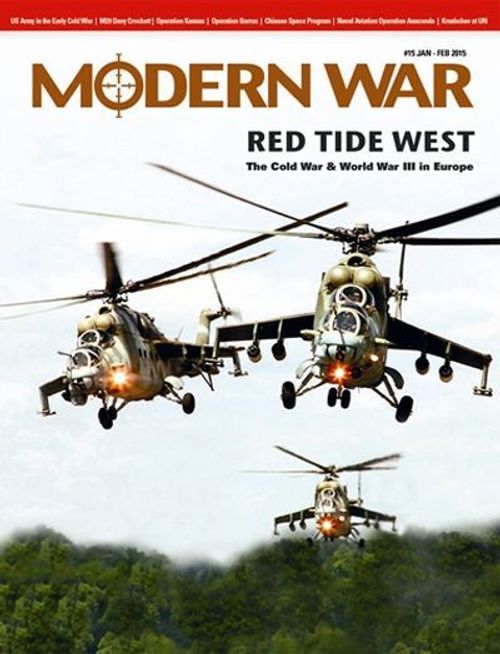
Red Tide West: The Cold War & World War III in Europe
Red Tide West: The Cold War & World War III in Europe Rulebook
Table of Contents
Table of Contents
- 1.0 Introduction
- 2.0 Components
- 3.0 Setting Up the Game
- 4.0 Sequence of a Game Turn
- 5.0 Stacking & Fog of War
- 6.0 Movement Rules
- 7.0 Airborne Operations
- 8.0 Fleeing Civilians
- 9.0 Zones of Control (ZOC)
- 10.0 Combat
- 11.0 Supply
- 12.0 Leaders
- 13.0 The Netherlands
- 14.0 Air Units
- 15.0 Nuclear Launches
- 16.0 Nuclear Threshold (Armageddon)
- 17.0 Munitions Factories
- 18.0 Victory Conditions
- 19.0 Simplified Victory Conditions (Optional)
- 20.0 Rebuilding Units with Victory Points (Optional)
- 21.0 Free Deployment Set-Up (Optional)
- 22.0 Designer's Notes
- Munitions Factories Destruction Checklist
1.0 Introduction
Red Tide West is a wargame that simulates a hypothetical Warsaw Pact invasion of West Germany in the late-1980's. Red Tide West also presumes a wider conflict beyond the scope of the game, but postulates West Germany to be the so-called "center of gravity" for the entire war. In other words, regardless of what is happening in, say, Scandinavia, or the Balkans, or the Middle East, etc., the presumption here is that the war will be won or lost in central Europe. To wit, if the Red Army cripples NATO and overruns West Germany, it is assumed that diplomatic negotiations will then suddenly become advantageous to both sides. For the Soviets, they would be satisfied to end the war with their substantial gains, not to mention the distinction of being regarded by the world as having won the war, especially if a nuclear exchange had not yet occurred. NATO, on the other hand (and especially the French) would want to end the war before the Red Army rolled into France proper, and certainly before a full-blown nuclear war erupted (or escalated further, if a limited nuclear exchange had already occurred).
On the other side of the coin, if the Red Army's drive into West Germany is halted or thrown back, the war will have run its course then and there, regardless of what is happening elsewhere in the world. Negotiations would be underway, regardless, but the Soviets would have very little to gain (and actually much to lose) by perpetuating a war that is then being perceived as the ultimate reproach of the Soviet state and Communist ideology. Indeed, before Soviet battlefield defeats became prolific and pronounced, and especially before NATO units began to push across the borders of East Bloc countries, the Soviets would be confronted with a choice of trying to negotiate an end to the war before the Warsaw Pact alliance collapsed (or worse, defected--something like a repeat of the Hungarian Uprising of '56, but on a larger scale), or resort to nuclear strikes to avoid a total defeat (a decidedly undesirable solution when considering NATO's predictable response).
Red Tide West presumes a short war whereby the final dispositions will be known within a matter of weeks. The Soviet timetables expected the Red Army to reach the French border within 15 days, and therefore the game excludes Soviet "Category C" and "Category D" reserves, which could not have been mobilized within the timeframe of the game--whether or not the Soviet timetables were realistic in the first place.
It should be noted that the orders-of-battle also presume that other Soviet Fronts are engaged in other theaters, and thus are not available as an endless pool of reserves to be hypothetically rushed to central Europe. Red Tide West does include provisions for reserve forces that were specifically intended to follow up an invasion of West Germany, but only if their arrival could occur within the length of the game (and in time enough to contribute to the outcome).
1.1 Scale
Each hex in Red Tide West is equivalent to about 10 miles (16 kilometers) from side to opposite side, and each turn represents about a day.
2.0 Components
Red Tide West should include these rules and charts, two maps that fit together to form a playing area representing West Germany and bordering areas, and two counter sheets with a total of 560 two-sided playing pieces (280 per counter sheet), which will be referred to as "units," "counters" and/or "markers" throughout these rules. Players will need to provide themselves with at least two six-sided dice of any color, and two ten-sided dice of two different colors.
2.1 The Maps
The two maps included in the game are defined as "North" and "South", and they must be laid together in such a way so that the North map is arrayed lengthwise above the South map, matched up evenly via the hexagon rows. Each hexagon (hereafter referred to as a "hex") is printed with a four-digit numeral that is listed in numerical order from north to south along each such hex row.
Note: For purposes of clarification, hexes 0509, 0167, and 0268 are all West German hexes (not Danish and Dutch, respectively).
2.2 The Game Pieces
The game pieces represent all of the conventional and strategic forces that existed in the theater of operations during the mid-1980's, as well as various functional or memory aid counters. Moreover, the game pieces include other specialty markers that pertain to various specific rules; each pertinent rule will indicate what relevant markers are to be used and how.
The most common type of game piece is the unit, which represents a military formation of some kind. There are units for numerous countries, each of which is color-coded to indicate its nationality, although there are only two opposing sides during a game of Red Tide West; all units belong to either one side or the other (notwithstanding Austrian and Danish units, which are neutral; see 6.10).
Note: All Warsaw Pact units can be identified by their yellow icons.
Each unit is printed with a variety of symbols and data to interact with the game rules; each such symbol and datum is defined as follows.
There are different kinds of military units in the game, although most function exactly the same. Some, like air units, function differently, which is explained under that relevant set of rules in this rules booklet.
Designer's Note: Red Tide West does not include Soviet Southern Group of Forces (SGF), as these units are assumed to be assigned to invade Italy (and elsewhere). Accordingly, Red Tide West does not include the Italian Army, which is assumed to have its hands full dealing with SGF.
2.3 Unit Types (NATO icons)
There are various types of units for both sides in the game, most of which are identified with NATO-style icons. The majority of the NATO-identified units function exactly the same and are only identified differently for historical purposes, although some unit types (such as the airmobile units) possess special abilities that are explained later in the rules.
2.4 Front & Back Sides
Most land units have two sides, a front side (representing that unit's full-strength disposition) and a back side (representing that unit after it has been reduced by combat losses); the back side of a land unit is known as its "degraded" side. A full-strength unit's icon (the NATO symbol in the center of the counter) is colored (for example, US icons are white), whereas a degraded unit's icon is non-colored (showing only the background color of that counter).
Note: The four divisions of the 2nd Guards Tank Army (the 16th Tank Division, as well as the 94th, 21st, and 207th Motorized Division) are printed with the same ratings on the front and back. This formation had been upgraded in 1984 and was further augmented with three additional independent tank regiments that same year.
3.0 Setting Up the Game
To set up the game, players should first decide which side they will play; one player must play the NATO side (the United States and its allies), and one player must play the Warsaw Pact side (the Soviet Union and its client states).
Note: The four Dutch land units will not arrive in play if any nuclear detonation has occurred prior to their entry (see 13.0).
Then set up each land unit in a specifically numbered hex per the hex number that is printed along the right side of each such unit (for example, the Soviet 79th Armored Division is to be set-up in hex 1182).
Exception: If the unit is printed with the word "Any" in place of a hex or reinforcement number, that unit may be set up anywhere on the map in a friendly airbase/airport hex of the owning player's choice.
Errata: The Danish 1st Mechanized Brigade's printed set-up hex should be 0654 (not 0653), the Danish 2nd Mechanized Brigade's printed set-up hex should be 0803 (not 0802). The W. German 3rd Helicopter Brigade's printed set-up hex should be 0235 (not 0234).
Some units are not printed with a hex number, but are instead printed with a single digit numeral; this number refers to a specific turn box on the turn track, indicating that unit to be a reinforcement (meaning that it will arrive in play during that game turn). Place each such unit in a numbered game turn box corresponding to the same number that is printed along the right side of each such unit; that unit is not permitted to enter play until the movement step of that side's phase. See 3.1 below.
Next, place all leaders in each side's respective Leader Draw Pool box printed on the map, as well as one strategy chit of each type in each side's respective Strategy Chit Available Pool box printed on the map.
Finally, place the victory point counters on the Victory Point Track box printed on the map; these are used somewhat like an abacus to indicate the current tally of accumulated Warsaw Pact victory points from turn to turn. For example, victory point chits on the "500" grid, "20" grid, and "7" grid would thus indicate the current tally of Warsaw Pact victory points up to that game turn is 527.
Each game begins with minus forty-five (-45) victory points (until both West Berlin hexes have been captured).
3.1 Reinforcements
Some units begin the game off the map and are assumed to be en route to the battlefront when the game begins. Such units will be printed with a single-digit numeral instead of a hex number, indicating the turn that they must arrive on the map, entering via the map edge.
Note: This includes the East German 9th Tank Division, which was historically stationed in Eggesin, GDR (about hex 1716).
A unit that enters the map is eligible to move its full movement allowance once it has entered the map (counting the first hex entered as its first hex of movement).
Note: The lack of terrain features in map-edge countries is intentional, and thus the movement point (MP) cost to enter each hex in France, Luxembourg, the Netherlands, Czechoslovakia, and Poland is 1 MP per hex. Any unit entering the map via a road is assumed to be entering via the road movement cost (1/2 MP) if entering that hex from off the map.
A unit that enters the map may only enter the map via a land hex, and obviously only from their own side of the map (the left side map edge for NATO, the right side map edge for the Warsaw Pact). The Warsaw Pact player may also enter the map via any Austrian map edge hexes, but doing so would be considered a violation of Austria's neutrality per 6.1.
Exception: No Warsaw Pact unit may enter the map via any Swedish map-edge hex.
During the movement step of a player's own phase, all air unit reinforcements that are scheduled to arrive during that game turn must simply be placed on any friendly airbase/airport hex(es) anywhere on the map, if that airbase/airport has not been destroyed, and if not in excess of its capacity.
3.2 Amphibious Landings
Some units (specifically the Soviet Spetsnaz Naval Brigade and the British 3rd Marine Brigade) are permitted to arrive as normal reinforcements per the game turn indicated (printed along the right side of each unit), or may instead arrive during the movement step of game turn 2, if the owning player prefers. If arriving during game turn 2, that unit must be placed on any coastal hex that is adjacent to an all-sea hex, which must not be farther than 15 hexes from its own side's map-edge (the eastern map-edge for the Soviet unit, and the western map-edge for the British unit). This placement is not normal movement, but is an automatic placement regardless of any intervening terrain, terrain costs or other units. Moreover, it is only ever permitted once (during game turn 2), and never thereafter.
Exception: The Soviet Spetsnaz Naval Brigade unit may not be placed on any Swedish coastal hex.
However, the coastal hex itself may not be occupied by any enemy land unit (notwithstanding any lone enemy leader; see 12.6), although the presence of any enemy air unit does not interfere with an amphibious landing.
After placement, a landed unit is not permitted to move for the remainder of that game turn (except to advance after combat or retreat), although a landed unit that has not been eliminated is permitted to conduct an attack against any adjacent enemy unit during the ensuing combat step (unless the combat step for that phase had already occurred, as can be the case with NATO phases; see 4.0).
If a coastal hex is occupied by any enemy air unit(s) of any type, the enemy air unit(s) in that hex are automatically eliminated immediately if occupied by an enemy landed unit.
3.3 Warsaw Pact Off-Map Airbases
Representing proximal airbases that are not shown on the map, the Warsaw Pact player may place any of his own air units (whether starting air units or arriving reinforcement air units) into the Warsaw Pact Off-Map Airbases box printed on the map. Air units in the Warsaw Pact Off-Map Airbases box cannot operate therefrom (no strikes, air superiority or air support missions may ever be conducted from the Warsaw Pact Off-Map Airbases box), nor may the Warsaw Pact Off-Map Airbases box be encroached upon or attacked by any NATO game piece. However, during the Recovery step of the Warsaw Pact phase, any of the air unit(s) in the Warsaw Pact Off-Map Airbases box may then be placed in any friendly airbase/airport hex(es) of the Warsaw Pact player's choice (if not destroyed, and not in excess of capacity).
Note: The Warsaw Pact Off-Map Airbases box cannot be targeted or destroyed by any nuclear attack.
After any air unit has been placed on an airbase/airport hex, it functions normally thereafter, but may never be returned to the Warsaw Pact Off-Map Airbases box.
4.0 Sequence of a Game Turn
Each game turn is comprised of a Warsaw Pact Phase and then a NATO Phase (always in that order). Each of those two phases is further sub-divided into individual "steps," which must be performed in exactly the order listed below. A particular step may be skipped during a single phase (if there is nothing to do during that step of that particular phase), but once skipped, a player may not perform that step later during that game turn.
Designer's Note: The Warsaw Pact player is restricted to conducting movement and then combat in that strict order, whereas the NATO player is permitted to either conduct movement before combat, or vice versa. This difference is intended to simulate the contrast between rigid Soviet doctrinal plans and NATO's more flexible capabilities.
Warsaw Pact Phase
1. Strike and/or Nuclear Launch Step
a) The Warsaw Pact player may launch all of his intended air strikes (with available fixed-wing aircraft) at this time (see 14.3) and/or all of his intended nuclear launches (with nuclear target markers) at this time (see 15.0). If any nuclear target markers have been placed during this step, consult the nuclear threshold (16.0) during this sequence, but only after all of the nuclear target markers that he intends to launch this sequence have been placed.
b) The NATO player may announce that he is conducting interception of any Warsaw Pact strikes (see 14.5) that were announced during sequence (a) above.
c) Resolve Air Superiority Combat, if any, and then conduct all strikes that were announced above (if they survived Air Superiority Combat) per 14.5. If any nuclear strikes successfully occur, consult the nuclear threshold (16.0) during this sequence, but only after all of the intended nuclear strikes have been resolved (if successful).
d) Place all surviving air units in the Returning to Base box printed on the map. Eliminated air units are removed from play permanently.
e) Detonate any NATO nuclear target marker(s) in the chosen target hex(es) that had been launched by the NATO player during the preceding NATO Strike and/or Nuclear Launch step (of the preceding phase).
f) Move any air units that will be transferred to another airbase/airport to the friendly Returning to Base box.
2. Movement Step
a) The Warsaw Pact player may move any Warsaw Pact units at this time. Warsaw Pact reinforcements that are scheduled to enter this game turn must do so during this step.
3. Fleeing Civilians Placement Step
a) Place any Fleeing Civilians markers during this step per 8.0.
4. Combat Step
a) The Warsaw Pact player may declare attacks with any Warsaw Pact units at this time.
b) Any Warsaw Pact air unit(s) may be flown to any declared combat hex to contribute Air Support to that attack at this time.
c) Any NATO air unit(s) may be flown to any combat hex to contribute Air Support to the defense of the NATO unit or stack that is the recipient of that Warsaw Pact attack (regardless of any Warsaw Pact air units there).
d) Resolve Air Superiority Combat, if any.
e) Resolve the declared attack, contributing Air Support of any surviving air units in the combat hex.
f) Place all surviving air units in the Returning to Base box printed on the map. Eliminated air units are removed from play permanently.
g) Conduct any resultant retreats and/or advances after combat, if any.
5. Recovery Step
a) Rebuild any Warsaw Pact units that have been degraded with available victory points (see 20.0).
b) Return all air units (from both sides) that conducted a strike or contributed Air Support to a combat hex (or conducted a transfer) from the Returning to Base box back to any friendly airbases/airports (even if just captured during this phase) of the owning player's choice. These air units are available during the next phase, normally.
NATO Phase
6. Strike and/or Nuclear Launch Step
a) The NATO player may launch all of his intended air strikes (with available fixed-wing aircraft) at this time (see 14.3) and/or all of his intended nuclear launches (with nuclear target markers) at this time (see 15.0). If any nuclear target markers have been placed during this step, consult the nuclear threshold (16.0) during this sequence, but only after all of the nuclear target markers that he intends to launch this sequence have been placed.
b) The Warsaw Pact player may announce that he is conducting interception of any NATO strikes (see 14.5) that were announced during sequence (a) above.
c) Resolve Air Superiority Combat, if any, and then conduct all strikes that were announced above (if they survived Air Superiority Combat) per 14.5. If any nuclear strikes successfully occur, consult the nuclear threshold (16.0) during this sequence, but only after all of the intended nuclear strikes have been resolved (if successful).
d) Place all surviving air units in the Returning to Base box printed on the map. Eliminated air units are removed from play permanently.
e) Detonate any Warsaw Pact nuclear target marker(s) in the chosen target hex(es) that had been launched by the Warsaw Pact player during the preceding Warsaw Pact Strike and/or Nuclear Launch step (of the preceding phase).
f) Move any air units that will be transferred to another airbase/airport to the friendly Returning to Base box.
7. Movement or Combat Step
a) The NATO player may choose to either move NATO units or conduct combat with NATO units (except those that are not officially belligerent) at this time. If NATO units move now, this is considered to be their Movement Step, and their Combat Step is next (although no unit is ever required to conduct combat); If NATO units conduct combat now, this is considered to be their Combat Step, and their Movement Step is next (although no unit is ever required to move during their Movement Step). NATO reinforcements that are scheduled to enter this game turn must do so during the Movement Step of this phase, whether it occurs before or after the Combat Step. It is not possible to conduct two movement steps or two combat steps during the same phase.
b) If this is the NATO Combat Step, any NATO air unit(s) may be flown to any declared combat hex to contribute Air Support to that attack at this time.
c) Any Warsaw Pact air unit(s) may be flown to any combat hex to contribute Air Support to the defense of the Warsaw Pact unit or stack that is the recipient of that NATO attack (regardless of any NATO air units there).
d) Resolve Air Superiority Combat.
e) Resolve the declared attack, contributing Air Support of any surviving air units in the combat hex.
f) Place all surviving air units in the Returning to Base box printed on the map. Eliminated air units are removed from play permanently.
g) Conduct any resultant retreats and/or advances after combat, if any.
8. Combat or Movement Step
a) The NATO player may choose to move NATO units if this is their Movement Step, or the NATO player may choose to conduct combat with NATO units if this is their Combat Step. NATO units may not move if they had already moved during the previous step (being their Movement Step), or NATO units may not attack if they had already conducted attacks during the previous step (being their Combat Step). NATO reinforcements that are scheduled to enter this game turn must do so during the Movement Step of this phase, whether it occurs before or after the Combat Step. It is not possible to conduct two movement steps or two combat steps during the same phase.
b) Any NATO air unit(s) may be flown to any declared combat hex to contribute Air Support to that attack at this time.
c) Any Warsaw Pact air unit(s) may be flown to any combat hex to contribute Air Support to the defense of the Warsaw Pact unit or stack that is the recipient of that NATO attack (regardless of any NATO air units there).
d) Resolve Air Superiority Combat.
e) Resolve the declared attack, contributing Air Support of any surviving air units in the combat hex.
f) Place all surviving air units in the Returning to Base box printed on the map. Eliminated air units are removed from play permanently.
g) Conduct any resultant retreats and/or advances after combat, if any.
9. Fleeing Civilians Movement Step
a) All Fleeing Civilians markers must be moved towards the closest French and/or Dutch (Netherlands) hex(es) at this time, per 8.4.
10. Recovery Step
a) Rebuild any NATO units that have been degraded with available victory points (see 20.0).
b) Return all air units (from both sides) that conducted a strike or contributed Air Support to a combat hex (or conducted a transfer) from the Returning to Base box back to any friendly airbases/airports (even if just captured during this phase) of the owning player's choice. These air units are available during the next phase, normally.
c) Advance the game turn marker from the game turn box where it presently exists (the current turn) to the next adjacent game turn box to the right.
4.1 End of the Last Game Turn (Victory Determination)
If step 10 above is completed for the last game turn (Game Turn 16), the opposing players must then tally the quantity of victory points (VP) that the Warsaw Pact side has accrued throughout the game, and determine if the Warsaw Pact side has won or lost the game (see 18.0).
5.0 Stacking & Fog of War
Whenever more than one friendly land unit occupies the same hex together, they are considered to be stacked together. A unit that is moving through a hex that is occupied by another friendly unit is not considered to be stacked with that unit. However, if a moving unit ends its movement in a hex that is occupied by any other friendly unit, those units are immediately considered to be stacked together.
Under no circumstances may any land unit ever enter, move through, or stack with any other enemy land unit, even temporarily.
Some types of units (such as air units) are excepted when determining stacking in a hex, or are governed by different stacking rules (see 5.1).
Note: A Fleeing Civilians marker and/or any leader is always ignored when determining stacking in a hex.
It is permitted for stacks to move together as stacks, if within stacking limits (see 5.1 and 5.2 below), even when moving through hexes that are occupied by other friendly units. See 6.4.
5.1 Stacking Limits
Each hex is permitted to stack a maximum of four (4) full-strength friendly land units of any type (excluding fleeing civilians and leaders, if any, which are ignored when determining stacking in a hex). However, each degraded land unit is only counted as half of a full-strength land unit, and so a player may stack up to eight (8) degraded friendly land units of any type in each hex or any combination thereof, so long as the total stack does not exceed the equivalent of four full-strength land units.
Exception: Company (I), Battalion (II), and Regiment (III) sized units are never counted for stacking, although there is always an absolute limit of eight units in any single hex.
Air units are ignored when determining stacking in a hex, although air units are subject to basing limits at airbases and airports (see 14.7).
5.2 City Stacking Limits
If a hex is printed with a city symbol, the stacking limit in that hex is a maximum of five full-strength friendly land units, instead, or up to 10 degraded friendly land units (or any combination thereof).
5.3 Overstacking
Overstacking is not permitted (except temporarily whenever a unit is moving through a hex that is presently occupied by another friendly unit). If any hex is found to be overstacked as of the end of any movement step, the owning player must immediately eliminate the overstacked units to comply with the stacking limits (although, in such cases, the owning player may always decide which of his units are eliminated).
5.4 Fog of War
A player is always entitled to know the contents of any and every enemy stack, as well as the terrain below any enemy units, and the printed values on both sides of any enemy units, anywhere on the map.
Designer's Note: Satellites, electronic surveillance, reconnaissance, and very thorough espionage (from both sides) during the 1980's meant that NATO and the Warsaw Pact were rarely unaware of enemy locations and movements at this scale.
6.0 Movement Rules
Movement is simply the process by which units are moved about the map. During the appropriate phases, all of a player's eligible units may be moved, unless otherwise blocked by impassable terrain, other game pieces and/or stacking limitations. A player is never required to move any units, but he may choose to move only some of his units, or all of his units, as he prefers (within the allowances of the rules), and this freedom applies each game turn during the course of the game (unless the rules or a scenario dictate otherwise).
All units are printed with a movement number, which indicates its movement allowance in terms of expendable movement points (abbreviated throughout the rules and charts as MP) for that game turn. Each unit must expend a specific quantity of its own movement points as it enters different types of hexes, depending on what kind of terrain or other game pieces are in each hex that is entered. Some hexes are prohibited altogether to any movement at all (see 6.2), but otherwise all units pay the same exact movement cost, regardless of their unit type.
Exception: Full-strength airmobile type units only ever pay one movement point (1 MP) per hex they enter, regardless of the terrain or other units in each hex/hexside entered/crossed (see 6.1).
Movement costs in a hex never change regardless of what other units (enemy or friendly) may have entered there previously. The movement point (MP) cost for any non-air land unit as it enters each type of hex is listed as follows (as well as listed on the map); the listed MP number is the quantity of points that must be deducted from the moving unit's printed movement allowance as it enters that type of hex and/or crosses that type of hexside.
| Terrain | Movement cost |
|---|---|
| All-sea hex (all sea color) | Prohibited |
| Coastal hex (partly sea color) | 1 MP |
| Clear hex (no terrain features) | 1 MP |
| Munitions hex (silhouette) | Per the other terrain in that hex |
| Hills hex (brown) | 3 MP |
| Forests hex (green) | 2 MP |
| Hills/Forest hex (green and brown) | 5 MP |
| Clear Terrain Road hex (from any road hex) | 1/2 MP (or per 6.7) |
| Terrain Road hex (from any road hex) | 1/2 MP (or per 6.7) |
| Minor river hexside (if crossing) | 1 MP |
| Major river hexside (if crossing) | 4 MP |
Terrain movement costs are indeed cumulative. In other words, if there is more than one type of terrain in a particular hex, all of the terrain movement costs in that hex must be added together as a sum, to determine the total movement expenditure required to be expended to enter that particular hex. This includes hexside terrain (such as a river) that a unit must cross to enter a hex.
Note: The MP cost of all terrain automatically includes the underlying clear terrain underneath that type of terrain, if any. For example, a forest hex with clear terrain coloring around the forest artwork in a hex only requires an expenditure of 2 MP, not 2 MP plus the cost of the clear terrain in that hex, too.
Terrain movement costs apply equally throughout a hex, even if only a small portion of that hex is depicted with a particular terrain feature.
Aside from these strictures above, and any limitations imposed by a scenario or other rules, as well as the limitations of the playing area, a player may move his eligible units in any direction or combination of directions as he prefers.
6.1 Capturing Hexes
A hex is considered captured when any enemy unit enters that hex, even if only moving through it during movement. However, a particular city's victory points are only granted to the capturing player when an eligible land unit is presently occupying that city.
6.2 Conducting Movement
The movement point (MP) cost of a hex is never paid (expended) by the moving unit until it has actually entered a particular hex, never before. When a unit is moved, that unit may only enter a hex that is adjacent to its current hex location; no unit may ever skip or otherwise jump hexes. But, as a unit enters a new hex (after expending the required movement point cost, per 6.0), it is then eligible to move into the next adjacent hex, if it is otherwise legal for that unit to enter that hex.
Thus, to move a unit, a player simply picks up that unit and places it in an adjacent hex of his choice (if otherwise legal), expends the required movement point cost for that hex, then picks up that unit and places it in another hex of his choice (that is adjacent to the first entered hex), expending the required movement point cost for that new hex, and so on in this manner until the moving player chooses to stop that unit's movement, or until that unit has insufficient remaining movement points available to enter the next intended hex.
When a unit has completed its movement, whether voluntarily or because of a lack of remaining MP, it may not move again during that same game turn (except if eligible to advance after combat or when required to retreat). However, at the beginning of each new game turn, all units' movement allowances are reset to their printed value, and they are eligible to use any or all of their available movement points again during that new turn (when otherwise legal to do so). A unit's previous movement (or lack thereof) has no effect on this reset.
Movement points can never be saved or accumulated from turn to turn, phase to phase or step to step; movement points that are not used during a turn are lost forever. No unit may ever lend its movement points to (or ever borrow movement points from) any other unit, nor may any unit borrow its own movement from any upcoming game turn.
Note: No unit is ever required to move (except when it must retreat), nor move any particular distance in hexes, although no unit may ever move farther than its printed movement allowance allows, except in the cases of advances after combat (see 10.8) or retreats (see 10.7).
The actual movement of any unit has no bearing on the movement of any other unit, although the presence of fleeing civilians can affect a moving unit's movement (see 8.0).
6.3 No Minimum Movement
A unit may never move into any hex if that unit lacks enough movement points to pay the terrain cost across or therein. There is no "minimum move" in Red Tide West.
6.4 Stack Movement
A stack of friendly units may be moved together as a singular stack, if the owning player prefers. There is no intentional penalty for doing so, but a moving stack may never split up to branch off into different directions as it is moving. Once a stack begins its movement together, it must move together as a stack.
Exception: As a stack is moving, it is permitted for any unit(s) of that stack to be 'dropped off' in any hex(es) that have been entered by that stack, as that stack continues to move on from there (if the owning player prefers). Any unit that is dropped off, however, may not continue to move from that hex during that same movement step (even if that stack subsequently reenters its hex).
6.5 Crossing Arrows
Crossing arrows are printed on the map across various sea depictions that separate particular land formations, indicating that normal land movement is permitted across that specific sea depiction. There are two types of crossing arrows, BLUE crossing arrows that are printed within some hexes, and RED crossing arrows that are printed across some hexsides of two adjacent hexes. Blue crossing arrows have no effect on play whatsoever, and only serve as an indicator that movement within a hex is not affected by any depiction of sea within that hex at all (in other words, players are to regard hexes with blue crossing arrows as having sufficient bridges, ferries, undersea tunnels, fords, et cetera to permit normal land movement therein). However, movement across any red crossing arrow hexside requires a crossing unit to begin its movement adjacent to that hexside. And, once across that crossing arrow hexside, that crossing unit must then stop in the adjacent hex for the remainder of that game turn. Red crossing arrows require the entirety of any land unit's movement allowance to cross, but do not impede Zone of Control across any sea depiction where it is printed.
Red crossing arrows do not prevent any attack from a unit across that hexside, but no unit may advance after combat across a red crossing arrow. Furthermore, no unit may retreat across a red crossing arrow hexside (if required to retreat across a red crossing arrow hexside, that retreating unit must be eliminated instead, assuming no other alternative retreat route is available).
Any attack across a red crossing arrow incurs a two-column leftward shift penalty.
6.6 Civilians
Fleeing Civilians markers have an assumed movement allowance of "1", but otherwise move like any other land unit, except per the variances listed under rule 8.3.
6.7 Road Movement
Roads represent major highways that greatly facilitate the movement of large military formations. Whenever any unit enters a hex that is printed with a road symbol, from a hex that is printed with a connected road symbol, that unit is automatically assumed to be utilizing road movement, which decreases that unit's movement cost (while moving via a series of connected road hexes). Thus, a unit that is moving from one road hex to an adjacent and connected road hex only expends a reduced MP cost of one-half movement point when entering each such connected road hex.
Note: Road movement is not affected by stacking or the presence of any other friendly unit(s), except Fleeing Civilians (see 6.8).
Road movement is the same for all units. When any unit is moving via road hexes through any type of terrain, the movement cost to enter each such road hex is one-half (1/2) of one MP. However, when any unit is moving via road hexes into any hex that is also within any enemy (or nuclear detonation's) Zone of Control, that unit must stop in that hex (although it is entitled to only pay the road movement cost to enter that hex, if entering that hex from a hex with a connected road symbol).
It is certainly possible that a moving unit may find itself moving in and out of road hexes. In those cases, any remainder fractions (if any) when that moving unit stops are always rounded up to the nearest whole number. Any remainder fractions are also rounded up if a moving unit moves out of a road hex into a regular non-road hex, whether stopping in that hex or not.
Example: If moving from a road hex to a connected road hex (regardless of the other terrain), the MP cost would be 1/2 + 1/2 (1) if that moving unit stops there (instead of entering another road hex). If, instead, that same unit moved off of that road hex into a non-road clear hex, the MP cost would be 1/2 + 1, which is rounded up to two (2), even if that unit doesn't stop there.
Designer's Note: The roads on the two maps are depicted as they actually existed in East and West Germany, and therefore they often undulate in and out of various hexes, sometimes quite irregularly (for example, the road 0814 wends into 0815 and then over into 0866 before continuing into 0816). While most wargames typically depict roads conveniently conforming to a map's hex pattern, the meandering routes on the Red Tide West maps are intentionally unaltered. As such, the players may find themselves struggling for control of critical road hexes that deviate from an otherwise linear front line.
6.8 Fleeing Civilians Traffic Jams
If a Fleeing Civilians marker is present in any road hex, no road movement is permitted by any NATO unit in that hex. That is to say, the normal movement cost of the other terrain(s) in that Fleeing Civilians marker's hex must be paid by any NATO land unit (including other Fleeing Civilians markers, if any) that enters its hex, in addition to the additional 1 MP cost for entering a Fleeing Civilians marker's hex (see 8.0).
Warsaw Pact units are also potentially subject to this rule, but the Warsaw Pact player may instead choose to simply eliminate a Fleeing Civilians marker as any Warsaw Pact land unit enters its hex. In doing so, however, the Soviet player must immediately roll one ten-sided die (per each Fleeing Civilians unit he opts to eliminate) and reduce his victory points by a quantity equal to each such die roll.
Note: A roll of "0" here is considered to be "zero," not 10.
6.9 Bridges
Bridges only span major rivers (minor rivers are assumed to have plenty of smaller bridges or other crossing points, or are easily spanned by engineers or easily crossed by the plethora of amphibious vehicles), and only have the effect of allowing land units to cross bridged hexsides via road movement.
Note: A bridge symbol that is printed on the map represents all bridges across that river hexside, even if not every road or river depiction along the same hexside is printed with a bridge symbol. If a bridge is not intact (see 14.5), all bridges across that river hexside are assumed to not be intact.
An attack via a bridged major river (if intact) incurs only a 1 leftward shift penalty instead (see 10.4).
Errata: The major river between hex 0491 and 0540 is assumed to depict a bridge, normally.
6.10 Out of Play Countries
Certain countries are out of play, meaning that only units that are native to those countries or units that are designated as reinforcements (those printed with a reinforcement turn number) may ever enter those countries, and only for the purpose of entering the playable area of the map; once they exit into the playable area of the map, such units may never re-enter those out-of-play countries. The list of countries that are out of play is as follows.
Note: Dutch units are subject to additional restrictions in the event of any nuclear detonation (see 13.0).
- France
- Belgium (hex 0034)
- Luxembourg
- Netherlands (including hex 0028, 0029, 0030)
- Sweden
- Switzerland
Denmark and Austria are neutral countries, but are not out of play, and may be invaded or overflown by Warsaw Pact units without restriction. However, a violation of Austria's neutrality does affect the nuclear threshold (see 16.0). Accordingly, NATO units may violate Denmark's and/or Austria's neutrality if the Warsaw Pact has already done so. In the latter case, the nuclear threshold is not affected by the presence of any NATO units in Denmark and/or Austria.
Designer's Note: The Soviets' operational goal is to defeat the bulk of NATO's forces in West Germany. Any strategic intention beyond that (such as an actual invasion of France proper) is unnecessary here because that type of circumstance involves completely different [strategic level] victory conditions (which presupposes that peace negotiations had already failed). As such, the borders of the out-of-play countries can be thought of as nuclear tripwires; the French, for instance, may feel sufficiently threatened by the advancing Red Army to employ their nuclear arsenal to prevent French soil from becoming the center stage of a world war for the third time in a century. Whether or not this would all actually happen in this way is debatable, but is beyond the scope of the game in any case.
6.11 Airmobile Units
Airmobile units are identified by a NATO icon with a "Y" type of symbol; these represent heliborne units. Airmobile units function normally in all respects except that they only ever pay 1 MP per hex (or 1/2 MP on a road) that they enter, regardless of the terrain. This capability is signified by a white movement number printed on the front side of airmobile units.
Exception: Airmobile units do not possess this capability when degraded, and thus are not printed with a white movement number (representing the fact that their helicopters have been shot down or simply returned to base).
In either case, airmobile units are entitled to utilize road movement per 6.7 normally, but airmobile units are not permitted to enter any enemy unit's hex, and are required to stop when entering any enemy unit's Zone of Control (representing the prevalence of SAMs, particularly shoulder-fired MANPADs).
If a leader is stacked with an airmobile unit, it may move with that airmobile unit, paying only 1 MP per hex entered, so long as that leader remains with that airmobile unit, and only if that leader is the same nationality as that airmobile unit.
7.0 Airborne Operations
During his own movement step, a player may select any friendly airborne unit(s) that began that movement step occupying any friendly airbase/airport hex(es)--that is not within enemy zone of control--and then simply place them in any hex anywhere within Germany and/or Denmark. This placement is not normal land movement, but is an automatic placement regardless of any intervening terrain, terrain costs or the presence of enemy units between the starting airbase/airport hex and the intended placement (destination) hex.
Note: There is no limit to the quantity of airborne drops that an airborne unit may conduct, provided that it occupies a friendly airbase/airport hex (not in an enemy zone of control) before conducting each drop.
However, an intended destination hex may not be occupied by any enemy land unit (notwithstanding lone enemy leaders; see 12.6), although the presence of any enemy air unit does not interfere with any intended destination hex. Furthermore, the intended destination hex may not be any all-sea hex, city hex or forest hex.
Note: Fleeing Civilians markers have no effect upon an airborne drop (but would impede an airborne unit's subsequent movement normally, per 6.8 normally).
7.1 Airborne Drop
After an airborne unit has been placed into the owning player's intended destination hex, that airborne unit is immediately susceptible to a di(c)e roll to determine the status of that airborne unit. If the airborne unit is a NATO unit, the NATO player must roll two six-sided dice, but if the airborne unit is a Warsaw Pact unit, the Warsaw Pact player must roll one ten-sided die, resolved as follows:
| Roll | Result |
|---|---|
| 1-6 | Unsuccessful Drop, that airborne unit is eliminated immediately. |
| 7-9 | Bad Drop, that airborne unit is landed in the intended destination hex, but is degraded. |
| 10-12 | Successful Drop, that airborne unit is landed in the intended destination hex without effect. |
Note: A roll of "0" here is considered to be "10," not 0 (zero).
The owning player may add +1 to his airborne drop di(c)e roll per each hex (regardless of terrain or other units therein) that is directly in between that airborne unit and the nearest enemy air unit(s) currently based at any airbase/airport hex. For example, if the nearest enemy air unit's hex is four hexes from that intended destination hex (not counting the intended destination hex or the enemy air unit's airbase/airport hex), that airborne unit is therefore entitled to a +4 die roll modifier when conducting its airborne drop. This modifier is not affected by the quantity of nearby enemy air units, nor the quantity or location of any friendly air units.
7.2 Airborne Landing
After a drop, an airborne unit is not permitted to move for the remainder of that game turn (except to advance after combat or retreat), although an airborne unit that has not been eliminated is permitted to conduct an attack against any adjacent enemy unit during the ensuing combat step (unless the combat step for that phase had already occurred, as can be the case with NATO phases; see 4.0).
If an airborne unit's destination hex is occupied by any enemy air unit(s) of any type, the enemy air unit(s) in that hex are automatically eliminated immediately by the occupation of that airborne unit (unless that airborne unit was eliminated as a result of an unsuccessful drop there, in which case no enemy air unit is eliminated by that airborne drop).
8.0 Fleeing Civilians
To represent the exodus of civilians fleeing the war (especially if nuclear and even chemical weapons have been used), numerous markers have been provided to represent citizens escaping westward ahead of the advancing Red Army.
8.1 Placement
After the Warsaw Pact player has completed all of his intended movement during his own Movement Step of each game turn, place a single Fleeing Civilians marker in whichever West German city is closest to (but not yet ever occupied by) a Warsaw Pact land unit in West Germany (only). If there are two (or more) West German cities that are equidistant to the nearest Warsaw Pact land unit, a Fleeing Civilians marker is then placed in each of those West German cities. Under some circumstances, additional Fleeing Civilians markers are placed, or not placed, as explained under rule 8.2 and 8.3.
During the Fleeing Civilians Movement step of the NATO phase of a game turn, each present Fleeing Civilians marker must be moved towards the closest westernmost hex on the map--until it moves across a purple border hexside (at which time it is eliminated permanently).
Note: Once all Fleeing Civilians markers have been eliminated in this way, no more are placed, regardless of Warsaw Pact movements or dispositions thereafter.
Fleeing Civilians markers are placed each game turn until all of the Fleeing Civilians markers are presently on the map and/or have been eliminated.
Example: A Soviet unit has ended its movement in hex 0837 just north of the city of Wurzburg. As such, during the upcoming Fleeing Civilians Placement step, Fleeing Civilians markers must be placed in the cities of Frankfurt, Offenbach, Erlangen, Furth, and Nuremburg (because they are all equally nearest to the Soviet unit's hex). All of those Fleeing Civilians markers will then move (one hex per game turn) during the Fleeing Civilians Movement step of each and every game turn (until eliminated).
8.2 Mass Exodus
If the Warsaw Pact player has used the chemical weapons combat modifier during any combat occurring anywhere on the map (regardless of who is attacking or defending, and regardless of the results of that combat), or if any successful nuclear detonation has occurred anywhere on the map, all Fleeing Civilians markers that are not already on the map are placed onto the map immediately in each West German city (if never captured) that is closest to any Warsaw Pact land units.
Note: In the event that there are more equidistant cities than available Fleeing Civilians markers, the Warsaw Pact player chooses which of the cities that the Fleeing Civilians marker(s) are placed in.
In this case, no additional Fleeing Civilians markers are placed thereafter.
8.3 Exceptions
The following cases are specific exceptions to the above rules.
a) Fleeing Civilians markers are never placed in any city that has ever been occupied by any Warsaw Pact land unit.
b) Fleeing Civilians markers are never placed in any city where a nuclear detonation has occurred (those inhabitants are already dead).
c) A Fleeing Civilians marker, once eliminated, is never placed on the map again (regardless of the causality of its elimination).
8.4 Civilian Movement
All Fleeing Civilians markers on the map must be moved during the Fleeing Civilians Movement step of the NATO phase, regardless of when they had been placed. Each Fleeing Civilians marker only ever moves one hex--regardless of terrain--closer to the westernmost map edge (although a Fleeing Civilians marker may not ever enter all-sea hexes and must move around them in the most direct route towards the nearest westernmost map edge).
The NATO player moves all present Fleeing Civilians markers from their current hex (where each marker began the step), but he may only move each Fleeing Civilians marker to a hex from a connected hex that is closer to a western map edge hex, provided that this movement does not enter any all-sea hex (although Fleeing Civilians markers are permitted to cross unbridged major rivers without restriction).
Note: In cases where there are two or more choices of hexes that are equidistant to the western map edge, the NATO player may choose which hex the Fleeing Civilians marker will enter, provided that it is legal for that Fleeing Civilians marker to enter that hex.
Fleeing Civilians markers may stack with and move through hexes containing other NATO units, including other Fleeing Civilians markers, if necessary, to move closer to a western map edge hex, but no Fleeing Civilians marker may ever enter a hex containing any Warsaw Pact unit of any type (including air units).
Fleeing Civilians markers are never affected by zone of control, friendly or enemy, under any circumstances (including any nuclear detonation's zone of control).
In some instances, a Fleeing Civilians marker will be unable to move because of the presence of Warsaw Pact units and/or nuclear detonations, et cetera; in such cases, that Fleeing Civilians marker is eliminated (they have either starved, melted back into the local population, been rounded up, massacred, or all of the above). In these instances, the Warsaw Pact player is not liable to roll a victory point penalty die roll (see 18.3).
8.5 Leader Movement
Leaders may move like normal land units in all respects, except that they project no zone of control (even in their own hex), but are individually not affected by enemy zone of control. Leaders may move independently of other friendly units, but a leader cannot ever capture any hex it enters. Furthermore, no leader may ever enter any other enemy unit's occupied hex, of any kind.
If a leader enters a Fleeing Civilians marker's hex, that leader is subject to rule 6.8 normally.
If any leader is alone in a hex that is entered by any enemy land unit, that leader is automatically eliminated.
9.0 Zones of Control (ZOC)
Each land unit in the game (except Fleeing Civilians and leaders) projects a so-called "zone of control" (ZOC) into all six land hexagons surrounding that unit, regardless of the type of unit, and regardless of the type of terrain in each surrounding hex. A ZOC only exists around a land unit while that land unit is present in its current hex, not while that land unit is moving. A ZOC is never negated, even by another overlapping ZOC (whether friendly or enemy) or another unit (friendly or enemy).
The singular effect of any ZOC is that it immediately halts the movement of any land unit (except Fleeing Civilians and Leaders), regardless of type, that moves into any enemy unit's ZOC hex during a movement step when the entrance occurred.
Designer's Note: The zones of control rules are harsh in Red Tide West, representing the increased range and accuracy of modern weapons, particularly anti-tank guided missiles, etc.
An enemy ZOC does not affect the movement of any unit that began its current movement step within that enemy ZOC and then exited that ZOC. In fact, a unit may exit an enemy ZOC (at the beginning of its movement) and even reenter another enemy ZOC, at which time that moving unit must halt its movement again and remain in that hex throughout the remainder of that game turn (until that unit is normally eligible to move again).
Nuclear detonations also project ZOC exactly like any other unit (representing radiation and fallout), per the same rules listed above, but affect both sides equally. In other words, a nuclear detonation is assumed to project an enemy ZOC to all land units, regardless of nationality.
ZOC has no effect upon an advance after combat, but does disallow the retreat of any enemy unit, even if that hex is also within the ZOC of another compatriot unit, or even if actually occupied by another enemy unit.
10.0 Combat
During each combat step of a player's phase, whenever that player's land units are adjacent to any enemy unit(s), the owning player may (but is never required to) declare any enemy units to be the target of an attack by any adjacent land units belonging to the owning (attacking) player. A player may announce and conduct as many attacks as he desires with his own units, provided that each attacking unit is adjacent to an enemy unit (that it intends to attack) during that same combat step. The enemy player cannot avoid or otherwise prevent an attack against any of his own units.
If multiple attacks have been declared, the attacking player may resolve them in any order he prefers, but each attack must be resolved to completion once it has begun, which includes any retreats that result from combat, as well as any advances after combat, if any.
10.1 Conducting Combat
When a particular attack has been announced and declared against a specific enemy-occupied hex, the attacking player must denote which of his adjacent units are attacking that enemy-occupied hex. No unit is ever required to attack, and it is even permissible for one unit in a stack to attack while another unit in that same stack does not, or for some units adjacent to an enemy unit to attack it while other units adjacent to that enemy do not.
If an enemy-occupied hex contains multiple enemy units therein, the declared attack must [and is always assumed to] be attacking every enemy unit in that same hex. Individual enemy units within the same hex cannot be selectively targeted separately from the other unit(s) in that hex. Furthermore, when an attack is declared against a particular enemy-occupied hex, that is the only attack that may be brought against that hex during that same step; thus, any attacking units that intend to attack that enemy-occupied hex must all do so at the same time, as one combined attack (if they are otherwise eligible to do so at that time; see 7.1). Any units that do not participate in an attack may not later attack that enemy-occupied hex during that step (although they may conceivably attack that same hex during a subsequent step, if otherwise eligible).
Any attacking unit must contribute its entire printed attack strength to its intended attack; no unit may ever divide, share, lend, borrow or otherwise parcel out any portion of its attack strength to any other unit, nor be used to participate in any other attack (other than the attack it is conducting). Each attacking unit may only devote its entire attack strength to one singular enemy-occupied hex per game turn.
Note: This rule does not apply to defending units. A defending unit is entitled to contribute its printed defense strength to the defense of its own hex every time it undergoes an enemy attack during the same game turn.
If multiple units are attacking the same hex, their collective printed attack strength must be added together as a sum (as one total attack value).
Attacks may never be declared against empty hexes or against friendly units for any reason.
10.2 Calculating an Attack
Once the attacking player has decided which of his adjacent units will be designated to attack a particular enemy-occupied hex, he then determines the total attack strength of the attacking unit(s). If multiple adjacent units are attacking the same enemy-occupied hex, their collective printed attack strength must be added together as a sum.
Next, the defending player must determine the total defense strength of the defending unit(s) in that targeted hex. If multiple units are present in the same hex, their collective printed defense strength must be added together as a sum.
The attacking player's sum and the defending player's sum are then compared as an odds ratio, either expressed in whole numbers (such as 3 to 1 odds) or as a percentage (such as 300%), either of which means the same thing (per this example, the attacker's sum combat strength is at least three times greater than the defender's sum combat strength).
Note: If an odds ratio results in any fraction (for instance, if 18 sum points are attacking 5 sum defending points, which is 3.6 to 1, or 360%), the fraction is always lowered to the next whole number (per this example, 3 to 1, or 300%).
Then, the column for that odds ratio is consulted on the Combat Results Table below (but, do not roll the di(c)e yet; see 10.4).
Note: It is legal for units with a "0" attack strength to attack (alone or collectively), but any attack of only zero points is always calculated as a 1 to 3 (33%) attack (but may be shifted from there normally).
10.3 Combat Results Table
| NATO Dice Roll | Warsaw Pact Die Roll | 1 to 3 (33%) | 1 to 2 (50%) | 1 to 1 (even) | 3 to 2 (150%) | 2 to 1 (200%) | 3 to 1 (300%) | 4 to 1 (400%) | 5 to 1 (500%) | 6 to 1 (600%) | 7 to 1 (700%) |
|---|---|---|---|---|---|---|---|---|---|---|---|
| 12 (LE) | - | DR | DS | DS | DE* | DE/O* | DE/O* | DE/O* | DE/O* | DE/O* | DE/O* |
| 11 (LE) | - | DD | DR | DS | DS |
* = Eliminates any enemy leader in the defending hex.
10.4 Column Shifts
Once the odds ratio has been determined per 10.2, the column is subject to possible shifts leftward or rightward, such that an odds ratio may be decreased (shifted left) or increased (shifted right) depending upon other circumstances that affect combat, all of which are listed below (listed from "a" to "j" in no particular order). Regardless of the accumulation of shifts (leftward or rightward), the Combat Results Table can never be shifted leftward below 1 to 3 (33%), nor rightward beyond 7 to 1 (700%).
Note: Column shifts are cumulative; all shifts, leftward or rightward, that apply must be added and/or subtracted to arrive at a final net shift. Column shifts are not optional, nor may a player decline to apply any specific columns shifts, even those that are in his own favor.
If multiple attacking units include only one unit or leader that is entitled to a shift, that shift applies to the entirety of that attack. Conversely, if multiple defending units include only one unit or leader that is entitled to a shift, that shift applies to the entirety of their defense.
a) Air Support (see 14.3)
An odds ratio column will be shifted by the presence of Air Support in the combat hex (after any and all Air Superiority combat has occurred there). Whichever side can demonstrate the preponderance of friendly Air Support is entitled to shift the odds ratio a single column, or more, in their own favor (depending on whether they are the attacker or the defender) on the Combat Results Table. The specific amount of shifts depends on the type of air unit(s) that are there to provide Air Support (see 14.3).
Note: An air unit that rolled any di(c)e during the preceding Air Superiority combat, if any, cannot conduct air support, although an air unit that had been merely targeted during Air Superiority combat may conduct air support without effect (assuming it was not eliminated or forced to return to base).
If any air unit that is providing Air Support is a different allied nationality than all of the friendly land units that are attacking or defending in that combat hex, that air unit's shift number is automatically assumed to be reduced one numeral during that combat (that Air Support).
b) Support Units
Certain specific units are automatically entitled to shift the odds ratio a rightward column or a leftward column, or more (depending on whether attacking or defending) on the Combat Results Table. The specific amount of shifts depends on the number printed on the upper lefthand corner on each such unit. Accordingly, support units are identified by their printed shift number, but may also have other special capabilities (see 6.11).
Support units are entitled to apply their shift whether attacking or defending alone, or when in conjunction with an attack or a defense involving other friendly units.
c) Leader Shift (see 12.0)
If a leader is stacked with a land unit that is participating in an attack or being attacked, that leader's presence automatically entitles its side to shift the odds ratio a rightward column or a leftward column, or more, in their own favor (depending on whether they are the attacker or the defender) on the Combat Results Table. The specific amount of shifts depends on the number printed on the upper lefthand corner on each present leader.
This shift is only every applicable once per combat, regardless of the quantity of leaders present with the attacking or the defending force. Furthermore, a leader's shift can only ever be applied to one attack per game turn, but may be applied to the defense of the units it is stacked with each and every time it is attacked.
If both the attacking and defending units are stacked with a leader, each side is entitled to its own leader shift (leftward or rightward, as appropriate), which may only serve to cancel each other out (unless one leader or the other is printed with a higher shift number).
Leader markers are not printed with any combat number, and therefore may never conduct an attack alone. If any lone leader marker is attacked, it suffers an automatic DE result (see 12.6).
d) Surrounded
If a defending land unit's or stack's hex is being attacked by attacking land units on two opposite or three triangular sides (see the image below), that attack is entitled to a two-column rightward shift on the Combat Results Table.
e) Terrain
Each type of terrain in a defending land unit's or stack's hex will automatically apply a leftward shift or more, depending on the type of terrain, to any attack conducted against that hex. The leftward shift(s) imposed by each type of terrain is listed as follows.
| Terrain | Column shift |
|---|---|
| All-sea hex (all sea color) | Prohibited |
| Coastal hex (partly sea color) | No additional shift |
| Clear hex (no terrain features) | No additional shift |
| Red Crossing Arrow | 3 Leftward shifts |
| Munitions hex (silhouette) | No additional shift |
| Hills hex (brown) | 2 Leftward shifts |
| Forests hex (green) | 2 Leftward shift |
| Hills/Forest hex (green) | 3 Leftward shifts |
| Road hex | No additional shift |
| Minor river hexside (if all attacking units are across) | 1 Leftward shift |
| Major river hexside (if all attacking units are across) | 2 Leftward shifts |
Note: River terrain (even if spanned by an intact bridge) is unique in the regard that its leftward shift only applies if a river depiction separates the defending unit from all of the attacking land units (that are attacking that hex). In other words, if an attack is occurring whereby any of the attacking units are not attacking from across a river hexside, then no river leftward shift applies to that attack, even if other units are also attacking that hex from across a river.
All terrain shifts are cumulative; if there are multiple types of terrain in a particular hex, each type of terrain imposes that shift collectively. For example, a hex that contains a hill depiction, a forest depiction and a city depiction would impose a total of five leftward shifts to any attack upon that hex (in additional to any other applicable shifts, left or right).
f) Chemical/Biological Weapons (Attacker only)
At any time prior to rolling any di(c)e to conduct any particular attack, the attacking player may declare that he is using chemical/biological weapons during that attack. There is no limit to the number of attacks that may utilize chemical biological weapons, but each such attack negatively affects the nuclear threshold (see 16.0).
An attack that utilizes chemical/biological weapons is entitled to a two-column rightward shift on the Combat Results Table.
However, no advance after combat is ever permitted after conducting any attack that utilized the chemical/biological weapons rightward shift, regardless of the outcome of the attack. Although, a chemical/biological attack has no other effect upon the combat hex itself, then or later.
g) Command Difficulties (Attacker only)
Any attack that involves more than one nationality's units (even if only another nationality's air unit providing Air Support) must incur a one leftward column penalty during that attack. Additional nationalities that participate in the same attack do not increase this penalty, nor is this penalty applicable when different nationalities are stacked together and defending the same hex.
h) Warsaw Pact Defections
If any non-Soviet Warsaw Pact land unit (in other words, an East German, Polish, or Czech unit, et cetera) participates in any attack, a one leftward column shift penalty is imposed upon that attack. If any non-Soviet Warsaw Pact land unit is in a hex that is being attacked, a one rightward column shift bonus is applied to the enemy's attack. In either case, the shift applies regardless of the ratio of Soviet to non-Soviet units that are attacking or defending, and regardless of other applicable shifts, such as Communist Optimism, which must be applied, regardless. This penalty is also imposed if any non-Soviet Warsaw Pact fixed-wing or helicopter unit participates in that combat hex (whether attacking or defending).
In the case of a defending stack, the Warsaw Pact player may not purposefully withhold any non-Soviet land unit from being calculated as part of the defense in that hex to avoid this penalty (the Warsaw Pact player may, however, choose to exclude any non-Soviet land unit from participating an attack to avoid this penalty).
10.5 Minimum and Maximum Shifts
Regardless of the calculated combat odds or net shifts, no attack can ever be resolved at an odds ratio of greater than 7 to 1 (700%). Conversely, an attack is always entitled to a minimum of a 1 to 3 (33%) odds ratio, even if the attacking unit's or stack's odds are less than that, or even if the net shifts would otherwise be less than that.
When calculating the totality of applicable shifts, the net result (of attacker shifts vis-à-vis defender shifts, if any) is not shifted to any odds ratio greater than 7 to 1 (700%) or less than 1 to 3 (33%).
10.6 The Combat Di(c)e Roll
After the net result of all applicable column shifts have been applied to the Combat Results Table, adjusting the original odds ratio calculation, the attacking player rolls his attack di(c)e. If the NATO player is attacking, he must roll two six-sided dice, adding the result of those two die rolls together to arrive at a final result. If the Warsaw Pact player is attacking, he must roll one ten-sided die (once) to arrive at a result. In either case, the attacking player must then cross-reference his di(c)e roll with the final odds ratio (after all shifts, if any, have been applied) to determine the combat result of that attack. See 10.7 below.
Designer's Note: This feature of Red Tide West, in which each side rolls a different kind of di(c)e roll, is designed to reflect the higher proficiency of NATO soldiers, equipment and weapons over those of the Warsaw Pact, as well as create more consistent results for NATO forces (via the bell-curve result percentages of two six-sided dice). The Warsaw Pact's performance--had war actually erupted--is somewhat speculative, but would probably have varied considerably based on the overly rigid Soviet operational doctrine (which would be very advantageous in some circumstances, but quite disadvantageous in others), as well as innumerable other factors. Of course, the dice themselves will inherently disperse the outcomes for both sides, just more so for the Warsaw Pact by way of this model.
10.7 Combat Results
After the attacking player has rolled the combat di(c)e, he cross references that di(c)e roll row on the Combat Results Table above with a column that corresponds to the calculated odds ratio for that attack. For example, a roll of "7" that is cross referenced with the "300%" column on the Combat Results Table yields a specific result of DS (Defender Shattered). That result is a code that explains what has occurred; all such combat result codes are listed and explained here, as follows.
"DE/O" (Defender Eliminated/Overrun): All of the defending land units that contributed combat points to that combat are completely eliminated and removed from the map immediately. Additionally, after any units have conducted an advance after combat (see 10.8) into the combat hex, any of those advancing units (but not any units that did not advance after combat) may move a maximum of one additional hex (regardless of terrain, if otherwise eligibly enterable), regardless of enemy zone of control, or movement costs in either hex (or any movement expended up to then), but provided that there are no enemy units (or Fleeing Civilians) in the additional entered hex.
A DE/O result eliminates any leader stacked with the defending units.
"DE" (Defender Eliminated): All of the defending land units that contributed combat points to that combat are completely eliminated and removed from the map immediately. The attacking units may advance after combat (see 10.8) only.
A DE result eliminates any leader stacked with the defending units.
"DS" (Defender Shattered): Each defending land unit (that contributed combat points to that combat) is degraded, or eliminated if it was already degraded (or a one-sided unit) prior to the attack.
If this result eliminated every defending unit in a hex, any leader stacked in that same hex is also eliminated.
"DR" (Defender Routed): The defending player must withdraw (retreat) every defending land unit from its targeted hex to any one adjacent hex that is not within any enemy unit's ZOC, and if not in violation of stacking limits (even temporarily) or terrain restrictions (for example, a retreating unit may not move across a terrain feature, such as water, that it could not normally cross during regular movement).
If a defending unit or stack cannot legally withdraw (retreat) to any adjacent hex because of enemy ZOC, stacking limitations, or terrain restrictions, the attacking player must choose to degrade one of the enemy player's defending land units. The attacking player cannot force a withdrawal (retreat) that would cause an elimination.
If every defending unit in a hex is eliminated because of an inability to withdraw, any leader stacked in that same hex is also eliminated.
"DD" (Defender Depleted): The defending player must degrade one defending unit of the defending player's choice (or eliminate one defending unit, of the defending player's choice, if that was already degraded).
If this result eliminated every defending unit in a hex, any leader stacked in that same hex is also eliminated.
"DW" (Defender Withdrawal): The defending player must withdraw (retreat) every defending land unit from its targeted hex to any one adjacent hex that is not within any enemy unit's ZOC, and if not in violation of stacking limits (even temporarily) or terrain restrictions (for example, a retreating unit may not across a terrain feature, such as water, that it could not normally cross during regular movement).
However, instead of withdrawing (retreating), the defending player may choose to degrade any one of his own defending land units, of his choice, essentially converting this result into a "DD" (Defender Depleted) result in doing so.
Note: The defending player is always entitled to this option, but once he has chosen to withdraw (retreat) or degrade one of his defending land units, he cannot renege on this decision afterwards (for example, a withdrawing player cannot change his mind once he has seen that the attacking player has advanced after combat, if he had assumed otherwise).
If a defending unit or stack cannot legally withdraw (retreat) to any adjacent hex because of enemy ZOC, stacking limitations, or terrain restrictions, he must choose to degrade one of his own land units.
If every defending unit in a hex is eliminated because of an inability to withdraw, any leader stacked in that same hex is also eliminated.
"-" (No Effect): Neither side suffers and effects from that combat.
"EE" (Even Exchange): Both the attacker and the defender must each either eliminate any one of their own full-strength land units, or--alternatively--choose to allow the enemy player to degrade any one of the other player's land units of the enemy player's choice. Each player may choose which of these two options to impose upon himself, but both players must incur this result. The attacker must always decide which of these two options to incur before the defender.
Note: Any one-sided unit or an already-degraded unit that is chosen to be eliminated fulfills the elimination option. Conversely, if the degradation option is chosen, the enemy player may choose to degrade (thereby eliminating) an opposing one-sided or already-depleted unit of his choice, if any.
If this result eliminated every defending and/or attacking unit in a hex, any leader stacked in that same hex is also eliminated.
"FC" (Fierce Combat): The attacking player must roll one six-sided die; the result of that die roll is the quantity of "hits" (degrade results) that both sides must each suffer from amongst their own land units, if those units participated in that combat. Each player may choose which of his own land unit(s) suffer the hit(s); a player may choose to inflict multiple hits on different units, or he may choose to eliminate any full-strength unit(s) outright to incur two hits each, if multiple hits occurred.
If there are not enough land units to suffer all of the required hits by one side and/or the other, any excess hits are ignored (they are not carried over), whether attacking or defending.
If all of the attacking or defending land units were eliminated as a result of an FC result, any leader that was stacked with the eliminated land units is eliminated (killed) as well. That leader is not eliminated, however, if any friendly land unit has survived that Fierce Combat.
No retreats or advances after combat may occur following an FC result.
"AB" (Attack Blunted): The attacking player must degrade one attacking unit of the attacking player's choice (or eliminate one attacking unit, of the attacking player's choice, if that was already degraded).
If this result eliminated every attacking unit in a hex, any leader stacked in that same hex is also eliminated.
"AB[D]" (Attack Blunted [Defender's Choice]): The attacking player must degrade one attacking unit of the defending player's choice (or eliminate one attacking unit, of the defending player's choice, if that was already degraded).
If this result eliminated every attacking unit in a hex, any leader stacked in that same hex is also eliminated.
"AS" (Attacker Shattered): Each attacking land unit (that contributed combat points to that combat) is degraded, or eliminated if it was already degraded (or a one-sided unit) prior to the attack.
If this result eliminated every attacking unit in a hex, any leader stacked in that same hex is also eliminated.
"AE" (Attacker Eliminated): All of the attacking land units that contributed combat points to that combat are completely eliminated and removed from the map immediately.
An AE result eliminates any leader stacked with the attacking units.
"(LE)" (Leader Emerges): This is strictly a die roll result (indicated in bold), regardless of the actual odds ratio (or final odds ratio after shifts); if the NATO player rolls a 2, 11, or 12, a NATO leader appears. If the Warsaw Pact player rolls a "0", a Warsaw Pact leader appears. See 12.0.
10.8 Advance After Combat
After an attack has been resolved against a particular enemy hex, if all of the enemy units present in that hex have been forcibly retreated or eliminated, the owning player is permitted to immediately move any of those land units that participated in the attack (that forcibly retreated or eliminated the enemy units) into that vacated hex, if not in excess of normal stacking limits. This is known as an advance after combat.
An advance after combat is not regular movement, and therefore does not require the expenditure of any movement points. Terrain (and enemy ZOC) is ignored when advancing after combat, although any unit that advances after combat must end its move in that vacated hex (a unit may not continue to move after advancing after combat).
Exception: A combat result of DE/O (Defender Eliminated/Overrun) permits any unit that advanced after combat to move one additional hex thereafter (see 10.7).
An advance after combat is completely voluntary; the advancing player may choose to move none, some or all of his attacking units (if not in excess of stacking limits) into that vacated hex, provided that unit is otherwise eligible to enter that hex normally. However, "FC" (Fierce Combat) combat results on the Combat Results Table disallow an advance after combat immediately thereafter, even if all enemy units have been eliminated from the combat hex.
Furthermore, no advance after combat is ever permitted into any combat hex if the Chemical/Biological shift modifier was applied there, nor into any hex where a nuclear detonation exists.
After any unit has advanced after combat into a hex, it remains in that hex (and has captured that hex) for the remainder of the game turn, unless subsequently forcibly retreated or eliminated.
11.0 Supply
There are no supply considerations in Red Tide West. Within the scope of the game, the participating combatants carried enough supply (or could capture, scavenge, or appropriate from civilian sources most anything else) to last through the duration of the timeframe represented by the game.
Designer's Note: However, the effects of low or exhausted supply after intense combat are abstractly represented by the "Surrounded" column shift (see 10.4 d), as well as the ZOC rules in Red Tide West.
12.0 Leaders
Certain di(c)e rolls on the Combat Results Table will generate a random leader marker for the attacker. Each side is provided with an allotment of various leaders, all of which must be kept aside in that side's leader draw pool (which are printed on the map), face down and unrevealed to either player (until drawn).
Designer's Note: For the NATO side, a leader will emerge after the best dice rolls, indicating that an adept tactician has demonstrated his moxie in combat, and has therefore been promoted or been given a field command, or what-have-you. Perhaps counterintuitively, for both sides, a leader will also emerge after the worst rolls. But, this is meant to represent those instances when an incompetent commander was killed, wounded, or simply relieved of command--being that he was responsible for that poor di(c)e roll--and is hence replaced by a more able officer.
12.1 Leader Nationality
Leader markers exist as distinct nationalities, as indicated by their printed color; a leader marker that is drawn must be the same nationality as the attacking unit or stack. If there is more than one nationality participating in an attack, the drawing player may choose the nationality--from among the leader markers currently available in the pool--of the leader he draws (although the drawing player may not know the back side of the leader marker he draws until after he has drawn it).
Designer's Note: The East Germans and Poles are not provided with any leaders; This represents the more probable apathy of these Soviet client states.
12.2 Leader Draw
If the NATO player rolls a 2, 11, or 12 (regardless of any odds ratio), a NATO leader emerges as a result of his attack. If the Warsaw Pact player rolls a "0" (regardless of any odds ratio), a Warsaw Pact leader emerges as a result of his attack. In either case, when a leader emerges, the attacking player must immediately blindly draw a single leader marker from his own draw pool (from among the nationality or nationalities that participated in that attack), and then stack that leader in any hex with any unit or stack of his choice that had participated in that attack. A drawn leader, however, must be placed in a stack of the same nationality as that drawn leader. If there are no leader markers available (of the proper nationality) in the draw pool, no leader emerges after all, and the aforementioned di(c)e roll is ignored.
Exception: If all of the attacking units were eliminated as a result of that attack, then no leader emerges. The "(LE)" result is simply ignored in that case.
No more than one leader marker may ever be drawn per incident (per roll), and once drawn may not be returned to the leader draw pool.
12.3 Leader Placement
If multiple units had attacked from different hexes, the owning player may choose which of those hexes that his emerged leader is placed (if those units had not been eliminated there as a result of that attack). Once placed, that emerged leader may participate in subsequent combat normally, but cannot ever retroactively be applied to any attack that already occurred, including the attack from which that leader just emerged.
12.4 Leader Types
There are various types of leaders; each kind is printed with a specific shift number (on the back side of each leader counter) to be applied when participating in any combat (whether attacking or defending); see 10.4 (c). A leader's shift can only ever be applied to one attack per game turn, but may be applied to the defense of the units it is stacked with each and every time its hex is attacked.
12.5 Leader Movement
Each leader marker may move like any other unit, and is thusly printed with a movement number normally, although leader markers never project ZOC, nor are they ever affected by enemy ZOC. Moreover, leader markers are ignored when determining stacking in any hex.
A leader marker may move with a stack of any friendly units (including as part of an advance after combat or a retreat), even if with a different allied nationality, but its movement number does not increase or otherwise aid the movement of any other unit. A leader marker may move alone, adhering to all normal movement rules when doing so (except ZOC). However, a lone leader may never capture any hex, or displace any other game piece anywhere on the map.
12.6 Leader KIA
If any enemy land unit enters a hex containing any lone enemy leaders (whether during regular movement, as an advance after combat, or even a withdrawal), that leader marker is automatically eliminated immediately.
Furthermore, any attack that is declared against any lone enemy leader is assumed to be an automatic DE result, and even permits the attacking unit(s) to advance after combat into that eliminated leader's hex.
Once any leader marker is eliminated, that marker is removed from the game permanently. The quantity of leader markers provided in the game is a finite limit; no more leaders may emerge during a game than exist as game pieces.
13.0 The Netherlands
Though the four Dutch air units are automatic reinforcements normally (during game turn 2), the four Dutch land units only enter the map if there has been no successful nuclear detonation (by either side) prior to their entry (which otherwise occurs on game turn 2, as well). Furthermore, once any nuclear detonation has occurred (from either side), all of the Dutch land unit are automatically removed from the map immediately (although the Dutch air units are not removed automatically in such a case).
Additionally, if any Dutch air unit is eliminated by any means during the game, one Dutch land unit (of the NATO player's choice) must be automatically removed from the map immediately per each Dutch air unit that has been eliminated. Any Dutch land unit(s) that are removed from the map are not necessarily eliminated permanently, however; it/they will return to play as a reinforcement per 3.1 if any Warsaw Pact unit enters any Dutch (Neth.) hex, at which time they remain on the map regardless of nuclear detonations or Dutch air units eliminated.
14.0 Air Units
Specific types of units in the game are known as "air units," representing either helicopters or fixed-wing aircraft. These units are identified by their aircraft silhouette and their lack of any movement number (all of the air units in the game possess more than enough range to reach any location on the map; see 14.1).
Note: Fixed-wing air units are depicted with a top-down silhouette, whereas all helicopter units are depicted with a side silhouette. In one instance, a UK fixed-wing air unit is printed with a side silhouette instead of a top-down silhouette (representing Hawker Harriers, as well as some helicopters), although that one air unit is considered to be a helicopter type of air unit for all game purposes.
Each air unit may only either exist on the map at a printed airbase/airport hex (any hex with an airbase/airport symbol, if not in excess of that base's capacity limits; see below) or in a target or combat hex where that air unit is considered to be aloft and above any terrain or land units in that same hex (and regardless of any stacking there, even in the air). This is the only instance in which a game piece may exist in the same hex as an enemy game piece.
A player may place his own air unit(s) in any target hex(es) of his choice (see below) during the Strike and/or Nuclear Launch Step of his own phase (to participate in a strike), or during any Combat Step after an attack has been declared there by either side (to contribute Air Support), but always before any di(c)e roll is rolled to resolve that attack. However, no more than two fixed-wing type of air units from each side may be placed in the same target hex during the same phase, as well as no more than two helicopter type of air units from each side in the same target hex (see 14.2).
Note: Air units never project ZOC, nor are they ever affected by enemy ZOC. Moreover, air units are ignored when determining stacking in any hex (except per airbase/airport capacity; see below). An air unit may never capture any hex, or displace any other game piece anywhere on the map.
14.1 Range Restrictions
A player may move any quantity of his own air units to any hex(es) anywhere on the map (per 14.2), although only US (dark blue) and UK (tan) air units are ever permitted to enter East Germany, regardless of the mission.
Designer's Note: This rule assumes that most NATO members will not risk any portion of the air force flying deep penetration missions into enemy airspace (at least not while the outcome of the war was still in doubt).
14.2 Maximum Mission Package
The maximum quantity of air units that each side may place in a combat hex (whether a strike or as Air Support) is two fixed-wing type of air units, and also two helicopter type units, regardless of which side is the attacker or the defender. Thus, it is possible for a total of eight air units to be aloft together in the same hex (four friendly air units, and four enemy air units), but never more.
Note: NATO air units of different nationalities that participate together during the same mission do not affect the maximum mission package one way or the other; the limit is always two fixed-wing air units and two helicopter type air units (per side).
Of course, in either case, a player is never required to add the maximum quantity of air units, if he prefers to add less. But, neither player may violate the fixed-wing/helicopter ratio; that is to say, each side is limited to a maximum of two fixed-wing air units, even if only one or no helicopter air units are also placed in that target hex. Likewise, each side is limited to a maximum of two helicopter air units, even if only one or no fixed-wing air units are also placed in that hex.
Designer's Note: The maximum mission package (which is based on a RAND study of aircraft operational tempos per day during the Gulf War) is modeled on an average of achievable sortie rates (two missions per day, at most, per aircraft in ideal conditions against typical target distances). US F-15s and F-16s, for example, were rearming, refueling, and undergoing maintenance for three hours after each daylight mission. Of course, even under the most suitable circumstances, this pace could not be maintained during an intense and protracted conflict.
14.3 Air Unit Missions (Strikes or Air Support)
When an air unit has been placed in a target hex during the owning player's Strike and/or Nuclear Launch Step, that air unit may conduct a strike (assuming it survived any Air Superiority combat there; see 14.4), per the strike rule (see 14.5).
Note: Only infrastructure (airbase/airport symbols, munitions symbols, bridge symbols) may be attacked by strikes, although a nuclear air strike may be conducted against any hex anywhere on the map, except per the restrictions of 15.4.
When an air unit has been placed in a combat hex during any Combat Step, that air unit does not conduct a strike there, but instead adds its printed shift number to the Combat Results Table when land combat is resolved there (assuming it survived Air Superiority combat there) in favor of (leftward or rightward) the friendly unit(s) attacking or defending that hex. This is known as Air Support; see 10.4.
Air Support shifts are always cumulative; thus, if a player placed multiple air units into the same combat hex (assuming they survived Air Superiority combat), all of their shifts are added together and applied cumulatively to the Combat Results Table (in favor of that player's own side, whether attacking or defending) when resolving land combat.
If the enemy player has also placed any air unit(s) into that same combat hex, the shifts of the enemy air units (assuming they survived Air Superiority combat) are applied cumulatively to the Combat Results Table, as well (in favor of that enemy player's own side, whether attacking or defending), resulting in a final net shift to the Combat Results Table (that is to say, subtracting the total defender's shifts from the total attacker's total shifts, and applying the net result to the Combat Results Table, depending on how many air units were involved and survived Air Superiority combat).
14.4 Interception and Air Superiority Combat
When a player--during his own phase--moves any of his own air units to a target hex or combat hex, the enemy player may, immediately thereafter, declare an "interception;" he does so by simply moving any of his own air units to that same target or combat hex (if within Maximum Mission Package limits).
Exception: Helicopter type air units (signified by a side-view silhouette) can never intercept, but they can always be intercepted.
Interception is automatic and immediate when declared.
Note: Interception can only ever occur in a target or a combat hex, never against any enemy air unit(s) en route to a hex.
Inasmuch as the intercepting player has the advantage of knowing how many and what types of enemy air units have been placed in the target or combat hex before he declares his interception (representing radar), he must decide how many of his own air units will be conducting interception before Air Superiority Combat begins.
After interception has occurred, Air Superiority combat commences immediately; both players simply roll one di(c)e roll per each friendly non-helicopter air unit that is aloft in the same target or combat hex with any enemy air unit(s); the NATO player must roll two six-sided dice per NATO air unit (whether the interceptor or the intercepted), whereas the Warsaw Pact player must roll one ten-sided die per Warsaw Pact air unit (whether the interceptor or the intercepted).
Example: If two NATO air units intercept two Warsaw Pact air units, the NATO player will roll four six-sided dice (two per air unit), and the Warsaw Pact player will roll two ten-sided dice (one per air unit).
An air unit's printed shift number is irrelevant during Air Superiority combat.
Note: A Warsaw Pact die roll of "0" here is considered to be ten (10), not zero.
The Air Superiority di(c)e roll is then modified by the distance of the closest airbase/airport (in terms of hexes) to that target or combat hex (an airbase/airport from where any of those participating air units were based). Add a +1 to the NATO dice roll if at least one of the participating NATO air unit's airbase/airport hexes was closest to that target or combat hex (closer than any of the participating Warsaw Pact air unit's airbase/airport hexes). Conversely, add a +1 to the Warsaw Pact die roll if at least one of the participating Warsaw Pact air unit's airbase/airport hexes was closest to that target or combat hex (closer than any of the participating NATO air unit's airbase/airport hexes). If neither side can demonstrate a closer airbase/airport, than no modifier is applied either way.
Next, each side modifies the Air Superiority di(c)e roll by adding each air unit's printed Air Superiority modifier to his own di(c)e roll. If an air unit is not printed with an Air Superiority modifier, it does not modify the Air Superiority die roll.
Whichever side rolled the highest collective di(c)e roll (after adding all applicable modifiers) has won air superiority, and the lower rolling player must immediately eliminate one of his own air units (of his choice) present during that Air Superiority combat. However, if the higher rolling player's modified di(c)e roll is at least double (twice) the lower rolling player's di(c)e roll, the lower rolling player must immediately eliminate two of his own air units (of his choice). Furthermore, if the higher rolling player's di(c)e roll is at least triple the lower rolling player's di(c)e roll, the lower rolling player must also immediately eliminate any of his own helicopter units (of his choice) there, if any. If the higher rolling player's di(c)e roll is at least quadruple the lower rolling player's di(c)e roll, the lower rolling player must also immediately eliminate all of his own air units (fixed-wing and helicopter) there.
If both sides rolled the same exact di(c)e roll result (after adding all applicable modifiers), then all of the air units in that hex (even if not participating in air combat) from both sides are returned to base (14.8). This can represent anything from weather to misadventures.
Any fixed-wing type of air unit that did not participate in Air Superiority combat (in other words, did not contribute a di(c)e roll during Air Superiority combat) and also survived Air Superiority combat may then be added as Air Support (per 10.4) or conduct an intended mission (a strike) in that hex. With regards to Air Support, it is possible for both sides to have surviving air units in that combat hex, and thus both sides may apply their eligible shifts to that pending land combat, deducting from each other to determine the actual net combat shift (provided that any such air unit did not participate in Air Superiority combat).
14.5 Strikes
During a player's Strike and/or Nuclear Launch Step of his own phase, any of his own air units (including any helicopter type units) that have been placed in a target hex may conduct a strike there (assuming the air units survived Air Superiority Combat, if any). A target hex is considered to be any hex that contains an airbase/airport symbol, a munitions symbol, or is adjacent to a major river with an intact bridge hexside (although a nuclear strike may target any hex on the map). The nationality of the striking air unit is irrelevant when resolving any strike.
Note: An air unit that rolled any di(c)e during the preceding Air Superiority combat, if any, cannot conduct a strike, although an air unit that had been merely targeted during Air Superiority combat may conduct a strike without effect (assuming it was not eliminated or forced to return to base).
To conduct a strike, the owning player declares his intended target within that striking air unit's hex. Each present air unit may strike one target in a hex. Multiple air units may each conduct a separate strike against the same target, or may conduct separate strikes against separate targets in that same hex, but the owning player must designate which air unit is attacking which target during the same strike into the same hex (he may not await the outcome of one particular strike before deciding to strike a different target).
Note: A designation aid box is printed on the map so that the striking player may place his air units in the space corresponding to the specific target he intends it to attack.
Each striking air unit is entitled to conduct either one, two or three strike di(c)e rolls against one (only) designated target, depending on the shift number printed on that striking air unit (which, in the case of this rule, is not applied as a shift on the Strike Table below). Each aircraft is nevertheless only ever entitled to strike one target (an air unit that is printed with a shift number of "3" cannot attack three different targets in the same hex during the same strike, but may conduct three strikes against one single target in its hex).
Exception: A player may announce that he does not intend to conduct any additional strikes (or any strikes at all) if he prefers (if, for example, that target was already destroyed by a preceding strike, or if the striking player simply decides that he does not want to risk a possible SAM hit).
To resolve each strike, the owning player simply rolls a di(c)e roll (two six-sided dice if a NATO air unit, or one ten-sided die if a Warsaw Pact air unit) and consults the following chart, cross-referencing that di(c)e roll with the type of target that has been designated.
| NATO Strike Dice Roll | Warsaw Pact Strike Die Roll | Airbase/Airport Target | Bridge Target | Munitions Target |
|---|---|---|---|---|
| 11-12 | 8-9 | Miss (no effect) | Miss (no effect) | Miss (no effect) |
| 9-10 | 6-7 | Miss (no effect) | Miss (no effect) | Destroyed (SAM hit) |
| 6-8 | 4-5 | Destroyed | Destroyed | Destroyed |
| 4-5 | 2-3 | Miss (SAM hit) | Miss (no effect) | Miss (SAM hit) |
| 2-3 | 0-1 | Miss (SAM hit) | Miss (SAM hit) |
If the di(c)e roll result is "Miss (no effect)", there is no effect to the designated targeted, and no effect to that striking air unit. If, however, the di(c)e roll result is "Miss (SAM hit)", there is no effect to the designated targeted, but the striking air unit is eliminated immediately (forfeiting its remaining strikes, if any) and removed from the game permanently. If the di(c)e roll result is "Destroyed (SAM hit)", the designated target is destroyed, but that striking air unit is eliminated immediately (shot down), and removed from the game permanently.
Note: A "SAM hit" result can be ignored by the Warsaw Pact player if the "K" Munitions Factory has been destroyed or captured (per 17.0).
If an airbase/airport and/or bridge target is destroyed, that symbol is not considered to be intact or usable (by either side) throughout the remainder of the game (destroyed targets cannot be repaired within the timespan of the game). If a munitions target is destroyed, the NATO player must immediately consult the effects of losing that particular munitions target letter-code (see 17.0).
If an airbase/airport is destroyed whilst any enemy air unit(s) was present at that airbase/airport (in other words, not aloft in the airspace above), the air unit(s) present there are automatically destroyed, as well.
14.6 Nuclear Air Strikes
Any fixed-wing (non-helicopter) air unit that has been flown to conduct a strike per 14.5 may be declared to be conducting a nuclear air strike against that target hex (in addition to any other strikes). In such a case, that nuclear air strike is resolved per the Nuclear Air Strike Table below, instead of per the normal Strike Table.
| NATO Strike Dice Roll | Warsaw Pact Strike Die Roll | Target Hex |
|---|---|---|
| 11-12 | 8-9 | Miss (no effect) |
| 9-10 | 6-7 | Destroyed |
| 6-8 | 4-5 | Destroyed |
| 4-5 | 2-3 | Destroyed (SAM hit) |
| 2-3 | 0-1 | Destroyed (SAM hit) |
Each air unit may only conduct one nuclear air strike per target hex, regardless of its printed shift number, and no particular target may be (nor need be) designated. A "Destroyed" result automatically eliminates everything in that target hex (place a mushroom cloud marker in that hex immediately afterward) exactly per 15.3. A nuclear strike is not subject to a nuclear detonation roll per 15.2, but is otherwise automatic if a Destroyed result occurred on the Nuclear Air Strike Table.
Note: A "SAM hit" result can be ignored by the Warsaw Pact player if the "K" Munitions Factory has been destroyed or captured (per 17.0).
14.7 Airbase/Airport Capacity
Each friendly airport/airbase symbol printed on the map is permitted to base a maximum of four air units (unless that airbase/airport had been destroyed, in which case no air units may be based there). Helicopter type units, however, are never counted when calculating airbase/airport capacity.
Note: Any number of helicopter type units (including the UK RAF unit that begins the game set up in hex 0526) may stack in any quantity at any airbase/airport hex without regard to the capacity. In essence, helicopter type units do not ever utilize airbase/airport capacity, although they are always required to occupy a functional airbase or airport hex when not conducting a mission, normally.
Each captured airbase/airport (an airbase/airport that began the game as friendly to one side, but is or has ever been captured by the other side's land unit) is only permitted to base a maximum of two air units, not four (although helicopter units may nevertheless stack in any quantity at any airbase/airport).
Note: For purposes of simplicity, there is no distinction between military airbases (or airfields) and airports. Many airports in West Germany were available for the contingency of war, to some degree or another, and within the relatively short timeframe represented by Red Tide West, almost any runway could suffice in a pinch.
An airbase/airport that has been destroyed has no capacity whatsoever and cannot be repaired.
14.8 Returning To Base
After Air Superiority combat and all intended strikes have occurred in a hex (if any), all surviving air units in that hex must be immediately placed in the Returning to Base box printed on the map (unless it had been eliminated during Air Superiority combat or by a SAM hit, in which case it is removed from the game permanently). Air units in the Returning to Base box must be returned to any friendly airbase/airport hexes of the owning player's choice (even if just captured) if not in excess of the airbase/airport capacity there.
Any air unit that is unable to return to a friendly airbase/airport hex (if, for example, all other friendly airbase/airport hexes have been captured by enemy units), it is eliminated immediately instead.
14.9 Overrunning Air Units
If any friendly land unit moves into any enemy airbase/airport hex, that airbase/airport is automatically captured, and any enemy air units currently present there are automatically eliminated immediately (even if as a result of an advance after combat or a retreat).
An enemy air unit that is present in any airbase/airport hex may never be attacked via a land combat attack by any adjacent unit, whether that air unit is alone or stacked with any other enemy unit.
An air unit that has been flown to conduct a strike or contribute Air Support cannot be attacked by any land units.
14.10 Air Transfers
During a player's own Strike and/or Nuclear Launch step, he may move any of his own air units from their current position on the map directly to his own side's Returning to Base box. During the Recovery step of that same phase, those air units can be moved from that Returning to Base box directly to any friendly airbase anywhere on the map, if not in excess of the capacity there (and if not destroyed or presently occupied by any enemy unit).
Transfers also apply to any air units that are in the Returning to Base box after conducting a strike or after participating in combat. No air unit is ever necessarily required to return to the same airbase/airport from where it originated, unless no other alternative is available.
An air unit that is transferring may not conduct any strike or otherwise conduct any other activity when being moved to/from the Returning to Base box. Conversely, an air unit that is transferring cannot be intercepted when it is moved to/from the Returning to Base box.
15.0 Nuclear Launches
Nuclear missiles do not exist as on-map units, but as nuclear target markers that are printed with a mushroom cloud depiction on the back side. During a player's own Strike and/or Nuclear Launch phase, he may announce that he is initiating a nuclear launch against any quantity of target hexes (up to his limit of available nuclear target markers). Nuclear launches are fraught with the risk of causing the launching player to immediately lose the game (see 16.0).
When a player has announced a "nuclear launch," he simply selects his intended target hex(es) (if otherwise legal; see 15.4) and places one nuclear target marker in each target hex (with the mushroom cloud side facing down). Once placed, a nuclear target marker cannot be removed (the missiles are on the way). After consulting the Nuclear Threshold chart, the nuclear target marker(s) will remain in placed target hex(es) until the end of the enemy's Strike and/or Nuclear Launch step, at which time they are detonated.
Note: A nuclear launch does not prevent any enemy air units in its targeted hex from conducting a mission (and thereby escaping the nuclear target marker).
It is permissible for the launching player to place any quantity of his nuclear target markers into the same hex(es), in the hopes of assuring that any particular target hex(es) will be nuked, although there is no additional affect if more than one nuclear detonation occurs in the same hex. All nuclear target markers in the same hex are subsumed by the same nuclear detonation there.
15.1 Allotment of Nuclear Target Markers
Aside from nuclear strikes delivered by aircraft (see 14.6), which are theoretically unlimited (both camps actually possessed thousands of deployable nuclear weapons), each side is provided with exactly 35 nuclear target markers (blue markers for NATO, and red markers for the Warsaw Pact), which may be used during any game turn and in any available quantity, per 15.0.
Once a nuclear target marker is used, regardless of its result, it is not replaced or reacquired during the game.
15.2 Nuclear Launch Detonations
During the Strike and/or Nuclear Launch step of the immediately-following phase (in other words, during the enemy's phase) after a nuclear launch was announced, the launching player may then determine if each of his launches will successfully detonate. To do this, the launching player rolls one di(c)e roll per each of his own nuclear target markers that he has placed in each target hex (the NATO player rolls two-sided dice, whereas the Warsaw Pact player rolls one ten-sided die), and he then consults the following table.
| NATO Dice Roll | Warsaw Pact Die Roll | Result |
|---|---|---|
| 4 to 12 | 2 to 9 | Successful Detonation Occurs |
| 2 to 3 | 0 (zero) to 1 | Unsuccessful (no detonation occurs) |
If a nuclear detonation is unsuccessful, no effect occurs from that nuclear marker; that nuclear target marker is immediately removed from the map and the game permanently. There is no provision in Red Tide West to reacquire any nuclear target marker after it has been removed, regardless of its successful detonation or not.
15.3 Nuclear Effects
If any nuclear detonation has successfully occurred in a hex, flip the nuclear target marker in that hex to the side with the mushroom cloud depiction. That hex is considered to be completely destroyed, as well as everything in it, including any unit(s) therein of any nationality, and any bridge or red crossing arrow astride any hexside of that hex. Moreover, that hex is considered to be out of play for the remainder of the game (any victory point value therein, if any, is also considered to be destroyed, and cannot be acquired by either side). Moreover, no unit, including air units, may ever enter that hex for the duration of the game.
Note: If a munitions factory hex is destroyed by a nuclear detonation, the penalty per 17.0 is imposed the same as if that hex was captured.
A mushroom cloud marker possesses a ZOC in each of the six hexes surrounding its detonation hex. A mushroom cloud's ZOC functions exactly like the ZOC of any enemy unit (halting the movement of any unit that enters therein) except that its ZOC is considered to apply to all land units (including fleeing civilians and leaders). Air units, however, are unaffected by a mushroom cloud's ZOC.
15.4 Targeting Restrictions
Neither side may ever select a target hex that is a friendly city, occupied by any friendly unit, or in any out-of-play country.
The NATO player cannot select a target hex that is occupied by any Fleeing Civilians marker (although this restriction does not apply to the Warsaw Pact player).
Under no circumstances may the NATO player ever select any German (West or East), Austrian, or Danish city hex as a target hex.
16.0 Nuclear Threshold (Armageddon)
When any "Nuclear Target" marker is placed in a hex during either Launch step, or when any nuclear air strike has occurred (per 14.6), there is a possibility that Nuclear Armageddon will be the result, which ends the game as a defeat for the side that caused it. The chances of a player causing Nuclear Armageddon depend upon how many nuclear target markers have been placed and/or successful nuclear air strikes have occurred, but also including all previous nuclear attacks that he successfully detonated at any time before then (cumulatively) during that game (assuming, of course, Nuclear Armageddon did not occur then).
Note: An enemy player's previous nuclear attacks are irrelevant in this regard; a player only accounts for his own nuclear attacks.
The nuclear threshold is checked during the same Strike and/or Nuclear Launch step that any nuclear target marker(s) and/or successful nuclear air strikes have occurred in any target hex(es), but only after all of the intended nuclear target markers and/or nuclear air strikes have occurred during that step (not after each detonation). The player that placed the nuclear target marker(s) and/or conducted nuclear air strikes during that step must then roll two six-sided dice and then consult the chart below. However, if no nuclear target markers were placed and no nuclear air strikes occurred during a player's Strike and/or Nuclear Launch step, then no nuclear threshold dice roll is rolled, regardless of any previous nuclear detonations.
| Nuclear Target and/or Nuclear Detonation Markers Placed (cumulative) | Dice Roll (two six-sided dice) Results Causing Nuclear Armageddon |
|---|---|
| 1 | < 1 |
| 2 | < 2 |
| 3 | < 3 |
| 4 | < 4 |
| 5 | < 5 |
| 6 | < 6 |
| 7 | < 7 |
| 8 | < 8 |
| > 9 | < 9 |
Designer's Note: When considering a nuclear attack, a player has two possible strategies, according to the statistical odds: He can opt to get all of his nukes in the air at one time (this will entail a very high likelihood that he will trigger Nuclear Armageddon, but he would only be risking one nuclear threshold dice roll), or he can try to escalate his nuclear launches incrementally from turn to turn with the intention that he may be able to conduct a few surgical nuclear attacks that are not individually statistically likely to trigger Armageddon, but also challenges his opponent with the choice of either retaliating (whereby he would be risking causing Armageddon and losing the game), or 'riding out' the enemy's nuclear attacks. In essence, the Nuclear Threshold Chart is designed to mimic the uncertainty of two divergent theories regarding the employment of nuclear weapons during the Cold War: A massive first strike in the hopes of dealing a decisive blow before the enemy could effectively respond, or selective, tactical nuclear strikes that would hopefully only incite an escalatory response--albeit after the initial strike had theoretically crippled the enemy.
16.1 Nuclear Threshold Dice Roll Modifiers (DRM)
The Nuclear Threshold dice roll is modified by specific events, if they have occurred, during the game. The modifiers usually apply to one side or the other, but are cumulative to each side if otherwise applicable. Each specific event and its associated dice roll modifier is listed as follows.
| Event | Modifier |
|---|---|
| If the Warsaw Pact had violated Denmark's neutrality. | -1 DRM (Warsaw Pact only) |
| If the Warsaw Pact had violated Austria's neutrality. | -1 DRM (Warsaw Pact only) |
| If any Warsaw Pact land unit had crossed any Rhine River hexside. | -2 DRM (Warsaw Pact only) |
| If a successful nuclear detonation occurred in a West German city hex. | -2 DRM (Warsaw Pact only) |
| Per each game turn after the first (cumulative). | -1 DRM (NATO/Warsaw Pact) |
| If the enemy side conducted the first successful nuclear detonation. | +1 DRM (NATO/Warsaw Pact) |
| If the Warsaw Pact currently possesses at least 200 victory points. | +1 DRM (NATO only) |
| If the Warsaw Pact had used Chemical/Biological weapons per 10.4. | +2 DRM (NATO only) |
Designer's Note: The chances of causing Nuclear Armageddon are not insignificant in Red Tide West, but this is an intentional design element. Players may glean from this that it is not the intention of the design that nuclear weapons should necessarily be used at all. That said, either player may certainly consider his nuclear arsenal to be a plausible (albeit risky) option to inflict a decisive blow upon his opponent.
17.0 Munitions Factories
Munitions factories exist as printed symbols on the map, each with a corresponding letter code (printed within a black disc). If a munitions factory hex has ever been captured by any Warsaw Pact land unit (except a leader), a penalty is imposed upon the NATO side.
Note: The munitions symbols are only analogs, representing the kind of weapons or equipment being manufactured there. They have no specific bearing on play beyond simply being an identifier.
The specific penalty depends upon the specific munitions factory hex that is captured, and is implemented immediately upon capture. The list of each munitions factory and its corresponding letter code (penalty) is listed in the chart to the right.
Transcriber's note: the per-letter penalty chart that this rule refers to ("the chart to the right") is printed on the map, not in the rules text supplied to the transcriber, so the individual penalties are not reproduced here. The letter codes and hex numbers are given in the Munitions Factories Destruction Checklist at the end of this rulebook, as printed.
The imposed penalty is only a one-time event (in other words, the penalty is not reinstituted if a munitions factory is repeatedly lost and then recaptured by the Warsaw Pact side), but the penalty is otherwise permanent. For example, if a helicopter is eliminated as a result of a captured munitions factory, that helicopter is removed permanently from the game (it is not resurrected if that munitions factory is subsequently recaptured).
Note: A successful nuclear detonation in a munitions factory hex imposes the associated penalty as if that hex was captured.
If a particular penalty cannot be imposed (for example, if there are no remaining air units to eliminate), it is ignored (although it must be implemented to the extent possible before it is ignored, in such a case). Other nationalities may not be substituted for West German units in any such case, nor may any other type of unit be substituted for the unit(s) specified by any penalty.
When a particular munitions factory is destroyed, simply place a spare hammer and sickle counter (or any other convenient mnemonic) atop that munitions factory symbol on the Munitions chart printed on the left side of the map.
18.0 Victory Conditions
Victory is determined by an amount of victory points (VP) that the Warsaw Pact side has accrued throughout the game (from game turn 1 to game turn 16). As of the end of the last game turn (16), the opposing players must count the total quantity of victory points that the Warsaw Pact side acquired up to that time (regardless of which turn they were acquired).
Note: There is no draw result possible in Red Tide West. One side or the other will be perceived by the media and history (not to mention the Germans) as the winner.
18.1 Acquiring Victory Points
Only the Warsaw Pact ever acquires victory points, and only per each city that is captured (unless it has been destroyed by a nuclear hit). The amount of victory points that each city is worth is printed parenthetically adjacent to each city's name. For example, Heidelberg (in hex 0540) is printed with a "(7)" adjacent to the city name. Thus, Heidelberg is worth exactly seven (7) victory points if it is captured.
Note: Some munitions factory hexes, if also captured, award additional victory points to the Warsaw Pact (see 17.0).
Combat has no effect upon any city's VP value, and nor may any player declare any city to be demolished or razed to eliminate its VP value (although a city that is destroyed by a nuclear attack provides no VP; see 18.2).
Any city's victory point value is only ever awarded so long as that city is currently owned by the Warsaw Pact side (that is to say, a Warsaw Pact land unit must either currently occupy or have been the last to have occupied any such city to acquire the victory points for that city). If a city is recaptured by any eligible NATO land unit, the Warsaw Pact side loses the victory point value for that city, until it is recaptured by the Warsaw Pact, if ever.
Designer's Note: The victory point values of the cities on the maps are derived from numerous factors, such as each city's population, any defense industry there, its strategic importance, its political relevance, its newsworthiness if captured, ad infinitum).
Victory Points are recorded on the Victory Point Track printed on the map, either added or deducted, as they occur. Inasmuch as the game begins with the West Berlin hexes (hex 1522 and hex 1523) as NATO controlled, the Victory Point markers must begin the game on their negative side, placed on the Victory Point Track at 45 to indicate -45 VP. If the West Berlin hexes are captured by the Warsaw Pact, flip the Victory Point markers to their front side, and reset the Victory Point Track to zero, and then begin to adjust them on the Victory Point Track to correspond with Victory Points captured in West Germany and Denmark up to that time, if any.
18.2 Deducting Victory Points
In addition to victory points that are deducted if a captured West Germany or Danish city is recaptured by any NATO land unit, the Warsaw Pact player must also deduct victory points for any Warsaw Pact city that has been captured by any NATO land unit.
A Warsaw Pact city in Red Tide West is defined as any city in East Germany or Czechoslovakia. Unlike West Germany cities, the Warsaw Pact player does not regain the lost victory points for recapturing a Warsaw Pact city (representing the political consequences of the worldwide media reporting that NATO forces had actually pushing into Warsaw Pact territory and liberated a city that had been behind the Iron Curtain for 40 years).
Note: This is indicated by the negative VP number printed next to the name of any East German and Czechoslovakian city.
If any West German city is destroyed by a nuclear detonation, that city does not provide any victory points to the Warsaw Pact player throughout the game. However, if any Warsaw Pact city is destroyed by a nuclear detonation, its VP value must nevertheless be deducted from the Warsaw Pact's VP tally.
18.3 Eliminating Civilians Victory Point Penalty
A Warsaw Pact player that has chosen to eliminate a Fleeing Civilians marker (as any Warsaw Pact land unit enters its hex) must immediately roll one ten-sided die (per each Fleeing Civilians unit he opts to eliminate) and reduce his victory points by a quantity equal to each such die roll (see 6.8).
18.4 Victory Level
To win the game, the Warsaw Pact must have acquired (and currently possess) at least 300 victory points before the end of the last game turn.
Designer's Note: If the Warsaw Pact had ever actually invaded West Germany, the totality of the war would have then become a singular issue. In other words, almost regardless of what is happening elsewhere in the world, the battle for West Germany would have determined the outcome of the war as a whole. Assuming that a total nuclear exchange did not occur in the process, the inevitable negotiations to end the war (before a widespread nuclear exchange erupted) would benefit whichever side controlled significantly more of West Germany, particularly its key strategic and economic centers.
19.0 Simplified Victory Conditions (Optional)
If both players agree, they may forgo the normal victory conditions (which require the tallying of victory points per 18.0) and instead determine victory based on the capture of specific city hexes. These particular specific city hexes are printed in orange (for example, the city of Hamburg in hex 0867).
Note: These hexes represent the most strategically important locations on the map, but also serve as guides for Warsaw Pact axes of advance per the normal victory conditions (inasmuch as they indicate the highest concentration of victory points on the map, representing 60% of all the victory points available).
Thus, as of the end of the last game turn (16), the opposing players must count the total quantity of orange victory hexes that are currently owned by the Warsaw Pact (defined as having been the last to occupy each such hex) when the game ends. Victory points are ignored, but the Warsaw Pact is considered to have won the game if at least 10 of the orange victory hexes are owned by the Warsaw Pact when the game ends.
If the Warsaw Pact only owns 8-9 of the orange victory hexes when the game ends, the game is instead considered to be a tie (a draw game). If the Warsaw Pact side only owns 7 or fewer orange victory hexes when the game ends, the Warsaw Pact is considered to have lost the game.
However, a Warsaw Pact victory is downgraded to a tie (draw) if any East German city is owned by any NATO land unit when the game ends. Although a tie (draw game) is never downgraded to a defeat.
20.0 Rebuilding Units with Victory Points (Optional)
During a player's own Recovery Step, he is permitted to expend victory points to rebuild any non-air type land units, if present anywhere on the map's hexfield, and if that unit is presently degraded. Note that airmobile units are considered land units (they are not air units).
Exception: If playing with optional rule 19.0, this rule is not applicable. Instead, beginning as of the game turn that all three Berlin are owned by the Warsaw Pact player, each side will be permitted to rebuild one non-air type land unit present anywhere on the map's hexfield (if that unit is presently degraded) per game turn.
Only degraded (not eliminated) land units may be rebuilt, the cost of which is always exactly equal to that unit's printed movement value. For the Warsaw Pact side, victory points expended to rebuild any degraded unit(s) must be immediately deducted from the current total of victory points assessed on the Victory Point Track (the Warsaw Pact player is permitted to expended victory points as a deficit, if he finds it necessary to do so). For the NATO side, victory points expended to rebuild any degraded unit(s) must, instead, be immediately added (as an absolute value) to the current total of victory points assessed on the Victory Point Track. Thus, each degraded Warsaw Pact unit that is rebuilt will subtract VP from the Victory Point Track, and each degraded NATO unit that is rebuilt will add VP to the Victory Point Track.
Once any unit has been rebuilt, the victory points spent to rebuild it are not refundable (in other words, no unit may ever be degraded intentionally to gain victory points).
21.0 Free Deployment Set-Up (Optional)
Instead of setting up the game's units per the historical set-up (see 3.0), players that wish to experiment with a free deployment may use this optional rule instead, per the following instructions.
When setting up the game, the Warsaw Pact player must always set up all of his starting units first. Warsaw Pact units may be set-up anywhere in East Germany and/or Czechoslovakia (only) per the normal stacking and basing rules (per 5.1 and 14.7 normally), except in the Allied Zone or US Zone of Berlin. However, no Warsaw Pact unit may be set up in any hex that borders West Germany (for example, no Warsaw Pact unit may be set up in hex 1389).
After setting up all starting Warsaw Pact units, the NATO player must set up all NATO units second per the normal stacking and basing rules (per 5.1 and 14.7 normally). However, NATO units must be set up according to the following strictures.
- Austria: The Austrian unit must be set up in hex 1745.
- Belgian: The starting Belgian unit must be set up in hex 0479.
- Canadian: All starting Canadian units must be set up in hex 0396.
- Danish: All starting Danish units must be set up anywhere in Denmark.
- Dutch: All starting Netherlander units must be set up anywhere in Neth.
- French: All starting French units must be set up anywhere in W. Germany south of the US Set-up Boundary. Additionally, a 0-1-5 unit must be set up in hex 1522.
- German: All starting West German units may be set up anywhere in W. Germany. Additionally, a 0-1-0 unit must be set up in hex 1522 and 1523.
- UK: All starting UK units must be set up anywhere in W. Germany north of the US Set-up Boundary line. Additionally, the 0-1-5 UK unit must be set up in hex 1522.
- US: All starting US units must be set up anywhere in W. Germany south of the US Set-up Boundary line. However, a maximum of two US units may be set up north of the US Set-up Boundary. Additionally, the 0-1-5 US unit must be set up in hex 1523.
After all units are set up, the game then begins (starting with game turn 1), and all other reinforcement units arrive normally, per 3.1. All other rules apply normally, as well, throughout the game.
22.0 Designer's Notes
Red Tide West simulates one of the more profound unknowns of modern history, i.e., how would a Warsaw Pact invasion of West Germany have actually unfolded, had it occurred? And, moreover, would a nuclear exchange--or even Armageddon--have ultimately resulted?
From what is known now, largely from Soviet archives that became available after the end of the Cold War, it appears that the Soviets had no specific intention to premeditate war with NATO. It should be stated that this makes perfect sense when considering the broader psychology of the Russian mindset during the 20th Century. The enormous losses endured by the Russians during the Second World War (which are estimated to be nearly 27,000,000 dead, not counting another five million killed by Stalin's regime) was reason enough for the Russians to avoid a third world war (or at least the accompanying consequences), sans a very compelling cause.
However, and this was the proverbial rub, it must be remembered that the Soviet regime of the 1980's was nothing less than paranoid (if not downright schizophrenic, geopolitically speaking), and this paranoia was not allayed by President Reagan's military buildup in the 1980's, which the Soviets viewed with great alarm (besides the fact that the Soviet leadership genuinely feared Reagan, believing him to be a self-styled "cowboy" prone to impetuousness and perhaps even rashness). Untrue as this perception of Reagan was, in some sense the Soviets' worldview was understandable when considering that Russia had been invaded by foreign armies repeatedly during the previous four centuries, and this had even included Western powers (i.e., the Crimean War).
To add to the irony, the Russians' most recent experiences during the Second World War had revealed that their own casualties were lowest when they were conducting offensive operations (as when compared to the staggering losses endured when an enemy, such as the Germans, controlled the strategic initiative). Ergo, the collective reasoning of Soviet military thinkers after the Second World War was simply that offensive doctrines were the preferred strategy, in most cases. And so--not surprisingly--the Red Army evolved to orient its entire philosophy of national defense to be decidedly offensive in nature, if war with the West ever became necessary.
Thusly, if a war had occurred, the Red Army's plan to win a quick and decisive victory was preordained to be both aggressive and paradoxically reckless, in a manner of speaking, which is to say that their plan brazenly presumed the employment of chemical, biological, and especially nuclear weapons from the very start. It is difficult to understand the Soviets' rationale when considering the certain response from the United States, et al, which would nullify the Red Army's military objectives at the outset, if nothing else (besides risking total nuclear war), but the simple fact was that the Soviet state could not devise a strictly conventional strategy that would remedy its own paranoia. It is the strange conundrum of totalitarian regimes that their absolutist control precludes the kind of creativity that flourishes in free societies, and so it can be said that the Communist ideologues in the party simply had no mechanism to fundamentally change the status quo, even when the status quo was absurdly ludicrous.
If there was any exception to the above during the 1980's, it was perhaps vested in the Red Army generals themselves who were understandably not unanimous about the wisdom of an NBC (nuclear-biological-chemical) strategy (though they tended to be chronically reticent, for obvious reasons). From what is known of Soviet war plans, nuclear weapons were intended from the very beginning, and any other strictly-conventional strategies were only theoretical contingencies. Naturally, it was well understood by most generals in the Red Army that NATO would retaliate in kind, and therefore the only true question in their minds was whether such a nuclear exchange would escalate beyond the confines of Germany (this point, incidentally, was quite irrelevant to the Germans).
As a matter of fact, the United States had openly threatened to use tactical nuclear weapons against the Warsaw Pact if it ever dared to invade West Germany, and so it can be rightly said that the Soviets had good reason to assume that a nuclear exchange--even if only a limited nuclear exchange--was foreordained. With this in mind, the Soviets reasoned that a first strike was their best bet, albeit with the forlorn hope of achieving some level of surprise (and perhaps crippling or decapitating NATO), or at least avoiding a NATO first strike--the so-called "use 'em or lose 'em" maxim.
The singular dilemma for the Soviet generals, however, was that it would be impossible to orchestrate any substantial preparations without NATO noticing something, if not everything, before the fact. And so, this worsened the Soviets' operational problems inasmuch as any Soviet intention to launch a first strike might not only become discovered by NATO beforehand, but could theoretically provoke a preemptive first strike by the United States (as far as the Soviet generals were concerned), resulting in a sort of "reverse-surprise", to coin a phrase. In some circuitous way, all of these ponderables reveal, perhaps, why World War Three never occurred: Simply stated, it was just too risky to attempt.
Since the 1950's, much had been written of the MAD (Mutually Assured Destruction) theory and its deterrent value, which is ultimately the nexus of all discussions concerning Cold War and World War Three strategies. But, since the Cuban Missile Crisis, the theory may never have endured a truly extreme political crisis, especially a crisis that may have unexpectedly escalated to a point whereby some miscalculation or mis-assessment could have touched off a provocatively dangerous incident (particularly once the two opposing armies were primed and ready to roll, moreover). This type of circumstance was probably the most likely scenario by which World War Three could have begun in the 1980's. Interestingly, when examining such a scenario, it may have been the one case that might not have involved the usage of any NBC weaponry, at least not initially. Namely, if heightening tensions resulted in an escalatory incident (presumably in Europe), it is conceivable that a conventional response to said-incident would have escalated without the employment of any NBC munitions (again, initially, at least). Indeed, such a phenomenon would actually probably have been quite intentional if it can be safely assumed that the leadership on both sides would've been very reluctant to risk igniting Armageddon.
This, therefore, is the premise of Red Tide West. Wargamers with a penchant for plausible contexts may presume that a hypothetical global crisis between the Soviet Union and the United States has become critical, culminating in some kind of serious incident that escalates tensions even further.
Omitted: the printed section then gives a dated, fictionalized 1980s "alternate timeline" backstory (a Barents Sea submarine incident, the Berlin airlift confrontation and the Red Army advance, 15 November to 7 January, 198?). It is flavour fiction and is not transcribed here.
Munitions Factories Destruction Checklist
| Letter Code | Hex | Place a checkmark if destroyed |
|---|---|---|
| A | 1144 | |
| B | 1198 | |
| C | 1248 | |
| D | 1298 | |
| E | 1046 | |
| F | 0863 | |
| G | 0694 | |
| H | 0846 | |
| I | 0699 |