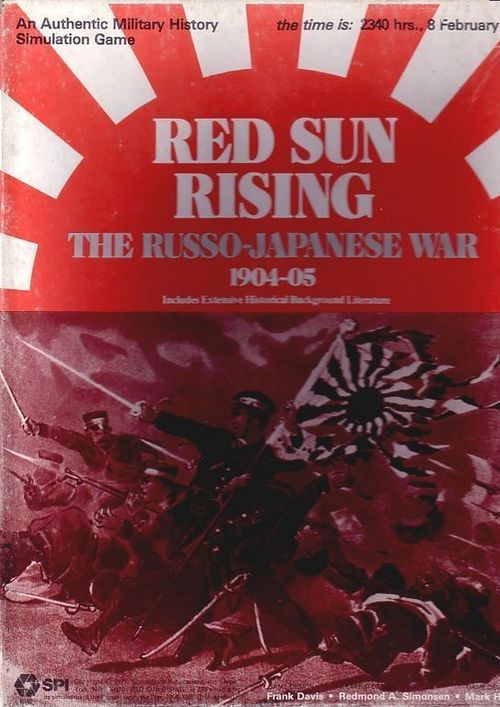
Red Sun Rising: The Russo-Japanese War 1904-05
Red Sun Rising: The Russo-Japanese War 1904-05 Rulebook
Table of Contents
Table of Contents
[1.0] Introduction
Red Sun Rising is a brigade/divisional level simulation of the Russo-Japanese War, 1904-1905. The game-map shows the theater of operations. The playing pieces represent the armed forces, both land and sea, of both belligerents that participated in the conflict.
[2.0] General Course of Play
Red Sun Rising is basically a two Player game. Each Player moves his units and executes attacks on Enemy units in turn, attempting to fulfill the conditions of victory. To move from one hex to another, each unit expends a portion of its Movement Allowance. Land combat is resolved by comparing the total Combat Strengths of adjacent opposing units and expressing the comparison as a simplified probability ratio. A die is rolled and the outcome indicated on the Combat Results Table which is applied to the land units involved. Naval combat takes place on the Tactical Naval Display when opposing fleets sight each other.
[3.0] Game Equipment
[3.1] The Game Map
The mapsheet portrays the area of conflict during the Russo-Japanese War, 1904-1905. A hexagonal grid is superimposed on the map to regulate movement and position. The hexes are numbered for ease of identification. There are two maps, the larger of which is the Land Map. The small map in the lower right corner of the mapsheet is known as the Strategic Naval Map.
[3.2] The Playing Pieces
Two sets of die-cut counters in contrasting colors are supplied. These counters are the playing pieces and are commonly referred to as units. They represent the various command units, combat units, and ships that fought in the conflict. The game also includes various markers that aid in performing various game functions.
Sample units
- Typical combat unit: front (activated) side shows designation, unit size, unit type, Combat Strength, Command Value and Movement Allowance; the back is the unactivated side.
- Typical Army Headquarters: front (activated) and back (unactivated); shows name, Command Value and Movement Allowance.
- Typical Admiral: shows name and Initiative Rating (front/back).
- Typical ship: front shows Attack Strength, Ship Class, Defense Strength and name; back also shown.
- Strategic Naval Map markers: a Fleet marker (At Sea / In Port sides), a Fleet Range marker and a Fleet Morale marker (current morale).
Summary of counters
Naval game: Torpedo Flotilla; Destroyer Flotilla; Cruiser; Battleship; Admiral; Merchant Fleet.
Land game: Infantry Division (3 counters: full strength, reduced strength, unit assignment marker); Infantry Garrison (1 counter, Russian only); Cavalry Division (3 counters: full strength, reduced strength, unit assignment marker; Russian); Cavalry Brigade (2 counters, Japanese: unit and unit assignment marker); Artillery Brigade (2 counters, Japanese: unit and unit assignment marker); Siege Artillery (2 counters, Japanese: unit and unit assignment marker); Kobe Brigade (Japanese, 2 counters); Army Headquarters (1 counter, front/back).
Game markers: Japanese City Control marker; Trench marker (Level 1 and Level 2); Japanese Replacement Step marker; Port Arthur Supply marker; Mine Level marker; Hours Left and Current Weather marker; Game-Turn marker.
Counter Erratum: Russian Supreme Headquarters unit Alexiev should read SHQ rather than SHG.
[3.3] Tactical Naval Display
The Tactical Naval Display, which is separate from the main map, provides a surface on which naval units are placed during Naval combat. It also contains several charts and tables used during Naval combat.
[3.4] Unit Assignment Charts
There are two Unit Assignment Charts - one for the Japanese Player and one for the Russian Player. Players use the Unit Assignment Charts to keep track of which combat units are assigned to which command units.
[3.5] Glossary of Terms
- Command Value: The Command Value of a unit is measured in Command Points. The Command Value represents a unit's relative ability to activate.
- Activation: In order for a unit to move or attack, it must first be activated. An activated unit is represented by placing the unit in question on its activated side.
- Initiative Rating: Admirals are rated for their historical ability to initiate offensive operations.
- Sortie: When a fleet goes to sea, this act is known as a sortie.
- Combat Strength: This term describes both the offensive and defensive power of a combat unit.
- Movement Allowance: Movement Allowance is the quantification of a unit's ability to traverse a certain distance in one Game-Turn as measured in Movement Points.
- Capital Ship: In game terms, any Naval unit with a ship name is a capital ship. B = Battleship; C = Cruiser.
- Flotilla: A flotilla consists of a group of small ships, either destroyers or torpedo boats.
[3.6] Inventory of Game Components
A complete game of Red Sun Rising should include the following parts:
- One sheet of die-cut Counters (400)
- One sheet of die-cut Ship Counters (100)
- One Land Map/Strategic Naval Map
- One Tactical Naval Display
- One Rules booklet
- One Japanese Unit Assignment Chart
- One Russian Unit Assignment Chart
- Two plastic Dice
- One Game Box/Coversheet Assembly
[4.0] Sequence of Play
The sequence of events delineated in this Section must be strictly followed throughout each Game-Turn.
[4.1] Strategic Naval Sequence of Play
[4.11] Russian Naval Initiative Stage. All Russian fleets that wish to sortie must first possess Naval Command Initiative. Roll the die for each fleet attempting to sortie. If the die roll is equal to or less than the Initiative Rating of the commanding admiral, then the fleet possesses Command Initiative. Flip the fleet over from its in-Port side to its at-Sea side (see Section 5.0).
[4.12] Japanese Naval Initiative Stage. Same as Case 4.11. Japanese Merchant fleets always possess Naval Command Initiative (see Section 5.0).
[4.13] Naval Search Stage. If any opposing at-Sea fleets are in the same Strategic Naval Map hex, both Players have the option of executing a Naval Search procedure (see Section 6.0).
[4.14] Naval Movement Stage (consists of 10 rounds). The Naval Movement Stage consists of 10 rounds (see Section 7.0). Each round consists of 3 impulses. They occur in the following order:
- A. Movement Impulse (see Case 7.1).
- B. Raiding Impulse (see Case 7.2).
- C. Search Impulse (see Case 7.3).
At the conclusion of the tenth round, the Naval Movement Stage is over. All fleets are placed on their in-Port side, if they have not done so already.
Note: Whenever a successful search is executed, play immediately proceeds to the Naval Combat Sequence of Play (see Case 4.4).
[4.15] Attrition Stage. If the Japanese fleet is on Blockade, then the Japanese Player rolls on the Blockade Attrition Table. Any fleets or merchant fleets not in port or in coastal hexes are eliminated (see Section 15.0).
[4.2] Russian Land Sequence of Play
[4.21] Russian Supply Stage. During the Supply Stage, units are to be judged either in or out of Supply. This determination is made during this stage and remains in effect until the Land Combat Stage (see Case 10.36).
[4.22] Russian Reinforcement Stage. All Reinforcements and Replacements are placed on the map at this time, and all unit assignments are incorporated (see Sections 14.0 and 17.0).
[4.23] Russian Land Movement Stage. Before any units may move, they must first be activated (see Case 9.1). First the Supreme Headquarters (SHQ) rolls one die for activation. Then the Player attempts to activate each Army Headquarters individually. If the SHQ is activated, it may add its Command value to any Army Headquarters attempting to activate within its command radius. Any Army Headquarters that are activated may attempt to activate the units assigned to them. As each unit is activated, it is moved before any other unit attempts activation. A unit that fails to be activated may not move during the Land Movement Stage. Only units whose Army Headquarters are activated may themselves attempt activation.
[4.24] Russian Land Combat Stage. The Combat Stage is composed of as many as three Assault Rounds. Combat is voluntary and may only occur between adjacent combat units. At the conclusion of the third Assault Round, the Combat Stage is over. During each Assault Round, no unit may be forced to defend more than once. A Friendly unit is not required to attack the same defending unit each Assault Round. After all attacks of an Assault Round are completed, another Assault Round begins at the option of the Russian Player, to a maximum of three Rounds.
[4.3] Japanese Land Sequence of Play
[4.31] Japanese Supply Stage. Identical to Case 4.21.
[4.32] Japanese Reinforcement Stage. All Japanese units that were transported (to the land map) are placed on the land map, and all unit assignments are incorporated. In addition, the Japanese Player may expend Replacement Steps to bring units up to full strength (see Section 17.0).
[4.33] Japanese Land Movement Stage. Identical to Case 4.23.
[4.34] Japanese Land Combat Stage. Identical to Case 4.24.
[4.35] End Stage. Mark the passage of a Game-Turn, place Trench markers on map, and flip all counters to unactivated sides. Some eligible fleets may raise their morale by 1 (see Case 8.78).
[4.4] Naval Combat Sequence of Play
If at any time during the Naval Sequence of Play a successful search is executed, play reverts to the Naval Combat Sequence of Play. The following Sequence of Play is used until the naval combat is concluded. The Naval Combat Sequence of Play consists of a number of Rounds equal to the number of daylight hours (see Case 8.22). Each hour of daylight consists of the following Phases.
[4.41] Weather Phase. The weather for the current hour of battle is determined (see Case 8.3).
[4.42] Search Phase. This Phase only occurs when opposing fleets are beyond Maximum Sighting Range (see Case 8.8).
[4.43] Range Determination Phase. The range between the opposing fleets is determined (see Case 8.4).
[4.44] Gunnery Combat Phase. If the opposing fleets are within maximum sighting range, gunnery combat occurs, and the results are applied at the end of the Phase (see Case 8.5). If the fleets are beyond maximum sighting range, the Players conduct a Search Phase (see Case 8.8).
[4.45] Torpedo Attack Phase. One Player may launch a torpedo attack (see Case 8.6).
[4.46] Morale Phase. A fleet's morale may be re-evaluated during this Phase. Morale adjustment may result from the sinking of ships or an admiral casualty during either the Gunnery Combat Phase or Torpedo Attack Phase (see Case 8.7). After the Morale Phase, mark the passage of one hour and conduct another Round of combat if at least one hour remains. If no hours remain, revert back to the Naval Sequence of Play (see Case 4.14).
NAVAL GAME
[5.0] Naval Command Initiative
All fleets that wish to sortie must possess Command Initiative. In order to determine Command Initiative a die is rolled. The die roll is then modified for the season. If the adjusted die roll is equal to or less than the Initiative Rating of the fleet admiral, the fleet possesses Command Initiative. The fleet counter is turned from its in-Port side to its at-Sea side. Japanese Merchant fleets always possess Command Initiative. During all winter Game-Turns, add two to all Command Initiative die rolls. During spring Game-Turns and fall Game-Turns add one to all Command Initiative die rolls. During summer Game-Turns there are no modifications to Command Initiative die rolls.
Exception: Whenever a Japanese fleet is on blockade (see Section 15.0), it automatically possesses Command Initiative at the conclusion of the first round of Naval Movement (see Section 7.0).
[6.0] Naval Search
GENERAL RULE: Whenever two opposing fleets occupy the same hex on the Strategic Naval map during a Naval Search Stage (see Case 4.13) or during a Search Impulse (see Case 4.14C), a search procedure may occur at the option of either or both Players. In addition, if during a naval combat the opposing fleets are beyond the maximum sighting range due to weather or range, a search procedure may be executed during each hour of remaining combat at the option of either or both Players (see Case 8.84).
PROCEDURE: Search is voluntary, but both Players have the option to execute one search for each applicable situation. The Japanese always has the option to search first. When a search is to be attempted, the weather for that hex is determined first (see Case 6.21). Next, the Search Limit Number is determined. The Search Limit Number is dependent on the type of hex the two fleets are occupying (see Case 6.1). Roll the die and modify it for the weather and the number of destroyer flotillas present in the searching fleet (see Cases 6.22 and 6.23). All die modifiers are cumulative. If the modified die roll is equal to or less than the Search Limit Number, the fleets sight each other. If either Player conducts a successful search, naval combat may occur (see Section 8.0).
[6.1] Search Limit Numbers
- [6.11] If the fleets occupy a high seas hex, the Search Limit Number is 1.
- [6.12] If the fleets occupy a coastal hex, the Search Limit Number is 2.
- [6.13] If the fleets occupy a port hex, the Search Limit Number is 3.
[6.2] Search Die Modifiers
- [6.21] Before the die is rolled for a search, the weather in the Strategic Map hex must first be determined. Throw one die; if the die roll is 1, 2, 3, or 4 the weather is clear. If the die roll is 5, the weather is fog. If the die roll is 6, storm conditions prevail.
- [6.22] After the weather is determined, roll one die for search. Add one to the search die roll if the weather is fog. Add two to the search die roll during a storm. Do not modify die roll if weather is clear. In addition, the die roll may be modified if destroyer flotillas are in the hex (see Case 6.23).
- [6.23] Subtract one from the die roll for each destroyer flotilla present in the fleet attempting the search procedure. Note: Torpedo flotillas do not count toward this modification.
- [6.24] All die modifications described in Cases 6.22 and 6.23 are cumulative.
[7.0] Naval Movement
GENERAL RULE: All naval movement takes place on the Strategic Naval Map. The Naval Movement Stage consists of ten Rounds. Each round consists of three Impulses. The Impulses occur in this order: Movement, Raiding, and Search. During any Search Impulse, the Naval Movement Stage may be interrupted to conduct Naval Combat (see Section 8.0). At the conclusion of the tenth Round, the Naval Movement Stage ends. Japanese Merchant fleets may transfer from the Strategic Naval Map to the Land Map during the Japanese Reinforcement Stage (see Case 7.5). Only fleets that possess Command Initiative (see Section 5.0) may move during the Naval Movement Stage.
Note: A fleet occupying a Friendly port hex at the beginning of a movement Round may flip to its in-Port side rather than move.
PROCEDURE: Whenever a fleet possesses Command Initiative, it is flipped over from its in-Port side to its at-Sea side during its respective Naval Initiative Stage. Only fleets on their at-Sea side and Japanese merchant fleets may move during a Movement Impulse. During a Movement Impulse, every at-Sea fleet and every merchant fleet may either move to an adjacent sea hex or remain in the same hex (see Case 7.1). After a Movement Impulse, a Raiding Impulse may occur (see Case 7.2). After the Raiding Impulse, if any opposing fleets occupy the same hex, a search procedure may be instituted (see Case 7.3).
When a successful search has been conducted, naval combat occurs. The Naval Movement Stage is interrupted until the conclusion of the naval combat, at which time the Naval Movement Stage resumes from the point at which it was interrupted. After all combats are concluded, any remaining Round(s) of naval movement occurs. At the conclusion of the tenth Round, the Naval Movement Stage is over.
Note: All Japanese fleets on blockade that do not possess Command Initiative automatically possess Command Initiative at the conclusion of the first Round of Naval Movement.
[7.1] Movement Impulse
All at-Sea fleets and merchant fleets may move to any adjacent hex or remain in the same hex on the Strategic Naval Map. The Russians move all of their at-Sea fleets first, then the Japanese move all of their at-Sea fleets and merchant fleets.
[7.2] Raiding Impulse
If a Russian at-Sea fleet occupies a hex on the Strategic Naval Map containing at least one Japanese merchant fleet, one Japanese merchant fleet is eliminated from the hex. The presence of a Japanese fleet in the hex has no effect on this situation.
[7.3] Search Impulse
If any opposing at-Sea fleets occupy the same hex, a Search Procedure may be instituted by either or both Players (see Section 6.0). If a search is successful, naval combat can occur (see Case 8.1). If naval combat occurs, the Naval Movement Stage is interrupted until the conclusion of the combat. If naval combat does not occur, then the Players start a new Round of naval movement (if one remains). If no further naval movement Rounds remain, the Naval Movement Stage is over and play proceeds to the Land Sequence of Play.
[7.4] Merchant Transport
Each merchant fleet can carry up to four Command Points per Naval Movement Stage. The Command value of a land unit is measured in Command Points. A merchant fleet can transport units that start the Naval Movement Stage stacked with it on the Strategic Naval Map. At the end of the Naval Movement Stage, if the merchant fleet occupies a coded coastal hex (i.e., one containing one of the large letters A through E), the land units being transported can be transferred to the land map during the Japanese Reinforcement Stage (see Case 7.5).
- [7.41] Command units do not count toward this four Command Point limit and may be transported by merchant fleets for free.
- [7.42] If the merchant fleet is destroyed, all units currently being transported by that fleet are also destroyed.
- [7.43] A Japanese siege artillery unit counts as four Command Points (for transport purposes only).
[7.5] Transfer of Merchant Fleets
Whenever a Japanese merchant fleet occupies any of the coded coastal hexes (A, B, C, D, or E) on the Strategic Naval Map during the Japanese Reinforcement Stage, it may transfer to the Land Map. Each merchant fleet is represented by two counters. Whenever a merchant fleet is transferred to the land map, the Japanese Player leaves one of the corresponding merchant counters on the strategic naval map while placing the other merchant counter - plus all units the merchant fleet was transporting - on the land map. A merchant fleet may be placed on any coastal hex on the land map lying within the letter boundaries corresponding to the merchant fleet's position on the strategic naval map. During winter, a merchant fleet may only be placed in a Friendly port lying within the letter boundaries. If no such Friendly port exists during the winter Game-Turn, the merchant fleet and its cargo are eliminated (see Case 15.2). A merchant fleet can never be moved on the Strategic Naval Map without first removing its corresponding counter from the Land Map during the Naval Stage (see Case 10.25). Exception: A merchant fleet supporting a blockade need not be in a port during winter Game-Turns (see Case 15.21).
Example: If a Japanese merchant fleet occupies hex A on the Strategic Naval Map during the Japanese Reinforcement Stage, it may transfer to the land map. Place the corresponding merchant fleet counter plus cargo on any coastal hex from 1701 to 1210 inclusive. If it were a winter Game-Turn, the fleet would be placed in either hex 0801 (Port Arthur) or hex 0803 (Dalny). If these hexes are both controlled by the Russian Player, the merchant fleet and cargo are eliminated. (Exception: see Case 15.21).
[7.6] Naval Stacking
There is no limit to the number of units that may occupy the same hex (stack) on the Strategic Naval Map. Merchant fleets do not count toward stacking limits on the land map. Any number of merchant fleets can occupy the same land hex.
[7.7] Fleet Composition
Each fleet marker represents the ships that are contained within it. To change its composition, a fleet must start the Naval Movement Stage stacked in the same hex on the Strategic Naval Map with another Friendly fleet, at which time the composition of the two fleets can be re-arranged by the owning Player. The composition is entirely up to the owning Player. There is no restriction on the number of ships in a particular fleet. If a fleet contains no ships or flotillas, it is removed from the Strategic Naval Map. If the Japanese Player (only) has one fleet marker on the Strategic Naval Map, he can create a second fleet at the beginning of any Strategic Naval Stage by placing the second fleet marker in the same hex as the first fleet and re-arranging the composition of the two fleets so that at least one ship is in each fleet. There is no penalty or cost to re-arrange the composition of the fleets.
[8.0] Naval Combat
GENERAL RULE: This section deals with the Tactical Naval Display and all activities that take place on it. Whenever two opposing fleets occupy the same hex on the strategic naval map, and either fleet conducts a successful search - during the Naval Search Stage (see Case 4.13), a Search Impulse (see Case 4.14C), or during a Search Phase (see Case 4.42) - naval combat may occur. If a successful search is conducted and the Player who has "been found" is in a Friendly port hex on the strategic naval map, he has the option to avoid naval combat (see Case 8.1). If the Player decides to fight, or - regardless of the Player's wishes - if the Player's fleet occupies any hex on the strategic naval map other than a Friendly port hex, a naval combat occurs (see Case 8.2). If the Player chooses to avoid combat, he then immediately flips his fleet over from its at-Sea side to its in-Port side and lowers his fleet's morale by one (see Cases 8.1 and 8.7). The naval combat, once it commences, continues until one of the following occurs:
- a fleet's morale becomes zero (see Case 8.76).
- the range between the two fleets is greater than the maximum sighting range (see Case 8.8).
- the hours of combat remaining is zero.
[8.1] When Does Naval Combat Occur
Naval Combat occurs whenever a successful search is conducted and the fleets that have sighted each other are in a Strategic Naval Map hex other than a port hex, or - if the Players are in a port hex - if both Players choose to fight. If a search is successful and the fleets are in a port hex, the Player to whom the port hex is Friendly may refuse combat, in which case he must immediately flip his fleet to its in-Port side and reduce that fleet's morale by one. Play proceeds to the Naval Movement Stage (see Case 4.14). If a Naval combat occurs, begin the Naval Combat Sequence of Play (see Case 4.4).
[8.2] How to Set Up the Tactical Naval Display
The Tactical Naval Display is the separate sheet which contains the Naval Combat Charts and the Display to place the Naval units on. The Display contains several parallel rows of boxes. The rows of boxes are labeled and will be called by their label for the rest of this section. When Naval Combat occurs, the Players interrupt play on the main map and move over to the Tactical Naval Display for the entire duration of the combat. The set up of the display is rigidly controlled, so Players can set it up simultaneously or by taking turns.
The Japanese Player places his battleships in the Japanese Battleline. The battleships are placed one per box. The first battleship is placed in Box 1 and the second battleship is placed in Box 2. The Japanese Player continues placing battleships in consecutive boxes until all battleships have been placed on the display.
Example: If the Japanese Player had six battleships, they would be placed one per Box in Boxes 1 through 6. The Russian Player follows an identical procedure in placing his battleships in the Russian Battleline.
The Japanese Player places his cruisers on the Display in attack strength order. The cruisers are placed in consecutive numbered Boxes starting with the lowest numbered vacant Box on the Japanese Battleline. First, all cruisers with Attack Strengths of 6 are placed on the Japanese Battleline in consecutive order; then all 5's, 4's, etc. The Japanese Player may place only one cruiser per box.
Example: Japanese battleships occupy Boxes 1 through 6, the first cruiser is placed in Box 7, the second cruiser in Box 8, etc.
The Russian Player follows the identical procedure in placing his cruisers on the Russian Battleline. If either Player has more than 28 ships in his fleet, the excess is placed on the display as if the Boxes continued 29, 30, 31, etc., until all ships are on the display.
The number of ships in both fleets are now compared. If both contain the same number of capital ships, nothing further is done to the opposing Battlelines. If, however, one fleet has more capital ships than the other, the larger fleet places all excess capital ships in its row of Secondary Force boxes. Excess ships must be taken from the back of the battleline first. The Player may place one or more capital ships in any Secondary Force Box.
Example: The Japanese Player has 28 capital ships and the Russian Player has 23. The Japanese Player places his excess ships in Boxes 24 through 28 in the Japanese Secondary Force section. He may place one ship per Box or several ships per Box. Ships do not have to be placed consecutively.
The Japanese Player then places all his destroyer flotillas in the Japanese flotilla section. The first destroyer flotilla is placed in Box 1 of the Japanese flotilla section, the second in Box 2, etc. When all destroyer flotillas have been placed on the Display, the torpedo flotillas are then placed in the same fashion as the destroyers. The first torpedo flotilla is placed on the lowest numbered vacant Box of the Japanese flotilla section. The Russian Player follows an identical procedure in placing his flotillas on the Russian flotilla section of the Display. No flotillas may be placed on the Flotilla Attack Position section at this time.
Example: The Japanese Player has 4 destroyer flotillas and 5 torpedo flotillas. The destroyer flotillas are placed in Boxes 1 through 4 of the Japanese flotilla section, the torpedo flotillas are placed in Boxes 5 through 9.
- [8.21] Once the capital ships and flotillas have been deployed, the Players place the appropriate fleet Range markers on the range track. The Russian Range marker goes in the zero Range Box, and the Japanese marker is placed in the Range Box appropriate to the prevailing weather (see Case 8.3).
- [8.22] The Russian Player rolls two dice. The result is the number of hours of combat that will take place. Place the Hours/Weather marker in the appropriate Box on the Hours/Weather Track. During either the Naval Search Stage (see Section 6.0) or Search Impulse (see Case 4.14C), the weather for the hex has already been determined. Place the Hours/Weather marker in the appropriate weather section of the hours box.
- [8.23] The Morale markers are placed in the appropriate Box on the Morale Track (see Case 8.7).
[8.3] Weather
During each Weather Phase (except the first, see Case 6.21) either Player rolls one die to determine the weather for that Round of naval combat. The marker on the current Weather/Hours Remaining track on the Tactical Naval Display is moved to reflect any change in weather that occurs during that Round.
- [8.31] If the weather in the previous Round was clear, a 6 changes it to fog.
- [8.32] If the weather in the previous Round was fog, a 1, 2, or 3 changes it to clear; a 4 or 5 changes it to storm.
- [8.33] If the weather in the previous Round was storm, a 1 or 2 changes it to clear; a 6 changes it to fog.
[8.4] Range Determination
[8.41] Initial Range Determination. For the first hour of combat, the fleets start at the Maximum sighting Range, which is dependent on the current weather. The Russian Range marker is always on the zero-Range Box. If the weather is clear, the Japanese Range marker is placed in the 6 Range Box. If the weather is fog, the Japanese Range marker is placed in the 4 Range Box. If the weather is stormy, the Japanese Range marker is placed in the 3 Range Box.
[8.42] Changing the Range. At the beginning of each Range Determination Phase the range is re-determined. Only the Japanese Range marker is moved, but either (or both) Players may move it. The Russian Range marker always remains in the zero Range Box. The Russian Player always goes first during the Range Determination Phase. The maximum number of Range Boxes that either Player may move the Japanese Range marker in a particular direction is equal to his fleet's current morale. Moving the Japanese Range marker away from the Russian Fleet is known as "opening the range." Moving the Japanese Range marker closer to the Russian Fleet is known as "closing the range." First the Russian Player opens or closes the range by moving the Japanese Range marker a number of Range Boxes equal to or less than the Russian Fleet's current morale. Then the Japanese Player may open or close the range a number of Range Boxes equal to or less than the Japanese fleet's current morale. Wherever the Japanese Range marker resides is the new Range.
- [8.43] If the Range at the end of the Range Determination Phase is greater than the Maximum Sighting Range - which is dependent on the current weather for that hour of combat - play reverts back to the Search Phase (see Case 8.84).
- [8.44] If the range is the same at the end of two consecutive Range Determination Phases, then on the next range determination the Players - instead of going through the Range Determination Procedure in 8.42 - consult the Naval Maneuver Table (8.49).
- [8.45] If the situation as described in Case 8.44 occurs, the die is rolled during the Range Determination Phase and the Naval Maneuver Table (8.49) is consulted.
- [8.46] If the range between opposing fleets does not change because the fleets are beyond the Maximum Sighting Range, the Players do not roll on the Naval Maneuver Table (this is an exception to Case 8.44).
- [8.47] The range between the two fleets may never be less than zero.
- [8.48] After the new range has been determined, all ships in the Secondary Force section of the display may move to a new box or they may remain where they are. A Player may move all, some, or none of the ships in the Secondary Force section. There is no stacking limit in the Secondary Force section.
- [8.49] Naval Maneuver Table (see Tactical Display).
[8.5] Gunnery Combat
Gunnery combat occurs during the Gunnery Combat Phase. Gunnery combat is assumed to occur simultaneously, although for game purposes the Russian Player fires first. All damage inflicted by this fire is not applied until after the Japanese Player fires. After both Players have fired, all combat results are applied.
-
[8.51] A capital ship may fire at the enemy ship that is its opposite number in the Enemy battleline, or it may fire at the Enemy ship whose box number is one greater or less than its own. Example: A capital ship in Box 2 may fire at a ship whose position in the Enemy battleline is 1, 2, or 3. A ship at position 1 may fire only at ships in Box 1 or 2.
-
[8.52] Each ship fires individually. Players cannot combine ships' Attack Strengths, although several ships may fire individually at the same target. Gunnery combat is resolved on the Naval Combat Results Table. In order to calculate an attack a Player locates the ship's Attack Strength on the Naval Combat Results Table and rolls a die, adjusting the die roll for all necessary modifiers (see Case 8.54). Cross-indexing the adjusted die roll with the appropriate column yields a number. If the number is equal to or greater than the Defense Strength of the Enemy ship, the Enemy ship is disabled (turn the ship over to indicate this status). If the result is at least twice the Defense Strength of the Enemy ship, the ship is sunk and removed from play. If a disabled ship is again disabled, it is sunk and removed from play (see Naval Combat Results Table, 8.24).
-
[8.53] All ships located in a Secondary Force Box are considered to be in the corresponding numbered Box on the battleline for gunnery combat position purposes. Example: A Japanese cruiser in Box 4 of the Japanese Secondary Force is considered to be in Box 4 of the battleline for gunnery position purposes. Thus, the Japanese cruiser could fire at a ship in the Russian battleline in Boxes 3, 4, or 5. The range for ships in the Secondary Force area is the same as the range for the Battleline.
-
[8.54] Gunnery Combat Die Roll Modifiers
- The die roll is reduced by 1 for each Range Box separating the two opposing fleets.
- The die roll is reduced by 2 if the current weather is stormy.
- The die roll is reduced by 1 if the current weather is fog.
- The die roll is reduced by 3 if the firing ship is disabled.
[8.6] Torpedo Attacks
Destroyer and Torpedo Flotillas may launch torpedo attacks during the Torpedo Attack Phase. Only one Player may launch a torpedo attack during the Torpedo Attack Phase. The Player with the higher current morale has the first option to launch a torpedo attack; if he declines, his opponent has the option. If both fleets have the same current morale, a die is rolled, and a result of 1, 2, or 3 gives the Russian the first option and a die roll of 4, 5, or 6 gives the Japanese the first option. If both Players decline, no torpedo attack takes place during that Phase. Play proceeds to the Morale Phase at the conclusion of the Torpedo Attack Phase (see Case 8.7).
[8.61] Torpedo Attack Procedure. To launch a torpedo attack, the opting Player moves his flotillas from their position in the flotilla section to the corresponding Torpedo Attack Position Box. A Player must always move the flotilla in Box 1 before the flotilla in Box 2 and the flotilla in Box 2 before the flotilla in box 3, etc. A Player may move any or all of his flotillas when executing a torpedo attack, but no flotilla may be moved out of numerical order.
Once all flotillas are moved to the Torpedo Attack Position Box, each Friendly flotilla conducts gunnery combat against any Enemy flotilla occupying a correspondingly numbered Box (i.e., any Enemy flotilla directly adjacent). Then the Enemy flotillas conduct gunnery combat against all Friendly adjacent flotillas. All gunnery combat is assumed to be simultaneous at a range of zero, and all combat results are applied at the end of the Torpedo Attack Phase. Every flotilla that is not directly adjacent to an Enemy flotilla can launch a torpedo attack against a capital ship or an Enemy flotilla. To launch a torpedo attack, place the flotilla on top of the target unit. The target unit may at this time fire at each attacking flotilla separately at a range of zero. If an attacking flotilla is disabled or sunk, the torpedo attack for that flotilla is aborted, and the flotilla is placed back in its original box on the flotilla section of the display (unless it was sunk, in which case it is removed from play). If the flotilla does not receive a combat result, it may launch a torpedo attack, at a range of zero, against the target unit on the 1 column of the Naval Combat Results Table. After all torpedo attacks and gunnery combats are included, all attacking flotillas are placed in their original position on the flotilla section of the display.
- [8.62] Capital ships that fire during the Gunnery Combat Phase may fire during the Torpedo Attack Phase at each attacking flotilla.
- [8.63] Only the target unit being attacked may fire at an attacking flotilla.
- [8.64] There is no limit to the number of torpedo attacks a flotilla may make during a game.
- [8.65] If the target unit is a flotilla the procedure is identical to attacking a capital ship. The target flotilla may fire once at each attacking flotilla, even if it fired during the current Torpedo Attack Phase.
Naval Combat Sequence (flow chart printed beside the rules). Phases: Weather Phase, Range Determination Phase, Gunnery Combat Phase, Torpedo Attack Phase, Morale Phase.
- A. If due to new weather conditions the opposing fleets are beyond the Maximum Sighting Range, conduct a Search Phase.
- B. If the fleets are within the Maximum Sighting Range, conduct a Range Determination Phase.
- C. If the fleets are within the Maximum Sighting Range, conduct a Gunnery Combat Phase.
- D. At the conclusion of the Gunnery Combat Phase, conduct a Torpedo Attack Phase.
- E. After the Torpedo Attack Phase, conduct a Morale Phase.
- F. Mark the passage of one hour of combat and conduct another Weather Phase if at least one hour of combat remains. If no hours of combat remain, continue the Naval Movement Stage where it was interrupted.
- G. If neither fleet sights the other, mark the passage of one hour of combat and conduct another Weather Phase if at least one hour of combat remains. If no hours of combat remain, continue the Naval Movement Stage where it was interrupted.
- H. If due to the new range the opposing fleets are beyond the Maximum Sighting Range, conduct a Search Phase.
- I. If a sighting occurs conduct a Range Determination Phase.
[8.7] Morale
- [8.71] A fleet's initial morale equals the Initiative Rating of its commanding admiral. Current morale is reflected on the Morale track (see Tactical Naval Display).
- [8.72] A fleet's morale is reduced by one for every five Defense Strength Points of ships sunk.
- [8.73] If a fleet in a Friendly port hex refuses combat, its morale is reduced by one (see Case 8.1).
- [8.74] A fleet's morale is reduced by one when its commanding admiral is wounded (see Case 8.56).
- [8.75] A fleet's morale is reduced to zero when the admiral is killed, either through the Admiral Casualty Table or loss of the flagship (see Case 8.56).
- [8.76] When a fleet's morale reaches zero, either through naval combat or by loss of an admiral, the fleet must break off the engagement (see Cases 8.77 and 8.8).
- [8.77] A fleet with a current morale of zero must always open the range as much as it can and has the ability to move 6 Range Boxes per Range Determination Phase.
- [8.78] A fleet's morale is increased by one during the End Stage of every Game-Turn it spends entirely in a Friendly port hex. A fleet's morale cannot be greater than the Initiative Rating of the commanding admiral (see Case 4.35).
- [8.79] A fleet's morale may be increased or lowered by the appointment of a new commanding admiral who possesses a higher or lower Initiative Rating than his predecessor.
[8.8] Breaking Off a Naval Combat
Naval combat is broken off temporarily or permanently when one of the following situations occurs:
- The opposing fleets are beyond the maximum sighting range (the action is considered temporarily broken off, see Case 8.84).
- The hours remaining in the naval combat reaches zero (see Case 8.85).
- [8.81] In clear weather, if the range between opposing fleets is seven or greater, the action is considered to have been temporarily broken off.
- [8.82] In fog, if the range between opposing fleets is five or greater, the action is considered to have been temporarily broken off.
- [8.83] In storm, if the range between opposing fleets is four or greater the action is considered to have been temporarily broken off.
- [8.84] If the action is temporarily broken off because the range between opposing fleets is beyond Maximum Sighting Range, the following procedure is initiated. For each hour of combat remaining, the Russian Player (first) conducts a Weather Phase (see Case 4.41). If, due to a change in the weather, the fleets are now within maximum range, play proceeds to the Range Determination Phase (see 4.43). If the fleets remain out of sighting range, a search procedure is conducted (see Section 6.0). If a sighting occurs, follow the instructions in 8.41. If a sighting does not occur, mark the passage of one hour, and repeat this procedure for each hour remaining. When there are no hours remaining, revert to the Naval Movement Stage at the point it was interrupted. If the fleets re-sight each other they continue the engagement except that they do not roll for the hours of combat remaining.
- [8.85] Whenever the hours of combat remaining reach zero, combat is over, and both players revert to the Naval Movement Stage where it was interrupted.
- [8.86] Either fleet's morale reaches zero (that fleet must attempt to break off action, see Case 8.77).
- [8.87] Naval Combat Results Table (see Tactical Display).
LAND GAME
[9.0] Land Movement
COMMENTARY: The Russo-Japanese War was characterized by a great deal of military ineptitude. Army headquarters and combat units frequently disobeyed or failed to respond to orders. Consequently, in Red Sun Rising, each command and land unit possesses a Command Value, which represents the unit's ability to respond to orders. The Command Value thus reflects the overall initiative of a particular unit.
GENERAL RULE: Units respond to orders passed down the Chain of Command. The Supreme Headquarters is directly superior to all Army Headquarters. An Army Headquarters is directly superior to all combat units currently assigned to it (see Section 14.0). An Army Headquarters may move and attempt to activate combat units assigned to it only if it is activated. A combat unit may move only if it is activated. A land unit within the Command Radius (see Case 9.18) of its direct superior is said to be in Command Control. A land unit's ability to activate is measured by its Response Value. A unit in Command Control has a Response Value equal to its Command Value plus the Command Value of its direct superior. A unit out of Command Control has its Response Value equal to its Command Value alone.
[9.1] Activation of Units
During the Land Movement Stage, the Phasing Player may attempt to activate his Supreme Headquarters, Army Headquarters, and combat units. If the Supreme Headquarters is activated, it can aid in this process. If a particular Army Headquarters activates, it may attempt to activate its assigned combat units. As each combat unit is activated it is moved before any other combat unit attempts activation.
- [9.11] When a land unit attempts to activate, one die is rolled. If the die roll is less than or equal to the unit's Response Value, the unit is activated. If the die roll is greater than the unit's Response Value, then the unit has failed to activate. A unit in Command Control has its Response Value equal to its Command Value plus the Command Value of its direct superior. A unit out of Command Control has its Response Value equal to its Command Value.
- [9.12] An activated Army Headquarters may have the units assigned to him attempt to activate. The combat units attempt to activate one by one. After a combat unit activates, it is immediately moved before any other combat units attempt activation.
- [9.13] If an Army Headquarters fails to activate, then all units assigned to it may not attempt activation that Game-Turn.
- [9.14] If the Supreme Headquarters fails to activate, all Army Headquarters have their Response Value equal to their Command Value for that Game-Turn.
- [9.15] Combat units that are out of Command Control but whose Army Headquarters activates have their Response Value equal to their Command Value.
- [9.16] Combat units can be assigned directly to the Supreme Headquarters (see Section 14.0). If the Supreme Headquarters activates, all combat units directly assigned to it may attempt to activate. The Supreme Headquarters is considered the direct superior of all combat units assigned to it. If the Supreme Headquarters does not activate, the units assigned to it may not attempt activation.
- [9.17] During winter Game-Turns, add two to all activation die rolls. During spring and autumn Game-Turns add one to all activation die rolls.
- [9.18] The Command Radius of a Headquarters is three Movement Points. This path may not be interrupted by Enemy units or Enemy zones of control. If a unit's path to Headquarters is interrupted by Enemy Units or Enemy zones of control, the unit is out of Command Control.
[9.2] How to Move Units
Once a unit is activated, it is moved contiguously hex by hex, expending Movement Points in each hex it enters. Basically, each unit expends one Movement Point of its total Movement Allowance for each rough terrain hex it enters, other terrain costs more or less than one Movement Point to enter or to cross. The distance a unit may move depends on the type of terrain it traverses. A unit may not move in excess of its allotted Movement Points.
[9.3] Zones of Control
Each land combat unit projects a Zone of Control into each adjacent clear terrain hex and each adjacent contiguous road hex.
- [9.31] Command units do not exert a Zone of Control.
- [9.32] Units in defensive positions do not exert a Zone of Control (see Section 13.0).
- [9.33] A land combat unit exerts a Zone of Control into adjacent non-clear terrain hexes only through contiguous road hexes.
(A diagram on this page illustrates Zones of Control around a 8-2-5 unit; it carries no further rules text.)
[9.4] Movement Inhibitions and Prohibitions
- [9.41] A land unit may not enter an all-sea hex.
- [9.42] A land unit must cease movement upon entering an Enemy controlled hex.
- [9.43] A land unit may not move directly from one Enemy Zone of Control to another.
- [9.44] A land unit may move out of an Enemy Zone of Control if it begins a Movement Stage in one, but it must cease movement upon entering another Enemy Zone of Control.
- [9.45] A land unit may never enter a hex containing an Enemy unit.
- [9.46] Terrain Effects Chart (see page 32).
[10.0] Land Supply
GENERAL RULE: During the Supply Stage combat units are judged to be in or out of Supply. There are two types of Supply Sources: General and Limited. A General Supply Source can supply an unlimited number of combat units. A Limited Supply Source can supply only a certain number of Command points. To be in Supply a combat unit must be within three Movement Points of an adequate Supply Source or within three Movement Points of the combat unit's assigned Command unit which, in turn, is within three Movement Points of a Supply Source. A combat unit that can meet neither of these conditions is out of Supply. Combat units that are out of Supply suffer attrition (see Case 10.4).
[10.1] Russian Supply Sources
- [10.11] Hexes 3316 and 3337 are Russian General Supply Sources. Any rail hex that is connected by a contiguous path of rail hexes leading to either of these hexes, unbroken by Japanese units or Japanese Zones of Control, is a Russian General Supply Source (see Case 18.4).
- [10.12] Port Arthur (hex 0801) and Vladivostok (hex 2937) can be Russian General Supply Sources, but they are General Supply Sources only if they contain at least one Game-Turn of Supply. The number of Game-Turns of Supply contained within these hexes is reflected by the appropriately labeled Supply Level Track on the map. Port Arthur starts with an initial supply of 6 Game-Turns, and Vladivostok starts with an initial supply of 3 Game-Turns.
- [10.13] For each Land Combat Stage in which units tracing a supply line to either Port Arthur or Vladivostok are attacked, one Game-Turn of supply is expended by the appropriate supply source. If combat units tracing a supply line to either Port Arthur or Vladivostok are not attacked, no supply is expended in that Game-Turn.
- [10.14] Each Reinforcement Stage, the Russian Player may increase the Supply by one Game-Turn for either Port Arthur or Vladivostok - not both. In order for the Supply to be increased, the hex in question must be connected by a contiguous path of rail hexes to either hex 3316 or 3337, unbroken by Japanese units or Japanese Zones of Control (see Case 18.4).
- [10.15] No more than 12 Game-Turns of Supply may be in either Port Arthur or Vladivostok.
[10.2] Japanese Supply Sources
- [10.21] Any Japanese merchant fleet in a coastal or port hex on the land map is a Limited Supply Source. Each merchant fleet can supply four Command Points of combat units.
- [10.22] During winter Game-Turns, merchant fleets can be Limited Supply Sources only if they occupy a port hex on the land map (see Case 7.5).
- [10.23] During spring, summer, or fall Game-Turns, a merchant fleet can be a Limited Supply Source if it occupies either a coastal or port hex on the land map (see Case 7.5).
- [10.24] Supply is traced from the unit requiring supply to the hex on the Land Map containing the merchant fleet that is providing the supply.
- [10.25] At the end of the Supply Stage, merchant fleets can move to a new hex on the land map, as long as the new hex is within the boundaries of the corresponding hex occupied by the merchant fleet on the Strategic Naval Map (see Case 7.5).
- [10.26] A merchant fleet that is supporting a blockading fleet cannot be used for land supply.
[10.3] Supply Lines
- [10.31] Any Russian combat unit that can trace a Supply line to a General Supply Source is in Supply.
- [10.32] Any Japanese combat unit that can trace a supply line to a Limited Supply Source which has sufficient Command Points is in Supply.
- [10.33] A valid Supply line can be traced a distance of three Movement Points from the unit to a supply source. This path is subject to all terrain costs, just as if it were applied to a land unit moving. If the Supply line is interdicted by Enemy units or Enemy Zones of Control, the Supply line is considered blocked. A blocked Supply line provides no supply.
- [10.34] A valid supply line can also be traced a distance of three Movement Points from the unit to a Command unit which is, in turn, able to trace a Supply line three Movement Points to a Supply Source. This type of Supply line is subject to the restrictions delineated in Case 10.33.
- [10.35] A combat unit can trace a Supply line as described in Case 10.34 only if the combat unit is assigned to that particular Command unit. Combat units may never trace a Supply line to a Command unit to which they are not assigned.
- [10.36] Any combat unit in Supply during the Land Combat Stage may attack.
- [10.37] Any combat unit not in Supply that is forced to defend during the Land Combat Stage is automatically eliminated.
[10.4] Attrition
A unit that is out of Supply loses one step to attrition at the end of each Supply Stage.
- [10.41] Any combat unit that cannot trace a Supply line to a Supply Source - General or Limited - is out of Supply and therefore suffers attrition.
- [10.42] Any Japanese combat unit that traces a Supply line to a Limited Supply Source that does not have Command Points to supply it is out of Supply and suffers attrition.
- [10.43] Command units never suffer attrition.
- [10.44] Naval units are not subject to Land Attrition.
[11.0] Land Combat
GENERAL RULE: Combat is voluntary and may occur only between adjacent combat units. The combat stage is composed of three Assault Rounds. A unit may attack only if activated and supplied (see Case 10.36). A unit may not attack more than once per Assault Round, nor may a unit ever be forced to defend more than once per Assault Round. After all attacks of a given Assault Round have been completed, another Assault Round may begin at the option of the Phasing Player. At the conclusion of the third Assault Round - or when the attacker is finished, whichever comes first - the Land Combat Stage is completed. Note: A unit defends normally whether it is activated or not.
[11.1] Retreat Before Combat
- [11.11] The defender has the option, before each Assault Round, to attempt to retreat any Friendly units adjacent to Enemy units one or two hexes. Before a unit may retreat in this fashion, the owning Player must roll a die. Only if the die roll is equal to or less than the retreating unit's Command Value may the unit(s) retreat. There are no die modifiers.
- [11.12] A unit may attempt to retreat before combat once per Assault Round when it fulfills the conditions of Case 11.11.
- [11.13] If a unit successfully retreats before combat, the attacking units may advance into the hex if it is totally vacated at the conclusion of the Assault Round (see Case 11.3).
- [11.14] A unit may retreat one or two hexes. If a unit retreats two hexes, the owning Player rolls a die. If the die roll is 1, 2, or 3 the units suffer no adverse effects. If the die roll is 4, 5, or 6, the unit loses one step. If a unit retreats only 1 hex, there are no adverse effects.
- [11.15] Units may not retreat through Enemy-occupied hexes, but they may retreat through Enemy Zones of Control.
[11.2] Combat
In order to conduct an attack, the attacker determines whether he possesses a Supply line for the attacking units (see Case 10.36). Then the defender determines whether he possesses a Supply Line (see Case 10.37). Assuming both Players possess Supply lines for their respective units, the Players total the Combat Strengths of their respective forces. The attacker's Combat Strength is compared to the defender's as a ratio. The Players find the appropriate column on the Land Combat Results Table and roll the die. All combat die roll modifiers are applied, and the modified die roll is cross-referenced with the appropriate column to yield the combat result, which is applied immediately.
- [11.21] A Phasing unit may attack any adjacent Enemy unit during any Assault Round after all retreats before combat have been executed.
- [11.22] A unit may attack only once per Assault Round.
- [11.23] A unit may be forced to defend only once per Assault Round.
- [11.24] A unit is not required to attack each Assault Round.
- [11.25] A unit may attack different Enemy units each Assault Round at the owning Player's option.
[11.3] Advance After Combat
If, at the conclusion of an Assault Round, the defender's hex is vacated due to a retreat before combat or the elimination of the defending units due to combat, then the attacking units may advance into the vacated hex. The advance after combat takes place after all attacks for that particular Assault Round have been completed and before the next Assault Round begins.
[11.4] Combat Die Roll Modifiers
The Combat Die Roll is modified for various reasons. All Combat Die Roll modifiers are cumulative.
- [11.41] Units defending in certain types of terrain may modify the combat die roll. All effects of terrain are cumulative (see Terrain Effects Chart).
- [11.42] Fortifications and Trenches modify the combat die roll according to their current strength status (see Section 13.0).
- [11.43] If Command units are present, they can modify the die roll, provided the Command unit is stacked with the units that are participating in the combat. The combat die roll is modified by one in favor of the side whose Command unit has the higher Command Value. If both Command units have the same Command Value, the die roll is not modified. If only one side has a Command unit present, that side benefits from the modification. A Command unit may modify a die roll for a combat in which at least one of its assigned units is involved.
- [11.44] If combat units assigned to different Command units participate in a combat together, and one or all of the Command units are present, the owning Player must choose which Command unit will modify the die roll.
- [11.45] A Command unit can modify the die roll once per Assault Round.
[11.5] Step Reduction
The Combat Results Table gives results in terms of step losses. All divisions have two steps. All brigades and reduced-divisions have one step. When a brigade takes a one-step reduction, it is removed from play. When a division takes a one-step loss, it is replaced with a reduced-division counter of the same designation. When a reduced-division counter takes a one-step loss it is eliminated. Command units are a special instance (see Case 11.53).
- [11.51] Division Reduction Example: An 8-2-5 division takes a step loss and is replaced by its 4-1-5 reduced-division counter; a further step loss means it is permanently eliminated.
- [11.52] Brigade Reduction Example: A 3-1-7 brigade that takes a step loss is permanently eliminated.
- [11.53] When a Command unit alone in a hex is attacked, it is either eliminated or moved to the nearest Friendly stack that is in Supply. If the Command unit is not in Supply, it is eliminated. If the Command unit is in Supply, it is placed on the nearest Friendly stack of land units in Supply.
- [11.54] When a Combat unit that can sustain only a one-step loss is eliminated, it is removed from play permanently.
- [11.55] Reduced-division counters can be re-built up to full strength through the process of Reinforcement points or Replacement steps (see Section 17.0).
- [11.56] If all combat units in a hex are eliminated in combat, any Command units in the hex are eliminated as well.
- [11.57] Land Combat Results Table (see page 32).
[12.0] Stacking
GENERAL RULE: At the end of the Land Movement Stage units may not be stacked in a hex in excess of the hex's stacking limit (see Terrain Effects Chart). Units in excess of the hex stacking limit at the end of the Land Movement Stage are eliminated at the owning Player's option.
[12.1] Stacking Costs
- [12.11] A unit has Stacking Points equal to its Command Value.
- [12.12] Command units, merchant fleets, and Defensive Positions do not count toward the stacking limit.
[12.2] Excess Units
If a hex is overstacked at the end of the Land Movement Stage, combat units are eliminated by the owning Player until the hex is no longer overstacked.
[13.0] Defensive Positions
GENERAL RULE: Certain hexes on the map are fortresses. Fortresses cannot be built. Both sides have the option to build trenches in any land hex, even in a fortress hex. A hex may not have more than one fortress and one trench marker in it. Fortresses and trenches modify the combat die roll. Fortresses or trenches that are vacated as a result of combat are destroyed and, in the case of trenches, removed from the map. Players must keep mental note of destroyed fortresses.
[13.1] Constructing Trenches
[13.11] In order for a Player to construct a trench in a hex, he must fulfill the following conditions:
- At least three Command Points of combat units must be in the hex.
- These combat units may not move during the Game-Turn of construction or improvement (retreats count as movement).
- These units may not be adjacent to Enemy units.
A Player may build one level of trench per Game-Turn for each hex in which units fulfill the above conditions. There are two levels of trenches. If a hex contains no trench and the above conditions are met, a level 1 trench is placed in the hex. If a hex contains a level 1 trench and the above conditions are met, a level 2 trench is placed in the hex. No trench may be greater than level 2.
- [13.12] Trenches can be built in fortress hexes.
- [13.13] Trenches, once constructed, are permanent and may not be destroyed except by combat.
- [13.14] Combat units do not have to be activated to build trenches.
- [13.15] Command units may never build trenches.
- [13.16] Trench markers are placed on the map during the End Stage.
[13.2] Fortresses
There are only two fortresses in the game: Port Arthur (hex 0801) and Vladivostok (hex 2937). The combat die roll for an attack against units in a fortress hex is reduced by 2. The effects of fortresses and trenches in the same hex are cumulative.
Example: Port Arthur (hex 0801) has a second level trench in it. If the hex were attacked, the combat die roll would be reduced by four (one for each of two trench levels and two for the fortress). There may be other combat modifiers depending on the situation.
[14.0] Unit Assignments
GENERAL RULE: Combat units must be assigned to a Command unit if they are on the map. Combat units not assigned to a Command unit may not move or attack until assigned. Units are assigned during a Reinforcement Stage. Units may be assigned during a Reinforcement Stage at the discretion of the owning Player. There is no limit to the number of combat units that can be assigned to a particular Command unit.
PROCEDURE: During the Reinforcement Stage, a Player assigns combat units that have just entered the land map or re-assigns units already on the land map at the owning Player's discretion. Each unit is represented by a combat unit and an Information marker with the same designation and symbol. To assign a particular combat unit to a particular Command unit, a Player places the Command unit's Information marker in the appropriate box on the Unit Assignment Chart.
[15.0] Naval Blockade and Attrition
GENERAL RULE: A Japanese fleet may be in a coastal hex on the Strategic Naval Map at the end of the Naval Movement Phase if it is stacked with a merchant fleet. A fleet fulfilling this condition is considered on blockade. A fleet on blockade functions as if it were in a port hex. At the end of the Naval Movement Stage, the fleet is placed on its in-Port side and attempts Command Initiative as if it were in a Friendly port hex. An exception to this is that when a fleet is on blockade it automatically possesses Command Initiative at the conclusion of the first round of the Naval Movement Stage. Each Game-Turn during which a fleet is on blockade it must roll for attrition on the Naval Blockade Table (see Case 15.1).
[15.1] Naval Blockade Attrition
Each turn that a fleet is on blockade, it must roll on the Naval Blockade Attrition Table during the Attrition Stage (see Case 4.15) and immediately apply the result.
- [15.11] All Naval Blockade Attrition (NBA) die rolls are modified by the season only.
- [15.12] During summer Game-Turns, the NBA die roll is not modified.
- [15.13] During spring or fall Game-Turns, add one to the NBA die roll.
- [15.14] During winter Game-Turns, add two to the NBA die roll.
- [15.15] Naval Blockade Attrition Table (see Tactical Display).
[15.2] Lost at Sea
Any fleet or merchant fleet that is at sea at the end of a Naval Movement Stage is eliminated during the Attrition Stage.
- [15.21] During a winter Game-Turn, any merchant fleet that is neither supplying a blockade nor in port is eliminated.
- [15.22] During a spring, fall, or summer Game-Turn, any merchant fleet that is not on a coastal hex or port hex at the end of the Naval Movement Stage is eliminated.
- [15.23] Any at-Sea fleet not on blockade or in port at the end of a Naval Movement Stage is eliminated.
[16.0] Mines
GENERAL RULE: If a Japanese fleet is on blockade, and does not move during the Naval Movement Stage, it can raise the mine level in the hex it occupies by one. This is done at the end of the Naval Movement Stage. Mines can only be laid in the Port Arthur or Vladivostok hexes. The current level of mines in these hexes is represented on the appropriate Mine Level Track on the map. Japanese fleet activation is not considered movement.
PROCEDURE: Every time a fleet enters or leaves a port that is mined, a die is rolled. The number corresponds to one of the first six ships (see Case 8.2 to determine positions).
Example: If the die roll is five, the fifth ship is indicated. The indicated ship is attacked by the mine level on the Naval Combat Results Table using the mine level as the column. The mine level in a hex can only increase or stay the same - it can never decrease.
[17.0] Reinforcements and Replacements
GENERAL RULE: The Russian Player receives reinforcements and replacements by expending Command Points. Each Game-Turn the Russian Player receives Command Points. The Russian Player may either build new divisions and brigades with them or he may rebuild reduced-division counters. The cost of a unit is equal to its Command Value measured in Command Points. The Japanese Player starts the game with all his units on the map in Japan. The Japanese Player may not build units. The Japanese Player receives Replacement Steps. A Japanese reduced-division counter can be rebuilt back to full strength by the expenditure of one Replacement Step.
PROCEDURE: During the Reinforcement Stage the Russian Player places all newly built combat units in either hex 3316 or 3337. He expends one Command Point for each unit Command Point built. He may accumulate Command Points if he so desires (keep track of these on a separate piece of paper). The Japanese Player starts with all his combat units on the Strategic Naval map and can bring them on the Land map through the process of merchant transport (see Case 7.4). A reduced-division counter can be rebuilt back to full strength by stacking with its assigned Command unit during the Reinforcement Stage and expending either a Command Point for the Russian or a Replacement Step for the Japanese.
[17.1] Reinforcements
- [17.11] All Command units begin the game on the map or arrive according to the Turn Record Track. All arriving Russian Command units are placed in either hex 3316 or 3337. All arriving Japanese Command units are placed in any Japanese home port hex on the Strategic Naval map.
- [17.12] The Japanese start with all their combat units on the Strategic Naval map, thus they do not receive combat reinforcements during the game.
- [17.13] The Russians receive their reinforcements in terms of the number of Command Points they can build during the Reinforcement Stage. The Russian Player may accumulate these Command Points. These Command Points may alternatively be used for replacement purposes (see Case 7.21).
[17.2] Replacements
During the Reinforcement Stage, reduced-division counters can be re-built up to full strength if they are stacked with their assigned Command unit, and a Command Point (if the unit is Russian) or a Replacement Step is expended (if the unit is Japanese).
- [17.21] The Russian Player receives his replacements in terms of the number of Command Points with which he can re-build reduced-division counters during the Reinforcement Stage.
- [17.22] The Japanese Player receives one Replacement Step at the beginning of the Reinforcement Stage of each January, April, July, and October Game-Turn. The Replacement Step can be used during the Reinforcement Stage it is received in. Replacement Steps can be accumulated and are kept track of on the Japanese Replacement Track (see map).
[17.3] Withdrawals
When the Turn Record Track calls for a Command unit to be withdrawn, the unit is simply removed from play.
[18.0] Special Rules
COMMENTARY: The rules in this Section add complexity to the game. These are not optional rules. The game should be played with these rules for full effect.
[18.1] Ship Repair
A disabled ship can be repaired if it spends a number of Game-Turns in a Friendly port equal to its Defense Strength. Players should keep track of this on a separate piece of paper. When a ship is repaired, it is flipped from its disabled side to its full-strength side.
[18.2] Capturing a Fleet
If the port a fleet occupies is captured by Enemy Combat units, the fleet is captured. Remove the fleet and all its ships from play.
[18.3] Foreign Aid
Every time the Japanese achieved a victory, they found foreign money easier to obtain. The game reflects this by allowing the Japanese to receive extra merchant fleets whenever they achieve certain objectives.
The Japanese Player receives a merchant fleet in a home port hex during the Reinforcement Stage immediately following the Game-Turn in which he accomplishes each of the following.
- A Japanese unit first occupies a rail hex.
- The Japanese capture Seoul.
- The Japanese capture Port Arthur.
- The Japanese capture Liaoyang.
- The Japanese capture Mukden.
[18.4] Rail Line
The rail line costs no Movement Points for purposes of transporting units, tracing Supply lines, or for Command Radius determinations. Both sides are restricted as to when they can use these abilities. Basically, each rail hex to be used by a particular side must be able to trace a path of contiguous rail hexes back to a specific railhead. This path of contiguous rail hexes may not be interdicted by Enemy units or Enemy Zones of Control.
- [18.41] The Russian Player may use a rail hex for all purposes, as long as the rail hex can trace a contiguous path of rail hexes to either hex 3316 or 3337. Any rail hex that cannot fulfill this condition may not be used by the Russian Player for any purpose.
- [18.42] If the Japanese Player controls either Port Arthur or Dalny, he may use a rail hex for tracing Supply lines and Command Radii as long as the rail hex can trace a contiguous path of rail hexes to either Port Arthur or Dalny. Any rail hex that cannot fulfill this condition may not be used by the Japanese Player for any purpose. No Japanese units may use the rail line for movement (Exception: See Case 18.9).
[18.5] Russian Fleet Disbandment
During any Russian Reinforcement Stage, the Russian Player can permanently disable 25 Defense Strength Points of ships and receive in that port hex a naval brigade. These ships may not be repaired. A maximum of two naval brigades can be created in this fashion.
[18.6] Garrison Units
All Garrison units may use their Combat Strength defensively only. They may never attack. Garrison units may never be moved from the hex to which they are initially deployed.
[18.7] Port Arthur Follies
During the siege of Port Arthur, both Smirnov and Stoessel were in command. On any turn that the Russian Player wishes to activate the Port Arthur command he must first roll the die. On a die roll of 1 through 5, Stoessel is considered in command for that Game-Turn. On a die roll of 6, Smirnov is in command for that Game-Turn.
[18.8] February 1904
The Japanese surprised the Russians during February 1904. The following rules cover special effects that apply to the February 1904 Game-Turn exclusively.
- [18.81] All Japanese combat units and Command units are activated.
- [18.82] All Japanese fleets possess Command Initiative.
- [18.83] Surprise Torpedo Attack. Each Japanese Torpedo flotilla (not Destroyer flotilla) may launch a torpedo attack on any Russian capital ship. For this special situation, the following procedure is instituted. Each torpedo flotilla attacks any Russian capital ship currently in the game on the 1 column of the Naval Combat Results Table. The capital ship may not fire. All results are applied immediately.
[18.9] Japanese Siege Artillery
Japanese Siege Artillery may move only on rail hexes. If forced to retreat into a non-rail hex, it is eliminated. In addition, a Japanese siege artillery unit has a Response Value equal to the Command Value of its assigned Command unit. The Japanese Siege Artillery can move an unlimited number of hexes on the rail line within the restrictions of Case 18.4. Japanese siege artillery is an exception to Case 18.4 which specifies that no Japanese unit may move on the rail line. A Japanese siege artillery unit equals 4 Command Points for transport purposes only (see Case 7.44).
[19.0] How to Set Up the Game
GENERAL RULE: Red Sun Rising has only one scenario. The general situation shows all the Japanese forces in Japan ready to invade the mainland. The Russian forces in the east are at half strength, and the Russian fleets are not ready for combat. For historical information, the Russian cruiser Varyag is considered sunk. The game begins with the Japanese torpedo attack on Port Arthur.
[19.1] Japanese Set-Up
Land Units. All Japanese land units start at full strength. Units are listed below by the hex they start the game in. Place the appropriate units in the designated hex on the Strategic Naval Map.
- Hex 14: 6th Infantry Division; Kobe 6 Infantry Brigade; 1st Cavalry Brigade; 1st Artillery Brigade; 1 Siege Artillery Regiment; 1 Merchant Fleet.
- Hex 24: 12th Infantry Division; Kobe 12 Infantry Brigade; 2nd Cavalry Brigade; 2nd Artillery Brigade; 1 Siege Artillery Regiment; 1 Merchant Fleet; 1st Fleet marker; 2nd Fleet marker.
- Hex 25: 5th Infantry Division; 11th Infantry Division; Kobe 5 Infantry Brigade; Kobe 11 Infantry Brigade; 1 Siege Artillery Regiment; 1 Merchant Fleet.
- Hex 26: 4th Infantry Division; 10th Infantry Division; Kobe 4 Infantry Brigade; Kobe 10 Infantry Brigade; 1 Siege Artillery Regiment; 1 Merchant Fleet.
- Hex 27: 1st Infantry Division; 9th Infantry Division; Guards Infantry Division; Kobe 1 Infantry Brigade; Kobe 9 Infantry Brigade; Kobe Guards Infantry Brigade; 1 Siege Artillery Regiment; 1 Merchant Fleet.
- Hex 35: 3rd Infantry Division; Kobe 3 Infantry Brigade; 1 Siege Artillery Regiment; 1 Merchant Fleet.
- Hex 47: 2nd Infantry Division; 7th Infantry Division; 8th Infantry Division; Kobe 2 Infantry Brigade; Kobe 7 Infantry Brigade; Kobe 8 Infantry Brigade; 1 Siege Artillery Regiment; 1 Merchant Fleet.
Naval Units. Located in Hex 24 of the Strategic Naval Map are both Japanese fleet markers. Commanding Admiral of the 1st Fleet is Togo, Commanding Admiral of the 2nd Fleet is Kamimura. The Japanese Player may place his ships in either fleet at his own discretion. All Japanese ships in the counter mix start the game in either the 1st or 2nd Fleet.
[19.2] Russian Set-Up
Land Units. All Russian land units that start the game on the Land map start at reduced strength. Place the appropriate division markers but with one step reduced (xx). All land units start on the land map.
- Hex 0801: 3rd East Siberian Infantry Division; 4th East Siberian Infantry Division; 7th East Siberian Infantry Division; Tr Cavalry Division; Or Cavalry Division; PA Infantry Garrison; Stoessel (PA HQ).
- Hex 2937: Vlad Infantry Garrison; 1st East Siberian Infantry Division; 6th East Siberian Infantry Division; 8th East Siberian Infantry Division; Limivitch (1M HQ).
- Hex 2734: 2nd East Siberian Infantry Division.
- Hex 3316: 5th East Siberian Infantry Division; 9th East Siberian Infantry Division.
Units stacked with a leader are initially assigned to that leader. Units not stacked with a leader are given their army assignments during the first Russian Reinforcement Stage.
Naval Units. On the Strategic Naval Map the Russians have two fleet markers. The Russian 1st Fleet marker is placed in Hex 42, and the Russian 2nd Fleet marker is placed in Hex 54.
The following ships are in the 1st Fleet, commanded by Admiral Stark: Peresvyet (B), Petropavlovsk (B), Pobyeda (B), Poltava (B), Retvizan (B), Sevastopol (B), Tsarevitch (B), Askold (C), Bayan (C), Boyarin (C), Diana (C), Novik (C), Palleda (C), Destroyer Flotillas 1, 2, 3, 4, and 5, Torpedo Flotillas 1 and 2.
The following ships are in the 2nd Fleet, commanded by Admiral V. Essen: Bogatuir (C), Gromoboi (C), Rossiya (C), Rurik (C), Destroyer Flotilla 6.
Russian Naval Reinforcements. The Russian Player receives the Baltic fleet on the May 1905 Game-Turn during the first round of Naval movement on any of the hexes numbered 12 through 19 on the Strategic Naval Map. The Baltic fleet possesses Command Initiative for the May 1905 Game-Turn. The commanding admiral is Rozhestvansky, and the fleet comprises the following ships: Alexander III (B), Apraxin (B), Borodino (B), Navarin (B), Nicholas I (B), Orel (B), Oslyabya (B), Senyavin (B), K. Suvarov (B), Ushakov (B), S. Veliki (B), Aurora (C), D. Donskoi (C), Izmrud (C), V. Monomakh (C), A. Nakhimov (C), Oleg (C), Svetlana (C), Zemchug (C), Destroyer Flotillas 7 and 8.
[19.3] Admiral Succession
If an admiral dies, the next admiral scheduled to arrive on the Turn Record Track arrives on the next Game-Turn. If no more admirals are scheduled to arrive, the last living admiral withdrawn from the game arrives to take command. If neither of these conditions can be met, assume an incompetent is in command with an Initiative Rating of 1 (use any unused counter to represent this admiral). The succeeding admiral is placed on the fleet in port, whether the port is under siege or not. (Replaced by the 3 April 1978 errata; see Errata below.)
[19.4] Victory Conditions
During the course of the war both sides attempted to end the conflict through diplomatic pressure. On the Japanese Turn Record Track, at the end of each season, a number of cities is indicated. If the Japanese Player does not control at least the indicated number of cities, the game is over and victory evaluated. To control a city, the Japanese Player must have a combat unit in the city or be the last to have had a combat unit pass through the city. If the Japanese control fewer than the indicated number of cities, then the game is over and victory is evaluated by the following schedule:
Japanese Control:
- 1 city or less: Russian Decisive Victory
- 2 cities: Russian Substantial Victory
- 3 cities: Russian Marginal Victory
- 4 cities: Japanese Marginal Victory
- 5 cities: Japanese Substantial Victory
- 6 or more cities: Japanese Decisive Victory
If the Japanese control the required number of cities, the game ends when the Japanese have achieved a Decisive Victory according to the above schedule or at the conclusion of the December 1905 Game-Turn.
Charts and Tables
[9.46] Terrain Effects Chart
| Terrain Type | Movement Point Cost | Stacking Limitation (Command Points) | Adjustment to Combat Die Roll |
|---|---|---|---|
| Rail Line (see Case 18.4) | 0 | 4 | NA |
| Road | 1/3 | NA | NA |
| Clear | 1/2 | 12 | none |
| Rough | 1 | 6 | -1 |
| River | 1 | NA | -1 |
| Mountain | 2 | 4 | -2 |
| Fortress |
EXPLANATION: Values are Movement Points for Movement and Command Points per hex for stacking; NA = Not applicable (depends on other terrain in hex). Note: Impassable hexsides on the Strategic Naval Map block naval units; impassable hexsides on the land map block overland movement of land units (representing blocking effect of the sea).
[11.57] Land Combat Results Table
Ratio of Attacker Strength/Defender Strength:
| DIE | 1-3 | 1-2 | 1-1 | 2-1 | 3-1 | 4-1 |
|---|---|---|---|---|---|---|
| 0 | 3/1 | 2/1 | 2/1 | 1/- | 1/- | 1/1 |
| 1 | 2/1 | 1/- | 1/- | 1/- | 1/1 | 2/2 |
| 2 | 1/- | 1/- | 1/- | 1/1 | 2/2 | 1/1 |
| 3 | 1/- | 1/- | 1/1 |
All losses are expressed in terms of steps lost. #/# = Losses to Attacker/Defender. - = No effect. Die rolls of less than 0 or greater than 6 are treated as 0 or 6 respectively. Ratios greater than 4-1 are treated as 4-1. Ratios less than 1-3 automatically result in a (1/-).
[8.24] Naval Combat Results Table
Attacker's Strength:
| DIE | 1 | 2 | 3 | 4 | 5 | 6 | 7 | 8 |
|---|---|---|---|---|---|---|---|---|
| 1 | 0 | 0 | 0 | 0 | 0 | 1 | 2 | 3 |
| 2 | 0 | 0 | 0 | 0 | 1 | 2 | 3 | 4 |
| 3 | 0 | 0 | 0 | 2 |
If the resulting number is equal to or greater than the target's Defense Strength, the target is disabled. If the result is equal to or greater than twice the target's Defense Strength, the target is sunk. If a disabled ship is disabled again, it is sunk.
MODIFIERS: The die roll is reduced by 1 for each Range Box separating the opposing fleets. The die roll is reduced by 2 if the current weather is Storm, reduced by 1 if the current weather is Fog, reduced by 3 if the firing ship is disabled.
[8.56] Admiral Casualty Table
| DIE | Result |
|---|---|
| 1-3 | No effect |
| 4 | Admiral wounded; Fleet Morale reduced by 1 |
| 5, 6 | Admiral killed; Fleet Morale reduced to zero |
[8.49] Naval Maneuver Table
| Die-Roll | 1 | 2 | 3 | 4 | 5 | 6 |
|---|---|---|---|---|---|---|
| Increase/Decrease in Range | +1 | -1 | -1 | -2 | -2 | -3 |
[15.15] Japanese Naval Blockade Attrition Table
| DIE | Result |
|---|---|
| 1-4 | No effect |
| 5 | 5 Defensive Strength Points of Japanese ships are disabled |
| 6 | 10 Defensive Strength Points of Japanese ships are disabled |
| 7, 8 | Two Japanese Battleships are sunk (Note that this result can occur only once per game. Any subsequent instances calling for this result are treated as though the Player had rolled a "6.") |
Note that the Japanese Player chooses which ships suffer attrition effects. Add 1 to the die roll during Spring or Fall Game-Turns. Add 2 to the die roll during Winter Game-Turns.
Tactical Naval Display (other printed items)
The Tactical Naval Display also carries: Russian and Japanese Battleline boxes 1-28; Russian and Japanese Secondary Force boxes; Russian and Japanese Flotilla boxes 1-10 with a Flotilla Attack Position row; the Range Between Fleets track (0 to 11, with Russian Fleet at 0, Max Storm at 3, Max Fog at 4, Max Clear at 6); the Current Weather and Hours Remaining track (0-12), with weather change rolls (Clear: roll 6, change to FOG. Fog: roll 1, 2, 3 change to CLEAR; roll 4, 5 change to STORM. Storm: roll 1, 2 change to CLEAR; roll 6 change to FOG); and Russian and Japanese Morale and Defense Strength Lost tracks (not reproduced here).
Unit Abbreviations
The following explanations of abbreviations found on the unit counters in Red Sun Rising is provided to clear up any confusion that such abbreviations may cause among players.
Japanese: G = Guards; K = Kobe.
Russian: Ca = Caucasian Cossack; ED = Eastern Detachment; ES = Eastern Siberian; 1M = First Manchurian Army (2M = Second; 3M = Third); Or = Orenburg Cossack; PA = Port Arthur; R = Rifles; S = Siberian; Sb = Siberian Cossack; Tr = Transbaikal Cossack; Ur = Ural Cossack; Vlad = Vladivostok.
General: SHQ = Supreme Headquarters.
Red Sun Rising Errata (as of 3 April 1978)
The picture of the front of a typical combat unit is incorrect. The first number is the Combat Strength. The second number is the Command Value, not the Combat Value. The third number is the Movement Allowance.
- [7.0] (addition) Japanese Merchant fleets that do not begin the Game-Turn in a Japanese Home Port may not move during the first round of a Naval Movement Stage. Japanese Merchant fleets that do start the Game-Turn in a Japanese Home Port may move in the first and subsequent rounds of the Naval Movement Stage. On the second and subsequent rounds of Naval Movement, all Japanese Merchant fleets may move according to the rules of Naval Movement.
- [7.2] (addition) If a fleet has a morale of zero, it may not participate in raiding, even if it fulfills the requisite conditions (see case 8.76 addition).
- [7.44] (addition) Japanese units may be transported and disembarked without being activated.
- [7.45] (clarification) Land units may never be disembarked in a hex occupied by Enemy land units.
- [7.71] (clarification) Ships may never sail individually; they must always be contained within a fleet led by an admiral.
- [7.72] (addition) A fleet must always sail with all available ships (exception: see Case 7.73).
- [7.73] (addition) A fleet may leave ships behind when it sorties if the ships being left behind in port are disabled and being repaired.
- [8.24] (Naval CRT addition) If the die roll is reduced below 1, the result is no effect.
- [8.76] (addition) When a fleet's morale reaches zero through naval combat, and the fleet breaks off the action, it must move to the nearest Friendly port by the shortest path possible and may not engage in raiding (see Case 7.2 addition).
- [8.77] (exception) The Baltic fleet commanded by Rozhestvansky, upon reaching a morale of zero, must always open the range, but it may open the range only 5 instead of the usual 6.
Player's Notes
Red Sun Rising simulates a war that lasted less than two years between a supposed world power and a supposed non-world power. It was a war that taxed the military machines of both imperial Russia and Imperial Japan to the breaking point. The total war of 1904-1905 changed the world dramatically. Russian strength was seen to be a myth, and Japan burst upon the world scene as a major power.
There is one basic point that must be made in terms of the overall game at the outset. It is, as much as any game can be, a truly accurate simulation of the war. The problems and difficulties encountered by both sides, and the conditions for victory are those that actually played a part in the war during 1904-1905. The Japanese, in order to win even a marginal victory, must advance and attack. The Russian can virtually sit tight and, by judicious placement and strategy of holding or containment, can win. Delay, wasted attacks, and the failure to press or take advantage of mistakes will all lead to greater Russian victories.
At the outset, the Japanese possess certain intrinsic strengths. First, the Japanese fleet is far superior in quality, numbers and fleet morale strength. The Japanese move first in the game, and by virtue of their fleet strength they control the seas. In the early stages of the game not only can they blockade both Russian fleets, but they can dictate the terms of any sea battle.
In general, the Japanese commanders are superior, and their command initiative is also superior, In game terms, this means that the Japanese are usually able to move and attack, rarely being forced to remain stationary as the Russians are. Moreover, the Japanese are initially stronger in terms of land. forces. After the first winter is over, they can invade almost anywhere. Thus — depending on where and how the Russian has deployed and the command initiative on their side — the Japanese can and should move quickly to the attack. Such action can be decisive in taking the cities they must take to win.
Lest it be said the game is stacked against the Russians let me point out that they too have intrinsic strengths, at least one of which I found either embarrassing or annoying — and sometimes both, Russian reinforcements can use the rail lines to move. Therefore any Russian unit arriving at a railhead in the north (i.e., hex 3316) can instantly arrive at Liaoyang, or for that matter, anywhere the Russian player desires it to enter the line. Ina game with developer
Mark Herman, by the time I attacked Liaoyang, he had almost the entire Russian Army placed in and around the city. Or, as in another game, just when the Russian seemed about to break and run, he received reinforcements right at the point in his line I wanted to breach. And in this example lies another Russian strength. Eventually, a smart Russian will have numerical superiority and, with it, combat superiority. He can use this advantage slowly at first, and then more rapidly to push the Japanese Army into the sea from whence it came.
Another important strength, if used correctly, is the ability of the Russian to build interior lines of defense. This can mean the difference between victory and defeat. If this doctrine is properly executed the Russian player can effectively dictate the terms of a land confrontation — or at least its timetable — just as the Japanese can dictate the terms of any sea battle. By intelligently utilizing these defensive interior lines, the Russian can knock the Japanese off his timetable and avoid a decisive Japanese victory. He can hold on toa city long enough, or make it so costly for the Japanese to take it, that the Japanese will waste himself trying to take the cities. And, likely as not, the Russian will be able to retake it.
The perfect example was the game I referred to with Mr. Herman. As the Japanese, I tried to attack and take Liaoyang. Mark set up a thin outer defensive line along hexes 1907, 1807, 1808, 1809 and 1811. By the time I had breached that line, taking casualties along the way, Mark had set up a second line, stronger, and with trenches that lay in hexes 2007, 1908, 1909 and 1910. I eventually took Liaoyang, but the cost in terms of troops was so desperate that, as in a chess game, I resigned. Mark could have easily either retaken Liaoyang, prevented me from ever reaching Mukden, and could probably have pushed me into the sea as the winter was fast approaching and my resources were overtaxed.
The Russians, with the exception of those at Port Arthur, have a relatively stable and secure supply line that is not easy to break except between Port Arthur and Liaoyang. The Russian must realize that the Japanese player will break into the rail line somewhere along this line as a prelude to attacking Port Arthur and Liaoyang. He should expect it as most likely between hexes 1606 and 1105 or 1004.
In terms of weaknesses, the Japanese are on thin but not too thin ice. A lapse at almost any moment, a not too well thought out strategy or a lack of foresight can easily be turned to advantage by the Russian. The very things that are strengths can become weaknesses through poor military decisions. The Japanese, although initially very strong on land, can not replace losses as rapidly as the Russian, and Japanese resources at some point can give out. They have only so much at their disposal, and their supply lines are fragile. Once the lines are cut, combat steps are lost that are difficult, if not impossible, to replace.
The biggest Japanese disadvantage in the game, as in the real war, is that they must win by a certain date. With limited resources, they must capture the cities, and this dictates that the Japanese player must follow the historical timetable to win. The rules reflect this most directly. They must capture one city per season. If at the end of a given season the Japanese does not hold the requisite cities, the game is over, and the Japanese may very well be the losers. The Japanese must be careful not to overextend themselves in too many areas at once.
The Russian weaknesses are initially poor command control, slow reinforcements, and the burden of defending the cities and the rail line. Poor command control and poorer leaders mean that, at the critical early stages of the game, the Russians may find themselves unable to meet the Japanese with any effect. This, combined with the slow arrival of early reinforcements, permits the Japanese to take command of the situation. The necessity of defending the cities and the rails means that the Russian will play a waiting game. It will not allow him the freedom of movement that the Japanese player has, and therefore his military options are limited.
In terms of strategy, the Russian is initially weak and spread out all over the map. His commanders are mediocre at best, and he can not stop the Japanese from invading and taking Seoul on the first turn, nor can he prevent the Japanese from blockading Port Arthur, Vladivostok, and the Russian fleets.
The Russian player must try to do two things at once. First, he must reinforce Port Arthur, to make it difficult for the Japanese to take, and at the same time he must try to put obstacles in the path of the Japanese Army moving up the Korean Peninsula. The Japanese will not get any further than the Yalu River in the first turn, so the Russian player must try to send some token force, enough to hold the Japanese for at least one turn at the Yalu. Hex 1412 (or thereabouts) is a good location to place this unit. From there it can fight a delaying action along the coast to Port Arthur, or it can fight the same action along the road to Liaoyang, depending on the thrust of the Japanese attack. The Russian should realize that the unit sent to the Yalu is likely to be eliminated, but if it has held up the Japanese attack for a turn, it is well spent. The Russian should be willing to judiciously sacrifice units for time.
As the Japanese must take either Port Arthur or another port to support their winter operations, the Russian should hold the port of Dalny (hex 0803) for as long as is possible within the confines and dictates of the overall military situation. Here, the Russian might find it cost effective to sacrifice a unit in combat for the port if it seems likely he will inflict Japanese casualties as a result of the action,
These initial steps are delaying tactics, as the Japanese will almost certainly break over the Yalu line and will force open the port of Dalny. Before the troops in Dalny, or most of them, are eliminated, they should fall back into Port Arthur. They will serve better in Port Arthur as a strong force, united with the original force and with whatever reinforcements are sent there. A unit should be sacrificed only if the delay or the Japanese casualties are nearly certain.
The Russians should from the very first build trenches at predetermined sites. Troops in Liaoyang can venture out as far as two hexes to set up a thin outer defensive line. Whatever troops are sent to stop the Japanese at Yalu — if they are not eliminated — can fall back on the ‘‘thin red line’ while reinforcements occupy Liaoyang and set up the interior lines. If the ‘‘Yalu’’ unit is gone, then other units must perform the function, but care must be taken not to strip Liaoyang for the line.
As a last point for the early stages, the Russian player should keep an eye open for the possibility that the Japanese player will try to cut the rail suply line at hex 1606 to begin a second flanking assault on Liaoyang from one or two directions in conjunction with an attack from the Yalu. It can be of significant value to place a unit there, entrenched, or in a nearby hex to block such an attack for a while. I would suggest withdrawing this unit before it is eliminated, There is no need to sacrifice at every opportunity. If the maneuver succeeds, the unit should abandon its position and help to form one of the flanks around Liaoyang. Remember that the Japanese can invade at hex 1706 in the summer months and begin another flanking move from there, and if the unit at 1606 is still sitting there, it will be cut off and destroyed.
In response to the Japanese strategy — the powerful flanking moves — the Russian should retreat, slowly to be sure, but retreat, to save their army. 14
The Russian must keep his army in the field. To give in means the Japanese will run up to the cities and take them quickly. The Russian player must fight a delaying action all the time, making the Japanese fight for every hex. But take care not to fight too hard, Just delay. Keep the Japanese player off his timetable and try to deny him the cities as he needs them. Remember that a decisive victory in the field for the Japanese will give him the game.
The Japanese have a simple strategy. Take the cities and take them as quickly as possible. As the Yalu River line cannot be breached on the first move, it is incumbent on the Japanese to move as much as he can up to the Yalu as soon as he can, Speed is essential to him. Do not waste time trying to eliminate the Russian holding forces. Most likely, the Russians can be put out of supply or kept occupied with minimal forces. The initial moves are crucial. The Japanese must have a port, and so they must take Dalny; and then of course, to meet the victory conditions, they need Port Arthur. But Dalny will allow them to operate if Port Arthur proves a tough nut. Once the Japanese have Dalny they should try Port Arthur. Attacking units may engage in combat three times in each attack at the option of the attacking player, but if the first attack fails and you take losses, it might be more practical to await further troops. Remember that the Japanese can ill afford to take losses early as they will be sorely regretted later on.
The Japanese player should always keep his options open. A first goal should be to cut the lines of supply to Port Arthur while establishing the start of a second or third prong of a flank attack on Liaoyang. Once this has been done and Dalny is taken, look at the victory conditions and get together sufficient forces to take the necessary cities. If the opportunity to take more than is necessary presents itself, take it. But be careful. I suggest you take Port Arthur and move on Liaoyang before the Russian has had a chance to set up his interior lines. If he has set up a line facing that Yalu that is too strong, be ready and able to launch an invasion at or near hex 1706 and move up to Liaoyang following the rivers. You will not reach Liaoyang on the turn you invade. But the invasion will necessitate the Russian player moving his lines and therefore thinning them out, or it will permit the Japanese to alter the axis of the attack and take Liaoyang from behind. The Japanese should be ready to shift the line of attack based on the Russian lines or points of least resistance. This flank attack presents an interesting option: The supply line to Liaoyang can be cut from behind thereby cutting Liaoyang off, and sooner or later it will wither and die on the vine. If the Japanese succeed, the game is over for all intents and purposes. First, the bulk of the Russian Army is gone, and second, most of the Russian commanders are gone too. And it may be possible to take Mukden first or cut it off as well. The general rule to follow is to threaten the Russian supply lines at every opportunity from all sides.
The Japanese player will be tested in utilizing his forces correctly. Forces must be gathered and husbanded as in few other games. Decisions here can not easily be corrected. The Japanese player must always attack in force, so his ability to get his forces to the right places at the right time is critical. It will take him longer than the Russian to do so, but the challenge is there, for it is in the opening months that the war is won or lost, even though this may not be apparent until later on in the game. The naval segment of the game is just plain good fun, but it can have disastrous effects on the outcome of the game. It can be readily seen from the naval combat results chart that the Japanese fleet can stand off at a safe distance, incurring minimal damage while destroying the Russian fleet. For the Russian player to exit Port Arthur with his fleet before Marakov is in command is worse than stupidity. It is throwing away any possibility of winning the war. Japanese morale attrits as the game, progresses, and the fleet remains on blockade. Then is the time for the Russian to move. The important item for the Russian to note and keep in mind is that a severely damaged Japanese fleet, or one that is not commanded by Togo, will find it difficult to defend the merchant/supply fleets. When and if this occurs, the Russian can deliver a severe if not crippling blow to the merchant fleet that can leave the Japanese land forces at the mercy of the Russians.
Lastly, the game is a test for all players. One must keep control of the troops, by use of charts that delineate armies and restrict combat effectiveness thereby. It will strain the ingenuity of the players and in general will provide them with a good, solid game accurate, interesting and forceful in all aspects.
Designer's and Developer's Notes
The Russo-Japanese war was one of the most misunderstood conflicts of its period. It was a war that occurred between eras. The mixture of old and new that was witnessed in the course of this encounter would be seen again, less than ten years later. The advent of the newer weapons (machine guns and rapid fire artillery) was in total contradiction to the use of cavalry which both sides employed. the contemporary military thinkers did not learn the lessons taught by this war. The Russo-Japanese war graphically showed the horror of trench warfare and the potency of the new weapons, but this realization came about only in hindsight, after the world had already been committed to the same horrors on a much wider scale.
When Red Sun Rising was being designed, two main points were emphasized in the land game — leadership and supply. Leadership was a critical factor during the real conflict. It was a two level problem as poor leadership led to poor coordination of effort. The poor leadership is represented in the game by the values assigned to various Army Headquarters. This value represents not only the ability of the commanding officer (whose name is printed on the headquarters) but also the ability of the staff under him. The poor coordination effect is attained through the process of activating — or failing to activate — units. Historically the Russians, and to a lesser degree the Japanese, had a huge problem in getting units to move to a specific timetable. This lack of coordination led to many attacks being applied piecemeal thus nullifying their effect. the solution that was chosen to represent this lack of coordination is a good one, but the resultant increase in the number of die rolls that has to be made may turn some players off. GDW in their game had a paralysis rule which required the Russian player to roll the die until a total of twenty was achieved, The major problem with this is that it erroneously states that after a point in the game the Russians no longer have command control problems. The problem of coordinating effort stayed with both sides right up to the end of the war. Thus, the new system that is used in the game is highly realistic and accurate. The decision was made in favor of realism, not playability.
Supply was the other highly critical factor in the conflict. the Japanese had an overseas merchant pipeline that was extremely vulnerable to surface action whereas the Russians had only a single rail line. The Japanese solved their supply vulnerability by aggressively blockading the major Russian naval fleets in the area. The Russians never solved their supply problems, The Russians never won a battle during the Russo-Japanese war, but they never really lost one either. What occurred at Liaoyang and Mukden are classic examples of this point. In both battles the Japanese gained an advantage on a flank and threatened to cut the Russian supply line. The Russian commander, Kuropatkin, realizing the danger in both cases, ordered a general retreat. In both battles both sides took about even losses, but the threat to the Russian supply line was decisive in each instance. Kuropatkin rightly felt that to keep the army in being was more important than taking a chance on victory and possibly losing the entire army. In the game the attrition rules will eliminate an entire army intwo Game-Turns if itis out of supply. Thus, when a piayer’s supply line is threatened, he should weigh the consequences of any future action. The indirect approach to victory in Red Sun Rising is a very viable strategy.
The Naval game was a very difficult part of the design, The Japanese in all respects were superior to the Russians in everything but overali numbers. ‘ Due to the geographical situation, a large proportion of the Russian naval resources could not be immediately brought to bear. Thus, the Japanese had to destroy the Port Arthur fleet before the Russian Baltic fleet could sail around the world and give the Russians naval numerical superiority. The critical factor in this war was not numbers but naval leadership. Historically, naval leaders in this conflict had tremendous effect on the performance of their fleets. The majority of the Russian leaders were appointed nobility with little or no naval experience. ' The one shining exception was Admiral Marakov, Marakov was a brilliant admiral, and his book on naval strategy and tactics was always next to Admiral Togo’s bed. When Marakov arrived in the Far East, the morale of the Port Arthur fleet rose sharply. But while sortying out of Port Arthur to engage the Japanese, his ship ran over a mine and sank severa! minutes later. His untimely loss totally demoralized the fleet, and it never really fully recovered. During the Battle of August 10th, at the outset of the engagement, Admiral Vitgeft was killed. The Fleet immediately changed course from Vladivostock to Port Arthur. The majority of the fleet was unscathed, but again the loss of a single man was the critical factor. This crucial but little known factor is represented in the game by the fact that the morale of the fleet immediately becomes zero when the admiral is killed, regardless of the status of the rest of the fleet. The justification for this gross effect is historical and although it may be hard for an unlucky player to swallow, it is highly realistic. The Japanese would probably have reacted the same way if Togo had met a similar fate, but the fact that the Japanese did not lose a single capital ship to Russian gunfire makes this impossible to substantiate historically.
Mines also were an interesting and important factor during the Naval blockade of Port Arthur. Both sides laid mines in the approaches to the harbor. Admiral Marakov’s death is a classic example of the effect of mines. The Japanese lost two battleships to mines. Their loss is an interesting sidelight of the war. The Russian minelayers were under strict orders not to lay mines in certain areas. One Russian minelayer captain disobeyed. orders and lay a minefield far out to sea. The next day, due to a quirk of fate, the Japanese battleships showed up, and the result is history. This is represented in the game on the Naval Blockade Attrition Table (notice the last result).
The intent of the Red Sun Rising design was to show what were the critical factors of the conflict. Realism was stressed over playability in all cases. We feel that the game accurately shows the real problems of the war and allows the players to operate under the same restrictions as were historically imposed on both sides. The reason I use the word restrictions instead of abilities is to stress a point. The major focus of this game is to overcome potentially fatal problems while conducting a military campaign. If this has been done, I am satisfied.