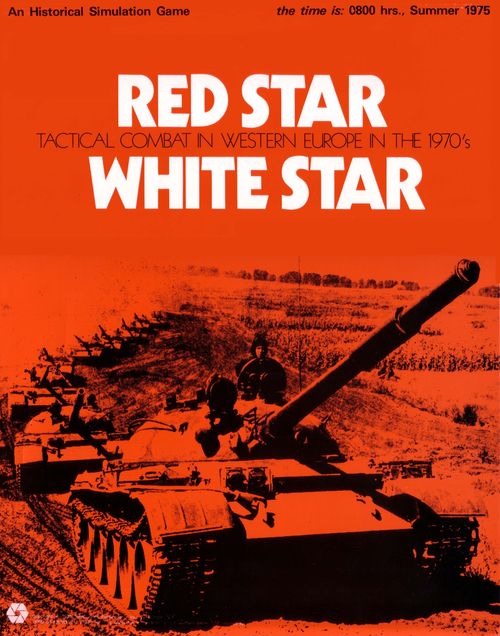
Red Star/White Star: Tactical Combat in Europe in the 1970's
Red Star/White Star: Tactical Combat in Europe in the 1970's Rulebook
Table of Contents
Table of Contents
- General Course of Play
- Game Charts and Tables
- Definition of Terms
- Game Inventory
- Game Scale
- Preparing for Play
- Sequence of Play
- Movement
- Combat
- Fire Combat
- Close Assault
- Zone of Control
- Weapons Effectiveness
- Unit Breakdown and Stacking
- Entrenchment
- Helicopter Gunships and Soviet Air Defense
- Airstrikes
- Air Superiority
- Optional Rules
- Hidden Movement
- Nuclear Weapons (Experimental Rule)
- Tactical Notes
- Terrain Effects Chart
- Combat Results Table
- The Scenarios
- How to Set Up the Game and Use the Scenarios
- Sectors
- Lettered Hexes
- Scenario One: Tank Battle
- Scenario Two: Screening Action
- Scenario Three: General Delaying Action
- Scenario Four: Russian Assault
- Scenario Five: Extended Russian Assault
- Scenario Six: Airmobile Delaying Action
- Scenario Seven: Meeting Engagement
- Scenario Eight: Rear Guard Action
- Reinforcement Schedules
- Errata and Addenda
General Course of Play
Red Star/White Star is basically a two-player game. One Player is the US Player who controls the United States and West German units. The other Player is the USSR Player who controls the Soviet units. The game is organized around several Scenarios depicting possible conflict situations.
The Game Map: The 34" by 22" Game Map shows a typical area of southern West Germany where any possible conflict between the US and Soviet units would be most likely to occur. A hexagonal grid has been superimposed over the map to enable the Players to determine movement, position, and firing ranges of their units. Significant terrain features which appear on the map are explained on the Terrain Effects Chart.
The Playing Pieces: The square, die-cut pieces (hereafter called units) represent platoon, battery, company, and battalion size military organizations of several different types (e.g., artillery, infantry, armor, helicopters, etc.). The numbers and symbols represent the unit's abilities with respect to combat and movement.
Typical Combat Unit
The printed unit carries the following information (labels as printed on the diagram): Nomenclature; Type Identity Code; Unit Symbol; Attack Strength; Target Type; Range Allowance; Defense Strength; Movement Allowance; Weapon Category; Stacking Value.
Non-Combat Units
- Spotted Marker
- Disrupted Counter
- Nuclear Detonation Marker
- Crippled Counter
- Dummy Markers
- Entrenched Counter
Game Charts and Tables
Various visual aids are provided to simplify and illustrate certain game functions. These are the Combat Results Table, the Terrain Effects Chart, the Organization Chart, and the Scenario Charts. Each of these charts is fully explained where presented.
Definition of Terms
Attack Strength is the basic offensive power of a unit (see Combat and Weapons Effectiveness); it is expressed in terms of Attack Strength Points. A unit with an Attack Strength of "4" has four Attack Strength Points.
Defense Strength is the basic defensive power of a unit (see Combat); it is also expressed in Strength Points.
Range Allowance is the maximum number of hexagons through which a unit may project its Attack Strength, i.e., fire its weapons. Certain units have both a maximum and minimum Range Allowance indicated by two numbers in different sizes of type, with the minimum range shown in the smaller type-size.
Movement Allowance is the basic maximum number of hexagons which a unit may move in one Movement Phase. A unit expends one or more Movement Points in moving one hex; see the Terrain Effects Chart.
Weapons Category refers to the class of weapon(s) which the unit fires, either Light Gun weapons (LG), Armor-Piercing weapons (AP), High Explosive weapons (HE), or Mixed Weapons (MX). See the Weapons Effectiveness rules.
Stacking Point Value/Size Symbol: The small stars located directly under a unit's Weapon Category indicate the size of the unit and the number of Stacking Points the unit comprises (a single star indicating one Stacking Point and two stars indicating two Stacking Points). A US company and a Russian battalion are always two Stacking Points each, while US platoons and Russian companies are one Stacking Point each.
Target Type is an indication of a unit's vulnerability to certain types of fire. There are two target types; "Hard" targets (indicated by the brackets around the unit's Defense Strength) and "Soft" targets (indicated by the lack of brackets around the Defense Strength).
Type Identity Code is a three-digit number used to identify specific counters for Play-by-Mail games as well as for general identification purposes. The first digit indicates the general type (tank, infantry, etc.) and the remaining two digits indicate the specific type and specific unit of that type. See the Unit Identification Chart.
Game Inventory
A complete game of Red Star/White Star should contain: one Game Map; two sets of die-cut Unit Counters (510 pieces); one set of rules; one Unit Identification and Scenarios folder; one die; one box and label.
If any of these components are missing, please write to Simulations Publications, 44 East 23rd Street, New York, NY 10010.
Game Scale
Each hex measures 300 meters from side to side. Each Game-Turn represents six minutes and forty seconds of real elapsed time.
Preparing for Play
Take the Mapsheet and fold it back against itself along the machine folds in order to make it lie flat. Place it on a smooth table top. Players may wish to lightly tape the mapsheet to the table using pieces of masking tape to prevent the map from shifting during play. Familiarize yourself with the counters using the Unit Identification Table before punching out the die-cut squares. Keep the units separated by color and type. Store them in labelled envelopes in the box compartments when not in use. This greatly facilitates future game set-ups. Read through the rules quickly and then play a trial game, referring back to them as necessary. Do not try to memorize the rules; let the game teach them to you as you play. Do not take any of the rules for granted, as you will find many substantial differences in the play of Red Star/White Star as compared to that of other tactical games.
Players will discover game mechanics which may seem strange at first, especially when compared with other Simulations games. They should keep in mind two basic facts: that each unit does not represent an individual man, or single armored vehicle or gun, but rather groups of these types; also, each hex equals 300 meters.
Sequence of Play
Red Star/White Star is played in turns, called Game-Turns. Each Game-Turn is composed of two Player-Turns. Each Player-Turn is composed of five Phases, some of which are further divided into Segments, during which the specific game actions are performed. The Player whose Player-Turn is in progress is termed the Phasing Player. Players must strictly follow the Sequence of Play. Any game section executed out of sequence constitutes a violation of the rules.
Outline of a Complete Game-Turn
- FIRST PLAYER-TURN ("First Player" is indicated by the scenario):
- A. OFFENSIVE FIRE/AIR STRIKE PHASE.
- Initial Helicopter Movement Segment. The Phasing Player may move his helicopters six hexes during this segment.
- "LG" and "AP" Fire Segment. The Phasing Player now specifies what offensive fire attacks are being made by his "LG," "MX," and "AP" Weapon Class units, and whether they are being assisted by "AP" helicopter gunships. These attacks are then resolved in any order that the Phasing Player desires. Combat results are applied immediately as they occur, before the next combat is resolved.
- "HE" Fire Allocation Segment. Next, the Phasing Player specifies what offensive fire attacks are being made by his "HE" Weapon Class units, and whether they are being assisted by "HE" helicopter gunships and/or airstrikes. Then, all units in hexes being attacked by "HE" Weapon Class units are broken down to one-Stacking-Point units.
- "HE" Fire Resolution Segment. "HE" Weapon Class attacks are now resolved in any order that the Phasing Player desires. Combat results are applied immediately as they occur.
- Final Helicopter Movement Segment. Any helicopters which did not participate in fire attacks in this Player-Turn may move the remainder of their Movement Allowance, deducting the number of hexes they moved in Segment One.
- B. MOVEMENT PHASE. The Phasing Player may move all, some, or none of his units as he desires, in any direction, consistent with the rules of movement. Units which fired in the Offensive Fire/Air Strike Phase may not move in this Movement Phase. The Non-Phasing Player may execute Fire Attacks against any of the Phasing Player's Units which initiate Close Assault or which attempt to move out of a hex which is in one of the Non-Phasing Player's unit's Zone of Control. Each and every time one of the Phasing Player's units attempts to leave a hex which is in one of the Non-Phasing Player's units' Zones of Control, that unit may be attacked, even if several controlled hexes are moved through by the same unit. The Non-Phasing Player may use both direct and indirect fire from any units that are prohibited from firing by terrain. Non-Phasing Player units may fire more than once in this phase. None of the Non-Phasing Player's units may be moved in this Phase. See Zones of Control and Close Assaults.
- A. OFFENSIVE FIRE/AIR STRIKE PHASE.
Game Length
The Game-Turn procedure is followed, turn by turn, for a total of ten Game-Turns in every Scenario. At the conclusion of the tenth Game-Turn the game ends and a winner is determined according to the victory conditions presented in the rules for the scenario being played.
Movement
General Rule
During a Player's Movement Phase, the Player may move as many or as few of his units as he desires. Each unit may be moved as many hexes as desired within the limits of its Movement Allowance, the Terrain Effects Chart, and the Zone of Control Rules.
Procedure
Move each unit individually, tracing the path of its movement through the hexagonal grid.
Cases
(A) Movement is calculated in terms of hexagons. Each unit expends one or more Movement Points of its total Movement (point) Allowance for each hex entered. See the Movement section of the Terrain Effects Chart for a full list of these different "entry costs."
IMPORTANT NOTE: Regardless of terrain costs, any unit which has a Movement Allowance of "1" or greater may always move at least one hex per Friendly Movement Phase provided it has not fired its weapon in the immediately preceding Offensive Fire Phase.
(B) In any given Movement Phase of a Player-Turn, the Player may move all, some, or none of his units. Movement is never required; it is always voluntary. (Exception: see Combat Results explanation, Disruption Results.)
(C) Units are moved individually, in any direction or combination of directions. A unit may be moved as many or as few hexes as the owning Player desires, as long as Movement Allowance is not exceeded in a single Movement Phase. Unused Movement Points may not be accumulated from Phase to Phase or transferred from unit to unit. Each unit must finish movement before another unit is moved.
(D) No Enemy movement is permitted during a Player's Movement Phase.
(E) Any units which have fired in the preceding phase (the Offensive Fire Phase) may not be moved during the ensuing Movement Phase.
(F) In any given Movement Phase, as Friendly units leave an Enemy's Zone of Control, they may be attacked (see Zone of Control).
(G) Enemy units and Friendly units may only occupy the same hex if a Close Assault is occurring.
(H) Friendly units may pass through or onto other Friendly units as long as the stacking limit is never exceeded (see Stacking) by the combined Stacking Points of the stationary and moving units. One-Stacking-Point units may be combined into two-Stacking-Point units, and two-Stacking-Point units may be broken down into one-Stacking-Point units, at any time during the Movement Phase (see Stacking and Unit Breakdown).
(J) ROAD MOVEMENT. Units moving on roads may do so at the Road Movement Rate (see the Terrain Effects Chart). Units may only use the Road Movement Rate if they are entering the Road hex through a Road hex-side. If entering a Road through a non-Road hex-side, the unit must pay the full entry cost of the other terrain in the hex being entered.
Only "Soft" target type units may cross river hex-sides on bridges, with no additional Movement Point penalty. All others must expend three additional Movement Points each time they cross a river hex-side, bridged or unbridged.
Units may not enter Road hexes containing any other units and still be considered to be travelling at the Road Movement Rate. In effect, the presence of one other unit, whether Enemy or Friendly, negates the road, and such a hex may only be entered at the non-Road movement rate as dictated by the other terrain in the hex.
Only one-Stacking-Point sized units may use the Road Movement rate.
(K) If a Close Assault fails to retreat or eliminate all defending units, the Close Assaulting unit(s) must retreat to the hex from which it entered the Defender's hex.
(L) Units are moved individually, and each unit must be moved completely before another unit is moved. Thus a Player may not move a unit partially, move a second unit, and then finish the first unit's movement. This is very important, since stacking limitations are effective during movement. Once a Player has finished moving a unit, it may not be moved again in the same Movement Phase.
Combat
General Rule
There are two modes of Combat: Fire Combat and Close Assault Combat. Air Strike Combat is explained in a separate rule section, as it is not used in all scenarios.
Procedure
Determine type of attack, making adjustments to Attack Strength as necessary. Total up the adjusted Attack Strength(s) of the attacking unit(s), and compare the total Attack Strength to the total Defense Strength of the unit(s) under attack. State the comparison of the two Strengths as a probability ratio, simplified downward to the nearest whole number on the Combat Results Table. Example: 29-10 (or 2.9 to 1) would be simplified as 2:1 odds on the Combat Results Table. Roll the die, and read the result on the appropriate line, under the computed odds. Apply each result immediately before going on to resolve any further combat.
Cases
(A) All attacking units attacking the same defending unit(s), and using the same mode of attack, must combine their Attack Strengths into one combined Attack Strength before computing the odds comparison. You may not attack the same unit more than once per phase (exception: see Zones of Control).
(B) A unit may never divide its individual Attack Strength among different targets.
(C) All units of non-AP weapon category except helicopter gunships may triple their Attack Strength during any phase; after this tripled Attack Strength is used, the firing unit is removed from the Game-map. (It has expended its ammunition.)
(D) During the course of a Friendly Player-Turn, a given Enemy unit could conceivably be attacked during the Offensive Fire Phase, and again during the Close Assault Phase. Friendly units may never participate in more than one attack during the entire Friendly Player-Turn.
(E) During an Enemy Player-Turn, a given Enemy unit could be attacked at two times: during Phase B (it could be attacked several times in succession during this Phase; see Sequence of Play, Zones of Control, and Close Assault), and again during Phase E (Defensive Fire Phase). Friendly units may never participate in attacks in more than one Phase during the entire Enemy Player-Turn.
Fire Combat
(F) Fire Combat takes place during the Offensive Fire Phase, the Movement Phase, and the Defensive Fire Phase. The Phasing Player fires his weapons during the Offensive Fire Phase; any of his units which leave an Enemy-controlled hex may be fired at by the Enemy Player's units during the Phasing Player's Movement Phase. During the Defensive Fire Phase, the non-Phasing Player may fire his weapons.
(G) The following are the major items to be considered when executing a Fire Attack:
- Range — the Range Allowance of the firing unit(s) and the distance to the target-hex.
- Category of Weapon — there are four basic weapon categories. Do not confuse Weapon Category with Target Type. (There are two types of targets.)
- Blocking Terrain — see Line of Sight, Case M.
- Condition of Target — the terrain in the target hex.
- Attack Strength vs. Defense Strength — the final adjusted Combat Odds in a given fire attack after Terrain Effects and Weapons Effectiveness have all been taken into consideration.
- Target Type — there are two types of targets, Hard and Soft. Hard Target Type units have brackets around their Defense Strength.
(H) There are two techniques of fire which can be used in Fire Combat: Direct fire and Indirect Fire. All units which have an Attack Strength may use direct fire, while only units with a Range Allowance of "7" or higher may use Indirect Fire. For an explanation of the Indirect Fire technique, see Case Q.
(J) Direct Fire is flat-trajectory, line-of-sight fire against targets which can be directly observed by the units firing at them. Units may use Direct Fire against targets which are any number of hexes distant up to the limit of the firing unit's Range Allowance. However, units may never use the Direct Fire technique at ranges of greater than ten hexes, even if the unit's Range Allowance is greater than ten hexes. Direct Fire may be applied into Covering Terrain, but not through Blocking Terrain (see Case M). Direct Fire may always be applied to adjacent hexes, regardless of terrain.
(K) Range is determined by counting the fewest number of hexes from the firing unit into the target hex, as if one were moving the unit, but disregarding Movement Point costs.
(L) Line of Sight/Line of Fire. In order to fire at a given target hex, the Attacking Player must be able to trace a perfectly straight line unobstructed by terrain (see Case M) from the center of the hex containing his firing unit to the center of the target hex (exception: see Case N). Players should use a straight edge (such as a ruler or stiff cardboard) in order to delineate the Line of Sight (since one can direct fire only against targets which one can "see," the terms "Line of Sight" and "Line of Fire" are identical and will be used interchangeably).
If a Line of Sight/Line of Fire bisects a given hexside lengthwise, it is only blocked if the hexside is common to two blocking terrain hexes, or it passes through the corner of a hex in which one of the three intersecting hexsides is a blocked hexside. The Line of Sight is not blocked if the hexside has at least one contiguous non-Blocking terrain hex.
Examples (diagram): "blocked" and "unblocked" lines of sight drawn across a hex grid of woods and town hexes.
Judging the Line of Sight. Lay the straight-edge from the center of the firing hex to the center of the target hex. If any point along the line passes through obstructing terrain, then the Line of Sight is blocked and Direct Fire may not take place. All ambiguous cases should be decided in favor of the defending unit. Players should keep in mind the spirit of the rules, which are attempting to represent three-dimensional effects in a two-dimensional environment.
For Direct Fire purposes, a unit does not have a Line of Sight into a Covering Terrain hex, unless that hex has been spotted (see Case P).
(M) Blocking Terrain and Covering Terrain. There are three types of Blocking Terrain: Woods hexes, Town hexes, and Hill hexes (see Case N). If any portion of a hex contains one of these terrain symbols, then the entire hex is considered to be Blocking Terrain.
Fire is never obstructed by the presence of any unit, Enemy or Friendly.
A unit that is attacking by fire must be able to trace a Line of Sight that is not obstructed by Blocking Terrain. If the Line of Sight at any point between (but not including) the hex of the firing unit and the target hex, passes through Blocking Terrain, the unit may not engage in Direct Fire Combat.
If the target unit is situated in a Woods or Town hex, the target unit is in "Covering Terrain." The Line of Sight only extends into the Covering Terrain hex if the unit in that hex is Spotted (see Case P). Units may freely fire out of Covering Terrain, depending on the condition of the target unit.
(N) When a unit is on a hill hex, a Line of Sight may be traced to or from it, regardless of any other intervening terrain, unless there is another intervening hill hex.
(P) Spotting. Spotting is a necessary precondition for all Indirect Fire, and for Direct Fire against units in Covering Terrain. To use Indirect Fire against any hex, or Direct Fire against a Covering Terrain hex, the target hex must be spotted by a Friendly unit at the instant of the Fire attack. Players are not required to attack Enemy units in spotted hexes.
Spotting is accomplished in either of two different manners:
-
An Enemy unit firing from any hex within ten hexes of a Friendly unit is automatically spotted in that hex; place a "spotted" marker in that hex until it is no longer spotted. All Blocking and Covering Terrain, and Range Allowances, are ignored for this spotting technique. That hex remains spotted as long as there is a Friendly unit within ten hexes of the spotted hex at the end of each Friendly Movement Phase, and the fired unit remains in the hex. If the "revealed" unit leaves the hex, or there is not a proper Friendly unit within ten hexes, that hex is no longer spotted. While the originally fired unit remains in the hex, other Enemy units in that hex are also vulnerable to fire directed into that hex. If the fired unit leaves the spotted hex, that hex is no longer spotted, even if the fired unit returns to the hex.
-
An Enemy unit is spotted for Indirect Fire, or for Direct Fire into Covering Terrain, if any Friendly unit can trace a Line of Sight to that Enemy occupied hex. The spotting Friendly unit may be thought of as a "weaponless" Direct Fire unit that has a range-for-spotting of ten hexes. The Spotting Line of Sight may not exceed ten hexes. Remember that units may always fire into adjacent hexes, and thus automatically spot any Enemy units in adjacent hexes. The spotting unit need not have an Attack Strength to spot.
(Q) Indirect Fire. Indirect Fire is a technique by which certain units may fire at hexes which would ordinarily be blocked due to terrain, or the greater than ten hex range limitations on the Line of Sight for Direct Fire.
Indirect Fire may be used at any range, subject to the firing unit's Range Allowance. There are two basic preconditions necessary to permit Indirect Fire to be used.
- The firing unit must have a Range Allowance of seven hexes or greater (although it may attack at less than this number of hexes);
- The target hex must be spotted (see Case P).
Russian units cannot employ Indirect Fire after they move from their hex of initial placement at the start of the game, although they may spot for other units which have not yet moved.
Direct and Indirect Fire may be concentrated upon the same target in the same Phase, as long as the requirements for both types of fire are met for the respective firing units.
(R) Attacking Stacked Units. When defending units are stacked together in a given target hex, they may be singled out and attacked as individual units or they may be attacked as one or more groups of units, combining all of their Defense Strengths. As long as no target unit is attacked more than once in each Phase Segment in a given Fire Phase (Offensive or Defensive), and as long as no unit fires more than once in a given Fire Phase, the target units in a given hex may be attacked in any combination the firing Player chooses within the following restrictions:
-
Target units in Woods or Town hexes must be combined and attacked as a whole Defense Strength. If there are any Hard Target Type units in such a stack, then the entire stack must be treated as a Hard Target Type.
-
"HE" Class weapons have a special advantage when firing against a stack. "HE" Class weapons may individually attack every one-Stacking-Point-sized unit within the stack regardless of Covering Terrain; or they may attack the stack as one combined Defense Strength. This means that a two-Stacking-Point-sized unit must be broken down first and have each of its one-Stacking-Point-sized component units attacked by the "HE" Class weapons. If two two-Stacking-Point-size units in the same hex are attacked by "HE" Class weapons, the units must conform to Stacking rules in their next Friendly Movement Phase or be eliminated from the map.
Close Assault
(S) Close Assault Combat attacks are executed during the Close Assault Combat Phase of a Player-Turn. Infantry type units may always close assault, but no other type of unit may close assault unless there is a Friendly infantry unit in that hex to be close assaulted. Units with "HE" class weapons may never engage in Close Assault attacks. All units entering an Enemy occupied hex must close assault.
(T) Procedure: Units participating in a Close Assault attack must be in the same hex as the Enemy unit being Close-Assaulted. The Close Assaulting units must have moved into that hex during their Movement Phase. This is the only instance in which units of both Players may occupy the same hex. Do not take Weapons Effectiveness into account, simply use the printed Attack Strength of the Close Assaulting units. All Enemy units in the hex must be attacked, combining the Defense Strengths into one sum, and ignoring any effect of their target type.
(U) Close Assaults may be made in any type of terrain without regard to any Terrain Effects. Exception: units defending against a Close Assault in a Town hex have their Defense Strength doubled.
(V) Non-infantry units have their basic Defense Strength reduced to one Strength Point if Close assaulted without Friendly infantry units in the same hex. Their Defense Strengths are normal if at least one Friendly infantry type unit is defending in the same hex.
(W) An Enemy unit making a Close Assault upon a defending Friendly unit may be fired upon by the defending Friendly unit (and any other Friendly units within range, using either Direct or Indirect Fire) in the hex from which the close assaulting unit enters the defending Friendly unit's hex.
Because of the Sequence of Play, this Defensive Fire actually occurs during the Enemy Movement Phase when the Phasing Player indicates his intent to enter the hex of the Defending unit and Close Assault. Units which fire defensively against a Close Assault cannot fire in the subsequent Defensive Fire Phase of the same (Enemy) Player-Turn.
Zone of Control
General Rule
The six hexagons surrounding a unit, and the hex that the unit occupies, constitutes that unit's Zone of Control. Hexes upon which a unit is exerting its Zone of Control are called Controlled hexes. Note that crippled units do not have a Zone of Control. Friendly units must announce their intentions to leave any Enemy Controlled hexes during the Movement Phase, and they may be attacked each time before they move from a Controlled hex. They are attacked while in the hex they are about to leave, not the hex they move into. They may be attacked by any capable defending unit(s) within range which have a Clear Line of Fire or the ability for Indirect Fire.
(Diagram: a single unit surrounded by its six Controlled hexes.)
Cases
(A) All rules of Combat apply in the Fire Combat during the Movement Phase; all Combat Results take effect immediately.
(B) If the attack results in a "no-effect" combat result, the moving unit may continue with any remainder of its Movement Allowance (Note: there is no additional Movement Point cost to enter or leave Enemy Zones of Control).
(C) Zones of Control do not extend into Woods or Town hexes.
(D) Targets in Woods or Towns must always be "spotted."
(E) Since Players may only move one unit at a time, and since only moving units may be fired upon in the Movement Phase, there will never be an instance in which the non-Phasing Player fires his controlling units at more than one moving Enemy unit at a time (even when the moving unit is in Covering Terrain). Each and every time an Enemy unit attempts to leave a hex controlled by the non-phasing Player, the non-phasing units may fire at that Enemy unit (even if this means that the unit is attacked more than once in that Movement Phase). Non-phasing units may fire an unlimited number of times during the Enemy Movement Phase (once for each time an Enemy unit attempts to leave a Friendly Zone of Control). Units which fire during the Enemy Movement Phase may not fire during the ensuing Defensive Fire Phase.
(F) Units entering a hex occupied by a defending Enemy unit during a Close Assault are considered to have left the defending unit's Zone of Control and the Close Assaulting unit may be attacked by fire before entering the hex; see Close Assault Combat Case W.
Weapons Effectiveness
General Rule
Certain classes of weapons are more (or less) effective when used against certain types of targets. There are FOUR classes of weapons and TWO types of targets. The weapons class and target type of a given unit are independent characteristics and should not be confused with each other.
Weapon Classes
- High Explosive (HE): Low velocity shells rely primarily upon blast and fragmentation for their effectiveness.
- Armor Piercing (AP): High velocity shells specifically designed to be used against armored (hard targets).
- Light Guns (LG): Includes machine guns, grenades, and light guns of 75mm or smaller.
- Mixed (MX): Weapons which can be considered (at the owning Player's discretion) to have the characteristics of either LG or AP weapons.
The weapons class of all units will be found as a two letter abbreviation located between the Attack Strength and Range Allowance of the unit. Units which have no attack capability will naturally not be given a weapons class.
Target Types
- Soft Targets: Non-armored vehicles, towed guns, and "foot" infantry. Soft target units can be differentiated from hard target units by noting that their Defense Strength does not have brackets "[]" around it.
- Hard Targets: Armored Vehicles. All hard target units have their Defense Strength enclosed in brackets "[]".
Remember, simply because a unit may be a Hard target does not necessarily mean that its weapon is an Armor Piercing one and vice versa.
Procedure
When firing at a given unit, determine the target-type of the defending unit and the weapons category of the attacking unit. Adjust the unit's Attack Strength according to the following cases. Such modification is in addition to the terrain-related modifications.
Cases
(A) Weapons effectiveness is only taken into account during Fire Combat. Fire Combat occurs during the Offensive Fire Phase, the Movement Phase, and the Defensive Fire Phase. Weapons Effectiveness is not taken into account when conducting Close Assaults or Air Strikes.
(B) A stack of units in a town or woods hex must be treated as one combined Defensive Strength (except when subjected to HE weapon attack). If such a stack of units has at least one Hard target type in the stack, then the entire stack is treated as a Hard target. If a stack of units in non-covering terrain is voluntarily treated as a combined Defensive Strength by the Attacking Player, then the entire stack is also treated as a Hard target if one or more Hard units are present.
(C) AP class weapons firing at Soft target type units, have their Attack Strength divided by ten. For example, an AP unit with an Attack Strength of "15" would fire at a Soft target with an effective strength of 1½ Strength Points.
(D) LG class weapons firing at a range of more than one hex, have their Attack Strengths cut in half.
(E) MX class weapons attacking Soft targets at ranges of more than one hex have their Attack Strength cut in half.
(E) HE class weapons never have their Attack Strength reduced for any reason. When HE weapons attack a target of any type, during any possible Phase, the units in the target hex are broken down to one Stacking Point sized units and attacked individually. The entire Attack Strength of the HE weapon(s) is applied against each unit. HE weapons may, alternatively, treat a stack as one combined Defense Strength and execute a single attack against it.
(Note: the printed lettering repeats "(E)" in this case group; it is transcribed as printed.)
(F) Units armed with Wire-guided antitank missiles (i.e., those AP class units which have their Attack Strength enclosed in parentheses) can only fire their weapons once, and may only fire at Hard targets. Immediately upon firing, such a unit is removed from play (although it is not considered to be destroyed for Victory purposes). Note that this is the only type of weapon which is limited to firing at only one target type.
(G) All non-AP weapons may, at the owning Player's discretion, TRIPLE their effective Attack Strength for a single attack. Immediately after firing at this tripled value, the unit is removed from play (although it is not considered to be destroyed for Victory purposes). Exception: Helicopter units may not avail themselves of this tripled Strength effect.
Unit Breakdown and Stacking
(more than one unit per hexagon)
General Rule
Each Player may have as many as four Stacking Points of Friendly units per hexagon, except when making a Close Assault attack in Towns where the stacking limit for the Close Assaulting Player is three Friendly Stacking Points. Each US platoon and each Russian company equals one Stacking Point. Each US company and each Russian battalion equals two Stacking Points.
Cases
(A) Stacking limitations apply at all times, even during a Movement Phase of a Player-Turn. Therefore a unit may not move through a hex if the total Stacking Points of the moving and stationary Friendly units exceed four. See also Movement, Case J.
(B) Enemy units, disrupted and crippled markers, entrenched markers, and spotted markers have no Stacking Points for the purpose of Friendly Stacking Point limitations (i.e., they have no effect on stacking and are ignored for Friendly stacking purposes).
(C) Units may be "broken down" into smaller units and recombined at any time during the Movement Phase. Units, however, may never voluntarily break down if this would violate the Stacking Limit. To break down or recombine units, simply remove the unit(s) to be replaced, and place the unit(s) replacing it on the same hex.
(D) In all instances, a unit with a Stacking Value of "two" breaks down into three, one Stacking Point units of the same type. Note, however, that it is not always possible to form a two Stacking Point unit from any three same-type one Stacking Point units. Only certain types of units may combine into two Stacking Point units. Counter types may not be mixed in order to form a two Stacking Point unit.
(E) There is no Movement Point cost for the act of breaking down, and/or combining, and a Player may breakdown and recombine units several times during the Movement Phase if he so desires.
Entrenchment
General Rule
All units (if the Scenario so specifies) may begin the game in an entrenched condition. An infantry unit in an entrenched condition has its Defense Strength multiplied by ten. Non-infantry units have their Defense Strengths multiplied by five when in an entrenched condition.
Procedure
To indicate that a unit is entrenched, place an entrenched marker on top of that unit. When the unit leaves its entrenchment, remove the marker.
Cases
(A) Units may not be entrenched in Town hexes. Units may be entrenched in any other type of negotiable terrain. Units entrenched in Woods hexes have the multiplication effects of the Woods added to the entrenchment multiple (i.e., infantry entrenched in Woods are multiplied by fourteen, other types are multiplied by seven).
(B) Other Friendly units may move into a hex occupied by an entrenched unit, but they do not thereby become entrenched.
(C) Infantry-type units are the only units which may entrench during the course of the game. In order to do so, the infantry unit may not move during its Movement Phase. At the end of his Movement Phase, the owning Player rolls the die; a result of "1" means the unit has succeeded in entrenching; immediately place an entrenched marker on top of the unit. Any other die result means that the infantry unit is not entrenched. It may attempt to entrench again in its next Movement Phase under the same restrictions.
(D) Units which are being Close Assaulted do not gain the benefit of their entrenchments.
(E) In order to leave an entrenched condition, the Player must announce his intention to do so at the beginning of his Movement Phase. The unit must remain stationary during that entire Movement Phase. At the end of the Movement Phase the entrenched marker must be removed. The unit may move in its next Movement Phase.
(F) Entrenched units which are forced to leave their hex as a result of combat, lose their entrenched status.
(G) A crippled or disrupted infantry unit cannot entrench.
Helicopter Gunships and Soviet Air Defense
General Rules
Helicopter Gunships enter certain scenarios to provide fire support for the US Player. Their Attack Strengths are added to those of the US ground units attacking Enemy units. They may independently attack Enemy units as well. When moving, helicopters ignore all terrain effects.
Procedure
Helicopters, when included in the scenario, always start the game within five hexes of a Friendly ground unit. They must operate only within the Playing Area used in the Scenario. Helicopters with a limited amount of ammunition are immediately removed from the map after they expend their fire.
Cases
(A) In each Scenario the US Player is given a specific number of Helicopter Gunships. At the beginning of the scenario, he may select any type or types of Gunship from those in the counter mix to meet his allotted amount of Gunships. The US Player may choose helicopters equipped with mini-guns (an HE weapon) which remain in the playing area throughout the game, or he may select the Rocket-firing (HE) or OTOW-firing (AP) helicopters which must be removed from the game after firing their weapons a single time. Two OTOW-equipped helicopters may be chosen for every one helicopter gunship called for in the scenario.
(B) Helicopters move through the hex grid just like ground units, except that they move during the Friendly Offensive Fire Phase, and they expend only one Movement Point to enter each hex, regardless of terrain.
(C) Helicopters may move up to six hexes prior to firing their weapons during the Offensive Fire Phase. They may move the remainder of their Movement Allowance if they do not fire in that Fire Phase. (See Sequence of Play.)
(D) Every non-crippled, non-disrupted Soviet ground unit has an Air Defense Zone. Whenever a US helicopter unit enters a hex in a Soviet Air Defense Zone, the Soviet unit(s) may fire at the helicopter unit. The Soviet units may each fire at the helicopter once for each hex in the Air Defense Zone that is entered by the helicopter. All Soviet units, except two types, have an Air Defense Zone identical to the seven hex (i.e., one-hex radius) Zone of Control pattern. Two unit types have wider Air Defense Zones. Soviet SU-57 units have an Air Defense Zone with a radius of four hexes. Soviet 14.5mm Air Defense Machine Gun units have an Air Defense Zone with a two hex radius.
The Soviet Player rolls the die immediately as the helicopter enters an Air Defense Zone hex using the results listed below:
Soviet Air Defense Table
| Soviet Unit | Die Roll to Eliminate Helicopter |
|---|---|
| SU-57 or 14.5 MG | one or two |
| All others | one |
Firing at helicopters does not constitute a use of a Soviet unit's Attack Strength (indeed, even units without an Attack Strength may fire at helicopters). This fire does not affect the Enemy unit's ability to fire upon ground units in other segments of the Game-Turn.
(F) Observation Helicopters are presented in the optional "Observation Helicopter" rule.
(G) Helicopters are never affected by Enemy Fire Attacks or Close Assaults against other Friendly units in the same hex. Helicopters can only be attacked as described in Case D, above.
(H) Helicopter Gunships may never "spot" Enemy units for other Friendly units.
Airstrikes
(Air Strike symbol: "40 HE")
General Rule
In some scenarios the US or USSR Player receives a number of Air Strikes to allocate to his fire attacks. Each Air Strike consists of forty Air Strength Points represented by a special Air Strike Marker. These Strength Points represent air support from Friendly aircraft.
Procedure
The number of Air Strikes allotted to the Player in each Scenario may be applied to attacks at his discretion during the game.
Cases
(A) A given Air Strike must apply its total Strength as an integral whole in one hex just as with regular combat units.
(B) The Player may allocate some or all of his Air Strikes to any of his offensive or defensive "HE" class fire attacks. The Air Strike Points are simply added to the total of his other attacking Strength Points for odds determination. These Air Strikes are expended and reduce his remaining total. (Give the expended markers to the Enemy Player as a record of their use.)
(C) Air Strikes may attack hexes independent of any Friendly ground units.
(D) Air Strike Points may be applied to each Enemy Stacking Point in an Enemy stack so attacked, in the same manner as other "HE" weapons (see "Fire Combat" case R).
(E) If the Air Strike is made into a Woods or Town hex, the hex must be spotted by Friendly ground units or Observation Helicopters (see optional rules). Air Strikes themselves may never spot.
(F) Air Strike Markers cannot be "shot down" or in any way affected by ground fire.
Air Superiority
General Rule
In many Scenarios, the US Player has air superiority over the battlefield. This condition allows the US Player to consider as spotted any Soviet unit not in Covering Terrain (Woods or Town hexes).
Cases
(A) Soviet units in Covering Terrain are not considered spotted due to air superiority unless they reveal their position by firing at US ground units. If they do reveal their positions by firing, they are considered spotted until they move to some other Covering Terrain hex (or until they move out of and then re-enter their original position, even in the same Phase).
(B) Soviet units in Covering Terrain may still be spotted in the conventional manner.
Optional Rules
Observation Helicopters
In any Scenario in which the US Player has Air Superiority, the Optional Observation Helicopter rule may be used in place of the Air Superiority rules. The Scenario will indicate how many Observation Helicopter units the US Player receives. Observation Helicopters act as highly mobile spotting platforms (they may not actually participate in any combat).
General Rule
All Soviet units in non-Woods/non-Town hexes that are within five hexes of an Observation Helicopter unit are considered spotted if the Observation Helicopter has paid the 30 Movement Point cost for spotting.
Procedure
Move the Observation Helicopter units as many as six hexes each during the Initial Helicopter Movement Segment. If the Helicopter units are to perform their spotting function, an additional 30 Movement Points are expended by the spotting units during this segment. No movement results from this 30 Movement Point expenditure. Place a Spotted marker on all Soviet-occupied non-Covering terrain hexes within five hexes of the spotting Observation Helicopter units.
Cases
(A) Soviet units spotted by Observation Helicopters remain spotted until the next Initial Helicopter Movement Segment unless they move out of spotting range (more than five hexes away from the Observation Helicopter in open terrain, or into Covering Terrain not directly under the Observation Helicopter).
(B) Soviet units in Covering Terrain may be spotted by Observation Helicopters if the helicopters are in the same hex. Additionally, Soviet units which choose to fire at Observation Helicopters are also considered to be spotted, regardless of terrain. Soviet units in Covering Terrain which are within five hexes of an Observation Helicopter (that is performing its spotting function) are considered to be spotted if they fire at a US ground unit.
(C) Observation Helicopters are subject to the same Soviet Air Defense effects as Helicopter Gunships (see Helicopter Gunship rules). Observation Helicopters which are performing their spotting function and which are shot down by Soviet units, are considered to have spotted those Soviet units.
(D) Observation Helicopters may use the remainder of their Movement Allowance during the Final Helicopter Movement Segment. If they have expended the required 30 Movement Points to perform their spotting function, and are fired at by Soviet units during the Final Helicopter Movement Segment, those Soviet units are spotted.
Hidden Movement
This rule may be used with or without the optional Observation Helicopter rule. Units may be placed on the map face-down if they cannot be spotted by the Enemy Player. When spotted, they are turned face-up. When using this rule, add the following amount of dummy (star) counters to each Player's units in the Initial Deployment, depending on the Scenario being used. Dummies have a Movement Allowance of "6." All dummy units exposed due to spotting are removed from play and may not reenter play. All other real units that move out of spotting range are immediately turned face-down again.
| Scenario | 1 | 2 | 3 | 4 | 5 | 6 | 7 | 8 | 9 | 10 |
|---|---|---|---|---|---|---|---|---|---|---|
| Nr. of Dummies for each Player | 2 | 2 | 5* | 2 | 2 | 5 | 6 | 2 | 2 | 2 |
* US only.
Nuclear Weapons (Experimental Rule)
General Rule
Nuclear Weapons are added to any Scenario during a pre-First Game-Turn "Nuclear Exchange Phase." After the results of these weapons are taken in this Phase, the game "starts" with the First Game-Turn and continues as usual. No Nuclear Weapons may be utilized during the regular game.
Procedure
The Player who moves first in the Scenario being played may "fire" one or two Nuclear Weapons of his choice. The possible Nuclear Weapon choices and results are indicated on the Nuclear Weapons Results Table. The second Player may then respond by "firing" the same type and number of Nuclear Weapons from his arsenal upon the first Player's forces. Nuclear Weapons are fired by hypothetical units "off the map."
Cases
(A) Prior to the start of the game, both Players must agree upon the preparedness of their troops against nuclear attack. Either the troops are "prepared" or "unprepared." Both Players must choose the same state of preparedness.
(B) Each Player indicates the Impact Point hex (IP) in which each of his weapons is fired by placing an appropriate Nuclear Detonation Marker. All units in the surrounding hexes are subject to elimination according to their distance from the IP and the resulting die roll on the appropriate Nuclear Weapons Results Table.
(C) Experiments: To vary the "what if" possibilities of Nuclear Weapons, Players may agree to give one or more Nuclear Weapons to only one of the Players and/or to experiment with different States of preparedness for each Player's forces. This rule is labelled "experimental" and Players are encouraged to modify it to make it be what they would like it to be.
The effects of the nuclear weapons in this experimental rule are only the immediate effects upon the men in the units involved. Actually, many more casualties due to radiation would result in the hours and days following exposure.
How to Use the Nuclear Weapons Results Table
Determine the state of preparedness of the defending unit, the weapon type being used, and the distance of the unit (in hexes) from the Impact Point. Match this information to one of the four lettered lines streaming across the top of the table. Use the distance from impact to determine which of the four vertical columns will contain the result for that unit. Roll the die and cross-index the die-number with the appropriate result column and read the result.
For example, in the case of a 1-Kiloton artillery shell being fired directly into a hex containing a prepared unit, line "b," column "0" would be used. If the die-number were "2" the result would be "no effect."
Roll the die for each unit which has any chance of being eliminated. Don't break down two-Stacking-Point units for nuclear results (unlike HE fire).
Nuclear Weapons Results Table
Distance (in hexes) from Impact Point, by result column:
| Type of Weapon | Unit State | Column 1 | Column 2 | Column 3 | Column 4 |
|---|---|---|---|---|---|
| a. 1-Kt Shell | Unprepared | 0-2 | 3 | 4 | 5 or more |
| b. 1-Kt Shell | Prepared | — | — | 0 | 1 or more |
| c. 10-Kt Warhd. | Unprepared | 0-4 | 5 | 6 | 7 or more |
| d. 10-Kt Warhd. | Prepared | 0-1 | 2 | 3 | 4 or more |
Die roll result, by result column (Effect on Unit):
| Die Roll | Column 1 | Column 2 | Column 3 | Column 4 |
|---|---|---|---|---|
| 1 | E | E | E | o |
| 2 | E | E | o | o |
| 3 | E | E | o | o |
| 4 | E | o | o | o |
| 5 | E | o | o | o |
| 6 |
Explanation of Results
- E = Unit Eliminated (immediately)
- o = Unit not affected (within the timespan of game).
Tactical Notes
When the US Player is defending, his best bet is to go after the Russian infantry and attempt to keep it out of action. There is nothing more useless than a tank regiment with no infantry left to protect it from close assault. If one side can deprive the other of its infantry through the use of artillery, helicopter gunships or direct tank fire, it will usually emerge victorious because of its ability to attack in covering terrain with impunity.
When you gain or start with an infantry advantage you must still be very cautious and remember that you cannot simply charge in and jump on your opponent's units. If his units are in covering terrain and you attempt to close assault them from an adjacent clear terrain hex, you will find him ignoring your tanks and using his defensive fire to disrupt or cripple your infantry units. This is especially true for the Soviet Player whose infantry is exposed to attacks at 11-1 odds if the US Player chooses to use some of his innumerable OTOW units. The US Player must also be very careful because of the low Defense Strengths of his infantry units.
Whenever you are attacking a position which contains or is supported by HE weapons the primary rule is never stack in the open. Another silly mistake is forming into two-Stacking-Point units in the open because then the Enemy Player will always zap them with all his available HE fire.
One of the toughest problems in the game is the taking of towns that are defended by infantry and tanks. If the hex contains an infantry unit and a two-Stacking-Point armored unit, then the job is impossible unless you can rustle up three or four hundred Attack Points of HE and can get a little lucky. If the town consists of only a few hexes and they are all occupied, then it is extremely difficult because your opponent will simply hold his fire until your infantry tries to enter his hex and he will disrupt or cripple it. The only effective way to take a town or woods hex is to sneak up on it. This involves moving into a covering terrain hex adjacent to the target hex and entering from there so that you will not be subject to fire for leaving an Enemy Zone of Control. If there is no covering terrain hex adjacent and he has sufficient firepower to disrupt several infantry units then the only way to take the town is to sacrifice the two or three infantry units needed to "draw his fire." If this tactic of sacrifice is used, then it will be possible to use a two-Stacking-Point armored unit in the attack without fear of your opponent using a heavy HE concentration to cripple it.
A very important decision is the type of weapons load that you, as the US Player, choose for your gunships if you have any. The decision should be based on several things, the most important of which is what your target is. If the Soviet Player has a lot of artillery and your helicopters are going to be in for the length of the game, then the artillery is the logical target. Since this would require more than a single strike you would probably choose the MG load. If you know that the Russian has only a few infantry units you would probably choose the OTOW load so that one of them, in cooperation with any other unit, could guarantee the crippling of one infantry unit. These are the most common targets and therefore the most common loads. Occasionally, a particularly strong artillery unit such as the 240mm howitzer will merit the presence of an RK load or two to insure its demise.
Often when one Player is defending he will find that he must block a road so that the Enemy cannot use it to run between the covering terrain hexes. This is the purpose of the large amounts of seemingly useless reconnaissance units. An M-114 unit in a wood or town hex adjacent to a road or entrenched on the road itself will prevent the enemy from running along the road immune from fire. If you are the US Player, another handy method is to leave a helicopter over the road and zap the enemy unit as it leaves your Zone of Control.
Another useful idea is the tripling of artillery. Although this should be used sparingly, it is often a good idea to use this to take one or two otherwise untouchable positions late in the game. But this should be done only after all else has failed.
The basic thing to remember is that you are in control of a lot of units of different types and none of them can do the job alone. The secret is to get each unit doing what it does the best in conjunction with every other unit doing its own job. No one arm can win the game. It takes a close coordination of all of them to accomplish the tasks set in the scenarios.
Terrain Effects Chart
Red Star/White Star Terrain Effects Chart
| Terrain Type | Movement Point Cost to Enter Hex | Effect on Defender in Fire Combat |
|---|---|---|
| Clear | 1 MP | No effect. |
| Road | ½ MP when moving at Road Movement Rate. See Movement rules, Case J. | No effect. Other terrain in hex has whatever effect it has in non-road hexes. |
| All-Lake Hex | PROHIBITED | No effect. |
| Hill | 3 MP | No effect. |
| Woods | All Infantry types: 3 MP. All others: 6 MP | All Infantry types: multiply Defense Strength by four. All other types multiply by two. |
| Town | ½ MP; treated as roads. | All infantry types: multiply Defense Strength by ten; all other types multiply by five. |
| River Hex-side | 3 additional MP to cross. | No effect. |
Terrain Notes
-
Remember, all units which have a Movement Allowance of "1" or greater may always move at least one hex per Friendly Movement Phase (assuming that they have not fired their weapons in the immediately preceding Offensive Fire Phase).
-
Terrain Effects are ignored when calculating odds for Close Assault (with exception that Defense Strength of units defending in Town is doubled).
-
Units defending in a Woods or Town hex must be treated as one combined Defense Strength except when undergoing an HE Fire attack.
-
Helicopters ignore all terrain movement restrictions. Helicopters expend one Movement Point for each hex entered, regardless of terrain.
-
Be careful not to make any assumptions about terrain characteristics (or anything else, for that matter) or carry over any rules from other tactical games: Red Star/White Star may be similar to other Simulations Tactical games in some respects, but in many important ways the rules are completely different.
Combat Results Table
Red Star/White Star Combat Results Table
Combat Odds (Attack Strength to Defense Strength). Die roll in the left and right columns.
| Die Roll | 1-2 | 1-1 | 2-1 | 3-1 | 4-1 | 5-1 | 6-1 | 7-1 | 8-1 | 9-1 | 10-1 | 11-1 | 12-1 | Die Roll |
|---|---|---|---|---|---|---|---|---|---|---|---|---|---|---|
| 1 | • | D0 | D1 | D1 | D2 | D3 | D3 | D4 | D4 | X | X | X | X | 1 |
| 2 |
Explanation of Combat Results
- • = no effect
- D (followed by a number) = Disruption
- X = Crippled
Disruption: A disrupted unit must retreat the number of hexes indicated by the number following the "D." In addition, the unit is then marked with a Disruption Counter equal to the result. Thus, a result of "D4" indicates a retreat of four hexes after which the unit is marked with a "D4" counter. The number indicates the number of Game-Turns that the unit will be disrupted. A result of "D0" indicates no retreat; the unit is marked with a D1 counter.
Disruption Record: During each Player's Disruption Record Phase, all of his disrupted units have their Disruption counters reduced, except units that were disrupted in that Player-Turn.
Procedure: Replace the Disruption Counter with one whose value is one point less. Thus, a "D4" counter is replaced with a "D3" counter; a "D1" counter is removed and no Disruption Counter is replaced — that unit is now normal again.
Retreats: The unit to be retreated is simply picked up and placed on any vacant or Friendly occupied hex which is the indicated number of hexes distant from its original hex. The owning player determines the hex of retreat. The hex that the unit retreats to must be as far as possible away from the Enemy Player's units. If no vacant or Friendly-occupied hexes exist the proper number of hexes away, the retreating unit is eliminated. Note that the method of retreat in this game is very different from that of most Simulations Series games; in Red Star/White Star, no actual path of retreat is traced. Rather, the unit is directly placed in a hex the proper distance away from its original position. Units which are retreated to Friendly occupied hexes which are slated to be attacked during that Phase-Segment, suffer the same combat results as the host units, but do not contribute to the defense of that hex in that Segment.
Effect of Disruption: Units in a disrupted state that are again disrupted, are crippled instead. Units in a disrupted state that are then crippled, are eliminated instead. Units in a crippled state that are then disrupted or crippled, are eliminated instead. Disrupted units may not attack; only defend. They may move only one hex per Friendly Movement Phase, regardless of terrain movement costs. Disrupted units may spot. They do have a Zone of Control.
Crippling: Any unit that receives a crippled result is marked immediately with a Crippled Counter; the unit does not retreat. Unless eliminated, crippled units remain crippled for the remainder of the game. Crippled units may not attack; only defend. They may move only one hex per Friendly Movement Phase, regardless of terrain. Crippled units may not spot. They do not have a Zone of Control. The Phasing Player may move into and through hexes occupied by Enemy Crippled units. The Crippled unit is "brushed aside" (moved one hex by the Phasing Player). A Crippled unit may be moved only one hex per Movement Phase by this action. The Phasing Player may not move into or through a hex occupied by enemy Crippled units which he has already brushed aside in that Phase.
The Scenarios
How to Set Up the Game and Use the Scenarios
Each Scenario constitutes a separate game representing a particular conflict situation that could occur in the event of an outbreak of war in Europe during the 1970's.
You may use any Scenario, but it is suggested that you use Scenario One the first time you play the game. The Scenarios are organized in order of increasing complexity (and "more complex" is not necessarily "better").
All units remain face-up in the Standard Game rules, whether spotted or not. An optional rule provides for face-down placement of units, i.e., the effect of limited intelligence.
Each Scenario indicates the following information:
- The nature of the situation and its title;
- The initial forces for each Player;
- Initial deployment for each Player;
- Reinforcements (if any) received during the scenario;
- Special Rules pertaining to the Scenario;
- Victory Conditions — how to win, for each Player.
The Initial Forces listed for each side contain US and USSR regiments and battalions, plus attached units. In each case, pictures of the appropriate counter type will be shown with a quantity number directly underneath. Thus, a picture of a US Mechanized Infantry company with an "x3" underneath it would mean that that organization has three Mechanized Infantry companies in it.
Whenever a superior organization (such as a regiment) is shown in terms of game counters, it will have an overall box around it as well as an identifying heading. An overall multiplier will be found to the left of such organizations indicating how many superior organizations are to be used.
Optional Rules, by their nature, tend to make the game more complex and somewhat more "realistic." It is suggested that you use these Optional Rules only after you have mastered the Standard Game.
Sectors
The map is divided into six numbered and tinted "Sectors." Each Scenario will be played in one or more of these Sectors. When a Scenario requires that the game be played within a Sector, no movement or combat may occur in hexes outside of the specified Sector(s). In some Scenarios, the entire map is used.
Lettered Hexes
There are six hexes on the map, lettered A, B, C, D, E, and F. They have no terrain effect and they simply are used as points of reference for deployment purposes.
Note on this transcription (gaps disclosed): each Scenario's initial forces are printed as pictorial counter diagrams with quantities. Only the formation headings and multipliers that were legible are given below; the unit-by-unit counter lists are not reproduced in text. Where a Scenario's deployment, special-rule or victory text could not be read reliably from the scan, the entry says so rather than guessing. The Unit Identification Chart (printed page 9) and the Designer's Notes and design credits are not reproduced.
Scenario One: Tank Battle
A head-on engagement has developed between a US Tank Battalion and a Soviet Tank Regiment with supporting units.
US Initial Forces: one Tank Battalion (multiplier x1).
USSR Initial Forces: one Tank Regiment (multiplier x1), with supporting units.
US Deployment: Force enters on the Game Map's eastern-most row of hexes during the first Game-Turn.
USSR Deployment: Force enters on the Game Map's western-most row of hexes during the first Game-Turn.
Special Rules
- Before the start of game, each Player rolls the die; higher number deploys first and moves first.
- Only Sectors 4 and 5 are used in this Scenario.
- No units may be entrenched at the beginning of the game.
- Neither Player has Air Superiority.
Victory Conditions: Each Player receives one Victory Point for each crippled or eliminated Enemy Attack Strength Point, and one Victory Point for each hex counted from his most distant uncrippled unit to his starting map edge. The Player with the higher score wins the game.
Scenario Two: Screening Action
A US Infantry Battalion and supporting units are screening an advancing Soviet Tank Regiment with attached Infantry.
US Initial Forces: one Mechanized Infantry Battalion (x1), with supporting units.
USSR Initial Forces: one Tank Regiment (x1), with attached Infantry.
US Deployment: Deploy second, move second. Anywhere on map East of hexes A, B, C. May not be entrenched at the beginning of the game.
USSR Deployment: Deploy first, move first. Anywhere on map West of hexes A, B, C. May be entrenched at the beginning of the game.
Special Rules
- Neither Player has Air Superiority.
- Use entire Map.
Victory Conditions: The Soviet Player wins if two or more undisrupted, uncrippled T-62 companies are east of the Horloff River at the end of the game. The US Player wins by avoiding the Soviet Victory Conditions.
Scenario Three: General Delaying Action
A West German force is attempting to delay an advancing Soviet Tank Regiment.
German Initial Forces: one Panzergrenadier Battalion (x1), with Jeep/OTOW and other attached units.
USSR Initial Forces: one Tank Regiment (x1), with attached Infantry.
German Deployment: Deploy second, move first. All German units may be deployed in Sectors 1, 2, and 3. German units may not be entrenched at the beginning of the game.
USSR Deployment: Deploy first, move second. Russian units must deploy on the eastern edge hex-row of the playing area. Russian units may not be entrenched at the beginning of the game.
Special Rules
- The German Player has air superiority (or, optionally, three Observation Helicopters).
- The playing area consists of Sectors 1, 2, and 3.
Victory Conditions: The Russian Player must control a line of road hexes leading from the western edge to the eastern edge of the Playing Area in order to win the game. German Player wins by avoiding the Soviet Victory Conditions. No hex of the route may be in an Enemy Zone of Control or within range of Enemy Direct Fire.
Scenario Four: Russian Assault
A Strong Soviet Force is advancing over the entire Game Map, from the west to east. The game concerns the action that is occurring in Sector 5, where an augmented US battalion is defending its standard front. The rules of the Scenario reflect the action occurring outside Sector 5.
US Initial Forces: one Mechanized Infantry Battalion (x1), with attached armor, helicopter and artillery units as printed on the scenario card.
USSR Initial Forces: one Mechanized Infantry Regiment (x1), with attached armor and artillery units as printed on the scenario card.
Special Rules: the printed text on the scan for this Scenario's deployment and special rules is not fully legible in the transcription pass; see the transcription note under "The Scenarios" above.
Victory Conditions: The USSR Player wins if he has at least five uncrippled units east of the Horloff River at game's end. The US Player wins if no uncrippled Russian units are across the Horloff River at game's end. Any other result is considered a draw.
Scenario Five: Extended Russian Assault
This Scenario is similar to Scenario Four except that the US forces are covering a wider front.
US Initial Forces: one Mechanized Infantry Battalion (x1), with attached armor, helicopter and artillery units as printed on the scenario card.
USSR Initial Forces: one Mechanized Infantry Regiment (x1), with attached armor and artillery units as printed on the scenario card.
US Deployment: Deploy first, move second. Anywhere within Sectors 4 and 5. Units may be entrenched at the beginning of the game.
USSR Deployment: Deploy second, move first. Deploy in Sector 1, within three hexes of Sectors 4 and 5. Russian units may be entrenched at the beginning of the game.
Special Rules
- The US Player has Air Superiority (or, optionally, four Observation Helicopters).
- All units must remain in Sectors 4 and 5 after entering them. Units may move freely from Sector 4 to Sector 5, or vice versa; units are not required to enter Sectors 4 and 5.
- Units in Sector 1 may not move farther than three hexes from Sectors 4 and 5, nor may they move into any Sector other than Sectors 4 and 5.
Victory Conditions: The USSR Player wins if he has at least seven units in a non-crippled state, east of the Horloff River at game's end. The US Player wins if four or fewer non-crippled Soviet units are east of the Horloff River at game's end. Any other result is considered a draw.
Scenario Six: Airmobile Delaying Action
A US rearguard, composed mainly of OTOWs, is attempting to delay a large Soviet force which has broken through the main front line.
US Initial Forces: Jeep/OTOW (x12) and Infantry (x1) units.
USSR Initial Forces: one Tank Regiment (x2), with attached Infantry and 14.5mm machine-gun units.
US Deployment: Deploy first (move first) anywhere on map, east of hexes A, B, C. May be entrenched.
USSR Deployment: Deploy second (move second). One Tank Regiment within three hexes of hex "A"; one Tank Regiment within three hexes of hex "B." 14.5mm machine guns with regiment A and/or B. Soviets may not be entrenched.
US Reinforcements: At the start of the Offensive Fire Phase of the US second, fourth, sixth, and eighth Player-Turns, the US Player receives one additional Airmobile Infantry Platoon. These platoons may be placed anywhere on the map except in Soviet-occupied hexes and in Woods or Town hexes.
Special Rules
- US Player has Air Superiority (or optionally, five Observation Helicopters).
- After an OTOW has fired its weapon, turn it face down (instead of removing it from play). At the beginning of the US Player-Turn, any three OTOWs which have not moved in the previous US Player-Turn, may be turned face-up, signifying that they have been resupplied by air, and are once again capable of firing. This process may repeat itself any number of times. Disrupted OTOWs may not be considered resupplied while in a Disrupted condition.
Victory Conditions: Victory is based on the number of uncrippled Soviet T62 companies exited off the eastern edge of the map. Soviet units exit the map by reaching the easternmost row of hexes and then expending one Movement Point to get off.
| Victory Level | Companies Exited |
|---|---|
| US Substantive | 0 through 1 |
| US Marginal | 2 through 4 |
| Draw | 5 through 8 |
| USSR Marginal | 9 through 11 |
| USSR Substantive | 12 or More |
Scenario Seven: Meeting Engagement
A US force is attempting to contain the advance of a Soviet force which is driving from the opposite side of the map.
US Initial Forces: Reconnaissance Battalion (x1), as printed on the scenario card.
USSR Initial Forces: Mechanized Infantry and Tank formations as printed on the scenario card.
US Deployment: Deploy second, move second. Deploy only six one-stacking point units (Player's choice) on any road hex adjacent to the map's western edge. Each subsequent Player-Turn the USSR Player must place an additional eight one-stacking point units on the same road hexes, and bring them into play during his Movement Phase. Units may not be entrenched at the beginning of the game.
Special Rules
- Neither Player has Air Superiority.
- All map Sectors are used; movement into particular Sectors is not barred.
Victory Conditions: Victory is based on the number of uncrippled USSR units in Sectors Four, Five, and Six at game's end.
| Victory Level | Companies in 4, 5, & 6 |
|---|---|
| US Decisive | 0 |
| US Marginal | 1 through 4 |
| Draw | 5 through 9 |
| USSR Marginal | 10 through 14 |
| USSR Decisive | 15 or more |
Scenario Eight: Rear Guard Action
A small US force is attempting to delay the passage of a large Soviet force across the map, thus permitting an "off-the-map" US main force time to regroup and move to better positions.
US Initial Forces: Reconnaissance Battalion (x1), as printed on the scenario card.
USSR Initial Forces: Mechanized Infantry and Tank formations as printed on the scenario card.
Special Rules
- The US Player has Air Superiority on any two consecutive Game-Turns of his choice. During these two Game-Turns, three Helicopter Gunships of the US Player-Turn may enter the map from the southern edge and remain in play until expended, or until the end of the Second Game-Turn of Air Superiority.
- Neither Player has Air Superiority on the other Game-Turns.
- During the two Game-Turns of Air Superiority, the US Player may employ the Air Superiority rule, or optionally, employ two Observation Helicopters.
Victory Conditions: The level of victory depends upon the number of separate road "routes" controlled by the USSR Player from the northern to the southern edge of the map. These "routes" must consist of a series of adjacent hexes connected by road, and may be as long and as devious as necessary. Only one "route" may be traced through a given road hex for each road that passes completely through that hex. In other words, two routes may not share a single road, although they may pass through a single hex if two roads cross in that hex. No hex of the route may be in Enemy Zone of Control or within range of Enemy Direct Fire.
| Level of Victory | Number of USSR Controlled Roads |
|---|---|
| US Substantive | 0 |
| US Marginal | 1 or 2 |
| Draw | 3 or 4 |
| USSR Marginal | 5 |
| USSR Substantive | 6 |
Scenario Nine: Airmobile Raid
US forces are attacking the Soviet front. An airmobile force is being dropped on the Soviet rear to disrupt communications.
US Initial Forces: Airmobile Infantry Battalion (x1), with Jeep/OTOW and helicopter units as printed on the scenario card.
USSR Initial Forces: Tank Regiment (x1) and Mechanized Infantry Regiment (x1), with supporting units as printed on the scenario card.
Special Rules
- The US Player has Air Superiority (or optionally, 4 Observation Helicopters).
- Use entire Game-Map.
The deployment text for this Scenario is not fully legible in the transcription pass; see the transcription note under "The Scenarios" above.
Victory Conditions: Victory is based upon the number of north/south roads controlled by the USSR Player at game's end (see Scenario Eight).
| Victory Level | Number of USSR Controlled Roads |
|---|---|
| US Substantive | 0 through 1 |
| US Marginal | 2 or 3 |
| USSR Marginal | 4 or 5 |
| USSR Substantive | 6 |
Scenario Ten: Airmobile Attack
A strong US force is attacking an entrenched Russian force of smaller size by land and by air. Their objective is the capture of two key towns.
US Initial Forces: Mechanized and armor units (x3, x6, x1, x1) and 40 HE Air Strike markers (x10), as printed on the scenario card.
USSR Initial Forces: as printed on the scenario card.
The deployment, special rules and victory conditions for Scenario Ten are not fully legible in the transcription pass; see the transcription note under "The Scenarios" above.
Reinforcement Schedules
The printed page carries these schedules without naming the Scenario they belong to; they are reproduced as printed.
Reinforcements (Game-Turn 11 onward, as printed)
- Game-Turn 11: (NE): 289 i, 290 i, 291 i; (SE): 6 a cav
- Game-Turn 12: (SE): 2 i, 10 i, 11 i, 101 i, 104 i, 328 i; (NE): 66 a, 67 a, 41 ai
- Game-Turn 13: (SE): 317 i, 318 i, 319 i; (NE): 329 i, 330 i, 331 i
- Game-Turn 14: (W): 354 e, 342 e, 392 e, 366 e, 1308 e, 1313 e, Fr. Lt. i. (Brig)
- Game-Turn 15: (SE): 134 i, 137 i, 320 i; (NE): 24 i, 60 i, 401 G
- Game-Turn 16: (W): 34 a; (SE): cca6, ccb6, ccr6
- Game-Turn 17: (SE): cca11, ccb11, ccr11
- Game-Turn 18: (W): 68 i (X), 151 i (X), 231 i (X); (SE): 513 pi, 193 G, 507 pi, 194 G
German Historical Reinforcements
- Game-Turn 1: 1 a (x)
- Game-Turn 2: 2 a (x), Von Der Hedyte
- Game-Turn 3: 3 a (x)
- Game-Turn 4: 4 a (x), 2ss a (III), 3ss ai (III), 4ss ai (III), 9ss a (III), 19ss ai (III), 20ss ai (III), 8 ai (III), 29 ai (III), FE (x)
- Game-Turn 5: 5 a (x), 1130 i (III)
- Game-Turn 6: 6 a (x)
- Game-Turn 7: 7 a (x)
- Game-Turn 8: 8 a (x), 33 a (III), 10 ai (III), 11 ai (III), 104 ai (III), 115 ai (III), FG (x), 79 i (XX)
- Game-Turn 9: none listed.
- Game-Turn 10: 167 i (XX)
- Game-Turn 11: none listed.
- Game-Turn 12: 246 i (XX)
- Game-Turn 13: 9 i (XX)
- Game-Turns 14, 15, 16, 17: none listed.
German Accelerated
- Game-Turn 1: 1 a (x)
- Game-Turn 2: 2 a (x), Von der Heydte, 2 ss a (III), 3ss ai (III), FE (x)
- Game-Turn 3: 3 a (x), 4ss ai (III), 9ss a (III), 19ss ai (III), 20ss ai (III), 8 ai (III), 29 ai (III), 10ss a (III), 21ss ai (III), 22ss ai (III), 15 a (III), 110 ai (III), 111 ai (III), FG (x)
- Game-Turn 4: 4 a (x)
(The German Accelerated listing continues on the scan beyond Game-Turn 4 and is not reproduced here.)
Errata and Addenda
The following is the Consolidated Errata & Addenda (as of 31 May 73), reproduced as printed on the errata sheet. Where it says "Should read," it replaces the printed text of the rule named; where it says "Add," the item is added to that rule. The errata on the printed rules pages (p. 7 and p. 8) are the same corrections.
Combat
(A) Should read — You may not attack the same unit more than once per phase using the same Weapon Class (exception: see Zones of Control).
General Rule — Add: Certain units have both a Maximum and Minimum Range Allowance indicated by two numbers in different sizes of type, with the Minimum Range shown in the smaller type size, and is positioned above the Maximum Range. Such units may not fire at enemy units closer than the Minimum Range Allowance.
Sequence of Play
E. Defensive Fire Phase — Should read — The Non-Phasing Player may specify what fire attacks are made against the Phasing Player's units at this point. "LG" and "AP" Weapon Class units are resolved first, then "HE" Class. Combat results are applied immediately as they occur. Non-Phasing Player units that fired in Phase B of the current Player-Turn may not fire in this phase. Air Strikes may be used; no units may be moved except as mandated by the Combat Results Table. In effect, the Non-Phasing Player repeats segments 2, 3, and 4 of Phase A.
Movement
(K) Add — Stacking Limitations may never be violated. If the hex from which the Close Assaulting unit(s) entered is occupied, any excess Stacking Points of the retreating Close Assaulting unit(s) are eliminated, in order of priority of entry into the close assaulted hex. The last unit entering the close assaulted hex is retreated first. This continues until stacking limitations are violated and the remaining Close Assaulting unit(s) are eliminated.
Fire Combat
(H) Should read — Only HE units may use Indirect Fire. To use Indirect Fire a unit need not have a Range Allowance of "7" or greater.
(J) Should read — Direct Fire may never be used at ranges greater than ten hexes. Direct Fire never requires Spotting. Direct Fire may be applied into, but not through, Blocking or Covering Terrain hexes.
(L) Should read — For Direct Fire purposes a firing unit may trace a Line of sight into, but not through, Blocking or Covering Terrain hexes.
(M) Should read — If the Line of Sight at any point BETWEEN (BUT NOT INCLUDING) the hex of the firing unit and the target hex, passes through Blocking Terrain, the Line of Sight is blocked and Direct Fire is prevented. A unit may use Direct Fire against a unit in Covering Terrain, without the target hex being spotted, if the firing unit can trace a Line of Sight (no longer than ten hexes) into the target hex.
(P) Should read — Spotting is a necessary precondition only for Indirect Fire. Spotting is never required for Direct Fire. Because Direct Fire cannot be employed at ranges greater than ten hexes, and because a firing unit will always be able to trace a Line of Sight into (but not through) Blocking or Covering Terrain hexes (assuming the firing unit is within ten hexes range, and that there is no intervening Blocking or Covering Terrain) Direct Fire will never require Spotting.
(Q) Should read — Indirect Fire may only be used by HE units. To use Indirect Fire HE units need not have a Range Allowance of "7" or greater. Indirect Fire may be used at any range, subject to the firing unit's Range Allowance. The two prerequisites for using Indirect Fire are: (1) Only HE units may use Indirect Fire. (2) The target hex must be spotted (as in Case P).
Close Assault
(S) Add — Self-Propelled, Wire-Guided Missile Launcher units may never engage in Close Assault attacks.
(V) Add — Two Stacking Point sized, non-infantry units have their basic Defense Strength reduced to two Strength Points if close assaulted without Friendly infantry units in the same hex. ARCv units may defend against Close Assault attacks at full strength, but other non-infantry units in the same hex do not benefit by the presence of the ARCv unit and must defend at their reduced Defense Strength.
(W) Should read — An Enemy unit making a Close Assault upon a defending Friendly unit may be fired on by the defending Friendly unit (and any other Friendly units within range, using Direct or Indirect Fire) only if the hex from which the Close Assaulting unit enters the defending Friendly unit's hex, is in a Friendly Zone of Control (i.e. Enemy units Close Assaulting from Woods or Town hexes may not be fired on during the Close Assault by the defending Friendly unit or any other Friendly units).
Zones of Control
(D) Should read — Targets in Woods or Town hexes must always be spotted for Indirect Fire only. If a firing unit can trace a Line of Sight into a Woods or Town hex, it may use Direct Fire against Enemy units in that hex without requiring the hex to be spotted.
(E) Should read — No Friendly unit may fire more than once during the Enemy Movement Phase. Non-Phasing units may each fire only once during an Enemy Movement Phase at Enemy units which attempt to leave Friendly Zones of Control. Once a unit fires during an Enemy Movement Phase it may not fire again during that phase regardless of how many Enemy units attempt to leave its own, or any other Friendly Zone of Control. Units which do fire during the Enemy Movement Phase may not fire during the ensuing Fire Phase.
Helicopters
General Rules — Helicopters do possess a normal Zone of Control. Soviet ground units are affected by helicopter Zones of Control and must announce their intention to leave such a Zone, and are subject to fire when they attempt to leave a helicopter Zone of Control. Note also, in any Game-Turn in which a helicopter remains stationary in a Soviet Air Defense Zone, the Soviet unit(s) may fire at the helicopter (using the Soviet Air Defense Table) in the Soviet Offensive Fire Phase. This fire is in addition to any normal ground fire the Soviet unit wishes to employ during his Offensive Fire Phase.
Helicopter Gunships, Case (A) — Add — The AH/IRK (Rocket firing "HE") unit must be removed from the game after firing its weapon a single time.
Explanation of Combat Results
Crippling — Add — The Phasing Player may move into and through hexes occupied by Enemy Crippled units, at the Movement Point cost of the other terrain in the hex.
Terrain Effects Chart
Wooded Hill Hex — 6 MP to enter.
Airmobile Units
General Rule — Airmobile units must be "dropped" in the Initial Helicopter Movement Segment, at the rate of one stacking point per hex. Units may not be dropped onto or adjacent to Enemy occupied hexes or in covering terrain hexes.
Cases
(A) Airmobile units may move in the Player-Turn that they are dropped.
(B) Airmobile units which are dropped in the Air Defense Zone of an Enemy unit are subject to Enemy Air Defense Fire in the same manner as helicopters, and are eliminated in the same manner as helicopters.
Unit Identification Chart
The size of the following units were given incorrectly. They should read as follows:
- Soviet 14.5mm Machine-Gun, 82mm & 120mm Mortars are Platoon sized units. All other Soviet 000 series units and the SU57 unit are Battery sized units. The BRDM(A) and the M'CYC units are Squad units. The BTR40 and PT76 are Platoon sized units.
- The U.S. 105mm, M 109, M 110 and M 107 are Battery sized units. The Jeep/OTOW, M113/OTOW and the M114 are Squad sized units. The OH-6, AH/MG and AHIRK are Section sized units. The AH/OTOW is a Team sized unit.
The following unit quantities are wrongly noted on the Unit Identification Chart; the quantity given is the correct one:
- US M 125 Platoons — (6) is the correct quantity.
- US M 106 Platoons — (4) is the correct quantity.
- US OTOW/APC Platoons — (12) is the correct quantity.
The Scenarios
Scenario # 8 — The counter-mix is lacking one ARCv Platoon. In this scenario Players should make up the unit from spare counters.
Soviet units entering the mapsheet (rather than being initially deployed) may never employ Indirect Fire.