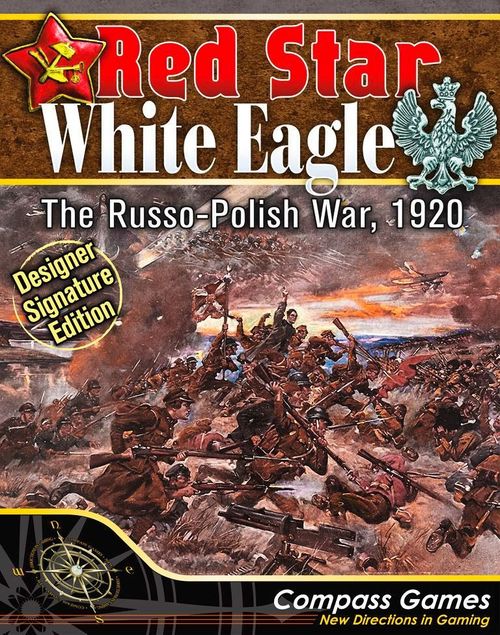
Red Star/White Eagle: The Russo-Polish War, 1920 – Designer Signature Edition
Red Star/White Eagle: The Russo-Polish War, 1920 – Designer Signature Edition Rulebook
Table of Contents
Table of Contents
- 1.0 Introduction
- 2.0 Game Equipment
- 3.0 How to Win the Game
- 4.0 Zones of Control
- 5.0 Stacking
- 6.0 Sequence of Play
- 7.0 Reinforcements and Replacements
- 8.0 Movement
- 9.0 Combat
- 10.0 Supply
- 11.0 Russian Withdrawals
- 12.0 Russian Fronts
- 13.0 Polish Substitution
- 14.0 Armored Trains
- 15.0 Rail Nets
- 16.0 Flotillas and Marines
- 17.0 Map Edges and Borders
- 18.0 Warsaw Fortifications
- 19.0 Zero Movement Factor Units
- 20.0 Moto-Mechanized Units
- 21.0 Allied and Other Units
- 22.0 Polish Rally
- 23.0 Scenarios and How to Set Up the Game
- 24.0 Optional Rules and Variants
- 25.0 Historical Notes
1.0 Introduction
The Designer Signature Edition of Red Star/White Eagle is an operational level simulation of the 1920 conflict over the border areas of Eastern Europe. It is a two-player game; one player maneuvers the forces of Bolshevik Russia, and the other maneuvers the forces of the resurgent Polish nation. Players also control the forces of several other nationalities that were drawn into the struggle.
The rules are numbered and presented in sets of major sections, each section divided into numerous major and secondary cases. The rules cross-reference other rules using (parentheses), so for example you will see, "The supply state of a unit affects the die roll when using the ZOC Retreat Table (Losses During Retreat, 9.14)", meaning Case 9.14 is related to this rule. The rules of this game have been arranged both for ease of comprehension on first reading and for ease of reference later.
To familiarize yourself with this historical game, first look at the playing pieces, then give the rules a quick read through. Please don't try to memorize them. Follow the set-up instructions for The Gates of Warsaw introductory scenario (23.1) and then read Section 6.0 that describes the general course of play. As questions arise simply refer back to the rules. After a few minutes of play, you will find yourself becoming familiar with the game mechanics.
About This Designer Signature Edition
Red Star/White Eagle: The Russo-Polish War, 1920 was originally published by Game Designers' Workshop (GDW) in 1979. The game has garnered rave reviews over the years, given its subject matter, rich historical detail, and game system. The situation is very fluid and intense as both sides struggle to cover the front at any given point in time. One of the most overlooked aspects of the game are the optional rules to turn it into a fantastic three-player game, with two players splitting the Russian forces by Front.
The DSE treatment aims to represent the final word, or "be-all, end all" version of a game by a noted designer. The focus is on delivering completely redesigned components, with full-color graphics throughout and player-friendly enhancements to make the game as enjoyable as possible. Enhancements to the original game include: incorporation of all GDW errata and corrections of errata never reported before; super-sized components featuring 5/8" counters and two full-size game maps; fixed original deployment maps; all-new artwork; campaign set-ups and reinforcement codes on the counters; separate Ukrainian and Galician counters in each side's color; two added Polish armored trains to remove the unnecessary rule to recycle from dead unit pile; enhanced ergonomics in the set-up and reinforcement/turn record charts; all new rules treatment replete with illustrations, an index, and clarifications; a revised Warsaw fortification rule; expanded Flotilla rules; review of all place names by native speakers; all new Historical Notes.
2.0 Game Equipment
2.1 Game Inventory
Your copy of the Designer Signature Edition of Red Star/White Eagle includes:
- Two color maps, 41.9" x 34" total
- Two countersheets of 5/8" die-cut counters (344 total, 322 used for play)
- One (two-sided) 8.5" x 17" Deployment Map
- Two identical (two-sided) 8.5" x 11" Player Aid Cards
- One (two-sided) 8.5" x 11" Turn Record Track
- Four (two-sided) Set-up Charts (two Polish, two Russian)
- This Rulebook
- One six-sided die
Note: The bottom right row of countersheet 2 of 2 was intentionally removed. You are not missing a row of counters.
2.2 The Game Map
The map portrays the area of Eastern Europe where the campaign was fought. A hexagonal grid is superimposed on the map and is used to determine movement. Terrain features include Clear, Marsh, Rivers, Forest, Lakes, Trench, Railroads, Rough and Fortifications. See the Terrain Effects Chart on the Player Aid Card for more details on their effects on play.
The map covers a diverse region which included the peoples of Poland, Germany, Ukraine, Belarus, Lithuania, and Russia, often in shared geographic spaces. Many places had different spellings or names depending on who was doing the writing. Spelling variants for place-names have been chosen that best reflect the general language, national character, and history of specific locations, with some exceptions made for places well-known by a standard English term (Warsaw, Kiev, etc.).
2.3 Charts and Tables
A number of visual aids are provided in the game to facilitate and display many of the game functions. These visual aids are printed on the Campaign Deployment Map, the Scenario Set-up Charts, and on the map. The use of these charts and displays are explained in the appropriate rules section. Various cards also contain various tables and tracks needed for play, such as the Combat Results Table, the Turn Record Track, and the ZOC Retreat Table.
2.4 The Playing Pieces
There are 322 playing pieces in two die-cut sheets included with Red Star/White Eagle. These playing pieces are referred to as counters. Some represent the actual military units that participated during the war while others are simply markers used to facilitate certain game mechanics.
2.4.1 How to Read the Counters
Red Star/White Eagle counter mix includes forces from the opposing nationalities and armies. Each nationality and army is indicated by a color unique to that force:
| Nationality | Color |
|---|---|
| Polish | Blue |
| Russian | Red |
| German | Grey |
| Lithuanian | Orange |
Units range in size from division down to battalion, and the size of a unit is important for stacking and replacements.
2.4.2 Unit Example
Each counter is printed with a military symbol indicating its nature and function, historical identification, and several numerical factors. The counter examples indicate the layout of the information on the counters. A combat unit shows: Campaign Setup or Reinforcement Code; Unit ID; Unit Size; Delay Factor (4.1); Unit Type; Attack Factor; Defense Factor; Movement Factor. A cavalry unit additionally shows a Charge Factor (9.10) and an Army or Nationality designation.
The first unit illustrated is the Russian (nationality) 57th (unit ID) Infantry (unit type) Division (unit size) with a Campaign Setup in area "M" at game start. The unit possesses an Attack Factor of 5, a Defense Factor of 3, and a Movement Factor of 7. The unit also exerts a Zone of Control with a Delay Factor of 1. Based on its white on orange unit type box color coding (2.4.4), this unit operates in the West Front.
The second unit illustrated is the Russian (nationality) 14th (unit ID) Cavalry (unit type) Division (unit size) of the Konarmiya Army (army or nationality). The unit possesses an Attack Factor of 8, a Defense Factor of 8, a Movement Factor of 9, and a Charge Factor of 12. The unit also exerts a Zone of Control with a Delay Factor of 3. Based on the black on orange unit type box color coding (2.4.4), this unit operates in the Southwest Front.
Units may contain special symbols. Secondary units for purposes of stacking (5.1.1) are identified by their unit size indicator being placed inside of a lightly-shaded box. Some units are non-replaceable (7.2.5) and marked with a square to the right of their unit type symbol. Certain units also carry intrinsic supply capabilities (10.7.2) and are marked with a supply indicator in their upper right-hand corner. Moto-Mechanized units have a color band (20.0).
Replacement counters (RCs) are provided for both the Russian (red on white) and Polish (blue on white) nationalities. A Replacement counter shows a Replacement Indicator (7.2.1), Unit Type, Replacement Factor and Movement Factor. Please note that RCs are either infantry or cavalry based on their unit type symbol (7.2.4.3).
2.4.3 Unit Size Symbols
| Symbol | Definition |
|---|---|
| II | Battalion |
| III | Regiment |
| X | Brigade |
| XX | Division |
2.4.4 Unit ID/Army/Nationality
Each unit has its ID to the left of the unit's type symbol and its army or nationality (if any) to the right.
| Abbr. | Unit/Army/Nationality |
|---|---|
| B | Belarusian or Bashkir |
| Cauc | Caucasian |
| Coss | Cossack |
| FG | Frontier Guard |
| FK | Freikorps |
| G | Galician* |
| J | Jaworski |
| K | Kopa |
| KA | Konarmiya |
| L | Lithuanian |
| LB | Lithuanian-Belarusian |
| Mosk | Moscow |
*Galician appears as part of the designation on Russian-controlled units.
All armies and nationalities are further distinguishable by the colors of their unit type box as illustrated on the counters:
- black on orange: Russian Southwest Front (12.0)
- white on orange: Russian West Front (12.0)
- black on white: Russian Reserves (17.1)
- black on green: Ukrainian (21.1)
- white on orange (Lithuanian): Lithuanian (21.2)
- black on light green: Galician (21.6, 23.4.8)
- black on gray: German Freikorps (24.11)
- black on light blue: Polish Regular Army
- white on light blue: Polish Legion (21.4)
- black on green (Polish side): Ukrainian (21.1)
- black on light yellow: Belarusian and Lithuanian-Belarusian (21.3)
- black on light green (Polish side): Galician (21.6, 23.4.8)
2.4.5 Unit Types
- Infantry
- Cavalry
- Artillery
- Mountain Infantry
- Marine
- Garrison
- Armored Train
- Flotilla
- Militia Units: Peasants and Workers, Students, Women, Priests
- Moto-Mechanized Units: Armored Car (Austin-Putilov), Tank (French Renault FT), Motorized Infantry
2.5 Game Markers
The game contains various markers to facilitate play. These markers are not units and do not affect stacking in any way and their use will be detailed in the appropriate sections of the rules. Note: some markers are optional for play and some game markers are color-coded by nationality for use by each side.
- Game Turn (6.0): Russian / Polish sides
- Control (3.2.3): Russian / Polish sides
- Cavalry Charge (9.10): "Charge!" marker
- Polish Rally (22.0): "Rally" marker; reverse is "Plus Next 2 Turns"
- Polish Air (24.7), optional: Kosciuszko Squadron / Albatros D.III
2.6 Scenario Set-up Charts
The Scenario Set-up Charts show the unit positions at the start of each scenario. Some units list exact setup hexes, while others list areas. Follow the set-up instructions in each scenario (23.0) for the initial placement of units.
2.7 Glossary of Game Terms
- Attack Factor is the relative fighting capacity of a unit attacking against enemy units, expressed in terms of a number.
- Defense Factor is the relative fighting capacity of a unit defending against enemy units, expressed in terms of a number.
- Movement Factor represents the ability of a unit to move, expressed in terms of Movement Points.
- Charge Factor is the relative fighting capacity of a cavalry unit attacking against enemy units when Charging (9.10) and is used instead of the Attack Factor, expressed in terms of a number.
- Delay Factor is the relative ability of a unit to project its power into adjacent hexes and is represented by a number.
- NRN stands for National Rail Net. Each side has its own National Rail Net, usable only by that side for NRN movement.
2.8 Game Scale
The unit counters represent battalions, regiments, brigades, and divisions. Each hex represents 14 miles (23 km). Each turn represents one-quarter of a month (slightly more than a week).
3.0 How to Win the Game
General Rule
Victory is determined following the last turn of each scenario. All scenarios except one end on the October IV turn and thus have the same victory conditions. The one exception is the short version of the Belarusian scenario; its victory conditions are noted in its scenario rules.
Cases
[3.1] If, at any time in any scenario, the Russian player occupies Warsaw with a unit, the game immediately ends. The Russian player has won a Cataclysmic victory.
[3.2] Other than (3.1) above, victory is determined by means of victory points (VPs) awarded to players for controlling certain cities. For VP purposes, a player controls a city if he occupies the city with a friendly unit or was the last to occupy the city with a friendly unit.
[3.2.1] As an exception to the preceding, the Russian player controls a city on the Polish NRN only if he occupies the city with a unit. At all other times, the city is considered to be controlled by the Polish player.
[3.2.2] The VP value of a city is printed on the map, in a yellow triangle adjacent to the city. There are fifteen VP cities on the map, totaling 38 VPs.
[3.2.3] For easy reference, players should indicate who controls a particular VP city with the control markers. The player with the most VPs at the end of a game is the winner. To determine the extent of a player's victory, use the chart below:
Victory Level Chart
| VPs | Polish Victory Level | Russian Victory Level |
|---|---|---|
| 20-23 | Scant | Unimpressive |
| 24-27 | Marginal | Marginal |
| 28-36 | Major | Major |
| 37-38 | Crowning | Cataclysmic |
If both players have equal amounts of VPs (19), then the game ends in a stalemate. Note that the levels of victory could be modified by Optional Section 24.12, Objective: Warsaw.
4.0 Zones of Control
General Rule
The six hexes that surround a unit (or stack) constitute the Zone of Control (ZOC) for that unit or stack. ZOC affect movement, retreat, and supply. Hexes in the ZOC are called controlled hexes, and they inhibit the movement of enemy units.
Cases
[4.1] Which Units Exert a Zone of Control
All units (non-markers) with a delay factor have a ZOC. Units with a delay factor of 0 do not. Replacements are not units and do not have a ZOC. Overstacked units have no ZOC (5.1.5).
[4.2] Extent of Zones of Control
ZOC extend into all six hexes adjacent to the controlling unit's hex, regardless of terrain type (exception: all-sea hexsides).
[4.3] Effects of Zones of Control on Movement
[4.3.1] Units pay an additional movement cost to enter an enemy-controlled hex. This cost is the greatest delay factor of any single unit exerting a ZOC into the hex to be moved into, and is over and above the terrain cost for entering the hex.
[4.3.2] Delay factors are not added together when paying for movement; only the greatest delay factor applicable to a hex is used.
[4.3.3] A unit may move from enemy ZOC to ZOC if it has the Movement Points remaining to pay for the hex and the delay factors.
Example: During its movement phase, the Polish 7R Infantry brigade (4-2-7) moves as shown. The unit first enters hex 1210, entering the ZOC of the 53rd Infantry division (4-3-7). The cost to enter is 1 for the hex and 1 for the enemy ZOC, for a total of 2 movement points. The unit then moves to hex 1211, entering the ZOC of two Russian units. The 6th Cavalry division (8-8-9) shown has a delay factor of 3, and the unit it is stacked on has a delay factor of 1. The largest single delay factor exerting an enemy ZOC into the hex has a factor of 3, so it is applied and added to the movement point cost to enter the hex. Note the unit is eligible to move directly from one enemy ZOC hex to another so long as it has sufficient movement points remaining.
[4.3.4] There is no cost to leave an enemy ZOC.
[4.3.5] Friendly units do not negate enemy ZOC for movement purposes, including advance after combat. If enemy and friendly units both exert ZOC into the same hex, such ZOC are said to mutually exist in the hex and do not cancel each other out.
[4.3.6] Friendly ZOC never affect friendly units, only enemy units.
[4.4] Effects of Zone of Control on Retreats
[4.4.1] If a unit is forced to retreat into or through an enemy ZOC hex, the unit may be reduced or eliminated based on the results from the ZOC Retreat Table (Losses During Retreat, 9.14).
[4.4.2] Friendly units do not negate enemy ZOC in the hexes they occupy for the purposes of retreat; the retreating unit is still subject to losses on the ZOC Retreat Table (Losses During Retreat, 9.14).
[4.5] Effects of Zones of Control on Supply
Friendly units negate enemy ZOC in the hexes they occupy for the purposes of tracing supply (10.0).
5.0 Stacking
General Rule
Players may place more than one unit in a single hex within certain limits. This is referred to as "stacking." Game markers never count towards the stacking limit. Players may freely inspect the stacks of the opposing side at any time.
[5.1] Stacking Restrictions
[5.1.1] The stacking limit is three primary units and three secondary units. Primary units are all cavalry, infantry, and mountain divisions and all cavalry, infantry, and mountain brigades. All other units are secondary units and are designated with their unit size symbol located inside a lightly-shaded box. The limit for each type is calculated separately. For example, the limit would be exceeded if a secondary unit moved into a hex already containing three secondary units, even if there were no primary units in the hex.
[5.1.2] Any unit in excess of the stacking limits is overstacked. For example, if there were five primary and four secondary units in a hex, then two of the primary and one of the secondary units would be overstacked. The owning player, at the start of each combat phase, declares which specific units are overstacked.
[5.1.3] A player may not voluntarily overstack his units. Units may move through a fully stacked hex, but they may not end their movement there. Units may not overstack through advance after combat. Units may become overstacked due to retreat after combat, but only if this conforms to the retreat priorities (Retreat After Combat, 9.13). New units may enter the game overstacked.
[5.1.4] A player may not voluntarily leave his units in an overstacked condition. Overstacked hexes must be corrected during the first friendly movement phase in which it is possible to do so. Units are never eliminated for violating the stacking limits.
[5.1.5] Overstacked units may not attack. The delay factor of an overstacked unit is modified to 0; thus, overstacked units lose their ZOC. Overstacked units contribute nothing to the defense of the hex they occupy, but suffer all adverse combat results affecting the hex. Overstacked units of the attacker suffer no adverse results unless all other units in the hex are eliminated, in which case the overstacked units suffer the same fate. The factors of overstacked units lost in any of the various combat exchanges are not counted when calculating the losses to the opposing player.
6.0 Sequence of Play
General Rule
Red Star/White Eagle is a two-player game. The Russian player moves all, some, or none of his units as desired, and then fights any combats his movement has allowed, if desired. The Polish player does the same with his units. These two moves together make a complete game turn.
Two Turn Record Tracks are provided, based on the scenario being played. The Gates of Warsaw Track Record Track is used only for that scenario. For all other scenarios, use the Campaign and Belarusian Turn Record Track.
The Turn Marker should be placed on the Turn Record Track on either the Russian or Polish side, based on the player turn in progress. The Turn Marker is then moved forward on the Turn Record Track (Russian side up) and the next turn begins. This continues until one side or the other achieves their victory conditions (3.0) or until the last turn of the scenario being played.
In any given phase, only the phasing player is allowed to execute the appropriate actions. The non-phasing player may not undertake any activity unless the rules explicitly permit it. Basically, the only action the non-phasing player is allowed to perform is to retreat his units due to combat.
[6.1] Game Turn Outline
I) Russian Player Turn
- a) Russian Reinforcement and Replacement Phase: The Russian player receives new units and rebuilds weakened or previously destroyed units. Various other less crucial activities are conducted in this phase.
- b) Russian Movement Phase: The Russian player moves all, some, or none of his units up to their full movement allowance. Units may move in any direction or combination of directions. Movement allowances cannot be transferred from unit to unit or accumulated from turn to turn.
- c) Russian Combat Phase: All combats are now resolved by the Russian player in any order he wishes.
II) Polish Player Turn
- a) Polish Reinforcement and Replacement Phase: The Polish player receives new units and rebuilds weakened or previously destroyed units. Various other less crucial activities are conducted in this phase.
- b) Polish Movement Phase: The Polish player moves all, some, or none of his units up to their full movement allowance. Units may move in any direction or combination of directions. Movement allowances cannot be transferred from unit to unit or accumulated from turn to turn.
- c) Polish Combat Phase: All combats are now resolved by the Polish player in any order he wishes.
III) Game Turn End Phase: The Turn Marker is moved one space and another turn begins, unless this was the last turn of the scenario. If it was the last turn, check the victory conditions.
7.0 Reinforcements and Replacements
General Rule
As the first step of each player turn, the players may receive reinforcements and replacements. In addition, the Russian player may be required to withdraw units (11.0). Reinforcements must pay the appropriate movement point costs for their hex of appearance; the cost is determined by the terrain type of the hex and the movement type the unit will use in the following Movement Phase.
Reinforcements do not have to enter play on their scheduled turn of appearance; players may elect to delay their entry until later turns. Reinforcements may appear in enemy ZOC.
Note: the reinforcement code (turn of entry) printed on the counter pertains to the Campaign Game (including Belarusian scenario) only. The reinforcement schedule for the Gates of Warsaw scenario is listed on the Gates of Warsaw Turn Record Track.
Cases
[7.1] Reinforcements
[7.1.1] Polish reinforcements arrive at Warsaw unless Warsaw is isolated. Warsaw is isolated when it is impossible to trace an all-rail route from Warsaw to at least four other cities on the Polish NRN. This rail route may be traced through enemy ZOC but not into hexes occupied by enemy units. If Warsaw is isolated, then Polish reinforcements may appear in any city on the Polish NRN that is not occupied by Russian units. Also, any or all reinforcements may still appear in Warsaw, at the Polish player's option.
[7.1.2] Russian West Front reinforcements may appear in any hex on the eastern edge of the map in the West Front command area (hexes 5101 to 5119, inclusive) or in any hex on the northern edge of the map, east of hex 3301 (inclusive).
[7.1.3] Russian Southwest Front reinforcements may appear in any hex on the eastern map edge south of hex 5120 (inclusive).
[7.1.4] Russian Konarmiya units may appear as Southwest Front reinforcements or may appear in any hex on the southern map edge east of hex 4236 (inclusive). Also, Konarmiya armored trains must enter on a rail hex. All Konarmiya units receive a bonus of three additional movement points on their turn of entry.
[7.2] Replacements
General Rule
Replacements are available at the beginning of each turn, in the form of infantry and cavalry replacement points, as listed on the Turn Record Track. Players may use these points to replace previously eliminated units, or they may convert these points into replacement counters (RCs) which may be brought into play themselves. For example, a player receiving two cavalry replacement points could take a two-factor cavalry RC or two one-factor cavalry RCs. The RCs are then either brought into play (in the same manner as reinforcements), or held in an off-map pool for use in later turns.
RC types: Russian Infantry (2/3), Russian Cavalry (2/3), Polish Infantry (2/5), Polish Cavalry (2/5) (replacement factor / movement factor).
[7.2.1] Replacement Counters (RCs) are not combat units and do not count against the stacking limits. An RC has no ZOC, nor does it have a combat strength. The factor on the RC is only its replacement factor. RCs can not block supply lines, rail lines, or supply sources.
A unit may freely enter a hex containing only enemy RCs, during the movement or combat phase, destroying all enemy RCs in the hex.
If a unit is adjacent to a hex containing only enemy RCs during the combat phase, it may attack that hex. In this case, all RCs in the hex are destroyed, and the attacker rolls on the 7:1 column to determine his advance after combat, ignoring all combat losses.
If RCs are stacked with combat units and those units are eliminated or retreated from the hex, then all RCs in the hex are destroyed.
[7.2.2] A two-factor RC may split into two one-factor RCs during any friendly Reinforcement and Replacement phase; likewise, two one-factor RCs may combine into a two-factor RC. On-map RCs may be withdrawn into the off-map pool during a friendly Reinforcement and Replacement phase. RCs may be withdrawn if they are on or adjacent to a friendly supply source (10.0). Players may keep track of the off-map pools on paper, if they wish; this frees replacement counters for use on map.
[7.2.3] Recreated Units (Off-Map Replacements)
[7.2.3.1] The off-map replacement procedure occurs during the Reinforcement and Replacement phase. Previously eliminated units may be recreated and returned to play. The player must eliminate a number of replacement factors from the off-map pool equal to the attack factor of the unit being recreated. Cavalry units may only be recreated with cavalry replacement factors. Infantry, mountain, militia, and garrison units may be recreated with infantry and/or cavalry replacement factors.
[7.2.3.2] One-step units must be recreated at their face values. Two-step units may be recreated at either their two-step or inverted sides, with the player paying the appropriate costs. A recreated unit enters the game exactly as if it were a reinforcement.
[7.2.3.3] There is an additional charge to the above for recreating division and brigade sized units. Two additional replacement factors must be spent to recreate a division-sized unit; one additional replacement factor must be spent to recreate a brigade sized unit. This charge is levied for all recreated divisions and brigades: one step, inverted, or two-step.
[7.2.4] On-Map Replacements
[7.2.4.1] On-map RCs are used to return inverted units to their two-step strengths. Only inverted units on the map may use this procedure. Move the RC to the same hex as the unit to be returned to full strength. The RC will be expended in the following friendly Reinforcement and Replacement phase.
[7.2.4.2] The number of replacement factors needed is equal to the difference in attack factors between the inverted and two-step sides of the unit. The RCs are removed from play, and the unit is flipped to its two-step side. This procedure may not take place in an enemy ZOC. The unit receiving the replacements may move normally in the following movement phase, but it may not attack in the combat phase.
Example: The Russians wish to rebuild their reduced strength 15th Infantry division (4-3-7) occupying hex 1110 and flip it back over to its two-step side. At full strength, it is a (7-5-7) unit. The difference in attack factors between the inverted side (4) and its original strength, two-step side (7) is 3. Therefore, both RCs shown will need to move and stack with the infantry division as shown to provide the 3 replacement factors needed to rebuild it during the following friendly Russian Reinforcement and Replacement phase. Note that a cavalry RC unit may be used to rebuild an infantry type unit per 7.2.4.3.
[7.2.4.3] Cavalry units may only receive cavalry replacement factors. Infantry, mountain, and garrison units may be restored with infantry and/or cavalry replacement factors.
[7.2.4.4] No additional charge is levied for brigades and divisions, since the brigade or division is already in existence.
[7.2.5] Non-Replaceable Units
A limited number of units may neither be recreated nor receive on-map replacements. These units are specially marked (2.4.5) for easy identification with a small square symbol (of any color). When such a unit is eliminated, it should be placed on the non-replaceable unit chart to ensure that it will not be inadvertently replaced.
8.0 Movement
General Rule
Red Star/White Eagle has three basic types of movement: Standard, Strategic, and National Rail Net (NRN) movement. A unit may only use one type of movement in a turn, and there is no cost when picking movement type. In addition to the three types, there are special movement rules governing armored trains (14.0) and flotillas (16.0).
During the Movement Phase of his player turn, each player may move as many or as few of his units as he wishes. As long as a unit does not spend more movement points than its movement allowance, it may be moved as many or as few hexes as desired. Unused Movement Points may not be accumulated or transferred between units.
Procedure
Movement is regulated by the hexagons superimposed on the map. Movement is expressed in terms of movement points, which are expended in varying amounts as a unit moves from hex to hex depending on terrain and enemy ZOC (4.3). Units are moved individually, in any order the phasing player desires, tracing a path of contiguous hexes through the hex grid. Once a player begins moving a particular unit, he must complete its movement before any other unit is moved.
Cases
[8.1] Standard Movement
[8.1.1] Movement points expended for terrain are summarized on the Terrain Effects Chart. The cost for entering a hex varies with the terrain type, the type of movement, and the enemy delay factors (4.3) exerted upon the hex.
[8.1.2] If a unit does not have sufficient movement points remaining to pay the full cost to enter a hex, it may not enter the hex.
[8.1.3] The cost of crossing a river is in addition to the cost of entering a hex. Railroads crossing a river do not negate the cost of crossing the river hexside.
[8.1.4] Cities are treated as clear terrain for movement (only; use the other terrain in the hex for combat purposes). Railroads entering a city hex are considered connected to all other railroads entering that hex. If an NRN extends to a city, then that city may be entered via NRN movement (e.g., the Russians may enter Kiev this way).
[8.2] Movement Restrictions
[8.2.1] A friendly unit may never enter a hex containing an enemy unit.
[8.2.2] Units may enter an enemy Zone of Control but must pay the greatest delay factor of any unit exerting a ZOC into the hex to be moved into, and this cost is over and above the terrain cost for entering the hex (4.3).
[8.2.3] Stacking limits must be observed at the end of the Movement Phase. Units may move through friendly units in violation of stacking so long as the stacking restrictions are met at the end of the Phase.
[8.2.4] No unit may voluntarily move off the edge of the map.
[8.3] Strategic Movement
[8.3.1] A unit using Strategic movement has its movement factor doubled (thus a unit with a MF of 7 would have a MF of 14 for strategic movement).
[8.3.2] The unit may not begin the movement phase in an enemy zone of control, nor may it enter one at any point during its move.
[8.3.3] The unit may not attack during the following combat phase.
[8.3.4] Any number of units may use Strategic movement in a turn.
[8.3.5] As long as the unit moves along a railroad (i.e., from a hex containing a railroad to an adjacent hex containing a railroad, with the railroad itself passing through the hexside shared by the two hexes), it pays only one movement point per hex entered, regardless of the standard cost to enter the hex. Rivers are not negated; an additional movement point must be spent to cross a river hexside. Any unit may use any rail net (Polish, Russian, or devastated) or combination of nets for Strategic movement.
[8.3.6] If a unit using strategic movement does not move along a railroad, it must pay triple the standard cost to enter a hex or cross a river. Thus, entering a clear hex would cost three movement points, entering a marsh hex would cost six, crossing a river into a forest would cost nine, etc.
[8.3.7] A unit using strategic movement may combine on-rail and off-rail movement in the same turn.
[8.4] National Rail Net Movement
[8.4.1] A unit may use NRN movement only if it began the Movement Phase on its own national rail net. A unit using NRN movement has an unlimited movement factor. It may not enter a non-rail hex, nor may it leave its own NRN.
[8.4.2] Since the unit receives an unlimited movement factor, all terrain costs are ignored.
[8.4.3] Enemy ZOC do not affect units using NRN movement; such units may start in, pass through, and/or stop in enemy zones of control without penalty.
[8.4.4] Units are allowed to attack in the following combat phase.
[8.4.5] Up to two divisions may use NRN movement each player turn. Brigades are counted as 1/2 of a division; regiments and battalions are counted as 1/4. The following units may use NRN movement but never count against the two-division limit: all reinforcements and recreated units appearing that turn, all armored trains, and all replacement counters.
| Symbol | Definition | NRN limit (2 max.) |
|---|---|---|
| XX | Division | 1 |
| X | Brigade | 0.5 |
| III | Regiment | 0.25 |
| II | Battalion | 0.25 |
[8.4.6] NRN hexes cannot be destroyed.
[8.4.7] The presence of an enemy unit on a NRN hex prevents movement into that hex. A national rail net may become fragmented due to the presence of enemy units; however, the owning player may use the net even when in such a state.
Example: if Russian units occupied Jaroslaw (1426) and Lwow (2028), then Przemysl (1527) would be isolated from the rest of the Polish NRN. The Polish player could use both segments for NRN movement.
[8.4.8] The Polish NRN is located in the western portion of the map, the Russian NRN is in the eastern portion of the map, and the devastated rail net lies between the two.
9.0 Combat
General Rule
During the Combat Phase, combat may occur between opposing forces that are adjacent. Combat is at the phasing player's discretion; it is never mandatory. The phasing player is the attacker, and the non-phasing player is the defender, regardless of the overall situation. The attacker resolves battles in any order he wishes after he has finished moving.
Attacking units in the same hex may fight different battles against defenders in different hexes. Attacking units in more than one hex may combine to attack defenders in one hex. Defenders stacked in one hex must be fought as one group, in one battle, with their defense factors added together. An attacking unit may not attack more than one hex. Combat factors of the same unit may never be split into more than one battle.
Procedure
The phasing player first declares each attack he wishes to make as he makes them (not all at once), noting which units are attacking. All attacking units must be adjacent to all defending units.
Attacks are resolved separately in any order the phasing player desires. The order chosen can be important, as the results of one attack may influence others.
The attacker resolves attacks by totaling the number of attack factors attacking a hex or hexes, and compares this to the total defense factors of all enemy units in the defending hex. Replacement counters, overstacked units, and units that used strategic movement in the preceding movement phase may not attack; overstacked units in the defending hex do not contribute to the defense.
Individual enemy units in a hex may not be attacked separately; all are attacked as a combined force. The total of eligible attacking factors versus the total of eligible defending factors is expressed as a simple odds ratio, rounding in favor of the defender (e.g. 26 to 9 is reduced to 2 to 1). The attacker may voluntarily reduce the combat odds if desired.
The attacker consults the Combat Results Table, locates the column corresponding to the odds ratio, then rolls a die and notes the result. Any modifications to the die roll for terrain, supply, etc. are made. Modified rolls above "6" and below "1" are treated as "6" and "1", respectively. The result may affect either or both the attacker and the defender and may consist of a retreat, an elimination, an advance, or some combination thereof. Note that red results pertain to the attacker and black results pertain to the defender or both. Any losses are taken before any retreats, and retreats occur before advances.
Example: Two Polish infantry brigades (each 3-2-6) declare an attack on the Russian cavalry regiment (1-1-9) in Jaroslaw. The initial odds calculation is 6 attack factors vs. 1 defense factor, or 6-1 odds. Die roll modifiers are now applied to the combat, with a -1 modifier for the Russian unit defending in a city hex, and a +1 modifier since the defender has only 1 defense factor. So die roll modifiers cancel each other out. The Polish player rolls a "2" and cross-references the result on the 6-1 CRT column. The result is "X" and "3". The "X" Exchange results in the Russian defender being eliminated. The Polish attacker must lose attack factors equal to the total defense factors lost ("1"). The Polish player can flip over either of his attacking units to absorb this loss (unit becomes a 1-1-6). The "3" result indicates the attacking units may immediately advance after combat by expending up to 3 movement factors (not 3 hexes, as in many games).
Cases
[9.1] Terrain has a variety of effects upon combat. The terrain in which a battle is fought is the terrain type of the hex occupied by the defender. The terrain of the hexside(s) through which the attack is launched may also affect combat. The terrain of the hex(es) occupied by the attacker has no effect upon combat. Terrain effects upon combat are listed on the terrain effects chart; specific comment on these effects is presented below.
[9.2] The attacker subtracts 1 from the die roll if the defender occupies a marsh, forest, rough, city, or intermittent lake hex.
[9.3] The attacker subtracts 1 from the die roll if all units attack through river hexsides. One or more units attacking through a non-river hexside negate this effect.
[9.4] Russian attackers must subtract 1 from the die roll if all of units attack through the face (pointed side) of trench hexsides, or through a combination of trench and river hexsides. Russian attacks through the rear (smooth side) of trench hexsides are not affected. Polish units may attack through trench hexsides without penalty.
[9.5] Attacks through all-sea hexsides are prohibited.
[9.6] Polish defenders in fortified hexes have their defense factors doubled. Note that Polish units in Warsaw and Modlin attacked across fortification hexsides benefit from the fortifications and the city; their defense factors would be doubled and 1 would be subtracted from the die roll. Russian units never receive any benefit from fortifications.
[9.7] Towns and railroads do not affect combat.
[9.8] When an attack is made into a hex containing only one defense factor (as determined before doubling for fortifications, if any), the attacker adds 1 to his die roll.
[9.9] If any or all of the defenders are unsupplied, 1 is added to the die roll. If any or all of the attackers are unsupplied, 1 is subtracted from the die roll. If both sides are unsupplied in a battle, both modifications are taken, for a net modification of 0.
[9.10] Cavalry Charges
[9.10.1] Certain cavalry units have a charge factor that may be used instead of their combat factor when attacking, if both of the following conditions are met:
- The cavalry unit did not begin its movement phase in an enemy zone of control.
- The cavalry unit did not leave any hex in an enemy ZOC during its movement.
[9.10.2] Place a charge marker on a charging cavalry unit to distinguish it from cavalry units that did not charge. The marker is removed following resolution of the attack (or at the end of the combat phase if no attack was made).
[9.10.3] Charge factors may be used to attack units in all terrain types except one: Russian cavalry units may not use charge factors to attack across fortification hexsides from their face hexes.
[9.10.4] Charge factors may only be used for attack, never for defense.
[9.10.5] Charging cavalry may attack in conjunction with units not using (or having) charge factors.
[9.10.6] If a cavalry unit uses its charge factor in an attack, then the charge factor is used to determine combat losses. Two-step charging cavalry units taking partial losses use the difference in the charge factor printed on both sides of the counter. (Note: the Russian 8th Cavalry Division does not have a charge factor on its inverted side; for partial losses in this instance, the difference between the charge factor of the two-step side and the combat factor of the inverted side is used.)
[9.11] Explanation of Combat Results
- A# - Attacker retreats all attacking units back # hexes, as per Retreats (9.13).
- A1/2E - Attacker 1/2 Eliminated. The attacker must remove units whose total attack factors at least equal one half the total attack factors of the attacking units (Combat Losses, 9.12).
- A1/2X - Attacker 1/2 Exchange. The attacker must remove units whose total attack factors at least equal one half the total defense factors of the defending units (Combat Losses, 9.12).
- - (dash) Contact. The units remain in contact; no losses are suffered on either side. In the next player turn, the defender may decide to remain and attack, becoming the attacker (more units can join this attack), move out, or remain without attacking.
- D# - Defender retreats all defending units back # hexes, as per Retreats (9.13).
- D1/2E - Defender 1/2 Eliminated. The defender must remove units whose total defense factors at least equal one half the total defense factors of the defending units (Combat Losses, 9.12).
- DE - Defender Eliminated. All defending units are eliminated and removed from the map (Combat Losses, 9.12).
- X - Exchange. All defending units are eliminated. The attacker must remove units whose total attack factors at least equal the total defense factors lost by the defender (Combat Losses, 9.12).
- 1/2X - 1/2 Exchange. The defender takes losses as in D1/2E. The attacker must remove units whose total attack factors at least equal the total defense factors lost by the defender. (Combat Losses, 9.12).
- # - Number of movement points granted the attacking units for an advance after combat (9.15).
[9.12] Combat Losses
Some units have multiple strengths, or "steps," of different values. When a loss occurs, two-step units may flip to their inverted sides, with the difference in the appropriate strength factor contributing to the loss requirement.
Example: A Polish 7-4-7 infantry unit attacks a Russian 5-3-7 infantry unit at 7:3 odds (which reduce to 2:1). A "6" is rolled, calling for an exchange. The 5-3-7 is eliminated, and the Polish player must lose three attack factors to match the Russian three defense factor loss. The Polish player may satisfy this requirement by flipping the 7-4-7 to its 4-2-7 side. Note that if, for some reason, the Polish player had to lose four attack factors, the entire 7-4-7 would have to be removed.
[9.12.1] Whenever a player's units suffer a result calling for the loss of half of the force (D1/2E or A1/2E), the player may choose to satisfy this requirement by inverting all of the involved units. All one-step and inverted units are eliminated, and all two-step units flip to their inverted sides. This is allowed even though the actual factors lost may be less than one half the total. Alternately, players may choose to calculate losses normally. In general, players are urged to choose the option that results in fewer losses to their forces.
[9.12.2] Units to be reduced/eliminated are selected by the owning player. Losses can only be taken from units involved in the battle (exceptions: overstacked defending units are eliminated in a DE result; overstacked attacking units are eliminated if all attacking units are eliminated, 5.1.5). A player may elect to lose more factors than required in order not to lose a particular unit. In attacks against fortifications, losses are always assessed at face (non-doubled) values. Fractional losses are rounded up (1/2 of 3 is 2, 1/2 of 1 is 1, etc.).
[9.13] Retreat After Combat
[9.13.1] Units retreat the number of hexes indicated on the combat result, following the priorities listed in 9.13.4.
[9.13.2] Units are retreated individually. Movement points are not considered, and a unit may exceed its movement allowance during retreat.
[9.13.3] The owning player chooses the path of retreat if more than one path is available.
[9.13.4] Retreat Priorities:
- A unit must retreat the full number of hexes indicated, without entering the same hex twice. If this priority cannot be met, the unit is eliminated (exception: Map Edges, 17.3).
- A unit must attempt to end its retreat the furthest number of hexes away from its original position as possible. There is no penalty, however, if it is impossible to meet this priority.
- A unit must attempt to end its retreat in compliance with the stacking limits. Priority 1 or 2 may force units to overstack (Stacking, 5.0).
- A unit should retreat towards an appropriate supply source. Polish units should retreat towards any city on the Polish NRN that is functioning as a supply source. Russian units should retreat towards the east edge of the map.
- Russian units should attempt to stay in command (Russian Fronts, 12.0).
- There is no requirement for a retreating unit to avoid enemy ZOC. However, there is a risk involved in retreating through enemy ZOC. Therefore, players may attempt to avoid enemy ZOC, but only if the above five priorities are not violated.
[9.13.5] The priorities must be followed in strict order. For example, if Priorities 2 and 3 cannot both be met, then Priority 2 has precedence.
[9.13.6] Units may retreat over or onto friendly units but not enemy units. Friendly units do not negate enemy ZOC for purposes of retreat (4.4.2).
[9.13.7] Units may never retreat through all-sea hexsides.
[9.13.8] Any unit ending its retreat stacked with friendly units that are subsequently involved in combat is considered to be overstacked for the remainder of the combat phase and suffers the penalties for overstacking (5.1.5), whether or not overstacking has actually occurred. The units already in the hex are not adversely affected if true overstacking has not occurred; only the units that retreated.
[9.14] Losses During Retreat
[9.14.1] Retreating units which enter enemy ZOC may suffer full or partial elimination. All enemy delay factors of each hex into which the unit retreated are totaled. Friendly units occupying a hex of the retreat do not negate the enemy delay factors exerted into that hex; these delay factors have full effect against retreating units. The delay factors are counted for each hex entered by the retreating unit; thus, the delay factors in the hex where the retreat originated are not counted. All enemy delay factors are counted, not just the greatest value exerted in a hex. If a unit retreats into two or more hexes in the ZOC of the same enemy unit, then that unit's delay factor is counted that number of times.
[9.14.2] After totaling the enemy delay factors, one die is rolled for each retreating unit, and the ZOC Retreat Table is consulted. The die roll is cross-referenced with the appropriate delay factor column to produce a result, which is applied immediately.
[9.14.3] The die roll for the ZOC Retreat Table is modified by the supply state of the retreating unit. If the unit begins the retreat unsupplied, subtract 1 from the die roll. If the unit ends the retreat unsupplied, subtract 1 from the die roll. These modifications are cumulative. Modified die roll results below 1 are treated as 1.
[9.14.4] Explanation of results:
- - (dash) No Effect. The unit retreats without loss.
- 1/2E Half Eliminated. A one-step or inverted unit is eliminated. A two-step unit is inverted.
- E Eliminated. The unit is eliminated and removed from play, even if a two-step unit.
Example: The Polish infantry brigade is defending and receives a "D3" combat result. The Polish unit must retreat 3 hexes towards a friendly supply source (NRN hex 1012 will be the retreat destination). The retreating unit determines the total delay factors along its optimal path of retreat. The first hex has a delay factor of 1, the second has a delay factor of 1, and the third has no delay factors. Note that if the unit attempted to retreat into hexes 1110 or 1011, the delay factors would have been 5 and 4, respectively, due to the two Russian divisions occupying hex 1010. Note also the Russian cavalry regiment in hex 1309 has no ZOC and therefore does not contribute any delay factor for the first retreat hex (1211). The unit begins its retreat in supply as it has sufficient movement factors to trace a non-rail supply path to NRN hex 1012 (10.5.2) - and this rail network can reach an exact supply source (10.5.3, 10.5.5). There is no die roll modifier as the unit begins and ends its retreat move in supply. The Polish player rolls on the ZOC Retreat Table using the '2-3' column. He rolls a "4" which results in a successful retreat with no losses incurred.
[9.15] Advance After Combat
[9.15.1] If the defender's hex is vacated due to combat, either as a result of retreat or elimination, the attacking unit(s) may immediately advance into the vacated hex and possibly beyond.
[9.15.2] If the attacker's hex(es) is vacated due to combat, either as a result of retreat or elimination, the defending unit(s) may immediately advance into the vacated hex and possibly beyond.
[9.15.3] Advance after combat is always voluntary. All, some, or none of the units involved in a battle may advance.
[9.15.4] Units advancing may not violate stacking limits at the end of the advance, but may during the advance.
[9.15.5] The advance is stated as a number of movement points (not hexes as in most games) that each victorious unit receives; a unit may spend these points in the standard movement type, paying all terrain and ZOC costs.
[9.15.6] A unit may not exceed its printed movement factor in an advance, despite the number of movement points that are awarded for an advance (exception: 9.15.7).
[9.15.7] The first hex entered in an advance must be the enemy's vacated hex. If more than one hex is vacated (as when an attacker retreats), then any of the vacated hexes may serve in this function. Advancing units may always enter the vacated hex; even if they were awarded insufficient movement points to do so, they may spend the entire award and enter the vacated hex.
[9.15.8] Each unit is advanced individually, not as a stack.
10.0 Supply
General Rule
Supply affects a unit's ability to attack, defend, and retreat; supply has no effect on movement or ZOC. To avoid adverse die roll modifiers, all units involved must be able to trace supply to a friendly supply source at the instant of combat. Units are said to be either supplied or unsupplied depending upon their ability to trace supply to a friendly supply source.
[10.1] Russian supply sources are any eastern map edge hex, or any hex on the northern edge of the map east of hex 3301 (inclusive) if friendly. Each Russian supply source can supply an unlimited number of units. This is denoted on the map by a white and red supply symbol with a "U" in it in each supply source.
[10.2] Polish supply sources are any city on the Polish NRN, or any of the three specially-marked rail hexes on the western edge of the map.
[10.3] Polish supply sources can supply only a limited number of units. Warsaw may supply up to eight divisions, each city on the Polish NRN may supply up to four divisions, and each of the three rail hexes may supply up to four divisions. This is denoted on the map by a white and blue supply symbol with a number in it in each supply source. For supply purposes, a brigade counts as 1/2 of a division, and any other non-divisional unit counts as 1/4 of a division. Excess supply capacity cannot be stored for use in later turns.
| Symbol | Definition | Divisional Supply Cost |
|---|---|---|
| XX | Division | 1 |
| X | Brigade | 0.5 |
| III | Regiment | 0.25 |
| II | Battalion | 0.25 |
[10.4] A supply source physically occupied by an enemy unit cannot provide supply for any unit. A supply source in an enemy ZOC functions normally.
[10.5] Tracing Supply
[10.5.1] A supply line is a path of hexes traced from a unit to a supply source. A supply line may have up to two components: a rail element and a non-rail element. These elements may be arranged in one of the following ways:
- a non-rail element from a unit to a supply source;
- a rail element from a unit to a supply source; or,
- a non-rail element from a unit to a rail element to a supply source.
Any other combination of elements is not allowed. Specifically, it is not permitted to trace a non-rail element once a rail element of a supply line has been traced.
[10.5.2] The non-rail element of a supply line is traced from a unit to a supply source or to the start of a rail element. This non-rail element may not exceed 15 movement points in length. This path can be traced through an enemy ZOC, paying the enemy ZOC (delay factor) and standard movement costs. For purposes of tracing supply, a friendly unit negates the effects of enemy ZOC in the hex it occupies (thus negating the delay factor cost when tracing the supply path).
[10.5.3] The rail element of a supply line must be traced to a supply source. This element may be of any length, but it must be entirely along a railroad (as defined under Strategic Movement, 8.3). The path may be as convoluted as necessary and may pass over any combination of rail nets. Supply cannot be traced through an enemy ZOC on the devastated or enemy NRN; however, a friendly unit negates the effects of enemy ZOC in the hex it occupies for the purpose of tracing supply. A supply line can be traced through enemy ZOC on the friendly NRN.
[10.5.4] Supply may never be traced into or through an enemy occupied hex.
[10.5.5] Polish units must trace a line to the exact source providing supply, due to the fact that each Polish supply source has a limited capacity. This becomes crucial when a pocket of units has only a few sources available or if the Russians have occupied a substantial number of Polish supply sources.
[10.6] Effects of Being Out of Supply
[10.6.1] If any of an attacker's units in a battle are unsupplied, then 1 is subtracted from the combat resolution die roll.
[10.6.2] If any of a defender's units in a battle are unsupplied, then 1 is added to the combat resolution die roll.
[10.6.3] A retreating unit must check its supply status at the start and end of its retreat. If the unit is out of supply, an unfavorable die roll modifier applies when using the ZOC Retreat Table (Losses During Retreat, 9.14).
[10.7] Special Cases
[10.7.1] An armored train (14.0) may trace a non-rail element supply line even though the armored train itself is prohibited from leaving a rail line.
[10.7.2] River flotillas and replacement counters are always supplied; they never need to trace a supply line. (Flotillas carry an intrinsic supply symbol.)
[10.7.3] Russian West Front units are always supplied on the first turn following a completed Standdown (23.4.7).
11.0 Russian Withdrawals
At various times, as indicated on the turn record chart, the Russian player is required to withdraw specific units from play. During the Reinforcement and Replacement phase (7.0) of the indicated turn, the specified units are removed from the map; the units are not required to move to a map edge. Units are withdrawn even if they are unsupplied and/or surrounded by enemy units.
[11.1] On the June I turn, the 15th (7-5-7) and 29th (8-6-7) Infantry Divisions of the West Front must be withdrawn. Also, the total factors withdrawn must at least equal 15 attack factors. If the 15th and 29th no longer equal this amount, then additional West Front units must be withdrawn to make up the difference. Two step units may be inverted to help meet the requirement.
[11.2] On the September IV turn, the Konarmiya (13 units) must be withdrawn. The withdrawal requirements are divided by unit type:
- Konarmiya Cavalry: All seven Konarmiya cavalry units must be withdrawn. Also, the total cavalry factors withdrawn must at least equal 18 attack factors. If surviving Konarmiya cavalry units do not meet this requirement, then the difference must be met by withdrawing other Southwest Front cavalry units. If the total still cannot be met, then all cavalry replacement factors arriving on subsequent turns must be applied against this deficit until the requirement is met.
- Konarmiya infantry and armored cars: Both of these units must be withdrawn, if they are still in play. There is no requirement to withdraw a specific amount of factors.
- Konarmiya Armored Trains: These units are not differentiated from other Southwest Front armored trains. A total of four of these trains must be withdrawn, but the Russian player may use Southwest Front armored trains that were eliminated in previous turns as part of the total. Example: By the September IV turn, the Southwest Front has had three armored trains eliminated. Thus, only one armored train must be withdrawn with the Konarmiya
[11.3] Units specifically designated to be withdrawn may never return to play, nor may they be recreated or replaced after their scheduled turn of withdrawal. Other units (if any) that were removed to meet a required factor total may re-enter play through the off-map replacement procedure (7.2.3).
12.0 Russian Fronts
[12.1] The Russian forces are divided into two commands, or fronts. The West Front operates on the northern half of the map; the Southwest Front on the southern half. The units of the two fronts are distinguished by the color of the unit type: West Front units are white printing on red counters, and Southwest Front units are black on red. The two fronts have only a limited ability to co-operate.
[12.2] The front boundary line, running from the east map edge to the Bug River, divides the two Russian commands. Western Front units more than two whole hexes south of the line are out of command; Southwestern Front units more than two whole hexes north of the line are out of command. Note that when the line crosses through the center of a hex, dividing it into two halves, the resulting partial hex does not count toward determining a unit's distance from the front boundary (see illustrated example).
Example: West Front units shown. 3-2-7 is in command as there are no restrictions when operating west of the Bug River. 4-3-7 is in command because it is within two whole hexes of the front boundary line. Only the 6-4-7 is out of command as it is more than two whole hexes south of the front boundary line.
[12.2.1] The front boundary line extends only to the Bug River; Russian units are free of all front restrictions when operating west of the Bug River.
[12.3] Out of Command
[12.3.1] Units which are out of command due to violating the front boundary line may not attack. Units out of command are always considered to be unsupplied, even if the units are able to trace a supply line.
[12.3.2] Units may never voluntarily move out of command. Thus, the only way out of command status can occur is when a unit is forced to retreat out of command due to the retreat priorities. (Note that units retreating out of command will end their retreat unsupplied, should the ZOC Retreat Table need to be consulted.) Units that retreat out of command must attempt to regain command as soon as possible in subsequent Russian movement phases.
[12.3.3] Note the normal state of units in play is that they are in command at all times. The command rules regarding the front boundary are an exception to this general rule.
[12.4] Inter-Front Non-Cooperation
[12.4.1] Units of different fronts may not voluntarily stack together. If forced to stack together due to a retreat, then the units of one front (Russian player's choice) must be considered to be overstacked, regardless of their actual condition.
[12.4.2] Units of different fronts may not combine in an attack. Furthermore, they may not make separate attacks against the same defending units. In other words, when units of both fronts are adjacent to an enemy-occupied hex, only one battle may be fought against those enemy units, and only the units of one front may participate in the attack.
[12.4.3] Galician and Ukrainian units under Russian control are considered to belong to the Southwest Front. Lithuanian units under Russian control belong to the West Front. Russian reserve divisions and replacement counters belong to neither front and ignore all front restrictions.
13.0 Polish Substitution
[13.1] During the Polish Reinforcement and Replacement phase (7.0) of the July II turn, or on any turn thereafter, the Polish player may create the 21st Mountain Division. In order to do this, the 4th Mountain Regiment and the full-strength Rybak Mountain Brigade must be stacked together. The Polish player removes these two units and places the 21st Mountain Division in their hex.
[13.2] The substitution may occur in any hex under any conditions.
[13.3] The newly-created unit may move and engage in combat normally in the following phases.
[13.4] Once the substitution is made, it cannot be reversed; the 4th Mountain Regiment and the Rybak Mountain Brigade may never be returned to play.
14.0 Armored Trains
[14.1] Armored trains may only move along railroads (as defined under Strategic Movement, 8.3).
[14.2] Armored trains may only use standard or NRN movement modes; they may not use strategic movement. When using standard movement, they pay one movement point per (rail) hex entered; they must pay an additional movement point to cross a river hexside.
[14.3] They may enter enemy ZOC, paying the appropriate ZOC costs.
[14.4] Armored trains may not combine standard and NRN movement in the same turn.
[14.5] An armored train retreating after combat along its own NRN ignores all enemy ZOC exerted into the NRN hexes. Thus, the armored train would not consult the ZOC Retreat Table in this case. An armored train advancing after combat along its own NRN ignores all enemy ZOC in the NRN hexes.
[14.6] Armored trains must retreat in accordance with the priorities given in 9.13.4, but only in so far as these priorities may be followed along a rail line. If all rail routes of retreat are blocked, then a retreating armored train is eliminated instead.
[14.7] An armored train may attack into any adjacent hex. An armored train may only advance after combat along a railroad. If it cannot advance into the enemy's vacated hex due to the preceding, then it may not advance.
15.0 Rail Nets
General Rule
There are three types of railroads on the map, forming an interconnected system. The Polish NRN consists of the specially-marked rail hexes in the western portion of the map. The Russian NRN is composed of the specially-marked rail hexes in the eastern portion of the map. In between the two is the devastated rail net (see the Terrain Effects Chart).
Cases
[15.1] The devastated rail net is the portion of the Eastern European rail system that was extensively damaged during World War I. Although not totally destroyed, it is less useful than the two NRNs. The devastated rail net may be used by armored trains and units in the strategic movement type. This net cannot be used for NRN movement, nor may it be added to a player's NRN.
[15.2] Rail lines cannot be destroyed. The only way to prohibit enemy use of a rail line is to physically occupy the rail hexes with units.
[15.3] While a bridge exists everywhere a rail line crosses a river hexside, the additional movement point cost to cross the river is not negated by the bridge. This is due to the effects of World War I, which left the bridges in this area of the world in a precarious condition. For game purposes, bridges cannot be repaired or further destroyed.
[15.4] Railroads in the German areas of the map (Germany, East Prussia, and Danzig) are marked as part of the Polish NRN. However, the Polish player may not use these railroads except in certain specific optional rules. As a special case of the preceding, the rail line in hexes 0402, 0501, and 0602 may not be used for Polish NRN movement, except in the aforementioned optional rules.
16.0 Flotillas and Marines
General Rule
Flotillas represent collections of river craft that were used for military purposes during the Russo-Polish War. As such, they operate under special rules for movement and combat. Marines are land units that have the capability of operating with the flotillas.
Procedure
Flotillas may only move in hexes that are adjacent to certain rivers. Both Russian flotillas and the Polish Pinsk flotilla may move anywhere along the Dnepr River and any rivers connected to the Dnepr. The Polish Vistula flotilla may move anywhere along the Vistula River and any rivers connected to the Vistula. However, flotillas may not proceed beyond any flotilla movement limit markers on the map.
Within these bounds, flotillas have unlimited movement ability. Flotillas may move through enemy ZOC but may not enter or move through hexes occupied by enemy units (e.g., Russian units in hexes 0711 and 0712 would prevent the Polish flotilla from moving to Torun from Modlin).
Flotillas are always supplied. Flotillas do not have ZOC.
Individual flotilla units are based in and generally limited to either the Dnepr or Vistula watersheds; however, the Dnepr-Bug Canal linked the two river systems between Brest-Litovsk and Pinsk. The Canal is marked on the map as a short stretch of river with flotilla movement limiter markers at either end (between hexes 2317 to 2718). During 1920 the Canal was shallow and poorly maintained, so normal flotilla travel along it is prohibited. Players may attempt to use the Canal for flotilla movement but they risk grounding its vessels and permanently losing the flotilla unit in the attempt (Case 16.6). For non-flotilla units, the Canal is treated as a normal river hexside for all purposes of movement and combat.
Cases
[16.1] A flotilla may only attack adjacent enemy units that occupy hexes into which the flotilla is permitted to move.
Example: a flotilla in hex 4530 could attack into hexes 4430, 4529, 4630, or 4631, but not into hexes 4531 or 4431.
[16.2] A flotilla may be attacked according to the normal provisions of the combat rule, and it receives the defensive benefit of the terrain of the hex it occupies. Flotillas may attack enemy flotillas, alone or jointly with other units.
[16.3] If a flotilla is forced to retreat, it may simply move to any other hex within its movement restrictions; the ZOC retreat table and the specified retreat distance are ignored. It may not retreat into or through an enemy occupied hex. The flotilla is eliminated if it is unable to retreat at least one hex.
[16.4] A flotilla may never advance after combat.
[16.5] The Russian flotilla received as a reinforcement must enter in hexes 5133 or 5134. If Polish units occupy these hexes, then the entry of the flotilla must be delayed.
[16.6] Passage of the Dnepr-Bug Canal by flotilla units can be attempted only during the movement phase, or in an attempt to retreat as a result of combat, only during game turns in the months of April, May, and June. In all other game turns, the Canal is completely impassable to flotillas.
To attempt passage, move the flotilla unit to either end of the Canal as indicated on the map and roll a die. On a result of 1-2, the flotilla is successful in traversing the Canal, and may proceed normally. On a roll of 3-6, the flotilla is immediately eliminated. If a marine unit is traveling with the flotilla, it is considered to have disembarked at the moment the flotilla is eliminated.
[16.7] Marines
[16.7.1] If a flotilla and a marine unit begin the movement phase stacked together, the flotilla may transport the marine unit. The flotilla moves as normal, but the marine unit may not move by itself. The flotilla may disembark the marines at any point during its move. Both the marines and the flotilla may attack in the following combat phase. If both a marine unit and a flotilla are required to retreat from a battle, then the retreating flotilla may transport the marines. This satisfies the retreat requirement for the marines.
[16.7.2] Marines do not trace supply in the manner described in Supply (10.0). Instead, they trace supply to a friendly flotilla. Marines more than two hexes from a flotilla are automatically unsupplied; they are supplied if they can trace a supply line of two hexes (not movement points) or less to a flotilla. Enemy units, but not their ZOC, block this supply line.
17.0 Map Edges and Borders
General Rule
Various on-map actions may lead to certain off-map reactions. These reactions, in part, allow certain reinforcements to enter play in advance of their scheduled turn of entry. Once brought into play, these units remain in play, even if the situation that caused their entry subsequently changes.
Cases
[17.1] Russian Reaction
[17.1.1] If, at the start of any Russian Reinforcement and Replacement phase, there is a Polish unit east of the Russian Reaction Line (denoted by a red dotted line, see the Terrain Effects Chart), then the Russian player has his replacement rate doubled for that turn. In addition, the Russian player receives a reserve division as a reinforcement. For this rule, reserve divisions are taken in inverse order of appearance; i.e., the reserve division of the October I turn is taken first, then the one of the September IV turn, etc.
[17.1.2] This reaction occurs every turn a Polish unit is in the triggering area during the appropriate phase. Polish units do not trigger a reaction if they were in the area but left it (e.g., through advance after combat) before the start of the Russian Reinforcement and Replacement phase. The Polish player may voluntarily eliminate any unit of his that is forced to retreat into the triggering area.
[17.2] Latvian Border Garrison Reaction
[17.2.1] The Latvian border garrison is composed of three West Front infantry divisions, as identified on the various Russian setup charts. These units are released to enter play if, at the beginning of any Russian Reinforcement and Replacement phase, there is a Polish unit north of the Dvina River. These units enter play in any hex on the northern map edge east of hex 3801 (inclusive).
[17.2.2] Two of the garrison units are received as regular West Front reinforcements during the course of the game. The third unit can only enter play in response to Polish units crossing the Dvina, as described above.
[17.3] Map Edges
[17.3.1] No unit may voluntarily move off the edge of the map. However, units may retreat off the map edges in response to the retreat priorities. Russian units may retreat off the northern, eastern, or southern map edges; they are eliminated if they retreat off the western map edge. Polish units may retreat off the western map edge, but they are eliminated if forced to retreat off any other map edge. Units retreating off a map edge must return to play in the following friendly movement phase; they return by entering any hex on the same map edge off which they retreated.
[17.3.2] The southern map edge is divided into two zones by the Romanian border. Units retreating off the map in one zone must re-enter in the same zone that they were forced to exit.
[17.4] Borders
[17.4.1] Any unit that enters Romania, Czechoslovakia, Germany, Danzig, or East Prussia is interned. The unit is permanently removed from play. A unit that retreats off a map edge may not re-enter play within these areas. The rail lines of these areas may not be used for movement or supply purposes. (Exceptions: Optional Rules 24.8, 24.10, 24.11)
[17.4.2] Non-Lithuanian units may freely cross the Lithuanian border and operate inside Lithuania. However, at the end of every combat phase, all non-Lithuanian units are eliminated. Thus, players may move through or even fight in Lithuania as long as their units are outside that country at the end of the combat phase. The Lithuanian border does not block or inhibit ZOC of any unit. The Lithuanian rail lines may not be used for the purpose of tracing supply.
18.0 Warsaw Fortifications
General Rule
The Warsaw fortifications are the five fortification hexes printed on the map. Polish units in a fortified hex have their defense factors doubled if attacked across a fortification hexside, in addition to all other terrain effects. For example, if a Russian unit attacked into Warsaw from across the Vistula River, then the Polish units would be doubled for defense and 2 would be subtracted from the die roll. Only Polish units benefit from the fortifications.
Cases
[18.1] The fortifications are permanent and cannot be destroyed. Polish units always receive the full defense benefit of the fortifications, even if the hex was previously occupied by Russian units.
[18.2] Units with a movement factor of 0 (Zero Movement Factor Units, 19.0) have unlimited movement within the five-hex fortification zone. They may ignore enemy ZOC but may not enter an enemy occupied hex. They may never move out of the fortification zone. They are subject to the normal combat rules, except that they may only retreat or advance after combat within the zone. If a retreat forces them outside this zone, they are eliminated instead.
[18.3] Other than 18.2, the fortifications have no effect on movement.
19.0 Zero Movement Factor Units
General Rule
The Polish player has ten units that have a movement factor of 0: two garrison units, one artillery unit, and seven militia units. These units may not use any movement type, although such units in the fortification zone are granted a limited movement ability (18.2). These units may engage in combat normally, but they may not retreat or advance after combat outside of their restricted movement area. If forced to retreat outside of the allowed movement area, the units are eliminated instead.
Cases
[19.1] Each of the two garrison units has a city name as its unit identification; if recreated through the replacement procedure (7.2.3), the garrison unit must appear in its named city. If the city is enemy occupied, then the garrison unit may not be recreated.
[19.2] The militia units, which appear via the Polish Rally Table (22.0), may appear (and be recreated) in any Polish city on the Polish NRN.
20.0 Moto-Mechanized Units
General Rule
Armored car, tank, and mechanized infantry units are collectively known as moto-mechanized (MM) units. The Polish player has a number of these units, and they must conform to the restrictions below. The Russian player has one MM unit, the Konarmiya armored car unit; this unit functions exactly as a cavalry unit and ignores the provisions of this rule. (Polish MM units are identified by a color band; the Russian Konarmiya armored car is treated as Cavalry, no color band.)
Cases
[20.1] Movement
[20.1.1] Polish MM units ignore all enemy ZOC for all purposes (movement, supply, advances, retreats, etc.). Terrain affects Polish MM units somewhat differently than other units. See the TEC for details.
[20.1.2] Standard Movement: MM units must pay double the terrain costs for all terrain types except clear terrain and city. They pay the standard cost for clear terrain and city.
Example: The Polish 1st Armored Car Battalion (2-1-8) is in hex 2116. It conducts standard movement to hex 2115, paying 4 MPs (forest), and then to hex 2114, paying 1 MP (clear). It ends its move by entering hex 2113, paying 3 MPs (2 for crossing the river and 1 for clear). It has used a total of 8 MPs, expending all of its movement factors for the turn.
[20.1.3] Strategic Movement: MM units have their movement factors doubled. When moving along a railroad, they pay one movement point for each hex entered and two extra movement points to cross a river. When moving off-rail, all terrain costs are double the cost paid by MM units using Standard movement. Thus, an MM unit using Strategic movement would have to pay eight movement points when entering a forest hex.
[20.1.4] NRN Movement: MM units have no special rules for this movement type; they follow the provisions of 8.4.
[20.2] Supply
The Standard movement rules (20.1.2) are used when tracing the off-rail element of a supply line for an MM unit. Thus, enemy ZOC are ignored, but the higher terrain costs must be paid (20.1.2).
[20.3] Breakdowns
[20.3.1] During the Polish Reinforcement and Replacement phase of each turn in which there is at least one Polish MM unit on the map, the Polish player must determine the effects of MM breakdowns. A die is rolled for each MM unit in play; on a roll of 1 or 2, the unit loses a step. (Since most MM units have only one step, this will result in the loss of the unit.) Each unit is checked only once per turn.
[20.3.2] If three steps have already been lost due to breakdowns in a turn, then no other MM unit need be checked for breakdown on that turn.
[20.3.3] The Polish player determines the order in which the MM units will be checked for breakdown.
[20.3.4] The Polish player never rolls for breakdowns on the first turn of any scenario.
[20.3.5] Polish MM units arriving as reinforcements are not checked for breakdown on the turn of their appearance.
[20.3.6] Units not on the map, whether in play or not, are not checked for breakdown.
[20.3.7] The supply status of a MM unit has no effect on breakdown.
21.0 Allied and Other Units
Commentary
Alongside the regular Polish and Russian Armies, there were other nationalities and special formations. These are described below.
General Rule
Unless specifically stated otherwise, all references to Russian units also applies to the Lithuanian, Galician, and Ukrainian units under the Russian player's control. Likewise, all references to Polish units also apply to the Galician, Ukrainian, Belarusian, and Lithuanian-Belarusian units under the Polish player's control. These allied units may move, engage in combat, and stack with the controlling player's other units, unless expressly forbidden below.
Cases
[21.1] Ukrainians
[21.1.1] The Ukrainians have four units. These units may be controlled by either player (but never by both simultaneously). The Ukrainians begin all scenarios under Polish control. Control may switch between the players any number of times. Note that each player has a set of Ukrainian counters; be sure and use the correct counter set depending on who currently controls the Ukrainians.
[21.1.2] The Ukrainians are commanded by the player who controls, or was the last to control, the cities of Lwow and Kiev simultaneously. Kiev is controlled by the player whose combat units occupy the city or were the last to occupy the city. Lwow is controlled by the Russian player only if a Russian unit occupies Lwow; at all other times, the city is under Polish control.
[21.1.3] A player loses control of the Ukrainians when the opposing player simultaneously controls Lwow and Kiev. (Note that loss of just one of these cities would not switch command.) When a player loses command of the Ukrainians, all Ukrainian units are immediately removed from play. The new controlling player may subsequently re-introduce these units (21.1.4).
[21.1.4] During each friendly Reinforcement and Replacement phase of the controlling player, that player rolls one die for each of the Ukrainian cities he controls. For each 6 rolled, the player may choose one of the following options:
- He may bring into play any one Ukrainian unit. The unit appears in a Ukrainian city controlled by the player; the unit appears at its inverted strength.
- Any one inverted Ukrainian unit, anywhere on the map, may be flipped to its two-step side.
Should all Ukrainian units be in play and all at full-strength, then excess steps gained in this manner are lost.
[21.1.5] Ukrainian units may only enter play in the manner so described. However, once in play, these units may receive on-map replacements from the controlling player.
[21.2] Lithuanians
Although controlled by the Russian player, Lithuanian units may not stack or combine in attack with Russian units. Lithuanians are always supplied in their country. Outside their country, they are supplied if they are within four hexes of the Lithuanian border and can trace a non-rail element supply line to any hex in Lithuania. They may not trace a rail element supply line. Lithuanian units may never be replaced or recreated.
[21.3] Belarusians
The Belarusian and Lithuanian-Belarusian units are integral parts of the Polish forces and have no special rules.
[21.4] Polish Legion and Volunteer Divisions
The Polish Legion and Volunteer divisions have no special properties except that Polish Legion cavalry regiments may be recreated at a cost of one replacement factor instead of two (7.2.3.1).
[21.5] Polish Frontier Guard Cavalry Units
The Polish player has a number of frontier guard cavalry regiments which begin most scenarios on specific hexes along the East Prussian and Lithuanian borders. These units may not move or attack until released. Units are released individually, whenever a Russian unit moves within five hexes of the frontier guard regiment. Lithuanian units do not release these guards until a Lithuanian unit crosses or attacks across the Lithuanian border.
[21.6] Galicians
The Galicians only appear in the Campaign Game (23.4).
22.0 Polish Rally
General Rule
If, at the beginning of any Polish Reinforcement and Replacement phase, there are Russian units totaling nine or more attack factors in central Poland, then the Polish rally begins. Central Poland is defined as any hex within eleven hexes of Warsaw; this can be seen on the map as a light-blue dotted line labeled "Central Poland." When totaling the Russians in central Poland, count Russian cavalry units at half factor, retaining fractions.
Cases
[22.1] The Polish rally occurs on the turn it was triggered and during the Polish Reinforcement and Replacement phase of the next two turns. The Polish player receives six units per turn of rally as rally reinforcements; these are taken from the Polish Rally Table (PRT). Place the Polish Rally marker on the turn it occurs so that you can track the next two turns for added reinforcements.
[22.2] A die is rolled separately for each unit to be received; each die roll corresponds to one of the numbered rows on the PRT. The leftmost unit in a row is taken as a rally reinforcement.
[22.3] The Polish player continues to roll for rally reinforcements until he has received six units from the PRT in that turn or until there are no more units remaining on the PRT.
[22.4] Rally reinforcements appear as regular Polish reinforcements (7.0), with two exceptions:
- Units designated from Poznan must appear in hex 0111. If the hex is enemy occupied, then the appearance of these units must be delayed.
- The militia units may appear in any Polish-controlled city on the Polish NRN.
[22.5] Some of the units on the PRT are scheduled to appear as regular reinforcements. These units are removed from the PRT and enter play on their scheduled turn of appearance. During the Polish rally, units on the PRT that are scheduled to appear as regular reinforcements enter as such. Six units are still received as rally reinforcements.
[22.6] In addition to rally reinforcements, the Polish player receives six infantry and two cavalry replacement factors on each turn of the Polish rally. This is in addition to any scheduled replacement factors.
[22.7] The Railroad Reserve
[22.7.1] Beginning with the Polish rally and lasting for the rest of the game, the Polish player may create and maintain a railroad reserve. This reserve is formed by holding units off-map. During the Polish Reinforcement and Replacement phase, any arriving reinforcements, recreated units, and replacement counters may be placed in the reserve. Also, any Polish unit in play that is able to move to Warsaw or the three rail supply hexes via NRN movement may enter the reserve; remove the unit from the map. Any unit entering the reserve does not count against the two-division limit for NRN movement. Any number of units may be in the railroad reserve.
[22.7.2] Any or all of the units in the reserve may be brought back into play during a Polish Reinforcement and Replacement phase. They may appear as reinforcements (7.1), or alternately, they may appear in any Polish-controlled city that can trace a NRN line to Warsaw.
[22.7.3] Units may not both enter and leave the railroad reserve in the same turn. Units may leave the railroad reserve on any turn following their turn of reserve entry.
23.0 Scenarios and How to Set Up the Game
General Rule
There is a Set-up Chart for each scenario. Each of the Set-up Charts displays the units available for the scenario, their starting strengths, and their specified hexes or areas of deployment. (Note: for some scenarios, there is no set-up code provided in the colored circle. This is intentional.) The charts also list which units are considered to be eliminated prior to the scenario start; some may be replaceable (7.2) and some may be non-replaceable (7.2.5) and may not enter play.
There are two Turn Record Tracks; one for The Gates of Warsaw scenario (23.1) and one for the Campaign Game (23.4) and both Belarusian scenarios (23.2, 23.3). The Turn Record Track displays the scenario length and the entry of reinforcements. The replacement points received by both sides are given on a turn-by-turn basis. Finally, the chart indicates when the Konarmiya is to be withdrawn (11.0).
When deploying the units, players need only match the unit types and factors displayed. With one exception, it is not necessary to deploy the units according to unit identification. The exception is the Konarmiya, which must be deployed according to unit identification.
If units are listed as deploying in an area, rather than a specific hex, deploy the units as follows:
- All front-line hexes must be occupied by a unit or in the ZOC of a unit of that deployment area.
- Units may not deploy overstacked.
- Russian units may not start stacked with Galicians.
Certain units must begin in a specific hex. Overstacking in this case is allowed, but it must be corrected in the first friendly movement phase.
The Turn Record Track keeps track of the passage of game time, indicating when a scenario starts and ends. Replacement rates, reinforcements, and withdrawals are specified on this chart. The Gates of Warsaw scenario has its own Turn Record Track.
For a schedule of specific units arriving as reinforcements or needing to be withdrawn, refer to the Polish Reinforcement Chart and Russian Reinforcement and Withdrawal Chart for the specific units. Note: These charts apply for all scenarios except The Gates of Warsaw scenario.
Some scenarios have special rules listed under them; these rules apply only to those scenarios.
[23.1] The Gates of Warsaw
The Gates of Warsaw should be the first scenario played when learning the game. Both players must deploy their units as specified on the deployment charts; thus, order of deployment is inconsequential. Due to the nature of the historical situation, players will find this scenario tilted in favor of the Poles.
[23.1.1] The scenario starts on the August III turn. On this turn, the entire Russian player turn is skipped, so play begins with the Polish Reinforcement and Replacement phase. The scenario ends upon the conclusion of the October IV turn. The scenario is ten turns in length.
[23.1.2] The Polish rally has already occurred; thus, the Polish Rally Table (22.0) is not used. Polish player may create the railroad reserve (22.7) at any time.
[23.1.3] The Polish units in Plock and Modlin begin the game overstacked. This must be corrected during the first Polish movement phase.
[23.1.4] The Ukrainians begin the scenario under Polish control (21.1).
[23.1.5] All Polish frontier guards have been released from the provisions of 21.5. The Latvian border garrison has not been released, but it consists of only one unit in this scenario.
[23.1.6] There are no accumulated off-map replacement factors for either player.
[23.1.7] The units specified to be deployed in the Warsaw fortifications may be deployed on any fortification hex, but they may not overstack.
[23.1.8] Only The Gates of Warsaw Turn Record Track is used for this scenario. Reinforcements are included on this Turn Record Track; no reinforcement chart is needed.
[23.2] The Belarusian Scenario (Long Version)
[23.2.1] The scenario begins on the July I turn, starting with the Russian player turn. It ends upon the conclusion of the October IV turn. The scenario is sixteen turns in length. The Polish player deploys first.
[23.2.2] The Ukrainians begin the scenario under Polish control (21.1).
[23.2.3] The Polish frontier guards have not been released from the provisions of 21.5. The Latvian border garrison has not been released either.
[23.2.4] The Polish rally has not occurred.
[23.2.5] There are no accumulated off-map replacement factors for either player.
[23.2.6] The Standdown (Campaign Game, 23.4.7) is assumed to have ended on the June IV turn. Thus, the first turn of the scenario is the first turn following the Standdown. West Front units receive all post-Standdown effects.
[23.3] The Belarusian Scenario (Short Version)
This scenario follows all the rules and instructions of the long version with two exceptions:
- This scenario ends upon the conclusion of the Russian player turn of August IV. There are eight turns in this scenario.
- The victory conditions of 3.0 are not used. The Russian player wins if he has 17 or more VPs at the end of the scenario. The Russian player wins a Cataclysmic victory if he occupies Warsaw at any point during the game. If the Russian player does not win, the Polish player wins.
[23.4] The Campaign Game
[23.4.1] This scenario starts on the April IV turn. On this turn the entire Russian player turn is skipped, so play begins with the Polish Reinforcement and Replacement phase. The game ends upon the conclusion of the October IV turn. The game is twenty-five turns in length. The Russian player deploys first.
[23.4.2] The Ukrainians begin the scenario under Polish control (21.1).
[23.4.3] The Polish frontier guards have not been released from the provisions of 21.5. The Latvian border garrison has not been released either.
[23.4.4] The Polish rally has not occurred.
[23.4.5] There are no accumulated off-map replacement factors for either player.
[23.4.6] Polish-Ukrainian Relations
[23.4.6.1] The Polish player must occupy Kiev for any one full (Polish or Russian) movement phase by the end of the May III turn. If he fails to do so, he immediately loses control of the Ukrainians: all Ukrainian units are removed from play.
[23.4.6.2] If the Polish player loses control of the Ukrainians, the Russian player does not automatically gain control; instead the first player to simultaneously hold Lwow and Kiev gains control of the Ukrainians (21.1).
[23.4.6.3] If the Russians gain control of the Ukrainians before the May III turn, the provisions of this rule are ignored.
[23.4.7] The Standdown
[23.4.7.1] The Russian player must, no later than the start of the June II turn, declare a Standdown. The Standdown affects all West Front units: these units may move normally but are restricted in their ability to attack. For each attack made against West Front units, the West Front may make one retaliatory attack. Other than this, the West Front may not attack.
Example: The Polish player made three attacks on West Front units in the preceding turn; the West Front may make only three attacks in its turn.
[23.4.7.2] The Standdown lasts for three consecutive turns and cannot be interrupted. The Standdown can be declared at the start of any turn; if it has not been declared by the start of the June II turn, it must be declared on that turn.
[23.4.7.3] On the turn following the last turn of Standdown, West Front units regain their full attacking capabilities. On this turn (only), all West Front units are automatically supplied, regardless of position. On the next turn, and continuing for four consecutive turns (inclusive), West Front units ignore enemy ZOC for all movement purposes (including advances/retreats after combat).
[23.4.7.4] The Standdown can be declared only once per game.
[23.4.7.5] Southwest Front and Lithuanian units are not affected by the Standdown.
[23.4.8] The Galicians
[23.4.8.1] The Galicians begin under Russian control. They are deployed on specific hexes, and no unit may start stacked with them.
[23.4.8.2] The Galician Mutiny. At the end of the Polish player's first movement phase, the Galicians may mutiny. One die is rolled for each unit, with the following results:
| Roll | Result |
|---|---|
| 1-2 | Unit defects to the Polish player |
| 3-5 | Unit deserts and is removed from play |
| 6 | Unit remains loyal to Russian player |
Defecting Galician units are controlled by the Polish player for the rest of the game, starting with the combat phase following the Galician mutiny rolls. Loyal Galicians remain under control of the Russian player. Galician units may never be replaced or recreated. Note that each player has a set of Galician counters; be sure and use the correct counter depending on who currently controls each individual Galician.
[23.4.9] Northern Theater of Operations
[23.4.9.1] On the April IV, May I, and May II turns, Polish units may not move adjacent to West Front units. Likewise, West Front units may not move adjacent to Polish units in this same period.
[23.4.9.2] During this period, the Russian player must bring at least half of his available replacements of each type onto the map in the West Front command area.
[23.4.9.3] Russian on-map RCs may not be removed into the off-map pool until the May III turn.
24.0 Optional Rules and Variants
Commentary
Several game variants are presented below, covering a wide range of game options, historical possibilities, and some fairly implausible situations. Each may be used alone or with the others, unless otherwise noted.
[24.1] The Fall of Warsaw
For players who believe that the Poles, despite the catastrophic loss of their political and cultural capital, would not have caved in if Warsaw fell, this optional rule is presented.
[24.1.1] If the Russians occupy Warsaw at the end of any scenario, they win a Cataclysmic victory.
[24.1.2] If the Russians occupy Warsaw during a scenario, the game does not end. However, as long as Warsaw is occupied, the following conditions are in effect:
- All Polish units attack and defend as if they were unsupplied. There is no additional effect for those units that are actually unsupplied.
- Polish reinforcements appear as if Warsaw was isolated, but they may not appear in that city.
- The Polish rally, if in progress, is suspended until Warsaw is liberated from the Russians.
- The Polish player may not maintain a railroad reserve; he must bring all units in the reserve onto the map at the first opportunity.
- Polish units lose their ZOC.
[24.1.3] If the Poles retake Warsaw, all the negative effects of its fall (24.1.2) cease.
[24.1.4] If the Russians capture Warsaw on or before their September III turn, then the Konarmiya does not have to be withdrawn; it may stay in play for the rest of the game.
[24.2] Three-Player Game
In this variant, each Russian front is commanded by a separate player.
[24.2.1] The two Russian players are considered friendly and may not attack one another.
[24.2.2] Units of one front may not enter hexes containing units of the other front unless the controlling player permits such movement through the hex in question. However, units of one front may not end their movement in a hex occupied by the other front; rule 12.4.1 prohibiting stacking units of different fronts still applies.
[24.2.3] Units of either front may operate anywhere west of the Bug River (12.2), and the Inter-Front Non-Cooperation restrictions on movement and combat (12.4) are still in force.
[24.2.4] The three-player game may only be used with the Campaign Game (23.4) or Belarusian scenario (long version, 23.2).
[24.2.5] The victory conditions remain as normal. To determine relative Russian performance, compare each Russian player's VP total. If one is larger than the other, then that player has performed marginally better. If one is four or more points larger, then that player has performed substantially better. If one player captures Warsaw, he is declared a "Hero of the Soviet Union," and his compatriot gets sent on a military mission to Outer Mongolia.
[24.3] Polish Free Deployment (Belarusian Scenarios)
Allow the Polish player to adopt a more sensible deployment in the Belarusian scenario. All Polish units north of Babruysk may be deployed in any deployment area north of that city. Russian units must deploy as normal.
[24.4] Lithuanian-Russian Relations
[24.4.1] The Lithuanians begin the Campaign Game and Belarusian scenarios as neutrals. The Russian player may move Lithuanian units, but they may not move or attack across their border.
[24.4.2] The Lithuanians remain neutral until either:
- A Polish unit moves or attacks across the Lithuanian border, or
- The Russian player captures Wilno.
[24.4.3] On the game turn following the either occurrence of 24.4.2, Lithuanian units may operate, for the rest of the game, as described in 21.2. However, as long as the Russian player controls Wilno, this city must be garrisoned by a Lithuanian unit.
[24.5] Partisans in the Ukraine
When the Poles launched their April offensive, the Bolshevik situation in the Ukraine quickly became critical. Not only were the Poles advancing, but the Galician deserters were causing problems behind the Russian lines. Furthermore, the remnants of Denikin's White Army were still present off-map to the south, and the anarchist Makhno controlled an area off-map to the east. Therefore, on the entire May I turn, all Southwest Front units are unsupplied.
[24.6] Ukrainian Nationalism
The Polish occupation of Kiev in May 1920 marked the fifteenth change of regime that city had experienced in the last three years. As a result, the inhabitants were less than enthusiastic with attempts to set up a functioning Ukrainian state and army to help fight the Bolsheviks. Assuming that the Ukrainians were not so disillusioned, use the following rule for the campaign game.
If the Poles occupy Kiev for one full game turn, then all four Ukrainian units are brought into play at full strength in the next Polish Reinforcement and Replacement phase. All on-map Ukrainian units go to full strength at that time. This can occur only once per game.
[24.7] The Kosciuszko Squadron (KS)
A group of American pilots volunteered to help Poland against the Bolsheviks. Using abandoned German equipment, they flew on Poland's behalf throughout the war. A counter is provided to represent this squadron.
[24.7.1] In the Polish combat phase, the KS may be used to add 1 to the die roll in resolving one battle. At least one supplied Polish unit must be in this battle.
[24.7.2] At the start of the Russian movement phase, the Polish player may place the KS anywhere within three hexes of a supplied Polish unit. The KS has an effect of a 1 strength delay factor in the hex it occupies (only). The KS is removed from the map at the end of the Russian combat phase.
[24.8] Upper Silesia
Upper Silesia had been placed under Triple Entente administration, in preparation for a plebiscite there. The French president of the International Commission in Upper Silesia, General Le Rond, was strongly pro-Polish. It is possible that he would have allowed Polish rail transit through the area. Allow the Polish player to use the railroads in Upper Silesia as part of the Polish NRN. Katowice and Sasnowiec, however, are not considered to be Polish supply sources.
[24.9] Danzig
Entente shipments of munitions to Poland were quite important to the Polish war effort. These munitions were unloaded at Danzig and shipped into Poland. Therefore, allow the Polish player to trace a rail element supply line (only) to Danzig.
[24.9.1] Danzig may supply up to four divisions.
[24.9.2] The Russian player may declare a dock workers' strike in Danzig at the start of any turn. The strike lasts for four consecutive turns. During the strike, Danzig may not be used as a Polish supply source. The strike may be called only once per game.
[24.9.3] This module may not be used in the Gates of Warsaw (24.1) scenario.
[24.10] The Plebiscite Area
This variant assumes that the plebiscite in the Marienwerder-Allenstein districts of East Prussia had been held before the war and that the districts had voted to join Poland (quite unlikely). Add the Plebiscite Area of East Prussia to Poland. The railroads in this area are part of the Polish NRN. Allenstein (Olsztyn) and Marienburg (Malbork) are Polish supply sources.
This module may not be used in the Gates of Warsaw (24.1) scenario.
[24.11] The Freikorps (FK)
This variant assumes that Dmowski somehow managed to gain all his goals at the Paris Peace Conference. The Germans would not have accepted this situation, and it is likely that the Freikorps movement would have been active in this area. For game purposes, the FK is controlled by the Russian player.
[24.11.1] Add all of the German areas on the map (East Prussia, Danzig, Pomerania, and Upper Silesia) to Poland. The railroads in these areas are part of the Polish NRN, and the cities in these areas are Polish supply sources.
[24.11.2] FK units may operate anywhere on the map as regular units do; they are free of all Russian front restrictions.
[24.11.3] They are supplied if they can trace a non-rail element supply line to any hex on the west edge of the map or to any German city not occupied by a Polish unit. FK units may not trace a rail element supply line.
[24.11.4] The three Polish rail hex supply sources are inoperative.
[24.11.5] The Russian player receives 12 FK replacement factors on the May I turn. Thereafter, he receives 4 FK replacement factors per turn. Any FK unit not in play may be activated by spending the replacement factors. There are no FK RCs; any inverted FK unit may receive replacement factors if it is supplied. Russian units may not use FK replacements, and FK units may not receive Russian replacements.
[24.11.6] FK units enter the game by appearing in any hex on the western map edge. Also, they may appear in either Dansig or Konigsberg, provided that their city of appearance is not occupied by a Polish unit.
[24.11.7] No FK units are present at the start of the game. FK units appear only when the Russian player spends FK replacement factors to activate them.
[24.11.8] An FK unit exerting a ZOC into a hex in the East Prussia and Danzig areas has its delay factor doubled in those hexes (only).
[24.11.9] Add the following to the VP cities: Danzig - 2, Konigsberg - 2, Katowice - 1.
[24.11.10] Victory conditions remain as in 3.0. However, if a FK unit occupies Warsaw, then the game does not end. Instead, play continues under the provisions of 24.1.
[24.11.11] This optional rule cannot be used with any other optional rule except for 24.1, the Fall of Warsaw optional rule, which must be used with it.
[24.12] Objective: Warsaw
It is assumed that any sportsmanlike Russian player will go for a cataclysmic victory and try to take Warsaw. However, there are some timid souls who are willing to settle for half a babka, and they should be forced to play with the following rule.
[24.12.1] In the Campaign Game (23.4) and Belarusian scenario (long version, 23.2), the Russian player must attack the Warsaw fortified area with at least 30 attack factors or must take Warsaw. The attack on the fortified area may be made at any time and through any fortified hexside. It may be several attacks occurring on different turns, as long as a total of 30 factors eventually attacks. The attack does not have to succeed; it only need be made. If the Russian player does not make this attack, the level of victory is adjusted two levels in favor of the Polish player.
[24.12.2] In the Belarusian scenario (short version, 23.3), the Russian player must either capture Warsaw or make the attack and get 19 VPs to win, otherwise the Polish player wins.
[24.12.3] None of this applies to the Gates of Warsaw scenario (23.1). The Russians are assumed to have already made the attack and failed prior to the start of the scenario.
25.0 Historical Notes
The rulebook's Historical Notes section (pages 21-25: background essays on the Polish-Russian conflict and the 1920 campaign) is narrative and not transcribed here. The rulebook's counter-sheet reproductions and rules index are likewise omitted. The Combat Results Table, ZOC Retreat Table, Terrain Effects Chart, and set-up/turn record charts are printed on the separate Player Aid Cards and charts, not in the rulebook.