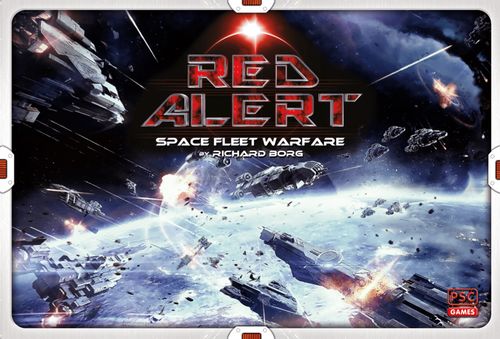
Red Alert: Space Fleet Warfare
Red Alert: Space Fleet Warfare Rulebook
Table of Contents
Table of Contents
Game Components
- 1 RED ALERT Booklet
- 1 Star-field Game Mat
- 92 Starships
- Each Faction has 46 Ships
- 1 Flagship
- 3 Cap Fighters
- 6 Battleships
- 12 Cruisers
- 12 Destroyers
- 12 Long-range Fighters
- 92 Ship Bases & 154 Poles
- 18 Space Feature tiles
- 36 Star tokens
- 32 Faction markers (16 for each faction)
- 11 Red Alert markers
- 3 Cloaking Device markers
- 6 Capital Ship Debris tiles
- 50 Unit markers
- Each Faction has 25 unit markers
- 1 Flagship
- 1 Heavy Battleship
- 2 Battleships
- 3 Heavy Cruisers
- 4 Cruisers
- 3 Heavy Destroyers
- 4 Destroyers
- 3 Heavy Fighters
- 4 Fighters
Star-field Game Mat
The star-field game mat (hereafter referred to as the battlefield) has a hex grid of 13 hexes wide by 11 hexes deep superimposed on the mat. The battlefield is divided into three sectors by two dotted lines, giving each player a left wing sector, a centre sector and a right wing sector. Where the dotted line cuts through a hex, the hex is considered to be part of both a wing sector and the centre sector.
The half-hexes that border the sides of the battlefield are not considered part of the battlefield and are not in play.
Space Features
There are two types of space feature tiles: Asteroids and Planet Groups. For a description and rules for these features, see the "Space Features" rules section.
Starships
Prior to the first game, each ship model will need to be placed onto a base. Flagships and battleships use the low poles; other ships use the high poles. Fighters are placed on round bases.
There are three classes of starships: Capital, Strike and Fighter.
Capital Class
A flagship unit has one flagship figure and three cap fighters. A heavy battleship squadron has four battleship figures in a unit. A standard battleship squadron has three battleship figures in a unit.
Strike Class
A heavy cruiser squadron has four cruiser ship figures in a unit. A standard cruiser squadron has three cruiser ship figures in a unit. A heavy destroyer squadron has four destroyer ship figures in a unit. A standard destroyer squadron has three destroyer ship figures in a unit.
Fighter Class
A heavy long-range fighter squadron has four fighter figures in a unit. A standard long-range fighter squadron has three fighter figures in a unit.
Note: Battleship, cruiser, destroyer and fighter figures are used to represent both heavy and standard units. The main difference between a heavy and a standard unit is the starting number of ships in the unit, four ships in a heavy unit and three ships in a standard unit.
Cap fighters are a special type of fighter figure. Cap fighter figures are assigned to protect a larger vessel and are deployed as part of a flagship unit. Cap fighters must move with the ship they are deployed with and are part of that unit.
Unit Markers
The unit markers shown in the booklet are an example of unit markers of one faction. Each faction has its own unique background colour. Note: The terms standard and long-range are not noted on unit markers.
The front of a unit marker contains the following details:
- Small hexes (the number of hexes is equal to the unit's sub-light movement)
- Unit type (name)
- Unit symbol (purple square, blue triangle or green circle)
- Combat value (which is the number of dice the unit rolls at different ranges)
The back of a unit marker contains the number of victory points gained when the unit is eliminated.
- Only one marker is placed in a hex with a unit.
- The marker will stay with the unit until the unit is eliminated.
- When the unit is eliminated, the marker is given to your opponent.
- To help track the units that are fighting for your faction, a player should keep the unit marker slightly behind the ship figures that make up the unit.
Command Cards, Combat Cards & Task Force Cards
Command cards are used to order units. Ordered units can move, battle, or do other special actions.
Combat cards represent powerful tactical, and sometimes unexpected, battle actions. These cards may hinder the opposition task force, enhance a player's units or may instantly change the course of a fight.
A task force card represents a temporary grouping of starship units formed for the purpose of carrying out a specific operation or mission. Each task force card lists the number and type of ships that make up the task force and the points value of the ships in the task force.
Star Tokens
Star tokens are a measurement of each faction's resources, leadership and luck. Star tokens also act as the currency that fuels the play of combat cards and a number of basic star play actions that are only available through the use of star tokens.
Faction Markers
Faction markers are used in a number of ways.
- Faction markers are used to mark a faction's deployment hexes on the star-field game mat at the start of a scenario.
- Faction markers are also used as victory point counters to track victory points that are gained when occupying a certain space feature hex or completing other specific scenario objectives.
Red Alert Markers
When a unit retires because of two or more red alerts, a red alert maker is placed on the hex with the unit that retired.
Cloaking Device Markers
Place a cloaking device marker with a unit when the "Cloaking Device" combat card is played on an ordered unit.
Capital Ship Debris Tiles
When a capital ship is eliminated and the capital ship model is removed from the battlefield, place a capital ship debris tile on the hex. For additional details, see the "Space Features" rules section.
Battle Dice
The six-sided battle dice show: Blast, Fighter Class, Capital Class, Striker Class, Star and Red Alert. The battle dice are used to resolve combat and for other game functions.
Unit Summary Sheet
The unit summary sheet shows important ship data:
- Purchase Points
- Class
- Ship Name
- Figures – number of figures in unit
- Sub-Light Movement – movement in hexes
- Battle – number of battle dice rolled at various ranges
- Unit Hit On – what icon (shape/colour) is needed to score a hit on the unit (green circle, blue triangle, purple square and blast)
- Shields & Manoeuvre – states the number of blast icons that are ignored from the various ship classes
- Notes
- Red Alert – states when a unit can ignore a red alert
- Victory Points – when a unit is eliminated, this is the number of points the unit is worth to your opponent.
Victory Stands
A victory stand is used to help track and organize a player's victory points. At the start of a game, a player's victory stand is placed in his play area.
How to Play Red Alert
Object of the Game
The object of a battle is to be the first faction (player) to capture a set number of victory points. The number of victory points needed to win will depend on the selected scenario's victory conditions.
Victory points are gained for each enemy unit entirely eliminated. When the last ship of an opposition unit is eliminated, its unit marker is taken from the battlefield and placed on a player's victory stand in the player's play area with the victory point side face up.
In some scenarios, occupying a certain space feature hex or completing other scenario objectives may gain additional victory points. See the "Scenario Objectives" rules section.
Victory is achieved, and the game ends immediately, as soon as a faction gains the required number of victory points.
Playing with more than two players
For a battle with three players on each side, one player – the person in the centre – is considered the Fleet Commander and the other players are the Fleet Commander's wing officers. The Fleet Commander is in control and has the final say as to which command and combat cards to play, but conversation and suggestions from the two wing officers is encouraged and a wise Fleet Commander will solicit any and all advice to create the best battle plan. During a scenario, the Fleet Commander will control (move and battle) ordered units in the centre sector. When a left wing command card is played, the left wing officer will control the ordered units, and when a right wing command card is played, the right wing officer will control the ordered units. Each player is in command of one sector of the star-field game mat, and together they will need to strive to achieve victory!
For a battle with two players on each side, one player is the Fleet Commander, and the other player controls both wings.
Setting Up a Game
-
Select a battle from the scenarios section of this booklet. To introduce players to the basics of the game, it is recommended players set up and play through the first two scenarios, "Uneasy Truce" and "Declaration of War".
-
Each scenario specifies which faction is at the top and bottom of the battlefield and players should sit on the side closest to the faction they will command.
-
Place the space feature hexes (space terrain) on the battlefield as indicated by the scenario's battle map.
-
In the opening two scenarios the scenario map shows in what hex each faction's units are deployed onto the battlefield. Each unit symbol on the scenario map represents an entire unit. Use the scenario map as a guide and place the proper unit marker on each hex along with the unit figures.
After players have gained experience by playing through the first two scenarios, they will have the opportunity to customize their forces, using task force cards and purchasing support vessels of their own choosing. For additional deployment options and details when using task force cards and purchasing support vessels, see the "Task Force Cards" rules section.
-
Shuffle the command card deck thoroughly and deal the number of command cards to each player as indicated by the scenario's battle notes. Keep the command cards a secret from the opposing player. Set the remaining deck of command cards face down alongside the battlefield within easy reach of the players.
-
Shuffle the combat card deck thoroughly and deal the number of combat cards to each player as indicated by the scenario's battle notes. Keep the combat cards a secret from the opposing player. Set the remaining deck of combat cards face down alongside the battlefield within easy reach of the players.
-
Create a common star token pool alongside the battlefield. Each player takes the number of star tokens from the common pool as indicated by the scenario's battle notes and places these tokens in his own star token pool in his play area.
-
Place the battle dice and other markers and tokens alongside the battlefield. Note: Faction markers are not used in the first two scenarios.
Player's Turn
The player taking his turn is the active player, while the active player's opponent is considered the defending player.
The active player's turn sequence is as follows:
- Phase 1: Play a Command Card
- Phase 2: Order Units
- Phase 3: Movement
- Phase 4: Combat
- Phase 5: End of Turn
A previous turn phase must be completed before proceeding onto the next phase.
Phase 1: Play a Command Card
At the start of a turn a player must play a command card from his hand. Place it face up in front of you and read it aloud. Command cards are used to order a player's units to move, battle, or do something special.
There are two types of command cards, sector cards and tactic cards.
Sector Command Card: A sector command card is recognizable by an iconic representation of the battlefield on the card. Each sector card is used to order a set number of units in a sector or a combination of sectors of the battlefield, highlighted by an arrow and a number.
Tactic Command Card: A tactic command card orders units across the battlefield in any sector and may allow the ordered units to move and/or battle in ways not normally allowed by the basic rules.
If a player is ever in a situation where none of a player's units can be ordered by the command card just played, disregard phases 2 through 4 of the game turn and go directly to the End of Turn phase.
Phase 2: Order Units
After playing a command card, announce which corresponding units will receive orders.
Note: To help track which units are ordered, players may wish to place a battle die on the hex with each ordered unit. After the unit completes its actions in the turn (movement and/or battle), the die is removed.
- Only those units that are issued an order may move and/or battle during a turn.
- Figures grouped together on the same hex form a unit.
- Only one order may be given to a unit during the course of a turn.
- When a unit is on a hex with a dotted line, the unit may be ordered from either the wing or centre sector.
- When a sector command card issues more orders in a given sector of the battlefield than the number of units in that sector, those additional orders are lost.
- When a tactic command card issues more orders than the number and/or type of units deployed, those additional orders are lost.
Phase 3: Movement
Movements are announced and made sequentially, one ordered unit at a time in the sequence of a player's choice. A player must complete one unit's movement before beginning another.
Unit Movement
- A unit may only move once per turn.
- A unit that is ordered does not have to move.
- Ordered units may move from one sector of the battlefield into another.
- A unit may never move onto any of the half-hexes that border the sides of the battlefield.
- A unit may only move off the battlefield's baseline hexes when explicitly allowed in the scenario notes.
- Two units may not occupy the same hex.
- When moving a unit, the unit may not normally move onto or through a hex occupied by a friendly unit and/or an enemy unit.
- A unit may not split off individual ship figures from the unit; the figures of a unit must stay together and always move as a group.
- A unit that is reduced through casualties may not combine with another unit.
- Some space features will impact unit movement and may prevent a unit from moving its full distance and/or battling.
- Red alert retire movement rules vary slightly from ordered unit movement. See the "Red Alert" rules section.
Starship Movement
Capital Class
- A flagship along with its cap fighters will move 1 hex at sub-light speed.
- A heavy battleship squadron or a standard battleship squadron will move 2 hexes at sub-light speed.
Strike Class
- A heavy cruiser squadron or a standard cruiser squadron will move 2 hexes at sub-light speed.
- A heavy destroyer squadron or a standard destroyer squadron will move 2 hexes at sub-light speed.
Note: Both heavy and standard destroyer units may warp speed at 3 hexes, when the warp movement places the destroyer unit adjacent to an enemy unit and the destroyer unit is able to close quarters combat.
Fighter Class
- A heavy fighter squadron or a standard fighter squadron will move 4 hexes at sub-light speed.
Basic Star Play Action: Full Impulse – A player may spend 2 star tokens to move a unit at full impulse speed, which is 1 hex more than the unit's listed sub-light movement.
Note: A destroyer unit that is making a warp movement cannot be ordered to move at full impulse.
Phase 4: Combat
Combats are checked and resolved one ordered unit at a time, in the sequence of the player's choice. Announce and resolve one unit's combat entirely before beginning the next unit combat.
- A unit that is ordered does not have to combat even when adjacent to the enemy unit.
- A unit may normally combat only once per turn.
- A unit may not target and split its battle dice between several enemy units.
- The number of casualties (figures lost) a unit has suffered does not affect the number of battle dice the unit rolls in combat. A unit with a single figure retains the same combat strength as a unit at full strength.
There are two types of combat: ranged and close quarters. The combat sequence is purely at the owner's choice and a player may freely switch between ranged combat and close quarters combat from one unit to the next.
Ranged Combat (Fire)
A battlefield unit battling an enemy unit more than 1 hex away is said to engage in ranged combat against the enemy target unit.
- A target unit must be within both range and in line of sight of the firing unit.
- Ranged combat may not be used against an enemy unit in an adjacent hex.
- A unit adjacent to an enemy unit may not fire on another more distant enemy unit. If the unit chooses to battle, the unit must engage in a close quarters combat against the adjacent enemy unit.
- Regardless of the number of ordered units that could fire on an enemy unit, each ordered unit's ranged combat must be resolved separately.
Close Quarters Combat
A unit battling against an enemy unit on an adjacent hex is said to be in close quarters combat with the enemy unit.
- A unit must be in an adjacent hex to an enemy unit to engage in close quarters combat.
- A unit that is attacking at close quarters is always considered in range and has line of sight to the adjacent target unit.
- A unit adjacent to an enemy unit must close quarters combat the adjacent enemy unit if the unit chooses to battle. It cannot use ranged combat against the adjacent enemy unit or another enemy unit within its range.
- Regardless of the number of ordered units adjacent to an enemy unit, each ordered unit's close quarters combat must be resolved separately.
Starship Combat
Flagship
An ordered flagship unit may remain in its hex or move up to 1 hex and perform combat. A flagship unit has a range of 4 hexes.
Battle dice: adjacent (close quarters) 2 dice, two hexes 3 dice, three hexes 3 dice, four hexes 1 die.
- Adjacent is not ranged combat, the 2 dice roll is close quarters combat. In addition to the flagship's close quarters dice, add 1 die for each cap fighter figure with the flagship unit.
- Two hexes to target roll 3 dice.
- Three hexes to target roll 3 dice.
- Four hexes to target roll 1 die.
Heavy Battleship Squadron and Standard Battleship Squadron
An ordered battleship unit may remain in its hex or move up to 2 hexes and perform combat. A battleship unit has a range of 4 hexes.
Battle dice: adjacent (close quarters) 3 dice, two hexes 3 dice, three hexes 3 dice, four hexes 1 die.
- Adjacent is not ranged combat, the 3 dice roll is close quarters combat.
- Two hexes to target roll 3 dice.
- Three hexes to target roll 3 dice.
- Four hexes to target roll 1 die.
Heavy Cruiser Squadron and Standard Cruiser Squadron
An ordered cruiser unit may remain in its hex or move up to 2 hexes and perform combat. A cruiser unit has a range of 4 hexes.
Battle dice: adjacent (close quarters) 3 dice, two hexes 3 dice, three hexes 2 dice, four hexes 1 die.
- Adjacent is not ranged combat, the 3 dice roll is close quarters combat.
- Two hexes to target roll 3 dice.
- Three hexes to target roll 2 dice.
- Four hexes to target roll 1 die.
Heavy Destroyer Squadron and Standard Destroyer Squadron
An ordered destroyer unit may remain in its hex or move up to 2 hexes and perform combat. A destroyer unit has a range of 3 hexes.
Battle dice: adjacent (close quarters) 3 dice, two hexes 2 dice, three hexes 1 die.
- Adjacent is not ranged combat, the 3 dice roll is close quarters combat.
- Two hexes to target roll 2 dice.
- Three hexes to target roll 1 die.
Note: A destroyer unit may warp 3 hexes, when the warp movement places the destroyer unit into a close quarters combat.
Long-range Heavy Fighter Squadron and Standard Fighter Squadron
An ordered fighter unit may remain in its hex or move up to 4 hexes and perform combat. A fighter unit has a range of 2 hexes.
Battle dice: adjacent (close quarters) 3 dice, two hexes 1 die.
- Adjacent is not ranged combat, the 3 roll dice is close quarters combat.
- Two hexes to target roll 1 die.
Combat Procedure
- Announce Unit Combat
- Check Range (for ranged combat)
- Check Line of Sight (for ranged combat)
- Determine Battle Dice Reduction
- Determine Command and/or Combat Card Dice Adjustments
- Resolve Battle
- Score Hits
- Collect Star Tokens
- Apply Red Alerts
- Possible Defending Unit Battle Back
- Possible Pursuit Move and Bonus Combat
1. Announce Unit Combat: Announce which ordered unit is going to combat and the enemy unit being targeted.
2. Check Range: For ranged combat, verify that the target unit is within range. The range is the distance between the firing unit and the enemy target unit measured in hexes. Determine the number of battle dice the unit is entitled to roll based on the unit's range to the target unit.
When counting the range in hexes include the target unit's hex, but not the firing unit's hex.
Example: A player's cruiser unit engaging in ranged combat would count the hexes to its target unit as follows: first hex 3 dice; second hex 3 dice; third hex 2 dice; fourth hex 1 die.
A close quarters attack is always considered in range to the adjacent target unit.
3. Check Line of Sight: For ranged combat, verify that the target is within line of sight.
Line of Sight: Imagine a line, drawn from the centre of the hex, containing the firing unit to the centre of the hex containing the target unit. This line of sight is blocked only if a hex (or part of a hex) between the battling unit and the target hex contains an obstruction. Obstructions include a unit (regardless if friend or foe), some space features and the half-hexes that border the side of the battlefield. The space feature in the target unit's hex does not block line of sight.
If the imaginary line runs along the edge of one or more hexes that contain obstructions, line of sight is not blocked unless the obstructions are on both sides of the line.
Example (line of sight diagram, four cases A–D):
- A. The Commonwealth destroyer unit has line of sight to the Confederation battleship unit on the asteroid hex, because the asteroid space feature in the target unit's hex does not block line of sight.
- B. The Commonwealth destroyer unit has a line of sight to the Confederation cruiser unit, because the imaginary line of sight only runs along one edge of the asteroid obstruction.
- C. The Commonwealth cruiser unit does not have a line of sight to the Confederation cruiser unit, because the imaginary line has asteroid obstructions on both sides of the line.
- D. The Commonwealth cruiser unit does not have a line of sight to the Confederation fighter unit, because the imaginary line has an asteroid obstruction on one side and a half-hex that borders the side of the battlefield.
A unit that is attacking at close quarters always has line of sight to the adjacent target unit.
4. Determine Battle Dice Reduction: A space feature, which the target unit is on and in some instances the attacking unit battles from, may impact the number of battle dice rolled in combat, usually reducing the number. Adjust the number of battle dice rolled for space feature. See the "Space Features" rules section.
A unit with a red alert marker will also have its combat dice reduced by one. See the "Red Alert" rules section.
5. Determine Command and/or Combat Card Dice Adjustments: After all reductions are applied, adjust the number of battle dice based on any command card modifier and/or combat card modifier. The command card modifier and/or combat card modifier will usually increase the number of battle dice rolled in combat and will be detailed on the card.
6. Resolve Battle: Roll the adjusted number of battle dice and resolve the results.
7. Score Hits: The attacking unit will score one hit for each die symbol rolled that matches the targeted unit.
- A green circle will score one hit on a fighter class unit.
- A blue triangle will score one hit on a strike class unit.
- A purple square will score one hit on a capital class unit.
The attacking unit will also score one hit for each blast symbol roll with the following modifications:
- Because of superior shielding, a capital class unit (unit marker with a square symbol) will ignore one blast symbol rolled against it when attacked by a strike class unit (unit marker with a triangle symbol).
- Because of superior shielding, a capital class unit (unit marker with a square symbol) will ignore two blast symbols rolled against it when attacked by a fighter class unit (unit marker with a circle symbol).
- Because of superior shielding, a strike class unit (unit marker with a triangle symbol) will ignore one blast symbol rolled against it when attacked by a fighter class unit (unit marker with a circle symbol).
- Because of its ability to manoeuvre, a fighter class unit (unit marker with a circle symbol) will ignore one blast symbol rolled against it when attacked by a capital class unit (unit marker with a square symbol).
For each hit scored, one figure is removed from the target unit. When more hits are rolled than the number of figures in the enemy unit, these additional hits have no effect. When the last ship of an opposition unit is eliminated, its unit marker is taken and placed on your victory stand in your play area.
Hitting A Flagship: At the start of a battle a flagship unit has three cap fighters. Cap fighters indicate the relative strength and number of hits the flagship can absorb. When a hit is scored on a flagship, one cap fighter figure is removed for each hit scored. When there are no remaining cap fighters to protect the flagship, any hits scored on the flagship must be confirmed to take effect and eliminate the flagship. To confirm a hit, reroll all the dice that scored hits. On the reroll, a purple square symbol or a blast symbol will confirm the hit and the flagship figure is eliminated. When a flagship figure is eliminated, the flagship's unit marker is taken and placed on your victory stand in your play area.
8. Collect Star Tokens: During a combat roll collect one star token for each star symbol rolled.
Important Note: Star tokens are only collected when targeting an enemy unit during a combat dice roll.
9. Apply Red Alerts: A red alert symbol rolled does not cause a hit, but may cause the unit to retire.
Red Alert
After all hits have been taken and ship figures are removed, red alerts are resolved. A roll of a red alert is a signal that there is some sort of crisis on the ship that needs to be resolved. Some possible causes for the red alert are: collateral damage, shields down, warp core breach, engineering issue, and so on.
When one or more hits are scored on a unit and one or more red alerts are rolled during the combat, the targeted unit must retire. A unit does not have to retire if one or more red alerts are rolled but no hits are rolled during the combat.
When one or more hits are scored and one red alert is rolled the unit must retire two hexes back towards its faction's baseline; two red alerts the unit must retire four hexes; three red alerts the unit must retire six hexes; and so on.
The player controlling the unit that is retiring decides which hexes the unit retires onto using the following rules:
- A unit must always retire towards its controlling player's side (its baseline) of the battlefield regardless of what direction the attack came from. There are usually two hexes of choice when a unit must retire.
- A unit may never retire sideways.
- A unit may never retire onto a half-hex that borders the side of the battlefield.
- A unit may retire through a hex containing a friendly unit. The controlling player will roll 1 battle die and a hit is scored on the retiring unit when a matching unit symbol is rolled. All other symbols rolled have no effect.
- A unit may retire through a hex containing an enemy unit. The opposition player will roll 2 battle dice and a hit is scored on the retiring unit for each matching unit symbol rolled. All other symbols rolled have no effect.
- When a unit cannot retire because the hex it would retire onto is impassable, or the unit has reached the edge of the battlefield, or the unit's retire movement would end on a hex with a friendly or enemy unit, the unit will retire as many hexes as possible and then one hit is scored on the unit for each retire hex that cannot be completed.
- Space feature movement restrictions will not affect a unit's retire movement. A unit may therefore retire onto or through a planet and/or an asteroid feature without stopping. However, retiring onto or through an asteroid can be dangerous, see the "Space Feature: Asteroid Field" rules section.
- Impassable features may not be retired onto or through during a unit's retire movement.
Disregard A Red Alert
Some situations will allow a unit to disregard a single red alert rolled against it. When one or more hits are scored on a unit and a single red alert is rolled against a unit:
- A flagship may disregard one red alert.
- A unit adjacent to a flagship may disregard one red alert.
A unit may disregard only one red alert each time it is attacked. Disregarding one red alert result when eligible is purely a matter of choice.
Some situations will not allow a unit to disregard a single red alert:
- A unit's ability to ignore a red alert when on an asteroid field hex is overridden and does not work when on an asteroid field hex.
- When a unit is on an asteroid field hex adjacent to a flagship, the flagship's ability for other ships to ignore a red alert is overridden and does not work for the adjacent unit on the asteroid field hex.
- When a unit receives 2 red alerts and is adjacent to the flagship, the unit cannot ignore one of the red alerts, and must retire.
Basic Star Play Action: Engineering Red Alert Repair
When one or more hits are rolled and a single red alert is rolled against a unit, the controlling player may have engineering repair the alert. To conduct repairs a player must spend 2 star tokens and the red alert is resolved and ignored. The unit will not have to retire.
Some situations will not allow engineering to repair a red alert rolled against it:
- A player may not spend 2 stars to resolve one red alert on a fighter class unit.
- A player may not spend 2 stars to resolve one red alert when the unit is hit and two or more red alerts are rolled against the unit. Engineering cannot resolve multiple red alerts and the unit must retire.
- A player may not spend 2 stars to resolve a red alert when a flagship unit is hit and two or more red alerts are rolled against a flagship unit. The flagship unit must retire.
- When two red alerts are rolled, a player may not have engineering repair one red alert and take the second red alert.
Important Note: When one or more hits are scored on a unit and two or more red alerts are rolled, the unit must retire.
Voluntary Taking Red Alerts
When one or more red alerts are rolled against a unit, but there are no hits rolled during the combat, a player may choose to have the unit retire. The unit, however, must take all red alerts rolled against the unit. The player may not choose to take one or just some of the red alert rolls and ignore the remaining.
Note: When two or more red alerts are taken voluntarily, it will also require placing a red alert marker on the unit.
Red Alert Markers
When a unit retires because of two or more red alerts, a red alert maker is placed on the hex with the unit.
- A unit with a red alert marker may not move and in combat the unit's battle dice are reduced by one.
- A unit with a red alert marker cannot place a faction marker on the occupied hex of the planet group at the start of a player's turn.
- When a unit with a red alert marker has a hit and a red alert rolled against the unit, the red alert is not considered a red alert; the red alert roll is instead considered a hit.
- A unit's ability to ignore a red alert when the unit has a red alert marker is overridden and does not work.
- The flagship's ability for other ships to ignore a red alert when adjacent is overridden and does not work when a flagship has a red alert marker.
Remove a Red Alert Marker
During Phase 2 Order Units, a player may choose to spend star token(s) to remove a red alert marker from any units.
- Spend 1 star token to remove a red alert marker from an ordered unit with a red alert marker.
- Spend 2 star tokens to remove a red alert marker from a unit that is not being ordered this turn.
When the red alert marker is removed, the unit will again function as normal.
10. Possible Defending Unit Battle Back: In some situations the unit that was targeted in combat may use a basic star play action and battle back.
Basic Star Play Action: Battle Back
A player may spend 2 star tokens to have a unit that was just attacked in combat (ranged or close quarters) battle back against the attacking unit. To battle back one or more of the player's defending unit's figures must have survived the combat and the unit did not retire from its hex.
- Battle Back procedure follows the same rules as the active player unit's combat.
- There is no further battle back possible after a unit's battle back. The combat stops immediately after the non-active player unit's battle back.
- A unit that is battling back may not make a pursuit move or bonus combat.
- The unit that is attacked in ranged combat may not battle back against the attacking enemy unit that did a ranged attack, when it is adjacent to another enemy unit.
Example: The Confederation cruiser unit has engaged the Commonwealth cruiser unit in ranged combat (at a range of 2 hexes). The Commonwealth cruiser unit may not spend 2 star tokens to battle back, as it is adjacent to a Confederation fighter unit.
11. Possible Pursuit Move and Bonus Combat: A destroyer unit has the special ability of using a basic star play action for a pursuit move and bonus combat.
Basic Star Play Action: Pursuit Move and Bonus Combat
A player may spend 2 star tokens to have a destroyer unit pursuit move and bonus combat when it has conducted a successful close quarters combat.
Pursuit Move: When an ordered destroyer unit attacks in close quarters combat and eliminates or forces the defending enemy unit to retire from the hex it occupies, the destroyer unit has conducted a successful close quarters combat. The successful attacking destroyer unit may move onto the vacated hex by spending 2 stars. This is referred to as a pursuit move.
Pursuit movement after a successful close quarters combat is not mandatory. However, if the unit does not move onto that vacated hex, the victorious attacking destroyer unit forfeits the possible opportunity to make a bonus combat, even if adjacent to another enemy unit.
The following situations do not allow a unit to pursuit move:
- A unit that moves onto a space feature hex that prevents further movement this turn will prevent a unit from a pursuit move.
- A unit battling back is not eligible to pursuit move.
- A unit ordered by a "First Strike" command card or "Ambush" combat card is not eligible to pursuit move.
Bonus Combat: After a unit's pursuit movement, the destroyer unit is also eligible to combat a second time in the turn.
- Bonus combat is always optional. A pursuit move does not have to be followed by a bonus combat.
- Bonus combat can be either ranged combat or close quarters combat.
- A unit that qualifies for a bonus combat, after its pursuit move, may choose to combat any enemy unit. The unit does not have to battle the enemy unit that just retired from the hex.
- When a unit's bonus close quarters combat is also successful, the unit may not pursuit move again. A unit may only pursuit move and engage in one bonus combat on a turn.
- Some space feature restrictions may prevent a unit from making a bonus combat.
Important Note: There are a number of combat cards that will also allow other ship types to make a pursuit move and bonus combat. The same pursuit move and bonus combat rules will apply to these units.
Phase 5: End of Turn
After all unit movements and combats have been resolved, the active player will discard the command card played face up next to the deck of command cards and will draw one new command card. The active player then has the choice of taking two star tokens or taking one star token and drawing one combat card.
Important Note: When cards are discarded they are always discarded face up.
Important Note: A player who plays a combat card during the opponent's turn does not immediately replenish his combat card or star tokens.
If the active player did not play a combat card during the turn, at the end of the turn before drawing cards, one combat card can be discarded and one star token is collected. A maximum of one combat card may be discarded at the end of a player's turn.
When the command card deck or combat card draw deck runs out of cards, shuffle the discarded cards to form a new draw deck.
Once the active player's command card is drawn and a combat card and/or star tokens are replenished, the player's turn is over.
Star Tokens
Star tokens are initially placed in a common pool alongside the game board. During the course of the game, the star tokens a player earns are kept in his own star token pool in his play area. The number of star tokens a player holds is public information throughout the game.
Managing and replenishing star token reserves is just as important as managing the hand of command cards and combat cards. A player must carefully watch his star reserves and make sure to keep adequate reserves if the player is to launch his own combat card actions or basic star play actions at the most opportune time.
There is no limit to the number of star tokens a player may have in his reserve. However, should the common star token pool run out, no further star tokens can be gained until the common pool is replenished. Actions that normally grant star tokens will instead grant nothing.
The following are some of the ways a player may gain star tokens:
- A number of star tokens are taken at the start of a game as indicated by the scenario battle notes.
- Star tokens are gained for each star symbol rolled when battling against an enemy unit.
- At the end of the active player's turn, the player discards one of his combat cards and gains one star token.
- At the end of the active player's turn, the player opts to take one or two star tokens.
- As a result of playing certain combat cards.
Important Note: Rolling a star symbol during other times other than in combat will not gain a star token.
Star Token Use
Star tokens quite literally fuel the special actions of the combat cards. But in addition to spending stars for combat cards, there are a number of basic star play actions that are possible by spending star tokens.
Basic Star Play Actions
There is no limit to the number of times any of these basic star play actions can be done in a turn. As long as a player has a star token reserve, any and all actions can be repeated.
- Spend 2 star tokens to move a unit at full impulse. Full impulse adds 1 hex to the unit's sub-light movement. Note: Spending stars does not modify a unit's warp or light speed movement.
- Spend 2 star tokens to have a unit battle back. Note: A single ship may battle back against each attack so long as a player has star token reserves.
- Spend 2 star tokens to have engineering rectify one red alert. Note: Two or more red alerts cannot be solved on the spot by engineering; the unit must retire.
- Spend 1 star token to remove a red alert marker from an ordered unit.
- Spend 2 star tokens to remove a red alert marker from a unit that is not ordered.
- Spend 2 star tokens to have a destroyer unit execute a pursuit move and bonus combat manoeuvre.
Combat Cards
Combat cards and star tokens are some of a player's most precious assets. Combat cards, in terms of game play, represent military actions and happenings or unit abilities. These cards may hinder the opposition fleet, enhance a player's units or may instantly change the course of a battle.
There is no limit to the number of combat cards a player may hold, unless the scenario battle notes state otherwise.
Every combat card contains the following information:
- Combat card title.
- The cost in star tokens that are required to play the card and apply its effect.
- When during a turn a combat card must be played.
- The combat card's target, subject, or beneficiary, plus a description of the action, effect, and any special rules.
Players must observe a number of simple, but critically important, rules when bringing a combat card into play:
- A player may play a maximum of one combat card during his turn.
- A player may play a maximum of one combat card during the opponent's turn.
- A combat card must always be played during its indicated phase of play. Some combat cards may be played out of turn during the opponent's game turn, or in reaction to one of his or his opponent's actions.
- When playing a combat card, place it in front of you during the appropriate phase of play (possibly in reaction to one of your opponent's actions) and read it aloud.
- To play a combat card the player must be able to immediately pay its corresponding star cost out of the star tokens already in a player's possession prior to the card's effect coming into play.
- In case of contradiction between the effects of two combat cards played in succession, the second card trumps the effect of the first card.
- In case of conflict between the basic rules and combat card, the rules of the combat card take precedence. However, space feature movement and battle restrictions will always apply to combat cards unless stated otherwise on the combat card.
End Game & Victory
Players alternate taking turns until one player's faction reaches the required number of victory points detailed in the scenario's victory conditions. For most scenarios, this is 21 points or the elimination of 8 opposition units.
Players accumulate victory points in a number of ways, but the most common is by eliminating enemy units. When the last ship of an opposition unit is eliminated, its unit marker is taken and placed with the point side up on your victory stand in your play area.
The number of victory points collected is public information throughout the game.
In some scenarios, occupying a certain space feature hex or completing other objectives may also gain additional victory points. See the "Scenario Objectives" rules section.
A game ends the moment a player reaches the required number of victory points regardless of when this occurs during the turn. This means that a game might even end with the victory going to the active player's opponent.
Victory Points
- Flagship — 8 victory points
- Heavy Battleship unit — 7 victory points
- Standard Battleship unit — 6 victory points
- Heavy Cruiser unit — 4 victory points
- Standard Cruiser unit — 3 victory points
- Heavy Destroyer unit — 4 victory points
- Standard Destroyer unit — 3 victory points
- Heavy Fighter unit — 2 victory points
- Standard Fighter unit — 1 victory points
Scenario Objectives
Planet Control Scenario Objective
When planet control objective rules are in effect, one victory point is gained for each unit that occupies a planet hex at the start of a player's turn. Place a faction marker on the occupied hex of the planet group at the start of a player's turn. Each faction marker placed is worth one victory point. Once gained the point will continue to count. In addition, as long as the unit occupies a planet hex, one additional victory point is gained at the start of each turn.
Note: Faction marker points when occupying a planet hex are not placed on a player's victory stand in your play area. The faction markers are placed on the occupied planet hex. Players should take note of these point markers when determining victory.
Example: The Commonwealth cruiser unit occupies a planet hex at the start of the Commonwealth player's turn. One faction marker is placed on the hex the unit occupies. Each faction marker on a planet hex is worth one victory point. If the Commonwealth cruiser unit still occupies the planet hex at the start of the next turn, another faction marker is placed. Even if the Commonwealth cruiser unit moves off the planet hex, the faction markers will remain on the hex and will still count as victory points.
When an enemy unit is on an adjacent planet hex, it will contest the occupied planet hex and a faction marker cannot be placed at the start of a turn. If an enemy unit is on an adjacent hex, but the hex is outside the planet group of hexes, the occupied planet hex is not contested. A unit with a red alert marker or a unit that is cloaked cannot place a faction marker on a planet hex at the start of a player's turn.
Example: If during the Confederation player's turn a Confederation unit moves onto a planet hex adjacent to the Commonwealth cruiser unit's hex, a faction marker cannot be placed on the planet hex at the start of the Commonwealth player's turn.
Clearing A Sector Scenario Objective
When clearing a sector objective rules are in effect, one victory point is gained when there are no enemy units in a sector of the battlefield at the start of a player's turn. Place a faction marker on your victory stand in the player's play area at the start of a player's turn. Each faction marker is worth one victory point. Once gained the point will continue to count. In addition, as long as there are no enemy units in a sector of the battlefield, you gain one additional victory point at the start of each of your turns.
Note: When determining a clear sector, a hex with a dotted line is considered as part of centre sector.
Breakthrough Scenario Objective
When breakthrough objective rules are in effect, each unit that exits the battlefield from an opponent's baseline hex gains the player victory points. The number of victory points gained is equal to the unit that exits' victory points. When a player's unit exits the battlefield, its unit marker is taken and placed point side up on your victory stand in the player's play area.
- To breakthrough and exit the battlefield, the unit must be ordered and move off the battlefield.
- A unit must start its turn on an opponent's baseline hex to exit the battlefield.
- Moving off the battlefield from a baseline hex counts as one hex of movement.
- A unit that is cloaked may not exit.
Time Pressure Scenario Objective
When time pressure objective rules are in effect, the scenario rules will explain which faction is the attacking faction and which faction is defending. After playing a "Scout" command card, the defending player can choose to draw one command card and one faction marker instead of drawing 2 command cards at the end of his turn. Place the faction marker on your victory stand in your play area.
Important Note: Taking a faction marker due to time pressure is not possible if doing so would give the player enough victory points to win the battle.
Task Force Cards
A task force card represents a temporary grouping of starship units formed for the purpose of carrying out a specific operation or mission. Each task force card lists the number and type of units in the task force and the total points value of all the units making up the task force.
After the first two scenarios, players will have the opportunity to use task force cards and, in addition, purchase a number of support vessels.
A task force card is a pre-constructed force, usually close to 100 total points. When the total is less than 100 points the number of remaining points are noted at the bottom of the card. A player can use these remaining points when purchasing support vessels.
Purchasing Support Vessels
Each player, in addition to the units listed on the task force card, will have a number of points with which to purchase additional support vessel units. These units, along with the units from the task force card, are the fleet of ships that a player will command in a scenario.
Unless stated otherwise in the scenario notes, each player will normally have 40 points to spend on support vessel units.
- Heavy Battleship unit (4 ship figures) — 23 points
- Standard Battleship unit (3 ship figures) — 18 points
- Heavy Cruiser unit (4 ship figures) — 16 points
- Standard Cruiser unit (3 ship figures) — 11 points
- Heavy Destroyer unit (4 ship figures) — 15 points
- Standard Destroyer unit (3 ship figures) — 10 points
- Heavy Fighter unit (4 ship figures) — 6 points
- Standard Fighter unit (3 ship figures) — 4 points
Note: The number of fighter units deployed by a player may not exceed the number of other units in the task force, which includes any support units purchased.
Remaining Points & Stars
The number of points remaining after a player purchases his support vessels will affect the number of stars a player has at the start of a scenario.
After support units are purchased:
- When a player's remaining purchase points are over the scenario points allowed: lose 1 star for the 1st point over, or lose 2 stars for 2 points over. A player cannot go over 2 points.
- When a player's remaining purchase points are under the scenario point total allowed: gain 1 star when 1 point under, or gain 2 stars when 2 or more points under.
Task Force Unit Deployment
After each player gathers the corresponding unit markers as listed on the task force card, each player will purchase additional support vessel units. Once support vessel units are purchased, gather the corresponding unit markers. Support vessel units along with the units from the task force card will make up the fleet of starships a player commands in the scenario.
When players are using task force cards and are purchasing support vessels, steps 3 and 4 of the set up procedure (see the "Setting Up A Game" rules section) are amended as follows:
Step 3. Place the space feature hexes (space terrain) on the battlefield as indicated by the scenario's battle map. When players are using task force cards, the scenario map will show a number of hexes with a faction marker, usually 10. Place a faction marker on each hex on the battlefield as indicated by the scenario map. These battlefield hexes with a faction marker are the deployment hexes for a player.
Step 4. Scenario battle notes will direct players as to whether a task force card is drawn randomly or is chosen. If drawn randomly, shuffle the task force cards and draw one card at random.
Hidden Deployment
Each player at the same time will select one unit marker and place it under any one of his faction markers. The unit marker is hidden in this way from the opponent during the deployment. When a player has placed a unit marker on all hexes with his faction markers, any remaining markers a player still has are held back.
If both players still have unit markers held back, the player with the highest task force card number will place his remaining unit markers on any hex that is adjacent to one of his faction markers. These makers will be visible to his opponent. After all these unit markers are placed, the player with the lower task force card number will then place his remaining unit markers on a hex adjacent to one of his faction markers.
Should only one player have markers held back, he will place his markers on any hex that is adjacent to one of his faction markers.
When both players have deployed all markers, players will then remove all faction markers from the battlefield, leaving the unit markers, and return these to the faction marker pools. Both players will then place their unit figures on the hexes with their unit markers.
Space Features
There are 18 space feature tiles in the game. There are three multiple hex planet groupings, one of 7 hexes and two of 4 hexes. The hex planet groupings have a letter at two points on the hex to assist in setting them up. There are three single hex planet tiles. An asteroid space feature is pictured on the reverse side of all the planet tiles.
Each space feature description includes the following information:
- Movement: Any effect on moving into a hex of this feature is detailed.
- Retire: Explains what happens when a unit retires onto or through the feature.
- Combat: Any effect on a combat involving a unit in this feature is detailed.
- Line of Sight: Whether or not the feature blocks line of sight.
Asteroid Field
Move
A unit ordered to move onto an asteroid field hex must stop and move no further this turn. When an ordered unit moves onto an asteroid field hex, roll one die. If a red alert is rolled, place a red alert marker on the unit.
Important Rule Note: At the start of a player's turn, before playing a command card, one die is rolled for each player's unit that occupies an asteroid field. When a red alert is rolled, place a red alert marker on the unit. If a unit on an asteroid field already has a red alert marker and a red alert is rolled on the unit, it scores one hit on the unit. During the ordering unit turn phase, a red alert marker may be removed when a unit is ordered by spending 1 star, or 2 stars when the unit is not ordered.
Retire
When retiring onto or through an asteroid field hex, roll one die. When a unit symbol is rolled, the unit takes one hit.
Combat
- A unit may combat the turn it moves onto the asteroid field hex.
- A unit may combat when it is ordered and is on an asteroid field hex.
- When targeting an enemy unit on an asteroid field the attacker's combat dice are reduced by one die.
- A unit's ability to ignore a red alert when on an asteroid field hex is overridden and does not work when on an asteroid field hex.
- When a unit is on an asteroid field hex adjacent to a flagship, the flagship's ability for other ships to ignore a red alert is overridden and does not work for the adjacent unit on the asteroid field hex.
Line of Sight
An asteroid field hex blocks line of sight.
Planet Group
A planet is composed of one or more hexes. All adjacent planet hexes are treated as a single planet grouping.
Move
- An ordered unit must start on an adjacent hex next to the planet group hex to move onto a planet hex.
- When moving onto a planet hex the unit may only move 1 hex and must stop.
- A fighter unit that is ordered by a "Move, Combat, Move" command card can on its second movement, if adjacent to a planet hex at the start of the second move, move onto the planet hex.
- A destroyer unit that is on an adjacent hex to the planet, and conducts a successful close quarters combat against a unit on a planet, can pursuit onto the planet hex.
Retire
Retiring onto or through a planet grouping hex is possible with no retire movement restrictions.
Combat
- A unit may not combat the turn it moves onto a planet. A fighter unit is an exception; it may move onto a planet and still combat.
- The turn after a unit occupies a planet hex, the unit will combat as normal.
- When targeting an enemy unit on a planet, but the attacking unit is not on the planet grouping, the attacker's combat dice are reduced by one die.
- When targeting an enemy unit on a planet and the attacker is also on the same planet grouping, the attacker's combat dice are not reduced.
- A unit's ability to ignore a red alert when on a planet hex is overridden and does not work when on a planet hex.
- When a unit is on a planet hex adjacent to a flagship, the flagship's ability for other ships to ignore a red alert is overridden and does not work for the adjacent unit on the planet hex.
Line of Sight
- A unit not on a planet hex, ranged combat line of sight is blocked when the unit's ranged combat must go through one or more planet hexes in a group.
- Ranged combat line of sight is not blocked between units occupying the same planet grouping.
Example (line of sight diagram, cases A–C):
- A. The Commonwealth fighter unit does not have line of sight to the Confederation cruiser unit, because line of sight is blocked by a planet hex.
- B. The Commonwealth fighter unit and Confederation destroyer unit have line of sight to each other, as they occupy the same planet grouping.
- C. The planet group also blocks the line of sight from the Commonwealth battleship unit to the Confederation destroyer unit.
Capital Ship Debris
When a capital ship unit is eliminated and the last figure is removed from the battlefield, place a capital ship debris tile on the hex.
Move
A unit may not move onto a ship debris tile. The hex with the ship debris tile is considered an impassable space feature.
Retire
A unit may not retire onto or through a ship debris tile. The hex with the ship debris tile is considered an impassable space feature.
Line of Sight
A ship debris tile hex will block line of sight.
Space History
After the joint effort by all known systems and races in the galaxy to defeat the Krawl invasion in the early part of the 15th epoch, the tension between the outlying planets and the Commonwealth Alliance again began to mount. Coming to a head during the High Council meeting in the second session of the 16th epoch, which traditionally was still being held on the Commonwealth home planet, a number of delegates calling themselves the Confederation stated that their planets were no longer willing to accept the Commonwealth's self-serving priorities and trade deals, and walked out of the meeting.
Although the Commonwealth Alliance didn't like the idea of a rival galactic organization, an unwritten truce came into existence, with the thought that the Rebel Confederation would eventually collapse under the financial stress of maintaining a new governing body and its fleets. But despite these challenges, or maybe because of them, the Rebel Confederation proved to be a resourceful federation that continued to grow.
In time, the unwritten truce began to disintegrate. The Rebel Confederation, armed with a small number of military space fleets still in service after the war with the Krawl, would gain strength and challenge the Commonwealth Alliance's interplanetary peace-keeping force, which was once the most powerful force in the galaxy.
As history writes, the only difference between the Commonwealth Alliance and Rebel Confederation ships was the colour of their fleets.