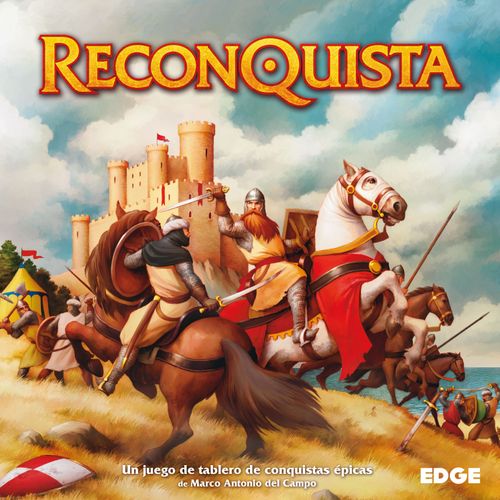
Reconquista (2018)
Reconquista (2018) Rulebook
Table of Contents
Table of Contents
- Introduction
- Goal of the Game
- Kingdoms
- Contents
- Component Descriptions
- Game Setup
- How to Play
- Bidding Phase
- Reconquista Phase
- Income Phase
- Controlling Territories and Enemies
- Management Phase
- Maneuvers Phase
- Battles and Sieges Phase
- Sieges
- Upkeep Phase
- Winning the Game
- Action Cards
- El Cid's Exile
- El Cid's Spain
- Quick Reference
Introduction
Reconquista is a strategy board game for 3-4 players set in 11th-century Spain, during the wars between Moors and Christians. Play the role of one of four kingdoms fighting for control of the Iberian Peninsula: Castile and León (Castile from now on), Aragon, Seville, and Zaragoza.
Each round, players will collect Income to invest in Troops and Castles. Once ready, they'll move their Armies on the board to conquer new territories.
Although conquests and resource management are key elements of the game, the core lies in the Battles and Sieges. Players must be careful when moving their Armies and watch out for sudden victories.
Goal of the Game
To win a game of Reconquista, you must earn Victory Points (VP) by winning Battles, carrying out successful Sieges, and resolving the historical events from Reconquista cards. If by the end of the 9th round no one has won, the game ends and a winner is decided (see Winning the Game, p. 14).
Kingdoms
Moorish Faction
Seville: Concerned about the Christians' recent victories, the poet king Al-Mu'tamid sought the help of the African emir Yusuf ibn Tashfin to stop the infidels' offensive.
Zaragoza: Al-Muqtadir is campaigning to annex the eastern regions, leaving Zaragoza vulnerable. Abd al-Malik is his second-in-command.
Christian Faction
Castile: King Alfonso VI of León is the primary architect of the Christian expansion. El Cid is his most formidable asset on the battlefield.
Aragon: Sancho Ramírez is the sovereign of a budding kingdom. He is allied with the Moorish Mundhir al-Hajib, king of the taifa of Lérida.
Contents
The game box includes:
- 1 Game Board
- 68 Control Markers
- 4 Protected Territory Markers
- 12 Castles
- 4 Royal Army tokens
- 4 Vassal Army tokens
- 60 coins
- 30 Infantry Cards
- 30 Cavalry Cards
- 18 Siege Engine Cards
- 8 Leader Cards
- 24 Action Cards
- 20 Reconquista Cards
- This Rulebook
Component Descriptions
This section provides a brief description of all game components.
Game Board
The game board is a map of the Iberian Peninsula at the end of the 11th century, divided into 30 territories. Players will compete to take control over these territories.
Board elements, as numbered in the component illustration:
- Income Yield provided by the territory to the player controlling it.
- Terrain Type: Forest, Plain, or Mountain.
- Sea Routes connect two Regions separated by water.
- Round Order track.
- VP track.
Control Markers
Each player has 17 Control Markers. These are mainly used to mark which territory belongs to which kingdom. They are also used to track each player's position in the Round Order and their VPs.
Protected Territory Markers
Each player has a Protected Territory marker. Territories with this marker are better protected than other territories. This is due to the king's good Vassalage relations with the local nobles.
Castle Tokens
Each player has 3 Castle tokens. Castles provide strong defense for the territories they occupy, and they also mark the starting territories for new Armies. Assemble each Castle by putting its 2 pieces together.
Royal Army Tokens
Each player has a Royal Army token, which represents an Army led by the king. These tokens have two sides: the Attacker side, which shows a crown and a sword, and the Defender side, showing a crown.
Vassal Army Tokens
Each player has a Vassal Army token, which represents an Army led by the king's primary vassal. These tokens have two sides: the Attacker side, which shows a horse and a sword, and the Defender side, showing a horse.
Coins
Use coins to bid for Round Order, to recruit Troops, build Castles, navigate Sea Routes, and pay Ransoms. There are coins with values 1, 5, and 20. Whenever a game effect gives you coins from the supply, you may take any combination to reach the total.
Troop Cards
Troop Cards form the Armies that players will use to fight for control of the territories on the board. These cards provide a wide range of values for Battles and Sieges, and are limited by the number included in the game. The back of each Troop Card shows its price in coins. There are 3 types of troops: Infantry, Cavalry, and Siege Engines.
Leader Cards
Each player has 2 Leader Cards: the King and a Vassal in the King's service. These Leader Cards, along with the Troops under their command, are represented on the board by the Royal Army token for the King and the Vassal Army token for their Vassal.
Action Cards
Action Cards provide a variety of benefits to the players and can be used during different phases of the game.
Reconquista Cards
Reconquista Cards represent historical events that can alter the course of the game. These cards are divided into three historical stages: I, II, and III.
Game Setup
Follow these steps to set up Reconquista before playing:
- Place the Game Board. Unfold the board and place it at the center of the table.
- Form the coin supply. Place all coins next to the game board to prepare the coin supply.
- Prepare the Troop decks. Shuffle the Troop Cards by type: Infantry, Cavalry, and Siege Engines. Place them face down next to the game board forming 3 separate decks.
- Prepare the Reconquista deck. Follow these steps to form the Reconquista deck:
- Remove the two copies of the Reconquista card "How fiercely from his eyes he wept..." from the game, since they are only used with the optional rule "El Cid's Exile" (see page 14).
- For your first games, pick the 9 Reconquista cards with the crown symbol in the top left corner.
- For advanced games, pick any 9 Reconquista cards, agreed upon by all players.
- Separate all Reconquista cards into groups I, II, and III, and shuffle each group separately.
- Form the Reconquista deck by placing all groups face down in ascending order, with group I on top. Place the deck in one of the reserved spaces on the game board and use the other space to form the discard pile.
- Assign kingdoms. Keep in mind that the Kingdom of Zaragoza cannot be chosen in 3-player games. Each player can either choose one of the available Kingdoms at random or by mutual agreement. Then, each player takes all the Control Markers, Army tokens, Castles, Leader Cards, and Action Cards of their Kingdom. In 3-player games, return all Zaragoza cards, Castles, tokens, and Markers to the box.
- Pick Action cards. Each player chooses or draws 3 random cards of the 6 Action Cards available for their kingdom. Return the remaining Action Cards to the box, as they will not be used during the game.
Everything is now ready to play! Let the Reconquista begin!
Starting Player and Round Order
Some rules refer to the Starting Player and the Round Order. A player is considered the Starting Player if their Control marker is in position 1 of the Round Order track.
Each phase, the player whose Control marker is in position I, the Starting Player, plays first, and then the game continues in ascending order along the Round Order track for the remaining players.
4-Player Game Setup Diagram
The setup diagram (in the rulebook illustration) numbers the following areas:
- Game Board
- Coin Supply
- Reconquista deck and discard pile
- Troop decks
- Kingdom of Castile game area
- Kingdom of Castile starting setup
- Kingdom of Aragon game area
- Kingdom of Aragon starting setup
- Kingdom of Seville game area
- Kingdom of Seville starting setup
- Kingdom of Zaragoza game area
- Kingdom of Zaragoza starting setup
How to Play
Reconquista is played in several Rounds, each divided into seven phases. Players continue playing Rounds until someone wins or until the 9th round ends, when the last Reconquista card is drawn.
Below is a summary of the phases that make up each round:
- Bidding Phase: Players bid coins to change the Round Order, as described on page 6. Skip this phase during the first Round.
- Reconquista Phase: The Starting Player draws and reads a Reconquista card aloud, as described on page 6.
- Income Phase: Following Round Order, players collect their Income, as described on page 6.
- Management Phase: Players spend their coins to recruit Troops, build Castles, pay Ransoms, or pay a leader's Vassalage, as described on page 7.
- Maneuver Phase: Following Round Order, players move their Armies, as described on page 9.
- Battles and Sieges Phase: In the order determined by the Starting Player, all potential Battles and Sieges are resolved for each territory, as described on page 10.
- Upkeep Phase: Following the Round Order, players deploy their Royal Army token on the game board, if necessary, as described on page 14.
Bidding Phase
Skip this phase during the first Round.
During the Auction Phase, players bid coins to try to change the Round Order. To do so, each player will hold as many coins as they wish to bid in their hand. Players may leave their hand empty. Once all players are ready, they simultaneously reveal their bids for the new Round Order.
Only the player who bid the most coins may decide to become the new Starting Player. If they do, they move their Control Marker to space I on the Round Order track. This causes all other Control Markers to move one position to the right, without changing their order.
In the event of a tie, no changes are made on the Round Order track.
At the end of this phase, regardless of the outcome, all players must pay the coins they bid to the coin supply.
Example: 1. The Kingdom of Seville's control marker is in space III on the Round Order track, and they have just won the bid to change the order. 2. The player decides to become the new Starting Player and moves their Control Marker to space I on the Round Order track. Then, they move the Control Markers of Castile and Aragon one position to the right without changing their order.
Reconquista Phase
Throughout the Iberian Peninsula, many events that lie beyond the control of the great kingdoms take place. During this phase, the Starting Player draws the top card from the Reconquista deck and reads it aloud. Some cards take effect immediately, while others remain in play until the end of the Round or until their conditions are met, whichever comes first.
After reading the card, the Starting Player discards it face up in the designated space of the board for the discard pile.
If a Reconquista Card contradicts a standard rule of the game, the card takes precedence.
Note: If a Reconquista or Action Card references a Control Marker, that does not include the Protected Territory Marker.
Elements of a Reconquista Card
- Card title: The thematic name of the card.
- Rules text: This text describes the special effect that occurs when the card is resolved.
- Flavor text: This text has no game effect. It simply provides thematic context of a historical moment.
- First-Game icon: A crown icon indicates that the card is perfect for your first games of Reconquista.
- Historical stage: The group to which the card belongs: I, II, or III.
Income Phase
Following Round Order, each player takes as many coins from the coin supply as the values shown on all the territories they control. A controlled territory that has a Castle generates double Income.
Players may only collect Income as long as there are coins left in the supply. It is possible to collect part of the Income owed if there aren't enough coins in the supply for the full amount.
Controlling Territories and Enemies
In Reconquista, a territory is considered controlled by a player if it has a Control Marker, a Protected Territory Marker, or a Castle belonging to that player's kingdom, regardless of whether or not there are Army tokens belonging to other players in that territory.
Use a single component to show control of a territory: a Control Marker, a Protected Territory Marker, or a Castle.
A territory is considered empty if it has no Control Markers, Protected Territory Markers, or Castles and is not controlled by anyone.
For players, any Control Marker, Protected Territory Marker, Army token, Castle, or Troop Card that belongs to another player is considered "the enemy." During Battles and Sieges, players may support another player's defense or attack. In that case, "the enemy" are the players opposing that attack or defense (see Battles and Sieges Phase, page 10).
Management Phase
Following Round Order, players may spend their coins to recruit Troops, buy Castles, pay Ransoms, or pay Vassalage.
Recruit Troops
During this phase, players can buy Troops for their Armies on the board. There are three types of Troop Cards: Infantry, Cavalry, and Siege Engines. Each type of Troop Card has a different cost, and each card of the same type has different values and abilities.
Infantry are strong in Sieges but not as useful in Battles. Additionally, Infantry cannot defend a Siege.
Cavalry are strong in Battles but not in Sieges, both attacking or defending.
Finally, Siege Engines are specialized troops required to attack in Sieges but basically useless in Battles. They cannot defend during Sieges either.
Elements of a Reconquista Card
Editor's note: the printed heading above this diagram reads "Elements of a Reconquista Card", but the diagram and its numbered items describe Troop Cards (Strength, Siege Strength, Siege Defense, Forced March, Recruitment Cost). Heading transcribed as printed.
- Strength: The combat value that the Troop Card provides in Battles.
- Siege Strength: The combat value provided by the Troop Card when used as an Attacker in Sieges.
- Siege Defense: The combat value provided by the Troop Card when it is used as a Defender in Sieges. Siege Engines do not have a Siege Defense value.
- Terrain Type Ability: This icon indicates in which terrain (Forest, Plain, or Mountain) the card is more experienced (see Battles and Sieges Phase, page 10).
- Forced March Ability: This icon only appears on Infantry cards and allows the Army that the card belongs to increase its movement (see Maneuvers Phase, page 9).
- Recruitment Cost: The price in coins to recruit the card.
Elements of Leader Cards
- Army Type: This icon connects Leader Cards to their Army tokens. The crown represents the Royal Army token, and the horse represents the Vassal Army token.
- Strength: The combat value provided by the Leader Card in Battles and Sieges, whether as the Attacker or Defender.
- Command Value: The maximum number of Troop Cards that the Leader can command, and the maximum number of Troop Cards that the Leader can recruit for their Army during a single Management Phase.
- Ransom Cost: The price in coins to pay for the Leader's Ransom if they are captured by the enemy.
- Vassalage Cost: The price in coins required for a Leader's Army to enter the game. This value only appears on Leader Cards of the Vassal Armies.
Players may recruit any number or type of Troop Cards by paying their total cost in coins to the coin supply. Once the payment has been made, players must place the Troop Cards under the Leader Card of the Army that will get those Troops. At any point during the game, if a player acquires Troop Cards, they must place them under the Leader Card of an Army.
The requirements to recruit Troop Cards for each Army are as follows:
- The player must decide how many Troop Cards of each type they wish to recruit and pay for them before drawing them from their respective decks.
- Newly acquired Troop Cards must be assigned to a single Army and cannot be split between Armies. If a player wishes to recruit Troop Cards for both Armies, assuming both are in play, they must recruit Troops separately, once for each Army.
- The player recruiting the Troops must be able to trace a line of communication from one of their Castles to the territory with the Army token that will receive the Troops. This line must go through territories under their control and cannot use Sea Routes (see Maneuvers Phase, page 9). This line of communication through controlled territories does not need to include the territory where the Army is located. If it is not possible to trace a line of communication, the Army cannot receive new Troops.
- The maximum number of Troop Cards an Army may have is determined by the Command Value of its Leader. An Army's maximum number of Troop Cards cannot exceed its leader's Command Value. If an Army exceeds its leader's Command Value at any point during the game, the player controlling that Army must choose and discard any excess cards. These cards are returned face down to the bottom of their corresponding decks.
Note: The illustrations on Troop Cards are for reference only. This means that you may recruit Troop Cards whose illustrations belong to different armies. Historically, a single army was sometimes made up of both Christians and Muslims.
Recruitment Example
The Kingdom of Seville player has both of their Army tokens on the board.
- The Royal Army token, commanded by Al-Mu'tamid, cannot recruit Troops because it does not have a line of communication through controlled territories to one of its Castles.
- The Vassal Army token, commanded by Yusuf, has a line of communication through controlled territories to one of its Castles and can recruit Troops.
- Yusuf's Vassal Army currently has 2 Cavalry Cards and 1 Infantry Card.
- After paying 11 coins to the coin supply, Yusuf recruits another 3 Cavalry Cards and 2 Infantry cards. Given that this exceeds Yusuf's Command Value by one, the player must choose and discard 1 card from among those in his Army.
Armies
In Reconquista, each player has two types of Armies: the Royal Army and the Vassal Army. Each Army is represented by an Army token, a Leader Card, and a number of Troop Cards, which are limited by the Command Value of the corresponding Leader Card.
Army tokens show the location and state of the Royal and Vassal Armies on the board, as well as indicating whether they are Attackers or Defenders. Players move Army tokens around the map to engage in Battles and Sieges. An Army token may move around the board and participate in Battles and Sieges, even if that Army only has its Leader Card.
At the start of a game of Reconquista, Vassal Army tokens remain off the board until their Vassalage Cost has been paid (see Elements of Leader Cards, page 7, and Vassalage Payment, page 8).
The Troop Cards of each Army are kept under their corresponding Leader Cards and are only used during Forced Marches, Battles, and Sieges. Players may look at their own Troop Cards at any time. They may also check the number and type of Troop Cards under their enemies' Leader Cards, but their combat values are hidden.
Paying Vassalage
The Royal Army token will remain on the board unless its Leader is captured (see Capturing Leaders, page 13). On the other hand, the Vassal Army token starts the game off the board and will leave the board again after being defeated in a Battle or Siege.
Whenever a player wishes to place their Vassal Army token on the map, they must pay Vassalage. To put it in play, the player places the Vassal Army token with its Defender side face up in a territory that has one of their Castles, and must pay the Army Leader's Vassalage Cost in coins. They may then recruit Troop Cards for that Army.
Paying Ransom
If they enter combat, Leaders may be captured after a Battle or Siege (see Battles and Sieges Phase, page 10). To recover a captured Leader, their owner must pay the Ransom Cost shown on the Leader Card to the player holding them captive.
Once the Ransom has been paid, the player recovers the Army token and the Leader Card. If it is the Royal Army, the player must immediately place it in a territory that has one of their Castles. If it is the Vassal Army, the owner must pay Vassalage during any Management Phase for it to enter play again. This includes the Management Phase in which the Ransom was paid.
Building Castles
Castles are essential to a kingdom's expansion. They are strongholds that can shape a kingdom's fate. Castles provide many benefits:
- A controlled territory that has a Castle cannot be entered by enemy Armies unless those Armies have Siege Engines in their ranks (see Sieges, page 14).
- Controlling a territory with a Castle opens lines of communication between controlled territories to recruit Troops (see Recruiting Troops, page 7).
- It also allows Army tokens to be deployed (see Paying Vassalage, page 8).
- Lastly, a controlled territory that has a Castle generates double Income (see the Income Phase, page 6).
To build a Castle, follow these steps:
- Pay 25 coins to the coin supply.
- Choose one of your controlled territories that does not have a Castle and place a Castle there.
- Remove the marker from that territory.
- Gain 1 VP.
Note: A Castle only provides VP when it is built.
Each player has only 3 Castles. If a player has already placed all 3 of their Castles on the board, they cannot build any more Castles during the Management Phase.
For thematic purposes, every territory on the board is considered to have a castle. However, they are not relevant to the game except in one case: if at any point during the game a player has no Castles on the board, the nobles of their controlled territories grant them one of their Castles for free. This does not provide 1 VP. The player with no Castles simply places one of their Castles in a territory under their control and removes the Control Marker from that territory.
Maneuvers Phase
During this phase, players move their Armies on the board as they try to conquer territories and position themselves for future maneuvers.
Starting with the Starting Player and following Round Order, each player performs a Movement Step with their Royal Army, followed by a Resolution Step. You must complete both steps one after the other before the next player takes their turn with their Royal Army. Once all players have completed both steps of the Maneuvers Phase with their Royal Army, repeat the process for any players who have a Vassal Army token on the board: a Movement Step followed by a Resolution Step.
1. Movement Step
During the Movement Step, an Army token may move a distance of 1 territory, meaning it may only move to adjacent territories.
Some territories on the board are connected by one or more Sea Routes, which are represented by dotted lines. These territories are considered adjacent to each other for movement purposes. As long as the player who controls the Army pays the cost shown on the Sea Route, an Army token may travel by sea during a Movement Step.
If an Army token has at least one Troop Card with the Forced March ability in its ranks, the player controlling that Army may move an additional territory for each card with the Forced March ability that they discard, if they so choose. While moving, an Army may not conquer or stop in any territories it moves through.
After carrying out the Forced March, the player must discard all Troop Cards with the Forced March ability that were used for that march. This represents attrition for the Army.
Troops cannot make Forced Marches through territories with enemy Castles, but they can make them through territories occupied by enemy Army tokens.
Sea Routes may be used during a Forced March by paying the corresponding price.
If an unsupported Army token (see Supports, page 11) leaves a territory while under attack by another Army token, that movement is considered a Retreat (see Retreats, page 11). The player controlling the Attacker Army may choose to either gain 1 VP or force the player whose Army is retreating to lose 1 VP. A player can never have fewer than 0 VPs. Players whose Armies supported the Attacker neither gain VPs nor make the Retreating player to lose VPs.
If Retreating causes a player to abandon a territory because their Army token was their only token there, the main Attacker (not the supporting players) takes control of the territory. The Attacker returns the territory's Control Marker to its owner and places one of their own there, if possible, or a Protected Territory Marker instead. If the Protected Territory Marker is already in another territory, the player may swap a Control Marker that is not on the board for the Protected Territory Marker, then place the Protected Territory Marker in the newly conquered territory. To do so, you must have at least one Control Marker off the board.
If the Retreating player had a Castle in the abandoned territory, the Attacker gains 1 additional VP or forces the Retreating player to lose 1 additional VP. The Attacker then takes possession of the Castle by swapping it for one of their own. If the Attacker already has all 3 of their Castles on the board, they must remove the enemy Castle from the territory. Then, they must decide whether to move one of their Castles to that territory (provided that Castle is not currently under Siege) or leave their Castles as they are. In the first case, they keep control of the territory from which they moved the Castle by placing a Control Marker there. Otherwise, they may place a Control or Protected Territory Marker in the newly conquered territory.
The player who takes control of the territory gains coins from the supply:
- 1 coin for taking control of a territory from a Kingdom of the same Faction. For example, Castile, of the Christian Faction, takes control of a territory from Aragon, also of the Christian Faction.
- 2 coins for taking control of a territory from a Kingdom of the opposing Faction. For instance, Castile, of the Christian Faction, takes control of a territory from Seville, of the Muslim Faction.
The Attacker and their supporters, when applicable, must flip their Army tokens to show the Defender side.
If an Army token with supporters leaves a territory while being attacked by another Army token, it is considered a Retreat (see Retreat, page 11) and must follow Retreat rules. However, neither the Attacker nor their supporters gain VP, nor can they force the Retreating player to lose VP. After resolving the Retreat, all Army tokens in the abandoned territory remain in their current state: Attacker or Defender. Control of the territory will be determined after the Battle or Siege.
A player may choose to skip the Movement Step, allowing their Army token to remain in the current territory before proceeding to the Resolution Step.
Army tokens that did not move must remain in their current state: Attacker or Defender.
2. Resolution Step
Once this step begins, the Army token's Movement Step is considered spent. Next, check the type of territory where the Army Token is located:
A. If it is a territory under your control with one of your markers and no enemy Army tokens:
Nothing happens. Leave the Army token in its Defender side.
B. If the territory is empty or has only an enemy Control Marker:
The Kingdom whose Army is now in the territory takes control of it. Place a Control Marker on that territory and return any Control Marker already there to its owner.
Instead of placing a Control Marker, you may place your Protected Territory Marker. If the Protected Territory Marker is already in another territory, you may replace it as described above.
Protected Territory Markers represent territories that are strongly defended by the king's vassals. If there is an enemy Protected Territory Marker in the territory, the Army that entered or stayed in the territory will take control of it. However, they will lose 2 Troop Cards of their choice, or all of them if it has less than 2.
Next, the player who has taken control of the territory gains coins from the supply:
- 1 coin for taking control of an empty territory or a territory from a Kingdom of the same Faction.
- 2 coins for taking control of a territory from a Kingdom of the opposing Faction.
C. If a territory has enemy Army tokens but no Castle:
If one or more Army tokens of the same player are in the territory, flip the Army token that just entered or remained in the territory so that it shows its Attacker side. All other Army tokens remain in their Defender side.
If there are Army tokens of several enemies in the territory, and Attackers and Defenders have already been declared, flip the Army token that has just entered or stayed in the territory to the Attacker side to support the attack, or to the Defender side to support the defense. Then, place the Army token underneath the Army token that was already attacking or defending to form an Attacker Support stack or a Defender Support stack, respectively. If there is already an Attacker or Defender Support stack, place the Army token at the bottom of the corresponding stack.
If there are Army tokens of several enemies in the territory but none have been declared the Attacker, for example because of the outcome of a Battle in a previous round, then flip the Army token that has just entered or remained in the territory to its Attacker side. This attack targets the Army of the Kingdom that controls the territory. If the territory is under control of the same Kingdom as the Army token that entered or stayed in the territory, the target may be any other Army present.
Having two Army tokens of the same Kingdom in a territory does not allow a player to carry out two Battles, there is a limit of one Battle per Kingdom per territory. Therefore, two Armies of the same Kingdom may only take part in the same Battle if one is supporting the other.
D. If the territory has one of your Castles:
Leave the Army token in the Defender side to show that it is defending the territory during a Siege, or will defend it if a Siege begins.
E. If the territory has an enemy Castle:
An Army may only enter or stay in a territory with an enemy Castle to lay Siege, or to support the Attacker or Defender in a Siege.
To lay Siege, if no other Army is already doing so in that territory, flip the Army token to its Attacker side. Only Armies with Siege Engines in their ranks may lay Siege.
Supporting Armies of a Single Player
It is important to keep in mind that Armies of the same Kingdom may support each other in Battles and Sieges. However, unlike other forms of support, this only allows the player to choose which Army will engage in the Battle or Siege, while the other Army stands by. When two Armies of the same Kingdom share a territory, they are considered to be supporting each other.
At the time the Attacker is declared in a Siege, if the Kingdom who owns the besieged Castle has no Army in that territory, that player may immediately move their nearest Army token to the territory to defend it. This applies even if the Army has already completed its Movement and Resolution Steps. If the Army had not yet carried out its Movement Step, this emergency movement prevents it from moving again later in the round. If both of your Armies are at the same distance from a besieged castle, you may choose which Army to move there. If a player cannot or does not want to move their nearest Army token to the besieged Castle, then the Attacker immediately takes the Castle unopposed, as if they had won the Siege (see Sieges, page 14).
Note: When an Army moves this way, the territory it leaves behind may have been under attack by another player. If that's the case, the movement is not considered a Retreat, so no one gains or loses 1 VP. However, if the territory belonged to the player whose Army just moved, that player loses control of it, and it falls into the hands of the Attacker (see Movement Step, page 9). Any other tokens in the territory the Army moved from stay in their current side: Attacker or Defender.
To support a Siege, if another Army was already laying Siege to that territory, flip the Army token so that it shows its Attacker side. This marks that the Army is supporting the Siege. Then, place that Army token under the Army token that was already laying Siege to the Castle to form an Attacker Support stack. If there is already an Attacker Support stack, place the Army token at the bottom of that stack. Only Armies with Siege Engines in their ranks may support a Siege.
To support the defense of a Castle under Siege, if another Army was already defending it, the Army token remains in the Defender side, marking its support of the defense. Then, place that Army token under the Army token that was already laying Siege to the Castle to form a Defender Support stack. If there is already a Defender Support stack, place the Army token at the bottom of it.
You cannot defend an enemy Castle in a Siege except as support in an already declared Siege.
After players complete their Maneuvers Phase, the game continues with the Battles and Sieges Phase.
Maneuvers Phase Example
The current Round Order is: Seville, Castile, Zaragoza, and Aragon.
- Seville's Royal Army moves to Huelva to fight Castile's Vassal Army. Then, during the Resolution Step, Seville flips its Royal Army token to its Attacker side.
- Castile's Royal Army moves to Córdoba during its Movement Step to lay Siege to the Castle of Seville. Since Castile has Siege Engines in its Royal Army, it flips its Army token to show its Attacker side during the Resolution Step.
- Since the Castle in Córdoba is undefended, Seville moves its nearest Army token to defend it. Seville's Vassal Army comes to its defense from Málaga.
- Zaragoza's Royal Army then decides to support Seville's defense of the Siege. Once there, Zaragoza's Royal Army token is placed under Seville's Vassal Army token, forming the Defender Support stack.
- Aragon's Royal Army decides to stay in Albacete.
- Seville's Vassal Army cannot move since it previously moved to Córdoba to defend its Castle from the Siege laid by Castile's Royal Army.
- Castile's Vassal Army decides not to Retreat from Seville's Royal Army's attack, opting to stand and fight.
- Zaragoza's Vassal Army could support the Royal Army in Córdoba because it has more Infantry Cards. When two Armies of the same Kingdom support each other, the player may choose which Army will fight. However, they decide to move to Albacete to attack Aragon instead. During the Resolution Step, they flip the token to show its Attacker side.
- Aragon originally intended to conquer Granada with their Vassal Army and place a Protected Territory Marker there. However, they can no longer do so since Zaragoza is attacking their territory. Aragon can only Retreat to a territory under their control, such as Murcia. Although this action would not cause Aragon to lose 1 VP or Zaragoza to gain 1 VP, since they have the support of the Royal Army, Aragon chooses to stay and fight the enemy because its Vassal Army has more powerful Troop Cards than its Royal Army.
Once the two steps of the Maneuvers Phase have been completed with the Royal Armies, any Vassal Armies on the board take their turn.
(The numbered call-outs 1-9 are placed on the printed example map, which is an illustration and is not reproduced here.)
Battles and Sieges Phase
During this phase, players fight for the chance to earn VP or cause the defeated enemy Army to lose VP.
Battles
In the order determined by the Starting Player, players must resolve a Battle in every territory with Armies from at least two different Kingdoms but no Castles.
Note: Remember that the Armies fighting each other are those whose tokens show the Attacker side against those whose tokens show the Defender side. If there are supporting Armies, their tokens will be in the corresponding Support stacks and will be considered to belong to the same team: Attacker or Defender. If there are no Battles or Sieges in the current Round, the Round ends and a new one begins.
To resolve a Battle, follow these steps in order:
-
Organize Forces: Each player with an Army token present in the Battle, whether as the Attacker, Defender, or support, collects all the Troop and Leader Cards from that Army. If a player has both Army tokens in the Battle, they must choose an Army to fight and one to stay out of the battle.
-
Combat: Starting with the Attacker, the Attacker and Defender take turns playing 1 or 2 Troop Cards from their hands. When playing Troop Cards, you must declare the total combat value of the cards played. This value is the total Strength of the Troop Cards played at that time. Players may play their Leader Card, adding its Strength value to that of another Troop Card or on its own. When you play a Leader Card, that Leader is considered to have entered the Battle and may be Captured (see Combat Resolution below).
-
Call Supports: When an Army is defeated or Retreats, you must check if it was in a Support stack:
- If not, the Battle ends with the Combat Resolution step, and the owner of that Army is considered the last player to Retreat or be defeated.
- If it was in a Support stack, the Battle continues with the next undefeated Army whose Army token is at the top of the corresponding Support stack. Go back to the Combat step and pit the winner against the supporting Army. The Battle continues with the supporting Army attempting to play a valid response against the last total Combat Value played.
As soon as the last player of one side cannot play a valid response or Retreats, the Battle ends with the Combat Resolution step, whether that player was a supporter or not. When resolving it, the last defeated or Retreating player is the owner of the last defeated or Retreating Army.
-
Combat Resolution: First, all players who fought in the Battle return all played Troop Cards face down to the bottom of their respective decks.
The player whose Army defeated or forced the Retreat of the last opposing Army is the winner of the Battle, and may choose to gain 1 VP or make the last defeated or Retreating player lose 1 VP.
Seasoned Troops
Troop Cards with a terrain type ability that matches the terrain type of the territory where the Battle is taking place are considered Seasoned Troops. A player may use 2 Seasoned Troop Cards to reset the total Combat Value to the total Strength of those cards. This is the only valid response that may be lower than the current total Combat Value.
Example: The last valid response had a total Combat Value of 11, and the territory where the Battle is taking place is a Plain. If the next cards played are 2 Troop Cards with a total Strength of 7 and both cards have the Plains terrain ability, the new total Combat Value resets to 7.
Protected Territories
If the Battle takes place in a territory with one of the combatants' Protected Territory markers, the marker's owner may call on the help of that territory's vassals. When a player cannot play a valid response with the Troop Cards in their hand (including their Leader Card), they may reveal their cards to their opponent. Then, if possible, they may draw up to 2 Cavalry Cards from the Cavalry Troops deck to attempt a valid response.
Retreats
If an Army Retreats during a Battle, Siege, or the Maneuvers Phase, it must immediately move to an enemy-free territory under their control, without making a Forced March or using Sea Routes. If this is not possible, the Army cannot Retreat. An Army may Retreat from Battle immediately after playing a valid response that does not involve its Leader.
Valid Response
To play a valid response, you must match or exceed the total Combat Value of your opponent's last cards, whether by playing one or two cards. As soon as a player cannot or does not wish to play a valid response, they are defeated, and the Battle continues with the Call Supporters step.
The Battle then continues with the Call Supports step.
Examples of Battles with Support
The printed rulebook shows four short support examples, each as a row of illustrated panels. Their captions read:
Example 1
- Seville attacks Castile with support from Aragon.
- Seville wins the Battle, gaining 1 VP or forcing Castile, the last defeated player, to lose 1 VP. In this case, despite being on the winning side, Aragon does not gain VPs and cannot cause Castile to lose VPs.
Example 2
- Seville attacks Castile with support from Aragon.
- Castile defeats Seville, but the Battle does not end because Seville has support from Aragon. Therefore, Aragon continues the Battle, and attempts to play a valid response.
- Aragon wins the Battle, gaining 1 VP or causing Castile, the last defeated player, to lose 1 VP. However, Seville suffers no penalties for losing to Castile because it belongs to the winning side, though it also does not gain VP or cause Castile to lose VP.
Example 3
- Seville attacks Castile with support from Aragon.
- Castile defeats Seville, but the Battle does not end because Seville has support from Aragon. Therefore, Aragon continues the Battle, and attempts to play a valid response.
- The Battle ends in a victory for Castile. Castile may now gain 1 VP or cause Aragon to lose 1 VP since Aragon was the last defeated player. For losing the Battle against Castile, Aragon and Seville must discard the Troop Cards from their defeated Armies, remove their tokens from the board, and if their Leaders entered the Battle, have those Leaders captured.
Example 4
- Seville attacks Castile with support from Aragon. Zaragoza supports the defense of Castile.
- Castile defeats Seville, but the Battle does not end because Seville has support from Aragon. Therefore, Aragon continues the Battle, and attempts to play a valid response.
- Aragon defeats Castile, but the Battle does not end because Castile has the support of Zaragoza. Zaragoza continues the Battle, attempting to play a valid response against Aragon.
- Aragon Retreats, and the Battle ends with a victory for Zaragoza. Zaragoza may gain 1 VP or cause Aragon to lose 1 VP since Aragon was the last player to be defeated. However, Aragon keeps its Troops and Leader because they Retreated. Castile suffers no penalties for losing the combat because it belongs to the winning side. Seville, however, must discard the Troop Cards from its defeated Army, remove its token from the board, and have its Leader captured if it entered the battle.
Example of a Battle Without Support
Castile's Royal Army, led by Alfonso VI, attacks Seville's Vassal Army, led by Yusuf, in a Plain. Yusuf's Protected Territory Marker is in that territory.
(The Troop Card lineups for both armies are shown in the printed illustration.)
- Since Castile's Army is the Attacker, it starts the Battle by playing 2 Cavalry Cards, with a total Combat Value of 13. Seville decides to respond with 2 Cavalry Cards, totaling 13 and matching Castile's Combat Value.
- Castile increases the total Combat Value to 14 with 2 Cavalry Cards. Seville then plays 2 Seasoned Troop Cards, since they have the Plains terrain ability, matching the terrain type of the territory where the Battle is taking place. The total Strength of these experienced Troop Cards is 11, so the total Combat Value resets to 11.
- Castile responds to Seville's last played cards with a total Combat Value of 11. However, to do so, Alfonso VI must enter the Battle. Seville is in trouble because it has no Troop Cards to play a valid response. Luckily, the Battle is taking place in a territory with Seville's Protected Territory Marker. After revealing its hand to Castile's player, Seville calls on its vassals for help. Seville then draws 2 Cavalry Cards, which allow it to play a valid response with a total Combat Value of 14. Castile cannot play a valid response and loses the Battle. Additionally, Alfonso VI is captured by Seville because he entered the battle.
Sieges
A Siege is a battle that takes place in a territory that has a Castle. Castles provide formidable defense, since Sieges are only possible when the Attacker Army has Siege Engine Cards. Likewise, any other player who wants to support the attack during a Siege must also have Siege Engine Cards.
To resolve a Siege, follow the same rules for resolving Battles, with the following exceptions:
- Step 2: Combat. The Attacker goes first and must start by playing at least 1 Siege Engine Card. Calculate the total Combat value of each valid response using the Siege Strength values on the Attacker's Troop Cards, the Siege Defense values on the Defender's Troop Cards, and the Strength value on Leader Cards.
- Step 4: Combat Resolution. Winning a Siege gives 2 VP to the winning Army instead of 1, or forces the last defeated or Retreating player to lose 2 VP instead of 1. Additionally, if the winner belongs to the Attacker's side, they take control of the Castle.
When you take control of an enemy Castle, replace it with one of your own. If all 3 of your Castles are already on the board, remove the enemy Castle from the territory and decide whether to move one of your Castles to that territory, provided that your Castle is not currently under Siege, or leave your Castles as is. If a player moves one of their Castles, they may place a Protected Territory or Control Marker in the territory from which the Castle was moved. If they do not move a Castle, they may place a Protected Territory or Control Marker in the newly conquered territory. Then, if control of a territory with a Castle has been seized, the player whose Army defeated their opponent gains:
- 1 coin for taking control of a territory from a Kingdom of the same Faction. For example, Castile, of the Christian Faction, takes control of a territory from Aragon, also of the Christian Faction.
- 2 coins for taking control of a territory from a Kingdom of the opposing Faction. For instance, Castile, of the Christian Faction, takes control of a territory from Seville, of the Muslim Faction.
Impregnable Castles
If a player is left with only one territory, that territory's Castle becomes impregnable and no enemy may enter the territory.
Upkeep Phase
Before starting a new round, any player whose Royal Army token is off the board after being defeated in a Battle or Siege must place that token in one of their Castles following Round Order, unless their Leader has been captured.
Winning the Game
A player wins the game when their Control Marker is on space 5 of the VP track, and they win a Battle or Siege, or have forced the last opposing Army in a territory to Retreat. However, if a player has 4 VP and gains 2 VP at once, they do not win by moving past space 5; instead, they move to space 6 and must still fulfill the victory condition by winning a Battle or Siege, or by forcing an enemy to Retreat. Players may optionally agree to play longer 6 VP games, following the same conditions and rules.
If nobody has won by the end of the 9th Round, when the last Reconquista card is drawn, the player with the most VP wins. If there is a tie, the player who controls the most territories wins. Count the Castles and Control Markers on the board for this. If the tie persists, the player whose Control marker is closest to space I on the Round Order track wins the game.
Action Cards
Action Cards provide benefits when played and may be used in any Round of the game. However, they must be played during the phase listed on the cards themselves. You may play more than one Action Card in a single Round, provided that you play each card during the corresponding phase.
Each Action Card may only be played once per game. Once an Action Card has been played, return it to the game box.
El Cid's Exile
El Cid's Exile is an optional rule that modifies the game to provide a different playing experience. It represents El Cid's shifts in allegiance in 11th-century Spain.
Before each game, players must agree whether to use this rule. If they decide to play with it, apply the following changes when setting up the game:
Game Setup (El Cid's Exile)
Prepare the Reconquista deck. Choose 7 Reconquista Cards either randomly or by consensus with the other players. Add the two copies of the Reconquista Card "He turned his eyes towards them, and wept profusely..." to the deck.
Separate all Reconquista cards into groups I, II, and III, and shuffle each group separately. Form the Reconquista deck by placing all groups face down in ascending order, with Group I on top. Place the deck in its reserved space on the board.
Reconquista Phase (El Cid's Exile)
During the Reconquista Phase, if the Starting Player draws the first copy of the card "He turned his eyes towards them, and wept profusely..." give El Cid's Leader Card to the Kingdom of Zaragoza in 4-player games, or the Kingdom of Seville in 3-player games. Then, check the location of El Cid's Vassal Army token:
- If El Cid's Vassal Army token is off the board, the Kingdom of Castile must give it to its new owner. From that moment on, that player may pay for El Cid's services for their Vassal Army.
- If the token is on the board, the Kingdom of Castile must set aside the Troop Cards under El Cid's command until his return. The Kingdom of Castile loses control of El Cid's Vassal Army token, which remains on the board but is now controlled by its new owner.
- If El Cid has been captured, he escapes immediately. Give El Cid's Leader Card, along with his Vassal Army token, to its new owner. From that moment on, that player may pay for El Cid's services for their Vassal Army.
Note: El Cid's Vassal Army token replaces the Vassal Army token of the new owner for all purposes. If El Cid's new owner's Vassal Army token was already on the board, remove it and return the Troop Cards in that Army to their respective decks.
During the Reconquista Phase, if the Starting Player draws the second copy of the card "He turned his eyes towards them, and wept profusely...", return El Cid's Leader Card to the Kingdom of Castile. Then, check the location of El Cid's Vassal Army token.
- If it is off the board, the Kingdom of Castile recovers it. From that moment on, that player may pay for El Cid's services for his Vassal Army. If Castile had set aside Troop Cards awaiting El Cid's return, the player may place those cards under El Cid's command upon paying for his services.
- If the token is on the board, it remains there but is once again under the control of Castile. Additionally, if that player had Troop Cards set aside awaiting El Cid's return, they may immediately place those cards under El Cid's command.
- If El Cid has been captured, he escapes immediately. Give El Cid's Leader Card and his Vassal Army token to the Kingdom of Castile. From that moment on, that player may pay for El Cid's services for his Vassal Army.
Note: When the Kingdom of Castile regains control of El Cid, the Kingdom of Zaragoza also recovers its Vassal Army token. In a 3-player game, the Kingdom of Seville does so instead.
Historical sidebar, printed alongside El Cid's Exile:
After a second landing, the Almoravid sultan was defeated while attempting to besiege Aledo with the Armies of Al-Mu'tamid and the other taifa kings. During the conflict, betrayals and desertions unfolded among the Andalusi kings. At the same time, El Cid suffered his second exile due to Alfonso's anger over his delayed defense of the stronghold. From that point on, the Castilian knight acted independently, achieving successive victories throughout Levante.
In a third landing, Yusuf returned with the intention of dethroning the taifa kings and taking control of all Al-Andalus. Al-Mu'tamid's dark premonition came true: he ended his days as a captive in Agmat, weighed down by chains.
El Cid was the only one who posed a real threat to the Almoravids at this point, and he took Valencia from them in 1094. However, Yusuf's followers lacked his strength, charisma, and determination. Islamic power would later weaken, giving way to a new Muslim dynasty, the Almohads, and paving the way for renewed Christian advances.
El Cid's Spain
The period in which the game takes place, the final third of the 11th century, was a pivotal time in the Reconquista.
It was also a period filled with larger-than-life characters and events.
The taifa kingdoms were wealthy and culturally splendid, but politically and militarily weak. Muslim Spain was caught up in rivalries and internal strife. The Christian kings exploited this situation. Still lacking the strength and population needed for rapid expansion, they initially limited themselves to taking part in Muslim conflicts, forging alliances and vassalage ties, and forcing the payment of parias as tribute in exchange for protection.
Rodrigo Díaz de Vivar, also known as El Cid, was King Alfonso VI of Castile and León's most trusted man. He earned the nickname "El Campeador" for his many victories in pitched battles. However, he went too far while repelling an incursion by Muslim troops when he sacked the taifa of Toledo, which was under Alfonso's protection. This led to a rift with the king and El Cid's first exile. Afterwards, he entered the service of Al-Muqtadir, the king of the taifa of Zaragoza. Due to his numerous victories, El Cid was welcomed in Zaragoza as "sidi" ("my lord").
After the death of Alfonso's ally and friend, king Al-Mamun of Toledo, by poisoning, the Leonese king took the initiative toward a more aggressive expansion, conquering Toledo in 1085. Alfonso VI's conquest of Toledo had a significant impact on the Muslim kings, as expressed by the Toledan faqih Ibn Assal:
"Ready your horses, O Andalusians, for staying here is madness. Garments usually begin to fray at the edges, but the garment of our Peninsula has already been torn through the center."
With Toledo and Valencia on Alfonso's side and military and economic pressure mounting on the taifas, the kings of Seville, Granada, Badajoz, and Almería sought aid from the Almoravids in Africa. Al-Mu'tamid, the poet king, called the Almoravid emir Yusuf to holy war. However, he feared being nullified and subjugated by his supposed ally, as he expressed in his reasoning: "I would rather be a camel-driver in Africa than a swineherd in Castile"
The Almoravids were a renewed Islamic power in Africa. They were made up of warrior monks, religious zealots, and people who despised Andalusian civilization and decadence.
When Yusuf landed at Algeciras, Alfonso was laying siege to Zaragoza. Yusuf decided to march out to meet Alfonso and was defeated at the Battle of Sagrajas. This was his first major defeat, but Yusuf had to return to Africa due to the death of his son.
The siege of Zaragoza was probably when Alfonso and El Cid reconciled. With the arrival of the Almoravids, rigurous followers of Islamic law, a Christian leading Muslim troops could no longer be tolerated.
Quick Reference
Round Reference
- Bidding Phase: Players bid coins to change the Round Order (page 6). Skip this phase during the first Round.
- Reconquista Phase: The Starting Player draws and reads a Reconquista card aloud (page 6).
- Income Phase: Following Round Order, players collect income (page 6).
- Management Phase: Following Round Order, players spend coins to recruit Troops, build Castles, pay Ransoms, or pay a Leader's Vassalage (page 7).
- Maneuvers Phase: Following Round Order, players move their Armies (page 9).
- Battles and Sieges Phase: In the order determined by the Starting Player, all potential Battles and Sieges are resolved in each territory (page 10).
- Upkeep Phase: Following Round Order, players deploy their Royal Army token on the game board (page 14).
Maneuvers Phase Reference
Starting with the Starting Player and following Round Order, each player performs:
- A Movement Step (page 9), and a
- Resolution Step (page 9).
Once all players have completed both steps of the Maneuvers Phase with their Royal Armies, repeat the process for any players with a Vassal Army token on the board.
Battles and Sieges Reference
To resolve a Battle or Siege, follow these steps in order:
- Organize Forces (page 10): Each player whose Army token is present in the Battle collects their Troop Cards.
- Combat (page 11): Starting with the Attacker, the combatants take turns playing 1 or 2 Troop Cards from their hands. An Army may retreat from a Battle immediately after playing a valid response.
- Call Supporters: If an Army is defeated or Retreats, their supporters in the territory enter combat. As soon as a side is unable to play a valid response or the last player Retreats, the Battle ends with the Combat Resolution step.
- Combat Resolution: Players who participated in the Battle return all played Troop Cards and flip all their Army tokens so that they show their Defender side.
If it is a Battle, the winner may choose to gain 1 VP or make the last defeated or Retreating player lose 1 VP. In a Siege, the winner may choose to gain 2 VPs or make the last defeated or Retreating player lose 2 VPs.
The player whose Army defeats their opponent gains coins from the supply if they conquer the territory: 1 coin for taking a territory from a kingdom of the same Faction, or 2 coins for taking a territory from the opposing Faction.
Defeated Armies on the losing side discard all their Troop Cards, and their Leaders are captured if they entered combat. All Armies on the winning side, as well as any Armies that Retreated on the losing side, keep their Troop Cards and Leaders.
Cost Table
| Item | Coin cost |
|---|---|
| Infantry | 1 |
| Cavalry | 3 |
| Siege Machine | 6 |
| Castle | 25 |
The cost table prints this item as "Siege Machine"; the rules text calls the same card type Siege Engines.